Category: Photography

  • How to Select the Right Camera Memory Card

    In today’s market if you want to buy a camera memory card, you may find it challenging to select the right one. A card comes with the following criteria; type, speed, price, capacity. If you want to buy a high capacity card with low price it might come with a low transfer speed. If you wish to buy a high transfer speed with high capacity card it may come with a really high price. If you want to strike a balance between both, you really have to compromise on quality.

    Paul Hudson

    By Paul Hudson

    What is a memory card?

    A small removable memory medium which can be used to store data on one medium and to transfer the data to another medium.

    Let’s see each criteria which will help you decide on a memory card in detail.

    Capacity

    This one is fairly straightforward, and not a big deal. A 32GB memory card can hold up to about 1000 RAW photographs. Assuming that one RAW file size is 30MB, in general a Canon 5D MKIII will produce a RAW file between 25-35MB in size. Likewise a 16GB card can hold up to about 500 photographs, and so on. If you shoot in jpeg format, then a 32GB card can hold around 3200 photographs, assuming you have your jpeg settings as fine in detail, and large in file size. With that setting a jpeg file will come in at an average size of 10MB on a Canon 5D MK III camera.

    Types

    There are many types of memory cards available on the market ranging from Micro SD card, SD card, CF card, M2 (from sony). But there are only three type of cards being used primarily in the photography world, Secure Digital (SD) card, Eye-fi card, Compact Flash (CF) card.

    Micro SD card

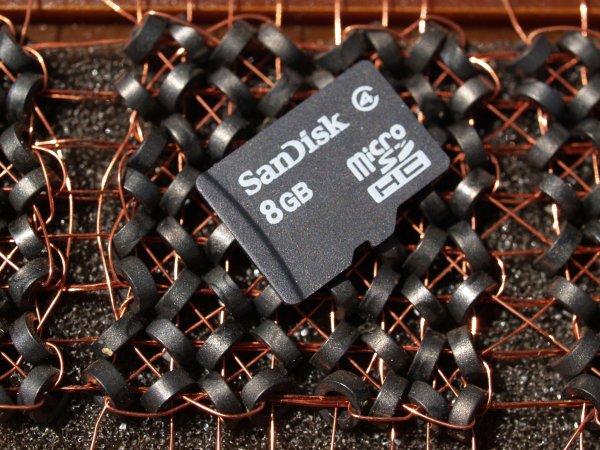
    Micro SD card is a miniature version of the SD card and meant to be used in mobile phones. This card has capacity, as well as transfer speed restrictions. That is why it is used primarily in Smartphones where one can store music and apps, or any other relatively less active data.
    Daniel Sancho

    By Daniel Sancho

    Secure Digital card (SD card)

    This type of the card is widely being used in digital cameras, primarily in point and shoot cameras and secondarily being used in professional cameras. The constraint in using this card is the capacity of the card. The initial high capacity is only 2GB when introduced in 1999. But as the time and technology progressed a later version as SDHC is introduced with a higher capacity of 64GB in 2006 (HC means Higher capacity). The recent third iteration of SD card been announced in 2009 as SDXC cards (XC stands for extended capacity). This type of card offers up to 2TB and increased transfer speed.

    Eye-fi card

    These are unique SD cards that come with built-in WiFi. This allows you to transfer the data to your computer or a cloud based service or even to your Smartphone directly, thus enabling you to clear off the memory as you shoot, without having a need to replace the memory card. It is even possible to geotag your photographs with the available wireless service, but with less accuracy though.

    Bfishadow

    By bfishadow

    There seems to be a promising future for this card!

    Compact Flash card (CF card)

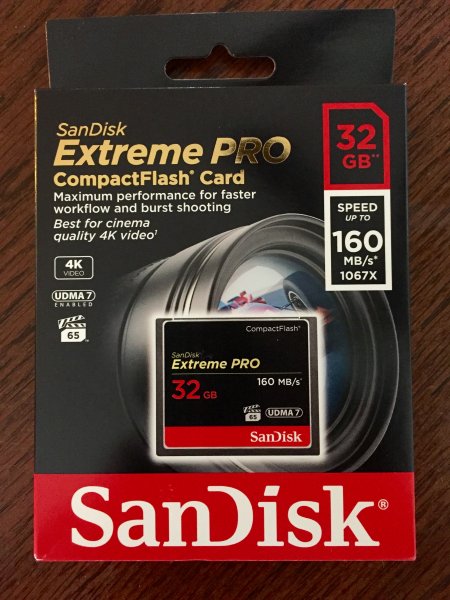
    First introduced in 1994, CD cards have high speed, and high capacity. This is the reason why CF cards occupy the primary card slot in professional cameras. Present SD cards are equalling the speed and capacity of CF cards, but camera manufacturers are not leaving CF cards just yet. They often provide slots for both an SD and CF card, but some photographers wish they would offer two SD card slots instead. This provides some extra space inside the camera and saves money for the photographer (CF cards costs roughly twice that of SD cards). Hopefully they will switch the importance to SD cards in the near future.

    As the name suggests this is a flash memory which aids high speed reading/writing speed, and has a higher capacity too.

    Speed

    Speed in SD cards

    All memory cards come with speed, either mentioned or not. Speed here means both writing and reading. The one indicated on the card is the maximum speed the card can read, but the most important thing is the write speed. Read speed is the time taken to read the data from the card and the write speed is the time taken to write the data. Simply put read speed comes into action when you transfer the data from the card, write speed comes into play when you shoot. In general the write speed is about half of the speed of read speed in SDHC cards. In few other cards both the read and write speeds are about the same.

    Simon Yeo

    By Simon Yeo

    The speed of cards have been classified into classes by the SD Association, which are referred to below. The speeds are primarily meant for video recording, where sustained recording (write) is required and it is supposed to be the minimum worst case scenario speed.

    You really need to give weight to this one single-most important factor, when you buy a memory card. All SD cards have a class noted on them. Check the attached diagram below:

    Class Minimum Speed
    2 2MB/s
    4 4MB/s
    6 6MB/s
    8 8MB/s
    10 10MB/s

    Later, in 2009 another class, UHS, was introduced by the SD association and is designed for SDHC and SDXC memory cards. UHS utilizes a new data bus that will not work in non-UHS host devices. If you use a UHS memory card in a non-UHS host, it will default to the standard data bus and use the “Speed Class” rating instead of the “UHS Speed Class” rating. UHS memory cards have a full higher potential of recording real-time broadcasts, capturing large size HD videos and extremely high quality professional HD.

    Courtesy – SanDisk website.

    UHS Class Minimum Speed
    1 10MB/s
    3 30MB/s

    Speed in CF cards

    Laurie Cooper-Murray

    By Laurie Cooper-Murray

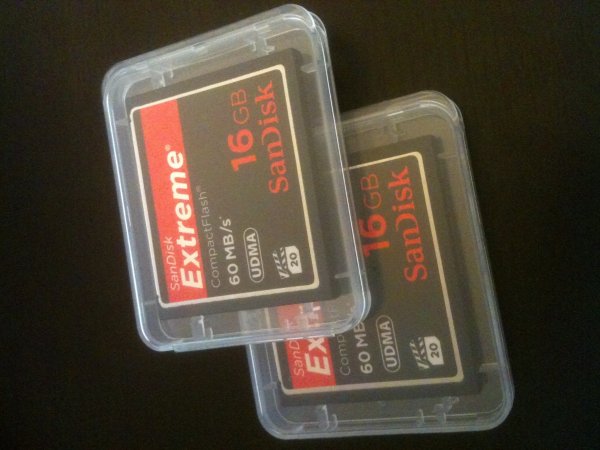
    When it comes to CF cards the speed is often mentioned as X times and in many cards it’s been mentioned as MB per second, which is pretty straight forward. Whereas when the speed is mentioned as 600X or 1066X what exactly does it means? X means 150Kb per second. It is a standard brought over from optical media recording. Now to find out what exactly the speed is of 600X – to find this multiply 600 by 150 and divide the result by 1000. The final result is in MB per second. Eg., a 600X speed card is capable of 90MB per second read speed (600?150/1000).

    The latest CF cards come with the UDMA 7 which improves in clearing the camera’s buffer memory quickly, which allows the camera to get ready for the next burst. Firmware upgrade is required for the Canon 5D MKIII (yours may require it also, check with the manufacturer) camera to make full use of UDMA 7.

    Price
    Phil Romans

    By Phil Romans

    When it comes to price, the fastest card is the primary criteria which decides the price. The next deciding factor is capacity of the card. An SD card is 50% of the price in the same capacity CF card. So, if you want to buy a high speed card with same capacity you will need to pay more. On the other side if you want to buy a high capacity card at a lower price, it is possible to do so but you’ll get a lower speed card.

    Notes

    • If you use two cards at different speeds, the lowest speed is the deciding criteria for the burst. For instance if you use a CF card at 90 MB/sec in one slot and an SD card having the capacity of 45MB/sec (and you set RAW files for both cards) then you won’t get the advantage of 90MB/sec and the possibility of missing the shot. You have to use both cards at the same speed.
    • If you do not upgrade to the latest firmware for the 5D MKIII camera, the host memory will perform for UDMA 6 which significantly consumes more time in clearing the buffer memory.
    • I wish the camera manufacturers would switch to SD cards completely for both slots. The speeds of the SD card already matches with the CF cards, there is no point paying twice the price, and we’d get the added bonus of saving space inside the camera.
    • In few cases the SD card speed is higher than CF cards. For instance SanDisk Extreme Pro speed is 280 MB/sec but from the same manufacturer the CF card’s maximum speed is 160 MB/sec.

    Hope you have gotten a bit of information from this article. Do share your thoughts in the comments.

    googletag.cmd.push(function() {
    tablet_slots.push( googletag.defineSlot( “/1005424/_dPSv4_tab-all-article-bottom_(300×250)”, [300, 250], “pb-ad-78623” ).addService( googletag.pubads() ) ); } );

    googletag.cmd.push(function() {
    mobile_slots.push( googletag.defineSlot( “/1005424/_dPSv4_mob-all-article-bottom_(300×250)”, [300, 250], “pb-ad-78158” ).addService( googletag.pubads() ) ); } );

    The post How to Select the Right Camera Memory Card by Navan Viswa appeared first on Digital Photography School.

    Digital Photography School

  • Trick Photography: Creating Appealing Illusions with Your Camera

    Trick photography – creating appealing illusions with your camera Trick photography helps in creating an illusion of the scene through the ideas of the photographer. While there’re many, some of the popular trick photography ideas include tilt-shift, infrared, high speed, light painting, zoom & panoramic photography. Trick photography is a way to make a scene look more appealing and attractive Continue Reading

    The post Trick Photography: Creating Appealing Illusions with Your Camera appeared first on Photodoto.


    Photodoto

  • Tips for Photographing Butterflies

    Butterflies can provide a colorful and fun way to explore the macro world, and the basic techniques are easy to master with a little patience and practice.

    Just because butterflies are fast movers, doesn’t mean you have to be! If you watch carefully, you will notice that each species tends to visit the same variety of flower. If you miss a photo opportunity, wait a couple of minutes and the chances are that the butterfly will soon be back again to the same flower, or to a neighboring one. When approaching, avoid unnecessary vibrations and be careful not to cast a shadow over the butterfly.

    Butterfly 1

    Lens choice

    Although a macro lens is an advantage, almost any lens can be used. A wide angle lens will help show context, whilst lenses with a longer focal length will isolate the butterfly from the background and will also ensure that it is not physically disturbed.

    Camera settings

    As in all macro photography, the background is as important as the subject and using the right aperture can make or break the photo. Use Aperture Priority mode and choose a fairly wide aperture (a small f-number). A good starting point is somewhere between f/3.5 and f/5.6, which will help separate the butterfly from the flowers or branches behind.

    Of course, a wide aperture will also reduce depth-of-field, so your final choice will often depend on the position of the butterfly. If its wings are closed for example, and you are parallel to its body a wide aperture will be fine. If not, you may need to try something smaller such as f/8 or f/11.

    Sometimes you will be lucky enough to find a butterfly who is feeding and poses beautifully for the camera, but most of the time they are in constant motion. Using a fast shutter speed of 1/800th and upwards will help reduce your quota of blurry photos.

    Ideally, your ISO will be set to either 200 or 400, although you may need to increase this depending on available light.

    Butterfly 2

    Focus

    If your butterfly is part of a larger scene, you may get away with autofocus. For close-ups, there is only one way to focus, and that’s manually! Autofocus rarely puts the focus exactly where you want it, and with butterflies you are aiming at their eyes. If they are visible, the eyes are the key to the image and they need to be sharp.

    If you are wondering how to manually focus on the microscopic eyes of a tiny, moving creature, don’t worry. Try pre-focusing on a flower so that when the occupant arrives you only have to make minor adjustments. Good focusing can be a bit hit and miss, so take plenty of photos to increase your chances of having a few sharp images.

    Butterfly 3

    Lighting

    As for most photography, avoid the harsh light of the middle of the day. Early morning provides great light and slower moving butterflies, but late afternoon on a sunny day is often the best option. The butterflies are active and the sun is low in the sky.

    Once you feel comfortable with the more classical front and side-lighting, have a go at back-lighting. This can be achieved by positioning the butterfly between yourself and the sun. Avoiding lens flare can be a bit tricky, but this type of lighting will really show off the details of the wings and put a beautiful rim of light around the butterfly.

    If your back-lit photos are on the dark side, you may need to over-expose slightly. Dial in some exposure compensation until the butterfly is correctly exposed.

    Butterfly 4

    Composition

    Photographing a butterfly from above, will showcase the patterns and colours of its wings. Getting down to eye level however, will give your photos much more impact and intimacy (especially if those eyes are sharp). Vary your perspective, move around, and show the butterfly from angles that are rarely seen.

    As well as close-up shots, you may also want to consider the larger picture and show the butterfly in its natural surroundings.

    Butterfly 5

    Tripod

    Whether you use a tripod or not is a personal choice. A tripod will bring you an element of stability and will help with composition and focus. The down side is that it is cumbersome and will severely restrict your movements when photographing these fast moving, and somewhat erratic subjects.

    As for finding butterflies, you shouldn’t have to go far. Your garden will probably reveal several passers-by, and others can be found in local parks, fields and woodlands. Butterfly houses also provide great photographic opportunities with nice, even lighting and many species under one roof.

    Butterfly 6

    With a bit of perseverance you will soon develop your own technique for photographing these little beauties. Be warned though, chasing butterflies can become highly addictive!

    Kathy Samuel is a natural light photographer with a passion for the outdoors and the world of macro photography. She is English, but now lives in the southern French Alps where there is no shortage of tiny subjects for her camera. You can visit her at Kathy Samuel Photography.

    googletag.cmd.push(function() {
    tablet_slots.push( googletag.defineSlot( “/1005424/_dPSv4_tab-all-article-bottom_(300×250)”, [300, 250], “pb-ad-78623” ).addService( googletag.pubads() ) ); } );

    googletag.cmd.push(function() {
    mobile_slots.push( googletag.defineSlot( “/1005424/_dPSv4_mob-all-article-bottom_(300×250)”, [300, 250], “pb-ad-78158” ).addService( googletag.pubads() ) ); } );

    The post Tips for Photographing Butterflies by Kathy Samuel appeared first on Digital Photography School.


    Digital Photography School

  • Five Useful Lightroom Keyboard Shortcuts

    Lightroom shortcuts

    Adobe makes life easier for Lightroom users by building in keyboard shortcuts. You probably know some of the more important ones by heart (e.g.: T to reveal or hide the Toolbar, \ to toggle between before and after views, and O to reveal the Adjustment Brush overlay). But I’m also betting there are quite a few shortcuts you didn’t even know existed. Here are some of the more useful, lesser known ones.

    1. Reveal all Shortcuts

    Keyboard shortcuts are difficult to remember, especially if you don’t use them that often. But if you press Ctrl + / (PC) or Cmd + / (Mac), Lightroom displays a list of the shortcuts available in the current module. When you’re done, click anywhere on the shortcut list to hide it.

    Lightroom shortcuts

    Library module shortcuts.

    Lightroom shortcuts

    Develop module shortcuts.

    Note: The rest of these keyboard shortcuts are for the Develop module. Not all of them are shown on the shortcuts list.

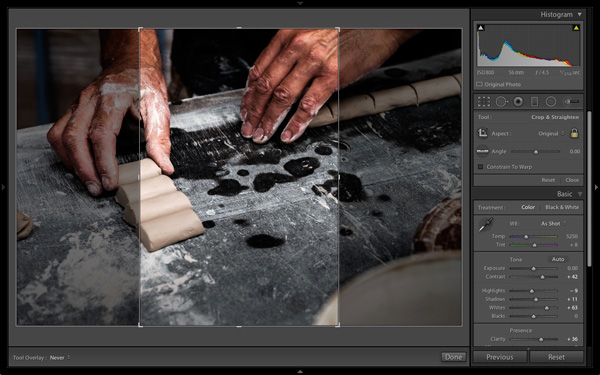
    2. Rotate the Crop Overlay

    If you’ve ever tried to make a portrait crop from a landscape image you’ll have experienced the frustration of trying to rotate the Crop Overlay (press R to go straight to that tool).

    Lightroom automatically gives the Crop Overlay the same orientation as the photo, with no immediately obvious way of rotating it. To do so, simply press X.

    Lightroom shortcuts

    By default the Crop Overlay is automatically given the same size and orientation as the original frame.

    Lightroom shortcuts

    Press X to rotate the Crop Overlay and make an extreme crop.

    3. Resample Spot Removal Tool

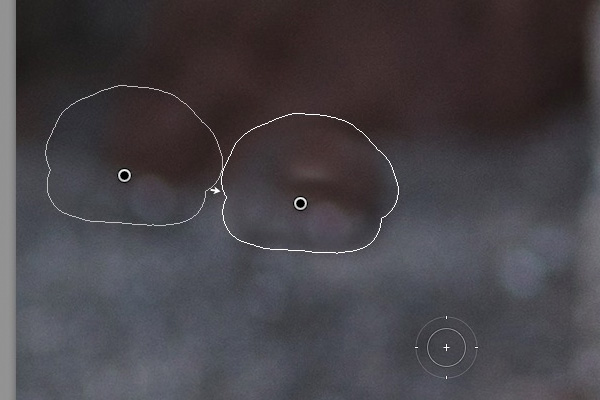
    The good thing about the Spot Removal Tool (which you can activate by pressing Q) is that Lightroom is quite good at guessing which part of the image it should sample, in order to heal the selected area. But it doesn’t get it right all the time. If you don’t like the result, press the / key and Lightroom will choose a different area to sample. Repeat as often as you like.

    Lightroom shortcuts

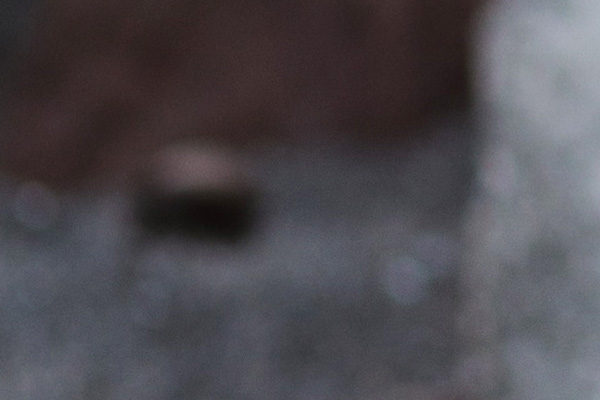
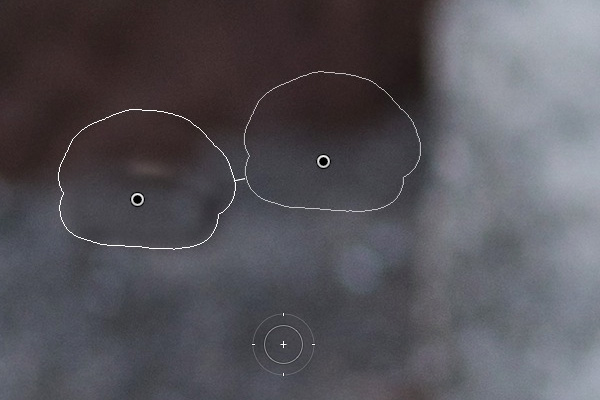
    In this example I wanted to get rid of this dark blob in the background because it’s a distraction.

    Lightroom shortcuts

    Lightroom’s first guess doesn’t really work.

    Lightroom shortcuts

    But the second one is much better. You can of course fine-tune it by moving the pin indicating the sampled area manually.

    4. Automatic White and Black points

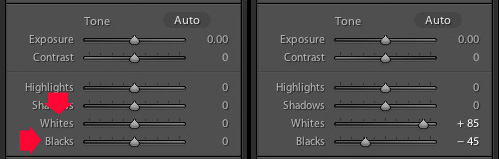
    If you double-click on the Whites and Blacks sliders in the Basic panel, Lightroom resets them to zero. If you hold the Shift key down while you do it, Lightroom calculates the best settings, working out where to position both sliders so that the histogram stretches all the way from the left side of the graph (shadows) to the right (highlights) without any gaps. This quick fix makes most photos look better right away. The flatter the original photo, the more extreme the settings required.

    Lightroom shortcuts

    Double-click the Whites and Blacks sliders while holding the Shift key down. Make sure you double-click the words and not the slider itself.

    5. Flip a Graduated Filter

    Press the apostrophe key to flip (invert) a Graduated Filter. One practical use for this is as follows:

    • Create a Graduated Filter over the sky of a landscape image (hold the Shift key down while you do so to keep the Graduated Filter straight) and move the Exposure slider left to darken that area.
    • Right-click on the Graduated Filter’s pin and select Duplicate. This creates a new Graduated Filter with exactly the same settings as the first.
    • Press the apostrophe key to flip the Graduated Filter. Now the minus Exposure setting is applied to the foreground. We don’t want to make the foreground darker, so double-click the Exposure slider to return it to zero. Now we are ready to use this new Graduated Filter to enhance the foreground.
    • Move the Clarity slider right to emphasise the texture in the foreground. You may also need to move the Exposure slider left if this brightens the foreground too much.

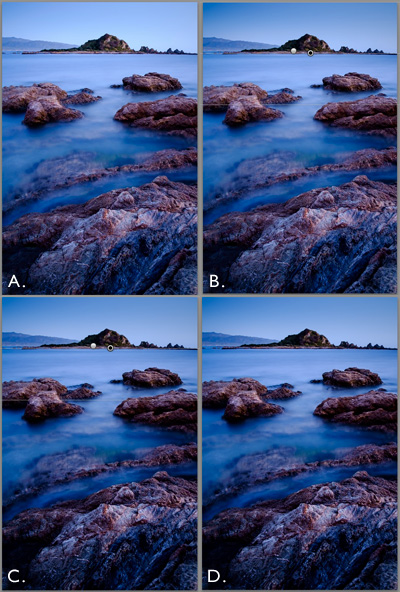
    The net result is that you have applied two Graduated Filters, one to the sky, and the other to the foreground.

    ***By the way, the apostrophe shortcut also works with the Radial Filter.

    Lightroom shortcuts

    (A) Original photo. (B) Graduated Filter with minus Exposure applied to sky. (C) Duplicated and flipped Graduated Filter applied to foreground, with plus Clarity and minus Exposure. (D) Final result.

    Your turn

    What keyboard shortcuts do you use in Lightroom and why? Please let us know in the comments.


    The Mastering Lightroom Collection

    Mastering Lightroom ebooksMy Mastering Lightroom ebooks will help you get the most out of Lightroom 4 and Lightroom 5. They cover every aspect of the software from the Library module through to creating beautiful images in the Develop module. Click the link to learn more or buy.

    googletag.cmd.push(function() {
    tablet_slots.push( googletag.defineSlot( “/1005424/_dPSv4_tab-all-article-bottom_(300×250)”, [300, 250], “pb-ad-78623” ).addService( googletag.pubads() ) ); } );

    googletag.cmd.push(function() {
    mobile_slots.push( googletag.defineSlot( “/1005424/_dPSv4_mob-all-article-bottom_(300×250)”, [300, 250], “pb-ad-78158” ).addService( googletag.pubads() ) ); } );

    The post Five Useful Lightroom Keyboard Shortcuts by Andrew S. Gibson appeared first on Digital Photography School.


    Digital Photography School

  • 6 Things to Consider Before Becoming a Professional Photographer

    192

    So, you’ve got a nice camera, you really love photography, and you’ve been thinking that maybe it would be nice to make a little bit of money from this passion you’ve discovered. Before you decide to make that leap, read on. You may be convinced to throw that idea out the window, or you may find that you truly are ready, and it’s time to try your hand at photography as a career.

    Before we go any further, I have to clarify something about the photos in this article. First of all, I had to include photos, because every article is better with pictures, right? Secondly, this session was inspiring, fun, and an example of every reason that I LOVE being a photographer. This client does not exemplify any of the cons of the business. Also, for this article “professional photographer” is defined as someone who gets paid to take photos, particularly portrait photographers.

    137

    1. You’re not good enough…yet

    Maybe you love photography, and maybe you get a lot of compliments on your photos, but you may not be a good enough photographer to actually take money from people yet. Do you sometimes take a bunch of photos where the majority of them are garbage? Do you often say to yourself, “I’ll fix that later in Photoshop?” If your photos aren’t consistently in focus, exposed correctly, and great IN CAMERA, before you get to Photoshop, you’re not ready.

    If you look at other professional photographers’ work and wonder how on earth they got their photos to look like that, you are not ready. I don’t mean that you have to be able to produce photos exactly like the photographers that you admire. I’m saying that you should have an understanding of how they achieve the look they get. You should know how light, depth of field, angles, etc., contribute to the photo. You should have an idea of how much of the photo is a result of post-processing.

    Having a nice camera does not qualify you to be a professional photographer.

    151

    2. You don’t have enough experience

    This goes along with not being good enough, but experience is important. You have to be consistent every time. You have to know that every single session you do will result in good photos, and that you can roll with the punches if conditions aren’t ideal. You have to know your camera settings inside and out, because when you’re chasing a naughty toddler around, you don’t have time to try to figure out what your shutter speed should be.

    I’ll admit that I didn’t have enough experience when I started. I did some sessions for friends and family, then requests started coming in. I didn’t really have the goal of making money with my photography, but when people started asking me, I thought, “Hey, why not?” Some of my early sessions are dear to my heart, but some of them I look at and cringe. I feel bad that people paid money for me to experiment and find out who I was as a photographer.

    182

    3. You don’t want to lose the love of photography

    Once you turn a passion into a job or career, you have a very real possibility of it turning into something you do because you have to, and not because you want to. I’m not saying this happens to everyone, but I’ve seen enough professional photographers burn out and quit, that I know it’s a very real thing. You may think that it will be fantastic to make money doing something you love, but are you ready for the possibility of not loving that thing anymore?

    True confession here: I rarely get my camera out anymore for anything except a paid session. When I’m on vacation, sometimes the last thing I want to do is “work” while I’m there, and I certainly don’t want to drag my camera around when I’m supposed to be having fun.  Then, if I do take some photos just for the heck of it, they sit there on my computer forever, because I don’t really feel like sorting and editing yet another batch of photos. This doesn’t happen to every pro photographer, but I’m being real here. Sometimes I wish that I could just take photos because I love it, but the truth is, I’m often too tired after my paid sessions for the week to get my camera out again. I still love photography, but it’s more that I love my job; I love the photos and what I can create, I love working with people, but I don’t love photography just for photography’s sake anymore.

    186

    4. You don’t want to deal with business stuff

    Taxes, business licenses, contracts, equipment upkeep, scheduling, email, phone calls – it’s all a very real part of running a photography business, and it takes far more time and effort than you’d like to believe. Being a professional photographer is not just happily snapping some photos, collecting money, and then spending all of that money on anything you’d like. There are expenses, lots and lots of expenses. There are boring, repetitive tasks. There are hours spent doing behind the scenes stuff.

    No matter how great of a photographer you are, if you aren’t good at the business side of things, you are going to struggle as a photographer. It’s hard. It’s frustrating. Sometimes it’s overwhelming. Some days horrible things happen, like The Cloud losing your entire photography calendar (yes, speaking from experience). Sometimes you have to ask people for money, and that’s not easy for everyone. You have to be able and willing to run a pretty tight ship with scheduling, collecting money, and sticking to your policies. You have to decide your policies, and your fees, and how you are going to do business beforehand, because believe me, people will ask you to change all of it for them, and you have to be ready for it.

    165

    5. You don’t like to deal with difficult people

    Luckily for me, I actually really love working with people, but even then, sometimes some people are hard to deal with. When people are paying you money to photograph them, sometimes they expect you to do anything and everything they want, and sometimes, even when you’ve done your best, they aren’t happy with you. If you are sensitive, like I am, that kind of criticism can be very hard to take.

    Most of the people you will take photos for are fantastic, wonderful people, who love your work, and love you, which is why they hired you. That doesn’t happen every time though. Sometimes you have to spend lots of time on the phone talking to a worried client (what about the weather? what about junior’s bad haircut? what about clothes they’ll wear? what if they smile awkwardly?). Or someone who has lots of ideas they saw on Pinterest, and wants to discuss every one of them with you, in depth, even if they aren’t even remotely your style of photography. Sometimes you’ll show them their gallery and they’ll say they love it, except can you photoshop every single wrinkle off of their face? Questions are great, and most people don’t have unreasonable demands. But, you have to know that sometimes people are just not on the same page as you are, and you have to be able to work with them, and do your best to keep them happy.

    155

    6. It isn’t the fairytale job you think it is

    I hear from people all the time about how much fun it must be to be a photographer, and how much they wish they could be a photographer too. Many people who jump into the photography business, without doing a lot of research and self-evaluation, get a harsh slap to the face when they realize that it’s work. A lot of work. Many people pop in the “professional photographer” scene on a whim, and pop right back out of it within a year or two, and sometimes don’t even last a few months. It’s work to get clients. It’s work to keep clients. They don’t just fall in your lap, waving hundred dollar bills and smiling their pearly whites for your camera.

    You’re going to have competition, and sometimes criticism from others. Sometimes the world of photographers can get pretty nasty. You will find wonderful people to collaborate with, and those who encourage you, but you will also find some that will tear you down if they get the chance.

    There are many benefits of running your own business, but it’s also hard. You have to know what you are doing, and if something goes wrong, it’s all on your shoulders. Being a professional photographer is much more than loving to take pictures. When you realize all of the work it’s going to be, you might decide that taking photos for the love of it, and because you’re an artist, may be much more fulfilling in the end.

    169

    Do I sound a little bitter? I know that I might, but I want to be realistic here. I think being a photographer is such a romanticized notion, that there are oodles of people just itching to jump into photography as a business, without really knowing what they’re getting into. I’ve learned so much over the years, and sometimes I wonder if I would have even started had I really understood all of the cons.

    Then, remember why I do this. Yes, it’s a job, and it’s hard. Yes, I hate the business side of things sometimes. Yes, some days I want to go hide in a hole and bury my camera there. But most of the time I feel blessed beyond measure to be a photographer. I love the people I get to work with. I love creating beautiful photos, and capturing real personalities. I love happy clients, and I love that I can create memories for them that will last forever. Right now I wouldn’t trade this job for any other, because now, that I’ve learned and lived through the hard parts of my job, I know that it’s all worth it, for me.

    Now you get to decide: will it be worth it for you?

    googletag.cmd.push(function() {
    tablet_slots.push( googletag.defineSlot( “/1005424/_dPSv4_tab-all-article-bottom_(300×250)”, [300, 250], “pb-ad-78623” ).addService( googletag.pubads() ) ); } );

    googletag.cmd.push(function() {
    mobile_slots.push( googletag.defineSlot( “/1005424/_dPSv4_mob-all-article-bottom_(300×250)”, [300, 250], “pb-ad-78158” ).addService( googletag.pubads() ) ); } );

    The post 6 Things to Consider Before Becoming a Professional Photographer by Melinda Smith appeared first on Digital Photography School.


    Digital Photography School

  • Review of the Mindshift Gear Rotation180° Professional Backpack

    Screen Shot 2015-03-19 at 2.40.05 PMI thought the whole Rotation180 thing was a gimmick, and avoided the packs by Mindshift Gear because who needs a new gimmick, right? I wanted a useful pack and had it in the f-stop Gear Satori EXP that joined me trekking in Nepal more than once. That pack is amazing and fits all kinds of stuff for my longer trips in the backcountry.

    The best way I can describe the Mindshift rotation180° Professional pack is that it’s more amazinger. The Satori EXP is an amazing pack and can take a beating, but I found the rotation180° Pro better suited to my style and shooting needs. But, it’s not for everyone. Instead of a boring, exhaustive review, let me point out the highlights that sealed the deal for me.

    The Rotation Gimmick That is Actually Awesome

    One of the biggest obstacles I find when I am out hiking with my camera is stopping to get it out my pack each time I want to use it. Not only that, but living in Washington half the time means hiking in inclement weather, which means leaving my camera on the outside is not much of an option. The same goes for trekking in the Himalayas; having a heavy camera around my neck or shoulder just doesn’t work for me.

    The r180° Pro attempts to solve this problem by making the lower part of the bag into a huge waist pack that swings around when needed. It works quite well.

    Peter-West-Carey-_PWC3982

    The rotation feature requires that your hip belt is attached first, otherwise it won’t really work. The belt is nicely padded all the way around, and is as comfortable as I’d expect in a long distance pack. The clips in front are normal size, I found the adjustment straps a little more complex than they need to be, but they work.

    On the right side of the pack is a quick release buckle.

    Peter-West-Carey-IMG_7344

    Peter-West-Carey-IMG_7345

    The more I study it, the more I am impressed because the buckle can only be removed by sliding it down, yet it can be attached by simply placing both pieces close together and letting the magnetic, one-way buckle attach. This makes it remarkably easy to attach by sense of feel but still secure enough to keep things in place. It is very well thought out.

    With the buckle detached, the entire waist pack section is free to rotate. There is a handle loop on the right side of the pack, as well as huge loops on the front of the belt to aid in rotation.

    Peter-West-Carey-IMG_7340

    You can see in the image above that a full size DSLR (Canon 7D with battery grip, in this case) will fit, even with a 28-300mm or 70-200mm lens attached. The compartment comes standard with those dividers you find in all the packs these days, and can easily accommodate a smaller DSLR or mirrorless camera, an extra lens and a flash.

    Screen Shot 2015-03-19 at 2.36.25 PM

    Peter-West-Carey-IMG_7341

    Inside the compartment there is ample storage for the small things. Filters and cards have side and top pockets including one with a zipper and mesh to make finding articles easy.

    The waist belt also comes with its own rain cover and pockets for spare batteries and cards on the belt, interior pockets for filters, and other items.

    Peter-West-Carey-IMG_7342

    Peter-West-Carey-IMG_7343

    But Does it Work?

    At its core, the rotation180° is all about the quick action of slipping the waist belt around to access your gear. So how well does it work? I tested the pack over the course of two months, on ten different hikes, covering over 52 miles, as well as seven airline flights.

    To those ends, the pack works very well for the right audience. It’s not as easy to take through airports as a smaller bag, or a roller bag as I am accustomed to using. But on the trail, it is hands down the best pack for mixed use.

    Peter-West-Carey-_PWC3984

    By that I mean, when your goal is to cover some ground and also take some photos, especially in inclement weather. I found this pack extremely useful for taking photos while keeping up with other non-photographers in the group. Because the action of sliding the belt around, extracting my big old camera, taking a shot and returning it all in place is so easy, I take more pictures and fall behind less than when I have to remove my whole pack.

    This action alone is what has made the rotation180° Pro my replacement pack for the f-stop Satori EXP.

    A Technical Pack

    Beyond the waist belt, the pack is a technical pack, meaning those who love options and comfort in their pack will be happy. There are dozens of attachment points for hiking, skiing, and photography gear. It comes with a rain cover and tripod attachment straps.

    Peter-West-Carey-_PWC3993 Peter-West-Carey-_PWC3991

    Peter-West-Carey-_PWC3989

    The shoulder straps allow for a full range of adjustment for someone up to about 6’6″. Ice axe/trekking pole loops on the bottom match up with daisy chain loops on the back for the most adventurous. An outside stuff flap allows wet or oversized gear to remain away from precious camera gear.

    Peter-West-Carey-_PWC3988

    There are daisy chain loops on the bottom for affixing things like sleeping bags or pads. Compressions straps are also available to help hold the pack to your back.

    Space!

    The space in this pack! Inside the main compartment is a removable organizing bag. This is accessed from the part of the pack that goes against your back, which helps increase security while traveling. With this bag removed, as I often used the pack, there is ample room for a full day hike worth of food, clothes, first aid, etc.

    Peter-West-Carey-_PWC3985

    Screen Shot 2015-03-19 at 2.37.52 PM

    While knocking around town I carry a few books, iPad, chocolate and other odds and ends in this space. There is also a large pouch on the back of the pack that fits flipflops or a larger map (pictured below on the right). Along the sides are large tube sleeves, one of which typically holds the raincover. On the left side the tube can hold a large water bottle or bladder (there is also a hydration hole to allow a bladder to remain inside the main compartment).

    Peter-West-Carey-_PWC3987

    Organization

    This pack is not the best for carrying a home office, as I am often apt to do. There are zippered pockets on the outer top flap, inner top compartment, and inside the opening against your back. There are five pockets in all, that are perfect for filters, remote controls, card wallets and recharging cords. But it doesn’t have anything for pens or business cards or protection for a laptop/tablet.

    Peter-West-Carey-_PWC3986

    That being said, the rotation180° Pro Is not designed for the mobile worker. It does an excellent job of keeping your photo gear separated (the waist belt has pockets for cards, filters, and other small items as well). I’m quite happy with its ability in that case. It’s not the bag for you if you need a mobile office bag.

    Thoughtfulness in Design

    It’s the little things I keep finding, and appreciating on this bag, even two months later:

    • The back open sleeve is entirely removable.
    • There are straps to help balance the load of a tripod specifically.
    • There is a whistle in the sternum strap.
    • The big thumb loops to help rotate the waist belt (and to just hook your thumbs in while on long hikes).
    • Rubberized zipper covers to keep out the elements.
    • A hidden compression strap for even more gear on the back, or your tripod.
    • Loops on the waist belt, to attach water bottle holders or lens bags.
    • Velcro attachment on the rain covers so they don’t blow off, but can be removed to dry out.
    • Custom designed outer rain cover that works with the waist belt system flawlessly.
    • The waist belt magnetic clip.
    • It fits in overhead compartments of major airliners.
    • The waist belt is easy enough to remove when the pack is not on your back, but is harder than any other bag I’ve used.
    • Comfort.

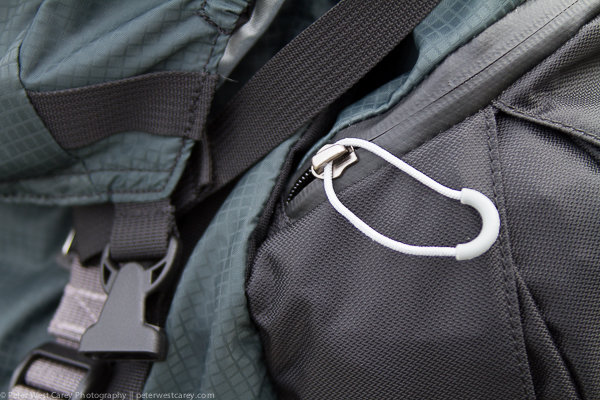
    All the zipper pulls have decent sized loops, and there are two zippers to make opening the main compartment easy. Inside there is enough room for a full size DSLR and longer lens (pictured is a Canon 7D with battery pack and 28-300mm lens, equivalent in size to a 70-200mm lens). The unit also comes with dividers for those with smaller cameras and multiple accessories.

    Peter-West-Carey-_PWC3990

    No pack is worth its weight if it is not comfortable to lug around. While the pack is not super light because of its substantial build quality, materials and stitching, the weight is carried well thanks to extra padding against your back and shoulders.

    I would estimate that the pack has ridden on my back for about 60 hours. This includes city walks, forest hikes, snowshoeing, airports and just standing around waiting for transit. I have tested other packs for much shorter periods and that is because they didn’t feel right. I would not hesitate to take this pack on multi-week treks in the Himalayas, as I have done with the f-stop Satroi EXP.

    What Doesn’t Work

    The pack is not perfect, but it’s close. It really is not the right size pack to be schlepping through airports. While I have been doing it (so I can use the bag at my regular locations) I prefer the f-stop Guru instead, or the ThinkTank Aviator rollerbag.

    Removing your camera when the pack is not on your back is not that hard but can make things dirtier than normal when on the trail, because you now have two pieces in the elements.

    This may seems like a small thing, but I found that dog hair loves this pack and sticks quite easily. I know this is not normal review criteria, but this bag is more magnetic to dog hair (and probably llama, cat and zebra hair as well) than any pack I’ve used.

    Conclusion

    The Mindshift Gear rotation180° Pro is one heck of a great bag. It is also not cheap and retails for $ 389.99 USD. Thankfully that cost translates into care in design and a solid build (nothing on this bag feels cheap). A month after using the bag I was still finding helpful attachment loops and straps.

    This bag is designed for the active photographer with any size camera, while noting it works well for large lenses. Mindshift also has smaller versions of this bag if you don’t need to carry so much gear.

    Finally, if you have a family who has a mind of their own and tends to walk away even after you have muttered, “Hold on a sec, I need to get a photo of that!” for the 60th time during a trip, this bag is for you. I love the ability to quickly get my shot and return my camera to both a comfortable carrying position, and a safe spot out of the elements.

    Disclaimer: Mindshift Gear furnished the author with a pack in order to review this product.

    googletag.cmd.push(function() {
    tablet_slots.push( googletag.defineSlot( “/1005424/_dPSv4_tab-all-article-bottom_(300×250)”, [300, 250], “pb-ad-78623” ).addService( googletag.pubads() ) ); } );

    googletag.cmd.push(function() {
    mobile_slots.push( googletag.defineSlot( “/1005424/_dPSv4_mob-all-article-bottom_(300×250)”, [300, 250], “pb-ad-78158” ).addService( googletag.pubads() ) ); } );

    The post Review of the Mindshift Gear Rotation180° Professional Backpack by Peter West Carey appeared first on Digital Photography School.

    Digital Photography School

  • Photo History Club: 7 Famous Photographers You Should Know

    I’ve said here before that exploring photographic history is a great way to kick-start your creative engine. It’s often said that there’s nothing new under the sun, but for every photographic approach and philosophy you can find, someone somewhere did it first. Studying what’s come before you can often reveal something new ahead of you. So with that sentiment in mind, I Continue Reading

    The post Photo History Club: 7 Famous Photographers You Should Know appeared first on Photodoto.


    Photodoto

  • Shooting Better Waterfalls: Five Tips for Improving Your Waterfall Photography

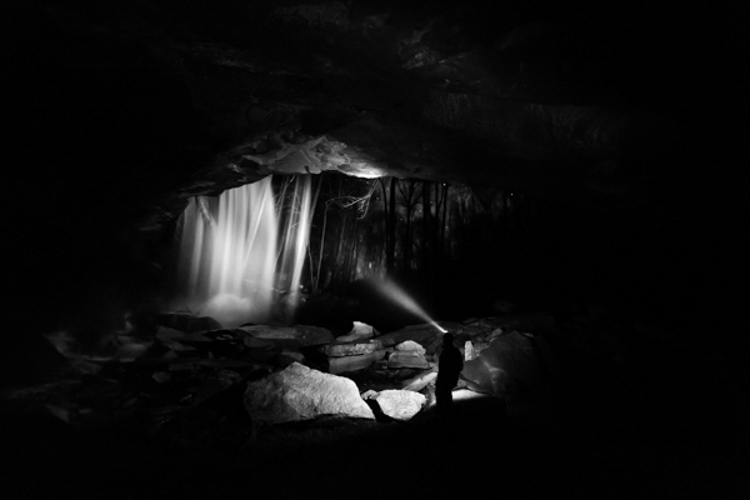
    Cave Selfie

    Perhaps there isn’t a more sought after and photographed subject than water. More specifically, waterfalls. When you really think about it, waterfalls are one of the most basic and simple things that we can find in nature. They are just streams or rivers that happened, by one geological occurrence or another, to find themselves flowing over some height of cliff or stone or other drop-off. Still, we remain captivated by the simple beauty and serenity that can come from being near, and photographing a waterfall.

    That’s where we, as photographers, often slam face first into a huge creative and artistic wall. How can you make an interesting photograph of something that has already been so extensively covered by countless other photographers? While there is unfortunately no secret formula for all waterfall photo sessions, there are some very simple and useful tips that can help you create better, and more unique images, of these phenomenal natural occurrences. Let’s dive in (get it?) and get started on the path to better waterfall photography.

    Have a plan

    I always stress the importance of research and preparedness before any photographic excursion regardless of what the subject or goal might happen to be. This is especially true when you, the outdoor photographer, are readying yourself to photograph waterfalls. There is simply no denying that the more you know about a location, the better your odds will be of coming home with images that you are happy to claim as your own.

    Conduct some quick research and find out what the main waterfall or waterfalls are in the area you plan to visit. Google (or another search engine) will be your absolute best friend in this regard. Try to find as many images as you can before you set out so that you can be inspired and have a head start on coming up with your own unique compositions that haven’t been tried with that particular spot.

    Map

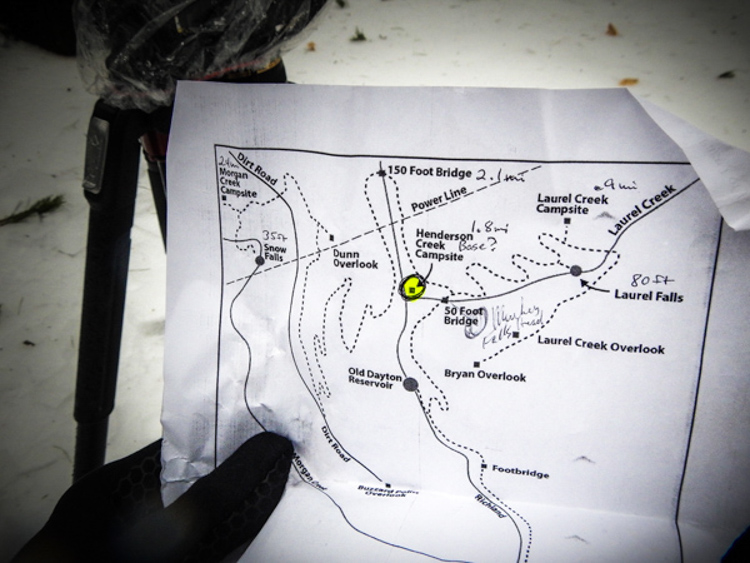
    Also, if at all possible, print out a map of the area and highlight the waterfalls that you feel are the most promising for you on that particular day and focus on those first. Don’t waste time trekking into a place that probably won’t yield a good result. Know before you go, and you will make better use of your time and become a much more efficient shooter.

    Use a tripod

    The topic of using a tripod can sometimes scare you off just from the sheer repetition of the statement. For whatever reason it seems like this essential bit of knowledge is where most beginner photographers find themselves in a state of complete denial. Believe me, I know how uncomfortable, to downright physically painful and tiring it can be to carry a tripod on your person for an extended amount of time. Still, though not always convenient, a tripod will always help you in the long run to produce better photographs. There is simply no other way to limit camera shake without having a solid shooting platform – there just isn’t. You will need such a platform for the longer exposure times often used when encountering waterfalls. End of story.

    Another fact that beginners, and even some seasoned photographers, fail to grasp is that the quality of the tripod plays an essential role in its overall use to you. You will need a tripod that locks securely and reliably, and can handle the weight of whatever camera rig you happen to be shooting, as well as the shooting conditions. I can’t tell you how many long exposure images I ruined due to drifting of the tripod head because all I had available was a suboptimal tripod.

    The biggest gripe I hear concerning tripods is that the good ones are too expensive. It’s true that a quality tripod will not be cheap. However, it is just as true that you can still obtain one without being outrageously expensive. Shop around and find a tripod that has good reviews, fits your current needs, and will also grow with you as a photographer. Do you really need carbon fiber? Do you need the most advanced ball head? Ask yourself questions like that and your purchase will make less of a dent on your pocketbook. A good tripod will last you years and yield incredible benefits. It will literally pay for itself and be one of the best investments you will make.

    Make the waterfall the secondary subject

    Foreground Focus

    This image puts the colors of the moss and the detail of the foreground as the first point of interest and less on the waterfall itself.

    This tip may seem a little counter intuitive but stay with me. It’s fairly straightforward to walk up to the front of a waterfall and snap a quick photo to take home. That’s great if that’s all you want. But let’s face it, you wouldn’t be pouring through all the great content here on dPS if all you wanted was to make average photos. You want to shoot with a purpose, and make photographs instead of taking snapshots. One of the best ways to do this is to think about the subject differently than the average photographer, and waterfalls offer a great opportunity to do this.

    When you arrive at a particular falls you should really study the scene. Give yourself a few minutes before you even start thinking about making an exposure. Watch how the water flows and interacts with the other pieces of the scene. It may be rocks, boulders, sand, trees or any number of artifacts found in such places. Don’t let the waterfall itself distract you from the other photographs that could be there.

    After all, the waterfall is not the only thing you notice so why should it be the only thing you show your audience? Look for ways to include different parts of the scene and even have the falls take a back seat if that makes a stronger image. Pay attention to what is often overlooked by other photographers. If you do this you will almost always be able to present the waterfall in a way that has never been seen before.

    Pay attention to color

    Color is a great way to grab the attention of your viewers and pull them into a photograph. Never underestimate the creative power of color when photographing waterfalls. Water is an incredible thing because it not only reflects the different colors around the surface such as the sky and leaves, but also the colors that come from underneath as well.

    Use Color

    The first step to getting the most interesting colors from a scene is to always shoot in RAW if at all possible. Shooting RAW will allow the most information to be recorded by your camera sensor, which will in turn give you much greater latitude for getting creative later with your post processing. Experiment with creative white balance and see what happens. Enhance the vibrancy and saturations in some areas and decrease them in another. You will be surprised how much more lively and interesting a waterfall can become with simply letting your imagination run free, and by using color creatively.

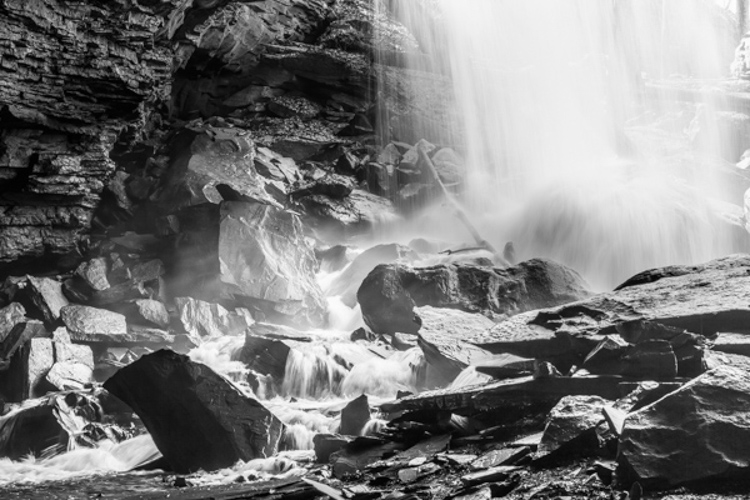
    On the flip-side of the color coin, is that some waterfalls work much better when photographed in black and white. I have often said that I prefer images that tell a story through black and white, unless the color of the scene can speak louder. If you find yourself shooting a waterfall that lacks a lot of native color then why not put your pre-visualization skills to work (you’re still practicing that, right?) and try to imagine how the image could appear in black and white? Look for contrasts between light and dark areas on rocks, and contrasts within the water itself. Are there any interesting textures or reflections?

    Here’s an unprocessed RAW version of a waterfall. Notice there’s not much color to boast about.

    Virgin Falls RAW

    Here we see the same image after a little cropping and black and white conversion.

    Virgin Falls Processed

    Lastly, with this photo, the textures and light really made the image so I converted it to black and white as well.

    Rocks and Falls

    Never discount the power of a monochrome image. Black and white waterfall work can be extremely profitable especially when you’re shooting in the drab and often colorless winter months.

    Don’t forget to protect your gear

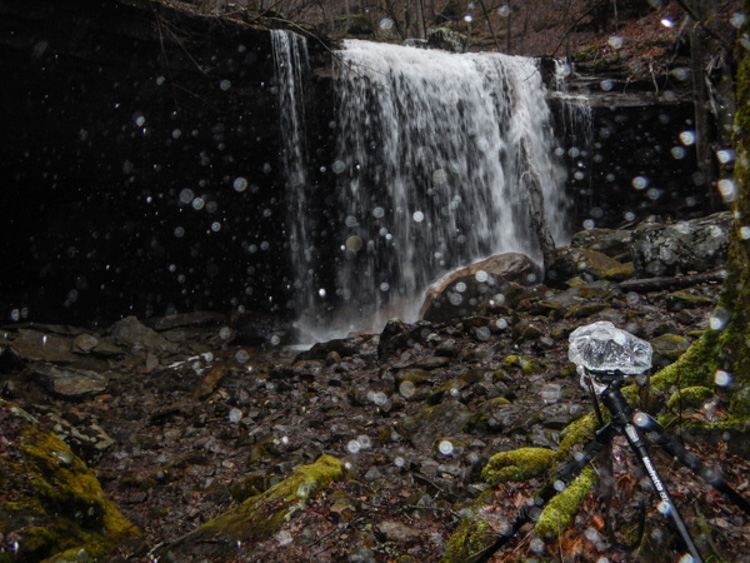
    This isn’t really a tip, but rather a lesson that should be learned and become second nature to the serious waterfaller. When shooting a waterfall of any large size and flow there will always be moisture in the air, whether it is visible to you or not. The shear force of the water impacting the terminus of the fall, with render small droplets into the air that will absolutely ruin your shot and potentially destroy your camera and lenses.

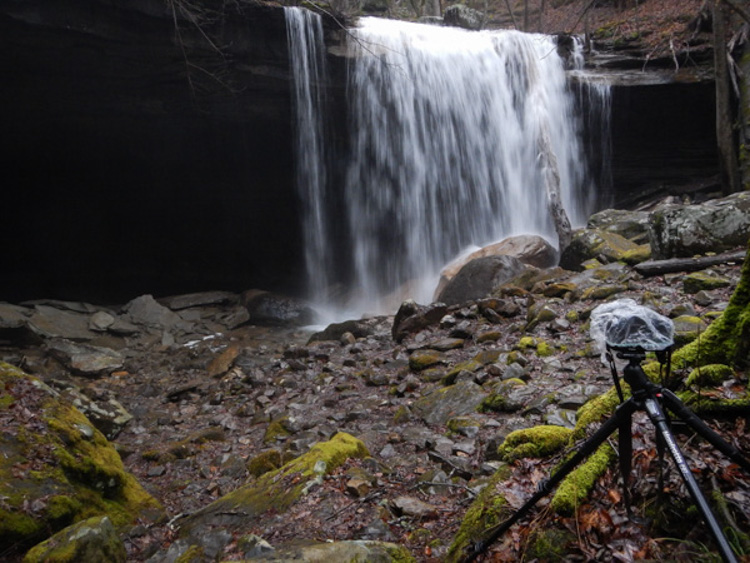
    Without Water Drops

    The air surround a thirty-five foot waterfall without flash.

    Water Drops

    Then with a flash firing to show the moisture in the air.

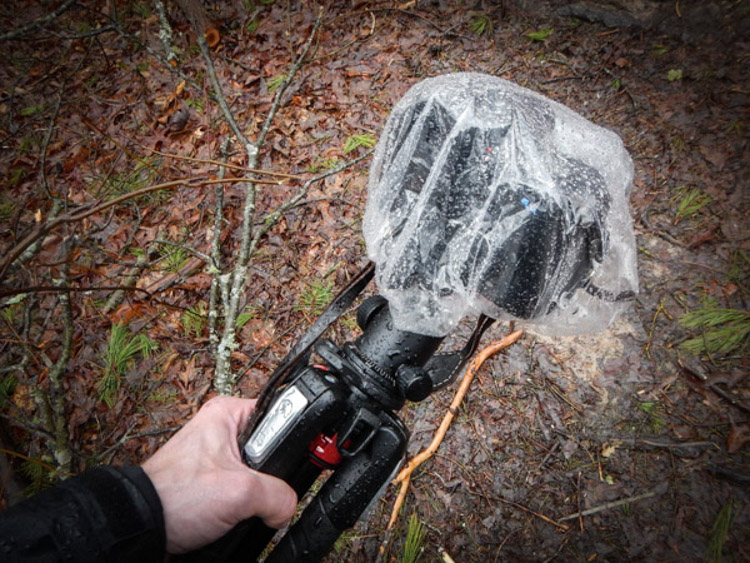
    Always use some protective barrier to protect your camera and lens while you set up for your exposure, and for transport around the waterfall. This barrier doesn’t have to be fancy. Personally I use pre sized slip-on plastic container covers that you can pick up at virtually any grocery store. They are perfectly waterproof and fit snugly around my camera and are unnervingly cheap.

    Protect Gear

    The same goes for your lenses. Even if they are in your camera bag, always protect them from the moisture. Again, low tech is often your best option here. I simply wrap my lenses in a cloth and place them individually into resealable sandwich bags. The cloths will help to absorb any condensation that builds up from temperature changes and were a hard learned lesson for me. Lastly, minimize the amount of time you leave the cap off your lens, and always carry a good lens cloth for wiping the front between takes.

    Shooting even small waterfalls can be very rewarding, and are a great way to just get out and enjoy nature. Learning to shoot them creatively, however, can be a little more challenging. That doesn’t mean that it has to be difficult or intimidating. Just remember these five simple tips and you’ll be ahead of the game when it comes to waterfall photography:

    1. Research and plan beforehand.
    2. Don’t desert your tripod.
    3. Think of the waterfall as part of a whole and not the only part of a scene.
    4. Learn to use color creatively or when to get rid of it altogether.
    5. Always protect your gear from the elements.

    Now go out and do what you love to do!

    googletag.cmd.push(function() {
    tablet_slots.push( googletag.defineSlot( “/1005424/_dPSv4_tab-all-article-bottom_(300×250)”, [300, 250], “pb-ad-78623” ).addService( googletag.pubads() ) ); } );

    googletag.cmd.push(function() {
    mobile_slots.push( googletag.defineSlot( “/1005424/_dPSv4_mob-all-article-bottom_(300×250)”, [300, 250], “pb-ad-78158” ).addService( googletag.pubads() ) ); } );

    The post Shooting Better Waterfalls: Five Tips for Improving Your Waterfall Photography by Adam Welch appeared first on Digital Photography School.


    Digital Photography School

  • Winners of the Defrozo Contest Plus a Bonus for All dPS Readers

    A huge thank you to everyone who entered our recent contest to win one of five prize packs from Defrozo.

    Defrozo 1b

    The response was great with numerous valuable suggestions left for the Defrozo team in the comments. The Defrozo founder, Demetrio Fortman, even decided to add a bonus offer for ALL of the Digital Photography School readers (details below).

    And now to the winners. . .

    Below a list of the five winners, their comment, and a note from the Defrozo team to each of them:

    Winner #1 – bv

    “At 51, my initial foray into a more serious version of my photography as me a top 20% popular photographer on ViewBug, a Facebook page with 2K+ fans, and the ability to sell and donate a couple of items.

    I need something serious that elevates my game to a viable new level. I would love to see a one-stop command center that unifies everything a photographer may be doing. Uploading photos to multiple sites, contact with friends lists and email contacts with newsletters/messages featuring my contact information, it would be awesome to tie-in to invoice program, calendar, run contests, Somebody needs to step up and create a Photography Business Mothership! Are you that company?”

    Note from Defrozo: Photography Business Mothership? We couldn’t say it better. We look forward to creating one together with you.

    Winner #2 – Domien De Clercq

    “I do however have some questions before making any decisions.
    Will there be a plugin with lightroom to ease exports? With inclusion of metadata such as tags?
    Will the images be uploaded in raw or jpg?
    Will the images be protected with a watermark?
    Will there be a separate image bank (not all pictures go on your website) to which clients can search and purchase images?
    Will the processing of different image resolutions happen on the server side or client side?
    How is the pricing, commission and rights handled? Do the images stay property of the photographer or is it like Facebook and they become property of the site via some loophole?
    If an image is sold for 6 months, will it automatically reappear in the stocklist after the contract is completed?
    If you upload images to the site, can you mark them as sold (images taken for a paid shoot) for a given time so they appear in the stock after this time without us having to worry about this?

    I could go on but these are the main questions for now.”

    Note from Defrozo: Domien, this is just the beginning for both of us, we look forward to making Defrozo your best companion as your grow your business.

    Winner #3 – MelissaL

    “I am at a point in my life ready to switch careers, and make the scary leap from photo enthusiast to professional. Defrozo looks like it might make my venture a little less intimidating, since I really have no business background, and want to hit the ground running. I would like a way to optimize my name and future website to be at the top of search lists for people looking for a photographer in my area, with easy and fast downloading of my work, and I want a beautiful aesthetic quality to my site. A critical element is also making sure my clients can see the products and framing they will purchase in detail, and having easy, safe, and robust payment options at their fingertips. I am excited to learn more, and also find out if the pricing listed is per year or month, beyond the free site, and what bonuses are included. Storage is such a key part of online photos, that I would want to be sure that I have enough spade for high res files and that the images can be password protected for the privacy of my clients. I am excited to find Defrozo and learn all about it. By the way, what’s with the name “Defrozo” anyway?”

    Note from Defrozo: Melissa, hopefully, we’ll make this leap towards your professional photography career together!

    Winner #4 – Andrew F

    “Defrozo looks like it could have a lot of potential. As a professional photographer it is important to keep all your client interactions in one place. Otherwise you waste a lot of time trying to manage a mess of relationships. I am currently using ShootQ and ShootProof as my CRM and Gallery. Here is what I would like to see in the full version of Defrozo:

    1) Fully interactive CRM with:
    • Lead management – follow up reminders (with alerts sent right to your phone), lead workflows with auto emails and tasks, appointment requesting, calendar sync (with google AND iCal), & relationship management/group marketing
    • Online booking – online contracts and auto invoicing, proposal and estimates, image usage options for business and corporate clients, auto emails, client portal for payments and shoot progress
    • Client management – Shoot workflows, auto emails, invoice reminders, email templates, etc.
    • Email marketing capabilities to specific groups or client types
    • Easily understandable interface

    2) Online gallery with:
    • intuitive yet easily understood interface
    • client collaboration
    • easy to download images – setting a limit on # of image downloads, allowing download of web and full res files.
    • auto emails and templates
    • ability to show photographer’s favorite images
    • Print fulfillment through partner labs
    • Image archiving/ cloud storage

    3) Interactive client or event websites

    4) Everything must be mobile friendly and easily accessible

    I don’t have much use for the website site of things, as I would imagine most photographers don’t. There are plenty of affordable options out there on that spectrum.

    I would use this in my everyday workflow. I’m sure there are a ton more options you could add down the line, but I think these are the main ones to get people to switch over to your product.”

    Note from Defrozo: Andrew, your comment was a goldmine of valuable suggestions. We hope one day not so far in the future we’ll become your ultimate tool for managing your business.

    Winner #5 – Emily M

    “I have been venturing into photography for the last year now, an enthusiast who wants to turn a hobby into a successful business. I have a two year plan of which I am in year one, one of the goals for this year was to start up a blog as I build my portfolio; Unfortunately starting up a blog from scratch for a newbie is kind of complicated from the loads of research I have done. Defrozo seems to be an awesome way to go; especially being a marketing platform tailored for photographers. Marketing has never been easy but with the right tools you can get your product right onto the doorstep of prospective customers. Defrozo’s setup is very chic and professional. I honestly think that Defrozo is the partner I need to transition from my day job to a fully fledged photographer.”

    Note from Defrozo: Emily, with a clear game plan and goals, you’re on the right track to becoming a successful photographer. We look forward to walking this route together with you!

    Winners will be emailed with details of how to collect their prize by the team at Defrozo.

    A message from Defrozo and a special bonus

    We’re excited to receive so many great entries on this contest. Your feedback and suggestions help us create truly useful software for enthusiast and pro photographers, so thank you for all the valuable tips you sent us via comments!

    If you were not lucky enough to win, don’t be upset. Here’s our extra bonus for ALL Digital Photography School readers:

    defrozo-2b.jpg

    50% OFF our most popular Kickstarter reward ($ 50 value)

    To receive your special discount, pledge $ 50 toward the Defrozo Kickstarter campaign by April 17th. Leave your Kickstarter username in the comments below this post, and we will immediately DOUBLE your reward to the $ 100 level. You get our juiciest pack of goodies with 50% off – an opportunity that will never repeat again.

    Thanks again for all the awesome entries,

    The Defrozo Team

    Thanks again to everyone for entering and to Defrozo for sponsoring this competition. Don’t forget to sign up for your free Defrozo membership and contribute to creating the ultimate photography business platform.

    googletag.cmd.push(function() {
    tablet_slots.push( googletag.defineSlot( “/1005424/_dPSv4_tab-all-article-bottom_(300×250)”, [300, 250], “pb-ad-78623” ).addService( googletag.pubads() ) ); } );

    googletag.cmd.push(function() {
    mobile_slots.push( googletag.defineSlot( “/1005424/_dPSv4_mob-all-article-bottom_(300×250)”, [300, 250], “pb-ad-78158” ).addService( googletag.pubads() ) ); } );

    The post Winners of the Defrozo Contest Plus a Bonus for All dPS Readers by Darlene Hildebrandt appeared first on Digital Photography School.


    Digital Photography School

  • Your Basic Lighting Kit: A Spin Around the Block

    So you bit the bullet and spent ~$ 100 for the stuff needed to turn your hot shoe flash into a mini portable studio lighting system. What do you with the box of stuff the UPS guy just dropped onto your dorstep? Where do you start?

    That is exactly the gap we explore whenever I teach a beginner's lighting class. So today we are going to walk through a "first steps" exercise.

    Read more »
    Strobist