Category: Photography

  • How to Shoot Panoramic Photos

    Image stitching is not new, neither is panoramic photography. Since almost the beginning, photographers have been intrigued with providing a wider view of a given scene. The reason is that panoramic images provide context. In a normal frame of a large expansive scene, we only see a small part of the bigger picture. A panoramic image however, gives us a broader view, and a context for that image. The word panorama is derived from two greek words, “pan” which means everything and “horama” which means that which is seen or the view. So, panorama literally means – a view of everything.
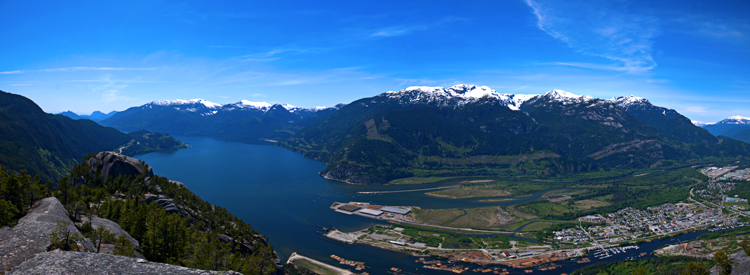
    Stitched Panorama

    A six image pano of Howe Sound, Squamish BC

    Early on, photographers would make panoramics manually, by simply panning across a scene and taking sucessive images. Once the images were printed, they would manually stitch them by overlaying one image on top of the other, or even cutting them into place. This was a new way of viewing and capturing scenes. I saw my first panoramic image as a young boy. It was a huge scene of photographs that had been stuck together and overlaid. It was in a museum in the city where I grew up. I was intrigued, it gave me a view of the city I was living in, that I had never seen before. It gave me a whole new perspective on the place that I called home. I wasted many rolls of film as a youngster trying to do the same shots, but never managed to get it right.

    One solution to this challenge was the panoramic camera. These cameras revolutionized panoramic photography. They were able to capture a panoramic scene of 180 degrees in a single shot. No more cutting and sticking photographs together. These rotating cameras captured great images of scenes and did it with ease. There were also wide-angle panoramic cameras that took in much more of a scene in a single image and again, changed the way we viewed images and scenes. These cameras changed the views, and contexts of many famous places. In their day, they were the pinnacle of technology.
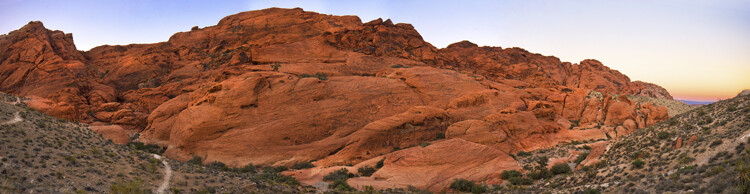
    Stitched Panorama

    Red Rock Canyon, Las Vegas

    Once again, the wheel of progress turned and all of this changed when digital panoramics became possible. The photographer only had to pan across the scene and take successive images, as in the past, but now the stitching process in the computer gave a seamless result. The photographer simply dropped these images into a photo stitching tool and voila, an amazing panoramic image magically appeared. Well, that was the idea anyway, in practical terms it was not so easy.

    1. How to shoot panoramic photos

    Autopano giga is a standalone software tool that stitches your images together. There are a few guidelines to follow when you do a photostitch. By following these guidelines, you will be almost guaranteed that your image will stitch properly the first time.

    A. Shoot in Manual mode

    Expose for your scene manually and don’t change the exposure between shots. You may have to do a light meter reading for the brightest and darkest parts of your scene. Adjust your settings to make sure that you have good exposure throughout the images and then start shooting.

    B. Overlap your shots by at least 30%

    Overlap each image by at least 30% if you are shooting in landscape orientation and up to 50% if shooting in portrait. By overlapping you will have duplicates of parts of your scene, this will allow the software to stitch the images together better and adjust for the perspective distortion too.
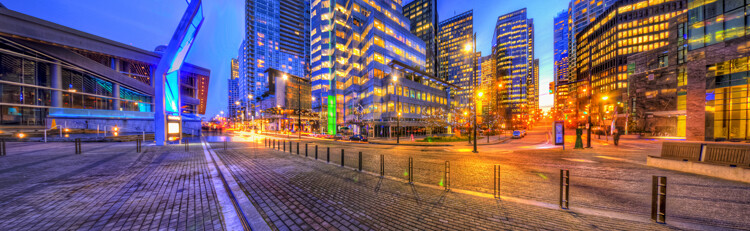
    Stitched Panorama

    Five images stitched, Jack Poole Plaza, Vancouver

    C. Use a tripod

    You can shoot handheld, but using a tripod will ensure that the images will be shot along the same horizontal plane. This can also help with the stitching process too.

    D. Keep your aperture between f/8 and f/11

    You will want to keep everything in focus, so be sure that your aperture is set to at least f/8. At f/2.8 your focal point may change and this could cause some parts of your image to be out of focus. It may also be a good idea to set your aperture to f/8, focus your camera, then switch to manual focus. That way your camera won’t be focusing on a different part of the scene in each image. At f/8 or f/11 the whole scene should be in focus.
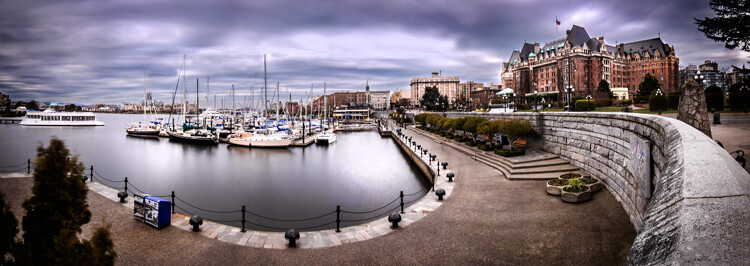
    Stitched Panorama

    Six image Pano, Victoria Harbour on a snowy, windy day

    Now the magic part, digitally stitching the images together. You can do this using Autopano Giga or Photoshop, my preference is Autopano Giga. To learn more about how to do this, take a look at these articles I wrote on image stitching: Walk Through and Review of Autopano Giga – Image Stitching Software and Step By Step How to Make Panoramic HDR Images.

    Lets make this fun, upload some of your images that you have stitched, then tell us what software you used. Enjoy, happy shooting and stitching.

    googletag.cmd.push(function() {
    tablet_slots.push( googletag.defineSlot( “/1005424/_dPSv4_tab-all-article-bottom_(300×250)”, [300, 250], “pb-ad-78623” ).addService( googletag.pubads() ) ); } );

    googletag.cmd.push(function() {
    mobile_slots.push( googletag.defineSlot( “/1005424/_dPSv4_mob-all-article-bottom_(300×250)”, [300, 250], “pb-ad-78158” ).addService( googletag.pubads() ) ); } );

    The post How to Shoot Panoramic Photos by Barry J Brady appeared first on Digital Photography School.
    Digital Photography School

  • Adobe Announces New Lightroom CC – What Features are You Most Excited About?

    Lightroom CC

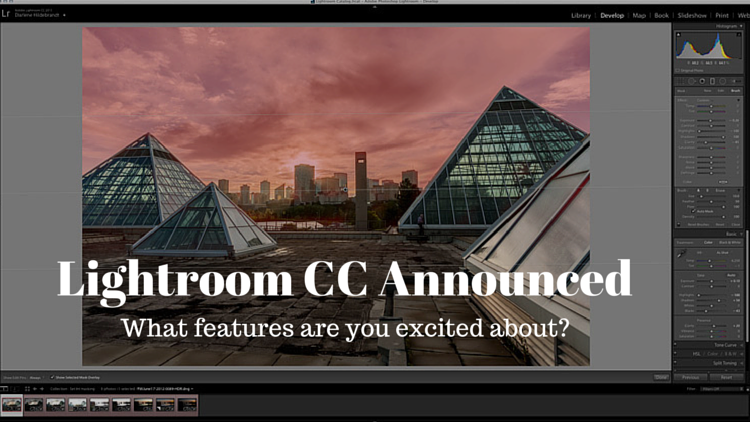
    Well yesterday Adobe pulled the trigger on the much anticipated release of the new Lightroom 6, which is actually called Lightroom CC (part of the Creative Cloud). It will still be available as a stand alone product but many people, myself included were eagerly downloading the new version as soon as it was available.

    We’ll have one of our writers doing a more involved look at the new features soon but I wanted to see what you are most interested in with this new version.

    LR-CC-03

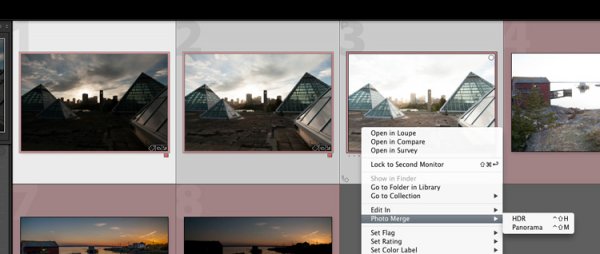
    New Photo Merge feature in LR CC

    What features were on your LR wish list?

    So tell me in the comments below – what things were you hoping Adobe would build into this incarnation of Lightroom? Did you get all the features you wanted? What’s still missing in your opinion?

    Was there anything you wanted removed?

    What new features are you most fired up about?

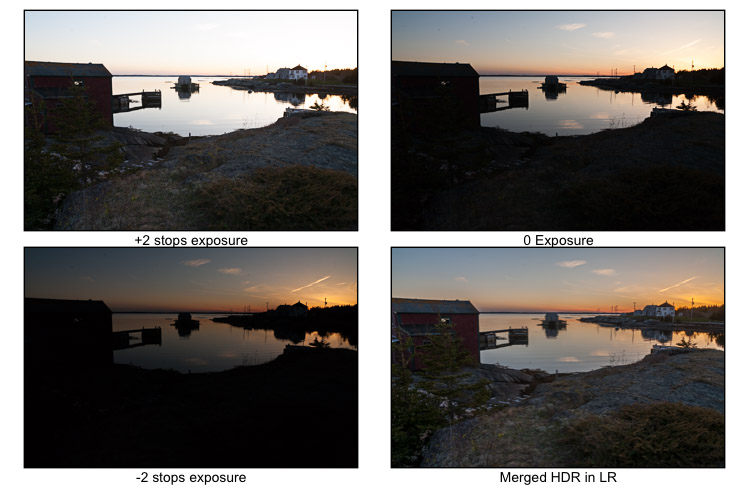
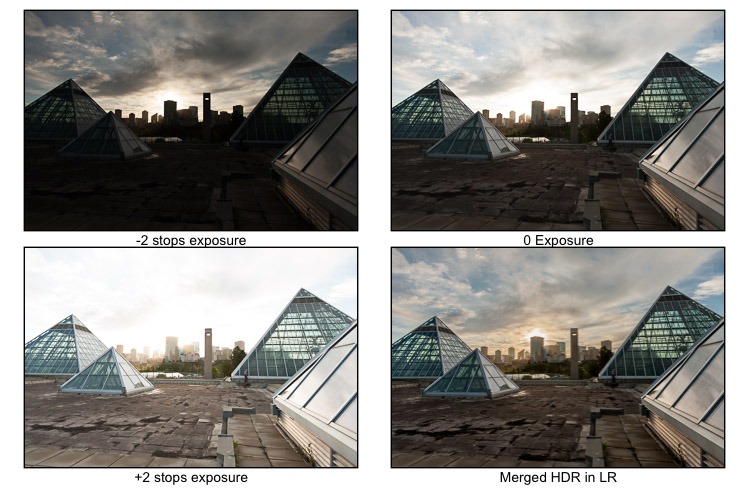
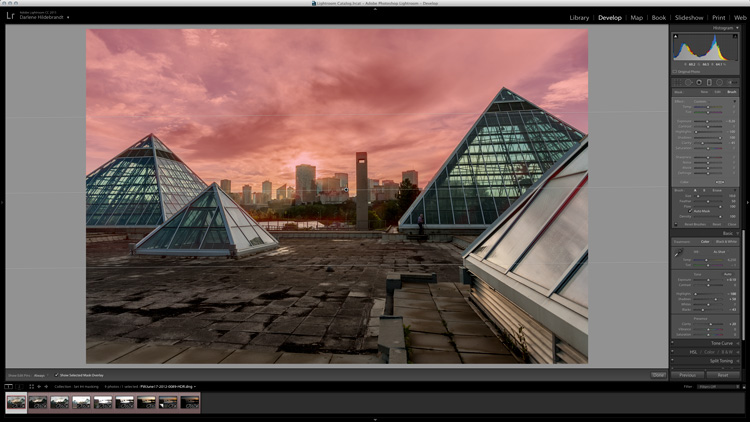
    In watching some of the live broadcast of the announcement I picked up on a few of the new features and was eager to try them out, most of all the Merge to HDR (Pano also available). It takes your bracketed shots which you previously had to take to either Photoshop or another plugin to work with – and now Lightroom merges them into a gorgeous 32-bit file which comes back in as a DNG no less! So you have all the editing power of a 32-bit file at your fingertips without every leaving Lightroom CC – I’m sold!

    I ran a couple sets through the HDR to test it. Was pretty impressive and super easy. I’ll have to dig into it more later.

    LR-CC-02 LR-CC-01

    Previously on the set of images above I had to mask the sky back in – but using LR local adjustments and the new HDR Merge I was pretty happy with the result which took about three minutes.

    Some of the new features I’m excited about and keen to try are:

    • The Merge feature (to Pano and HDR – it even handles alignment, auto tone and deghosting)
    • Add to Collection on import
    • Filter in Collections (search)
    • Enhanced video slideshows (I use it now for easy shows, this looks like it can make them look better now too)
    • Auto-straighten on the crop tool
    • New finer control using the graduated filter and radial filter. You can now brush out, or mask (hide) part of it to bring back buildings, trees and areas you do not want affected by the filter. Brilliant!

    See a complete run down of all that’s new on the Adobe site.

    LR-CC-04

    New brush option on graduated filters, very slick!

    How about you?

    We’ll have more on the new Lightroom in the coming weeks but for now tell us what you think in the comments below.

    googletag.cmd.push(function() {
    tablet_slots.push( googletag.defineSlot( “/1005424/_dPSv4_tab-all-article-bottom_(300×250)”, [300, 250], “pb-ad-78623” ).addService( googletag.pubads() ) ); } );

    googletag.cmd.push(function() {
    mobile_slots.push( googletag.defineSlot( “/1005424/_dPSv4_mob-all-article-bottom_(300×250)”, [300, 250], “pb-ad-78158” ).addService( googletag.pubads() ) ); } );

    The post Adobe Announces New Lightroom CC – What Features are You Most Excited About? by Darlene Hildebrandt appeared first on Digital Photography School.

    Digital Photography School

  • Lighting for Macro Photography

    Macro photography is great for exploring new worlds that are otherwise invisible to the naked eye. You can turn ordinary, boring subjects into fascinating ones. A closeup photograph’s composition is 80% determined by the lighting, therefore it is the single most important element a macro photographer should have complete control over. With good lighting your macro photographs will pop out of the frame and will be sharp, vibrant, and visually stunning. If you get the lighting wrong however, your macro photograph will just look dull and boring.

    Image 1

    In this article I hope to show you some of the ways you can illuminate your macro subjects in order to capture fantastic photographs. Macro photography can be achieved using three forms of light; continuous, flash, and natural. All of these have separate advantages over one another, but it is completely down to personal preference as to which one you should use.

    Continuous Lighting

    Continuous macro lighting is great for controlling a number of lighting characteristics. Furthermore, with continuous light you can see how the light is affecting the subject at all times. I believe continuous light is the best option for beginning macro photography. It allows you to build your understanding of how lighting effects macro photography considerably, which will result in you becoming a better macro photographer. Continuous lighting also offers a much more convenient way to direct light on to specific areas of a subject. This gives you full control of the lighting environment, which can result in some stunning photographs.

    Continuous lighting also adds another weapon to a macro photographer with a video capable camera. Macro videography is incredible and with continuous lighting, you don’t even need to change anything to switch between capturing photos and videos.

    Image 2

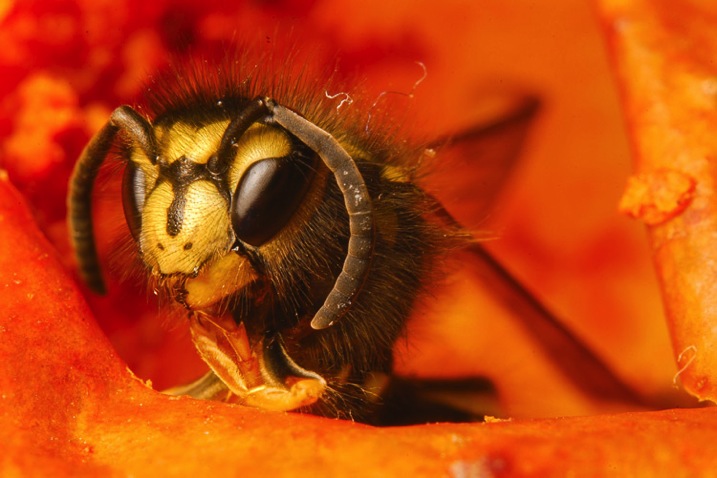
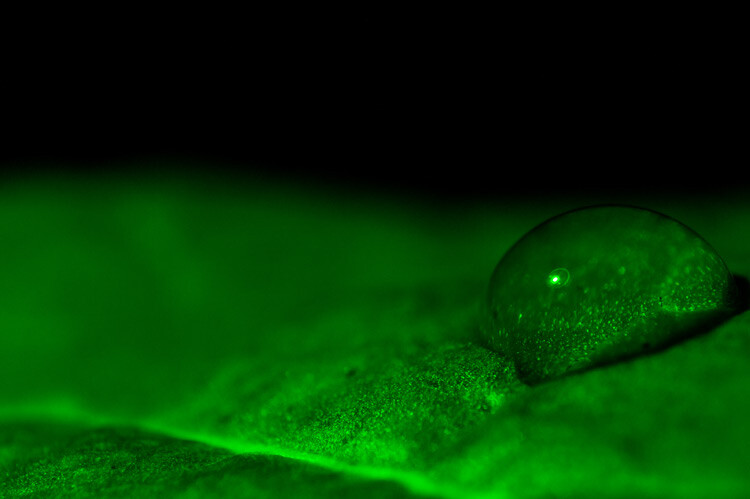
    The images above were both captured using continuous lighting techniques. The first image subject is a wasp and the second is moss.

    Flash (strobe)

    Flash photography is great if used properly. Its main advantage is the ability to freeze subjects due to the short duration of the light. This makes it excellent for out in the field as a fill light and for capturing moving insects.

    Flash is more complex to learn to use properly, with strange flash settings such as manual mode, TTL and rear curtain sync. However, once learned well the results are amazing. Using flash is very much a trial and error process and it takes a lot of time to get right.

    Natural Light

    Image 3

    Natural sunlight usually provides more than enough light for macro photography. You can combine it with reflectors and other photography accessories to gain an element of control. Natural light can also be used alongside either continuous or flash light accessories.

    Image 4

    The two images above were captured using natural light.

    Adding additional elements of lighting control:

    Controlling your lighting environment is essential to producing that perfect macro photograph. Here are a couple of methods that you can use to help achieve complete control.

    Diffusion

    Lighting that doesn’t look natural is not a good look for a macro photograph, if it is unintended. The way to avoid this is to use diffusers, which spread out the light across a bigger surface area. This results in a softer light that looks natural and makes your macro photographs aesthetically more pleasing. Diffusers can be made out of materials found in the home; tissue paper is great for example.

    Image 5

    This image was taken with no diffuser, notice how the light is quite harsh and reflects off the subject.

    Image 6

    This is the same subject, but captured using a diffuser. Notice how the light looks much more natural and makes the image look more appealing.

    Colour

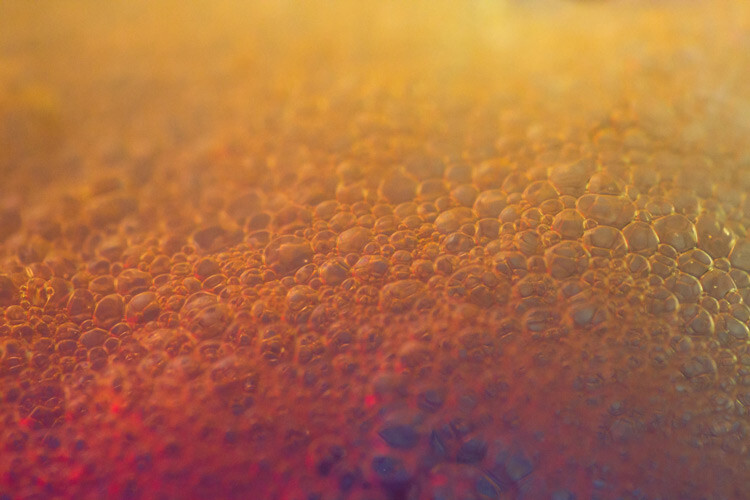
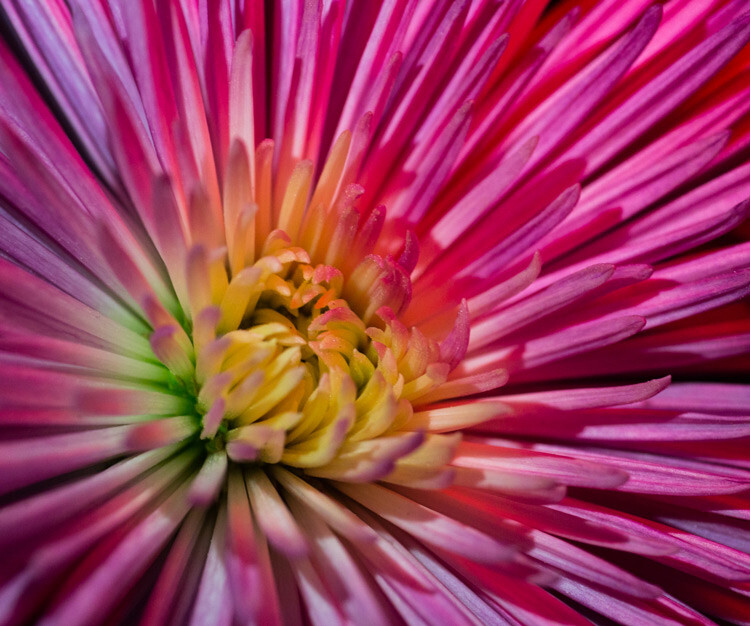
    Adding coloured lighting to macro photos can make them unique, and stand out in the crowd. You can do this by applying gels or colour filters to your lighting equipment.

    Image 7

    This image of shaving foam has been captured using coloured continuous lighting.

    Image 8

    This image of a flower has been captured using coloured continuous lighting.

    Lighting Position

    Understanding how the direction of light alters the appearance of your subject is significant. This is much easier to do with continuous light, although it can be done with flash as well. A macro subject will look completely different with a light behind it for example.

    Image 9

    This image of liquid soap has been captured using a light positioned from behind the subject.

    I hope this article has given you a great insight to how lighting affects macro subjects and how you can control it. If you have any questions or additional tips, please leave a comment below.

    googletag.cmd.push(function() {
    tablet_slots.push( googletag.defineSlot( “/1005424/_dPSv4_tab-all-article-bottom_(300×250)”, [300, 250], “pb-ad-78623” ).addService( googletag.pubads() ) ); } );

    googletag.cmd.push(function() {
    mobile_slots.push( googletag.defineSlot( “/1005424/_dPSv4_mob-all-article-bottom_(300×250)”, [300, 250], “pb-ad-78158” ).addService( googletag.pubads() ) ); } );

    The post Lighting for Macro Photography by Samuel Granger appeared first on Digital Photography School.

    Digital Photography School

  • 3 Simple Tips for Subtle Landscape Photography Post-Processing

    Landscapes are one of the most popular photography subjects, and for good reason. Nature is enchanting to the human eye, and it’s only natural for people to want to capture that stunning natural scene with cameras. Some landscape pros and über-enthusiasts will plan ahead with tripods, shutter release cables, filters, and extra gear to make sure they really nail the shot they have in mind.

    Then there are more casual photographers like myself who tend to shoot landscapes on a spur of the moment basis, usually during vacation. If you fall into the latter group, this article is more geared toward you. Maybe you have a single landscape shot that looks pretty good, but you’re looking for some light post-processing tips to top it off. If that’s you, read on!

    In this article, I will present a few methods for enhancing natural scenes to keep them looking close to how you originally viewed them. All of these techniques have to do with enhancing a single shot, and the effects are not too dynamic or exaggerated, keeping you safe from overdoing it with say, HDR.

    Tip #1: Enhance details

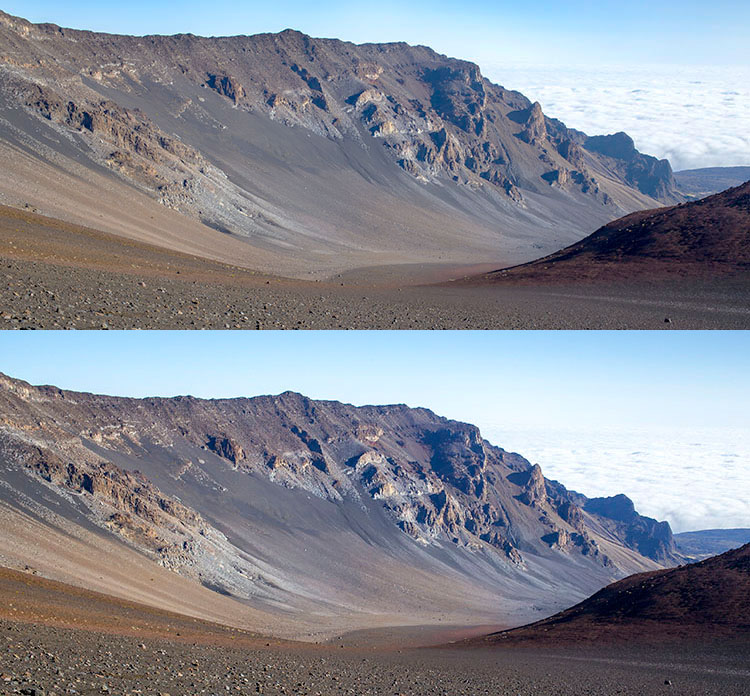
    One of the quickest and easiest ways to polish any photo is to apply image sharpening. There are several ways to do this in Photoshop. For this article we’ll focus on applying the High Pass filter’s image sharpening effects to the landscape image below of Haleakala, a hiker-friendly dormant volcano in Maui, Hawaii. The before image is above and the after one is on the bottom. The effects may seem subtle from a zoomed-out perspective, but compare distinct areas such as the rock formations to see the sharpening in effect.

    High pass sharpening filter landscape photography

    Steps for sharpening using the High Pass filter

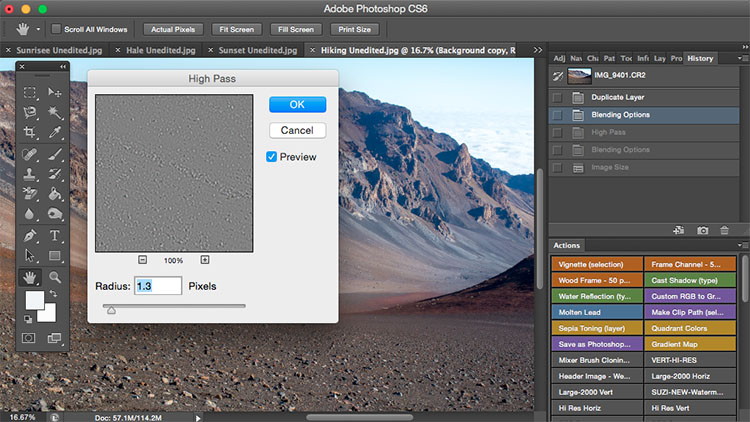
    1. Start by duplicating the Background layer, and changing the blend mode of the new layer to Overlay. The image will appear heavily contrasted, and with the Overlay blend mode applied, you’ll be able to get a preview of the High Pass filter effects.
    2. Next, apply the High Pass filter to the duplicate layer. It is located in the Filter menu at the top screen in the Other section.
    3. Adjust the filter settings: You’ll then see the High Pass filter dialogue box, which will allow you to use a simple slider to increase or decrease the intensity of the radius value (aka strength of the filter’s effect). The higher the value, the more intense the High Pass filter effect. Generally speaking, it’s best to keep the value on the lower side, between 1-5 pixels. In the case of this image, the radius was set to 1.2 to provide just enough sharpening around the edges of the image without exaggerating the effect.
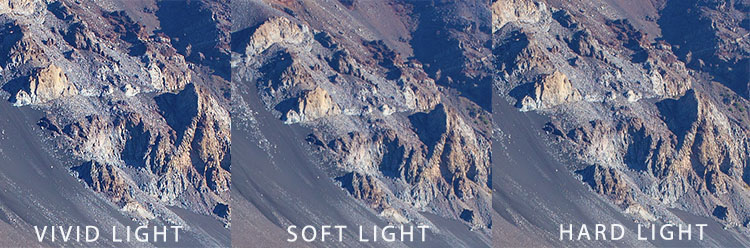
    4. Tweak the layer settings: After the High Pass filter is applied, it can be fine-tuned by adjusting the blend mode of the duplicate background layer and/or lowering the layer’s opacity. The blend mode you choose can either intensify or reduce the amount of sharpening. For some examples, take a look at the image comparisons below. Hard Light and Vivid Light increase sharpening, whereas Soft Light keeps it subtle.

    Landscape photography high pass sharpening filter

    High Pass filter landscape photography

    Tip #2: Remove image haze

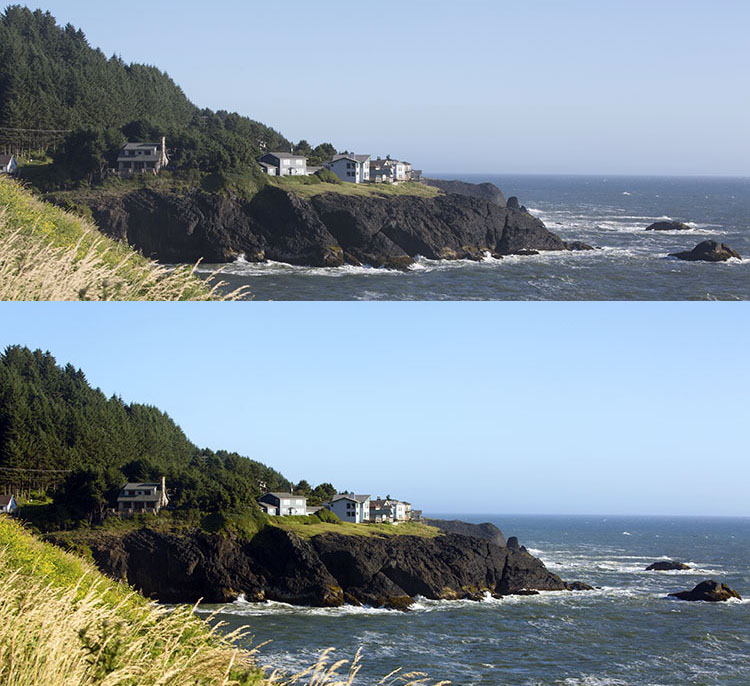
    It’s not uncommon for landscape images to appear hazy or foggy when the natural weather conditions are such. The image above was shot on the Oregon Coast a few summers ago using a Canon 70-200mm at f/11 with just a basic clear UV haze filter on the lens. The mist in the air give the photo a dull look in the unedited, straight-out-of-camera version (top image below) but luckily this can be easily fixed in Photoshop (bottom image below).

    Landscape Haze before and after

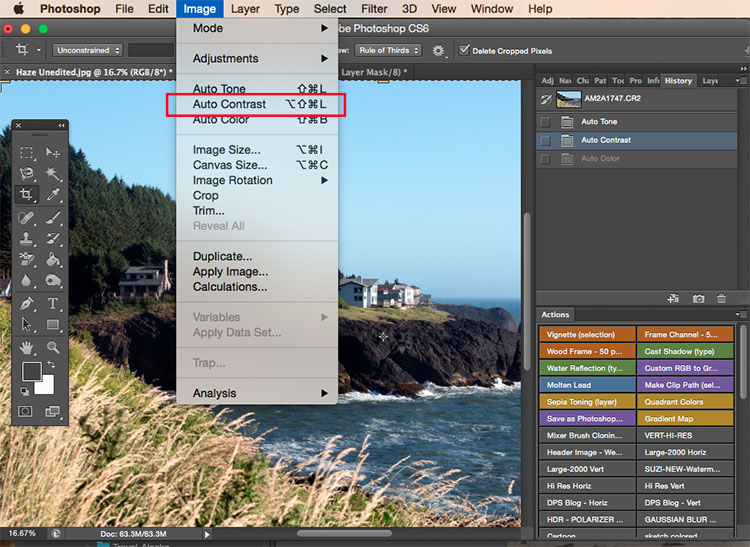
    Since the biggest problem with hazy images is soft contrast, the quickest fix is to simply select the Auto Contrast function, located in the top menu dropdown under Image. Poor image contrast is then instantly fixed based on pixel luminosity, resulting in overall finer image contrast. After Auto Contrast was applied, I also adjusted Levels, Saturation, and Vibrance, and the resulting image looks much more balanced and vibrant despite the hazy conditions of the scene. 

    Landscape photography auto contrast

    Tip #3: Enhance the colors in the sky

    Most sunset photos are already quite spectacular when they’re captured with a camera, but sometimes it doesn’t hurt to enhance them a bit more, to fully convey an exceptionally surreal or beautiful scene you witnessed. The photo below is an unedited sunset shot taken at the Grand Wailea in Maui, Hawaii. It looks pretty fine on its own, but I wanted to paint a little more orange and pink into the sky. 

    Landscape photography Sunset before after

    To do so, we’ll follow these simple steps:

    1. Create a new layer by clicking on the layer icon to the left of the trash can in the layers panel.
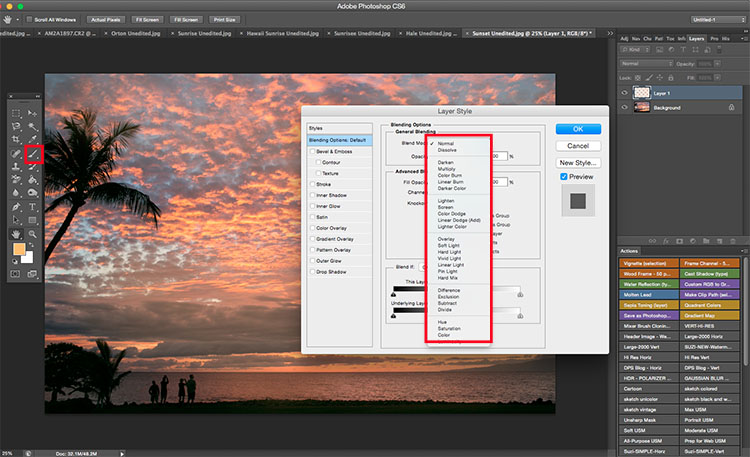
    2. Then go to the toolbox and select the Paintbrush icon. To ensure a smooth transition, make sure the opacity is set to 100% and the brush hardness is set at zero.
    3. Set your color: With the Paintbrush still selected, click on the Foreground Color, which is at the bottom of the toolbar. A dialogue box will appear and your cursor will transform into an eyedropper tool. Left click on the desired color in your image that you wish to paint with, in my case a light pink-orange.
    4. Next, start painting over the areas of the sky that you wish to enhance. Be sure to limit the brush strokes to just your sky area; in my case, I wouldn’t want to paint over the darkened shadows on the left side of the photo since I want to keep them as dark as possible.
    5. Change the Layer Blend Mode: After you’re done painting, right-click on the layer you painted on and change the blend mode to something like Soft Light or Overlay to achieve the desired effect. If the effect is too strong, adjust the opacity of the layer to a lower percentage.
    6. Violá! You should now see much stronger, vibrant colors radiating from your sunset image.

    Landscape photography sunset sky painting

    How do you process your landscape images? Do you have any other tips or tricks? Please share in the comments below.

    googletag.cmd.push(function() {
    tablet_slots.push( googletag.defineSlot( “/1005424/_dPSv4_tab-all-article-bottom_(300×250)”, [300, 250], “pb-ad-78623” ).addService( googletag.pubads() ) ); } );

    googletag.cmd.push(function() {
    mobile_slots.push( googletag.defineSlot( “/1005424/_dPSv4_mob-all-article-bottom_(300×250)”, [300, 250], “pb-ad-78158” ).addService( googletag.pubads() ) ); } );

    The post 3 Simple Tips for Subtle Landscape Photography Post-Processing by Suzi Pratt appeared first on Digital Photography School.

    Digital Photography School

  • 7 Essential Tips for Shooting Portraits on Location

    I have so many friends who have the good fortune to travel the world, but they always come home frustrated because they either try to take portraits in obvious places, standing on top of the landmark with thousands of people all around, or they don’t show the things that they found interesting or personal about where they were. So let’s Continue Reading

    The post 7 Essential Tips for Shooting Portraits on Location appeared first on Photodoto.


    Photodoto

  • The Ultimate Guide to Natural Light Photography

    Dps covers template 363x448

    As a photographer, the most powerful tool you have is natural light

    It may be free for the taking – but are you making the most of it to create beautiful images?

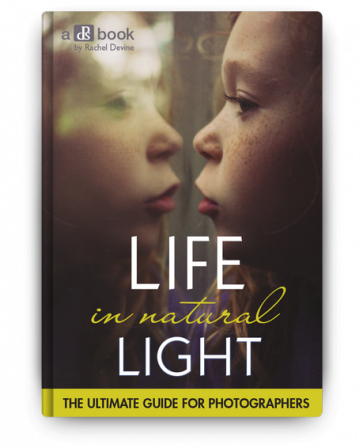
    Today I’m pleased to announce the launch of our latest dPS eBook – Life in Natural Light by Rachel Devine.

    Rachel is someone I have had come to photograph my family – largely because I love the way that she uses natural light to capture special moments of life – so when our team began talking about who we wanted to write this eBook Rachel was the first person to come to mind.

    In this beautifully illustrated eBook Rachel reveals her secrets for finding and using natural light to tell unique visual stories, enhance mood and create quality images.

    Knowledge, Advice and Inspiration

    I love what Rachel and our team have done in producing this eBook. You’re going to come away from reading it with a few really important things:

    • a comprehensive understanding of the different types of natural light (because it’s something that is always changing)
    • practical advice on how to spot, control and harness the power of natural light
    • inspiration to get out and shoot having seen Rachel (and other photographers) beautiful images

    What more could you want – theory, advice and inspiration that will transform your approach to this important topic!

    NewImage

    Our Early Bird Offer to dPS Readers

    To celebrate the launch of Life in Natural Light we’ve put together a fantastic little bundle together for you. You’ll not only get this great eBook but bundled with it comes:

    • 16 Lightroom presets for you to use, optimized for natural light and custom-created by Rachel herself
    • A natural light printable worksheet, to use as a quick reference in the field

    Normally this bundle would retail for $ 29.99 USD but for a limited time you can pick it up for just $ 19.99 USD.

    Learn more about Life in Natural Light and grab your copy today here.

    googletag.cmd.push(function() {
    tablet_slots.push( googletag.defineSlot( “/1005424/_dPSv4_tab-all-article-bottom_(300×250)”, [300, 250], “pb-ad-78623” ).addService( googletag.pubads() ) ); } );

    googletag.cmd.push(function() {
    mobile_slots.push( googletag.defineSlot( “/1005424/_dPSv4_mob-all-article-bottom_(300×250)”, [300, 250], “pb-ad-78158” ).addService( googletag.pubads() ) ); } );

    The post The Ultimate Guide to Natural Light Photography by Darren Rowse appeared first on Digital Photography School.


    Digital Photography School

  • Quality of Light – What is Beautiful Light?

    quality of light

    This photo is lit by the soft light found inside on a sunny day. The light suits the subject because it reveals all the detail on the antique scales.

    We talk about quality of light a lot in photography. I often use the word beautiful, and tell people that great photos require beautiful light. But what is beautiful light?

    To answer that we need to understand that light has many qualities that vary immensely, depending on factors like the light source, time of day, season, and location. Light can be extremely hard (one extreme) or very soft (the other extreme) or anywhere in-between. It takes time to appreciate the nuances and variations of light and learn how to use light that suits both the subject matter, and the style that you are shooting.

    What is hard light?

    Hard light is strong, directional light that casts deep, hard-edged shadows. It’s the quality of light you get in the middle of a sunny, cloudless day, or from an unmodified flash head.

    quality-light-hard-soft-10

    Hard light, generally speaking, is considered bad lighting for many types of photography. There are two fundamental problems with hard light.

    One is contrast – the brightness range (between the area lit by the light source and the shadows it casts) is so great that the camera’s sensor (or film) can’t record detail in both. The other is that hard light is not as aesthetically pleasing as soft light in many situations. It’s another generalization, I know, but it’s the reason that time and time again you will be advised not to take photos in midday sun or with an unmodified flash head.

    The key to working with hard light is to recognize its limitations and find suitable subjects to work with. Personally, I find that black and white is better than colour for working in hard light, and that subjects like buildings can work quite well.

    quality of light

    Hard light is considered unsuitable for portraits because the hard shadows create too much contrast across the model’s face and are not flattering. However, you may be able to work in hard light with a male model, especially in black and white, as it tends to suit the ruggedness of a man’s face. Regardless of whether your model is male or female, simply facing them into the light so that shadows are as small as possible can work well.

    I don’t have any portraits that show these techniques myself, but here are a couple of examples from photographer Betina la Plante. Just click the links to see the photos.

    Female portrait taken in hard light. Note how the model faces the light so that the shadows are minimized.

    Male portrait taken in hard light. See how the photographer used the deep shadow cast by the hard light to throw one side of the model’s face into shadow and bring out the texture of his skin.

    quality-light-hard-soft-11

    In both cases the black and white treatment suits the hard light.

    Another solution is to use portable flash to light the model when shooting in hard light. The idea is that the softer light from the flash (fitted with appropriate modifier) overpowers or fills in the hard light from the sun. That’s what I did with the following image.

    quality of light

    What is soft light?

    Soft light is that which casts either no shadows, or shadows with soft edges. It is more suitable than hard light for many subjects, including many types of landscape and portraits (but especially portraits).

    For example, if you are taking someone’s portrait during the middle of a sunny day, then one of the best things you can do is find some shade, and take a photo of your model there. The softness of the light, and the fill from the brighter, sunlit surroundings, is a very flattering type of light that makes the model’s face glow and creates large catchlights in her eye.

    quality of light

    You also get nice light for portraits after the sun has set at the end of a sunny day, when the sky is filled with a soft glow from the last rays of the setting sun. This works best during the longer days (and twilights) of spring and summer.

    quality of light

    If you are using flash, then a modifier such as a softbox or umbrella softens the light, making it more flattering for portraits (although it won’t be as soft as the types of natural light just described).

    In-between light

    I’ve just described several scenarios, starting with midday sun, which is very hard, through to shade or twilight, where the light is very soft. The truth is that most light falls somewhere between these two extremes.

    For example, lets say you are taking a landscape photo on a sunny day. The light changes as the sun gets lower, softening and changing in colour. The exact changes depend on the time of year, atmospheric conditions and the weather. Here in New Zealand, the light is very hard, especially during the summer, until the sun slips below the horizon. In other places the prevalent atmospheric conditions may make the light much softer, even on a sunny day.

    This photo was taken just after the sun had set. The light was soft and warm, but still hard enough to pick out the side of the island.

    quality of light

    The key is to find the point at which the light suits your subject, in the style that you’re trying to shoot. Depending on what you want to achieve, the light is most likely to be suitable sometime during the transition from the hard light of the day to the soft light of twilight. It’s up to you to familiarize yourself with the lighting conditions in the places that you shoot, and to learn to recognize how hard or soft the light is, and when the quality of the light matches the subject you want to shoot.

    This photo was taken on an overcast day. The soft, even lighting means the toy car casts a soft shadow. The soft light makes it easy for the camera to record all the important details, avoiding clipped highlights and overly dark shadows.

    quality of light

    Size of the light source

    So far I’ve just talked about light in terms of its quality. I think the best way to evaluate the quality of light is to learn to look at it and assess the direction it’s coming from, plus the hardness or softness of the light, for yourself by seeing how it falls on the subject.

    But it will help if you understand the key factor that differentiates a hard light source from a soft one is the size of the light source relative to the subject.

    The key factor that differentiates a hard light source from a soft one is the size of the light source relative to the subject

    For example, if you use a flash head without a modifier to take a portrait, the light is hard because the light source is much smaller than your model. To make the light softer, you need to use the largest modifier you can and move the flash as close to your subject as you can.

    quality-light-hard-soft-9

    The light on a sunny day is hard because the sun is small in relation to your subject. If you were able to look at it without damaging your eyes it would appear to be just a dot in the sky.

    Yet if it is cloudy, foggy, or raining, the weather conditions diffuse the light, spreading it out so that it seems to be coming from the entire sky, rather than a single point in the sky. The light source is now very large compared to the subject, and the light much softer.

    A similar diffusion effect occurs as the sun nears the horizon at sunset.

    Your turn

    Hopefully this article has helped you understand the key differences between hard and soft light. How important is the quality of light in your work? What types of light do you prefer to shoot in? Please let us know in the comments.


    Mastering PhotographyComposition and line

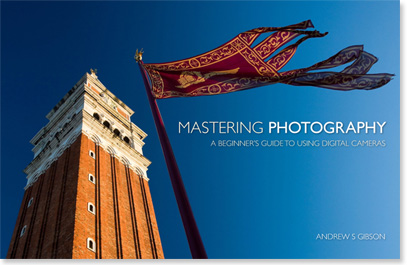
    My ebook Mastering Photography: A Beginner’s Guide to Using Digital Cameras introduces you to digital photography and helps you make the most out of your digital cameras. It covers concepts such as lighting and composition as well as the camera settings you need to master to take photos like the ones in this article.

    googletag.cmd.push(function() {
    tablet_slots.push( googletag.defineSlot( “/1005424/_dPSv4_tab-all-article-bottom_(300×250)”, [300, 250], “pb-ad-78623” ).addService( googletag.pubads() ) ); } );

    googletag.cmd.push(function() {
    mobile_slots.push( googletag.defineSlot( “/1005424/_dPSv4_mob-all-article-bottom_(300×250)”, [300, 250], “pb-ad-78158” ).addService( googletag.pubads() ) ); } );

    The post Quality of Light – What is Beautiful Light? by Andrew S. Gibson appeared first on Digital Photography School.


    Digital Photography School

  • Vintage Cars x Modern Sunsets SF Bay Area Photowalk This Saturday

    AWESOME PHOTOWALK IN THE SFBAY AREA THIS SATURDAY

    Priime is hosting an exclusive photo event + photo walk that starts at a Sports Car Museum in Corte Madera, at the base of Mount Tamalpais, then moves to a fantastic vantage point to shoot above the fog from the top of Mount Tam.

    The event starts this coming Saturday, April 25, 2015 at 4pm.

    4pm – 6pm: food, photos, and photographers
    6pm – 8pm: sunset on Mount Tamalpais

    I’ll be making a few remarks about my own photography at this event, but am mostly just looking forward to hanging out with other photographers.

    You can RSVP here, but there is limited space!

    See you there! :)


    Thomas Hawk Digital Connection

  • The Advantages of Renting Photographic Gear Before you Buy

    We have all heard the expression “The gear does not make the photo. The photographer makes the photo.” That being said, the gear does certainly help in perfecting the art of photography.

    If you are a professional photographer or even a serious amateur, you know that photography is quite an expensive profession/hobby. Good equipment can be expensive and by the time you build your day-to-day gear bag, it can set you back several thousands of dollars. Just when you think you have the perfect setup,  you hear about the latest camera or a faster lens than what you have just being released for pre-order. Gear lust is very real among photographers!

    Kenichi Nobusue

    By kenichi nobusue

    This is where renting gear or even borrowing becomes a viable option for many professional as well as serious amateurs.

    Benefits of renting photo gear

    There are several advantages to renting photographic equipment.

    • The cost of renting is typically much lower than cost of buying the gear. This becomes more relevant if it is not something you are going to use too often (like a mega telephoto lens, fish-eye, or tilt-shift lens).

      Jon Fingas

      By Jon Fingas

    • Ability to try out the equipment and see if it suits your style of photography. Once you know you like a piece of gear, you can make the investment and know you’re making the right choice.
    • Using a rental as a backup system for assignments especially events like weddings or concerts.
    • Traveling light and having gear shipped directly to your hotel is an option many photographers mention as a plus for renting. This also eliminates travel-related anxiety around lost luggage and excess baggage charges.
    • Using a rental when your main gear is out for repair. This let’s you keep working while you wait for repairs to be completed.
    • Eliminating buyer’s remorse. It is true that not every piece of gear works for everyone. Often times we buy gear because a certain photographer that we admire has the same equipment, only to be disappointed that our pictures are no where like theirs.

    Renting – online versus local stores

    Richard Fisher

    By Richard Fisher

    There are many different options for renting photographic gear. You can do so from local stores in your area or online vendors. In the US, big camera chain stores like CalumetPhotographic and AdoramaRentals sell as well as rent photo gear. CalumetPhoto, one of the local camera retailers in my area, also has local stores where you can go to pick up and drop off rental equipment. They tend to have a wide variety of equipment but definitely recommend reserving gear, especially if you want it for a specific event like weddings, to ensure you get what you want.

    There are online stores like Borrowlens and Lensprotogo that also offer a wide variety of lens, cameras and other equipment for rent. You order online and have the gear shipped to your home or location of your choice. Once you are done, you ship it back to them. There is definitely more flexibility in renting gear online but there is the added cost of shipping and insurance, as well as a slight risk that the gear might not arrive in time (any unforeseen circumstances like extreme weather).

    Benefits of borrowing photo gear

    Giyu (Velvia)

    By Giyu (Velvia)

    Sometimes you get lucky and have other photographer friends who let you borrow their equipment for a photoshoot, or just to test out – definitely one of the more cost effective ways of trying out photographic gear. However, for those of us who don’t have such awesome friends, there is another method of renting temporary gear that is starting to become popular.

    Online companies like CameraLends provide access to a lending community where you can rent cameras directly from local photographers and film makers. On the CameraLends website, they offer a peer-to-peer lending community for photographers and videographers. Owners post unused gear to rent out to other photographers and you can rent gear directly from local photographers, faster and cheaper than traditional means. But this service is somewhat dependent on the market you are in. Not every market will have every piece of equipment available for rent.

    Screen Shot 2015-04-15 at 10.51.13 AM

    Regardless of what method you choose to borrow or rent camera equipment, definitely try out gear before you make the investment to purchase it. The last thing you want to happen is buying equipment you think you want or need, only to find that it is really not benefiting your particular style of photography.

    googletag.cmd.push(function() {
    tablet_slots.push( googletag.defineSlot( “/1005424/_dPSv4_tab-all-article-bottom_(300×250)”, [300, 250], “pb-ad-78623” ).addService( googletag.pubads() ) ); } );

    googletag.cmd.push(function() {
    mobile_slots.push( googletag.defineSlot( “/1005424/_dPSv4_mob-all-article-bottom_(300×250)”, [300, 250], “pb-ad-78158” ).addService( googletag.pubads() ) ); } );

    The post The Advantages of Renting Photographic Gear Before you Buy by Karthika Gupta appeared first on Digital Photography School.


    Digital Photography School

  • How Your Camera Gets in the Way of Creating Great Photos

    I am the kind of person who loves nothing more than to read a new camera manual back to front. When the Canon 5d MK3 came out the manual was over 200 pages, YUM! It was the thickest Canon manual yet, heaven!

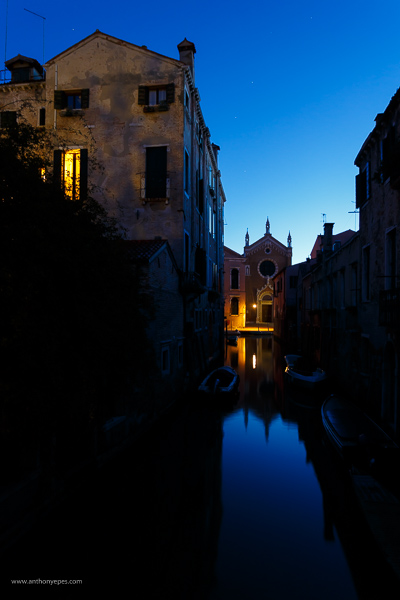
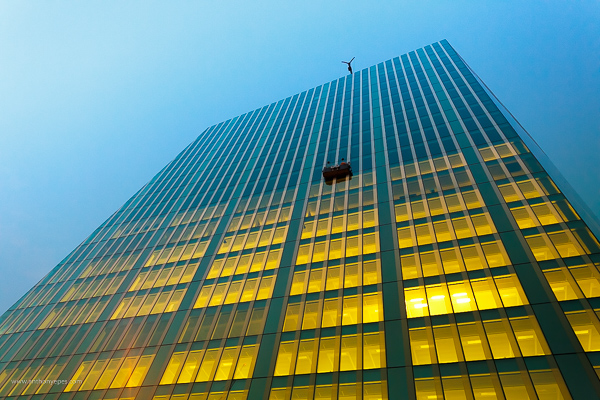
    Anthonyepesphotography dps2 1

    I love my kit and I love finding out how it works, what cool tricks I can do with it and what every single button does plus custom settings, autofocus modes, etc. I still use film (and digital of course), print my own work (which I keep detailed records of) so you can see that I am a solid tech nerd.

    Yet, I see all the time how distracting the camera can be when we are taking photos. This statement probably seems like a massive contradiction so let me explain. We expect this piece of kit to take great photos for us – even though the camera is an inert and emotionless device with no brain or heart. Thinking, seeing and feeling are what create great photographs.

    Sound technical knowledge is just the springboard – don’t get stuck there. Use it to launch your work to the next level by spending the majority of your time improving your ability to see, and I don’t mean just taking photos.

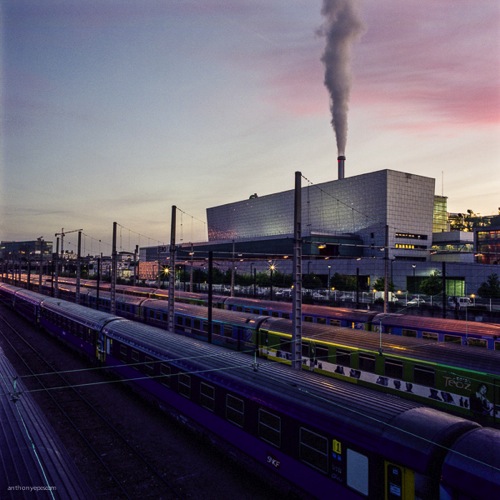
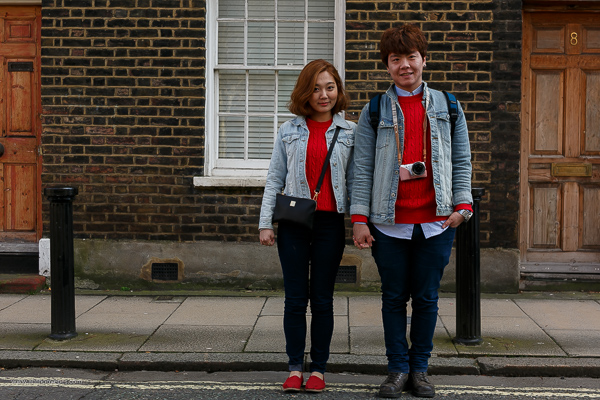
    Anthonyepesphotography dps2 4

    Good technique will only improve the quality of your shots – it will not help you create awesome images, it will not help you tell a story, communicate the feelings of a subject, or show the viewer how a place feels to be standing right there. Only you, the photographer can do that. This is where I think many photographers get a bit lost.
    Diane Arbus, one of my favourite photographers, and one of the most revered portrait photographers we’ve ever had, had a brilliant relationship with her camera:

    “I think the camera is something of a nuisance in a way. It’s recalcitrant….I mean I can work it fine, although I’m not so great actually. Sometimes when I’m winding it it’ll get stuck or something will go wrong and I’ll just start clicking everything then suddenly, very often, it’s alright again.”

    For her the camera was just a tool that helped her execute her vision. To create her famous portraits, she spent the most amount of time on finding subjects she was fascinated by, creating a relationship and connecting with them. It’s that connection, and the ease at which her subjects felt with her that created the power of her work. The expressions that she obtained from her subjects are often very moving and they tell the story about what it was like to be them.

    Once you’ve learned the fundamentals of how to use your camera, then you are obligated, in my opinion, to focus on seeing, truly looking and truly feeling what’s going on in this world. That is how you will create truly unique and original images.

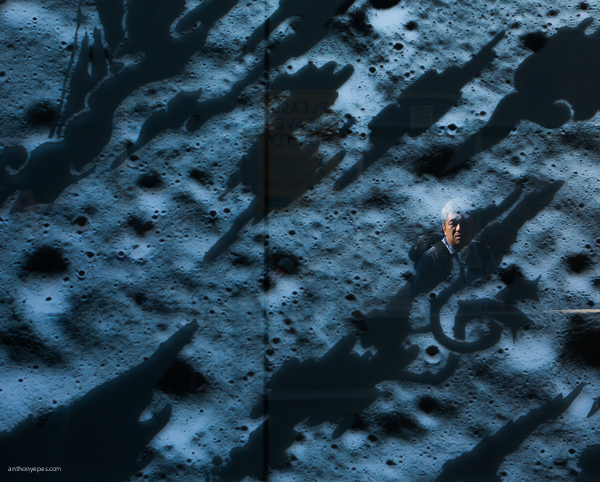
    Anthonyepesphotography dps2 2

    Seeing is a state of mind

    Learning to really see, is learning to be in a state of mind where you notice everything around you. Not just visually, but with every sense, because all of your senses feed into each other. You’re wandering around one morning and you smell fresh bread baking; it leads you to the back door of a bakery where the door is propped open and the bakers are laughing as they bake trays of bagels. It’s intriguing. It is making you smile.

    You are not taking photos. But you are practicing seeing by noticing, by having the intention to notice. All of this is fuel for your photography. It stokes the flames of your creativity, it creates a discipline that you are becoming more and more aware in this world. At first it is a very active practice. It’s like becoming a child again. You have to keep paying attention rather than get lost in your thoughts, your to-do list, your future. But the more you do it the more it comes naturally and you start to see the impact that it has on your photography.

    Anthonyepesphotography dps2 3

    Chase the light

    A great way to develop your eye is to always be chasing the light. Light diffracts, reflects, is filtered, and bounces off of things in a myriad of ways. If you see a shadow, think about where is that light coming from. I’ve spent a lot of my life looking for the sources of reflected light; off building windows, puddles. It’s like a light puzzle and when I’ve found the incident angle, I’ve solved it, and sometimes get a good shot as a prize.

    Return to the same places

    We miss most of the things that are happening around us because our brain blocks out what it considers to be unnecessary stimuli. So we are essentially fighting our brain and retraining ourselves to notice. I find going back to a place is a good way to see new things. Ask yourself, “What can I see in this place today that I didn’t see yesterday? How can I show something new that I haven’t photographed before? How has this new light changed the scene?”.

    Anthonyepesphotography dps2 5

    Create seeing projects for yourself

    One fantastic way to start training your eye is to create a seeing project for yourself. Pick a subject, then look for that subject wherever you go. I’ve done snail-trails; my friend did red-jack playing cards. It could be tabby cats, purple cars, the colour yellow. Lots of people like shooting doors. You get the idea.

    Choose something that is not that rare, but rare enough that you’ll be challenged, and it will help you to develop your eye. It’s like when your mate gets a new car and suddenly you see that car everywhere. The reality is that there aren’t more of those cars but your attention has been focused, honed to it. I’m always taking photos of things embedded in the street, purely for my own satisfaction (looking down is as important as looking up!)

    Feel

    Our senses all work together, and heightening one sense will heighten the others. Having an emotional reaction to your subject will help your photos because you will imbue those feelings in your photos. I loved what travel photographer Steve McCurry said in an interview:

    “A picture of a guy in the street in New Guinea, with a bone through his nose is interesting to look at. But for it to be a really good photograph; it has to communicate something about what it is like to live with a bone through your nose. It is a question of the moment to reveal something interesting and profound about the human condition.” Steve McCurry

    Anthonyepesphotography dps2 6

    Shoot the third thing

    A few years back Victoria Coren wrote about some advice her father, the late writer Alan Coren, had given. I thought this was a brilliant idea that could be applied to taking photos:

    “Don’t write the first thought that comes into your head, because that is what everyone will write. And don’t write the second thought that comes into your head, because that is what the clever people will write. When you hit on a third thought, pick up the pen. That one is just yours.”

    That first thought is the photo everyone sees and takes (the tourist shot). The second photo is one you thought over and shot. But the third photo is one where you stopped and really examined everything around you. When you start taking that third shot you will see your style come through. This third way of shooting will come quicker as you practice.

    Don’t underestimate the power of looking in a different direction

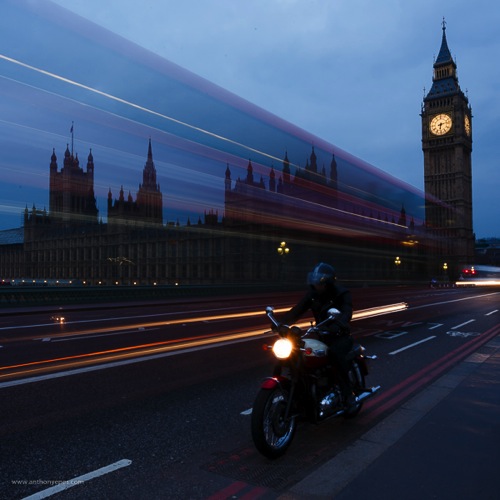
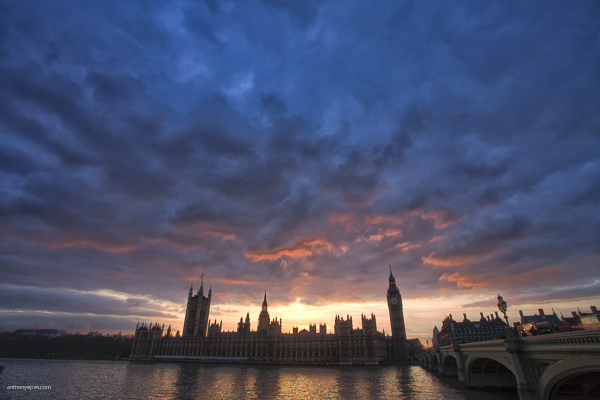
    I’ve found that photographers are often drawn to the same places. I have had so many situations like this one – where I’ve stood with banks of photographers on Westminster Bridge and they are all shooting in one direction:

    Anthonyepesphotography dps2 7

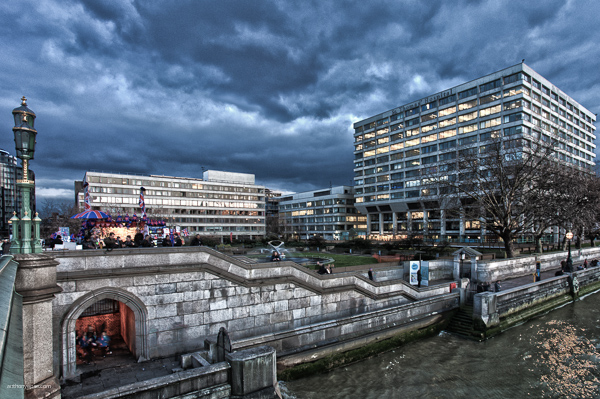
    But then, if you turned around, there was a very different style of photo behind us, which everyone was ignoring:

    Anthonyepesphotography dps2 8

    Seeing is a lifelong journey that will open up tremendous opportunities for your photography. Commit to improving your ability to see, and it will transform your photos. Push yourself always to see more, experience more and feel more.

    googletag.cmd.push(function() {
    tablet_slots.push( googletag.defineSlot( “/1005424/_dPSv4_tab-all-article-bottom_(300×250)”, [300, 250], “pb-ad-78623” ).addService( googletag.pubads() ) ); } );

    googletag.cmd.push(function() {
    mobile_slots.push( googletag.defineSlot( “/1005424/_dPSv4_mob-all-article-bottom_(300×250)”, [300, 250], “pb-ad-78158” ).addService( googletag.pubads() ) ); } );

    The post How Your Camera Gets in the Way of Creating Great Photos by Anthony Epes appeared first on Digital Photography School.

    Digital Photography School