Category: Photography

  • How to do Frequency Separation Portrait Retouching in Photoshop

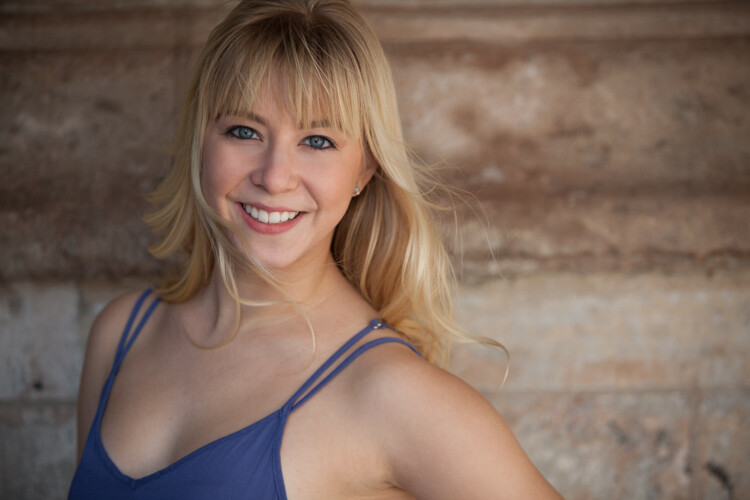
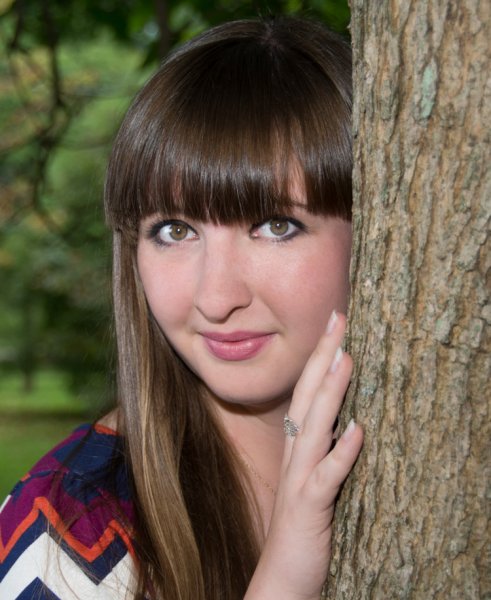
    The goal of portrait retouching is to bring out the most naturally pleasing image of the subject. This image is the finished result of Frequency Separation Retouching in Photoshop.

    The goal of portrait retouching is to bring out the most naturally pleasing image of the subject. This image is the finished result of Frequency Separation Retouching in Photoshop.

    Portrait retouching may be accomplished using many different methods. Still, how often have you seen a portrait image that has been retouched to the point that the subject’s face looks unnatural? Even many of the software packages available for portrait retouching result in an airbrushed effect to skin tones.

    What if the detail and color of a portrait could be separated for retouching? Frequency Separation Retouching will allow you to do just that! It will allow you to fix all the usual facial issues like removing wrinkles, bags under eyes, and blemishes. By dividing your image into two separate frequency layers, one layer being high frequency digital data, which contains the information of detail in the image, and a low frequency layer which contains the tonal and color information of the image.  However, the neat thing with Frequency Separation Retouching is that it allows you to make these corrections and retain the natural textures of the skin. By separating the colors and the details you can work on one aspect without affecting the other. Sure, some people will prefer the usual retouching methods, including airbrushing, but Frequency Separation Retouching gives you another option to use for enhancing your portraits. If you have a working knowledge of Photoshop, here’s how to get started:

    Setup

    #1 Make two copies of the background layer

    In Photoshop, open your image, then make two copies of the background layer. Label the first layer “color” as this will be your low frequency layer, then name the second layer “detail” to become your high frequency layer.

    #2 Apply a blur to the color layer

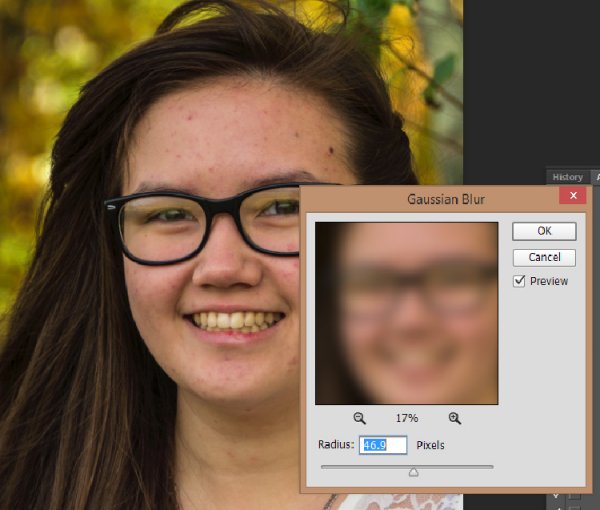
    Turn off the detail layer and select the color layer. Apply a Gaussian Blur (found under the Filter menu>Blur) to a setting that blurs all the detail of the image, but leaves features intact (see sample below). This setting will vary from one image to another depending of the size of the image.
    3-7-2015-2-21-56-PM750

    #3 Setup the detail layer

    Turn the detail layer back on and select it, then go to Apply Image under the Image tab. Depending on which color depth you are working with, 8 bit or 16 bit, see settings below for Apply Image.
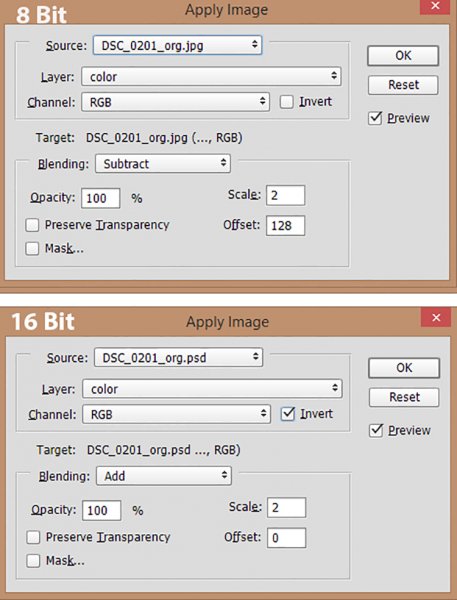
    apply-image3Set your Layer to color. For 8 bit images set the Blending to Subtract, Scale to 2 and Offset. For 16 bit images set the Blending to Add, Scale to 2, Offset to 0 and check the Invert box.

    Set your Layer to color. For 8 bit images set the Blending to Subtract, Scale to 2 and Offset. For 16 bit images set the Blending to Add, Scale to 2, Offset to 0 and check the Invert box.

    1. Change the blending mode of the detail layer to Linear Light.
    2. Create a layer group, and drag the color and detail layers into the new layer group.

    Once you get the hang of this setup, it’s easy to make a Photoshop action to take care of these steps with one click. Download my Photoshop action for the setup HERE (the file is zipped, just unzip and load into Photoshop)

    Now you’re ready to start the fun part!

    Retouch the Color layer

    By retouching the color layer, you are going to even out all the color tones of your subject’s complexion and to remove dark and light areas.

    Clone Tool – the Clone tool can be used to even out the color tones or experiment with different blending modes. Normal, Darken and Lighten are very good effect modes to use on the color layer. You may also need to adjust the opacity (the degree of transparency) of these blending modes.

    Dodge and Burn Tools are a couple of other useful tools to even out dark and light tones of the skin tones.

    As with almost any Photoshop function, there are various ways to get the results you desire. The tools mentioned above are good starting points for working on the color layer, but the possibilities are endless! Don’t be afraid to experiment.

    Retouch the Detail layer

    Click on the Detail layer, which contains every detail of your portrait image. There are a wide variety of tools you can use to fix skin imperfections, ranging from wrinkles to acne.

    Clone Tool – Use the Clone tool with mode set to normal and just clone out imperfections, sampling (ALT/OPT key click) from a desirable area to paint over an imperfection in another area.

    Healing Brush Tool –  The Healing Brush tool works similarly to the Clone tool and will sample textures from nearby areas to make a seamless patch.

    Spot Healing Brush –  Spot Healing Brush works similarly to the Clone tool and Healing brush, but does not require you to sample a source area. It will automatically sample from another area to repair the target imperfection. Use the adjustable brush sizes to paint over spots and remove them.

    Patch Tool – Like the Healing tool, the Patch tool will match the texture of the near-by area for a seamless repair. Make a selection over the area to be repaired and drag the selection over a good area. For best results work on small areas at a time.

    Content-Aware Patch –  Similar to the Patch Tool, but with the Content-Aware Patch you select a good area and drag it over area to be repaired, and the tool will match the texture.
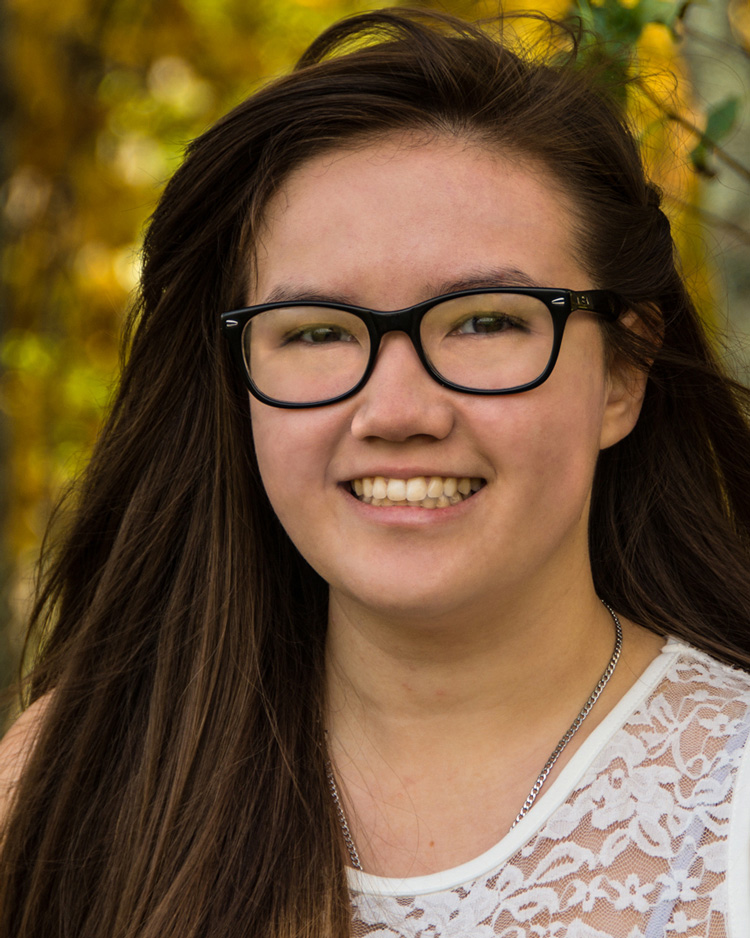
    After image

    After image

    Once you have finished retouching the color and detail layers of your image, you can simply turn off the layer group to see the before and after of your work. (This is also a handy review tactic as you are working, to see how your adjustments are affecting the image.) Because all the retouching you have done are applied to the two new layers, it is completely non-destructive to the original image.  So, if you are unhappy with your first results, you can simply delete the retouched group and start over.
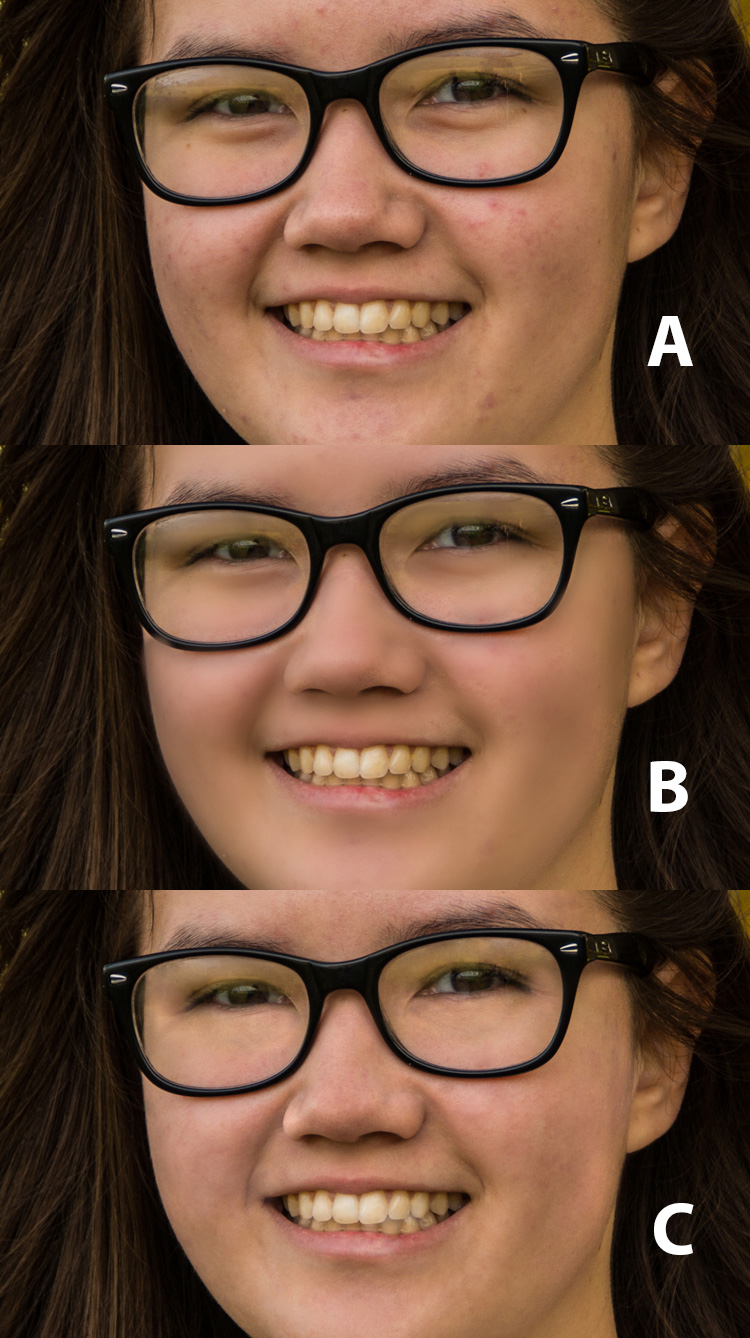
    frequency-retouching-2-750

    A – Original image B – Air-Brushed look retouching C – Frequency Separation retouching


    Conclusion

    Portrait retouching can be accomplished by using many different methods, and various software and plugins designed especially for that purpose. This article is meant to give you a Photoshop option for retouching and enhancing your portrait photography. The great feature of this method is the ability to separate the detail from the color and tones before retouching. Do you have any tips for portrait retouching?

    googletag.cmd.push(function() {
    tablet_slots.push( googletag.defineSlot( “/1005424/_dPSv4_tab-all-article-bottom_(300×250)”, [300, 250], “pb-ad-78623” ).addService( googletag.pubads() ) ); } );

    googletag.cmd.push(function() {
    mobile_slots.push( googletag.defineSlot( “/1005424/_dPSv4_mob-all-article-bottom_(300×250)”, [300, 250], “pb-ad-78158” ).addService( googletag.pubads() ) ); } );

    The post How to do Frequency Separation Portrait Retouching in Photoshop by Bruce Wunderlich appeared first on Digital Photography School.
    Digital Photography School

  • 18 Awe-Inspiring Tips to Take Better Photos

    Today all of us play the role of photographers – using small electronic cameras, smartphones or tablets, we document each and every moment of our lives. If you’d like to take better photos and memorize moments in your life in a more professional way, have a look at those 18 key tips. 1. Keep it to the eye level Just Continue Reading

    The post 18 Awe-Inspiring Tips to Take Better Photos appeared first on Photodoto.


    Photodoto

  • Why You Should Make Dark Images

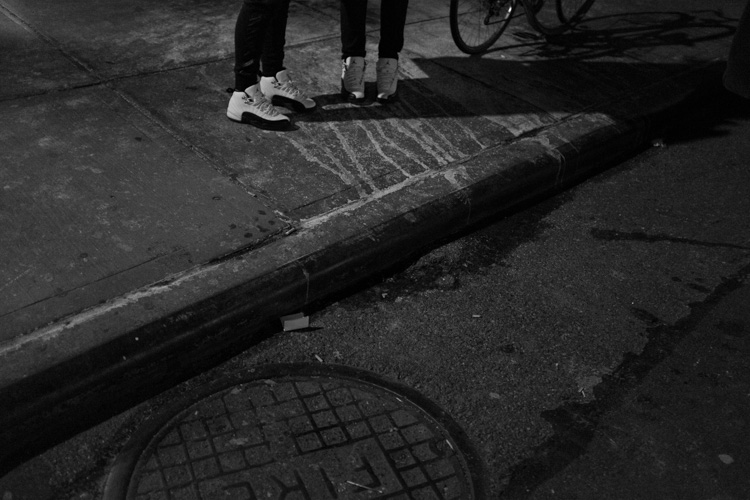
    Street scene

    One of the most unexplored aspects in digital photography is the dark image.

    With digital, we have built-in light meters, histograms, incredible ISO capabilities, and processing programs, which make it much easier to expose our images brightly in all different lighting situations. This can have the effect of making photographers feel that they need to expose all of their images with a neutral histogram, where you can see the image perfectly well, with some information in the highlights, mid-tones, and shadows.

    This is often what you want to do, but not always.

    When you are using Aperture Priority, Shutter Priority, or the Automatic modes, your camera’s light meter has the aim of making whatever it is focusing on a neutral grey. Thus, it has the tendency to overly darken scenes with a lot of bright highlights or to overly brighten scenes with lots of dark tones.

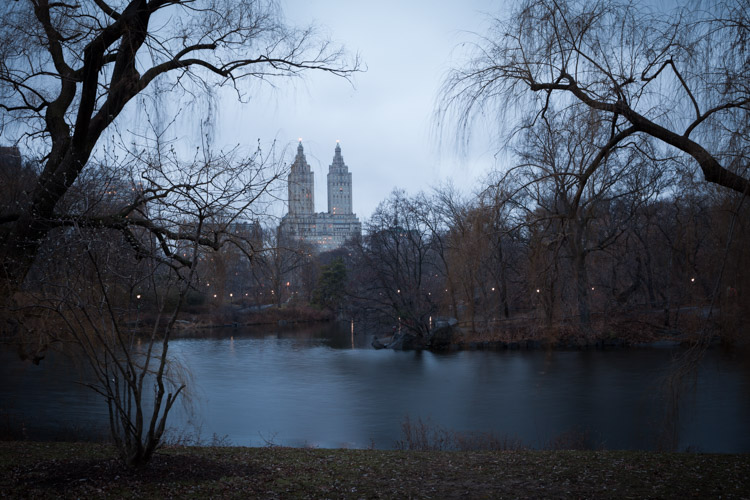
    The Lake, Central Park – NYC

    Because of this, when you photograph in dark situations your exposures can end up being bright as if they were taken during the day. It’s easy to think that this is okay, and often it is, but it also makes it easy to forget that sometimes a dark image is a good thing too. There is nothing wrong with making an image look like it was taken at night. There is nothing wrong with making the image tougher to see, like the scene was to your eye as you captured it.

    For me, it was an experience when I started to look at older photography books and came across images that I couldn’t quite make out. ‘They should have been brighter”, I immediately thought, but then I realized that I liked them. I realized how natural and moody it made the images feel. I had to put in more effort to make out what was going on, and I liked that. It felt moody and real.

    This image could have been made brighter and still worked.

    Technically, to achieve this on Aperture or Shutter Priority, you need to lower your exposure compensation (+/-) setting when you are photographing subjects or areas with a lot of darker tones. I usually default to -2/3 or -1 stop, then tweak from there depending on the situation. You can even take it further by going into full Manual mode to override the camera’s light meter. Since the lighting is fairly consistent in many dark situations, this is often a great way to shoot.  I do this when shooting at night, in train stations, alleyways and many indoor situations. You can even shoot like this during the day by strongly underexposing your image.

    If you notice, in the images in the article, the highlights are represented as middle grey tones. This is called exposing for the highlights and that is a key for making a dark image. Get used to seeing lots of deep blacks and mid greys. It can help to take a file into Lightroom and play around with the exposure to get a feel for how an image can look at different exposures. When shooting in dark situations, which means you will probably be using a very high ISO, you will want to make sure to get the image as close as possible to the prime exposure in the camera. But when you are learning it can only help to experiment in Lightroom to find the exposure that you like the best.

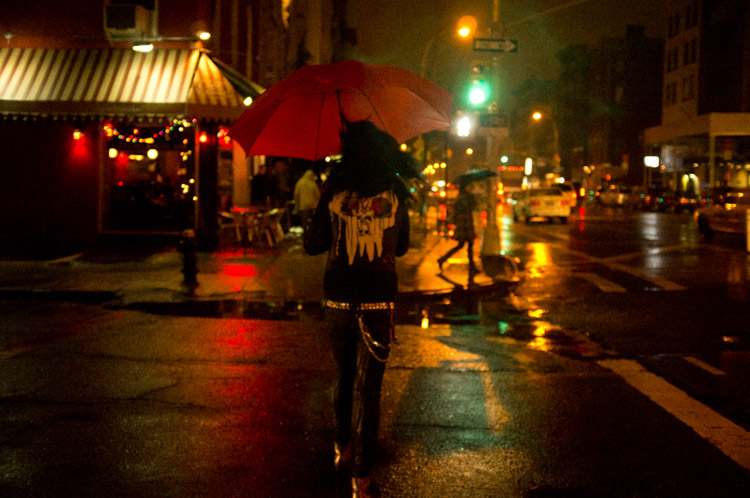
    Nightlife Street Scene, East Village, NYC.

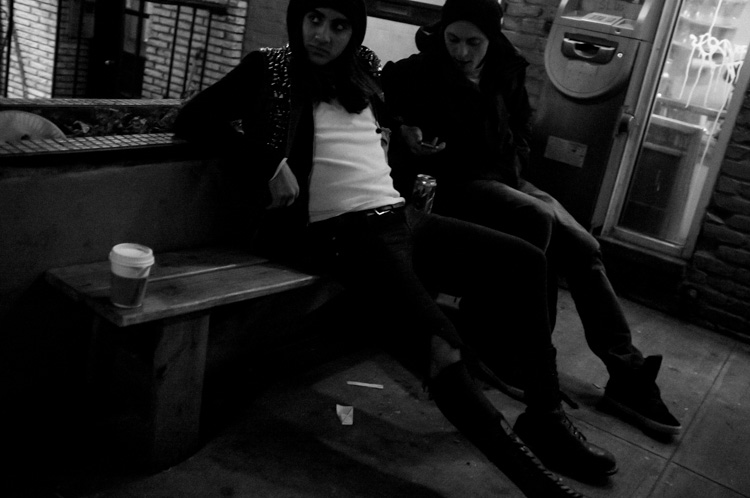
    But what is the purpose of making an image dark? There are a few reasons. The first is that in many situations it can feel more realistic. Night images that look dark feel more like the viewer is actually there. They feel accurate and that can go along way for the viewer. Dark images can feel moody, eerie, dangerous, quiet, romantic, scary, weird, or contemplative. Many backgrounds look more beautiful with the dark shadows and moody lighting at night.

    In addition, dark images draw the viewer in. Often with photography, the devil is in the details and sometimes it can be hard to draw viewers in to really look around an image. Dark images do that. As the viewer tries to make out the details, they inadvertently start exploring the image in more depth.

    So next time you are shooting at night or in a dark area, think about making that image a bit darker.

    Nightlife Street Scene, NYC.

    googletag.cmd.push(function() {
    tablet_slots.push( googletag.defineSlot( “/1005424/_dPSv4_tab-all-article-bottom_(300×250)”, [300, 250], “pb-ad-78623” ).addService( googletag.pubads() ) ); } );

    googletag.cmd.push(function() {
    mobile_slots.push( googletag.defineSlot( “/1005424/_dPSv4_mob-all-article-bottom_(300×250)”, [300, 250], “pb-ad-78158” ).addService( googletag.pubads() ) ); } );

    The post Why You Should Make Dark Images by James Maher appeared first on Digital Photography School.

    Digital Photography School

  • 9 Tips for Photographing Mountain Lake Reflections

    How to Photograph Mountain Landscapes

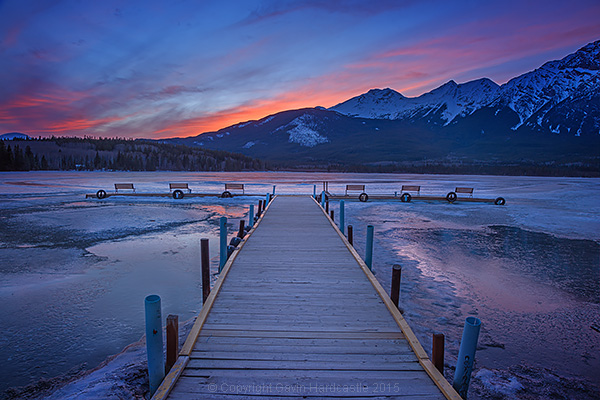
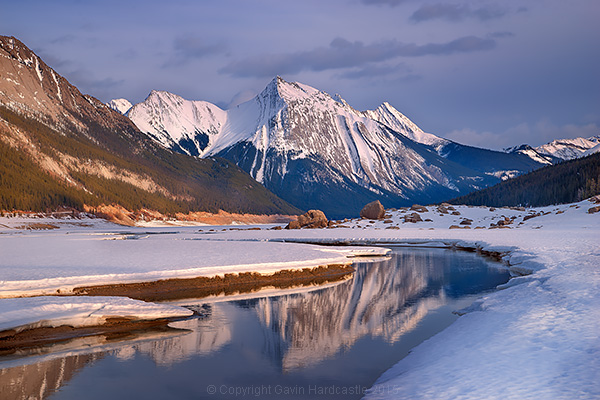
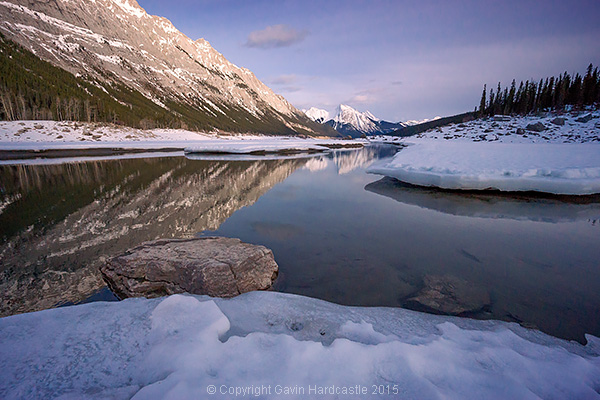
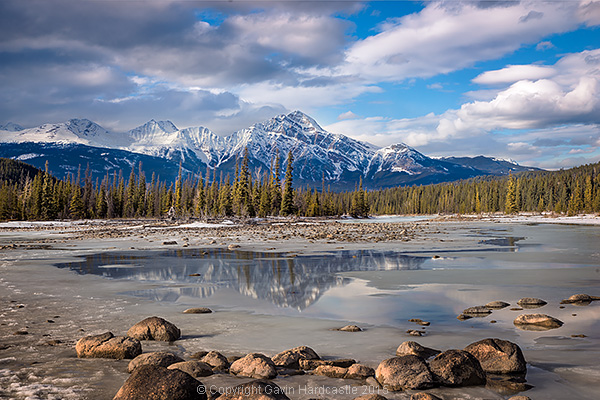
    There’s something ultimately alluring about lake and river reflections in landscape photography, especially when surrounded by majestic snow capped mountains that glow hot from the light of the setting sun.

    Here’s a little time-lapse video I put together using some of my recent lake reflection still shots in Alberta, Canada. Each frame is from a still image shot with a small mirrorless digital camera. Read on to learn the methods I use when trying to capture stunning lake and river reflections in my photography.

    1 – Don’t shoot super wide

    Regardless of whether your camera is full frame, APS-C or MFT (micro four thirds), it’s important to realize that when shooting mountain reflections you might not need your widest lens to capture the most pleasing composition.

    A lot of the time I shoot in the super wide realm but that doesn’t work so well when shooting mountain reflections. A super wide lens tends to reduce the epic size of the distant mountains and magnifies the foreground.

    That’s great when you can get fairly close to my central subject, but when that subject is a snow capped mountain a few kilometers away, it’s time to strap on a lens that gets you closer to the action.

    At my most recent visit to Banff and Jasper in Alberta I found that I rarely shot with anything wider than 35mm on full frame. In many cases I was zoomed in past 50mm, and often beyond 100mm. Here’s an example.

    This first shot is at a focal length of 70mm.

    How to shoot mountain lake reflections

    This second shot is at 16mm, super wide. There are a few minutes of light change in between the shots but otherwise it’s the exact same scene, from almost exactly the same position. I don’t know about you, but I much prefer the simpler, cleaner composition of the first, zoomed image.

    How to shoot mountain river scenes

    2 – Fill your frame with what’s cool

    This is good advice for any kind of photography but with mountain lake reflections it’s easy to get wowed by the colourful clouds that are reflecting in the mirror surface lake. If they really are doing something impressive then by all means, devote some frame space to the clouds.

    You’ll find however, that when you zoom closer to fill your frame with your most impressive mountain range and reflection, your image may have much more impact. At times this isn’t too obvious when you look through the viewfinder or LCD but when you view that zoomed image back on a large computer screen it often has more wow factor than your wider, cloud filled image.

    How to Photograph River Landscapes

    3 – Waiting for the wind to stop

    If you’re out on a gale force windy day, don’t expect any lake reflections. You need that water to be perfectly still for good reflections. A mild, occasional wind is fine, just stick around and wait for it to periodically die down. You only need a few minutes. Bring a camp chair and thermos, then chill out while you wait for the perfect moment. It’ll come.

    4 – Shoot two versions – adjust the polarizer

    If you shoot lake scenes without a polarizer you’ll get a lovely mirror-like reflection, but you might be missing out on some interesting details under the water in the foreground. I like to take at least two shots with my polarizer in different positions. One shot will give me the maximum reflection while the other shot will reduce that reflection to reveal the details under the water.

    I can then easily blend these two exposures in Photoshop to get the best mixture of reflection and water detail.

    5 – Interrupt the reflection

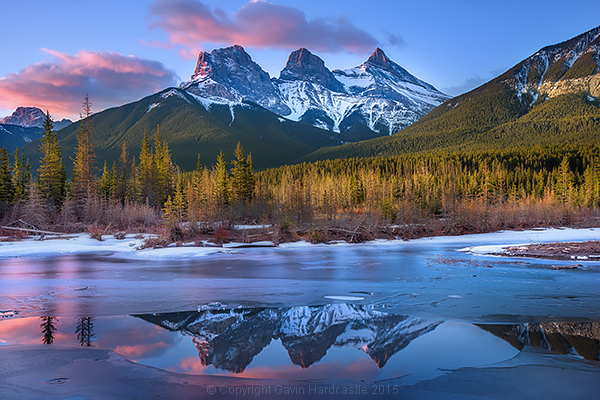
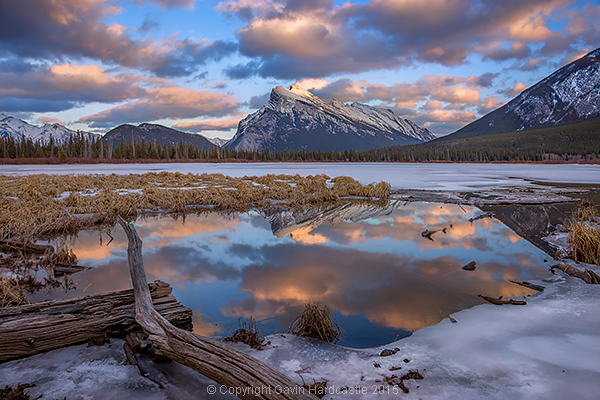
    Vermillion Lakes, Banff - Mirror World by Gavin Hardcastle

    I have a thing for the interrupted reflection. I find it more interesting to have my mountain reflection interrupted by ice formations, river bends, rocks and branches as apposed to a completely whole and perfect reflection. Try and avoid that obvious BAM reflection. Be a bit clever and put some thought into how you can make the reflection more interesting.

    6 – Get down low

    I like to pick the most interesting point of my mountain range then find a spot in my foreground that reflects that interesting point. I often need to get the camera down lower to achieve this, sometimes adjusting the tripod to its lowest point. At times you might not need to get so low and maybe just step back a few feet to place your reflection where you need it to be.

    You can’t change where the mountain is, but you can change your position relative to it to capture the most interesting foreground and reflection.

    7 – Look for framing elements in the foreground

    If possible, try to incorporate elements in your foreground than frame the scene. It creates a window into your scene that we humans find very appealing.

    8 – Look for leading lines in your foreground

    Lake Photography Tutorial

    Try and find foreground elements that suck the eye in to the centre of your image. Use rocks, logs and branches to blatantly point at the mountain scene in your image. Obviously you’ve got to work with what you have but there’s almost always something there.

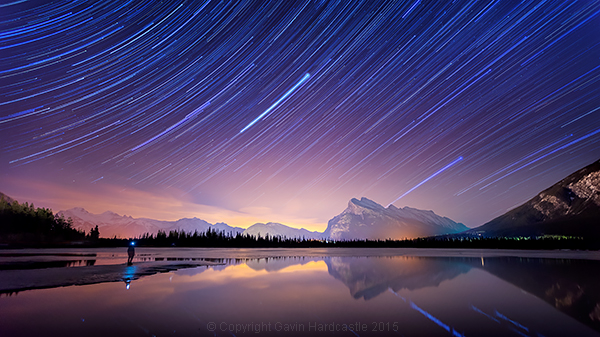
    9 – Star reflections are gold

    If you’ve got a calm, clear night that is the perfect chance to capture the Milky Way or star trails in your lake reflection. Place a colossal mountain range in the centre of that and you’ve got yourself a killer shot. For tips on how to shoot star trails like this, view my tutorial How to Shoot a Star Trails Selfie.

    Star Trails Selfie Tutorial

    googletag.cmd.push(function() {
    tablet_slots.push( googletag.defineSlot( “/1005424/_dPSv4_tab-all-article-bottom_(300×250)”, [300, 250], “pb-ad-78623” ).addService( googletag.pubads() ) ); } );

    googletag.cmd.push(function() {
    mobile_slots.push( googletag.defineSlot( “/1005424/_dPSv4_mob-all-article-bottom_(300×250)”, [300, 250], “pb-ad-78158” ).addService( googletag.pubads() ) ); } );

    The post 9 Tips for Photographing Mountain Lake Reflections by Gavin Hardcastle appeared first on Digital Photography School.


    Digital Photography School

  • The Ultimate On-Location Storage Solution – ioSafe Rugged Portable SSD Review

    That’s a big call really, isn’t it? “Ultimate on-location storage” what does that even mean, and do you need it? Well, dear reader, read on and we’ll get to the bottom of this relatively new, bomb proof storage device from ioSafe.com

    The aptly named Rugged Portable is an external solid state drive that connects to your computer via USB 3.0 to store all of your files – in my case, raw images photographed on location. We have the 1TB version on a trial and that’s going to be (much) more than enough for most photography adventures.

    slideshow_rugged-portable_3

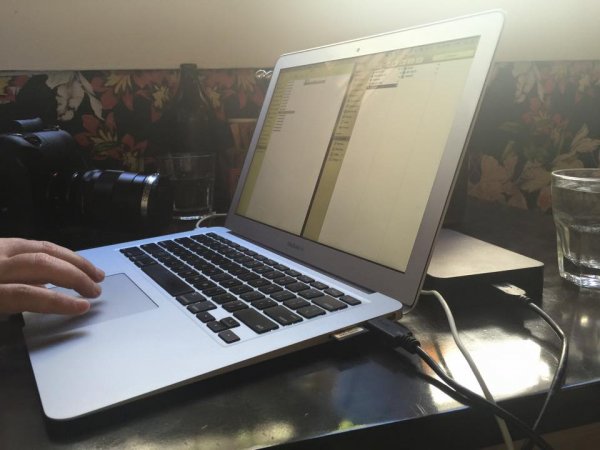
    Transfer speeds via USB 3.0 are usually more than enough under the two circumstances I’ve used the drive. The first being to copy from my 32GB Sandisk Extreme Pro CF card via a Lexar USB3 card reader, through the Macbook Air and out the other side into the compact ioSafe drive. I also use a couple of Thunderbolt drives at home, and the noted difference between Thunderbolt and USB3 transfer speeds isn’t actually all that noticeable under real world conditions.

    The second scenario was while shooting for an agency that’s recently hired me to be the photographer for a series of shoots. When tethered, and shooting on location, I find myself importing the images to my WD Passport Pro and running a second copy off to the ioSafe – Why? This client takes my CR2 files at the end of each shoot and the designer handles the processing and editing, so I unplug the WD and hand it to the producer and he takes it away with him until next shoot, the ioSafe comes with me. You’re still sitting there scratching your forehead?

    Six of the shoots I’ve done so far for this client, four of them have been of scenarios I can’t recreate for one reason or another. If those images are lost by me between location (sometimes on set for two days, away from home and the comfort of backing up to my Promise R8 – yes, I love storage) and the client has a mishap – well, frankly, we’re stuffed. Obviously this is a worst case scenario, but these are the ones that we like to avoid!

    s123

    Sure, you find a way to work around it – you’re a professional, and that’s why I think it’s nice to not have to “get around it” and to take as much risk out of your shoot days as possible.

    When I say “if those images are lost by me” I’m hoping to never have a catastrophic failure that involves my gear melting down, drowning or being driven over, but human error involves dropping drives, spilling a glass of wine on your laptop – the list goes on.

    I can see this drive being the perfect storage and transport for destination wedding photographers, commercial photographers travelling to shoot, pretty much anyone that really cares about their, or their clients’ images, between shoot and final delivery.

    The ioSafe Rugged portable has some pretty impressive statistics and while I’ve not tested these personally* I know the ioSafe crew are pretty serious about their gear and have a data recovery guarantee attached to their products (more on that after the stats).

    slideshow_rugged-portable_2

    • Crush Protection up to 5,000 lbs.
    • Drop Protection up to 10 feet
    • Immersion protection up to 30′ for three days
    • USB 3.0 SuperSpeed (like Superman, you know)
    • Data Recovery Service up to $ 5,000/TB
    • World’s best warranty
    • Mac or PC

    Like I said, pretty impressive… But then, it’s not really impressive unless I test some of this stuff, right? (This was an afterthought and, now *I have tried some of them!)

    Enlisting the services of Filmmaker and Educator, Lee Herbet of Capturing Passion We’re going to try show you what makes the ioSafe Rugged Portable the little beast that it is.

    So, for some examples! In most of these examples I was either tethered shooting to the drive (crush test) or it was at least plugged in and powered up (water and drop tests)

    1. Crush test

    I’m on set, shooting the OutdoorTech van (Thanks to Blonde Robot!) when one of the directors glides in silently in his Tesla S… Clearly the Tesla has a great rear facing camera, but this one doesn’t have a front facing camera and well, you can see how that played out!

    2. Submersion test

    We’re back shooting some images for a water conservation company here in Melbourne, thankfully not into 30′ of water, but you get the idea!

    3. Drop test

    I’d forgotten to simply use my CamRanger with the 7.3m (24′) tall Kupo LookOut stand while shooting a lifestyle image… Watching this back almost reminds me of a Mr Bean sketch!

    So, even though the shooting situations above were staged, the drive really did get run over, dropped, and drowned multiple times to make these short films. The footage was also saved onto the drive and the films edited together on location at my favourite cafe right after we wrapped the final filming. You can even see the drive data light flashing in the Tesla video as I was shooting to it just before it was run over!

    In closing , do you need the ultimate on-location storage solution? Only your business requirements can answer that question for you, but if you’re after an easily portable SSD external drive for your photography, that will look danger in the face and laugh – this is it.

    This drive leaves me nothing to complain about and so I give it five gold stars.

    Thanks for reading! Hope you enjoyed my take on the ioSafe Rugged Portable!  –Simon

    googletag.cmd.push(function() {
    tablet_slots.push( googletag.defineSlot( “/1005424/_dPSv4_tab-all-article-bottom_(300×250)”, [300, 250], “pb-ad-78623” ).addService( googletag.pubads() ) ); } );

    googletag.cmd.push(function() {
    mobile_slots.push( googletag.defineSlot( “/1005424/_dPSv4_mob-all-article-bottom_(300×250)”, [300, 250], “pb-ad-78158” ).addService( googletag.pubads() ) ); } );

    The post The Ultimate On-Location Storage Solution – ioSafe Rugged Portable SSD Review by Sime appeared first on Digital Photography School.

    Digital Photography School

  • 5 Photoshop Layer Mask Tricks – Video Tutorial

    Photoshop has many features that can make photo editing both non-destructive and creative. Using Layer masks is one such feature. Masks can also be confusing to understand and they have many ways to apply and use them.

    In this video tutorial Joshua Cripps goes over five layer mask tricks – I even learned a couple things I hadn’t seen before, so thanks for that! See if you can pick up some things you can use for post-processing your images:

    Menu > Image > Apply image = brilliant!

    Try and see for yourself. Do you have any other Photoshop layer masking tips or tricks? Please share with us in the comments below. There are a million ways to do things in Photoshop, no one can know them all so show me something else I haven’t seen!

    googletag.cmd.push(function() {
    tablet_slots.push( googletag.defineSlot( “/1005424/_dPSv4_tab-all-article-bottom_(300×250)”, [300, 250], “pb-ad-78623” ).addService( googletag.pubads() ) ); } );

    googletag.cmd.push(function() {
    mobile_slots.push( googletag.defineSlot( “/1005424/_dPSv4_mob-all-article-bottom_(300×250)”, [300, 250], “pb-ad-78158” ).addService( googletag.pubads() ) ); } );

    The post 5 Photoshop Layer Mask Tricks – Video Tutorial by Darlene Hildebrandt appeared first on Digital Photography School.

    Digital Photography School

  • 24 Architecture Images with Graphic Powerful Lines

    Architecture photographers strive to get the lines all perfectly straight and up and down. But sometimes converging lines, or bending ones can create more powerful images.

    Note: Check out our Using Lines in Your Photography series for more on this topic.

    Let’s have a look at some architecture images that have graphic, powerful lines which are not always straight:

    Photograph blackbox by markus studtmann on 500px

    blackbox by markus studtmann on 500px

    Photograph The Haunting by Michael Woloszynowicz on 500px

    The Haunting by Michael Woloszynowicz on 500px

    Photograph Manhattan Tower in Paris La Défense by Julien Batard on 500px

    Manhattan Tower in Paris La Défense by Julien Batard on 500px

    Photograph The Lightscraper by  M. Rafiee on 500px

    The Lightscraper by M. Rafiee on 500px

    Photograph Curvation by Aaron Yeoman on 500px

    Curvation by Aaron Yeoman on 500px

    Photograph Illumination XXV by Roland Shainidze on 500px

    Illumination XXV by Roland Shainidze on 500px

    Photograph Symphony of Lines by Roland Shainidze on 500px

    Symphony of Lines by Roland Shainidze on 500px

    Photograph Curve II by Roland Shainidze on 500px

    Curve II by Roland Shainidze on 500px

    Photograph SPACE WARP by SEPEHR GHASSEMI on 500px

    SPACE WARP by SEPEHR GHASSEMI on 500px

    Photograph Time's up by Julien Delaval on 500px

    Time's up by Julien Delaval on 500px

    Photograph Butterflies by Alfon No on 500px

    Butterflies by Alfon No on 500px

    Photograph From the 80th Floor (2) by PhotonPhotography -Viktor Lakics on 500px

    From the 80th Floor (2) by PhotonPhotography -Viktor Lakics on 500px

    Photograph *Telepathy* by Manita Goh on 500px

    *Telepathy* by Manita Goh on 500px

    Photograph Real world Tetris by Beboy Photographies on 500px

    Real world Tetris by Beboy Photographies on 500px

    Photograph Staircase by Sus Bogaerts on 500px

    Staircase by Sus Bogaerts on 500px

    Photograph *Visual Resonance #3* by Manita Goh on 500px

    *Visual Resonance #3* by Manita Goh on 500px

    Photograph Vertiginous by Daniel Cheong on 500px

    Vertiginous by Daniel Cheong on 500px

    Photograph Pure by Sébastien DEL GROSSO on 500px

    Pure by Sébastien DEL GROSSO on 500px

    Photograph The Stanley by Benjamin van der Spek on 500px

    The Stanley by Benjamin van der Spek on 500px

    Photograph Lines by Mason Noteboom on 500px

    Lines by Mason Noteboom on 500px

    Photograph Let there be light! by PK  on 500px

    Let there be light! by PK on 500px

    Photograph shell by Christian Richter on 500px

    shell by Christian Richter on 500px

    Photograph Sexy by Grant Orbeta on 500px

    Sexy by Grant Orbeta on 500px

    Photograph Black and White by Mike Orso on 500px

    Black and White by Mike Orso on 500px

    googletag.cmd.push(function() {
    tablet_slots.push( googletag.defineSlot( “/1005424/_dPSv4_tab-all-article-bottom_(300×250)”, [300, 250], “pb-ad-78623” ).addService( googletag.pubads() ) ); } );

    googletag.cmd.push(function() {
    mobile_slots.push( googletag.defineSlot( “/1005424/_dPSv4_mob-all-article-bottom_(300×250)”, [300, 250], “pb-ad-78158” ).addService( googletag.pubads() ) ); } );

    The post 24 Architecture Images with Graphic Powerful Lines by Darlene Hildebrandt appeared first on Digital Photography School.

    Digital Photography School

  • Weekly Photography Challenge – Architecture

    Cities are full of great photography subjects, architecture is among the most popular. Doorways, windows, cityscapes, details or full wide sweeping vistas.

    If you live in an urban area you have lots of built-in subjects just waiting for you to photograph them:

    Thomas Hawk

    By Thomas Hawk

    Perceptions I Sichtweisen

    By perceptions I sichtweisen

    Weekly Photography Challenge – Architecture

    Your job this week is to get out and photograph buildings, man-made structures. Use whichever manner you choose either proper corrected lines, or twisted, curved, tilted and converging lines. Go for wide shots, or put on a long lens and shoot details – it’s totally your call.

    Thomas Hawk

    By Thomas Hawk

    Perceptions I Sichtweisen

    By perceptions I sichtweisen

    Thomas Hawk

    By Thomas Hawk

    Thomas Hawk

    By Thomas Hawk

    Thomas Hawk

    By Thomas Hawk

    Perceptions I Sichtweisen

    By perceptions I sichtweisen

    Jovan J

    By Jovan J

    Share your architecture images here:

    Simply upload your shot into the comment field (look for the little camera icon in the Disqus comments section) and they’ll get embedded for us all to see or if you’d prefer upload them to your favourite photo sharing site and leave the link to them. Show me your best images in this week’s challenge. Sometimes it takes a while for an image to appear so be patient and try not to post the same image twice.

    googletag.cmd.push(function() {
    tablet_slots.push( googletag.defineSlot( “/1005424/_dPSv4_tab-all-article-bottom_(300×250)”, [300, 250], “pb-ad-78623” ).addService( googletag.pubads() ) ); } );

    googletag.cmd.push(function() {
    mobile_slots.push( googletag.defineSlot( “/1005424/_dPSv4_mob-all-article-bottom_(300×250)”, [300, 250], “pb-ad-78158” ).addService( googletag.pubads() ) ); } );

    The post Weekly Photography Challenge – Architecture by Darlene Hildebrandt appeared first on Digital Photography School.

    Digital Photography School

  • RAW vs JPEG: Which is Better Shooting on DSLR?

    The photography world is constantly rattled by many opinion clashes. Which is the better camera, which is the better photography style and even which format is better to save photos in. These and many more questions keep cropping up and seem like never ending. This discussion will help you in putting an end to at least one of such questions, Continue Reading

    The post RAW vs JPEG: Which is Better Shooting on DSLR? appeared first on Photodoto.


    Photodoto

  • What are the Real Responsibilities of a Professional Photographer?

    The number of different roles that a professional photographer has to lead these days can be pretty intense and intimidating, but it’s just part of the job. From the creative, to the technical, to the business and marketing, here is a list everything that a professional photographer really has to do to make a living.

    Portrait of a dancer

    Share this with anyone who thinks you only push a button for a living!

    1. A photographer is an artist and storyteller

    Professional photographers are in the business of telling stories. They create images that are both beautiful on the surface, and give us a glimpse of what is underneath. Portrait photographers aim to capture a feeling of what the person is like with a single look. Wedding and event photographers aim to tell the story of what the day was like. Product photographers aim to give the viewer an idea of what using the product will feel like. Art photographers aim to make the viewer think and feel something.

    There are artistic aspects to all types of photography. To be a good photographer you will often have to compromise to the needs of your client, but figure out how to infuse your spin on what you create whenever possible.

    2. A photographer is a craftsperson

    No matter how good of an artist and storyteller you are, there lies the underlying fact that photography is also a craft. You need to be good with your tools and technical abilities. You need to have the ability to successfully take what’s in your head and turn it into the final product. Spend an equal amount of time learning your tools as you do thinking about what to capture.

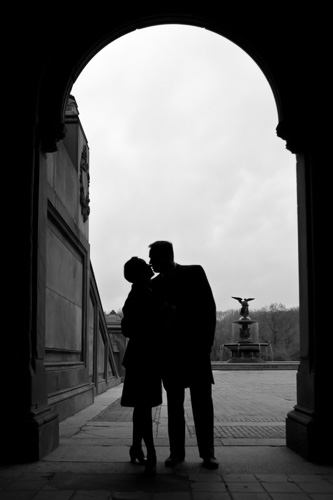
    Bethesda Terrace Wedding

    Engaged couple

    You need to know how to use your camera. You need to know how to use light and color to your advantage. You need to know how to edit and retouch your work so that it can look its absolute best. You need to be able to organize your archive well and to work quickly and efficiently. You need to have a standard workflow. This is all part of becoming a good craftsperson.

    3. A photographer is a businessperson

    Not many people actually enjoy the process of selling. We all wish our work sold itself – that people would be able to see the talent in the images and would purchase something or hire you based on that alone. However, that rarely happens in the real world, no matter how good you are. Even top artists rely on galleries, representatives, and marketers to sell their work.

    From the very beginning, you need to think as both a creative and a businessperson. You need to put equal time into each to succeed. You should read books on selling and marketing. Don’t make people uncomfortable of course, but don’t be afraid to sell. The worst words a photographer can say are, “Sorry for the shameless self-promotion.” Don’t feel shame for promoting what you do. If you’re proud of your product, then let people know about it! Social media, mailing lists, networking, SEO, web design, and branding are all tied into this idea. The more put together you are as a business, the easier it will be to market.

    Being a successful businessperson these days means that you have to network. Let people know what you do, pass out your business cards when it’s appropriate, connect with similar creatives to share advice, and connect with people in your community and field. And for pete’s sake, respond quickly to inquiries! If you don’t, someone else will.

    3. A photographer is an expert in logistics:

    Executive group portrait

    Pushing the button is only a tiny part of the process of any job. Photography is about creating an experience for your clients. From the beginning, you have to be good at communicating with them to understand what they want. You can lead clients in certain directions that you think are best, but you need to cater to their likes and interests at the same time. A photographer needs to listen and advise so that everyone has the right expectations and has an idea for how a job will go.

    A photographer is a planner. They are in charge of organizing the assistants, travel, make-up artists, and everything else in a seamless manner. Job planning is difficult work and should be charged for. This is all part of being a good photographer. Some high-end photographers have production companies to do this work for them. If you are one of the many who does this yourself, charge for your production time.

    A good photographer is meticulous about planning but then relies on serendipity. A photographer is an expert in contingencies and Murphy’s Law, and saves the day when things go wrong. I know wedding photographers who carry small sewing kits with their gear. Plan the day and the shots that you want to capture. Have backups for everything that can possibly break or go wrong. Go into a job comforted that you can handle anything and your confidence will soar. Then when the job happens, keep your eyes open to serendipity. That is where the magic happens. The better planned you are, the more comfortable you will be to veer off of the plan when the situation presents itself.

    4. A photographer is an actor and a performance artist

    Worrying is good, but showing your worry is not. Plant a smile on your face and show confidence in the face of adversity. Inspire and comfort. You will come across to many clients who will be so nervous. Photography has the ability to make a lot of people nervous. There are many people who hate having their photograph taken.

    You want to learn how to read people and get through to them effectively. Each subject is different and sometimes you have to play the role of therapist to figure out how to talk to them to get them to do what you need. I’m an introvert myself and have had to teach myself to do this over the years. It used to make me so uncomfortable but now it’s way far down on my list of worries.

    Have a stash of jokes or comments to back you up. When I see people giving one of those awkward smiles to the camera I like to just call them out on it. “Give me your most uncomfortable smile. Well, we can only go uphill from that look!” Or “That’s just terrible.” I don’t use that for all types of people, but it works a lot.

    People also like direction. It makes them think that you know what you’re doing. I personally try to capture my subjects in ways that feel natural, so if they look like they need direction, I’ll pose them even if I know I’m not going to use those photos, all to make them more comfortable. Then I’ll tell them to stand in a way that feels natural to them and we’ll go from there. That usually works.

    Keep them moving. Tell them to change positions slightly every shot or two. If someone starts getting uncomfortable in their stance, point for them to move somewhere else to break their tension.

    Ask them questions that make them think and open up! Get them talking about themselves so they loosen up and like you more. Smile at what they say. Sometimes I’ll even hold the camera up and tell them I want to shoot them while they’re talking. I’ll take some shots while they are and when they give the right look or mood I’ll tell them, “Hold that! Don’t move an inch!.”

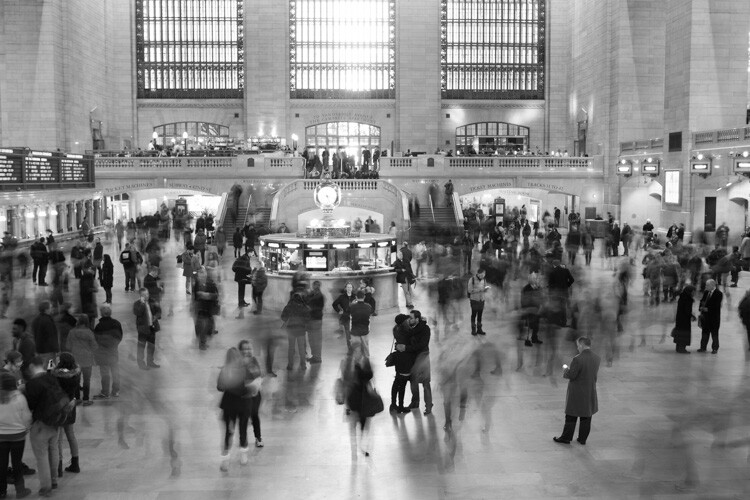
    A portrait for an engaged couple in Grand Central Station NYC (seen kissing in foreground)

    Getting to the point of pushing the button, and all the editing afterwards, is where the real work happens for a photographer. When all of this is done well, the pushing of the button can almost feel like an afterthought. It will be so much easier to record those magical moments when you are able to create a magical environment.

    Did I miss out on anything? What else do you think a professional photographer needs to do to be successful?

    googletag.cmd.push(function() {
    tablet_slots.push( googletag.defineSlot( “/1005424/_dPSv4_tab-all-article-bottom_(300×250)”, [300, 250], “pb-ad-78623” ).addService( googletag.pubads() ) ); } );

    googletag.cmd.push(function() {
    mobile_slots.push( googletag.defineSlot( “/1005424/_dPSv4_mob-all-article-bottom_(300×250)”, [300, 250], “pb-ad-78158” ).addService( googletag.pubads() ) ); } );

    The post What are the Real Responsibilities of a Professional Photographer? by James Maher appeared first on Digital Photography School.

    Digital Photography School