Category: Photography

  • How to Make a Triptych in Lightroom

    Lightroom print module triptych

    It seems that the majority of photos we see online or in print are presented individually. But if you have several strong images on a related theme, you may be able to create a stronger presentation by placing them together.

    The triptych – three images laid out side by side – is a traditional way of doing this. While there is no way of creating a triptych in Lightroom’s Develop module, it’s easy to do in the Print module. It’s a simple procedure and saves you having to leave Lightroom to create the triptych in Photoshop. Then you can either print it directly from Lightroom, or export it as JPEG file to use in a photo book or upload to a photo sharing website like Flickr.

    Here’s how to make a triptych in Lightroom

    Step #1 – Create a collection of the photos for the triptych

    Go to the Grid View in the Library module and create a new Collection containing the photos you want to use in the triptych. The photos should be the same orientation and aspect ratio. Click and drag to arrange them in the desired order.

    Lightroom print module triptych

    Step #2 – Setup in the Print module

    Go to the Print module, click the Page Setup button and make sure the paper orientation is set to landscape. Then go to the Template Browser panel and select the Triptych template from the Lightroom Templates list.

    Lightroom print module triptych

    Step #3 – Crop images correctly

    For some reason Lightroom crops the photos to square format and arranges them vertically, so you need to change that. Go to the Image Settings panel and uncheck the Zoom to Fill box. Then go to the Layout panel and, under Page Grid, set Rows to 1 and Columns to 3, and untick the Keep Square box. It will look something like this:

    Lightroom print module triptych

    Step #4 – Show guides

    To see how the layout is created, go to the Guides panel and tick the Show Guides box. The screen shot below shows the Margins and Gutters (light grey, indicating the three column and one row layout) and the Image Cells (black).

    Lightroom print module triptych

    Step #5 – Size images

    Return to the Layout panel and move the Height slider under Cell Size right to increase the size of the Image Cells. All three are adjusted together – you cannot make adjust them individually. You can also adjust the left and right margins to increase the space around the three photos.

    Lightroom print module triptych

    Step #6 – View without guides

    Return to the Guides panel and uncheck the Show Guides box to view the photos without any guides. This makes it easier to see whether you have the right amount of spacing between images.

    Lightroom print module triptych

    Step #7 – Save your print layout

    Lightroom print module triptychClick the Create Saved Print button at the top of the Content window and give the print a name in the Create Print window that appears. The print is saved inside the Collection of your choice, and marked by a printer icon. Now you can leave the print and come back to it later without losing any of your work. To export the triptych as a JPEG file simply click the Print to File button under the right-hand panels.

    Other options

    You can use the same template to create a diptych by setting Rows to 1 and Columns to 2, like so:

    Lightroom print module triptych

    If you set Rows to 1 and Columns to 5 you can lay out five images side by side like this:

    Lightroom print module triptych

    You can also explore the other templates in the Print module for alternative layouts. How do you use the Print module for laying out your photos? Please let us know in the comments.


    The Mastering Lightroom Collection

    Mastering Lightroom ebooksMy Mastering Lightroom ebooks will help you get the most out of Lightroom 4 and Lightroom 5. They cover every aspect of the software from the Library module through to creating beautiful images in the Develop module. Please click the link to learn more or buy.

    googletag.cmd.push(function() {
    tablet_slots.push( googletag.defineSlot( “/1005424/_dPSv4_tab-all-article-bottom_(300×250)”, [300, 250], “pb-ad-78623” ).addService( googletag.pubads() ) ); } );

    googletag.cmd.push(function() {
    mobile_slots.push( googletag.defineSlot( “/1005424/_dPSv4_mob-all-article-bottom_(300×250)”, [300, 250], “pb-ad-78158” ).addService( googletag.pubads() ) ); } );

    The post How to Make a Triptych in Lightroom by Andrew S. Gibson appeared first on Digital Photography School.


    Digital Photography School

  • Tips for Choosing a Tripod Head

    NO PARKING

    One of the first accessories many people buy after getting a camera is a tripod, and most of those are the all-in-one kind with three legs on the bottom, and a top part called a head, onto which you mount your camera. Typically these heads feature a handle that juts out from one side that can be tightened or loosened to allow you to change the angle at which your camera is situated. These tripods usually cost about $ 25 to $ 50 which makes them quite attractive to photographers looking to invest in some gear to help them take better photos. However, one of their main limitations involves the head: it is usually non-removable, which means you are bound by its constraints, and you may soon discover that your creative sensibilities outstrip the capabilities of the tripods.

    two-tripods

    All-in-one tripods like this are inexpensive and great for beginners.

    I remember the first time I walked into a camera store to look at a some tripod heads and was shocked to find that the sticker price was well beyond what I thought was reasonable. I thought to myself, “Why would anyone spend $ 150 on a tripod head alone, when a basic tripod could be had for less than half that amount?” Then I looked at the price of tripod legs and just about hit the floor. Over the years I came to realize that the reason these components are so expensive was because they are made of much higher-grade materials and built to specifications that demanding photographers need.

    When you’re ready to take the step of buying a tripod head and set of legs separately, there are so many options from which to choose it can leave you in a state of confusion with no clear answers. When you’re thinking about spending hundreds of dollars you don’t want to make a bad choice. So, I’m going to take a look at four of the most common types of tripod heads and discuss how they would suit different types of photography. Hopefully it will give you a better idea of what to look for the next time you walk down to your local camera shop, or browse through some of your favorite online photo stores.

    Ball Heads

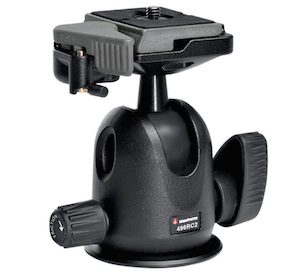
    manfrotto-496rc2

    Manfrotto 496CR2 ball head

    This is my favorite type of tripod head, and one that I think suits most casual or enthusiast photographers quite well–much moreso than the standard pan/tilt head that comes with all-in-one tripods. Ball heads are designed around a 360-degree swivel (basically a large ball bearing, hence the name, ball head) which you can tighten or loosen with a lever or dial on the side. You can turn your camera from side to side, rotate it in a circle, or change its orientation from portrait to landscape in an instant, all with virtually no effort on your part.

    Some are specifically designed to let you change just one direction of motion at a time, which is useful if you are into special types of shots like panning. The first time you use one it can be a bit disorienting until you get used to the sheer amount of freedom they offer. But be careful to keep one hand on your camera while you adjust the locking mechanism on the ball head. If you don’t, your camera may suddenly flop to the side which can be a bit scary the first time it happens. This degree of freedom can actually be a bad thing if you only want to adjust one parameter at a time, and it can be tricky to operate ball heads when you want micro-level adjustments. But, as an overall step up from an entry level tripod, it’s hard to go wrong with a ball head.

    Pan/Tilt Tripod Heads

    manfrotto-804rc2

    Manfrotto pan/tilt tripod head 804CR2

    If this model looks familiar to you, it’s because you might already have one like it, or have seen them on all-in-one tripods. Basic models have one or two adjustment levers, but if you spend a bit more you can get one with three levers to give you fine-tune control over specific adjustments. They are much more precise than ball heads in this regard, and it is not uncommon to find pan/tilt heads with built-in bubble levels to help you make sure you have your camera positioned exactly how you want. While it takes more steps to reposition your camera compared to a ball head, it can actually be a good thing because you can adjust just one parameter at a time. For example if you have your subject perfectly aligned up but need to rock your camera to one side, you can use one lever to adjust only the tilt. A pan/tile head is not as simple as a ball head, but the added control it offers is nice, once you get the hang of working with multiple levers.

    Pistol Grip Tripod Heads

    vanguard-gh-200

    Vanguard GH200 pistol grip tripod head

    Pistol grips are designed to give you the same degree of control as a ball head but some photographers find them much easier to adjust, due to their full-handed grip mechanism. Whereas a ball head requires you to turn a relatively small knob in order to alter the position of your camera, which can leave your camera flopping around like a wet noodle unless you keep one hand on it too – the pistol grip head, which is also available as a joystick style, gives you precise one-handed control over the exact position of your camera. To use it, just squeeze the grip and the head will unlock so you can reposition it. Most of these have tension dials to adjust how easily you can change things when you squeeze the grip, and more advanced ones allow you to rotate the camera along one axis which makes panning shots much easier. As you can see in the photo they are much larger than ball heads which makes them slightly less portable, but the tradeoff can be well worth it if you need precise control over the position of your camera, while maintaining a high degree of freedom, as well as quick access to a full range of motion with a squeeze of your hand.

    Pan/Tilt Tripod Heads for Video

    manfrotto-700rc2

    Manfrotto 700CR2 tripod head

    Similar to the pan/tilt head shown earlier, these specialty heads are designed with video shooters in mind, and while they can be used for still photography, they are less than ideal due to some important limitations. As is common with most video heads, these often feature a long extension arm which allows for greater control and smooth movements for panning shots, but is not very practical when shooting still photography. Contrary to what you might think, the extension arm does not twist in your hand to let you adjust your camera: it is merely a lever that lets you swing your camera from side to side, and does not actually do anything itself. You lock your camera in place by turning knobs on the side of the head, and loosen them to gain access to movement. This particular head is designed for two types of movement: rocking back and forth and twisting from side to side. This means if you want to tilt your camera to the left or right (to shoot a vertical image) you simply can’t do it–at least not without spending much more money on a high-end version.

    Recommendations

    vanguard-sbh-100

    Vanguard SBH-100 ball head

    If you’re looking to step up from a basic tripod my recommendation is almost always to get a ball head, partially because it allows such a fantastic amount of control, but also due to the more intimate relationship it creates between you and the camera. Using a ball head with your eye to the viewfinder (as opposed to the LCD screen) while positioning your camera is an incredibly freeing experience if you have only used an all-in-one tripod, and might even help you find new types of shots that you had not considered before. While ball heads do not offer the same type of precision control as dedicated pan/tilt heads, some like the  model shown here, do allow you to at least adjust the rotation of your camera separately from the other movements which can assist with motion or panning shots. If you like to shoot video with your DSLR perhaps a video head would suit your needs a bit more, and virtually all dedicated tripod heads feature solid construction and well-lubricated parts which make operating them much smoother overall.

    Using a ball head made positioning my camera for this shot much easier than if I was working with a standard all-in-one tripod head.

    Using a ball head made positioning my camera for this shot much easier than if I was working with a standard all-in-one tripod head.

    What about you? What is your favorite type of tripod head, or do you have any other tripod tips to share? Leave your thoughts in the comments below!

    googletag.cmd.push(function() {
    tablet_slots.push( googletag.defineSlot( “/1005424/_dPSv4_tab-all-article-bottom_(300×250)”, [300, 250], “pb-ad-78623” ).addService( googletag.pubads() ) ); } );

    googletag.cmd.push(function() {
    mobile_slots.push( googletag.defineSlot( “/1005424/_dPSv4_mob-all-article-bottom_(300×250)”, [300, 250], “pb-ad-78158” ).addService( googletag.pubads() ) ); } );

    The post Tips for Choosing a Tripod Head by Simon Ringsmuth appeared first on Digital Photography School.


    Digital Photography School

  • 24 Powerful Images With Complementary Colors

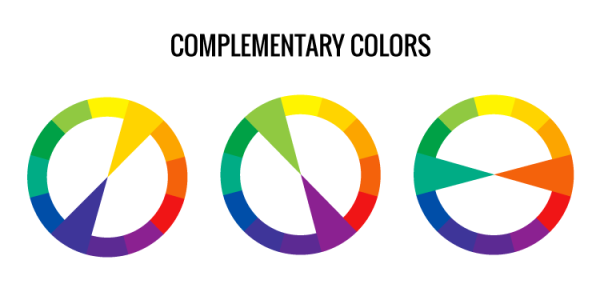
    Complementary colors are ones which are opposite on the color wheel.

    Lacie Lynnae

    By Lacie Lynnae

    They appear often in nature and are called complementary because they do just that, complement one another. They work well and make strong compositions.

    Photograph Water and fire by wim denijs on 500px

    Water and fire by wim denijs on 500px

    Examples of common color combinations that work are:

    • Orange and blue
    • Yellow and purple
    • Red and green

    Here are 24 examples of images that use complementary colors for a powerful composition:

    Photograph Flower 03 by MaX Smiles on 500px

    Flower 03 by MaX Smiles on 500px

    Photograph The Concert Hall by Jürgen Lehmann on 500px

    The Concert Hall by Jürgen Lehmann on 500px

    Photograph The Red Dress by Ken Thai on 500px

    The Red Dress by Ken Thai on 500px

    Photograph Cloud Atlas by Meer Sadi on 500px

    Cloud Atlas by Meer Sadi on 500px

    Photograph Silent Witness by Moni  on 500px

    Silent Witness by Moni on 500px

    Photograph Cosmos by Julia Carvalho on 500px

    Cosmos by Julia Carvalho on 500px

    Photograph Fickle macro by Stolpulus II on 500px

    Fickle macro by Stolpulus II on 500px

    Photograph Dream sailing by Roberto D'Antoni on 500px

    Dream sailing by Roberto D'Antoni on 500px

    Photograph Calm Sunset in El Nido by Sunny Merindo on 500px

    Calm Sunset in El Nido by Sunny Merindo on 500px

    Photograph Heart of October by Mihai Dulu on 500px

    Heart of October by Mihai Dulu on 500px

    Photograph Norah by Suzy Mead on 500px

    Norah by Suzy Mead on 500px

    Photograph A colorful morning by Martijn Barendregt on 500px

    A colorful morning by Martijn Barendregt on 500px

    Photograph Perfect Cuteness by Gurdyal Singh on 500px

    Perfect Cuteness by Gurdyal Singh on 500px

    Photograph BayBridgeBlueFull by Bill Nichols on 500px

    BayBridgeBlueFull by Bill Nichols on 500px

    Photograph Star Chamber by Joseph Rossbach on 500px

    Star Chamber by Joseph Rossbach on 500px

    Photograph pondering by Alex Serres on 500px

    pondering by Alex Serres on 500px

    Photograph attractor by Pascal Faber on 500px

    attractor by Pascal Faber on 500px

    Photograph white eye by Woody L. Chu on 500px

    white eye by Woody L. Chu on 500px

    Photograph I am not a Lady Bug :P by Gideon James Draviam on 500px

    I am not a Lady Bug :P by Gideon James Draviam on 500px

    Photograph delicious pomegranate cocktail by Oxana Denezhkina on 500px

    delicious pomegranate cocktail by Oxana Denezhkina on 500px

    Photograph ...complementary colors... by Marko  Grubisic on 500px

    …complementary colors… by Marko Grubisic on 500px

    Photograph Complementary colors by Mauro Moroni on 500px

    Complementary colors by Mauro Moroni on 500px

    Photograph Red sea by Vitaliy Sokol on 500px

    Red sea by Vitaliy Sokol on 500px

    Photograph Yellow Butterfly by alaine  on 500px

    Yellow Butterfly by alaine on 500px

    googletag.cmd.push(function() {
    tablet_slots.push( googletag.defineSlot( “/1005424/_dPSv4_tab-all-article-bottom_(300×250)”, [300, 250], “pb-ad-78623” ).addService( googletag.pubads() ) ); } );

    googletag.cmd.push(function() {
    mobile_slots.push( googletag.defineSlot( “/1005424/_dPSv4_mob-all-article-bottom_(300×250)”, [300, 250], “pb-ad-78158” ).addService( googletag.pubads() ) ); } );

    The post 24 Powerful Images With Complementary Colors by Darlene Hildebrandt appeared first on Digital Photography School.


    Digital Photography School

  • Weekly Photography Challenge – Complementary Colors

    This week I thought we’d do another photography challenge based on color, but not just one color – complementary or opposite ones like the images shared earlier here.

    Pichenettes

    By pichenettes

    Complementary color appear opposite on the color wheel. Find them in the example above. Use them in the challenge this week.

    Weekly Photography Challenge – Complementary Colors

    Your job is to find and photograph things with complementary or opposite colors. Many pairs of them occur in the natural world if you just look around. If you can’t find any, make your own. Here are a few more examples:

    Shålaco

    By Shålaco

    Margaret Almon

    By Margaret Almon

    Andy Farnsworth

    By Andy Farnsworth

    Eileen McFall

    By Eileen McFall

    Distant Hill Gardens

    By Distant Hill Gardens

    Jeyp.

    By jeyp.

    Kate Ter Haar

    By Kate Ter Haar

    HIM LEE

    By HIM LEE

    Bogdan Suditu

    By Bogdan Suditu

    Michael Wallace

    By Michael Wallace

    Surajram Kumaravel

    By Surajram Kumaravel

    Share your complementary images here:

    Simply upload your shot into the comment field (look for the little camera icon in the Disqus comments section) and they’ll get embedded for us all to see or if you’d prefer upload them to your favourite photo sharing site and leave the link to them. Show me your best images in this week’s challenge. Sometimes it takes a while for an image to appear so be patient and try not to post the same image twice.

    googletag.cmd.push(function() {
    tablet_slots.push( googletag.defineSlot( “/1005424/_dPSv4_tab-all-article-bottom_(300×250)”, [300, 250], “pb-ad-78623” ).addService( googletag.pubads() ) ); } );

    googletag.cmd.push(function() {
    mobile_slots.push( googletag.defineSlot( “/1005424/_dPSv4_mob-all-article-bottom_(300×250)”, [300, 250], “pb-ad-78158” ).addService( googletag.pubads() ) ); } );

    The post Weekly Photography Challenge – Complementary Colors by Darlene Hildebrandt appeared first on Digital Photography School.


    Digital Photography School

  • 25 Fabulous Easter Egg Photos for Your Inspiration

    Easter is a few days ahead and it’s a great opportunity for shooting! While you will be taking photos of your family and friends, turn your camera a bit to the treasure you have on your table – Easter eggs! Creative and colorful eggs with all those Easter decorations look just fabulous. See yourself! Here we have put together 20 Continue Reading

    The post 25 Fabulous Easter Egg Photos for Your Inspiration appeared first on Photodoto.


    Photodoto

  • 7 Tips to Take Better Family Photos

    Regardless of the type of photographer you are, family photos are among the most important pictures you’ll ever take. Here are some things to keep in mind.

    #1 – Make sure the family is prepared

    Picture1

    Even if it’s a few emails, a phone call, or an in person meeting at a coffee shop, have a consultation with the family at some point before the shoot. Address things like what the family will wear (use a service like Pinterest to create a board for the family to look at for suggestions on how they might dress), what time of day would be the best for them, and what they’re looking to get out of the shoot (i.e., candids, headshots, or a holiday card).

    Send out an email a day or two before their appointment with the time, date, and place of the session. Provide a checklist reminding them to make sure the kids are fed and they pack any essentials with them. Depending on the season, your checklist will change (e.g., knit hat reminders in winter and sunscreen and water it the summer). A family shoot will never go perfectly, but by making sure the family is prepared, you can maximize the likelihood that things will go as smoothly as possible.

    #2 – Become friends with the kids (bribery is underrated)

    Picture2

    Young or old, everyone loves little gifts. Stop by the Dollar Store before your next shoot and pick up some bubbles, a baseball, stickers or a tiny stuffed animal. If it’s autumn, stop by a farm market and a grab a small pumpkin. Summer? Grab a bunch of wildflowers. These tiny gestures will take some pressure off the parents, gain you points with the kids, and have the added benefit of making the pictures more fun and interesting. It’s a win – win.

    #3 – Let parents play with their kids

    This is when the magic happens. If you let the parents be who they are and more importantly, let kids be kids, the pictures will start to fall into your lap. Facial expressions on both the parents and children will be authentic and genuine. Smiles will come more easily, and your job is just to capture the moment.

    Picture3

    #4 – Provide direction

    Don’t be afraid to move the parents around and tell them where they need to be. Even if you’re just casually photographing your neighbor’s family, you’re the professional and people will listen. If a location isn’t working or the light is poor in a certain area, suggest an alternative in a positive way. Say something like, “Why don’t we try moving into that large open shade area by that tree, it will give us a break from this heavy sun”, rather than, “The light is horrible here, let’s move”.

    Relying on the parents to direct their kids can make your job a lot easier too. A little boy will listen to his mom who tells him to hug his sister over a stranger that he just met.

    Picture4

    #5 Make everyone feel comfortable

    Most people feel awkward having a camera pointed at them. Keep the conversation positive and periodically tell everyone how great the pictures are looking. You can even show them a few shots along the way. Your enthusiasm and excitement for what you’re seeing will put everyone at ease and make your job much easier.

    Picture5

    #6 – Improvise

    The night before the shoot I’m usually scouring Google for “family photo tips” or pulling the “How to Pose Children” books off my shelf. Preparation is essential. But photographing a family is a mixture of luck and skill, and when you’re in the thick of it and things aren’t going as planned, you’re going to have to improvise. Kids won’t sit still? Pop on a telephoto lens, back off and let them run around a bit. You might be surprised at the photos you get when you’re forced to do what wasn’t planned.

    Picture6

    #7 – Embrace the outtakes

    As photographers we want every photo to be a masterpiece – perfect light, natural expressions, everyone looking at the camera. But sometimes the best photos that you wind up taking are the most ridiculous — a boy with his hand up his nose, a brother embracing his crying sister, or one sibling looking at the other with a crazy face. Don’t stop shooting just because the kids aren’t cooperating for a moment, or the parents are chasing them around. Sometimes these situations can lend to the funniest and most memorable shots.

    Picture7

    We all wear different hats as photographers. One of these days, you’ll be asked to do family photos. Keep these tips in mind and you’ll be one step ahead.

    Please share your comments and any other suggestions below.

    googletag.cmd.push(function() {
    tablet_slots.push( googletag.defineSlot( “/1005424/_dPSv4_tab-all-article-bottom_(300×250)”, [300, 250], “pb-ad-78623” ).addService( googletag.pubads() ) ); } );

    googletag.cmd.push(function() {
    mobile_slots.push( googletag.defineSlot( “/1005424/_dPSv4_mob-all-article-bottom_(300×250)”, [300, 250], “pb-ad-78158” ).addService( googletag.pubads() ) ); } );

    The post 7 Tips to Take Better Family Photos by Joe Turic appeared first on Digital Photography School.


    Digital Photography School

  • Constructive Photography Critique: How to Give and Receive with Grace

    I’ve been in a funk lately. Just a little……off. Like I often hear other people do, I blamed it on the weather and assumed it would pass. A month later and it still hadn’t budged. This wasn’t the snow or the cold, yet completely normal, temperatures—it wasn’t even my kids who have been relatively low maintenance lately (all things considered).

    There was only one thing left to do before I took complete stock of my life and started looking into some serious therapy or, dare I even consider, enroll in a yoga class, and that was to bug my husband about it: “What’s wrooooong with me? Why am I sooooooooo cranky? Why don’t you tell me I’m pretty and feed me cookies anymore?” His reply was: a) “I do tell you you’re pretty and you know where we keep the cookies”, and b) “well, you’ve taken some pretty harsh blows lately.”
    lynseymattingly5

    He was right. I have had more than a lions share of un-constructive criticism tossed my way these last few months. I consider myself to be fairly good at rolling with the punches. I accepted a long time ago that not everyone is going to like me; no matter how badly I want to invite them over to my house and tell them they are pretty and feed them cookies and convince them to. And not everyone is going to like my photography. I can deal with those things—I really can.

    Like many of you, I saw early on that photography strikes so many chords with people, it’s very easy to get an internet debate going between total strangers about whether a random image is good or not. Whether or not it’s strong, if it’s beautiful, and the one that people seem to get hung-up on the most – if it’s correct or not. I have never heard talk of someone using the wrong paint strokes on a canvas. I’ve never walked into a debate over a songwriter using the wrong chords on his original music. I’ve never watched the internet get excited about the exact one proper way to throw pottery. But photography…photography is different with its mathematical magic and scientific reasoning. Photography is the one art that seems to have that one perfect right way.
    lynseymattingly2

    We will never all agree on that one right way though. It wasn’t long ago I was reading about a photography trend of the “in-between-shots”, which it turns out, I had been doing for years, I just had been calling them “out of focus shots.” So if even focus is subjective, how can we possibly come together on all the other pieces of our craft? We can’t. What we can do however, is be better for our peers and ourselves by being open to other viewpoints, and being better critics and brave receivers. This comes by giving and receiving constructive feedback, emphasis on the constructive part.

    Kind criticisms can be helpful—both offering them to other photographers and being willing to hear them ourselves. I know the internet is never going to be a place where I can post an image and expect nothing but rainbows and sugarcanes of encouragement and praise to come my way, but I have to believe it can be better than what I have personally seen lately.
    lynseymattingly8

    Here are three questions I ask myself each time I get feedback, whether requested or not:

    1) Am I really wanting other people’s opinions of this image?

    Am I really? Because the truth is that there are some images we don’t need feedback on. Either they are just very special to us, are personal, or our client loved them, and for whatever reason, we don’t feel the need to hear what a friend or stranger may have to say about them.

    If you find yourself in this situation where unrequested feedback has fallen in your lap over a photo you don’t need or want feedback for, move on. It’s not your job to validate the comment or engage in debate if you didn’t request it. They said what they needed to say, and what a wonderful gift you gave them of allowing them the space to say it.

    If however, you have found yourself receiving feedback you asked for and decided that you actually don’t want, be honest! There is nothing wrong with saying, “I guess I wasn’t as ready to hear feedback as I thought I was.” There is no shame in not being interested in criticism, or in thinking others would enjoy your work more.
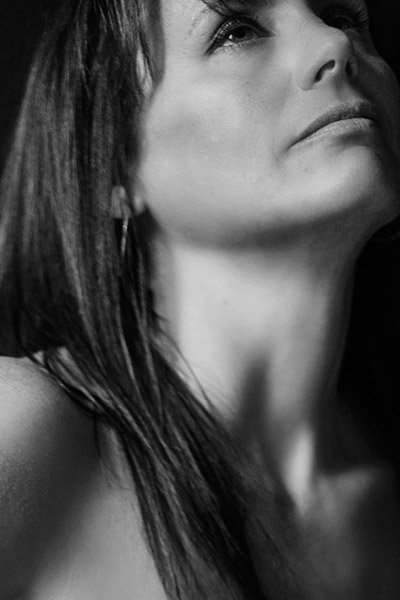
    lynseymattingly3

    2) Is it helpful?

    One of the most frustrating things about photography is that there are no redos. You can reshoot anything until kingdom come, but it won’t be the exact moment it was before. So, while nitpicking over a single image, all things considered, will not likely help that photograph, hearing feedback about things in general can possibly help you the next time. Can you take what they are saying and apply it? Can you rework the image in post-production to be stronger? Is there a lesson somewhere to be had in the feedback you are getting?

    “You asked for it, you got it!” moments can sometimes be humbling. Remember—it’s not a reflection of you, your character, or your very soul. For as passionate as we can be about photography, for as much as we live and breathe it, criticism is just words on a page or in the air, about a piece of paper or part of a screen that somehow came from your camera. These words cannot eat you, or make you spontaneously combust, even though sometimes it can feel that way.
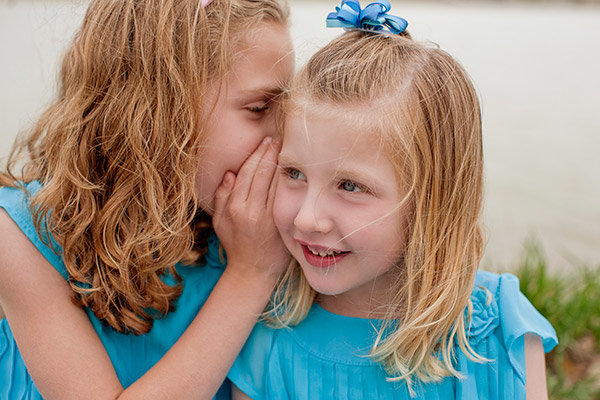
    lynseymattingly6

    3) Is it really about my image?

    Some people just need to share their opinion. I get that—I have a tendency to be an over-sharer myself. In this time of social media, we over-sharers forget that not everyone cares what we had for breakfast. Not everyone is interested in knowing that when I’m stressed, I get whiny and want to be fed cookies.

    Really look at the feedback you received. If it feels off, or truly doesn’t make sense or seem helpful in any way, consider that it’s not about you. The feedback you received is maybe related to a battle you know nothing about, that somehow got caught-up in the vortex of sequences and ended up under your image because it needed a place to land.

    I’m not a big fan of people saying, “it’s not personal, it’s business.” This “business” has taken from my personal life every chance it got. Photography has made me friends and taken my sleep. It’s taught me about beauty and kept me away from my family. You bet it’s personal! But that’s exactly the thing—the image is personal. It gets to be as personal as you want. The feedback however? That’s just business.

    lynseymattingly4

    A photographic community only works if people participate. There was a time when I was desperate for feedback of my work—a time when I truly wanted to learn and needed people more experienced to be willing to share their knowledge and skills with me. What power we are giving people when we ask for this! If I could do anything, besides teach the world to sing in perfect harmony, I would create a kinder internet. An internet that remains the most helpful source in the world, something that brings us all together, but isn’t so darn mean. I believe with all my unicorn believing ways that this is possible, and that being kind is the first step to being a respected member of any community. Giving constructive criticism is almost as hard as receiving it.

    Here are three questions I ask myself before I offer feedback to another photographer:

    1) Is it helpful?

    It does no good for me to simply tell someone “nice image”. While a pat on the back is always great, enough of them and you’ll just push the person right over. If someone has truly asked for thoughts or a response to their image, is what I am about to tell them helpful? Can they use it going forward? Could it be taken as condescending or hurtful, or am I showing the proper respect? Just because someone asked for my opinion (or the opinion of the internet at large), doesn’t mean I have to be rude about it. Remember that it does take a bit of courage to share your very personal work with the world and though unspoken, I think a photographic community works best when the rule is – to above all else be kind.
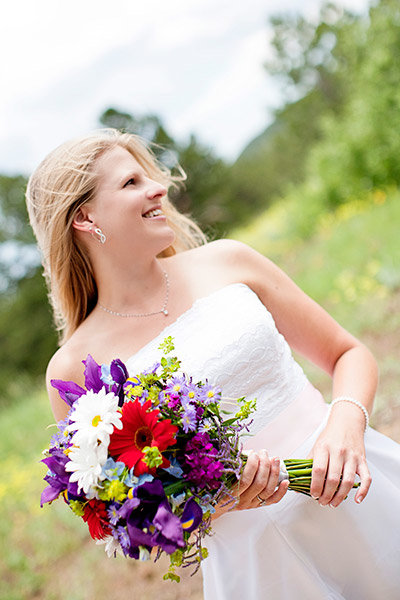
    lynseymattingly9

    2) Is it balanced?

    Does my comment also offer encouragement along with any negative elements I’ve mentioned? Have I pointed out something that was done well, so it’s clear that I invested more than a brief second before I spoke my thoughts for the world to see? I can hear some of you now saying, “it’s not my job to tell them it’s good—they wanted honesty!” To you I say, honesty can still be kind. You don’t have to reassure anyone or lie about your feelings to be honest. One of my all-time favorite quotes:

    “Be an encourager. The world has plenty of critics already.” – Dave Willis
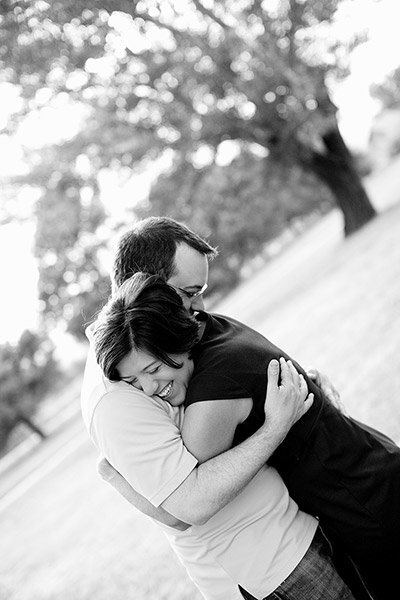
    lynseymattingly7

    3) Am I okay with this being the only thing someone has ever heard me say?

    When you comment on the internet, it is usually read by people you don’t even know. Possibly hundreds or thousands of them. The world does not know that I try my hardest to be a decent human being, but sometimes my mouth gets away from me. The world doesn’t know that my passion can sometimes come across as overbearing. The person requesting feedback doesn’t likely even know who I am. So if what I am about to offer is the only thing anyone could ever attach to my name, am I okay with that? Have I been fair? Have I been helpful? Have I been kind? I would rather be completely forgotten than permanently attached to a unnecessary comment that I wrote in haste or worse yet, an unhelpful comment that I wrote out of spite.

    lynseymattingly10

    Do you leave comments on images? Do you post your images and ask for feedback? What are your thoughts?

    googletag.cmd.push(function() {
    tablet_slots.push( googletag.defineSlot( “/1005424/_dPSv4_tab-all-article-bottom_(300×250)”, [300, 250], “pb-ad-78623” ).addService( googletag.pubads() ) ); } );

    googletag.cmd.push(function() {
    mobile_slots.push( googletag.defineSlot( “/1005424/_dPSv4_mob-all-article-bottom_(300×250)”, [300, 250], “pb-ad-78158” ).addService( googletag.pubads() ) ); } );

    The post Constructive Photography Critique: How to Give and Receive with Grace by Lynsey Mattingly appeared first on Digital Photography School.


    Digital Photography School

  • Tips for Photographing a Lunar Eclipse

    _MG_5566-MWhile some obscure astronomical events get over-hyped, a total lunar eclipse is always a crowd-pleaser. It is easy to observe and photograph, even among the bright lights of the big cities. April’s Easter Lunar Eclipse (2015) is visible from North America, across the Pacific to Australia, and eastern parts of Asia. The photography advice below will also serve the rest of the world well in September when an eclipse is visible to those who miss out on this one.

    Eclipse Details for Saturday April 4th, 2015

    A lunar eclipse occurs when the alignment of the moon’s orbit is just right, taking it inside Earth’s shadow at the time of full moon, when the moon is opposite the sun. This total eclipse occurs on Saturday April 4th, 2015, in the morning for observers in the Americas, and the evening for those in Australia and Asia. In total, this eclipse lasts for three and a half hours but totality, where the moon is fully inside our shadow, only lasts for around five minutes.

    Because the moon only grazes into the shadow, this eclipse is likely to be a little brighter than usual, and the color more orange than red. For people in eastern Canada and the United States, as well as western parts of South America, the moon will set before the total eclipse begins, but you will have the opportunity to create unique images of the moon setting partially eclipsed.

    lunar_201504

    Visit in-the-sky.org for event times in your area. Change your location on the right hand side if the automatic selection is incorrect.

    Photographing a Lunar Eclipse

    There are two main approaches to photographing a lunar eclipse using just a DSLR and a tripod, excluding more complex approaches with telescopes and tracking mounts.

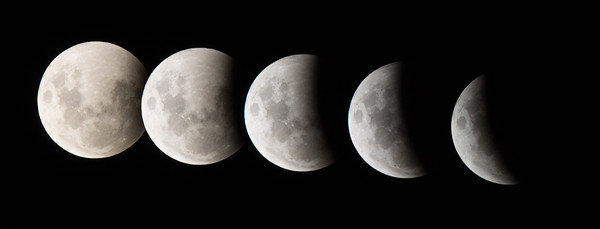
    1. You can get in as close as possible with a telephoto lens to capture detail of the changing partial, and total phases of the eclipse.
    2. Create wide-field and composite images showing the stages of the eclipse as the moon moves through the sky.

    Wide-field Eclipse Composites

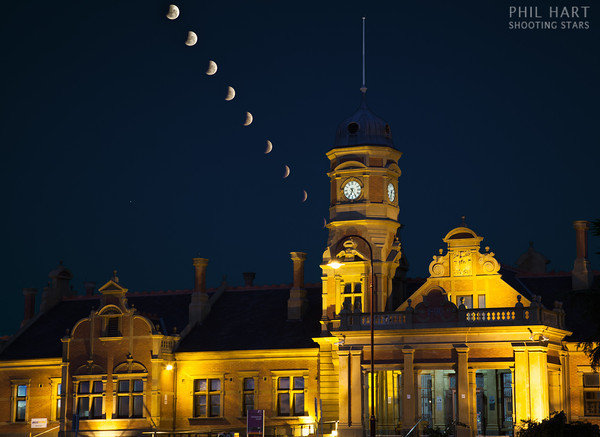
    Lunar Eclipse over Maryborough Station-M

    Partial phases of a lunar eclipse over Maryborough Station.
    Canon 5D Mark II, 24-105mm lens at 82mm.
    Nine exposures of the moon each 1/90 sec, f/8, ISO 200.
    Images stacked is PS using lighten blending mode with one 2 second exposure of the foreground.

    The moon moves across the sky at approximately 15 degrees per hour or 50 degrees over the full duration of the eclipse. You need a wide angle lens around 18mm focal length (28mm on a full frame camera) to capture all the stages of the eclipse in one field of view. An alternative is to frame up part of the eclipse with a longer focal length about 50mm (80mm on a full frame camera) like the image above which shows the partial stages in more detail.

    In the northern hemisphere, the moon (like the sun) moves from left-to-right through the sky. So at the start of the eclipse, position the moon in the left side of the frame leaving it room to move across the image during the eclipse. Reverse that advice in the southern hemisphere. Night sky planetarium Apps such as Stellarium and SkySafari (iOS only) allow you to visualize the path of the moon through the sky to help plan your framing.

    Telephoto Eclipse Images

    With a moderate telephoto lens you can get nice detail of the changing stages of a lunar eclipse. During the partial stages the brightness of the moon allows for very short exposures, so trailing it should not be a problem, although you will need a sturdy tripod and use mirror lock-up to reduce vibration.

    Lunar Eclipse Partial Phases Composite Canon 1100D, 300mm lens with 1.4x teleconverter, 1/125 sec, f5.6, ISO200

    Lunar eclipse partial phases composite.
    Canon 1100D, 300mm lens with 1.4x teleconverter, 1/125 sec, f/5.6, ISO 200

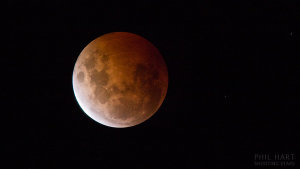
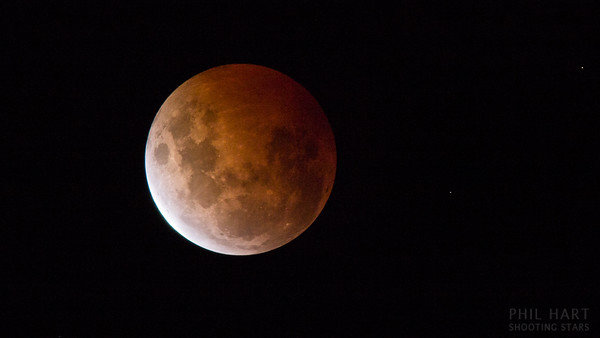
    During totality, the Moon’s brightness greatly reduces, however this eclipse will be a little brighter than usual. Aim for exposures of around one second with the aperture wide open, and push the ISO as much as you need to, being careful not to blow the highlights on the brighter edge. You should be able to capture images like this one below, which is an example of what you can do even with regular affordable cameras (although nice lenses do help).

    _MG_5566-M

    Totality during a lunar eclipse
    Canon 1100D, 300mm lens with 1.4x teleconverter, 1/2 sec, f/5.6, ISO 200

    Eclipse at Moonset

    In the eastern United States and Canada, and the western half of South America, the moon will set during the partial stages before total eclipse. Through central areas the moon will set while totally eclipsed which will make it much dimmer than a normal moonset and potentially hard to see amongst bright city lights. In the western half of North America you get to enjoy the partial phases leading up to, and including the total eclipse, then capture the moon setting as the partial phases reverse at the end of the eclipse.

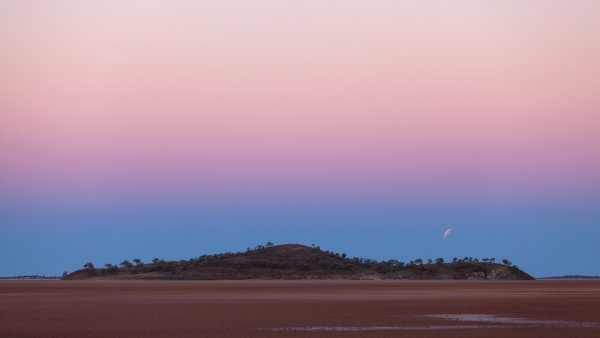
    You can use apps and software like The Photographers Ephemeris (Android/iOS) and Photo Pills (iOS only) to plan the alignment of the moon against landscape features as it rises or sets. Australian photographer Colin Legg captured this shot of the moon rising during an eclipse last year. An astronomer would immediately recognize the unusual configuration – a crescent moon can normally only appear in a twilight sky in the same direction as sunrise or sunset. Here the crescent moon appears amidst the beautiful shading of Earth’s shadow and The Belt of Venus, opposite where the sun set about 15 minutes earlier. Similar images before sunrise will be possible across North and South America during April’s lunar eclipse.

    2014-10-08-Lake-Ballard-Lunar-Eclipse-115mm-1200

    Lunar Eclipse over Lake Ballard, Western Australia – image courtesy of Colin Legg

    Will you get out and give it a go? Share any comments and questions below, and if you get a great shot of the eclipse share it here too. You might want to share it on the weekly photography challenge Shoot the Moon also.


    fi3-340x220Want more night sky photography tips? Right now Phil’s eBook Shooting Stars is 50% off over at Snapndeals. Now only until April 27th!

    googletag.cmd.push(function() {
    tablet_slots.push( googletag.defineSlot( “/1005424/_dPSv4_tab-all-article-bottom_(300×250)”, [300, 250], “pb-ad-78623” ).addService( googletag.pubads() ) ); } );

    googletag.cmd.push(function() {
    mobile_slots.push( googletag.defineSlot( “/1005424/_dPSv4_mob-all-article-bottom_(300×250)”, [300, 250], “pb-ad-78158” ).addService( googletag.pubads() ) ); } );

    The post Tips for Photographing a Lunar Eclipse by Phil Hart appeared first on Digital Photography School.


    Digital Photography School
  • Post-Processing Tips for Overcoming Beginners Acts of Omission

    In an old dressmaking shop in Paris, a master-tailor has finished stitching a bridal gown. He is eager to show it to the world, but he knows that the job is not yet done. He has a few thoughts passing through his mind, and he has to make sure that the dress is presentable before the bride arrives. He tells himself that these threads dangling from here and there need to be trimmed, the ruffles need to be neatened, and the seams still need to be pressed. The master in him criticizes the dress until the tailor in him fixes the final details.

    When it comes to photography, the story is no different. You must lose ownership of your image for a few seconds, and look at your own work with a fine-tooth comb. As beginners, we often rush to upload or print our photos, eager for appreciation and likes from others.

    I have also been impatient in this way, though with time, I have now made it a habit to review my image critically at the end of post-processing. Here are some tips I hope that will help you taking your post-processing experience to the next level and pick up on some things that beginners often miss. I use Adobe Lightroom and Photoshop, so I will be talking about both where applicable.

    Crooked images

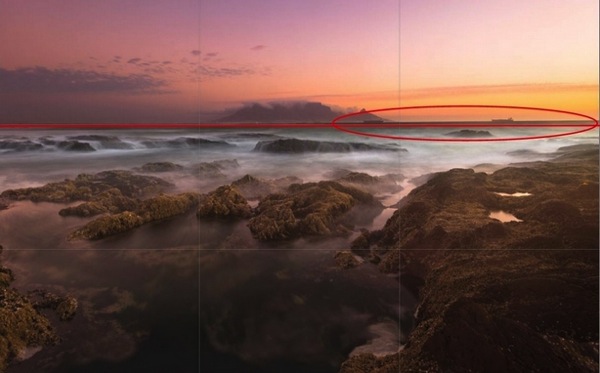
    There is nothing more embarrassing than your client telling you that the photo is a bit askew. Once spotted, it is an eyesore that will forever jar when you look at your image. It is not easy to judge tilted images when it comes to mountains and forests, but landscapes are also more forgiving when it comes to a tilt. With seascapes, however, one needs to ensure that the sky meets water on the perfect horizontal for a harmonious and balanced image. Similarly, check the angles of your doorways and buildings, that they are aligned appropriately. Adobe Lightroom has a useful Straighten tool, as well as options in Photoshop.

    Skew Horizon

    A crooked horizon is not always obvious; verify it using the proper tools.

    Spots

    Zoom-in and inspect your photo to make sure that there are no spots. Dried water droplets and dust become more visible when you increase the contrast of colors in your post-processing. Adobe Lightroom has a Spot Removal tool, and Adobe Photoshop also provides various ways to remove spots from your image.

    Spots

    Imagine printing a large image with these spots. These are very visible.

    Chromatic aberration

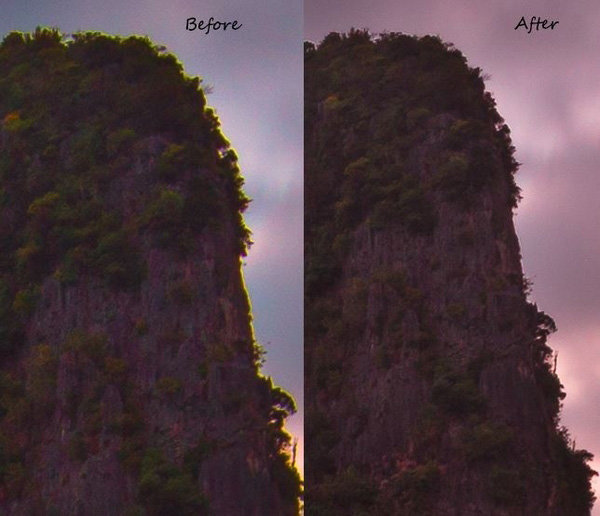
    Chromatic aberration, or color fringing, often happens around the edges of objects in your images. Why this happens is a technical topic on its own related to your lens, but what you need to know is that modern tools help remove this problem. Adobe Lightroom has a Remove Chromatic Aberration tool that you can use to overcome this issue.

    Chromatic_Aberration

    With just one click, I was able to remove the color fringe from the edges.

    Barrel distortion

    Barrel distortion is associated with wide angle lenses. It causes your image to look more like a sphere. You might get away with it if the elements in your scene are uneven, and not particularly familiar to the eye. However, you need to be aware that the wider your focal length, the more distortion your image will have. Adobe Lightroom allows you to remove barrel distortion using the Lens Corrections feature. In the following image, people standing on each side of the image have elongated faces. I did not, of course, include this in the bridal album!

    Raaiqah & Taariq Wedding, November 2014

    Unwanted objects

    Look for unwanted objects in the scene. Remove shopping bags, cans, tins, ships on the horizon, and even people if they are not desired in the scene. I use Adobe Photoshop’s Content Aware fill tool to achieve the desired results.

    Image in black and white

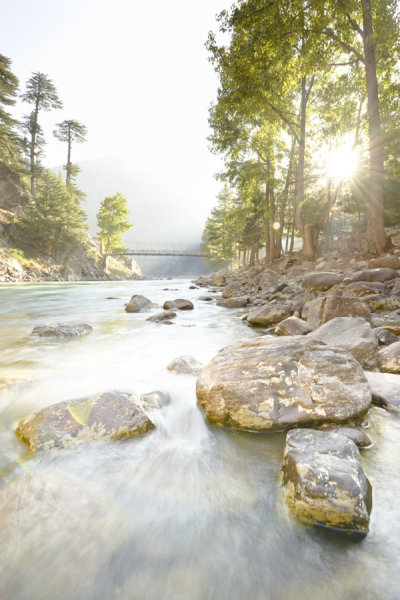
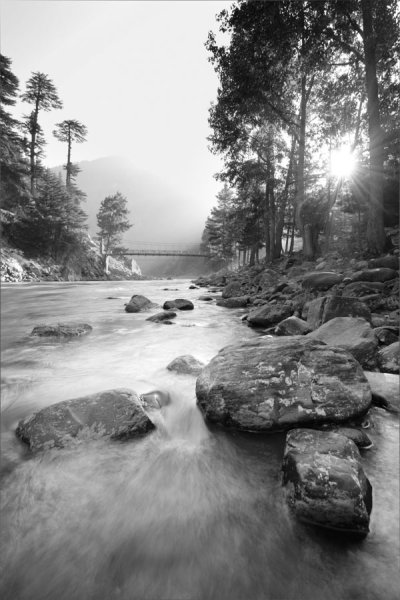
    Before and after post-processing, I usually check my images in black and white. By not allowing yourself to be distracted by colours, this is a good way to see if an image is flat. I do this for several reasons. Some images are just meant to be black and white, especially the ones in which the colour adds little by way of interest, and in fact may distract from the subject. You might also want to turn an image into black and white because the sky is overexposed, in this way salvaging, rather than discarding the image altogether. By converting an image to black and white, sometimes unwanted distracting elements in the background of your image can be de-emphasized, with some additional light adjustment (e.g. a person standing behind your main subject in a portrait).

    Color_Landscape BW_Landscape

    Black and White allows you to appreciate the landscape with emphasis on the harmonies and lines rather than on the colours.

    Color_Portrait BW_Portrait

    In black and white, the background is not as distracting.

    Tip: Walk away

    Once you have finished editing your image (or a batch of images), step back and give review it full screen. Turning off the room lights and leaning back is a good idea. Without the mouse and the keyboard in my reach, I can think about the image critically. I sometimes even walk away and let the image lie there for some time before returning for a fresh approach.

    Whether you are a beginner or a professional, after putting effort into post-processing, you tend to think that you have done enough to make the image ready. You focus on certain areas too much, and your mind forgets to tell you that you need to look in other areas to see if the image is balanced and harmonious. So, take your time and allow the image to fully absorb without patience in the post-processing phase. A lovely image can be converted into a magical one by proper processing.

    Though these steps may sound pedantic, a good image needs loving care.

    I hope these tips are helpful. Your feedback and comments are welcome.

    googletag.cmd.push(function() {
    tablet_slots.push( googletag.defineSlot( “/1005424/_dPSv4_tab-all-article-bottom_(300×250)”, [300, 250], “pb-ad-78623” ).addService( googletag.pubads() ) ); } );

    googletag.cmd.push(function() {
    mobile_slots.push( googletag.defineSlot( “/1005424/_dPSv4_mob-all-article-bottom_(300×250)”, [300, 250], “pb-ad-78158” ).addService( googletag.pubads() ) ); } );

    The post Post-Processing Tips for Overcoming Beginners Acts of Omission by Mujahid Urrehman appeared first on Digital Photography School.


    Digital Photography School

  • DIY Light Modifier You Can Do With Savage Translum Material

    Translum Blue 600

    The thing studio product photographers hate the most is when undesirable reflections show up in their images. There are many ways to control these and I’ve got one that you can easily build at home. It’s a DIY project using the Savage Translum material.

    What you’ll be creating is a rollable sheet of Translum with a hole in the middle for your camera lens. That will enable you to set it between the object you’re photographing and the camera which will eliminate the big direct reflections you get by using a softbox pointed straight on the subject.

    Compare 600

    What is Savage Translum material?

    Savage is known for their paper backgrounds. They have a ton of them and are pretty much the industry standard as far as that goes. However, they do make other studio product such as the Translum material. It is a roll of thick white translucent styrene plastic, 54” wide (or 60”, depending on the model you get) by 18 foot long. When you put a light behind it, it gets highly diffused and loses two stops of light (that is, with the heavyweight version).

    There are many uses for it such as; creating a pure white background and making DIY light diffusers and reflectors. Currently, there are three options (lightweight, medium and heavyweight). The difference is the quantity of light you lose and, thus, the amount of diffusion. You lose two stops with the heavyweight (it’s the original Translum), 1.5 stops with the medium weight and ¾ of a stop using the lightweight one. I think of the heavyweight for use with flash whereas the lightweight Translum would be to diffuse window light, for example. One thing that makes that material so useful is that is very cuttable and encourages improvisation in the studio, leading to more creative light setups. You can pick some up at all the big camera stores (B&H, Adorama, Amazon).

    Build it!

    Before you can start building, you’ll need to gather the items you’ll need in the project. They are:

    • A roll of Savage Translum
    • A measuring tape
    • A pencil
    • A pair of scissors
    • A compass (to trace the circle)
    • A X-acto (utility) knife
    • A central vacuum system with 2” PVC pipe the width of your roll (54” or 60”)
    • A handsaw (to cut the PVC)
    • A roll of Tuck Tape
    • A roll of painter’s tape

    The very first thing you’ll need to do is determine the length of the sheet of Translum you’ll want. Mine measures 54” wide (the size of the roll) by 50” long. You can have it as long as you want, but I suggest not going less than 50” and also not too long because you may want to use the remaining Translum later and it would be a waste (to the floor is usually sufficient).

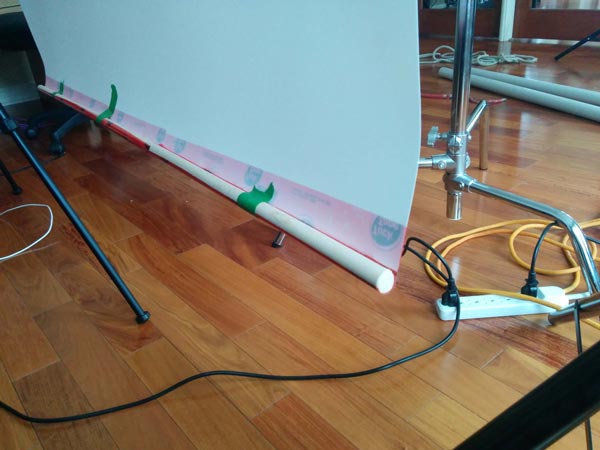
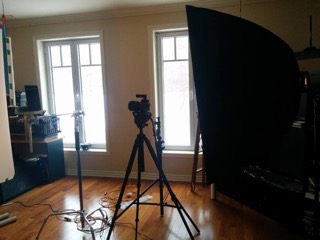
    Once that’s done, simply measure the desired length and cut it. A pair of regular kitchen scissors works wonder to do so.

    Next, decide where to place the hole for the lens to fit through. I would suggest putting it 6-12″ lower than the exact center, because you need a lot less material under your camera than you do up top. Once that’s done, mark that point and grab a compass (if you don’t have one, any round object that’s large enough will work just as well). To select the size of the hole, you want it to be as small as possible but still big enough so that the front of your lens can pass through.

    Take the diameter of your lens and add an inch just so you have some play. Then, make the appropriate circle with the compass and grab an X-acto knife and a cutting board. Again, it is surprisingly easy to work with Translum and cutting the circle should be a breeze. The easiest way to do so it is by placing it on the floor (put the cutting board underneath the Translum to protect your floor). Since the plastic is really sturdy and resistant, it’s no problem if you step on it. Try to cut the circle so that you end up with a it in one piece as it will be useful in the future.

    Next cut the central vacuum system PVC pipe. These are good because they are light, inexpensive, and available at your local hardware store. I strongly suggest that you take a 2” diameter one. Since they are sold 10 feet long, you’ll need to cut it to the right size for your Translum. A regular handsaw does the job.

    TuckTape 600

    Once that’s done, you can start assembling everything (see photo above). The best tape to stick the sheet to the PVC is a roll of Tuck Tape. Duct tape is not strong enough and gaffer’s tape is thick and expensive. The PVC will be at the top of the sheet so make sure it is on the end that is the farthest from the hole that’s near the middle. You want to put down a piece about two feet on the Translum. Half of the width of the tape should be on the PVC and the other on the sheet of diffusion. After, just finish taping that side down, flip everything 180° and apply pressure on the sheet of Translum so that the tape you just put on is folded nicely. Finally, you want to to place another row of Tuck Tape on the opposite side of the Translum, so that the construction is rock solid.

    The last step is to tape a piece of wood at the bottom in order to add rigidity, and to limit the tendency of the material to curl up. While any diameter will work, I recommend you that you use 5/8 of an inch. The best way to add the wood is to put tape running the full width of the roll with the sticky side facing up (again, half the tape should be on the plastic). Then, just put the wood at the end of the tape and slowly roll up toward the Translum. That way, most of the wrinkles will be eliminated.

    Wood 600

    To store the sheet when you’re done using it, just roll it around the PVC pipe and use a few pieces of painter’s tape to hold it in place.

    Results and other setups

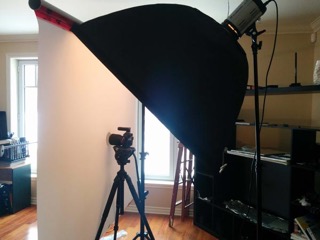
    The most basic, and effective, setup to use the DIY sheet of Savage Translum for catalog product shots on a white background is as follows: place a softbox (or stripbox) at about a 45° angle where the top almost touches the upper edge of the Translum sheet. The horizontal center of the softbox should align with the camera. You can place the Savage roll between the object and the camera lens with the lens through it very slightly. This will create very soft lighting without any big and ugly direct reflections.

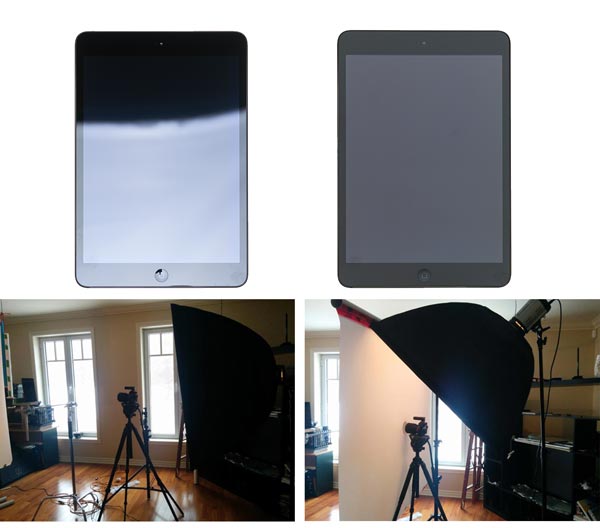
    To compare, I shot an iPad (for its shininess) in two ways: one setup without the Translum sheet and one with. The light was moved down in the first image so there is a part with a reflection and one without. In the image just under, you can see the tremendous differences between the two. All of the settings were identical.

    No Translum 600 IPad Reflection 600
    Translum 600 IPad 600

    As much as I like Savage Translum, it is not perfect and will never give you a final image right out of the camera (nothing will). The shot above still need quite a bit a retouching to be complete.

    Remember I recommended keeping the hole for the lens away from the middle? Well, for another setup, you can put the lens back into the sheet, hold it in place with a little piece of scotch tape and move the whole Translum sheet to any other position other than in front of the camera. That allows a huge amount of different setups to be created. Experiment with different light modifiers for your flash or even none at all. Try moving the material everywhere and see what it does to the shot. That’s where the fun is!

    This is just one of the many uses of the wonderful Savage Translum! What’s nice is that, when you’re ready for another DIY project, you’ll still have more than 13 feet of the stuff left.

    Have you used the Translum diffusion sheet before? Did you come up with another DIY light modifier? Tell us below, we all love the share our ideas.

    Read more about light modifiers here in this Beginner’s Guide to Light Modifiers

    googletag.cmd.push(function() {
    tablet_slots.push( googletag.defineSlot( “/1005424/_dPSv4_tab-all-article-bottom_(300×250)”, [300, 250], “pb-ad-78623” ).addService( googletag.pubads() ) ); } );

    googletag.cmd.push(function() {
    mobile_slots.push( googletag.defineSlot( “/1005424/_dPSv4_mob-all-article-bottom_(300×250)”, [300, 250], “pb-ad-78158” ).addService( googletag.pubads() ) ); } );

    The post DIY Light Modifier You Can Do With Savage Translum Material by Tristan Robitaille appeared first on Digital Photography School.


    Digital Photography School