Category: Photography

  • Finding the Best Quality of Light During the Day

    Light is the main ingredient in any photograph. Without light, you cannot make an image. Photography is all about drawing or painting with light. One book I read on the subject said that light IS the subject in photography, in many ways, this is true. Light is a difficult phenomenon to quantify. Most of the time, we don’t really think about light in our day to day lives.
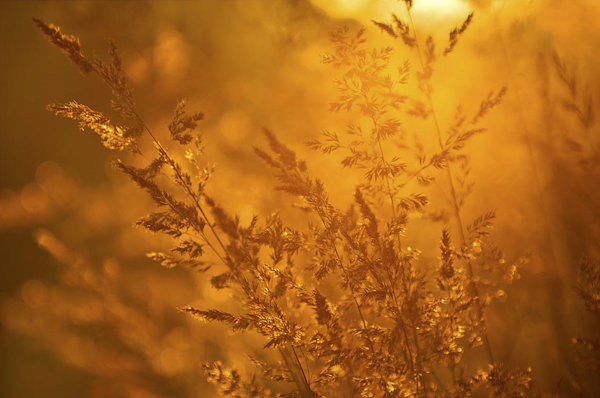
    Shoot for the light...

    Shoot for the light…

    As a photographer however, light is your currency. Without it, you cannot create an image. If you were in a lightproof room, with no light entering the room at all, it would be nearly impossible to make a photograph. However, if you were to light one candle in that lightproof room, suddenly you could make many images. Light is the key to every photograph ever made.

    As a result of light being so ethereal, the photography world has tried to make sense of it. Photographers speak about the attributes of light, namely: quality, direction, color and intensity. In this article, I want to look at the first of those definitions, known as quality of light.

    What is quality of light?

    Light quality is determined by the source of the light. Small light sources that are far from the subject, will create harsh lighting conditions, while a large light source will create soft lighting conditions. Another way to think of it is to look at the shadows what are created by your light source. If the shadows are clear and defined, then your light source is small relative to your subject, and the light is harsh and high contrast. If the shadows are blurry or nondescript, then the light source is large compared to your subject, and the light is soft and low contrast.

    A small light source could be something like the popup flash on your camera. This is a small, sharp source of light that will blast bright light into your scene. It creates hard shadows and will create a high contrast scene. A large light source could be the light on an overcast day. The sun’s light is scattered, or diffused, by the cloud cover so the light becomes larger, soft, and less defined.

    Warm sunset colours over the Vancouver runway

    Warm sunset colours over the Vancouver runway

    Time of day is key

    You will be shooting either in daylight or nighttime conditions and often in the soft light between day and night. Each situation comes with its own challenges. If you are serious about taking your photography to the next level, you need to be shooting more often during the golden hour of the day. The golden hour occurs from about half an hour before, until about an hour after sunrise in the morning, and then an hour before sunset, to about 20 to 30 minutes after the sun has gone down in the evening. If you are going to shoot in this soft light, you will need a tripod, the rewards will be well worth the effort. It is not always possible to shoot at these times of day, so below are some guidelines about shooting throughout the day. Another good time to photograph is during the blue Hour which is the hour after the sun has set (more on this later).

    1. Shooting in the middle of the day

    Many of us were taught to shoot under bright sunlight, in the middle of the day, with the sun behind us. Sure, that can work, but you won’t get dramatic results every time, in many cases, your images will look very average. This is because light is harsh at this time of day.

    Generally, when the sun is high in the sky, it is a small light source compared to the subject. This means that your subject will have very bright highlights and very dark shadows. This is high contrast scene. Also, the shadows will be very well defined and the light will be very directional. In other words, you will be able to see clearly where the sun is because the shadows will be very well outlined.

    If you are photographing a wedding at midday in the summer (this is often the case) and the bride is in the full sunlight, you will have have some harsh shadows under her eyes to deal with. That’s not to say that you should never photograph in the midday sun, you can, but you need to know how to deal with the contrast situation. That might mean you need to use a reflector to put some of the light back into the bride’s face, or use some fill flash to lighten the shadows under her eyes. Remember, the brighter and smaller the light source, the harsher the quality of light.
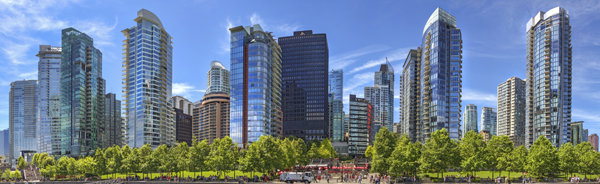
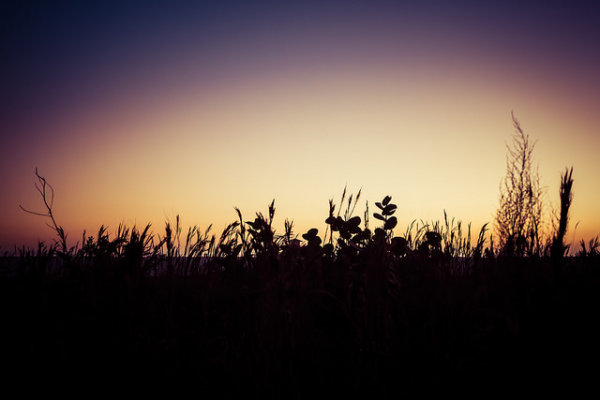
    Panoramic image taken at midday in full sun. The image works because the image is properly exposed for the bright sun.

    Panoramic image taken at midday in full sun. The image works because the image is properly exposed for the bright sun.

    2. Shooting during the golden hours

    Shooting in the early morning, before the sun has risen, or shooting at sunset as the sun goes down, gives you a great opportunity to capture images, in dramatic light. Many of the scenes that people love to see in photography, are very often low light or golden hour ones. The reasons why these times are so good to shoot at area:

    • The light is golden in colour and changes colour from yellow, to orange to magenta.
    • The light is soft, i.e. no major contrast such as hard shadows and very bright highlights.
    • Colors are more exaggerated, the color of the light is far more emphasized, much more oranges, reds and magentas are visible in the scene.

    It is for these reasons that photographers choose to shoot in the early morning or early evening, these times produce the most dramatic images.
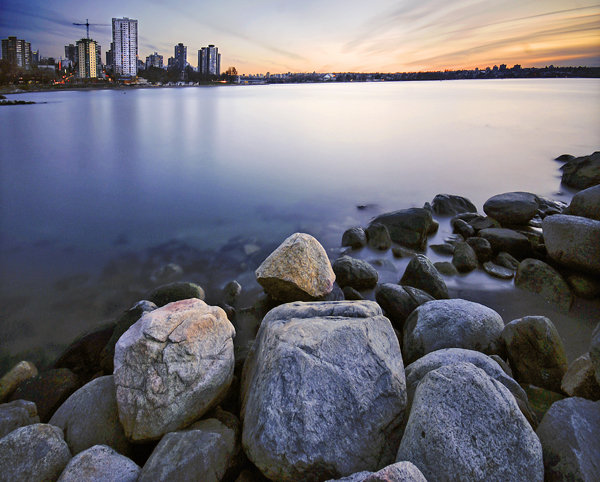
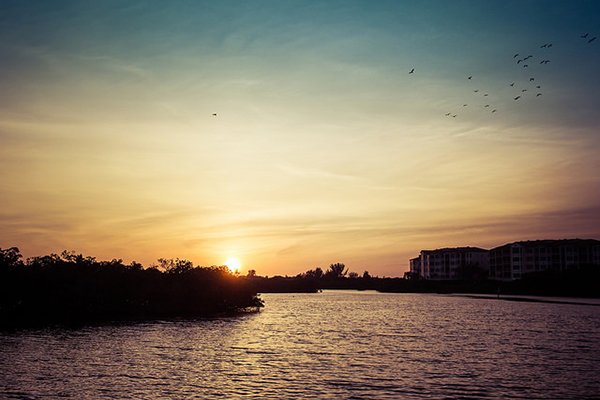
    Golden hour shot of the city with a warm glow in the sky.

    Golden hour shot of the city with a warm glow in the sky.

    3. Shooting during the blue hour

    Blue hour conditions don’t always occur, but when they do, the results are spectacular. For the best possible blue hour conditions, you will want a sunset with very little, to no clouds in the sky. Summertime is normally good for this, but any time of year can work. If there is 80% cloud cover, you will probably not see the blue light in the sky, so a clear sky is important to make this work. Blue Hour is the time after the sun has dropped below the horizon and the sky goes a radiant blue for a while. The blue lasts anywhere from 40 minutes to an hour, and that’s the time you want to be photographing.

    To make sure you get it right, be in position and set up 20 minutes before sunset. That way, when the light starts getting good, you are able to hit the shutter release and make some great images. Cityscapes work really well for blue hour images. The reason is that the sky will go blue, but the city will be reflecting the yellowy, orange light of the sunset. This means that you will have the sun setting behind you.

    The beauty of blue hour images is that that the blue and yellow colours work well together, they are complementary colours on the visual colour wheel, so the scene is visually appealing. If you are not sure about when blue hour will be, you can visit this site and simply enter your city name and it will tell you what time it will be occurring in your city, on a given evening and morning. There is even an iPhone app you can download to work this out in the field, pretty amazing!

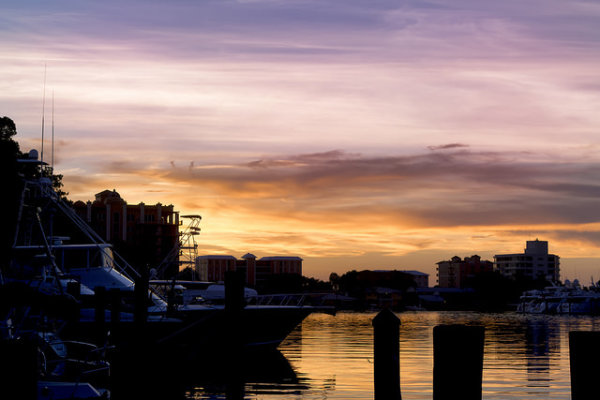
    Blue Hour panoramic, the blues and the yellows work well in this image

    Blue hour panoramic, the blues and the yellows work well in this image

    What do I need to use to get the best images

    A tripod is always a good idea. You will be able to make sure that your camera is perfectly still as you make longer and longer exposures. As the light starts fading, your exposures may be a few seconds long, this is impossible to handhold without getting blurred images. Use the best quality lenses you have and a cable release or remote shutter release to avoid any camera shake. You will want to set your camera up in manual mode and have your aperture settings at f/8 or f/11. Set your shutter time accordingly, make sure your ISO setting is at 100 and you are ready to go. When the light show starts happening, click away and enjoy the results!

    googletag.cmd.push(function() {
    tablet_slots.push( googletag.defineSlot( “/1005424/_dPSv4_tab-all-article-bottom_(300×250)”, [300, 250], “pb-ad-78623” ).addService( googletag.pubads() ) ); } );

    googletag.cmd.push(function() {
    mobile_slots.push( googletag.defineSlot( “/1005424/_dPSv4_mob-all-article-bottom_(300×250)”, [300, 250], “pb-ad-78158” ).addService( googletag.pubads() ) ); } );

    The post Finding the Best Quality of Light During the Day by Barry J Brady appeared first on Digital Photography School.
    Digital Photography School

  • How to Create a Simple Slideshow in Lightroom

    Slideshow module Lightroom

    If you’re over a “certain” age, you remember creating slideshows for friends or family members to see. The viewing process required a projector and a screen, plus a darkened room to enable people to see the projected slides properly.

    Thankfully, things have moved on since then and it’s now much easier to show your photos to an audience. The advent of laptop computers, social media, blogs and photo sharing websites has rendered the old style of slideshow redundant.

    However, there’s still a place for the new style of slideshow – one viewed on a computer monitor, rather than a white screen. Lightroom users can create slideshows from within the program itself, using the Slideshow module, greatly simplifying the process.

    In this article I’ll show you how to create a simple slideshow, and point out some of the more advanced customization features you may wish to explore.

    First steps in the Slideshow module

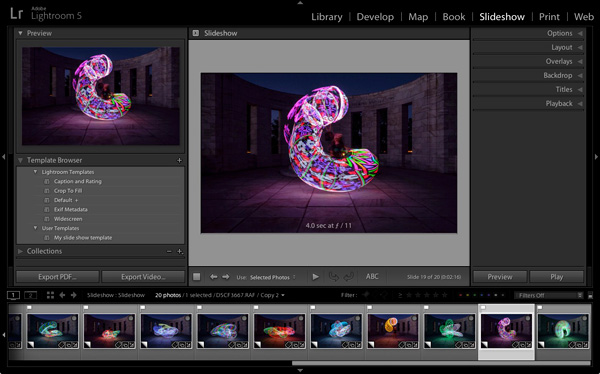
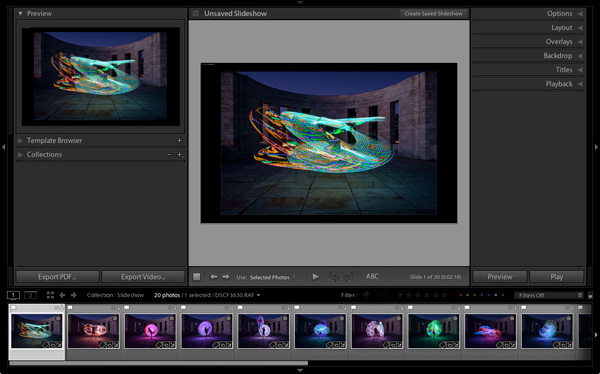
    It helps greatly if you create a new Collection for the photos you want to use in your slide show. Once you have done so, switch to the Slideshow module. You will see, depending on whether you have used it before, something like this.

    Slideshow module Lightroom

    Click the Create Saved Slideshow button at the top of the Content window. When you do so, Lightroom creates a new Slideshow Collection which is placed (by default) inside the original Collection. From this point on, any changes you make to your slideshow are automatically saved, and you can’t lose them.

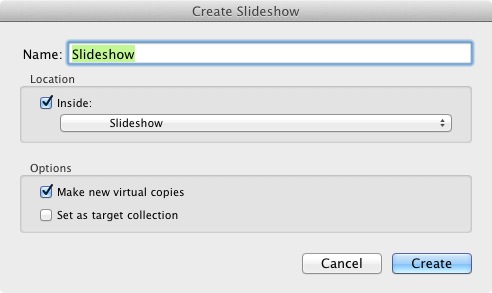
    Give your slideshow a name in the Create Slideshow window, and decide where to save it using the drop-down menu under Location. If you tick the Make new virtual copies box you will be able to edit Virtual Copies in the Slideshow Collection without affecting the originals.

    Slideshow module Lightroom

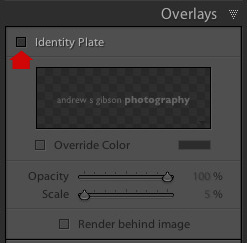
    Identity Plates

    If you have created a custom Identity Plate then you may see it displayed in the top-left corner of your slide show, as several of Lightroom’s slideshow templates incorporate Identity Plates in their layout.

    You can move the Identity Plate by clicking and dragging, or enlarge it by clicking on, and dragging the white squares around the edge. Now is probably a good time to point out that there are two types of personalized Identity Plates in Lightroom – Graphical and Styled Text Identity Plates.

    While Graphical Identity Plates have their uses (mainly as a picturesque alternative to Lightroom’s default Identity Plate) you can’t enlarge them beyond their native size of 400 x 57 pixels without pixelating the graphics, making them nearly useless for incorporating into slideshows. Styled Text Identity Plates are much better as Lightroom simply scales them to the required size without any pixelation.

    If you don’t want to include an Identity Plate in your slide show at all, go to the Overlays panel and untick the Identity Plate box. This is the simplest option, but if you wish you can create your own Styled Text Identity Plate by going to Lightroom > Identity Plate Setup (Mac) / Edit > Identity Plate (PC).

    Slideshow module Lightroom

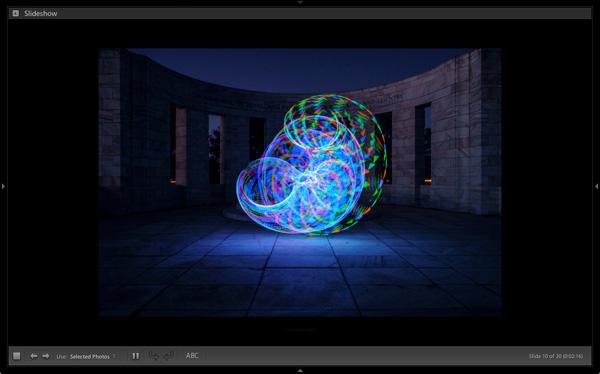
    Previewing your slideshow

    Opening the Slideshow module automatically creates a slideshow (yes, it’s as simple as that) and if you’re happy with the default settings you’re already done. To see what it looks like, click the Preview Slideshow button (the play icon) in the Toolbar. For maximum effect retract the top, bottom and side panels first (keyboard shortcut: Shift+Tab).

    Slideshow module Lightroom

    Customizing your slideshow

    Now that you have seen the default slideshow in action, it’s time to take a look at how you can customize it.

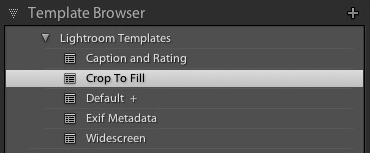
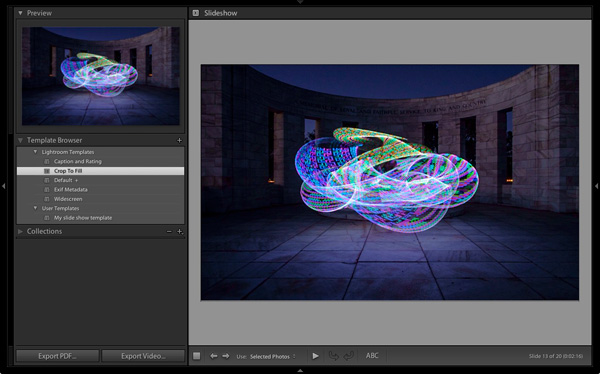
    The place to start is the Template Browser, located in the left-hand panels. There are five Lightroom Templates to choose from. They are fully customizable. The easiest way to design your slideshow is to choose the template that gets you closest to where you want to be, and then make the required adjustments from there.

    Slideshow module Lightroom

    For my slide show I chose the Crop to Fill template, which expands (and crops) the photos in the slide show to fill the entire screen.

    Slideshow module Lightroom

    Most of the templates have Text Cells. If you don’t want a Text Cell to appear in your slide show, simply click on it and press the Delete (Mac) / Backspace (PC) key on the keyboard to remove it.

    Alternatively, you can edit the content of the text box by clicking on the Text Cell, then going to the Custom Text menu in the Toolbar and select Edit. This opens the Text Template Editor, where you can select what will be displayed in the Text Cell.

    Slideshow module Lightroom

    If you want to add a new Text Cell (for example, if you are using the Crop to Fill template, which has none) you can do so by clicking the ABC button in the Toolbar. Select Edit (or one of the presets) from the Custom Text menu. If you select Edit the Text Template Editor opens and you can choose what will appear in the Text Cell.

    You can drag the Text Cell around the slideshow to position it, and adjust the size of the font by making the text box larger or smaller by dragging the corner or edge handles. Go to Text Overlays in the Overlays panel to set the font type, colour and opacity of the font in the active Text Cell.

    Slideshow module Lightroom

    Exporting slideshows

    The easiest way to show someone a slideshow is to open Lightroom, go to the Slideshow Collection you wish to view and hit the Play button.

    There are also times when you may need to export the slideshow in a format that is viewable by other people, such as a movie file. To do so, click the Export Video button underneath the left-hand panels. Exported videos are saved in the .MP4 format, which is compatible with many video players including Adobe Media Player, Apple Quicktime and Windows Media Player 12. The video includes music if it has has been added to the slideshow.

    Slideshow module Lightroom

    Conclusion

    Hopefully this article has given you a good idea of what you can achieve in Lightroom’s Slideshow module. If you like what you’ve seen so far, take some time to explore the right hand panels, where you will discover more ways to customize the appearance of your slideshow.

    What uses have you found for Lightroom’s Slideshow module? Is it powerful enough for your needs or do you prefer alternative software? Please let us know in the comments.


    The Mastering Lightroom Collection

    Mastering Lightroom ebooksMy Mastering Lightroom ebooks will help you get the most out of Lightroom 4 and Lightroom 5. They cover every aspect of the software from the Library module through to creating beautiful images in the Develop module and making photo books and slide shows. Click the link to learn more or buy.

    googletag.cmd.push(function() {
    tablet_slots.push( googletag.defineSlot( “/1005424/_dPSv4_tab-all-article-bottom_(300×250)”, [300, 250], “pb-ad-78623” ).addService( googletag.pubads() ) ); } );

    googletag.cmd.push(function() {
    mobile_slots.push( googletag.defineSlot( “/1005424/_dPSv4_mob-all-article-bottom_(300×250)”, [300, 250], “pb-ad-78158” ).addService( googletag.pubads() ) ); } );

    The post How to Create a Simple Slideshow in Lightroom by Andrew S. Gibson appeared first on Digital Photography School.

    Digital Photography School

  • On Assignment: I Got Rhythm

    I have been photographing dancers for several years now as part of my affiliation with the local arts council. The results were catch-as-catch-can, mostly because of the limitations of flash recycle time, timing, and my not really knowing what to expect from them nor when to expect it.

    But a little trick I tried last week changed everything.

    Read more »
    Strobist

  • Tips for Creating Landscape Photos during the Golden Hour

    The golden hour. Even if you haven’t been involved in photography for very long, you undoubtedly have heard the term thrown around. As photographers we are in the business of capturing light, and there is no better light to have cast on our subjects, than sun light that is low on the horizon.

    The golden hour is defined as periods of time; specifically, the hour after sunrise, and the hour before sunset. The length and time of these occurrences depends on your location on our planet, and time of the year.

    siesta_silhouette

    Regardless of the type of photography you do, natural light generally falls into two categories; harsh (hard) and soft. Harsh light is what you see when the sun is high in the sky, during the middle of the day (cloudless day).

    Because the light is at its most intense during that time, and shining directly down from above, shadows are sharp and well defined. They can also appear in places you don’t want them, such as on a human subject’s face. You can sometimes counter this by using fill flash and reflectors. When you’re shooting landscapes, you see the more unwelcome effects on the sky, with less warmth and higher contrast.

    Your subjects are well lit, but generally only from one direction. Images shot during at midday can be rather dull and uninspiring, and it becomes more difficult to capture something spectacular.

    goldenhour_article_new4

    After the sun lowers in the horizon and sunset approaches however, everything changes. Simply put, taking photos during the golden hour give the images atmosphere. These times give the best light for all kinds of photography, but what advantages do you gain by shooting your landscapes during the golden hour?

    Reduced Contrast

    Light from the golden hour effectively reduces the contrast in your images. A black and white street shot could benefit from harsher light in the middle of the day, because the higher contrast and sharp shadows better define the subject and the environment. For landscape photos however, the world comes alive when the sun is low, and the light is soft and diffused. Shadows become longer and less defined, and the tonal range changes significantly. Clouds are illuminated differently, and their visual transitions against the sky soften.

    Colors

    The position of the sun during the day creattes varying temperatures of light, as you can see by the different colors as it crosses the sky. When we discuss temperature in photography, we’re discussing tthat of color, instead of heat. Neutral temperatures are what you see during the middle of the day. The main point to take away from this is that neutral temperatures are fairly uninteresting in regards to their aesthetic effect on your photography.

    sunsetcolors

    Color ranges become more vibrant and pronounced when the sun is closer to the horizon.

    During the golden hour periods, colors tend to bend to the extremes, and give you much more pronounced effects on your images. During the morning golden hour, just after sunrise, the color temperatures are cooler, and give a moody, bluish hue to the shot. In the evening before sunset occurs, the spectrum shifts to warmer colors, providing you with warm oranges and reds.

    A photo captured during the golden hour has a wonderful warmth and feel that’s impossible to capture at midday.

    Softer Light Through Diffusion

    Diffusion can be visualized with the words, scattering and softening. Light that is diffused is soft with less defined edges, and scattered across a greater area than non-diffused light. A good example of that is a diffuser attachment for your DSLR flash unit. The translucency of the diffuser attachment emulates the soft light you get from the sun being in a low position in the sky, and takes away hard shadows.

    diffusion

    Diffused light is more evenly and softly applied throughout a scene, and a low-hanging sun or sunlight projecting through clouds becomes a great natural diffuser.

    Your landscape photos benefit from this by less pronounced shadows from objects in your shot, and in general the light that falls on your subjects within the landscape scatters in a more even, favorable manner. What does this all give you? Again, the one thing you’re ultimately striving for in landscape shots; atmosphere.

    Sun Flare Effects

    Another advantage of shooting during the golden hours is the opportunity to introduce sun flare effects and backlighting into your images. Because of the sun’s position in the sky (low and near the horizon), you have the ability to better introduce it as a subject, or as a compliment to the subject in your shot.

    flare

    Sun flares are easier to capture during the golden hours, and produces a much more dramatic effect on the final image.

    Flaring occurs when the sun is either at or near the edge of the frame of your photo, and while in some situations it is unwanted (photographers typically use lens hood attachments to minimize these effects), flares can add mood and drama to a landscape shot.

    So now that you’re aware of the wonderful effects of photographing during the golden hour, how do you go about shooting our landscape images during these times?

    Settings

    Your camera settings for shooting during the early mornings or late evenings are going to depend on your exact subject, but in general, since less light is getting to your sensor, a larger aperture is usually required.

    You may also need to bump up your ISO setting to compensate for the lower amount of light. This will increase noise, but usually not to a noticeable point, and even then, there are steps in post-processing that can easily remove it.

    Again, this all depends on what type of shot you are doing. If you’re looking at a long exposure capture, you would set your camera for a smaller aperture and lower ISO.

    goldenhour_article_new3

    Use a Tripod

    As a landscape photographer you are always encouraged to use a tripod. Since generally you will be shooting in one static location for each set of shots, the tripod will allow you a wider range of apertures to work with. You always want your landscapes crisp!

    Prepare

    By definition, you have two hours each day to shoot for the best light, so your preparation for those times are even more critical than usual (you’re always prepared for any shoot, right?). If you’re planning on just taking your gear and spending time to set everything up on location, you run the risk of missing the shots you’re looking to get in the first place.

    Either prepare before you leave, or allow extra time well before the golden hour to get everything settled. Scout the location ahead of time. Have your settings ready for the appropriate shots, and pack anything extra that you might need, including food, drinks or something warm to cover up with.

    Keep Shooting!

    While the scope of this article has been the golden hour, don’t forget that the magic doesn’t stop after the sun dips below the horizon. After this point, the blue hour begins, when colors and tones change even more rapidly and dramatically. Keep adjusting your settings, and shoot until there’s no light left to capture. You’ll be surprised at what you have when you finally get those images unloaded on your computer.

    White Balance

    While white balance is a setting on your camera, because of its overall effect on the atmosphere of your images, it warrants a little extra attention when shooting landscapes during golden hour. My recommendation is to take your camera off of AWB (automatic white balance) because the camera will attempt to neutralize the warmth of the image on this setting. Most DSLR’s have a cloudy or shade setting that will retain that color tone.

    If you’re shooting RAW images, this is a step that can be adjusted in post-production.

    goldenhour_article_new2Helpful Apps

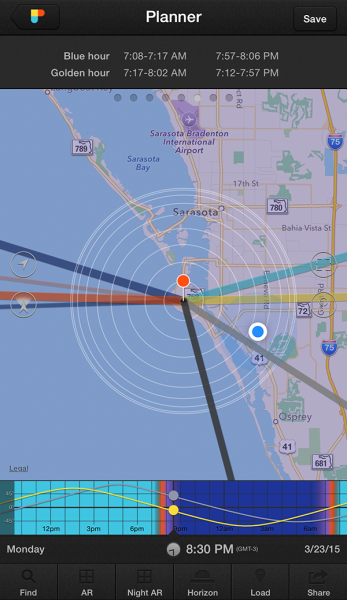
    Thankfully, there are several Smartphone apps that can also help your planning process. A search on the Apple app store and Google Play shop will provide no shortage of this kind of apps, although there a few that I’ve used that seem a bit more robust, and worth the price you’ll pay. These apps provide calculators that will let you see when the golden and blue hours occur in any location in the world, and also include calculations for exposure, depth of field, time lapse, and more.

    • PhotoPills – iPhone/iPad, $ 9.99
    • Golden Hour – iPhone/iPad, £1.49
    • The Photographer’s Ephemeris – iPhone/iPad, $ 8.99, Android, $ 4.99

    Enjoy the Light!

    Shooting at optimal times of the day is one of the easiest things you can do to improve your photography. Nothing else adds character, atmosphere, and dimension to your work so dramatically.

    What other golden hour tips do you have to share? How do you apply these guidelines to your own photography? Be sure to join in the conversation below, and keep churning out those golden shots!

    googletag.cmd.push(function() {
    tablet_slots.push( googletag.defineSlot( “/1005424/_dPSv4_tab-all-article-bottom_(300×250)”, [300, 250], “pb-ad-78623” ).addService( googletag.pubads() ) ); } );

    googletag.cmd.push(function() {
    mobile_slots.push( googletag.defineSlot( “/1005424/_dPSv4_mob-all-article-bottom_(300×250)”, [300, 250], “pb-ad-78158” ).addService( googletag.pubads() ) ); } );

    The post Tips for Creating Landscape Photos during the Golden Hour by Tim Gilbreath appeared first on Digital Photography School.

    Digital Photography School

  • The Ultimate Guide on How To Photograph Special Events

    Weddings, birthday parties, anniversary dinners, christenings, product launches, retirement parties – these are special occasions and people always want professionally taken photographs to remember them by. This means that if you can perfect your technique and build a good portfolio of event images, you will always be in demand! The Do’s and Don’ts of Special Event Photography The important thing Continue Reading

    The post The Ultimate Guide on How To Photograph Special Events appeared first on Photodoto.


    Photodoto

  • 4 Tips for Creating Portraits with Impact

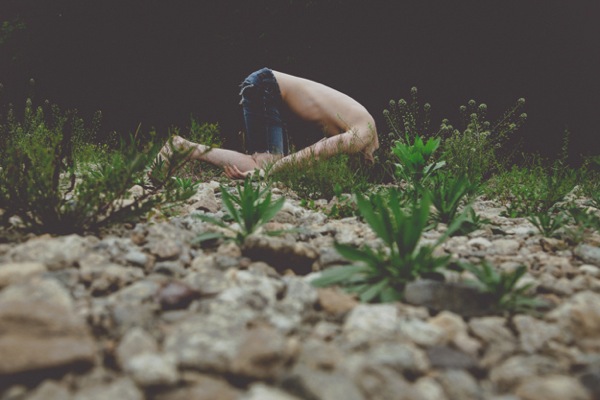
    Faceplant

    Since the birth of the camera, an overwhelming number of photographers have concentrated on portraiture. Capturing the personality, mood, or expression of a fellow human is sublimely beautiful. Because of this, many of us have thousands of portraits saved on hard drives, and eagerly await the next portrait contest. Honestly, how many of these portraits actually have visual impact? How many of our portraits are powerful enough to hold a viewer’s attention longer than a couple of seconds?

    We can continue to produce countless portraits that are stale and void of visual power, or we can step back, evaluate our work, and begin to strategically create portraits that do have impact. Whether you are shooting on location or in a studio, begin adding some punch to your portraiture to captivate your audience. Here are a few ways to start creating portraits with impact immediately.

    #1 INCLUDE ENVIRONMENT

    When we pick up our cameras to snap a portrait, we almost instinctively move close to our subject. Yet, constantly shooting tight portraits can put us in a close-up rut. Simply moving your camera body closer to someone’s face, or using the telephoto aspect of your lens, doesn’t always lend itself to powerful photographs (the selfie is a perfect example of how easy it is to botch a close-up portrait).

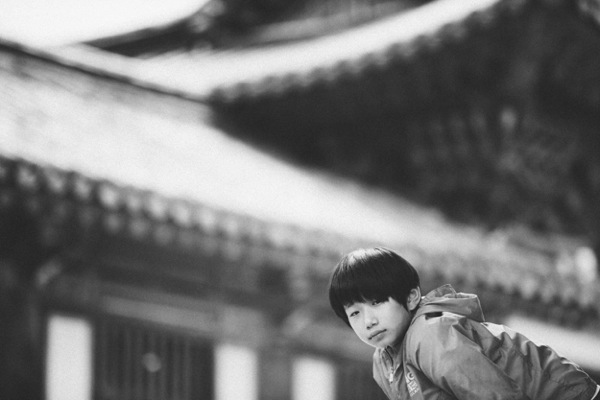
    Jun Temple

    By physically taking several steps back, or by retracting your zoom, you allow context to enter the frame. Suddenly, what was just a photograph of a person’s face, can become an image rich with balance and environmental information. Additionally, a portrait with contextual information can easily appeal to a much wider audience by relating a story.

    Steve wide

    Shooting tip: When shooting wide portraits, make smart lens choices. Many wide-angle lenses (such as Canon’s 17-40mm L-Series) come with a great deal of distortion and will exaggerate a subject’s features. So that your subjects are not distorted, use a standard portrait lens (i.e. 85mm) and move your body in relation to your subject.

    #2 USE NEGATIVE SPACE

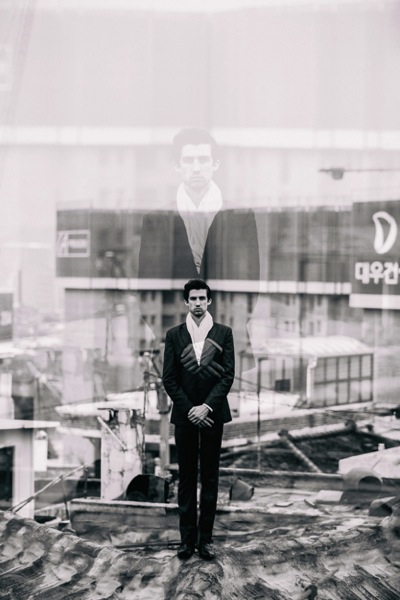
    Negative Monks

    Stepping back and including environmental information can add impact to many portraits. However, the surrounding environment can also distract from your intended subject. At times, photographs are more powerful if the environment is minimal or void.

    To draw the viewer’s eye directly to your subject, strategically add abundant negative space (area around or between a subject) in your frame. The use of negative space can be a key element in artistic composition in that it emphasizes and defines the main subject of a photograph (positive space) and adds impact.

    #3 FORGET THE FACE

    When we think of portraits, the first thing that usually comes to mind is a frame filled with a face. We can agree that there are many positives to this approach to portraiture. In a headshot we can see facial features, skin tones (unless we wipe them away in Photoshop or Elements) and the catchlights that draw us into the windows of the soul.

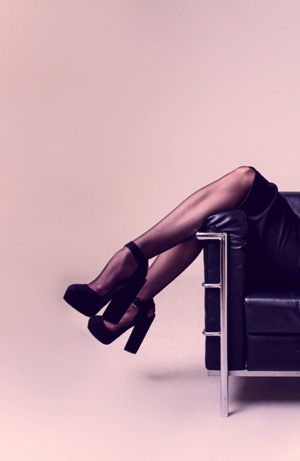
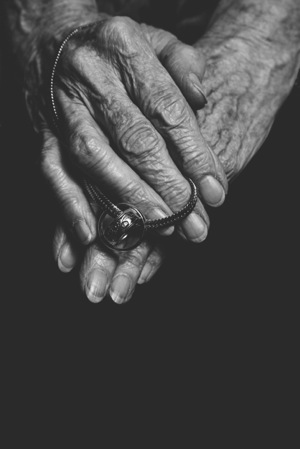
    Alessa s Leg Grandmother s Hands

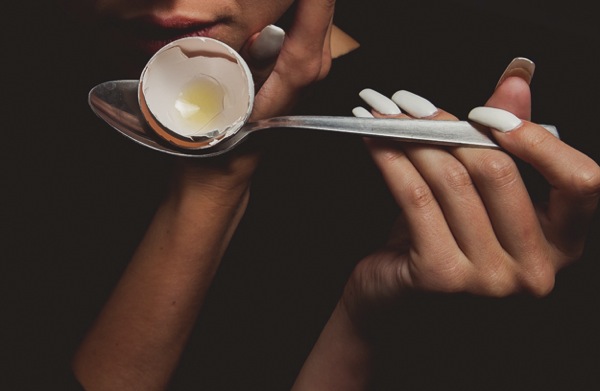
    Luckily though, all of our photographs do not have to follow a headshot-only, antiquated view of portraiture. It is important to remind ourselves that a portrait is simply a representation of a person. Photographers are given the artistic license to determine how their subjects are portrayed. Instead of snapping a run-of-the-mill headshot, try shooting hands, feet, necks or even the cast shadow of a person. At times, moving away from a person’s face can lead to a frame that carries a tremendous amount of visual impact.

    #4 CROP YOUR FRAMES

    IMG 5902

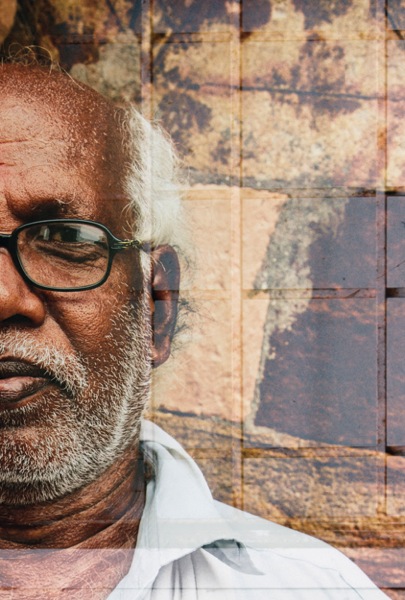
    Another way to add impact to your portraits is to experiment with cropping. This is one of the simplest ways to add impact to a portrait and to showcase your aesthetic as a photographer. If you are finding it difficult to see fresh or unique frames while you are actually shooting, experiment with the crop tools in post-production.

    Focusing on smaller portions of your subject can have much more impact than if you neglect to adjust the original frame. Moreover, a cropped picture can completely alter the photograph’s intention or interpretation. The more you experiment with cropping, the more apt you will be in spotting unique and powerful frames in the field.

    Singh

    Shooting tip: If you are photographing with particular frame in mind, it is better to take photographs that are a bit wider than your intended crop. You can always crop tighter, but you cannot widen the original frame.

    Whether you are an amateur or a seasoned professional, rethinking the way you shoot portraits will inevitable invigorate your craft. The next time your camera is pointed toward another human, try something new. Experiment with a variety of strategies that will add impact to your portraits.

    googletag.cmd.push(function() {
    tablet_slots.push( googletag.defineSlot( “/1005424/_dPSv4_tab-all-article-bottom_(300×250)”, [300, 250], “pb-ad-78623” ).addService( googletag.pubads() ) ); } );

    googletag.cmd.push(function() {
    mobile_slots.push( googletag.defineSlot( “/1005424/_dPSv4_mob-all-article-bottom_(300×250)”, [300, 250], “pb-ad-78158” ).addService( googletag.pubads() ) ); } );

    The post 4 Tips for Creating Portraits with Impact by Andrew Faulk appeared first on Digital Photography School.

    Digital Photography School

  • A Beginners Guide to Light Modifiers

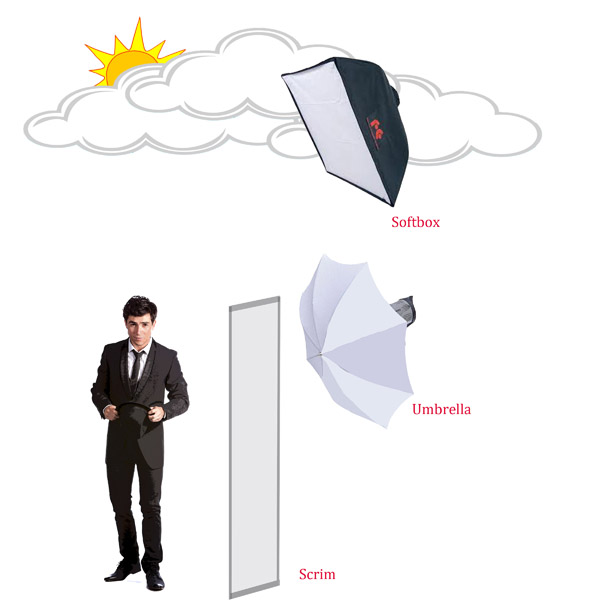
    Regardless of the light source you use (daylight, continuous or flash) it’s really easy to use light modifiers or shapers to train the light in any direction you want.

    light-modifers

    ***A quick note about costs

    Every kind of light modifier will have a top of the line version and a really cheap version. The main difference between the options is that the cheaper ones won’t be as durable. This becomes important when you’re using them every single day.

    When you’re learning how to use them however, I recommend choosing cheap versions. You’ll figure out how they work and save yourself a lot of money.

    I rarely work without some sort of diffusion because using naked flash spreads the light around too much. The result is hard shadows that I personally think look really unflattering.

    Nobody is ever going to tell you, “Wow I love the way your hard lighting has captured and enhanced every single pore, line and blemish on my skin. I actually look ten years older. Thanks!”

    There are, of course, many really cool uses for hard lighting and some photographers can make it look brilliant. I’m just not one of them. I like to control the light and only illuminate certain areas of my shot.

    There are a couple of factors I consider before deciding what kind of light modifier to use:

    1. What kind of lighting am I trying to replicate?

    Fill Flash Light Styles HARD

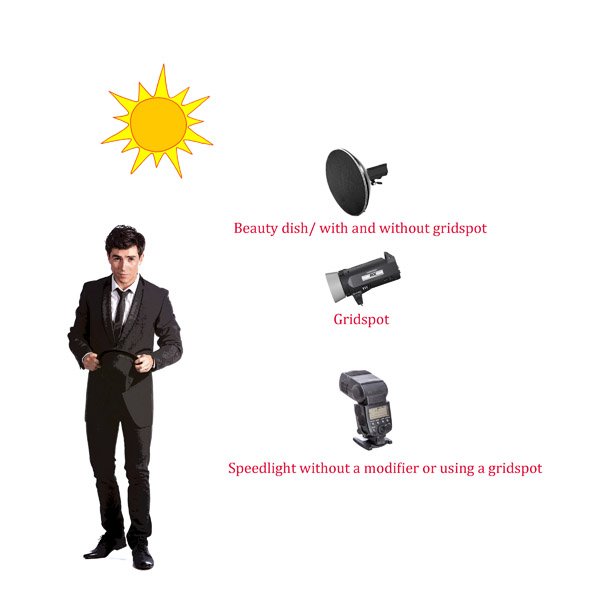
    As a general rule of thumb if you are in hard light conditions like full sun, then opt for a light modifier that creates hard light like a gridspot, beauty dish, fresnel lens or naked flash.

    Fill Flash Light Styles Soft

    If the light is soft like early morning, twilight, open shade, or overcast then chose a light modifier that produces soft light such as: a scrim, umbrella or softbox.

    2. What kind of mood I’m in

    What are the best light modifiers to recreate soft light?

    The Umbrella

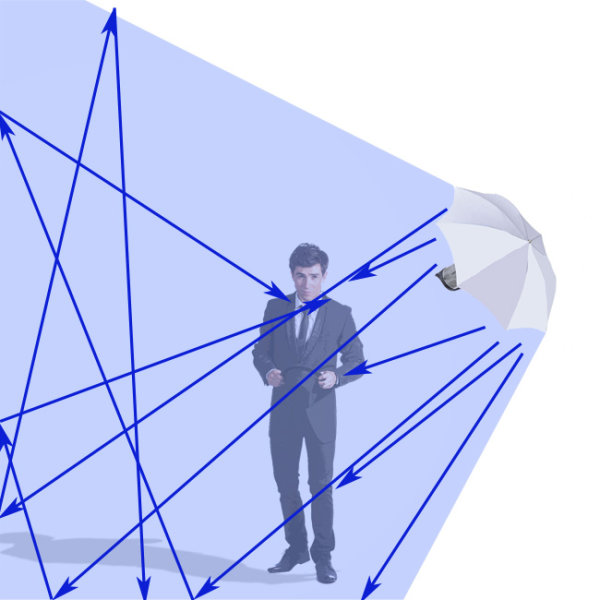
    An umbrella creates a quality of light that is soft and abundant, and very forgiving. They are great to use if you want to light a large area with flat even lighting. Because umbrellas are quite easy to use, and relatively cheap, they are great as your first light modifier.

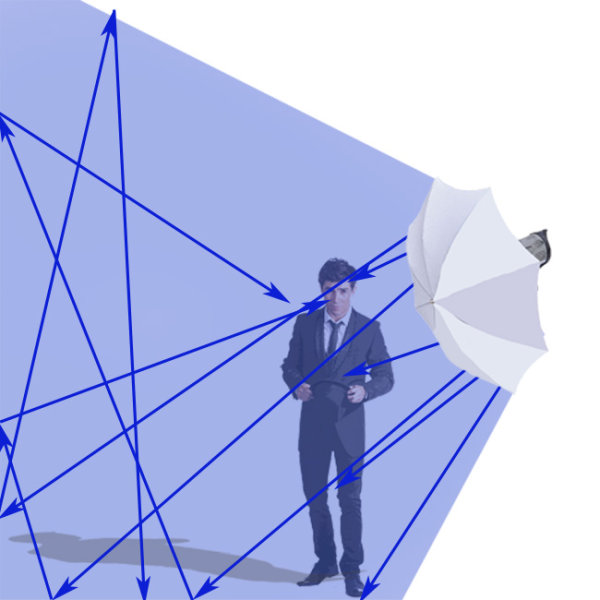
    On the downside, umbrellas will over-light your shot spreading lots of light around. Lots of light. Everywhere. Like a hose with its spray nozzle set to “everywhere”.

    UMBRELLA_bounce

    Bounce umbrella throws light everywhere

    Just like I consider eating Nutella straight out of the jar a sometimes food, you should consider using umbrellas as an only use in case of emergency style of lighting. If I overuse either, things tend to get a bit ugly.

    Types of umbrella light shapers

    • Silver/gold reflective umbrella: These babies throw light everywhere. They are great for lighting large groups of people. The silver umbrella will give you a slightly cooler light, while the gold umbrella creates warmer light. Both produce a slightly harder light than the white reflective umbrella.
    • White reflective umbrella: This umbrella creates a soft light with slightly less spread and contrast than the silver or gold reflective umbrellas. Because the style of light created allows people to move around a lot and in a constantly even source of lighting, they are great to use when you are shooting groups and couples under pressure, like for an event.
    • White Shoot through umbrella: These are perfect as your first light modifier as they diffuse and spread light quite evenly.
    Shoot Through_UMBRELLA

    White shoot through umbrella

    When my children were young, I taught them how to ride bikes using training wheels. The wheels boosted their confidence more than anything else. After a while, I took the wheels off and they rode on two wheels as if they’d been doing it all their lives.

    Training wheels

    I think using flash with umbrellas is the same. Use them as a learning tool until you get your balance, then move on to a better bike.

    A final note on umbrellas

    They are perfect for indoor lighting but become tricky, actually downright dangerous, to use outside. I’ve had countless (expensive) lights blown over using umbrellas! If you must use them then please make sure you have somebody holding them, or sand bags to keep them in place.

    Scrim, baby

    Scrim

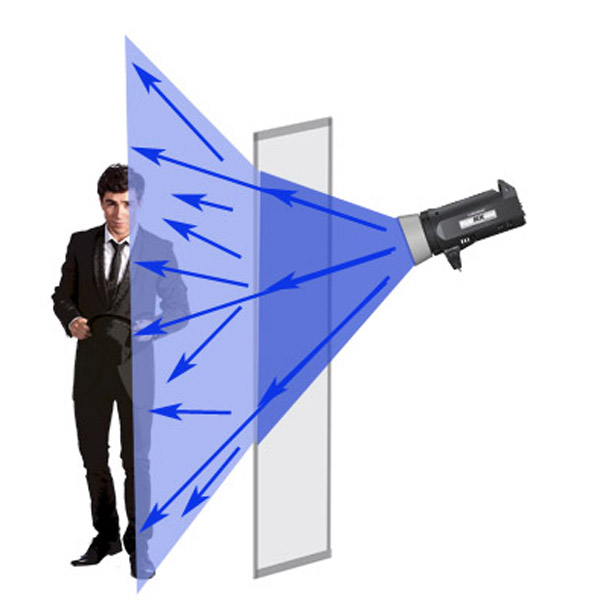
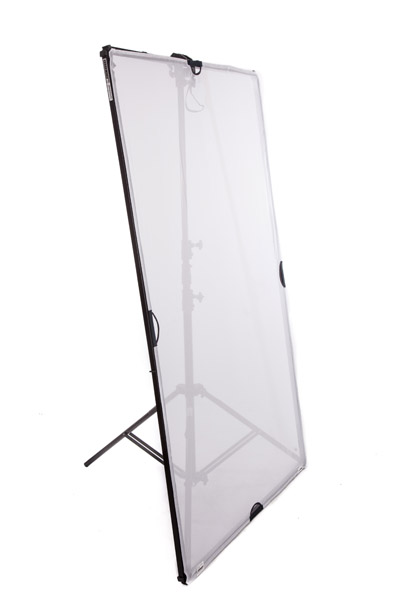
    After you’ve ditched your umbrella training wheels, the next step is to work with a scrim panel which is a square or rectangular frame with a fabric diffusion material covering it. Of all the light modifiers, a scrim is probably the most versatile and a must have in your kit.

    Shapers scrimThis is a really cool way to create large areas of soft diffused light, as if you were shooting next to a large window, or have light clouds over the sun.

    Remember: The larger the light source, the softer the light.

    This is a piece of equipment that you can easily make yourself. I used a DYI one for my first 10 years as a photographer and they are great for diffusing flash, continuous light, and sunshine.

    Using a softbox

    softbox

    Small softbox 580EX+Lumiquest+stand 1

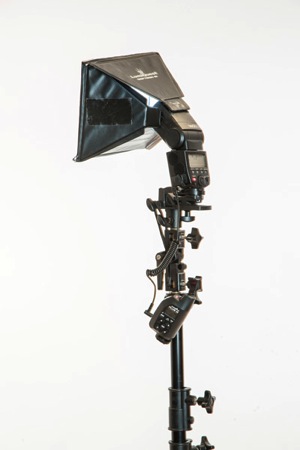
    This image of race-car driver, Glauco Junior Solleri, was taken using a speedlight and small Lumiquest Pro softbox. This is a low-cost and versatile modifier that creates a beautiful soft light source that you can easily control. In this instance I only wanted to light Glauco’s face and let the background go to black, If I had used an umbrella (and spray light everywhere) the entire background would also be lit, killing my moody vibe.

    If I could only pick one light modifier to take to a deserted island, it would have to be the softbox. Small, medium, or large – this little puppy is my go to light source for 80% of my shoots.

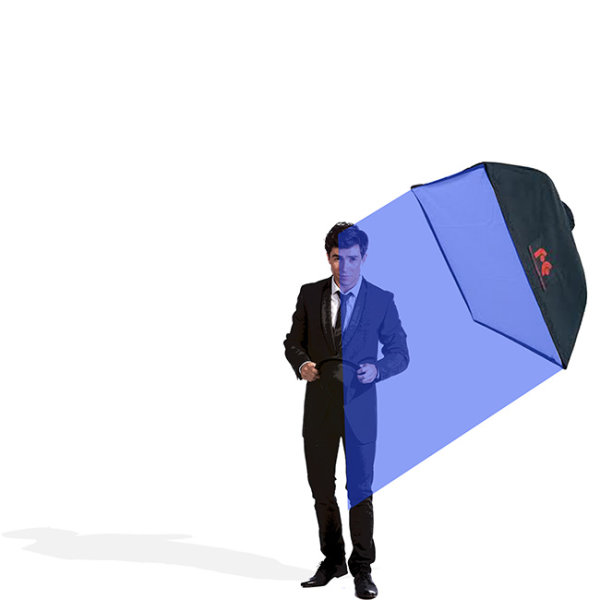
    Why? The quality of light is soft, flattering and malleable. Changing the angle and proximity of the softbox to the sitter easily changes the hardness of light, and direction of shadow.

    It’s one of the light modifiers that, I feel, recreates the effect of soft daylight through a window. I think what I like most about this light modifier is that it’s subtle. Highlights gently merge to shadows. I think I love this light modifier more than Nutella – there I said it.

    Different softboxes

    I use a few different kinds of softboxes depending on where and what I’m shooting.

    If it’s a studio shoot I love using my Chimira Medium softbox with white reflective interior. The white interior creates a softer light and this particular softbox has an extra layer of diffusion on the inside, adding even more softness to the light.

    Some photographers remove this interior panel because they like having more contrast of the harder light (because it’s not as diffused as much), but I prefer less contrast. You can also increase the spread and contrast of your light by using silver or gold interior panels.

    Shooting using beauty lights

    The beauty dish I have is quite a cheap brand, which goes to show you don’t need to shell out a lot of money for every piece of equipment. I like mine because it works with my speedlight, my Elinchrom monolight, and battery flashes.

    Beauty-2

    I like that kind of versatility in equipment because it means I have more options on the day of the shoot, and less to carry around!

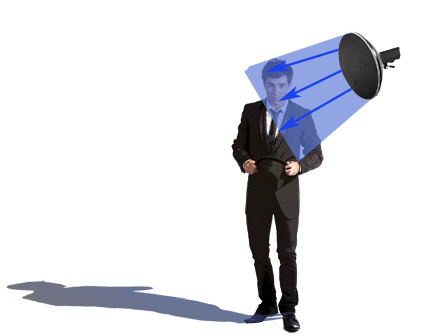
    The beauty dish differs from other light modifiers because it gives you a distinct circular, soft-contrast light, which is perfect for lighting faces and defining bone structure such as cheek bones and chin lines. They also create a circular catch light in your model’s eyes, which makes the reflection seem quite natural.

    You can see why these modifiers are popular with fashion/beauty and celebrity photographers.

    The downside of using beauty dishes is that the fall-off, from light to dark, is very rapid so you’ll often get shadows under your model’s chin and nose. You can compensate for the shadows by adding a fill board, like a white reflector, to reflect light up, onto your subject’s face.

    Why would you use this over other modifiers?

    A beauty dish gives you a certain look. It will just light a small area and flatten out your model’s features. It makes people look great but you need to light your model in quite a specific way, lighting them from above, to really pull it off.

    Using a grid spot

    Gridspot Gridspot 2

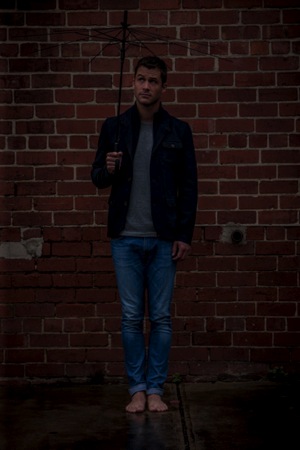
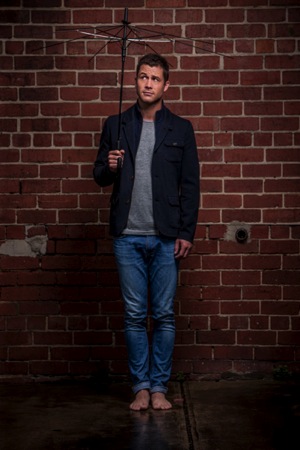
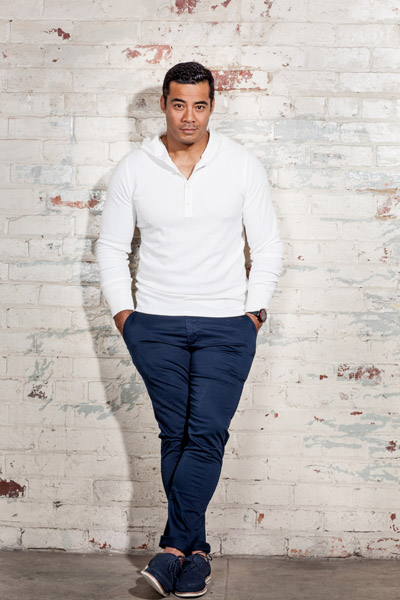
    A portrait shoot I did with Australian actor Scott McGregor shows lighting without gridspot (left) and with gridspot (right).grid

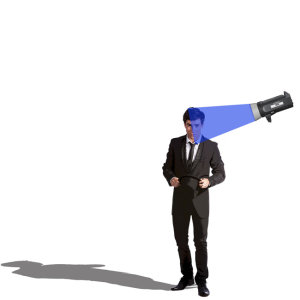
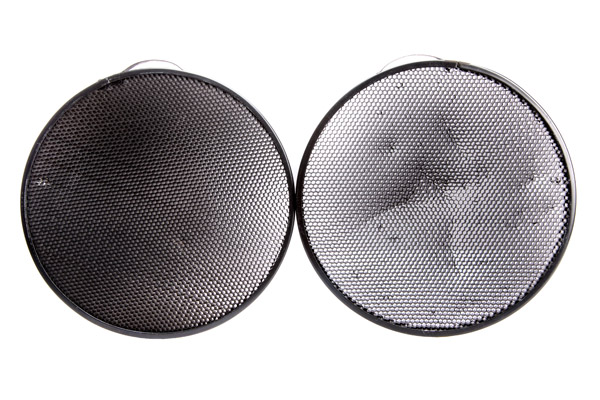
    The gridspot is a bit of kit you can use in conjunction with a speedlight, monolight, or battery operated flash. The width of the grid and the size of the holes will affect the width of the light beam hitting your subject. This is a hard focused light. I love to use grid spots in the same way I use beauty lights.

    Why would you use this over other modifiers?

    I like using grid spots because they create a similar light to beauty dishes. The light is a bit harder but they’re perfect for single portraits because you can pop a bit of light onto someone’s face and shoulders without impacting the background mood.

    They are also perfect to use outside as they won’t get blown about.

    Gridspot typesjpg

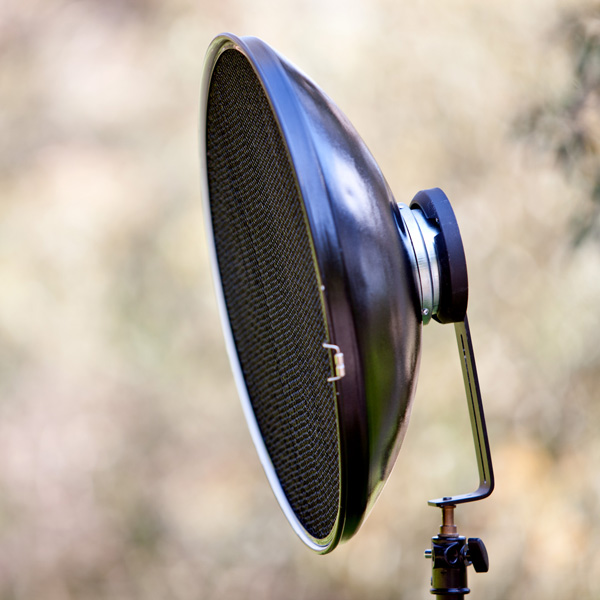
    BeautyDish+Grid 1

    Beauty dish with a gridspot

    Fresnel light (lens)

    Fresnel

    The Fresnel light modifier gives a soft, crisp and very distinct look to my portraits. In this portrait of Australian actor Robbie Magasiva, I’ve placed the Fresnel light slightly to camera right to create a shadow, which I’ve softened by using an umbrella (Sprays soft light everywhere) to increase the amount of daylight fill.

    Fresnel 2

    A Fresnel is a light modifier that can be focused. They were first used in lighthouses, then the technology was developed to include continuous lighting for movies and television.

    The style of lighting is soft and crisp, reminiscent of 1940s portrait lighting. This style of lighting has become really popular lately, particularly with fashion and editorial photographers. The downside of this type of lighting is you need to hock a kidney to afford one.

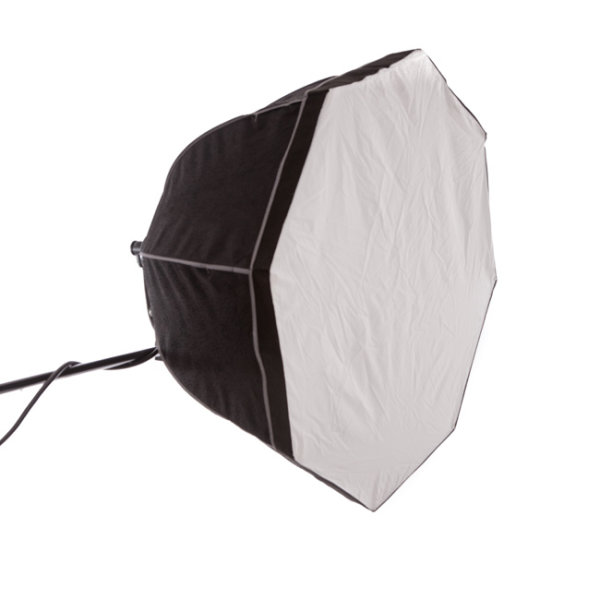
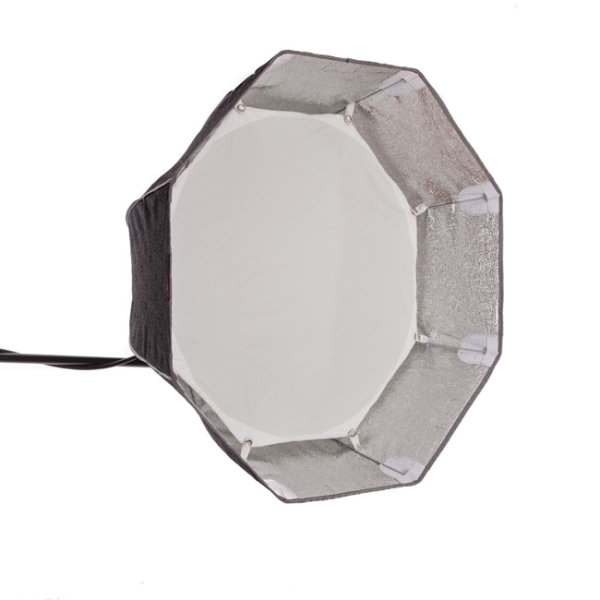
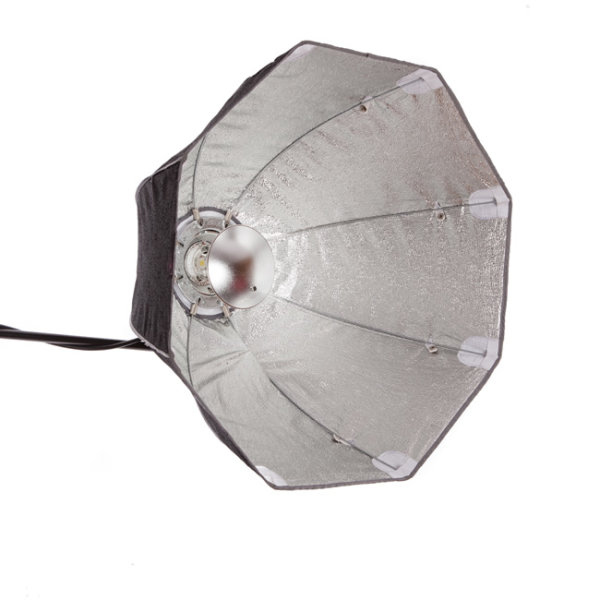
    Octabox

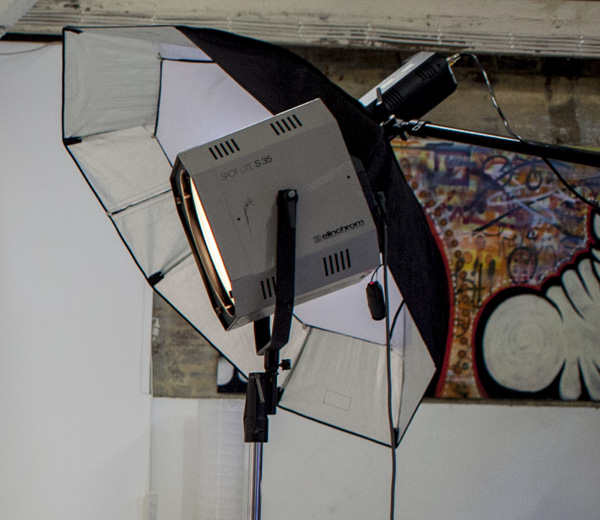
    Beauty dish Octa

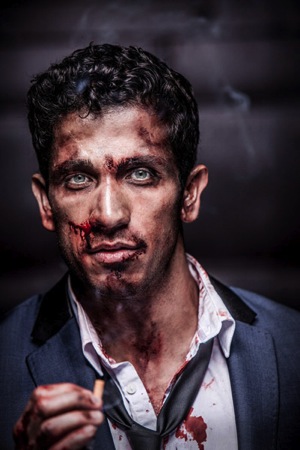
    Here are two different ways to use the Rotalux deep octabox. The image on the left of actor Firass Dirani is shot using a deep octabox as a beauty dish. The light source is hard and drops off rapidly under his chin to give a hard and contrasty light source, which not only defines and sculpts his features it also gives the image an edgy look.

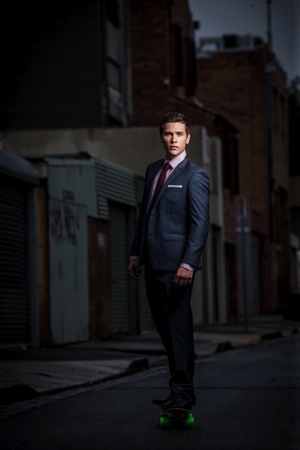
    The image on the right of actor Harley Bonner is shot using the same Rotalux deep octabox as I used with Firass but this time I’ve added the interior and exterior bevel giving a much softer light which blends in with the muted light and low key feel I was going for.

    An octabox is what you’d get if a softbox and umbrella got married and had babies. An octabox has soft light, just like its mama the softbox, but spreads its light around more just like his daddy the umbrella.

    They are fantastic for lighting large groups evenly. The other advantage some people like is they give round catch lights.

    I don’t own an Octabox because I’m not a huge fan but do have a Rotalux deep octabox, which is what you get if a softbox married a beauty dish and made babies. This, as far as I’m concerned is a match made in heaven for lighting single portraits.

    Octabox

    Octobox with the front panel in.

    octabox-interior-baffle

    Octobox with interior baffle exposed.

    octa_as_beauty_dish

    Octobox as a beauty dish.

    Mixing modifiers

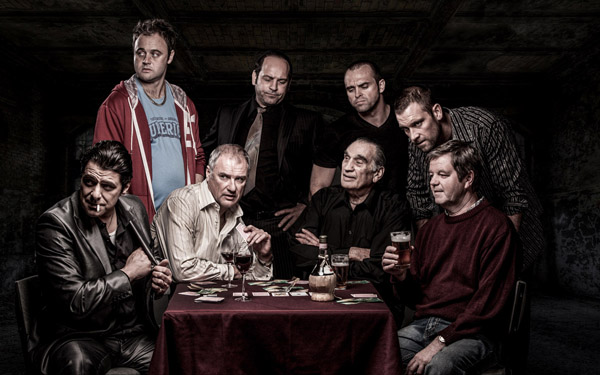
    Combolights

    Model credit: Fat Tony and Co., image courtesy Nine Network Australia.

    I often mix my lighting modifiers to make my images more interesting. In this television promotional shot I did for Fat Tony and Co., I used a medium deep octabox as my main light and a gridspot as a hair light. I also added an umbrella for fill light to camera left because the deep octabox alone was too moody and I wanted more detail in the shadows.

    Do you have a favorite light modifier or do you like working with naked flash? Do you have examples of your favorite images? Please share them in the comments below. I’d love to see them and hear your thoughts.

    googletag.cmd.push(function() {
    tablet_slots.push( googletag.defineSlot( “/1005424/_dPSv4_tab-all-article-bottom_(300×250)”, [300, 250], “pb-ad-78623” ).addService( googletag.pubads() ) ); } );

    googletag.cmd.push(function() {
    mobile_slots.push( googletag.defineSlot( “/1005424/_dPSv4_mob-all-article-bottom_(300×250)”, [300, 250], “pb-ad-78158” ).addService( googletag.pubads() ) ); } );

    The post A Beginners Guide to Light Modifiers by Gina Milicia appeared first on Digital Photography School.

    Digital Photography School

  • It’s Your Image Do What you Like to it

    Quite some years ago when I was doing my Fine Art Degree at University I was working on an image which I wasn’t quite sure about. My tutor came over and asked what was wrong. I told him that I thought people wouldn’t like one aspect of it. He looked at me and said, “It’s your image, you can do anything you like to it.” Ever since then I keep repeating those words to myself.

    For a number of years now I’ve been putting images on the internet like so many other people. The internet is flooded with them, yet, since the advent of digital photography, there seems to be a growing trend that making images your own is somehow cheating, or it is no longer a photo because you “Photoshopped” it. I don’t understand where this has come from.

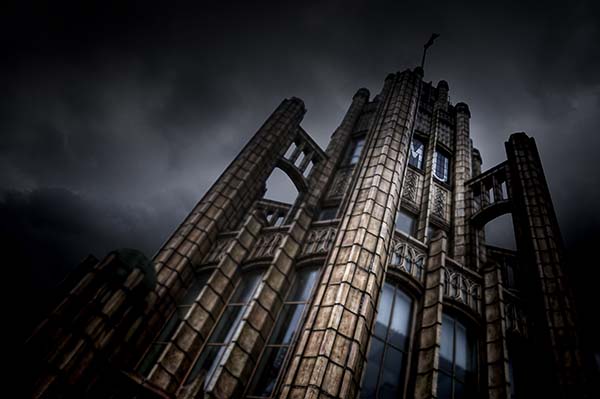
    1 LeanneCole manchester unity building

    Manipulating Photos

    So many times we hear people saying that they want to take the perfect image straight from the camera, but even in the days of film every image was manipulated to some extent in the darkroom. When working in the darkroom not every photo was printed exactly the same. They were all given different exposure times, or different levels of magenta for contrast (I only printed black and white) to get the best result. You could also dodge and burn for tone control.

    Even color good labs would print an image once, then make colour corrections and repeat until they were happy with the final result.

    I have no issues now in manipulating my photos until I am happy with the result. I am not looking for a true representation of what I see – I am looking for something more.

    Of course, I have to add that there are different types of photography and some styles, like nature and pure landscape, that frown on too much editing. You can really only do basic editing to those. I do fine art photography and I think in this genre as anything goes.

    I once read Adobe said about Photoshop “If you can imagine it, then you can create it.” I love that statement and it is one I live by. I believe there is nothing that is impossible and I push my images to get the best results for what I desire.

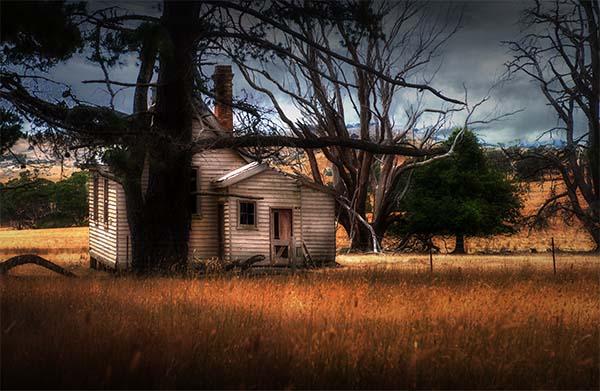
    2 LeanneCole emu flats schoolhouse abandoned

    Having a Vision

    Before you start doing a lot of work to your images it is good to have an idea of what look you are trying to achieve. I don’t know about having a preconceived idea first. Some people can work like that, but I’ve never found it helpful. I usually find if I do work from a preconception, I’m often disappointed with the final result.

    I have a certain thing, or look, that I try to get with my images because I like lots of drama and a sense of theatre. I have always been fascinated with how the world we live in would look if it were abandoned. I like empty images – images void of people. So many of my images, the fine art ones, don’t have people in them.

    The thing to remember is that everyone works differently, and how I work is not going to be the same as you. I have some techniques that I often try with images, but I tend to work intuitively. I just try things, delete things, and keep going until I am happy with what I have.

    3 LeanneCole pinklakes sunset national park

    Putting Images on the Internet

    The big test comes when the images are put online and people tell you what they think of them. The biggest thing to remember here is that it is your work; it is your image and your vision. What other people think shouldn’t matter.

    There are always going to be people who tell you what to do with your image, and think they know what you want to do with it more than you. I come across these people all the time, and I usually say something like, “Thank you, that is an interesting idea, but it isn’t really what I wanted,” or, “I tried it, but decided I didn’t like it.”

    Sometimes I think we care too much about what other people think, but in the end the only person who really has to like the work is you. If you are true to yourself then people start to understand that and begin to appreciate what you do.

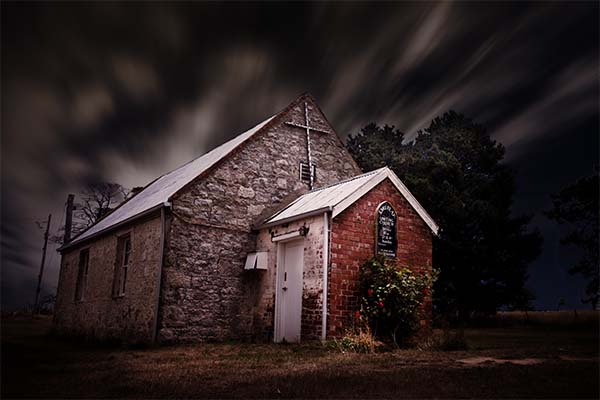
    4 LeanneCole emu flat church

    Fine Art Photography

    When you start disregarding the rules, you are moving further into fine art photography. There is a history in this area of pushing work to the limit, and bringing it back.

    If you go to any gallery and look at the contemporary art works you will find things that are unique and were considered, at the time they were done, as breaking rules, not conforming. You have to admire artists like Picasso who just did what they wanted. They make their own images the way they wanted. How different would the world be today if artists like Picasso, Monet, Warhol, to name a few, hadn’t disregarded what was considered art and just did what everyone else was doing?

    We live in a world where anything is possible and you can do whatever you like to your photos. There are always going to be people who think what you do isn’t photography, but you have to remember that it is just their opinion and you don’t have to listen to them.

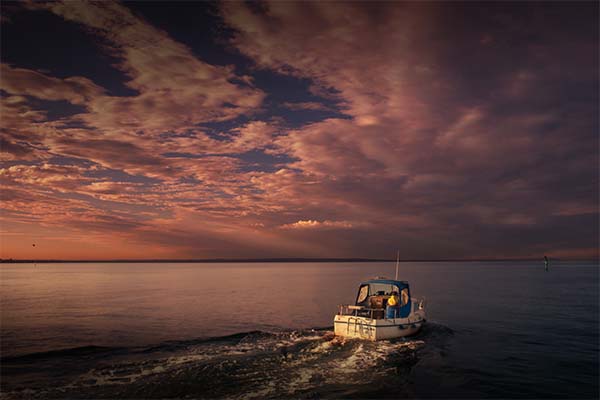
    5 LeanneCole mordiallic phillip bay boat

    Making My Work My Own

    In my own work, I have visions of what I am trying to accomplish and I strive to reach them. Though often, I have no plan of how I will actually get there, I just keep doing things until I am happy.

    I have folders of skies, so I can make sure I get the sky I want for my images. I’ve had people tell me that if I replace the sky then I have changed the image and it is no longer a photo. I ask them, “What is it now?”, they say they “don’t know, digital art”, but what is digital art? I don’t listen, it is still a photograph. It is merged, and there’s more than one image, but it is still photography.

    I have folders of textures to apply, though they can be overused. Again, it is a personal opinion and I might think that, and you can disagree. I find they can help certain images, but take over in others. It usually depends on how I feel at the time. I will try them, delete them, and then try something different. Often the hardest part is finding the texture that works best for that image.

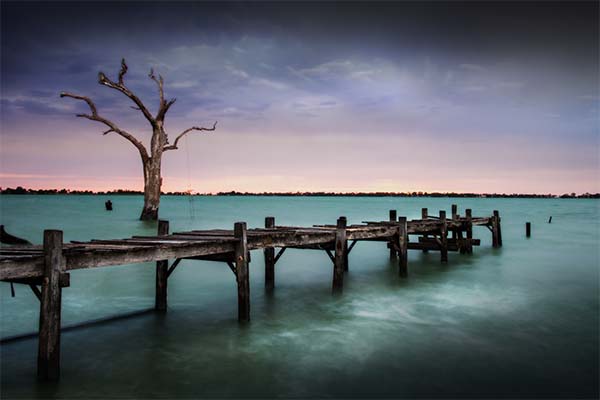
    6 LeanneCole lakecharm back pier tree

    Conclusion

    It really is all personal. Art is subjective. Love it or hate it, you have to respect what others do to their images. No one thing that Ansel Adams did in his darkroom was bad, we love his images. I say to you embrace that, make your images your own. Always remember;

    It is your image and you can do what you like to it.

    googletag.cmd.push(function() {
    tablet_slots.push( googletag.defineSlot( “/1005424/_dPSv4_tab-all-article-bottom_(300×250)”, [300, 250], “pb-ad-78623” ).addService( googletag.pubads() ) ); } );

    googletag.cmd.push(function() {
    mobile_slots.push( googletag.defineSlot( “/1005424/_dPSv4_mob-all-article-bottom_(300×250)”, [300, 250], “pb-ad-78158” ).addService( googletag.pubads() ) ); } );

    The post It’s Your Image Do What you Like to it by Leanne Cole appeared first on Digital Photography School.

    Digital Photography School

  • Tips for Using Golden Hour Light for Portraits

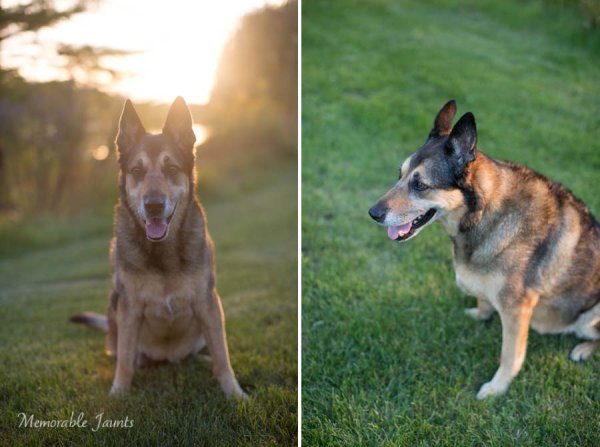
    Memorable_Jaunts_Portraits_During_Golden_Hour_DPS_Article-12

    Most photographers will argue vehemently that the golden hour – that pocket of time just after sunrise and just before sunset – produces some of the most gorgeous light ever. Golden light shows up during this time, generally about an hour or so before sunset (after sunrise). However these times are not exact because golden light does depend on where you live. The further away from the equator you are located, the longer golden hour lasts. The closer to the equator you are, the shorter it is. Golden hour is also seasonal.

    Memorable_Jaunts_Portraits_During_Golden_Hour_DPS_Article-13

    There is a reason why most natural light photographers tend to schedule their portrait sessions around golden hour – to maximize the amount of golden light that they can use and get amazing results for their clients.

    Why do you want to use golden light?

    There are several reasons why golden light is so sought after.

    Golden light is very soft

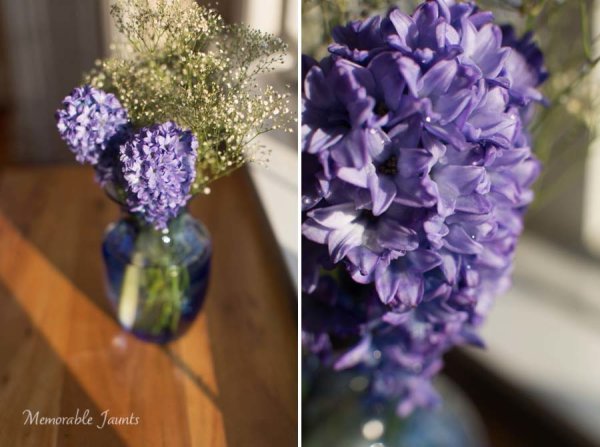
    Memorable_Jaunts_Portraits_During_Golden_Hour_DPS_Article-7

    Soft light illuminates the skin tones evenly.

    Since the sun is almost setting or just rising during golden hour, the sunlight tends to be much softer than when the sun is high in the sky. During the golden hour, you can have your subjects look towards the sun and not have to squint or shield their eyes. Practice discretion on how long you want them to stare at the sun, and also take care not to point lens and cameras directly into the sun.

    Golden light is warm

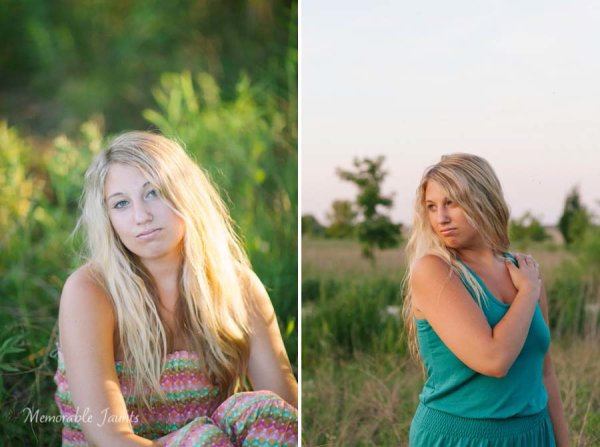
    Memorable_Jaunts_Portraits_During_Golden_Hour_DPS_Article-10

    The warm colors of sunlight are striking against the green grass.

    It is easy to think that any form of sunlight is warm – whether the sun is high in the sky, or close to the horizon. But in reality, the warmth varies as the sun moves across the sky. Sun near the horizon has less intensity of direct light since it must travel through more of the atmosphere. You may notice, it is much easier to look at a sunrise and sunset with the naked eye – not that you should because it can damage the retina. As per wikipedia, more blue light is scattered during golden hour, so the sun’s light appears more reddish.

    Golden light has dimension

    When the sun is high in the sky, particularly around noon, the overhead light is very harsh, creating strong highlights and dark shadows. This type of lighting is not very flattering or desirable especially in portrait photography. Most photographers will use external flash or even a reflector to add additional light to the subject’s face or body, to make the light more even. Because the contrast is lower during golden hour, shadows and highlights are not that extreme. In addition, the sun’s smaller angle to the horizon produces long shadows.

    Memorable_Jaunts_Portraits_During_Golden_Hour_DPS_Article-14

    How do you use golden light?

    Location scouting

    Take the time to know the area that you are looking to do photography. There are many website and apps that can provide exact sunrise and sunset times. Some even take it a step further and provide golden hour times – which is specifically for photographers! Even the location matters when searching for golden light. If your photoshoot is in a park that has a lot of tree cover, the light will be further diffused, giving you the option of having a spotlight type effect for your portraits. If you are in a big city, take advantage of the natural block that tall buildings provide when photographing a subject.

    Metering

    Golden light can be challenging from a metering perspective. Most people leave it in standard (matrix or evaluative) mode and then play around in post-production to try and get the look they want. There is an easier way to eliminate all that time spent in front of the camera. Spot metering is my preferred metering method particularly for backlighting situations. I spot meter off the subject’s face or shadowy part of the image and then recompose and adjust exposure compensation half a stop or more to get the look I want.

    Front lighting

    Memorable_Jaunts_Portraits_During_Golden_Hour_DPS_Article-1

    Options for front lighting include the sun along the side of the subject as well as subject facing the sun.

    Front lighting is when your subjects face the sun directly. Because of the low angle of the sun and the soft light, the sun isn’t as harsh and your subjects will not be squinting as they face the sun. The light is even and warm so make sure that is the look you want – gorgeous, warmly lit, imagery!

    Backlighting

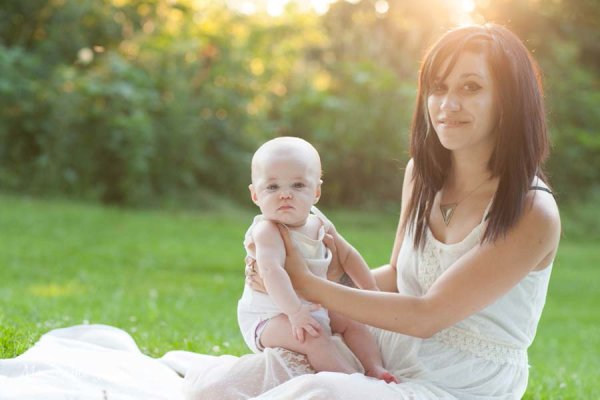
    Memorable_Jaunts_Portraits_During_Golden_Hour_DPS_Article-9

    Memorable_Jaunts_Portraits_During_Golden_Hour_DPS_Article-6

    Backlighting is when you put the subjects between you and the sun. This creates a warm glow and looks really stunning. Make sure you expose for your subject’s skin tones. If you expose for the sun, then you will get a silhouette effect (which might not be the look you are going for, but is equally stunning).

    Rim light

    Memorable_Jaunts_Portraits_During_Golden_Hour_DPS_Article-3

    Rim lighting occurs when you are using the sun to backlight the subject. Here the subject is between you and the sun. If you have a darker background, you can see a faint glow outlining them. That is a rim light and it really helps the subjects pop out in the image, drawing attention to them, adding separation of subject from the background.

    No matter what type of golden hour lighting you use, you are bound to get some awesome images. Experiment with various locations and techniques. Also go back to the same location at various times of the year and track how golden hour lighting changes – you will learn to gauge, judge, and use light as a key element in your portrait photography.

    googletag.cmd.push(function() {
    tablet_slots.push( googletag.defineSlot( “/1005424/_dPSv4_tab-all-article-bottom_(300×250)”, [300, 250], “pb-ad-78623” ).addService( googletag.pubads() ) ); } );

    googletag.cmd.push(function() {
    mobile_slots.push( googletag.defineSlot( “/1005424/_dPSv4_mob-all-article-bottom_(300×250)”, [300, 250], “pb-ad-78158” ).addService( googletag.pubads() ) ); } );

    The post Tips for Using Golden Hour Light for Portraits by Karthika Gupta appeared first on Digital Photography School.

    Digital Photography School

  • The Winners of the Four NYIP Photography Courses Are . . .

    The Winners of the Four NYIP Photography Courses Are…

    NYIP logo440x232black  In Post Top and Bottom

    A BIG thank you to everyone who entered our recent competition to win one of four photography courses from our friends at NYIP.

    The response was amazing with over 680 entries. In fact, it was so great that the team at NYIP decided to offer a special $ 150 discount off any of their courses (details below). But first – here are the four winners of the competition (chosen by NYIP):

    • Wedding Photography Course – Angela Pritchard
    • Portrait Photography Course – Jenn S
    • Travel Photography Course – Deonne Kahler
    • Photojournalism Course – Vicki

    A Message from NYIP (and a $ 150 discount)

    “Congratulations to all four winners! And thank you to all the participants for your many comments. We were so excited to see how many people were interested in our new photography courses. To those who did not win, we wanted to let you know that for a limited time we are offering you the chance to save $ 150 on the NYIP Course of your choice. Learn more at www.nyip.edu. But don’t wait, because this offer is only available until Thursday, March 26th. – The NYIP Team”

    Winners will be emailed with details of how to collect their prize by the team at NYIP.

    Thanks to everyone for entering and to NYIP for yet again, sponsoring another wonderful competition.

    The winning comments:

    By Angela PritchardFourteen years ago, when my husband and I tied the knot, we could not afford to hire a wedding photographer. Instead, we bought a few of those one-time use cameras and had family members take photos. Needless to say, we didn’t get any really good, memorable photos. Over the years I have gone through countless wedding photos posted on the internet and so many of them are images that I would have loved to have had to remember my wedding by. In the last few years I have actually photographed several weddings for friends and family. I make sure to photograph every single detail that I would have wanted captured for my big day. From the rings to the Borrowed, Blue, Old, and New, the dresses and the tuxes, the cake and the flowers, everything gets photographed. Photographing weddings can be very stressful but it’s that stress combined with all the photos I didn’t get for my wedding that pushes me to get the very best for the couple I’m shooting for. I would love to take the Wedding Photography course to help mold me into a better wedding photographer; to improve on the things I’m doing right and correct the things I may be doing wrong. I believe this course would help me immensely. I have my fingers crossed and I will be waiting right here in front of my computer for you to contact me to tell me that I have won. Thank you so much for considering me. And if by some strange reason I don’t win, I will still continue to make beautiful photos of the world around me.

    By Jenn S.I would love to win the Portrait Photography Course. Last year while I was pregnant with our second son, we learned that my husband had cancer. He got through treatments (and is now cancer-free!), but the cost of those treatments took a toll on our finances, and we were left with little money for me to start the photography business I had been planning on to help support our family. Through hard work, I was able to purchase some basic equipment, but because we could not afford it, everything I have learned about using my DSLR, equipment, and running a successful business has been self-taught, and I am sure that there are many gaps in my knowledge base. I would love to take the Portrait Photography Course to enhance my understanding of posing, learn how to better run my business, and so much more. I think I would really benefit from an environment where I am able to get the (professional) feedback on my work that I desperately need, and having a mentor to guide me sounds just heavenly! I also think I’d also greatly benefit from the student forum and the knowledge base my peers could provide there! Thank you so much for the opportunity to win!

    By Deonne Kahler I’d very much like to win the Travel Photography Course. I’ve been making photographs since high school, but only recently started taking it seriously, and just placed in my first competition. I’m on a mission to see every U.S. National Park, and until now I’ve been documenting those visits the best I can. I feel so strongly that it’s my job to let people know about the wonders of the parks – which include historical monuments, an easy and accessible way for all of us to learn more about this country and its past. I’m based in Taos, NM but I travel around the country with my dog Sam in my 13′ Scamp travel trailer. I’ve been winging it with my photographs up until now, but the NYIP course would push me to the next level, as I still have plenty to learn about using my Nikon D90, being more nimble with it in the field, documenting the National Park sites in a unique way (honing my voice), and translating that to books/online media where I share photos and stories about the Parks. They’re such a treasure, and with the NYIP course, i’d be much better equipped to tell their stories and get more folks involved either by simply visiting, or supporting the National Parks foundation to keep them safe from development. Thank you for the opportunity! (P.S. This is a terrific site – so much good information. Thanks for that, too.)

    By VickiI am a Social worker in the military and Photojournalism is exactly what I’m looking for. I’m a beginner and have been doing a lot of learning on my own, but would love to have the opportunity to learn from professionals. I’m drawn to photojournalism because of my love for people and our stories and would love to improve my ability to capture these stories in my pictures. I’ve only been deployed once but hopefully will have the opportunity to travel more with my Army career and use photojournalism skills to capture my travels.

    googletag.cmd.push(function() {
    tablet_slots.push( googletag.defineSlot( “/1005424/_dPSv4_tab-all-article-bottom_(300×250)”, [300, 250], “pb-ad-78623” ).addService( googletag.pubads() ) ); } );

    googletag.cmd.push(function() {
    mobile_slots.push( googletag.defineSlot( “/1005424/_dPSv4_mob-all-article-bottom_(300×250)”, [300, 250], “pb-ad-78158” ).addService( googletag.pubads() ) ); } );

    The post The Winners of the Four NYIP Photography Courses Are . . . by Darlene Hildebrandt appeared first on Digital Photography School.

    Digital Photography School