Category: Photography

  • Understanding the Difference Between Photoshop and Lightroom

    One of the most common questions I hear from people just starting out in photography is, “What program should I use to edit my photos?”. There are many free options such as iPhoto, Picasa, GIMP, and other commercial programs such as AfterShot Pro and Pixelmator but the most popular programs are Photoshop and Lightroom.

    That question is usually followed by another, which seems quite logical, “What’s the difference between Photoshop and Lightroom?”. While the two programs do share many similarities, and are both widely used by the photographic community, they each serve a unique purpose and are quite different in some very major ways. Understanding what makes them similar, as well as different, can help you make an informed choice when selecting the right software for your needs.

    PhotoshopLightroomQuestionMark

    If you’re not sure what the difference is between Photoshop and Lightroom, you’re not alone.

    Similarities

    At the core level both programs do essentially the same thing, edit images. How they go about handling that task, as well as how you actually use each program, is quite different – but if you are simply looking for software that will allow you to alter, tweak, and enhance your photographs, either one will suffice. Both are capable of handling multiple file types such as: JPEG, PNG, TIFF, and a perennial favorite of many photographers, RAW. In fact both Photoshop and Lightroom use the Adobe Camera Raw (ACR) processing engine to handle RAW files. So, you can expect similar controls and editing options in both programs when doing things like adjusting saturation, working with curves, and correcting for lens distortions.
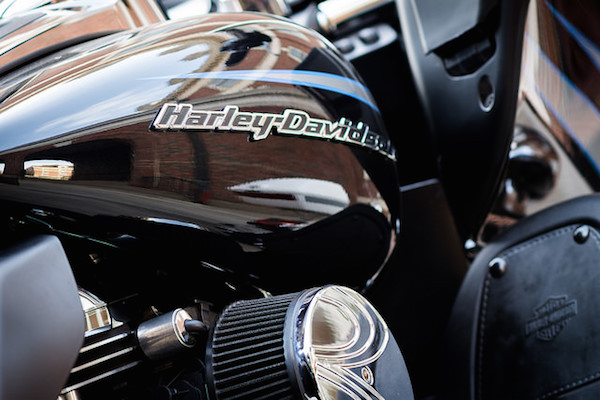
    Both Photoshop and Lightroom are powerful additions to any photographer's digital toolbox, but understanding what makes each one unique can help you choose one that suits your needs.

    Both Photoshop and Lightroom are powerful additions to any photographer’s digital toolbox, but understanding what makes each one unique can help you choose the one that suits your needs best.

    Both programs also feature an extensive set of editing and manipulation tools allowing you to do everything from; basic edits like cropping and adjusting exposure, to advanced alterations such as working with brushes, tone curves, and graduated filters. You will find a variety of built-in effects in both programs that will allow you to instantly apply edits such as black and white, sepia, and other artistic styles. The two programs are quite powerful image editors. I know some photographers who use Lightroom exclusively and never touch Photoshop, as well as plenty of others who spend all day in Photoshop and never open Lightroom. However, in order to understand which one is best for you it might help to see how they are also quite different from each other.

    Difference #1: File Handling

    One of the most significant ways in which Lightroom is different from Photoshop is that it does not actually edit photos, nor does it move your images around to different locations on your computer. Instead all the changes you implement are kept in a separate file called the Catalog, which is sort of like a recipe book of instructions for how each photo should be processed. When you apply some type of edit, like a radial filter or adjustment brush, Lightroom is essentially keeping a log of the alterations in a database, while leaving the original image intact. It’s a technique called nondestructive editing, which stands in stark contrast to how Photoshop operates.

    For example, several months ago I sent my father this photo I took of him, which I had subsequently edited in Lightroom.
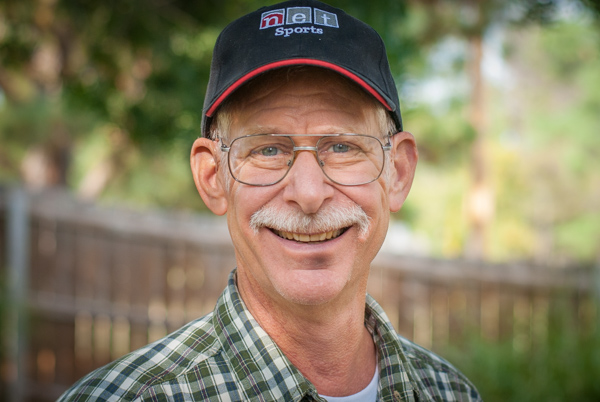
    simon-dad-edited

    Since the original file was left unchanged I can go back and re-edit the photo any time I want. The edits in Lightroom are a set of instructions for how to process the file, similar to how a recipe is a set of instructions for making food like a cake or casserole. After you finish making changes to an image in Lightroom the photo must be exported at which point it can be printed, shared, or posted online. Because the original photo remains on your computer fully intact and untouched you can go back to Lightroom at any point in the future and re-edit the photo however you want.

    Another benefit of this approach is that the catalog itself is quite small, often taking up only a few hundred megabytes on your hard drive even if you have several thousand images in Lightroom.
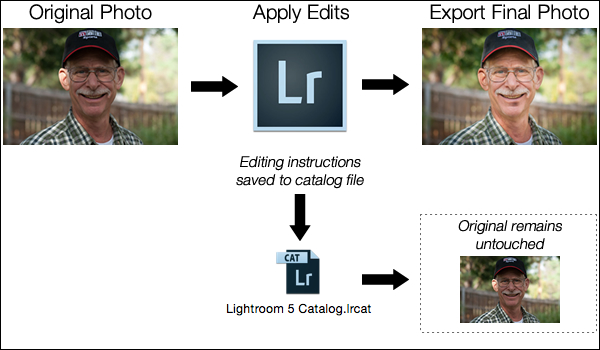
    LightroomEditingWorkflow

    A basic diagram of the Lightroom workflow: editing instructions are stored in the Catalog file and no changes are made to your original images.

    Photoshop, on the other hand, operates quite differently. When you edit a picture such as a JPG, PNG, or RAW file in Photoshop you are always working on the original file itself, unless you save a copy as a Photoshop PSD file that is usually several dozen megabytes in size. This PSD file contains all the changes made to a photo, and in order to share a given image it must then be saved to a final format such as JPG, PNG, etc. In essence, if you want to perform nondestructive edits in Photoshop you will end up with three separate files: the original camera RAW file, a PSD, and the final copy saved into a shareable format from the PSD. The process works something like this:

    PhotoshopEditingWorkflow

    A basic diagram of the Photoshop workflow: If you want to edit an image later it must be saved as a separate PSD file.

    FileDifferencesThe two processes look somewhat similar on the surface with one major difference; in Lightroom all your changes for every photo are saved in one single, relatively small, catalog file. In Photoshop all your changes are saved in unique files for every single picture you edit. This means much more space on your hard drive will be taken up as you work with multiple files in Photoshop, and you will end up with multiple versions of each image as well. So why would you want choose to use Photoshop instead of Lightroom? In a word, power.

    Difference #2: Editing Tools

    Lightroom is kind of like an all-terrain-vehicle you might see on some farms. It’s fast, nimble, and can be used for a variety of tasks like hauling small objects and towing little trailers. But it simply cannot match the sheer power of a massive farm truck when it comes to getting big, serious jobs done like transporting massive bales of hay, pulling a horse trailer, or ploughing through mud and snow.

    Nearly a decade ago Adobe realized that not everyone needed the capability of Photoshop, particularly photographers who were returning from events with hundreds of images to edit quickly. What this new generation of digital photographers demanded was the essential editing tools of Photoshop in one easy-to-use package which resulted in Lightroom.
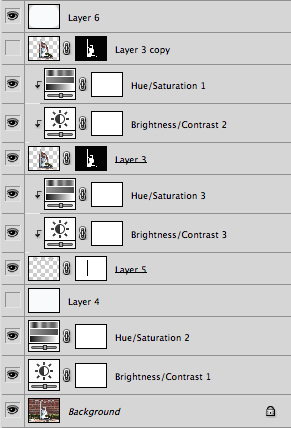
    PhotoshopLayers

    Photoshop uses layers, which can be intimidating for beginners but offers incredible versatility that Lightroom simply can’t match.

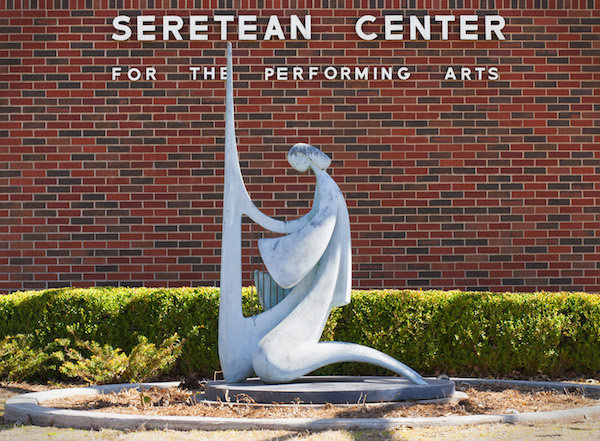
    Photoshop contains a dizzying array of filters, brushes, and other tools that allow you to perform all manner of edits and changes to your images. But more than that, Photoshop operates by letting you create different layers on which your edits actually take place. For example, the image on the right shows the various layers I used to edit the image of the statue, and each layer can be edited independently of the others. This might look like a lot, but it is not uncommon for a digital artist to use dozens of layers when editing an image. Lightroom, by contrast, works in a much more linear fashion with no layers, fewer editing tools and less overall flexibility. Both programs contain a history panel that lets you step back in time to any of your edits, but working with layers gives you infinitely more control over exactly how you edit your image.

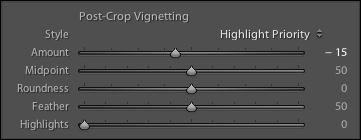
    Case in point, let’s say you want to add a vignette to a portrait. In Lightroom it’s as simple as clicking the “Vignette” option and changing a few basic parameters like the amount, how big the untouched middle portion should be, and how gradually the vignette should fade from the center. It’s a quick no-fuss solution that is incredibly useful for all sorts of photography situations, and if you want a bit more control you can click on the Radial Filter for a few more options.
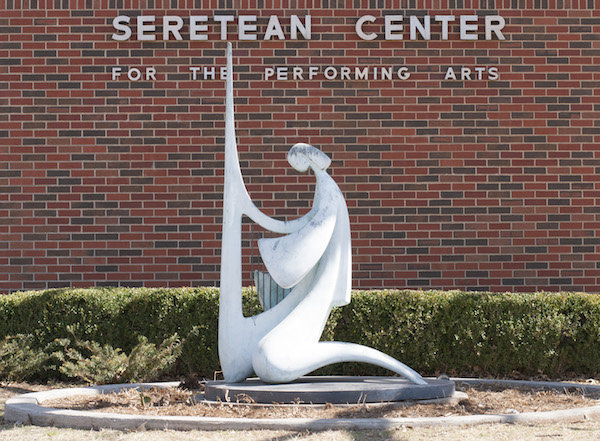
    SereteanStatueFinal

    After image


    SereteanStatueOriginal

    Before


    To do the same thing in Photoshop would require adding a special layer to your photo called an Adjustment Layer such as  Levels. Then you’d adjust the levels to darken the image in the highlights and overall, and apply a mask to the layer to only darken the outer edges. You could also change the opacity of the layer (lightening the effect) or the Blend Mode,  or you could apply a Dodge and Burn layer – and that’s just the beginning. While all these additional steps might seem hopelessly convoluted, the more you learn how to use the tools Photoshop has to offer the greater degree of control you will have over the editing process.
    LightroomVignette

    In Lightroom adding a vignette is as simple as clicking a button. In Photoshop it’s much more complicated but you get much more control as well.

    With all of its options and features (including support for text, 3D graphics, and even video) Photoshop is ideal for almost any image-editing situation. Lightroom essentially distills Photoshop down to the tools that Photographers use most, which is one reason it is so appealing to many shutterbugs.

    Difference #3: Workflow

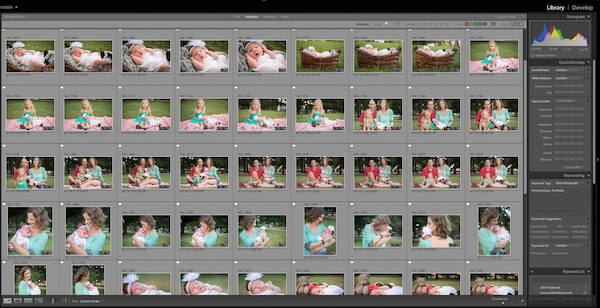
    Features and file options aside, the trump card that Lightroom has over its big brother involves its end-to-end workflow solution for photographers. Since it is designed specifically to address the needs of photography enthusiasts and professionals, it handles everything from importing photos from your memory card, to organizing, editing, sharing, and finally printing them. Lightroom has support for keywords and virtual folders to help you keep track of your images, and you can even use it to create a slideshow or photo book. Many photographers, even professionals, will go weeks or months without ever opening Photoshop, because Lightroom takes care of everything they need.
    LightroomLibraryModule

    Lightroom’s Library module lets you quickly sort, organize, and manage all your photos.

    On the other end of the spectrum is Photoshop which doesn’t transfer files, won’t organize your images, and certainly can’t make slide shows or photo books. But again, it’s all about the tradeoffs you are willing to accept. Nothing else can even come close to Photoshop in terms of sheer editing power. However, you can use Adobe Bridge to handle some workflow-based tasks like importing photos and organizing the digital media on your computer, which when paired with Photoshop, does offer a more comprehensive Lightroom-esque workflow experience. It’s not quite as streamlined as working in Lightroom alone, but it does provide a welcome degree of automation as opposed to manually organizing all your PSDs, JPGs, and other photos by hand.
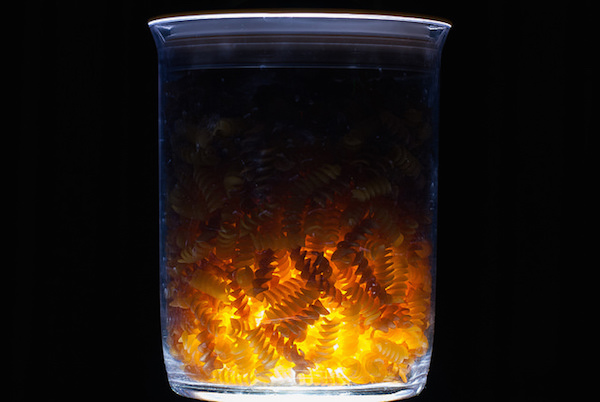
    Sometimes the best solution involves both programs. I used Lightroom to import this photo from my camera and do some basic edits, and then used Photoshop to add some more extensive tweaks.

    Sometimes the best solution involves both programs. I used Lightroom to import this photo from my camera and do some basic edits and then used Photoshop to add some more extensive tweaks.

    Which one is right for you?

    By now you probably realize that this is a question only you can answer, and until recently it meant spending $ 150 on Lightroom or several times that amount on Photoshop. Thankfully, Adobe has made the decision much easier with its release of Creative Cloud and you can now get both programs for $ 10/month. If you don’t like the idea of subscribing to software, you can still buy Lightroom by itself, and Adobe has stated they will continue to sell the standalone version for all future versions as well.

    This article could be much, much longer and in many ways it seems like I have just scratched the surface, but I hope you have a better understanding of what makes these programs similar and different.

    What about you? What differences do you think are worth noting between both programs, and what purpose does each serve for you? Leave your input in the comments section below.

    googletag.cmd.push(function() {
    tablet_slots.push( googletag.defineSlot( “/1005424/_dPSv4_tab-all-article-bottom_(300×250)”, [300, 250], “pb-ad-78623” ).addService( googletag.pubads() ) ); googletag.pubads().enableSingleRequest();
    googletag.pubads().disableInitialLoad();
    googletag.pubads().collapseEmptyDivs( true );
    googletag.enableServices();
    } );

    googletag.cmd.push( function() { googletag.display( ‘pb-ad-78623’ ); } );

    googletag.cmd.push(function() {
    mobile_slots.push( googletag.defineSlot( “/1005424/_dPSv4_mob-all-article-bottom_(300×250)”, [300, 250], “pb-ad-78158” ).addService( googletag.pubads() ) ); googletag.pubads().enableSingleRequest();
    googletag.pubads().disableInitialLoad();
    googletag.pubads().collapseEmptyDivs( true );
    googletag.enableServices();
    } );

    googletag.cmd.push( function() { googletag.display( ‘pb-ad-78158’ ); } );

    The post Understanding the Difference Between Photoshop and Lightroom by Simon Ringsmuth appeared first on Digital Photography School.

    Digital Photography School

  • How to Organize and Photograph Events Like a Pro

    The Main Event: How to organize and shoot events like a pro.

    EVENTS MAIN

    The Footy Show and image courtesy of Nine Network Australia © Gina Milicia 2015

    If you own a camera and are known in your circle of friends as an enthusiast or a pro, there’s a really good chance you’ve been asked to photograph an event.

    An event is basically any time a group of three or more people gather together to celebrate a milestone. This could be your best friend’s wedding, Uncle Dave’s 50th birthday, your next-door neighbor’s bar mitzvah, your cousin Maria’s engagement, a product or corporate event, or an awards ceremony. They’re all defined as events.

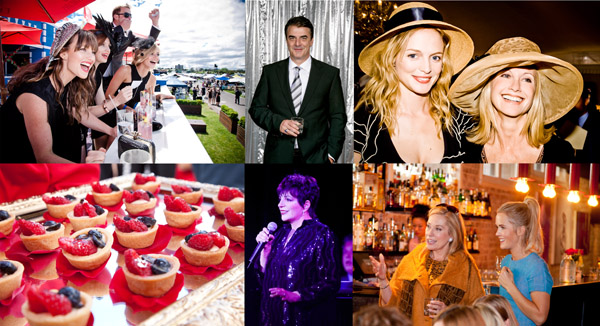
    Event Montage

    © Gina Milicia 2015

    I’ve been shooting events for the last 25 years. In that time, I’ve been the official event photographer for the Australian Grand Prix, the Melbourne Cup, the Dalai Lama, Bvlgari, WWE Wrestling, the Logies (Australia’s Emmys), press conferences with rock stars, product launches for big brands, Uncle Dave’s 50th (great party!) and my cousin’s engagement.

    The protocol I use to photograph events is the same for Uncle Dave’s 50th as it is for an A-list function. I’m going to share all the pre-event and event protocols, tips and techniques I’ve developed over the last 25 years – so you can photograph events like a pro too.

    The “no more tears” gear check list

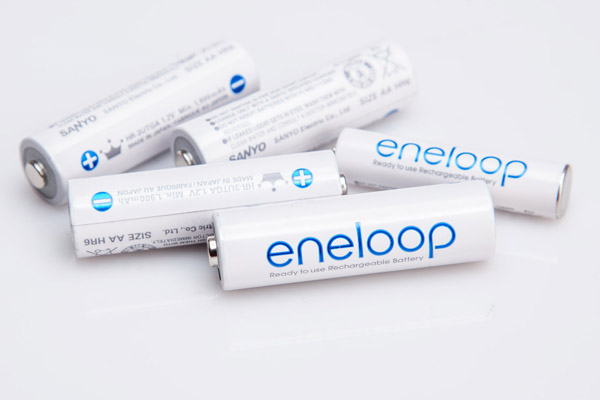
    Rechargeable Batteries

    © Gina Milicia 2015

    Always ensure you have fresh batteries for your event. If you are shooting a lot of events and working with flash on-camera you may want to consider investing in rechargeable AA and AAA batteries for your flashes and other devices. They are a bit of an investment at the start, but eventually pay for themselves and are far more environmentally friendly.

    “To be prepared is half the victory.” – Miguel de Cervantes

    I always organize my gear the day before I shoot a big event. This is an extensive list based on all the items I’ve managed to forget over the years – and yes, there have sometimes been tears and yes, they did cause me stress.

    • Test all flashes, sync cables and radio slaves. (I once broke someone’s wedding! If you haven’t heard this story, you can relive my heartbreak here.)
    • Pack fresh batteries and spares.
    • Charge all camera batteries.
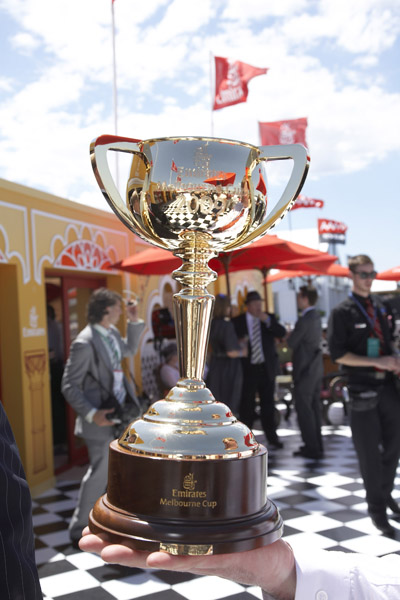
    Melb Cup

    © Gina Milicia 2015

    In one of my early Melbourne Cup shoots, I was sent to the finish line to cover the presentation of the Melbourne Cup for its sponsor, Emirates. It had been a long day and I was still a bit green to this event caper. I completely overestimated my flash and camera’s battery lives and had to endure a stressful 30 minutes waiting to photograph “the money shot” with my camera blinking, “I’m about to die! Now feed me!”

    My spare battery and charger were safely tucked away in my camera bag about 20-minute walk away. (Doh!) I managed to squeeze out five frames by turning the camera on and off. I got the shot, but it wasn’t fun.

    • Clean your lenses. Always check for dust, mould, scratches and smears. There’s nothing worse than having to retouch 300 shots because of gunk in the corner of the frame, or worse still, a large gooby that completely ruins a shot.
    • Fully charge your laptop, phone, and booster for remote locations.
    • Ensure you have all your cables, accessories and chargers for laptops, etc.
    • Pack two card readers and spare cables.
    • Carry extra memory cards and spare cards.
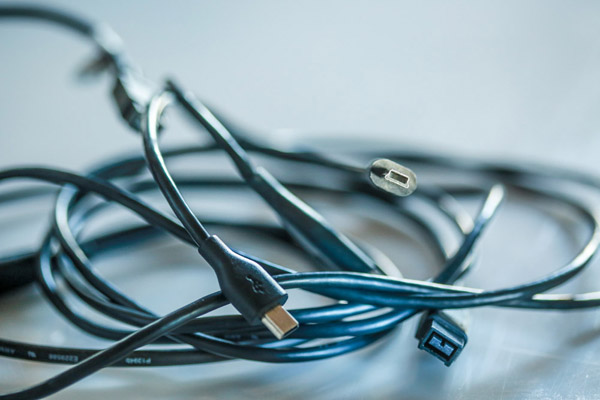
    Cables

    © Gina Milicia 2015

    I once shot a wedding at a very remote Australian location. It was at the end of a long, hard week and I realized when I arrived that I had forgotten the USB cable for my card reader. I knew it was going to be a big wedding — the magazine wanted full coverage, from start to finish — and I only had enough memory cards to cover about half of it.

    I sent my assistant out to the tiny country town’s shopping district in search of a cable or a card reader while I continued the pre-wedding shots. She rang every camera store within 20km (12.5 miles), but no luck. I ended up having to shoot with the limited number of memory cards I had, and treat it as if I was shooting with film.

    I got there in the end, but that little oversight could’ve been very costly. Now I carry two memory card readers and put spare cables in my glove box camera bag, handbag and laptop bag.

    Events 003

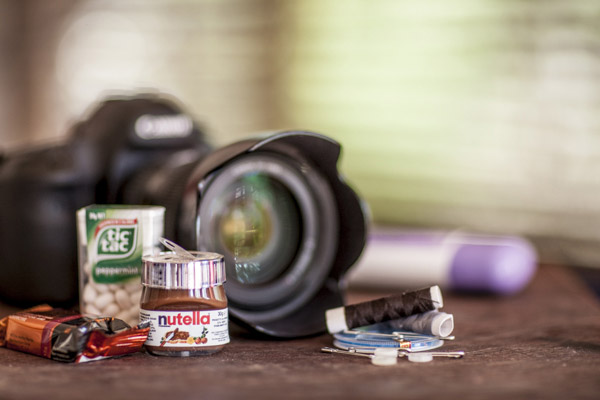
    Nutella comes in a handy travel size. © Gina Milicia 2015

    • Put together a survival kit (water, tissues, deodorant, mints, snacks, protein bars, nuts, umbrella, blankets, spare warm clothes, and comfy shoes for the drive home). Events can go on for hours and often run over meal times. There’s nothing worse than being cold, tired, hungry or stinky at an event. Always pack an emergency kit to keep you going between meals and showers.
    • Read the run sheet, look up all shoot locations and work out the best travel routes. I always work out the best way to get to my gig the night before. Events can be stressful enough without having to worry about getting lost on the way.
    • Wash your car and fill the tank. Again, it’s all about minimizing stress. Events are usually dressy affairs, so it’s nice to turn up in a clean car. It feels better, too.
    • Pre-pack and recheck all lighting, tripods, stands, and accessories.
    • Ensure your gear is portable, lightweight and quickly and easily accessible. Here’s my personal event location kit: Roller bag, laptop, monopod or tripod, two camera bodies, 24mm-105mm f/4 lens, 70mm-200mm f/2.8 lens, 85mm lens, two speedlights, rechargeable AA batteries.
    • Have a safe spot to store the memory cards you use at the event. Mark them clearly so you don’t accidentally overwrite them.
    • Bring a hard drive for backup. If you have time and a safe place to do it, download your memory cards onto your computer and back them up at the same time. I have an in/out system that I use. Check out: Photography Workflow Tips – From Memory Card to Computer and Beyond for more info.
    • Keep drunken guests away from your table. Food and drinks don’t mix with and laptops. One spilled drink and it’s all over.
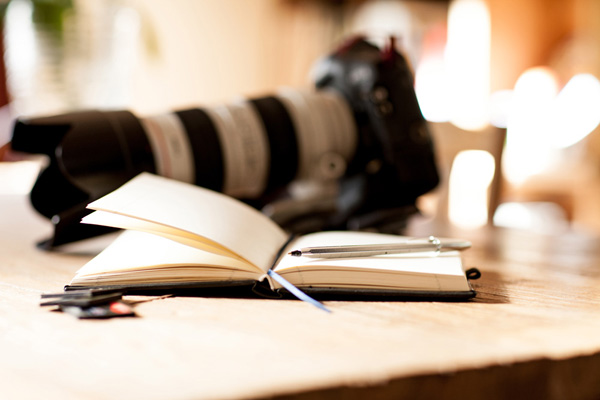
    • Don’t forget a pen and notebook to jot down important information.

    Dress code

    Your next clients may be among the guests at the event you’re shooting. You only have one chance to make a good impression, so make sure it’s a good one.

    Events 4

    © Gina Milicia 2015

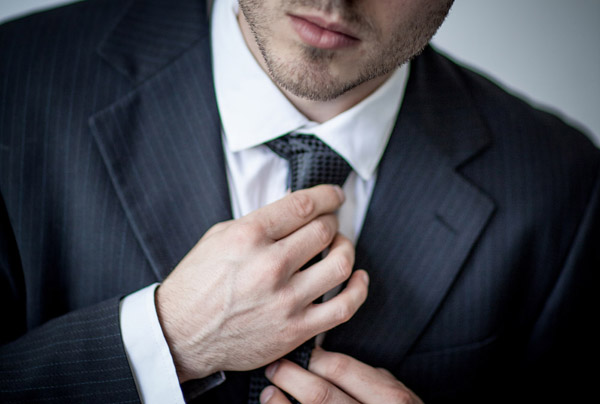
    I’d love to wear my favorite torn jeans and boots to every shoot I do, but I know that wouldn’t make a very good impression. I don’t want to embarrass clients by turning up in inappropriate attire, so I always check the dress code first.

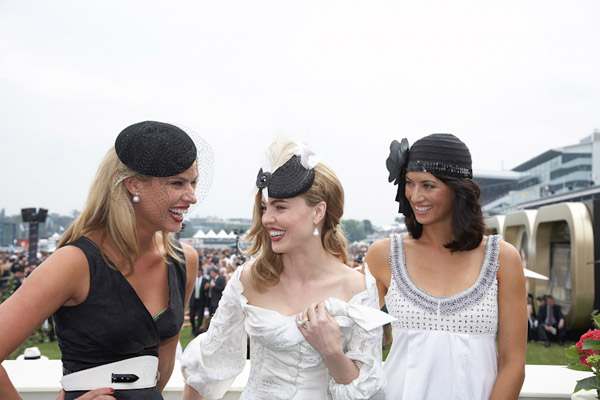
    I believe a good photographer should blend in with the guests. Don’t get me wrong, I’m not suggesting you turn up dressed like Paris Hilton. Rock out your own style, but maybe tone down the diamond tiara, nine-inch gold-plated heels and leopard skin jumpsuit.

    Here are a few suggestions you may want to take on board:

    • Buy a great pair of really comfortable dress shoes. There’s nothing worse than wearing uncomfortable shoes on a long shoot.
    • The best color to blend in at an event is black.
    • Always carry a lint roller, safety pins, shoe polish and a sewing kit in your bag for those just in case moments. I once tore my pants just before an event.

    Etiquette

    Events 5

    © Gina Milicia 2015

    • Never be seen eating or drinking at the event.
    • Food and drink should always be consumed away from guests (eat before you go).
    • Ask for the best place to store your gear (I often call the venue in advance to ask to have a space set up for me).
    • Don’t annoy guests and corner them and bang on with boring stories.
    • Only give out your card if somebody specifically asks for it.
    • Keep notes on a pad or your Smartphone so you can remember the names of key people.
    • Always ask guests if they mind you taking their photo. If people are deep in conversation, try and wait for a break before cutting in. This is tricky, especially for new photographers. Try, “Hello. Sorry for interrupting. Do you mind if I take a photo?” Tone is really important. Never be pushy and always have a huge smile on your face. Compliment guests on their hat, bag, shoes, or eyes, but do it sincerely.
    • If you’re working with other photographers, try and help them set up shots and work together. This is a small industry; chances are you will work together again and it’s always great to develop friendships with other photographers. This can be a lonely industry sometimes.
    • Never stand around looking bored. If you’ve run out of guests, shoot the food, band or signage.
    • Email shots of the band, flowers and food to the suppliers. This is a great way to value add for your client, a nice thing to do for the suppliers, and a great way to meet potential new clients.

    Day of the event

    Try and arrive 30 minutes, to an hour before the event. This will give you plenty of time to unpack your gear and compose yourself before the event starts. There’s nothing worse than arriving late and having to set up under pressure.

    Do a quick reconnaissance of the location, take note of the lighting and try to pre-plan good locations for group shots and portraits. Set up your gear. Test and retest everything to make sure it’s working. Check that your memory cards are in your camera, the ISO is set to the correct setting, and your flashes are firing properly.

    Read the shot list and check and double check you’re getting all your key shots. Continually refer back to this on the day. Cover every detail possible on the day: signage, food, gift bags, drinks, flowers, and table settings. This is a great opportunity to introduce your skills to other businesses, so make sure you forward these images to caterers, florists and designers.

    Try and keep group shots to a maximum of five people. I often shoot people in groups of two, three and five. Take three to five frames when shooting groups of people because someone will always blink or pull a funny face. Tell the group you’ll take a few shots so they don’t look, or walk away, after the first frame. Keep talking while you’re photographing the group so you command their attention. Otherwise they’ll look the wrong way, start talking or eating, and ruin your shot.

    Events 8

    Using a long lens makes it really easy to capture candid images at events. © Gina Milicia 2015

    People shots

    Don’t be afraid to tidy people up (fix their jackets, ask them to stand in a more flattering way). Not every shot needs to be posed. Try and get a mix of candid images of people talking, laughing and enjoying the day. I find these shots are best done using a long lens when people don’t know you’re taking them. It’s very difficult to look discreet when you’re five inches away using a 28mm lens.

    Try and shoot speeches with a long lens, no flash. This means you can be in a discreet position and take several shots of the speaker without annoying them with your flashes. I like to wait until the speaker looks up from their notes or smiles to acknowledge applause.

    Avoid taking shots of people eating. I’ve yet to see someone who looks glamorous with a mouth full of food.

    After the event

    Events 6

    © Gina Milicia 2015

    • Carefully back up ALL your files (Then back them up again when you get back to your office/base).
    • Do a final double check for random gear you might have left behind (I’ve lost two monopods).
    • Rehydrate and eat something before you process your files.
    • Send off any extra shots to caterers, florists or guests who may have approached you during the event.

    Do you have any pre-event rituals that you use to help your day run smoothly? Is there anything I may have missed? I’d love to hear your suggestions.

    googletag.cmd.push(function() {
    tablet_slots.push( googletag.defineSlot( “/1005424/_dPSv4_tab-all-article-bottom_(300×250)”, [300, 250], “pb-ad-78623” ).addService( googletag.pubads() ) ); googletag.pubads().enableSingleRequest();
    googletag.pubads().disableInitialLoad();
    googletag.pubads().collapseEmptyDivs( true );
    googletag.enableServices();
    } );

    googletag.cmd.push( function() { googletag.display( ‘pb-ad-78623’ ); } );

    googletag.cmd.push(function() {
    mobile_slots.push( googletag.defineSlot( “/1005424/_dPSv4_mob-all-article-bottom_(300×250)”, [300, 250], “pb-ad-78158” ).addService( googletag.pubads() ) ); googletag.pubads().enableSingleRequest();
    googletag.pubads().disableInitialLoad();
    googletag.pubads().collapseEmptyDivs( true );
    googletag.enableServices();
    } );

    googletag.cmd.push( function() { googletag.display( ‘pb-ad-78158’ ); } );

    The post How to Organize and Photograph Events Like a Pro by Gina Milicia appeared first on Digital Photography School.

    Digital Photography School

  • 5 Reasons to Use Flash to Improve Your Travel Photography

    When it comes to travel photography, I am all in for carrying less. However, a good flash is always within reach in my everyday camera bag. I strongly believe that a flash helps to achieve much better results in a number of situations, and here are five reasons and examples:

    1) Fill the shadows

    Fishing on the Cau River

    The alleyway that protects these fishing villagers from the heat in Vietnam makes it almost impossible to have a good balance between the bright sunlight on the river, and the walls of the alley. The use of flash, in a controlled way, over the foreground helps to open up the shadows and show some detail on the otherwise totally dark foreground.

    2) Under-expose your background

    Farmer in Van Ha

    When making portraits, it is always good to have decent separation between your main subject and the background. Granted, one of the most popular ways is to use a shallow depth of field and blur the background while keeping the principal element of your photo sharp. Another way is to intentionally under-expose your photo one or two stops, and light your subject with flash to compensate.

    3) Freeze motion

    For the love of the kids

    If you are working with moving subjects, the use of flash will help to freeze some of the motion if you intend to do so. This depends on a number of factors, including what shutter speed you are shooting at and the length of the flash duration. But, if you notice in the example above, the flash is only being used to achieve points one and two of this article, meaning I am also underexposing the image a tad, and opening up the shadows in the main subject to bring more attention to them.

    4) Dark interiors

    Old Black Hmong man

    This artisan from the Hmong minorities in North Vietnam was working his craft inside his house where no lights are available. Despite being close to a window, it was way too dark to photograph, even at high ISO. If you encounter a similar condition, the use of flash will not only make a big difference, but could also be the reason you get the shot at all.

    5) Keep shooting at night

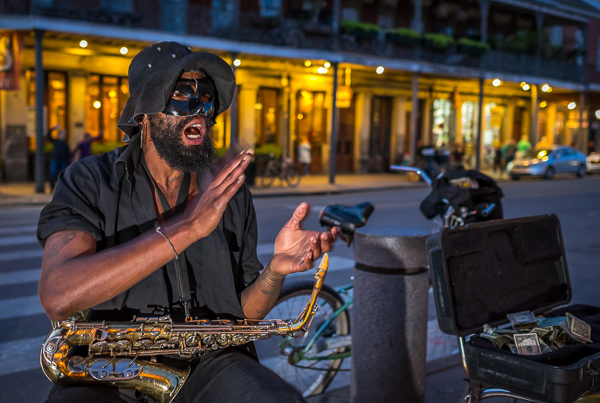
    Street performer at night in New Orleans

    Some places are meant to be enjoyed at night. All kind of photos are possible during this time. Cityscapes and lights trails are certainly compelling propositions, but when it comes to capturing street life there is no better way than with the aid of flash. That extra pop of light will make your subjects come alive and stand out.

    The key to doing this is to practice and learn how to manage and balance ratios. Every moment is different and sometimes your key light will be your flash, and other times you’ll be using it just to fill. My personal preference is to do it manually. I think you have much better control by dialling in the power of your speedlights manually, rather than letting the camera figure it out. It takes practice, but it is not difficult to master.

    In terms of equipment, I really like the Yongnuo YN 560-III, the main reason is the integrated radio trigger. The units are inexpensive, but well made, which doesn’t hurt either. But as I always use it off-camera, the fact that I don’t need to attach cables or be worried about optical slaves is something that I appreciate. That radio signal goes everywhere, even behind walls, making it very easy to trigger.

    What about you? Do you use any flash in your travel photos or in situations like these? Share your images and comments below.

    googletag.cmd.push(function() {
    tablet_slots.push( googletag.defineSlot( “/1005424/_dPSv4_tab-all-article-bottom_(300×250)”, [300, 250], “pb-ad-78623” ).addService( googletag.pubads() ) ); googletag.pubads().enableSingleRequest();
    googletag.pubads().disableInitialLoad();
    googletag.pubads().collapseEmptyDivs( true );
    googletag.enableServices();
    } );

    googletag.cmd.push( function() { googletag.display( ‘pb-ad-78623’ ); } );

    googletag.cmd.push(function() {
    mobile_slots.push( googletag.defineSlot( “/1005424/_dPSv4_mob-all-article-bottom_(300×250)”, [300, 250], “pb-ad-78158” ).addService( googletag.pubads() ) ); googletag.pubads().enableSingleRequest();
    googletag.pubads().disableInitialLoad();
    googletag.pubads().collapseEmptyDivs( true );
    googletag.enableServices();
    } );

    googletag.cmd.push( function() { googletag.display( ‘pb-ad-78158’ ); } );

    The post 5 Reasons to Use Flash to Improve Your Travel Photography by Daniel Korzeniewski appeared first on Digital Photography School.

    Digital Photography School

  • 10 Things I Discovered at the WPPI 2015 Trade Show

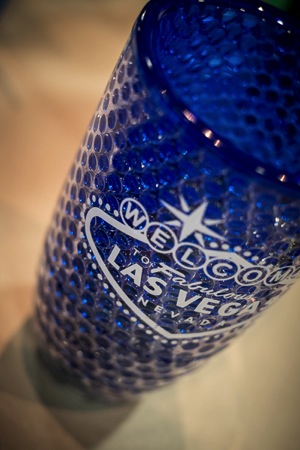
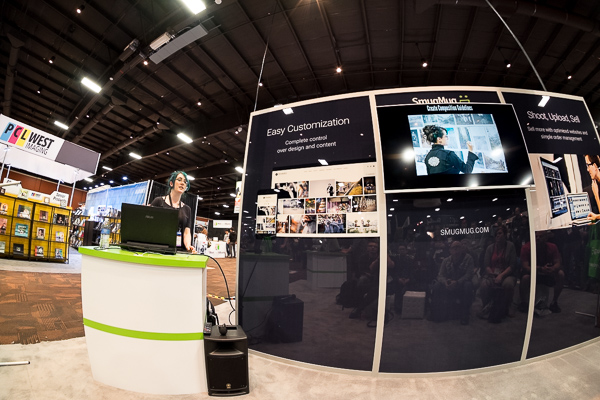
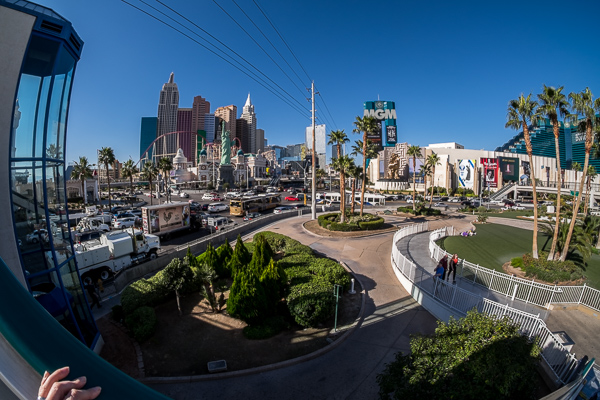
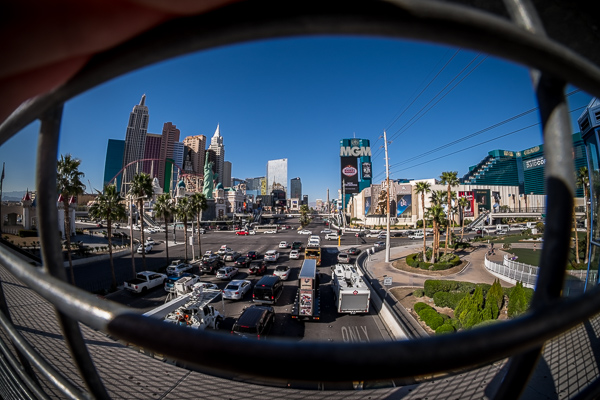
    Vegas-Mar2015-0117-600px.jpgWedding and Portrait Photographers International (WPPI) holds an annual conference and trade show. It’s a massive photography convention with over 10,000 attendees converging on Las Vegas, Nevada each year. I’ve personally attended it over 12 times – both as photographer and trade representative. This year I decided to go just to see some old friends I haven’t seen in way too long, meet some others I’ve only ever seen online, and to make some new contacts.

    In this article I’ll share with you my top 10 things I discovered at the trade show this year at WPPI 2015, and how you could apply some things to your photography:

    10 things I discovered at the WPPI 2015 trade show

    #1 Westcott’s Ice Light

    This seemed to be the hot ticket item of the show with constant line ups just to see and order one. Weighing in at just 1.3lbs (0.58kg), The Ice Light is an ultra-portable, battery operated, LED light you can take anywhere. It’s not cheap though – while the light itself is light, the price is a bit heavy at $ 450 USD.

    This finn promo video will give you an idea what it’s all about:

    Will it help you take better photos? Probably not – educating yourself will do that. But it might be a fun tool (aka toy) in your arsenal if the budget allows.

    #2 Photographer’s Ignite

    From Wikipedia: Ignite is a style of presentation where participants are given five minutes to speak on a subject accompanied by 20 slides. Each slide is displayed for 15 seconds, and slides are automatically advanced.

    Photographer’s Ignite started in 2006 and has become really popular. As the last event at WPPI 2015 the large room was filled pretty much to capacity. You can see some sessions from their archives which I shared the other day.

    There were some really great five minute talks, many of which inspirational. A great way to end a conference and head home – with ideas in your head. But remember, only taking action will move you forward. So watch as many of the sessions as you want – then get moving and DO something.

    #3 Some really cool camera bags for ladies

    Sorry guys there were man-style bags too, lots of them – I just didn’t scope them out this time around. One of my favourites (unisex) are ThinkTank – check those out!

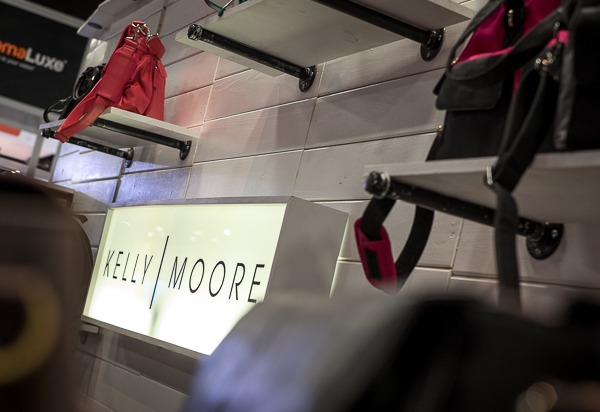
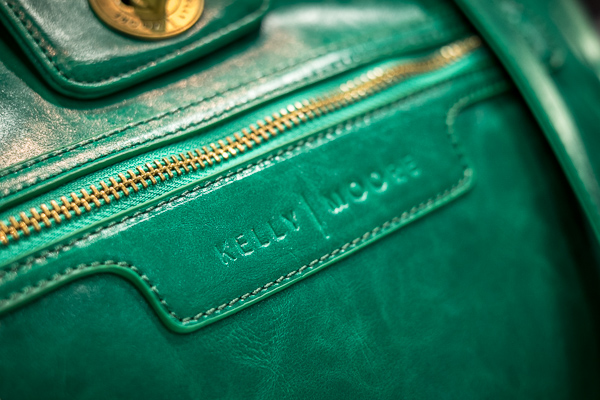
    Kelly Moore Bags

    This were literally flying off the shelves at the show, I even saw men purchasing them for their wives and people arguing over the last one of a particular style. They were that hot.

    Vegas Mar2015 0111 600px

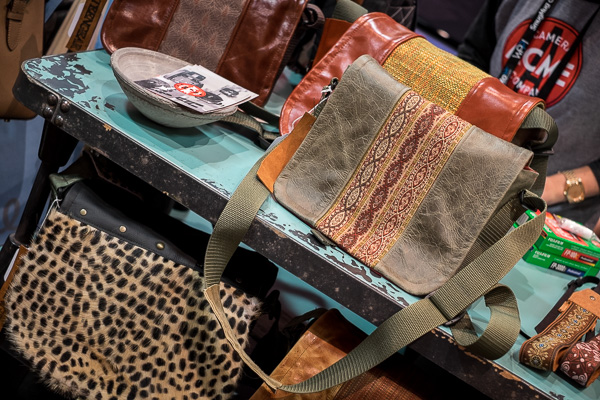
    What’s so great about Kelly Moore bags? Well, they don’t look like a camera bags – they look like purses. The inserts come out too so you can put in lots of camera gear and fill them, half gear and personal stuff, or just use it as a purse without inserts. I know many female pro photographers that swear by these bags. Some can even double as a diaper bag for mom photographers.

    Vegas Mar2015 0114 600px

    They look pretty well made and stylish, I have to say.

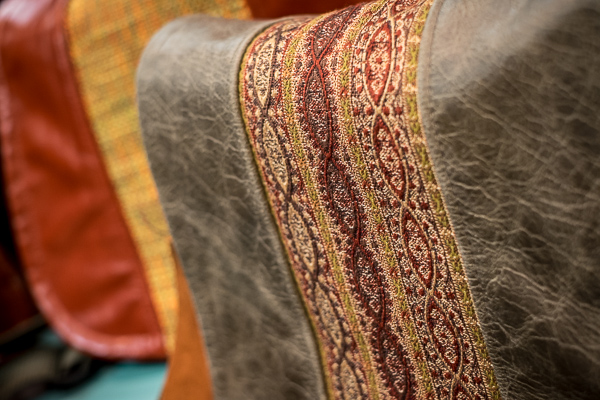
    Porteen Gear’s design your own bags

    I found these online a while ago but hadn’t seen one in person. One of the booth’s had some on display and they lived up to my expectations.

    Vegas Mar2015 0123 600px

    Well made, high-quality materials, and you get to pick all the materials and colours so you can make a totally unique bag that only you own. You can even play with their Bag Builder tool online to see your bag virtually before you order. Select your bag size and style, leather color, accent color, the interior lining material and the strap and see your bag built in front of your eyes. With over 30 leathers and 100+ accent colours – you can be conservative or go crazy and show your style!

    Vegas Mar2015 0126 600px

    #4 – Some of our dPS trusted suppliers

    As Editor of dPS I also took some time to stop in and meet some of our trusted vendors and suppliers like Tamron (who will be supplying one of our writers with their new 15-30mm f/2.8 lens to review for you), B&H Photo Video, and Adorama (more than a camera store). If you’re even in New York City, stop in and visit both of those stores. They are massive and you can get lost inside – but I do forewarn you – you may want to leave your credit card behind for safety!

    I also found some new companies and make a few connections with some third party brands to see if we can get some items to review for you. Stay tuned to the Cameras and Equipment section for more when that’s available. Two products I found particularly interesting were the Nissin flashes and Sirui tripods.

    #5 Storage and backup solutions

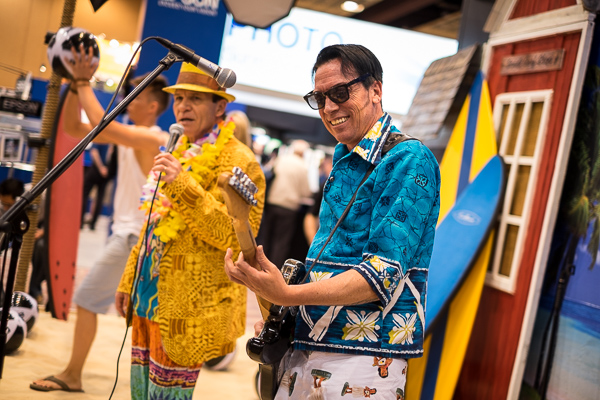
    Vegas Mar2015 0049 600px

    No the photo above has nothing to do with storage but photos of hard drives is a bit boring, so it’s a the token photos of an Elvis impersonator singing the Beach Boys instead. Only in Vegas!

    How to save, backup and archive your images can be a big issue. I’ve been researching (okay my tech husband has) solutions for a while. One we’ve been looking at is the Synology system. I found three others I hadn’t heard of before at the show as well. Here is a list of them – keep in mind this is not a recommendation only a list as I know very little about them. Before purchasing and setting up any backup system do your due diligence and research to find the one that’s right for your situation.

    • Qnap – might be an excellent option for a small home user or photographer.
    • CRU – have a free backup information booklet available on their site.
    • G-Technology – these guys had a lot of really well known photographers endorsing their products. The only thing I disliked about them was that you have to use their drives, they are proprietary. Most other systems allow you to put any brand of drive into the system.

    All of these are available on Amazon, but remember, please do your research before buying anything.

    #6 Friends

    Attending a photography workshop or conference is a great chance to make new friends, or see old ones. I did a little of both on this trip.

    Longtime friends

    Vegas Mar2015 0037 600px

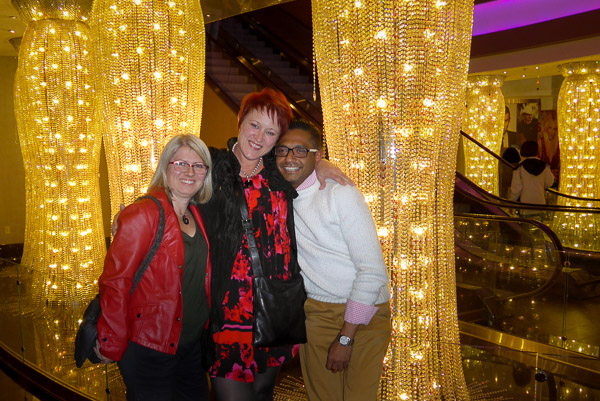
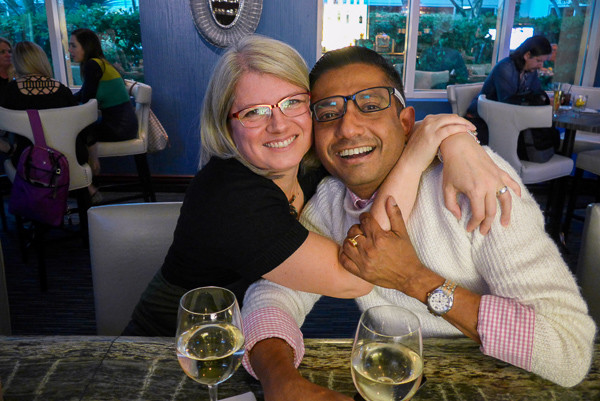
    One of my past incarnations, and why I’ve been to so many WPPI conferences, was the role of client support (North American representative) with Queensberry albums in New Zealand. They make some of the best wedding albums for professional photography studios (for wholesale resale to clients only). I worked with them for over nine years and made lifelong friends with my fellow workers and the company owners. Above you see Sonya (company director, used to be my boss), and Raktim (he’s my brother from different parents, mine in Canada, his in India).

    Vegas Mar2015 0033 600px

    It’s been six years since we have been in the same room together and we all agreed it’s been too long. Have you made friends at a conference or event in the past? Did you keep in touch? It’s a small world now – there’s no excuse not to – reach out to your “old” friends now.

    Vegas Mar2015 0017 600px

    I also got to see my friend, photographer Renee Robyn speak for the first time. She does amazing work with models, Photoshop and light. She’s travels regularly and does workshops all over the world. If this style is up your alley check out her work. I will warn you she’s not G-rated though (her images and her language), so enter with caution if you’re sensitive.

    New and online friends

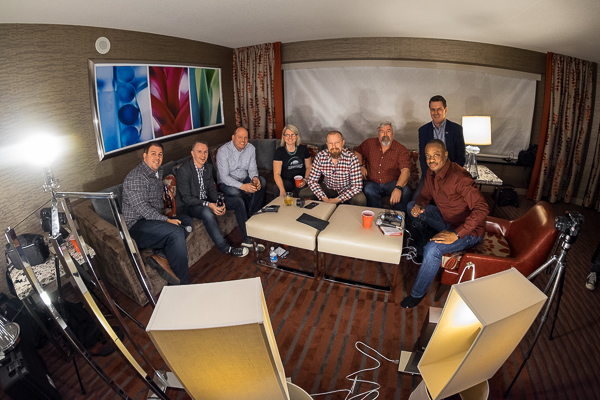
    Along with connecting with some longtime friends I also met some of my online or virtual ones for the first time. That included Mr. Frederick Van Johnson who’s podcast This Week in Photo I’ve had the honour of guest hosting several times. We even recorded an episode from a hotel room in Vegas (it was me and about nine other guys in the room, could have used dPS writer and another TWiP host Valerie Jardin for some extra female energy).

    Vegas Mar2015 0081 600px

    Don’t you just love the high-tech lighting going on here for the video? They had every lamp in the room in front of us. It was a lot of fun as we discussed the show, where photography is going, what’s hot and more. You can watch or listen to the episode here.

    I was also honoured to be interviewed by Frederick in the Panasonic booth for a women photography entrepreneurs Q&A session, with Catherine Hall.

    Vegas Mar2015 0137 600px

    #7 Education overload

    There were LOTS of choices opportunities for learning including: books, workshops, DVDs, online courses, and more – an almost overwhelming number of choices are available. The best plan is to pick one or two sources for education and stick to those – we hope you pick dPS – and then focus on doing and putting it into practice. We even discussed this on the podcast (link above), that learning + action is one of the keys to doing better photography.

    #8 – That an 8mm fisheye lens is a really cool toy

    Vegas Mar2015 0274 600px

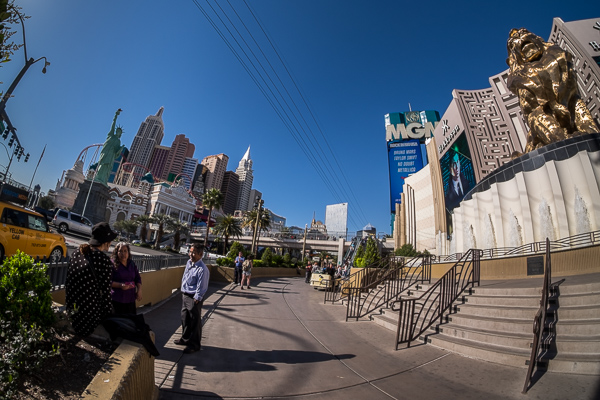
    Just days before I left for Vegas my much anticipated Amazon shipment arrived with a new Rokinon 8mm fisheye lens, for my Fuji X-T1 mirrorless camera (APS-C sensor). On the cropped sensor it’s equal to about 12mm and man is it cool.

    It’s completely manual (manual focus and exposure) and the camera doesn’t even recognize it. I have to shoot in a mode that tells the camera there is no lens on the front. But the camera does still adjust the exposure. Focus is a bit tricky but using the focus peaking feature on my camera helps. I have more than a few out of focus shots, so more use of the lens and practice is required yet.

    Vegas Mar2015 0276 600px

    Notice how wide the angle of view is; I had the lens touching the fence in this image and it’s still in the shot.


    Vegas Mar2015 0256 600px

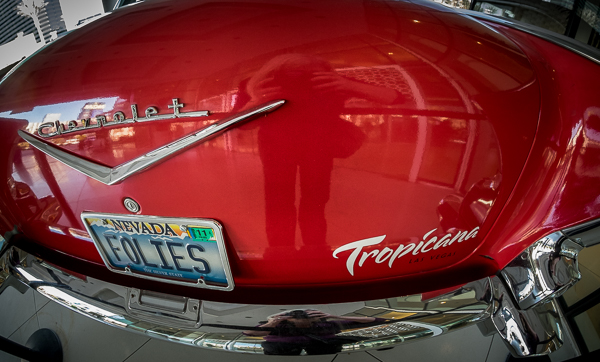
    If you’ve never tried a fisheye lens give it a go, you can be super creative. But learn to use it wisely. You must put something in the frame close to the lens as the subject or you’ll just have a wide mess of nothing. See if you can borrow or rent one, or perhaps even pick up an old film lens and adaptor.

    Vegas Mar2015 0301 600px

    An obligatory selfie in the car’s reflective surface.

    #9 That I really love travelling with the Fuji X-T1

    A few months ago I invested in a mirrorless system and chose the Fuji X-T1. I admit I’ve had some issues with it, including it completely quitting on me in Nicaragua and having to be shipped back to Canada. But it’s got a new motherboard now and that seems to have been the issue (I got a dud – great!) as it has had no further issues.

    The whole reason I added this camera (I didn’t switch, I still use my Canon 5D MkIII for portraits) to my lineup is for travel. I’ve been doing this a long time and I’m getting tired of hauling around so much heavy gear all the time. On this occasion I just grabbed the camera, 35mm f/1.4 lens (super light-weight and small) and the Rokinon 8mm. With the camera and lens around my neck, I was able to walk around every day carrying just my purse and extra lens inside. It was awesome!

    Not convinced – read some dPS articles on mirrorless cameras and you decide if it’s right for you. It may be – it may not be.

    #10 Sometimes getting away is a good recharge

    You’ve probably heard this before, but getting away from home – if even only for a couple days – can be a great energy reboot and boost for your creativity. You don’t even have to go far – a neighbouring town, a drive in the country for the afternoon even, just a change of scenery and routine can be just the thing you need.

    So that’s what I discovered at the 2015 WPPI show. Have you attended WPPI or any other photography conference? What were your take aways?

    googletag.cmd.push(function() {
    tablet_slots.push( googletag.defineSlot( “/1005424/_dPSv4_tab-all-article-bottom_(300×250)”, [300, 250], “pb-ad-78623” ).addService( googletag.pubads() ) ); googletag.pubads().enableSingleRequest();
    googletag.pubads().disableInitialLoad();
    googletag.pubads().collapseEmptyDivs( true );
    googletag.enableServices();
    } );

    googletag.cmd.push( function() { googletag.display( ‘pb-ad-78623’ ); } );

    googletag.cmd.push(function() {
    mobile_slots.push( googletag.defineSlot( “/1005424/_dPSv4_mob-all-article-bottom_(300×250)”, [300, 250], “pb-ad-78158” ).addService( googletag.pubads() ) ); googletag.pubads().enableSingleRequest();
    googletag.pubads().disableInitialLoad();
    googletag.pubads().collapseEmptyDivs( true );
    googletag.enableServices();
    } );

    googletag.cmd.push( function() { googletag.display( ‘pb-ad-78158’ ); } );

    The post 10 Things I Discovered at the WPPI 2015 Trade Show by Darlene Hildebrandt appeared first on Digital Photography School.

    Digital Photography School

  • Kickstarter Project That Will Change Your Photography Career Forever (Exclusive Freebie Inside)

    You might have already heard about Defrozo, a free multi-tool business app for photographers as it has been mentioned in the media quite a lot lately. Today the Defrozo Kickstarter went live, and it’s become a Staff Pick in less than 1 hour after the launch! With a working Beta, over 2000 users on board, and some quite ambitious goals, the Continue Reading

    The post Kickstarter Project That Will Change Your Photography Career Forever (Exclusive Freebie Inside) appeared first on Photodoto.


    Photodoto

  • Photographing Special Events Like the Birth of a Baby

    200

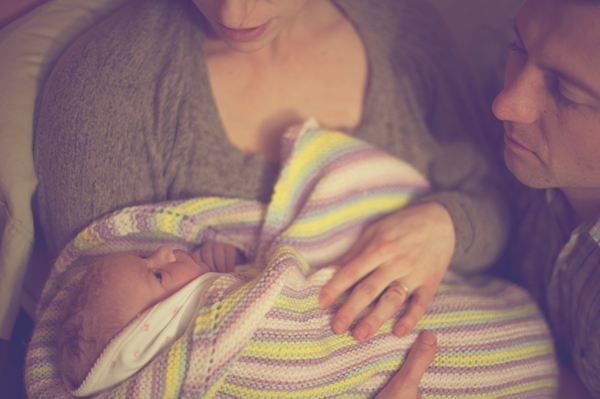
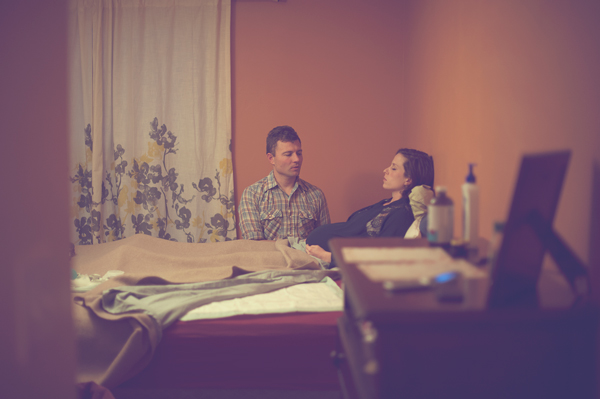
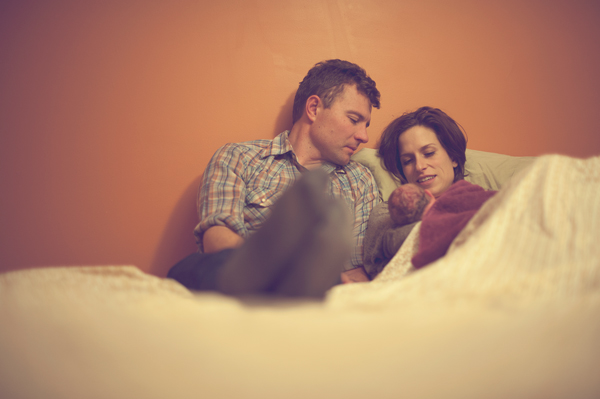
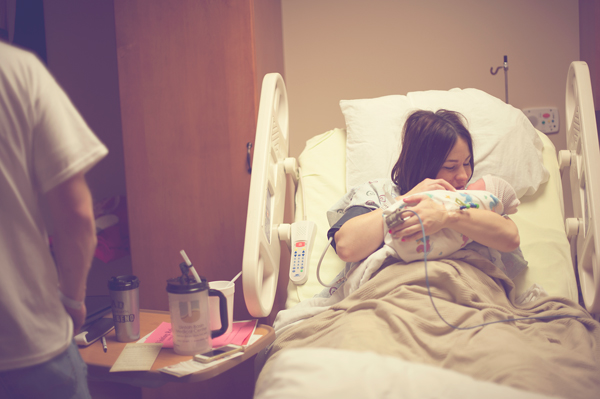
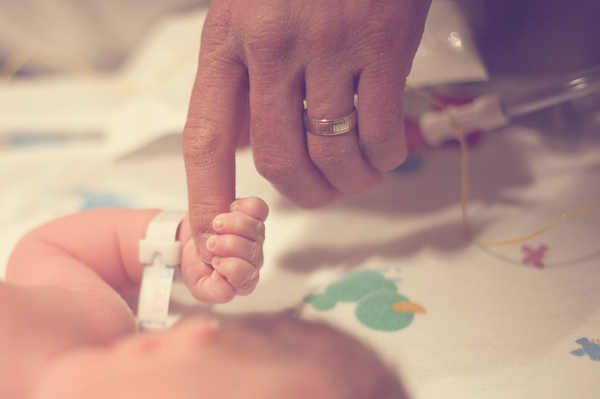
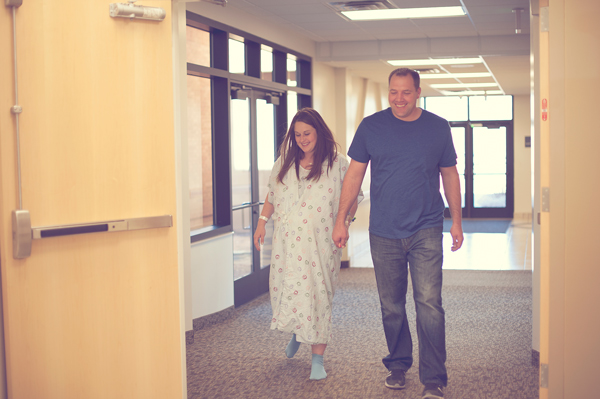
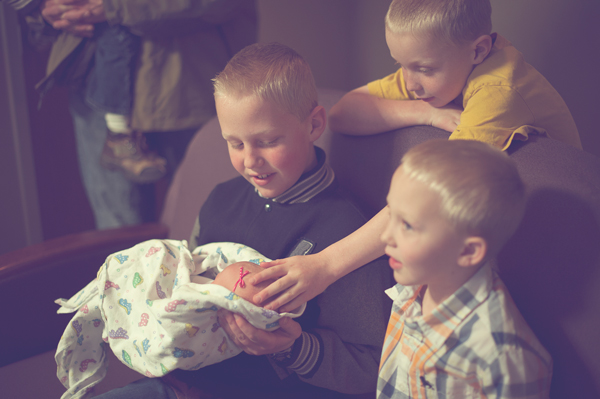
    Sometime in your life as a photographer, you might be lucky enough to get the chance to photograph an event that is so special, so sacred, so personal, that all you can do is be grateful that you have been invited to be part of that unforgettable moment.

    My photos and words will focus on photographing the birth of a brand new baby, but there are many other events, some happy, some sad, that you might be asked to photograph, and these suggestions may help you with those times too.

    057

    Be Respectful

    Above all else, be respectful. This moment isn’t about you. It isn’t about your amazing sparkling personality. It isn’t even about making sure you “set up a perfect shot”. My goal at each birth is that ultimately, they won’t even remember that I was there. They will have beautiful photographs that help them remember all the delightful details of that moment, but they won’t have memories of a photographer barking orders, or pushing their birth coach to the side to get a better shot.

    133

    I have a rule for myself that I don’t disturb anything that is going on. I try not to move anything, and I don’t give any suggestions to anyone about where they should be or what they should do. I have stood on a chair for a better vantage point, but I want to capture what would happen if I wasn’t even there.

    Make sure that you have permission, and that the hospital, or wherever you are photographing the event, is okay with you being there. You might want to mention to the nurse, midwife, or doctor, that you have no intention of getting in their way, and that they can let you know if you are, and you will move.

    199

    Discuss Expectations

    Make sure you know exactly how much they want photographed. Especially in a situation like a birth, there are many different comfort levels. Sometimes I photograph everything, and sometimes I photograph only what they’d want to show friends and children later. Make sure you know what they’re hoping to get, and make sure they know what you are willing to deliver. Birth stories can be very unpredictable, so make sure you are both prepared for things going differently than how you planned.

    177

    Every single birth story I have photographed has been vastly different, but that’s one of the things that makes them so amazing to photograph. I am photographing events as they unfold, not knowing when or exactly how everything will happen. I even photographed two births in the same night one time, one right after the other, and they were both their own unique, perfect story. I was a bit tired the next day, but it was so worth it!

    104

    Be Prepared

    Since you won’t know how long you will be there, and what might happen, be prepared for anything. Make sure your batteries are fully charged (I will admit that I had a bit of learning curve on this one. I had three batteries in my bag, all at one bar. As I checked one after the other, I couldn’t believe that I had forgotten to charge my spares. Luckily one battery lasted the entire time, (and it wasn’t a big deal, but it could have been a tragedy), make sure you have extra memory cards, and have your camera ready to go at a moment’s notice.

    I give the parents my cell phone number, my home number, and my husband’s cell phone number. I tell them to keep me updated as we get closer to the due date, and let me know about any labor, even if they think it might be false labor. It’s a guessing game to know what time to be there, but I try to be there around one or two hours before delivery, erring on the side of being there too early rather than too late (I missed a delivery by five minutes one time. The hospital was 30 minutes away, and neither I nor the parents expected labor to go that fast. It was one of my saddest days as a photographer).

    116

    You might even want to bring water, a snack, and a book or magazine to read. If things are progressing slowly, you will be glad you brought them. You don’t want the laboring mother, or her birth coach to feel like they need to worry about feeding and entertaining you. Remember, they shouldn’t even remember that you are there.

    188

    Be a Keen Observer

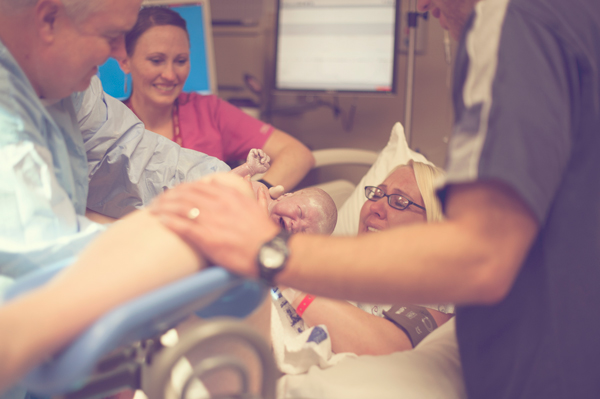
    Watch carefully so you don’t miss any emotions. Be aware of what could be coming, so you can position yourself in the right place at the right time. In the above photo, I knew that the mom didn’t know if she was having a girl or a boy, and I also knew that she had four boys already. I knew the moment she found out would be a very emotional moment. When she heard, “It’s a girl!” and had that baby placed in her arms, there was no holding back the tears of joy for any of us. Yes, I cry during births. It hasn’t hurt my camera yet.

    Be sensitive about emotions that they may not want to remember in a lot of detail later. Some moments during labor are very intense, and sometimes a mom might not be as in control as she hopes to be. I had a friend tell me once that she had a photographer at her birth, and she was disappointed later when she got the photos and saw herself. Her good memories of the experience were overshadowed by seeing pain and loss of control on her face in the photos.

    280

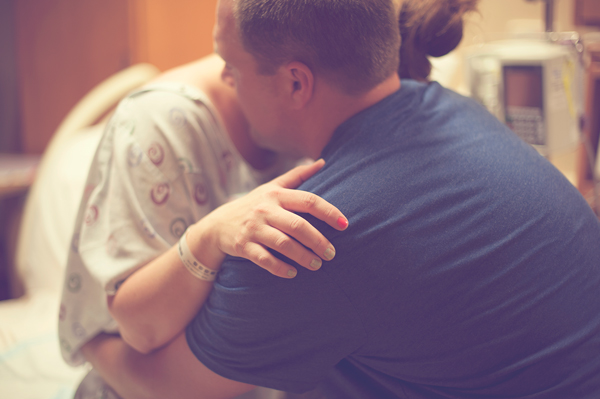
    The story that you are telling with your photos will be a big part of the memory that will stick with them, long after that day. The moments of pain can be captured by photographing the support and love: a hand held, a shoulder to lean on. Tell the story true, but focus on the strength, love, joy, wonder, and amazement.

    Have you ever had the chance to photograph a birth or other special event? I’d love to hear about your experience in the comments.

    googletag.cmd.push(function() {
    tablet_slots.push( googletag.defineSlot( “/1005424/_dPSv4_tab-all-article-bottom_(300×250)”, [300, 250], “pb-ad-78623” ).addService( googletag.pubads() ) ); googletag.pubads().enableSingleRequest();
    googletag.pubads().disableInitialLoad();
    googletag.pubads().collapseEmptyDivs( true );
    googletag.enableServices();
    } );

    googletag.cmd.push( function() { googletag.display( ‘pb-ad-78623’ ); } );

    googletag.cmd.push(function() {
    mobile_slots.push( googletag.defineSlot( “/1005424/_dPSv4_mob-all-article-bottom_(300×250)”, [300, 250], “pb-ad-78158” ).addService( googletag.pubads() ) ); googletag.pubads().enableSingleRequest();
    googletag.pubads().disableInitialLoad();
    googletag.pubads().collapseEmptyDivs( true );
    googletag.enableServices();
    } );

    googletag.cmd.push( function() { googletag.display( ‘pb-ad-78158’ ); } );

    The post Photographing Special Events Like the Birth of a Baby by Melinda Smith appeared first on Digital Photography School.

    Digital Photography School

  • Using the Adjustment Brush in Adobe Camera Raw

    Adjustment-Brush-title2

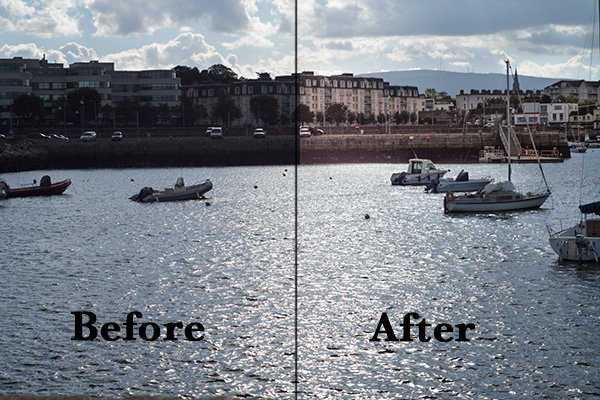
    A before and after using the Adjustment Brush on the buildings.

    What is the Adjustment Brush?

    The Adjustment Brush is an editing tool in Adobe Camera Raw (known simply as ACR). This tool is possibly the equivalent of the Dodge and Burn tools in Photoshop. So what is dodging and burning? To dodge is to lighten and to burn is to darken a specific area.

    What does it do?

    When you make your initial global adjustments of a RAW file in ACR, more than likely, you will need to make local adjustments too. This is where the Adjustment Brush is useful for making adjustments to specific areas of your photo.

    Recently, I have found I am using this tool more and more. If I am out and about just shooting for my own library, I tend to take photos slightly underexposed. This way, I can recover a lot of detail in the post editing stage. This is useful if you don’t have time for metering the shot perfectly, especially in the case where skies are involved.

    How does it work?

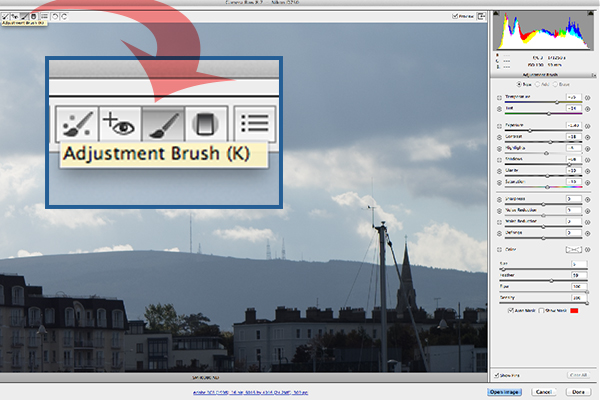
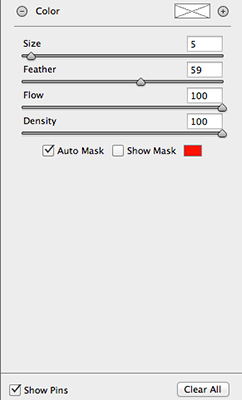
    The Adjustment Brush isolates a specific area by masking it, similar to using layer masks in Photoshop. When you click on the Adjustment Brush icon, the right panel changes to the Adjustment Brush tab. The bottom sliders modify the size of the brush and you can also determine how much feather and density (flow) you wish to apply.

    When you use the Adjustment Brush on a particular part of your image, a pin icon appears to determine where your adjustment has just been made.

    Adjustment-brush-zoomed-up

    The Adjustment Brush is located at the top left of the dialog box.

    Adjustment-Brush-and-Pin-icon

    How the Adjustment Brush looks when in use and the Pin icon which determines where on the image the adjustment has been made.

    Adjustment-Brush-slider

    These sliders adjust the size, feather and flow of the Adjustment Brush.

    I do find using the Adjustment Brush a bit cumbersome. But this tool definitely has its merits. Like most of the editing tools in ACR, Photoshop, Lightroom, etc., there is simply no one-click button that magically does it all.

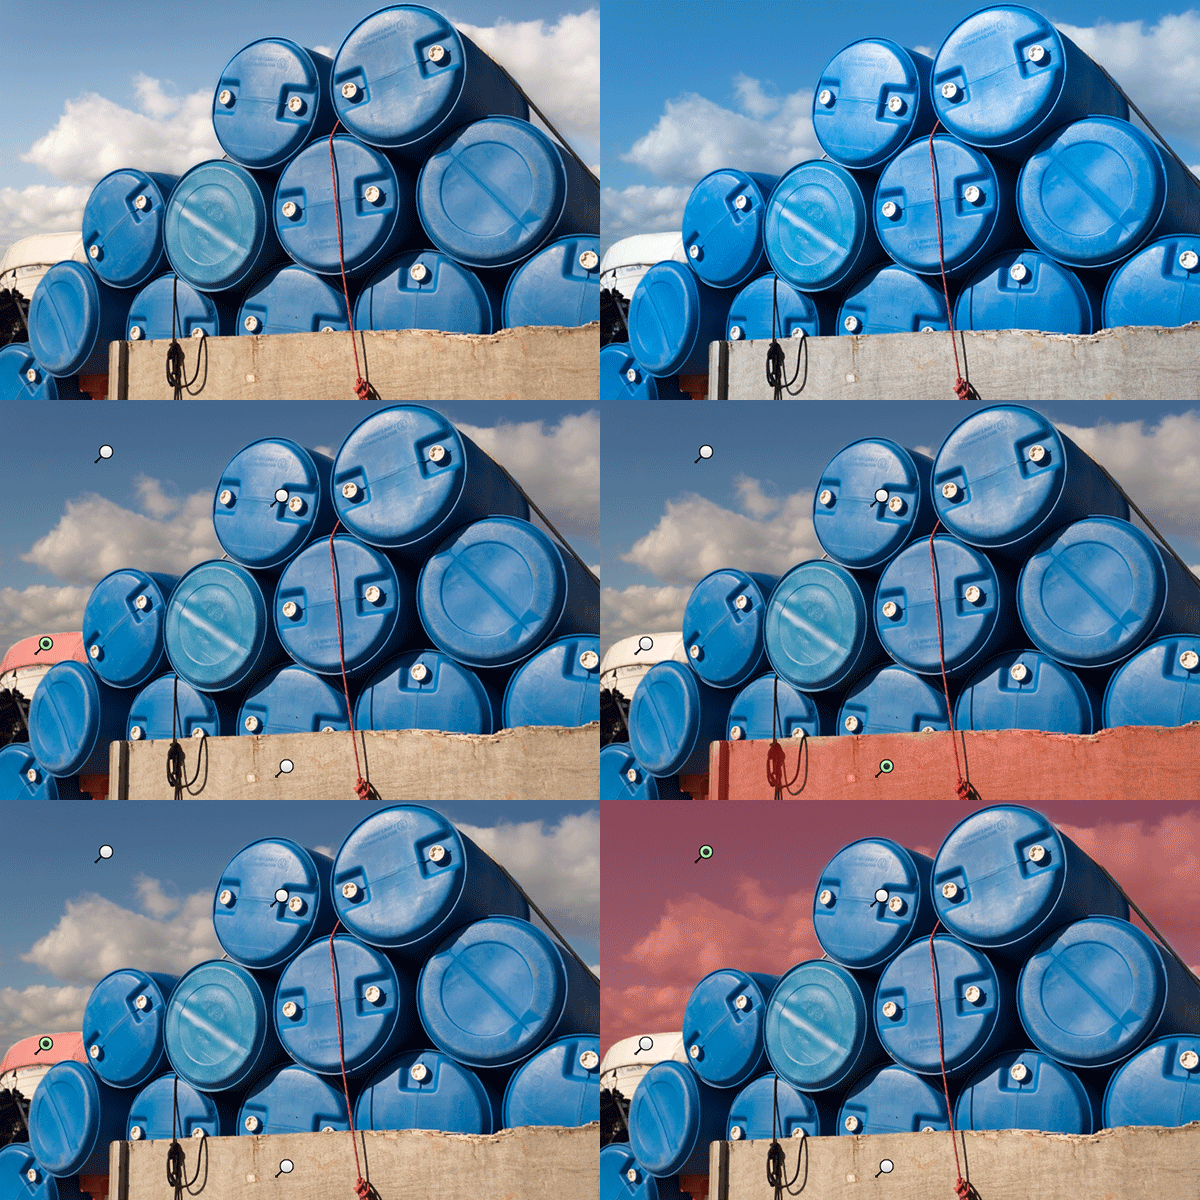
    You may find with a bit of practice using the Adjustment Brush that it could speed up your editing workflow. Take for example this image that I shot of some blue containers on a pier. I made the basic adjustments in ACR. I then used the Adjustment Brush in several areas: to lighten the sky; to keep the highlights on the small white boat on the left from being blown out completely. I also used the Adjustment Brush on the wood section to give it more warmth.

    blue-drums

    Several areas where the Adjustment Brush has been used as shown by the Pin icon.

    The Graduated Filter in conjunction with the Adjustment Brush is a great combination. It behaves in a similar way to a Graduated Neutral Density filter. I use this filter on skies, then use the Adjustment Brush to mask areas that I don’t want the Graduated Filter to effect.

    Pros

    • Broad local adjustments lightened or darkened.
    • Speed up your editing workflow as you may not need further adjustments in Photoshop or Lightroom.
    • Works really well in conjunction with the Graduated Filter tool.

    Cons

    • Cumbersome and sometimes awkward to use.
    • More refined detail is better done in Photoshop using layer masks where you have more control.

    Tip:

    A fantastic feature in Photoshop CC is that Camera Raw is now a filter. However, if you are using previous versions such as CS5/6, a substitute workaround is before you open your image from within ACR to Photoshop, make sure you open it as a Smart Object. You can do this by holding the Shift key and the Open Image button changes to Open Object. Or you can have this option ticked in Workflow Options. This is a pop-up dialog box located by clicking on the link at the bottom of the ACR screen. That way you can go back into ACR by double clicking on the layer.

    Harbour

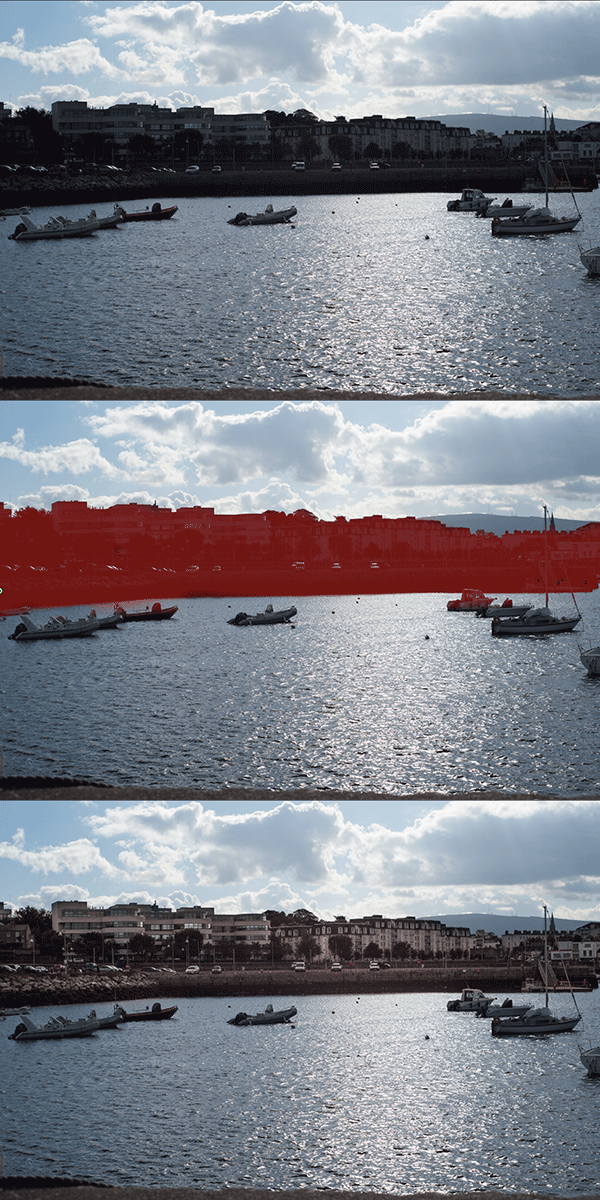
    By using the Adjustment Brush on just the buildings, I was able to recover a lot of detail.

    googletag.cmd.push(function() {
    tablet_slots.push( googletag.defineSlot( “/1005424/_dPSv4_tab-all-article-bottom_(300×250)”, [300, 250], “pb-ad-78623” ).addService( googletag.pubads() ) ); googletag.pubads().enableSingleRequest();
    googletag.pubads().disableInitialLoad();
    googletag.pubads().collapseEmptyDivs( true );
    googletag.enableServices();
    } );

    googletag.cmd.push( function() { googletag.display( ‘pb-ad-78623’ ); } );

    googletag.cmd.push(function() {
    mobile_slots.push( googletag.defineSlot( “/1005424/_dPSv4_mob-all-article-bottom_(300×250)”, [300, 250], “pb-ad-78158” ).addService( googletag.pubads() ) ); googletag.pubads().enableSingleRequest();
    googletag.pubads().disableInitialLoad();
    googletag.pubads().collapseEmptyDivs( true );
    googletag.enableServices();
    } );

    googletag.cmd.push( function() { googletag.display( ‘pb-ad-78158’ ); } );

    The post Using the Adjustment Brush in Adobe Camera Raw by Sarah Hipwell appeared first on Digital Photography School.

    Digital Photography School

  • Full Moon Photography Using The Photographer’s Ephemeris 3.0

    IMG_0450The latest release of The Photographer’s Ephemeris (TPE) releases even more tools to help us photographers get the shots we want. There is just too much for one article, so I am going to focus on a personal favorite subject – full moon photos.

    Before handy apps like TPE, LightTrac and PhotoPills, figuring out where the moon might be on any given night took some educating. Pile on top of that the desire to know when the moon was behind, or next to, a specific feature, natural or man-made, and the calculations were beyond anyone lacking a degree in mathematics. But now, it’s all so much easier. Let me show you how I plan on getting a shot of the full moon behind Seattle’s Space Needle this May.

    I’ll be using the iPad version of the app which allows for adding in a subject height. Nearly the same functionality is available with the Desktop and Android versions of the app, but the location of items may shift a little. With the desktop and Android version you will not be able to manually add in the subject height but can, using the Pythagorean theorem (and there are plenty apps for it), add in the angle you need.

    Pre-planning

    To get started, I have decided I want to get a shot of the full moon behind Seattle’s Space Needle. It’s a subject that lends itself well to moon photos. I had a shot in mind that I later confirmed possible after viewing Tim Durkan’s fine example from last year.

    Laying out the steps before I open the app, my process will look like this:

    • Find a location where I can see the Space Needle, and one which faces mainly South or West (because of hills, I know shooting to the East is hard and the moon will not appear to the North of the Needle because of being in the Northern Hemisphere).
    • Plot out my location and the location of the Space Needle.
    • Account for elevation change and the height of the Needle.
    • Let the program do its magic.
    • Record my findings and make actual plans.

    Finding your location

    Loading the app brings up a fairly full featured screen.

    IMG_0450

    To center the map on your intended location, simply move the map around with your finger until the crosshairs are over your location. You can then tap on the inside of the crosshairs or tap the red observer pin that looks like this:(null)

    I placed the location in a park near the shore of Lake Union, a place I know with good visibility of the Needle about 3/4 of a mile away. This will give me a good apparent size relationship of moon to Needle. Many locations can be scouted by using Google Street View.

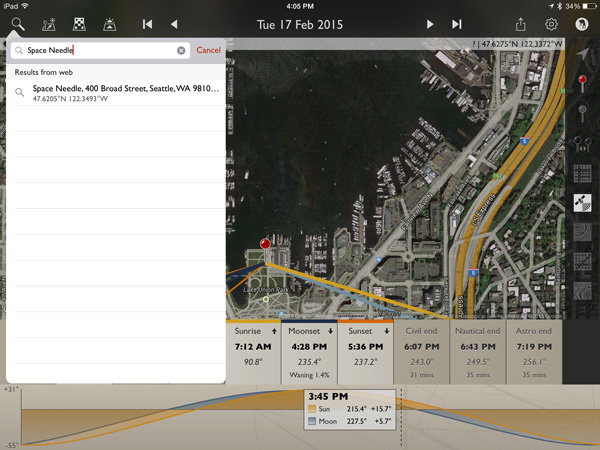
    Next, mark the location of the Space Needle. TPE has a decent search feature, you can use it to quickly find many natural and man-made features around the planet. Just click on the magnifying glass in the upper left and type Space Needle.

    IMG_0453

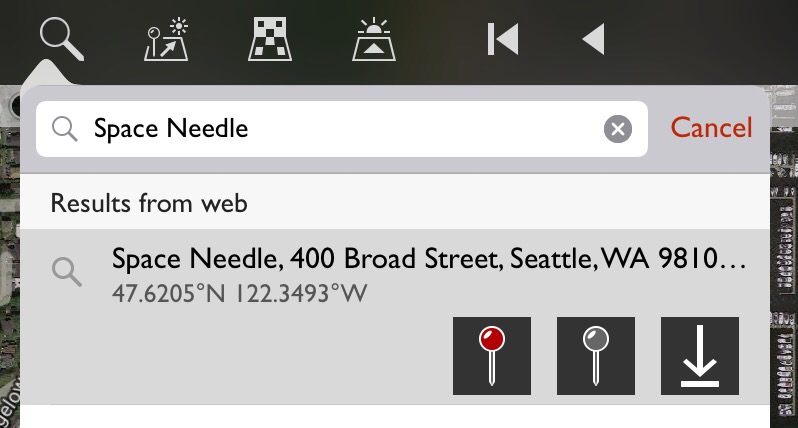
    Now click the Space Needle entry itself and you’ll see three options appear.

    (null)

    In order from left to right, these buttons allow you to: center the map on the location as your primary location, set this location as your secondary location (the item you wish to photograph), and the third is an option to save this item as a favorite, making future recall easy without searching. You will want to click on the gray map pin to set the Space Needle as the secondary location.

    (null)Using geodetic information

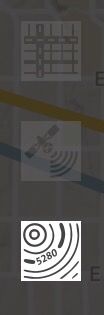
    To make things easier to see, click on the Google Terrain map set – an option on the right side of the screen that looks like this (image right)

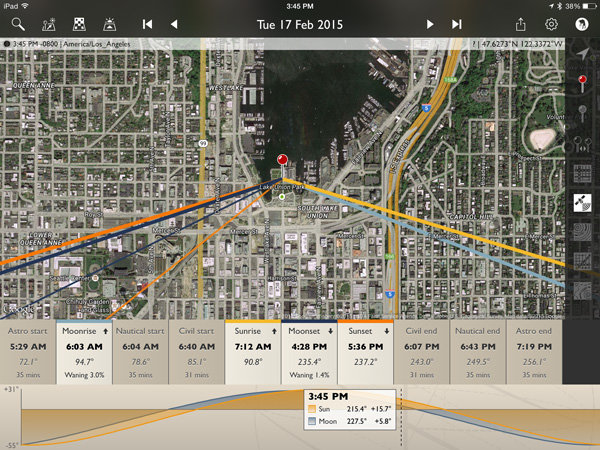
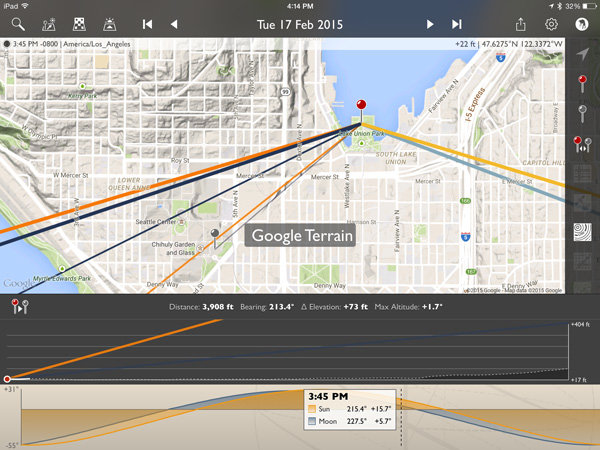
    Now the map is a little cleaner and after zooming out you can see the red pin where I’ll stand and the gray pin at the location of the Space Needle. Those orange and blue lines simply show location of the sun (orange) and moon (blue) when they rise, set and current location.

    IMG_0457

    Notice that the lower display also changed? It now shows the elevation different between the two points, with distance (3,908 feet – can also be set to metric), bearing (213.4 degrees), elevation change (73 feet) and the angle at which you are looking, be it up or down (+1.7 degrees). There is also a nice plot between the points showing elevation differences.

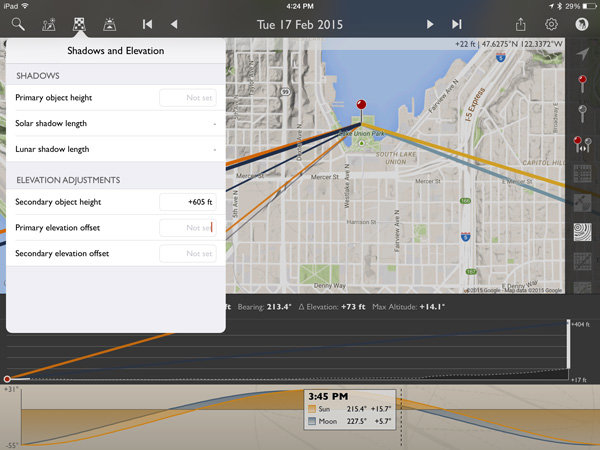
    This is great! But it only gives the elevation change at ground level. I need to add in the height of the Space Needle to position the moon properly. A quick wikipedia search tells me the Needle is 605 feet tall.

    Click on the Shadow and Elevation tool at the top left of the screen, just to the right of the Search feature. Where it mentions “Secondary object height” put in 605 feet for the Space Needle.

    IMG_0459

    Now on the elevation plot at the bottom of the screen there is a big white bar, representing the height of the Space Needle, on the far right. Perfect!

    Magic time

    Now let’s have TPE do the heavy lifting and tell us when the moon will be perfectly behind the Space Needle, place the event on our calendar and go find other things to shoot!

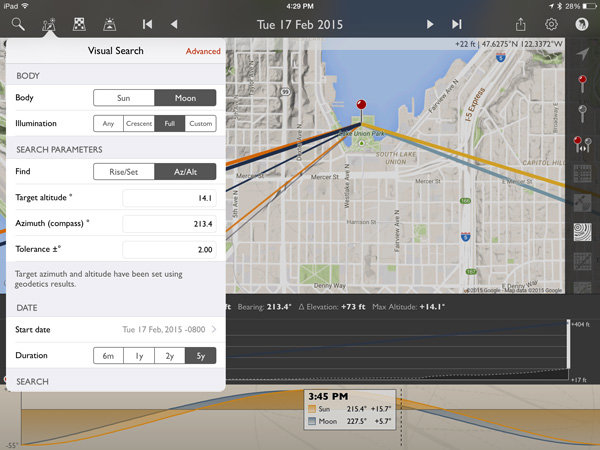
    Click on the Visual Search button, it is the one immediately to the right of the Search button on the top left. You will get a drop down that with all kinds of information. Click on the word “Moon” at the top and then “Full” and your screen will look like this:

    IMG_0460

    The app has filled in the target altitude (14.1 degrees), compass azimuth or bearing (213.4 degrees), and tolerance (2 degrees) for us!

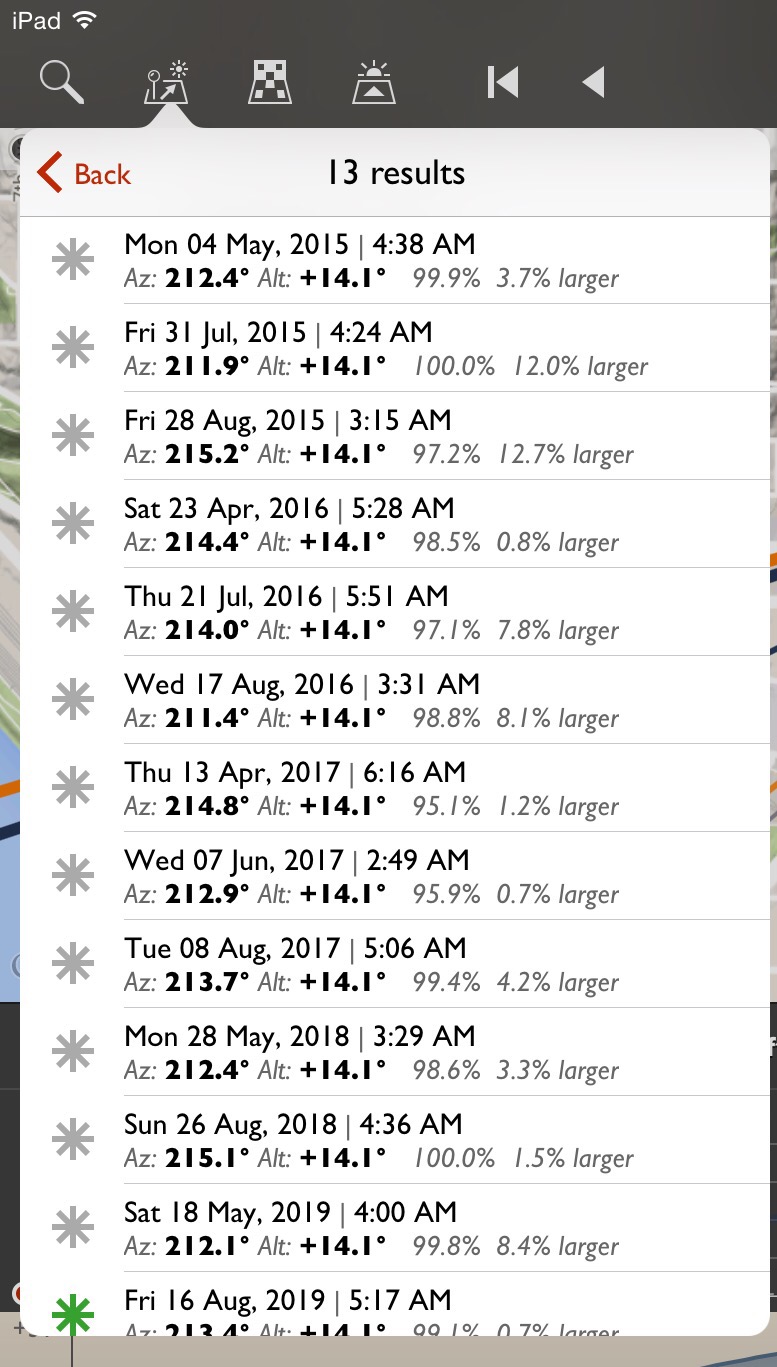
    For a first run, to get a full moon centered over the top of the Space Needle, click on the Duration you would like (I picked 5 years in this example) and then Perform Search. You will see a list of results that look like this:

    (null)

    Saving results

    What does all that mumbo-jumbo mean? Quite simply, those are all the dates and times (and exact location of the full moon and how full it will be) that fall within a two degree margin of our requested position. You will notice the one at the bottom for August 16, 2019 has a green asterisk; this simply means the moon will be within .5 degrees of the request.

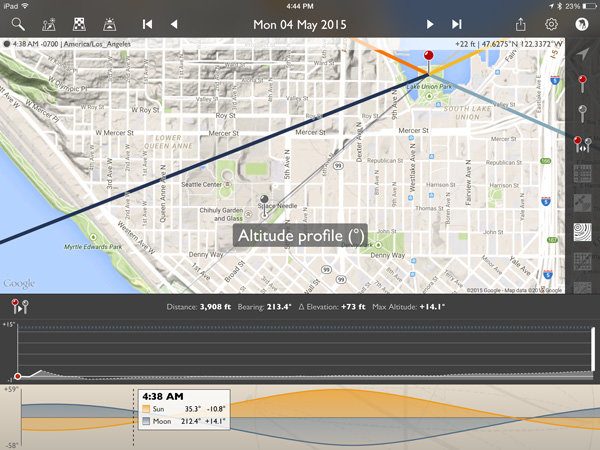
    Clicking on the top item for May 4th, 2015 will make the map mimic the conditions at that exact time. Double tap the elevation profile at the bottom and it will show the Altitude Profile where you can see the full height of the Space Needle on the right (tall white bar) and the level of the moon in dotted blue.

    IMG_0465

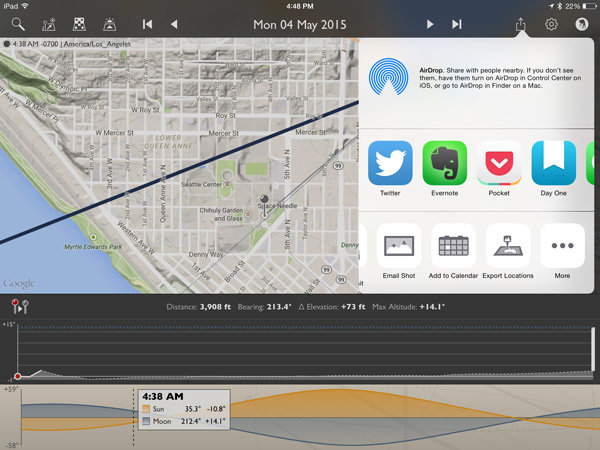
    All lined up! We’re now ready to save this information on our calendar or send it to a friend if we like. Click the share button on the upper right and you will see the option for adding to calendar as well as messaging, emailing, etc.

    IMG_0466

    IMG_0467

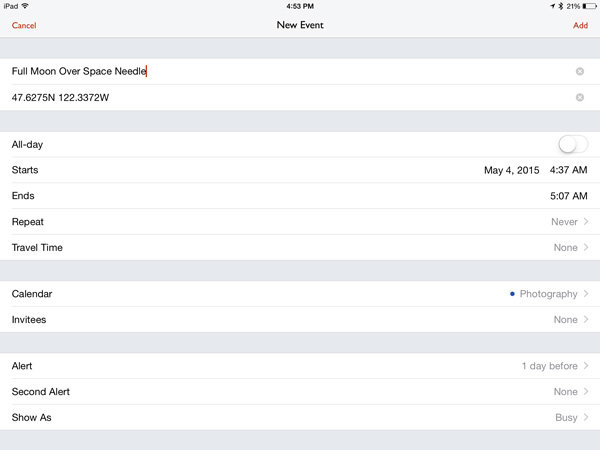
    Here’s the calendar add-item screen.

    The location is set to the Primary Location in the app. You may want to adjust the time so you arrive early, as it defaults to the exact moment pictured in the app.

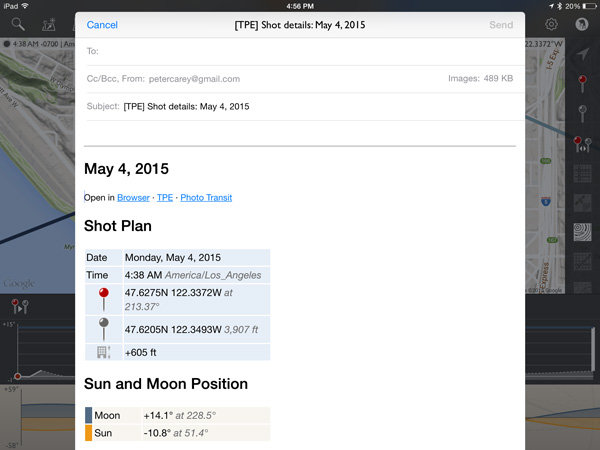
    The email option includes all the pertinent information to share the details with a friend. It will attach a map and the recipient can open the information in the TPE (if they have it) or on the web browser version.

    IMG_0468

    Conclusion

    I left a lot of information out of this article because TPE simply has too many options to describe here. At its most basic though, it is excellent for placing the moon over various subjects.

    IMG_0469

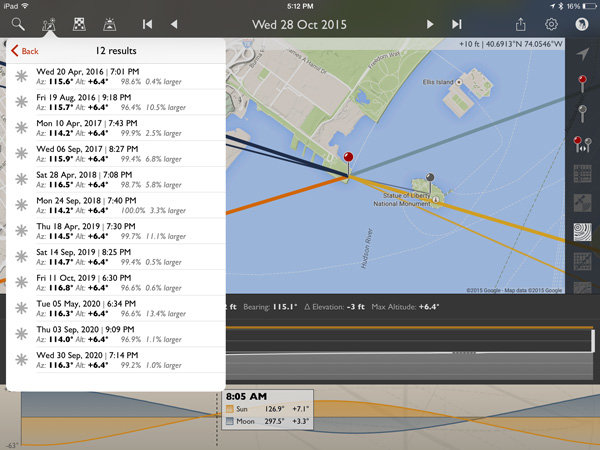
    How about a full moon over the Statue of Liberty?

    IMG_0470

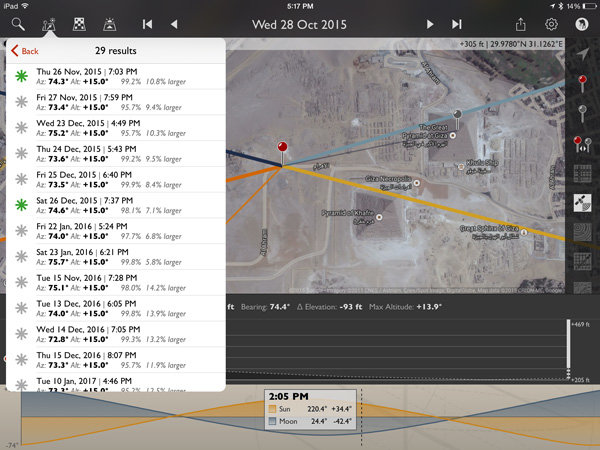
    Or the Great Pyramid of Giza?

    All it takes is a quick Wikipedia search for an object’s height and about two minutes in TPE to plan that moon shot you have been dreaming of!

    For those wishing to explore further, TPE’s documentation is fairly complete and worth the read to unlock a wealth of photo planning power.

    How can you use this tool in your photography?

    googletag.cmd.push(function() {
    tablet_slots.push( googletag.defineSlot( “/1005424/_dPSv4_tab-all-article-bottom_(300×250)”, [300, 250], “pb-ad-78623” ).addService( googletag.pubads() ) ); googletag.pubads().enableSingleRequest();
    googletag.pubads().disableInitialLoad();
    googletag.pubads().collapseEmptyDivs( true );
    googletag.enableServices();
    } );

    googletag.cmd.push( function() { googletag.display( ‘pb-ad-78623’ ); } );

    googletag.cmd.push(function() {
    mobile_slots.push( googletag.defineSlot( “/1005424/_dPSv4_mob-all-article-bottom_(300×250)”, [300, 250], “pb-ad-78158” ).addService( googletag.pubads() ) ); googletag.pubads().enableSingleRequest();
    googletag.pubads().disableInitialLoad();
    googletag.pubads().collapseEmptyDivs( true );
    googletag.enableServices();
    } );

    googletag.cmd.push( function() { googletag.display( ‘pb-ad-78158’ ); } );

    The post Full Moon Photography Using The Photographer’s Ephemeris 3.0 by Peter West Carey appeared first on Digital Photography School.

    Digital Photography School

  • Spring Photography Tips: Capturing the Full Bloom

    Spring is a great season to capture different images. Here are some spring photography tips to help you capture the flowers, birds and animals for this colorful season. Spring is all about color, new life and lots of daylight. For a photographer there is nothing better than having a whole new world of landscape come alive to be captured through Continue Reading

    The post Spring Photography Tips: Capturing the Full Bloom appeared first on Photodoto.


    Photodoto

  • Review of the CASE Remote Trigger and App

    The CASE Remote from Cheering Tech is a small box that connects to a DSLR camera via a USB cable and lets you wirelessly control almost every function, and some more.

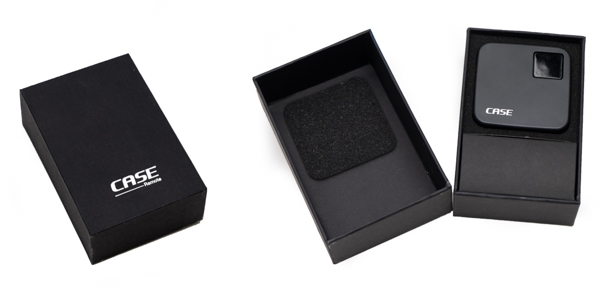
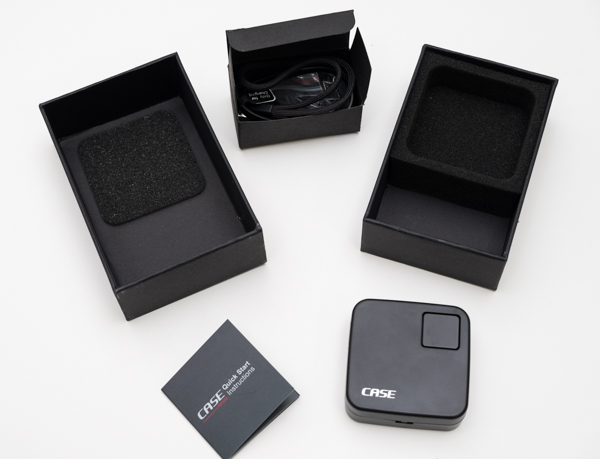
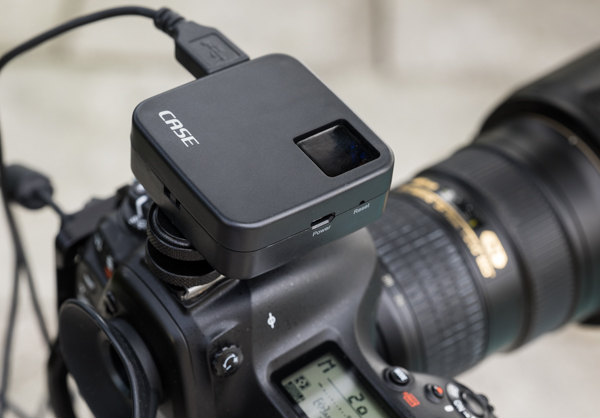
    I was offered the device for review from Cheering Tech and decided to try it on without many expectations. When I received the unit I was surprised by the quality of the packaging and presentation. The design of the CASE Remote is really nice, fairly small at two inches square and 70 grams (2.5oz). The size makes the remote convenient, and easy to throw anywhere in the camera bag.

    20150214_untitled_0025-Edit

    20150214_untitled_0027

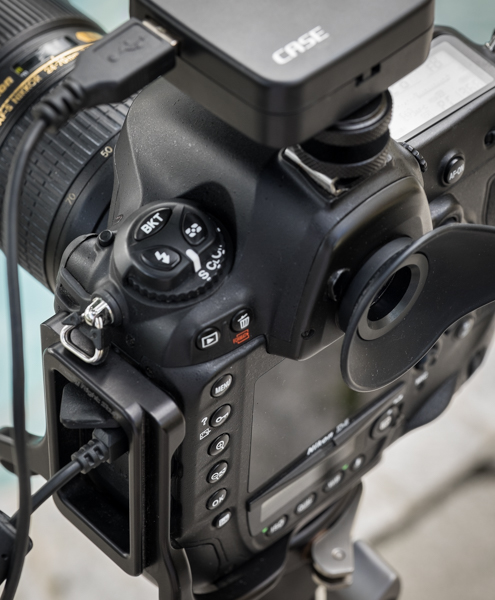
    The CASE Remote ships with a convenient hot-shoe adapter so you can easily attach it to the camera, and a USB cable to charge it. Something worth mentioning is that it does not include the USB cable necessary to connect it to the camera though – you need to use your own (one that came with the camera).

    Mounting it to the camera was a snap. You turn it on by pressing one square button at the top of the unit, which also contains lights which indicate battery life and system status. Once powered on, the CASE Remote creates its own WiFi network to which you connect your mobile device to access the app. The SSID and password for the connection comes in the back of the little instruction manual. I couldn’t find a way to change it or reset it to my own.

    20150221_untitled_0037

    20150221_untitled_0040

    What you can do with the CASE Remote:

    • Live view support on iOS (iPhone, iPad) and Android devices
    • Download photos to your device
    • Set camera functions right from your phone or tablet
    • HDR function
    • Time-lapse function
    • Focus stacking function
    • GPS function

    The device is ideal for different types of shooting, but especially for landscape or architectural work. The app is well designed and easy to use; however, something that I’d love to see improved in future iterations is the shutter lag. There is a delay on the live view function from the camera to the app, and there is also a brief delay when you press the shutter before the camera fires. But this is not usually an issue for the type of photography mentioned above.

    IMG_1370

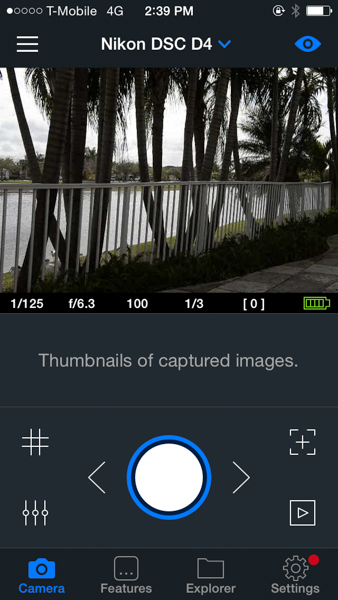
    From the main screen of the app, you can control and access almost any function of the camera. Live view can be turned on or off, and you can also activate a grid on top of the image if you want.

    IMG_1373
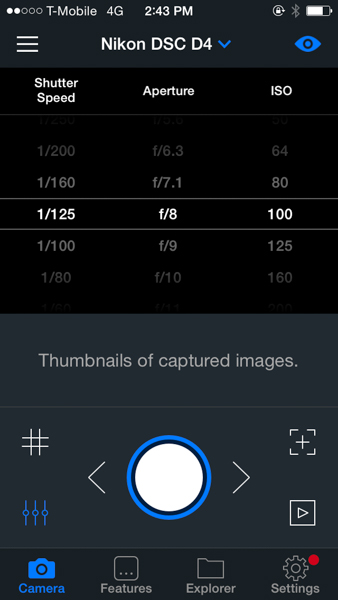
    There is a quick way to control shutter speed, aperture and ISO straight from the main screen by just pressing the lower left icon; that really comes handy and is a fast way to change settings.

    IMG_1369

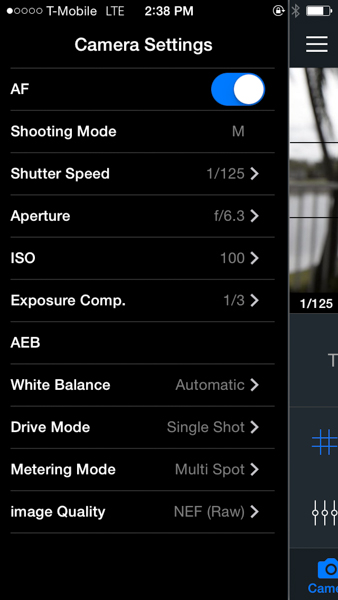
    The camera settings menu lets you control almost every aspect of the camera. From there you can turn on and off the autofocus function, the shooting mode, shutter speed, aperture, ISO, exposure compensation, white balance, drive mode, metering mode and image quality. I find this really complete as once you are in the app you don’t really need to go back to the camera to change anything – every function can be handled from there.

    IMG_1374

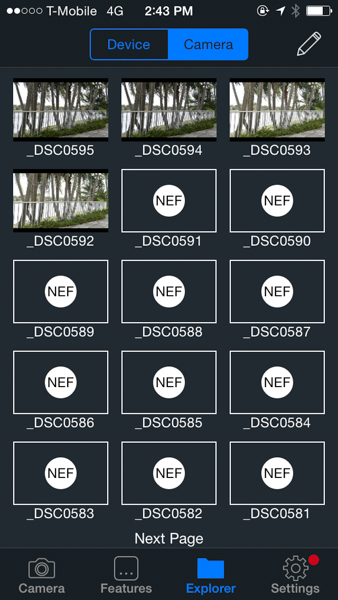
    The Explorer function lets you see the photos taken from the camera. You’ll only be able to see JPGs, the RAW files will show as icons. However, you can download both types straight to your phone or tablet from there.

    IMG_1380

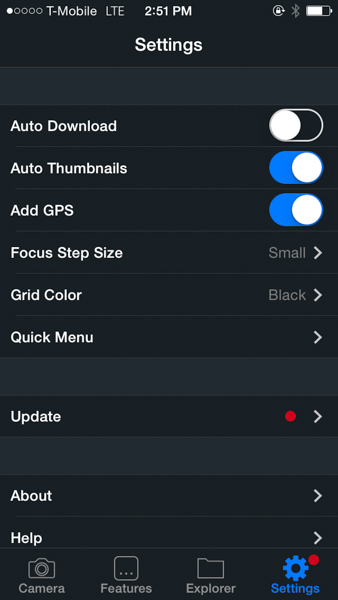
    The Settings function lets you control several general settings, like auto-download the photos to your device or add thumbnails to the main screen of the app. You can also control the GPS function from there.

    IMG_1382

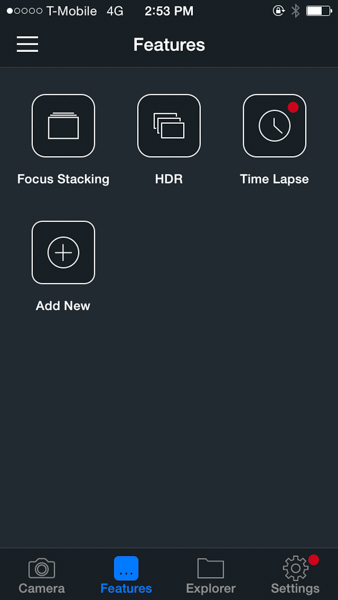
    The focus stacking, HDR and time-lapse functions are accessed via the Features menu. As you can see on the screen shot, there is plenty of room for more to be added in the future.

    At this time, the CASE Remote is only compatible with Nikon and Canon cameras, you can see the full list of supported models on their website. The company promises lifetime free updates via firmware upgrades and they claim to be working on support for Sony, Pentax and Fuji for later this year. The current asking price is $ 129 – a good value compared to other more expensive alternatives available in the market.

    I’d really like to see improvements in the application delay and lag, but I think that overall this is a great product with lots of potential for future developments and features.

    googletag.cmd.push(function() {
    tablet_slots.push( googletag.defineSlot( “/1005424/_dPSv4_tab-all-article-bottom_(300×250)”, [300, 250], “pb-ad-78623” ).addService( googletag.pubads() ) ); googletag.pubads().enableSingleRequest();
    googletag.pubads().disableInitialLoad();
    googletag.pubads().collapseEmptyDivs( true );
    googletag.enableServices();
    } );

    googletag.cmd.push( function() { googletag.display( ‘pb-ad-78623’ ); } );

    googletag.cmd.push(function() {
    mobile_slots.push( googletag.defineSlot( “/1005424/_dPSv4_mob-all-article-bottom_(300×250)”, [300, 250], “pb-ad-78158” ).addService( googletag.pubads() ) ); googletag.pubads().enableSingleRequest();
    googletag.pubads().disableInitialLoad();
    googletag.pubads().collapseEmptyDivs( true );
    googletag.enableServices();
    } );

    googletag.cmd.push( function() { googletag.display( ‘pb-ad-78158’ ); } );

    The post Review of the CASE Remote Trigger and App by Daniel Korzeniewski appeared first on Digital Photography School.

    Digital Photography School