Category: Photography

  • Demystifying Shutter Speed

    One of the most crucial factors of making any photograph is the selection of the shutter speed. It is not always an easy task to decide what shutter speed you should select, to correspond to the aperture or ISO setting you have chosen. It can be a little overwhelming, and sometimes discouraging, to learn how to select the proper shutter speed to produce whatever your desired photo may be. You might still be shooting in full auto just because you can’t seem to have any luck with manually selecting your exposures. Luckily, once you understand the basic concept of shutter speed in relation to photography, this aspect will become much easier and almost intuitive.
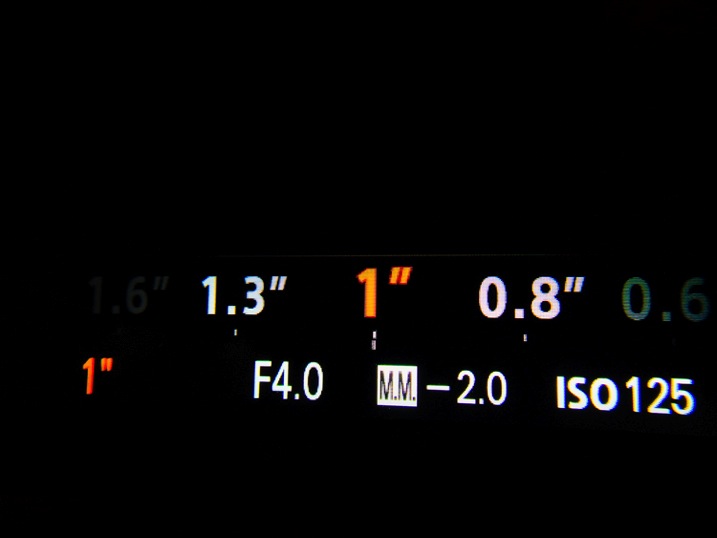
    Shutter Speed

    Let’s take a look at what shutter speed really is, and how to better understand it, so you can begin to have more control over your photography.

    What is shutter speed?

    First things first, what exactly do photographers mean when they say “shutter speed”? This refers to the amount of time that the shutter of the camera is open. Shutter speed can be easily compared to blinking. Close your eyes, then open them for about one second. Now close them again. You have just performed a one second exposure with your eyes. Though very simplified, the exact same thing happens inside your camera when you press the shutter release button. The shutter opens, and remains open, for whatever duration you have set your camera to expose. This lets in light through the lens which interacts with whatever receptor you’re using (film or digital sensor), in order to produce a photograph. In reality, it might help you to refer to shutter speed as shutter time.

    How does shutter speed affect a photograph?

    As I have said, shutter speed is one of the biggest assets you can control in order to produce the type of photograph you want. Now, the shutter is not to be confused with aperture. Aperture has nothing to do with the amount of time that light is allowed to enter your camera. Aperture simply refers to the size of the opening through which the light passes when the shutter opens. The larger the opening is, the more light that enters your camera. The shutter speed, on the other hand, controls how long light is allowed to linger in order to make the photograph. Got it? Good.

    So since shutter speed is related to time, it naturally means that it will directly affect how motion is recorded by your camera. This is where an infinite amount of creativity can be applied to your photographs. You may have heard a photographer say, “I used a really fast shutter speed to freeze the motion.” What they means here is that he or she used a shutter speed that was much faster than whatever motion was happening in the scene. The faster the motion, the faster the shutter speed will need to be, in order to arrest the movement. This is the very reason beginner photographers can become frustrated when photographing sports, children, or pets. They simply don’t understand that the shutter speed must be set in relation to the subjects motion to produce a desired outcome.

    Take a look at this quarter that I froze mid-roll by using a fast shutter speed of 1/1250th of a second.

    Fast Shutter

    The flipside of the shutter speed coin comes into play when you want to impart a sense of motion, or to intentionally use blur within your composition. There is no better illustration of this than when working with moving water and waterfalls. Photographers will often use a long shutter time in relation to the speed of the water in order to produce that smooth, almost fog-like appearance that many of us love (or hate) to see. This again, comes down to relativity. A longer shutter time will be needed to blur a slow moving subject. A faster moving subject will not require as long of a shutter time in order to produce the same effect.

    Here’s that same quarter shot at 1/50th of a second.

    Slow Shutter

    Things to keep in mind about shutter speed.

    As with virtually everything else that has to do with photographic technique, there are not absolutes when it comes to how you choose to manipulate your shutter speed. It always comes down to whatever it is you are trying to express through your photograph. However, this doesn’t mean that there aren’t other things that you should know which are related to shutter speed. Two of the most important things you need to know is how aperture and ISO interact with shutter speed.

    Aperture

    Aperture is the best friend, and worst enemy of your shutter. As you have already learned, aperture controls the size of the opening in your lens and is measured in “stops”. Stops are indicated by the usage of f-numbers. Understanding how aperture is measured is the most difficult aspect of the subject. It is actually somewhat counter intuitive and that is why it becomes so confusing. Basically, the larger the f-number, the SMALLER the physical opening becomes. It might help to think of aperture as a window in your home. The larger the window the more light can come through. When shooting at larger apertures (smaller f-numbers like f/2.8, etc.) you have a lot of light coming into your camera so your shutter time doesn’t have to be as long in order to reach the desired exposure. The opposite is also true. When you are shooting at smaller apertures (bigger f-number like f/22) a longer shutter time will be required to produce the same exposure that was achieved at the larger aperture.

    Here you can clearly see why less light can come through a smaller aperture.

    Apertures

    Let’s say a certain shutter time at a certain aperture gives you a properly exposed image. You then switch to a higher f-number. If you don’t increase your shutter time, this image will be underexposed compared to the previous one because you have essentially made the window into your camera smaller. The take-away point here is that a change in aperture must also be accompanied by a change in shutter speed if you wish for the overall exposure to remain the same.

    It should also be noted that aperture plays a key role in the perceived depth of field of a photograph…but that’s another article.

    ISO

    ISO is a measurement of light sensitivity. It is fairly straight forward to understand. The higher the ISO number, the more sensitive the camera sensor, or film, is to the light coming in through the lens. Although most modern cameras are capable of selecting ISO in smaller increments, when first learning about how ISO relates to shutter time it might be easier to use increments in powers of two; meaning ISO 100, 200, 400, 800, 1600, etc. Each time the ISO number doubles, the sensitivity to light also doubles. So ISO 200 is twice as sensitive as ISO 100.

    We can then easily relate ISO to shutter speed using a one second exposure to simplify the math. Let’s say we find that a proper exposure of a scene requires ISO 100 and a one second exposure time. If we increase the ISO to 200 then we have doubled the sensitivity so we can now get the same exposure using half a second instead of one second. If we further increase the ISO to 400 then we can get the same results from a ¼ second exposure. As you have probably already deduced, increasing your ISO is an easy way to allow for an increase in shutter speed to compensate for subject movement, or for low light.

    Take a look at these three images. I was able to get virtually identical results each time even though I decreased the exposure from 1 second to ¼ of a second just by increasing my ISO.

    ISO 100

    ISO 200

    ISO 400

    Be aware though, increasing your ISO will add grain (noise) to your final image to some extent depending on your camera and equipment. Still, it is almost always more acceptable to live with a little increased grain in an image, than to underexpose or miss the shot completely.

    Understanding what shutter speed means to your images doesn’t have to be a complicated issue at all. Shutter speed, or more accurately shutter time, is simply a measure of how long you choose for light to enter your camera to make an image. Learning how shutter time relates to other aspects of photography is slightly more complex. That doesn’t mean that it should discourage you from experimenting and seeing first hand how ISO, aperture, and shutter time come together to produce different types of images.

    Have more questions about shutter speed? Post them in the comments below.

    googletag.cmd.push(function() {
    tablet_slots.push( googletag.defineSlot( “/1005424/_dPSv4_tab-all-article-bottom_(300×250)”, [300, 250], “pb-ad-78623” ).addService( googletag.pubads() ) ); } );

    googletag.cmd.push(function() {
    mobile_slots.push( googletag.defineSlot( “/1005424/_dPSv4_mob-all-article-bottom_(300×250)”, [300, 250], “pb-ad-78158” ).addService( googletag.pubads() ) ); } );

    The post Demystifying Shutter Speed by Adam Welch appeared first on Digital Photography School.

    Digital Photography School

  • Tamron SP 15-30mm f/2.8 Di VC USD Lens Review

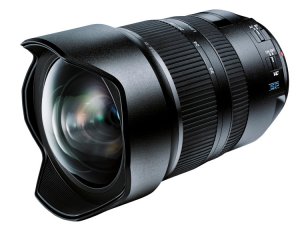
    Tamron SP 15-30mm F/2.8

    digitalphotographyschool-1-42

    Background

    While I was at WPPI this past year I got to meet our illustrious managing editor Darlene Hildebrandt. We walked the expo floor for a bit and I was introduced to a number of people by Darlene. We talked with some of the people over at Tamron and had some of their snacks and coffee that they offered at their booth. One of the perks of writing for Digital Photography School is gaining access to new equipment and software for review. It was there at WPPI that I got to see the Tamron SP 15-30mm F/2.8 for the first time (to be perfectly honest, I didn’t even know it existed!). A few weeks later, a loaner lens arrived at my apartment in Brooklyn, and I spent the next week taking it to a wedding, a travel trip to Seattle, a portrait session with a ballerina, a shoot with a fashion blogger, a corset ball, and a yoga party. Here are some my thoughts in this mini lens review:

    digitalphotographyschool-1-43

    Tiffany the ballerina (@glitteringpointe) looking lovely on the other side of the Tamron SP 15-30mm f/2.8. Taken at 1/1000 of a second at f/2.8, ISO 250

    What do all the letters and numbers mean?

    This is a Tamron SP 15-30mm f/2.8 Di VC USD. Let’s define some of the named elements of this lens so we know what we are dealing with:

    • Tamron: A Japanese company manufacturing photographic lenses.
    • SP: Superior Performance. This is Tamron’s version of an L Series lens for Canon. These lenses have superior sharpness compared to their other lenses, as well as a larger maximum aperture and other elements that make it a cut above.
    • 15-30mm: This is sometimes referred to as an “ultra-wide” lens. These types of lenses can give you a very wide angle of view, and often have some distortion when at its most extreme focal length (15mm). These lenses are typically used for landscape photography, some event photography, and interior shots.
    • f/2.8: The lens has a maximum aperture of f/2.8, at whatever focal length you use within its range.
    • Di: Digitally Integrated. This lens is made for full frame cameras (but can also work on cropped sensor cameras as well).
    • VC: Vibration Compensation. This is Tamron’s version of IS (Image Stabilization) on a Canon lens and VR (Vibration Reduction) on a Nikon lens. There are motors inside the lens that will auto-steady the lens as you shoot at slower shutter speeds, allowing for you to get sharper images.
    • USD: Ultrasonic Silent Drive. A USD designation means the lens has faster, and noiseless focusing.

    Basically this lens is a beast. It’s at the top of the food chain in terms of quality, build, and performance.

    digitalphotographyschool-1-44

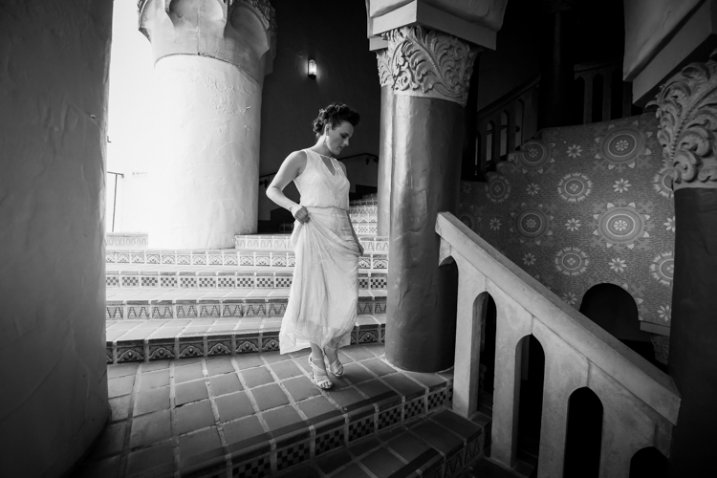
    Tarisa the bride descending the spiral staircase at the Santa Barbara Courthouse. Taken at 1/640th at f/2.8, ISO 1000.

    How it feels and performs

    This lens feels like a tank. It is super solid, heavy, and durable. I had no worries about bringing it out in some weather in NYC (and Seattle) since it has lens coating and moisture resistant construction to keep water away (still – don’t drop it into a pool). The front end has an enormous bulbous lens element that looks impressive when on the camera.

    As I used the lens throughout my various shoots there was one funny thing that I had to get used to, and that was that the direction that I twisted the lens to zoom in or out was opposite that of my Canon lenses. There was some “learnability” involved when using the lens.

    One thing I like about wide angle lenses, and shooting with a wide open aperture at f/2.8, is the natural vignetting that occurs. I think it is moody, cool looking, and natural.

    1/4000 of a sec at f/2.8, ISO 100, at 15mm. Notice the natural vignetting around the edges of this unedited photo.

    1/4000th at f/2.8, ISO 100, at 15mm. Notice the natural vignetting around the edges of this unedited photo.

    One area that I think the lens performed spectacularly was shooting in low-light environments, when I had to focus in the dark. I really noticed this because every other lens I use always ends up “searching” a bit in the dark before focusing, or it just doesn’t focus at all. So it was extremely satisfying pressing my focus button and having the lens lock in right away. There is nothing more embarrassing than telling people to wait a moment while you try to focus in the dark, then ending up with a blurry picture anyway.

    digitalphotographyschool-1-48

    Focusing in the dark was a breeze at this corset and gown ball.

    My last observation was that this is a big, heavy lens. This is not a lens I would take traveling around the world. For this New Yorker, who doesn’t have a car and travels with everything on his back, I could definitely feel the weight of this lens throughout the day as I went up and down the stairs into subways, airports and gigs. For the rest of you non-urban travellers, throw this in your bag, put it in your car and you’ll be fine.

    Sharpness

    Although this is not something I normally notice on a lens, the Tamron SP 15-30mm is consistently sharp from edge to edge. Lack of sharpenss around the edges is a complaint heard often with regards to ultra wide lens. They perform fairly well in the center of the image, but tend to get a bit fuzzy as you move closer to the edges. You can see in the ballerina picture and the accompanying cropped in photos how consistent the lens is across the image (below). Again, another point in favor of the Tamron SP against the big names debate.

    digitalphotographyschool-1-4 digitalphotographyschool-1-2

    digitalphotographyschool-1-3

    Pros and Cons of the Tamron SP 15-30mm f/2.8

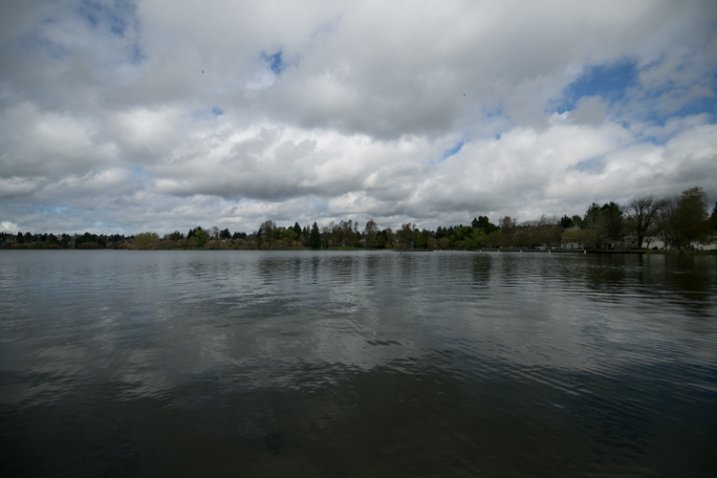
    View of Seattle through the eyes of the Tamron SP 15-30mm f/2.8

    View of Seattle through the eyes of the Tamron SP 15-30mm f/2.8

    Pros:

    • Great low-light focusing ability.
    • Maintains aperture at f/2.8 all the way through its focal length range (I believe this is the only ultra-wide angle lens to do this with image stabilization).
    • It’s weather resistant.
    • It has a solid, durable body.
    • Price: This lens is about $ 400 cheaper than its Canon rival, the 16-35mm L f/2.8, almost $ 500 less than the Nikon version.

    Cons:

    • It’s heavy.
    digitalphotographyschool-1-45

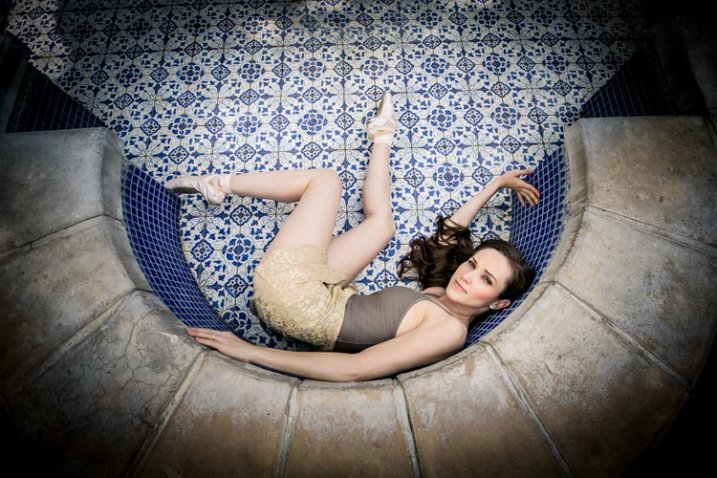
    Tiffany the ballerina hanging out in an empty fountain. Taken at 1/400th at f/4.5, ISO 100, 15mm.

    Overall Thoughts

    This is really a great lens and Tamron is making a point to set itself apart from the competition by it being the least expensive lens with the widest aperture, fastest focus, while also incorporating image stabilization. I would definitely use this for interior photography all the time, and for great urban or natural landscapes. I would not bring this along for long travel trips abroad because of its size and weight.

    On Amazon.com you can find the Canon mount here or the Nikon mount here.

    digitalphotographyschool-1-50

    googletag.cmd.push(function() {
    tablet_slots.push( googletag.defineSlot( “/1005424/_dPSv4_tab-all-article-bottom_(300×250)”, [300, 250], “pb-ad-78623” ).addService( googletag.pubads() ) ); } );

    googletag.cmd.push(function() {
    mobile_slots.push( googletag.defineSlot( “/1005424/_dPSv4_mob-all-article-bottom_(300×250)”, [300, 250], “pb-ad-78158” ).addService( googletag.pubads() ) ); } );

    The post Tamron SP 15-30mm f/2.8 Di VC USD Lens Review by Phillip Van Nostrand appeared first on Digital Photography School.


    Digital Photography School

  • 12 Steps to Successly Promote your Photography on Instagram

    If you’re reading this and are interested in digital photography, chances are you’re a user of Instagram, the current goliath of social media in photography. Instagram has become home to over 300 million users in the four years it’s been around, and it seems ready to only get bigger.

    post 1 image

    300 million is a big, big number. It can seem overwhelming, but it’s a great tool to not only create community, but also to become a better photographer. So how do you create a presence for yourself in all that noise? There are a lot of websites claiming to offer you the fastest way to Instagram success, but most of them offer terrible advice that will get you nowhere. Here are a number of strategies to get better exposure for your photography, build a community, and grow as a photographer through Instagram.

    1) Great artists only show great work

    The difference between a good artist and a great artist is that great artists only show great work. While nobody is expecting you to rival National Geographic photographers right off the bat, you should pay close attention to what you’re sharing. It only takes one uninteresting photo to for people to lose interest in your work. If a photo doesn’t make you say “OH yeah!” when you see it, don’t post it.

    Also, don’t post too often. Unless you have a really good reason for spamming my feed, don’t. I recommend sharing one or two images a week, which is a safe number to keep people interested without getting annoying.

    2) Find your niche.

    This is as important to your growth as a photographer, as it is in defining your brand: what makes you different from everyone else? The amazing thing with Instagram is that it is composed of people from across the world who each have something in which they’re interested. I’ve seen fantastic accounts focused just on street food in Vietnam, rock climbing in Utah, or architecture in Turkey. What the best accounts have in common is a focus around a central theme that captures their audience’s attention and keeps it.

    point 2 image

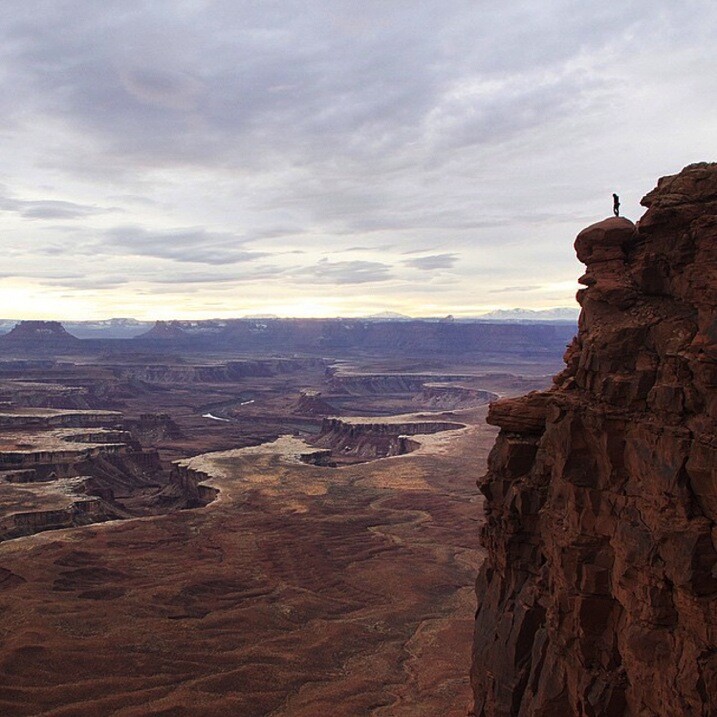
    Exploring the ancient #forests of Vancouver island, @kaitross and I found that even these giants succumb to time and the winds. Afterlife for these trees means giving life to a new world of creatures, from insects and animals to moss and a new generation of trees. When time calls, what will you leave behind? What will I? Will it be enough?

    Don’t forget: the only person who should define your niche is you. Do you love paper maché and dinosaurs? Then become the best photographer in the world working on seaside portraits of paper maché Velociraptors. For me, I love to travel and explore nature, so my account reflects that, and only that. You will not find photos of my food, my dog, or my nieces. If you want to share snapshots from your daily life, get a private account for your friends and your mother to follow, because they’re the only ones who (might) want to see that stuff.

    3) Use a real camera.

    Yes, your shiny new smartphone may take gorgeous snapshots, but relying on it is like trying to perform a piano recital on a kid’s electronic keyboard. Not only does using a dSRL (or a serious mirrorless) give you far more choices of focal length to play with, your opportunities for manipulating depth of field will result in way better photographs than anything coming out of your smartphone. As if that’s not enough, using a dSLR will let you shoot in RAW, allowing you to make those photos really pop in the editing process.

    Point 3 image

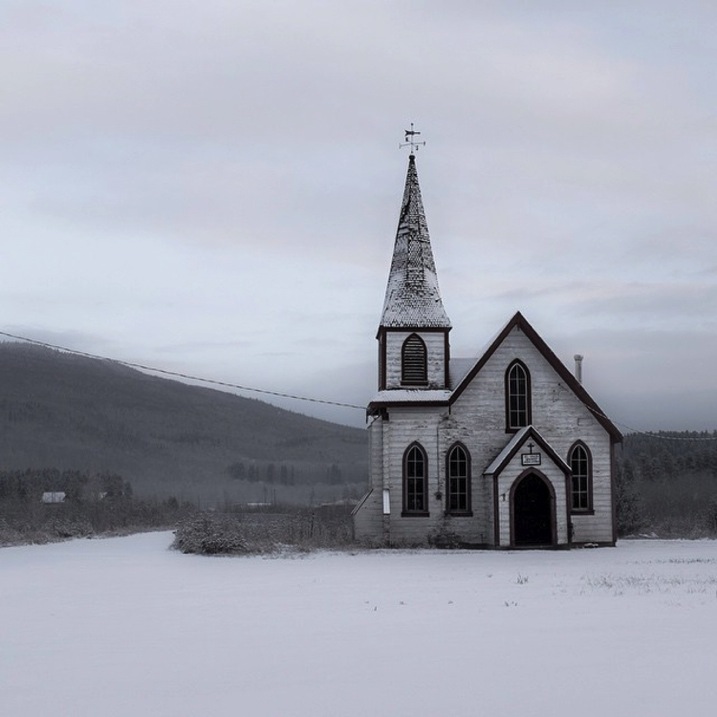
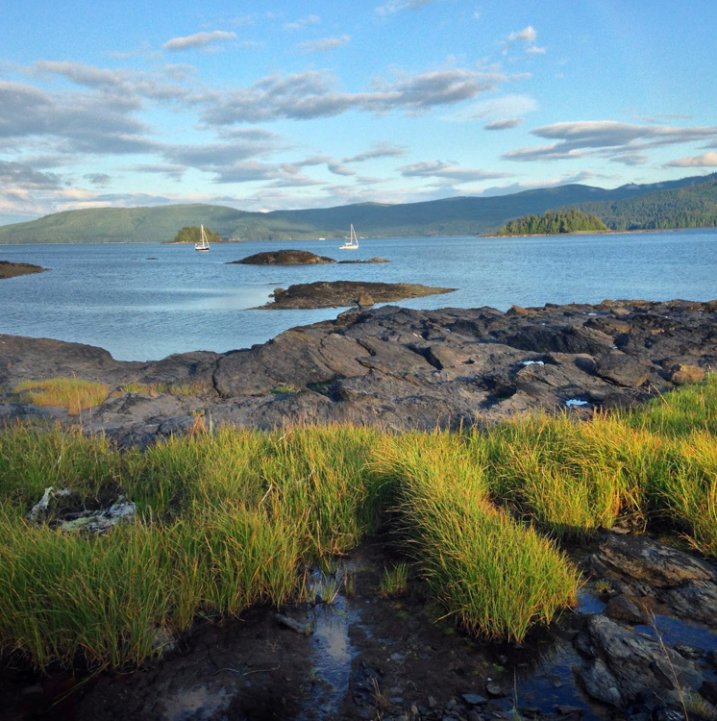
    Turning off the Yellowhead Highway and heading north to Alaska, you’ll quickly find yourself in Kitwanga, traditional lands of the Gitksan and Wetsuwet’en peoples. The massive Skeena River nearby has nurtured civilization and trade routes for over 7,000 years and today is a beloved fishing ground for all people. I stopped in this small reserve community early one morning when there was more dark than light, and a fresh snowfall cast a tranquility over the village.

    4) Take the editing process seriously.

    Instagram may lend itself to a snap-and-post style of photography, but producing excellent photographs doesn’t. Great photographs aren’t taken – they’re created. This means working in your favourite image editing program (I recommend Adobe Lightroom) to learn how to manipulate light, shadows, and clarity until your final product is something to be proud of. The Instagram app just isn’t built for this level of sophistication, so ditch all those cheesy filters and effects and do your work on the computer.

    Point 4 image

    Think your Monday is challenging? These porters in Huangshan, China haul 150-200lbs of materials up 2500m vertically each day, supplying the tourism infrastructure of this popular destination with daily necessities like food, toiletries, and building materials. While there is a gondola for tourists to ascend and descend the mountain, this is the raw manpower that runs Huangshan.

    5) Share a story with your photo.

    Great photography leaves an impression. So do well-written stories. But when you combine strong images with powerful words, you’ll evoke an emotional response in your viewer, and lead them to make a personal connection to your work. It wasn’t until I realized this and started sharing the story behind my photos that my account started getting real interaction – people speaking about how the image or words affected them, their own experiences, and their appreciation for it. Nobody expects the next Hemingway to come out of Instagram, but some carefully-chosen words in a thought-provoking caption will do wonders for connecting you to your fans.

    Point 5 image

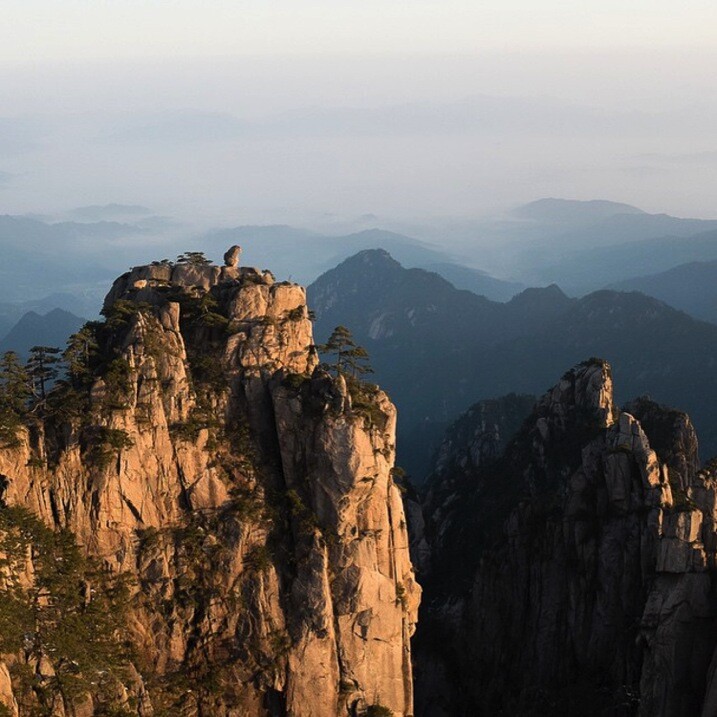
    After the frenzied atmosphere of Shanghai’s urban jungle, the fresh air of Huangshan’s Yellow Mountains was exhilarating. Still in the low-season, March snow clung to the boughs of trees while distant clouds made it feel like the horizon could go forever. One of China’s better-developed tourist attractions, Huangshan has a long history: first recognized in 747 AD, it was said to be the place from which the Yellow Emperor ascended to heaven. This year, over 1.5 million visitors (mostly Chinese) will wander its paths. I caught it on a quiet day, and these peaceful memories linger with me still.

    6) Ask questions in your captions!

    The difference between a story and a caption is that a story builds an emotional connection between the viewer and the image; a question builds a personal connection between your viewer and you. Your questions should be open-ended and create a space for your fans to contribute some of their own story to the community. Never forget, many Instagram users are new to digital photography and are looking for people to connect with, and this gives them the opportunity.

    Point 6 image

    “I mean… All I really need is a pair of wings. Anyone else get the insatiable urge to jump when they get to the edge of something really high? I tried it once when I was little after watching Mary Poppins off the second story of a building with an umbrella.” – Image and caption by @minayounglee

    7) Use hashtags effectively.

    I never understood the value of effective hashtagging until I started using them interwoven in my posts. You should be hashtagging important nouns and verbs – stuff people will be searching for. The effectiveness of using #fishing compared to #instagood is huge for obvious reasons: people who might be interested in your photo are much more likely to be searching for their favourite hobby or location than some meaningless term.

    point 7 image

    The seed from which the Haida Nation sprang, Haida Gwaii now works to redefine itself from a timber economy into an eco-tourism powerhouse. For an outstanding introduction to the history of these islands known as Canada’s Galapagos, pick up Vaillant’s “The Golden Spruce”. I’ll be exploring the rugged coasts and remote, old growth forests of these islands for the next ten days.

    Speaking of hashtagging, do a bit of digging around to see what effective hashtags you might be missing. It wasn’t until I came across the hashtag #explorebc that I began connecting with a ton of great local photographers who eventually featured my work on their account, resulting in a huge boost of exposure for my work.

    8) Wake up and post.

    Mornings are when most Instagram users login and check their feed, so cater to this. I live on the west coast, so I know I’m already posting late for my east coast followers when I share a photo at 8 a.m. Aim to get your posts out early in the day for whatever time zone you’re targeting (if your followers are worldwide, this is less useful).

    Is there a best day of the week to post? Studies are showing that Sundays have the greatest number of interactions, which makes sense given that many of you are trying to crawl out of your hangovers through long hours of cuddling with your phones. Otherwise, stick to weekday mornings.

    9) Build a community

    Build a community by actively finding photographers you respect and developing relationships with them. I won’t lie – this is a long process, but it’s necessary and worthwhile. Find a hashtag that speaks to you and your work, then check in with it whenever you can to see who’s posting what. When you find work you like, leave a thoughtful compliment and follow them. Chances are, they’ll check out your account and will reciprocate if they like what you’re posting. Whatever you do, don’t ask people to check out your account or follow you back. It’s tacky and makes you look desperate.

    point 9 image

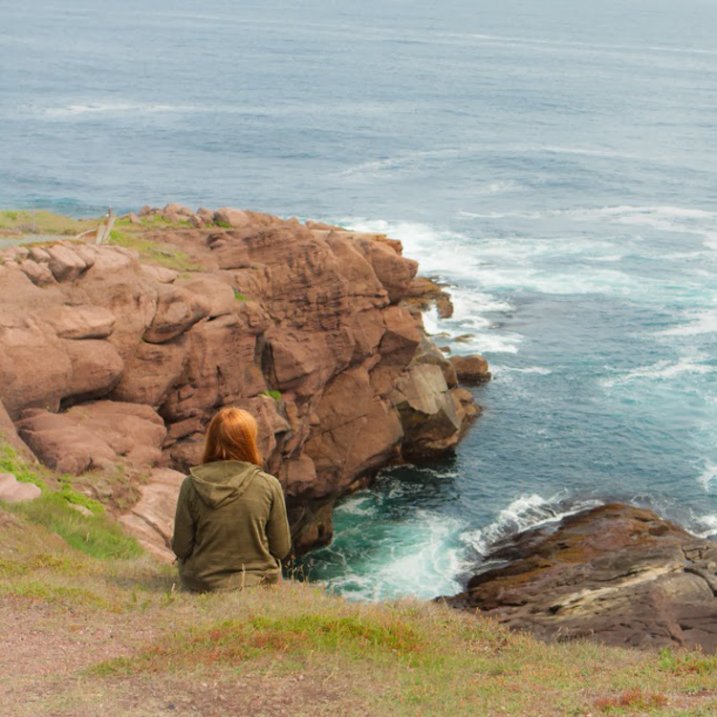
    We all know where the roads we walk take us, but do we pause to realize how with the journey we are changed? This is why I love travelling by land… it gives me time to sit and meditate on how the things I’ve done, the people I’ve loved and who have loved me, the hurts I’ve caused and have been caused to me, all of which paint a complex life. At the end of each journey remains one lesson that can always be learned better: to #love with an open and humble heart and to let go of whatever pain has tied one to memories that belong in the past. After days of planes, ferries, hikes, and hitchhiking with the finest people of Newfoundland, @maggiewhoa and I sat at the edge of the Atlantic Ocean and breathed in the salty breeze that was so hard-won.

    10) Cultivate champions

    Cultivate champions by fostering relationships with other users. Easier said than done, right? If users are leaving you thoughtful comments (as opposed to the ubiquitous thumbs-up nonsense), return the favour and respond with something more meaningful than “thanks!” If someone cares enough about your work to awkwardly type out praise on their smartphone, they’re worth their weight in followers. These are the people who are going to follow along through your adventures and refer their friends and followers, which really is one of the goals of this social network. Do enough of this, and these delightful unicorns will be out there promoting your work for you.

    11) Bring other into the conversation

    Bring others into the conversation by shooting with them or referencing them in your posts. Two amazing girls from Vancouver kicked off @localwanderer a year ago, in which they travel around North America visiting the hidden gems in communities. Where they really excel (besides their photography and writing skills) is in their ability to constantly bring local shops, restaurants, and people into the discussion. By doing this, they introduce their community to someone new, who in turn will introduce their community to @localwanderer.

    Point 11 image

    “Hellloooo, San Diego! We are soooo happy to be back in the sunshine state as we make our way around the California coast. Our first stop was the @moderntimesbeer tasting room (a.k.a. the “flavordome”) which combines two of our favourite things: coffee + beer! Also, be sure to check out their wall mural made out of floppy disks!” – Image and quote by @localwanderer

    Hellloooo, San Diego! We are soooo happy to be back in the sunshine state as we make our way around the California coast. Our first stop was the @moderntimesbeer tasting room (a.k.a. the “flavordome”) which combines two of our favourite things: coffee + beer! Also, be sure to check out their wall mural made out of floppy disks!

    12) Don’t confuse followers with community

    I’d rather have 100 fans who interact with my work than 1,000 followers who couldn’t be bothered. Your goal should never be the quantity of followers, but the quality of your community. Speaking of numbers, you’ll find a random assortment of Russian princesses begging for you to come cuddle with them – report them and block them if they add you. The last thing you need is a bunch of zombie accounts clogging up your Instagram. Also, one danger of having lots of inactive followers is that your account is less likely to be recommended to other users of Instagram.

    There you have it – the 12 steps to success with Instagram. What are yours? Let’s hear them in the comments section.

    See Robin’s Instagram account for more of his images and examples of putting these tips into practice.


    googletag.cmd.push(function() {
    tablet_slots.push( googletag.defineSlot( “/1005424/_dPSv4_tab-all-article-bottom_(300×250)”, [300, 250], “pb-ad-78623” ).addService( googletag.pubads() ) ); } );

    googletag.cmd.push(function() {
    mobile_slots.push( googletag.defineSlot( “/1005424/_dPSv4_mob-all-article-bottom_(300×250)”, [300, 250], “pb-ad-78158” ).addService( googletag.pubads() ) ); } );

    The post 12 Steps to Successly Promote your Photography on Instagram by Robin Ryan appeared first on Digital Photography School.

    Digital Photography School

  • Seeing in Depth of Field: A Simple Understanding of Aperture

    Photography can be simply defined as: painting with light.

    When you are painting with light, you are creating a story in a split second. That’s what photography is all about. Technically, your camera is measuring the light in the scene, and you are telling it how much of that light you want to use to create a properly exposed image. This becomes your story.

    There are three main settings used to control that light; Shutter Speed, ISO and my favorite, Aperture. Each of these settings has its own individual way of measuring light. When all three are balanced correctly, you create a proper exposure.

    1 Aperture Range 3265

    Though each of these three settings measures light, they also have unique characteristics that create artistic qualities in your photographs. By understanding them, you have control over the full story you want to tell.

    Shutter speed captures movement or freezes it. ISO helps control how sensitive your camera is to the available light in a scene. Finally, the aperture creates depth of field. This is where the real story comes from; it is with aperture that you control what is in focus, and what is out of focus.

    As a photographer, how do you decide what you want your viewer to focus on? How do you create a story? That’s what aperture is all about, and that’s why I love it.

    WHERE IS IT AND WHAT DOES IT DO?

    Aperture is located in your lens, not in the camera body. The lens opening expands and contracts to control light. By selecting a specific aperture size, you are telling the lens how much light you want to hit, and register on, the sensor.

    It is very similar to how the human eye works. Your pupils expand and contract based on the available light in the scene. Like when you first walk into a dark movie theater. At first you can’t see, then your eyes adjust. Your pupils expand, allowing your eyes to see as much light as possible in the dark room.

    Again, when you go outside on a sunny day, at first it’s too bright to see. Your pupils adjust by contracting, letting in less light. Your lens aperture works the same way. Changing aperture settings is like your pupils dilating or contracting.

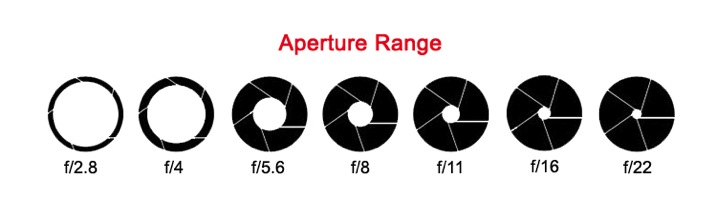
    The size of a lens aperture is measured in what we call f-stops (fractional stops). Just like all settings on a camera, there is a general range.

    2 aperture range2

    The numbers aren’t necessarily important to memorize. What’s important is to see the range in the settings. Here is the trick; the smaller the f-stop number (like f/1.8), the larger the aperture opening. This means more light will enter through your lens at once, and vice versa. The larger the f-stop number (e.g. f/22), the smaller the aperture opening, and less light will enter your lens.

    Think of these f-stops as fractions. Just replace the F with the number one. 1/4 of a pie is much more than 1/16 of a pie.

    A quick note: Not all lenses are built the same. Different lenses have different apertures. Some lenses have a wider range and some have less. Standard lens will range from F3.5–F22. Specialty lenses go as low as F1.2 or more. See: What the Numbers on your Lens Mean for more on this.

    SEEING IN DEPTH OF FIELD

    Here is where it gets fun. While measuring light, when the lens expands and contracts, it also measures depth of field. Again, your eyes do the same thing!

    As you look at the screen to read this, these words are mostly in focus to your eyes. In your peripherals, you can see other things, but they aren’t in focus.

    Notice, your hands on the keyboard, they are in the foreground, and perhaps a bookshelf is in background. You can see them but they are not in focus. You are seeing in depth of field.

    A great photograph does just that. It captures a foreground, a mid-ground and background. By setting your aperture you are controlling which of these areas is in focus. It is all based on your intention, your story.

    DEFINING DEPTH OF FIELD

    With your camera’s focal point (that little square in the middle of your viewfinder), you focus on a particular part of the scene. This point becomes the sharpest part of your image. There is an area in front of that point in focus, and an area behind it in focus as well. The distance from front to back that is acceptable focus is considered your depth of field. You decide what is acceptable by choosing a specific aperture size.

    3-Uluwatu-Monkey-8427

    This is a story about a monkey on a cliff. The bushes in the foreground and the temple on the cliff in the background are out of focus. They are out of the depth of field. This brings your attention to the focal point; the monkey in the middle (no pun intended).

    Remember, the lower the f-stop number, the bigger the opening, the more light comes through the lens. This means less of your scene is in focus and you have a shallow depth of field. The opposite is also true. The larger the f-stop number, the smaller the opening, the less light comes through the lens. In this case, more of your scene is in focus and you have a greater depth of field.

    Simply put, the larger the f-stop number, the more will be in focus. The smaller the f-stop number, the less well be in focus.

    A DEEPER LOOK AT DEPTH OF FIELD

    As you lock your camera’s focal point on a specific spot, that spot creates a focal plane. Everything that is the same distance away from the lens is on the same focal plane, and will be in focus.

    4 focal plane explained

    At a shallow depth of field (low number), the focal plane is very thin. As your depth of field becomes greater (high number), the focal plane becomes deeper.

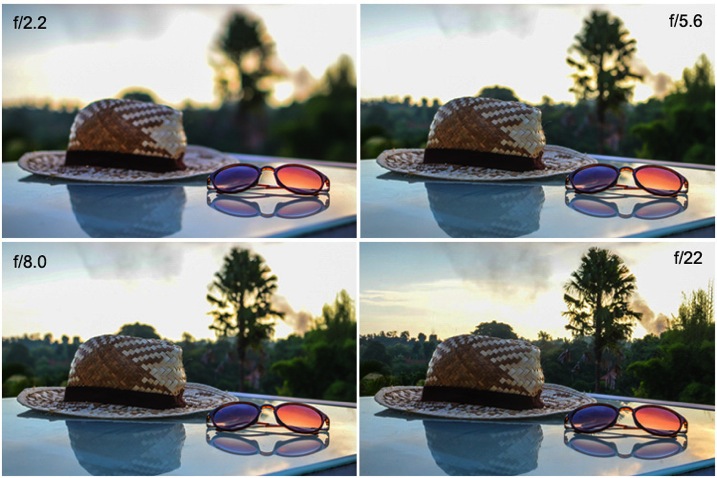
    Here is the same scene photographed with different aperture settings. Notice that the depth of field changes how much of the image is in focus.

    5 aperture example

    At f/2.2 only the sunglasses are in focus. At f/5.6 the hat is also in focus. By using f/8.0 you can start to make out the trees in the background. Finally, at f/22 everything in the image is in focus.

    Which one tells the best story? You as the photographer, get to decide.

    PRACTICE TIPS AND TRICKS

    Now that you’ve got a good grasp on the basics, it’s time to play! Here are some great tips to start your practice.

    Set your camera to Aperture Priority mode. You will have full control of the aperture, without having to worry about proper exposure. This way you can just focus on depth of field. It’s a great way to fully understand what your lens is doing as you change your aperture settings.

    Pick a subject or scene, and stick with it. Photograph your scene from many different angles. Choose different parts of the scene to focus on using the full range of aperture settings.

    Use these guidelines to capturing depth of field in different scenarios:

    6 Aperture Range 9748

    When shooting single subjects, like a portrait of a child, it is best to use a lower f-stop like f/1.2-f/2.8. Creating a shallower depth of field brings attention to the subject’s face, which is always most important in a portrait.

    7 Aperture Range 2145

    When shooting a small group of people (2-5), choose an aperture of f/4-f/8. This, being a slightly deeper depth of field, guarantees that everyone in the group will be in focus.

    8 Aperture Range 6150

    Any time you have a wide-open scene, for instance a landscape, and you want all of that landscape in focus, choose a setting above f/10.

    These are just guidelines. Photography is a form of art. Be creative, and remember, it’s all about telling a story.

    What story do you want to tell? Share your images here and show how you’ve used depth of field to create a great story.

    All Images in this article are © 2015 Danielle Werner and DEW Imagery & Design

    Bio

    Danielle Werner is a free-spirited photographer, designer and retoucher, on an endless journey around the world. She is also a passionate writer and educator who teaches photography workshops wherever she goes. Read Danielle’s inspirational travel stories at LiveWonderful.com, and check out more of her adventure and lifestyle photography at DEW Imagery & Design. You can also connect with her via:

    https://twitter.com/ImageryDEW

    https://www.facebook.com/livewonderfulblog

    googletag.cmd.push(function() {
    tablet_slots.push( googletag.defineSlot( “/1005424/_dPSv4_tab-all-article-bottom_(300×250)”, [300, 250], “pb-ad-78623” ).addService( googletag.pubads() ) ); } );

    googletag.cmd.push(function() {
    mobile_slots.push( googletag.defineSlot( “/1005424/_dPSv4_mob-all-article-bottom_(300×250)”, [300, 250], “pb-ad-78158” ).addService( googletag.pubads() ) ); } );

    The post Seeing in Depth of Field: A Simple Understanding of Aperture by Danielle Werner appeared first on Digital Photography School.

    Digital Photography School

  • The Sun Is Your Friend: Tips for Summer Photography

    Summer is just around the corner, folks. As the sun decides to become a more active member of our daily lives, we — especially those of us with nice cameras and itchy shutter-release fingers — feel an increasing compulsion to awaken from our lazy autumn habits and venture outside. And if you’re going to be outside, you might as well Continue Reading

    The post The Sun Is Your Friend: Tips for Summer Photography appeared first on Photodoto.


    Photodoto

  • Fashion Photography – Tips for Making Something out of Nothing

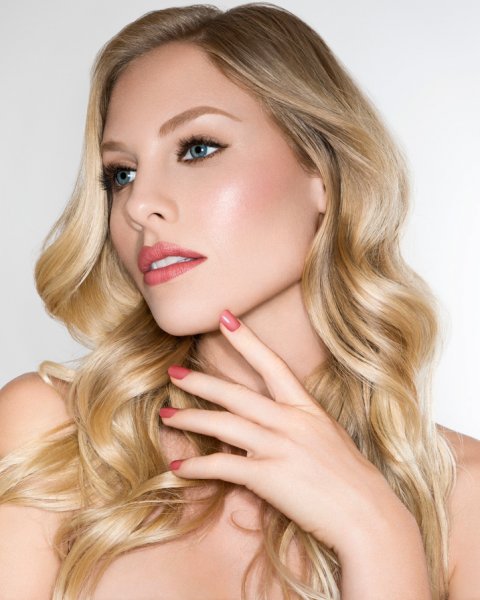
    Recently, I found myself in a conversation with a mentoring client who was feeling creatively stunted. I asked her where she wanted her portfolio to go and she said, “I want images like yours! But you live in California, and everything is pretty there!” I literally laughed out loud when she said that because California, while pretty, is filled with more urban yuck, specifically Los Angeles, than one can even imagine. I only wish I had infinity pools available to me, palm trees for as far as the eye can see, and no traffic to have to clone out! Even a green lawn, would be nice. But, alas, I’m not a Kardashian.

    fashion-01

    Beauty or fashion photography – not all glamorous

    The honest truth is like anywhere else, locations are always troublesome to find. In Los Angeles County, to shoot on the street, beach or outside a structure, you need a permit. It’s a serious business. Applying for a permit can take a substantial financial cost, and if for some reason the weather is bad on the day of the permit, you’re out of luck. Because of this, I’ve learned to be more open-minded, and have found ways to “make it work”. You can too! Stop preventing yourself from making amazing images because you don’t have the right spot.

    First, Don’t laugh at me. Nobody knows the magic behind the scenes, so keep that in mind. At the end of the day, the final image is all that matters! Trust me when I lead you down this liberating path of cheap backdrops, dirty backyards, and grocery store finds.

    Reference #1: Create a backdrop from leaves

    I shot a beauty story for Cosmopolitan magazine. I knew I wanted a lush tropical backdrop, and pops of color throughout. I called everyone I knew to see if anyone had bird of paradise, or other tropical looking greenery, in their back yards. Nobody had pretty backyards that were a good fit. So I decided to order some leaves from my local florist and make the backdrop I wanted. I decided my TINY backyard was the best place for me to shoot this story. So I will show you the final product first.

    This is the image that went to Cosmopolitan.

    Image 1b

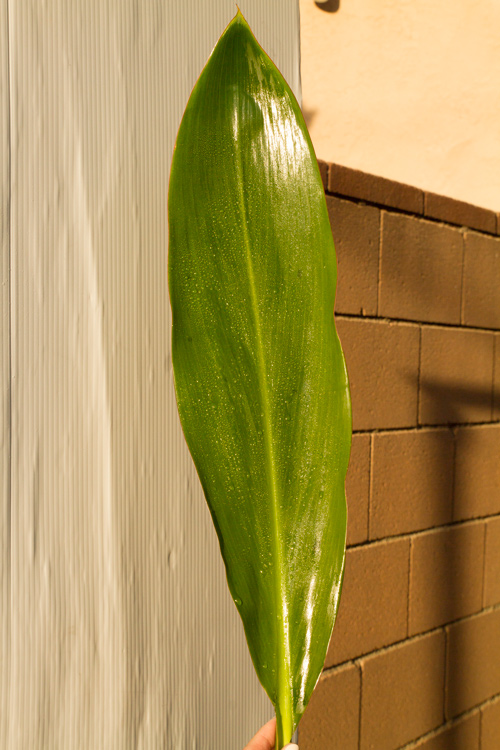
    Before we got started I set up a big piece of white plastic board I had in my garage. Why plastic board you ask? Because, I was out of white paper and it was there. I just needed a white background.

    Using natural sunlight, I took photos of the leaves, cleaned and misted against the white backdrop for samples.

    Image 2b

    Then I took the photo against the white backdrop. Using midday sun. YES, 2 o’clock burn our your retinas, sunlight. Don’t be afraid of sunlight. Once you conquer it, you can shoot anything!

    Image 3b

    My assistant is simply holding the leaf up behind the model. Pretty, but missing something right? By adding the leaf samples (duplicating them) in post-production, it gives it such an exotic feel. You CAN do this. You have poster board, correct? You have nature around you, right? Use it!

    Reference #2: Improvise

    A cosmetic commercial client wanted a summer themed campaign, with the tagline, Summer in High Def. I pitched the idea of a pool shoot with bold aquas and colorful pops of color. She told me she had no location budget, I told her, “No problem.”

    I took a quick stroll to my local grocery store chain. Luckily, it was May so they had lots of summer goodies in stock. I found an inflatable pool for $ 5. SCORE! Once again, at the end of the day, nobody knows what your set looks like.

    Image 4b

    The model barely fit in the five inch deep, kiddy pool. It was quite funny. The client LOVED the shots and couldn’t believe I pulled it off. I never had any doubts. This setup is my most requested one. Clients ask for it all the time. I simply say, “Oh yeah, it’s in my trunk”. They look at me oddly, and confused.

    Image 5b

    You can shoot at a mansion or in your own front yard, NOBODY KNOWS. Stop getting in your head that you need more. That’s what makes our business so beautiful. It’s really not about how big your studio is or how you have amazing locations. At the end of the day, all that matters is your final image.

    Do you have any other make-shift background or location tricks? Please share in the comments below.

    fashion-02

    googletag.cmd.push(function() {
    tablet_slots.push( googletag.defineSlot( “/1005424/_dPSv4_tab-all-article-bottom_(300×250)”, [300, 250], “pb-ad-78623” ).addService( googletag.pubads() ) ); } );

    googletag.cmd.push(function() {
    mobile_slots.push( googletag.defineSlot( “/1005424/_dPSv4_mob-all-article-bottom_(300×250)”, [300, 250], “pb-ad-78158” ).addService( googletag.pubads() ) ); } );

    The post Fashion Photography – Tips for Making Something out of Nothing by Courtney Dailey appeared first on Digital Photography School.


    Digital Photography School

  • Get Excited About the New Adobe Lightroom CC

    The day is upon us, my friends; Lightroom CC is here. The latest update to Adobe’s excellent photo management tool has arrived, and as cliche as it sounds, it really does offer something for everyone.

    While the updates won’t necessarily satisfy hardcore Aperture users (who are still licking their proverbial wounds), Lightroom 4/5 users can easily justify this upgrade as a satisfying mix of under the hood, and hands-on improvements.

    lr_splash

    First and foremost, you’ll be ecstatic to learn that Adobe has released an independent version of the software in the form of Lightroom 6, available as a physical DVD or as a digital download. Subscribers of Adobe’s Creative Cloud service (that have Lightroom as part of their subscription plan) will automatically receive Lightroom CC, which is identical to Lightroom 6. We all let out a collective sigh when it was verified Adobe would not leave non-Creative Cloud users out in the cold.

    The new and improved Lightroom sports several new features, and has included some improvements as well. Let’s go through a few of the highlights and see how they can make your photography workflow a more powerful and efficient process.

    Improved Speed

    While this is a behind-the-scenes improvement, it’s one of the biggest in this update. Instead of relying on the CPU (central processing unit) for all processing, as with Lightroom 5, Lightroom 6 has added the ability for some computations to be offloaded on the GPU (graphics processor) of your machine, specifically adjustments in the Develop module of the software.

    This takes some of the load off of the central processor of your computer, and makes the entire program noticeably quicker. Efficiency through speed!

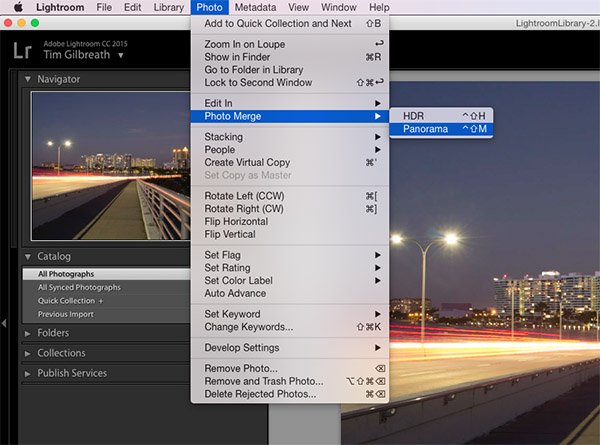
    Photo Merge to Panorama

    The new ability to create panoramic photos (multiple photos blended together to create a single super-wide image) directly within Lightroom will probably be one of the most talked about features of the update, along with HDR creation. In Lightroom 5, no “creation” of new pixels was allowed, meaning if you needed to create a panoramic image, you’d have to do it in Photoshop or a third-party piece of software.

    pano1

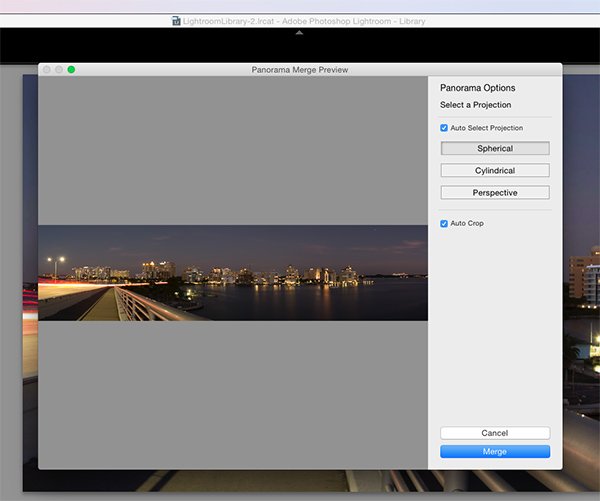
    Now, Lightroom allows you to select a set of images, and it will stitch them together with a single click. The detailed controls for this process are sparse, but this is a good thing. You can even have the software automatically crop after the stitch is complete by ticking a checkbox in the creation dialog.

    What do you get back after the build is complete? A 16-bit DNG (digital negative) file, a raw format that can be adjusted in the Develop module just like a RAW file. No compressed JPEG’s here.

    pano2

    The beauty of this process is that unlike the full rendering done in Photoshop, you are giving a very quick low-resolution preview of the image, and it can then be sent to the background, while you work on a different image. The progress of the panorama’s build is viewable in the new Activity Center, which allows you to monitor and control ongoing background processes.

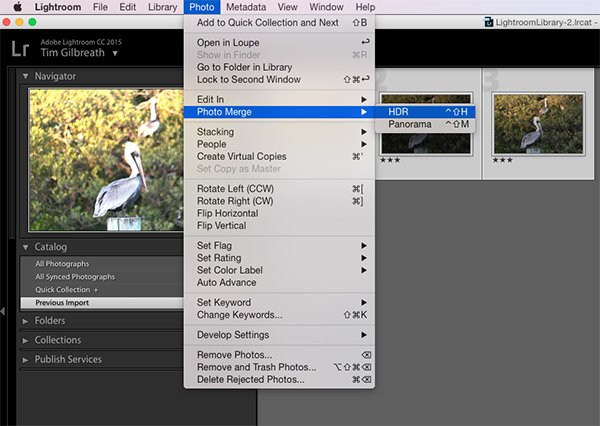
    Photo Merge to HDR

    The other high profile addition in Lightroom CC is undoubtedly the ability to create HDR (high dynamic range) files. HDR images are created by blending together several shots taken at various exposures, with the intention of pulling the optimal dynamic ranges from each of those images to create a photo that contains a larger dynamic range.

    As with creating panoramas, HDR creation was not available in Lightroom 5, and was most often done via a third-party program such as Photomatix, or within Photoshop.

    hdr1

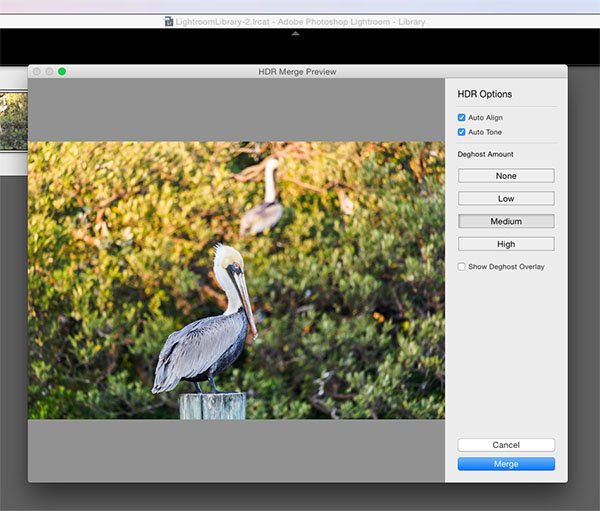
    Just as with panoramic creation, Lightroom allows you to select several files within the software, and merges them together into a DNG file, with no compression. They may be modified with any of the sliders in the Develop module, just as you would do with any RAW file.

    hdr2

    The obvious primary benefit for both the HDR and Panorama creation tools in Lightroom CC is the ability to perform these functions right there in Lightroom, without having to merge the files together in a separate program and then import them back into your Lightroom workflow.

    More Precise Adjustment Filters

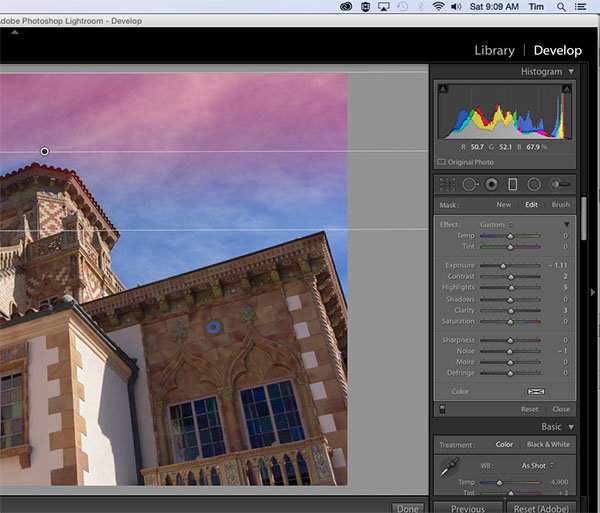
    The graduated and radial filters available in Lightroom are some of its most-used features. They give you the ability to paint on a varying layer of adjustments including color, exposure, and many other options. A common example would be adding a graduated filter in a landscape shot to decrease exposure in a blown-out sky, while maintaining the proper exposure for the foreground.

    adj_brush1

    Note the red you see here is the new tool overlay which shows you where it is applying on your image. Just like the adjustment brush tool.

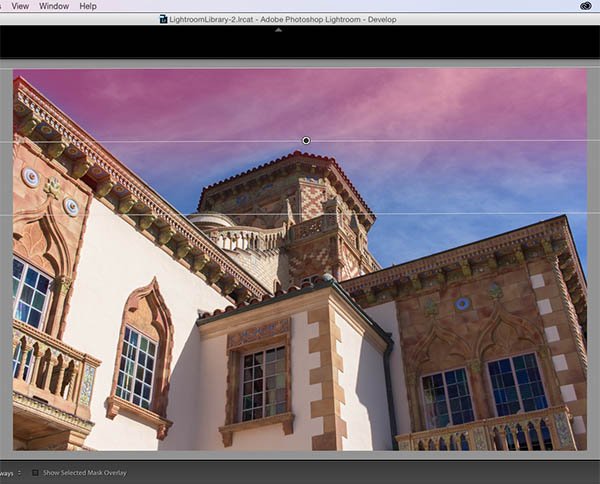
    One caveat to using these filters before Lightroom CC was that they were all “what you see is what you get” implementations; if there was an object such as a tall building in your landscape image that extended to the top, a graduated filter to darken the sky would also darken the building.

    adj_brush2

    With Lightroom CC, this is no longer an issue. You can apply a graduated filter as usual, and then use a brush to mask the building so that the effect is only applied to the sky. This adds almost unlimited potential to the filters available in Lightroom.

    Facial Recognition

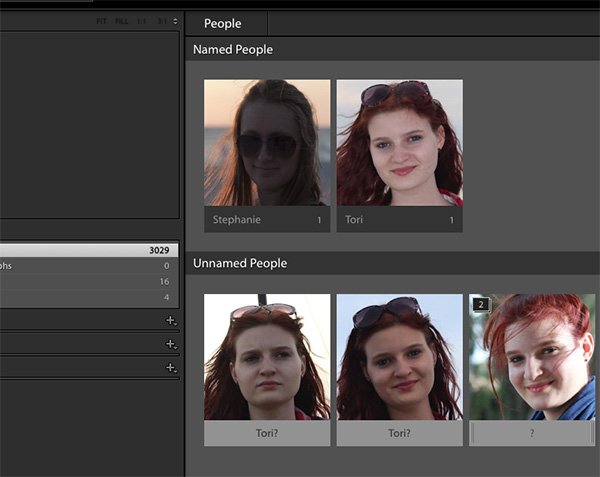
    A feature becoming more and more popular in our social-sharing world, facial recognition is well-known in apps such as Facebook, where identifying and tagging friends and family in shared photos is ideal. Lightroom throws its hat in the ring with a new Facial Recognition feature that will allow you to tag people in your photos in a similar manner.

    The software will automatically attempt to identify human faces, and allow you to name them for future use. Over time, you’ll build up a database of faces, and Lightroom will begin identifying faces from that database in your newly imported photos.

    faces

    The tags that are created from this process can then be converted into searchable keywords in the metadata for the photo, and used as any other keyword could be.

    What do you think?

    There are several other smaller improvements and enhancements in Lightroom CC, including updates to the Slideshow module, pet eye removal, and tethered shooting, as well as an improved experience in Lightroom Mobile. Just as a reminder, to use Lightroom Mobile you’ll need to have an Adobe Creative Cloud plan that includes Lightroom.

    We’ll likely have more in-depth analysis of Lightroom CC’s new features in the coming weeks, but early in the game, what do you think? Are you excited about the upgrade? Did it change your opinion of Adobe’s Creative Cloud direction of thinking? Thanks for reading, sound off in the comments below!

    googletag.cmd.push(function() {
    tablet_slots.push( googletag.defineSlot( “/1005424/_dPSv4_tab-all-article-bottom_(300×250)”, [300, 250], “pb-ad-78623” ).addService( googletag.pubads() ) ); } );

    googletag.cmd.push(function() {
    mobile_slots.push( googletag.defineSlot( “/1005424/_dPSv4_mob-all-article-bottom_(300×250)”, [300, 250], “pb-ad-78158” ).addService( googletag.pubads() ) ); } );

    The post Get Excited About the New Adobe Lightroom CC by Tim Gilbreath appeared first on Digital Photography School.


    Digital Photography School

  • How to Protect Your Camera in Extreme Weather

    If you love to photograph nature, you surely know how unpredictable, and often hostile the elements can be. While we may get a sniffle or a chill from bad weather, the electronics inside our cameras are much more sensitive.

    A little water, some sand, or extreme temperatures can cause your camera to temporarily malfunction or even suffer permanent damage. When the storm clouds roll in, it’s important to know how to take good care of, and protect your camera gear.

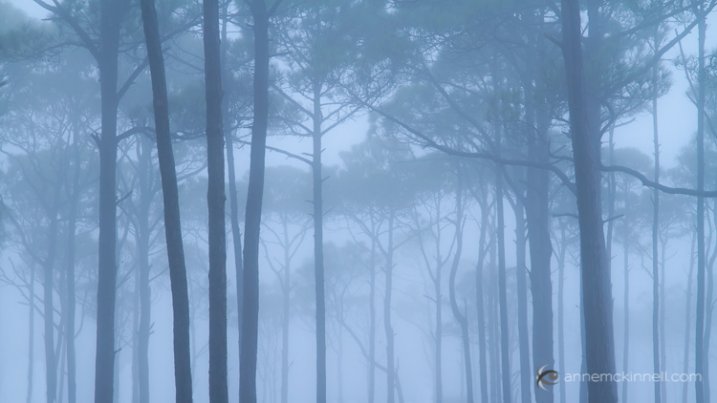
    Foggy trees by Anne McKinnell

    Moisture

    Whether it’s full-on rain or just intense humidity, moist conditions are your camera’s number one enemy. Not only can the wetness seep into the electronic elements of cameras, flashes, lenses, and other accessories and short them out, but it can get trapped inside the casing, causing condensation and eventually mold.

    To prevent this, consider purchasing a protective rain cover for your camera. You can find these in both disposable and reusable versions. In a pinch, a non-biodegradable plastic shopping bag will do the trick. Make sure all the rubber doors covering your camera’s inputs are sealed, and keep a clean, dry cloth handy to wipe away any water that condenses on the outside of the camera.

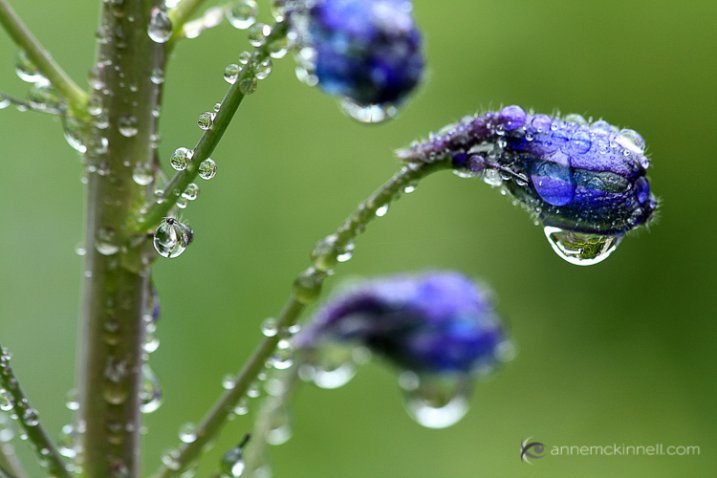
    Rain drops on flowers by Anne McKinnell

    In the event that your camera does get wet inside, remove the lens and set all the affected pieces next to a warm (not too hot) radiator. Remove the battery and memory card, open all the doors and gaskets, and place the camera face up and the lens face down to allow water to evaporate through the openings. Less sensitive accessories can be placed in a bag of dry rice, which will absorb the excess moisture.

    Tip: Throw some silica gel (the little packages in shoe boxes, etc., that read “DO NOT EAT”) in your camera bag to protect against humidification in storage.

    Intense Heat or Cold

    Most cameras are rated to work between -10 and +40 degrees Celsius (14-104 degrees Fahrenheit). This is generally not because of the camera itself, but because of the batteries – the chemicals inside of them cease to work properly when they get too cold, or too hot.

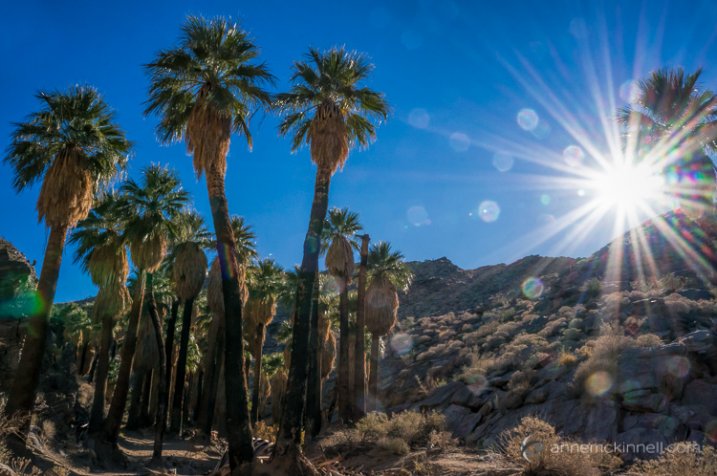
    Palm Canyon Sunburst by Anne McKinnell

    To avoid this problem, keep an extra battery in a temperature-controlled place. If you’re shooting in the cold, keep one in your pocket to be warmed by your body heat. In the heat, your camera bag should provide adequate shade to keep a battery cool enough to function.

    Never place your camera face up in direct sunlight. The lens works both ways, and can act like a magnifying glass to focus the rays into your camera and burn a hole in your shutter, and eventually, your image sensor. Remember that even magnesium-alloy cameras contain plastic components, so if you shoot in really extreme places such as near volcanoes or among raging fires, use common sense and keep your camera well clear of the flames.

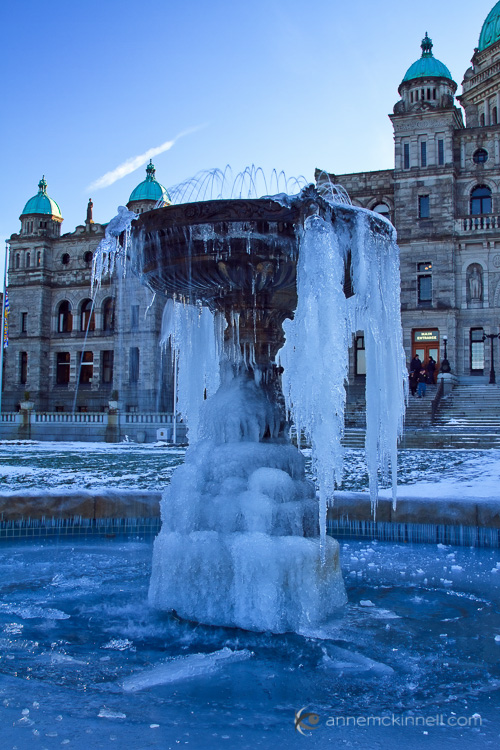
    Frozen Fountain by Anne McKinnell

    Sand

    Other than moisture, this is probably the most common cause of equipment malfunction. Everyone wants to take their camera to the beach (or maybe to the desert), but as anyone who has ever tried to picnic in the surf knows, sand gets anywhere, and everywhere. At best, it can become stuck inside the lens and cause spotty pictures. At worst, it will get inside the gears and severely damage moving parts such as the shutter or auto focus motor, or scratch the lens or image sensor.

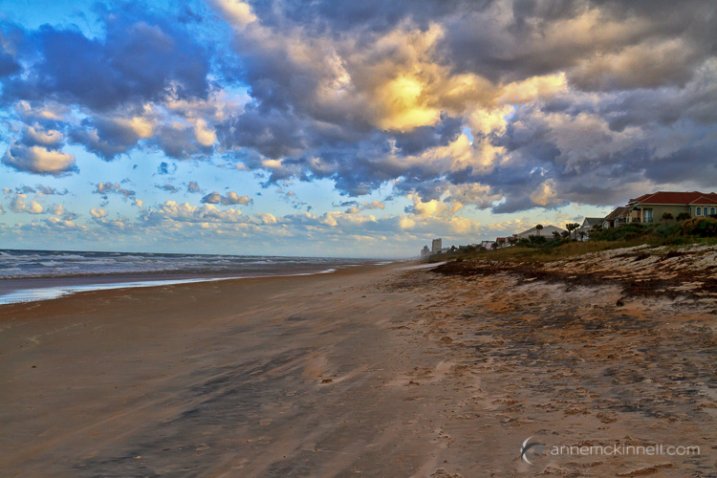
    Ormond Beach by Anne McKinnell

    This applies to compact cameras too – sand in the lens will cause it to grind and prevent it from extending, turning your little point-and-shoot into an expensive paper weight. Even tripods aren’t safe from this effect. Grains of sand inside the fastening screws can destroy the threading and keep them from tightening properly.

    Again, make sure the rubber gaskets on your camera are tightly sealed and always tuck your equipment away inside a sealed camera bag when not in use. A protective rain cover can also help keep your camera clear of debris. If sand does get on or in your gear, don’t wipe it with a cloth which can embed it deeper, or worse, scratch the glass elements. Instead, get a hand-pumped air blower to puff the grains away. Avoid compressed air canisters, which are too strong and contain chemicals that can cause damage. If you have no other option you can use your lungs, but be very careful not to project little spit particles into your camera’s insides.

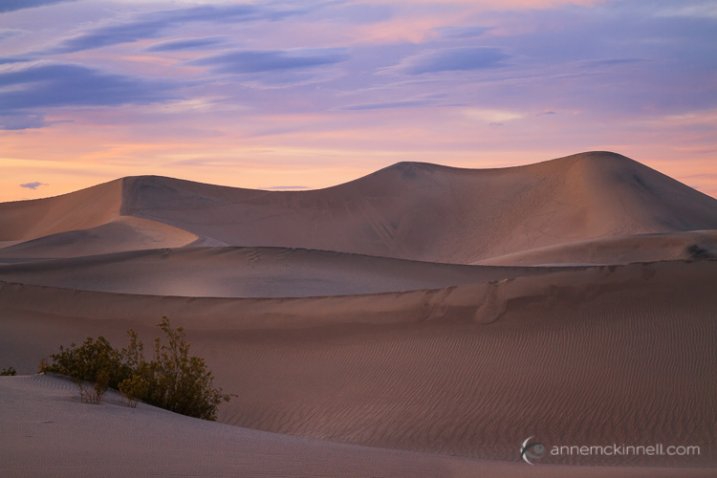
    Mesquite Sand Dunes by Anne McKinnell

    Wind

    A stiff breeze won’t hurt much on its own, but it can easily blow over a tripod and send your camera crashing to the ground, causing untold damage. On a windy day, anchor your gear using sandbags, or simply hang your camera bag from the tripod’s centre column to weigh it down (a sack full of rocks will also work). Keep in mind that wind combined with sand creates a natural sandblaster which can scratch up your lens quite badly if you aren’t careful.

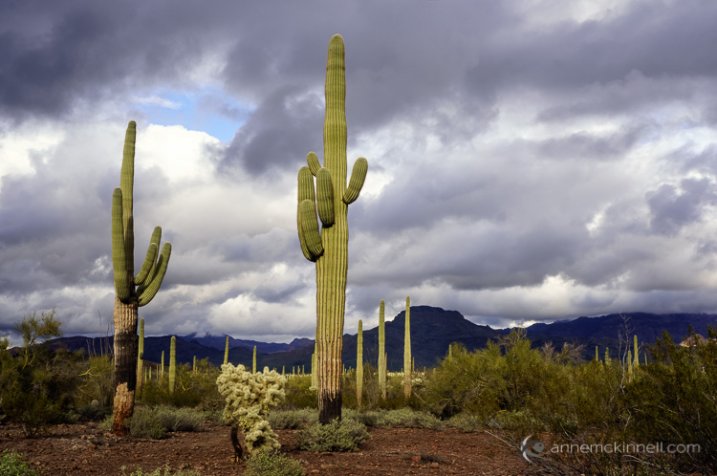
    Stormy Day at Organ Pipe Cactus National Monument by Anne McKinnell

    Bad weather can often make for good photographs, so get out there and make the most of it. Just make sure you are taking care of your equipment at the same time.

    googletag.cmd.push(function() {
    tablet_slots.push( googletag.defineSlot( “/1005424/_dPSv4_tab-all-article-bottom_(300×250)”, [300, 250], “pb-ad-78623” ).addService( googletag.pubads() ) ); } );

    googletag.cmd.push(function() {
    mobile_slots.push( googletag.defineSlot( “/1005424/_dPSv4_mob-all-article-bottom_(300×250)”, [300, 250], “pb-ad-78158” ).addService( googletag.pubads() ) ); } );

    The post How to Protect Your Camera in Extreme Weather by Anne McKinnell appeared first on Digital Photography School.

    Digital Photography School

  • 10 Tips for Better Cityscape Photography

    This article is based on the new eBook: Landscapes, Cityscapes & Photography Tricks – 50% off for a limited time only.

    Photography is escapism. We want to see what we can’t with our own eyes; towering skyscrapers, endless skylines, the people of faraway cultures. We long for the distant, so it makes sense that cityscape photos are so popular and marketable. I hope these 10 tips will help you take better cityscape photography, and inspire you to explore faraway cultures.

    Cityscapes1

    1. Right After Sunset is a Fantastic Time for Cityscape Shots

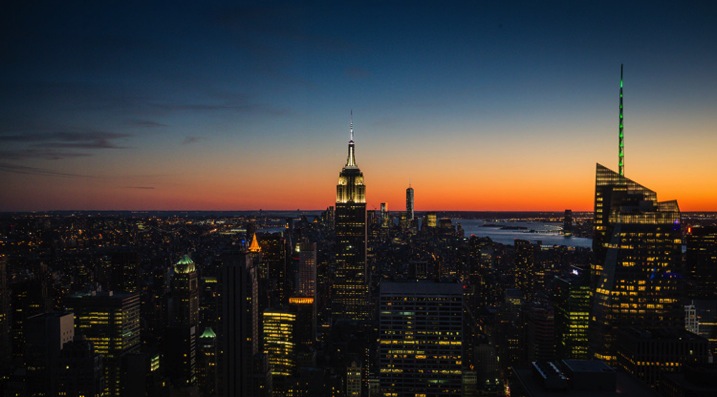
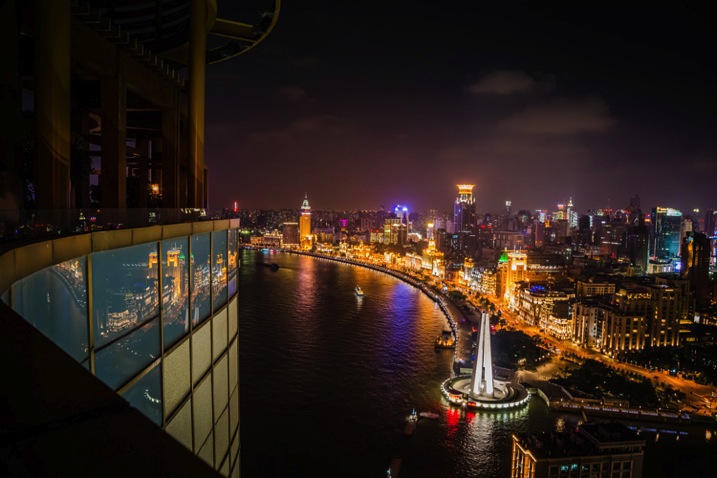
    After the golden hour settles, the sky grows darker, while city lights illuminate below. This immediately post-sunset or pre-sunrise moment (known as twilight or the Blue Hour), I would argue, is the best time for shooting cityscapes. Building lights turn on before the sky turns off, and the balance of light can look almost equal. It’s a great combination of tones, and worth getting up in the morning to catch.

    Cityscapes2

    2. Capture the Whole Skyline with a Wide Angle Lens

    For cityscapes, focal lengths between 12-35mm are a good bet. Not a necessity, but you will appreciate the wide angle, more often than not. This will allow you to capture a nice skyline without having to be miles outside the city, and allow you to include an entire skyscraper in vertical format, while standing near its base.

    Cityscapes3

    3. Use Your Camera’s Self-timer and a Tripod for Crisp Results

    For shooting during the golden hours, and after dark, a tripod is practically essential if you want sharp crisp results. Better yet, set your camera up on the tripod, and set your camera’s two or 10-second self-timer so you don’t have to touch or jostle the camera during the actual shot. This will help your camera stay more stable, avoid blur, and capture stunningly sharp results.

    4. Look for Those Leading Lines

    Just like for landscape photography, leading lines are an integral part of three-dimensional cityscape composition. They add perspective, depth, and intrigue to any image, while taking the viewer on a journey from one point of the frame to another.

    Cityscapes4

    In cityscapes especially, leading lines can create a strong sense of coherence in an otherwise chaotic scene. Think of train tracks for example. Rows of tracks, surrounded by eager commuters and tall buildings, could easily appear cluttered and frenetic (which could be a good thing, or could seem unfocused). But, slicing the image up with the right composition and a clean line, or series of lines, can cut through the chaos.

    5. In the Evening, Look for Good Vantage Points Over Busy Intersections

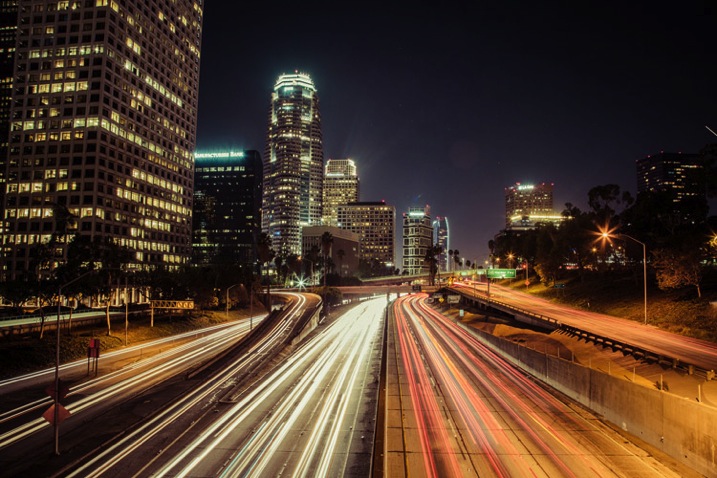
    Practice your long exposures, then look for busy intersections of a city. Finding the right location for heavy traffic can be tricky. You’ve got to know a city pretty well, or at least have an idea of where the congested thoroughfares are located. The idea here is blurred movement; traffic in a straight line may be interesting if you’ve got some variety in the shot (maybe skyscrapers or a city icon nearby), but failing that, you’re going to want to see some movement, leading lines and curves. That’s why bendy roads and intersections work so well; you can create light lines out of conflict, movement and chaos.

    Cityscapes5

    6. Just like Rivers are Great in Landscapes, Fountains are Great in Cityscapes

    Photographing fountains within your cityscape can add another element of beauty and serenity to your image. Most cities are full of them. From small, historic, fountains that can add interest to a composition to huge water fountain light shows that blast water up in the air and make for exciting and spectacular photos.

    Cityscapes6

    7. Look for Patterns

    Patterns have the ability to bring a sense of visual rhythm and harmony to an image. While at first sight, a common city scene may appear dull or bland. Focusing on repeating strong graphic elements, like shapes, lines, colors or forms, will draw the viewer’s attention, and make the whole thing a lot more interesting.

    Cityscapes7

    8. Don’t Be Afraid to Include Pedestrians in the Shot

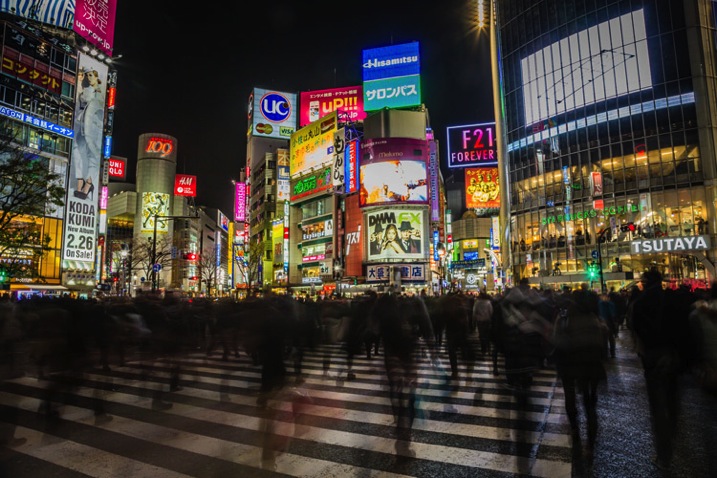
    When it comes to intersections, some bigger cities; New York, Tokyo, Toronto; will have four-way crosswalks, where pedestrians stream across in all directions, stopping cars on all four sides of the intersection. These make especially great hectic shots, with cloudy masses, surrounded by headlights and condo lights.

    Cityscapes8

    9. When Tripods Aren’t Allowed – Improvise

    Many businesses with great city views that attract photographers, have gotten the impression that tripods mean professional work and therefore, money. These establishments won’t let photographers in with a tripod, likely because they might be able to make money by charging a permit fee or production fee. I’ve run into this problem mostly in the U.S., but have also come across it in a few international cities I’ve visited. It is upsetting indeed, but instead of letting it defeat you, try to do your best with what you have.

    Cityscapes9

    Look to see if there is a place where you can set your camera down for the shot so you don’t have to hold it risking blur from hand movement. You can use tables, pillars, walls, edges, benches, anything that is flat and safe. If you can’t find a flat surface, you can make one. Prop your camera up with your jacket or other item of clothing.

    10. See Bad Weather as an Opportunity (Carefully)

    Not only does bad weather add an edge to your photo, but stormy weather creates skies that are full of color and texture, providing a feeling of gloominess, fury, eeriness and even peace. In short, the stormy sky portrays emotion.

    Cityscapes10

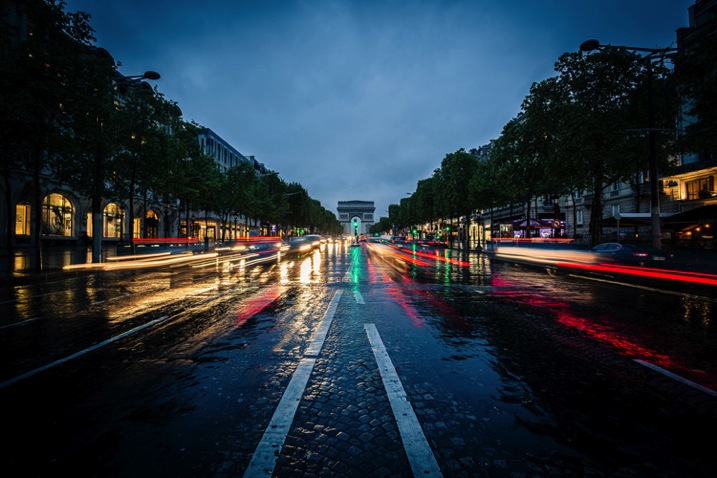
    With moisture everywhere, it just seems like the city glows more right after a rainfall. Most surfaces and structures will appear more colorful when wet, as water tends to bring out the saturation.

    I hope these have been some helpful tips to get you started!

    For Further Training:

    This relentlessly in-depth new eBook is designed to help you master challenging lighting conditions no matter your experience level, take more compelling photos, post-process them to perfection, and delve even further into long exposure tricks so you know all the possibilities. By knowing all the techniques possible, it is my hope that you will learn a lot faster than I did and start seeing hidden photo opportunities that others might miss.

    Found here: Landscapes, Cityscapes & Photography Tricks

    googletag.cmd.push(function() {
    tablet_slots.push( googletag.defineSlot( “/1005424/_dPSv4_tab-all-article-bottom_(300×250)”, [300, 250], “pb-ad-78623” ).addService( googletag.pubads() ) ); } );

    googletag.cmd.push(function() {
    mobile_slots.push( googletag.defineSlot( “/1005424/_dPSv4_mob-all-article-bottom_(300×250)”, [300, 250], “pb-ad-78158” ).addService( googletag.pubads() ) ); } );

    The post 10 Tips for Better Cityscape Photography by Richard Schneider appeared first on Digital Photography School.


    Digital Photography School

  • Weekly Photography Challenge – Roads and Pathways

    In this earlier post from this morning I share:  28 Wondrous Images of Long and Winding Roads

    Trey Ratcliff

    By Trey Ratcliff

    Roads and paths are easy to find – whether you live in the city in an urban area, or in the country – there are roads. A dirt track, a walkway, a sidewalk, or a highway – find a road or path and start shooting.

    Use the lines of the road to create an interesting and powerful composition. Lead the viewer into the image and tell a story. Like this images:

    Nate2b

    By nate2b

    Paojus Alquiza

    By paojus alquiza

    Oleg Zaytsev

    By Oleg Zaytsev

    Tommy Clark

    By Tommy Clark

    Andi Campbell-Jones

    By Andi Campbell-Jones

    Share your images here:

    Simply upload your shot into the comment field (look for the little camera icon in the Disqus comments section) and they’ll get embedded for us all to see or if you’d prefer upload them to your favourite photo sharing site and leave the link to them. Show me your best images in this week’s challenge. Sometimes it takes a while for an image to appear so be patient and try not to post the same image twice.

    Miwok

    By Miwok

    Alberto Carrasco Casado

    By Alberto Carrasco Casado

    Sherifx

    By sherifx

    Steve Schnabel

    By Steve Schnabel

    Flamouroux

    By flamouroux


    googletag.cmd.push(function() {
    tablet_slots.push( googletag.defineSlot( “/1005424/_dPSv4_tab-all-article-bottom_(300×250)”, [300, 250], “pb-ad-78623” ).addService( googletag.pubads() ) ); } );

    googletag.cmd.push(function() {
    mobile_slots.push( googletag.defineSlot( “/1005424/_dPSv4_mob-all-article-bottom_(300×250)”, [300, 250], “pb-ad-78158” ).addService( googletag.pubads() ) ); } );

    The post Weekly Photography Challenge – Roads and Pathways by Darlene Hildebrandt appeared first on Digital Photography School.

    Digital Photography School