Category: Photography

  • 5 Great Ways to Learn Photography

    All images ©Gina Milicia

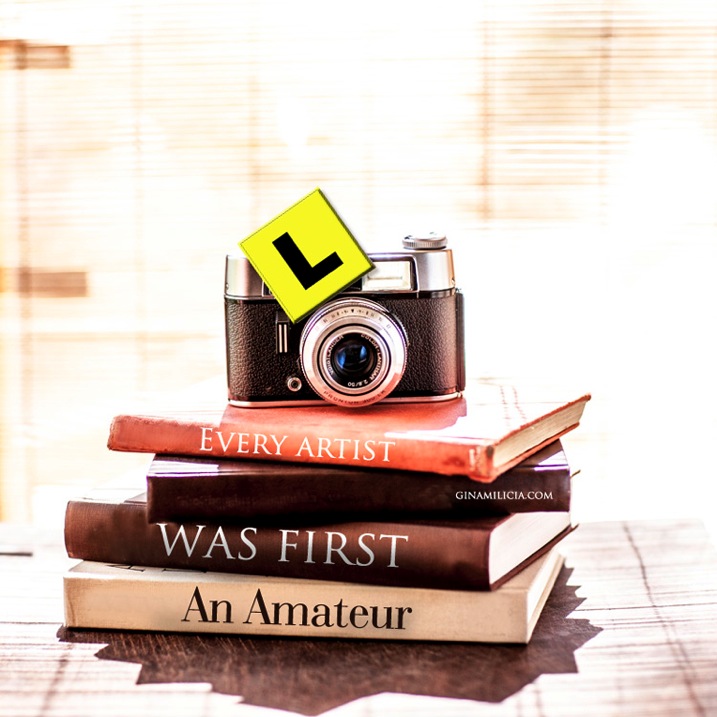
    “Every Artist was first an Amateur”- Ralph Waldo Emerson
    Learn 1

    If you’re just starting out as a photographer, congratulations! There’s never been a more exciting, or easier time to learn the art of photography. Today’s market is flooded with tertiary courses, books, workshops, websites, podcasts and online courses that didn’t exist as little as ten years ago.

    When I began my career 25 years ago, there were only a few options. You could learn photography at a university or technical college, you could complete an apprenticeship or internship with a photographer, or you could teach yourself through trial and error and by studying the work of other photographers. I combined all three of these techniques and found a way that worked really well for me.

    Today there are dozens of ways of developing your photography skills. None of them is right or wrong; just find the one that best suits your personality and learning style. This is a surefire way to fast track your development as a photographer.
    Learn 2

    What is your learning style?

    There are three different ways you can learn a new activity. Most people are a combination of all these styles of learning, so that’s why it’s best to try several different styles to help you learn new techniques.

    1. Visual

    A visual person will learn best from seeing something demonstrated and looking at photos, maps and diagrams.
    Watching “how to” videos and reading books and online blogs really support your learning style if you are a visual learner.

    2. Auditory

    Auditory style people learn through listening to lectures or audio presentations, talking things through and listening to what other people have to say. Listening to podcasts and audio books would be a great way to support your learning style.

    3. Kinesthetic

    Kinesthetic people like to learn by doing activities. You prefer to be hands-on and try things out and discover how they work. Attending practical workshops would really suit your learning style

    So if you really want to cover all bases read, watch, listen and do.

    I know for a fact that my weakness is auditory. I can’t sit still in a lecture or presentation for very long before I get fidgety, but if I listen to information while I’m doing a menial task I find I retain far more information. That’s why I love podcasts and audiobooks so much. I’m able to learn so much while I’m out walking, driving or burning, I mean cooking dinner.
    Learn 9

    Here are five options worth considering:

    1. University/college degree or photography diploma

    This is the traditional road, and the one that many people take. You’ll learn a wide variety of photographic styles, in a structured environment, from experienced teachers and industry experts. You’ll also have access to state-of-the-art studios with all the latest cameras, lighting equipment, accessories and software.

    Learning in school also has the advantage of being in a group learning environment. This will help you develop networks and social skills that you’ll use in the future. Sharing the journey with your new friends will make learning more fun.

    The downside is the expense. Depending on where you live, a degree or diploma can cost tens of thousands of dollars or more. There’s also a significant investment of time. This can be difficult to manage for older students who may have families to support.

    The school’s location will also be a factor. Many of the better photography courses are located in capital cities, so you’ll also need to consider travel or relocation expenses.

    If you think you’re suited to this style of education, thoroughly research the schools in your area. Find out who the teachers are, who the past students have been, and what they’ve gone on to achieve. If it’s feasible, attend an open day and ask current students what they think. I’ve known students who’ve been miserable and have even failed classes because their personality didn’t match their schools’ cultures. After transferring to schools better suited to their learning styles, they thrived.

    Learn 4

    2. Assisting – apprenticeship – internship

    Apprenticing is a traditional, and often overlooked, way of learning the ropes and breaking into photography. This is how many of my peers and I, worked our way up the ladder.

    After graduating from art school, I started out as an unpaid intern with a celebrity and fashion photographer. At the end of my eight-week internship, I was offered a full time job. I couldn’t have landed such a sought-after position based on my portfolio and by cold-calling photographers alone. I learned more in my first month on the job than in four years at art school.

    The 18 months I spent assisting taught me tons of lessons about how to light, direct, pose and talk to models. It also taught me how to work with makeup artists and stylists, and how to deal with difficult clients. But most importantly, I witnessed first-hand the ups and downs of running a business. Had I gone straight out on my own without working as an assistant, I never would’ve realized that ALL photographers experience downturns in their business, and that nobody — no matter how amazing or in-demand — is immune. That lesson was gold and saw me through many quiet times through my career.

    In some cases interning with the right person can be more valuable than doing a course. But that person needs to be generous with their knowledge, and should be an encouraging teacher. The wrong kind of internship can find you stuck in a tiny office filing, answering phones, and performing menial non-photography jobs without the opportunity to ever learn anything.

    Learn 8

    3. Workshops

    Workshops are a great way to refine and advance your skills. One of the advantages of workshops is that you can select the style of photography and techniques you want to improve, and the photographers you want to learn from.

    Some workshops are local, and only last a couple of hours. Others last longer and are held in exotic locations. These are great for travellers who want to shoot on location, but are reluctant to travel on their own.

    Whatever course you’re thinking of attending, read up on it. Read testimonials and find out how much experience the teacher has. But most importantly, find out the class size. Larger classes are fine for software workshops such as Lightroom and Photoshop, but when it comes to learning the craft of photography, smaller groups are much better. You’ll get more one-on-one time with the instructor.

    Learn 7

    4. Online courses

    Online course are great for learning at your own pace and in the comfort of your own home. Look for courses that are taught by professionals you respect and in a style you can relate to. The more you enjoy and relate to your teacher, the easier it’ll be for you to learn. Many of the really good courses offer money back guarantees, making them a zero-risk investment.

    Learn 6

    “When the student is ready, the teacher appears” – Buddhist Proverb

    5. Mentors

    A mentor can be anyone who’s realized the goals you want to achieve. This includes both friends who can help you understand some of your camera’s settings, and professionals with five, 10, 20, or more years of experience. Their skills may vary, but anyone who’s farther down the path than you has valuable information that will save you time, money and effort in reaching your goals.

    A great place to start looking for mentors is in your friendship and social media circles. It isn’t as daunting as it sounds. Look for someone whose work and working style you admire and respect. Follow them on social media and look for ways you can add value to the relationship. Retweet their posts, comment on their photos, share their work, refer clients to them, and send them links to great locations or items that may be interested in.

    Give the relationship time to develop before you ask them to mentor you. That will increase the chance that they say yes, because they will have had a chance to get to know you. A mentor is far more likely to want to give up valuable time to work with you if they can see you show initiative, and are respectful of their time.

    I’ve been lucky enough to work with several mentors in my career and I know their knowledge and guidance has saved me years of extra work and opened many doors I may never have walked through had I have stumbled along on my own.

    Learn 5

    “The journey of a thousand miles begins with a single step.” – Lao Tzu

    Finally, there is plenty of great information out there, and lots of amazing teachers, but in the end it’s up to you to take the first step.

    What have been the most successful ways for you to learn photography? Do you have any other suggestions I may have missed? I’d love to hear from you, please leave a comment below.

    googletag.cmd.push(function() {
    tablet_slots.push( googletag.defineSlot( “/1005424/_dPSv4_tab-all-article-bottom_(300×250)”, [300, 250], “pb-ad-78623” ).addService( googletag.pubads() ) ); } );

    googletag.cmd.push(function() {
    mobile_slots.push( googletag.defineSlot( “/1005424/_dPSv4_mob-all-article-bottom_(300×250)”, [300, 250], “pb-ad-78158” ).addService( googletag.pubads() ) ); } );

    The post 5 Great Ways to Learn Photography by Gina Milicia appeared first on Digital Photography School.
    Digital Photography School

  • Photobook Albums: How to Get the Best Design from Your Photos

    Photobooks are gradually replacing traditional albums as the photo-viewer’s medium of choice. These digitally printed albums offer a host of advantages, one of which is a greater flexibility of design and layout. But when you’re faced with lots of blank pages to fill, where do you start? In principal it’s easy to click and drag digital photos onto a virtual Continue Reading

    The post Photobook Albums: How to Get the Best Design from Your Photos appeared first on Photodoto.


    Photodoto

  • 5 Macro Photography Tricks to Make Your Images Stand Out

    Editor’s Note: This is the first article in a series on macro photography this week. Look for a new one each day for the next 7 days. The next newsletter will have them all if you miss any! 

    In the world of macro photography, most of discussions seem to surround the technical aspects of this photographic art form. Amongst my colleagues, lens choice comes up a lot, along with the use of a flash, extension rings, and bellows.

    _DSC5144W

    Dynamic and creative macro photographs.

    I’d like to switch gears away from the technical, and share some of my tricks to help you creatively enhance your macro shots for added impact and emotive value. If you’re a photographic purist, (not that there is anything wrong with that!) you may not want to keep reading. These tricks provide definite enhancements to the natural environment – so if real is what are shooting for, this article may not be for you.

    However, if you are looking to inject more creativity into your macro images, you may appreciate these easy, but high-impact, techniques and tricks.

     Creative Backgrounds

    1) Macro Blues

    Most macro shots seem to be of natural subjects, such as; flowers, plants, insects, webs, etc., that live under the blue sky of planet Earth. To enhance the point of view for these kinds of shots, try a using an old blue J-Cloth (it must have been washed many times to work well) as a background. You can drape it across nearby branches or rocks to provide a soft blue background that will make your flowers and spiderwebs pop.

    Use a shallow depth of field (f/2.8 or less, depending on your lens) and keep the background at least 12 inches from your subject for best results. I use a Sigma 105mm for my macro work, and these settings work well for this lens. You may need to experiment a bit with your lens and subject.

    _DSC0785_0026

    A macro background made from an old well-washed J-Cloth.

    _DSC0093Wjpg

    Creatively draped J-Cloth background.

    I like J-Cloths because I always have one handy at home, to grab and put in my pocket when I go on spontaneous photo walks and drives, and it fits easily in my camera bag or my pocket.  An old well-washed J-Cloth is the perfect shade of blue for my type of macro art. Newer ones that are out of the box, or that haven’t been used, are okay too but I find the blue is a little too dark. But try one for yourself and see which you prefer.

    2) Better with Bokeh

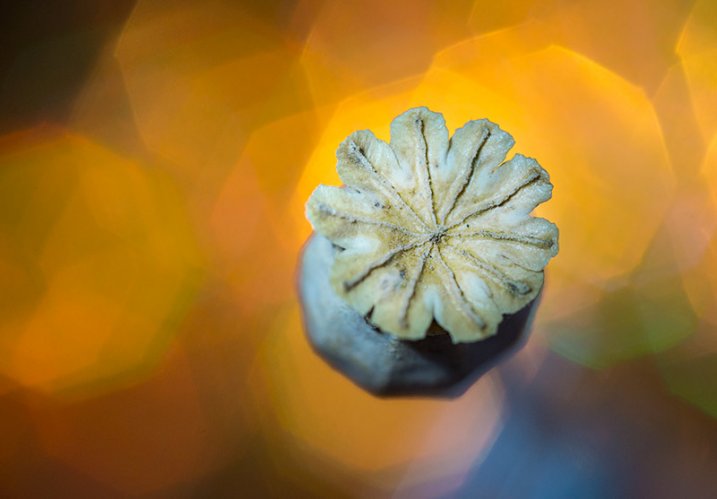
    If you really want to get really creative, go for big bokeh, those soft round(ish) blurred shapes in the background. I like the following technique because it emulates tiny light sources and adds a bit of mystery to your photos. Using this technique, you can create ethereal micro landscapes that look like they are from another planet!

    _DSC2670W

    Mysterious Macro

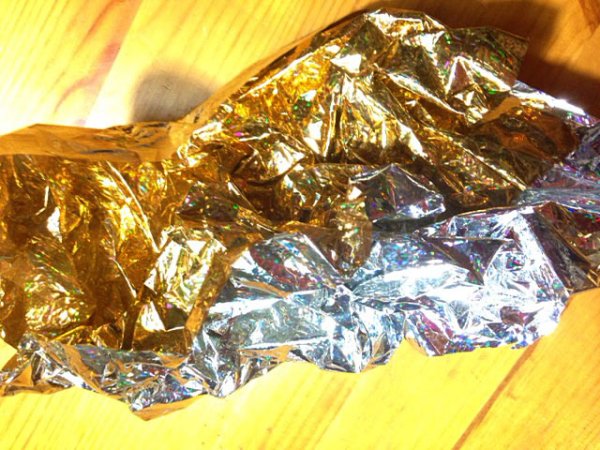
    Again this involves using a background material, in this case holiday wrapping paper. Look for plastic foil with a metallic coating. It costs a bit more than paper but it works great for creating macro bokeh, and you’ll have lots left over for actually wrapping gifts (of your amazing macro photos).

    wrapping-paper

    Crinkled metallic gift wrap.

    First crinkle the wrapping paper – scrunch it into a ball. If it’s the plastic type it will instantly “un-ball” itself, and you’ll have a wrinkled many faceted metallic backdrop. With this set up, you may also need a light source to bounce off the reflective metallic wrap, depending on where the sun is when you’re shooting. If I need light I usually use my iPhone flashlight, but if you have any other flashlight in your gadget bag it will work just as well. Just aim your light at about a 45 degree angle to the background, out of view of your subject, compose, use Live View if you have it, and your preview button to check the depth of field and bokeh effect. Adjust as needed. Make sure you have no big hot spots of light. Try using different colors of wrap as well. I always keep this gold colored stuff in my bag because I also use it as a reflector – which brings me to trick number three.

    3) Reflectors

    Just as in regular photography, there are times when you’ll need some additional brightness to light up parts of your macro subject. Once you’re up close and personal, you’ll often find shadows you didn’t see from your higher vantage point. In macro photography you may find a flash is often too much light, and the close quarters between your camera and the subject make soft lighting tricky. So try using a reflector.

    I often use the gold side of the wrapping paper to reflect sunlight into shadows or dark spaces in my subject. I also have (but seem to have misplaced) a 12″ square of copper foil sheeting (you can find this in craft shops or stained glass shops). It’s thicker than aluminum foil so it stands up on its own, and can be bent into angles to suit your needs each time. The copper color gives a nice warm tone to your subject, and again it’s light weight, cheap, and tucks nicely into your bag. I duct taped the edges to avoid getting cut – copper edges are sharp!

    Dew Drop In

    Nature photographers either love or hate these last two tricks.

    _2DS0492

    4) The Spray Bottle

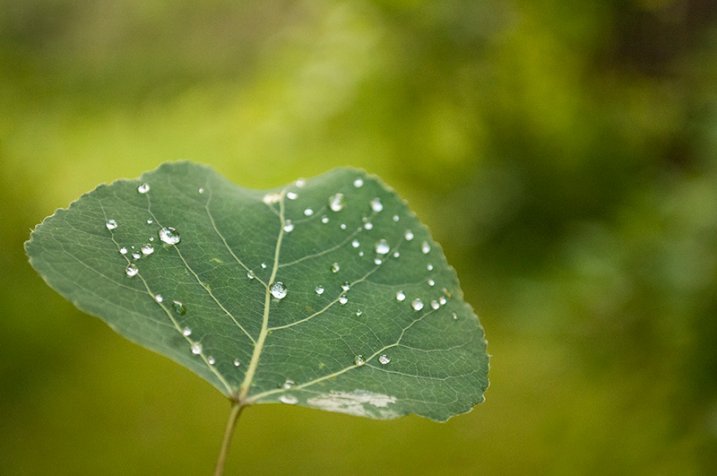
    There’s nothing more crushing than getting up at 4:30 am in the summer to capture the sunrise and the morning dew, only to arrive at your destination to find things dry as a bone. Fear not Grasshopper. With your handy spray bottle of water, you can create dew drops for spiderwebs, leaves, flowers, and everything else you choose to photograph.

    With a good soaking of water from your bottle, colors become more rich and saturated (is this where the term came from?), making for more vibrant and rich-looking photos.

    _DSC5428w

    Water drops add interest, and a sense of a moment.

    5) The Ultimate Droplet

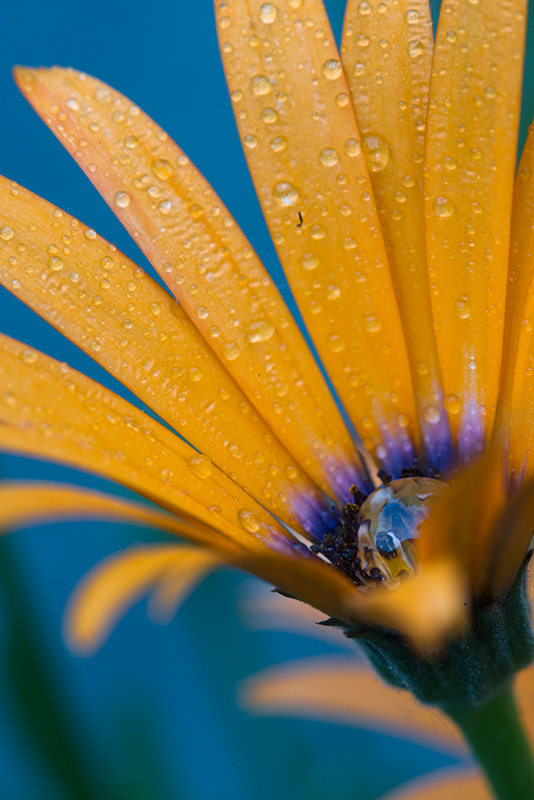
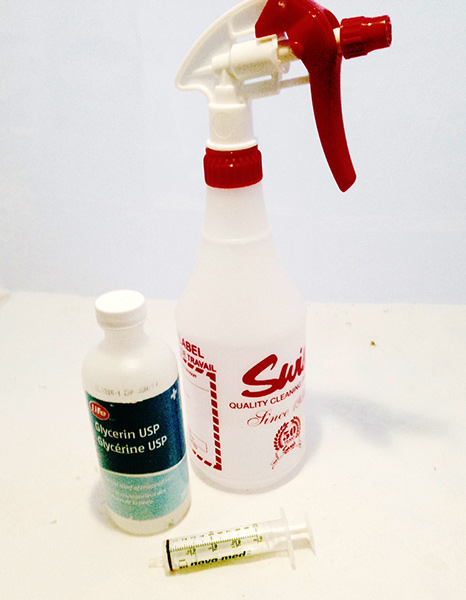
    Finally, if you need large drops, drips, or tears, nothing beats glycerine and an eye dropper.

    _DSC5095-(2)W

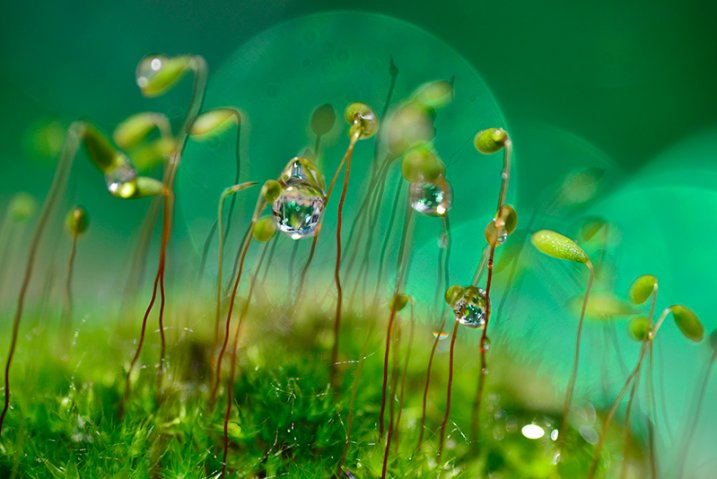
    Micro macro landscapes with bokeh and glycerine drops

    Glycerine is thick and viscous, and stays on your leaves and petals giving you a longer time to compose and shoot. The drips are syrupy and seem to stretch slower, so again you have more time to shoot. I don’t use glycerine in the natural environment though, only in my indoor macro studio. If you need thick drops for work in nature use white corn syrup, and use it sparingly. It’s super sweet and you don’t want the critters getting addicted.

    sprayW

    The creative macro photographer’s tool kit.

    _DSC0152W

    Color contrast with a creative background and a spray of water.

    Let’s wrap this up (excuse the pun).

    To keep in your bag for your macro photography:

    • J-Cloths
    • Glittery plastic gift wrap
    • A sheet of Copper foil
    • Small spray bottle for water
    • Eye dropper and small container of white corn syrup (for outdoor shots) or glycerine for indoor macro work.

    I’d love to know what other creative macro shots you can take using some or all of these tools and techniques. How do you feel about enhancing the environment for your macro shots?


    macro-coverWant to learn more about macro photography? Check out Ed Versosky’s Introduction to Close-Up & Macro Photography ebook – just $ 10 (over 30% off) this week with coupon code: DPS. You will need to enter the code to apply the discount.

    googletag.cmd.push(function() {
    tablet_slots.push( googletag.defineSlot( “/1005424/_dPSv4_tab-all-article-bottom_(300×250)”, [300, 250], “pb-ad-78623” ).addService( googletag.pubads() ) ); } );

    googletag.cmd.push(function() {
    mobile_slots.push( googletag.defineSlot( “/1005424/_dPSv4_mob-all-article-bottom_(300×250)”, [300, 250], “pb-ad-78158” ).addService( googletag.pubads() ) ); } );

    The post 5 Macro Photography Tricks to Make Your Images Stand Out by Alex Morrison appeared first on Digital Photography School.

    Digital Photography School

  • Backyard Macro Photography Safari

    Editor’s Note: This is part a series on macro photography this week. Look for a new one each day. The next newsletter will have them all if you miss any!

    As photographers, we often have the opinion that in order to capture a great image we need to head out to an exotic location. But, what if you don’t have the time or opportunity to go to one of those places? Say you have free time some morning, and would like to go outside and capture some stunning images. You might be surprised at what you can find to photograph right in your own backyard!

    If you don’t have a backyard, take a trek to a nearby park. Everywhere you look, you will find subjects to photograph in macro. Spring and summer are great seasons to go on a backyard macro photography safari. There are many advantages to such a shoot. For one, you don’t need to be up and at’em before the crack of dawn to travel – though it is beneficial to take full advantage of the early morning light. Also, keep in mind that if you are planning a Backyard Macro Safari for your weekend, you should put off mowing your grass until after your macro adventure, because your mower will likely destroy some potential subject matter in your yard.

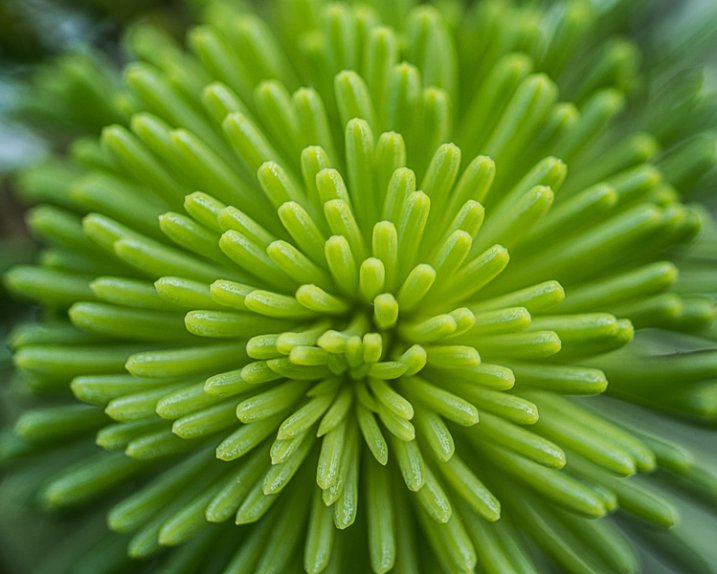
    New growth on a pine tree creates a unique color burst effect.

    New growth on a pine tree creates a unique color burst effect.

    Necessary Equipment:

    Keep it simple! Start out with your camera and macro lens on a tripod. Other equipment you might find useful includes a mat or knee pads, an off-camera flash, a reflector, and a diffuser. Another great thing about a backyard safari is, if you decide to use another piece of equipment you can just go back in the house and get it!

    Tripod

    As with almost every type of photography, the tripod is one of your most important pieces of equipment, for a couple of reasons. The most obvious reason is to avoid camera shake, But also, in many cases, your depth of field will be very shallow, and keeping your camera still on a tripod will help keep your subject in sharp focus. Another benefit to using a tripod is that to do so will slow you down, which is very helpful with setting up the composition and lighting of your image.

    Mat or knee pads

    Not every capture will be found at standing level. A mat or knee pads are great tools for helping you get to ground level conveniently and comfortably in your yard.

    Off-camera flash

    Sometimes you’ll find some of the most interesting subjects in the deep shadows of your yard. In these cases, using an off-camera flash will add some light to better reveal or enhance your subject.

    Light Reflectors

    Reflectors come in very handy when you need to add some light into the shadowy areas of your image.

    Light Diffusers

    If you are dealing with very harsh light, diffusers or light modifiers can soften the light.

    Black and white

    Converting to black and white can bring out the patterns and textures of your images.

    Take time to look around

    Yogi Berra once said “You can observe a lot by just looking around.” In macro photography, sometimes less is more, so slow down and seek out even the smallest detail that could create a great macro image. Try to find new angles that make even the simplest object interesting. Don’t be afraid to experiment with new techniques such as multiple exposures.

    What to look for, subject-wise

    There are many objects right in your own backyard that make great macro photography subjects, such as flowers and insects. But don’t just stop there! Look for repeating patterns, textures and leading lines. Water droplets and spider webs can become beautiful subjects if photographed carefully. Just as in any other form of photography, look for the color red to compose a powerful image.

    14844445274_cf84722530_o

    Choose your background wisely

    The background is one of the most important elements of a good macro. Setup your camera at the level of your subject. This will allow you to move 360 degrees around it, and carefully choose just the right background to enhance the subject. Be aware that if the background is too busy or too light, it will draw the viewer’s eye away from the subject.

    DSC_6693-Edit

    The muted colors of the background causes the subject to stand out sharply.

    Light

    Avoid harsh lighting or flat lighting. By looking for side light, or even back-lighting, you can create more dramatic images. Adding an off-camera flash is an effective technique to enhance your subject and separate it from the background. By setting your fastest flash sync-speed, and using a small aperture, you can make your subject pop from an otherwise boring background.

    Focusing

    Focusing can be the most difficult component of macro photography. Here’s a little trick to help you get the focus result you are looking to achieve: First, set your lens on manual focus. Next, turn the focus ring to the minimum focus length. Now simply move your camera closer to your subject until the part of the image that you want to be sharp is in focus and take the shot.

    The wind is not your friend

    Windy days make it very difficult to capture sharp macro images, and even harder to compose one if your subject is swaying back and forth in the wind. Try adding a flash to freeze your subject in windy conditions. In some cases the wind can help create interesting effects, but it’s a challenge!

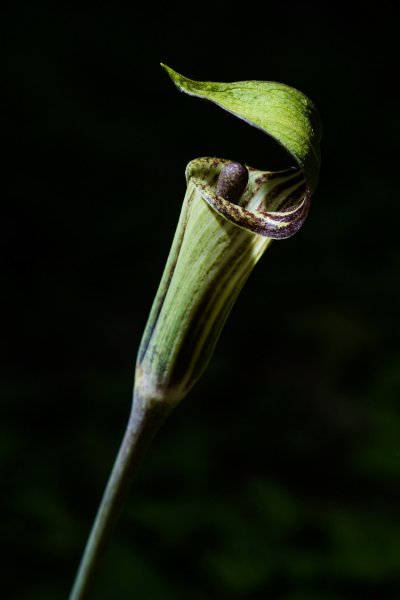
    Found this in the under growth in my backyard. Because of very low light I add a off camera flash set to low power on the side. I wanted to add some light to the top so I used my hat to reflect some of the light from the flash to the top of the plant.

    An off camera flash was used here to add side light to this Jack-in-the-Pulpit. A light colored hat was used as an impromptu reflector to add light to the top of the wild flower.

    Conclusion

    Capturing images of nature in your own backyard is rewarding and convenient. One of the best things about a Backyard Macro Safari is that you don’t have to go anywhere for the shooting experience, so if things don’t work out, you don’t have that long disappointing ride home with nothing to show for it. If it was successful, you can kick back and celebrate right away, though you may still have to face mowing the lawn! What macro images can you capture in your backyard safari?


    macro-coverWant to learn more about macro photography? Check out Ed Versosky’s Introduction to Close-Up & Macro Photography ebook – just $ 10 (over 30% off) this week with coupon code: DPS. You will need to enter the code to apply the discount.

    googletag.cmd.push(function() {
    tablet_slots.push( googletag.defineSlot( “/1005424/_dPSv4_tab-all-article-bottom_(300×250)”, [300, 250], “pb-ad-78623” ).addService( googletag.pubads() ) ); } );

    googletag.cmd.push(function() {
    mobile_slots.push( googletag.defineSlot( “/1005424/_dPSv4_mob-all-article-bottom_(300×250)”, [300, 250], “pb-ad-78158” ).addService( googletag.pubads() ) ); } );

    The post Backyard Macro Photography Safari by Bruce Wunderlich appeared first on Digital Photography School.

    Digital Photography School

  • Getting Started with Abstract Macro Photography

    Editor’s Note: This is part a series on macro photography this week. Look for a new one each day. The next newsletter will have them all if you miss any!

    Lines and light can emphasise your subject

    Lines and light can emphasize your subject

    Macro photography truly is a unique genre of photography. In most of the other types of photography (landscape, portrait, sport, etc.) you want to get the context of your scene in the image. In macro photography, you can literally focus in on what’s important and remove any distractions by simply getting closer. One of the best things about macro photography is that you can do it anywhere, all you need is something to photograph. In my previous article: Getting Started Guide to Macro or Close-Up Photography, I went into some details about what you will need to get started in macro photography. Take a look at that article to be sure that you understand more about the genre of macro photography.

    In this article we are going to be looking at getting great abstract images using macro photography.

    Look for shape and colour

    Look for shape and colour

    What is abstract macro photography?

    Abstract photography in general is about representing a subject in a non-literal way. The focus of abstract photography is more about colour, shape, and texture as opposed to the literal representation of the subject. Abstract macro photography, takes this to the next level by enabling you to get even closer to your subject, and therefore also able to be more abstract in a sense.

    The same guidelines around composition apply, you can use the rule of thirds, curves, and lines to draw the viewer into the image. The difference is, the subject may not be immediately recognizable, your centre of interest might be a colour or a curve of a flower. So for abstract macro photography, you will need to think a little differently.

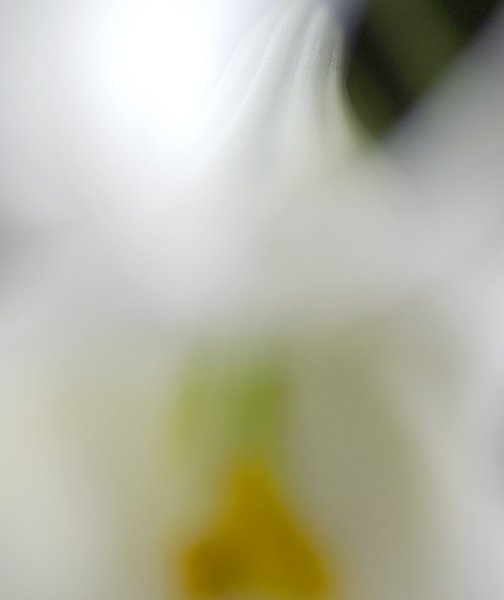
    Abstract close up of a lily

    Abstract close up of a lily

    What will I need?

    You will need a macro lens if you want to get in really close. You can use a prime lens like a 50mm, or even an 85mm lens, but for this type of work, a macro lens will work best. The reason is that you want be able to get in close enough to remove all distractions; in other words, you want to fill the frame with your subject. With a macro lens, you can do this. Most macro lenses have the ability to focus on subjects that are really close to the lens. The prime lenses can focus on subjects that are reasonably close, but you may not be able to get in close enough to remove the background.

    You will also need to use a tripod. The close focusing ability of the macro lens means that it is very easy for your subject to become out of focus with the slightest movement. Ideally, you will want to have you camera set up with your macro lens mounted, then get that in as close as possible to your subject. Next, you will want to set your aperture to f/8, or higher, and then click onto manual focus to get your subject good and sharp in the frame.

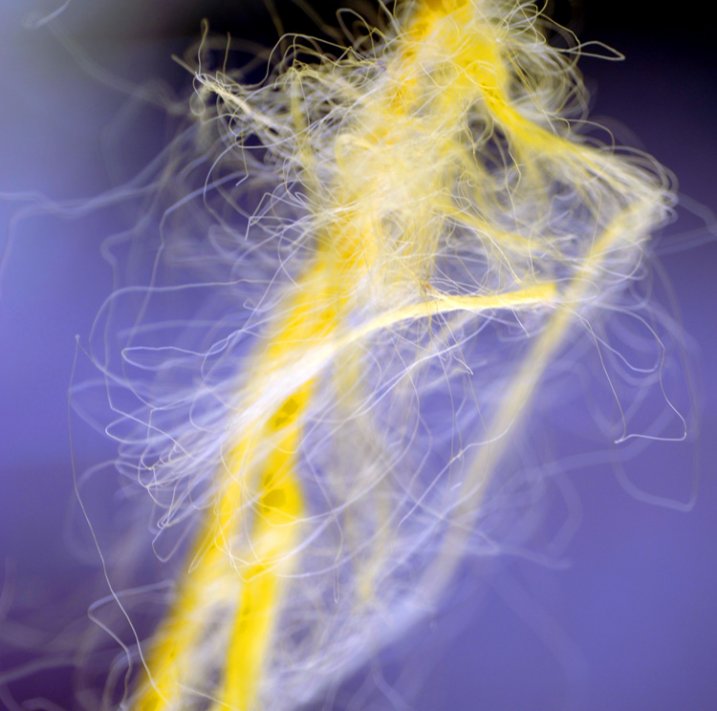
    Frayed rope abstract

    Frayed rope abstract

    What can I photograph?

    For abstract macro photography, I find that organic items work best. By organic I mean flowers, wood, fruit, vegetables, and so on. That does not mean you can’t photograph an abstract macro image of a computer keyboard or a coffee cup, but sometimes, these well known shapes are difficult to transform into abstract images. If you are going to photograph a product like a computer or another manufactured product, try shooting it from a different angle or get in very close so that any telltale signs of what it is, will be lost. Ultimately, you can photograph anything that you think will work, but start out with some easy subjects first,  then move on to the trickier ones.

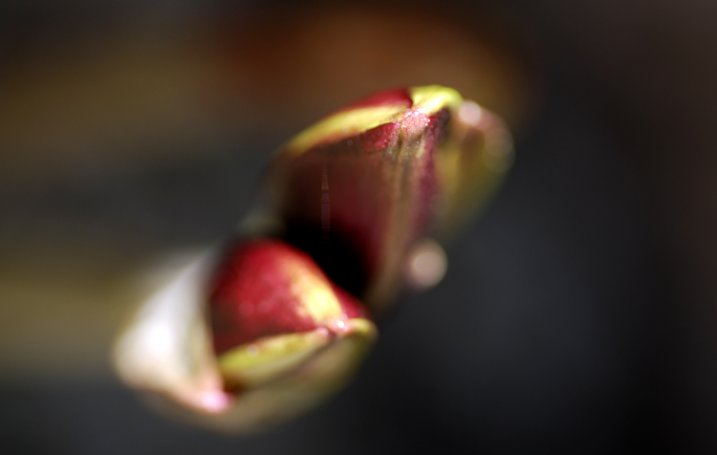
    Buds about to bloom

    Buds about to bloom

    Try this…

    Set up your subject and get your camera in position. Look through the viewfinder and start working on your composition. Try some of these pointers to get started and work from there:

    • Work on building your composition – are there any curves, lines, shapes ,or colours that you want to emphasize?
    • Use manual focus to bring even a small part of your image into sharp focus, this will be your centre of interest.
    • Make sure your centre of interest is obvious. In other words it should be in focus, it can be a different colour to the rest of the frame, or it can even be a well defined line or shape in the image
    • Check the exposure to make sure that you are exposing your scene correctly.
    • You can even overexpose slightly. In abstract macro photography, some slight overexposure is okay, as long as it does not distract from the rest of the image
    • Capture the shot
    • Try shooting the same image from a different angle and maybe even a different centre of interest.
    • Take as many images as possible, from different angles, with different focal points.
    • Choose the best three images and edit them in your chosen image editing software.

    This is a great indoor project, but you can try this outside too. Shooting macro images outside can be more challenging as the subject may be affected by changes in lighting. If it is a flower or a plant, there may be a slight breeze which can move the flower as you are trying to photograph it. The most important thing is to try this type of photography if you can. It will cause you to think creatively and to look for different things in your image setup. Give it a try and load up your results below – let’s see what you get.

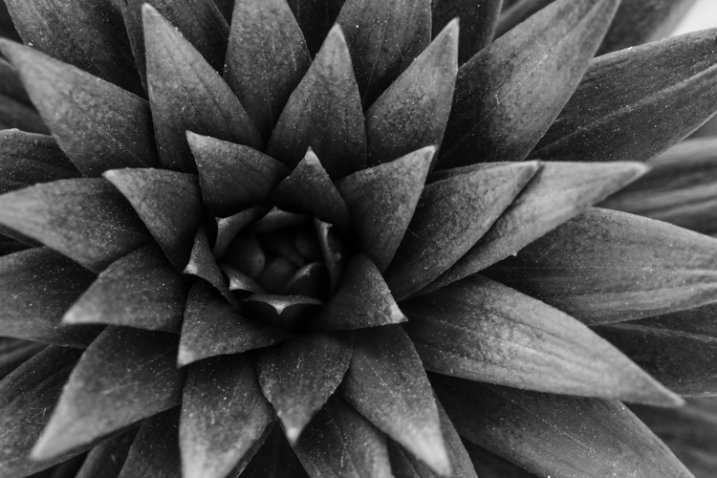
    Abstract of a lily leaf

    Abstract of a lily leaf


    macro-coverWant to learn more about macro photography? Check out Ed Versosky’s Introduction to Close-Up & Macro Photography ebook – just $ 10 (over 30% off) this week with coupon code: DPS. You will need to enter the code to apply the discount.

    googletag.cmd.push(function() {
    tablet_slots.push( googletag.defineSlot( “/1005424/_dPSv4_tab-all-article-bottom_(300×250)”, [300, 250], “pb-ad-78623” ).addService( googletag.pubads() ) ); } );

    googletag.cmd.push(function() {
    mobile_slots.push( googletag.defineSlot( “/1005424/_dPSv4_mob-all-article-bottom_(300×250)”, [300, 250], “pb-ad-78158” ).addService( googletag.pubads() ) ); } );

    The post Getting Started with Abstract Macro Photography by Barry J Brady appeared first on Digital Photography School.

    Digital Photography School

  • What it Takes to Go Pro – Lessons from 10 Professional Photographers

    The decision to go pro with your photography business is a big step. It’s a time when the future is ripe with possibility and fears tend to run high. In what we call a “crisis of confidence,” you may find yourself comparing your work to other photographers and wondering, “am I really good enough?” or “will people give me a chance?”

    When you begin experiencing these thoughts, take a deep breath and remember this; almost everyone feels this way before they begin a new journey – especially if their dreams are on the line. In fact, those super successful photographers you keep comparing yourself to likely experienced those same emotions when they decided to go pro themselves.

    I asked 10 experienced professional photographers to reflect on the early days of their careers – from finding their first clients, to marketing strategies they used to establish their brands. Read on to see how each of them was able to find success as a professional photographer — and how you can, too.

    It all starts with relationships

    750 CaseyKelbaugh

    Photo by Casey Kelbaugh

    When you decide to offer your photography as a professional service, you’ll need to find a few clients who are willing to take a chance on you. For many photographers, this means starting with friends and family members who already like and trust them. “In my 15 years in the business, I have never gotten a job out of thin air,” NYC-based photographer Casey Kelbaugh said. “ Every single break, every assisting gig, every big campaign, every meat-and-potatoes job has come to me through some kind of relationship.”

    Alfred Eisenstaedt, famous Life Magazine photographer said, “It’s more important to click with people than to click the shutter.” and “People hire you because of the quality of your work, but will hire you again and again because they enjoy your attitude and manner both on and off the set.” says landscape and commercial photographer Michael Zide.

    Steve Hansen, a headshot photographer from Los Angeles also began his career by leveraging his personal network. “My first client was actually a friend who needed headshots,” he said. “He couldn’t afford some of the more pricey photographers, and I needed clients, so we struck a deal.”

    According to photo and video educator Marlene Hielema, networking is also critically important. “You have to get out and meet people! People like to work with people they like, so you need to make connections with people who need the type of work you want to do. Have your elevator pitch ready, because I have met a lot of future clients at parties.”

    Marlene hielema 0347

    Photo by Marlene Hielema

    When networking, Kelbaugh also recommends looking beyond photo editors and art directors, since they’re already being bombarded with photography pitches. “Clients can be found anywhere, so think about reaching out to your friends that work at startups, universities, law firms and restaurants” she said. “When building your clientele, try to think outside of the box.”

    Speak up

    In addition to utilizing the power of your existing network, don’t forget to take advantage of opportunities as they arise – no matter the time or place. Take Cappy Hotchkiss, a New York-based wedding photographer who met her first buyer at a dog run (a park where dogs can run off-leash). “I had photographed weddings for a few friends and absolutely loved it” Hotchkiss said. “Someone at the dog run overheard me talking about it and asked me to shoot her wedding. I still remember what a thrill it was – and how scary and fabulous it was.”

    750 CappyHotchkiss

    Photo by Cappy Hotchkiss

    Sports photographer Chris Marion had a similar experience when he happened to meet the editor of a local sports magazine. “I asked him if they had a need for additional photographers” Marion said. “He said yes and gave me what was most likely a test assignment. The assignment went well and it went on to become my first real sports job.”

    Small wins lead to big ones

    As your portfolio and word-of-mouth referrals begin to grow, so will the likelihood that you’ll land that one, great assignment. These assignments can be game changers for some professional photographers – leading to high-profile work and long-term relationships that ultimately lead to even bigger projects in the future. “I got my best client, Google, by landing a smaller event for them and delivering photos that they just loved” photographer Andrew Federman said. “Word spread and they asked me if I would come shoot the inaugural Google Science Fair out in Mountain View, California at Google HQ.”

    750 AndrewFederman2 GoogleScienceFair

    Photo by Andrew Federman

    Marion landed his best client, the NBA, in a similar way. “My hometown of Springfield had an NBA development league and I was their team photographer for five years,” he said. “Through that experience I was able to capture the attention of the NBA, which then led to freelancing opportunities with Sports Illustrated, as well as others.”

    Professionalism counts more than you realize

    Sometimes that great assignment comes simply from being available. “One day I was at the library and got a phone call from a weird number,” said James Brosher, an editorial, commercial and wedding photographer in Bloomington, Indiana. “I answered, and I was glad that I did; it was a great job that paid my bills for an entire month. The client said he had called a couple other people but I got the job because I answered the phone. Ever since then, I’ve made a point to always answer my phone. You never know when a great client will call.”

    Brosher has also landed several jobs because of his flexibility to take on last-minute projects. “One day I was on the couch and got a call from the Indianapolis Star needing an event covered in 15 minutes,” he said. “Being around, available, and being able to anticipate when a publication might need you goes a long way.”

    Marlene hielema cycling 703

    Photo by Marlene Hielema

    According to Christina Van Dyke, the owner and founder of Van Dyke Design & Photography, something she’s found incredibly important is a focus on providing both great work and a great customer experience. “My best client found out about my photographic services from a word-of-mouth referral,” she said. “The lesson I’ve learned is to always treat each and every client as if they are your ONLY client. In return, your clients will reward you with wonderful referrals that keep your business growing and thriving.”

    Play the long game

    Hansen recommends focusing more on building your name, and less on your paycheck – at least in the beginning. “Don’t be afraid to take a pay cut in the early stages of building your business and name,” he said. “Yes, you may be worth a lot more, but having your work out there is invaluable to building a solid client list.”

    750 AndrewFederman1 YouTubeBrandCast

    Photo by Andrew Federman

    “My advice for young photographers is to remember that it’s the photographs you actually deliver to your clients that set you apart – not how slick your website is, how many Instagram followers you have, or how many blog hits you get,” Federman said. “Marketing is important, but delivering photos that blow away your clients will generate a powerful word-of-mouth force.”

    View the complete interviews on SlideShare (below)

    Thanks to our contributing photographers:

    • Casey Kelbaugh
    • Michael Zide
    • Steve Hansen
    • Marlene Hielema
    • Cappy Hotchkiss
    • Chris Marion
    • Andrew Federman
    • James Brosher
    • Christina Van Dyke

    googletag.cmd.push(function() {
    tablet_slots.push( googletag.defineSlot( “/1005424/_dPSv4_tab-all-article-bottom_(300×250)”, [300, 250], “pb-ad-78623” ).addService( googletag.pubads() ) ); } );

    googletag.cmd.push(function() {
    mobile_slots.push( googletag.defineSlot( “/1005424/_dPSv4_mob-all-article-bottom_(300×250)”, [300, 250], “pb-ad-78158” ).addService( googletag.pubads() ) ); } );

    The post What it Takes to Go Pro – Lessons from 10 Professional Photographers by Kelly Kingman appeared first on Digital Photography School.

    Digital Photography School

  • Things to Know About Protecting Your Images Online

    It is the digital age and therefore vitally important to have a presence on the internet. Photographers, both professional and novice, are using the internet more than ever to showcase their skill. This is imperative from a business and marketing standpoint, but with every great tool comes those who exploit it. Photographers are stuck between marketing themselves in the most Continue Reading

    The post Things to Know About Protecting Your Images Online appeared first on Photodoto.


    Photodoto

  • Macphun Noiseless Pro Software Review

    I hate digital noise. I’ve been a stickler about keeping it out of my images for years and have tried just about everything under the sun to aid in that process. So when Macphun offered to send over their new Noiseless Pro app I jumped at the opportunity (especially after seeing the promo video for it).

    Before we get started, let’s go over the basics of noise for those who are just dipping their toes in this area of post-processing. Noise is basically an unwanted side effect of shooting at high ISO levels or super long shutter speeds (long exposures). Without getting into photodiode leakage currents and other super-techy jargon, just know that noise is the little salt and pepper type specs that show up in your low light images.

    Noise reduction is a give-and-take process, just like anything else in photography. It comes at a cost most of the time, and the cost is some amount of detail. Because of the way the noise reduction algorithms work, and because of the nature of high noise images, you just can’t remove noise without losing some of the sharpness in your photo. So the task at hand for software companies who want to tackle noise is to eliminate as much as possible, without screwing up the image and making it unusable.

    Enter Macphun

    Screen Shot 2015-05-11 at 9.32.00 PMMacphun came onto the photography scene fairly recently; although only for the Macintosh users as evidenced by the first three letters of their name. Each app they have created comes in two versions: A simple, easy to use version that usually goes for around $ 20, and a pro version with more features that goes for around $ 60. With any software that has the word “pro” in it, I am going to expect it to perform at a pro level. So with that said, let’s go over some of the key features that I personally expect to see in a brand new noise reduction program, as well as how Noiseless Pro measured up.

    Video Review

    For those who prefer video content over reading, here’s a walkthrough of Noiseless Pro and how it stacked up to DeNoise from Topaz Labs with a couple different images. For those who prefer reading, or can’t watch the video at the moment, read on below!

    Differences Between Noiseless and Noiseless Pro

    Each product that Macphun offers comes in a basic version as well as a pro version. The base version of Noiseless is $ 17.99 and the pro version is $ 49.99. So what does the extra $ 32 get you?

    Each version comes with all the algorithms that were created to reduce noise in your images, as well as advanced algorithms for smart phones and GoPro cameras. The pro version comes with a few extra noise reduction presets, Adobe RGB/ProPhoto color space support, a navigator view to easily peruse the image when zoomed in, more advanced controls in the Adjust panel, as well as the ability to use the app as a plugin with programs like Adobe Lightroom and Photoshop (this is how I use it).

    So, in my opinion, it’s well worth the extra bit of cash to go with the pro version. Photo editing software has come down in price by leaps and bounds over the past several years, so $ 49.99 seems like a great deal to me.

    Ease of Use/User Interface

    This is where all of Macphun’s programs shine. By targeting a Mac-specific audience, they had to kill it in the UI department, and they have with each product I’ve seen. The program is both incredibly fast and incredibly clean in its layout.

    Screen-Shot-2015-04-18-at-12.38.53-PM

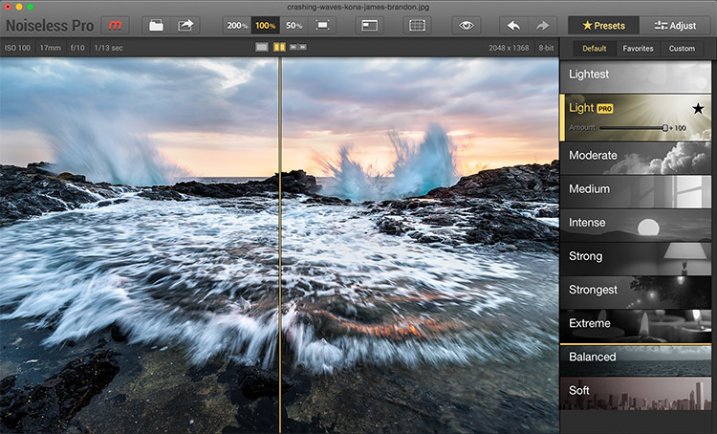
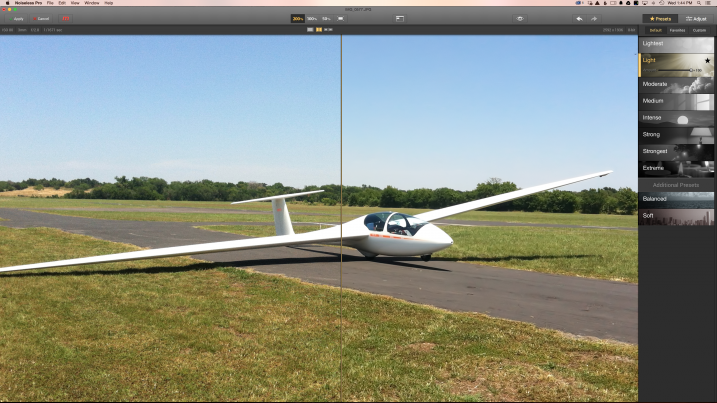
    You can either drag an image right into Noiseless Pro, or you can use the program as a plug-in with Photoshop or Lightroom. The program opens immediately, and by default, opens up with the image zoomed in to 200%. This works well because it really lets you see what the noise looks like in the image, so you can see what needs to be done to combat it. It does throw you off a bit at first, but I think I like it.

    From there, all you have to do is choose a preset on the right hand side (which couldn’t be easier). Just select the strength level that your image needs and make fine adjustments if needed. Each preset you select will have an “amount” slider appear once it’s been selected. Just use that to dial back the noise reduction strength if needed.

    If you need to make even finer adjustments, just click the “Adjust” button up in the top right corner. Here you can adjust color noise, luminance noise, structure, details, etc.

    Clouds and Skies

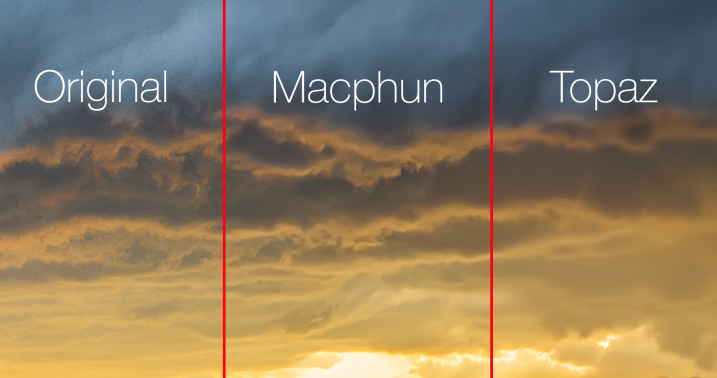
    This is where Noiseless Pro exceeded my expectations. It really does a great job at reducing noise while still managing to maintain some detail in your clouds. Skies are the main thing I use noise reduction on and this is an important tip to those who are new to the idea of reducing noise in your images: Never do it globally! This is the problem with noise reduction in programs like Lightroom. They apply the reduction to the entire image, sacrificing detail in every single pixel of your image. Sure, they have some sort of intelligence built-in to preserve some details, but you’re still make a global change to the image.

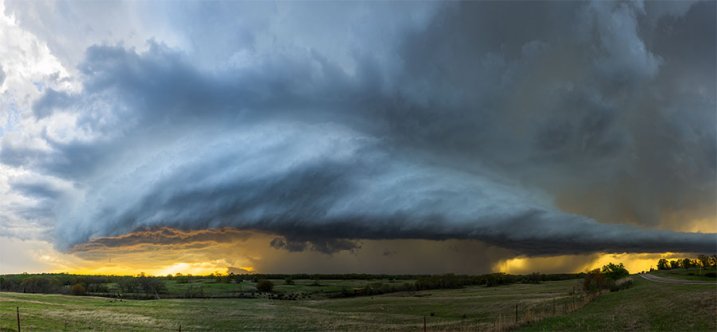
    Monstrosity | Somewhere Near Ardmore, OK

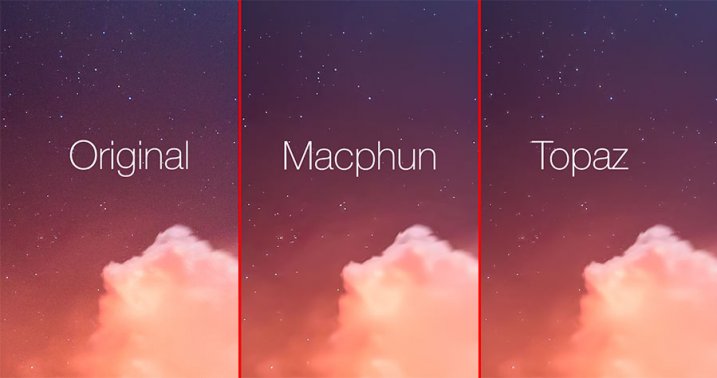
    Using Noiseless Pro side by side against Topaz Labs DeNoise was pretty impressive. I’ve been using DeNoise exclusively for years now really wasn’t expecting Noiseless Pro to outperform it, or even come close. After all, Topaz has been in this game for years. However, after running the minimal amount of noise reduction necessary to get rid of the noise with both programs, I was stunned to see how much more detail Macphun retained in the clouds beneath the storm.

    Screen Shot 2015-04-29 at 1.11.16 PM

    Landscapes

    This is one of the less common areas where I apply noise reduction. It really just depends on the image, but if I’m going to reduce noise in a foreground area, it’s usually going to be a body of water, windows on a building, the finish on a car or some other kind of flat surface that should be smooth.

    Noiseless did a great job in this area, and again, it’s so fast and easy to use. It literally just works like a breeze right out of the box.

    Mobile Photography

    One of the pro features mentioned in the marketing materials for Noiseless is “advanced algorithms for mobile photography.” I ran a few of my random mobile images through the program and it did seem to do pretty well. I think the biggest question here is, “Why?” I mean, it’s a nice feature and all but I doubt that personally will ever care enough about a mobile photo to reduce noise in it. That could of course change in the future, as our phones will likely continue to get closer to being capable of what our SLR’s do, but that’s not going to truly be the case any time soon (no, not even with the new LG phone that shoots RAW and offers manual controls). Of course, this is just my opinion.

    Screen Shot 2015-04-29 at 1.44.30 PM

    Astro Images

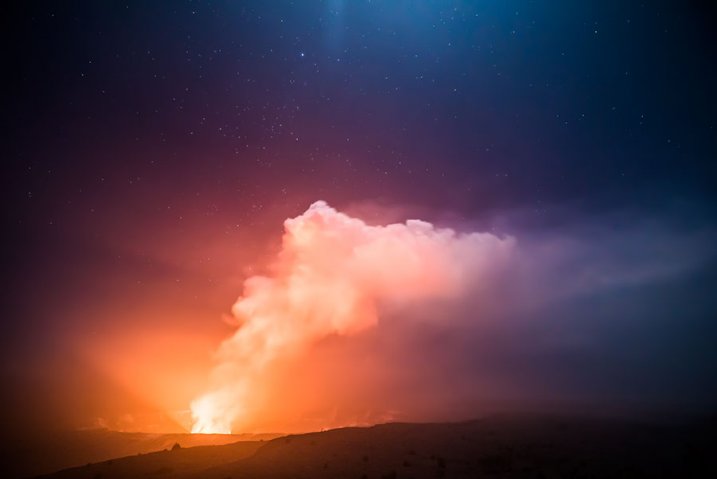
    Well, every fairy tale has its villain and astro photography, unfortunately, seems to be the enemy of Noiseless at this point in the game. I was really bummed to see this, but it’s true. Here’s one of the high ISO images containing stars that I used.

    Kilauea's Glow | Volcanos National Park

    Using Noiseless side by side with Topaz Labs DeNoise was pretty telling to say the least. But then again, Noiseless also did surprisingly better with clouds and skies. DeNoise seems to have something built into their software that detects the stars in an astro/night sky image and masks around them. Noiseless, on the other hand, just completely degraded the stars in every night sky image I threw at it. The good news is this is a known issue and one that has already been brought up to the team at Macphun by several other photographers/beta testers. Macphun seems to be a solid company with solid people running it, so I am pretty confident they will address this and create something for the astro photography community in a future iteration. Fingers crossed.

    Screen-Shot-2015-04-29-at-2.02.08-PM

    Conclusion

    While Noiseless may not perform as well as I’d like with astro/night sky images, it has still found a home in my post-processing workflow, especially for images containing clouds (which tends to happen quite often with landscapes). I’m certainly looking forward to where this program goes in the future, and really hope they will incorporate some better algorithms to handle stars.

    googletag.cmd.push(function() {
    tablet_slots.push( googletag.defineSlot( “/1005424/_dPSv4_tab-all-article-bottom_(300×250)”, [300, 250], “pb-ad-78623” ).addService( googletag.pubads() ) ); } );

    googletag.cmd.push(function() {
    mobile_slots.push( googletag.defineSlot( “/1005424/_dPSv4_mob-all-article-bottom_(300×250)”, [300, 250], “pb-ad-78158” ).addService( googletag.pubads() ) ); } );

    The post Macphun Noiseless Pro Software Review by James Brandon appeared first on Digital Photography School.

    Digital Photography School

  • 5 Creative Macro Photography Ideas that Really Work

    Editor’s Note: This is part a series on macro photography this week. Look for a new one each day. The next newsletter will have them all if you miss any!

    Here are 5 quick creative tips to help you with your macro photography:

    1) Use Flash for Tiny Details

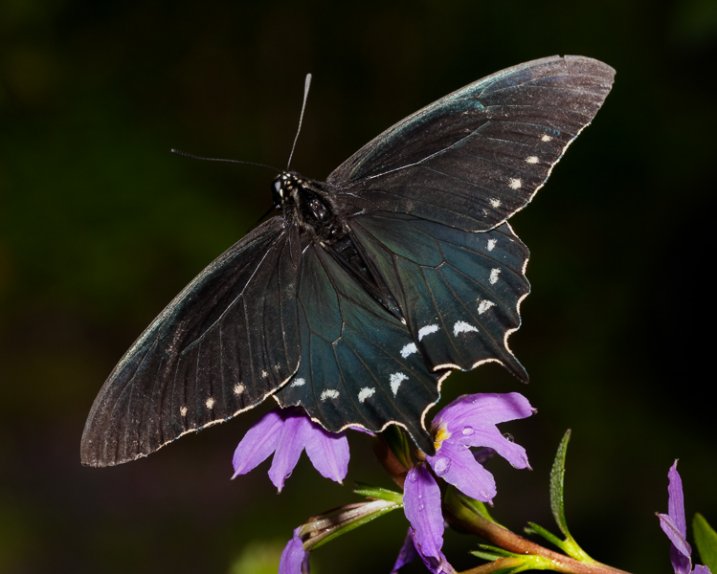
    While a macro lens with a 1:1 (one to one) ratio is a terrific tool for close-up work, so too is an external flash. Contrary to what some photographers will tell you, it doesn’t necessarily have to be a ring light for successful results. The trick is to reduce the flash output to approximately -1.75 in TTL mode. This will illuminate the finer detail in your macro work such as a butterfly’s antennae. Should you need even less light, cut the flash intensity further to -2 or -3 stops.

    1_butterfly_with_flash
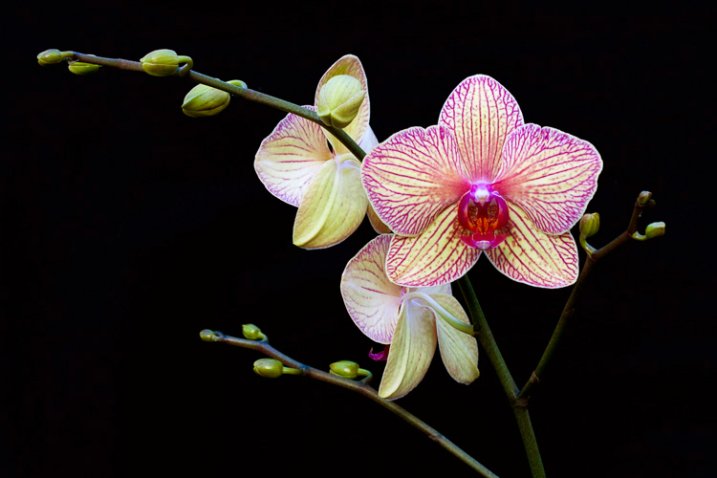
    There are times when you’ll want more depth of field to keep the entire subject sharp. This can be problematic, however, as more of the scene remains in focus and can be distracting. Rather than opting for a shallow depth of field, consider using flash. With it, you can illuminate the subject, enjoy great depth of field, and render the background really dark, or even black. To do this, position yourself so there is at least six to 12 inches of separation between the subject and the background. Your reduced flash will effectively expose your macro subject without reaching what’s behind it.

    2_orchid_flash

    2) Shoot Through a Flower Petal

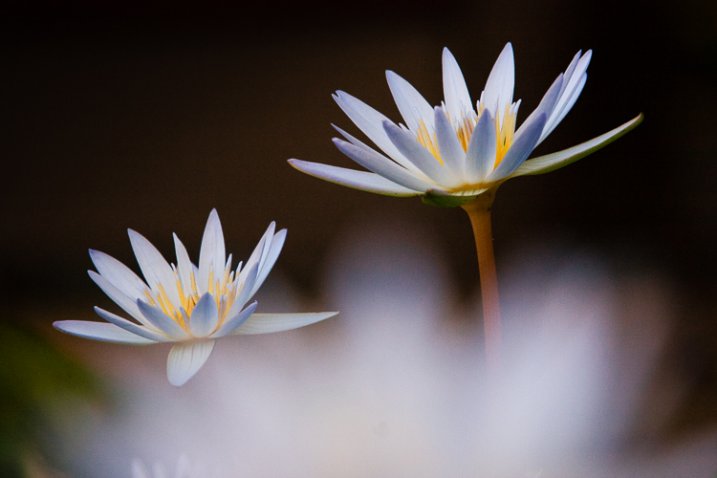
    Go beyond the routine snapshot by adding a layer of visual interest to your macro captures. By shooting through a flower petal or leaf, you can create a soft wash of color while keeping the main subject in sharp focus. The technique is simple but yields a sophisticated look that’s reminiscent of an impressionist painting. For this particular method, you may prefer the freedom of shooting without a tripod. By working handheld, it’s easier to position the camera directly into the patch of flowers.

    3_shoot_through_petals

    Start with your widest aperture, preferably around f/2.8. Locate a flower that’s in front of your subject, and place your lens approximately one inch away from it. Don’t worry if it largely blocks the main subject, as the extremely shallow depth of field will render it nearly transparent. The closer your lens is to the front flower, the more out of focus it will become. Carefully compose so that you can still see your subject in the background. Finally, move your single active autofocus point to the flower you want sharpest.

    4_shoot_through_petals

    3) Switch to Manual Focus

    Autofocus is highly effective for the majority of shooting opportunities. In extreme close-up situations however, it can struggle to find its mark. This is particularly true with ultra fine details such as a delicate spider web. A better alternative is to use manual focus aided by Live View or focus peaking. These options take the guess work out of manual focus, allowing you to view the scene at extreme magnifications. At 5x or 10x magnification, it leaves no doubt that something is sharp. On some camera models you can even couple the enlarged view with focus peaking. This works by outlining the portion of subject that’s in focus. While it’s possible to do this handheld, a stable tripod will improve your accuracy.

    5_spiderweb

    4) Mind the Background

    When shooting macro images, the importance of clean background can not stressed enough. If the area behind your subject is cluttered, it draws attention away from your main point of focus. Rather than taking the first vantage point offered, try composing with your feet. This is a deliberate process that forces you to slow down and explore the subject from all possible angles.

    6_butterfly_background

    Filling the frame with your subject can be an effective way to eliminate distracting backgrounds. With the close focusing ability of a macro lens, you can carefully arrange the scene to only include the flower. This enables you to work with small apertures such as f/16 for maximum depth of field. With sharp detail throughout the frame, there are no areas of soft focus to detract from the subject. For a more dynamic look, try using the rule of thirds instead of a bulls-eyed composition.

    7_fill_frame

    5) Experiment

    There is something serendipitous about in-camera double exposures that is lost when methodically stacking images in Photoshop. Making exposures this way builds a sense of anticipation that is normally not present in digital photography, with today’s camera’s featuring “instant everything”. Instead, you take the first image, look at it on the LCD and hold that visual in your mind while searching for a second scene to best compliment it. After capturing that, you have to wait a few seconds for the camera to reveal your creation. In that brief pause, suspense builds, and anything seems possible, much like the days of waiting for your film to be processed. Of course with a technique like this, there will be a few misses. Nevertheless, the results can be quite interesting when you get it just right.

    OLYMPUS DIGITAL CAMERA

    Another creative option is to experiment with slow shutter speeds and intentional camera movement. You don’t even need a macro lens to try it, just a basic zoom. Start by filling the frame with the flower and make sure it’s in focus. For this you can be at the longer end of your focal range. Press the shutter all the way down and start the exposure, then immediately zoom out to a wide-angle perspective. You can also reverse the process, starting with a wide angle and zooming in. The following settings are a baseline to get you started.

    • 1/6th of a second for the shutter speed.
    • f/22 on the aperture.
    • A very low ISO around 100.
    • Based on the existing light you may have to adjust these for the best results.

    OLYMPUS DIGITAL CAMERA

    Do you have any additional creative tricks to share? Please do so in the comments.


    macro-coverWant to learn more about macro photography? Check out Ed Versosky’s Introduction to Close-Up & Macro Photography ebook – just $ 10 (over 30% off) this week with coupon code: DPS. You will need to enter the code to apply the discount.

    googletag.cmd.push(function() {
    tablet_slots.push( googletag.defineSlot( “/1005424/_dPSv4_tab-all-article-bottom_(300×250)”, [300, 250], “pb-ad-78623” ).addService( googletag.pubads() ) ); } );

    googletag.cmd.push(function() {
    mobile_slots.push( googletag.defineSlot( “/1005424/_dPSv4_mob-all-article-bottom_(300×250)”, [300, 250], “pb-ad-78158” ).addService( googletag.pubads() ) ); } );

    The post 5 Creative Macro Photography Ideas that Really Work by Chris Corradino appeared first on Digital Photography School.

    Digital Photography School

  • More Thoughts on Flickr 4.0

    More Thoughts on Flickr 4.0

    Having had a few weeks now to spend significant time exploring Flickr 4.0, I thought I’d write up another more detailed post about my ongoing thoughts on the recent update by Flickr.

    1. Autotagging. Autotagging has received a mixed reception by the Flickr community as well as the broader press. Initially a lot of the Flickr diehards have very vocally opposed it.

    On the one hand, every time Flickr makes any change whatsoever a certain segment of the community will vocally oppose it no matter what the change is. The “who moved my cheese” crowd is strong and vocal at Flickr, so it’s easy to dismiss at least some of the initial criticism from the community as typical and predictable. On the other hand, many people have spent hundreds of hours organizing their tags on their Flickr photos and have a certain sort of emotional connection around tagging as it relates to their photos, which are very personal.

    Any time you try to use image recognition software to recognize things you will get false positives. This is no different at Flickr. The more sensational the press can spin a story, the more clicks they end up getting. This week you saw news outlets like the Daily Mail come out with stories highlighting that Flickr was tagging concentration camps jungle gyms and black people apes. CNN reported that “Flickr’s new auto-tags are racist and offensive.” This is bad because most of the general public make assumptions based on headlines without thinking deeper about the issues at hand and most are not intimately involved with the inner mechanics of Flickr.

    We also saw Google called racist this week because the White House was associated with a search for a derogatory racial term.

    Personally, I’m more optimistic about Flickr using image search technology going forward and hope that the bad PR doesn’t set their efforts back there. Flickr and Yahoo are not racist (either is Google). The people who work there are a very well meaning and forward thinking group. I’m sure they will work on their algorithm to get it more and more accurate, but part of that accuracy involves getting feedback from their community when inaccuracies arise. Longer-term I think we will all benefit from having more accurate and complete search available through Flickr.

    There is also part of me that wonders if Flickr’s autotagging efforts are not part of a longer-term effort to better organize this content in order to eventually partner with their community in a more significant way with stock photography. Stock photography is a multi-billion dollar business. Flickr is probably the most potentially disruptive site out there to this industry. As Yahoo thinks about monetizing Flickr in a more meaningful way, the better organized their library the more successfully they might be able to do this.

    I do think Flickr should offer a setting to opt out of autotagging and I’m guessing they probably will eventually. If autotagging is on by default 99.9% of Flick users will still be using it. By creating an setting to opt out this would be an immediate way to deflect the criticism from the vocal power users that dislike it.

    2. Search. Unfortunately my initial enthusiasm for search has been fading fast the past two weeks. While search looks cleaner and I do like the new view of smaller thumbnails that allow me to browse search results quickly, I’ve lost one of the most important functions of search, which is to search by my contacts.

    Over the past 10 years I’ve carefully and methodically built a very large number of contacts whose photography I like and want to see more of. When I’m interested in photos of a particular subject, location, event, etc., I always do searches filtered by my contacts. This allows me the highest quality search results and gets rid of all the noisy, watermarked, junky, inaccurate images that oftentimes come up a broader search of everybody’s photos.

    With the new search functionality this filtering capability is completely broken for me. What bums me out even more is that this broken functionality for my search experience is most likely affecting only people with a large number of contacts (like me) and thus is not likely to be addressed or fixed by Flickr for a long, long time.

    Search is one of the most significant ways I use Flickr and with the update it is now dramatically worse for me.

    Also, although I do like the two smaller view options Flickr gives you for search (a small sized photo or a thumbnail option), I do find myself missing the old larger views at the same time. Sometimes you want to search Flickr with images small so you can go fast, but other times you want to search Flickr to more carefully examine photos and here at least a medium view option would be nice to have back.

    Maybe Flickr could have three possible views, medium, small and thumbnail.

    One of the new features with the new search is that you can now search by date taken in addition to date posted. While date taken and posted are somewhat similar, I do see how date taken will become more and more useful over time, especially when using Flickr to search for breaking news.

    3. As far as the Camera Roll and the uploader, I’m finding that I’m not using either. This doesn’t mean they are not important though. For more casual users having a view like this makes sense as a way to try to organize their offline photos in the cloud. I think this is really important for most casual users and as a way for Flickr to appeal to a broader general audience.

    Personally, I carefully keyword all of my photos in Adobe Lightroom before uploading them to Flickr and then I use Jeremy Brook’s brilliant program SuprSetr to build albums based on these keywords. The only negative with this approach is that Flickr limits my sets to 4,500 photos when using Jeremy’s SuprSetr. :(

    Magic view was fun to look at once, but I probably will never use it or go back. I prefer the way that I’ve organized my photos more than Flickr’s auto-organization.

    I don’t use the uploader because for me Flickr is not a personal shoebox for all of my photos. Rather, for me, Flickr is a place to present and share my photos to the world. I don’t want random photos from my hard drive cluttering up my Flickr photostream even if they are private. 99.99% of the photos I publish to Flickr are public and the current web page uploader does a good enough job getting two batches a day up for me (except not last weekend).

    4. The Flickr mobile app. To me the new Flickr mobile app is slightly better than the old app but it’s still far from ideal.

    My biggest criticism is that sometimes it is so slow, laggy and clunky. Again, some of these issues may affect me more adversely than others because of the way I power use Flickr, but I find that going to my notifications can take 20-60 seconds sometimes on an LTE or wifi connection and that is just too long to have to wait. Sometimes it does go faster, but typically after not using it for a period of hours it frequently is just painful to use. It comes and goes, but I don’t have a consistent, fast experience with the mobile app. Facebook, Twitter, Google+ and most of all Instagram are so much responsive for me when I use them than the Flickr app.

    Another problem I have with the app is that frequently I’ll want to favorite a photo and so I double tap on it to do this, but Flickr misreads my attempted double tap and thinks I want to open the photo up and see it large instead. I’m not really sure that there is a solution to that problem, but it’s one that frustrates me that I don’t have with Instagram.

    I also find that if I look at my contact’s photos for more than about 10 minutes or so I run out of photos to look at and Flickr defaults “suggested” photos that I’ve already seen and favorited months ago. Sometimes I’ll be sitting on the train for more than 10 minutes, or working out, or doing something where I want to spend more than 10 minutes browsing my contact’s photos and wish that Flickr could expand the number of photos I’m allowed to see from my contacts on the mobile app.

    I don’t use the camera or the camera roll on the Flickr app at all. I use my iPhone’s camera and then edit with Snapseed or Priime which offer far more robust editing capabilities.

    5. The new album view. The new album view is more of a postscript to the new Flickr 4.0 than a part of the initial release. Earlier this week Flickr changed the primary album view on Flickr incorporating supersized huge photos into the album view layout. I really like this change. I think photos look sooooooo much better full-sized and large (which is one of the reasons why I enjoy Ello so much). Predictably many in the help forum hate this new view as they hate all change.

    I do think the header in the new album view is too large. I also think that Flickr should only choose photos to enlarge that are high res originals and that fit the crop format of their large view. Small sized photos or mobile photos don’t look as good as DSLR photos when blown up huge. Also having a bad crop on a large view, really makes that view look bad.

    In other news around Flickr’s new release, Bernardo Hernandez, who was managing Flickr resigned shortly after the new launch. I like Bernardo a lot and think that he was a very good leader for Flickr. After so many years in the wilderness with really ineffective management, I think Bernardo (and Markus Spiering before him) did a really good job promoting positive change at Flickr. I hope that whoever ends up replacing him is as strong and committed to the potential for what Flickr can become. After leaving Flickr, Bernardo did tweet that Flickr would be offering up support for RAW photos, this was the first time I’d seen this mentioned anywhere online and think that RAW support would be a huge positive for Flickr — especially given that Google is supposedly coming out with something new in the photo sharing space potentially as soon as the end of this month.

    It’s been refreshing watching how serious a contender Flickr has become in the photo sharing world since Marissa Mayer took the helm at Yahoo. Along with Bernardo and Markus, she and everyone working on the Flickr team deserve a ton of credit for orchestrating such a remarkable turnaround over the course of the last several years. Flickr continues to get better and better and really is turning into something much better than I ever would have thought 4 years ago. I still can’t believe that I’ve been on Flickr over 10 years now and am definitely looking forward to the next 10.


    Thomas Hawk Digital Connection