Category: Photography

  • 4 Photography “Tricks” That Should Be Quietly Retired

    If you’ve ever felt the temptation to “improve” some of your photos with some special tricks, then you’re not alone. Many people with a passing interest in photography employ all manner of “extras” to give their photo some added visual interest. Most of these tricks, however, are ham-fisted affectations that can not only ruin your photos, but mark you as Continue Reading

    The post 4 Photography “Tricks” That Should Be Quietly Retired appeared first on Photodoto.


    Photodoto

  • The Most Under-Valued Editing Tool for Architectural Photos

    Gradient-header

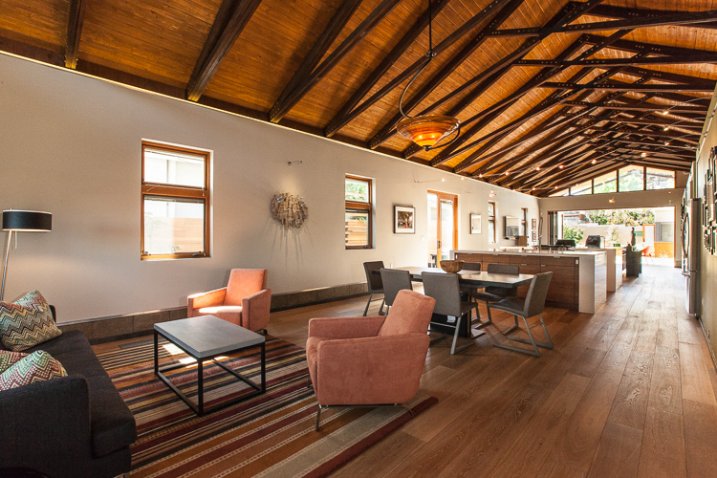
    Nothing catches the eye of a potential home buyer or design client quite like a beautiful set of photos. Whether it’s for real estate agents, designers, or homeowners, expectations are high, and restrictions are often many. It’s not uncommon to have to deal with extremely short notice, very short windows of time in which to work, or to be asked for almost immediate turnaround. We, as photographers, become torn between meeting all the needs while still producing work we are proud of… and all while still making a profit! In real estate, especially, this often leads to photos that are “good enough”. But does it have to be this way?

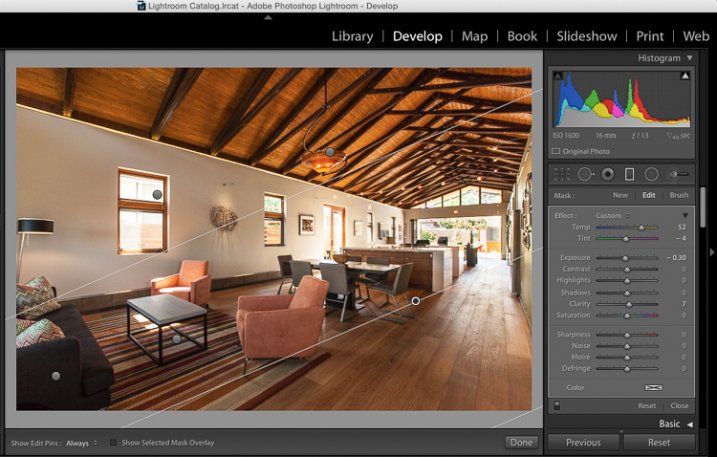
    While most are aware of the basics of editing images for interior spaces, there is one tool that is often undervalued – the Gradient Filter. This can be a tremendous tool for helping to balance out fading light on the edges of a frame when you are limited on gear and are not able to balance out the light on location. Adding a few Gradient Filters onto an image can make your mundane interior photos go from acceptable to impressive, with minimal time invested. The Gradient tool is also excellent in helping to sharpen up towards the edges of the frame, helping to compensate slightly for lens distortion.

    The Gradient Gilter can be found just below the histogram in Lightroom. Once applied, you can move it around by grabbing the central node, you can change the angle of it by placing cursor over center line and clicking to spin it, and you can also spread or tighten the gradient by grabbing the outermost line and moving it inward or outward. The flexibility of positioning alone is a great benefit when trying to keep editing time to a minimum.

    Gradient filter tool can be found under the histogram in Lightroom

    Gradient filter tool can be found under the histogram in Lightroom

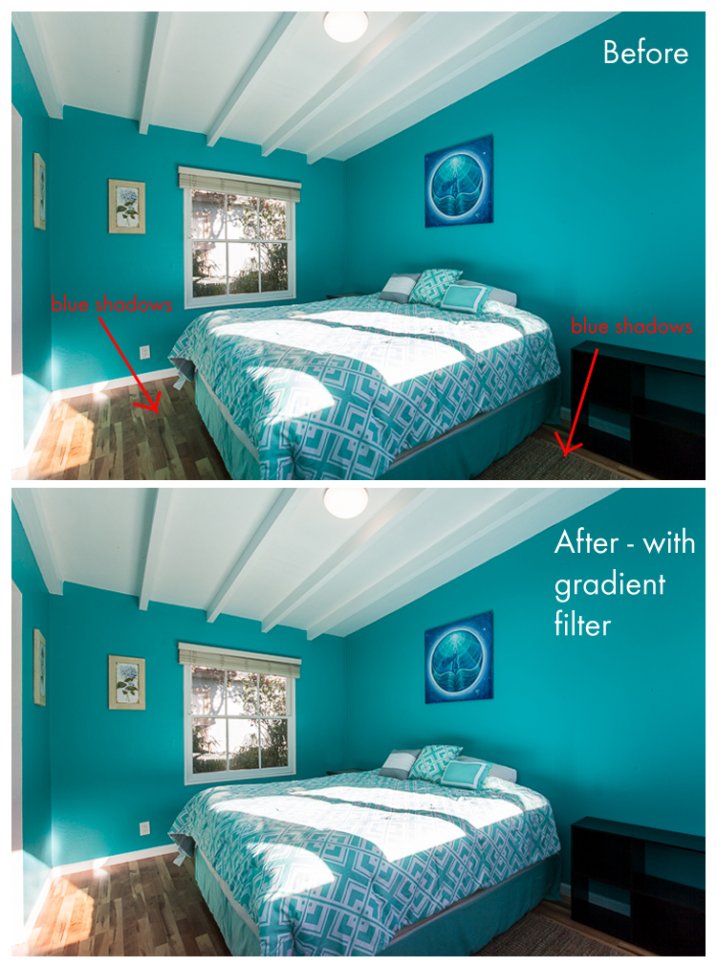
    Another great quality about the gradient filter is that, unlike the lens vignetting correction (under the Lens Correction module) or the post-crop vignetting effect, the Gradient Filter can adjust many factors of the image. You can adjust exposure, temperature, tint, sharpness, clarity, and several others. This makes it a very handy tool for making subtle adjustments that would otherwise be tougher to blend in with a brush filter. In this before-and-after example, the gradient filter has been used to adjust for the blue tint in the shadows on the floor due to the bed cover. It’s a subtle adjustment that helps to elevate the quality of work.

    Gradient4

    Let’s look at a few more before and after photos so you can see the effect of the gradient filter. In the series below, the only change that has been done to the After photos is the addition of Gradient Filters. While the Before photos are acceptable to most, adding the Gradient Filters helps to add extra polish to the photos. It helps to bring it up another notch, and will help to impress your clients even more than usual!

    Gradient3

    Gradient2

    Gradient1

    Note that in most cases, you will want to add several gradient filters, not just one. Each space will be a bit different, but the need tends to toward adding a bit of subtle light onto the sides of the frame, along with some clarity and possible slight temperature adjustments depending on light sources.

    Exterior photos can benefit just as much from the Gradient Filter as interiors! Not all scenes will need this type of adjustment, but below is an example of a common setup that benefitted greatly from gradient filter adjustments. The shadows in the lower left corner of the frame are too dark, and a gradient filter adjusting the brightness of shadows is ideal for balancing them out.

    Gradient-ext

    As a final point, it’s worth noting that the Gradient Filter tool is one that should finish off your editing, and should not be the main editing technique used on an image. In nearly all cases, it will be a perfect tool for some finessing of highlights/shadows or temperature so that your image will have that extra bit of polish. Before exporting your final files and sharing with your client, be sure to consider if a Gradient Filter should be added into your arsenal of editing tools.

    Do you have a different tool that you feel is undervalued for photo editing? Please share your thoughts in the comments below!

    googletag.cmd.push(function() {
    tablet_slots.push( googletag.defineSlot( “/1005424/_dPSv4_tab-all-article-bottom_(300×250)”, [300, 250], “pb-ad-78623” ).addService( googletag.pubads() ) ); } );

    googletag.cmd.push(function() {
    mobile_slots.push( googletag.defineSlot( “/1005424/_dPSv4_mob-all-article-bottom_(300×250)”, [300, 250], “pb-ad-78158” ).addService( googletag.pubads() ) ); } );

    The post The Most Under-Valued Editing Tool for Architectural Photos by Natalia Robert appeared first on Digital Photography School.


    Digital Photography School

  • Your Guide to Understanding Program Mode on Your Camera

    Almost every DSLR or Mirrorless camera has a mode dial with a variety of letters and icons on it, some of which might seem cryptic or confusing. Usually you’ll find a green icon for Full Auto mode (usually a green A or rectangle), Full Manual mode (M), as well as Aperture Priority (A or Av) and Shutter Priority (S or Tv). Your camera might also feature scene modes such as portrait, night, or macro, and even some user-configurable modes indicated with a U1 or U2 (or C1/C2, etc.).

    Somewhere on that dial is a letter that’s often left neglected, and unused by many people, even though it can be quite powerful – Program Auto (P). In my experience most people don’t use it because they don’t understand it. Is it Auto? Is it Manual? What can it do that the other modes can’t? The answer is a bit strange at first, but once you wrap your head around what the humble little P mode can do, you might find yourself using it much more than you thought.

    DSC_2475

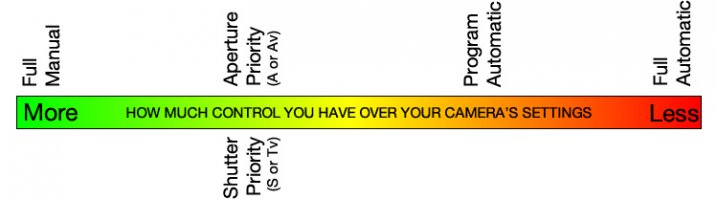
    The camera mode dial operates on somewhat of a continuum. On one end you have Full Manual mode, which gives you complete control over the three elements of exposure: shutter speed, lens aperture, and ISO sensitivity. On the other end you have Full Auto mode which gives you almost no control over exposure except whether the flash turns on or not (and on some cameras, not even that much). On most cameras Full Auto will not even let you choose basic parameters like white balance and focus mode, which is fine if you just want to shoot some pictures and not worry about all the technical aspects of photography.

    The other modes exist in the middle of the spectrum and give you some degree of control, while your camera handles the rest. For instance, in Aperture Priority you control the aperture and ISO, and let your camera figure out what shutter speed to use for a good overall exposure. In Shutter Priority things are reversed; you control the shutter speed and ISO, while your camera figures out what aperture to use.

    program-auto-diagram

    Program mode exists on the same continuum somewhere between Aperture/Shutter Priority and Full Automatic. When you initially put your camera in P mode you might notice that things look similar to Full Auto; your camera sets the aperture and shutter speed in order to get a proper exposure. One benefit you might not immediately realize is that you can set the ISO which will then remain unchanged by the camera. This is quite useful in situations where you want to intentionally use a lower ISO, such as outdoors or in bright light, or a high ISO when things are a bit darker and you prefer to not activate the flash. If nothing else, think of the Program Auto mode as an ISO Priority mode; you set the ISO and your camera figures out the shutter speed and the aperture. If that’s all you want to do, you’re set. Change the ISO (or not) and worry only about composing and framing your shots, then let your camera figure out the rest.

    DSC_2624

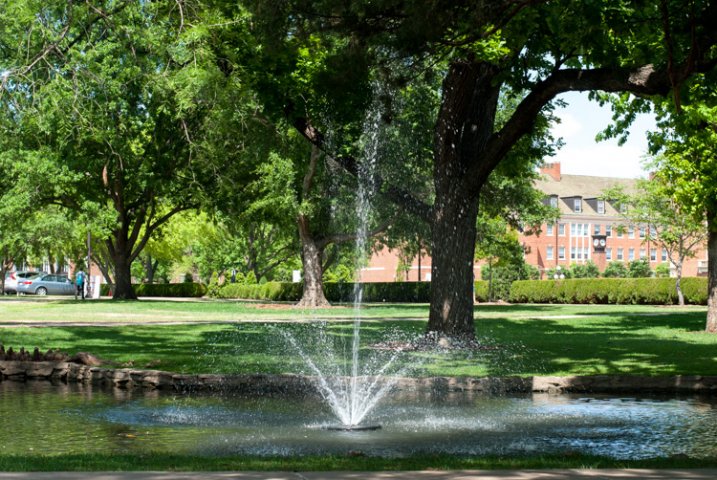
    Program Auto gave me a well-exposed picture but the result was not what I was hoping for. I wanted a smoother look for the fountain…

    fountain-motion-blur

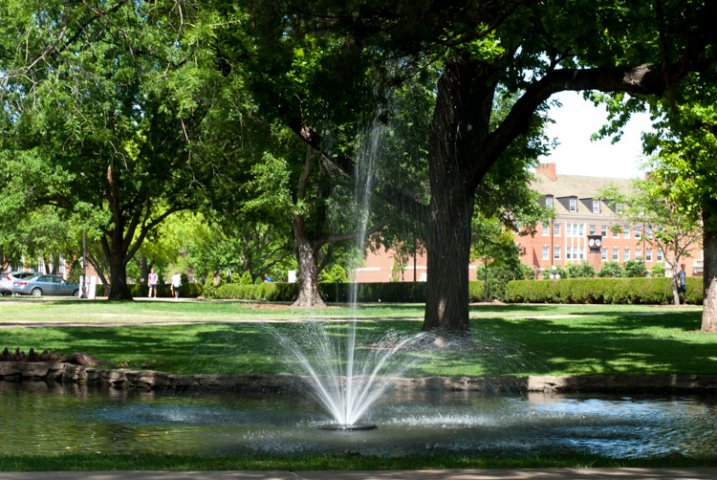
    …so I quickly adjusted my shutter speed to 1/20 using the dial on my camera. Program mode kept a nice exposure while giving me the motion blur I was looking for.

    If you’re willing to dig a little deeper you will find many more useful features to unlock in Program mode – far more than just giving you the ability to control the ISO. It’s kind of like the familiar Auto mode on steroids. There are many options available to you in Program that you won’t get in Full Auto, and many of these can help you get the shot you want, instead of the shot your camera thinks you want. However, as you start changing settings your camera will do its best to maintain a proper exposure. In this way Program is like the late-night infomercial version of Auto; it handles all the nitty-gritty complicated stuff for you…but wait, there’s more!

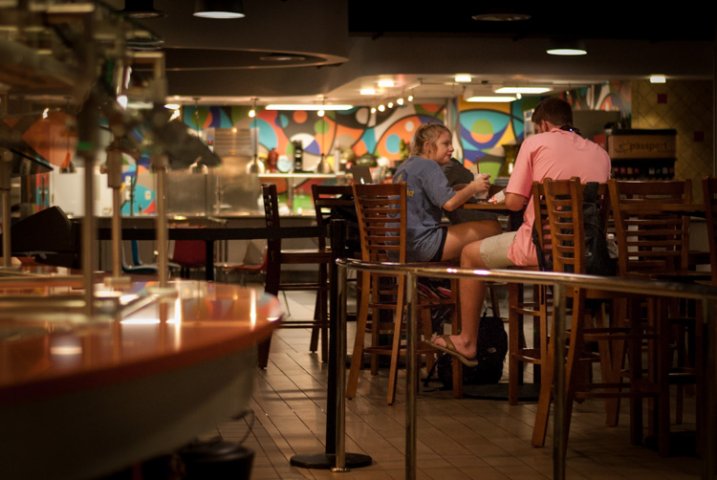
    For example: if you are using Program mode while taking pictures at an indoor birthday party you can set a high ISO so you don’t need to use the flash, and your camera will choose a combination of aperture and shutter speed to get a properly-exposed photo. You can then rotate the command dial (on some cameras it might be pressing a button) to change these values if you decide you want a wider aperture or slower shutter. Essentially your camera says “Here’s what I think will be good,” and then you take over and say “Thanks bro, I’ll take it from here” as you shift the values of your shutter and aperture using the dial on your camera.

    I shot this using Program Auto mode which was a great way to tweak my exposure settings on the fly with very little time to waste.

    I shot this using Program Auto mode which was a great way to tweak my exposure settings on the fly with very little time to waste.

    Or you might be outdoors doing some nature photography but aren’t quite sure what settings to use. So, you put your camera in Program and set the ISO to 100 in order to get as little noise as possible. Soon you might notice that your camera has selected a small aperture, and you’d like to get a bit of background blur so you quickly rotate the dial on your camera until your aperture is much wider. Your camera then automatically adjusts the shutter speed accordingly, in order to maintain a good exposure.

    You can also set parameters within Program like white balance, metering mode (full/center/spot), select which focus point to use, and even tell your camera to use the flash or not. Contrast this to the Full Auto mode and you start to see the usefulness of the humble little P marker on your camera’s mode dial. At this point you might be wondering why you would want to use Program Auto instead of Aperture or Shutter Priority because those will also allow you to set the ISO, aperture, and shutter speed. Program Auto sort of functions like the best of all worlds: you can change various options if you want to, or you can just leave everything alone and let your camera figure it all out.

    DSC_2641

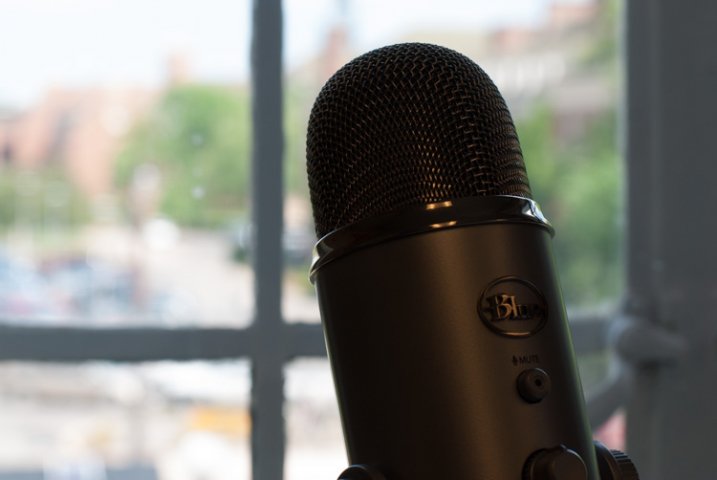
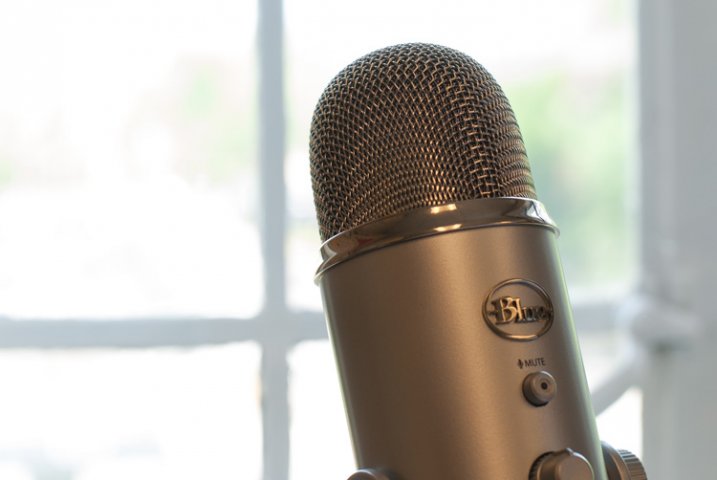
    Shooting in Program mode gave me a good overall exposure but I was not happy with the results…

    microphone-spot-meter

    …so I switched to spot metering, re-took the shot, and got what I wanted. Program allows for this flexibility, whereas Full Auto does not.

    I must admit that even though Program mode can be quite useful I spend most of my time in Shutter or Aperture Priority along with Manual. For me Program is great to have in a pinch, but I generally prefer to make more of the decisions when shooting, instead of having my camera do the heavy lifting.

    Still, it’s good to be aware of what it is, and what it can do, in case you find yourself in a situation where you don’t want to give up all control to your camera but also don’t want to do everything yourself. What’s your preferred method of shooting, and what do you like (or dislike) about using the Program Auto mode? Leave your thoughts in the comment section below.

    googletag.cmd.push(function() {
    tablet_slots.push( googletag.defineSlot( “/1005424/_dPSv4_tab-all-article-bottom_(300×250)”, [300, 250], “pb-ad-78623” ).addService( googletag.pubads() ) ); } );

    googletag.cmd.push(function() {
    mobile_slots.push( googletag.defineSlot( “/1005424/_dPSv4_mob-all-article-bottom_(300×250)”, [300, 250], “pb-ad-78158” ).addService( googletag.pubads() ) ); } );

    The post Your Guide to Understanding Program Mode on Your Camera by Simon Ringsmuth appeared first on Digital Photography School.


    Digital Photography School

  • How to Shoot in Low Light – 9 Commonly Asked Questions

    DSC_4289-Edit-Edit

    This image of Moon Rise over Marietta, Ohio was taken 20 minutes after sunset during the Blue Hour when the sun had set and the sky was a dark blue. Here the city lights make a great warm glow over the city.

    According to British photojournalist Donald McCullin, “There is no such thing as bad light, just misunderstood light.” Many photographers consider low light to be bad light. The purpose of this article is to encourage you to not consider low light as inferior or unusable, but rather to look for subjects to photograph that react well to the available light.

    Keep in mind that low light photography is not exclusively night photography. Low light photography opportunities may appear any time of the day as well. For instance, shooting waterfalls in low light allows you to shoot with a slow shutter speed, prevents over-exposure of the white water of the falls, and thereby creates a beautiful silky effect capturing the moving water. Using a flash will light up any subject, of course, but let’s take a look at how to improve your photography in naturally occurring low light. Some frequently asked questions about low light photography are addressed below.

    Low Light Photography FAQs
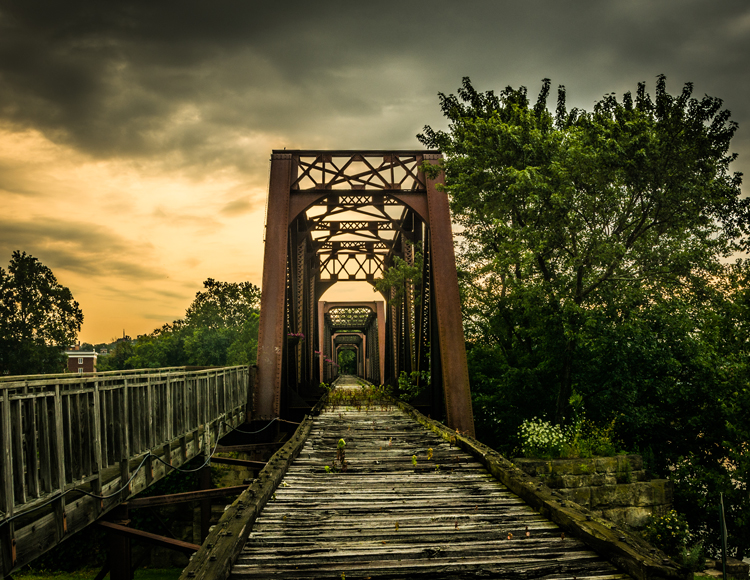
    14595250669_30c342a792_o

    Low light create very dramatic scenes. Dark storm clouds turned this potential sunrise into a great low light opportunity

    My low light images are blurry. Would a better lens alleviate the blur?

    The short answer to this question is YES, a fast lens with maximum f-stop of 1.8 for instance, will give you better results than a kit lens with a maximum f-stop of 3.5 or 5.6. But even the faster, more expensive lens, will give you undesired results with the wrong settings. The wider aperture opening will allow you to use a faster shutter speed resulting in a sharper image. These lenses with larger maximum apertures are called “fast” because they allow you to shoot with faster shutter speeds, due to more light that is entering your camera through the bigger opening.

    What are the best camera settings for shooting in low light?

    Manual Mode

    Shooting in manual mode is paramount to successful low light photography as it allows you to control every functional aspect of your camera. You basically have three ways to get more light on your camera sensor: Shutter speed, Aperture and ISO. These three controls are called The Exposure Triangle, and each of these can have a positive or negative result to your image’s exposure. Therefore, learning how to use them for the best result is the key to low light photography. Your in-camera light meter will reveal where adjustments should be made to the camera settings, and well-exposed images will be the result.

    Shutter Speed

    If you are shooting handheld, a good rule of thumb is to set your shutter speed to match your focal length. For example, if you are shooting at 50mm your shutter speed shouldn’t be any slower than 1/50th of a second. Of course, if the subject of your photo is moving, then you will need to increase your shutter speed to be fast enough to freeze the action. Therefore, choosing a slower shutter speed will allow more light into your camera, but with that setting, the possibility of a blurry picture occurs.
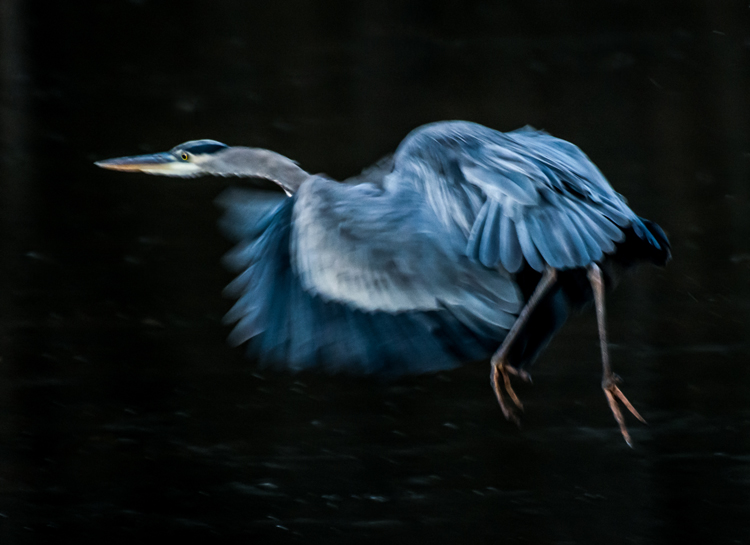
    Great Blue Heron in Fight was the subject of this low light image. Exposure 1/250 of a second, f/5.6, ISO 1250. Here using the combination of slower shutter speed and a higher ISO to create the blur of the wings and panning to match the speed of the fight of the heron.

    Great Blue Heron in fight was the subject of this low light image. Exposure 1/250 of a second, f/5.6, ISO 1250. Using the combination of slower shutter speed and a higher ISO to create the blur of the wings and panning to match the speed of the fight of the heron.

    Aperture

    In most low light situations you will probably need to shoot with your aperture wide open. But if there is enough light to allow you to shoot with a smaller f-stop, it will increase your depth of field. The principle to consider: choosing a wider aperture will let more light into your camera, but will decrease your depth of field, which could lead to an important portion of your image being out of focus.

    ISO

    The higher the ISO number the more light your camera will record. The trade-off here is, the higher the ISO, the more digital noise you are adding to your image. Keep your ISO as low as possible and only increase your ISO after you have maxed out your shutter speed and aperture.

    Shoot in RAW

    For best results, shooting in RAW is recommended, for the simple reason that your camera will save more shadow detail in RAW format compared to the compressed format of jpg.

    It is very helpful to learn how to check your histogram, and not just rely of what you see on your camera’s LCD screen. Use the histogram to check your exposure, and avoid clipping the highlights and shadows.
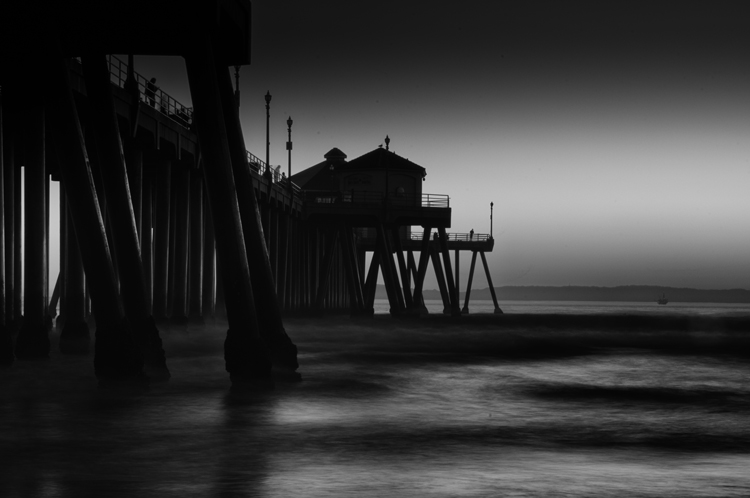
    11943436386_0912d70961_o

    Using the low light at Huntington Beach California to create this black and white image with a five second exposure.

    How do I take low light action shots?

    Shooting action in low light can be very challenging and is almost always going to require you to shoot with your aperture at its widest setting. When your aperture is set, then your shutter speed should be adjusted to match the action that you are trying to freeze. Of course, depending on how low of a light situation you are shooting within, there may simply not be enough light. If this is the case, adjust the ISO to a higher setting until a good exposure is set. If your ISO setting is so high that you are getting an unacceptable amount of digital noise, you have two options: either add light with a flash or some other source, or live with the noise and try to remove some of it in post processing. Sometimes with the noise issue, it comes down to getting the shot with noise, or not taking the shot at all.

    How do I reduce the digital noise level in low light images?

    The simple answer to this question is to shoot at the lowest ISO that you can. But it is also a good idea to know the ISO at which your camera produces noise that you consider unacceptable. Always make sure that your exposure is correct. Even at a low ISO, if your image is underexposed you will have some noise in the shadowed areas.
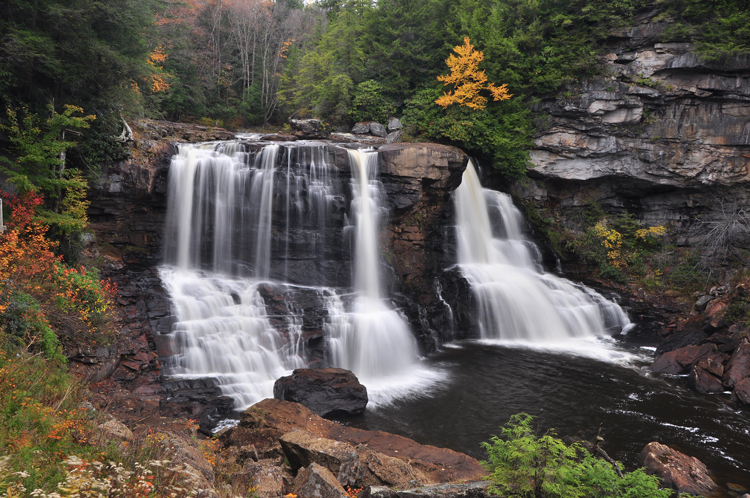
    4016735972_59e71999ac_o

    An over casted  cloudy day at Blackwater Falls West Virginia allowed for this long exposure without blowing out the highlight.

    How do I focus in low light?

    Another reason for blurry images in low light is the fact that some cameras just aren’t manufactured to focus properly with less light. Try shining a light on your subject to give your camera enough light to focus. You also may use you manual focus ring to fine-tune your focus. Using the center focus dot may also help as it is usually a cross-point type which focus faster and more accurately than others.

    How can I take pro-like images in low light?

    Four things that most pros are going to do in low light:

    1. Use a tripod
    2. Shoot in RAW
    3. Shoot in Manual Mode
    4. Use the histogram
    8038775792_361ab83c88_o

    Low light makes great silhouettes.

    How do I choose the best white balance for low light?

    Set your white balance to match you environment –  Tungsten for indoors with light from a regular lightbulb, Fluorescent for light from fluorescent bulbs, Cloudy for low light created by an overcast day, and Shade for shooting in a shaded or shadowy area. But, one thing to remember if you are shooting in RAW format is that you can adjust your white balance later in post-processing. But if you are shooting JPGs it is very important to get your white balance correct in-camera. For this reason you should not shoot Auto white balance, it’s very hard, sometimes impossible, to correct later from a JPG.

    Should I raise my ISO or lower my shutter speed in low-light?

    Assuming that you are shooting with your aperture wide open, in most situations this is an easy one to answer. Adjust your shutter speed and raise your ISO as a last resort. Remember that raising your ISO is going to add more noise into the image. Most new DSLRs do a much better job with the noise levels in their higher ISO settings, but as mentioned earlier, it is a good idea to know at what noise level you are unwilling to accept, and what ISO that is for your camera. In situations where your subject is moving, it may become necessary to adjust the ISO to keep your shutter speed fast enough to freeze the action.
    DSC_0101-Edit

    Fog created the low light in this fall image.

    Why aren’t my low light shots sharp even when I shoot using a tripod?

    Remember in most low light you will be shooting with your aperture wide open (or nearly so), hence your depth of field will be very shallow. Be extra careful to lock your focus (even try back-button focus) on the part of your image that needs to be in sharp focus. Case in point: when shooting a low light portrait, it is important to have the subject’s eyes in focus. If your subject is in motion, increase your shutter speed until it freezes the motion of the image. Also, make sure your camera’s vibration reduction is turned off, as this can actually create blur in your image even if shooting with a tripod.

    Bonus tip

    In low light the LCD screen on the back of your camera is going to look much brighter than the actual conditions. So, if your camera has an adjustment for the brightness of your LCD screen, turn it down so that your image will not appear to be overly bright when you view it, even if it is underexposed.
    7496092624_15c8de2ffe_o

    Conclusion

    The trick to low light photography is to take control of your camera, and know that every action or setting will have a reaction. So, how is that different than photography in any light? It’s not, really. Just consider photography in low light as an opportunity to be creative. What subjects do you like to shoot in low light?

    googletag.cmd.push(function() {
    tablet_slots.push( googletag.defineSlot( “/1005424/_dPSv4_tab-all-article-bottom_(300×250)”, [300, 250], “pb-ad-78623” ).addService( googletag.pubads() ) ); } );

    googletag.cmd.push(function() {
    mobile_slots.push( googletag.defineSlot( “/1005424/_dPSv4_mob-all-article-bottom_(300×250)”, [300, 250], “pb-ad-78158” ).addService( googletag.pubads() ) ); } );

    The post How to Shoot in Low Light – 9 Commonly Asked Questions by Bruce Wunderlich appeared first on Digital Photography School.


    Digital Photography School
  • How to Use the Right Captions on Your Photos to Better Connect With Viewers

    30 years ago, we used slides, prints and albums to share photos with family and friends.  Now, between Facebook, Instagram, Flickr, Google+ and 500px, you have more options than ever to share your photos.  The problem is, how do you connect to this much larger audience?

    Sharing a story alongside your photo will help you connect with your followers, and often turn a great photo into something spectacular.

    When you share a photo, people may wonder where it was taken, why you were there, what made you photograph the scene, or what was going through your head the moment you snapped the shutter. These are all questions that can be spun into a narrative and shared along with your photo.

    The right caption draws viewers into the image

    Here’s an example. Which of the following captions draws you in and makes the photo more interesting for you?

    Image1

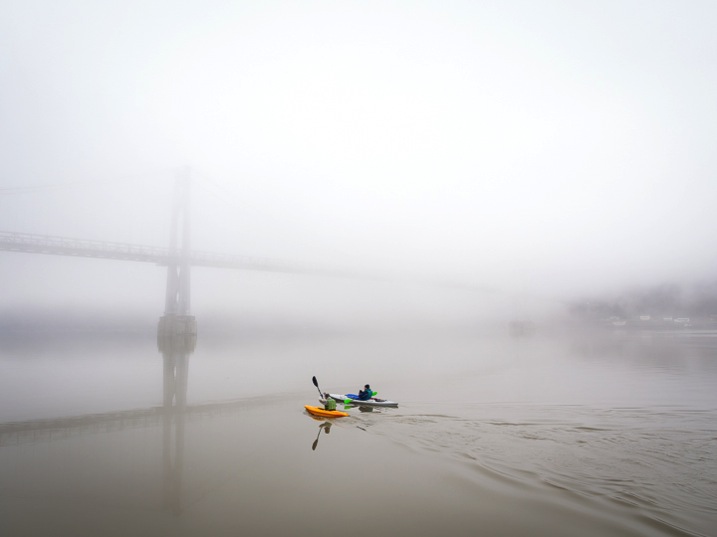
    Caption 1: Kayakers on the Hudson River

    Caption 2: Springtime in upstate New York is full of variable weather. The changing temperatures coupled with different types of precipitation can make for beautiful and unpredictable landscapes. On this particular morning, the Hudson River was covered in a thick fog and knowing how fleeting that can be, I hurried down to the waterfront hoping to capture some shots. Out of nowhere, two colorful kayakers appeared, adding life to my scene as they cut their way down the river and disappeared into the abyss.

    I may be biased, but for me it’s Caption 2. Seeing a beautiful photo with a story attached to it pulls me in. It puts me in the same space that the photographer was in when they took the photo, enriches my experience, and ultimately makes the photo, which was good in the first place, a great one.

    If you went to a yard sale and and saw a beautiful glass bowl for $ 20 you may think, “Well, that’s a bit steep for a simple bowl at a yard sale.” But, I bet your mindset would change if the owner told you a story about the bowl — how she acquired it at a glass blowing factory in Halifax back in the 1950s, how it was one of just a handful made and how the bowl moved around the United States with her and family for the past 60 years. Now $ 20 seems like a bargain!

    Nothing changed, you just got some more information. A story enriched your understanding, and in turn, completely changed how you experienced something.

    Here’s another example:

    Image2

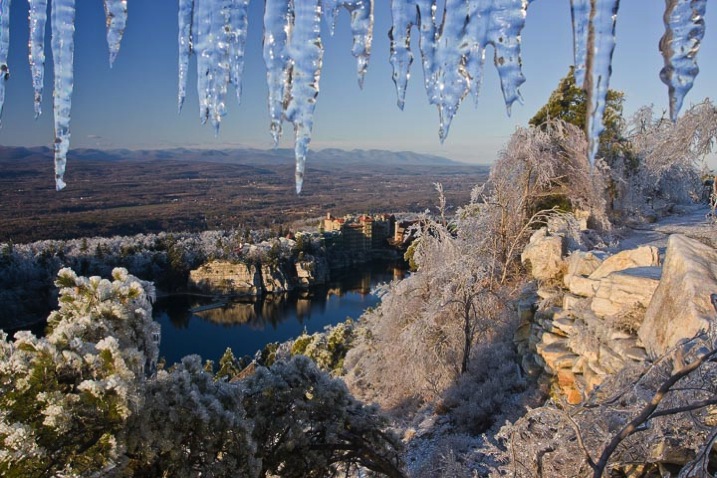
    Caption 1: The Mohonk Mountain House after an ice storm

    Caption 2: It was early December and an ice storm had just ripped through the Hudson Valley leaving debris, destruction, and a clear blue sky in its wake. My wife and I began our hike that day at a lower elevation, and realized as we got higher that the entire forest was encased in ice. It was a winter wonderland that was both beautiful and dangerous. Limbs of trees were scattered everywhere, boulders were slick with ice and in some spots, five foot long icicles hung like stalactites above our heads. As we made our way to the top of the mountain, I stepped into a small gazebo overlook and focused on the Mohonk Mountain House and surrounding landscape, letting the icicles in the foreground frame my shot.

    There’s nothing wrong with the first caption, but the second caption really paints a picture in the viewer’s mind and places them there with you.

    Here’s another shot I took this winter.  In the past I would have shared it with Caption 1 below, but instead I shared it with Caption 2,  and found that it really resonated with my audience.

    Image3

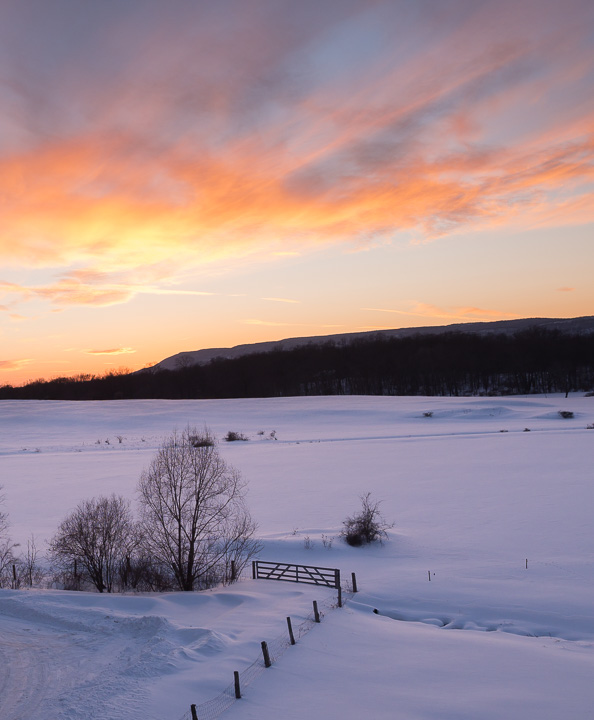
    Caption 1: Winter Sunset

    Caption 2: It was a Friday night and I rushed out of work wanting to photograph something. I made a quick stop at home, put on boots, and grabbed my snowshoes just in case. With so much snow on the ground I racked my brain for a spot that I could easily get to with the potential for a decent sunset shot. Luckily, this incredible vista is just down the street from me. I got there when the sky was beginning to turn all sorts of colors, hurriedly set up my tripod, and captured this winter sunset. I stayed for a little while, watching blues give way to pinks, yellows and oranges until all the color in the sky was gone and my frozen hands signalled to me that it was time to go home.

    Viewer experience is enhanced

    Not every photo needs a page of text written alongside it, but it’s been my experience that adding a couple of sentences, rather than just a few words (or none at all), greatly enhances the experience of the viewer.  It helps them to connect to your photo and ultimately with you as a photographer.

    Image4

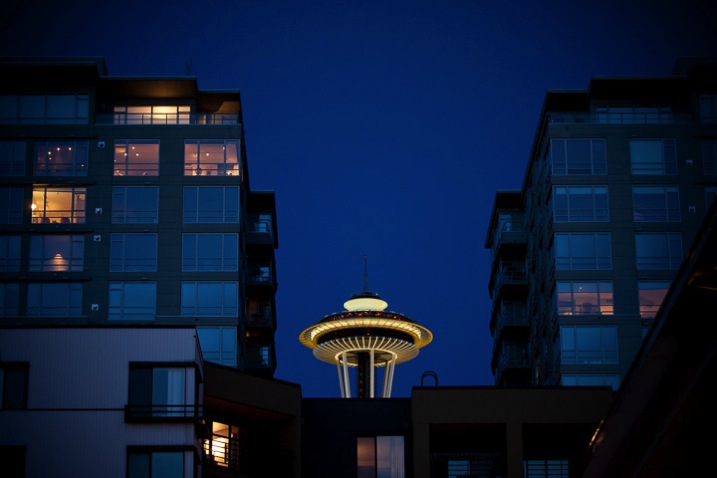
    Caption 1: The Space Needle in Seattle

    Caption 2: After an afternoon touring Seattle and Pike Place Market, my wife and I headed over to the Olympic Sculpture Park but found it was closing just when we arrived. Disappointed that I wasn’t able to capture any images of the park, I turned my camera around towards the city as we left and captured this unique view of the iconic Space Needle.

    Summary

    When I share a photo, I want people to respond to it. I want them to share in the moment and feel what I was feeling when I took the photo. Your story might seem mundane to you, but to your audience it gives them a closer look at who you are and how you think — as a person and a photographer.

    googletag.cmd.push(function() {
    tablet_slots.push( googletag.defineSlot( “/1005424/_dPSv4_tab-all-article-bottom_(300×250)”, [300, 250], “pb-ad-78623” ).addService( googletag.pubads() ) ); } );

    googletag.cmd.push(function() {
    mobile_slots.push( googletag.defineSlot( “/1005424/_dPSv4_mob-all-article-bottom_(300×250)”, [300, 250], “pb-ad-78158” ).addService( googletag.pubads() ) ); } );

    The post How to Use the Right Captions on Your Photos to Better Connect With Viewers by Joe Turic appeared first on Digital Photography School.


    Digital Photography School
  • On the Road? Backup Without the Bulk-Up

    I seldom review gadgets these days, but sometimes something is so useful that it's worth telling people about. Such is the case with the SD card-enabled Western Digital My Passport Wireless hard drive.

    Read more »
    Strobist

  • 8 Tips for Photographing Children

    Children’s expressions are genuine; they love to live life with passion and abound in energy. When they are happy, their laughter and joy is infectious. They can be the best subjects of all – busy, happy, playful and real. If you’ve ever tried to take photos of kids who were not so crazy about having a camera in their face, you also know that while they are all these wonderful qualities, they can also be difficult and may require a little more planning for a smooth session.

    Posed girl indoor studio

    These organizational tips for photographing children will help you prepare yourself for some extended camera time with a child – whether you are a professional photographer prepping for a session with an advanced DSLR, or a parent with a simple point-and-shoot wanting to get some nice shots of your young children.

    1. Timing and location

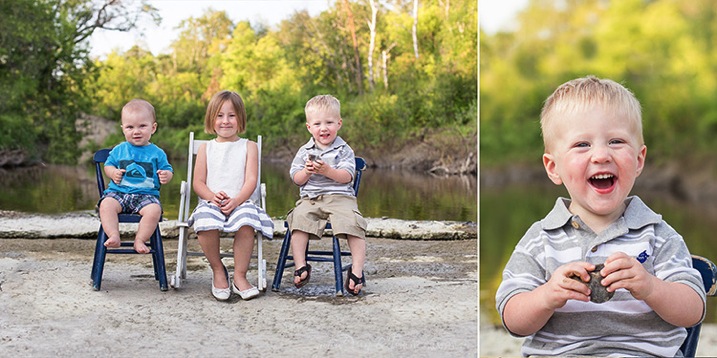
    Time of day is really important. A photo session generally works best after a nap and snack when the child is the happiest. Also something to keep in mind is harsh light. Outdoors at midday when the sun is bright and strong is not ideal for photography.

    A close second for importance is location. Outside is optimal and allows for lots of space to move around, but if you would prefer indoors (or it’s -40), make sure you have adequate space.

    Kids chairs water summer

    This family found some lovely outdoor locations, and we chose to do the session in the evening. We found the sweet spot between hungry, tired, sleepy kids and soft, flattering natural light.

    2. Be prepared

    Both you and the little ones want this to go as fast as possible. If you waste too much time floundering around when you could be shooting, children get bored, antsy and quickly lose interest. Make a flexible plan and be prepared before you bring in the child. Have your camera (charged battery, lots of room on a memory card, check your settings) and props ready (hide any toys where they can be easily accessed and only bring them out if or when they are needed). If you are using various backgrounds, know ahead of time the order you would like them in, and make sure they are ready to go.

    3. Make a list

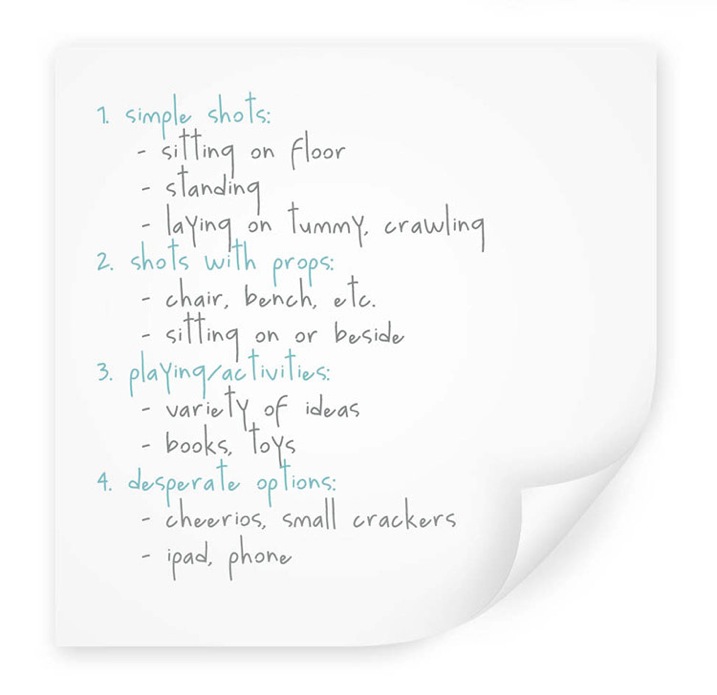
    Make yourself a list of potential non-posed shots such as: sitting, standing, laying down, playing, running, etc. – your child will not pose the same as the kids in Pinterest photos – and you don’t want them to. Look for ideas and themes, but don’t expect those exact poses. You want the picture to express who they are. Include activities that you have ready, as well as some back-ups such as snacks or a phone. Get any electronics you use to entertain them ready beforehand – their favorite Netflix episode ready-to-go, or an upbeat song already opened in iTunes just waiting for you to click play – however, these should only be options when you are desperate and have tried everything else. Be flexible with your list and ready to throw it out if needed.

    List

    4. Get reinforcements

    If possible, get some help. Ask your helper to stand directly behind you at first, not to the side – you want to try and get some pictures where the child’s eyes connect with the camera. For little ones your helper can plop them on a chair and quickly move away, while you wait ready with your finger on the shutter – you might only have two seconds to get the shot. Choose someone who can get them smiling and laughing. They will also help you keep your sanity when photographing your own kids.

    5. Start with poses

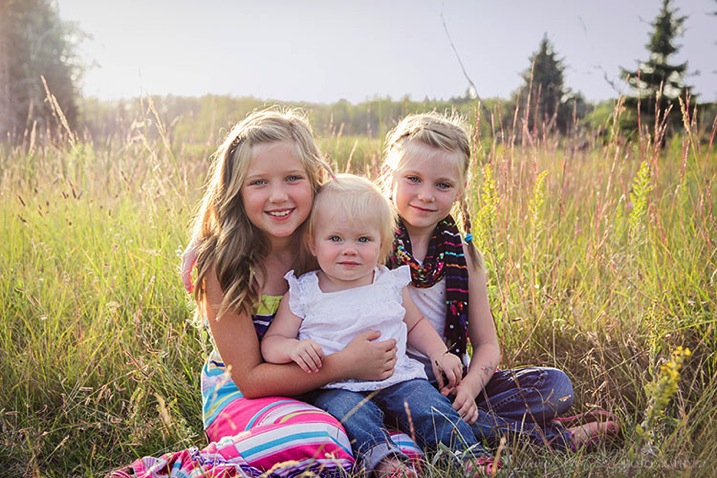
    Take the most posed, formal, look-at-the-camera pictures first. For example, a sibling shot where you want them all looking at the camera and smiling. You still might not get it, but this is where you have a chance.

    Sisters posed

    This posed shot was taken at the beginning of their session.

    6. Limit movement

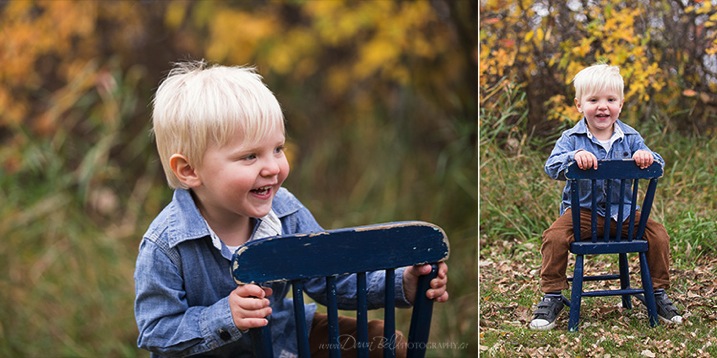
    Limit their movement at the start: A chair, stool, couch, basket, swing, etc. Just be flexible and don’t force it – a picture somewhere else is better than a red, blotchy, crying face. I will sometimes keep a chair or prop hidden until it’s time to use it. Stick a fun chair down where you want them to be, and see if they naturally head over there to explore. You might get lucky and have them crawl up there on their own. But they might not want to sit on the chair at all – move on, or let them stand holding onto it, or sit on the floor next to it. Come back later if you feel they are not ready. If not, just ditch it. You might have lots of ideas and only actually use a few of them.

    Boy chair

    Near the beginning of a session is a great time to limit movement using props, chairs, etc. After a while they will want to run around instead of sitting. This little guy wasn’t going for conventional, but that’s okay too – just go with it.

    7. Let them play

    Let them play after you have tried the formal, posed shots. Don’t try too much posing or force them to sit still; you are in for a battle, and they will likely win. Consider centering the rest of the session around an activity they enjoy, or a new one that you think might be a hit – in the yard with the sprinkler, at the park on the slides, walking along the beach to collect shells and go adventuring, tea party outside, flying a kite, jumping on the trampoline, bucket full of soapy water on the grass, etc. Music can also be helpful – a fun little dance party, maybe? Unless you have a kid that really likes to run far away, outside is an excellent option – kids love to have room to move around, and a big space affords more options.

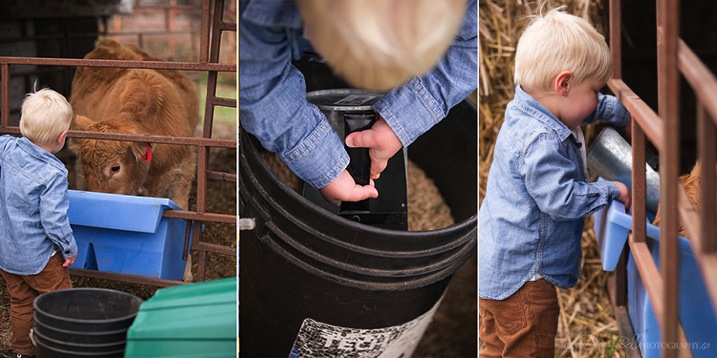
    Feeding cows boy

    We were nearing the end of this session and sitting still wasn’t an option anymore. This little guy loved feeding the cows, so over to the cows we went. It was also a way of telling the story of who he is, and what he loves. Sometimes the most cherished pictures don’t have a smile or eyes facing the camera.

    8. Relax

    Take a deep breath and relax! Kids can sense your stress, and it transfers onto them (and usually makes them do the opposite of what you want).

    Do you have any other tips for photography children? Please share in the comments below.


    googletag.cmd.push(function() {
    tablet_slots.push( googletag.defineSlot( “/1005424/_dPSv4_tab-all-article-bottom_(300×250)”, [300, 250], “pb-ad-78623” ).addService( googletag.pubads() ) ); } );

    googletag.cmd.push(function() {
    mobile_slots.push( googletag.defineSlot( “/1005424/_dPSv4_mob-all-article-bottom_(300×250)”, [300, 250], “pb-ad-78158” ).addService( googletag.pubads() ) ); } );

    The post 8 Tips for Photographing Children by Dawn Bell appeared first on Digital Photography School.


    Digital Photography School
  • The Best Selling DSLR Lenses With Our Readers

    best selling lenses

    Today we did some analysis of the Best Selling DSLR Lenses with our readers among dPS readers – based upon purchases made in the last 3 months.*

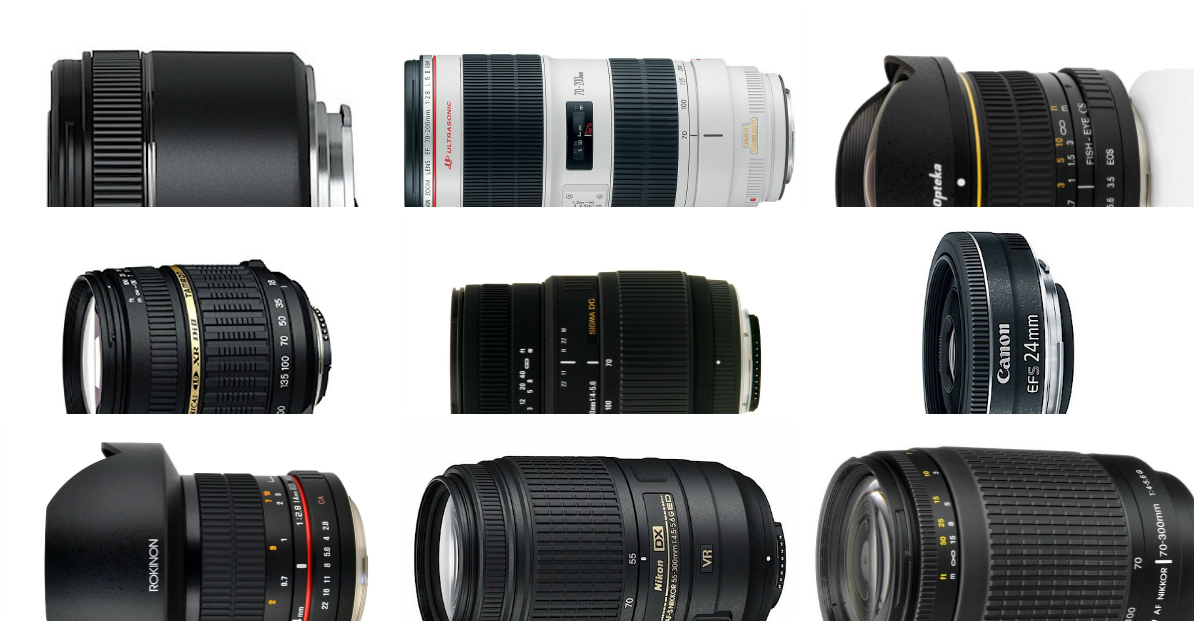
    As usual this list is dominated by Canon and Nikon lenses so we’ve again broken those two brands out into two separate lists of lenses and then have put the other best selling lenses from other brands into a third list.

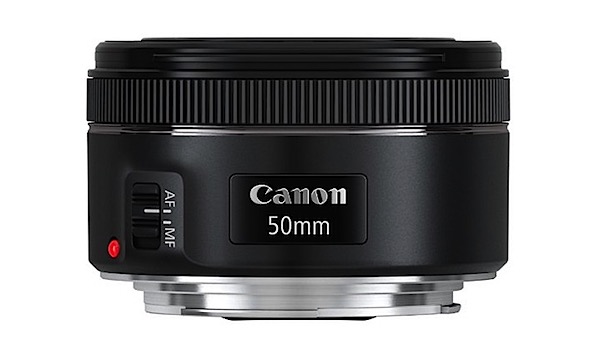
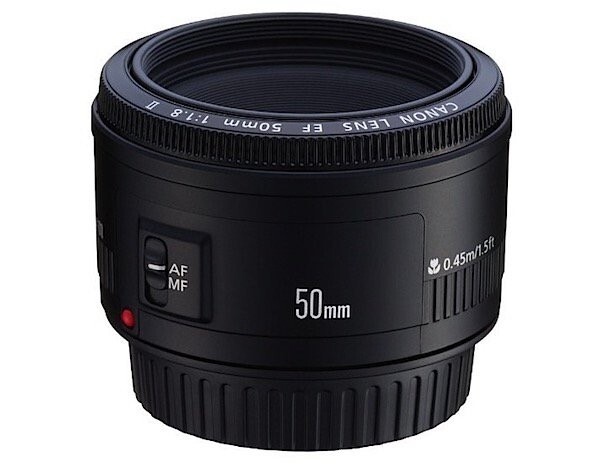
    Interestingly by far the #1 lens in the last 3 months has been the Canon EF 50mm f/1.8 STM lens which was released just this last month as a successor to their old Canon EF 50mm f/1.8 Mark II which was released back in 1990 but which has always previously topped our best selling lens lists (it is #2 for the first time ever this month).

    Note: at this stage we didn’t see any major trends in lenses for compact camera systems which is why we’ve not featured any hear. We expect this market to grow as the mirroless/compact system cameras continue to grow in popularity.

    Best Selling Canon DSLR Lenses

    1.Canon EF 50mm f/1.8 STM Lens

    Canon EF 50mm f:1.8 STM Lens.jpg

    2. Canon EF 50mm f/1.8 II Camera Lens

    Canon EF 50mm f1.8 II Camera Lens

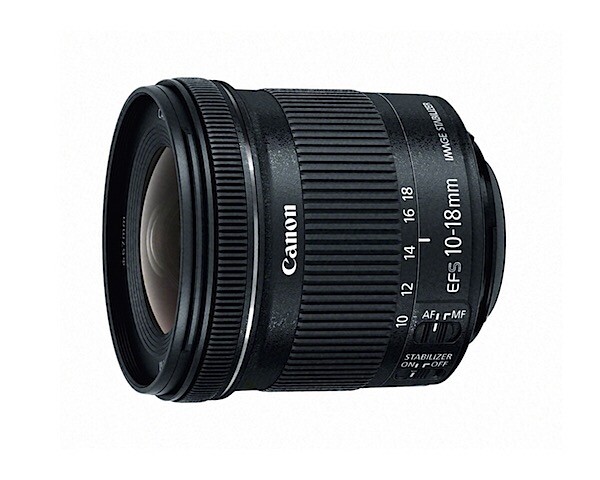
    3. Canon EF-S 10-18mm f/4.5-5.6 IS STM Lens

    _images_I_81OOhuXQS-L._SL1500_.jpg

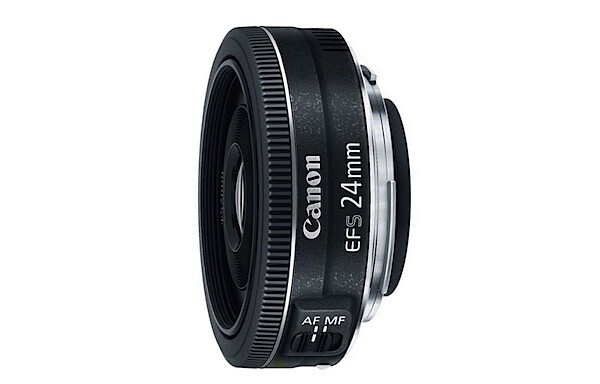
    4. Canon EF-S 24mm f/2.8 STM Lens

    Canon EF-S 24mm f:2.8 STM Lens.jpg

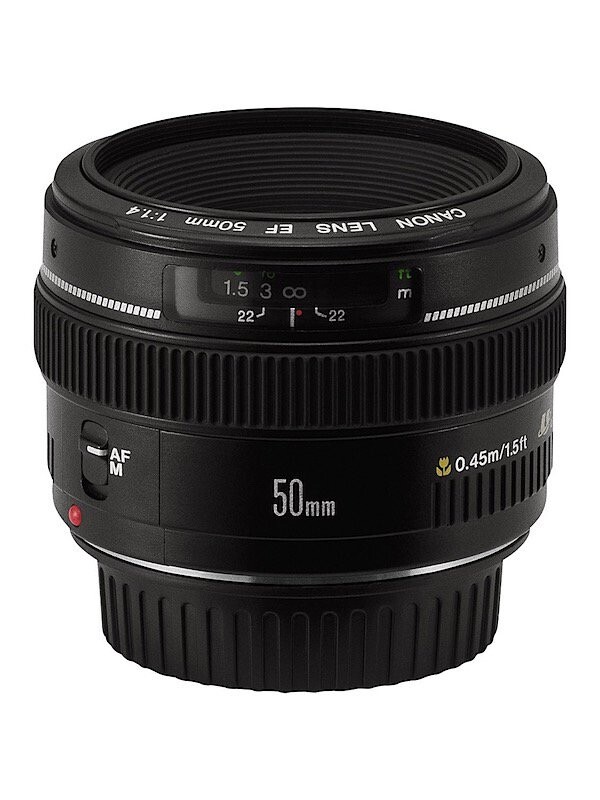
    5. Canon EF 50mm f/1.4 USM

    201506021444.jpg

    1. Canon EF 85mm f/1.8 USM Medium Telephoto Lens
    2. Canon EF 24-70mm f/2.8L II USM Standard Zoom Lens
    3. Canon EF 100-400mm f/4.5-5.6L IS II USM Lens
    4. Canon EF 75-300mm f/4-5.6 III USM Telephoto Zoom Lens
    5. Canon EF 100mm f/2.8L IS USM Macro Lens
    6. Canon EF 70-200mm f/2.8L IS II USM Telephoto Zoom Lens
    7. Canon EF 40mm f/2.8 STM Lens

    Best Selling Nikon DSLR Lenses

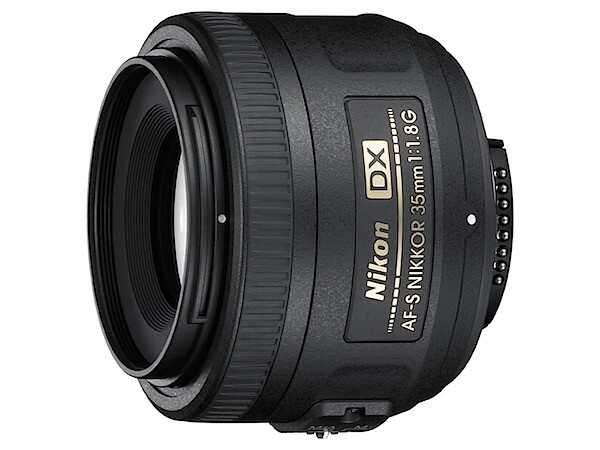
    1. Nikon 35mm f/1.8G AF-S DX

    201506021458.jpg

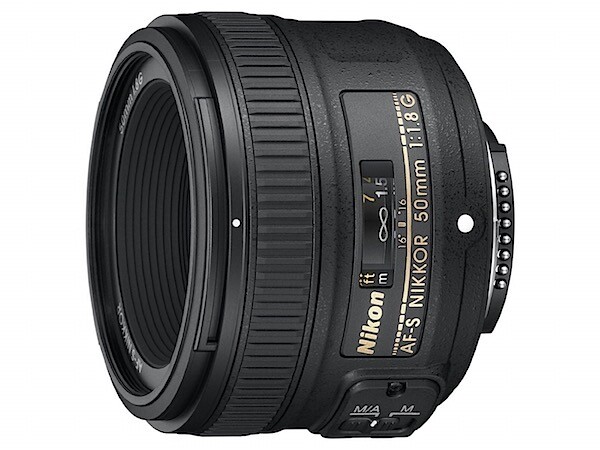
    2. Nikon 50mm f/1.8G AF-S NIKKOR FX

    201506021516.jpg

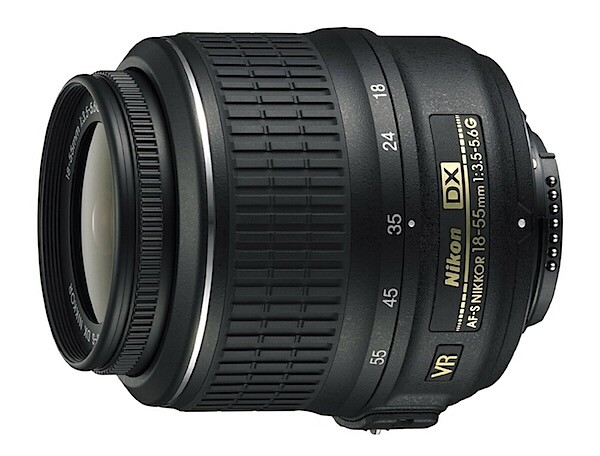
    3. Nikon 18-55mm f/3.5-5.6G VR II AF-S

    201506021519.jpg

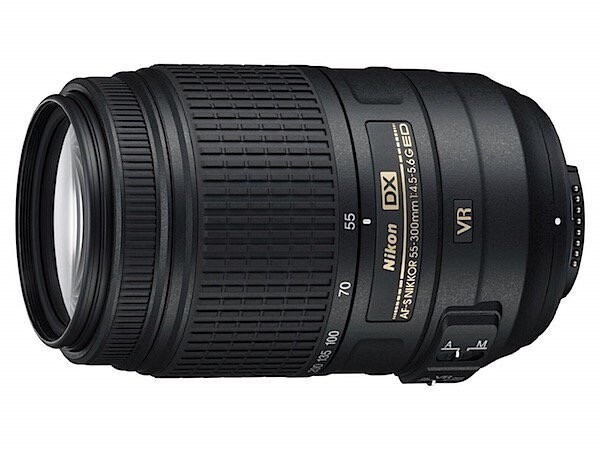
    4. 3. Nikon 55-300mm f/4.5-5.6G ED VR

    201506021518.jpg

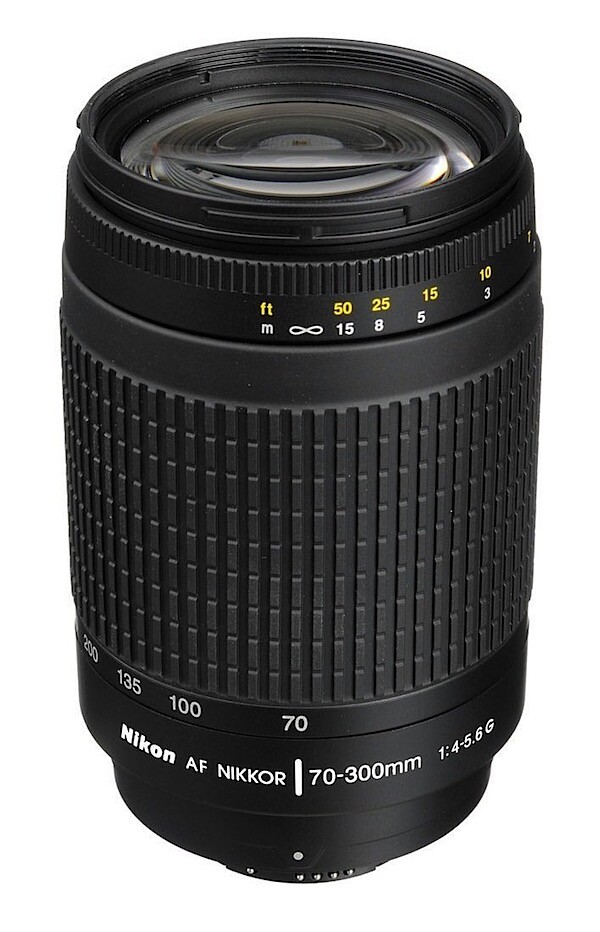
    5. Nikon 70-300mm f/4-5.6G AF

    201506021521.jpg

    1. Nikon 50mm f/1.4G SIC SW Prime AF-S
    2. Nikon 18-55mm f/3.5-5.6G VR II AF-S
    3. Nikon AF-S VR Micro-Nikkor 105mm f/2.8G IF-ED Lens
    4. Nikon 85mm f/1.8G AF-S
    5. Nikon 70-300mm f/4-5.6G AF
    6. Nikon 18-300mm f/3.5-6.3G ED VR AF-S DX
    7. Nikon 40mm f/2.8G AF-S DX Micro

    Best Selling DSLR Lenses from Other Brands

    1. Tokina 11-16mm f/2.8 AT-X116 Pro DX II (for Nikon DSLRs). Also available for Canon and Sony and Minolta cameras.
    2. Rokinon FE14M-C 14mm F2.8 Ultra Wide Lens for Canon (also available for Fujifilm X-Mount, Micro Four-Thirds, Olympus, Sony and Pentax and others)
    3. Sigma 70-300mm f/4-5.6 SLD DG Macro. (for Nikon DSLRs) Also available for Canon,Minolta and Sony and Pentax cameras.
    4. Opteka 6.5mm f/3.5 HD Aspherical Fisheye for Canon DSLRs.
    5. Sigma 340101 35mm F1.4 DG HSM Lens for Canon (also available for Nikon, Pentax and Sony)
    6. Tamron AF 70-300mm f/4.0-5.6 Di LD Macro (for Canon DSLRs). Also available for Nikons, Konica Minolta and Sony and Pentax cameras.
    7. Tamron AF 18-200mm f/3.5-6.3 XR Di II (for Canon DSLRs), Nikon, Konica Minolta and Sony and Pentax.

    *Note: as with our previous best seller lists this list was compiled from reports supplied to us from Amazon.com where we are affiliates. One of the ways dPS is able to cover its costs and be a sustainable business is that we earn a small commission when readers make a purchase from Amazon after clicking on our links (including those above). While no personal details are passed on we do get an overall report from Amazon about what was bought and are able to create this list.

    googletag.cmd.push(function() {
    tablet_slots.push( googletag.defineSlot( “/1005424/_dPSv4_tab-all-article-bottom_(300×250)”, [300, 250], “pb-ad-78623” ).addService( googletag.pubads() ) ); } );

    googletag.cmd.push(function() {
    mobile_slots.push( googletag.defineSlot( “/1005424/_dPSv4_mob-all-article-bottom_(300×250)”, [300, 250], “pb-ad-78158” ).addService( googletag.pubads() ) ); } );

    The post The Best Selling DSLR Lenses With Our Readers by Darren Rowse appeared first on Digital Photography School.


    Digital Photography School

  • Utilising Meerkat and Periscope for Your Photography Business

    In this article we’re going to talk about Periscope and Meerkat apps and how a photographer can benefit from these services. Use technologies of the future to grow your business! What are Meerkat and Periscope Meerkat is a live video streaming app. It’s available on iOs and Android. Meerkat links directly to Twitter profiles, which lets people stream a live Continue Reading

    The post Utilising Meerkat and Periscope for Your Photography Business appeared first on Photodoto.


    Photodoto

  • Quick Tips for Getting Into Stock Photography

    Getting accepted as a stock photographer can be a difficult and frustrating process. Especially when your best photos get rejected by photo reviewers. After helping many photographers trying to become accepted as Shutterstock contributors, I have discovered how the process can instead become a fun and educational experience.
    Stockphoto1

    Why become a stock photographer?

    Stockphoto3

    Earning money on your digital photography work is a great way to earn an extra income. But it is often not the main motivation for why many people try to become contributors. Being accepted, and being able to call yourself a stock photographer, means something. Similar to how many people develop their skills so they one day can become a professional in their field, being able to call yourself a stock photographer will for many mean more than saying you’re a professional photographer.

    When someone presents themselves as a professional photographer, people tend to have different views of what that means. Some associate a professional photographer with someone that makes high quality photos. Others may think of the person they hired to photograph their wedding. Or perhaps someone that has their photos sold in a gallery. Some may think a professional photographer is only someone that has a diploma, or someone that works full-time and earns their main income from their photography.

    Being able to say you’re a stock photographer says something about the level you have reached. Why? Because the stock photography industry is well known for its high quality requirements.

    Furthermore, the best part of being a stock photographer is knowing your work is being purchased, appreciated, and used all around the world. With modern tools like Google image Search, you can back trace and find were and how your most popular photos are being used.

    Stockphoto4

    Are you qualified?

    If you know how to make a manual exposure, get the focusing correct and have a good eye for correct white balance, you’re most likely qualified to become a stock photographer.

    Expect to get rejected

    It might take a few attempts. But once you’re accepted, as many existing stock photographers can testify, it made them an even better photographer. A rejection of your initial submission might feel like a disappointment at first. But take advantage of the feedback and suggestions provided. Your initial submission will most likely be more strictly evaluated than the general submissions you’ll make in the future after getting accepted.

    Stockphoto7

    Find the motivation to learn

    Try to see your first submission as a homework assignment for reading the stock agency’s submission guidelines. Like any course or workshop, your first homework assignment is not expected to be flawless. There will most likely be room for improvement. With this attitude, learning about stock photography can be an educational, fun, and even motivating experience.

    The first batch of photos is the hardest

    For example, when signing up to one of the most popular stock photography sites like Shutterstock, you are asked to submit 10 samples of your best work. Seven of these must pass the strict inspection of their reviewers. But if rejected, you’re provided with great feedback to help you improve your photography.

    Stockphoto5

    It gets easier after getting accepted

    As any existing stock photographer can testify, your initial batch of submitted work is much more strictly evaluated than the general submissions you will make in the future after getting accepted.

    You’re closer to getting accepted than you might think

    A submission that is not approved is often not completely rejected either. Many rejected photos can have only one minor issue that can sometimes even be fixed with a little editing. Even though it may feel like your entire batch of submitted work was rejected, you might only be a few adjustments away from getting accepted.

    Stockphoto2

    Try again. Many existing stock photographers did.

    Many existing stock photographers did not get accepted on their first attempt. For every initial submission that is not approved, take good use of the feedback that is required. See it as a free portfolio review from experts in the field. Be inquisitive, study the material and try again!

    googletag.cmd.push(function() {
    tablet_slots.push( googletag.defineSlot( “/1005424/_dPSv4_tab-all-article-bottom_(300×250)”, [300, 250], “pb-ad-78623” ).addService( googletag.pubads() ) ); } );

    googletag.cmd.push(function() {
    mobile_slots.push( googletag.defineSlot( “/1005424/_dPSv4_mob-all-article-bottom_(300×250)”, [300, 250], “pb-ad-78158” ).addService( googletag.pubads() ) ); } );

    The post Quick Tips for Getting Into Stock Photography by Kjell Leknes appeared first on Digital Photography School.


    Digital Photography School