Category: Photography

  • How to Use Video for Your Photography Website

    In modern society websites are all about storytelling and conveying the right message. Designers try to “make it big” by using proper images and videos to give users the maximum impact. Videos rose in popularity in 2014, and have been a growing trend ever since. Being a sister medium to photography, video can help you enhance your online brand presentation Continue Reading

    The post How to Use Video for Your Photography Website appeared first on Photodoto.


    Photodoto

  • 5 Unposing Tips for Kids for More Natural Photos

    Editor’s note: this week we will be featuring a series of articles on posing for portraits. Look for a new one each day. If you miss any make sure you subscribe to our newsletter and you’ll get a reminder of all our articles once a week.

    Posing kids is a whole different thing from posing models (unless you’re photographing a child model, and then you might not need this article). My biggest goal when capturing kids is to help them look as natural as possible, so truly I want to “unpose” them. Stiff, awkward, posed shots aren’t really what anyone wants, but I want to take this even a step further and talk about capturing kids’ true inner selves.

    159

    Have you ever had a kid in front of your camera, and whatever you tell them to do ends up looking like the most unnatural position ever? Chances are, the kid is as baffled as you are. He doesn’t know what you want from him. He hasn’t been studying pinterest boards and kid’s clothing catalogues. He just knows his mom dressed him up and told him not to get dirty or mess up his hair, and now some stranger is telling him to put his hand there, look over here, bend his elbow like this. Most kids don’t understand this.

    Let me share some unposing tips with you for helping kids to be more nature, so you and your little model can get some great shots!

    1. Kids don’t need much help to be adorable

    135

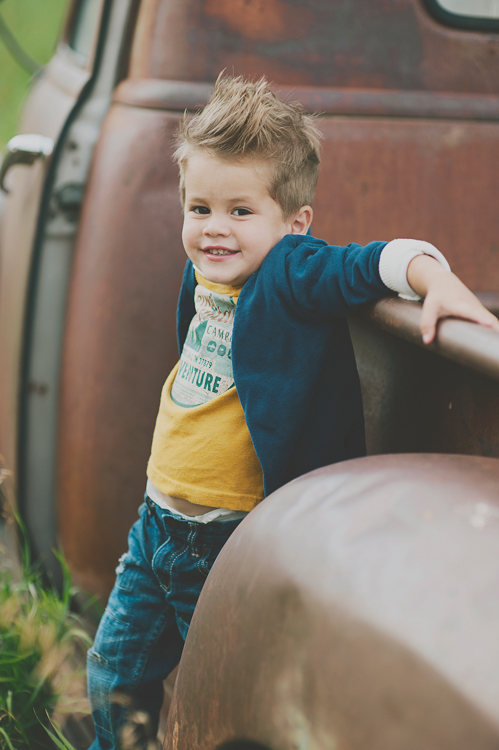
    If you can just let a kid be themselves, and explore, sometimes the photos you get can be more adorable than anything you could think up yourself. Part of each session could be unstructured, no posing direction, kid-led, fun. Photos like the above could happen all on their own, or if the child is shy, you could ask them, “What’s in that window?” Make picture time into play time, and let kids be themselves.

    Some props can be good, but sometimes they just add to the chaos, and you end up with a lot of canned, posed photos. I love kids’ cute faces, and that’s what I want to be the main focus of my photos. Don’t stress too much about making everything around the kid amazing. Like I said, kids don’t need much help to be adorable!

    2. Let them be with a buddy

    196

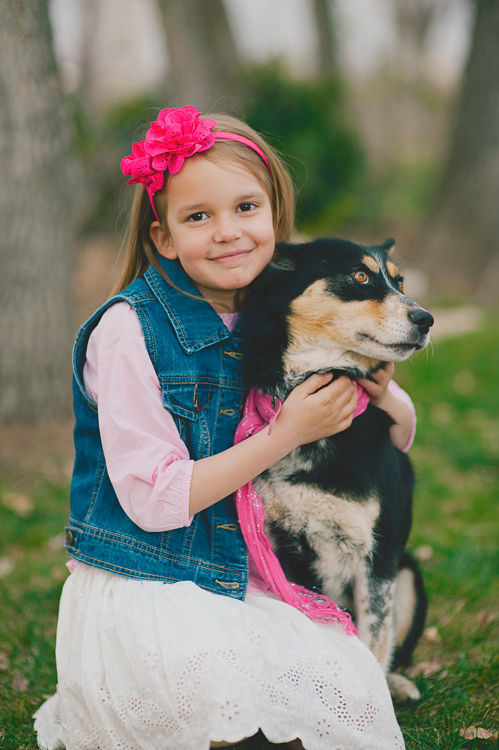
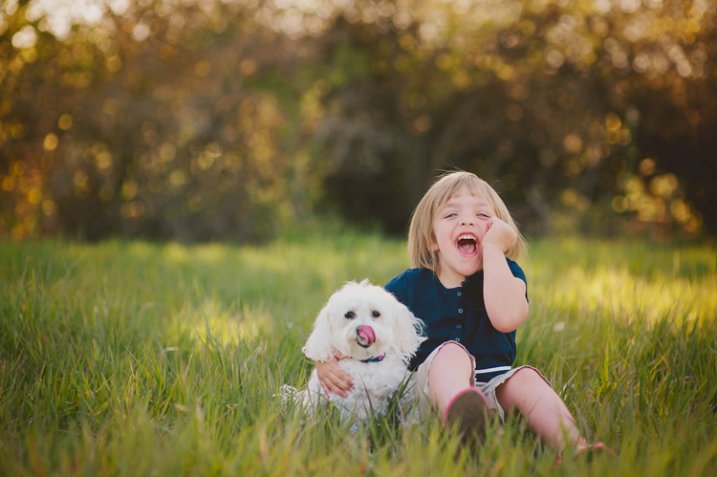
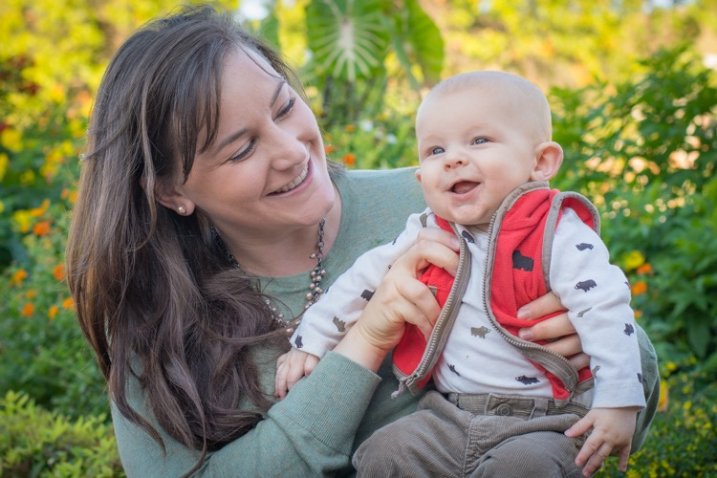
    Sometimes kids are nervous and anxious about getting their photos taken. Letting them take a few photos with a beloved pet, favorite stuffed animal, or even Mom or Dad, can really help relieve the pressure, and help them feel comfortable.

    186

    Sometimes the most spontaneous laughs, the happiest smiles, and the most relaxed poses, just happen when they’ve got their buddy with them in the photos. Adding a live wiggly friend can add extra work to getting a photo, but the payoff is often worth the work. Have Mom or Dad help you keep the pet under control, and be quick. Encourage a lot of interaction, and be ready for anything!

    3. Work Quickly

    161

    Kids aren’t going to be patient with a lot of posing cues and tweaks. You can give general direction, and then shoot fast. You could give some quick commands, “Now laugh at the silly caterpillar on my head!”, but don’t take a long time moving their arm just so, or turning their heads just so. Most kids won’t respond well to that, and will quickly tire before you get any good photos.

    Have your camera on a fairly fast shutter speed (I like mine at least 1/100th for kids), because they’re not going to hold very still for very long.

    Kandice3

    4. Some direction is good

    You don’t want to stand there, staring the kid down, waiting for them to spontaneously be in a spot with great light, doing something amazingly photogenic. You’ve got to give some direction, but try to do it in a way that makes the whole experience fun and relaxed. Here are some phrases that you could try:

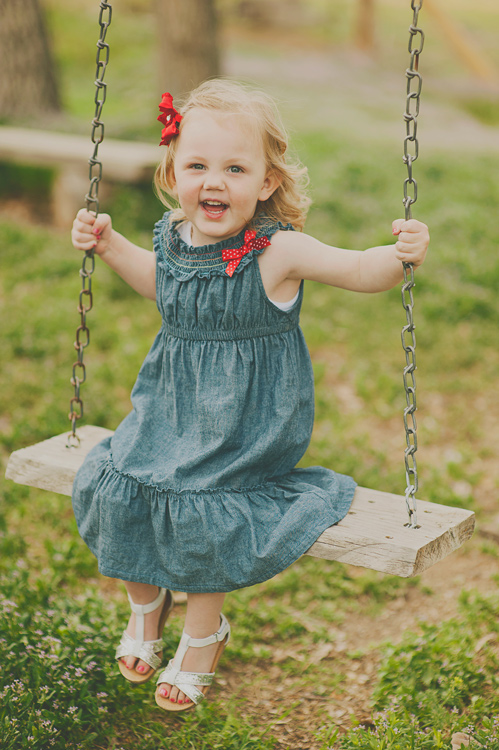
    • Could you come sit on my swing over here? Oh, you are so big! I didn’t know you could climb that high!
    • Can you sit here, criss-cross-applesauce? (Or whatever they call sitting cross-legged. You can ask them what they call it. Most kids learn this in preschool).
    • Let’s hug our freezing cold knees. Your knees say, thank you very much!
    • Where’s your tickle smile? Do I need to find your tickle smile? Is it hiding in your armpit?
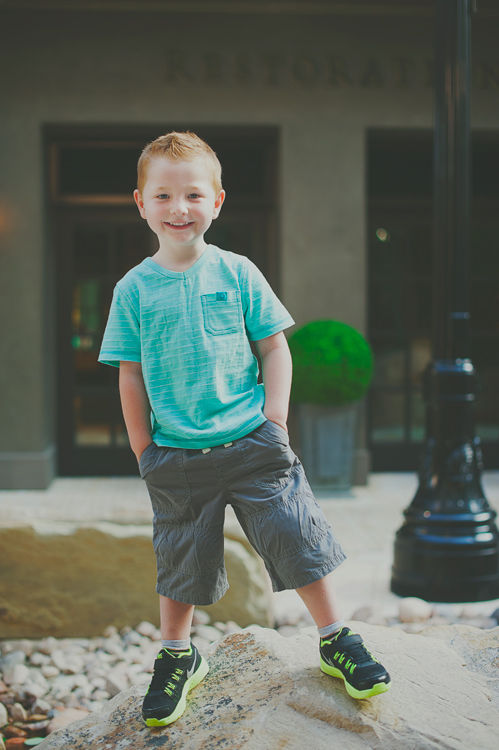
    • Do you think you would be brave enough to stand on this rock?
    • Whatever you do, don’t smile. No, I said don’t smile! (Classic reverse psychology).
    • Where should we put your hands? We should put them away somewhere. Do they like pockets?
    • Could you hold this tree up with your back? Oh, thank you! That tree was getting tired of standing up by itself!
    • Let’s play copy-cat. Whatever I do, you do it too.

    199

    5. Pay attention to personality

    Some kids love silly, others are pretty shy. Pay attention to how they react to you, and adjust accordingly. If they’re really rambunctious, you might want to dial down your silly a bit so you don’t get them too wound up. You can still have fun with them, but talk in a calm voice, and don’t ask them to do too many crazy things, because they’ll take what you say and bring it up a notch or two. Before you know it, you’ve got a kid running in circles that isn’t listening to a word you say.

    If they’re really introverted, you might want to try to capture more serious photos, and let them be contemplative. Don’t ask them to do things they are obviously uncomfortable with. When they’ve warmed up to you a bit, you may be able to give more requests, but really pay attention to the cues kids are giving you, and focus on capturing who they are, not the canned five poses that you do with every kid.

    AB07

    I would love to hear your tips for getting great unposed shots of kids! What are the fun things that you say to coax a smile? How do you get their attention, and make photo time fun?

    Check out Portrait Posing Tips- How to Help People to Relax and Take Better Photos for more in the posing series.

    googletag.cmd.push(function() {
    tablet_slots.push( googletag.defineSlot( “/1005424/_dPSv4_tab-all-article-bottom_(300×250)”, [300, 250], “pb-ad-78623” ).addService( googletag.pubads() ) ); } );

    googletag.cmd.push(function() {
    mobile_slots.push( googletag.defineSlot( “/1005424/_dPSv4_mob-all-article-bottom_(300×250)”, [300, 250], “pb-ad-78158” ).addService( googletag.pubads() ) ); } );

    The post 5 Unposing Tips for Kids for More Natural Photos by Melinda Smith appeared first on Digital Photography School.


    Digital Photography School

  • 8 Tips For Baby Photography Using Natural Light

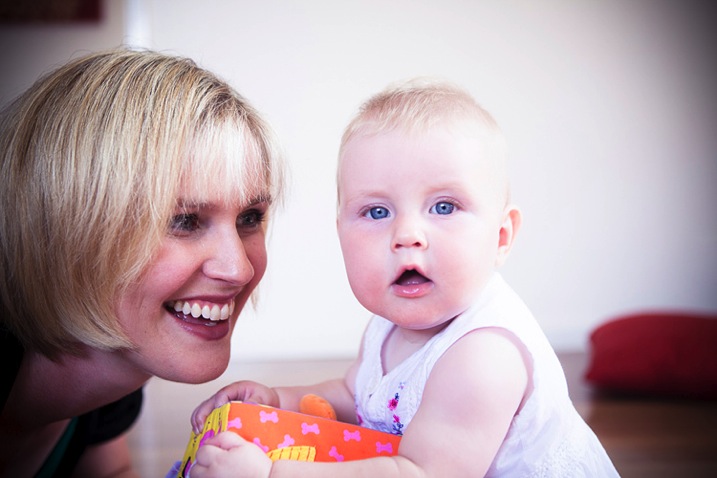
    Babies. Do you find them a challenge to photograph?

    They gurgle, spit, vomit, laugh, cry, smack their hands together… They do a whole lotta things that we don’t need to see forever in a photograph!

    But in between all that uncontrollable baby-behaviour are those moments that parents see every day and would love to keep alive forever in beautiful photos – the big eyes, cute smiles, tiny fingers, soft skin, and round cheeks – all those wondrous little details that only come with brand new life. Those are the things that connect to a parent’s heart in the moment, they happen and what they long for once their children have grown up.

    00 Copyright Beth Jennings Photography Digital Photography School Baby battle 5932

    Ruby, 3 months – ISO 1600, f/2.8, 1/250th

    It’s the reason why, in the whirl-wind madness of baby’s first year, that your friend or family member may call on you to ask you to photograph their beloved treasure.

    Maybe on one hand you feel honoured to be asked, but also that dreadful, pit-of-the-stomach feeling – do you worry they expect you to swaddle their baby up Anne Geddes style, and photograph him or her with stunning studio lighting and an elaborate set? Do you feel the pressure to create something amazing in the small window of only a couple of hours that you’ll have with them?
    How are you going to maximize on the time you’re given, while baby goes through his sleep-awake-feeding cycle?

    How are you going to interrupt that cycle to create something amazing, when the last thing you want to do is disturb the baby, wake him up, move him too much and make him cry? How the heck are you going to do it at all?

    01 Copyright Beth Jennings Photography Children Photography 2310

    Cody, 2 months – ISO 200, f/2.8, 1/200th

    Let’s assume you don’t have the studio lighting and equipment to set up in the parent’s home. All you have is you, and your camera, and you’ll work with natural, available lighting. It may sound like it’s not enough, but actually, it’s more than enough if you know how to make do with what you’ve got.

    The formula to successfully capturing babies within a limited time frame, one camera and no additional equipment, comes in eight tips total:

    02 Copyright Beth Jennings Photography Children Photography 2173

    Eliette, 9 months – ISO 1000, f/5, 1/160th

    Part 1 Planning

    Plan well, and it sets you up for your best chances of success on the day. Follow these steps in the one to two weeks before your shoot:

    Step #1 Timing

    Babies set their own criteria that rotates around a 1-2 hour schedule of sleeping, eating, crying, playing and nap time. Find out from the parents what that current cycle is, and build your plan from there.

    Step #2 Lighting

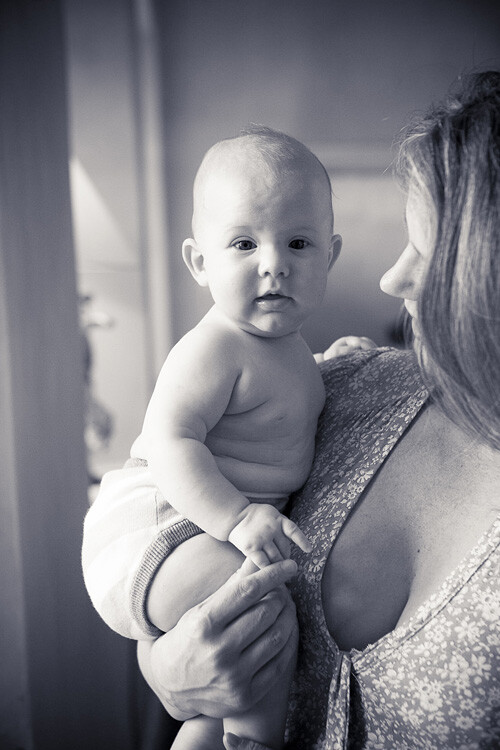
    Will you be photographing at their home? If so, this can include where their baby sleeps in a dimly lit room, by a window in Mom’s arms, perhaps also out in the backyard through dappled light if your shoot will include play time. Stay out of direct sun and just work with soft, diffused lighting. Find out what time of day is best for available lighting in their home and backyard.

    Step #3 Clothing

    It’s special for the parents to have you there to photograph their baby because it’s something they can’t actually do themselves. Advise them on having their baby’s preferred outfit clean and ready in advance, and a back-up in case of accidents. In order to feel safe and warm, babies also do well with accompanying blankets, bottles, beanies and soft toys. Check that the items all marry well together in terms of colours. If you have some clashes on the day and can’t change it, then shoot anyway and consider black and white for post-production to help strip it back a notch.

    Step #4 Schedule

    03 Copyright Beth Jennings Photography Children Photography 2195

    Anna, 8 months – ISO 400, f/2.8, 1/200th

    As best you can, plan the order of mini-events that the parent would like captured. For example, at noon baby will wake up, so you’ll be there from 11:45 and be quietly ready. That will be followed by feeding in the kitchen, and then tummy time in the backyard. If it all comes undone on the day, that’s okay. Just go with the flow of what is presented to you in the natural order that it happens.

    Part 2 On the Day

    It’s likely you won’t have much time with your subject, so follow these steps to be as prepared as possible before you actually start shooting:

    Step #1 Look for the light

    See where it is coming from, and where it is falling. For each of the baby pictures in today’s lesson, take note of the light source. Look at the shadows, as they indicate where the light source is positioned. Also observe the catch light (the little reflected glint) in the baby’s eyes which gives life and character. Notice that the pictures here are all created inside by window light, or outside in shaded areas.

    Step #2 Compose for the background

    Once you’ve established where the best light is coming from, then think about your composition, building up from the background first. See the picture of Cody above? What surrounds him? The rug and white blanket, with small elements of his sister and mother protectively surrounding him.

    Step #3 Set up your shoot flow

    While the parent is still preparing their baby to be photographed, get your technicals for ISO, shutter speed and aperture established with a test shot, and quick histogram check, to ensure you are achieving technically beautiful captures. Once in place, they are unlikely to change much because the light is constant, and baby won’t move much unassisted. (Shoot Flow is my seven step process for setting up your camera correctly in manual mode).

    Step #4 Time to shoot

    Once you’ve covered steps one to three, then position the baby (with the parent’s help) in the scene. Time is of the essence now, but it’s also the part you can’t control. All you need to do is be calm and observe what’s actually playing out in front of you in real time. Remember you can move, so keep yourself flexible and mobile. Compose your images, one by one, and keep your camera near your eye, finger at the shutter. When you see something worth capturing, be quick and go for it. One stunning capture is worth so much more than 10 average ones. Imagine your budget is $ 1 a shot and take your time.

    04 Copyright Beth Jennings Photography Children Photography 6370

    Olivier, one month – ISO 100, f/3.2, 1/160th

    What to do with a sleeping baby?

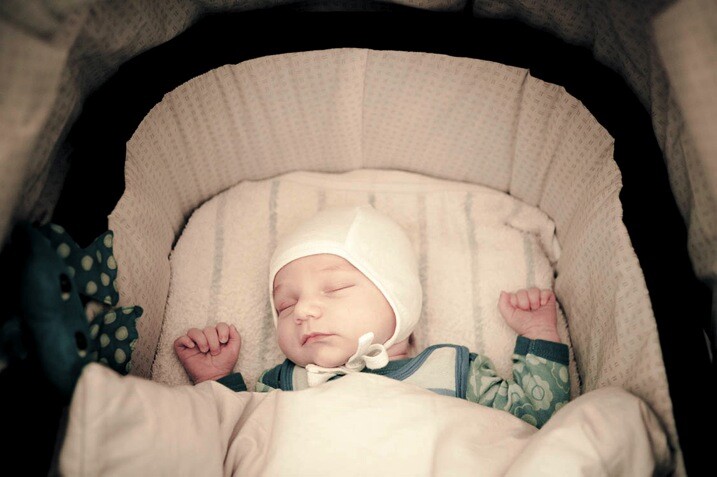
    Sometimes you don’t have the luxury to control all the set-up elements. See baby Bent (it’s a German name) below? He was already placed in the stroller and sleeping beautifully, and it would have been cruel to wake him!

    • Where is the light coming from?
    • Is the light play pleasing? Yes it is. It’s soft and softly coats the baby’s face – so the moment is worth capturing.

    Then compose the image for what you want to say – in this one, it’s all about those gorgeous cheeks and button chin, as well as the nestling, safe space of the bassinet. So come in close and make your composition for that.

    05 Copyright Beth Jennings Photography Children Photography 8987

    Bent, newborn – ISO 1600, f/2.8, 1/160th

    Technical tips for successful baby photography

    Have a look at the technical settings for all of the pictures in this article.

    ISO – whatever the light gives you is what you’ll use for ISO. If you’re shooting indoors, place the child nearer to window light than away from it, watching all the time how the highlights are rendering (ie, keep the tones gentle and not too hot).

    Aperture – isolating the beautiful child from the background is the perfect approach if you want to make your pictures about their gorgeous details.

    Shutter speed – for easy mobility you will likely be hand held when photographing babies, so make sure you are at least using your safe shutter speed of 1/125. Remember that children move quickly, so a faster shutter speed like 1/200 is recommended if they’re up and actively moving around.

    06 Copyright Beth Jennings Photography Children Photography 2478

    Rupert, 1 year – ISO 1000, f/4, 1/160th

    Three final notes for creative observations:

    • Look for the light: Where is it coming from and travelling to? How does it illuminate the subject and where are the shadows?.
    • Observe the composition: Close-up? Horizontal? Low camera angle? Why?
    • The decisive moment of capture: What was happening at the exact moment that the shutter actually fired?.

    How do these three elements come together in each photograph?

    Have you ever had a friend or family member ask you to photograph their baby? Were you pleased to be asked, or hesitant? How did you handle it? Let us know in the comments section below.

    googletag.cmd.push(function() {
    tablet_slots.push( googletag.defineSlot( “/1005424/_dPSv4_tab-all-article-bottom_(300×250)”, [300, 250], “pb-ad-78623” ).addService( googletag.pubads() ) ); } );

    googletag.cmd.push(function() {
    mobile_slots.push( googletag.defineSlot( “/1005424/_dPSv4_mob-all-article-bottom_(300×250)”, [300, 250], “pb-ad-78158” ).addService( googletag.pubads() ) ); } );

    The post 8 Tips For Baby Photography Using Natural Light by Beth Jennings appeared first on Digital Photography School.


    Digital Photography School

  • Portrait Posing Tips- How to Help People to Relax and Take Better Photos

    Editor’s note: this week we will be featuring a series of articles on posing for portraits. Look for a new one each day. If you miss any make sure you subscribe to our newsletter and you’ll get a reminder of all our articles once a week.

    One of the trickiest parts of doing a portrait photo shoot has nothing to do with operating your camera, mastering your lenses, controlling the light, or even dealing with uncontrollable weather. Getting your clients to relax, take it easy, and enjoy themselves during your time with them is just as important as making sure you have all the technical aspects of your equipment figured out.

    This is often the key to a successful photo shoot, and yet it’s so easy to get caught up in learning about your camera equipment and buying new gear that many people forget to invest time in developing the human element of a photo session. Portrait posing and how to help your subjects relax is key to taking better people photos.

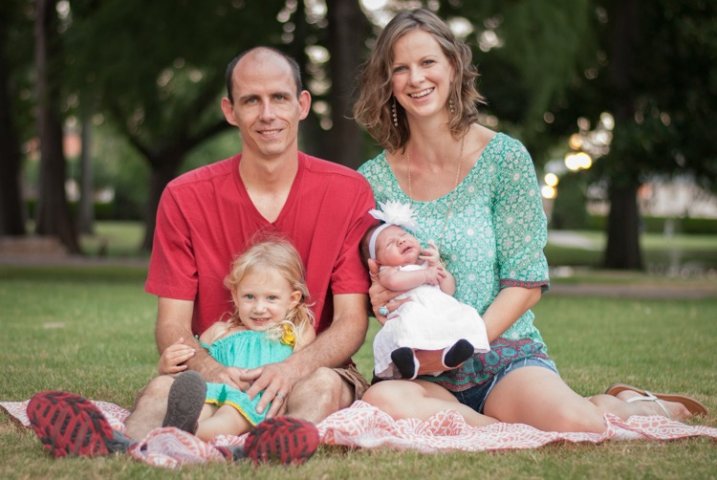
    parent-holding-baby

    If this aspect of your craft is not managed properly you could easily find yourself in the middle of a photo session where your clients are confused, agitated, bored, or worst of all, frustrated and angry. Every photographer has their own unique style, but generally speaking if you can get your subjects to get comfortable and relax, you can get more of the photos you (and they) are really looking for. It’s a tricky situation to be sure, and every photo shoot is different, but here are three techniques that may be helpful:

    1. Get to know your clients beforehand

    At its most basic level taking photos for clients is a simple business transaction wherein they pay you money for a service you provide. But it’s really much more than that: people are inviting you to record a point in their lives that they will hold dear for decades to come. When you order a sandwich or cup of coffee it doesn’t matter who you are, what hobbies you enjoy, what professional goals you have, or whether you woke up on the wrong side of the bed that morning. You hand over some cash, get what you ordered, and go about your day. However, taking portraits is almost the polar opposite because everything matters. A good portrait photographer will strive to capture the essence of the people they are working with, and getting to know them first is a key element of making this happen.

    family-sitting

    On my website I have three simple questions on my Contact page:

    1. Families: What was the best family vacation you ever went on?
    2. Children: If you could have the perfect birthday party, what would it be like?
    3. High School Seniors: If you had $ 1000 to spend, and a week off from school, what would you do?

    The answers to these questions help me understand more about my potential clients, but also send a message to them that they mean more to their photographer than just a pay-check. This helps with any pre-session discussions we might have, as well as the photo shoot itself, because the seeds have already been sown for good conversation and a relaxed atmosphere.

    I’m a teacher by trade, having taught in K-12 schools as well as at the college level (in addition to six-week classes for other teachers), and one common thread that I have found among people of all ages, is that most of them just want someone who will listen to and take an interest in them. With this foundation laid, classes are always much more productive for me and my students. So it goes for the photographer as well: if you show your clients that you are interested in them as people, you will find them to be much more cooperative as photography subjects. It might take some time to get to know them before you photograph them, but this will pay off handsomely for you and your clients throughout the entire picture-taking experience.

    senior-brick-wall

    2. Don’t treat the photo shoot like a photo shoot

    I did a photo session recently for a bright, intelligent, outgoing young man who simply did not want to have his picture taken. He was nearing the end of his time in high school and his parents wanted to get some nice photographs before graduation, particularly of him in his cap and gown. He would much rather have been at home playing video games or hanging out with friends, but instead was obliged to spend the late afternoon with me taking photos – a prospect that was about as much fun for him as getting a tooth drilled. How on earth can you possibly get someone like this to relax, have fun, and enjoy a photo shoot? Simple: don’t make it about the photos.

    One of the first things I said to this student as I hoisted my camera bag to my shoulder was “What video games are you playing right now?” He immediately relaxed and started telling me about one of his current favorites, which then branched into discussion of what his friends were playing, which then led to a dialogue about the recent school year and even his career goals. All the while I was snapping photos, while giving him subtle directions without interrupting the flow of our conversation. I got more good shots than I ever thought I would, and he enjoyed our time together far more than he had anticipated.

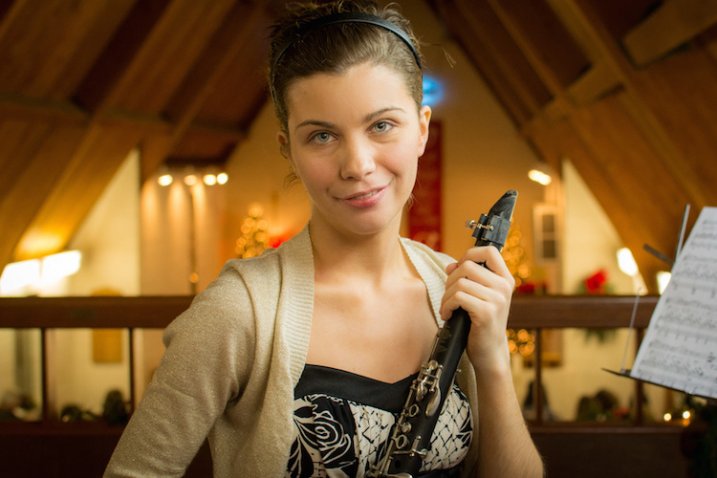
    This girl was a bit nervous about having her picture taken so instead we just talked about music. I don't know much about the clarinet, but she was more than happy to tell me about it, and in the process gave me plenty of good photo opportunities.

    This girl was a bit nervous about having her picture taken so instead we just talked about music. I don’t know much about the clarinet, but she was more than happy to tell me about it, and in the process gave me plenty of good photo opportunities.

    This is just one example, but I have seen the same scenario repeat itself over and over: people tend get nervous and self-conscious when getting their photos taken, so if you want them to relax, have fun, and enjoy the photo shoot, try treating it as an hour of just hanging out. They’ll enjoy it much more and you’ll be surprised at the nice results you can get.

    3. Build long-term relationships

    When you order a pizza or pick up a tool from the hardware store you’re not looking for any type of lasting personal commitment. It’s merely a simple business transaction that serves a functional purpose, whereas photography is quite the opposite. Because you are dealing with people, and not objects, you should not only get to know your clients and seek to build a rapport with them, but find ways to build a professional relationship with them after money and pictures have changed hands. This won’t necessarily improve a current photo session, but it will pave the way for many successful future sessions while also helping to spread the word to the client’s friends, family, and co-workers about your photography services. A few ideas to try include:

    Send a real thank you card

    Send a thank-you card to the client (not an email, but a physical handwritten card) a few weeks after they receive their photos. Let them know how much you enjoyed working with them and appreciated their business, which is a good way to build a positive professional relationship that will last for years to come, and help make future photo sessions much more relaxed and enjoyable. You can also slip in a discount for a future photo session, which will give them even more incentive to do business with you again. This is especially important if you work with children or families, as you can easily lay the groundwork for many years of photo sessions by letting them know how much you appreciate them and enjoy working with them.

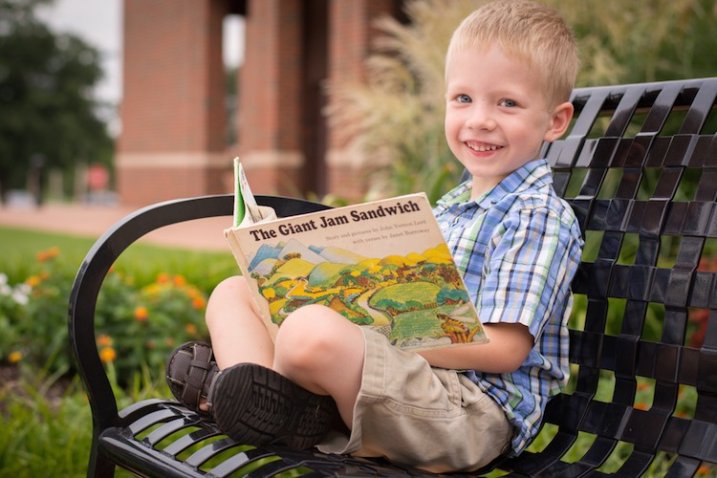
    child-bench-book

    This boy’s parents had such a positive experience on his photo shoot that they asked me to take pictures for their whole family a few months later.

    Post about the session on social media

    As more clients share their lives online, you can take advantage of the medium to publicly say how much you enjoyed working with a particular client, how good the photos turned out, or how you are already looking forward to a future session. Clients often respond quite positively, and this type of public recognition helps to reaffirm their good opinion of you as a photographer. Note that you will want to get your client’s permission first, and posting about a client on Facebook is not the same as friending a client. I don’t necessarily recommend that, though I know several photographers who do.

    Scratch their back, and they’ll scratch yours

    Many of your clients (or their parents) are working professionals and would appreciate your patronage as much as you like to have theirs. Remember the father of the cute kid from last week’s session who is a local plumber? Give him a call the next time your sink overflows. What about the upcoming wedding shoot with the couple who owns a local deli? Take your family there the next time you go out to eat. Building these types of professional relationships is a good way to help ensure that future photo sessions are relaxed and comfortable for your clients. They will start to trust you, be at ease around you, take directions from you, and also recommend you to their friends and family. This also sends the message that you are interested in more than just taking pictures, but are an active and supportive member of your local community, which is filled with people who might be looking for a photographer to do their next portrait session!

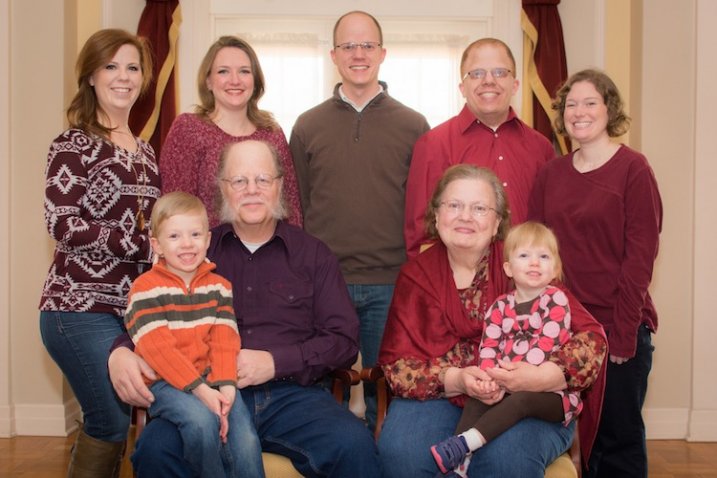
    family-portrait

    Getting to know this family, finding out about their interests, and building on experiences from previous photo shoots helped make this session fun and enjoyable for them and much easier for me as a result. The children knew me from their photo session earlier in the year, which not only helped them relax but put the adults at ease too.

    These are just three ways to help you get people to relax in your photo sessions, but there are many other ideas as well. What about you? What tips and tricks have you learned over the years to help your clients relax, enjoy themselves, and help you get the best shots you can? Leave your thoughts in the comments below.

    googletag.cmd.push(function() {
    tablet_slots.push( googletag.defineSlot( “/1005424/_dPSv4_tab-all-article-bottom_(300×250)”, [300, 250], “pb-ad-78623” ).addService( googletag.pubads() ) ); } );

    googletag.cmd.push(function() {
    mobile_slots.push( googletag.defineSlot( “/1005424/_dPSv4_mob-all-article-bottom_(300×250)”, [300, 250], “pb-ad-78158” ).addService( googletag.pubads() ) ); } );

    The post Portrait Posing Tips- How to Help People to Relax and Take Better Photos by Simon Ringsmuth appeared first on Digital Photography School.


    Digital Photography School

  • Take Your Light With You – the Power of Speedlights

    Off-camera flash is a huge part of lighting used in photography today. Of course you can’t compare it to studio lighting, but the question is, how close can you get? In this article I will talk about portable lighting, and how to control it with some simple accessories and light modifiers to achieve the big lights look.

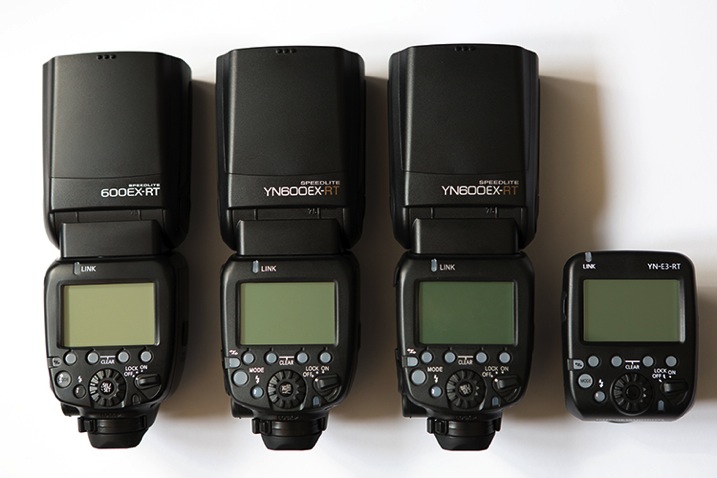
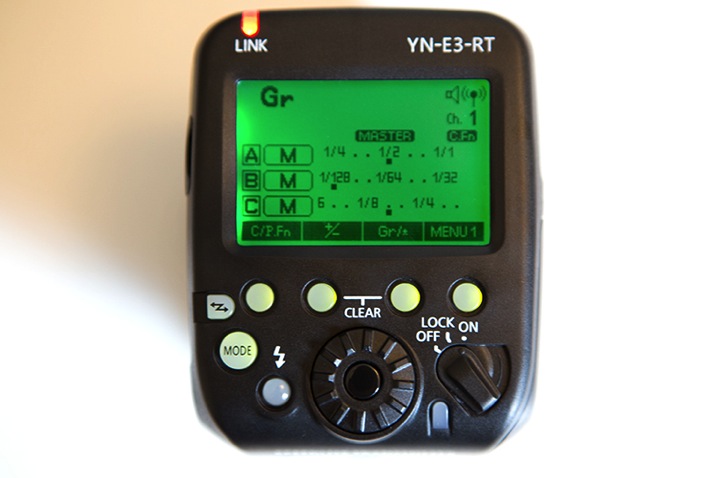
    As a serious off-camera flash fan, when the Canon 600EX-RT Speedlite was put out on the market, I immediately went out to buy it. I have to say, I love the way it performs and the upgrades it has, compared to its predecessor, the 580EX II. After testing it for a couple of weeks, I started thinking about buying another one so I could take advantage of the built-in radio triggers that are one of the major selling points of these units. But the thing is, they don’t come cheap. After some searching around, I realized that for the price of another Canon 600EX-RT, I could buy two Yongnuo 600EX-RTs plus one ST-E3-RT controller, which are really similar to the Canon units and use the same radio-triggering system. So this is what I ended up with:

    01

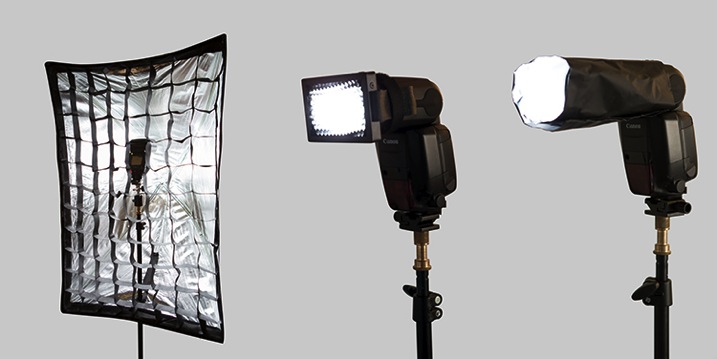
    You can see from the image how similar they look, and the functions and menus are pretty much the same as well. It’s the perfect solution for good equipment on a low budget.

    They are a Chinese-made product and I wouldn’t trust them for serious on-camera work as they’re reported to have some overheating and TTL metering problems. But surprisingly, the build quality is much better than I expected, so for the price, I decided to give them a go for off-camera lighting.

    You don’t really need three speedlights as a starting point to do off-camera flash. All you need is a simple flash that allows manual power control, a couple of cheap triggers, and you’re in business. This setup is a step forward in the off-camera flash world, as it allows you to control up to five groups of flashes in slave mode, through a master unit in manual or TTL mode.

    02

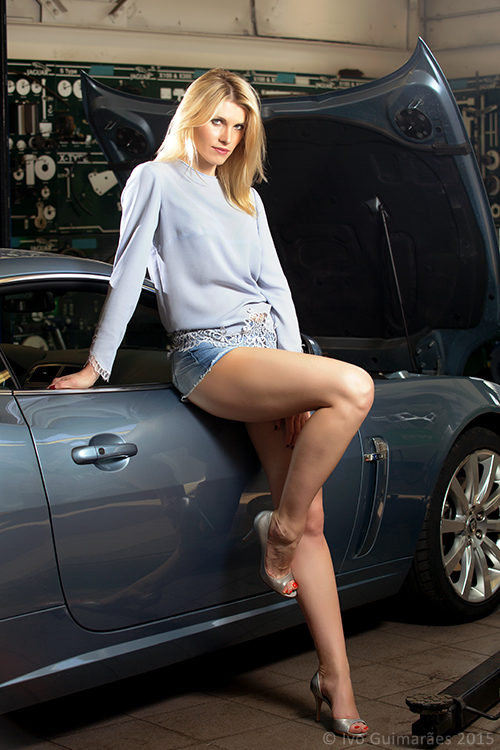
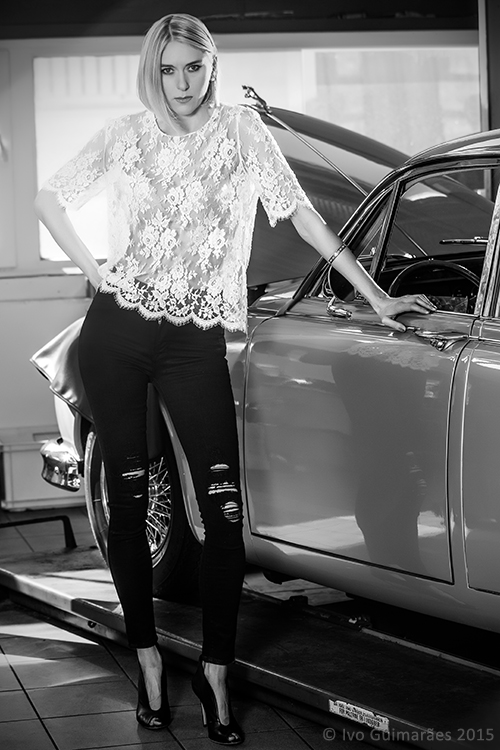
    The shooting session you are about to see was my first time trying out this setup, and it was all about getting familiar with the controls and trigger functions, which I found very intuitive and user-friendly. It took place in a high-end car stand with no prior scouting or production. So the idea was to get to the venue and work with what I had; two beautiful models, a great clothing collection, and a few exotic cars.

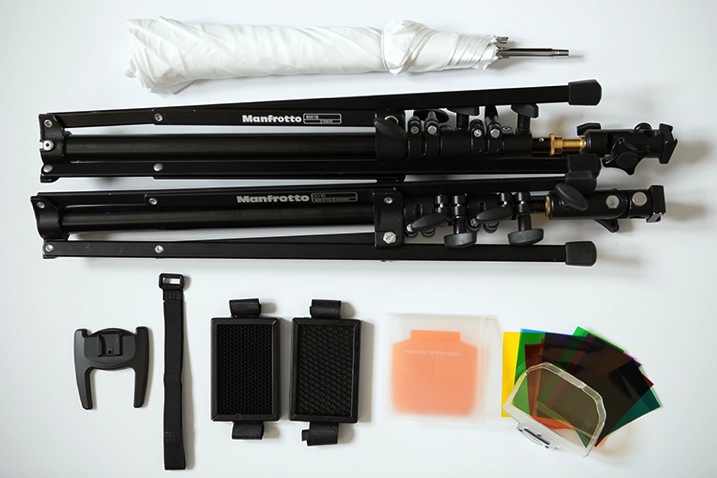
    All the images were made with simple light modifiers like shoot-through umbrellas, softboxes and snoot grids that are simple and fast to assemble, making the job a lot easier if you’re doing it alone. The light stands are the 001B by Manfrotto, which are ultra-compact, and support enough weight to use with speedlights and simple modifiers.

    I also carry around some gels for simple colour temperature correction, or for when I want to go crazy with colour and party like it’s the 90s all over again.

    03

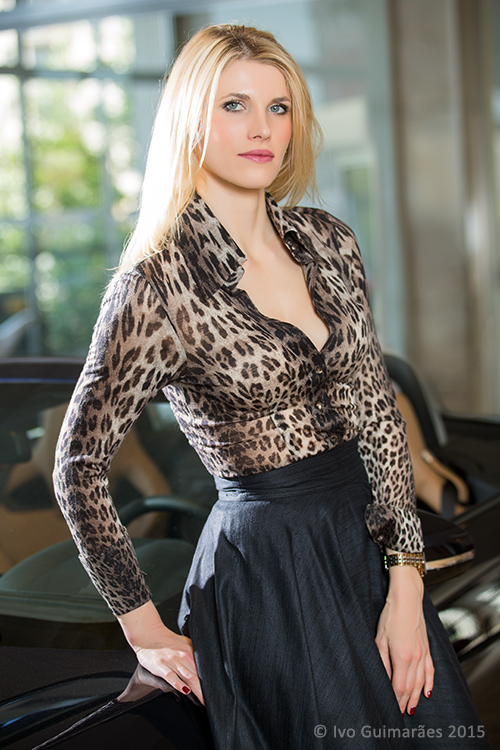
    This image is a good example of how you can achieve a high-end fashion look with this equipment and a simple two-light setup.

    04

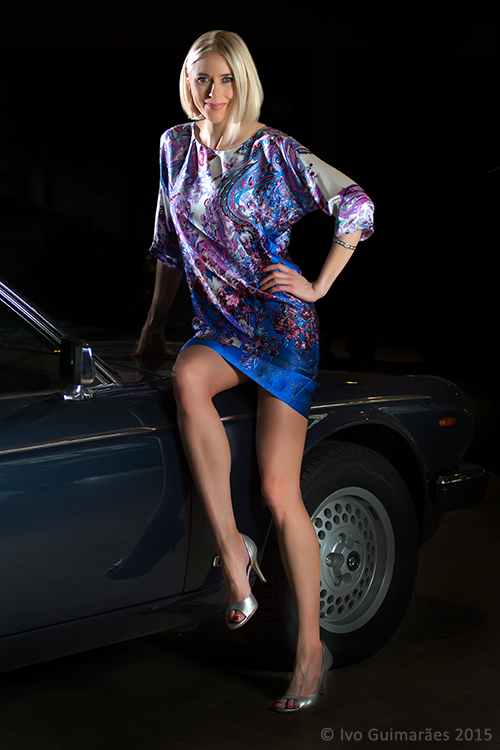
    The ambient light plays an important role in this image and it should always be the starting point. A quick reading with the camera light meter told me that the ambient light was – f/2.8, 1/125th at 100 ISO. So my flash power was set to complement that lighting without overpowering it; a main light with a shoot-through umbrella, and a hair light with a grid.

    A lighting ratio of 1:2 is usually a good proportion. The ability to control everything from a master transmitter on top of your camera is priceless, as it allows you to adjust things as you go, without having to constantly move and change settings in the units themselves. This is a great way to keep it simple and effective. When you have control of this basic setup, then you can start to play around with it. Change the light modifiers and add more light sources to fill out different areas in your image. Like the setup used in this second image where the light positioning is similar to the first, but I added a third flash to add a little more light to the background.

    05

    Besides power and ratio control, the next important thing is to control the direction of your light. One simple way to do that without a modifier is to use the internal zoom control in the flash. In these units it ranges from 20 to 200mm which enables you to control the angle the light is going to reach from a wider to a narrower beam.

    You can also use grids, or just make your own snoot or flag with some cardboard, or whatever you have with you that will do the trick. Usually I use black cinefoil which is completely malleable, and allows me to get the shape I want for greater light control.

    06

    This next image is all about grids, and critical light placement to keep the light focused on the model to allow for a dark background.

    07

    The trick here is the HSS (high-speed sync) function of these flashes which allows the use of shutter speeds higher than 1/200, freezing fast action movements and blocking the ambient light that would otherwise illuminate some of the background.

    The major drawback of off-camera lighting is, of course, the power output these units provide. Even with the powerful guide number of 197′ at ISO 100 and 200mm of the Canon 600EX-RT, which is probably the most powerful on the market in its range, it’s still not enough to compare to a studio strobe.

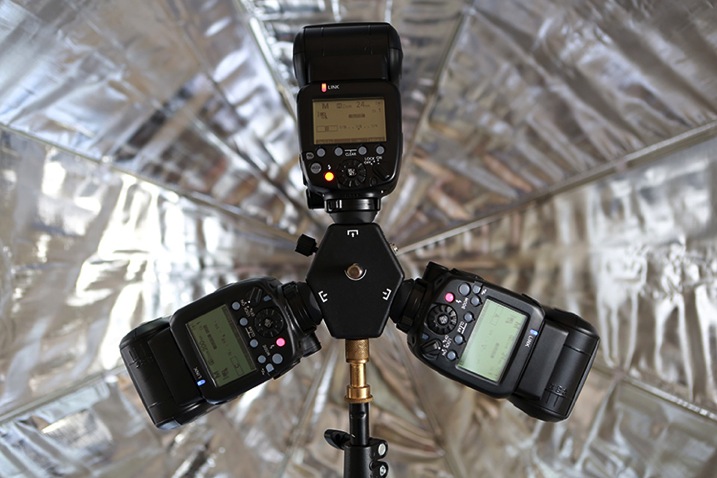
    But that doesn’t mean you can’t cheat. One easy way is to group flashes together and try to squeeze more juice out of them. I use a triple bracket inside a soft box to fake it, and get the look of a more powerful light source.

    08

    This way you can use different settings on your camera and make the light work your way, giving you more depth of field, for instance.

    09

    So, how close can you get to studio strobes with off-camera speedlights? Well, pretty darn close if you ask me, as long as you’re able to accept its limitations and just get the most out of it. How do you use your speedlights?

    googletag.cmd.push(function() {
    tablet_slots.push( googletag.defineSlot( “/1005424/_dPSv4_tab-all-article-bottom_(300×250)”, [300, 250], “pb-ad-78623” ).addService( googletag.pubads() ) ); } );

    googletag.cmd.push(function() {
    mobile_slots.push( googletag.defineSlot( “/1005424/_dPSv4_mob-all-article-bottom_(300×250)”, [300, 250], “pb-ad-78158” ).addService( googletag.pubads() ) ); } );

    The post Take Your Light With You – the Power of Speedlights by Ivo Guimaraes appeared first on Digital Photography School.


    Digital Photography School

  • Getting Organized: My Experience Using Google+ Photos

    Some time ago, I wrote a post covering different options for organizing and storing your photos. I did this as a first step toward getting my own photographic catalog in order. I decided to pull the trigger, so to speak, and give it a go. I decided to start out with Google+ Photo. I’m already pretty invested in the Google Continue Reading

    The post Getting Organized: My Experience Using Google+ Photos appeared first on Photodoto.


    Photodoto

  • 12 Steps to Becoming a Good Photographer

    The true key to growing as a photographer is to dedicate and immerse yourself in it on a consistent basis. Passion and enjoyment are key to becoming great at your craft.

    That beings said, there are many things to consider in order to progress through this journey as effectively as possible. If I were to start all over again, these are the stepping stones that I would have preferred to have taken, beginning with the technical and ending with the conceptual.
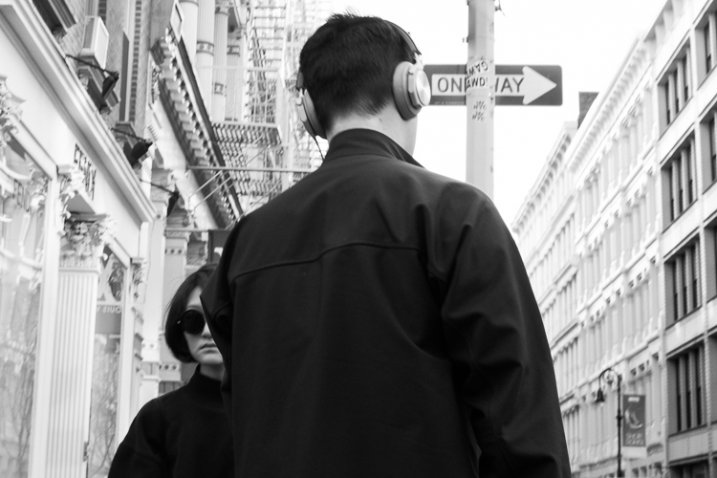
    SoHo, NYC.

    Part 1: Learning the Technical

    1. Look at Light

    When you start out in photography, it seems obvious to say that learning to use your camera is the logical first step. However, thinking this way can actually confuse you. The camera is just a tool that has the ability to record light.

    When you walk out the door to photograph, the first thing you should think about is light, and not the camera. What time of day is it? How strong is the light and what direction is it coming from? Is it sunny or cloudy? Is the light soft or contrasty? Is the sun in front of, or behind you? Where are the artificial light sources and what colors do they give off?

    This is the first thing that a seasoned photographer will look for every time they begin to shoot, and constantly be aware of while they are shooting. They do this for a reason. The light will affect how they shoot and the settings that they use. Even a slight change in direction to your light source can completely change how an image will look. You can’t learn how to use your camera correctly if you do not first understand the light.

    2. Learn Your Camera Settings
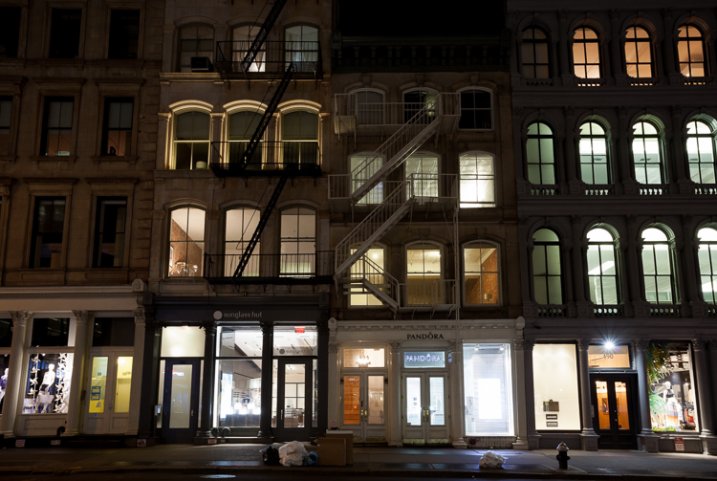
    SoHo at Night, NYC.

    SoHo at Night, NYC.

    Once you evaluate the light and environment, and figure out how you want the image to look, that is when you want to think about camera settings. For instance, do you want as much of the image as possible to be sharp, or do you want a lot of bokeh in the background? Do you want to zoom in and have a compressed look to the image or would you rather use a normal or wide angle lens? Do you want it to be a high-key shot, or on the darker side?

    That is when you change your settings to achieve the desired effect. It sounds like a lot of work just to take a single photo, and it is. However, if you start out shooting this way, eventually it will become second nature. It is just like learning a basketball shot or a golf swing. Doing it the correct way might feel unnatural and weird at first, but eventually it will come naturally and quickly, and you will be much better off for having spent time at the beginning to focus on it.

    Take your camera off Auto and experiment with either shutter priority, aperture priority, or manual mode. Some photographers take pride in shooting manual, and sometimes it makes sense to shoot that way, but manual is no better than shutter or aperture priority modes, and in many situations it can be a worse way to shoot. It all depends on the situation.

    Experiment with different zooms on your lens, with different apertures and shutter speeds, and experiment with different ISOs to see how the digital grain (noise) looks. Do not be afraid to raise your ISO when you do not have a tripod. Go back to look at your photos in Lightroom, zoom in to the details, and look at the settings to see how they altered the way your images look.

    3. Composition and Form
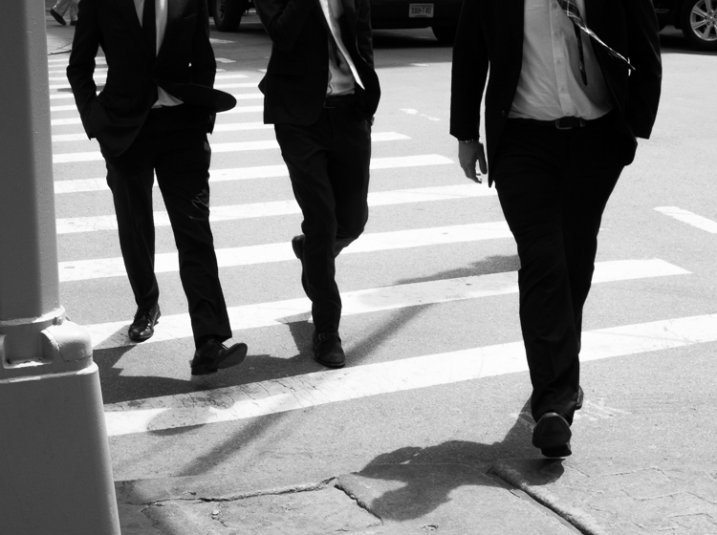
    Three Men, SoHo, NYC.

    Three Men, SoHo, NYC.

    Now is the time to think about composition. Some newer photographers tend to have a bad habit – they look up, see something interesting, then they photograph it quickly and move on. Yes, sometimes you’re on the move and this is the only way to shoot, but take some time to compose your image in the best possible way. The difference between a snapshot and a work of art is thought. If you see an interesting scene, you need to think about how to best capture it. Where is the best place to stand? Can I include other elements into the scene to create a more complex composition?

    I prefer to think about composition in this way – if I made a larger print, put it on my wall, and a friend came over and saw it for the first time, where would their eyes begin and how would they move through the image? How would it feel to them? Where are the lines in the image? What is the relationship of the main subject to the background? Is rule of thirds better here or is it better to center the main subject? Are there interesting shapes in the image? Do the edges of the image look good and keep the viewers eyes from moving out of the composition? Is there a foreground, middleground, and background in the image and does the image even need that?

    The difference between a decent image and a great image could be moving a foot to the left. This is another idea that can seem overwhelming at first, but will come to you more naturally the more you pay attention to it.

    4. Color
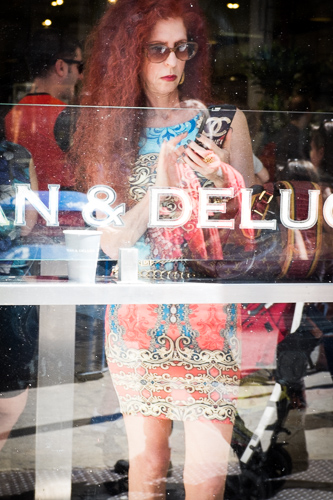
    Dean & Deluca, SoHo, NYC.

    Dean & Deluca, SoHo, NYC.

    Color (or lack there of) is a very important element of photography. Look at a color wheel and study how the colors work together. What do different colors represent? Do the colors add to the image or detract from it? I enjoy creating both black and white, and color images, and this is one of the first questions I think about when I am editing.

    What is the color quality of the light? Is it cool or warm, is there a color cast, and does that add or detract from the image?

    In addition to thinking about color while shooting, you will find yourself significantly improving your ability with color while you are editing. Play around with color temperature to see if you like an image warmer or cooler. Desaturate it, or add a little saturation, to see how it feels. How does changing the contrast affect the colors?

    For doing quality color work, make sure that you have a good monitor that has been recently color corrected. All your work will be for naught if your monitor shows colors that are different from the file and final print.

    5. Learn Lightroom

    Editing is vitally important to developing your vision and becoming a good photographer. I suggest using Lightroom, as it is the industry standard and it works well for so many photographers. Photograph in RAW to get the most flexibility and quality in your images and explore all of the RAW development settings. Try to recreate the looks of other photographers to get a feel for how their editing was done.

    Be diligent about organizing your archive. A little time spent each time you upload images will save you so much time in the future. Star your good images (Lightroom allows 1 through 5 stars) so they are easy to find, and create collections based on ideas that you grow over time. Viewing your work in this organized fashion will help you develop your skills much faster than if you have a messy archive.

    6. Print

    Maybe my views are rooted in the past and nobody is going to print in the future, but I do not feel like an image is truly complete until it has been printed and framed. That is the final step to all of this, and it is a great feeling to put an image on your wall.

    Photography Inspiration Corkboard

    36×48 inch Corkboard

    But there is another aspect to why you should print. It is one thing to see how your images look on a monitor, but it is a completely different experience to see them in their final, printed form. This will allow you to see how the light, the color, and your camera settings all affected the final image. You will learn a lot about how to shoot, from the art of printing. Try different papers, and view your prints under different lights.

    My favorite printer is the Epson 3880, but you do not need to do the printing yourself. Create a relationship with a local printer, or one of the reputable companies online, and have them made for you. If you do not print frequently, it can be much more affordable to have your prints made for you than making them yourself. But, don’t forget that doing the printing yourself can be very fun and satisfying, and it gives you the ability to make slight changes and see how they look right away.

    Try creating a photography corkboard. I have a 36×48 inch board next to my workstation and I swear by it. Fill it up with 5x7s and 4x6s and constantly change it. See how the images play off each other, which images last, and which you lose interest in. Use this as a playground for your prints.

    Part 2: Developing Your Photographic Voice and Style
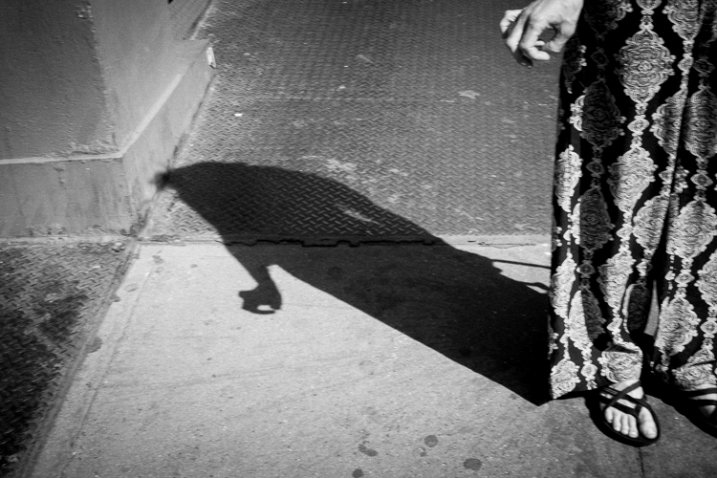
    Nerves, SoHo, NYC.

    Nerves, SoHo, NYC.

    Once you have gotten this far you are in a very good spot. Technically, you know what you are doing, your prints look beautiful, and they are well composed. But what’s next?

    The next step is to figure out how to take unique and interesting photographs. It is now time to spend more effort thinking about what it is that resonates with you in photography, and what makes an image stand out in your mind.

    7. Photograph!

    This is so simple, but it is the key to everything and needs to be said. So many people only take their cameras out on trips or vacations. They go to places that are specifically for photographing, such as mountain ranges, zoos, gardens, safaris, cute towns, or cities with great architecture. While this is great to do, push yourself further than that. Take some photographs during the course of your everyday life. Even use a cellphone when you are unable to take your main camera with you.

    The best photographers can take great photographs in the most ordinary of places. Practice this. Go out, anywhere, or specifically go out to someplace that you think will be terrible for photography, and figure out how to take an interesting photograph there. This practice will help you so much in your development. You can understand light and camera settings cold, but if you are not out photographing in a variety of situations on a somewhat consistent basis, then you are selling yourself short as a photographer.

    8. Galleries, Photo Books, and Reading
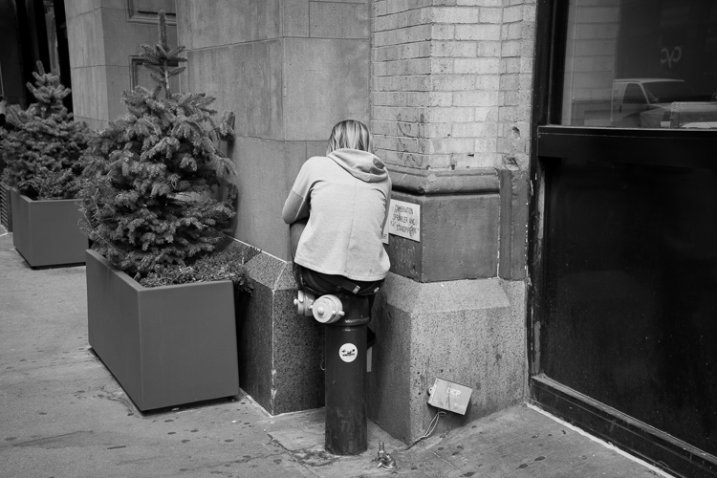
    Disconnected, NYC.

    Disconnected, NYC.

    One of the best ways to develop your own voice and style is to look at the work of others. Go to galleries, purchase photography books, and study the images of great photographers. The internet is a great place to view photography, but it is so easy to get lost. Galleries and books are curated for a reason. Study the images, think about how they were done, and figure out the context behind them. Sometimes images will hit you whether or not you know the context behind them, but other times it can be important to learn about the photographer and the history that are behind the image. This will add another layer to your appreciation.

    Try out the different styles of photographers that you like. Try to shoot like them to learn how they did it and why. Pick and choose your favorite elements from different photographers and merge them to create your own style.

    Purchase some prints. I’ve heard this a few too many times (sorry for the gender stereotyping) but it’s usually a wife saying something to me like, “I’d love to get this for our wall, but if my husband sees me buying the work of another photographer, he’ll kill me!” The average home has a lot of walls; enough for many artists.

    Yes, there is something satisfying about seeing an image, then going and figuring out how to create it for yourself, but it is really important to appreciate the works of others. Buy prints from other photographers to display along with books. Immerse yourself in the works of others to create your own inspiration.

    Finally, one of my favorite ways to gain inspiration is to read about things unrelated to photography. Learn about where and what you are shooting. Read poetry, read current events, read anything. This practice is about growing your voice outside of photography; the two are related.
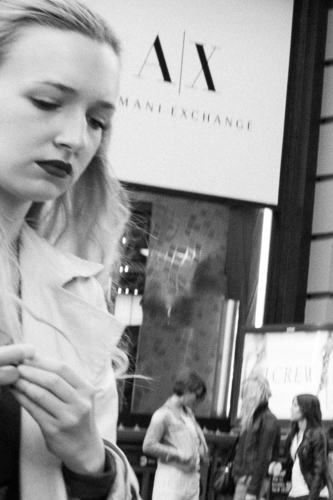
    Nerves, SoHo, NYC.

    Nerves, SoHo, NYC.

    9. Keep Coming Back

    Pick an area or a subject and immerse yourself in it. Go back to the same place at different times, in different light, and keep photographing it. This is very important for your growth since it will allow you to learn the area or subject like the back of your hand. Your images will take on more depth. There are photographers who have spent 40 years photographing in the same area.

    10. Curate a small group of photographers and friends to show your work

    The internet is an amazing place for sharing your work and learning about photography. However, it is also a very impersonal place. Everyone sees thousands of images a day from hundreds of people. While it’s definitely possible, it can be tough to get a proper critique and evaluation of your work over the internet.

    Find a few people and put together a group to show physical images to every once in awhile. You ultimately want to shoot for yourself, but seeing how others relate to your images is important for your growth. The more they get used to your work and your style, the better comments and thoughts they will have for you.

    These people do not have to be photographers. They can be friends, creatives, even significant others. A good tough critique from your partner can be very valuable. It can sometimes be tough to hear at first, but figure out how they really feel about an image. Your partner will know you well enough to be honest and not hold back, and that will be good for you to hear. Figure out what they like, and what they don’t like.

    11. Put together an edit of similar images

    One of the most beautiful aspects of Lightroom is that it allows you to create collections of images outside of your normal file structure. Start to group and sequence your images that relate to each other. Begin to turn them into a project. You can see how the images in this post relate to each other. This was done over time, not all at once. You can, and should, think about projects from the very beginning and go out to photograph them, but often projects and ideas will come about naturally during the process of daily shooting.

    Doing this will help you notice these moments when photographing in the future and over time you will develop ideas organically into beautiful projects.

    12. Develop a voice in your photography
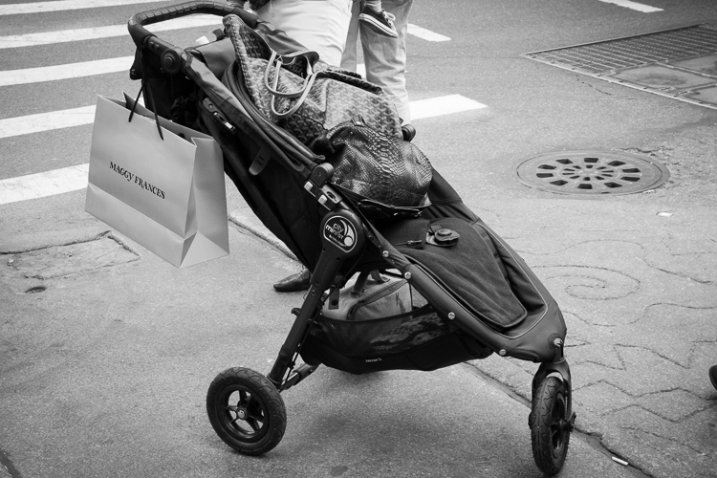
    Stroller, SoHo, NYC.

    Stroller, SoHo, NYC.

    If you have done the rest of these steps, your voice and style will develop organically over time. Think about it, and pay attention to it as you progress, but do not force it. Let it come to you over time. You can learn to use your camera quickly, but you cannot become a good photographer overnight. Take your time and try to improve a little bit each day and you will make huge strides over the course of a few years.

    Have you followed these steps? Do you have any others you’d add as part of the learning and growth process? Please share in the comments below.

    googletag.cmd.push(function() {
    tablet_slots.push( googletag.defineSlot( “/1005424/_dPSv4_tab-all-article-bottom_(300×250)”, [300, 250], “pb-ad-78623” ).addService( googletag.pubads() ) ); } );

    googletag.cmd.push(function() {
    mobile_slots.push( googletag.defineSlot( “/1005424/_dPSv4_mob-all-article-bottom_(300×250)”, [300, 250], “pb-ad-78158” ).addService( googletag.pubads() ) ); } );

    The post 12 Steps to Becoming a Good Photographer by James Maher appeared first on Digital Photography School.


    Digital Photography School
  • Step by Step Using Merge to Panorama in Lightroom

    Do you ever find yourself struggling to include everything you want to capture in a single frame? Well then, panoramic photography might be exactly what you need to solve this problem. With the new release of Lightroom 6, Adobe has made it possible to take multiple single frames of a panorama and stitch them seamlessly together with a few clicks of the mouse.

    trap-falls-pano-2

    Before we dive into the post production aspect of making a panoramic photograph, let’s take a step back and make sure you have a basic understanding of what you’ll need to capture in order to create an panoramic photograph.

    Panoramic Photography 101

    A quick guide to capturing suitable images

    You’ll need at least two different frames to stitch together to create your panorama, but three to five will give you more to work with, and allow for a much richer image. When capturing these frames make sure to overlap each frame by about 30% or so to allow enough information for the algorithms to match each image with its neighbor.

    A few other quick pointers to make it as simple as possible for yourself when you get back to the computer include:

    • Use a tripod to line up each shot.
    • Manually set your white balance, ISO, aperture and shutter speed as consistency between each frame is extremely important.
    • Make sure your area of focus remains consistent throughout the series of shots. Use back button focus, or autofocus and then switch to manual to lock it.

    Of course, that was only a quick taste of what it takes to capture images for a panorama. For more on the subject of capturing the images read these two great dPS guides:

    • How to shoot panoramas
    • Getting started in panoramic photography

    Panoramic Photography with Lightroom 6

    Once you’ve captured a set of images for a panoramic photograph, and imported them into your Lightroom library, Adobe makes creating the panoramic photograph about as easy as: select, click, done. Let’s walk through the process.

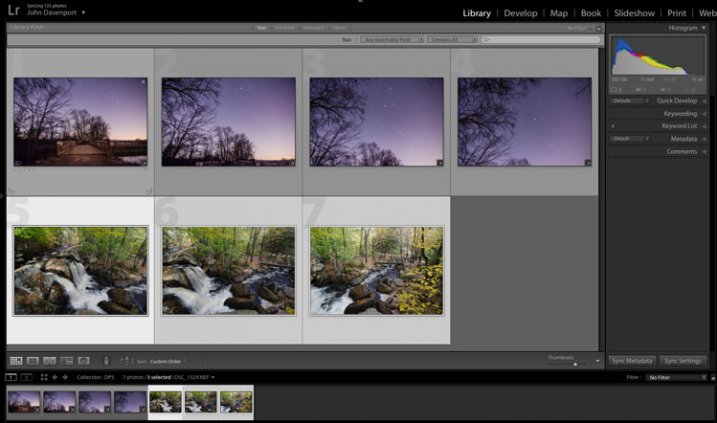
    Step #1 – Select the images you want to merge

    panoramic photography

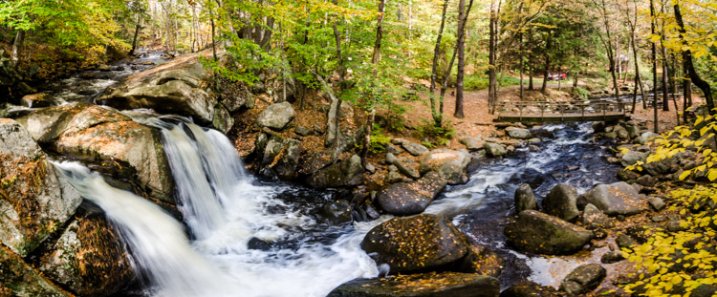
    Here I’ve selected the three separate frames that make up the panorama attached at the top of this article. It doesn’t matter if you’re in the Develop module or the Library as you’ll be able to create the panoramic image from either place.

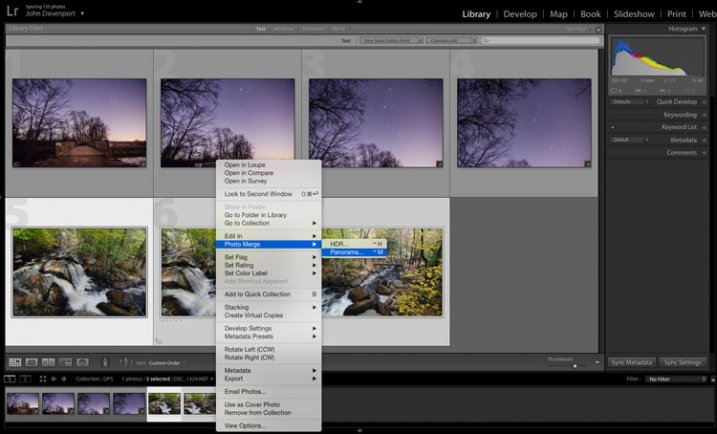
    Step #2: Right click and select Photo Merge > Panorama

    panoramic photography

    Yep! It’s really that simple!

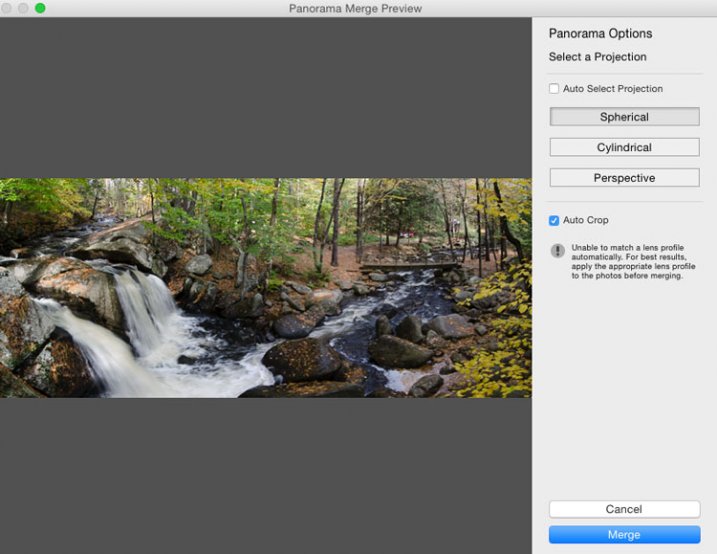
    Once you’ve selected Panorama you’ll be brought into a new window called the Panorama Merge Preview. There you’ll be able to see what the resulting panoramic photograph will look like, and you’ll have a few options for customizing it.

    panoramic photography

    The settings here are not exactly self explanatory, and Lightroom doesn’t really provide any popup hints to help you out – so here’s the basic rundown of these options.

    You have three options to choose from as to how you want your image to be projected as a panorama: Spherical, Cylindrical, and Perspective. This setting will determine how Lightroom merges the single frames together to control the distortion of the image.

    Spherical – Great for wide panoramas and essentially transforms your selected images as if they were placed on the inside of a sphere.

    Cylindrical – Similar to the spherical algorithm except that you’re images are now placed on the inside of a cylinder. In this case the vertical lines will remain straight.

    Perspective – Great for architectural photography as it will try to keep all straight lines straight, however, wide panoramas may experience excessive distortion.

    By selecting Auto Set Projection you can take the guess work out of this process by allowing Lightroom to pick the best option for you based on the images you’ve selected. In my experience Lightroom usually does a good job at choosing.

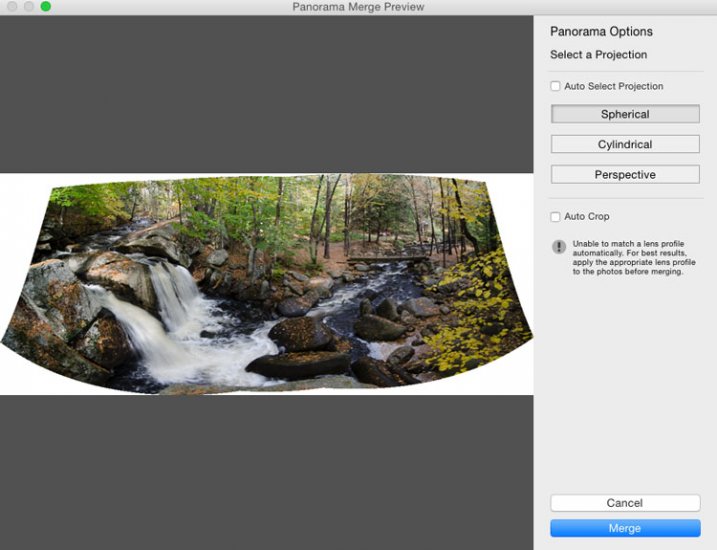
    Finally, inside of the preview window you have the option to tell Lightroom to automatically crop the image. If left unchecked this is how the waterfall image above would have looked.

    panoramic photography

    However, even if you leave the Auto Crop box checked, using the crop tool once you’re back inside Lightroom will allow you to get back the uncropped image should you want to change anything at a later time.

    Step #3 – Final Touches

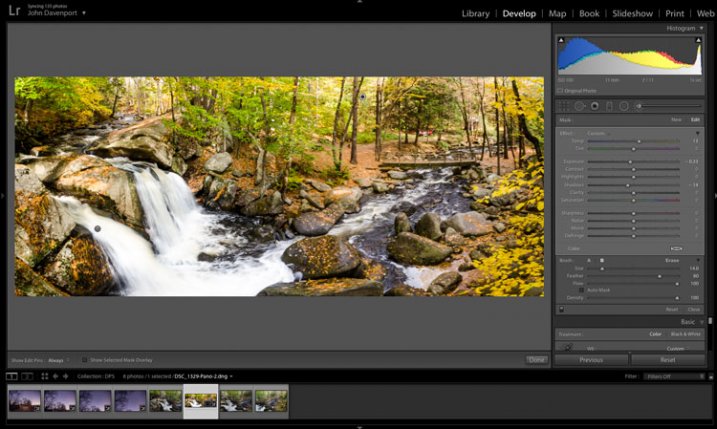
    Once you’re done merging your image it will be brought back into Lightroom, ready for you to finalize as you desire. Here I’ve just made a few small tweaks to bring out the colors and brighten the image up a bit.

    panoramic photography

    Another example – if you prefer video

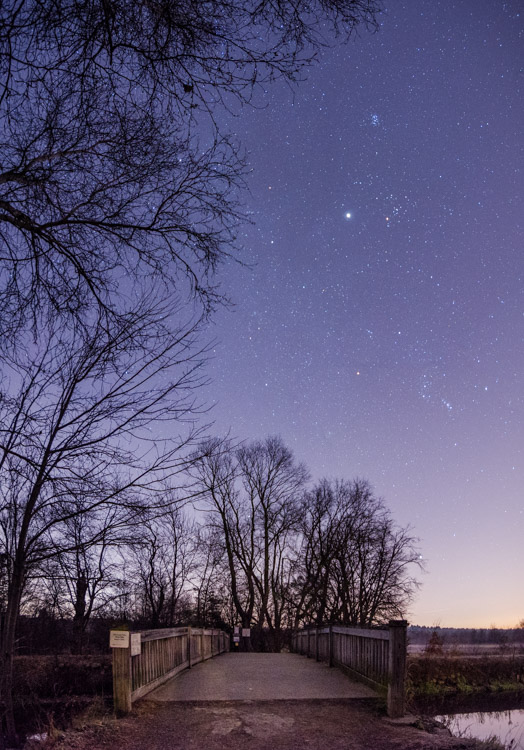
    Don’t forget that you can also use Lightroom to create panoramic images of a vertical scene as I’ve done here with this photograph below.

    panoramic photography

    Because everyone learns differently I’ve also created a simple video walkthrough of the process explained above, using this photograph to demonstrate the process click for click. Watch it below.

    See more of Lightroom 6’s new features here.

    googletag.cmd.push(function() {
    tablet_slots.push( googletag.defineSlot( “/1005424/_dPSv4_tab-all-article-bottom_(300×250)”, [300, 250], “pb-ad-78623” ).addService( googletag.pubads() ) ); } );

    googletag.cmd.push(function() {
    mobile_slots.push( googletag.defineSlot( “/1005424/_dPSv4_mob-all-article-bottom_(300×250)”, [300, 250], “pb-ad-78158” ).addService( googletag.pubads() ) ); } );

    The post Step by Step Using Merge to Panorama in Lightroom by John Davenport appeared first on Digital Photography School.


    Digital Photography School
  • Lighting 101: 4 Basic Lighting Looks

    I recently came across a proof book that I had shot wayyyy back in the dinosaur ages, when people used a thing called film, and photography was about your skill with a camera, not skill with your computer….but that’s a topic for another day. Anyway, in those days, I was all about people’s expressions, and not lighting at all, which Continue Reading

    The post Lighting 101: 4 Basic Lighting Looks appeared first on Photodoto.


    Photodoto

  • 3 Tips for Avoiding Blurry Photos of Kids

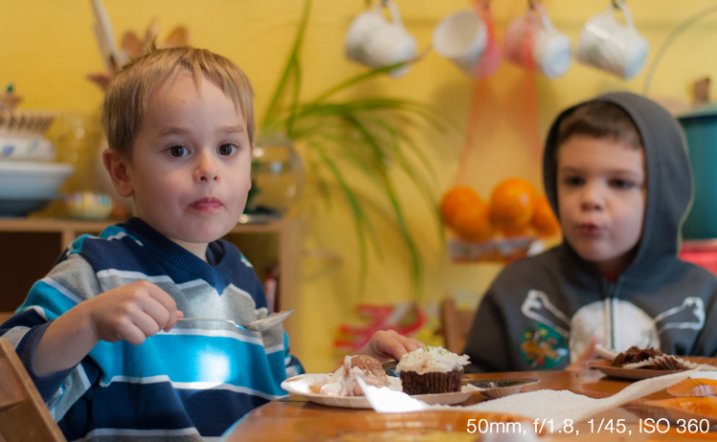
    One of the best things about kids is also one of the most frustrating when it comes to photographing them; they are so full of life and energy they rarely sit still, which can lead to an abundance of blurry pictures and heavy sighs when you go back to review your images. Instead of smiling faces and cute outfits, you often end up with a memory card full of photos where their cute little faces are a mishmash of fuzzy pixels, and any details in their hair or clothes are hopelessly lost. This is a chronic problem with photos of kids from smartphones, but it’s all too common in pictures taken with more expensive DSLRs too.

    One solution is to simply use the flash on your camera, but this has the unfortunate side effect of creating harsh shadows, poorly-lit backgrounds, and ghostly red-eye effects that have to be fixed on your computer. To get the types of photos of kids you’ve always wanted it’s important to know a bit about shutter speed, and look at some of the ways you can harness the controls of your camera .

    kid-dinner-table-eating

    Understanding Shutter Speed

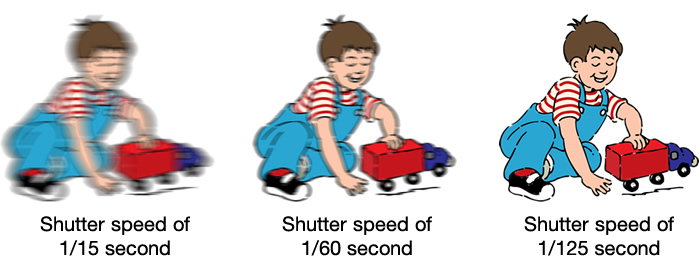
    The underlying problem of blurry kid pictures usually stems from your camera’s shutter speed; kids move quickly so a fast shutter is usually required to snap clear pictures. This is fine if you have plenty of light, but as soon as the sun goes down, or you find yourself indoors, your camera’s shutter slows way down in order to let in enough light for exposing – too slow for non-blurry photos of fast-moving children.

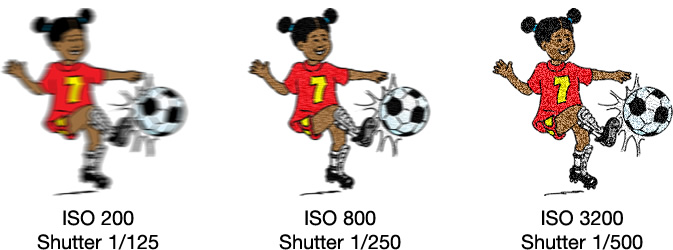
    A faster shutter will result in sharper photos with less motion blur.

    A faster shutter speed will result in sharper photos with less motion blur.

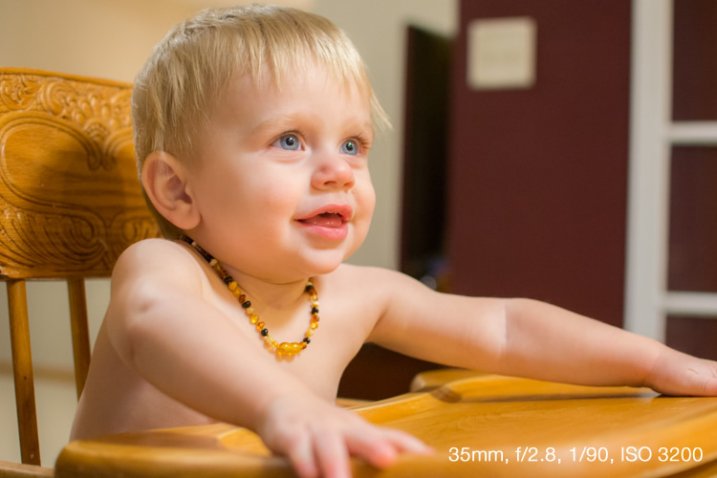
    Unfortunately the solution is not always as easy as increasing your shutter speed, as this can lead to pictures that are underexposed if there is not enough light available. This is why your camera will often opt to use the flash if you are shooting in low-light situations on Automatic mode. Rather than decreasing the shutter speed your camera simply creates its own artificial light. If you’re using a kit lens with a focal length between 18-55mm a shutter speed of 1/90 is probably sufficient to capture blur-free images of little ones, though the exact value will change depending on the focal length of your specific lens and how fast the kids are moving. As a general rule I don’t use shutter speeds slower than 1/90 second when taking pictures of kids with my 35mm lens, but that usually means I have to compensate for low light in a few other ways. Here’s a few tips to help:

    #1 Increase the ISO

    There are three primary ways to control the amount of light that enters your camera:
    • Aperture: Increase size of the opening in your lens so more light can pass through it.
    • Shutter speed: Open the shutter for a longer period of time.
    • ISO: Make the piece of digital film (sensor) in your camera more sensitive to light.
    The first method is limited by the physics of your lens. Most basic kit lenses simply don’t have large enough openings, or apertures, to let in much light (unless there is a great deal of light already available i.e. outside during the daytime or in a brightly lit room). The second method is easy if your subjects are not moving. You can leave the shutter open for many seconds at a time and get a non-blurry shot if everything is standing still, but that rarely happens with little kids. The third method, raising the ISO, was not a viable solution until recent years when camera technology advanced to the point that you could greatly increase the sensitivity of your sensor without a massive loss in overall image quality. Camera sensors are now so good that you can use faster shutter speeds to get blur-free shots of kids (even if your lens does not have a wide aperture) simply by raising the ISO.

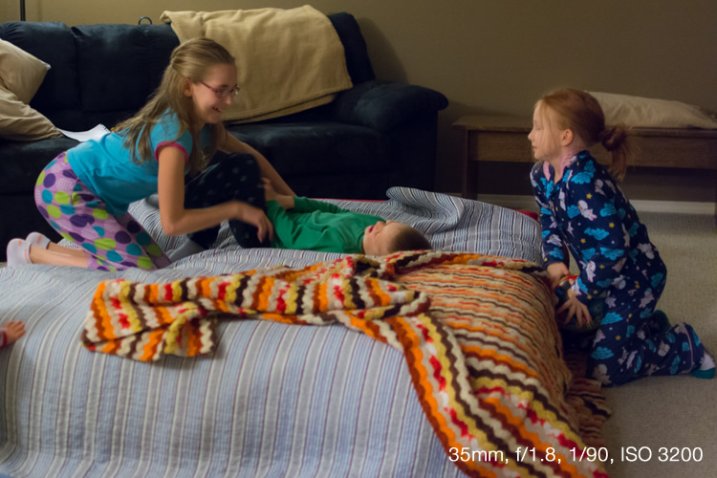
    Shooting at ISO 3200 allowed me to get pictures of my nieces' pajama party without using the flash.

    Shooting at ISO 3200 allowed me to get pictures of my nieces’ pajama party without using the flash.

    Until a few years ago most DSLR cameras were fine at ISO settings of 400, 800, or even 1600. Beyond that, photos started getting quite noisy and grainy, almost as though they were coated with a fine layer of colored sand. Now even basic consumer cameras like the Canon Rebel T4i or Nikon D3300 can go all the way up to ISO 6400 without too much detriment to their overall picture quality. Granted an ISO 6400 picture is never going to be as clean and sharp as one taken at ISO 100 or 200, but ISO 6400 essentially allows your camera to capture 64 times more light than ISO 100 (equal to 6 stops more). This means an image that would normally require a shutter speed of 1/15 second at ISO 100 could be taken with a shutter speed of 1/1000 second at ISO 6400 – a massive benefit if your goal is to capture pictures that are not blurry.

    Shooting at higher ISO values means your photos will have a bit more noise and grain, but you will be able to use much faster shutter speeds. It's up to you whether the tradeoff is worth it, but for me it usually is.

    Shooting at higher ISO values means your photos will have a bit more noise and grain, but you will be able to use much faster shutter speeds. It’s up to you whether the trade-off is worth it, but for me it usually is.

    One caveat to this technique is you simply cannot do it in Automatic mode. If you don’t feel quite confident to start shooting in Manual, try using the Program Automatic mode instead. Rotate your camera’s command dial to the P setting, then you are free to change the ISO while your camera figures out an appropriate shutter speed and aperture. The more you practice, the more you will get the hang of it, and start feeling comfortable with your particular camera’s capabilities at higher ISO values.

    #2 Use a large aperture

    I mentioned in the previous section that a wider aperture is one way to let in more light, and the best way to do this is with a prime lens. These lenses do not zoom in and out like the kit lens most cameras come with, but the trade-off is their extraordinarily large apertures – big enough to let in tons of light even at dusk, or in a dimly-lit room.

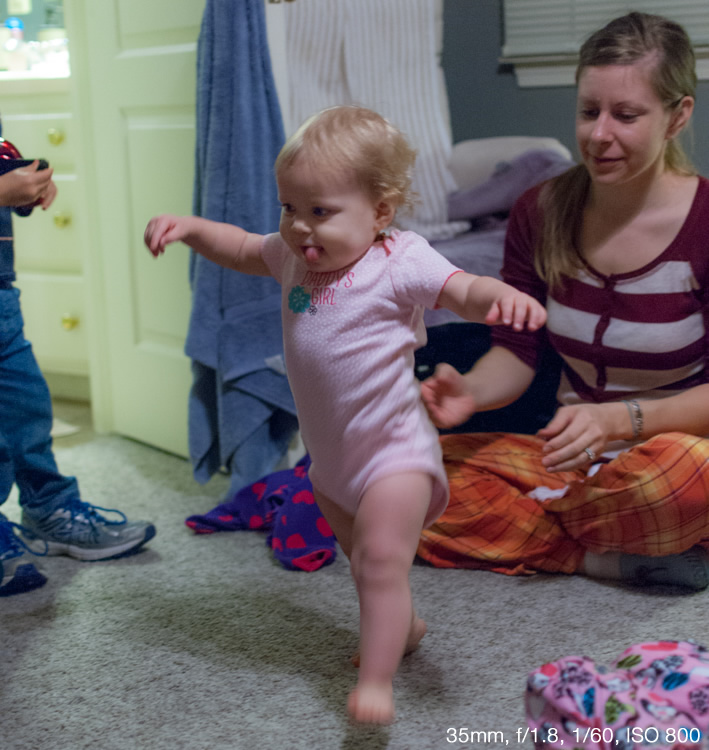
    Shooting at an ultra-wide aperture of f/1.8 allowed me to get a picture of this girl taking her first steps. Using the flash would have resulted in washed-out colors and would have been quite a distraction for the little girl.

    Shooting at an ultra-wide aperture of f/1.8 allowed me to get a picture of this girl taking her first steps. Using the flash would have resulted in washed-out colors and would have been quite a distraction for the little girl.

    If you don’t have a prime lens you can still use wider apertures, but you will likely have to raise your ISO a bit more as well. Most kit lenses have apertures of roughly f/3.5 when zoomed out all the way and f/5.6 when zoomed in, which might not sound like much but it’s actually a massive difference (f/5.6 to f/2 is three stops or 8x less light so it is quite significant – in the example above it would mean shooting at 1/4 second or 6400 ISO instead). This just means you will have to move around a bit more to position yourself closer to the kids instead of standing across the room and using the telephoto end of your lens.

    If you’re not entirely comfortable dealing with apertures and f-stops just yet, try using your camera in Shutter Priority (S or Tv) mode with auto-ISO. This lets you set the shutter speed while your camera figures out the best combination of aperture and ISO. As I said earlier, when taking pictures of kids with my 35mm prime lens I like to use a shutter speed of 1/90 second and faster, like 1/125 or 1/250, if they’re running around or jumping on furniture. The shutter speed you use will be different depending on your camera and the focal length you are using on your lens, but when you shoot in S/Tv mode with auto-ISO your camera will generally default to using the widest possible aperture and then start raising the ISO to get a good exposure. In other words, you are telling your camera “I want a fast shutter and no flash, so it’s up to you to figure out the biggest aperture and highest ISO to make this happen.” It doesn’t always work, but it’s certainly a good technique to try if you want clearer pictures of children.

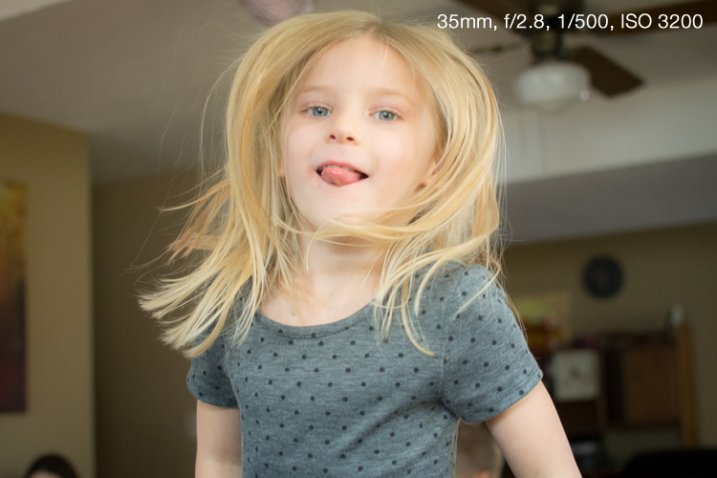
    The only way to get a non-blurry picture of this girl jumping on her trampoline was to use both a wide aperture and fast shutter.

    The only way to get a non-blurry picture of this girl jumping on her trampoline was to use both a wide aperture and fast shutter.

    This might sound a little counter-intuitive, but if you shoot in Aperture Priority (A or Av) mode, you can tell your camera to use a large aperture but in order to get a good exposure it will usually give you a slower shutter speed. By contrast, shooting in Shutter Priority will force your camera to use the widest possible aperture every single time in order to get a good exposure at the shutter speed you set. (Unless of course there is already plenty of light available in which case it might select a smaller aperture, but you would still get the non-blurry photo you want.)

    #3 Make better use of light

    One of the best sources of light is available for free all day long right in the sky above you. However, while the sun is certainly the brightest light, it is also the least controllable. This means you have to find ways of making use of the light it does provide, which usually is a simple matter of repositioning yourself or your subjects. When working with adults this is fairly easy, but kids are another matter; they rarely go right where you want, and if they do they are not likely to stay there for long. If you’re the kind of person who likes to take pictures while resting comfortably on a couch you might find yourself with plenty of blurry, or excessively dark or light photos, as a result. If you get up and start roaming about the room you can not only get a better vantage point from which to take your pictures, but find ways of making much better use of the sunlight that is likely to be streaming in through the windows.

    Sunlight was pouring in through a window just to the right of this photo, so I quickly found a location that took advantage of such a large amount of available light.

    Sunlight was pouring in through a window just to the right of this photo, so I quickly found a location that took advantage of such a large amount of available light.

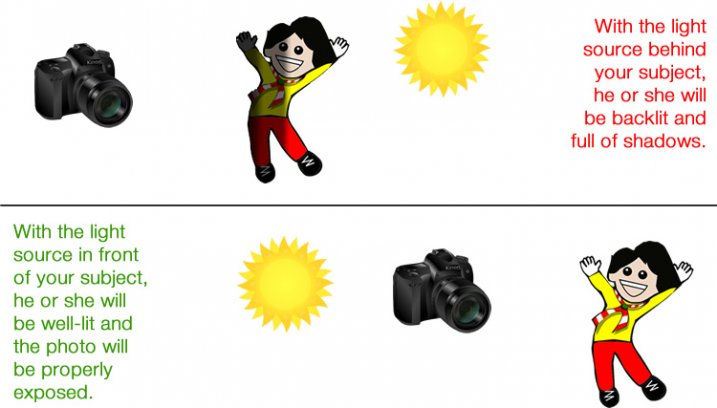
    This technique works great even if you don’t have a fancy DSLR or other such expensive camera. I often see pictures of kids posted to social networks that are blurry because the shutter speed was too slow to capture the action, even though there is plenty of sun or other light available. The trick is to learn how to reposition yourself such that your subject is in front of you and the main source of light is behind you. This will help make sure your subjects (whether they are kids, adults, pets, plants, or anything else) are properly lit, while also giving you enough light to use faster shutter speeds.

    light-sources


    This takes a bit of time to adapt to because you may be used to staying relatively still while kids run around and play. Once you start getting up, moving around, and learning to harness the available light instead of using the flash, you will see a dramatic improvement and far fewer blurry photos, even if you are using an iPhone or an inexpensive point-and-shoot camera.

    Do you like taking pics of children? What are some of your favorite techniques for getting photos that are sharp, in focus, and not blurry? Leave your thoughts in the comments below.

    googletag.cmd.push(function() {
    tablet_slots.push( googletag.defineSlot( “/1005424/_dPSv4_tab-all-article-bottom_(300×250)”, [300, 250], “pb-ad-78623” ).addService( googletag.pubads() ) ); } );

    googletag.cmd.push(function() {
    mobile_slots.push( googletag.defineSlot( “/1005424/_dPSv4_mob-all-article-bottom_(300×250)”, [300, 250], “pb-ad-78158” ).addService( googletag.pubads() ) ); } );

    The post 3 Tips for Avoiding Blurry Photos of Kids by Simon Ringsmuth appeared first on Digital Photography School.


    Digital Photography School