Category: Photography

  • 7 Tips for Using the Gestalt Theory for Better Composition

    Andrew’s newest ebook Mastering Composition is now on special for a limited time only at Snapndeals.

    Gestalt theory and composition

    Gestalt theory evolved in the 1920’s to explain some of the ways in which people perceive the world around them. The basic idea is that, when faced with a visually chaotic scene, the human mind simplifies it into more recognizable patterns and shapes.

    Gestalt theory provides an insight into the pattern recognition process that occurs when people look at photographs. Once you understand the principles of gestalt theory, you can use them to improve the composition of your photos.

    These are some of the useful aspects of the gestalt theory.

    1. Proximity

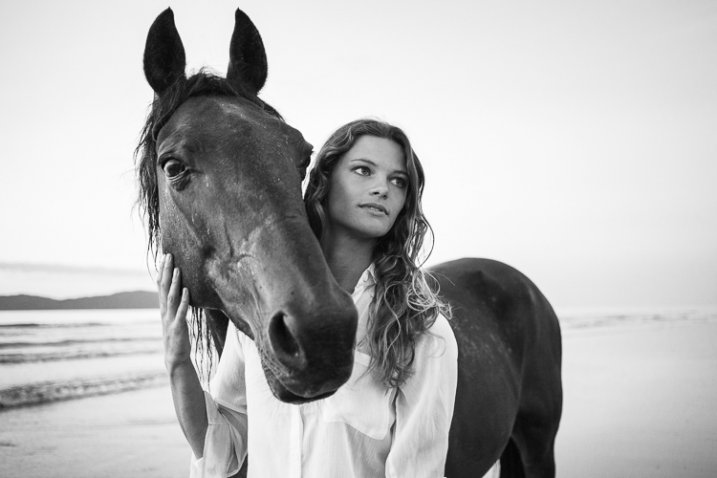
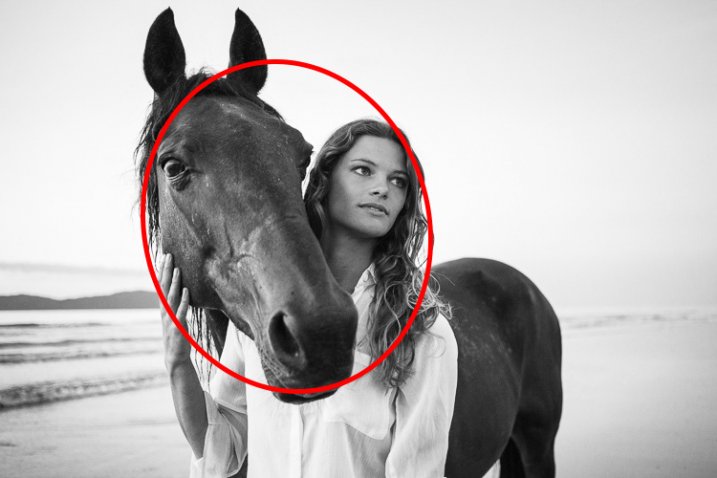
    A pair or group of objects that are close to each other are more likely to be perceived as belonging together than if they are far apart.

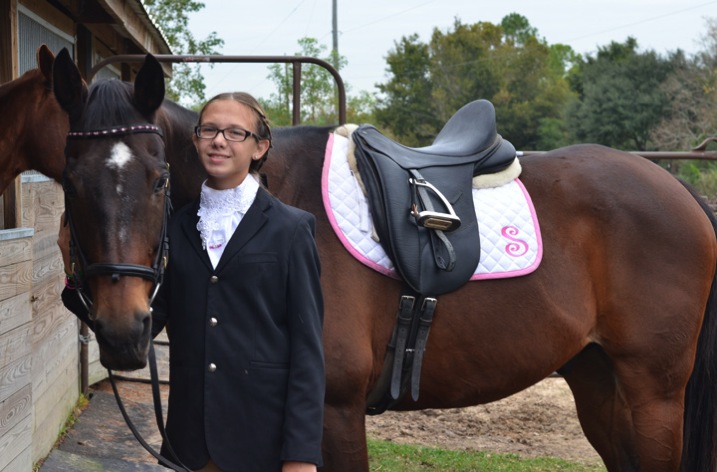
    In this portrait, the proximity of the girl and horse suggest a close relationship between them. If closeness is what you want to show, it would be far less effective to position them with their heads further apart.

    Gestalt theory and composition

    Gestalt theory and composition

    2. Similarity

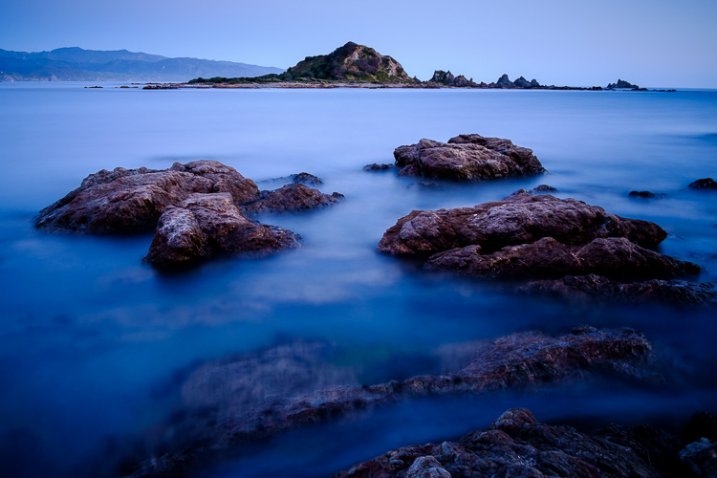
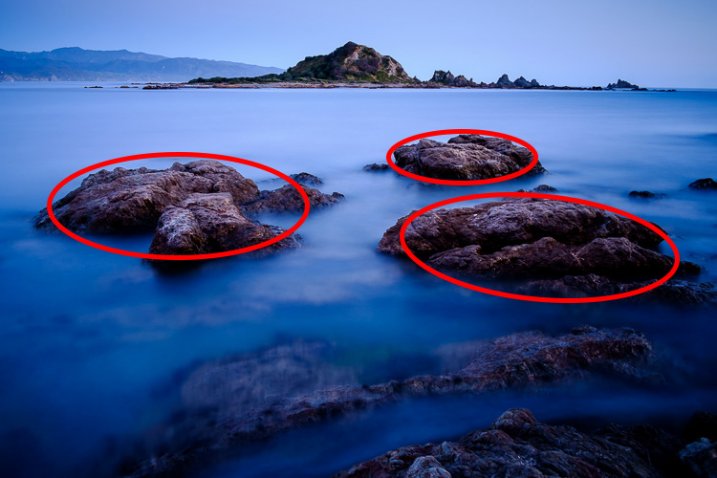
    Objects that are similar in shape, size or colour are seen as belonging together.

    In this landscape photo, the three rocks in the middle distance are linked by proximity (the previous point) and by their similarity in texture, colour and shape.

    Gestalt theory and composition

    Gestalt theory and composition

    3. Closure

    The mind completes shapes that don’t exist. This is a principle used in some optical illusions but it also applies to photography. Part of the skill of composition is learning to recognize shapes, and building the design of the image around them. The principle of closure helps you see shapes in the subject.

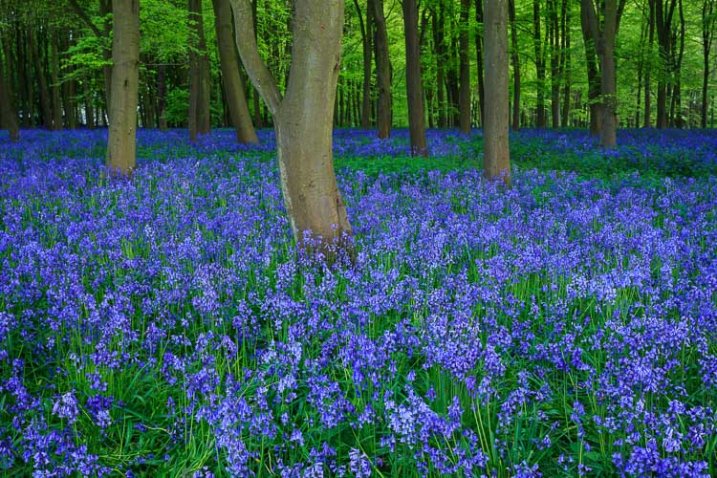
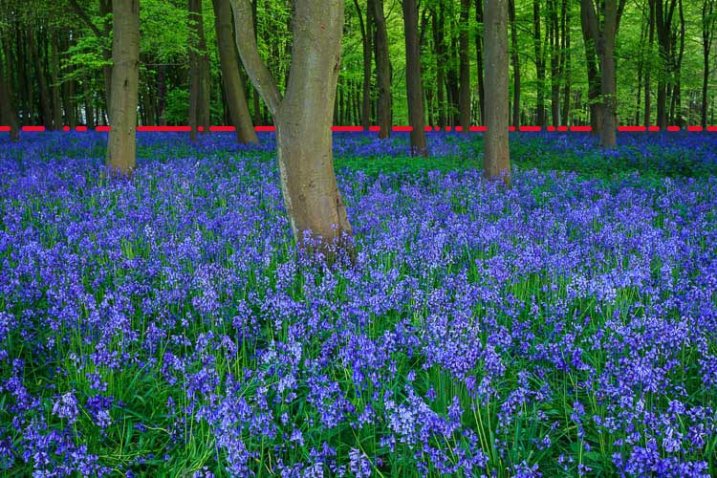
    For example, take a look at the landscape below. The bluebells form a solid block of colour in the lower two-thirds of the photo, with a strong horizontal line along the top. The line is interrupted by the trees passing through it, yet we still perceive it is a continuous straight line. The mind automatically fills in the gaps.

    Gestalt theory and composition

    Gestalt theory and composition

    4. Simplicity

    The mind perceives parallel lines that are close together as a single line.

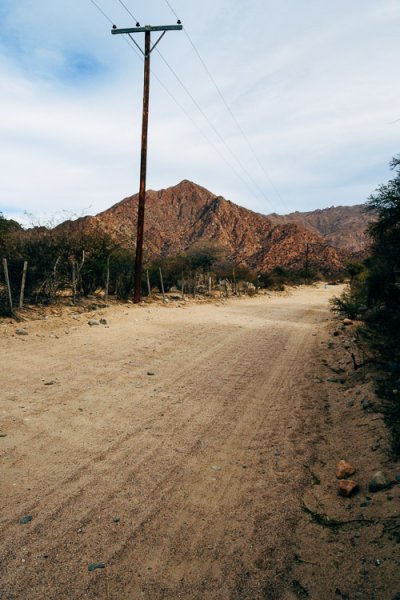
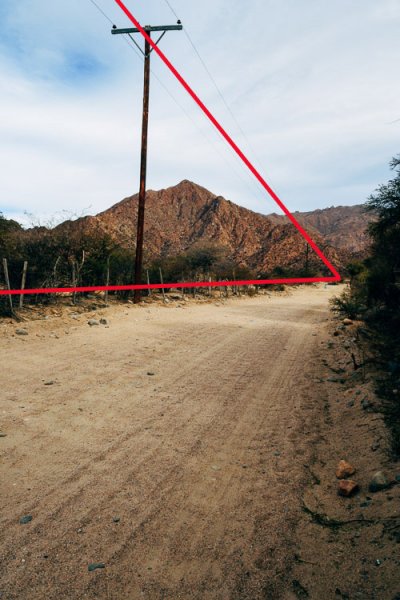
    The landscape photo below contains several lines, all leading towards a vanishing point on the horizon. The lines that are close together, like the cables dangling from the telegraph pole, are simplified by the mind which sees them as a single line.

    It’s the same with the fence. This set of short, vertical lines is simplified into a long, diagonal line that follows the side of the road.

    Gestalt theory and composition

    gestalt-theory-composition-5a

    5. Continuation

    The mind assumes that lines extend beyond the edges of the frame. In the landscape photo above this principle helps create a sense of depth (along with the use of a wide-angle lens) as the mind believes that the road continues beyond its vanishing point.

    6. Segregation

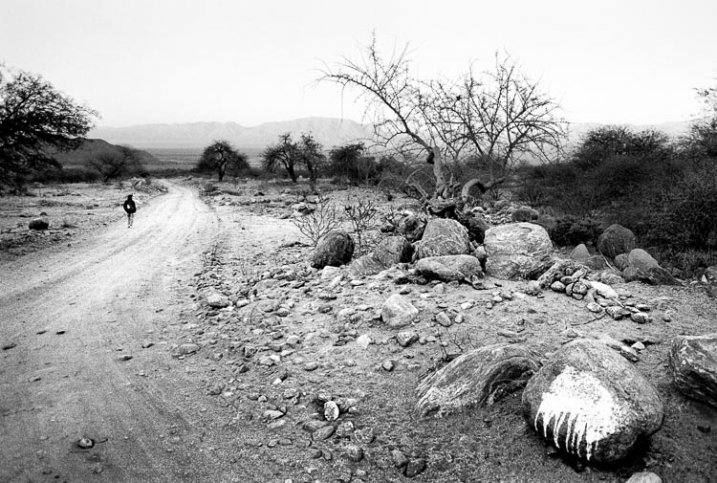
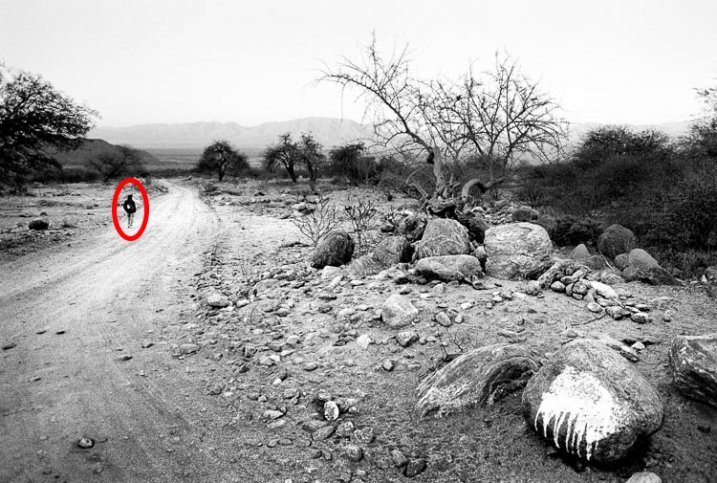
    For human figures to be recognizable they must stand out from the background. That way we can identify them easily even if they’re small in the frame. This is a useful principle because you can include small human figures in the landscape to indicate scale. But it is important that they don’t merge into the background, otherwise they are difficult to see.

    In this landscape, the man walking away from the camera is a dark figure against a light background (tonal contrast in action), and is easy to see and recognize.

    Gestalt theory and composition

    Gestalt theory and composition

    7. Emergence

    The viewer may not notice something in the photo when he first looks at it, but it becomes apparent after a period of study. This is an important concept because it is a way of making photos more interesting by presenting the viewer with something that is not evident at first, but reveals itself after reviewing the image. It’s a way of rewarding the viewer, and gives photos staying power.

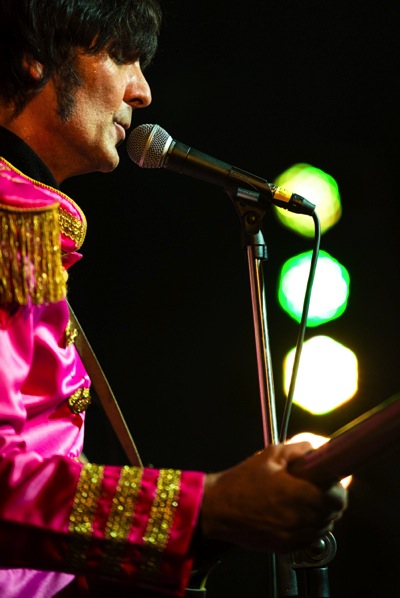
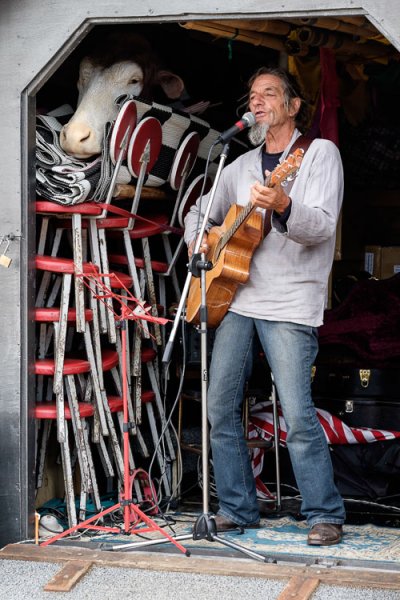
    For example, how long did it take you to see the cat in the photo on this page? Or the cow’s head in the opening photo (top of the article) of the singer?

    Gestalt theory and composition


    Mastering Composition ebookMastering Composition

    My new ebook Mastering Composition will help you learn to see and compose photos better. It takes you on a journey beyond the rule of thirds, exploring the principles of composition you need to understand in order to make beautiful images. It’s on special for a limited time only at Snapndeals.

    googletag.cmd.push(function() {
    tablet_slots.push( googletag.defineSlot( “/1005424/_dPSv4_tab-all-article-bottom_(300×250)”, [300, 250], “pb-ad-78623” ).addService( googletag.pubads() ) ); } );

    googletag.cmd.push(function() {
    mobile_slots.push( googletag.defineSlot( “/1005424/_dPSv4_mob-all-article-bottom_(300×250)”, [300, 250], “pb-ad-78158” ).addService( googletag.pubads() ) ); } );

    The post 7 Tips for Using the Gestalt Theory for Better Composition by Andrew S. Gibson appeared first on Digital Photography School.


    Digital Photography School

  • How to Build an Impressive Photography Portfolio from Scratch

    Creating a photography portfolio can be a daunting experience. As a rule, photographers have basic or no knowledge of design at all. Moreover, creating a site with the pictures in focus can be a tricky task.

    Being a photographer makes you a wearer of many hats. It’s critically important to have an online portfolio, so you can easily show your potential clients what you’re capable of. If you have no idea how to start, where to take pictures, how many of them you need for a site, and how to make your portfolio work for you, these tips may help you get started:

    What is a portfolio? How Many Shots Do You Need?

    A portfolio is an opportunity for you to present your work, but it’s important to consider why you need this portfolio. Are you going to use it to apply for a job? Do you want to use it to start your own photography business? Or do you just want to exhibit your work?

    1

    Portfolio by Marcus Smith

    Also, you have to think about how many images you need to upload to your site. The layout usually looks good with a small amount of images uploaded on the home page. There should be a balance between the number of images you’re going to show and the negative spaces you leave between, or around them. If you have many images, consider separating them into categories.

    When it comes to the home page, there should be something to pull the user in, then let them decide what to look at next. Value visitors’ time – they don’t need to see all the photos you took since 2008. Rather, display only your top-notch work and then show the potential client more photos if they request it. Don’t overwhelm them with pictures. Put the best pictures on the first page to stand out, and leave your other good work on the second page.

    Think of Your Audience

    Once you have decided why you need an online portfolio, you need to consider the audience you’re going to reach. Think of the reaction you want to evoke – do you want your clients to be touched, surprised or even shocked by your pictures?

    2

    Portfolio by Brian Ingram

    If you’re aiming to specialize in wedding or portrait photography, it’s logical to include these shots first in your portfolio. There is no need to demonstrate your awesome landscape shots if you are aiming to attract clients for portrait photography. Keep your target audience in mind and do your best to create a site that solves their problems and provides answers to their queries, rather than simply bragging about your versatility as a photographer.

    Brainstorm Project Ideas

    If you have no idea what photos to upload to your portfolio, or you have no photos yet, you need to do some brainstorming. You’re building your portfolio in hopes of getting more clients, meaning that you don’t have hundreds of photo models knocking at your door. Start photographing your friends for free, shoot some events for charity, or even ask a popular wedding photographer from your area to hire you as an assistant, just to get wedding photos for your portfolio.

    3

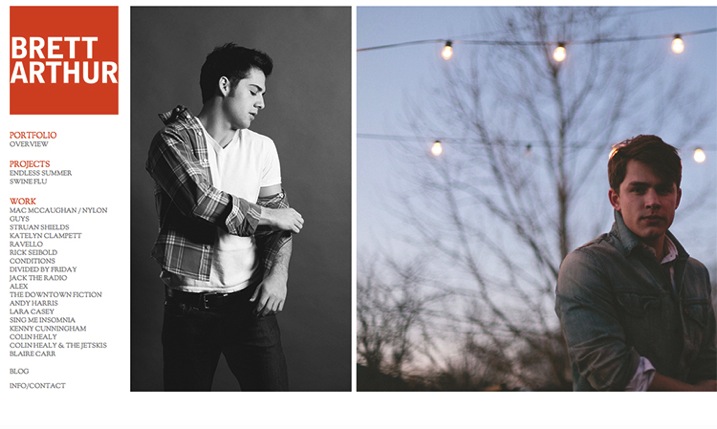
    Portfolio by  Brett Arthur

    There are many options when trying to find new project ideas: you can start a 365-day or 52-week project which will give you a great chance to practice as a photographer. This could lead to you shooting a subject that you never thought about and may result in a set of great shots for your online portfolio. Look at the work of other photographers to get new ideas for shooting, analyze their portfolios and try to make your own.

    Present Like a Pro

    Your portfolio website is nothing but a presentation, so when creating it, refer to some iconic presenters like Steve Jobs for better results. For instance, here are three presentation techniques from Apple’s founder you can apply to your own portfolio:

    1. Make your passion prominent.

    Jobs was passionate about every product he was involved in, his enthusiasm was obvious to anyone who heard him speak. There are few things in the world that spread as quickly as enthusiasm. Connect with your website visitors on an emotional level by showing your passion for what you do. This can be achieved through things like personal notes or comments on every image in your portfolio, a funny story told on your About page, or a set of behind-the-scenes photos shown in your main image slider or website background.

    2. Build a clean, visual interface.

    In his iPhone presentation, Steve Jobs used 19 words compared to the average 40 words used in a PowerPoint presentation. Make your website less wordy by utilizing a spacious preview page layout, big image sliders, and clean typography. Your business is about good pictures after all, not about writing essays. Make sure your site looks great on mobile devices and tablets, as that’s where the lion’s share of your visits will come from.

    4

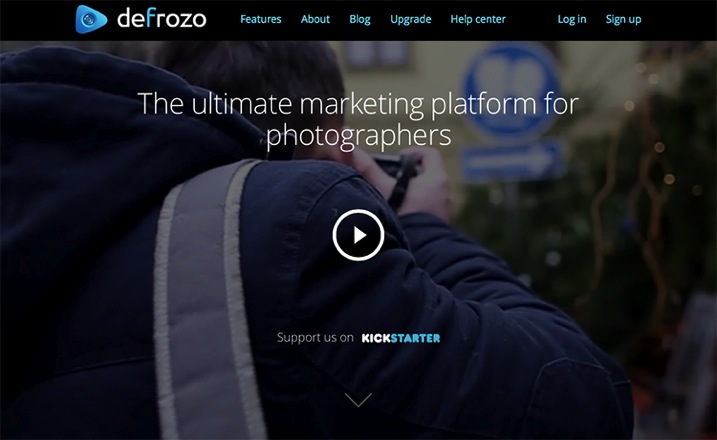
    Defrozo

    Among some free website builders that enable you to create beautiful, mobile-friendly websites are Defrozo and Koken. The first one is actually a multi-tool marketing platform that includes a full-fledged photography CRM (customer relation management), shopping-cart system, and other photo business tools in addition to a website builder. While Defrozo is a hosted service offering automatic updates and user support, Koken needs to be deployed on your own server.

    3. Inspire your audience.

    Every presentation by Steve Jobs was a great source of inspiration and education for his listeners. Images are a powerful medium that you, as a photographer, take advantage of by default. On your website, create a combination of images and words that would make people want to act and achieve something.

    5

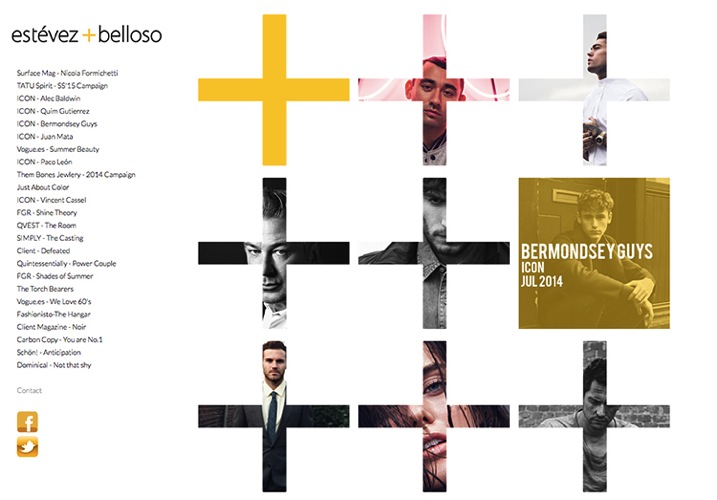
    Portfolio by Estevez & Belloso

    For instance, using a famous quote next to a photo, or telling a story behind one of your projects, can do the job of creating an extra layer of interactivity and inspire your web viewers.

    Tell a story

    Who doesn’t like a good story? Storytelling has become a powerful marketing engine lately and there’s no reason you can’t leverage it for your own business.

    When uploading photos to your portfolio, you must describe them. A description is even more important than a title. Remember, when people see your photos for the first time, they want to know who or what is displayed in the image, what the context is behind the image. Maybe there were some interesting facts connected to the image. Feel free to share this with your audience.

    Ask for Feedback

    Getting your portfolio in front of other eyes can help you pick up on the omissions and bugs in the site’s design and performance. Submit the preview link to some forums and photography communities you’re a member of, or simply let your friends and family play around the site. Create a quick survey for them to fill in after they have checked it out – keep it short and to the point, asking only questions you plan to act on, and include some open-ended questions at the end.

    Have different options

    You need to decide what kind of portfolio you need: digital or paper? In the past, everything was on paper.

    6

    Portfolio by Michael David Adams

    While a digital portfolio seems the ultimate solution these days, it’s also good to have a print portfolio for meetings with clients. Digital cannot fully replace print because of the special feel a printed photograph gives to the viewer. Consider creating your printed portfolio in a smaller format for portability purposes.

    A beautifully designed image slideshow with emotional music added to it is also an essential element to your portfolio package. Along with a responsive website and personalized client photo galleries, it will make your digital showcase toolkit work at full power.

    Over to You

    What are your top techniques of building your photography portfolio? Share your proven tips with fellow photographers in the comments below.

    googletag.cmd.push(function() {
    tablet_slots.push( googletag.defineSlot( “/1005424/_dPSv4_tab-all-article-bottom_(300×250)”, [300, 250], “pb-ad-78623” ).addService( googletag.pubads() ) ); } );

    googletag.cmd.push(function() {
    mobile_slots.push( googletag.defineSlot( “/1005424/_dPSv4_mob-all-article-bottom_(300×250)”, [300, 250], “pb-ad-78158” ).addService( googletag.pubads() ) ); } );

    The post How to Build an Impressive Photography Portfolio from Scratch by Nancy Young appeared first on Digital Photography School.


    Digital Photography School

  • dPS Writer’s Favorite Lens – the Nikon 70-200mm f/2.8 VR2

    We all have favorites; colors, cars, movies, and dogs. For one reason or another, they grow on you and the more you’re exposed to it, the more partial you become.

    When it comes to photographers, we have favorites too. Brands, camera bodies, software, and of course, lenses. I’m no different.

    Over the years many lenses have passed through my hands. I have also had experience with a slew of other lenses through newspaper jobs and loaners from friends; everything from fisheyes to 400mm, Sigma to Zeiss.

    Each new lens gets to be a favorite for a time – I call it the honeymoon phase. But to really work its way into your heart and truly be that solid go-to favorite, you have to have the lens for an extended period of time. You also need the opportunity to put it through its paces under a multitude of conditions.

    70 200 by Jeremie Schatz  10

    The lens that fits the bill for me is the Nikon 70-200mm f/2.8 VR2.

    Now, I am fully aware that the quality of this lens has never been in question. It is, after all, Nikon’s flagship fast telephoto zoom – with a price tag to match. Let’s start with the bad news: it costs a pension, it’s the size of a small tree, it weighs as much as a newborn baby, and its minimum focusing distance is about a mile away.

    For some photographers any or all of these reasons can easily make this lens a deal-breaker. The price is a non-issue if you are a pro. I paid over $ 2000 for mine more than four years ago and I wouldn’t flinch to do it again. The resale value stays fairly high as well, which may help enthusiasts justify it to themselves.

    The size and weight (3.4 pounds); well, you have to pay to play. I’m a bigger guy so I don’t often have the same complaints about the size and weight of a pro body and lens setup, and actually find smaller cameras a bit awkward to use for extended periods of time.

    One reason I don’t mind the size of the 70-200mm is because I find the long barrel gives me ample space to get a solid grip. This provides stability for hand-held shots as well as providing a good pivot point for panning shots.

    70 200 by Jeremie Schatz  4

    The longer barrel of the 70-200mm has space to get a solid grip which can help obtain sharper panning shots.

    The minimum focusing distance is 4.6 feet which, in contrast to the 10.8 inches of my second go-to lens – the Nikon 17-35mm f/2.8 – seems absurd. Would I trade any of the 70-200’s other features for closer focusing? Not a chance.

    Those are my justifications for tolerating this lens’ shortcomings.

    So why is this the lens that spends most of its life hanging off the front of my camera? Performance is definitely a factor. This is the sharpest lens corner to corner, throughout the aperture and zoom range I’ve ever used. While capturing dangerously sharp images, it maintains very impressive contrast, color rendition, and saturation under any conditions.

    70 200 by Jeremie Schatz  1

    The front lens element coating reduces ghosting and flaring, and produces great contrast and saturation in challenging lighting conditions.

    Even compared to the tried and true Nikon 80-200mm f/2.8 (which I have used extensively) that many still stand by and the subsequent VR1 model (which I have also owned), the VR2 with Nano coating blows them out of the water. Backlighting, cross lighting, or shooting right at the sun don’t even phase it.

    Some maintain that with camera bodies’ ever-increasing high ISO performance, optical stabilization isn’t as necessary as it once was. Perhaps. However, even compared to the previous iteration of this lens, the VR feature makes a very noticeable difference. I have scored sharp images shooting at quarter-second exposures hand held. Paired with its ability to focus in pitch darkness, it almost feels like cheating.

    Since I don’t get any commission for selling Nikon products, and performance is reason enough for anybody to use this lens, let me explain why this is the lens for me.

    Photojournalism, sports and weddings are what I primarily shoot.

    For photojournalism assignments it is imperative to carry at least a couple lenses. I can almost guarantee that no photojournalist in the last 10 years has walked out the door in the morning without a 70-200mm on one camera and probably something like a 24-70mm or a wide fixed lens on another body. If I had to head out into the unknown and could only bring one lens it would be the 70-200mm.

    70 200 by Jeremie Schatz  8

    A wider lens would have resulted in the planes looking tiny in the far distance. Being able to quickly zoom in and compress the scene can be very advantageous.

    The 70-200mm is a no-brainer for sports. Although it is nice to have a second body with a wide lens, that camera spends 98% of the event unused, while the workhorse does its thing.

    70 200 by Jeremie Schatz  6

    The 70-200mm is a mainstay for sports photography. Being able to quickly zoom out to 70mm allowed me to grab this shot.

    Another handy feature of this lens is its ability to be matched to a teleconverter. Dedicated career sports shooters mortgage their houses to buy a fast 300mm or 400mm lens. For the somewhat rare occasions where I can’t get as close to the action as I would like, I can compromise and use a 2x teleconverter. Yes, this leaves me with a f/5.6 maximum aperture and less overall sharpness, but it is a much smaller price to pay.

    70 200 by Jeremie Schatz  5

    Although image quality and aperture suffers, a 2x teleconverter turns the 70-200mm into a 140-400mm opening up a new range of possibilities.

    Personally, I love this lens for portrait-type work as well. While 85mm and 105mm lenses are favorite focal lengths for portrait work, the 70-200mm has both of these lenses built-in essentially. Maybe not at a super fast aperture but I much prefer to have the added versatility.

    70 200 by Jeremie Schatz  9

    Although some may not consider it a dedicated portrait lens, the 70-200mm delivers creamy backgrounds and its focal length doesn’t distort facial features.

    Even getting up close I will keep this lens mounted. I find 70mm to be wide enough that you don’t have stay too far from the action, while being able to get those tightly-cropped detail shots with creamy bokeh.

    Another reason why I stick with a longer lens is that depending on what I’m shooting, I often prefer to stay away from the action. We have all heard someone say something like, “who needs a zoom lens when you have feet”. I have found that if you have to get too close to the action, you inevitably become part of it. My feeling is that in many cases a photographer’s responsibility is to capture an event unfolding and not distract or divert attention from it. It’s not a hard and fast rule, but one I adhere to as often as possible to maintain the fly-on-the-wall philosophy.

    70 200 by Jeremie Schatz  2

    Sometimes you can’t, or don’t want to, get too close to the action.

    Everyone has an opinion, with reasons to support it, and those are mine. Anyone agree? Anyone think I’m full of it? If this is your go-to lens as well, what are your reasons?

    googletag.cmd.push(function() {
    tablet_slots.push( googletag.defineSlot( “/1005424/_dPSv4_tab-all-article-bottom_(300×250)”, [300, 250], “pb-ad-78623” ).addService( googletag.pubads() ) ); } );

    googletag.cmd.push(function() {
    mobile_slots.push( googletag.defineSlot( “/1005424/_dPSv4_mob-all-article-bottom_(300×250)”, [300, 250], “pb-ad-78158” ).addService( googletag.pubads() ) ); } );

    The post dPS Writer’s Favorite Lens – the Nikon 70-200mm f/2.8 VR2 by Jeremie Schatz appeared first on Digital Photography School.


    Digital Photography School

  • 5 Steps to Rock the Brenizer Method

    Pier brenizer

    What is the Brenizer Method?

    The Brenizer Method is named after wedding photographer, Ryan Brenizer. He didn’t invent the method but instead made it popular by using it with his wedding clients, and teaching others how to do it as well. For those who have been around photography for a while, you will recognize the process. Photographers have been stitching images together to create panoramas for decades. However, Photoshop and similar software have now made this method extremely simple for you.

    Advantages of using the Brenizer Method

    Creating an image using the Brenizer method takes more time than just capturing a single image, but the results are well worth it. When using this method, you will create an image with:

    • Very high resolution
    • Very shallow depth of field (it equates to using a lens that has an f-stop less than 1)
    • Great bokeh
    Mermaid brenizer

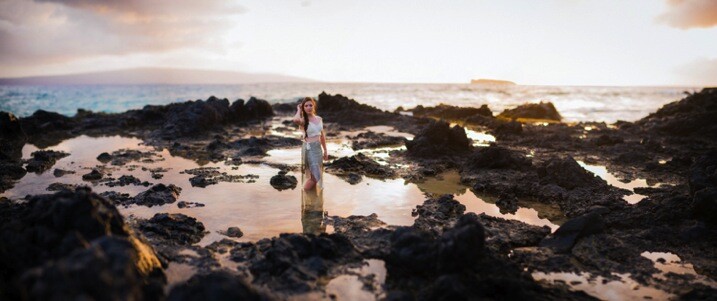
    This image was created using 32 different shots and merged together in Photoshop to give it an extremely shallow depth of field.

    PREPARING FOR THE SHOT

    Once you’ve decided you want to try the Brenizer Method, you will need to decide where and what to photograph. Look for layers that will be interesting with a shallow depth of field. If you are shooting a subject, make sure the subject chooses a comfortable pose they can hold for up to 30 seconds.

    Step 1 – Prepare Your Settings

    Aperture – Shoot as wide as your aperture will allow. For some lenses that might be f/1.2 for others it may be f/3.5, and for the rest, it will probably be somewhere in between. The wider you can go, the more amazing effect you will achieve.

    White Balance – You will want to choose any white balance other than auto. As you position your camera, auto white balance might change the color temperature as you move from shade to a brighter area or vice versa. Manually setting the Kelvin temperature is my preferred method. If you aren’t familiar with manipulating your white balance, here’s a great article to help you learn.

    Focal Length – As you take these shots, you want your focal length to stay exactly the same. Shooting with a prime lens makes this easy, otherwise make sure to hold your lens carefully if it tends to zoom in and out easily.

    Focus – Once you’ve set your focus on your subject, change it to manual and don’t touch it again until you’re done shooting your series.

    SHOOTING YOUR SERIES OF IMAGES

    Step 2 – Shoot Your Images Using an Organized Layout

    Layout shooting

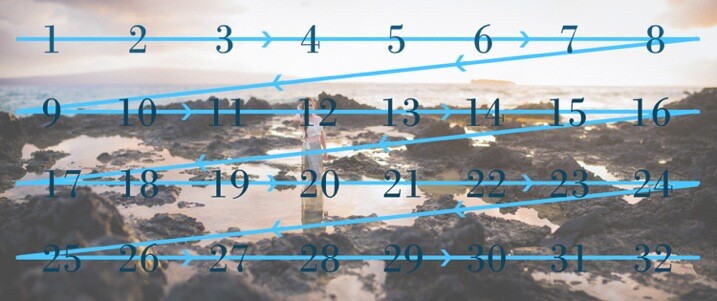
    Capturing your images in rows from left to right (like reading a book) will give you greater chances of not having holes (gaps) in your images.

    Shooting your series of images in an organized layout will help the images stitch together better in your editing software. When you first try this method, you might be tempted go out of order and continue adding as many images as you think you might need. When you do that, Photoshop might give you an image with some holes and extra pieces at the bottom of your picture.

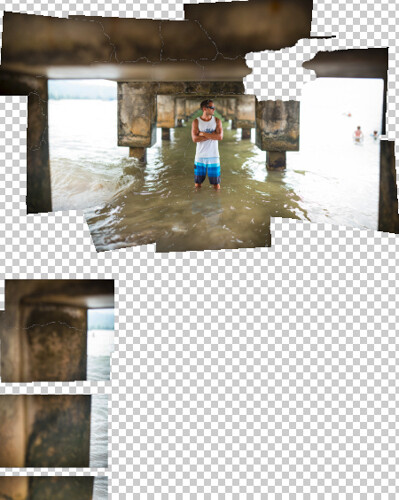
    Image with holes

    I shot this image in a circular motion, instead of the row method shown above. Photoshop had a hard time properly merging the image. There were many extra shots it didn’t know what to do with, so I had to go in and manually piece some of the images together. Save yourself time and learn from my mistake.

    Before you start shooting, think about your final image. Will it look best as a vertical, horizontal, square, or a panorama? Make sure to shoot enough shots to be able to crop it in your preferred orientation.

    Step 3 – Overlap Your Shots

    While you are shooting your series of images, make sure to overlap each shot by at least 1/3. That will give the software enough information to see where each image belongs when it does the stitching. Most people take between 20-50 shots in their series that will be compiled into one final image. Take as many as you need and overlap by more than 1/3 if you feel more comfortable with that. As you gain experience with the Brenizer method, you will probably find a way to get the same result with less shots.

    PROCESSING

    Step 4 – Batch Edit All the Images

    When you are ready to process the images, load them into a batch editing software, like Lightroom or Adobe Camera Raw. Edit the first image (exposure, contrast, saturation, etc.), then sync the entire batch of images so the exact same editing has been applied to each image in the series.

    Next, you are ready to export your images. Since you’re going to be merging so many images together, there is no reason to export these as high resolution files. Doing so, would only slow down the process in Photoshop. Export your images as JPGs, with the long edge between 700-1000 pixels, depending on how many images you’re going to be merging.

    Step 5 – Merge the Images

    Photoshop steps

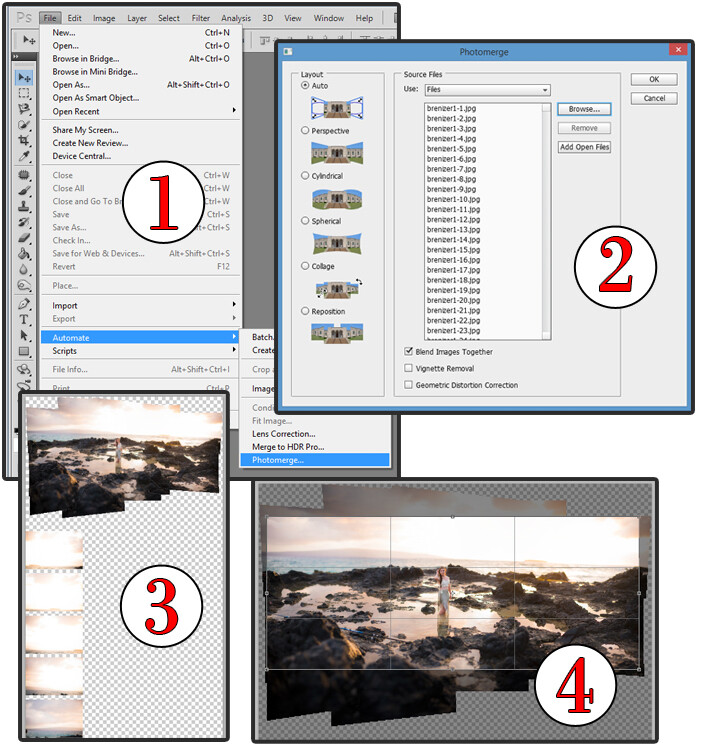
    1 – In Photoshop, click on File, Automate, and Photomerge. 2 – Leave the default settings selected and browse for your series of images. 3 – After the image merges, there are often extra images below the merged image. Sometimes they are extra and not needed because of the amount of overlapping, or sometimes the software doesn’t know where they belong and you’ll have to manually put them in their place. 4 – I decided that my image was fine without the extra images, so next I cropped out the excess to create the final image.

    Finally, open Photoshop. Go to File > Automate > Photomerge… When the window pops up, keep the default settings of “Layout: Auto and Blend Images Together” checked. Browse for your images and hit “OK”. Then it’s a waiting game. Depending on your file sizes, and the number of images your computer is processing, this could take 1-10 minutes.

    Note: Similar results can be created using other software. To save time, I’m just mentioning the process I use with Photoshop.

    If you shot your series in an organized layout, your software should have been able to piece your image together well. All that’s left to do is crop your image to the orientation you were hoping to use (vertical, horizontal, square, or panorama) and save it as a JPG. Voila!

    It may seem like a lot of steps your first time through, but with more practice it becomes second nature.

    Your Turn

    Have you tried creating an image using the Brenizer Method? What was your experience? Do you have any additional tips that would help those getting started? Let us know in the comments. Also, feel free to share your Brenizer Method images as well. We’d love to see what you create!

    googletag.cmd.push(function() {
    tablet_slots.push( googletag.defineSlot( “/1005424/_dPSv4_tab-all-article-bottom_(300×250)”, [300, 250], “pb-ad-78623” ).addService( googletag.pubads() ) ); } );

    googletag.cmd.push(function() {
    mobile_slots.push( googletag.defineSlot( “/1005424/_dPSv4_mob-all-article-bottom_(300×250)”, [300, 250], “pb-ad-78158” ).addService( googletag.pubads() ) ); } );

    The post 5 Steps to Rock the Brenizer Method by Danielle Ness appeared first on Digital Photography School.


    Digital Photography School

  • 6 Tips on How to do Horse Show Photography for Parents

    The sport of horse riding and showing can be very rewarding and beneficial to a young child. However, capturing those memories to print and share with family and friends can be a challenge for parents. Basic horse knowledge is helpful not only in keeping your child and their horse safe, but others around them as well. The following are a few dos and don’ts to get you started successfully, and safely, photographing your child at horse shows.

    #1 Avoid the use of flash

    Bowman sun

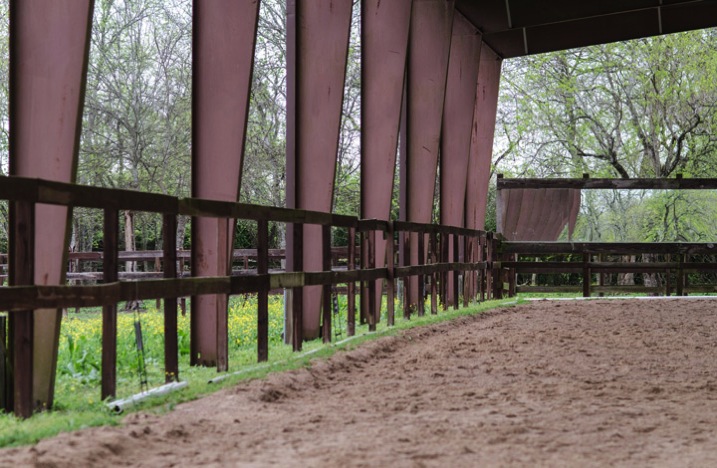
    Camera flashes from the audience during rodeos and exhibitions are common, and for the most part those horses are accustomed to many distractions. However that may not be true for the horse your child is riding. An experienced horse with an inexperienced or nervous rider, at an off-property show (and sometimes the excitement of a show at their home barn) may react differently from their usual calm, sensible self. A covered arena can be challenging in terms of lighting and on-camera flashes won’t effectively reach the far end. If they are riding in the morning or late afternoon one side of the arena should be sunny. Wait until the horse and rider are in the sunlit area before capturing the moment. Obviously, this will cut down on the number of images taken, but they should be sharper and brighter, and worth the wait.

    #2 Make yourself visible to the horses

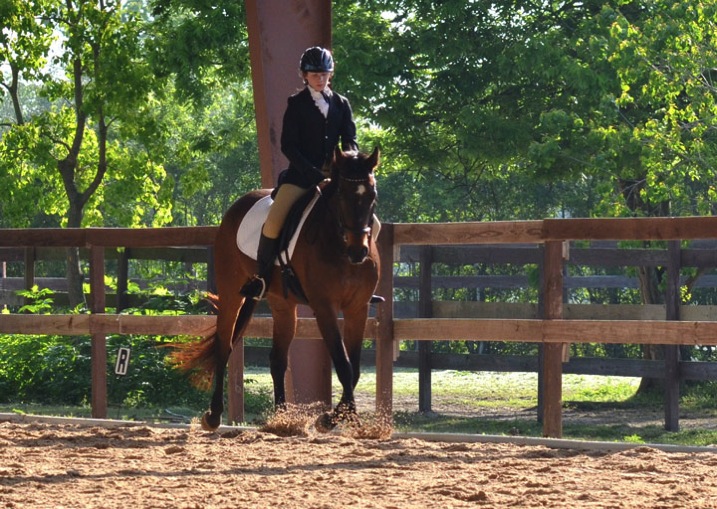
    Do not hide behind a fence post, arena support, fence, etc. Wide arena supports can be tempting to steady yourself, but this is essentially playing peek-a-boo with a half-ton animal (that has a mentality of a young child) which your son/daughter is sitting on. Horses notice change and if an object or person has moved they may look for it; taking their attention away from the rider. In addition to being noted as a comment or error on the rider’s test, this could also create a dangerous situation if your child’s horse is a bit on the nervous side. Stand or sit out in the open – let them see you, and stay there until the test is complete. Standing on a lower step of a mounting block, outside the arena, will get your camera higher than the fence. But, position yourself during the time riders are entering and exiting the arena, and remain there for the duration of the ride.

    Bowman arena

    #3 Shoot hand held without a tripod or monopod

    Do not use a tripod or monopod. Depending upon the type and location of the event there may be several horses, riders and their trainers, waiting to enter or exit the arena, return to stalls, etc. Extended tripod legs can be a tripping hazard for people, and a scary thing for horses. Fence railings, tables and tucking your arms into your body are good solution to stabilize your camera.

    Bowman horse

    Besides, most tests are over in a few minutes, so foregoing that extra gear will allow you to quickly rejoin your child. Larger shows often hire official show photographers who will take pictures inside the main arena (from a vantage point different from spectators) that you can purchase later. Additionally, if you are using a tripod or monopod you may be viewed as a professional (whether that is the case or not) by show officials who may ask that you refrain from taking any pictures if they feel you are in competition with the official photographer.

    #4 Use a fast prime lens

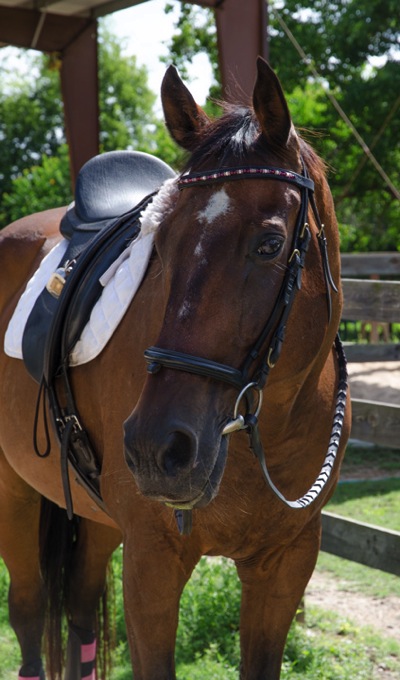
    DO buy, rent, or borrow the fastest prime lens you can – 50mm or 85mm preferred (keeps the horse’s head in proportion). A longer lens (85mm) also keeps your camera out of everyone’s personal space and avoids any possible flight response in the horse. There are many bomb-proof horses for young riders who will absolutely not react to anything (near or far), but you don’t want to test that out – especially with your child holding the reins or sitting on top of all that power.

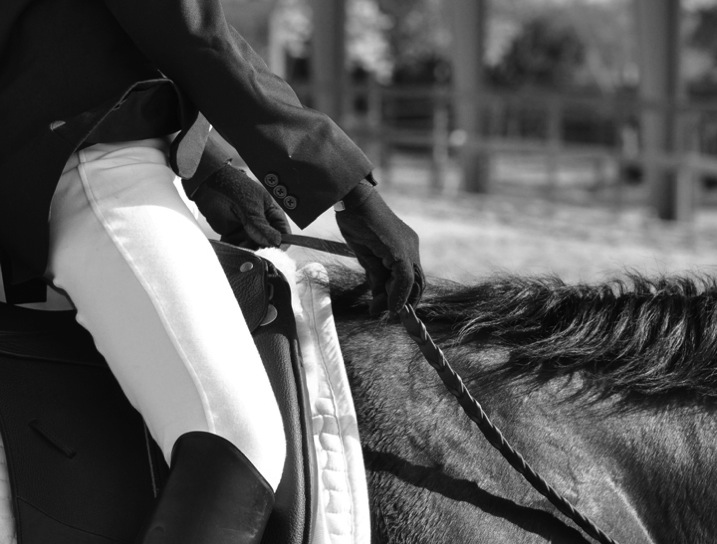
    A fixed focal length lens also means you won’t be able to adequately shoot across a large arena. Riding tests often have the horse and rider cover the entire arena, so capture your child when they are closer to you; details such as the rider’s hands, legs, and boots produce great images too.

    Bowman hands

    #5 Know the routine your child will be doing

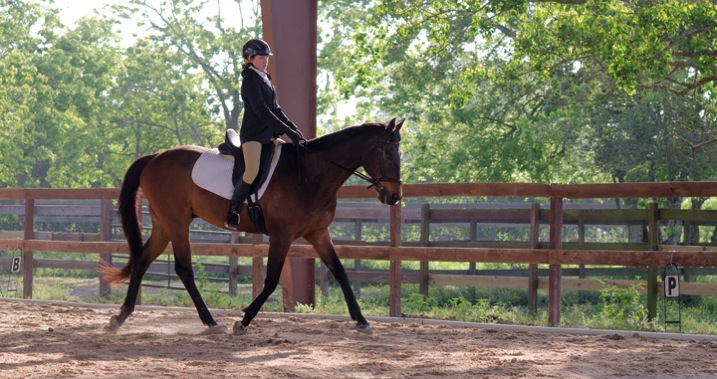
    DO learn the tests your child is riding. Tests in both English and Western disciplines require specific movements, to be performed at certain places in the arena. Being familiar with the tests will allow you to anticipate the next movement and be ready to shoot, especially when using a fixed focal length lens. Some movements are photographically more appealing than others, but simply ensuring that all four legs of the horse are visible, arena supports are not coming out of the rider’s head, and the focus is centered on the rider’s or the horse’s eyes, will improve your images. Test movement patterns can usually be found on the internet (In the states, the United States Equestrian Federation website is a good starting place for all disciplines).

    Bowman test

    #6 Take details shots outside the show ring

    Do shoot the details outside of the show ring; the relationship between horse and rider, grooming/tacking up, show clothes, friends, bridle, stalls, etc., – all those moments leading up to and after riding the actual test.

    Bowman showprep

    Photographing activities of the entire day completes the horse show story, which the show’s official photographers do not usually cover. Using a 50mm or 85mm lens captures the action without being too close (not adding to a rider’s show nerves) and produces casual, natural photographs. Older, more experienced riders, often assist the younger riders with tacking up and grooming for shows (among their many other duties that day) held at their home barn. An experienced rider can be a valuable asset on show day and may already have an established relationship with your child.

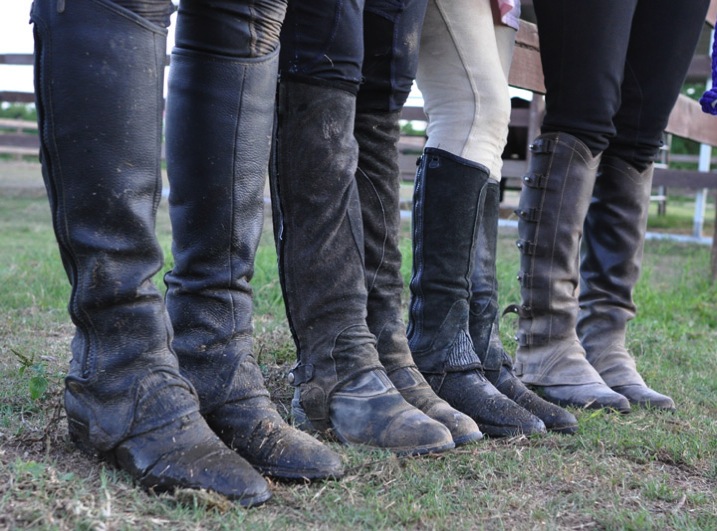
    Bowman boots

    Horse show photography can be exhausting, dirty, and a continuous learning opportunity, but can also be an amazing experience. Dress comfortably, avoiding open toed shoes, and approach the day as an adventure that you and your child will remember forever.

    googletag.cmd.push(function() {
    tablet_slots.push( googletag.defineSlot( “/1005424/_dPSv4_tab-all-article-bottom_(300×250)”, [300, 250], “pb-ad-78623” ).addService( googletag.pubads() ) ); } );

    googletag.cmd.push(function() {
    mobile_slots.push( googletag.defineSlot( “/1005424/_dPSv4_mob-all-article-bottom_(300×250)”, [300, 250], “pb-ad-78158” ).addService( googletag.pubads() ) ); } );

    The post 6 Tips on How to do Horse Show Photography for Parents by Sherry Bowman appeared first on Digital Photography School.


    Digital Photography School

  • Weekly Photography Challenge – Street Photography

    In this previous post I shared a bunch of street photography images. But not just any old random ones. They are images that were taken all around the world, but yet still have a common thread, a connection. They included:

    • Photographers shooting other photographers
    • Subways, taxis and transportation
    • Markets and vendors
    • And buskers or street musicians
    Fabrizio Maestroni

    By Fabrizio Maestroni

    Weekly Photography Challenge – Street Photography

    Now the challenge is over to you. Go do some street photography, and if you want to take the challenge up a notch then try to work with the themes mentioned above. See if you can add to the body of work in those categories and let’s see how far and wide dPS readers reach. When you post you photo please tell us where it was taken.

    Ben Fredericson (xjrlokix)

    By Ben Fredericson (xjrlokix)

    Alex

    By Alex

    Abhilash C

    By Abhilash C

    Luca

    By Luca

    Share your images below:

    Simply upload your shot into the comment field (look for the little camera icon in the Disqus comments section) and they’ll get embedded for us all to see or if you’d prefer upload them to your favourite photo sharing site and leave the link to them. Show me your best images in this week’s challenge. Sometimes it takes a while for an image to appear so be patient and try not to post the same image twice.

    If you need some tips for street photography try these:

    • There is no bad light for street photography
    • 7 Tips for a More Anonymous Approach to Street Photography
    • Using Humor In Street Photography
    • Practical Tips To Build Your Street Photography Confidence

    googletag.cmd.push(function() {
    tablet_slots.push( googletag.defineSlot( “/1005424/_dPSv4_tab-all-article-bottom_(300×250)”, [300, 250], “pb-ad-78623” ).addService( googletag.pubads() ) ); } );

    googletag.cmd.push(function() {
    mobile_slots.push( googletag.defineSlot( “/1005424/_dPSv4_mob-all-article-bottom_(300×250)”, [300, 250], “pb-ad-78158” ).addService( googletag.pubads() ) ); } );

    The post Weekly Photography Challenge – Street Photography by Darlene Hildebrandt appeared first on Digital Photography School.


    Digital Photography School

  • 39 Street Photography Images That Have Common Threads

    Street photography is a popular genre which many photographers enjoy, just for the sake of doing photography. You can find many articles on it here on dPS. Let’s look at a few street photography images from around the world and see if we can’t find similarities, as well as differences between them all.

    I got carried away selecting images for this collection because I found the inter-connections intriguing and it inspired me. I hope you can see it too.

    Photographers shooting other photographers

    Photograph Working the Scene by Shamas Malik on 500px
    Working the Scene by Shamas Malik on 500px

    Photograph He is nikon photographer. How long have you been doing photography? by Zachary Voo on 500px He is nikon photographer. How long have you been doing photography? by Zachary Voo on 500px

    Photograph The spy by Alexander Dragunov on 500px
    The spy by Alexander Dragunov on 500px

    Photograph Strike Back by Vichaya Pop on 500px Strike Back by Vichaya Pop on 500px

    Photograph Violinist And Photographer by Juha Roisko on 500px
    Violinist And Photographer by Juha Roisko on 500px

    Photograph fellow photographer by Nico Ouburg on 500px fellow photographer by Nico Ouburg on 500px

    Photograph spring frame... by Konstantin Vodolazov on 500px
    spring frame… by Konstantin Vodolazov on 500px

    Subways, taxis, and transportation


    Photograph Don't Forget to Smile by Liz Leeb on 500px
    Don’t Forget to Smile by Liz Leeb on 500px

    Photograph Subway In Lisboa by Damien Dohmen on 500px

    Subway In Lisboa by Damien Dohmen on 500px

    Photograph Munich Subway in Yelow by Darío Sastre on 500px
    Munich Subway in Yelow by Darío Sastre on 500px

    Photograph Waiting by Fabio Vittorelli on 500px

    Waiting by Fabio Vittorelli on 500px

    Photograph some day, the man of your dreams... by laurent aublé on 500px
    some day, the man of your dreams… by laurent aublé on 500px

    Photograph Youth by Olga Bekker on 500px

    Youth by Olga Bekker on 500px

    Photograph Taxi by Steffen Richter on 500px
    Taxi by Steffen Richter on 500px

    Photograph Paris Taxi by Manuel Orero on 500px

    Paris Taxi by Manuel Orero on 500px

    Photograph Trinidad Cuba - The Green Taxi by John Barclay on 500px
    Trinidad Cuba – The Green Taxi by John Barclay on 500px

    Photograph tuk tuk by Eo NaYa on 500px

    tuk tuk by Eo NaYa on 500px

    Photograph Tuk Tuk by Drew Hopper on 500px
    Tuk Tuk by Drew Hopper on 500px

    Photograph Pedicab by Kent Atwell on 500px

    Pedicab by Kent Atwell on 500px

    Photograph rickshaw by avenish jain on 500px
    rickshaw by avenish jain on 500px

    Markets and vendors

    Photograph Enlightened Colours by Daniel Bosma on 500px

    Enlightened Colours by Daniel Bosma on 500px

    Photograph Under the Bridge by Michael Steverson on 500px
    Under the Bridge by Michael Steverson on 500px

    Photograph Crab Steam ! by Mardy Suong Photography on 500px

    Crab Steam ! by Mardy Suong Photography on 500px

    Photograph Ducky by Michael Steverson on 500px
    Ducky by Michael Steverson on 500px

    Photograph Date Seller by William Selviz on 500px

    Date Seller by William Selviz on 500px

    Photograph Scottish Cheeseshop /Monger by Benedikt D-rner on 500px
    Scottish Cheeseshop /Monger by Benedikt D-rner on 500px

    Photograph Morning time by Dikye Darling on 500px

    Morning time by Dikye Darling on 500px

    Photograph market by Omid Farrokh on 500px
    market by Omid Farrokh on 500px

    Photograph Taladromhub , Samutsongkham , Thailand by Atipan Khantalee (Thailand) on 500px

    Taladromhub , Samutsongkham , Thailand by Atipan Khantalee (Thailand) on 500px

    Photograph A Piece of Lokbaintan by Fauzan Maududdin on 500px
    A Piece of Lokbaintan by Fauzan Maududdin on 500px

    Buskers or musicians

    Photograph sax player by Daniel Antunes on 500px

    sax player by Daniel Antunes on 500px

    Photograph The Accordionist by Joanna Lemanska on 500px
    The Accordionist by Joanna Lemanska on 500px

    Photograph Musicians  by Gazali © on 500px

    Musicians by Gazali © on 500px

    Photograph The street musician by Alina Voitkov? on 500px
    The street musician by Alina Voitkov? on 500px

    Photograph Clarinetist by Hai Hua on 500px

    Clarinetist by Hai Hua on 500px

    Photograph The Moroccan Street Crooner by Blindman shooting on 500px
    The Moroccan Street Crooner by Blindman shooting on 500px

    Photograph Prague by Eduardo González on 500px

    Prague by Eduardo González on 500px

    Photograph Busker by Marc Apers on 500px
    Busker by Marc Apers on 500px

    Photograph Street Musician in Cienfuegos by Nevzat Gökmen on 500px

    Street Musician in Cienfuegos by Nevzat Gökmen on 500px

    googletag.cmd.push(function() {
    tablet_slots.push( googletag.defineSlot( “/1005424/_dPSv4_tab-all-article-bottom_(300×250)”, [300, 250], “pb-ad-78623” ).addService( googletag.pubads() ) ); } );

    googletag.cmd.push(function() {
    mobile_slots.push( googletag.defineSlot( “/1005424/_dPSv4_mob-all-article-bottom_(300×250)”, [300, 250], “pb-ad-78158” ).addService( googletag.pubads() ) ); } );

    The post 39 Street Photography Images That Have Common Threads by Darlene Hildebrandt appeared first on Digital Photography School.


    Digital Photography School

  • 7 Steps to Create Street Photography Silhouettes

    For the street photographer, shooting a perfect silhouette is a very gratifying moment. Just like anything else in street photography, not every subject makes for an interesting silhouette photograph. Here are a few tips to help you capture an interesting silhouette on your next photo walk.

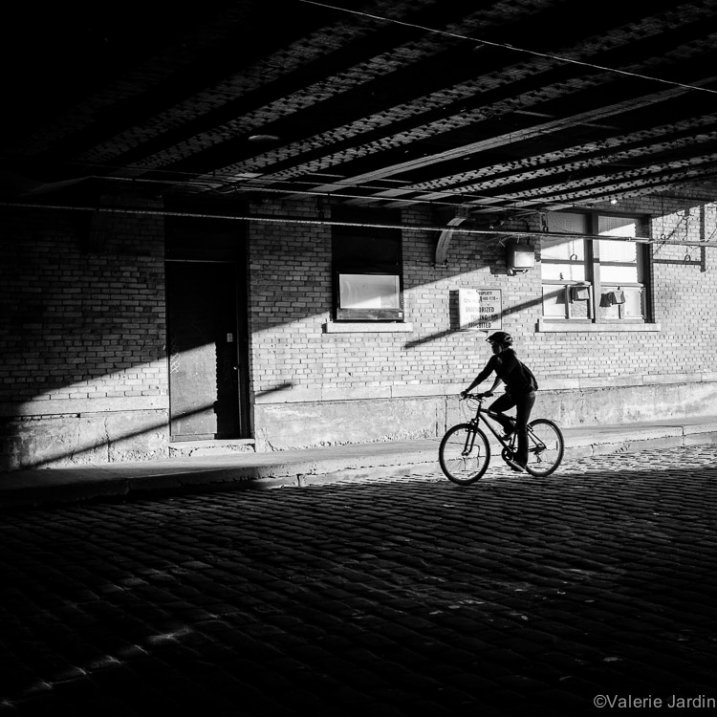
    Some elements, such as bicycles, make for more interesting silhouettes.

    Some elements, such as bicycles, make for more interesting silhouettes.

    1. Set your camera for success

    To shoot a silhouette you have to take control of your camera first. Your flash needs to be turned off. Ideally your exposure is set for the highlights (background). If you set your exposure on your subject, your camera will try to expose your subject properly. The result would reveal too much detail in the subject and blow out the highlights in the background. Exposing for the highlights is easily done if your camera is set to spot metering. You can also use average metering and trick your camera by stopping down your exposure compensation so that your subject remains dark.

    Focussing can be tricky. You can spot meter for the highlights and manually focus on your subject. Or, if you shoot in Aperture Priority, set your aperture to a large number (small aperture) to allow for most of the scene to be in focus (large depth of field)

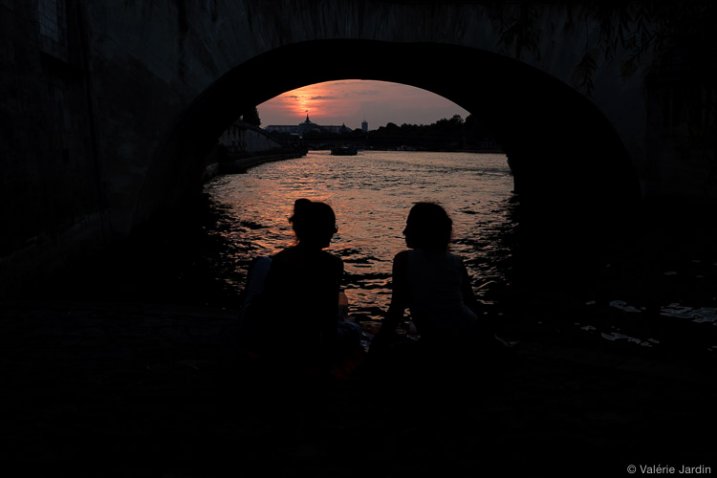
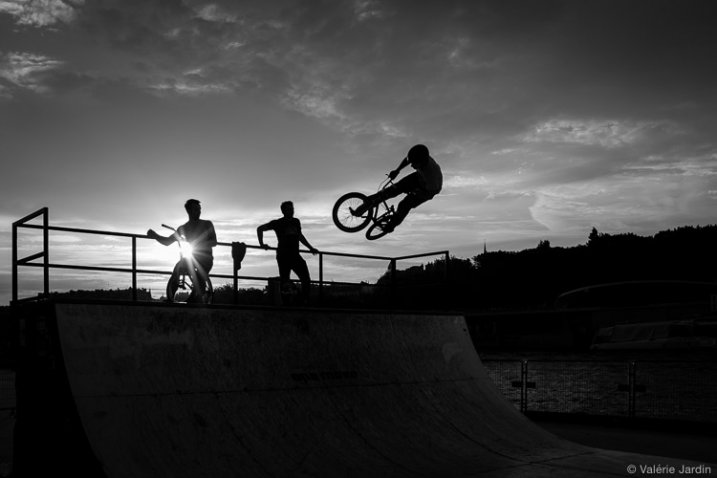
    It is important not to blow out the highlights in sunrise and sunset silhouettes.

    It is important not to blow out the highlights in sunrise and sunset silhouettes.

    2. Don’t be afraid to blow out the highlights

    Okay, I just told you to expose properly to avoid blowing out the highlights. That is certainly a good thing to keep in mind if you are shooting against the sunset, sunrise or the moon light for example. The rest of the time, unless the details in the background add to your story, you’re better off blowing out the highlights and going for a more dramatic effect. Your silhouette will stand out more on a white and unobtrusive background.

    Details in the background should not distract from your silhouette.

    Details in the background should not distract from your silhouette.

    3. Learn to recognize a good silhouette

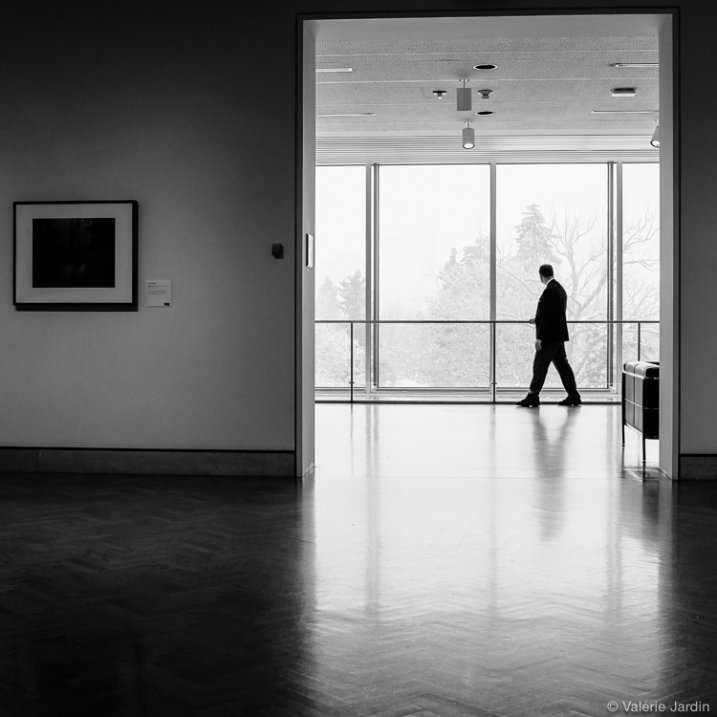
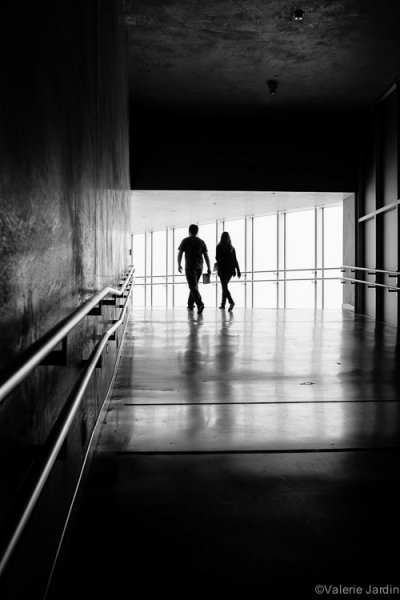
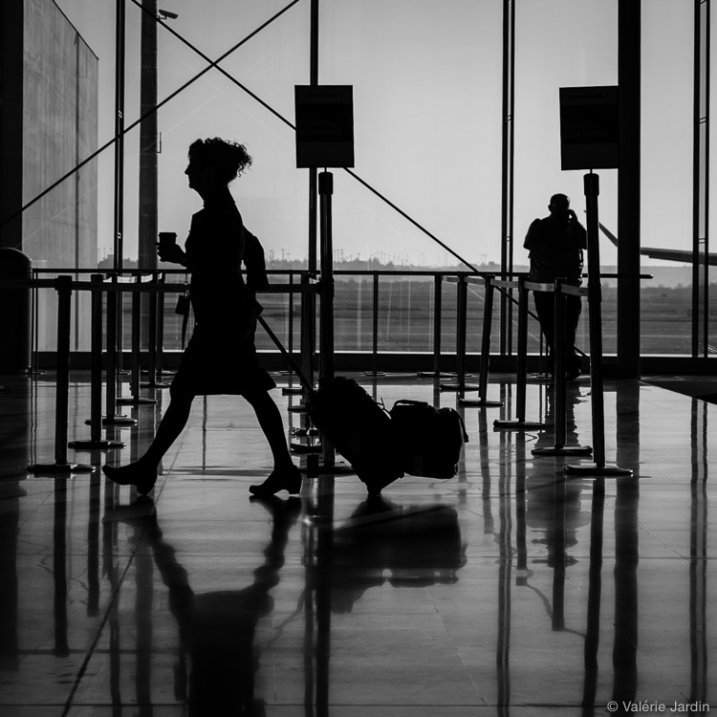
    Now you know the basic technique to shoot a silhouette, that was the easy part. The most important piece is to be able to see a potentially strong subject, so be discerning!  Many elements come into play. The body being well defined is important, you should be able to recognize the shape right away. If the subject is facing you or his/her back is turned to you, there should be space between the arms and the body, the legs should be well defined as well. If you are photographing a person looking sideways, the features of their face should be quite clear.

    Capturing the right gesture or step is a key element in a successful silhouette in street photography.

    Capturing the right gesture or step is a key element for a successful silhouette in street photography.

    4. Avoid obstructions

    Avoid obstructions in front of, and behind your subject. Timing is important. Silhouettes of posts or other obstructions can ruin the shot. Position yourself accordingly for the best possible shot.

    Timing is everything, especially in a cluttered environment.

    Timing is everything, especially in a cluttered environment.

    5. Try some added effects

    A sunburst can be an added bonus to a silhouette photograph, and a welcome added challenge for you, the photographer.

    Add to the challenge with a sunburst effect.

    Add to the challenge with a sunburst effect.

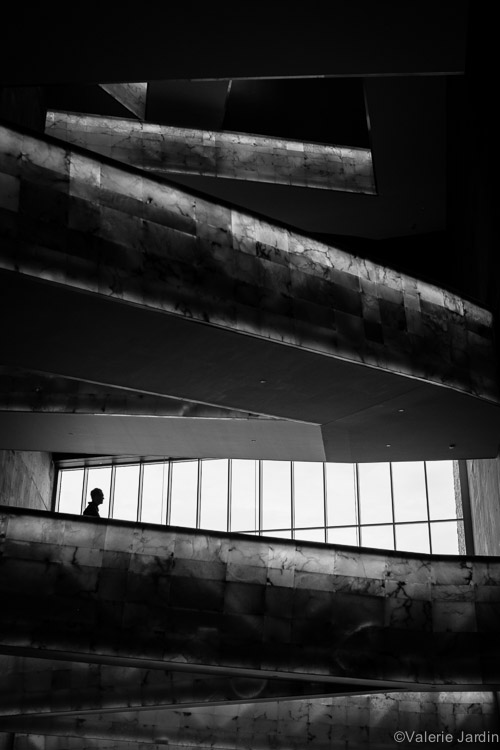
    6. Try a minimalist approach

    Find an interesting architecture or urban landscape and wait for someone to enter your frame. Even small, the human element becomes the focal point.

    A minimalist approach to photographing a silhouette can make for a strong image.

    A minimalist approach to photographing a silhouette can make for a strong image.

    7. Tweak in post-processing

    If you use Lightroom, you can easily tweak your photograph by using the contrast, highlights, shadows and black sliders for the final touches and the look you envision.

    Now grab your camera and hit the streets!

    googletag.cmd.push(function() {
    tablet_slots.push( googletag.defineSlot( “/1005424/_dPSv4_tab-all-article-bottom_(300×250)”, [300, 250], “pb-ad-78623” ).addService( googletag.pubads() ) ); } );

    googletag.cmd.push(function() {
    mobile_slots.push( googletag.defineSlot( “/1005424/_dPSv4_mob-all-article-bottom_(300×250)”, [300, 250], “pb-ad-78158” ).addService( googletag.pubads() ) ); } );

    The post 7 Steps to Create Street Photography Silhouettes by Valerie Jardin appeared first on Digital Photography School.


    Digital Photography School

  • More Thoughts on Google Photos

    More Thoughts on Google Photos

    Last week when Google Photos launched, I quickly tested it out and then wrote a post with my immediate initial reaction to the service. Much of my early disappointment centered around the fact that Google chose to limit the size of photos in the service to 16 megapixels. As a DSLR shooter this meant that a large portion of my library would be downsized with Google Photos. Bummer.

    Flickr by contrast offers every user 1TB of free storage for your photos (which is more than 99.999% of photographers need at present) at full original high resolution.

    So in my mind this made Flickr’s free offering a vastly superior offering over Google Photo’s free offering. Flickr’s had that offer out for a while now which is why I hoped that Google would respond by offering us a similar 1TB (or more) of full high res original storage. Google Photos will let you have a terabyte of storage for your high res photos as well, it will just cost you $ 120 per year vs. Flickr’s free deal.

    David Pogue (who works for Yahoo) wrote up a thoughtful review today comparing Google Photos and Flickr and made the same observation pointing to the negative of Google downsizing your original photos in Google Photos.

    Despite my disappointment about Google’s decision to downsize our photos with the free version of their product, after having spent a week seriously digging into Google Photos, I’m much more optimistic about the service than I was a week ago. There’s a lot to love here.

    1. Google Photos will back up your RAW files.

    At present I have two Drobo 5D units with 15TB worth of storage in each of them. In addition, I’ve got an 8TB Western Digital MyBook thunderbolt duo.

    I don’t actually have 38TB of storage because both the Drobo and the Western Digital (each in their own way) replicate my data. This protects me against hard drive failure. While it doesn’t necessarily protect me against fire or theft, this is a pretty good first line of defense. Most of the storage that I’m using right now is dedicated to the hundreds of thousands (million?) of RAW frames that I’ve fired off over the last 10 years. These are my RAW, unedited, original negative files.

    Flickr does not support RAW yet — although Flickr’s former Chief Bernardo Hernandez mentioned in a tweet after he left that RAW was “coming at some point,” at Flickr.

    Even though I am losing a lot of data when Google Photos converts my RAW files to JPG photos and also downsizes them, something (for free) is better than nothing.

    While it is still my responsibility to come up with a better suitable offsite backup solution for my terabytes of RAW photos, until I do I’d rather have a converted, compressed 16 megapixel version of my photo backed up online than nothing. I’ve been planning for a year or so now to duplicate all of my original RAW files and then store them on drives in a safety deposit box in a bank vault, but until I get around to doing that it’s nice to know that I’ll have at least an inferior version of my original RAW backed up online.

    2. Google’s free offering is unlimited.

    Flickr currently gives everyone a free terabyte of storage for your high res originals. In his review Pogue said that Flickr told him that less than 50 users out of 100 million are actually using over 1 terabyte.

    One terabyte certainly seems more than enough for Flickr’s present offering for most people. I am one of those few prolific photographers who will exceed the 1 terabyte limit though. At present I’ve uploaded about 950 gigabytes to Flickr (which is about 105,000 high res photos) and I should cross the one terabyte limit sometime within the next year.

    Fortunately for me, I was one of the original early Flickr users who signed up for their old paid “Pro” service ($ 24.99 per year). This service has since been discontinued, but old “Pro” accounts have been grandfathered their original unlimited high res storage deal and so I won’t need to worry about exceeding one terabyte when I hit it later this year.

    Although I’m an extreme edge case, if we assume that in the future camera makers will continue pushing technology with more and more megapixels (i.e. larger and larger files) and at the same time people begin taking more and more photos, I can see where a lot more people than 50 will end up exceeding their free terabyte at Flickr over the course of their life.

    While Yahoo could always extend the offer to two terabytes or raise their limits as people’s storage use increases over their lives, their is no guarantee that they will. It would be a bummer if you spent 10 years uploading all of your photos to Flickr and then ran out of space, which sounds unlikely, but might actually be more likely than we realize, especially given that some of us may actually live to be 150 or more in the future!

    Google Photos by contrast is offering unlimited storage if you downsize your photos.

    More Thoughts on Google Photos 2

    3. Google has interesting facial recognition software.

    Google’s facial recognition software is pretty slick. It’s very clever how the software can actually track a face as it ages and include a baby photo in the same batch of photos of someone when they are older. It seems to work best where you have a lot of photos for them to analyze and I found photos of my family members were much more accurately grouped than photos of strangers in crowds or people who I only have one or two photos of.

    Flickr doesn’t do facial recognition yet, but I get it’s something that they are working on. One of the advantages that Google has over Flickr here though is that their service is 100% a private service. 100% of your photos on Google can only be seen by your account unless you manually choose to create a link and share it with others. Facial recognition software can be scary stuff and even though Google doesn’t attach names and faces together, it’s the sort of thing that people get easily freaked out over.

    Flickr is a hybrid public/private service. Even though by default you can upload your photos privately to Flickr, you can also upload them publicly by default as well. Sometimes even a simple thing like a public vs. private setting on a photo can be screwed up by your average user. It’s not that Flickr won’t offer facial recognition in the future (they probably will) it’s just that they probably need to think a little bit more about privacy and the implications of people accidently making things public that they might not want to.

    4. Google Photos Assistant is fun.

    Although we’ve all probably seen way too many gifs in our lifetime already, when your own photos are turned into gifs just for you it can still be delightful. Because my photos are personal to me, I find that I’m enjoying Google Photos gifs much more than I thought I would. If someone else posted a gif of Jerry Seinfield moving his microphone stand around on stage I’d probably think it was boring, but when I was actually at the comedy show and watched him do it, and the gif was made from my photos, somehow it makes it more interesting to me. Most people could care less about my dog Bucky sitting in my friend Scott Jordan’s Pocketmobile, but it tickles me to see it — and Scott will probably like it too and I can share it with him and I bet he even posts it on Facebook. ????

    I find myself going back to my Google Photos assistant several times a day and hoping that they will have more treats for me.

    5. Google Photos is an interesting digital diary.

    Although Flickr has Camera Roll, Flickr doesn’t include all of my RAW photos so it is not as complete as Google Photos is turning out to be for me. I’m finding it more enjoyable to just randomly choose times in my life and scroll through my photos on Google Photos. There’s something about all the bad photos, unedited, raw material that feels like a more complete digital diary for me than the finished processed photos I’m posting on Flickr. I’d never want anyone else to see my raw material unedited and bad photos, but just for my eyes only I’m finding it a very interesting experience.

    It will be interesting to me to see how I like Google Photos as my digital diary when I’ve finally got everything uploaded into the service. In my case, I have a feeling that this will take a few years. So far I’ve uploaded 39,312 to the site in a little over a week. I’ve had it running pretty much non-stop since Google Photos launched. Sometimes it feels like it’s hanging and I’ll force Google Photos to quit and relaunch it, but still, it’s going to take a long, long time to get all of my photos up there. By the way, Google Photos doesn’t provide you a photo count of your photos, but if you want to see how many you have uploaded you can get that number here (it’s in light gray in the upper right hand corner).

    6. Google can give you back all of your photos at once.

    One of the things that I like about Google Photos is that they give me an option to get all of my photos back at once. While Flickr will let you get all of your photos back as well, you have to manually drag and select your photos at Flickr (us use an album) to get them put into a zip file that they send you. With tens or even hundreds of thousands of photos online, I like the way that Google can deliver all of my photos back to me better. Although I don’t ever plan on having to get all of my photos back at once, I feel good knowing that Google will let me have them all back with just a few clicks vs. Flickr’s more difficult way.

    7. No ads.

    It’s nice that Google is giving you Google Photos completely ad-free. Although as a paid Pro Flickr user my Flickr experience is also ad-free, Flickr’s free service does/will have ads. When I’ve browsed Flickr outside of my Pro account I’ve noticed ads every so often. They don’t feel very disruptive, but still, no ads are always better than even just a little.

    I did think it was interesting earlier this week when it felt like Apple CEO Tim Cook took a pretty direct swipe at Google’s new photo offering in a speech that he gave highlighting the importance of your digital privacy.

    “We believe the customer should be in control of their own information. You might like these so-called free services, but we don’t think they’re worth having your email, your search history and now even your family photos data mined and sold off for god knows what advertising purpose. And we think some day, customers will see this for what it is,” said Cook.

    Cook’s comment does make you think just a little bit about how much data you may end up giving sites like Google Photos and Flickr with all of these photos. On the other hand, I’m sure a lot of people probably wonder why you’d want to pay for Apple’s iCloud storage when Google or Flickr will give you all you need for free. Google and Flickr are competitors to Apple’s paid storage service and so you have to wonder how much of Cook’s warning is dire vs. how much is just that he’d rather you pay Apple to store your photos for you than let Flickr or Google do it for free.

    Anyways, those are my more detailed thoughts on Google Photos thus far. I’m sure I’ll blog more about Google Photos as I use it more, but after a week of use I have a much more optimistic view of it than I thought I would. I find myself using it much more and going back to it several times a day over and over again.

    Disclaimer: yeah, yeah, yeah, nothing is forever (except diamonds right?), both Flickr and Google could always renege on whatever deal they currently are marketing out there.


    Thomas Hawk Digital Connection
  • 3 Downsides to Scouting New Photography Locations Online

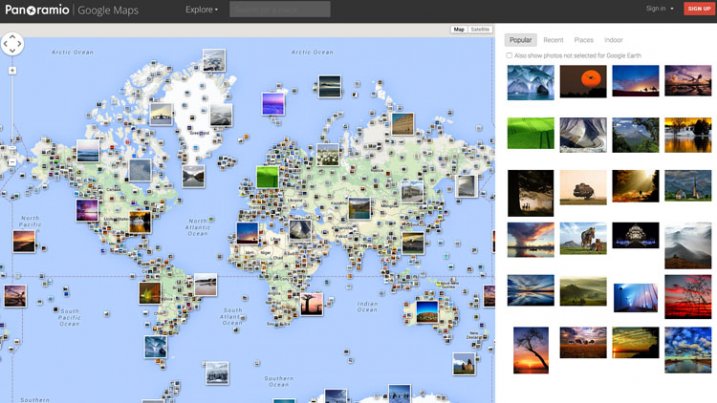
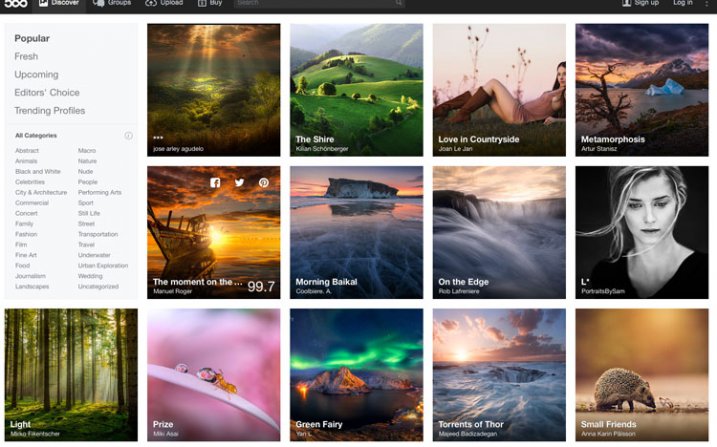
    Do you scout for potential photography locations online through sites like Flickr, Panoramio or 500px?

    Of course you do! It’s easy, you get hundreds of photographs to look at of any given location, and you might even get some great ideas that you hadn’t thought about for subject matter or composition. So why am I asking you this question?

    Well here’s another question for you…

    Have you ever thought about the downsides of online photo scouting?

    I’m going to venture a guess that it probably hasn’t even crossed your mind before today. What downsides could there possibility be with these rich resources, filled with information about where, and how a photograph was taken? Read on to find out.

    1. You’re seeing hundreds, if not thousands of photographs

    scouting-photos

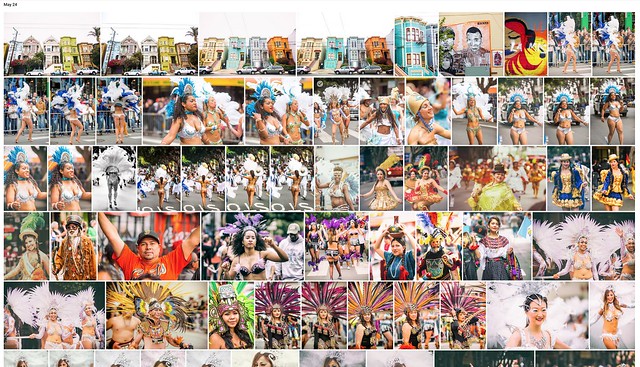
    When it comes to sites like Flickr or Panoramio, or even apps like Stuck on Earth (which pulls its photographs from these sites) you’re able to see many years worth of photographs taken by dozens, if not hundreds, or even thousands of photographers. At first glance this might seem like a great resource, and to some extent it is, but there’s also a downside – namely you might get lost trying to mimic and forget to create.

    Because you’re able to see so many photographs of a given location you may become so focused on a specific angle or idea from these photographs, that you forget to look for your own unique way to express the scene in question – and as a result your image may lose some originality.

    2. The things a photo can’t tell you

    A photograph on a website will give you some great ideas and insight into a location, but at the same time, it doesn’t tell you a lot of important things too. For example, you’ll have no idea how many attempts it took the photographer to find the right lighting conditions. You won’t know much about how difficult the location is to reach, or if that particular image required camping out to achieve the desired result.

    3. You’re drawn to the best photography

    scouting-photo

    Not only are you naturally going to be drawn to the best photography on these sites, but they tend to push the best photography higher in searches and ranking, making it even more likely that’s what you’re going to see. Again, on the surface this might sound like a great thing because you’re able to see all the great possibilities that a given location has to offer – but there may be a downside here as well.

    Think about this… how likely is it that these great photographs you’re seeing are from people who have visited a location just once? Most great photographs are planned, iterated upon, and purposefully shot. When you find a photograph on a site like this you’re looking at the best of the best, and as a result you’re seeing the best possible lighting conditions a scene might offer, which might not occur while your there.

    In an article I’ve previously written for DPS titled Start feeling GOOD about YOUR photography I noted that it’s important that you don’t compare your work to someone else’s. This is particularly true for those who have more experience behind a camera than you, as it will only lead to disappointment.

    I think that this advice can be extended to scouting for locations and inspiration as well. Setting the bar too high will only lead to stress and anxiety if you’re unable to produce results that live up to your expectations. This experience could leave you disappointed about your trip to a fantastic location – which had you gone in blind, may not have happened.

    Final thoughts

    I don’t want you to completely write off these resources, after all they do provide you with great inspiration and ideas. This isn’t an article designed to get you to stop using these sites, or even this technique for finding locations, but rather, to use it smarter. I hope this has given you something to think about. Please feel free to share your own thoughts in the comments section below.

    googletag.cmd.push(function() {
    tablet_slots.push( googletag.defineSlot( “/1005424/_dPSv4_tab-all-article-bottom_(300×250)”, [300, 250], “pb-ad-78623” ).addService( googletag.pubads() ) ); } );

    googletag.cmd.push(function() {
    mobile_slots.push( googletag.defineSlot( “/1005424/_dPSv4_mob-all-article-bottom_(300×250)”, [300, 250], “pb-ad-78158” ).addService( googletag.pubads() ) ); } );

    The post 3 Downsides to Scouting New Photography Locations Online by John Davenport appeared first on Digital Photography School.


    Digital Photography School