Category: Photography

  • Adobe Updates Photoshop and Lightroom with Creative Cloud 2015 and Launches Adobe Branded Stock Photography Library

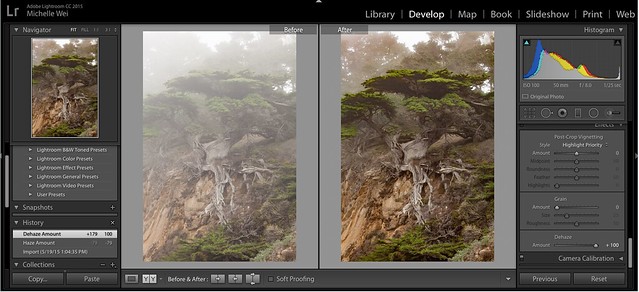
    Lightroom Dehaze UI

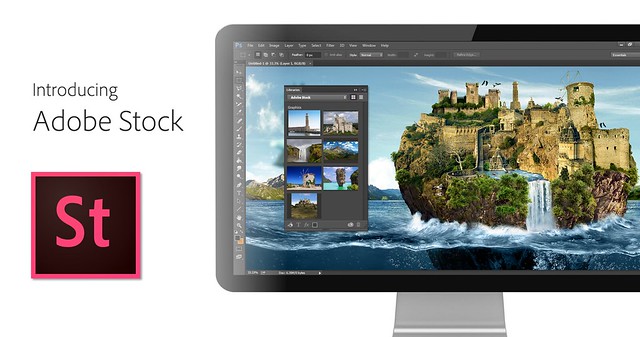
    Today Adobe is announcing updates for their Creative Cloud 2015 Photography package as well as the launch of their new stock photography offering Adobe Stock.

    I saw a demo last week of the new Creative Cloud enhancements. The enhancement that I liked the most was a new slider in Lightroom for haze and dehaze. With the haze slider you can now reduce unwanted haze in photos or add haze back in if you want more of an ethereal foggy type mood. I think that this tool will be especially dramatic when working with long exposure photography where you have clouds or low fog and want to get the mix of fog to subject just perfect.

    Photoshop is also adding in an additive noise function where you can produce more camera like realistic bokeh and blur noise when desired, making the transition in blur more natural. The Photoshop healing brush also now heals in real time and is faster than previous versions.

    These feature enhancements and updates will not be available to the current desktop versions of Lightroom and Photoshop, they will only be available for Adobe Creative Cloud subscribers. This is in line with Adobe’s previous stated goal of providing fast and rapid real time updates and upgrades to their subscription customers. I’m assuming that eventually these new enhancements will make their way to desktop upgrades/updates, but at present Adobe seems to be focused on providing the best and most current features available to their subscription customers.

    There are also additional features being launched for the mobile versions of Adobe products including better tone and vignette adjustment for Lightroom mobile and an Android version of Photoshop Mix.

    Adobe’s Creative Cloud photography package costs $ 9.99/month and you can subscribe to it here. They also offer a 30 day trial for you to try out Creative Cloud to see if it is right for you.

    Adobe Stock

    In addition to the improvements in Lightroom CC and Photoshop CC, Adobe is also announcing the launch of their new stock photography service simply called Adobe Stock.

    Because Adobe is so widely used by creatives in general, leveraging their software products to sell an Adobe labeled stock photography library seems to make a lot of sense. Adobe’s stock photography service will be featured as a menu item in Photoshop and will allow stock buyers to use watermarked versions of stock photos to create mockups and test design/layout ideas. Once a stock buyer is ready to license an image they can license it directly from Photoshop and download the unwatermarked version of the image.

    Images will cost $ 9.99 each to license or Creative Cloud subscribers can purchase one of two different subscription plans. The first plan costs $ 29.99/month and allows a subscriber to license up to 10 images a month and a second plan will cost $ 199.99 per month and will allow a subscriber up to 750 images per month.

    Adobe will pay out 33% of their sales proceeds to photographers — photographers interested in applying can apply here.

    Because so many stock photography buyers are connected into Adobe’s ecosystem, I think this stock photography offering will end up being very successful and represents formidable competition to the current stock photography giant Getty Images. Earlier this year Adobe purchased the stock photography agency Fotolia, but this new stock offering appears to be a different offering marketed directly under the Adobe brand and available through Adobe’s flagship Photoshop product.

    More: MacRumors, The Verge, Engadget, Techmeme.


    Thomas Hawk Digital Connection

  • Guide to Growing a Large Online Audience for Photographers

    In this article, learn about how you can grow an online following that will enable you to profile your work, make important new contacts, and eventually monetize your photography.
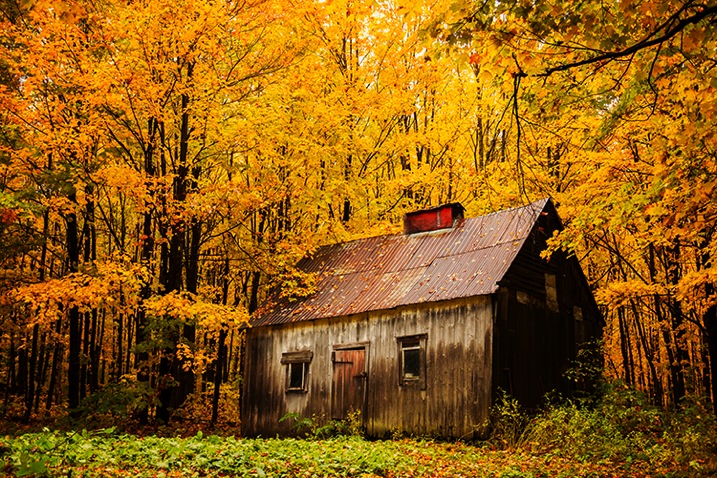
    TravelPhotographyMonetizedResized

    Through growing my online following I have successfully monetized a career in travel photography, visiting amazing destinations like Quebec, Canada.

    First, you need to decide on the best way to share your work. Is it a blog, a social media platform, or a combination of the two? Which social media platforms lend themselves best to photography? How many should you have? There are slight nuances between all social media platforms but the core ways to share remain the same.

    Choosing your platform

    The best advice for choosing your platform is to follow your heart. You should put your time and effort into the things that you enjoy. A great rule of thumb is to use a platform that you love, religiously, and then supplement it with one or two others. The best way to figure out what you love is to try everything, and I mean really try it. Give different platforms a few weeks each as you learn how to share content, how to engage with the community there, and how to navigate the different features. Look at how much momentum you can pick up in that time, how many users you connect with, and the sort of feedback you are receiving on your photography.

    Some great platforms for you to try are Facebook pages, Instagram, Steller, Trover, Google+, Flickr, 500px, Tumblr, Pinterest, Ello and of course, your own blog. Each social media platform is different with its own benefits and limitations. Make some effort to learn about each as you try them and remember that social media is social! If you’re not sure of something, just ask someone that you follow.
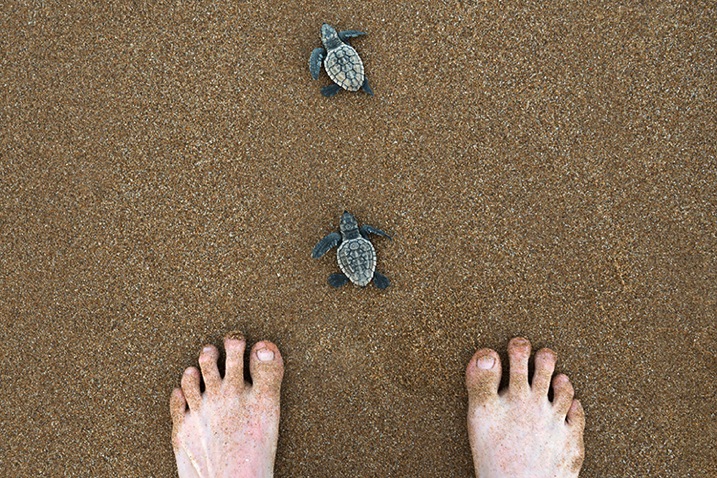
    ThePlatformILoveResized

    The platform that I love the most is Instagram because it lends itself well to the simple compositions I favor, plus users love uncomplicated images and subject matter such as these baby turtles in Bundaberg Australia.

    Sharing content

    Each platform is a little different, as are the ways of sharing your photographs, but despite subtle differences the core of sharing remains the same. Share your best work, network within the platform to get that work seen, and engage with the people who are engaging with you.

    What is your best work? From any shoot or session that you do, whether it is landscape, portraiture, a family shoot, wedding, macro, food photography, etc., choose a handful of favorites and feed them out slowly, as opposed to all at the same time. Build a story into your posts and talk about the work. You might wish to share your camera settings, a gaff you made during the shoot, some information about the subject matter, or maybe even ask for feedback or advice. Again this comes down to online sharing being social. Put yourself out there and you will be amazed at what can happen.
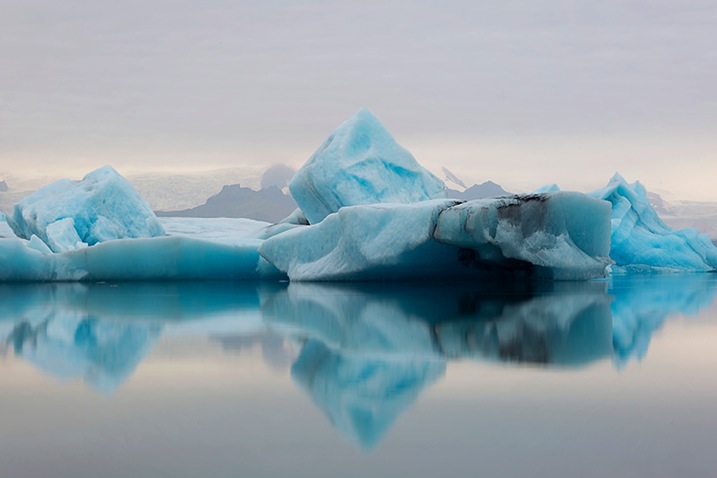
    ChooseTheBestResized

    I must have taken 500 photographs of the icebergs in Jökursárlón but I only shared a coupe online, and I made sure they were perfect for my audience, uncluttered with my trademark simple composition.

    Networking can be as easy as discovering photographers that you admire and commenting on their work, or using hashtag searches to find inspiration or even liking streams of images that you’re into. When another user receives a notification that you’ve engaged with their work they’re likely to come and check out yours. If they don’t, find others who will. Sharing your work online to grow an audience requires time and persistence as well as a genuine love and passion for what you’re doing. That’s why it’s important to use the platforms that you enjoy.
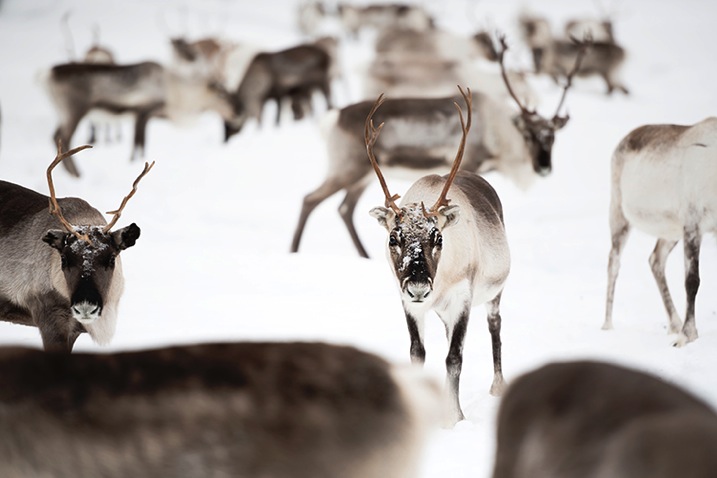
    WhyIEnjoyResized

    Another reason why I enjoy Instagram is because it is so populated. I can find any type of image, any destination, and many people with similar interests by sharing there. Reindeer fan anyone?

    Engaging can be done in several different ways but one of the most important ways is to thank people that have commented on your work or reply to questions as they’re asked. You don’t need to dedicate your life to it, but you will find that a little effort will enable you to snare new followers and build new connections.

    Over time, you may notice that you receive more likes and comments on a certain type of image. For example, if your macro photography is getting double the likes of your portrait photography then your followers are telling you what they really love. You can choose to give them more of what they love, or continue to diversify. In my experience the biggest social media accounts often have quite consistent subject matters. You will start to get people following you just for your macro photography, and perhaps you’ll notice a dip in engagement when you post anything else. It’s up to you how to manage this, but the best advice is to always stay true to your passions.
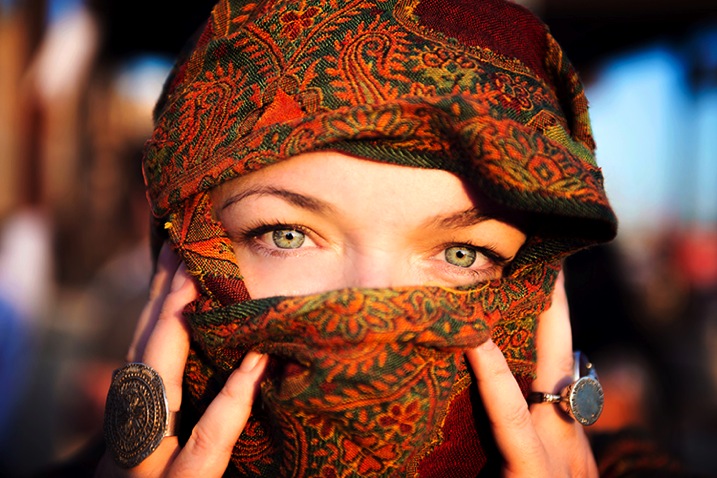
    StarTrueResized

    Although I am well known for travel photography and landscapes I also love portraiture, and despite the lower engagement I continue to post the work that resonates with me.

    Networking

    It’s a funny thing networking on social media; so many people do it badly. If you want to do well with people online then simply remember to be a person! You are not a faceless photographer pumping out uploads; you are a person with feelings, opinions, humor and personality, so you should let that shine through. Whatever platform you are using, you should have a profile photo that looks like you and a bio with a little information about yourself. Each time you upload a photograph you should write an engaging caption, and when people talk to you, talk back as you would in real life. You may be astonished at how many amazing people there are using social media, and they are all at your fingertips.
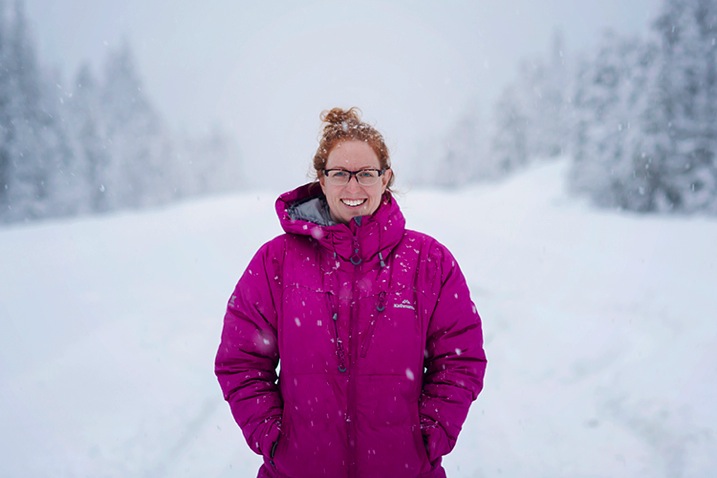
    ProfileShotResized

    A strong profile shot of you looking like yourself, doing something you love, in a scenic but uncluttered background, will help people engage with you.

    Over time you may realize that brands you admire use the same platform you do, and you should treat them the same way you would treat others. Engage with the brand and offer real feedback on what they’re doing in that space. Share your personality and you may find them discovering you back. The same goes with potential clients if you are trying to break into a certain photography industry. Just be yourself, share great work, network, engage, and persist.

    Monetize

    If you ever get to the stage where you have a large online following on any platform, then the time may be right to monetize. There are various ways of doing so. This can be really dependent on the type of photographer you are, and the kind of work you are doing. You may be a wedding photographer you has stylists offering you money to promote them on your channels. You might love travel photography (like me) and find a way to promote destinations to your online followers. Maybe you’re into lifestyle photography and brands pay you to include their product in shots in exchange for a fee. With an audience you will find that the photography industry will open up to you as more and more businesses are hiring based on both photography style and online reach.
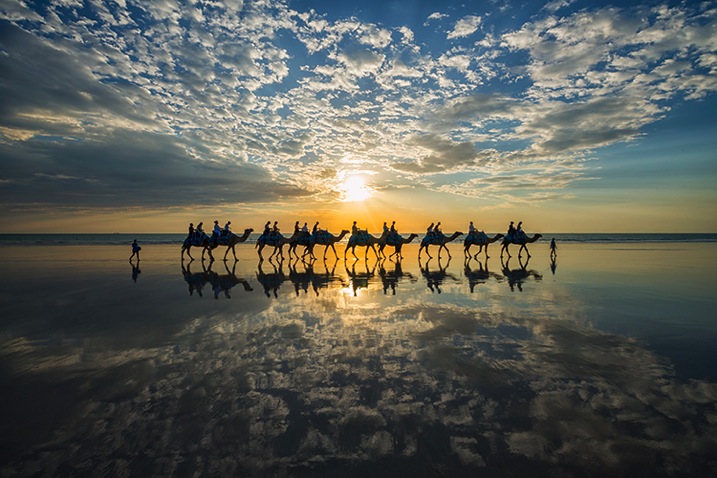
    OnlineReachResized

    It’s not a complicated image, perhaps any decent photographer could have taken it, but combine this image with a 400,000 strong audience and I get a foot in the door thanks to my online reach. (Follow Lauren on Instagram here)

    If not the above, then having an online following will expose you daily to an audience that may one day need a photographer. Online sharing gives you a chance to be seen by everyone from businesses, to journalists, to tourism boards, and of course potential clients and friends. By finding the platform that you love and sharing great work; by putting your best foot forward and networking and by keeping an eye out for opportunity, you can definitely go places no matter the level of your photography.
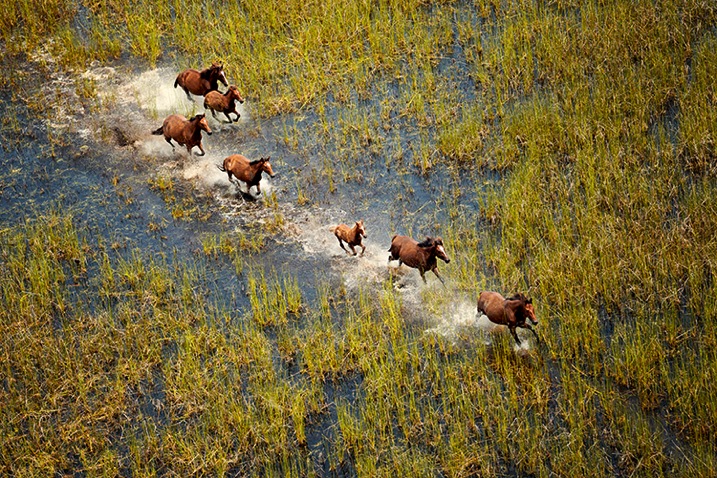
    WeAllStartSomewhereResized

    We all start somewhere. Online sharing has enabled me to take my photography to places I never would have believed possible and having an audience makes me proud and accountable for every image I share.

    googletag.cmd.push(function() {
    tablet_slots.push( googletag.defineSlot( “/1005424/_dPSv4_tab-all-article-bottom_(300×250)”, [300, 250], “pb-ad-78623” ).addService( googletag.pubads() ) ); } );

    googletag.cmd.push(function() {
    mobile_slots.push( googletag.defineSlot( “/1005424/_dPSv4_mob-all-article-bottom_(300×250)”, [300, 250], “pb-ad-78158” ).addService( googletag.pubads() ) ); } );

    The post Guide to Growing a Large Online Audience for Photographers by Lauren Bath appeared first on Digital Photography School.


    Digital Photography School
  • How to Pose Groups for Portrait Photography

    Group Main

    For many years the gold standard for posing groups looked just like my first grade school photo. Everybody would be lined up and asked to stand as awkwardly as possible, feet together and for the lucky ones in the front, hands clasped together in their laps.

    The photographer would shoot two frames (one for safety) and count every one in with a “1..2..3…say cheese” my grade one teacher Mrs. Witchell was way too cool to do cheese. She busted out her own version of Blue Steel instead. Respect.

    Sadly this style of posing large groups is still pretty much the norm. But with some careful planning, and a little imagination, portraits of large groups can look far more dynamic than my grade one school photo.

    Group 1

    The classic school or sports style group photo is rigid and posed awkwardly. Introducing some variation in height, pose and shape of the group with give your portraits more life and energy making them far more interesting and dynamic.

    There are four main styles I like use to shoot my groups:

    1. The 90210

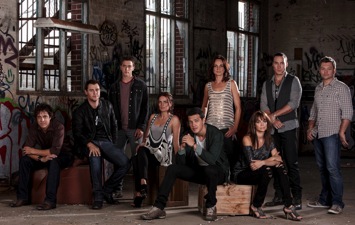
    I learned this style of posing groups by studying the publicity shots of the American teen drama from the 90s, 90210 (I had a huge crush on Dilan). I have now developed, and modified, this technique and it has become my go to pose for many of the cast shoots I do.

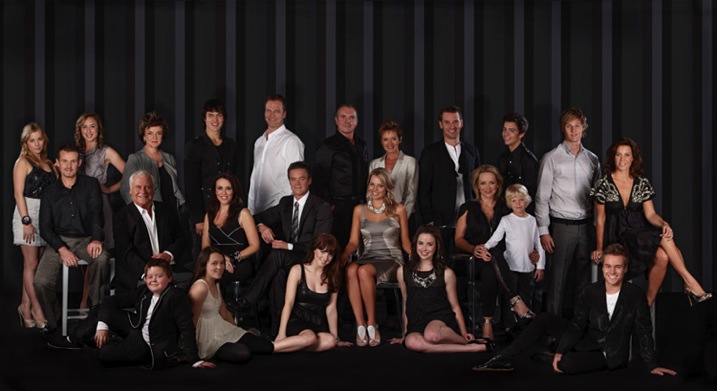
    I like to create interest in these group shots by staggering the levels of all my models. I will have the back row standing. Middle row seated at various heights including high stools, chairs, lower ottomans or boxes. I then have a third level either on the floor or seated on very low stools or boxes. Lastly I pose each person individually and bring them onto the set one at a time, so I can see how the overall shot is looking.

    90210 2 3 90210 2 4
    90210 2 90210 2 6

    Checklist

    • Shoot at 50mm or longer, as wider lenses will distort the group and make people in the front appear larger than those at the back. I usually shoot at around 100-150mm.
    • Ensure everyone is clearly visible.
    • Try and space everyone out so the image does not feel too constricted.
    • Shoot at least 10-15 frames. This is harder than it sounds because large groups can be intimidating and many people in the group tend to lose interest after two or three frames. The way around this is to warn everyone that you will be shooting at least 10 frames.
    • Keep the dialogue going. Be complimentary. Never single anyone out for doing the wrong thing.
    • If you need to, stop the shoot and give more direction.
    • Don’t be afraid to make people wait. I used to rush through my group shots (particularly with corporate males and athletes) because they intimidated me. I now realize that when I rush I don’t get great shots. Be confident and explain that you want to get this right, and if everyone does their bit it should all be over in five minutes.
    • Keep the dialogue going. Silence is a cue that you are unhappy with the shot or are finished shooting.
    • Lower your tone and speak calmly. This is a great trick I learned from my teacher training. Whenever I’m speaking to a large group I lower my voice rather than raise it. This way everyone becomes silent to hear you. I also find that women’s voices tend to go up and sound shrill when they try and raise it. This doesn’t sound very assertive or authoritative.

    90210 3

    The 90210 style also works for larger groups like this shot of the entire cast of the Australian Soap Opera, Neighbours ( above) or the cast and crew shot of the musical Moonshadow (below). I use the exact same approach and set up my shot in groups of three and five, staggering the head heights to keep the shot from looking too square.

    Big Groups

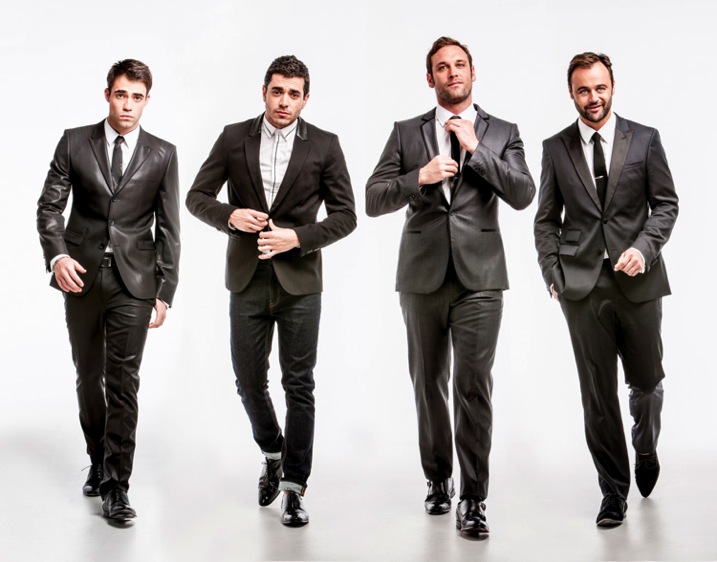
    2. The Reservoir Dog

    This shot was inspired by the opening sequence of a Quentin Tarantino movie, Reservoir Dogs.

    Resdog

    This is a great option to photograph groups if you are pressed for time, need something more dynamic, or have a group of people that have trouble posing or taking direction.

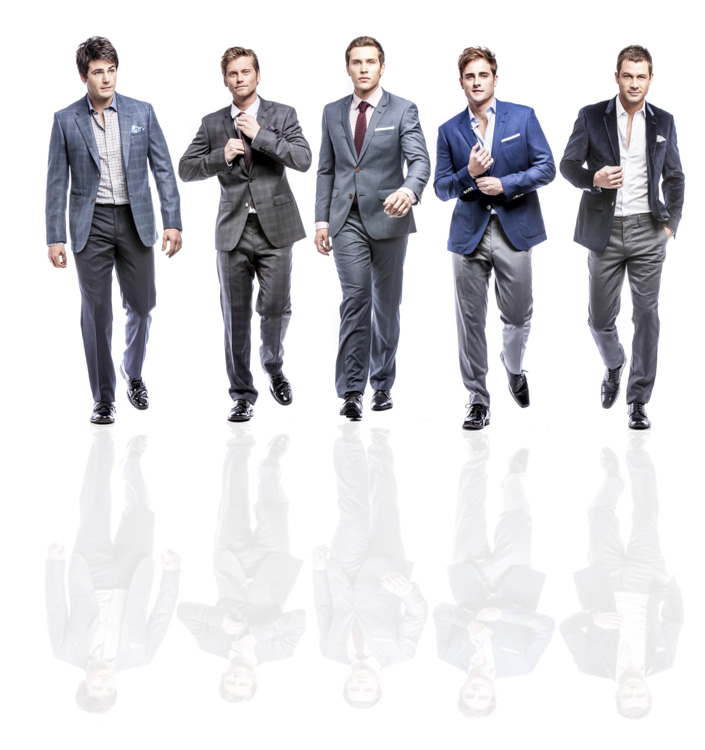
    I like to shoot very low to the ground (sitting or laying) and ask the group to walk towards me. It works best when I give each person individual direction before we start. Eg., Person 1 put one hand in your pocket;,Person 2 walk and fix your tie as you go, Person 3 button your jacket up as you walk, Person 4 walk with a strut and attitude.

    Reservoir Dog 2

    If this shot is left to chance you may get lucky, but a little direction will really take it to another level.

    When shooting set your camera to autofocus (AI servo for Canon or continuous for Nikon) and shoot with a long lens 150-200mm (to remove background distraction). I recommend aperture of f/5.6, a shutter speed of 1/250th of a second or higher, and focus on the face.

    3. The Cartier-Bresson

    This style is named after Henri Cartier-Bresson, a French photographer who took snapshots of everyday life and made them look extraordinary. He was a true master of candid photography.

    I love photographing groups in is this fly on the wall style, which is posed to look like a candid snap-shot of life. I often get my inspiration for these poses from popular culture.

    Cartier Bresson

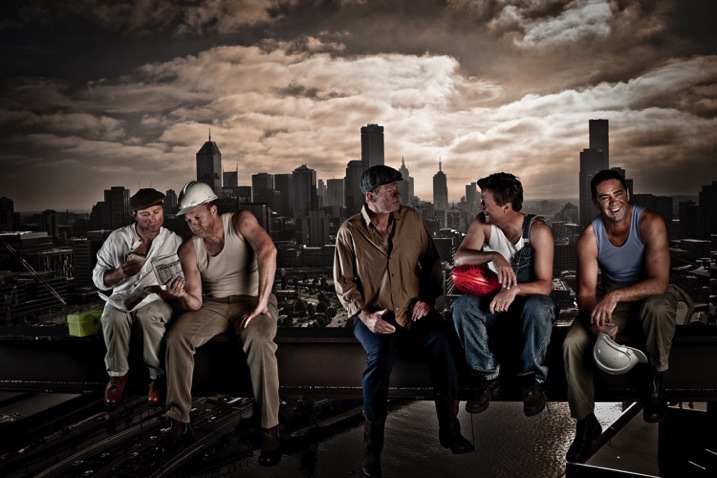
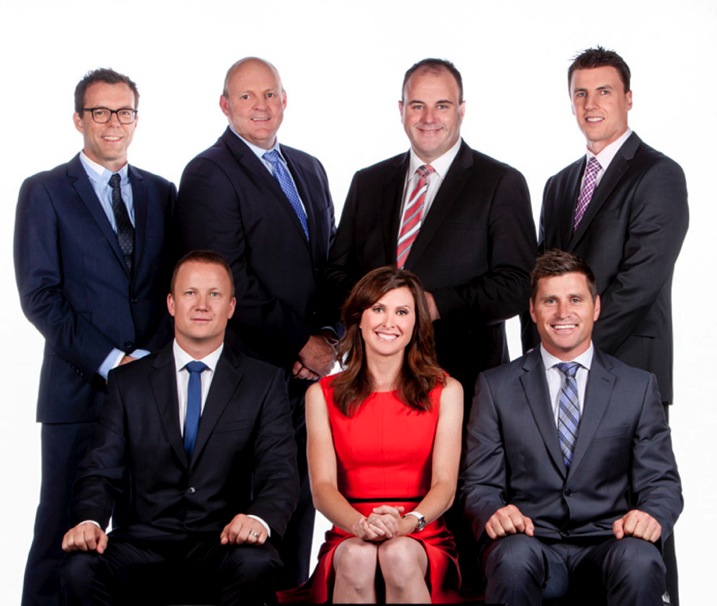
    This photo of the cast of The Footy Show is homage to the famous 1932 image Lunch atop a Skyscraper.

    When I’m directing a shoot like this I give everyone a role and ask him or her to repeat it over and over again. Poses are varied only minutely. For example: Billy and Shane (far left) were directed to look at the newspaper and eat the sandwich. Sam and JB (center) were asked to have an animated conversation and Garry (far right) was asked to laugh off camera. Expression was varied slightly but the pose was kept the same.

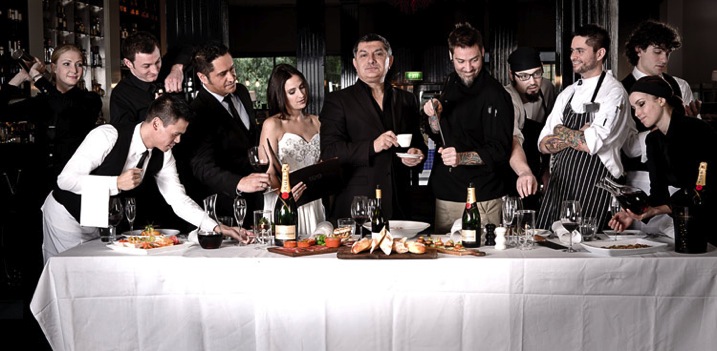
    Lastsupper

    This image was inspired by DaVinci’s Last Supper, and was photographed using a very similar technique to the Footy Show image.

    4. The lineup and “v” posed group shot

    Small Time Gangster

    I photographed the cast of Small Time Gangster individually for this movie poster and then the shots were Photoshopped to create a “V” shape that is really popular in advertising and the entertainment industry.

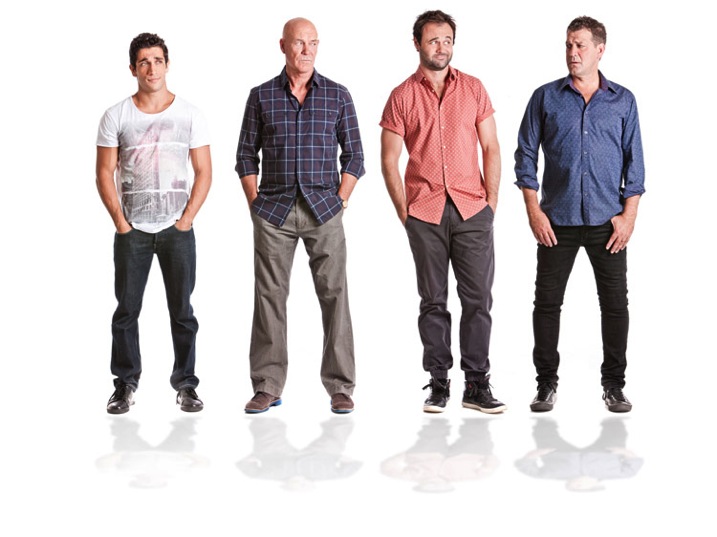
    Husbands A

    The Cast of House Husbands was shot individually for this group shot, then the best expressions and poses were selected to create this image.

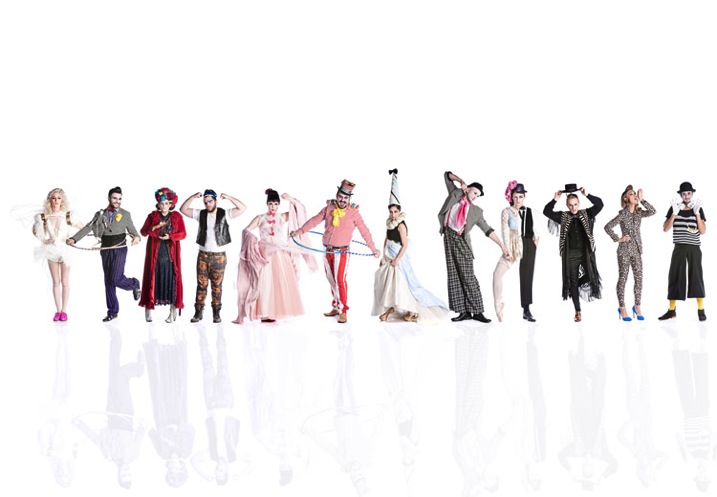
    Project Runway S4

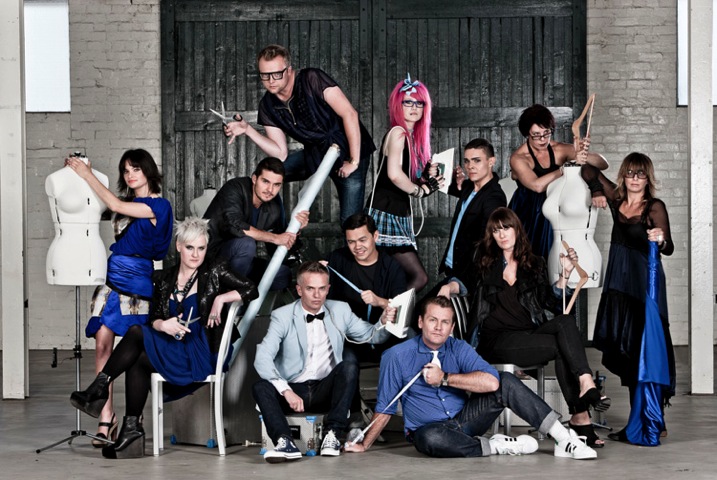
    This style of photography works really well for large families and corporate groups, and really lets the individual personalities come through. I thought this was the ideal way to capture the cast of Project Runway Season 4.

    This style of shooting was born out of necessity. Many of the TV shows I shoot cast shots for can’t schedule all their talent to be on set at once so I shoot them individually, and combine the shots in post-production. This is a great technique to capture everyone’s personality and it always looks dynamic.

    Finally, don’t forget to have fun when shooting group portraits and let their personality (and yours) shine!

    Lifestyle

    These images were all posed to look like they had been taken candidly. The problem with candid photography is that you are relying on too many variables to be just right before you can get your shot. You need good light, location and expression. Miss out on one of these and your shot may turn to caca. If you set up the shot and give everyone great direction, you are guaranteed a great shot.

    What are your favourite ways to pose and direct groups? Is there anything I may have missed or do you have a group portrait you are really proud of? I’d love to hear from you.

    All images copyright Gina Milicia 2015

    googletag.cmd.push(function() {
    tablet_slots.push( googletag.defineSlot( “/1005424/_dPSv4_tab-all-article-bottom_(300×250)”, [300, 250], “pb-ad-78623” ).addService( googletag.pubads() ) ); } );

    googletag.cmd.push(function() {
    mobile_slots.push( googletag.defineSlot( “/1005424/_dPSv4_mob-all-article-bottom_(300×250)”, [300, 250], “pb-ad-78158” ).addService( googletag.pubads() ) ); } );

    The post How to Pose Groups for Portrait Photography by Gina Milicia appeared first on Digital Photography School.


    Digital Photography School
  • 6 Strategies for Launching a Successful Photography Blog

    Blogging become one of the most popular pastime and income source for photographers these days. If you’re going to start a photography blog, you have probably faced with a lot of issues which are quite confusing. And the very first question is: where to start out? Fortunately, modern software solutions enable everyone to create a blog easily with no coding Continue Reading

    The post 6 Strategies for Launching a Successful Photography Blog appeared first on Photodoto.


    Photodoto

  • Portrait Tips for Posing Women

    Editor’s note: this week we will be featuring a series of articles on posing for portraits. Look for a new one each day. If you miss any make sure you subscribe to our newsletter and you’ll get a reminder of all our articles once a week.

    Let’s face it – unless you are working with professional models who know exactly what to do, and how to pose in front of the camera with little to no direction from the photographer, most of your clients, especially women are self-conscious and stiff the moment they get in front of the camera. Nervous laughs and fidgety hands are all signs that they are uncomfortable; they need to feel at ease and are looking for a lot of direction from the photographer. As photographers that is our primary job – to make the client feel comfortable with us, being in front of the camera, and also give them beautiful photos of themselves. To that end, there are some simple tips and poses that work wonders especially for posing women in portraiture.

    DPS Articles for posing tips for women 07

    #1 Put them at ease and make them laugh

    Even before you start taking their pictures, make small talk; ask them about their day and try to get them to relax. Find out what they think is their good side, and why, and keep that in mind while photographing them. If all else fails and they are still very uncomfortable and stiff, have them close their eyes, and at the count of three, open them and give you a very natural smile. This works almost 100% of the time. When they have their eyes closed, they relax their body and face and are able to gather their composure for a few seconds. If you have a continuous photographing mode in your camera (i.e. burst mode), use that to take a quick series with their eyes closed and when they open them. There is bound to be one that will work.

    DPS Articles for posing tips for women 06

     #2 Avoid stiff limbs

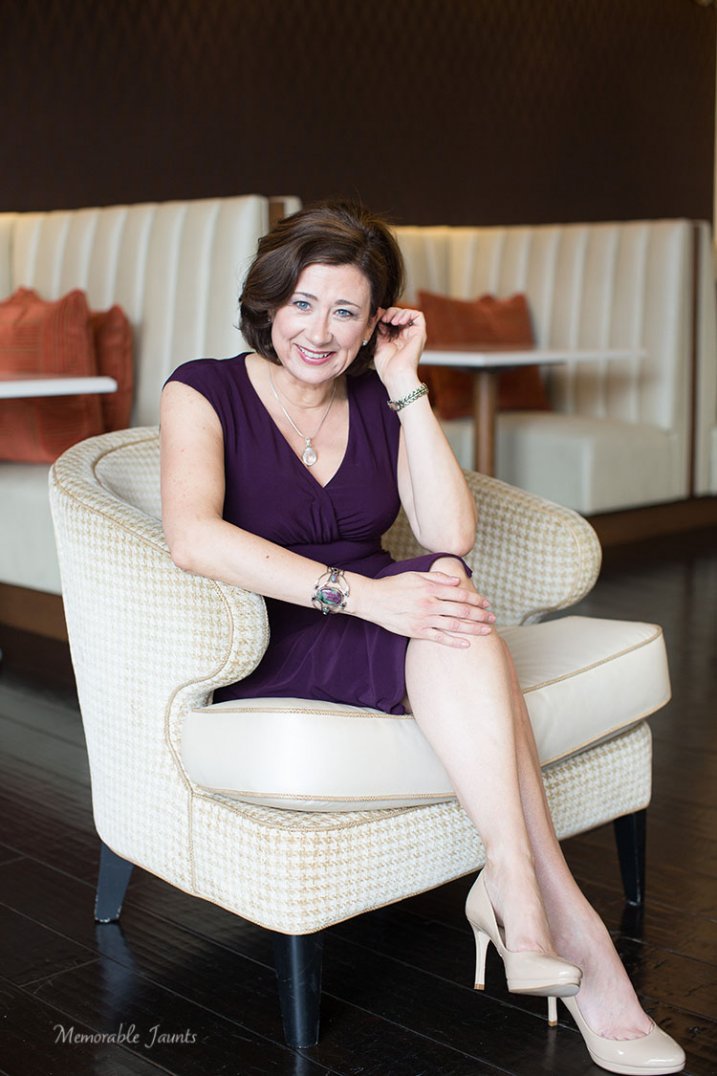
    Choose poses that avoid awkward angles to their hands and feet. Have them sit down on a chair, on the floor, or even on the sidewalk. With older women, have them sit on a chair and cross their legs. This gives a little poise and grace to the image. With younger women, or if you are outside, have them sit down on the ground, or lean against a wall or a fence, and cross their legs at the ankles. Always make sure there is a little bend in the limbs to soften the stance.

    DPS Articles for posing tips for women 05

    #3 Give them something to do with their hands

    Often when posing people if the hands are awkwardly hanging on the side of their body, it looks weird and unnatural. Instead direct your clients by giving them something to do with their hands. Touching their face lightly, putting their hands through their hair, twirling the ends of their hair with their hands, holding the folds of their dress, interlacing their fingers, and putting their hands on their lap all work well. This gives women something to focus on, and helps them relax.
    Give your clients something to do with their hands.

    Give your clients something to do with their hands.

    #4 Find the right angle to point the camera

    Women always want pictures that make them look slimmer. This is easily achievable by a small change in the angle of the camera. Photographing from slightly above the client with the camera pointing downward, elongates the neck and gives a long lean effect to the face. This also helps define the jaw line. One caution, don’t photograph down at a 90 degree angle to the face. Not only is this an uncomfortable pose to hold when the client is looking straight up, but you don’t want to photograph down someone’s nose!

    If you have to photograph women straight on where the camera is parallel to the face, have your clients slightly tilt their head to the right or left. Again, this relaxes the face, neck, and shoulders and gives a little twist to the normal straight-on portrait photo. Sometimes standing behind the client and having them look over their shoulder at you also works. To me this is a very natural and candid pose – as if they were doing something and turned to take a casual candid photo. One thing to be watch out for here is unflattering creases around the neck.

    DPS Articles for posing tips for women 02

    Looking up at the camera

    DPS Articles for posing tips for women 03

    #5 Environmental elements

    There is just something really magical about the wind blowing and lifting the hair, or even beautiful catchlights in the eyes. This almost instantly adds a wow factor to a portrait. If you happen to be outside, try and use such environmental factors to your advantage. If you are indoors, the same effect can be achieved with a small fan, simple hair dryer, or even an extra reflector used to create some wind.

    For catchlights, if you are outdoors, place your client in an open shade area and look towards a light source (the sun or even an off-camera flash). If it happens to be a cloudy day, or if you are photographing inside in a studio, catchlights can be achieved with reflectors. If you have a reflector that has multiple colored sides, use the sliver side and hold it at a 90 degree angle, or less, to the face. Play with the reflector placement to get the right look you want.

    DPS Articles for posing tips for women 04
    To me, all these tips have a common thread – pose your client such that they are comfortable in the pose. An uncomfortable pose or stance will show itself  obviously in your images, no matter how lovely you think the pose is. Never force a client into a particular pose.

    Feel free to share tips that work for you when posing women for portraits.

    Check out more in this week’s posing series here:

    • Portrait Posing Tips- How to Help People to Relax and Take Better Photos
    • 5 Unposing Tips for Kids for More Natural Photos
    • How to Pose People for Headshots

    googletag.cmd.push(function() {
    tablet_slots.push( googletag.defineSlot( “/1005424/_dPSv4_tab-all-article-bottom_(300×250)”, [300, 250], “pb-ad-78623” ).addService( googletag.pubads() ) ); } );

    googletag.cmd.push(function() {
    mobile_slots.push( googletag.defineSlot( “/1005424/_dPSv4_mob-all-article-bottom_(300×250)”, [300, 250], “pb-ad-78158” ).addService( googletag.pubads() ) ); } );

    The post Portrait Tips for Posing Women by Karthika Gupta appeared first on Digital Photography School.


    Digital Photography School
  • How to Shoot Images and Use Merge to HDR in Lightroom 6

    Master teacher Phil Steele brings us a video on how to shoot bracketed images and merge them into and HDR image using the new Merge to HDR function in Lightroom 6 (or CC).

    HDR is something that gets a bit of a bad rap and people seem to either love it or hate it. It’s one of those extreme things like opera and sushi. But the new Merge to HDR feature, inside Lightroom, makes it easy to try it and make realistic looking images in a snap – without the need for any other software or plugins.

    Let’s have a look at Phil’s HDR shooting and LR processing tips:

    If you enjoyed that and want to learn more about Lightroom you can check out Phil’s Lightroom course here.

    googletag.cmd.push(function() {
    tablet_slots.push( googletag.defineSlot( “/1005424/_dPSv4_tab-all-article-bottom_(300×250)”, [300, 250], “pb-ad-78623” ).addService( googletag.pubads() ) ); } );

    googletag.cmd.push(function() {
    mobile_slots.push( googletag.defineSlot( “/1005424/_dPSv4_mob-all-article-bottom_(300×250)”, [300, 250], “pb-ad-78158” ).addService( googletag.pubads() ) ); } );

    The post How to Shoot Images and Use Merge to HDR in Lightroom 6 by Darlene Hildebrandt appeared first on Digital Photography School.


    Digital Photography School
  • How to Pose People for Headshots

    Editor’s note: this week we will be featuring a series of articles on posing for portraits. Look for a new one each day. If you miss any make sure you subscribe to our newsletter and you’ll get a reminder of all our articles once a week.

    HeadshotPose8

    Headshots today are not what they used to be. Gone are the days of marbled backdrops in an indoor studio! Saturated markets filling up with fresh entrepreneurs, means that headshots are more important than ever these days. While location and wardrobe play a major role, knowing how to pose your subject is also vital in creating a successful headshot image that will stand out from the crowd. Let’s take a look at several examples of poses to keep in mind for your next shoot.

    Basics

    Before we go through some photos, let’s go over the basics of any pose. The fact that it’s for business use means that your subject should always be aware of their posture in a headshot. I simply tell people to put their shoulders back and their chest out. Once they adjust their posture, you can suggest gentle shifts if needed.

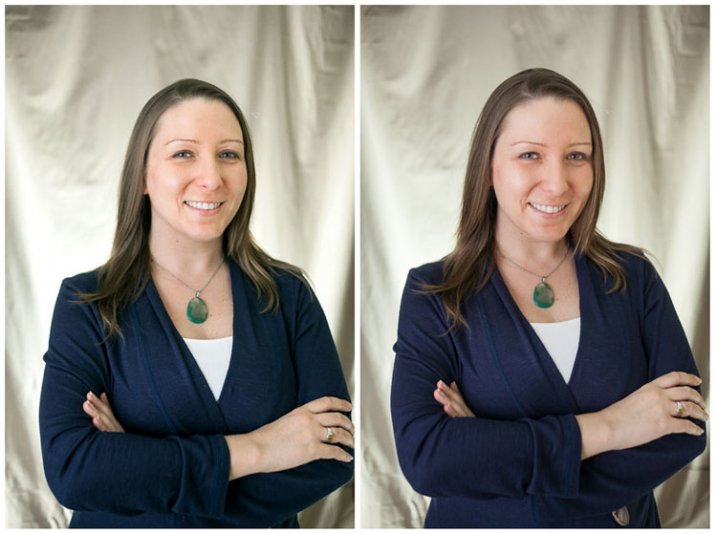
    Another key point to mention to your subject is that they should lead with the forehead. This one can be a subtle, but powerful, shift in their pose. To lead with the forehead simply means that, depending on the overall pose/activity, they should always aim to have their forehead lean ever-so-slightly toward the lens, while pushing their face slightly forward. Below are two photos to compare – the left photo is with the model looking more or less straight ahead, while the photo on the right is when she followed my instructions about leaning the forehead slightly toward the lens. Note that I almost always have to slightly adjust the subject, because most people will tend to either lean in too far or lower their chin too much, so have them make slight adjustments until you find that ideal angle for them!

    HeadTilt

    Left photo shows subject looking straight at camera. Right photo shows subject leading with the forehead.

    Now let’s get into several options for poses:

    Crossed arms

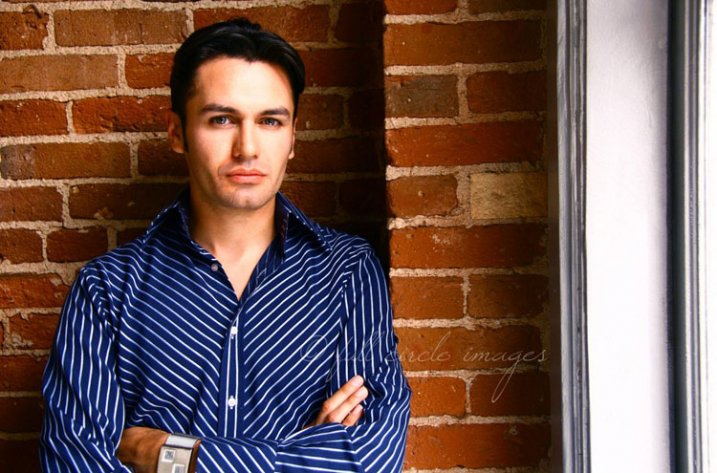
    First, let’s talk about one that harks back to traditional headshots – the crossed arms pose. While this general pose is nothing new, by simply changing location, having the subject add a slight lean, and loosening up the tightness of the crossed arms, this pose can feel modern. In the example below, the subject is slightly leaning in to the brick wall, while crossing his arms and maintaining an upright posture. When having women do this pose, encourage them to very loosely cross their arms; otherwise it will feel quite severe and cold. Men do have a bit more room to keep the arms tight, but be mindful of how tight they are to avoid that same severity.

    HeadshotPose17

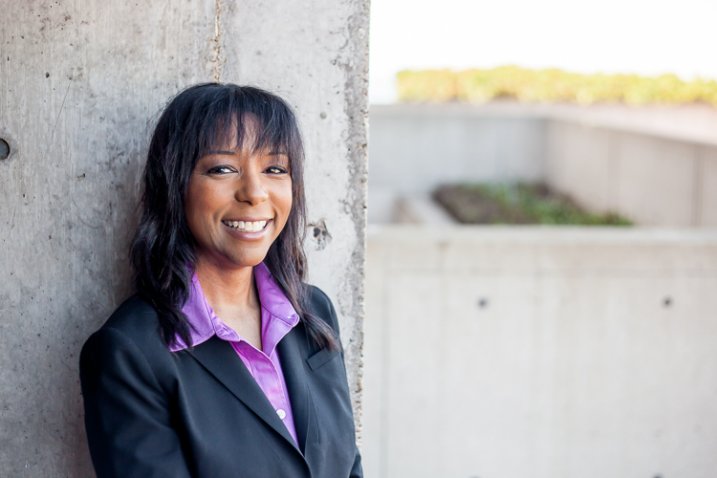
    Here we see another example of a headshot with crossed arms, only this one relies on location to add warmth. Since the subject is a woman, she is also adding a slight tilt to her hip and dropped her shoulder closest to the camera. This all helps to soften up a traditionally harsh-feeling pose.

    HeadshotPose14

    Lean

    Adding a slight lean can make a big difference in headshot posing. Many people are looking for a lifestyle feel to their headshots, which typically will call for an outdoor location. So if you go on location, why not use it to add personality?

    I’ve already mentioned adding a lean to the crossed arms pose, but a simple lean against a wall or railing can also provide a more natural feel to your pose. In the example below, the subject is leaning against a clean wall. The detail is in the texture of the wall, and the lean provides a softening to the pose. The wardrobe helps maintain some formality (this subject in particular is a lawyer), while the slight lean and setting add a touch of modern casualness.

    Note that even though the subject is leaning, it is still important for them to maintain good posture. You can let them know to lean with their bottom half, but not let their entire back slouch into the wall. Or, they can gently lean with one shoulder to maintain balance, while keeping posture upright. If the subject starts to look a bit stiff, have them “shake it out”, take a deep breath, and settle back into the pose. Sometimes all they need a break from the stiffness!

    HeadshotPosing18

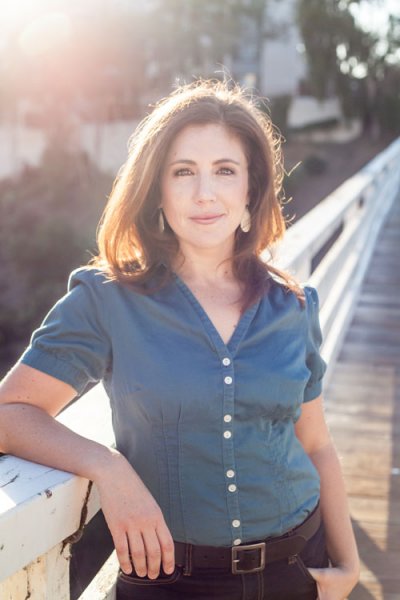
    Here is another example of a lean working to the subject’s advantage. In this case, below, the subject is portraying a casual brand, but still needs to look polished and professional. Using the railing of the foot bridge that is the setting, the subject raises one arm to lean on the railing. This helps to give the subject something to do, rather than having their arms dropped to the side. In this case, the crossed arms would have portrayed an image that was too formal for the client’s needs, so this alternative was ideal.

    HeadshotPose7

    Sitting pose

    There are a few variations of sitting poses that work well for headshots. One option is to have your subject sit and join their hands over their knees. Ideally, this would happen if they are sitting at a location where the knees end up being slightly higher than their hips, which can easily happen if they sit on stairs. In the example below, the subject is sitting on steps, loosely laying her hands over her knees, and still keeping her posture upright (very important!). This gives the subject something to do with their hands, and it adds a bit of formality to a pose than can very easily feel far too casual.

    HeadshotPose6

    This next example is a bit more formal overall in terms of location and expression, but the pose is meant to soften it a bit. Here we have two subjects, each sitting on different stairs. Note that the subjects are quite different in height, so the different steps offer an opportunity to balance out the heights a bit. In this photo, the subject on the top step is sitting and leaning slightly on the railing. His arm is casually laying over his leg. The lean towards the railing helps to show a bit more of his torso since there is another subject in front of him. The front subject is slightly leaning back and to his left, helping to unify him with the other subject. Since these two men are business partners, it was important to maintain a sense of partnership in their poses.

    HeadshotPose1

    Walking

    This is one of my favorite classic moves for headshots, and it does several things including:

    • It loosens up their body if they are a bit stiff in front of the lens.
    • It encourages a more natural expression because I get the opportunity to banter with them as they walk.
    • It creates a sense of movement that translates into a deeper connection with the lens.

    Below are several examples of headshot subjects walking towards the camera. As always, be sure to let your subject know to maintain good posture while walking.

    HeadshotPosing14 HeadshotPosing16

    Action

    Here is where modern headshots get fun. Especially with entrepreneurs, you have the opportunity to express something about what they do, and what their personality is like. If they make a product, you can have them show you their product, If they do some sort of training, you can have them perform a bit of what they do. With these, giving detailed direction about posing is not as important as letting them do their thing. In the photos below, the subjects were given free reign to do what they want to express themselves. In these cases, be prepared to snap quite a few frames! The final images will need to not only capture the movement and activity, but also have flattering facial expressions.

    HeadshotPose3 HeadshotPose18
    HeadshotPose16 HeadshotPosing12

    Regardless of the poses used, be sure that they are a good fit for the branding of the client. Getting to know the client’s needs is absolutely the best way to know how to pose them.

    Do you have any favorite poses that you like to use for headshot clients? Please leave a comment below to let us know.

    Check out more in this week’s posing series here:

    • Portrait Posing Tips- How to Help People to Relax and Take Better Photos
    • 5 Unposing Tips for Kids for More Natural Photos

    googletag.cmd.push(function() {
    tablet_slots.push( googletag.defineSlot( “/1005424/_dPSv4_tab-all-article-bottom_(300×250)”, [300, 250], “pb-ad-78623” ).addService( googletag.pubads() ) ); } );

    googletag.cmd.push(function() {
    mobile_slots.push( googletag.defineSlot( “/1005424/_dPSv4_mob-all-article-bottom_(300×250)”, [300, 250], “pb-ad-78158” ).addService( googletag.pubads() ) ); } );

    The post How to Pose People for Headshots by Natalia Robert appeared first on Digital Photography School.


    Digital Photography School

  • Review: Voeloon V58 Speedlight for Canon

    I’m going to start with a small admission… I’ve always been about brand-name stuff. There, I said it…

    I have had Canon cameras since the a5 (it was the small, boxy predecessor of the Ixus range) and before that, Nikon film cameras (and during, come to think of it) and have always had the mindset that I should purchase Canon lenses for my Canon cameras, always thought that I should buy well known lights and tripods and… (the list, it goes on and on)

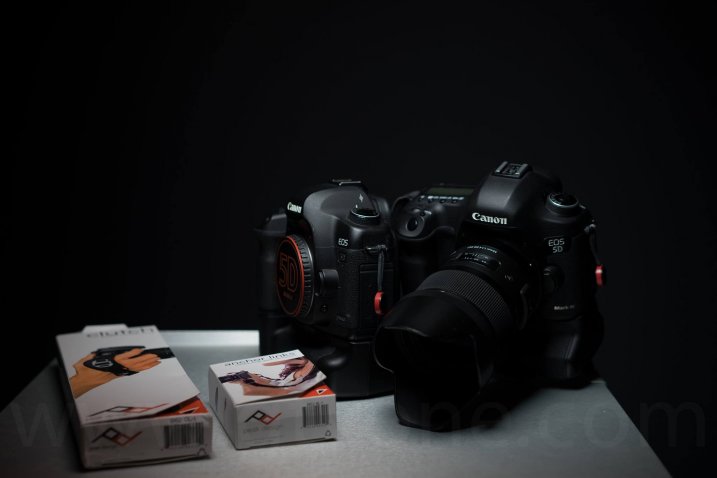
    Simon_Pollock_Canon_Cameras_Sony_PeakDesign
    More recently though, I’ve had less disposable cash (kids! yay) and when you add that to getting increasingly more creative through experience and needing different gear to try the ideas in your head, well, you hit walls. One of those walls I’ve found a way to work with – that’s the “but it costs so much” wall, there are a couple of non-big-brand products that do what you need and, in this case, do it quite well.

    camera_flash_review_gtvone

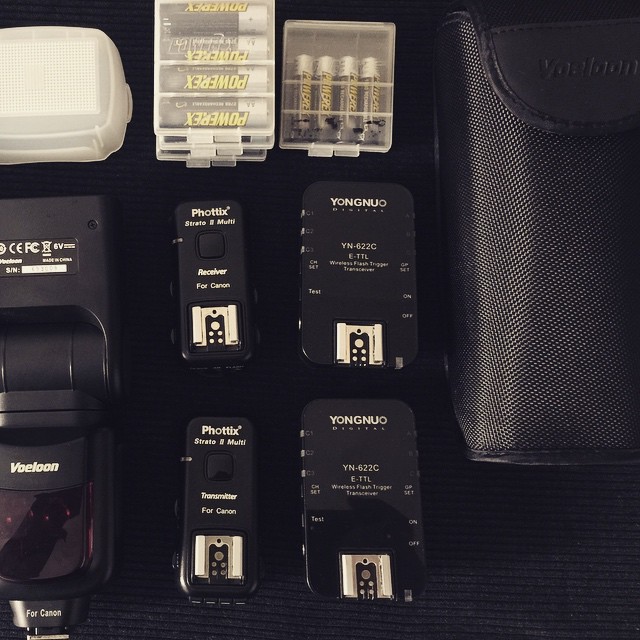
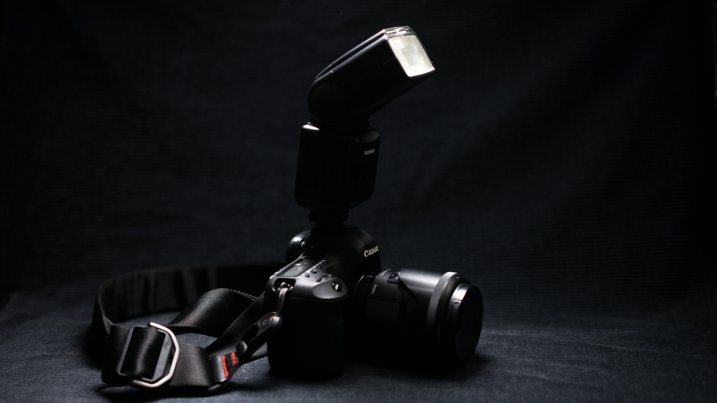
    Below is the Voeloon V58 camera flash, it’s a flash unit with a guide number of 58, it can high-speed sync up to 1/8000th of a second, and it comes in at just under half the price of a name brand unit. Should you buy one?

    Simon_Pollock_Voeloon_V56_Flash_Review

    Looking for alternatives to big brands, ones with more affordable price tags, the question that was frequently popping up in my mind was “but if I only spend $ 200 on a flash rather than $ 499, will it simply fail and be thrown away?”  Or there was the “but, the more expensive flash does more things, will I regret my choice?” and, honestly, for some people the answer will be yes, you will regret your choice – but that’s life I suppose.

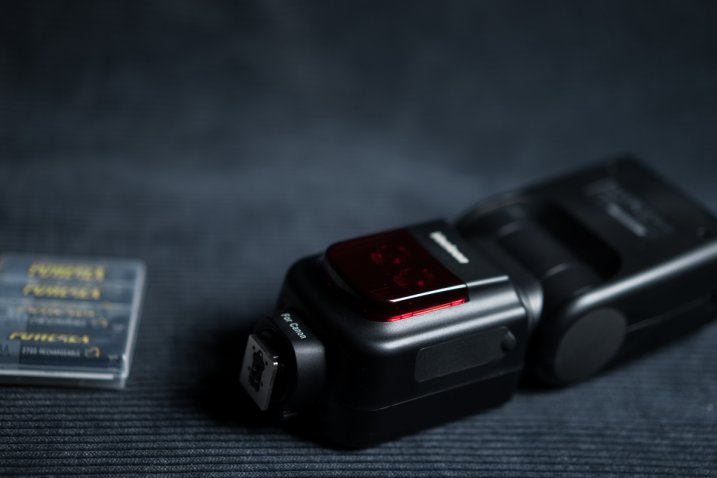
    The answer to my first question “will it simply fail and be thrown away” well, I’ve only had the flash unit for a bit over a month and I’ve had my Canon 580EX for almost 10 years – so I guess the answer to that is “ask me in 10 years”. To be fair, the Voeloon unit has an almost identical build to the 580EX, with a few differences in the battery door and a couple of other small bits and pieces, but it feels sturdy and each button feels good under thumb, all of the features work exactly as described, etc.

    Simon_Pollock_Gtvone_Flash_Review_Voeloon

    The V58 is HSS capable (High-Speed Sync – that basically means that you can use the flash over 1/200th of a second, and not get half of your frame all black – more on HSS here). The Voeloon V58 that I have is a Canon version, I have also used it on my Sony a7 in manual mode (clunky, but it worked). It’s a 24mm to 200mm zoomable hotshoe mounted flash that does everything my Canon flash does, and hasn’t limited me in anything I wanted to do. The guide number is similar to the 580EXII.

    Manufacturer’s Specs

    • Guide number of 58 at ISO 100 at 200mm
    • Built-in wide angle diffuser and reflector card
    • Supports eTTL II and manual settings
    • Repeating (RPT) flash / Stroboscopic for capturing movement
    • Advanced Wireless Lighting
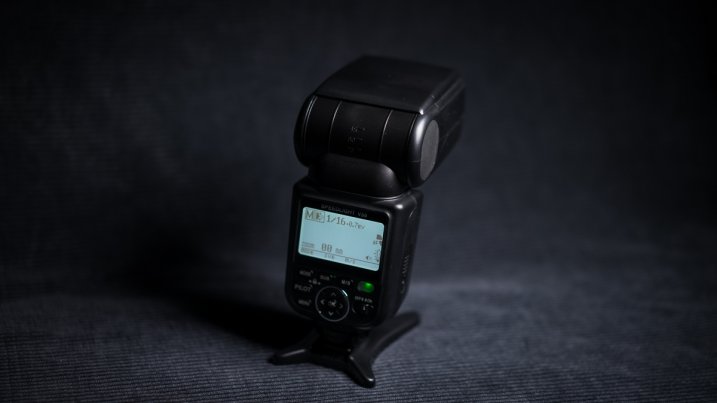
    • Audible and LCD display with backlight
    • Auxiliary Light for autofocus
    • Good protection against overheating
    • Solid metal hotshoe connector

    What’s in the box

    • The flash unit
    • Soft case
    • Instructions
    • The plastic shoe foot thing
    • Warranty card (1 Year)
    • Flash diffuser (not sure if was in the box, or is always included, but I got one in the box)

    I did something very unlike me and wandered through the instructions manual! There are a couple of sensible warnings in there, like don’t use stroboscopic more than 10 times in a row without letting your flash have a little rest. There are also helpful tips right throughout the manual, which I found quite sweet – basic stuff, but helpful.

    Anyways, stats and rhetoric aside – the bottom line for me when I decided to have a go at reviewing this Voeloon V58 was “Will it perform like a brand-name unit” and “will it allow me to do what I need to do for my clients, if I have a gig where I use a flash”

    Voeloon_Simon_Pollock_Gtvone_Flash_Review_dPS

    Yes, it does perform just like my Canon 580EXII, though I prefer the menu on the Canon, but as I mentioned, I’ve used that for 10 years, so that’s really just personal preference. It has enough power, recycles quickly and hasn’t broken – we’re certainly off to a good start.

    I’ve not had a shoot where I’ve needed a flash unit in the last month and a bit, so I’ve recreated a few scenarios myself (mostly tested running around the house after my kids, isn’t that punishment enough!) with the Voeloon performing as it should each time with no obvious downsides to my Canon flash.

    The bottom line is “would I recommend this flash to people looking for a cost effective way to get into flash photography?” – Yes, I absolutely would…  I see this as a good sturdy unit with all the features a photographer would need from a single, portable flash unit.

    Budget Tip: If you can’t afford a flash ($ 200 is still a wad of cash, I get it!) there’s a great array of desk lamps on eBay that you can buy for under $ 30, and sure – some of them might be a weird color temp, they might be flimsy and annoying, but they’re going to help you understand direction of light and help you learn how to control light – start making light modifiers from things you find around the house! 

    I award the Voeloon V58 five stars – Cost and functionality deserve these stars.

    googletag.cmd.push(function() {
    tablet_slots.push( googletag.defineSlot( “/1005424/_dPSv4_tab-all-article-bottom_(300×250)”, [300, 250], “pb-ad-78623” ).addService( googletag.pubads() ) ); } );

    googletag.cmd.push(function() {
    mobile_slots.push( googletag.defineSlot( “/1005424/_dPSv4_mob-all-article-bottom_(300×250)”, [300, 250], “pb-ad-78158” ).addService( googletag.pubads() ) ); } );

    The post Review: Voeloon V58 Speedlight for Canon by Sime appeared first on Digital Photography School.


    Digital Photography School
  • Weekly Photography Challenge – Posing People

    Editor’s note: this week we will be featuring a series of articles on posing for portraits. Look for a new one each day. If you miss any make sure you subscribe to our newsletter and you’ll get a reminder of all our articles once a week.

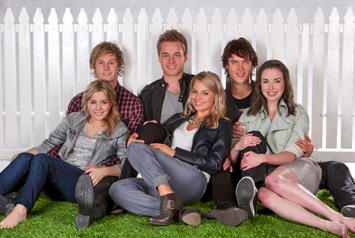
    Creating portraits is hard. There’s a lot of technical stuff you need to handle, and you have a real live subject in front of your camera. Even further, they are going to look to you for help to make them comfortable and look good in their photos. The right pose, whether casual or structured, is key.

    Greg L. Photos

    By Greg L. photos

    James Schaap

    By James Schaap

    Adults, teens and kids each come with different challenges. So you need to figure out what’s best for each individual, and guide them gently. Groups add even more complexity.

    Weekly Photography Challenge – Posing People

    This week’s challenge is about practicing working with people and doing some posing. If this is an area that’s new for you then try and get a model or subject that will be patient with you as you try different things. Or you could work with a professional model (in exchange for prints is a common practice if you can’t afford to pay for one) who can help you suggest poses or even do their own. Learning by watching is great way to go too.

    Darlene Hildebrandt

    By Darlene Hildebrandt

    Chemisti

    By chemisti

    Darlene Hildebrandt

    By Darlene Hildebrandt

    Clappstar

    By clappstar

    Lyndsay Esson

    By Lyndsay Esson

    Share your images below:

    Simply upload your shot into the comment field (look for the little camera icon in the Disqus comments section) and they’ll get embedded for us all to see or if you’d prefer upload them to your favourite photo sharing site and leave the link to them. Show me your best images in this week’s challenge. Sometimes it takes a while for an image to appear so be patient and try not to post the same image twice.

    You can also check out the dPS ebook Portraits: Striking the Pose or our set of posing guides 67 Portrait Poses (printable) if you need some tips.

    googletag.cmd.push(function() {
    tablet_slots.push( googletag.defineSlot( “/1005424/_dPSv4_tab-all-article-bottom_(300×250)”, [300, 250], “pb-ad-78623” ).addService( googletag.pubads() ) ); } );

    googletag.cmd.push(function() {
    mobile_slots.push( googletag.defineSlot( “/1005424/_dPSv4_mob-all-article-bottom_(300×250)”, [300, 250], “pb-ad-78158” ).addService( googletag.pubads() ) ); } );

    The post Weekly Photography Challenge – Posing People by Darlene Hildebrandt appeared first on Digital Photography School.


    Digital Photography School
  • 24 Photos of Perfectly Posed Portraits

    Editor’s note: this week we will be featuring a series of articles on posing for portraits. Look for a new one each day. If you miss any make sure you subscribe to our newsletter and you’ll get a reminder of all our articles once a week.
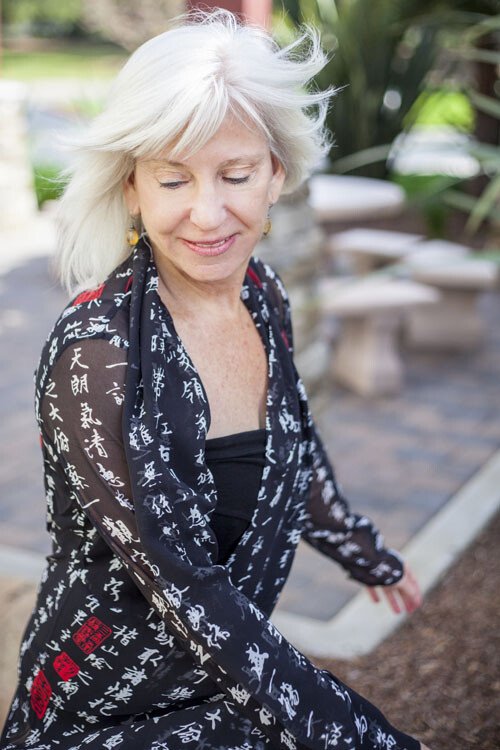
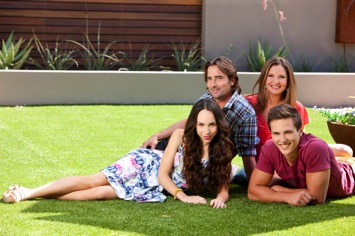
    When doing a portrait there is a lot to think about. You have to find a good location and background. The right lens needs to be selected. Camera settings are a consideration. The light needs to be just right.

    But if that’s all you focus on you’re forgetting something rather important. The person in front of your camera. They need direction and reassurance on how to position their body to look their best. As the photographer it is your job to help them, and it is our job to help you. So here are some ideas to get started posing people in your portraits. You can also check out the dPS ebook Portraits: Striking the Pose or our set of posing guides 67 Portrait Poses (printable).

    Photograph * * * by Sergey Lukankin on 500px

    * * * by Sergey Lukankin on 500px

    Photograph Stairway to heaven by Seemanta Dutta on 500px

    Stairway to heaven by Seemanta Dutta on 500px

    Photograph *** by Irina Dzhul on 500px

    *** by Irina Dzhul on 500px

    Photograph transylvanian hunger by  Moga on 500px

    transylvanian hunger by Moga on 500px

    Photograph **** by Brian Ingram on 500px

    **** by Brian Ingram on 500px

    Photograph Mehmet Haci by Ahmed  Mustafa on 500px

    Mehmet Haci by Ahmed Mustafa on 500px

    Photograph Marta by Noi korukay Marquez on 500px

    Marta by Noi korukay Marquez on 500px

    Photograph N by Nikolay Tikhomirov on 500px

    N by Nikolay Tikhomirov on 500px

    Photograph falling leaves by annabella photography on 500px

    falling leaves by annabella photography on 500px

    Photograph Country Family by Lisa Holloway on 500px

    Country Family by Lisa Holloway on 500px

    Photograph Family Portrait by Jimmy Rodriguez on 500px

    Family Portrait by Jimmy Rodriguez on 500px

    Photograph Brothers by Sarah johnson on 500px

    Brothers by Sarah johnson on 500px

    Photograph Magic Lavender by Sergey Bondarev on 500px

    Magic Lavender by Sergey Bondarev on 500px

    Photograph Family by Karin Sanders on 500px

    Family by Karin Sanders on 500px

    Photograph I see you... by Ett Venter on 500px

    I see you… by Ett Venter on 500px

    Photograph Doux by August Malinin on 500px

    Doux by August Malinin on 500px

    Photograph Afternoon by TJ Drysdale on 500px

    Afternoon by TJ Drysdale on 500px

    Photograph Portrait: "Lovers" by Mike Champagne by Mike Champagne on 500px

    Portrait: "Lovers" by Mike Champagne by Mike Champagne on 500px

    Photograph A Mother's Love by Jake Olson Studios on 500px

    A Mother's Love by Jake Olson Studios on 500px

    Photograph Mother and Daughter by Edi V on 500px

    Mother and Daughter by Edi V on 500px

    Photograph Contrast by Jake Olson Studios on 500px

    Contrast by Jake Olson Studios on 500px

    Photograph Daydremers by Katie Andelman Garner on 500px

    Daydremers by Katie Andelman Garner on 500px

    Photograph Kiss by Holly Spring on 500px

    Kiss by Holly Spring on 500px

    Photograph Old Men I by Alexander Rink on 500px

    Old Men I by Alexander Rink on 500px

    googletag.cmd.push(function() {
    tablet_slots.push( googletag.defineSlot( “/1005424/_dPSv4_tab-all-article-bottom_(300×250)”, [300, 250], “pb-ad-78623” ).addService( googletag.pubads() ) ); } );

    googletag.cmd.push(function() {
    mobile_slots.push( googletag.defineSlot( “/1005424/_dPSv4_mob-all-article-bottom_(300×250)”, [300, 250], “pb-ad-78158” ).addService( googletag.pubads() ) ); } );

    The post 24 Photos of Perfectly Posed Portraits by Darlene Hildebrandt appeared first on Digital Photography School.


    Digital Photography School