Category: Photography

  • DIY 101: How to Get Started with Product Photography

    My role as a stay-at-home parent, along with my work as a blogger, means I’m stuck in the house more often than not. I love what I do, both as a writer and parent, but I do find myself lacking for photographic subjects. Everyone in my home, including the cats and dogs, seems to be camera shy. So I began Continue Reading

    The post DIY 101: How to Get Started with Product Photography appeared first on Photodoto.


    Photodoto

  • 5 Tips to Take Less Photos of Everything and Take More Photos That Mean Something

    How many photos do you have from a recent holiday, that you just haven’t had time to organize? Or, have you come back from a dream vacation and your photos just don’t seem to match up with your memories? You are not alone, as this is an all too common issue, and both of these questions have their roots in a simple and easy to fix problem.

    Take fewer photos, not more!

    001A resized2

    I mean this literally, but also figuratively. Yes, overall take fewer photos. But, in reality this is a lesson in becoming more conscious of your photography. What is the point of the photo? Why are you clicking the shutter at that moment?

    You may have heard many times, that in the era of digital cameras, you can shoot your heart’s desire (a.k.a. until your SD or CF card is full), unlike with film which needed to be developed and only had a limited number of photos on each roll. While that is true, it is not true that more photos equals better photos. Well, you may have also heard that professional photographers shoot hundreds, or thousands, of photos just to get one or several good ones. That is also true, but they are first and foremost shooting with a purpose. Literally shooting less will allow you to discover your point of view, and thus figuratively you will shoot less of everything, and more of something.

    Here are five tips on how to take less quantity of photos but more compelling ones

    Tell more stories

    The story could be your personal story or could be of something else, but most important is that you communicate with your photos. If you are always shooting, you cannot create; you simply react. Creating a balance between creating and reacting will give you storytelling abilities. Be proactive by finding a place with good leading lines and waiting, not by rushing and hoping that one of your clicks is a keeper. Think about a beginning, middle, and an end. This can be easily depicted with shots at different focal lengths like a wide-angle (image above), a close-up (below), and finally a full-frame scene. The process of storytelling is something we have all grown up with – get back to it. Remember, the more simple the story, the more universal it can be.

    001B resized2

    Close-up gives direction.

    001C resized2

    Full-frame concludes the events.

    Give yourself some time to write (in a travelogue or in a diary)

    This gives you an opportunity to reflect, which gives meaning and helps you find purpose. Looking at your own writing helps you realize your patterns day by day, or travel experience by travel experience. Identifying structure will help you select moments and behaviours that lend themselves to your style of photography. You may see yourself getting up late despite your desire to have better golden hour photos, or that you feel more creative in the afternoon so you can set aside time to create your photographic stories when others are resting. You will also love reading what you write in 10 years!

    Curb your fleeting feeling

    Time is limited and you might just miss the moment. For a photographer, this manifests itself in too many photos, and too little purpose. The reality is you are always going to miss something, you can’t be in two places at the same time, and you definitely can’t turn back the clock. But that doesn’t mean that you must give in to the fleeting feeling. Let the event occur, or the scene develop, and visualize what you want from it. Be selective about your vision and then get it, not all of it. Three meaningful photos outweigh thirty so-so snapshots. You have worked hard for your days off and money saved for leisure; enjoy it and enjoy being productive with your photography.

    Create a concept and stick to it. Resist pulling out your camera immediately.

    This can be an exercise in patience and restraint. Buildings are not going anywhere, rivers will stay their course, and the coffee shop will always have another interesting customer. Find your concept in a developing scene, whether it is the arches of a building, reflections of the water, or a pair of hearty hands sipping a hot beverage. Know that your vision is attainable. Your concept can be simple or complicated, modern or traditional, but only needs to be defined and pursued by you. Just do it with conviction and don’t measure your concept against others. Go for it!

    002A resized2

    Creating a concept.

    002B resized2

    Slight variation of shooting through a window and making it B&W.

    002C resized2

    Going back to the concept and color to provide continuity.

    Philosophically you will never find what you are looking for…

    There is an old Chinese proverb that says, “If it will happen, it will no matter your actions; if it will not happen, it will not no matter what you do.”. There are many circumstances which seem to be too peculiar to be a coincidence, and as a photographer these are the moments of pure brilliance. Be present for them; don’t chase after them. There is a whole world of events that are unfolding in front of us at each moment. Your awareness of them is subject to your willingness to be aware of them, not the existence of them.

    Photography and traveling have always gone hand in hand. Both have ways of opening up new horizons and being in touch with new possibilities. Both are essential. Spend some time with an ethos of travel, a perspective of photography, and a philosophy of life – and watch your photos tell a story that speaks to the hearts and minds of more than just a few close friends. Instead of having photos sitting unedited, unorganized, and undiscovered; take less photos of everything and take more photos of something. Create a convergence between your photos and your ideas. Less really is more, especially when a photo is worth a thousand words.

    googletag.cmd.push(function() {
    tablet_slots.push( googletag.defineSlot( “/1005424/_dPSv4_tab-all-article-bottom_(300×250)”, [300, 250], “pb-ad-78623” ).addService( googletag.pubads() ) ); } );

    googletag.cmd.push(function() {
    mobile_slots.push( googletag.defineSlot( “/1005424/_dPSv4_mob-all-article-bottom_(300×250)”, [300, 250], “pb-ad-78158” ).addService( googletag.pubads() ) ); } );

    The post 5 Tips to Take Less Photos of Everything and Take More Photos That Mean Something by Branson Quenzer appeared first on Digital Photography School.


    Digital Photography School

  • 10 Things Photoshop Beginners Want to Know How to Do

    Terry White is an Adobe Photoshop expert and in this video he answers the 10 things that Photoshop (particularly for Photoshop CC) beginners want to know how to do including:

    1. How to touch up a photo; how to make people look better
    2. Layers and adjustment layers; what are they and how to use them
    3. Working with layer masks
    4. How to crop a photo
    5. Adjusting the exposure and using the Adobe Camera Raw filter
    6. Removing something from an image
    7. Move or copy objects in a photo
    8. How to put a person from one photo onto a new background (or putting two photos together)
    9. How to add text
    10. Saving photos and saving formats that are shareable

    It’s a bit of a long one but some really good tips in here that I’m sure you’ll find helpful if you’re new to Photoshop.

    He also mentioned grabbing a Wacom tablet to use for your editing instead of a mouse. I use one in Lightroom as well and it is much better and more precise and doesn’t leave you with a cramped hand after working on images for hours.

    googletag.cmd.push(function() {
    tablet_slots.push( googletag.defineSlot( “/1005424/_dPSv4_tab-all-article-bottom_(300×250)”, [300, 250], “pb-ad-78623” ).addService( googletag.pubads() ) ); } );

    googletag.cmd.push(function() {
    mobile_slots.push( googletag.defineSlot( “/1005424/_dPSv4_mob-all-article-bottom_(300×250)”, [300, 250], “pb-ad-78158” ).addService( googletag.pubads() ) ); } );

    The post 10 Things Photoshop Beginners Want to Know How to Do by Darlene Hildebrandt appeared first on Digital Photography School.


    Digital Photography School

  • The Photographers Ephemeris (TPE) Versus PlanIt! for Photographers

    Note: I have no affiliation with either program.

    TPE is probably the best known ephemeris application used by photographers. There is, however, a new kid on the block, PlanIt! for photographers.

    While TPE does a good job of being a basic ephemeris, it ends there.

    Shortcomings or challenges with TPE

    Like all good photographers, you’re planning a future shot of the moon rise. You consult TPE for the rise time at your selected location and, in due course, set off with plenty of time to prepare your gear. Comes the appointed time and the moon doesn’t show! TPE got the moon rise time over the horizon right, but didn’t note the hill in the way. TPE can, however, find the hill. It’s a fairly complex process that involves many steps and some calculation on your part, and the potential for getting it wrong is high.

    How PlanIt! picks up the slack

    PlanIt!, on the other hand, goes much further. Not only does it give you the rise and set times of moon, sun, Milky Way and many stars but it lets you know if there is an obstruction and when the desired celestial object will clear that obstruction. All you need to do is read the information off the screen.

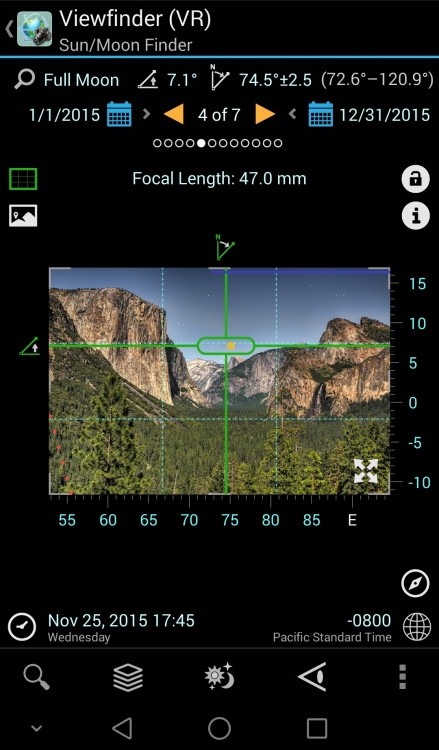
    Moon over Half Dome

    There are three major menus in PlanIt!: Ephemeris Features, Tools, and Backgrounds. By combining the features of these menus there are more than 500 possible variations of the information available to you, the photographer. All the features in Planit! are location and time specific. You set them to your requirements.

    With 12 separate Ephemeris Features, see below, PlanIt! pretty well has it all covered.

    Ephemeris menu

    With a few exceptions, the Ephemeris Features are self-explanatory.

    Milky Way:

    By zooming out on the map you will be able to use the Milky Way Center and Finder functions. In the Milky Way Center function you will see the times of visibility, the angle above the horizon and the bearing of the centre. If it is visible at the time and place entered, you will see an arc of red dots with a row of green dots representing the center of the Milky Way. The Finder function, on the other hand, will produce a list of times, between starting and ending dates, when the Milky Way will be visible at the selected location.

    The screen shot below shows the Milky Way over the Half Dome. This screen shot is in Panorama mode with the background in Viewfinder (VR) and graphically shows the relative heights of the mountains in the background. The broken lines at the bottom of the picture tell you that with a focal length of 24mm, a resulting field of view of 40 degrees, and an overlap of five degrees you will need five shots, at the centres shown, to create this panorama.

    Milkyway

    Dark Sky:

    This function uses the 1-9 Bortle Scale to indicate where you are most likely to get the best showing of stars. A one on the scale indicates a very dark sky, in other words no city lights and lots of stars, while nine means forget the star shots and photograph the brightly lit buildings instead.

    Time-lapse:

    Calculates the various parameters for a time-lapse film strip. You insert up to three of the four criteria, and PlanIt! calculates the rest. If you are doing star time-lapse, and the sun or moon will affect your plans, then PlanIt! will alert you to the fact and correct your timings.

    Time lapse

    The example above reads, from right to left, as: To make a 30 fps clip of 10 seconds duration, and you decide to take a shot every three seconds, it will take you 15 minutes in total and 300 photos will be taken.

    Exposure:

    Calculates the exposure triangle based on current light conditions as detected by your phone. Various Neutral Density filter values, and light measuring methods, are available via a drop-down menu.

    Light and shadow:

    Light and shadow gives you a graphical representation of where the light and the shadows will fall on a scene.

    That covers the ephemeris part.

    On my Samsung phone, pressing the bottom left key brings up, among other things, the Settings Menu. Scroll all the way down until you come to the Camera Settings. By entering your camera type, especially the sensor size, you enable the full strength of the scene planning features of PlanIt!.

    These features are selected in the Tools Menu and, coupled with various ephemeris and background features, a whole new world of scene and equipment planning is yours.

    Tools

    Tools menu

    Once again the menu items are mostly self-explanatory.

    Location:

    Allows you to enter a location by name or latitude – longitude. Provided you have internet coverage, and have enabled location services on your phone, PlanIt! will centre the map on your selection and, if necessary, automatically correct the time zone to the new location.

    Distance:

    Calculates the distance between the camera and scene icons. If the view is obstructed the green sight line will include a red section indicating where the obstruction is located. This feature gives you the opportunity to reframe your shot before going on location. The screen shot below shows the camera (the blue pin) just west of Yosemite Creek. The scene pin (red one) is off-screen but still located at the Half Dome. The shot cannot be made from this location because the ridge marked Yosemite Point rises higher than the sight line, hence the red section.

    Distance  obstructed  view

    The scene pin shown here with an exclamation mark indicates that the actual pin is off-screen. The camera pin will also be shown this way if it is off screen. Both pins can be left floating (will always be shown on-screen) or can be locked to their selected positions on the map, as is the case above.

    Focal Length:

    Part of planning your shot is knowing what lens to use. Here is where PlanIt! really shines.

    In the screenshot below, the green shaded area represents your Field of View for a given focal length. By altering the width of that view, PlanIt! immediately calculates the focal length necessary to achieve the shot. Conversely, altering the focal length will change the Field of View. So, by using PlanIt! you will always have the correct lens in your kit for any shot. Coupled with focal length, you can also see Depth of Field, and hyperfocal distance.

    Focal Length Horizontal

    Depth of Field:

    The aperture setting is ignored in every setup except Depth of Field. Here you are able to alter the aperture setting, and read off the Depth of Field limits as you do so.

    Panorama:

    As the name suggests, it calculates the number of shots, the focal length, the Field of View, and the overlap required to produce a cohesive set of shots with which to create your panorama.

    Backgrounds

    PlanIt! uses Google Maps as the basis for its various displays. This means the usual Google Map functions are available, plus a few others.

    Backgrounds menu

    The Map (Picture) background allows you to use a downloaded, or photographed map, e.g., a picture of a tourist map in a park. This requires correct orientation of the map to be of any real use.

    The various Viewfinder backgrounds allow the scene to be depicted in a number of ways, each giving different details of the scene. The (Picture) option actually uses the phone viewfinder as the background. Obviously this requires you to be on location, and your phone to have compass and GPS capabilities.

    It goes without saying, in such a comprehensive piece of software, that camera orientation, portrait or landscape, can be selected and this, in turn, affects the view presented. The change between horizontal and vertical focal length being a classic example.

    Compare the almost bewildering array of possibilities in Planit! with the ephemeris features of TPE and I think there is a clear winner. Planit! for photographers is available for Android 4 and above in Google play store and has recently been ported to iOS. My thanks to David Qiao of Yingwen Technologies for the screenshots.


    googletag.cmd.push(function() {
    tablet_slots.push( googletag.defineSlot( “/1005424/_dPSv4_tab-all-article-bottom_(300×250)”, [300, 250], “pb-ad-78623” ).addService( googletag.pubads() ) ); } );

    googletag.cmd.push(function() {
    mobile_slots.push( googletag.defineSlot( “/1005424/_dPSv4_mob-all-article-bottom_(300×250)”, [300, 250], “pb-ad-78158” ).addService( googletag.pubads() ) ); } );

    The post The Photographers Ephemeris (TPE) Versus PlanIt! for Photographers by John Sharples appeared first on Digital Photography School.


    Digital Photography School

  • 10 Essential Pieces of Gear you Need for Landscape Photography

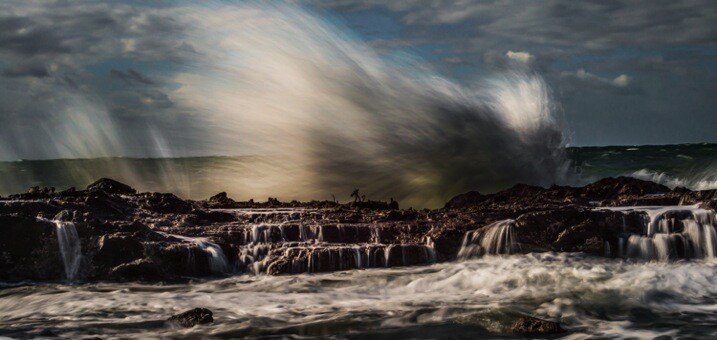
    If you are interested in going out and getting some high quality landscape photographs, here’s a comprehensive list of items you will either want to consider, or must have, in order to increase your chances of getting some keepers:
    002

    #1 – The Internet

    Whenever I start to plan a photo shoot to a particular location, I usually begin by googling the area. If it’s a relatively well-known location, you will probably find some very interesting, and comprehensive, websites made by other photographers or adventurists/bloggers. The problem is, if it’s a famous location, you will also get a ton of not-so-interesting and even incorrect information as well. Weeding through Google to isolate the helpful and high quality blogs or websites from the crummy ones is an art form all its own. Once you get used to perusing Google, reading just a few sentences of a blog will clue you in as to whether or not the information you’ve found is worth taking it to heart or not.

    If you aren’t lucky enough to find two or three really good blogs about the location, head over to Alltrails.com. It has a sizeable database of locations around the country that have been hiked, including user’s reviews of the location and the level of difficulty in getting there. If it’s a famous site, TripAdvisor.com has a good database of information, including the places to stay nearby.

    From there, you’ll be off and running with more information than you probably need. In most cases, what becomes tricky is weeding through everything you find and parsing it down into just a few brief paragraphs on your overall plan of action.

    #2 – A Strong Backpack

    If you’re looking for a place to save some money, a backpack is not where you want to be counting pennies. You get what you pay for, and when it comes to choosing a backpack to take on a landscape shoot, it is very important you use a bag that is strong and water resistant, with reinforced padding.

    Don’t fall victim to the lame zipper bug (you know you’ve been there before, trying to unzip the bag and before you know it, the zipper pops off the bag like a cricket). Do yourself a favor and invest in a high quality bag, like the Tamrac Expedition Series, or the Lowepro Pro Trekker. It will last you many years, and will help you take care of your camera and lenses in the long run.

    001

    #3 – A Weather-Sealed DSLR Camera

    Generally speaking, for various reasons, I still much prefer a DSLR (such as the Nikon D810) over a full-frame mirrorless camera (such as the Sony A7r) for landscape photography. One reason is that certain DSLR models are significantly more rugged and weatherproof than mirrorless.

    Eventually you’re going to drop a camera. It happens to all of us (at least that’s what everyone told me the first time I dropped a camera), especially those of us who are out in less than perfect weather conditions. DSLRs made from composite magnesium handle some rough treatment much better than the plastic-bodied entry level DSLRs. My first full-frame DSLR was the Nikon 700. That camera could survive being run over by a small truck. A perfect companion for the clumsy, just-starting-out landscape photographer that I was then.

    Also consider investing in a quality raincoat for your lens/camera. I don’t recommend getting one of the cheap, flimsy, clear plastic covers made from recycled sandwich bags…they will tear easily and won’t stay put in windy conditions. Get a cover that is heavy duty…one good coat will last a long time, and they aren’t pricey.

    #4 – A Sturdy Tripod

    To handle poor footing out in the muddy, rocky, sandy wilderness, and to protect your camera lens setup, a tripod is one item you don’t want to mess around with. In fact, this is the one item more than any other that I would recommend you consider heading to the northern end of your projected budget in order to select a high quality tripod.

    A flimsy tripod could end up costing you a chunk of a paycheck in repair bills. It only takes one good gust of wind to knock over an unstable tripod. Having a nice camera and lens, but an entry-level tripod is like putting four worn down, old tires on a Ferrari. It won’t run properly and it’s dangerous for the rest of the setup.

    003

    A good tripod will outlive both of us, so it’s rare you’ll need to invest in more than one over the course of many years. A few extra bucks goes a long way towards getting having a more stable, secure setup.

    See Really Right Stuff, Manfrotto, Gitzo, or Feisol for excellent tripods. In my opinion, you should strongly consider carbon fiber over aluminum; they are the lightest and strongest on the market.

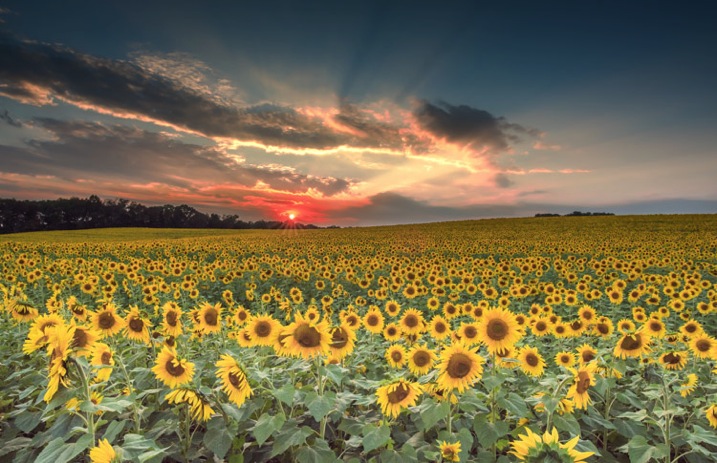
    #5 – Lenses

    This is where the fun begins, and your wallet ends. Lenses are the single most important piece of equipment in photography. You can have the finest camera, tripod, backpack, media card, and accessories available, but if you don’t have quality glass, it will severely complicate your ability to take a good photograph.

    I typically prefer to shoot with prime (fixed focal length) lenses, as opposed to using zoom lenses. My preference for primes is mostly about making sure that I get as personal and into the scene as possible.

    With zoom lenses, I tend to get a bit lazy and shoot without adequately working the scene. There is no substitute for moving your feet and SEEING the composition with your own eyes, and not just through the viewfinder. The element of perspective is lost if you simply zoom, instead of walking around and checking things out with your own eyes first.

    That said, it’s strictly a subjective thing. I know plenty of photographers who prefer using zoom lenses, and that’s great. Most of the time, the best gear for you is the gear you’re most comfortable with. The key suggestion here, with any lens, prime or zoom, is that you RENT one and try it out before buying it. You can’t know how the lens will work for you until you use it in various situations.
    004

    #6 – A Reliable Remote Trigger or Shutter Release

    This is often overlooked by many photographers, but I firmly believe having a remote trigger makes a big difference. Without one, you have to physically press on the top of the camera. No matter how careful you are, and no matter how securely fastened the camera is to the tripod, this will introduce some micro-shake into the setup. If you want your image to be as tack-sharp as possible, you don’t want anything touching the camera that doesn’t have to. Once the mirror locks up, you want your setup to be as steady as a concrete slab. Every DSLR has its own proprietary remote shutters, and you can also find quality third-party remote shutters available at a lower cost.

    #7 – Filters

    For landscape photography, some filters are almost as essential as lenses. I’ll keep it brief here and stick with just a few basic filters I would always want to travel with:

    Circular Polarizer

    A polarizing filter helps mitigate the nasty, harsh reflection of the sun off of shiny objects such as water or anything wet. To get it to work, you simply turn the filter until you see the glare disappear, then you stop turning the filter. A polarizer will also help darken a blue sky and make it a deeper, richer blue. Some people like that look, some don’t. If you do, a polarizer will help you achieve it. I use a polarizer practically all of the time when shooting in daylight.

    Neutral Density Filter

    An ND filter basically acts as sunglasses for your lens, it blocks some light from reaching the camera’s sensor, thereby slowing down the exposure. For example, a 3-stop ND filter (usually denoted as an 8X or 0.9 ND filter) allows three stops less light through than you’d get without the filter attached. A 5-stop ND filter will allow five stops less light, and so on. For the serious landscape photographer I’d recommend having a 2-stop, 3-stop and 10-stop ND filter. If you want to do some long exposure waterscape work, the 10-stop will come in handy to help make the water look silky smooth. You can also stretch out clouds or turn people into invisible ghosts with ND filters.

    Graduated Neutral Density Filter

    These are similar to ND filters, but instead of the entire filter being tinted, only the upper portion is darkened, with the tint getting darker from the middle to the edge. So, for example, if you’re photographing a horizon with a sky that’s two or three stops brighter than your foreground, you could use a graduated ND filter to help bring out the foreground more, without blowing out the horizon. It will effectively balance the amount of light received from both the brighter horizon and the darker foreground. Usually just a two or three stop GND filter is necessary. Here’s a photograph of a Graduated ND Filter:

    005

    Reverse Graduated Neutral Density Filter

    Same principle as the one above, except instead of the tint getting darker from the middle of the filter to the edge, it’s reversed. The middle of the filter starts out the darkest, and gradually gets lighter as you travel towards the edge. These are excellent for shooting sunrises and sunsets, where the horizon line is the brightest area of the frame, and as you go higher in the sky, it becomes less bright. This is what a Reverse Graduated ND Filter looks like:

    006

    UV or Clear Filter

    If it’s my lens, I want to do everything I can to protect it from wear and tear. I always have a clear, or UV, filter on the front of every lens I own. It does nothing to help improve the photograph in any discernible way, but it does a great job protecting the front lens element from dirt and dust, or from me walking into a door lens-first, which has happened more times than I prefer to admit.

    007

    #8 – Extra Batteries and Media Cards

    Always, without exception, carry an extra battery for your camera, an extra media card, and an extra battery for any other battery-consuming device. If you’re bringing along a flash that takes four AA batteries, take an extra set of four with you. Chances are you won’t ever need them, but there will always be the one time when you do, and you’ll wish you had them.

    #9 – The Photographer’s Ephemeris

    This clever app (TPE) does an amazingly accurate job at detailing when and where the sun, and moon, will rise and set. If you’re out chasing sunsets and sunrises for photographs, this app is a must-have.

    #10 – A good pair of shoes

    No joke; having a comfortable pair of shoes is like having good vision. If your feet aren’t comfy, then nothing else matters. You will not be as good a photographer as you otherwise would be with comfy feet. This especially holds true on longer hikes; invest in a good pair of hiking boots. A pair that strike a balance between breathing well but also offering some water resistance.

    That’s enough for the list of equipment you’d want to consider having to photograph landscapes. If you’ve made it this far in this article, I hope you’ve gotten something useful out of it. Have fun shooting those landscapes!

    008

    googletag.cmd.push(function() {
    tablet_slots.push( googletag.defineSlot( “/1005424/_dPSv4_tab-all-article-bottom_(300×250)”, [300, 250], “pb-ad-78623” ).addService( googletag.pubads() ) ); } );

    googletag.cmd.push(function() {
    mobile_slots.push( googletag.defineSlot( “/1005424/_dPSv4_mob-all-article-bottom_(300×250)”, [300, 250], “pb-ad-78158” ).addService( googletag.pubads() ) ); } );

    The post 10 Essential Pieces of Gear you Need for Landscape Photography by Jeb Buchman appeared first on Digital Photography School.


    Digital Photography School
  • Do I Need a Photo Release For That?

    With the increasing presence of quality Smartphone cameras and affordable, pro-grade compact digital cameras, there are more people than ever who have the power of taking photos. But how many people are aware of the legal constraints that come with being a photographer, even on a hobby or amateur basis? Perhaps more importantly, how many of us know when it’s legally okay, or not okay, for someone to snap a photo of ourselves?

    Sea2

    The answers to these questions are important for both photographers and photo subjects to know, so let’s examine some of the laws that have to do with photography. Before we dive into it, let’s also establish that these are the rules that apply in the United States in particular. If you are based elsewhere, or an American traveling abroad, it may be worth it to investigate photography rules pertaining to specific countries. Also, please note that I am not a legal professional and this is simply advice from another photographer based on experience and consensus of other online sources.

    Public versus private places

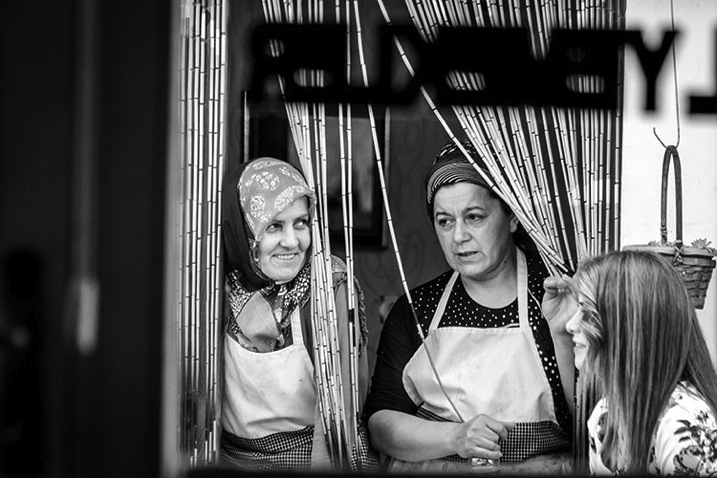
    First of all, let’s be clear that you are always free to sell photos of any subject without permission or a signed release, with one big exception: You cannot legally photograph people in private places without their expressed permission. In the United States, every citizen is guaranteed a reasonable expectation of privacy, meaning if you are in your home or on private property, you have the right to prevent someone from taking your photo if they are standing on your private land. However, the moment you step out into public areas, such as a public park, you forfeit your right to privacy and may be photographed by anyone without your consent. Thinking of this from a photographer’s perspective, it’s also important to realize that no one can legally prevent you from taking a photo in a public space, but they can do so in private spaces.

    Editor’s note: Just because you have the legal right to take someone’s photo it doesn’t mean you have the right ethically if they do not wish to be photographed. Be respectful of others as you’d want for your own wishes.

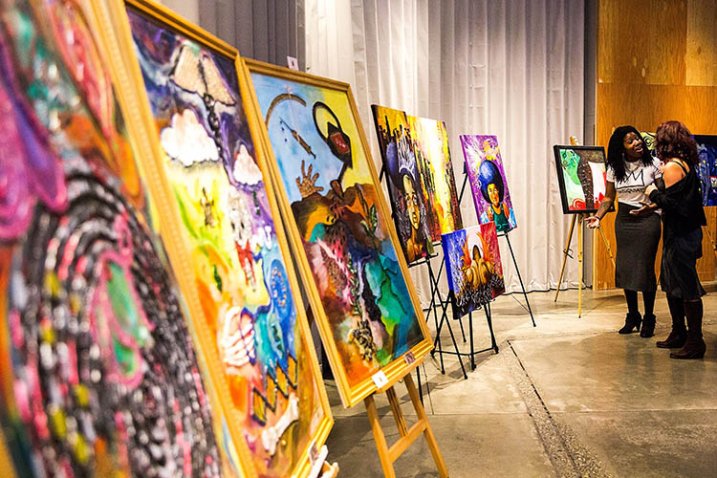
    2nd Annual Through the Eyes Of Art Event And The Value Of Black Life Concert

    Example of a private space

    Using someone’s likeness for promotion

    Despite the above notion of freely photographing people in public spaces, it doesn’t mean you can do as you please with those photos. This is where the idea of a person’s likeness comes into play, and this same concept also applies to recognizable private property. In a legal sense, one’s likeness has to do with a representation of that person or private property being used to promote something, such as a product, service, or idea. Every person, whether it be a celebrity or your average Joe/Jane, has the right to protect his or her likeness.

    Put into practice, this means that if you take a photo of someone in a public space and were to sell it to a publication or newspaper, you’re likely within your rights of doing so since that person and photo is not being used for the sake of promoting anything. However, you would be restricted from selling or using that photo for any sort of promotion, such as an ad for your product, service, or cause.  The reasoning is simple: that person didn’t consent to having their likeness used to further your promotion. Imagine being dedicated to a specific political party and seeing your mugshot used in an advertisement to promote the opposing party’s campaign. If you didn’t agree to it, you would have the grounds to ask the opposing campaign to take your photo down.

    Sea3

    To use this photo to promote something or sell something you would need a release

    When photo model releases come into play

    This idea of protecting one’s likeness is where the need for photo model releases becomes necessary. As a photographer, it all comes down to intent. If you snap a photo knowing there’s a high chance you’ll use it to promote something, it’s best to evaluate that scenario for any instances where a model release might be necessary. In fact, photo releases aren’t just for people. Depending on the use of the photo, you may also need a property release for privately owned buildings. Again, it all comes back to how you plan to ultimately use the final image, as well as the specific rules set in place by the agency or company selling the images. Below are some specific scenarios when you’ll want to have a photo (model or property) release.

    Stock Photography

    Selling images as stock photography can be a way to make a small, yet somewhat steady side income, but it does come with the expectation that any shots with identifiable people or landmarks come with a photo release to make them commercially licensed. The rules may vary according to the stock agency you work with, but most agencies require releases because there’s a high chance customers will use the photos for commercial purposes to sell something. In these cases, the likeness of people will need to be protected, or at least authorized, for possible commercial use via the photo model release.

    Editorial Photography

    Sea4

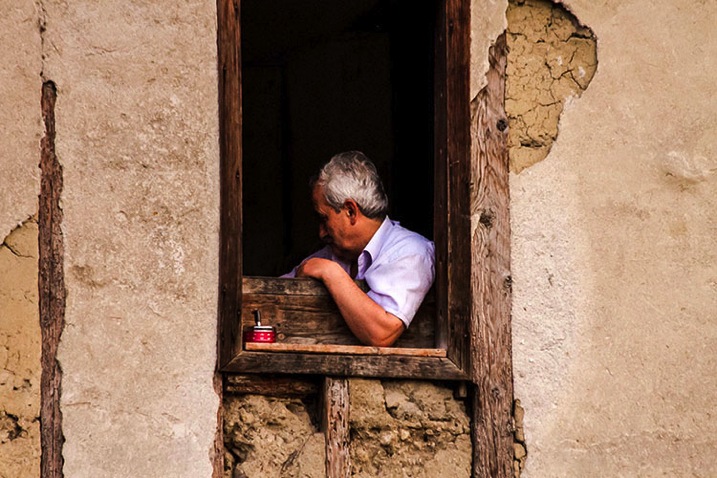
    Could be used for editorial

    There is one exception to the stock photo rule. In some cases, stock images of people can be sold without a photo release, but only for editorial use in magazines, newspapers, textbooks or other such publications. The one catch to this scenario is that the payout for editorial stock photos is usually significantly lower than if the same photo had a signed release and a proper commercial license. If you have any aspirations of making good money by selling stock photos, you should definitely consider going the commercial licensing route.

    Photography Contests

    With the number of photo contests available today, many photographers wonder if model or property releases are needed to submit photos to these contests. Again, it all comes down to intent. Some contests are hosted by companies who may want to use those photo entries for possible commercial use, in which case they’ll need signed photo releases. However, consider a magazine that wants to publish winning photos in an upcoming issue, or print images for an exhibit or gallery. In this case, photo releases most likely won’t be necessary. The bottom line is be sure to read the fine print before submitting your work to any photography contests and be on the lookout for how your submitted photos may be used.

    Summary

    In a nutshell, this is a brief summary to photo releases and some common scenarios when you may want to investigate the need for one. Do you have any advice or questionable encounters with photo releases to share? Let us know in the comments below!

    googletag.cmd.push(function() {
    tablet_slots.push( googletag.defineSlot( “/1005424/_dPSv4_tab-all-article-bottom_(300×250)”, [300, 250], “pb-ad-78623” ).addService( googletag.pubads() ) ); } );

    googletag.cmd.push(function() {
    mobile_slots.push( googletag.defineSlot( “/1005424/_dPSv4_mob-all-article-bottom_(300×250)”, [300, 250], “pb-ad-78158” ).addService( googletag.pubads() ) ); } );

    The post Do I Need a Photo Release For That? by Suzi Pratt appeared first on Digital Photography School.


    Digital Photography School
  • Now You Can Have Perfectly Posed Portraits

    Over the last week at dPS our writing team have focused their efforts on creating a great series of tutorials on the topic of posing subjects for portraits. They’ve covered 8 fantastic topics that have had some great feedback.

    In case you’ve missed any I’ve listed them below but am also including 8 more portrait posing tutorials below from our archives.

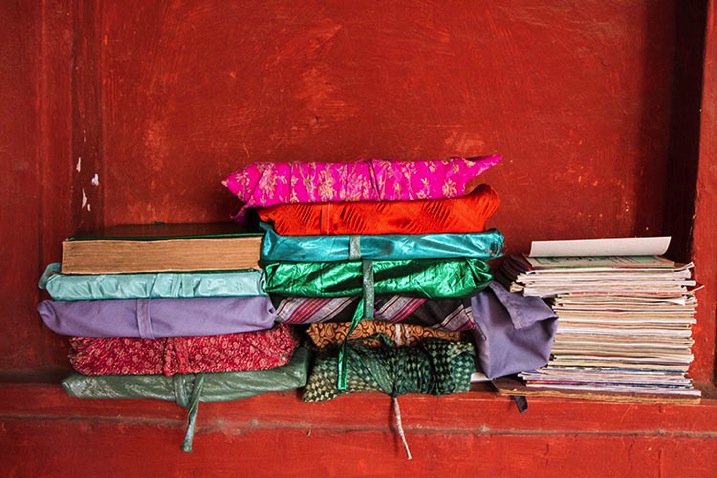
    Photograph Books Gives Us Wings by Maxim  Guselnikov on 500px

    Books Gives Us Wings by Maxim Guselnikov on 500px

    Also – if you’re looking to go even deeper into this topic check out our best selling Portrait Posing eBook – Striking the Pose by Gina Milicia and her Portrait Posing Printables Set for more great teaching.

    Here are out 8 Portrait Posing Tutorials

    • Portrait Posing Tips- How to Help People to Relax and Take Better Photos
    • 5 Unposing Tips for Kids for More Natural Photos
    • How to Pose People for Headshots
    • 24 Photos of Perfectly Posed Portraits
    • Portrait Tips for Posing Women
    • How to Pose Groups for Portrait Photography
    • 10 Fantastic Natural Wedding Posing Tips
    • Tips for Posing Muscular Female Body Types

    8 Great Portrait Posing Tutorials and Guides from our Archives

    • 8 Posing Guides to Inspire Your Portraiture
    • 5 Fail Proof Portrait Poses
    • Beginner Tips for Posing People with Confidence
    • Tips for Posing Men
    • Unposed Posing: Tried and True Tips for Photographing Families in Natural and Fun Ways
    • Posing Tips – Waistlines, Thighs and Bust lines
    • How to Pose Hands in Portraits
    • Pose for Effortlessness

    Portraits posing 468x190px

    googletag.cmd.push(function() {
    tablet_slots.push( googletag.defineSlot( “/1005424/_dPSv4_tab-all-article-bottom_(300×250)”, [300, 250], “pb-ad-78623” ).addService( googletag.pubads() ) ); } );

    googletag.cmd.push(function() {
    mobile_slots.push( googletag.defineSlot( “/1005424/_dPSv4_mob-all-article-bottom_(300×250)”, [300, 250], “pb-ad-78158” ).addService( googletag.pubads() ) ); } );

    The post Now You Can Have Perfectly Posed Portraits by Darren Rowse appeared first on Digital Photography School.


    Digital Photography School
  • How to Use Cinemagraphs to Spice Up Your Photography Marketing

    While cinemagraphs are not exactly new, they are still great for advertising purposes because of their format: a GIF/video hybrid where an element of the still photo plays in never-ending loop, which results in constant motion. Created by visual artists Jamie Beck and Kevin Burg of Ann Street Studio, they can be a fun and creative way to give a Continue Reading

    The post How to Use Cinemagraphs to Spice Up Your Photography Marketing appeared first on Photodoto.


    Photodoto

  • Weekly Photography Challenge – Night Photography

    Recently I rounded up some great examples of stunning night photography. It’s a genre of photography that is popular with many and comes with its own challenges and issues to overcome. But it’s worth the effort as you can create images with something special. Places just look different at night.

    Darlene Hildebrandt

    Route 66 near Chicago – By Darlene Hildebrandt

    Darlene Hildebrandt

    Trinidad, Cuba – By Darlene Hildebrandt

    Above are a couple examples of my own night photography. Now it’s your turn.

    Weekly photography challenge – night photography

    If you haven’t tried long exposure photography or gone out and done some shooting at night, now is the perfect time to try it. Find a buddy to come along with you, it’s more fun if you work with a friend. Photography clubs and meetup groups often do group events for night photography, look for one in your area. Find a mentor who has some experience with night photography to help you get started.

    Try some star shots, city light, light trails, moon or Milky Way shots, painting with light, or even a portrait. If you need some assistance see the list of articles below that can give you some tips.

    Thomas Hawk

    By Thomas Hawk

    Luc Mercelis

    By Luc Mercelis

    Chris Lofqvist

    By Chris Lofqvist

    Mike Boening Photography

    By Mike Boening Photography

    Mariusz Kluzniak

    By mariusz kluzniak

    Raphael Borja

    By Raphael Borja

    Mclcbooks

    By mclcbooks

    Jonathan Miske

    By Jonathan Miske

    Share your images below:

    Simply upload your shot into the comment field (look for the little camera icon in the Disqus comments section) and they’ll get embedded for us all to see or if you’d prefer upload them to your favourite photo sharing site and leave the link to them. Show me your best images in this week’s challenge. Sometimes it takes a while for an image to appear so be patient and try not to post the same image twice.

    DAVID MELCHOR DIAZ

    By DAVID MELCHOR DIAZ

    Alfredo

    By Alfredo

    Alfredo

    By Alfredo

    Theboseographer

    By theboseographer

    Need some help getting started?

    Try these articles for some night photography tips:

    • Tips for Retouching a Night Photograph using Lightroom
    • Tips for Getting Proper Exposure for Night Photography
    • 9 Tips to Help you get Sharp Focus at Night
    • How to do Long Exposure Photography and Light Trails at Night
    • Beginners Tips for Night Sky and Star Photography
    • Nightscapes: Photographing the City at Night
    • Better Star Trails Photographs with StarStaX
    • Beginner’s Guide to Light Painting

    googletag.cmd.push(function() {
    tablet_slots.push( googletag.defineSlot( “/1005424/_dPSv4_tab-all-article-bottom_(300×250)”, [300, 250], “pb-ad-78623” ).addService( googletag.pubads() ) ); } );

    googletag.cmd.push(function() {
    mobile_slots.push( googletag.defineSlot( “/1005424/_dPSv4_mob-all-article-bottom_(300×250)”, [300, 250], “pb-ad-78158” ).addService( googletag.pubads() ) ); } );

    The post Weekly Photography Challenge – Night Photography by Darlene Hildebrandt appeared first on Digital Photography School.


    Digital Photography School
  • 31 Mystical Night Photography Images

    There is something magical, mystical about the night, and night photography. Things you can’t see with the human eye, a certain peacefulness.

    Here on dPS night photography is a popular topic, with many articles to choose from if you want to learn how to do it.

    In this collection let’s look at some stunning examples of night photography done well:

    Photograph Black Lotus by Mathijs van den Bosch on 500px

    Black Lotus by Mathijs van den Bosch on 500px

    Photograph The beginning by Marco Bocelli on 500px

    The beginning by Marco Bocelli on 500px

    Photograph Along the Thames by Giuseppe Torre on 500px

    Along the Thames by Giuseppe Torre on 500px

    Photograph In New Orleans by Boberic Photography on 500px

    In New Orleans by Boberic Photography on 500px

    Photograph *H--H* by ömer yücel on 500px

    *H–H* by ömer yücel on 500px

    Photograph Shanghai at Night by Clemens Geiger on 500px

    Shanghai at Night by Clemens Geiger on 500px

    Photograph DUBAI by Ibrahim Albeshari on 500px

    DUBAI by Ibrahim Albeshari on 500px

    Photograph the queen by Ronny Behnert on 500px

    the queen by Ronny Behnert on 500px

    Photograph San Francisco, unseen night 2 by Ali Erturk on 500px

    San Francisco, unseen night 2 by Ali Erturk on 500px

    Photograph Belchite night 2 by Tony Goran on 500px

    Belchite night 2 by Tony Goran on 500px

    Photograph ?n Brugge by ?lhan Eroglu on 500px

    ?n Brugge by ?lhan Eroglu on 500px

    Photograph Salamanca in the night by Isidoro M on 500px

    Salamanca in the night by Isidoro M on 500px

    Photograph A Night To Remember by Arild Heitmann on 500px

    A Night To Remember by Arild Heitmann on 500px

    Photograph Celestial Cypress by Paul Marcellini on 500px

    Celestial Cypress by Paul Marcellini on 500px

    Photograph Fossilized UFO by Sakhr Abdullah on 500px

    Fossilized UFO by Sakhr Abdullah on 500px

    Photograph Portal by Brad Goldpaint on 500px

    Portal by Brad Goldpaint on 500px

    Photograph Stars over Teton homestead by Royce's NightScapes on 500px

    Stars over Teton homestead by Royce’s NightScapes on 500px

    Photograph My bike! by Khatawut J on 500px

    My bike! by Khatawut J on 500px

    Photograph M11 By Winter's Night - London by Pete Dobson on 500px

    M11 By Winter’s Night – London by Pete Dobson on 500px

    Photograph What Once Was by Aaron J. Groen on 500px

    What Once Was by Aaron J. Groen on 500px

    Photograph Reaching for the stars by Dan Barr on 500px

    Reaching for the stars by Dan Barr on 500px

    Photograph Ball of Light by Richard Steinberger on 500px

    Ball of Light by Richard Steinberger on 500px

    Photograph Star Filled Sky over The Grand Tetons #2 by Matt Anderson on 500px

    Star Filled Sky over The Grand Tetons #2 by Matt Anderson on 500px

    Photograph Galiano Island Stars by James Wheeler on 500px

    Galiano Island Stars by James Wheeler on 500px

    Photograph Moonlight Dock by James Wheeler on 500px

    Moonlight Dock by James Wheeler on 500px

    Photograph An appropriate night for anything by Milos Savkovic on 500px

    An appropriate night for anything by Milos Savkovic on 500px

    Photograph Thousand star Hotel by shaiith on 500px

    Thousand star Hotel by shaiith on 500px

    Photograph Ai-Petry. Night, Full Moon. by Denis Belitsky on 500px

    Ai-Petry. Night, Full Moon. by Denis Belitsky on 500px

    Photograph industrial portrait by Alina Cürten on 500px

    industrial portrait by Alina Cürten on 500px

    Photograph Wat arun under loy krathong day ,Thailand by Prasit Rodphan on 500px

    Wat arun under loy krathong day ,Thailand by Prasit Rodphan on 500px

    Photograph Good night by Fehrum on 500px

    Good night by Fehrum on 500px

    googletag.cmd.push(function() {
    tablet_slots.push( googletag.defineSlot( “/1005424/_dPSv4_tab-all-article-bottom_(300×250)”, [300, 250], “pb-ad-78623” ).addService( googletag.pubads() ) ); } );

    googletag.cmd.push(function() {
    mobile_slots.push( googletag.defineSlot( “/1005424/_dPSv4_mob-all-article-bottom_(300×250)”, [300, 250], “pb-ad-78158” ).addService( googletag.pubads() ) ); } );

    The post 31 Mystical Night Photography Images by Darlene Hildebrandt appeared first on Digital Photography School.


    Digital Photography School