Category: Photography

  • 6 Tips Using Visual Weight to Improve Your Composition

    Andrew’s newest ebook Mastering Composition is now on special for a limited time only at Snapndeals.

    Visual weight (also called visual mass) is the principle that some elements of the photo pull the eye more than others.

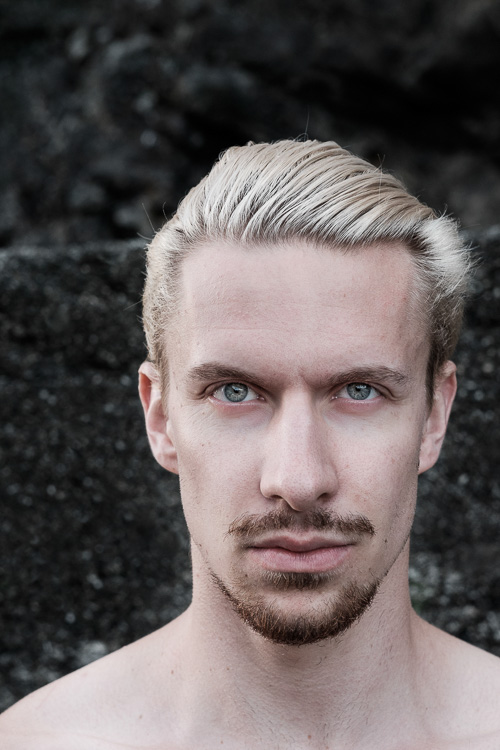
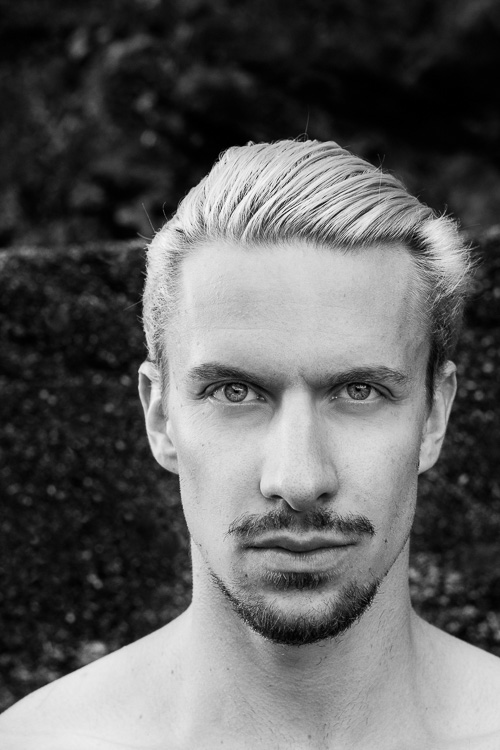
    Take a look at the portrait below. Where does your eye go? It should go straight to the eyes, because they have the most visual weight. They are the element exerting the greatest pull.
    Visual weight and composition

    Notice that the model’s eyes are not positioned on the traditional intersection points created by the rule of thirds. That doesn’t stop them from pulling the eye, although it could be argued that their visual weight would be strengthened by placing them on a third.

    Let’s look at the principles of visual weight (or visual mass) that you can use to improve the composition of your photos.

    1. Light tones

    Light tones and highlights pull the eye more than dark ones (the basis of tonal contrast). There is a strong contrast in the portrait above between the model’s skin and hair, and the dark background. It is easier to see in a black and white version of the same photo.
    Visual weight and composition

    2. People

    Curiosity about other people is part of the human condition. Our eye goes straight to any human figure that is present in a photo. Recognixable faces exert a stronger pull, while the eyes (the window to the soul) have the strongest visual weight of all.

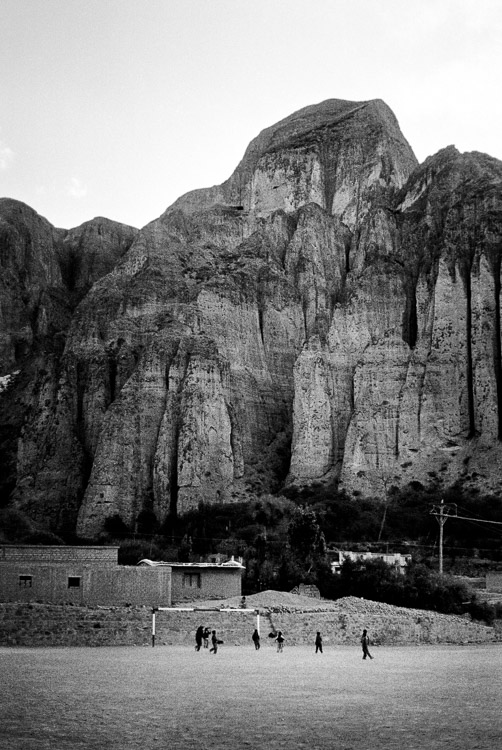
    This explains why you can use people, small in the frame, to give scale and context. It works because our eyes go straight to those figures, as long as they stand out from the background (gestalt theory in action).

    The people in the photo below are small, yet the eye goes straight to them. The inclusion of the human figures helps give the scene scale, and emphasizes the size of the mountain behind them.
    Visual weight and composition

    3. Visual weight and size

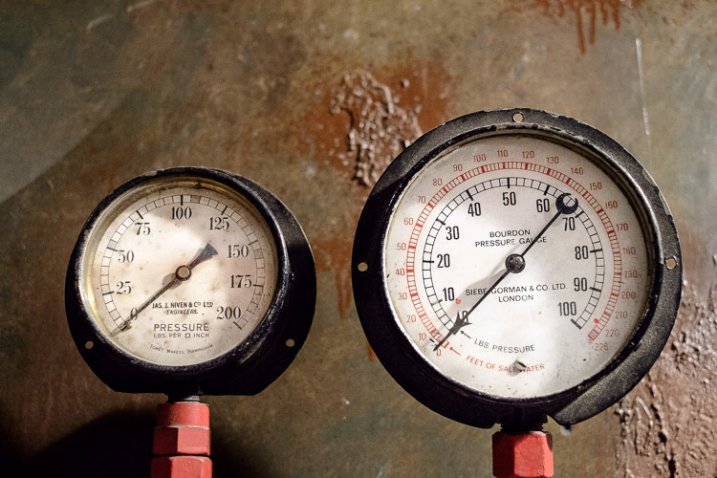
    The larger the element of a photo, the more it pulls the viewer’s eye. This principle works in harmony with the others discussed in this section. A small human figure, for example, can have much more pull than a large, inanimate object. A small splash of red can also pull the eye very strongly. But for objects of similar texture and colour, the larger one has the stronger pull.

    For example, the dials in this photo are virtually identical in terms of shape and design. The one on the right has the most visual weight because it is the largest of the two.
    Visual weight and composition

    4. Sharp or recognizable elements

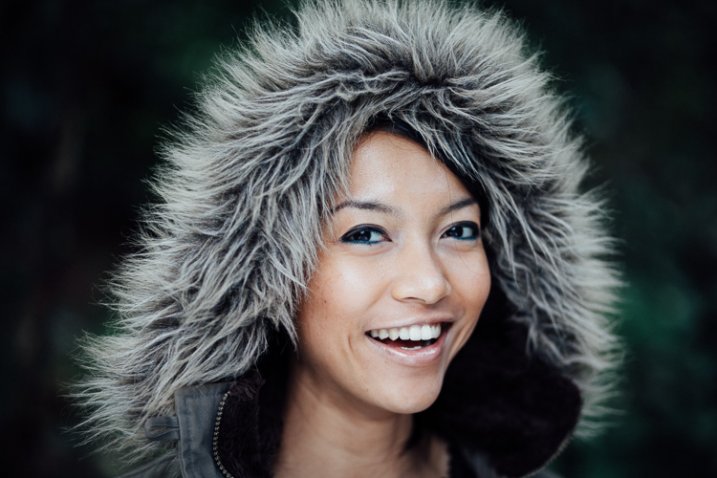
    Objects that are sharp or easy to recognize pull the eye more than ones that aren’t. According to gestalt theory, the mind looks for patterns and shapes that helps it make sense of chaotic scenes. Once something is identified, it gains significance in the frame compared to those that aren’t.

    The most obvious example of this is a portrait taken against a strongly blurred background. The visual weight of the background is reduced because it is no longer sharp, and no longer recognizable. The use of negative space also comes into play.
    Visual weight and composition

    5. High contrast

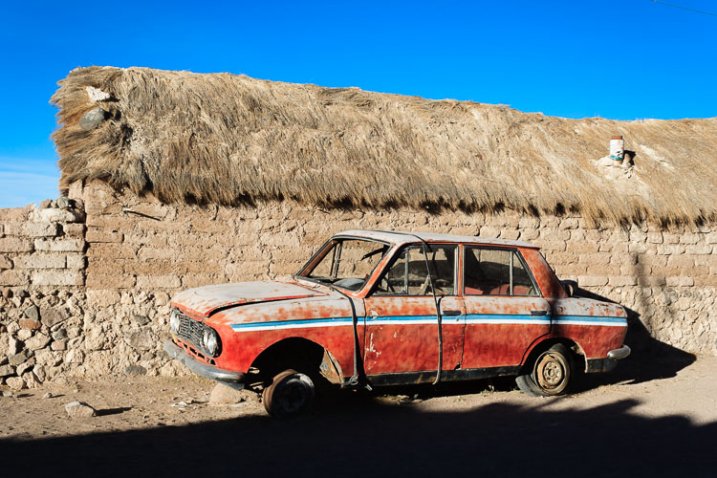
    High contrast subjects have more visual weight than low contrast ones. This is a good principle to apply in post-processing as well as the photo taking stage. Instead of increasing contrast universally across the image, try increasing it more in the areas where you want the viewer’s eye to travel. Lightroom’s Clarity slider is an excellent tool for this.

    In this example I used the Clarity slider to emphasise the texture of the old car and help draw the eye to it.
    Visual weight and composition

    6. Visual weight and colour

    Bright, saturated colours draw the eye. But not all colours are equal. Warm hues have more visual weight than cool ones. Red is the strongest colour of all.

    Simplifying the composition makes the relationship between the colours in the photo easier to see. A technique you can use, if your subject is brightly coloured, is to position it against a background comprised subdued, less powerful hues like grey, green and brown.

    Simplifying works for all aspects of visual weight. Eliminate everything that isn’t necessary. Keep the background as simple as you can. Once you’ve done this, look at the remaining elements and think about how the eye will move around between them, according to the principles of visual weight. The relationships between them become clearer as the composition is simplified.

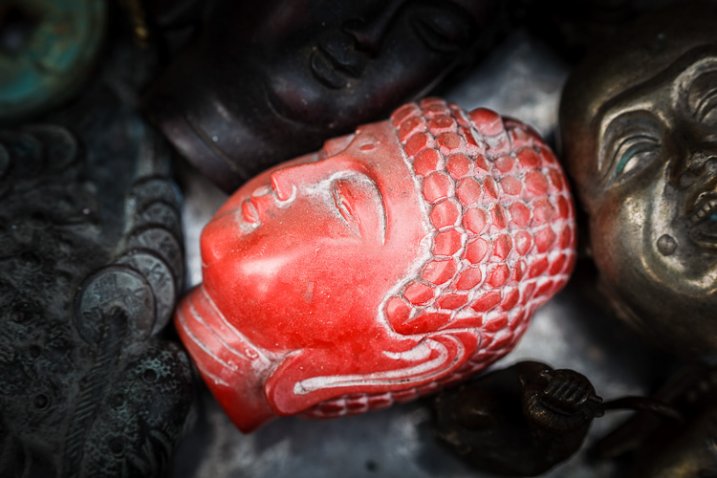
    The red figurine in the centre of the photo below has the most visual weight. I emphasised this in post-processing by using the Clarity slider to increase its contrast and adding a vignette to darken the background.
    Visual weight and composition


    Mastering CompositionMastering Composition

    My new ebook Mastering Composition will help you learn to see and compose photos better. It takes you on a journey beyond the rule of thirds, exploring the principles of composition you need to understand in order to make beautiful images. It’s on special for a limited time only at Snapndeals.

    googletag.cmd.push(function() {
    tablet_slots.push( googletag.defineSlot( “/1005424/_dPSv4_tab-all-article-bottom_(300×250)”, [300, 250], “pb-ad-78623” ).addService( googletag.pubads() ) ); } );

    googletag.cmd.push(function() {
    mobile_slots.push( googletag.defineSlot( “/1005424/_dPSv4_mob-all-article-bottom_(300×250)”, [300, 250], “pb-ad-78158” ).addService( googletag.pubads() ) ); } );

    The post 6 Tips Using Visual Weight to Improve Your Composition by Andrew S. Gibson appeared first on Digital Photography School.
    Digital Photography School

  • 3 Secrets for Creating Beautiful Nature Photos

    Secret #1 Start with you

    What elements of nature do you particularly like? You may already be clear on this; but even if you are, write it down, as something magical happens when you get things out of your head and living in front of you on paper.

    00 Copyright Beth Jennings Photography Digital Photography School Nature 2423

    Are you a flowers person? Do you like trees? How about specific elements of nature, for example, mushrooms on forest floors? No answer is a silly answer – just write them all down, no-one is screening what you say.

    You have your own take on the world and you need to work out what it is. Then you’ll make nature photos that have a little piece of you in them.

    Secret #2 How close is too close?

    You can go as far away, or as close as you like when photographing nature. Just so long as the element of nature is clear within the photograph.

    Let’s break it down a bit:

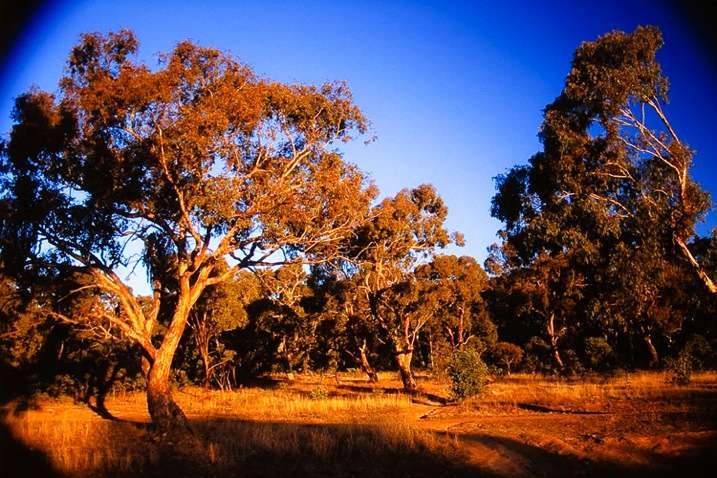
    You can get a fair distance from your nature subject and allow it to dominate your frame. These trees were captured in late afternoon light with a polarizing filter to make the blue sky really intense. The light is pouring through – totally natural. Would you believe this was shot on transparency film – no post-production, ha! However, that means I can’t give you the camera settings. (slaps forehead).

    Have a guess, what do you think the settings may have been?

    Either ISO 100 or 400 because that’s what was available at the time! Handheld – 1/125th of a second or faster. F/? something large to keep the depth of field, maybe, f/11.

    01 Copyright Beth Jennings Photography Digital Photography School Nature transparency

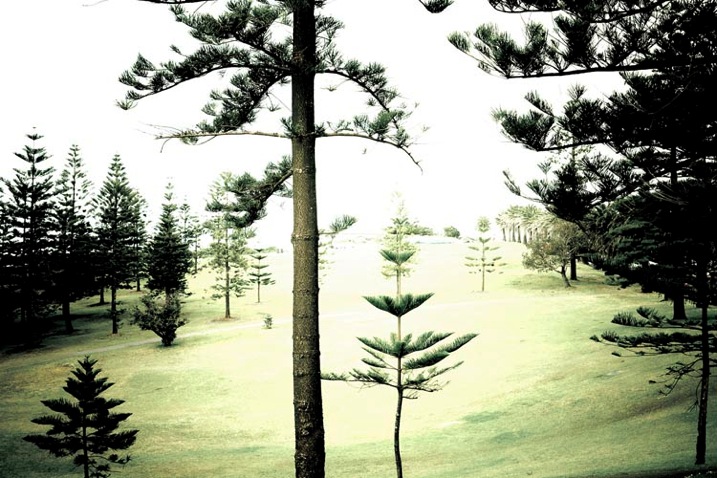
    Take a few steps in toward your trees and your composition changes. The trees run right to the edges and now we are so close that some are cropped off. See how the meaning of this picture changes, just by moving in closer? (Yes, it’s a different scene, but work with me here!)

    Where the previous picture was about the vast form of the trees, and the setting sun, this one is about the delicate nature of the branches and pine needles. It was taken about 11am on a bright, overcast day. The deep green needles contrast against the light, bright background.

    See the careful placement of all the trees in the composition? Look all the way to the edges, then through all the grassy areas. Notice the care in the spatial placement of the trees and the green grass? Take your time, and really see where the elements are falling in the composition.

    03 Copyright Beth Jennings Photography Digital Photography School Nature Photography 4348

    ISO 400, f/10, 1/160th

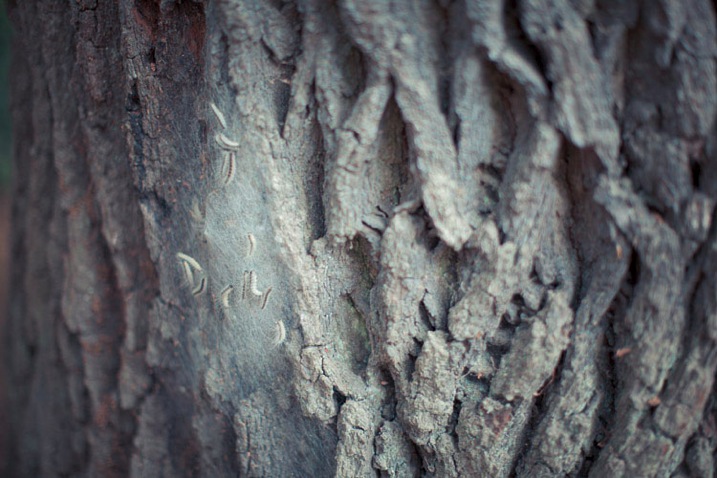
    Take a few more steps in on one tree, right up close on the detail. You have a choice now about rendering most of the capture out of focus, or creating lots of depth with the f-stop. This one has a shallow depth of field, to keep the focus on the tiny caterpillars. You can see parts of the texture of the tree to give a little hint as to the environment they live in.

    It was late afternoon with dappled, soft light coming through trees. The little creatures were spotted in their web in a soft, spot-lit area.

    04 Copyright Beth Jennings Photography Digital Photography School nature 2229

    ISO 320, f/1.2, 1/1600th

    Secret #3 Move your feet

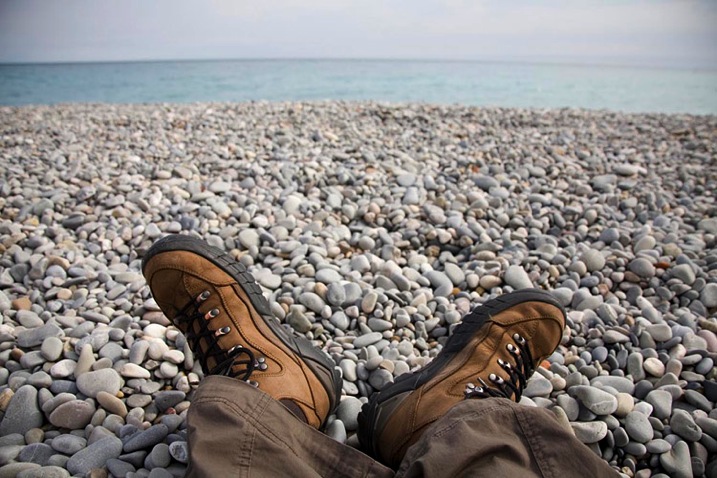
    When you come to photographing nature, it pays not to be too fixated on how you want to photograph your subject in terms of distance to subject, camera angle, and technical settings. Do have ideas in mind, but be open to the possibility that you may see something else (possibly better) on the day.

    05 Copyright Beth Jennings Photography Digital Photography School Nature 0332

    Walking and looking does wonders. Relax and enjoy your surroundings first. The beautiful things will come to you as long as you don’t force it.

    When something catches your eye, go up closer to it, study it, and figure out what element in particular it is that interests you. There is spontaneity in capturing nature in its living, untouched state. The key is being open to the most beautiful, particular and unique elements, and finding your composition, lighting and camera settings to suit.

    06 Copyright Beth Jennings Photography Digital Photography School Nature Photography 2 5

    It does sound a little new-age, but give this method a try, and hey, it costs nothing but your time to walk around and breathe it in.

    So there you have it – three secrets revealed as to how you can create pretty nature images, without it costing you a cent!

    What’s your secret to getting better nature photographs? Drop it in the comments area below.

    googletag.cmd.push(function() {
    tablet_slots.push( googletag.defineSlot( “/1005424/_dPSv4_tab-all-article-bottom_(300×250)”, [300, 250], “pb-ad-78623” ).addService( googletag.pubads() ) ); } );

    googletag.cmd.push(function() {
    mobile_slots.push( googletag.defineSlot( “/1005424/_dPSv4_mob-all-article-bottom_(300×250)”, [300, 250], “pb-ad-78158” ).addService( googletag.pubads() ) ); } );

    The post 3 Secrets for Creating Beautiful Nature Photos by Beth Jennings appeared first on Digital Photography School.

    Digital Photography School

  • GPP Pop-Up Seattle: Why Go, and What to Expect

    Several folks have asked for more specifics on the Seattle GPP Pop-Up. So here’s the long version.

    Gulf Photo Plus is widely regarded as one of the best photo weeks… well, anywhere. And deservedly so. Every year, people attend from dozens of countries all over the world.

    The problem is that GPP is held in Dubai, which is an awful long way for most westerners to travel.

    But each year Gulf Photo Plus holds a Pop-Up event somewhere other than Dubai. In 2013 they were in London, and in 2014 it was Singapore. This year, for the first time, a GPP Pop-Up is being held in the US. It’s scheduled for Sept 19th and 20th in Seattle, Washington.

    If there is any way you can get there, you want to be there.
    __________

    What to Expect

    Unlike the full GPP event in Dubai, GPP Pop-Ups are self-contained within a weekend. They are designed to be accessible without burning up your vacation time. Over two days, there are four sessions, and you’ll attend each one. The presenters this year are Joe McNally (location work and lighting) Zack Arias (building a photo business) Greg Heisler (understanding a creating evocative light) and yours truly (more on my session below).

    This is the same group we had in London in 2013, and they will each approach the weekend from totally different directions. As for London, it was obvious by the end of the weekend that the people who came left ot only with new-found knowledge but also a serious set of recharged batteries.

    Joe, literally a firehose of experience and information, teaches a lot. But generally he teaches alone rather than in combination with other instructors. Zack teaches not so often these days, more recently pouring himself into his busy, Atlanta-based photo career.

    Greg, on the other hand, is much more difficult to access. Having accomplished pretty much everything that one can accomplish as a photographer, he has since transitioned into a life as a professor at Syracuse University. That’s great (okay, fantastic) for Syracuse students, but a loss for the rest of us.

    I have spent a lot of time with Greg over the past few years. Still, I will sit and listen to him any time I get the chance. It’s hard to explain, but I have really come to believe that he thinks and works on a completely different level than most human photographers.

    Even more important, he is generous and gracious with sharing what he has learned through his decades of work. (And so many of the things that for him seem somehow genetically intuitive or something. It’s not even fair.)

    Fortunately, he is able to distill his knowledge and articulate it in a way that is easy to understand and makes perfect sense—in retrospect. Which is all the more impressive.

    Suffice to say that it can be humbling, if not downright intimidating, to share a stage with these guys. But I’ll happily do so any time I have the chance. As much time as I have spent with them, one thing I have learned is that you really never know where they are gonna go with it. So I am happy to be there to learn from them.
    __________

    We’re Headed to The Vista

    If I don’t know where the other guys are going with their sessions, I do know where I am going with mine. And I want to talk a little about that.

    As neat as a week of days at GPP in Dubai are, the nights are for me even better. And that was especially the case for the first few years I attended because of a place called The Vista. It’s a bar, and that’s it pictured above.

    All day we’d be teaching (and/or attending) our classes and workshops. And as the evening came and the desert air cooled we’d head up to the Vista, a rooftop bar at a nearby hotel. And we’d drink. And talk. And drink some more. And talk some more.

    Often, we’d close the place. And that might mean 3am, on a day when you were due on location for the next day’s shoot just a few hours later. I mean, how could you leave when people like Heisler and David Alan Harvey and David Burnett and a table full of others were sharing experiences and comparing notes with you?

    If the days were about F/stops and shutter speeds and lenses and flashes and general photo talk, the nights were reserved for what was arguably much more impotant stuff. It always tended to morph into the 50,000-foot view stuff:

    • Given everybody pretty much gets the F/stops, how do you possibly differentiate yourself?

    • What are the things that they don’t tell you about in photo books/courses that are (arguably much more) important to growing as a shooter?

    How the #!&$ did you talk yourself into the Ayatollah’s office in 1979 to hang out and make photos during the revolution? (That would be Burnett — no kidding.)

    In ny 35 years as a serious photographer, I hold few experiences to be more valuable than the nights spent at The Vista in deep conversation with other photographers. So for Sunday morning, that is where we are going—even if only metaphorically.

    We won’t have the alcohol (or whatever—I am not checking your coffee travel mug.) But we’ll be at The Vista in spirit. If the rest of the weekend is spent looking in towards photography, our session will be spent looking out from photography.

    Specifically, what is it about you—the “not photography” part—that you can tap to change your approach, your thought process, your opportunities, your career?

    We all share a love for, and a specialty in, photography. Which is both great and a curse. In that sense we are all competing with one another, and some days the pond seems really crowded.

    For most of us, that’s a problem. Especially if you are a mediocre photographer. And straight up: as far as I am concerned, I am a mediocre photographer.

    My pictures won’t move you to tears. They surely won’t cure cancer. So if I am just thinking as a photographer, I’m screwed in the long term.

    Fortunately, if I am a middling photographer, there is something else that I am good at. I can step outside of a box and look at a problem from another perspective. I can connect dots. I can see the way that things work together—and more important, new ways they can work together.

    You’ll probably never be able to compose with a 35mm lens the way David Alan Harvey can. But you can learn to arrange things that are not necessarily visual, and turn photo-related hurdles into new opportunities.

    Sure, you have expertise in photography. But that’s an overcrowded boat on a choppy sea. Where are your other areas of expertise? Where could new areas be? How could you combine those knowledge centers to create new opportunities?

    How much more powerful is your photography when it is only a component of another thing you are doing? Some other thing that can be far more unique to your interests or skill set?

    Those points of intersection are where I live. They are far less crowded, with far more opportunity, and thay are for more uniquely suited to who I am.

    Finding—and leveraging—those intersections, that’s where we are going Sunday morning. And it is especially cool because we can explore that space together without fear of saturation or competition. Because everyone’s collection of interests and expertises is unique.

    So while I can’t speak in detail for the rest of the weekend, that is where we are really going on Sunday morning. And after lunch, I’ll be parking my butt in a seat (probably with a notebook) to take in whatever Heisler is serving.
    __________

    GPP Pop-Up 2015: Seattle

    More info/tickets: GPP Pop_UP website
    Twitter hashtag: #GPPSeattle


    Strobist

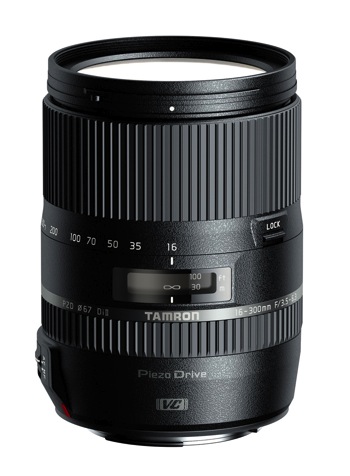
  • The Winner of the 16-300mm Di II VC PZD Tamron Lens is . . .

    Tamron 16 300mm Di II VC PZD Macro 750

    Tamron 16-300mm Di II VC PZD Macro

    A HUGE Thank You to everyone who entered our recent contest to win a 16-300mm Di II VC PZD Macro Lens from our friends at Tamron. This was not actually a photography competition, but so many of you shared your beautiful photographs, we encourage you all to go back and scroll the comments section for some wonderful photos and links to reader pages/sites.

    Yet again, the response was absolutely AMAZING with over 930 entries! But now, on to the winner! Drum roll – and the winner is:

    The Tamron 16-300mm Di II VC PZD Macro goes to – Hasan! Congratulations!

    His comment:

    I like landscape and street photography… I spent a long time trying to decide which I like more… but my wife told me I am good in both 😀 so my website has both www.hasanodeh.com

    I see this lens as a dream for my street photography… speed and discretion is the key to street photography… you have to be versatile. able to switch focal lengths instantly without changing lenses is an amazing way to make sure you get the best street images…. starting from environmental portraits all the way to close ups of a face of a 92 years old lady selling roses to young couples. The PZD will allow me to focus faster when the moment presents itself and the quite focusing system (along with the silencer mode on my camera) will make sure I do not disturb that magical moment as it happens. Also the vibration compensation would be amazing as shooting from a tripod is almost never an option for street photography… so a lens with a good VC is a god send.

    To anyone reading this… Look at my website and get this…. I am self taught… and this is where it all happened… on DPS… just keep shooting and keep reading… It’ll be amazing if DPS gives a lens that let me take what I learned here to another level. thanks guys whether you chose me or not for your efforts on DPS.

    We were all thrilled with the entries – you tugged at our heartstrings, made us laugh, made us smile, but most importantly, you made us keep wanting to do more of what we are doing; providing you quality information and guidance to become a better photographer. We were so pleased to see that you came from every part of the world, young adults to grandparents, and everyone in between. Thank you all for your entries!

    Here is a special post from the winner of the Tamron 16-300mm Di II VC PCD Macro from our December, 2014 Contest:

    I am not entering!!! I won one of these in December (THANKS DPS!!!!!) and I love love love the lens!!! For me, it takes so much stress out of getting the picture just the way I want to without a need to switch between lenses. It really freed me up as a photographer to think about things like composition and camera settings instead of handling the lenses. Wonderful feeling, and a wonderful lens. Thanks again! This picture was taken with it too, from a moving car – and I was READY!!!!

    Vera Irwin Photo

    Tamron Road Trip ImageFor those of you that didn’t win, Tamron has invited ALL dPS readers download their 2015 eBook Series!

    You can find those HERE!

    Tamron Rebates

    For all of you residing in the USA, when you do purchase your 16-300mm Di II VC PZD Macro Tamron Lens, make sure to take advantage of the $ 100 Total Rebate, through June 21, 2015. If you’d prefer one of the other award winning Tamron Lenses, please make sure to take check out these additional Tamron Rebates*. Find additional information HERE.

    728x90 Tamron Rebate Banner for Use

    *Current rebate offers end June 30, 2015. US RESIDENTS ONLY.

    The Winner will be emailed with details of how to collect their prize. Please make sure to look for our email. Thanks you again for all the wonderful submissions and to Tamron for sponsoring this competition.

    Tamron logo

    About Tamron

    googletag.cmd.push(function() {
    tablet_slots.push( googletag.defineSlot( “/1005424/_dPSv4_tab-all-article-bottom_(300×250)”, [300, 250], “pb-ad-78623” ).addService( googletag.pubads() ) ); } );

    googletag.cmd.push(function() {
    mobile_slots.push( googletag.defineSlot( “/1005424/_dPSv4_mob-all-article-bottom_(300×250)”, [300, 250], “pb-ad-78158” ).addService( googletag.pubads() ) ); } );

    The post The Winner of the 16-300mm Di II VC PZD Tamron Lens is . . . by Darlene Hildebrandt appeared first on Digital Photography School.

    Digital Photography School

  • Camera Bag Review – Miggo Agua

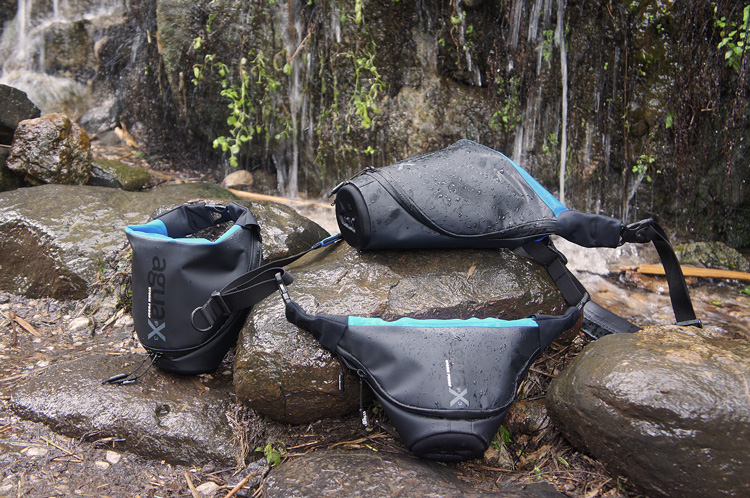
    Miggo Agua Stormproof Holster SLR 45 MAIN

    Image courtesy Miggo

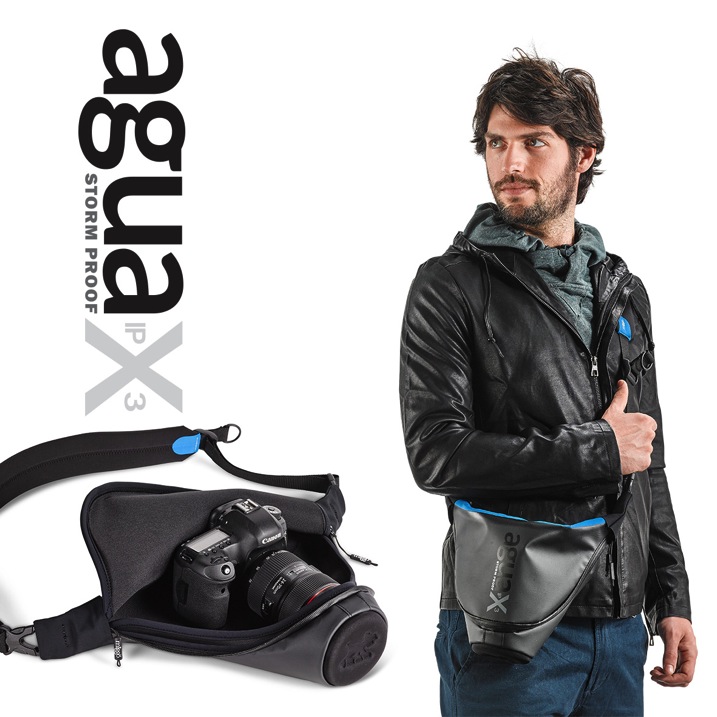
    As the Editor here at dPS I don’t usually do gear reviews here any more, but Miggo sent me a beta version of their new Agua bag to try out so here are my thoughts.

    Miggo Agua Features

    Directly from their product brochure, here are some of the main features of this bag:

    • Comes in three sizes from large SLR down to small for mirrorless cameras.
    • Storm-proof: water, sand, wind, snow, it keeps it all out and your camera safe from the elements.
    • Quick-draw ability (more on my thoughts about that later)
    • QUick-adjusting padded strap
    • Dual-use strap: connect to the bag or to your camera
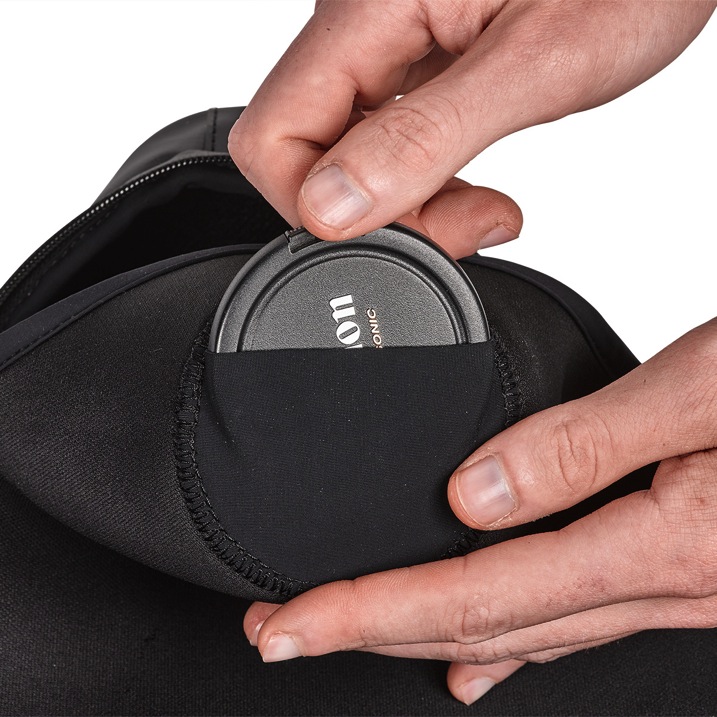
    • Lens cap inner pocket (never lose your cap again)
    • Thermo-forming front lens protector – put your camera in the bag without the cap on and it it still protected
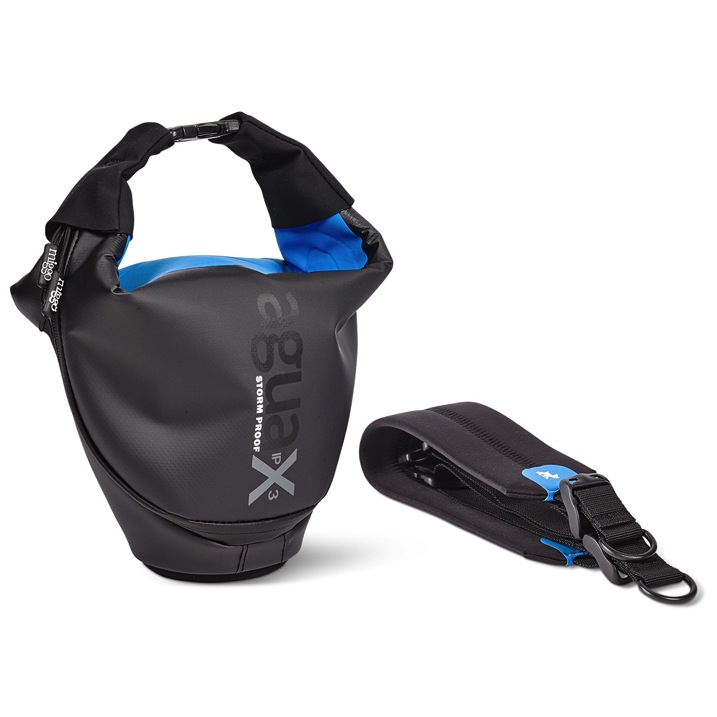
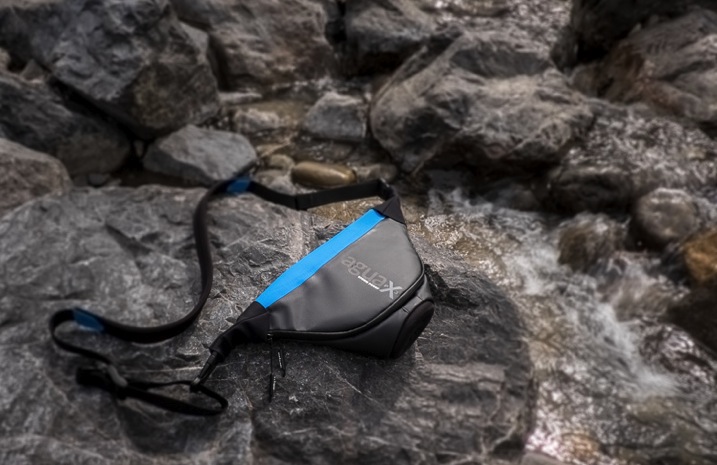
    Miggo agua bag and strap

    Image courtesy Miggo

    Miggo agua lens cover pocket

    Image courtesy Miggo

    Is it really waterproof?

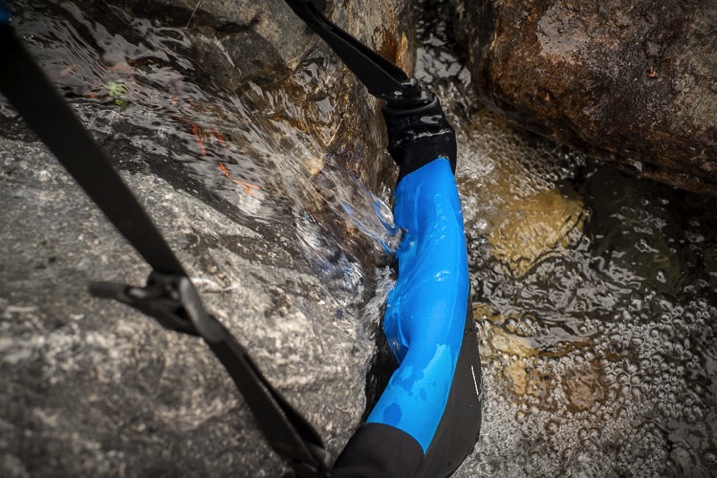
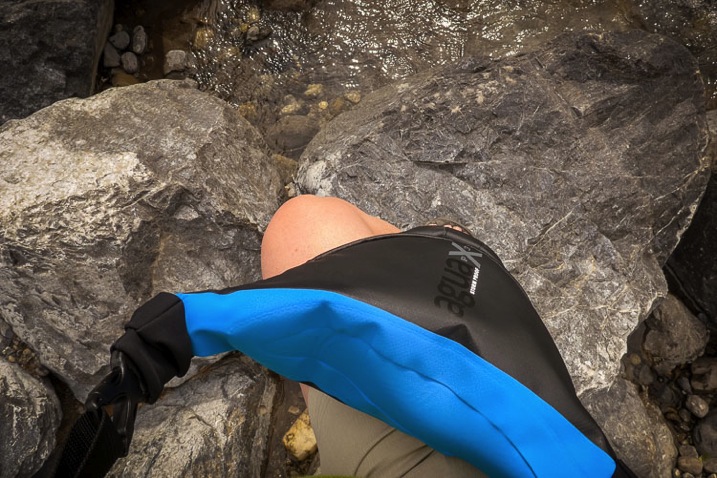
    I wanted to challenge their claims that it is storm and waterproof but not risk my camera just in case. So I decided to use a roll of toilet paper, tucked inside the bag to test its ability to stay watertight. As I was relaxing in the Canadian Rocky mountains last week I took it with me and went off in search of a stream. I decided this one would do nicely – it had nobody around to watch me and think I was a complete weirdo.

    Miggo Agua review 750px 03

    Stream I found to test the waterproof claims for this bag.

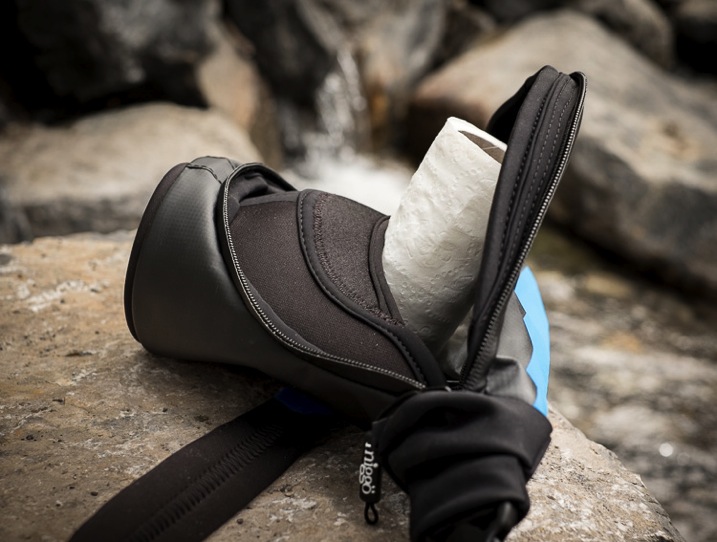
    So I borrowed the tissue from my hotel bathroom and stuffed it inside the bag.

    Miggo Agua review 750px 15

    Test subject – hotel toilet tissue.

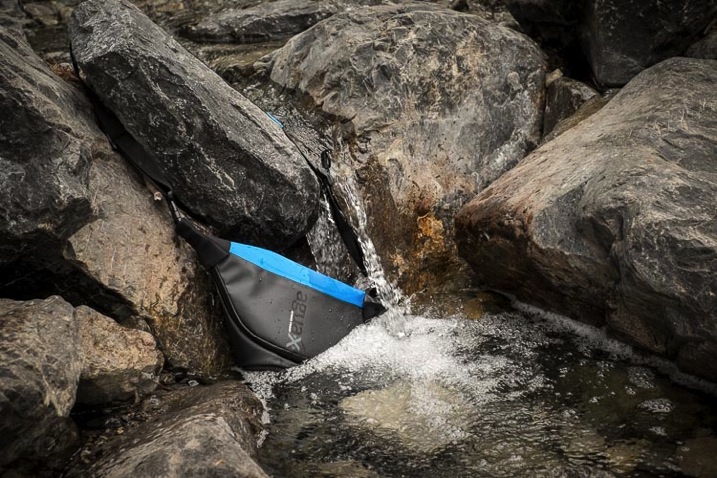
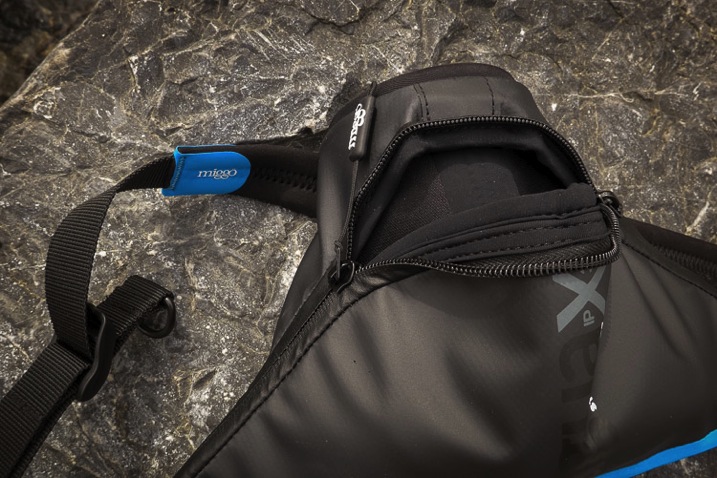
    Zipped it up and plunged it fully into the stream. First thing I noticed is that the zippers are a bit stiff and sticky. Could be a symptom of being a beta version, perhaps something they are working on for the final release.

    Miggo Agua review 750px 16

    I put the bag right into the running water.

    Miggo Agua review 750px 17

    I moved it around to cover all areas of the bag, and left it there for a couple minutes.

    So did it hold true to its claims? Did the little Miggo Agua bag keep the paper dry? Watch this little video I made and find out!

    How did the bag handle?

    Okay the next thing I tested was how comfortable and usable is the bag. They had sent me the mirrorless size so I put my Fuji X-T1 inside with the standard 18-135mm lens that comes with that rig. It did not fit! I removed the lens hood, and took my tripod insert off the bottom of the camera and still it did not fit. Hmmm . . .

    Miggo Agua review 750px 08

    The bag would not close with my Fuji X-T1 with 18-135mm lens attached (no lens hood).

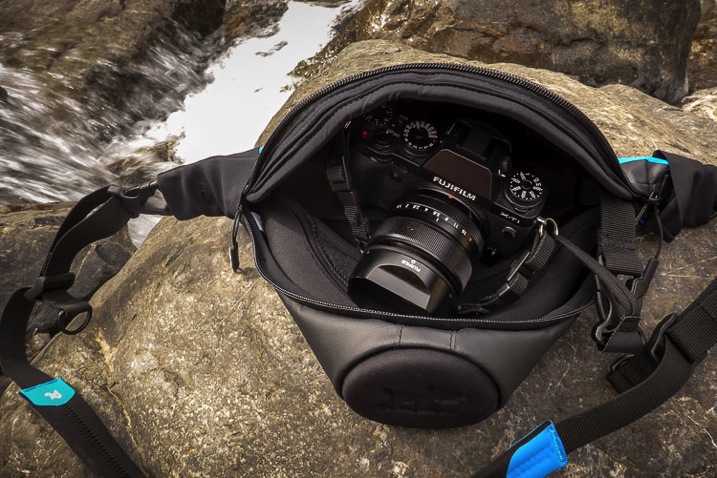
    I had to switch lenses to my 35mm f/1.4 which is much more compact and finally it fit inside the bag.

    Miggo Agua review 750px 09

    Had to resort to the smaller 35mm lens to give this a go.

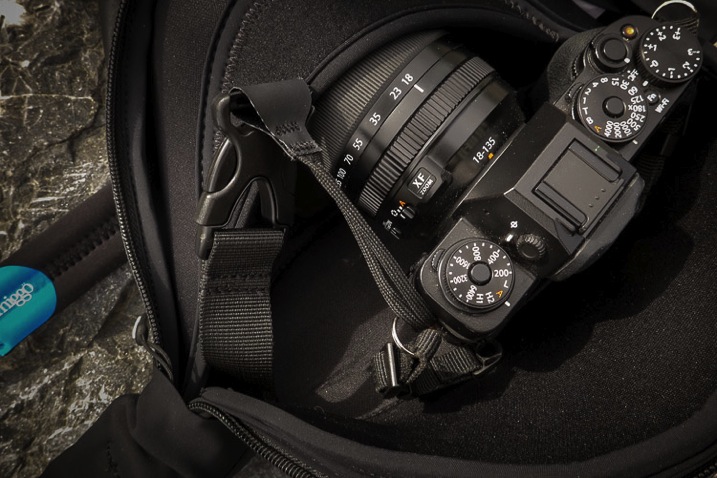
    Attaching the camera to the little quick-draw thing was a bit finicky and a bit annoying. I already have my regular camera strap in the o-rings attached to the camera. To get it to work with the Miggo I had to also add one of their straps as well. You can see how it goes on and clips inside the bag in the image below.

    Miggo Agua review 750px 06

    The camera attaches only to the left side of the bag via this strap and buckle.

    It only attaches on one side of the camera (left), then tucks inside the bag. I found using it in this manner was a bit cumbersome actually. I couldn’t leave the bag undone or the camera would pop out (not good), so I was forced to zip it up after each shot. Once again the sticky zipper was a bit annoying as it took two hands to do it up and undo it each time.

    I found the little cloth strap that attaches to the camera bit thin too. I find that with most camera straps there is wear and tear and the straps start to get frayed and worn through by rubbing on the o-ring and the camera itself. I could see this one getting worn through fairly quickly, but then again maybe not because it’s always inside the bag.

    Miggo Agua review 750px 12

    Notice how the bag doesn’t really bend? It’s very stiff.

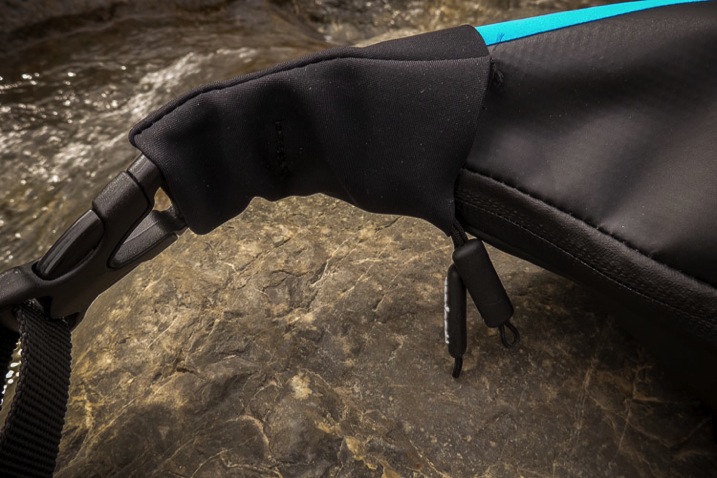
    Overall I found the bag a bit crunchy. The fabric is very sturdy but a bit inflexible, it doesn’t mould to the body or bend much at all. I didn’t hike around with it all day but could see it rubbing if one were wearing shorts.

    Size

    I already mentioned that my Fuji didn’t fit inside the size designed for mirrorless cameras – perhaps I’d need to go a size up, but that would be good to know before you buy it. I also found that I had to carry a second bag with me because there is no room inside the Miggo Agua for anything other than one camera and lens attached. Nothing!

    Miggo Agua review 750px 19

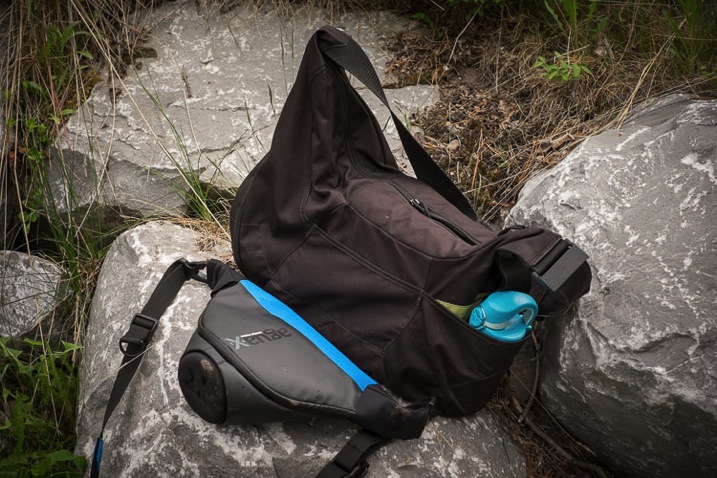
    Bag size comparison for reference.

    Above you see the size comparison to my LowePro Passport Sling bag, which I often use as a small day bag. It holds two lenses, batteries, a water bottle (as you can see in the photo), and personal items like a jacket, book, etc.

    I would have loved to see an extra pocket for a spare battery or memory card, maybe even one small lens. As it is it’s pretty limiting.

    Construction and build

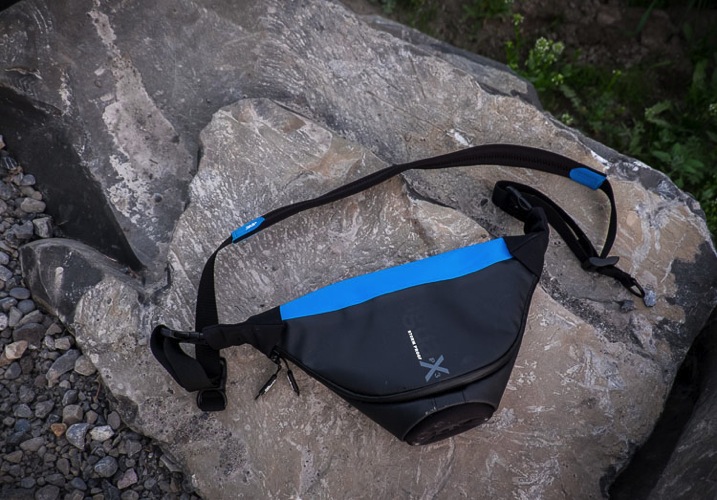
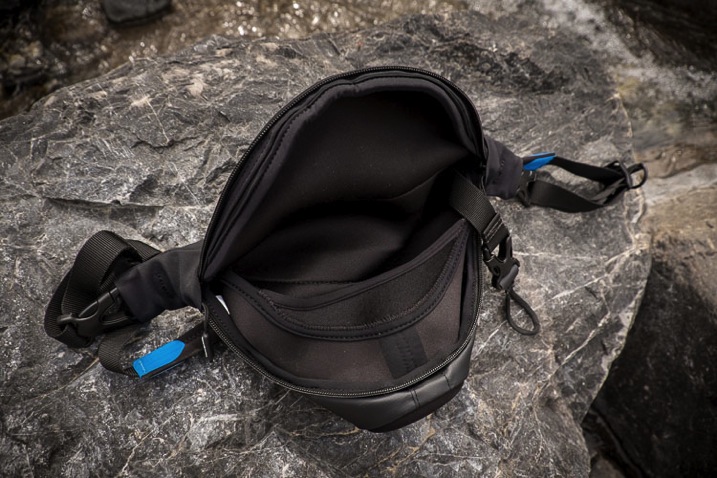
    No beefs here with construction and build, it is solidly made. The inside is double padded, the zippers tuck up under little flaps to keep the bag waterproof and the bottom is extra protected so you can put your lens inside without a cap and not worry.

    Miggo Agua review 750px 01

    Miggo Agua review 750px 04

    Miggo Agua review 750px 11

    Pros and Cons

    Pros of the Miggo Agua

    • It certainly does what it claims and keeps the water out.
    • It is compact.
    • The strap is comfortable and adjustable.
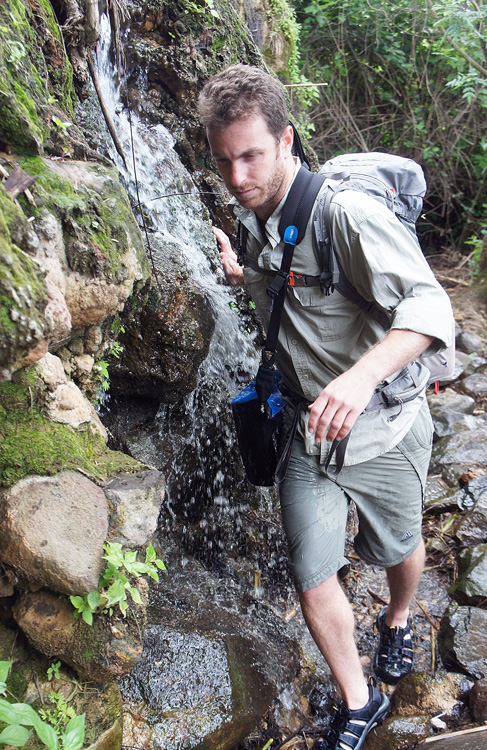
    • Great for adventurers that want to have their camera handy when hiking.
    SONY DSC

    Image courtesy of Miggo

    miggo-river-man-shooting-wide-750px

    Image courtesy of Miggo

    Cons of the Agua

    • It isn’t big enough to fit all mirrorless cameras. Size description needs to be more clear or a list of which cameras fit into which size nicely available before you purchase a bag.
    • There is no room for anything else – just one camera and lens attached – so it’s application is limited.
    • The attachment of the camera inside the bag just feels “off”. The strap is thin and having it only attached to one side makes it feel unbalanced somehow.
    • The zipper is a bit stiff and sticky.
    • It’s nearly impossible to leave the camera out, it has to be tucked away and zipped up after every use or shot.

    Who is this bag good for?

    SONY DSC

    Image courtesy of Miggo

    I’m giving this bag 3.5 out of 5 stars, mostly because there are a few things that could use improvement and I’m guessing that because this is a prototype some of those bugs will be worked out before the final version is released.

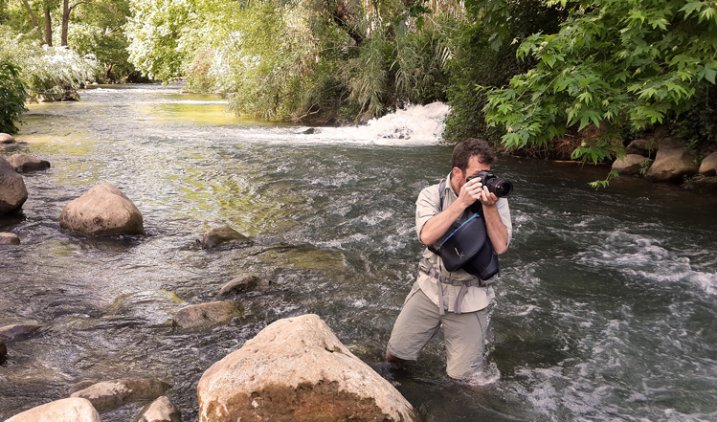
    I would recommend this bag if you are a backcountry hiker, like to kayak, do extreme sports, or spend a lot of time on the beach. This little bag will allow you to take your camera along and keep it safe in conditions you might otherwise leave it behind.

    This bag is likely not for you if you just do mostly city shooting and tend not to push the boundaries of where you take your camera. Also if you like to drag around all your lenses and extra stuff you may find its size limits too much for you and another option like a rain cover on your existing bag may be all you need.

    Learn more – get it early

    You can find out more about the bag in this video from the manufacturer or check out their Kickstarter campaign (already funded!) and get in on getting one of these bags early.

    googletag.cmd.push(function() {
    tablet_slots.push( googletag.defineSlot( “/1005424/_dPSv4_tab-all-article-bottom_(300×250)”, [300, 250], “pb-ad-78623” ).addService( googletag.pubads() ) ); } );

    googletag.cmd.push(function() {
    mobile_slots.push( googletag.defineSlot( “/1005424/_dPSv4_mob-all-article-bottom_(300×250)”, [300, 250], “pb-ad-78158” ).addService( googletag.pubads() ) ); } );

    The post Camera Bag Review – Miggo Agua by Darlene Hildebrandt appeared first on Digital Photography School.

    Digital Photography School

  • Tips for Posing Muscular Female Body Types

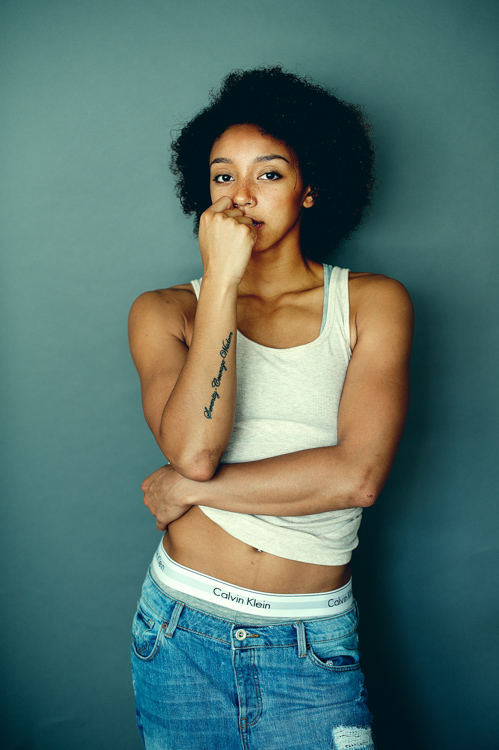
    You’ve found a model. You’re excited. She’s in AMAZING shape. I mean amazing as in 8% body fat and abs that you can wash your clothes on. This might not be quite what you were expecting so here are some tips for posing your muscular, super fit model in more feminine poses.

    Muscular Posing 1

    This athletic model has a muscular physique. The tips in this article will help you pose her in a softer way.

    Don’t flex

    Tell your model to avoid flexing. It might sound counterintuitive but these are not sports or fitness competition photos. You do not want the flex, you want the form. Make sure you encourage your model to relax. Relax her shoulders and her arms. Her shoulders are broad so you want to help her relax them as much as possible.

    Accentuate the curves

    Unless you’re shooting an athletic or an androgynous story, you will most likely want your model to have some curves. Your muscular model will most likely not have curvy hips. You can create the illusion by posing. The key here is to watch as your model moves, see what her body does.

    Muscular Posing 2

    Have her hug her body and play around with her arms. You can also have her bend her knee just a little to add a bit of a curve.

    Have her push her hips to one side, as she drops her shoulders and arms to hug her body. Another trick is to have her hug her body. This can create curves where there are none. As she’s hugging, have your model bend forward a little. Shoot from various angles to find the most flattering look. Thirdly, have her bend a knee – just a little. This knee will add yet another angle for you to work with. The knee should be moved as you’re shooting. Try having her cross her knee in front of the other leg. Use all of these tricks together to achieve the look you want.

    Muscular Posing 3

    Have your model embrace her hips. Encourage her to push one side out and have her hands and different lengths along her body as she leans forward just a bit.

    Frame it

    You can do a lot with a photo with your framing. Your muscular model will most likely have broad shoulders and you can bring those in a bit with your framing. Have your model pose with her shoulder facing you. Have her turn her head towards you, and you’ve now softened her shoulders. Encourage her to drop her shoulders as much as she can. She might not be able to go far so pay close attention, you don’t want to hurt her.

    You can have her tilt a bit if you need to. You can also have her face straight on towards you. Have her put her hands on her sides slightly above her hips, one hand should be just a bit higher than the other. Have her roll her hips towards the camera just a bit. One hip should be slightly to the side. This pose gives her a bit of movement in her shape and helps to soften her form. From this point, you can vary your shooting angle and framing to get the look your going for.

    Muscular Posing 4

    Have your model turn her shoulder directly towards the camera. Shoot at different angles to get the look you’re going for.

    These tips are the starting point for posing your muscular model. If you’re shooting athletic or competition photos then you’ll want to tweak these poses to accentuate the muscles. Remember that what you see is what you photograph. If something doesn’t look quite right, change it to look better. Use these tips to create the look you and your model want.

    googletag.cmd.push(function() {
    tablet_slots.push( googletag.defineSlot( “/1005424/_dPSv4_tab-all-article-bottom_(300×250)”, [300, 250], “pb-ad-78623” ).addService( googletag.pubads() ) ); } );

    googletag.cmd.push(function() {
    mobile_slots.push( googletag.defineSlot( “/1005424/_dPSv4_mob-all-article-bottom_(300×250)”, [300, 250], “pb-ad-78158” ).addService( googletag.pubads() ) ); } );

    The post Tips for Posing Muscular Female Body Types by Monica Day appeared first on Digital Photography School.


    Digital Photography School

  • Get it While It’s Hot! Ello Launches iOS App!

    Teaser:  Ello's iOS app is Launching Tomorrow :)

    A lot of you who follow my photography and blog know that I’ve been super excited about Ello, my favorite new social network on the web. Today Ello gets even a little bit better with the official launch of their iOS app. They just launched the iOS app about 10 minutes ago, but it may take a little bit of time to propagate in the app store before you will be able to download it.

    I’ve been testing a beta version of the app for the past few weeks and absolutely love it.

    If you are a photographer and are not using Ello, I’d encourage you to give it a spin. Put simply, your photos will look better on Ello than on any other social sharing site on the web today. Looking at my photos on a 5k iMac in extra large, full, high res glory just can’t be compared with any other photo network out there. Ello shows your photos huge, as they are meant to be seen.

    I love that Ello was designed for the web first and foremost, but one is not always at one’s computer and so having a mobile app these days is really important. Ello’s initial release is for iOS and the iPhone, but they have plans to ship an Android version later on in the future.

    Like the web version of Ello, what I love about the iOS app is the elegance of its design and its simplicity.

    Basically the app does six things for you really well.

    1. Ello’s iOS app allows you to browse content by the people you follow. You get two buckets for your contacts at Ello, friends and noise. You can browse either stream and easily love and comment on content that you find interesting and engaging directly from your iOS device.

    2. Ello’s iOs app allows you to look at your own content stream. You can go to your own stream and expand comments as well as scroll through your entire stream of posts from most recent to oldest.

    3. Ello’s iOs app allows you to look at your notifications page. Here you can see when someone adds you, or when someone specifically mentions you in a post by name, or when someone loves or comments on a photo of yours. This is a great tool to stay on top of the interaction on your content.

    4. Ello’s iOS app allows you to discover new content on Ello’s discover page. I’m not sure how content is selected for Ello’s discover page, but there is some super cool stuff. If you run out of photos to look at by your friends, check out discover too.

    5. Ello’s iOS app allows you to post your own content with or without a photo. Like Instagram, Twitter, Facebook and other sites, you can post messages, status updates, and photos directly from the app. Unlike Instagram, Twitter, Facebook and others, Ello does not mix advertisements or promoted posts in with your content or sell your data to advertisers.

    6. Ello’s iOs app allows you to easily search content on Ello. You can search for posts or for specific users.

    Overall I’ve found the beta version of Ello’s iOs app to be super smooth. I love the animations that come with the app. When you first load the app up, you get this cool spinning Ello logo while it loads content for you. As content streams in you get a sort of pulsating gray ball letting you know that an individual post is loading. It’s obvious that a lot of thought went into how to make Ello’s app simple, elegant and intuitive.

    I’ve been using the beta version of the Ello iOS app every single day since I’ve installed it and even though it’s beta it has not crashed or locked up on me once. The app is super stable.

    For those of you who are unfamiliar with Ello, Ello is structured as a public benefit corporation. There will never be any advertisements on Ello and they will never sell your data. Ello takes your privacy very seriously and in my opinion is the most user centered social network on the web/iOS today.

    The people that run Ello are very solid. They are community focused and driven. One of the big reasons why I’m so high on Ello is because I’ve spent some time familiarizing myself with the founders and I think they represent some of the most sincere integrity in the social networking space today. They can definitely be trusted with your content and my content and they deserve our support.

    In addition to a great team running Ello, the community itself is one of the most creative communities on the web. I’m continuously blown away at the talent and artistic vision of the artists, designers, photographers and thinkers that are part of the early Ello community. Not only will you find some of the most awe inspiring visual work on the web today, you will find that behind that work is one of the most inclusive, friendly and welcoming communities to date. While you can block people on Ello, fortunately there has been very little abuse thus far and people seem to get along really well.

    For those of my friends who are already there, I’m really digging your work. For those of my friends who are not there yet, I hope you take a few seconds out today to download Ello’s new iOS app and I’d love to know what you think about it and see more of your work there in the future. If you want to connect on Ello you can find me here.

    If you want to learn a little bit more about Ello, check out this great video below by Lucian and Todd where they talk a little more about what Ello is all about.

    More from: The Verge, TechCrunch, readwrite, Los Angeles Times, Engadget.


    Thomas Hawk Digital Connection

  • Easy Portrait Retouching Tutorial without Losing Skin Texture

    When it comes to skin retouching, less is more. Retouching skin is tricky. You want to enhance it, not beat it to death, make it fresh and glow-y, while still keeping the integrity of the skin. You want to soften wrinkles, not obliterate them. And to bring out their eyes and natural beauty while keeping them looking like themselves. Even Continue Reading

    The post Easy Portrait Retouching Tutorial without Losing Skin Texture appeared first on Photodoto.


    Photodoto

  • Tips for Enhancing Night Sky Photography in Photoshop

    You will learn some important steps of enhancing a night sky photo in this tutorial. It is specifically useful if your photos were shot in areas with notable light pollution. Light pollution could spoil your photo by outshining the comparatively dim stars in the sky. Here are the tips for bringing back those spectacular stars in the sky.

    First a slight digression, I recommend to shooting your night sky photos in RAW format if you aren’t already. This is because RAW has an incomparable dynamic range which enables you to bring back the details of the photo, including the night sky in post-processing.

    Pic1

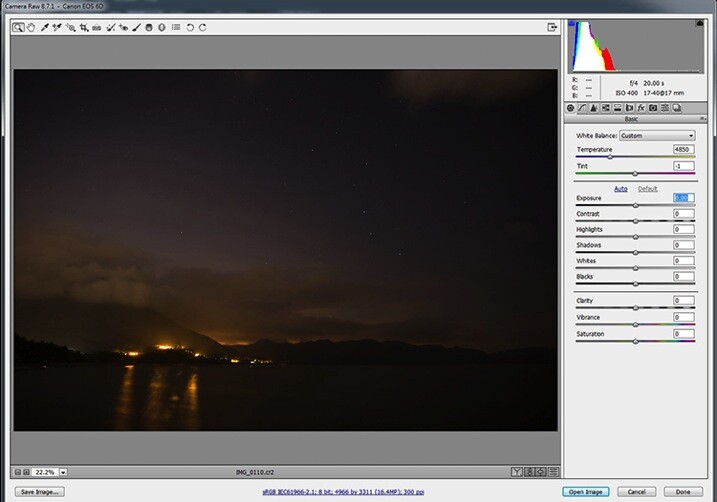
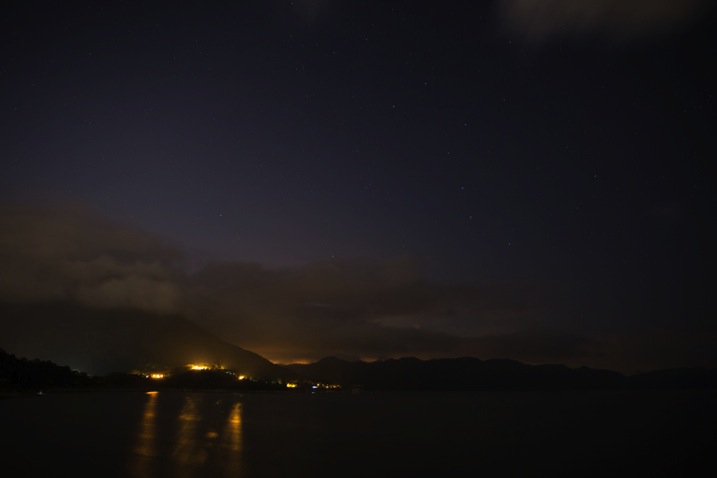
    The photo in the above screen capture is underexposed. We will need to play around with the exposure adjustments in a RAW Editor first. Generally, if the exposure of a dark image is boosted too much, there will be tons of noise. It is because the sensor failed to capture sufficient photons when the photo was underexposed. Therefore, the differences in the number of photons among pixels are significant. Such differences are the culprit of noisy images.

    Pic2

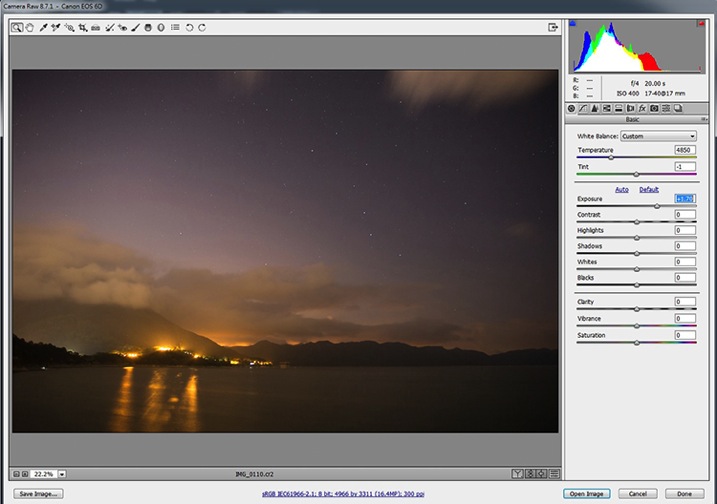
    First, you have to increase the exposure until the brightness of the photo appears to be appropriate. While adjusting the exposure parameter, use the histogram in the top right corner as a reference.

    Pic3

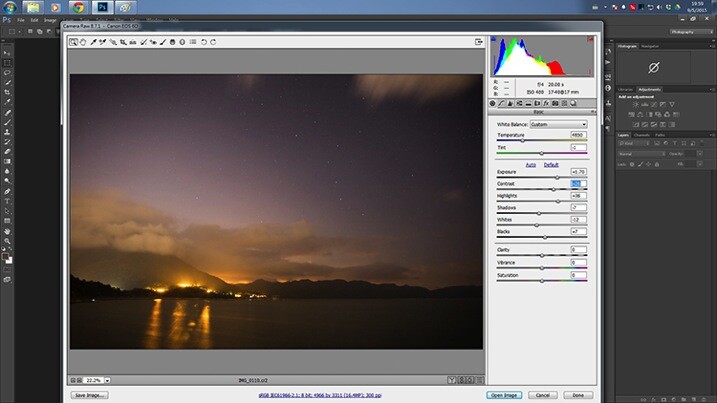
    You may want to play around with the value of the Highlight, Shadows, Whites and Blacks sliders for fine tuning the exposure. After that, add some contrast to the photo, this will make the stars stand out a little bit.

    Pic4

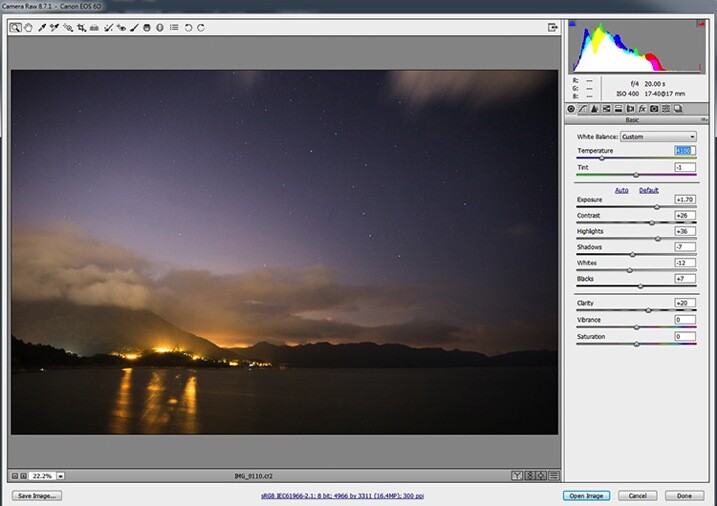
    You will need to boost the Clarity here for the whole scene. This improves the sharpness of the photo, including the stars. In my opinion, a bluish night sky is far more impressive and, therefore, you will need to adjust the Temperature setting. I would recommend a color temperature between 3500-4100. This will strike a balance between realism and aesthetic. Then, click “Open Image” (if you’re using Lightroom right click and choose “Edit in Photoshop” to continue with the next steps).

    pic5b

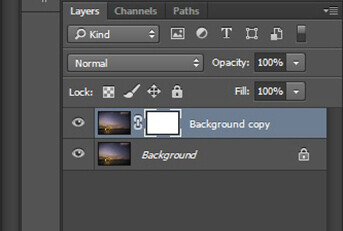
    Make a duplicate a copy of the Background layer after opening the image. Right click on the original layer, and click on “Duplicate Layer” from the pop-up menu. After that, create a layer mask for the duplicated layer. To create a layer mask, you will need to have the new layer chosen and click on the third button at the bottom of the Layer panel. Then, select the image next to the layer mask in the Layer panel.

    Pic6

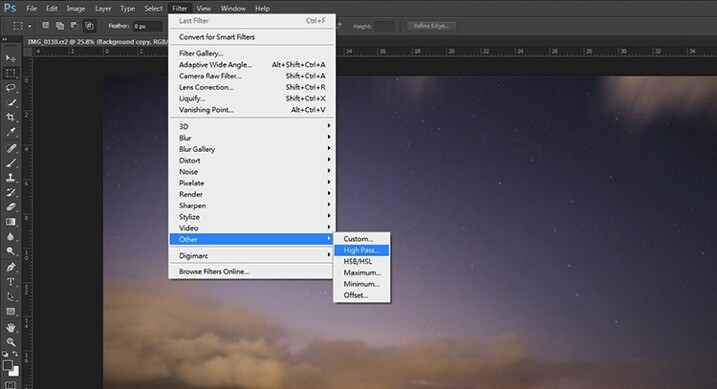
    Now you are going to add a High Pass filter to the newly duplicated layer. Choose Filter > Other > High Pass. This is to further enhance the visibility of the stars.

    Pic7

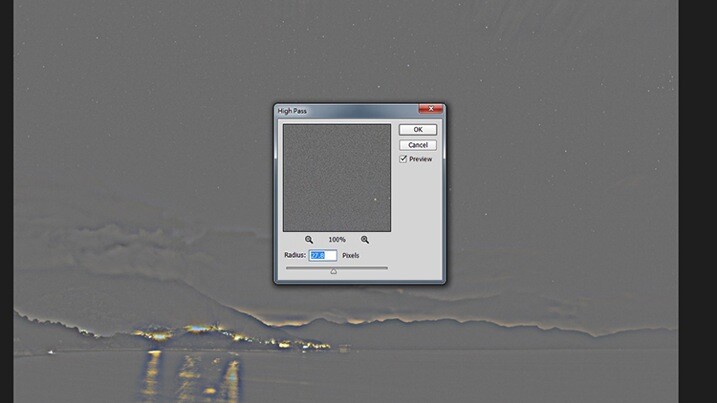
    A pop-up window will appear, tweak the Radius until the stars are being highlighted in the preview.

    pic8b

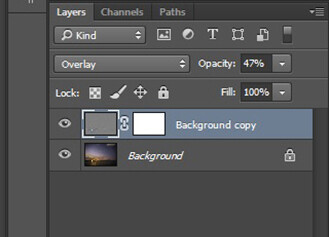
    Head back to the Layers panel. You will have to switch the Blending Mode of the layer from Normal to Overlay. The whole image will be sharpened noticeably. If you feel like the image is over-sharpened, you can lower the Opacity of the layer.

    Pic9

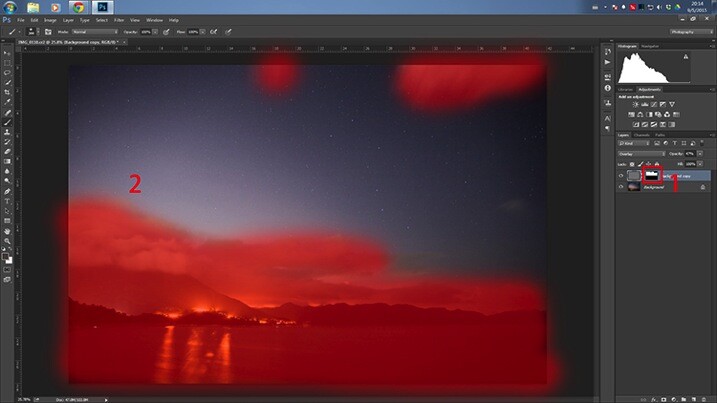
    You may find that the areas outside the night sky are being oversharpened. In order to remove the excessive sharpening from the other areas, you will have to erase (hide) them by painting on the layer mask that you created earlier.

    Pic10

    First, choose the layer mask in the Layer panel. Then, paint over the unwanted areas (the highlighted area in the above screen capture) with a black-colored brush.

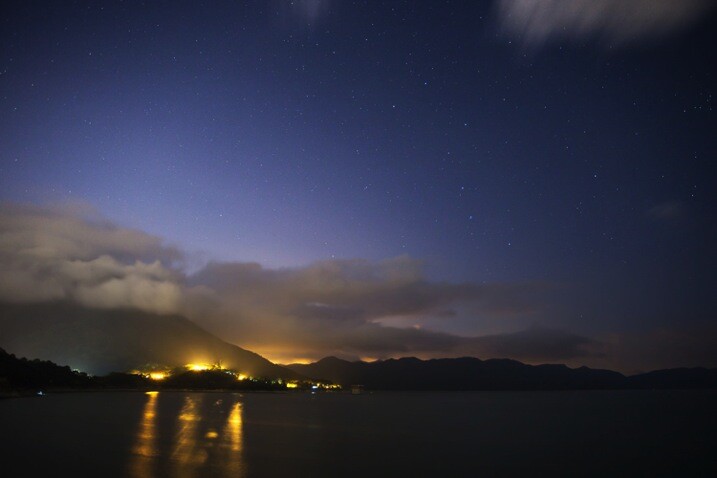
    Here is the final result:

    Before

    BEFORE

    IMG 0110

    AFTER

    Conclusion

    There are three techniques for enhancing the visibility of stars in the night sky. First, adding some contrast to the photo will help to a certain extent. Secondly, increase the clarity of the whole photo. Lastly, don’t forget to use the High Pass filter sharpening for the final enhancement. Thanks for reading, I hope you enjoyed it.

    googletag.cmd.push(function() {
    tablet_slots.push( googletag.defineSlot( “/1005424/_dPSv4_tab-all-article-bottom_(300×250)”, [300, 250], “pb-ad-78623” ).addService( googletag.pubads() ) ); } );

    googletag.cmd.push(function() {
    mobile_slots.push( googletag.defineSlot( “/1005424/_dPSv4_mob-all-article-bottom_(300×250)”, [300, 250], “pb-ad-78158” ).addService( googletag.pubads() ) ); } );

    The post Tips for Enhancing Night Sky Photography in Photoshop by Chris Yiu appeared first on Digital Photography School.


    Digital Photography School

  • 10 Fantastic Natural Wedding Posing Tips

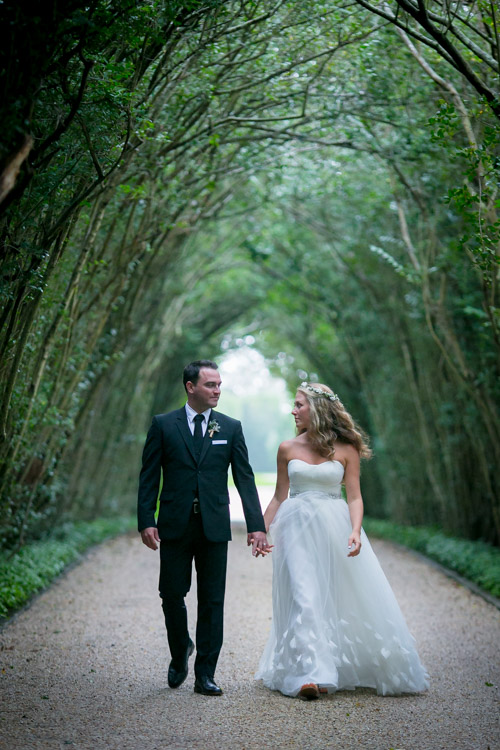
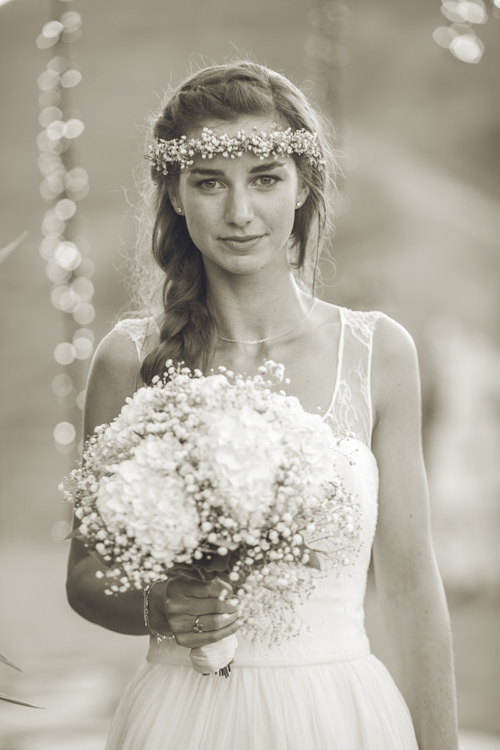
    It’s been a long time since the 80s and 90s formal wedding portraits in studios, that have given wedding photography a bad name in some circles. Nowadays there are really amazing wedding photographers creating images that look like art and capture true emotion, not staged photos. If you are thinking about getting into wedding photography or want an insiders look at how some of that beautiful, natural wedding posing is created, here are 10 tips to help keep it real.

    1. Stay in Touch

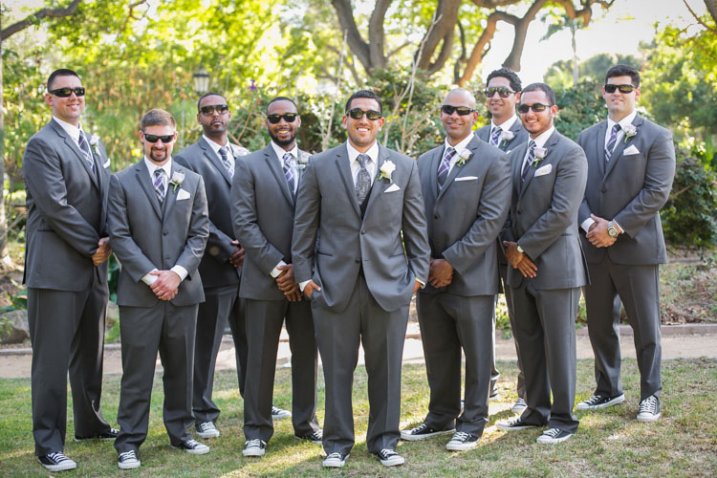
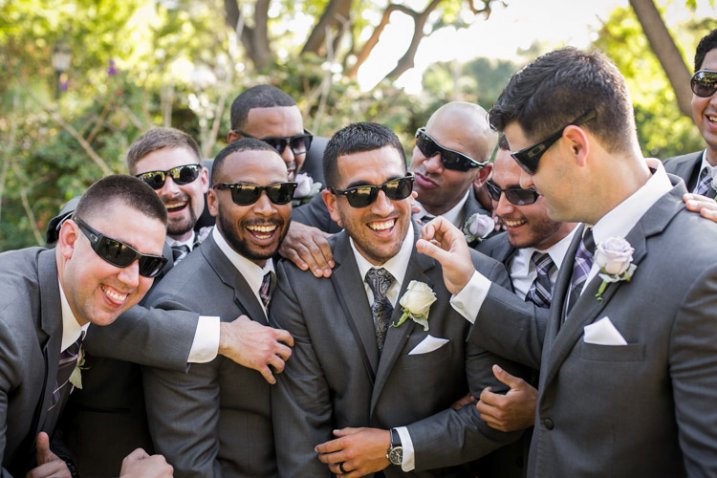
    There is something very intimate and powerful about seeing people touching. This might seem obvious to you, but I think a mistake can be made by leaving space between couples or groups. Tell your groups “Get real close- don’t be afraid of each other!” Or something silly like “Pretend you like each other!” with a big smile on your face. With the groomsmen, I love getting them in a line for something formal, and then telling everyone to “Harass the groom!”

    digitalphotographyschool-1-6

    Standard photo of groomsmen.

    digitalphotographyschool-1-7

    Look at the difference in a photo when you have people connecting physically. It doesn’t always have to be romantic to get a great photo.

    digitalphotographyschool-1-9

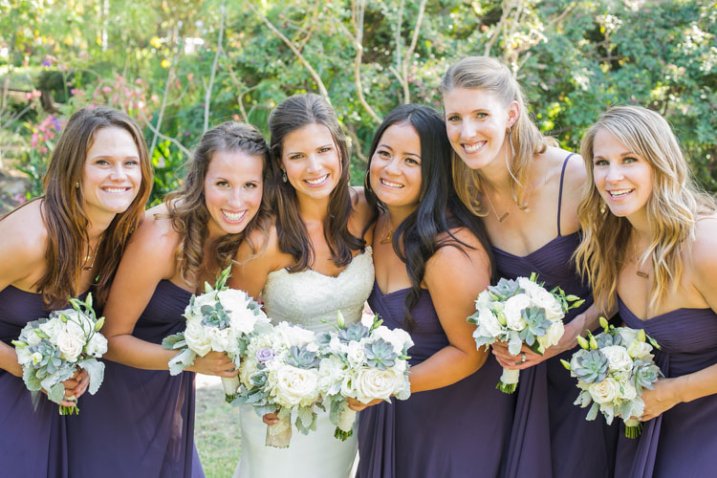
    Telling the bridesmaids to get as close as possible, and then lean towards me, gets them connecting physically with each other and elicits natural smiles.

    2. Walk Away and Come Back

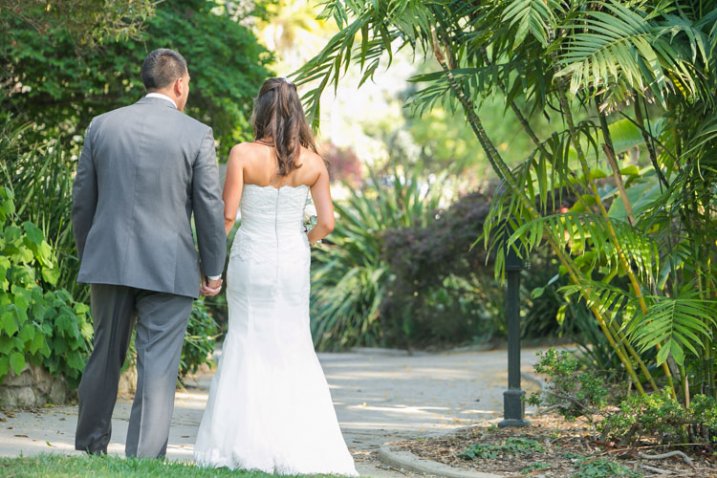
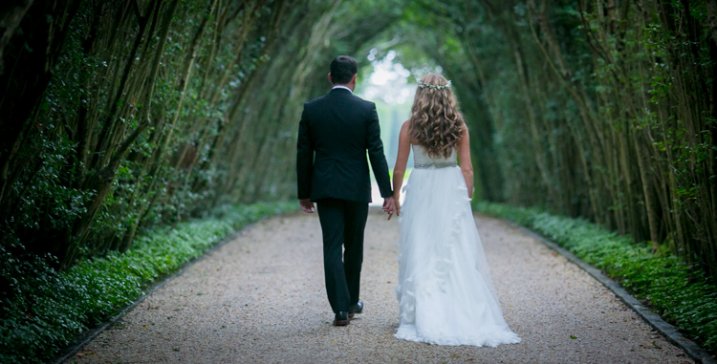
    This is my go to wedding posing instruction for most brides and grooms. I tell them to “Walk away, talk about what you’re going to do tomorrow.” Then after a few good shots I tell them to “Come back.” It’s the easiest thing for them to do, they aren’t thinking about themselves or me because I’m far enough away, and it looks natural because it is natural.

    digitalphotographyschool-1-10

    digitalphotographyschool-2-3

    digitalphotographyschool-1-11
    digitalphotographyschool-1-12

    3. Look at Your Shoes

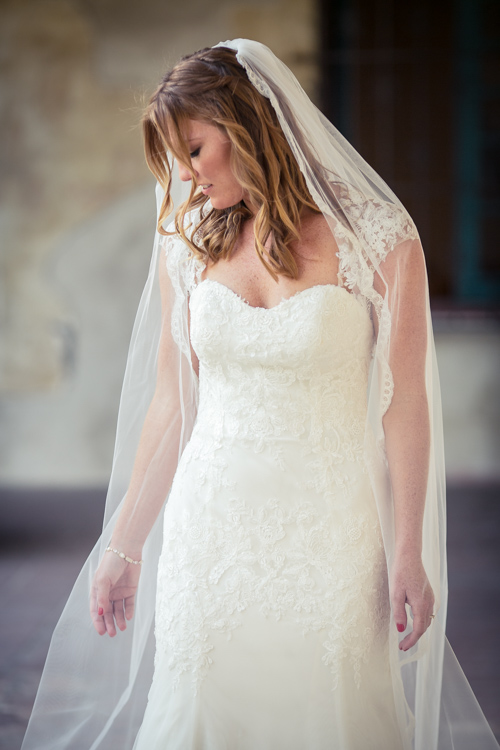
    This is a fun one that I’ve discovered makes for a very pretty glamour shot with the brides. Often I’ll see them look over their side at their shoes or the bottom of their dress, and the moment always seems fresh and natural and pretty, especially showcasing their profile. If they aren’t doing that naturally, you can always say “Look over your shoulder at your shoes.” Be ready to click in a moment!

    digitalphotographyschool-1-13

    digitalphotographyschool-1-14

    4. Button Up

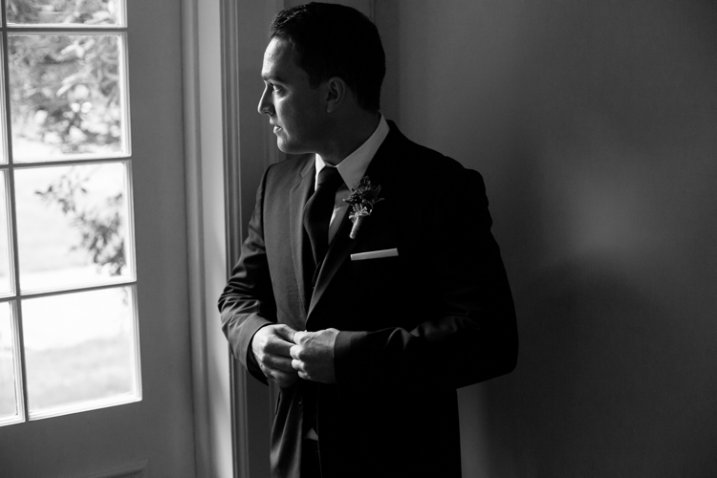
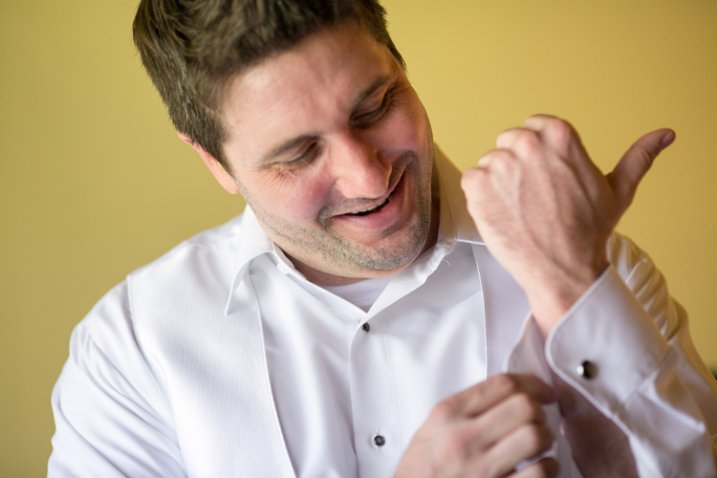
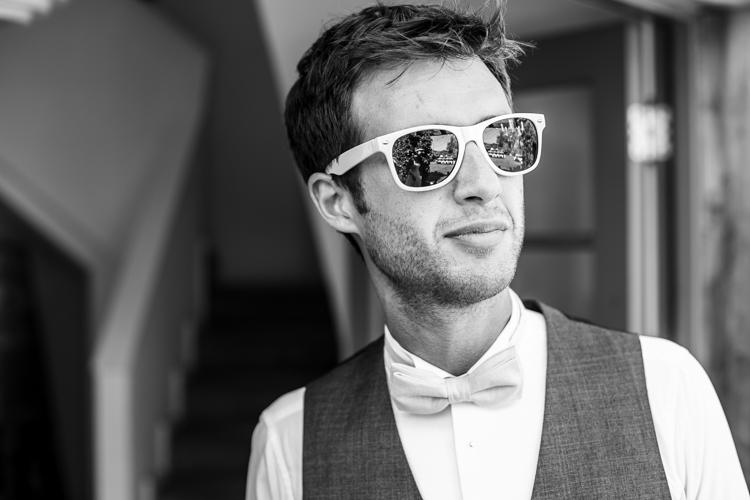
    There are some great natural wedding posing moments with the groom as he is getting ready. As the title suggests, tell the groom to unbutton and button his jacket up. Or put on his cufflinks. Or adjust his bowtie/tie. This gives him something to do, the moment looks natural and masculine, and if you are near some nice window light, you’ve got your money shot.

    digitalphotographyschool-1-17

    digitalphotographyschool-1-21

    5. Help the Groom Get Ready

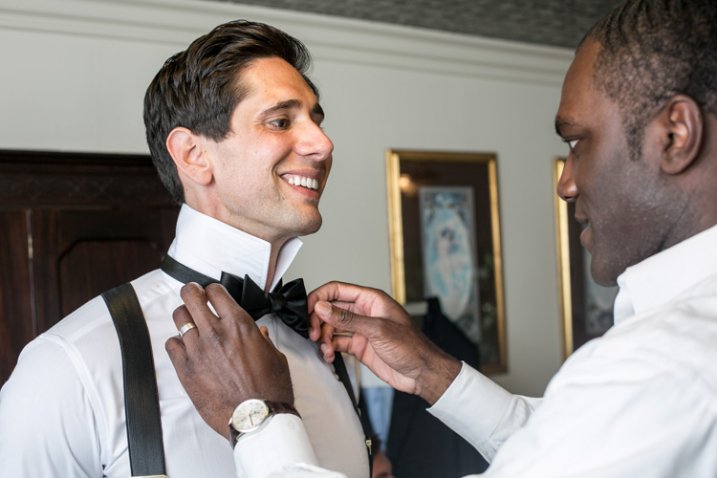
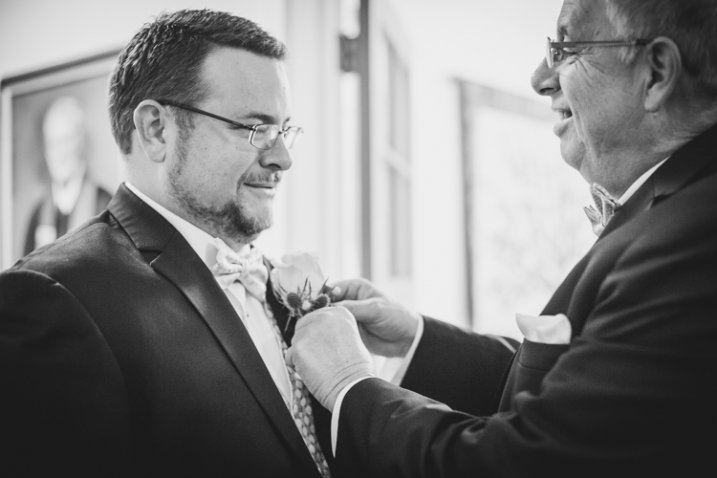
    This also involves the groom, but is a slight variant on the last tip. Have the groom’s father or best man (or anyone, really) help adjust something on the groom. Ideally his bowtie, tie, or boutonniere. If they aren’t doing it already, ask a groomsman if he can “make sure the groom’s tie is on right.” This creates a natural moment that looks great, and also involves tip #1, Stay in Touch.

    digitalphotographyschool-1-18

    digitalphotographyschool-1-20

    6. Spin

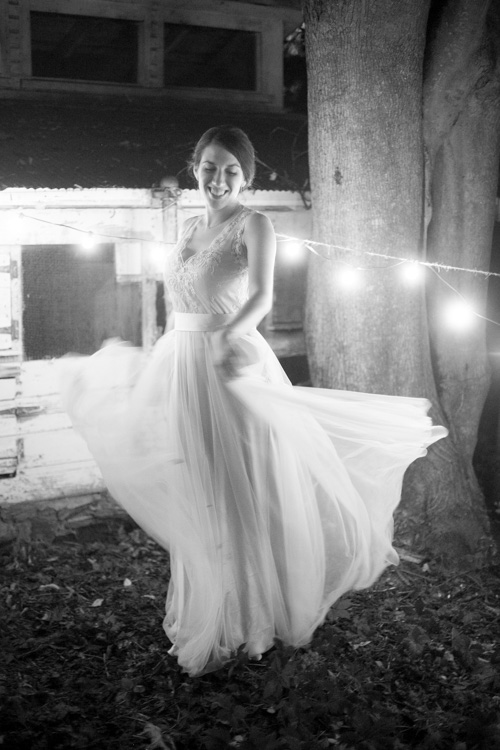
    If the bride has got the dress, use it! With the right personality and dress combination, you can bring out your bride’s inner child with this fun wedding posing tip. Ask her to spin! Slow down your shutter speed for a fun movement photo.

    digitalphotographyschool-1-22

    7. Something with Personality!

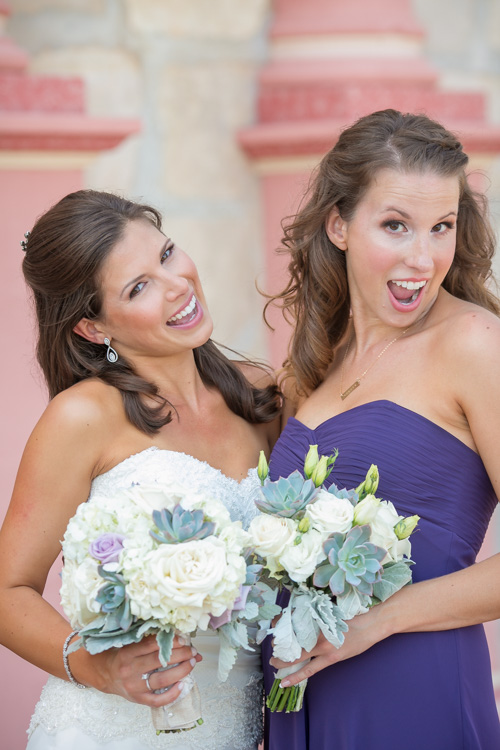
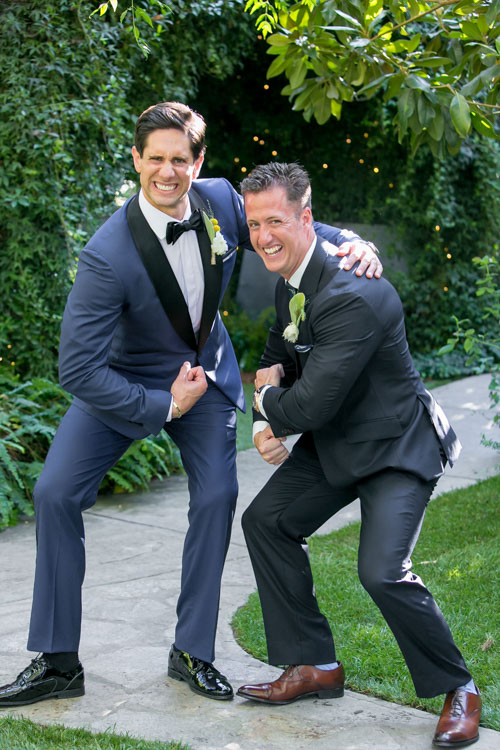
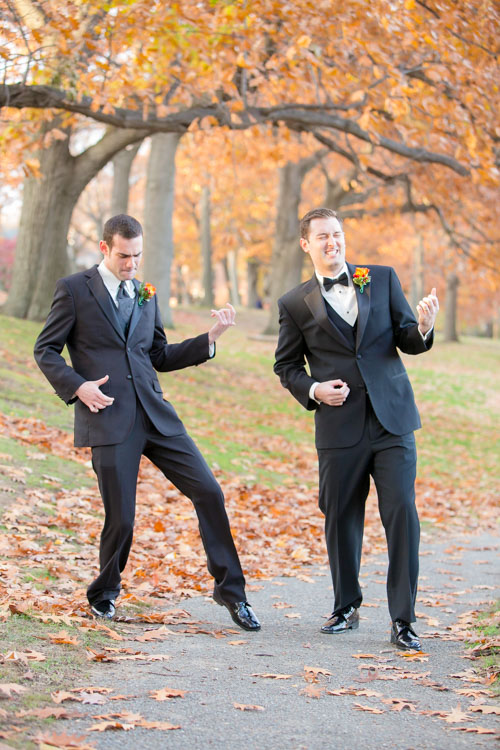
    I like doing this during photos with the wedding party. I typically will take a photo with the groom and each of his groomsmen separately, and the bride and each of her bridesmaids separately. To make it fun for them (and if the group seems like the type to do it) after each standard photo I’ll tell them to give me “something with personality!” This is typically what comes out, completely on their own:

    digitalphotographyschool-1-24

    digitalphotographyschool-1-52

    digitalphotographyschool-1-25

    digitalphotographyschool-2-5

    There are always lots of laughs during this time, and everyone enjoys something that could potentially be a bit tedious.

    8. Look Away, Look at Me

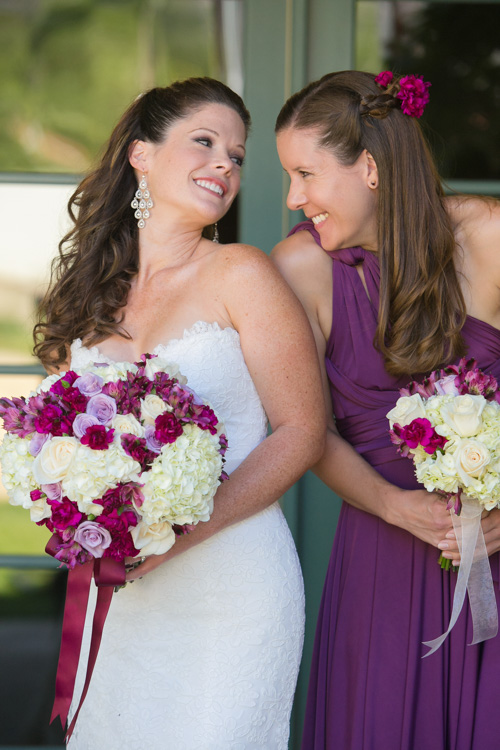
    Good portrait photographers know there is a fleeting moment that occurs half a second before a person focuses their vision on something. It’s a completely natural moment that is entirely unselfconscious. The person is busy deciding where to look and in that moment they are truly themselves, unaware of the camera or how they look. Take advantage of that moment. You can create this moment by telling your bride or groom to “look away…now look at me”, then *snap* you’ve got it.

    digitalphotographyschool-2-6

    digitalphotographyschool-1-54

    Bonus – looking away is also a nice photo moment that is unselfconscious.

    9. Compliment

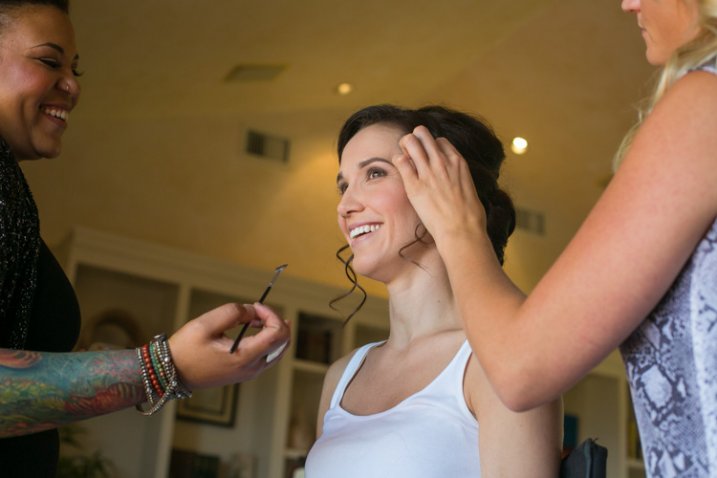
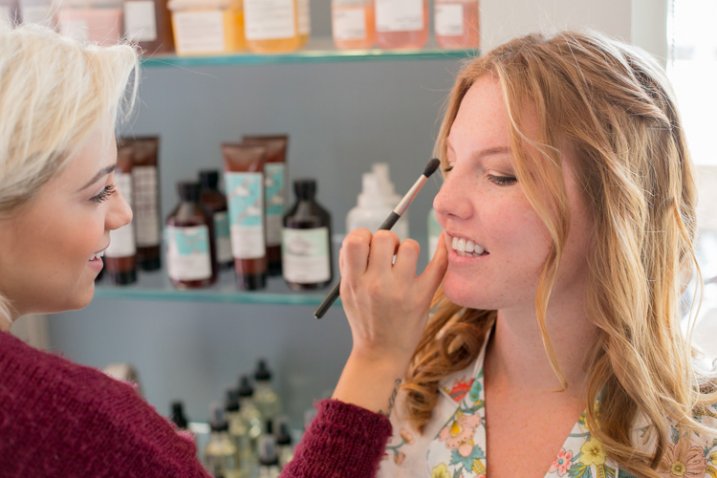
    Don’t be afraid to compliment your brides – or their mothers, sisters, grandmothers, etc. – this one is mainly for the ladies. I use this wedding posing tip at the beginning of the day, usually when makeup is being applied. Nothing brings out a natural smile like a genuine compliment. “You look amazing!” “So beautiful.” I’ve heard married guys say they have a hard time doing this, but it doesn’t have to be creepy and I’m never overstepping any boundaries when I tell someone I think they look fantastic. Doing this turns a bored getting-makeup-done look, into a lovely smile.

    digitalphotographyschool-1-55

    digitalphotographyschool-1-56

    digitalphotographyschool-1-57

    10. The Almost Kiss

    A little secret in the wedding photography industry is something called the “almost kiss.” This is used to create fantastic natural wedding posing. Kisses are fine but can sometimes be sloppy, maybe too intimate, and they give it all away. You can create palpable tension by telling a bride and groom to “get close for a kiss, but you are not allowed to kiss. Don’t do it!” This creates the best photo moments ever. In the end, give them what they want and let them kiss.
    digitalphotographyschool-1-15

    digitalphotographyschool-1-16

    Hopefully some of these tips have given you some inspiring ideas! Feel free to add your own awesome natural wedding posing tips in the comments below. I know there are many more great ways to make your wedding photos fantastic. Thanks for reading- Phil

    googletag.cmd.push(function() {
    tablet_slots.push( googletag.defineSlot( “/1005424/_dPSv4_tab-all-article-bottom_(300×250)”, [300, 250], “pb-ad-78623” ).addService( googletag.pubads() ) ); } );

    googletag.cmd.push(function() {
    mobile_slots.push( googletag.defineSlot( “/1005424/_dPSv4_mob-all-article-bottom_(300×250)”, [300, 250], “pb-ad-78158” ).addService( googletag.pubads() ) ); } );

    The post 10 Fantastic Natural Wedding Posing Tips by Phillip Van Nostrand appeared first on Digital Photography School.

    Digital Photography School