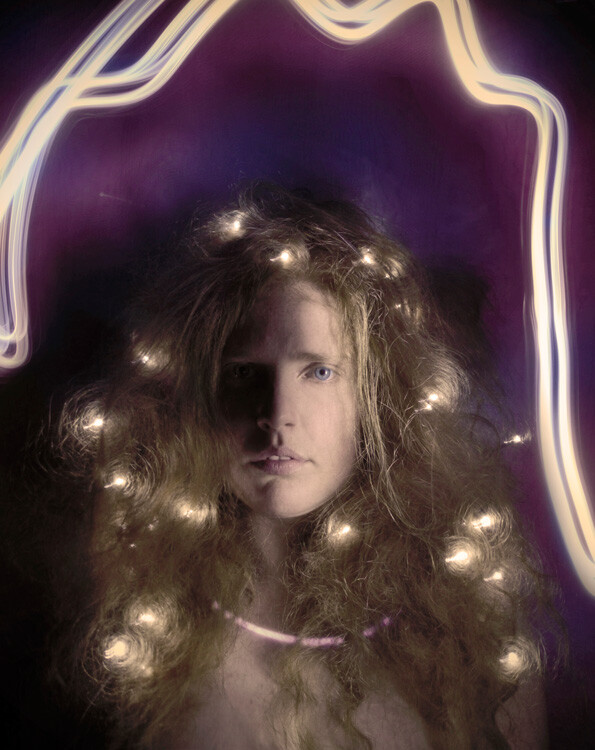
Category: Photography

  • 28 Wondrous Images of Long and Winding Roads

    Leading lines are a powerful element in composition. Nothing makes better lines in photos than roads and pathways. leading

    Let’s take a look at a few images using these to create strong compositions. Keep in mind light is also important so it all comes together.

    Photograph A ribbon of light by Dino Marsango on 500px

    A ribbon of light by Dino Marsango on 500px

    Photograph The road of kings by Jorge Maia on 500px
    The road of kings by Jorge Maia on 500px

    Photograph Road To The Heavens by Tristan O'Tierney on 500px

    Road To The Heavens by Tristan O’Tierney on 500px

    Photograph VIP Bridge #2 by Marek Kijevský on 500px
    VIP Bridge #2 by Marek Kijevský on 500px

    Photograph Road to... by Aydin Palabiyikoglu on 500px

    Road to… by Aydin Palabiyikoglu on 500px

    Photograph Fairy Castle Walkway by Paul O' Hanlon on 500px
    Fairy Castle Walkway by Paul O’ Hanlon on 500px

    Photograph Wooden catwalk by Roberto D'Antoni on 500px

    Wooden catwalk by Roberto D’Antoni on 500px

    Photograph Road to Cave Point by Scott Norris on 500px
    Road to Cave Point by Scott Norris on 500px

    Photograph Aurora Road by Christopher Waddell on 500px

    Aurora Road by Christopher Waddell on 500px

    Photograph Leading lines by Simon Roppel on 500px
    Leading lines by Simon Roppel on 500px

    Photograph The Way by Pablo Belastegui on 500px

    The Way by Pablo Belastegui on 500px

    Photograph Senbon Torii, Kyoto by Zachary Voo on 500px
    Senbon Torii, Kyoto by Zachary Voo on 500px

    Photograph Pathway by Mikko Lagerstedt on 500px

    Pathway by Mikko Lagerstedt on 500px

    Photograph Never Crossings by Philip Avellana on 500px
    Never Crossings by Philip Avellana on 500px

    Photograph The pathway by Jorge Maia on 500px

    The pathway by Jorge Maia on 500px

    Photograph Path to Serenity by Eva Lima on 500px
    Path to Serenity by Eva Lima on 500px

    Photograph magic autumn landscape in park by Sergiy Trofimov on 500px

    magic autumn landscape in park by Sergiy Trofimov on 500px

    Photograph Rise & Shine by Philip Escott on 500px
    Rise & Shine by Philip Escott on 500px

    Photograph The Way by Pat Teglia on 500px

    The Way by Pat Teglia on 500px

    Photograph Tree on a Path by Carlos Gotay on 500px
    Tree on a Path by Carlos Gotay on 500px

    Photograph Wood & water II by Ramón Menéndez Covelo on 500px

    Wood & water II by Ramón Menéndez Covelo on 500px

    Photograph Boshar's golden curves by Randy Legaspi on 500px
    Boshar’s golden curves by Randy Legaspi on 500px

    Photograph Zigzag by Gerald Macua on 500px

    Zigzag by Gerald Macua on 500px

    Photograph Zig Zag by Jeff Wallace on 500px
    Zig Zag by Jeff Wallace on 500px

    Photograph Dark Tube by Thiemo Hesse on 500px

    Dark Tube by Thiemo Hesse on 500px

    Photograph Route to Exit by Pete Lebow on 500px
    Route to Exit by Pete Lebow on 500px

    Photograph Red and white snakes by Kristian D. Hansen on 500px

    Red and white snakes by Kristian D. Hansen on 500px

    Photograph Out Of Sight by Ivor Sheehan on 500px
    Out Of Sight by Ivor Sheehan on 500px

    googletag.cmd.push(function() {
    tablet_slots.push( googletag.defineSlot( “/1005424/_dPSv4_tab-all-article-bottom_(300×250)”, [300, 250], “pb-ad-78623” ).addService( googletag.pubads() ) ); } );

    googletag.cmd.push(function() {
    mobile_slots.push( googletag.defineSlot( “/1005424/_dPSv4_mob-all-article-bottom_(300×250)”, [300, 250], “pb-ad-78158” ).addService( googletag.pubads() ) ); } );

    The post 28 Wondrous Images of Long and Winding Roads by Darlene Hildebrandt appeared first on Digital Photography School.


    Digital Photography School

  • 15 More Free WordPress Themes for Photographers

    Are you looking for free photography themes? Here you’ll find 15 incredible designs developed especially for the purpose. Who can use them? We guess these WordPress themes will be useful for artists, designers and developers. In a word, for everybody who wants to save some money on his/her future website design. Free themes don’t have 24/7 support like their premium Continue Reading

    The post 15 More Free WordPress Themes for Photographers appeared first on Photodoto.


    Photodoto

  • 6 Reasons to Become a Nature Photographer

    #1 An Ever-Changing Subject

    Nature photography never gets boring. Whether it be wildlife or landscape photography you are interested in, there is always a new angle you can introduce to your photos.

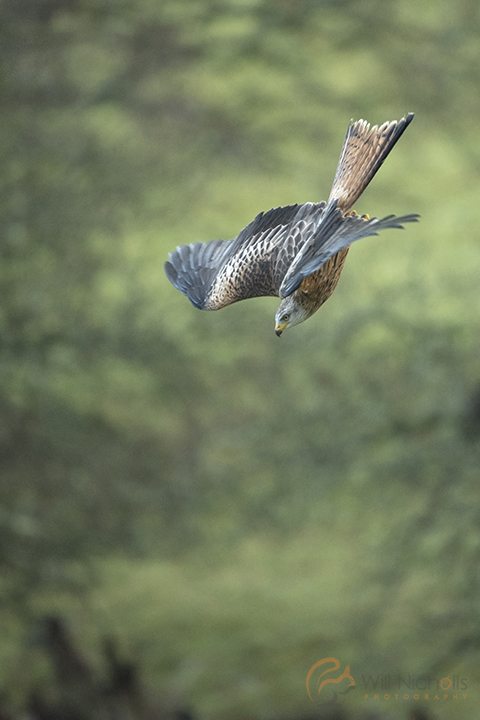
    Kite Dive

    For landscape photography, the weather is never exactly the same – clouds make unique formations, and the way sun rays cast over the scene in front of you are always very special.

    If you take photos of wildlife, then you will be forever capturing moments that will never be repeated. Take the example of two birds fighting on a branch: you will never get a photo of the exact same birds, with the exact same body and wing positions, in exactly the same backdrop. You have an opportunity to record something truly unique.

    #2 Be At One With Nature

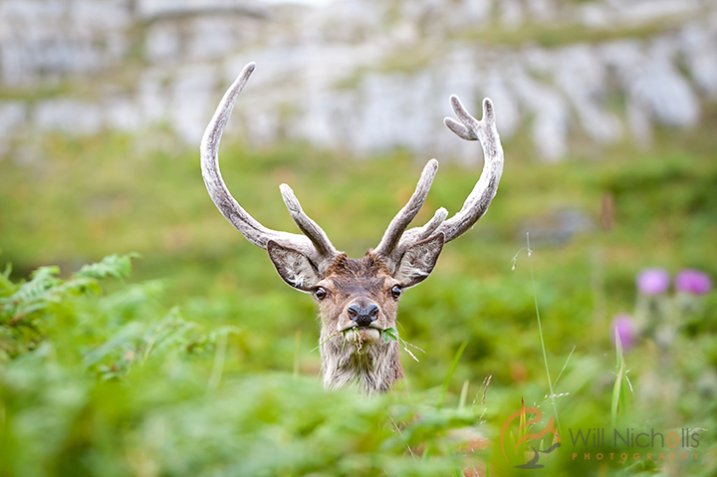
    Red Deer Head

    There’s no better excuse for getting outside than feeding your thirst for nature photography. Nowadays a lot of people spend too much time indoors, and going outside is extremely beneficial for your wellbeing – that’s for both your health and enjoyment. If you’ve caught the photography bug then getting into the outdoors with your camera becomes something you really enjoy doing.

    #3 It’s Easily Accessible

    Nature is everywhere – you don’t need to look far to find a beautiful scene or a bird that is willing to come to a bird feeder. You don’t have to book a studio and a model to take photos; just go outside and start clicking that shutter.

    Even for those who live in cities, there is wildlife everywhere – you may just not know it yet. At night, deer and foxes come into suburban areas and make for interesting photographs. Venture out into the countryside and you will find rolling hills and endless photographic opportunities.

    #4 It’s Relaxing

    Nature photography is extremely therapeutic if you can reap enjoyment from it. If you have had a stressful week, heading out to be alone with your camera and the natural world can be a great way to wind down and forget any troubles.

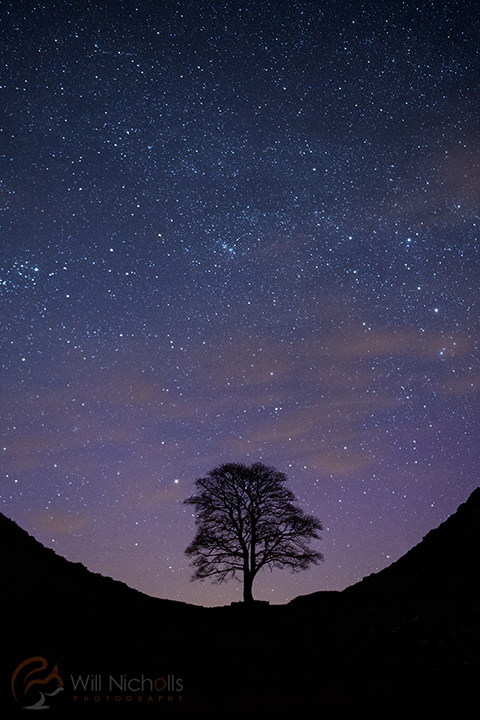
    starssmall

    #5 Everyone Loves Nature

    Most people admire nature in some form. Whether that be appreciating a dramatic, serene landscape or the glint in a swooping eagle’s eye, your photos are going to be appreciated by a wide audience. If you are looking to share something that people can connect with, nature photography is a great way to do this.

    When done correctly, nature photos will transport the viewer into your shoes, allowing them to imagine the scene as if they were there with you. Providing this window into the natural world to those who may not be able to access it themselves is a great thing to do.

    #6 Raising the Profile of the Environment

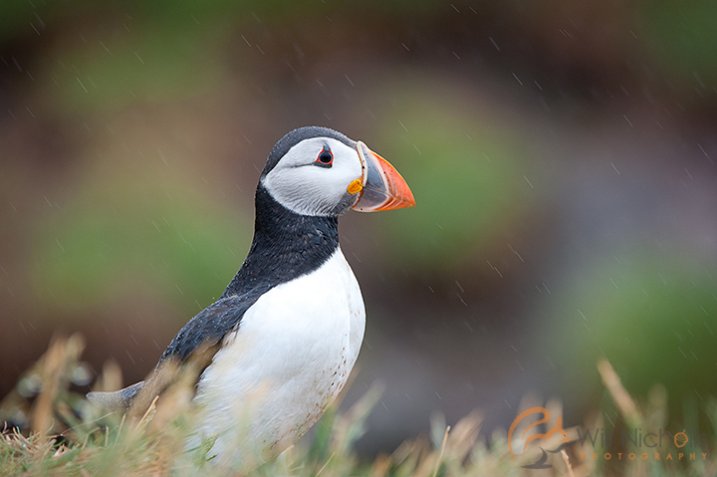
    PuffinInRain

    Nature photography helps to raise the profile of our planet and the environment. It allows people to experience things they may not see themselves, and therefore encourages them to care about its preservation. You can, in a small way, help to raise awareness of the natural world and work to promote its conservation.

    googletag.cmd.push(function() {
    tablet_slots.push( googletag.defineSlot( “/1005424/_dPSv4_tab-all-article-bottom_(300×250)”, [300, 250], “pb-ad-78623” ).addService( googletag.pubads() ) ); } );

    googletag.cmd.push(function() {
    mobile_slots.push( googletag.defineSlot( “/1005424/_dPSv4_mob-all-article-bottom_(300×250)”, [300, 250], “pb-ad-78158” ).addService( googletag.pubads() ) ); } );

    The post 6 Reasons to Become a Nature Photographer by Will Nicholls appeared first on Digital Photography School.


    Digital Photography School

  • The 4 Ps – Tips for Improving Your Wildlife Photography

    Taking photographs of wildlife can be one of the most exhilarating photographic experiences you can try. Spotting an animal in the wild can be thrilling, and being able to record that moment can be highly rewarding. However, wild animals can be a particularly challenging subject matter, so wildlife photography can often prove frustrating.

    To help you get the most out of this compelling type of images, here are some tips to improve your wildlife photography.
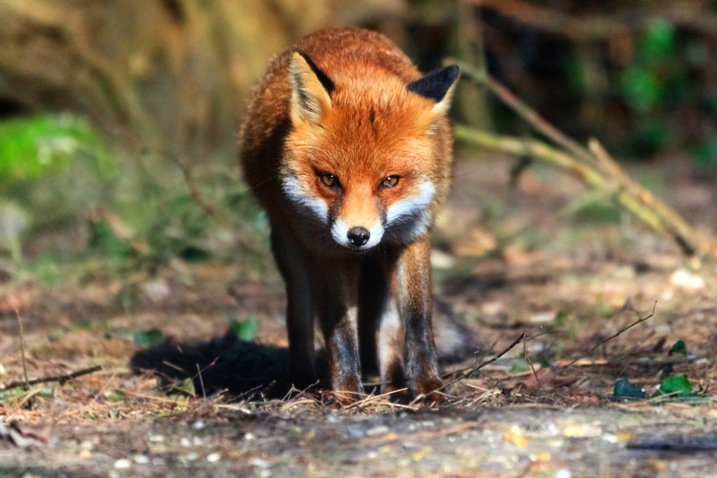
    Facetofacewithafox750

    #1 PREPARATION

    No matter what type of wildlife you have chosen to photograph you will need to spend time getting to know its behaviour, routine and movements. Read up about your subject in advance, or search online for video or audio files, that can help you learn more about spotting your chosen subject. If possible, talk to experts in the field who know where, and when, to spot wildlife. If you are heading to a nature reserve or national park to take photographs, staff and volunteers are normally very willing to let you know of recent sightings, or give you some handy local advice.

    Because you may only get a limited time in which to take wildlife photographs, getting to know your camera settings is extremely important. Familiarize yourself with how your camera and lens work before you get to the location so that you don’t miss an important shot by having the incorrect settings.

    Before setting out, make sure you have packed all of the required gear, and you have spare memory cards and charged batteries. For wildlife photography, a telephoto lens is probably going to be essential, but do not overlook packing a wider angle lens to capture your animals as part of the landscape. Some of the best wildlife photographs show an animal in its environment and are not necessarily frame-filling portrait shots. If you are using a telephoto lens, a tripod or monopod can also form a useful part of your kit to minimize camera shake. A monopod offers greater flexibility of movement than a tripod when you are tracking wildlife on the move, but can still provide adequate stability for your camera to get sharp images.
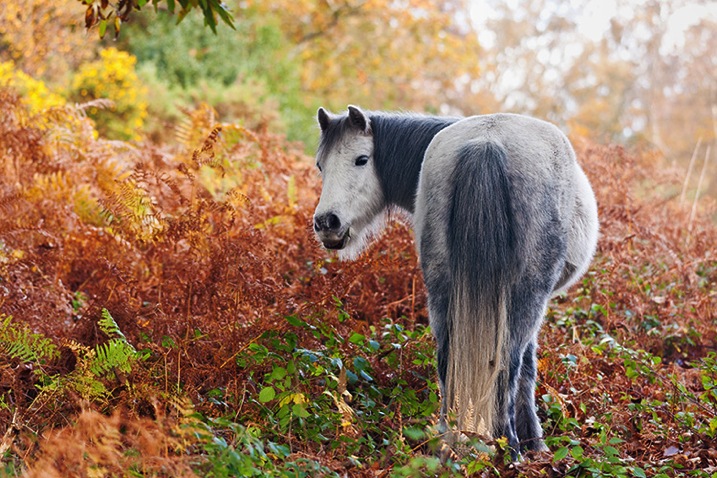
    Autumnpony750

    Check weather reports for the day you are going to shoot wildlife, but do not necessarily be put off by bad weather. Animals do remain active during rainy or stormy days, and it is possible to get some dramatic shots in such conditions. You can buy special covers to protect your camera and lens in wet weather but, often, a durable plastic bag fixed in place with elastic bands can work just as effectively.

    As with all genres of photography, lighting is key, and the best light for wildlife photography tends to be around sunrise and sunset. Animals also tend to be more active at these times of day, often searching for food. Therefore, make sure you get up early to be ready to take photographs in the golden light as the sun rises. Shooting into the sunset can transform a mundane subject into something special, so look for opportunities to capture dramatic wildlife silhouettes as the sun goes down (see image below).
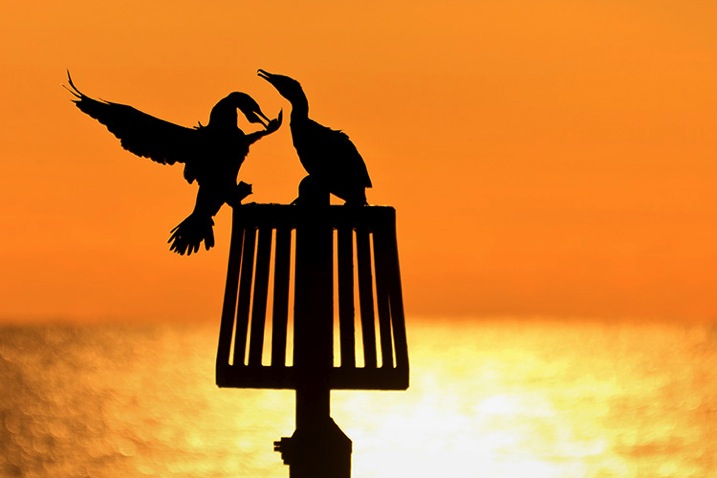
    Cormorants750

    #2 PRACTICE

    As with all types of photography, composition can make the difference between a good image, and a great image. When composing wildlife photographs, remember basic compositional guidelines such as the highly effective Rule of Thirds. If your subject is looking to the left or right, leave an appropriate amount of space in the frame into which they can look. The same guideline applies if a moving animal is being captured – always leave room in the frame for them to move into.

    Getting down to eye-level (or lower) with an animal can produce dramatic images. Taking a shot of an animal from a standing height looking down on it will usually lack any Wow Factor as this is the angle from which we are most used to seeing wildlife. Laying down on the ground so that you are at eye-level with, or looking up at, the animal will make your chosen subject seem large and powerful, and can add an element of drama to your final image.

    A fundamental rule of wildlife photography is that the subject’s eyes must always be in perfect focus. However, the autofocus system on your camera can easily be tricked into locking onto another part of the animal. A helpful way around this is to set the camera to One Shot mode (AF-S for Nikon users), select the centre focus point in the viewfinder, lock the focus on the eyes by pressing the shutter release button halfway down and then, without releasing, recompose your shot. In addition to being perfectly focused on the eyes, the most compelling wildlife images have a catch-light in the eye. A flash, or speedlight, in your kit can be extremely useful for adding light to dark eyes when taking close-up animal portraits.
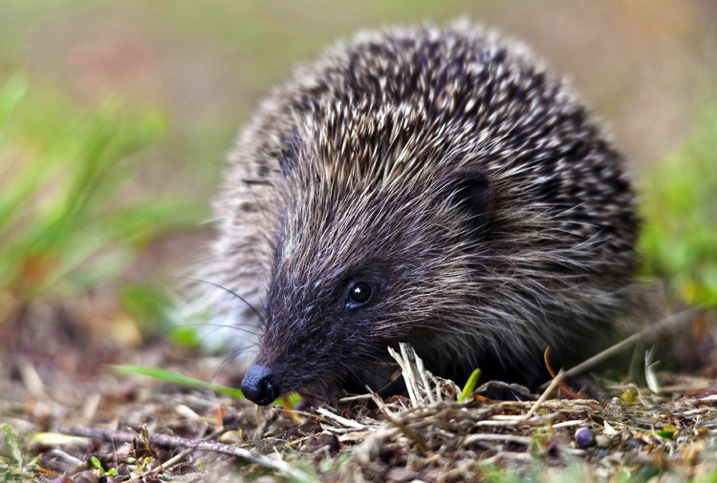
    Hedgehog750

    Getting the right focus becomes even harder when shooting an animal in motion. For moving wildlife, select a continuous autofocus mode such as AI Servo (AF-C) and select a single focus point in the viewfinder. Track the action by keeping the single focus point on the subject to ensure that remains in focus at all times, rather than the background or foreground.

    Shooting in Aperture Priority mode can be extremely useful for wildlife photography. By using the widest aperture available (such as f/2.8) you will be able to use the fast shutter speeds necessary to produce sharp images. The narrow depth of field from using a wide aperture will also help to blur the background and, therefore, will isolate your subject and really make it stand out in the final image.

    Do not be afraid to increase your ISO settings a little in order to keep the shutter speed fast, particularly if shooting in environments where lighting can be difficult, such as in a thick forest. A little bit of noise in your image is more acceptable (and easier to correct if you so wish) than an out-of-focus, or blurry image.

    #3 PERSEVERANCE
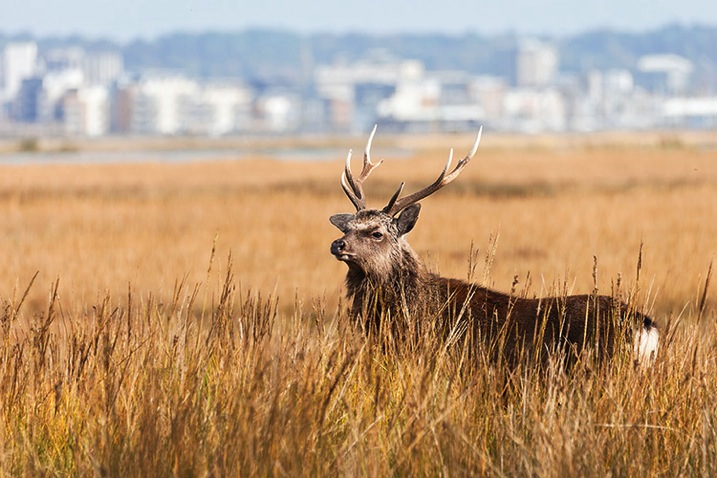
    Saltmarshstag750

    While there is no denying that a certain amount of luck definitely comes in handy, the real key to taking better wildlife photographs is patience. Not necessarily the patience required for your chosen subject to appear, but the patience to capture the perfect shot that you have envisioned.

    When you do find an animal out in the wild, watch it for as long as possible and not just from behind the viewfinder. Spend time with it and learn its ways. While observing the animal, try to capture some form of behaviour that is unique to that species. Documenting such behaviour can produce compelling wildlife shots. Most importantly, enjoy the experience of wildlife watching as much as taking photographs.

    One quick tip is to keep all noise (as in be quiet, not camera noise) to a minimum when you are shooting in the wild. Dress appropriately, tread carefully, and possibly most importantly, switch your phone to silent mode. There is nothing worse than framing a shot and having your subject scared off by a ringing phone.
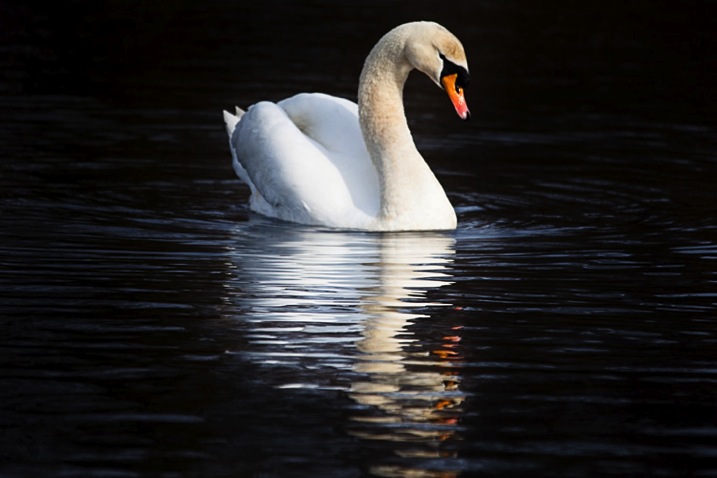
    Swanreflection750

    There may very well be some periods of waiting and watching. Try not to get too focused on one particular subject, take a look around while waiting for your subject to return. You never know, there may very well be something more interesting waiting just around the corner.

    If you want to put in more practice with your wildlife photography but don’t have much time to spare, a public park can be a great place to visit on a lunch hour or after work. Parks attract a range of wildlife such as geese, swans or deer and often you can get a little bit nearer to the action. A duck pond can produce many opportunities for action shots and is a great place to practice your skills at close range.

    #4 PASSION

    To take your wildlife shots from good to great, you need to be passionate about the natural world you are photographing. Take the time to appreciate nature and wildlife in all of its forms, wherever you find it. You do not have to go to an exotic location to do great wildlife photography. For example, macro photography offers a range of wildlife opportunities including spiders, beetles and flies. As someone who was once highly arachnophobic, I can now appreciate the beauty of spiders and, since photographing them, I do find them more fascinating than scary.
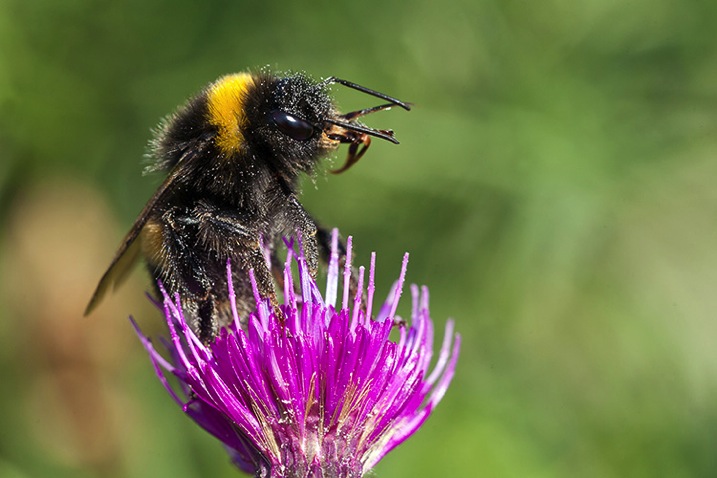
    Pollencoveredbee750

    You could even make a few simple changes to your own garden to encourage more wildlife to come to you. Making your garden wildlife friendly can be relatively inexpensive and highly beneficial to local wildlife. Adding a pond or wildflower patch is both good for the environment, and may provide you with photographic opportunities.

    Most importantly, take great care when photographing wildlife. Do not put yourself, or the wildlife, at risk and do not disturb their natural habitats in the process of getting your shot. Respect all wildlife, get to know your subject well and you will be rewarded with some great images to share with others, to inspire them to care as much about the natural world as you do.
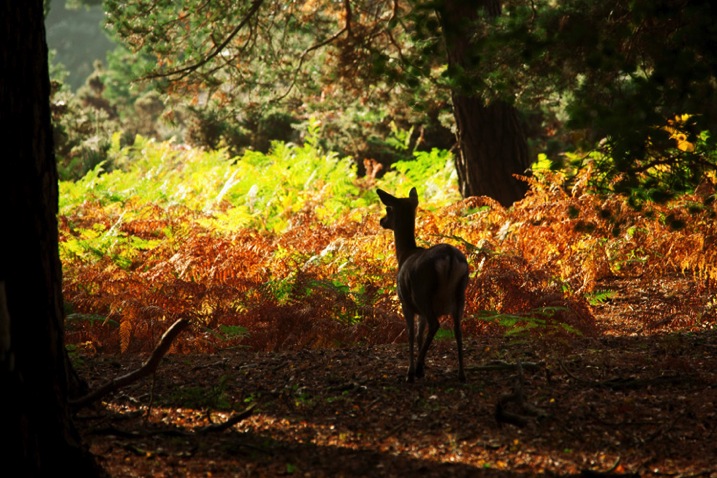
    Sikainthelight750


    googletag.cmd.push(function() {
    tablet_slots.push( googletag.defineSlot( “/1005424/_dPSv4_tab-all-article-bottom_(300×250)”, [300, 250], “pb-ad-78623” ).addService( googletag.pubads() ) ); } );

    googletag.cmd.push(function() {
    mobile_slots.push( googletag.defineSlot( “/1005424/_dPSv4_mob-all-article-bottom_(300×250)”, [300, 250], “pb-ad-78158” ).addService( googletag.pubads() ) ); } );

    The post The 4 Ps – Tips for Improving Your Wildlife Photography by Richard Beech appeared first on Digital Photography School.


    Digital Photography School

  • Consistency in Design

    I’m a big fan of the new Flickr. Despite a few bumps along the way, like last weekend’s uploading fiasco, it feels like a new fresher Flickr and I think the fact that people can download their photos now in bulk will be a wonderful way to attract new talent to the site.

    There are two little things that bug me about Flickr right now though. They are unimportant in the big picture of things, but the compulsive side of me tends to focus on the little things sometimes.

    Artifacts

    The first is the artifacting that takes place around icon that tells you if a photo is favorited or not or commented on not when you hover. Something just doesn’t seem right to me about this. It’s not a big deal for sure, but I wonder if Steve Jobs would let something like this fly? There appears to be two little dots around the star and the comment bubble seems cut off for me. I wonder if there is a way that this can be fixed?

    Flickr Favorite
    On most of Flickr a full white star means a photo has been favorited.

    Flickr Non Favorite
    On most of Flickr an empty white star means a photo has *not* been favorited.

    Flickr Favorite 2
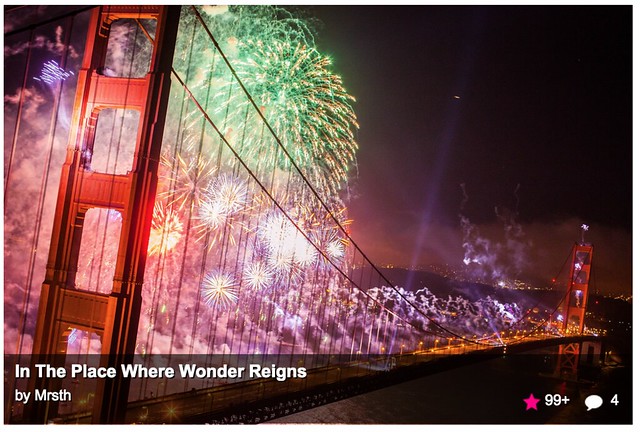
    On the “photos from your contacts” page a colored pink star means a photo has been favorited.

    Flickr Non Favorite 2
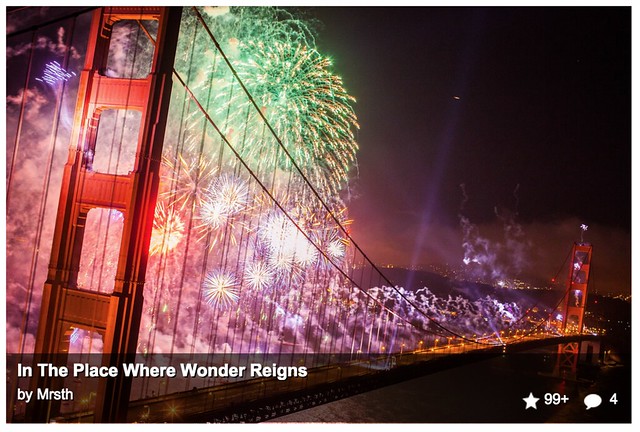
    On the “photos from your contacts” page a full white star means your photo has *not* been favorited.

    The second problem is a more serious one and something I’m sure will be addressed when Flickr rolls out their new page build to the “photos from your contacts” page — here the problem has to do with consistency in design.

    On most places when you favorite a photo on Flickr it turns an empty star into a full white filled star — but on the photos from your contacts page, it’s confusing. On the photos from your contacts page a full white star actually means the opposite, that a photo is *not* favorited, here the signal for a favorited photo is a colored pink star.

    As your eyes learn Flickr you become accustomed to seeing an empty or full white star to signal to you if it’s favorited or not, but when you go to this one page on Flickr and see a full white star it means the opposite.

    As Flickr rolls out their new page design to other areas of this site I’m sure that this inconsistency will be fixed.

    I’ve got a more serious problem with the “photos from your contacts page” that only affects some accounts at Flickr, and that is that the page is jumpy and unstable when I browse it. This is not a universal problem though and one that is only affecting some accounts (unfortunately mine is one) at the present time.

    These are first world problems for sure. With each new build Flickr gets better and better, and the team should be commended for doing such a great job these days.


    Thomas Hawk Digital Connection

  • 7 Travel Photography Tips Your Tour Guide Won’t Tell You

    This article is sponsored by the New York Institute of Photography. NYIP offers high-quality online photography courses that are affordable, convenient, and accredited.

    Beauty is hiding in plain sight, but only for those who learn to see beyond the obvious. To capture the heart of a region through your lens, you must connect with a place on a deeper level. This often involves slowing down and immersing yourself in the culture of those who call it home. By doing so, you become more than just a tourist with a camera, but a participant searching for truth and understanding. Every corner of this earth has its own unique characteristics, and the successful travel photographer exposes these differences in a way that others can relate to.

    chris_corradino_travel_1

    1) Search for Simplicity

    It seems counterintuitive, but in searching for clean, simple compositions, your photos will benefit from a new level of sophistication. As Paulo Coelho said,

    “Elegance is achieved when all that is superfluous has been discarded and the human being discovers simplicity and concentration: the simpler and more sober the posture, the more beautiful it will be.”

    When visiting new places, sensory overload can overwhelm even the most deliberate photographers. This is where a slow, methodical pace will have a big impact on your work. Large bus tours with heavy agendas don’t typically allow the necessary time to capture the look and feel of a place. Instead, try a self guided tour, or a small group that caters to photographers.

    chris_corradino_travel_2

    2) Include a Human Element

    Many photographers struggle with the idea of adding people to their compositions. After all, it can be unnerving to include a stranger in your composition. Yet, by working a human element into your travel work, your photography will become more visually engaging. Not only does it create a sense of scale, but they become more salable for stock photography. You’ll just need to secure a model release in order to do this. With a number of smart phone and tablet apps for releases, this no longer needs to be an awkward exchange of actual paper documents. For the participant’s cooperation, you can offer to send a high resolution copy of the image.

    chris_corradino_travel_3

    3) Think Small

    We all love to shoot scenic vistas bathed in the golden light of magic hour. While these dramatic landscapes can certainly round out a portfolio, it’s what you do with the remainder of the day that sets your collection apart. As you explore a location through your lens, think of yourself as a visual detective. No detail is too small. It’s the little things that ultimately add up to form the bigger picture.

    chris_corradino_travel_4

    4) No Rest for the Weary

    Anyone who says you should pack your camera away midday is doing you a disservice. Contrary to what many suggest, the light is good all day, even at high noon. The trick is to best match the various qualities of light to your subject matter. A rolling green landscape can appear lush and vibrant with the simple twist of a circular polarizing filter. Why limit your photography to the hours around sunrise and sunset?

    chris_corradino_travel7

    5) Plan on Getting Lost

    Researching potential shooting locations on the web is an essential part of any pre-trip preparation. With tools like the Photographer’s Ephemeris, you can study the precise time and locations of sunrise and sunset, along with with the moon phase. While this is helpful to create a basic shot list, remember to leave some time for unexpected adventure. Recognize that things will not always work out as planned. Getting lost is sometimes the only way to find what you’re looking for.

    chris_corradino_travel5

    6) X Does Not Always Mark the Spot

    It seems that even the most remote destinations have been photographed from nearly every perspective. This doesn’t mean you shouldn’t shoot them however. Instead, consider it a personal challenge to go one step further and create something unique. How can you take what’s already been done, and make it yours? It’s this vision that separates your work from the masses.

    chris_corradino_travel_6

    7) Explore Beyond Your Zoom’s Range

    Zoom lenses give you the ability to change your focal length with a flick of the wrist. This is indeed convenient for many types of photography including travel work. Yet, if you limit your perspective to what the lens provides, you’ll miss out on a number of great opportunities. Travel photography calls for us to explore beyond the end of our zoom range. Let curiosity guide your compositions and the nature of a place will reveal itself.

    chris_corradino_travel 8

    This article is sponsored by the New York Institute of Photography. NYIP offers high-quality online photography courses that are affordable, convenient, and accredited. Chris Corradino is a paid instructor with NYIP. 

    googletag.cmd.push(function() {
    tablet_slots.push( googletag.defineSlot( “/1005424/_dPSv4_tab-all-article-bottom_(300×250)”, [300, 250], “pb-ad-78623” ).addService( googletag.pubads() ) ); } );

    googletag.cmd.push(function() {
    mobile_slots.push( googletag.defineSlot( “/1005424/_dPSv4_mob-all-article-bottom_(300×250)”, [300, 250], “pb-ad-78158” ).addService( googletag.pubads() ) ); } );

    The post 7 Travel Photography Tips Your Tour Guide Won’t Tell You by Chris Corradino appeared first on Digital Photography School.


    Digital Photography School

  • Building Cultural Friendships with Photography

    As a photographer you’re probably always looking for ways to expand your subject range, or trying to find new ways to shoot your favorite genre with a twist. That means your neighborhood has been thoroughly explored, your family has seen less of you in person, and more of you behind a lens and any event, big or small, is an opportunity. One great solution is to travel!

    But translating your passion from your local environment that you know so well, to a place that you have never been, much less don’t speak the language or have any idea about their culture, can be intimidating to say the least. Even more, travelling is expensive so making the most of it is now more important than ever. Don’t worry, your camera can be a great tool to help you integrate into a situation that will give you great shots, and wonderful memories that may last long after your holiday ends.

    Do you wish you had that one photo of those people that you just missed? Do you remember a moment which gave you the desire to return one day, but it is only a memory? Or do you want a more personal touch to your travel photos? Well, let’s put an end to travel photos which are simply full of famous towers, museums and oh so many food photos, and start bridging the gap between people using our camera and photography.

    Show your camera but make eye contact first

    001 Eye Contact IMG 6746 2 resized

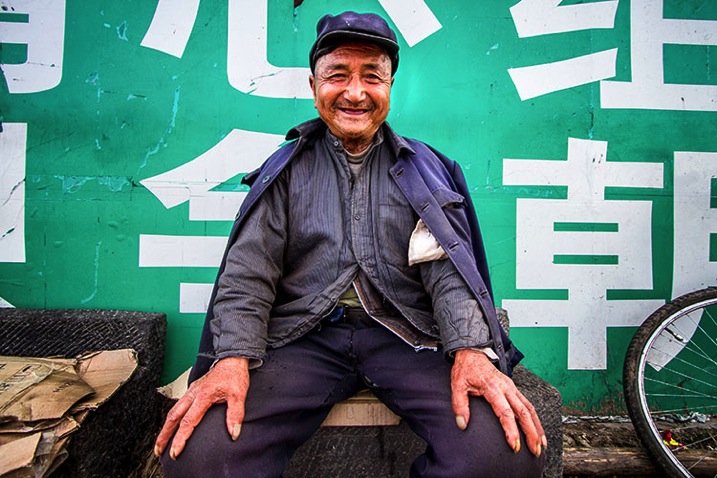
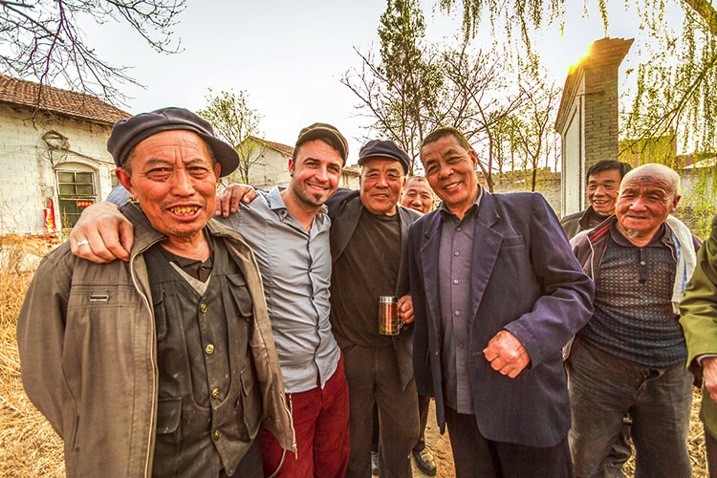
    Using good eye contact I was able to approach this man with a wide angle lens.

    This lets people know that you care for them first and the photo second. Showing a commitment to the person validates them, shows respect, and begins a level of trust. With these three elements you have created the foundation for friendship, and also opportunities for photography. It also allows them to duck out of the way if they don’t want to be photographed. Let your first impression to them be as a person and second as a photographer.

    Chimp the photo, for others

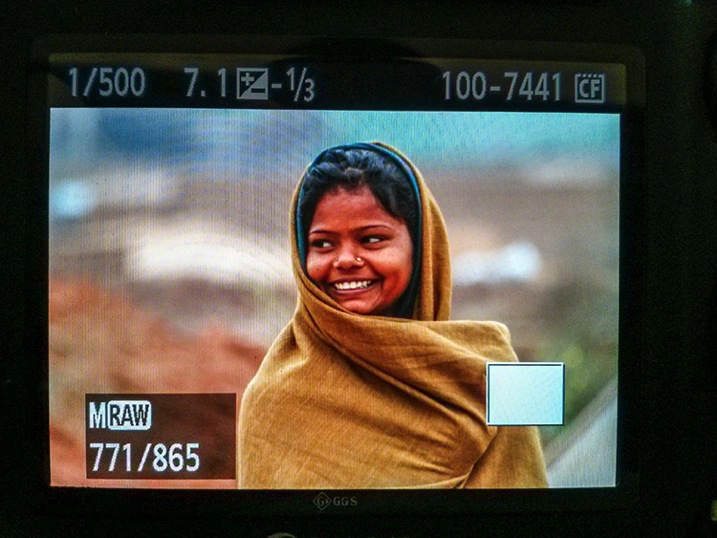
    Chimping is the act of looking at your LCD screen checking exposure, your histogram, etc., which is often accompanied by a short monkey like chirp in response to the image and thus the verbiage chimping. This is usually done for yourself, the photographer, but when you are travelling this a great communication technique. It immediately allows you to connect with the people around you. This is a great way for you to share the moment, especially with one person whom you would like to develop a better friendship, or to show more compassion. In many developing nations people have never seen a photo of themselves and the excitement is overwhelming. These moments can be the beginnings of longer term relationships, or at a minimum great photo opportunities.

    002 Chimp IMG 20140124 192620 2 resized

    This young laborer had never seen a photo of herself before she saw the back of my LCD screen.

    Let the scene develop

    The Decisive Moment is a frequently used term in photography that suggests quick action, or always being ready as the moment presents itself. That the moment is fleeting. But, when developing relationships in different cultures, being patient is a virtue, thus, striking a balance between the two is to your advantage. In many cases some of the most interesting subjects may be more shy, reserved, or even curiously suspicious. After all you are on holiday -relax and enjoy the moment.

    003 Scen Dev IMG 4911 2 resized

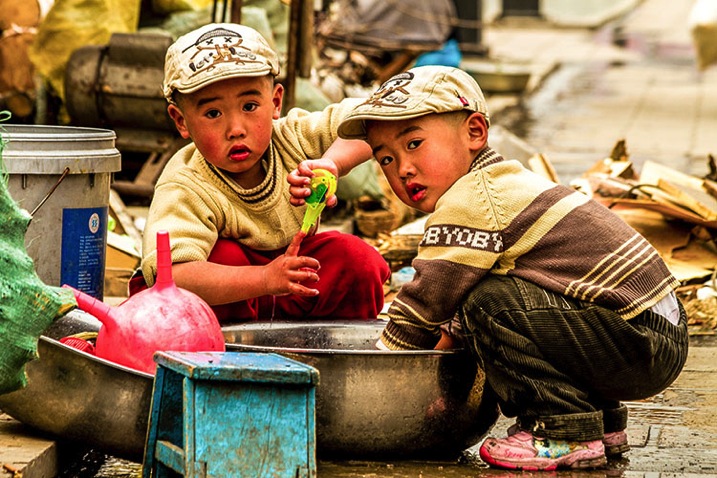
    So many toys and one little boy suggested a friend must be near. Who knew it would be his twin.

    Get rid of the voyeur attitude

    You are a person and so are they; all the cultural bells and whistles are just add-ons. Yes, the costumes and customs make for great photos, but to them you have a costume too, so use this to your advantage. In some corners of the world you will definitely become the subject of the photo, or even the whole village. Wealth can be measured in many ways, so while poverty deserves empathy, pity could take away from possible friendships.

    004 Voy Att IMG 4271 2 resized

    Someone sticks out like a sore thumb, just so happens to be the traveler, use that to your advantage.

    Be adventurous and push your boundaries

    Don’t be afraid to get out of your element. After all, that is why you are travelling and not watching a travelling program on the TV. Jumping on a camel cart or venturing into a local market are the norms for where you have travelled. It may be strange to you, but what is stranger, from their perspective, is why you wouldn’t get on, or go in. These places are great photography opportunities because the local people see you less as a tourist and more integrated into the everyday normal routine. They go about their business and you can go about your photography.

    005 Push Bound IMG 1529 2 resized

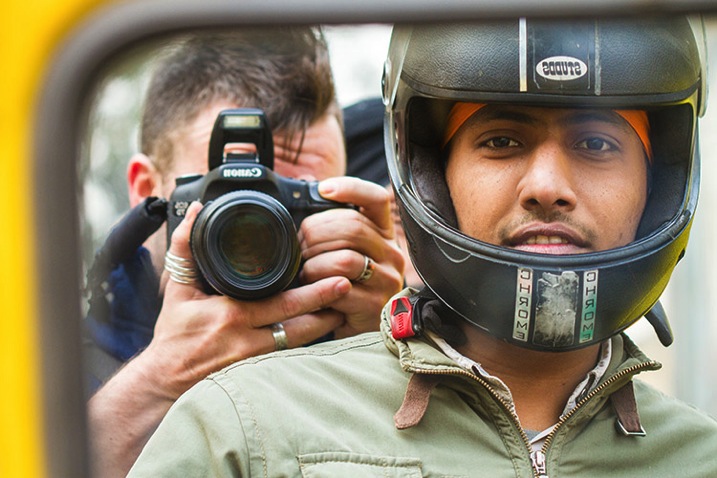
    On the back of a moped with a local is a great way to see a city that is not documented in the guidebook.

    Stick to your word

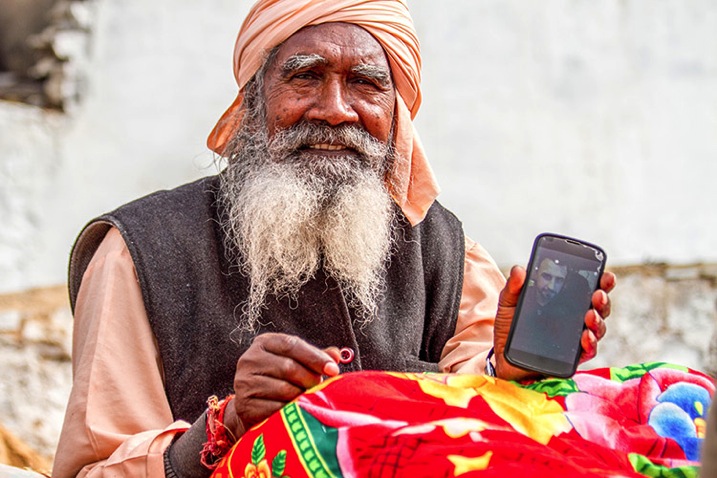
    If you say you will send a picture, send the picture. That’s easier than ever now with email and mobile devices. There are so many social media platforms that sharing is almost hard not to do. Find out what is the popular social media in the area where you are travelling. Download the app back at the hotel over Wi-Fi and send out the photo. Even taking a picture of the back of your LCD screen with your smart phone and sending it that way shows that you care.

    006 Your Word IMG 7661 2 resized

    Mobile devices are pervasive and extremely important even in rural communities.

    Wait, there is more! The really great news is that not only do you come home with some distinct and unique photos AND potential long term friendships from abroad, you will also gain fresh ideas about your own area which you knew so well. Why? When you have a cultural experience outside of your norm, it creates contrast to your normal life, and therefor can inspire you to see more creatively into what was your daily routine. This will open new opportunities for photography that you didn’t previously see. So, rediscover the uniqueness of your own culture when you return home.

    Today with social media and modern technology, long distance friendships can be pursued more easily and cheaply than ever before. A single photograph can be the beginning of a long term friend. So share your photos, ideas and tips below.

    googletag.cmd.push(function() {
    tablet_slots.push( googletag.defineSlot( “/1005424/_dPSv4_tab-all-article-bottom_(300×250)”, [300, 250], “pb-ad-78623” ).addService( googletag.pubads() ) ); } );

    googletag.cmd.push(function() {
    mobile_slots.push( googletag.defineSlot( “/1005424/_dPSv4_mob-all-article-bottom_(300×250)”, [300, 250], “pb-ad-78158” ).addService( googletag.pubads() ) ); } );

    The post Building Cultural Friendships with Photography by Branson Quenzer appeared first on Digital Photography School.


    Digital Photography School

  • 10 Tools to Make Your Photography Blog Rock

    These days blogging is not only a tool to share your thoughts and tips with the public, but is also a tool through which to promote your products and services, attract new clients and increase conversions. It’s an easy and low cost method to get your brand noticed. Moreover, for photographers, it’s a great opportunity to get on the top Continue Reading

    The post 10 Tools to Make Your Photography Blog Rock appeared first on Photodoto.


    Photodoto

  • 5 Easy Studio Setups With One Light

    Studio lighting is one of the most versatile tool sets available to you as a photographer. Apart from 24 hour access to a quality light source, there is a vast quantity of modifiers, accessories, and techniques that allow you to design and shape the light exactly as you need to fulfil your creative vision. However, all of this choice that is available to you can often result in confusion and indecision. The sheer amount of stuff available can also lead you to believe you need more than you already have.

    Fortunately, in the case of lighting, less is often really more. In this tutorial I am going demonstrate five ways to use a single light source to good effect, with a variety of subjects. Even though each of these images was created with a specific modifier, each setup will work with most any modifier of your choice. For example, you could swap a softbox for a beauty dish. This will alter the shape and softness of the light but you will still get good results. Some of the techniques also use a silver reflector.

    If you don’t have a reflector, you can get a large piece of cardboard and glue a sheet of aluminium foil to it. Another option is to use a mirror. You don’t even need a strobe or flash to make these techniques work; window light, with a bit of extra effort can produce the same effects.

    Here are five easy studio setups with one light you can try yourself.

    Setup #1

    Amb john mcintire photography 0049

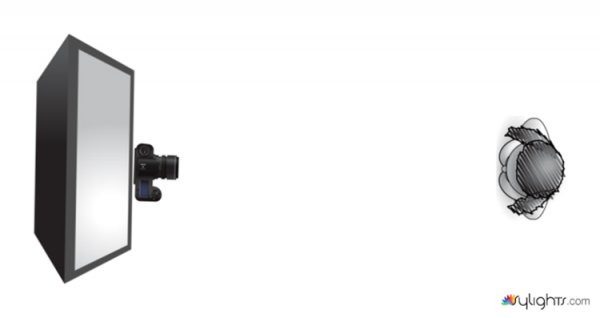
    Simplicity in technique is the aim of this first image. The light source is a strobe fitted with a medium sized softbox. It is positioned about five feet away from the subject, elevated about four feet above, and pointed down at a 45 degree angle. The camera is directly under the softbox (this is called Butterfly lighting).

    lightingdiagram1

    Lighting diagram for light placement

    The centre of the softbox is pointed to the left of the model (camera right) with only the edge of the light source directly falling on her. This technique is called feathering. It is useful for controlling and fine-tuning the light in a scene, and helps to soften light from a harder modifier such as an 110 degree reflector.

    If you don’t think you’re ready to try feathering just yet, try to aim your light source at your subject’s nose instead.

    Setup #2

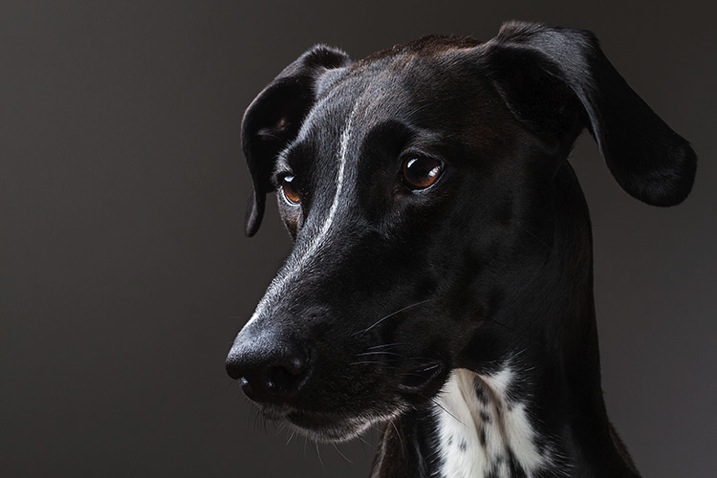
    Greyhounddalmatian john mcintire photography 0795

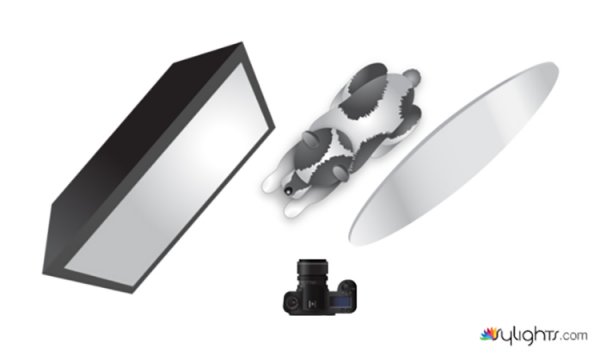
    lightingdiagram2

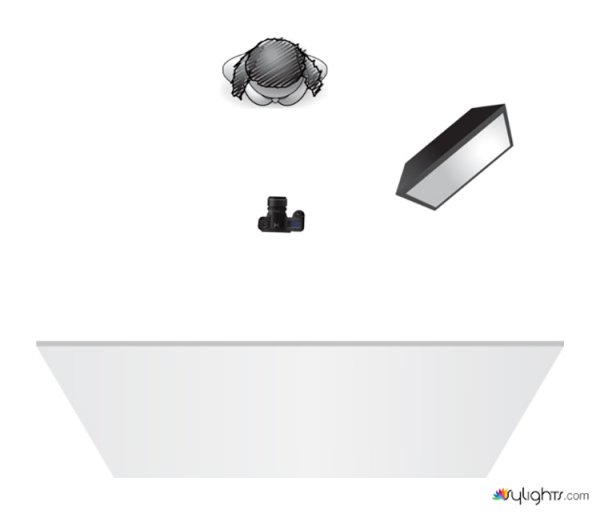
    To create dramatic lighting in your photos, try lighting your subject from behind. This image of my dog is lit by a softbox placed at a 45 degree angle behind her at camera left. The softbox is just out of the left-hand side of the frame and is very close to the subject. Because she is black and white, there is a huge amount of contrast in the scene. This left the shadow areas closest to the camera very dark. To fix this, you would introduce a reflector. The reflector is also only just out of the frame on the right-hand side. Bringing it in close allows you to increase the amount of reflected light filling in the dark shadows.

    Setup #3

    Pastry john mcintire photography 6968

    For added versatility, you can combine the previous two techniques. This image is again lit by a softbox six feet behind the pastry and elevated about five feet above. Instead of pointing the light source at the pastry, it is aimed straight ahead so that the softbox is not directly illuminating the subject. This is a more extreme version of feathering that creates beautifully soft light.

    lightingdiagram3

    When you feather the light in this way, be aware that you are lighting the scene with a only a tiny fraction of your flash’s output. You will need to compensate by altering your ISO, increasing the flashes power output or altering your aperture.

    To fill in the shadows created by the backlighting, use your silver reflector.

    Setup #4

    Romey john mcintire photography 0971

    lightingdiagram4

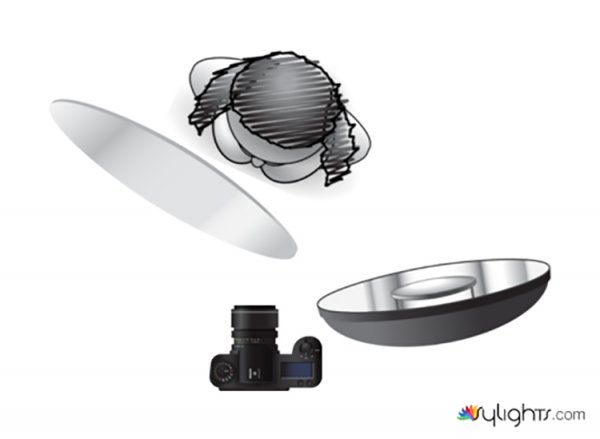
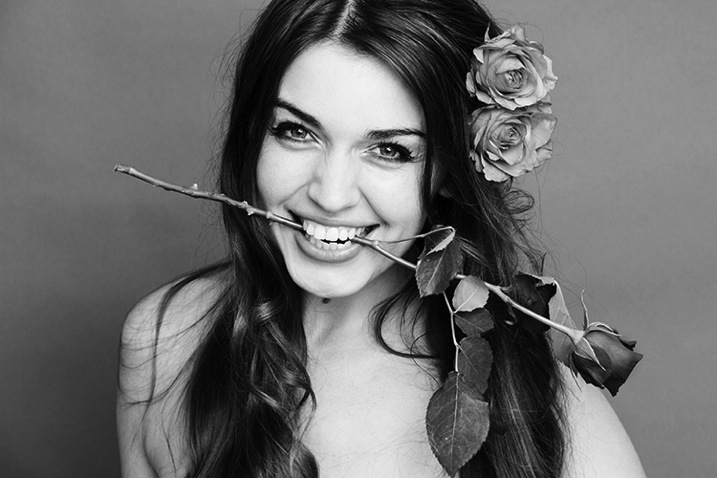
    If you want to create images with more contrast in your light than a softbox provides, try using a silver beauty dish. The light source in this photo is slightly to the right of the camera and is three feet away from the subject. The bottom edge of the beauty dish is lined up with the top of the model’s head, again creating the feathering effect. To fill in the shadows, ask your model to hold the reflector pointed towards her chin and just out of the frame.

    Setup #5

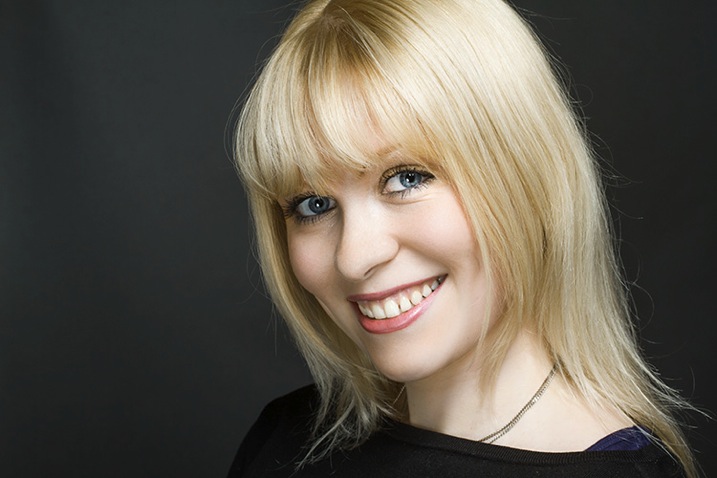
    Monika john mcintire photography 5347

    If you prefer really soft light, you need to increase the size of your light source in relation to your subject. The obvious ways to do this are to move your light source closer to your subject, or to use a bigger modifier.

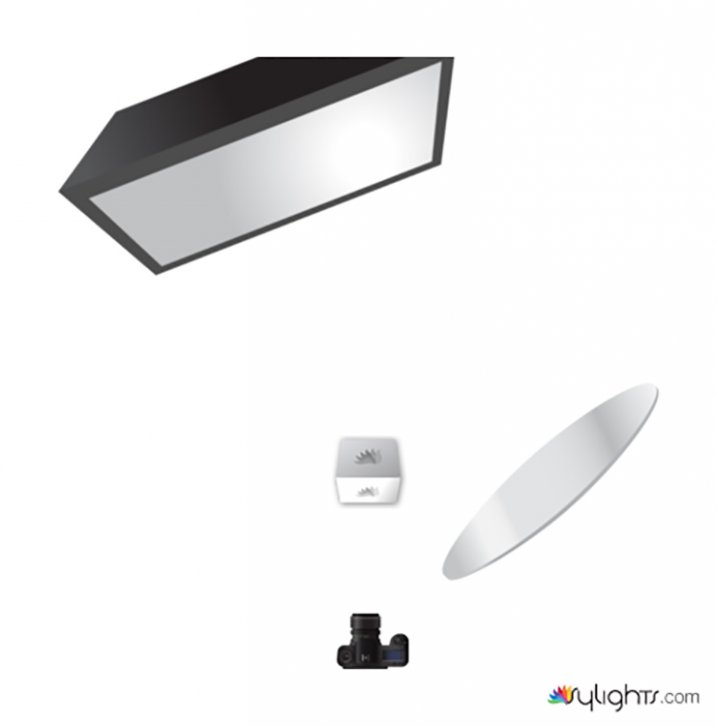
    Alternatively, you can bounce your light into a wall or a ceiling, converting that surface into your light source.
    To imitate the lighting in this image, fit your light source with a bare reflector and point it into the corner of a room. Be wary of off-coloured walls though; the slightest deviation from white can cause colour casts in your images that take a lot of time to correct. If you’re shooting black and white, then colour casts are irrelevant and you can bounce your light from just about any surface you can imagine.

    lightingdiagram5

    As you can see, you don’t need piles of equipment to get the most out of the studio. A single strobe, a modifier or two, and a reflector will provide you limitless creative opportunities for your photography. Go ahead and alter these suggestions to suit your needs and style and don’t be afraid to experiment, there really are an infinite number ways to use this modest amount of equipment.

    googletag.cmd.push(function() {
    tablet_slots.push( googletag.defineSlot( “/1005424/_dPSv4_tab-all-article-bottom_(300×250)”, [300, 250], “pb-ad-78623” ).addService( googletag.pubads() ) ); } );

    googletag.cmd.push(function() {
    mobile_slots.push( googletag.defineSlot( “/1005424/_dPSv4_mob-all-article-bottom_(300×250)”, [300, 250], “pb-ad-78158” ).addService( googletag.pubads() ) ); } );

    The post 5 Easy Studio Setups With One Light by John McIntire appeared first on Digital Photography School.


    Digital Photography School

  • Creating Effective DIY Studio Lighting With Household Items

    When I first started to experiment with controlling the light, I couldn’t afford to splash out on studio gear just to experiment, so I improvised with what I could find around the house, or acquire for only a few dollars. Some improvisations were, let’s just say, less successful than others. But some did produce good results. Some DIY studio lighting I still use, even though I now have a studio setup.

    Let’s start with an easy and free lighting method, because free is my favourite price!

    Use a table lamp

    HawkinsDPS1

    This shot was taken with a table lamp. Most of us have some sort of lamp around the place. Any kind will do. They come with their own diffuser, the lamp shade, and are easy to move around. You can adjust height with boxes, books, or anything stable you can find. You can experiment with alternative lamp shades as well as different strength, variety, or colour of light bulbs, or the number of lamps you use.

    Lamp lighting usually isn’t very bright so you might need a tripod or somewhere solid to put your camera. For the image above I had the model hold the lamp and move it around slowly as I fired away, getting her to go even slower or stop when things were looking good.

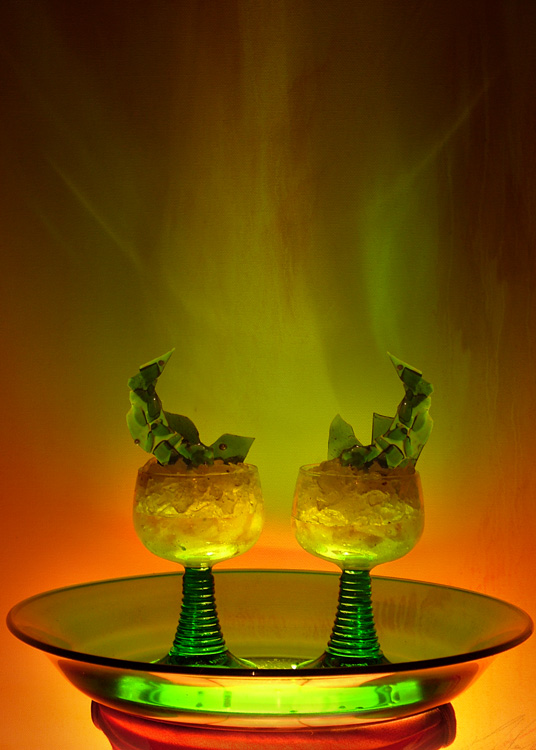
    For the shot below I put the green glass dish directly on top of a lampshade, in front of an abstract painting. It’s all about experimenting.

    HawkinsDPS2

    Make-shift softbox

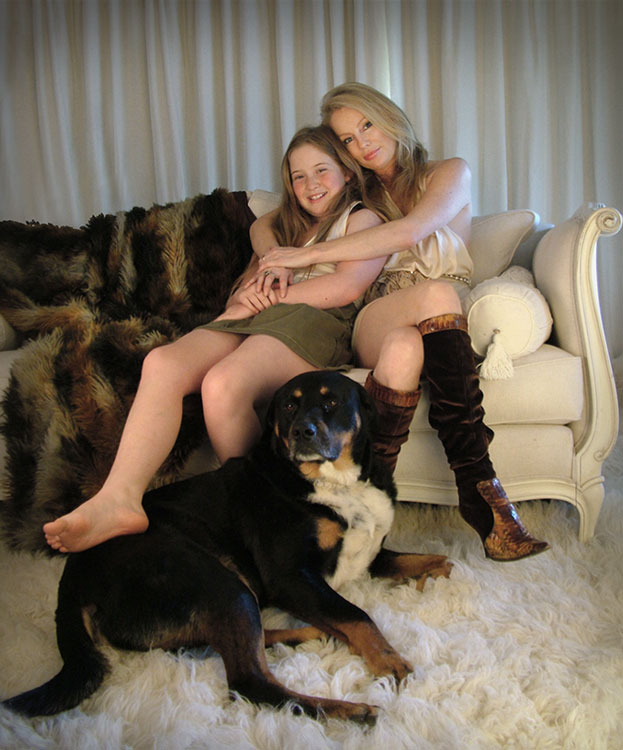
    While lamps were great, I really wanted to try soft box style lighting, so I had to get a bit more creative. The portrait below of friends and their dog was lit using a large open cardboard box lined with aluminium foil and placed on its side. I then shone a bright halogen work-light into the box, and softened the resulting light with a white sheet held up in front of the setup. Off to the side was a similar setup using a lamp with the shade removed, a smaller foil lined box, and a white pillow case.

    HawkinsDPS3

    It’s not a perfectly lit portrait. I was just starting out with portraiture and it was my first attempt with my DIY softboxes, but the results were encouraging enough for me to keep experimenting.

    Try different things – experimentation is key

    I went on to using regular white umbrellas, of the rain repelling variety, to diffuse the bright bulbs used for household outdoor lighting. I’ve bounced the light from an array of heavy duty flashlights, into a foil lined rain umbrella, all attached to a tripod with about a million miles worth of gaffer tape. I’ve used metallic cardboard sheets from the newsagent, or foil covered boards as reflectors. There were many experiments, some good, some not so much, and some were surprising.

    Basically you just need a light, or two, and something to diffuse or reflect/bounce the light, or both. Preferably without setting fire to anything. Work-lights and other really bright bulbs can get surprisingly hot. It’s best not to have flammable things like sheets or cardboard too close and have something protective underneath if the light is placed on surfaces.

    If you are not so keen on lining boxes and hanging sheets, you might like to try light painting.

    Light painting

    HawkinsDPS4

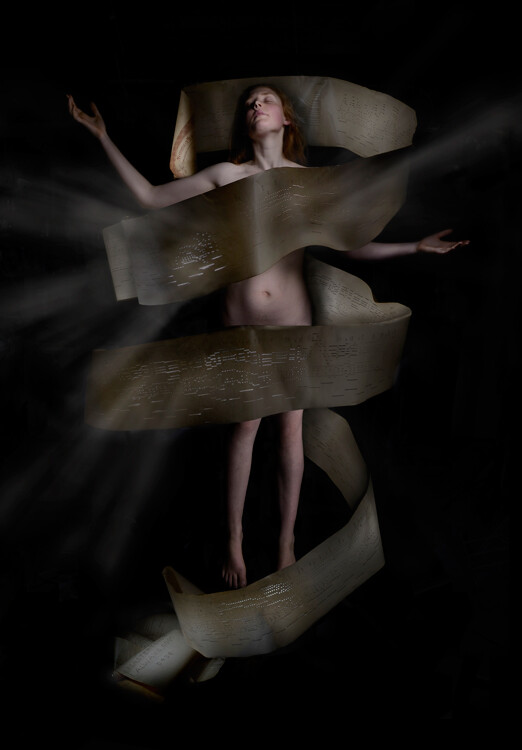
    Apart from the emanating beams of light which were added later in Photoshop, the rest of this image, shot in my kitchen, was lit with only a two dollar LED light from the junk store. This was a complicated shoot, which had to be lit and shot several times, then blended in Photoshop. But you don’t have to go to that extreme. With a bit of experimenting and practice you can light a subject this way in one single shot.

    There are many interesting and informative articles about light painting here on dPS. I highly recommend having a browse through them if you’ve never tried it before, but I’ll just run you through the basic idea here.

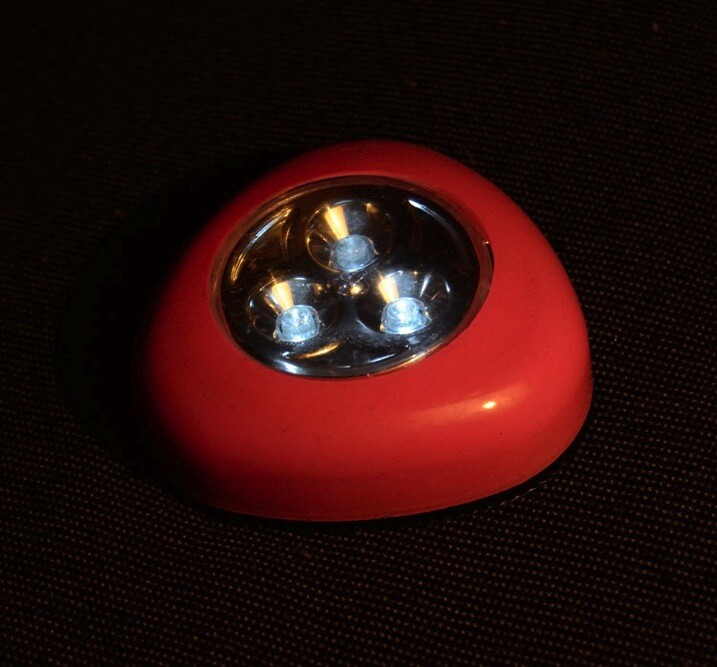
    You’ll need a tripod (or somewhere solid to put your camera), a completely or almost completely dark room and a cheap little flashlight, or LED light. This is what I used for the shot above, a two dollar press button, night light.

    HawkinsDPS5

    A slow shutter speed is necessary to give you time to paint. I usually start off with a shutter speed of about 20 seconds, ISO 400, aperture at roughly f/11. Then adjust from there, depending on the subject and light brightness. Once you are all set up, turn out the lights, shine your flashlight on your subject while looking through viewfinder to get your focus, then click the shutter and start painting your subject with light.

    You’ll have to move in close and run your light around only a few inches from the areas you want to light. That means being in front of the lens when the shutter is open, but the camera will only pick up what you shed light on, so as long as you don’t accidentally light yourself up, you won’t show up in the shot.

    Try a bit of side lighting, play around with different lengths of exposure time, different light sources. If the light shines directly into the lens, you will get what I call ghost lines, which can be used deliberately as I did in this shot below.

    HawkinsDPS6

    While these methods are obviously not a replacement for studio lighting gear, they are an effective alternative that can produce some surprisingly good results and allow you to take a bit of control over your lighting without forking out more than a few dollars. It’s also very fun and even though I now have a properly equipped studio, I still sometimes love to play around with a simple table lamp or two dollar torch (flashlight).
    Feel free to share any photographs you created with DIY lighting setups in the comments, I’d love to see them!

    googletag.cmd.push(function() {
    tablet_slots.push( googletag.defineSlot( “/1005424/_dPSv4_tab-all-article-bottom_(300×250)”, [300, 250], “pb-ad-78623” ).addService( googletag.pubads() ) ); } );

    googletag.cmd.push(function() {
    mobile_slots.push( googletag.defineSlot( “/1005424/_dPSv4_mob-all-article-bottom_(300×250)”, [300, 250], “pb-ad-78158” ).addService( googletag.pubads() ) ); } );

    The post Creating Effective DIY Studio Lighting With Household Items by Lea Hawkins appeared first on Digital Photography School.


    Digital Photography School