Category: Photography

  • 7 Street Photography Rules That Should Be Broken

    There is an all-too-common path that many people follow when they begin to practice street photography. They grab their camera, go to the busiest place they can find, and capture people head-on over and over again.

    While this is certainly something that you should do, it is not the only thing. I want to dispel a few myths about street photography to help broaden the content that you photograph. There is a wide range of ways to capture interesting street photographs for you to try.
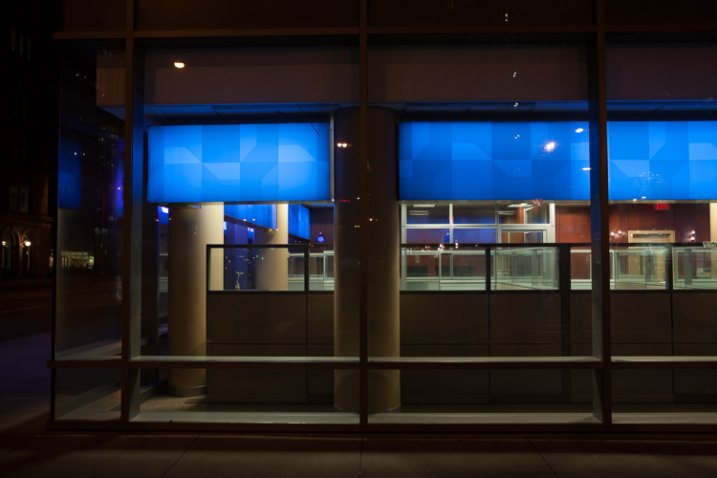
    Plant, Chase Bank

    Plant, Chase Bank

    1. People need to be present in the image

    Street photography is about people, but it does not have to include them. This type of photography is about life, and you do not need to smack a person in the middle of a frame to have it be a street shot.

    The goal for this type of photography is to capture unique and interesting moments that mean something to you. There is no rule for how to do this without people in the frame, but the goal is to go beyond the typical pretty landscape shot, and foster some sort of meaning and uniqueness within the image.

    No matter where you live, but particularly if you live in a less populated area, it can be good to focus on this idea. Explore your surroundings and try to explain it through your imagery. Include people when you can, and when it furthers your aim, but look for unique shots of your surroundings at the same time.

    If you find a great area with beautiful light, then capture it like it is. It is a typical mistake for photographers to mess up a really interesting scene by including any random passerby. Often people seem to think that this passerby is what makes the image a street image, but that could not be further from the truth. If you find a good background and want a person to be in the shot, that person needs to be able to add to the photograph. Otherwise, try to just capture the scene as it is.

    2. You can only photograph on busy city streets

    Front Yard, Burbank, California

    Front Yard, Burbank, California

    Explore the work of Martin Parr, Lee Friedlander, William Eggleston, Stephen Shore, Robert Frank, and Trent Parke, among others. Some of these photographers have photographed prolifically in very busy places, but all of them photographed, at some point or another, in areas devoid of people. Whether it is a shot of a busy beach/resort scene or a shot of a British pastry, you can still identify an image that was created by Martin Parr. Lee Friedlander’s images all have an eerie and dark quality to them (at least that’s how they make me feel) no matter if they were taken on a New York street corner, in a hotel room, or on an empty street in the suburbs. Study the works of these photographers taken in less populated areas and figure out which images appeal to you the most and why.

    Street Photography can be done almost anywhere. Great photographers have a knack for learning how to take strong photographs in areas that others may think of as lacking content. Go to areas that you think would be terrible for photography, and try to figure out how to take a good photograph there. This is a very powerful exercise for your growth.

    3. Never photograph a person’s back / You must always include the face
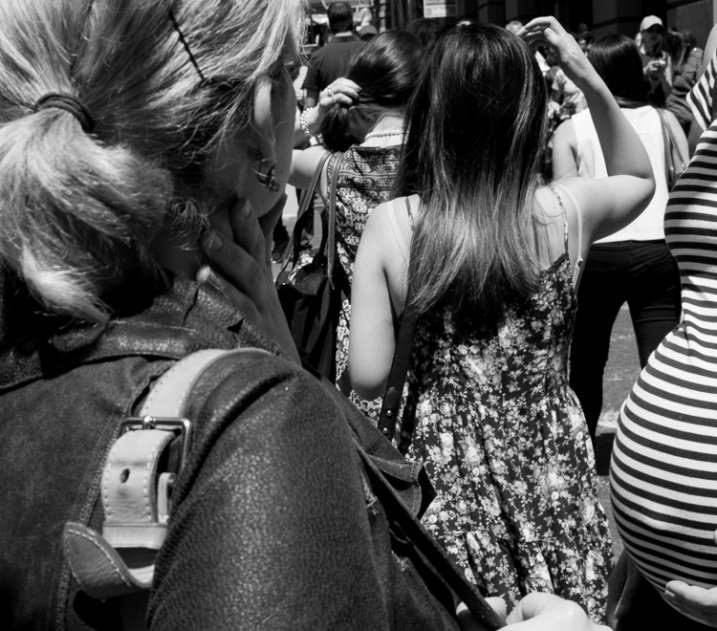
    Hands, SoHo, NYC.

    Hands, SoHo, NYC.

    While the face is one of the most powerful ways to show emotion in an image, it is not always necessary to include it, particularly if it has a boring expression. Missing a person’s face because of bad technique or fear is one thing; if the face is good, you should capture it. But gestures, hands, a pose, clothing, or a specific element on a person can all be the most interesting part of an image. In these cases, it might be best to get close and capture just that interesting element. Doing that, and getting in close to the details, can also give an image a graphic quality that makes shapes, lines, and colors stand out.

    4. You need a lot of depth and many different things happening in the scene for it to be effective
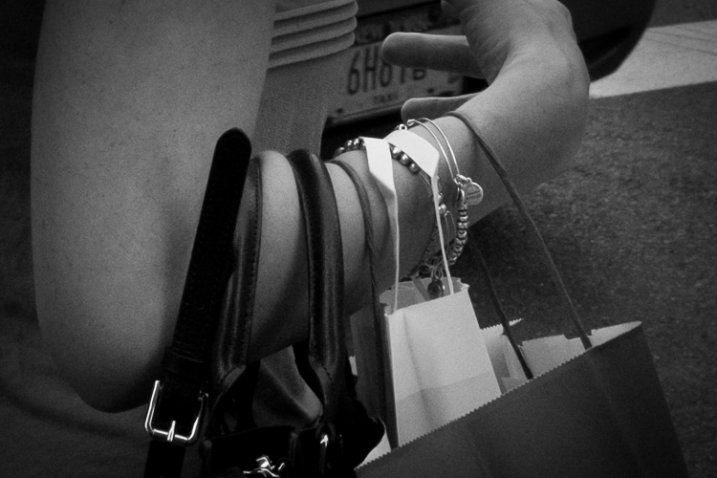
    Bags, SoHo, NYC.

    Bags, SoHo, NYC.

    I very much like shooting this way and if you are a fan of Alex Webb’s work, you probably already understand the allure of a complex image that shows multiple levels of interest, all put together in a single frame. When done well these images can be incredible. They are wow images. These are situations that you should seek out.

    However, compositions like this do not make the photograph good. What makes a photograph good is what is happening in it. Search for that first, and then you can figure out whether it will be better to create a complex image with a lot of supporting elements, or whether it will be better to just focus on the main element. It will be counterproductive if you walk out the door looking to create only images like Alex Webb. Look for interesting things and then figure out the best way to frame them.

    5. Great street photographs are all about luck

    As photographers we create our own luck. There is an element of randomness to every candid photograph, but the reality is that thousands of these “lucky” moments occur around us everyday that we don’t see.

    Photography is both about waiting for these moments and about seeking them out. If you put in the time to shoot, you will come across many moments, no matter where you are. As you improve as a photographer, more moments will not occur around you, you will just get better at noticing them.

    6. Street photography is about being bold
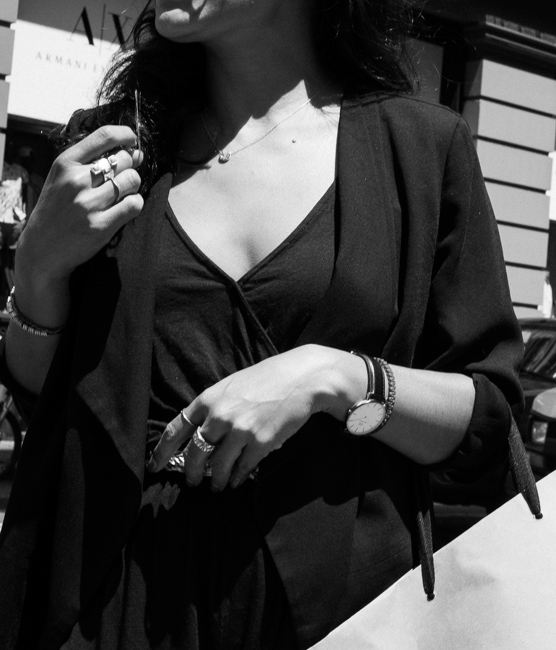
    Hair Tug, SoHo, NYC.

    Hair Tug, SoHo, NYC.

    Some street photographers are very extroverted and bold. Some are quiet and timid. Some get in your face with a flash, and some wait carefully for something to happen in front of them. Work around whatever personality you have. If you are an introvert, then there is a good chance that getting a running start as you pounce on a person with a flash like Bruce Gilden will be tougher for you to pull off. It’s important to create a strategy of shooting that feels comfortable for you. Otherwise, if you are not having fun out there, then you are not going to want to put in the time necessary to get good images.

    No matter what, you are going to have to bring yourself out of your comfort zone. You are going to have to figure out what you want your images to look like, and what you need to do to pull that off. If you want to use a zoom lens, use it because you like the look of a telephoto image, not because you are afraid to get close. If you are afraid to get close, use a light wide-angle lens, pick a spot, and let people come to you. Inch a little closer each time. You do not have to jump in there with cameras blazing to capture a good image. Figure out how to locate moments that are interesting and then develop your way of being able to put yourself in the right spot to capture them. Over time you will improve and feel like you belong there.

    7. Street photography is about the extraordinary

    There is a typical moment that I come across when teaching. I will be photographing with a student and suddenly a person with red, blue, or green hair, or covered in tattoos, will pass by. The student will take that shot faster than any shot they’ve taken the whole day. That hair or the tattoos just clicked as an interesting street image in their minds. Red hair can be interesting, but it is just one element. While it stands out and feels extraordinary and different, it’s not actually that unique.

    Street photography can focus on anything. It can be colorful, mundane, ordinary, or something overt. A lot of the most incredible street photography actually captures ordinary moments in ways that feel extraordinary. Street photography is about finding the extraordinary in all types of moments. Do not just sit there looking for red hair. Seek out people and scenes that fly below the radar, and capture what makes them interesting.
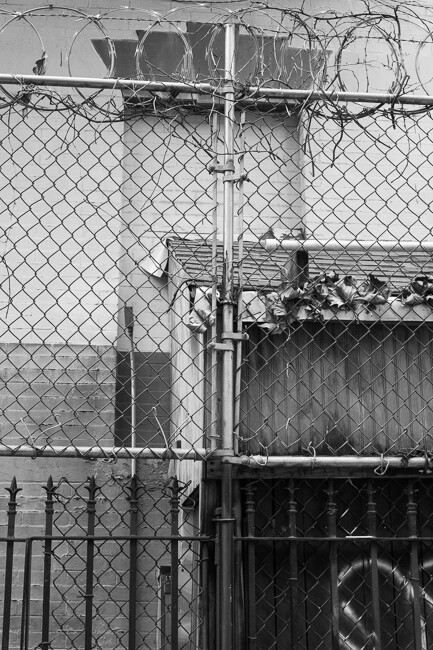
    Fence, East Village, NYC.

    Fence, East Village, NYC.

    googletag.cmd.push(function() {
    tablet_slots.push( googletag.defineSlot( “/1005424/_dPSv4_tab-all-article-bottom_(300×250)”, [300, 250], “pb-ad-78623” ).addService( googletag.pubads() ) ); } );

    googletag.cmd.push(function() {
    mobile_slots.push( googletag.defineSlot( “/1005424/_dPSv4_mob-all-article-bottom_(300×250)”, [300, 250], “pb-ad-78158” ).addService( googletag.pubads() ) ); } );

    The post 7 Street Photography Rules That Should Be Broken by James Maher appeared first on Digital Photography School.
    Digital Photography School

  • Discover the Secrets to Perfectly Focused Photos [Save 50% on Jay & Varina Patel’s Focus Collection]

    It’s deal #6 in our mid year sale and this one is courtesy of two of our favourite photography teachers, Jay & Varina Patel.

    For the next 24 hours, you can save 50% off their Focus Collection — In Sharp Focus & Hyperfocal Distance!

    The $ 44.50 discount will be automatically applied when you click ‘Add to the Cart’ here.

    These two in-depth courses will help master your focusing techniques.

    You’ll learn the best practices and camera settings for getting sharp focus every time, and gain the confidence to get in close using a wide angle lens.

    With 15 video lessons, over 80 minutes of invaluable content taught in the field, case studies and a post processing workflow walkthrough, not only will you be shown how to handle difficult focusing situations, but you’ll see how to get creative with focus too.

    One day is all you have, so get this great training now before time runs out!

    googletag.cmd.push(function() {
    tablet_slots.push( googletag.defineSlot( “/1005424/_dPSv4_tab-all-article-bottom_(300×250)”, [300, 250], “pb-ad-78623” ).addService( googletag.pubads() ) ); } );

    googletag.cmd.push(function() {
    mobile_slots.push( googletag.defineSlot( “/1005424/_dPSv4_mob-all-article-bottom_(300×250)”, [300, 250], “pb-ad-78158” ).addService( googletag.pubads() ) ); } );

    The post Discover the Secrets to Perfectly Focused Photos [Save 50% on Jay & Varina Patel’s Focus Collection] by Darren Rowse appeared first on Digital Photography School.

    Digital Photography School

  • 7 Major Elements of Photography Business Plan

    Did you know that entrepreneurs who create a proper business plan are usually two times more successful in developing and growing their business than those who have no business plan? This is according to a study conducted by Palo Alto Software. Just as you wouldn’t typically begin a photo shoot without proper lighting and gear setup, starting your own business Continue Reading

    The post 7 Major Elements of Photography Business Plan appeared first on Photodoto.


    Photodoto

  • Create Stunning Works Of Art from Your Photography: Our Most Popular Deal Back for 24 Hours

    Today as part of our Mid Year Deal week we’ve got two amazing courses for you from the amazing Sebastian Michaels.

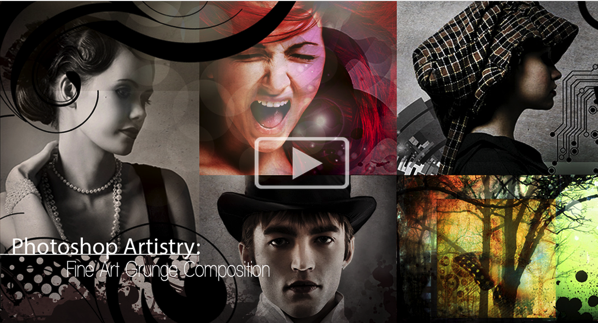
    Deal 1: 70% Off Photo Artistry: Fine Art Grunge Composition Course

    It’s back! But for 24 hours only…

    Photoshop Artistry: Fine Art Grunge Composition course — at an incredible 70% off the RRP!

    Screen Shot 2015 07 05 at 7 50 11 pm

    This was the hottest deal featured on our site in 2014. It flew out the door and smashed records in our dPS Christmas sale.

    So due to popular demand, we’ve brought it back for one more day here!

    Create Stunning Works Of Art from Your Photography

    If you want to go from merely editing your photos to creating intricate photo-art compositions, then this is is the deal for you.

    This cutting edge course will awaken your creative genius and reveal the secrets the pros use to create stunning works of art.

    By showing you how to create something new and extraordinary with your images, it will completely transform the way you approach your photography and use Photoshop. You’ll find yourself turning out richer, more sophisticated compositions than you ever thought you could create.

    With glowing reviews and an unbelievable amount of included value (over 70 training videos, downloadable PDF cheat sheets and over 7GB of bonus pro-designed content), you definitely can’t go wrong with this one.

    And at $ 89, it’s a MASSIVE $ 208 off… a price course creator, Sebastian Michaels, has only offered to dPS (you won’t find it anywhere else).

    Go ahead and see what all the fuss is about!

    Deal 2: Awake: Living the (Photo)-Artistic Life – $ 118 Off the Normal Price

    NewImage

    If you’re like one of the many dPS readers who took advantage of this deal in our Christmas sale, Sebastian’s new course is sure to tickle your fancy, too…

    ‘Awake: Living the (Photo)-Artistic Life’ is about waking up to all the possibilities and beauty around you — stimulating your imagination, vitality and inspiration, to find your unique artistic voice. Your art will become a more present, more powerful part of your life.

    With a full year of training, artist tutorials and pro-designed content, spots in the course are limited. So at $ 118 off the normal price just for today, you’ll have to be quick!

    Sign up here.

    Grab one or grab them both – these courses from Sebastian are only available at these prices for 24 hours!

    googletag.cmd.push(function() {
    tablet_slots.push( googletag.defineSlot( “/1005424/_dPSv4_tab-all-article-bottom_(300×250)”, [300, 250], “pb-ad-78623” ).addService( googletag.pubads() ) ); } );

    googletag.cmd.push(function() {
    mobile_slots.push( googletag.defineSlot( “/1005424/_dPSv4_mob-all-article-bottom_(300×250)”, [300, 250], “pb-ad-78158” ).addService( googletag.pubads() ) ); } );

    The post Create Stunning Works Of Art from Your Photography: Our Most Popular Deal Back for 24 Hours by Darren Rowse appeared first on Digital Photography School.


    Digital Photography School

  • Camera Showdown: the Nikon D5500 and D3300, Canon 70D and Sony a6000 Compared

    With so many cameras on the market now it’s hard to know which one to buy if you’re just getting into digital photography. Should you get a full on DSLR or go for the more streamlined mirrorless ones?

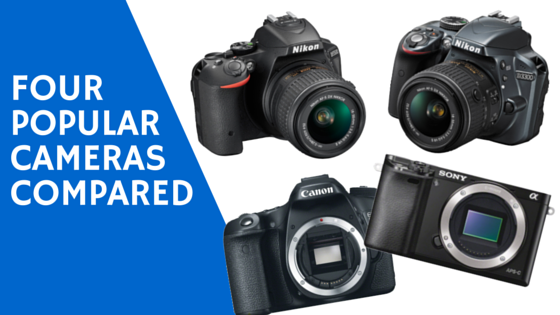
    4 Popular cameras compared

    In this video Tony Northrup and his partner Chelsea do a comparison of four different cameras in roughly the same price range (under $ 1000) including:

    • The relatively new Nikon D5500 – $ 747 body only
    • Nikon D3300 – $ 497 with 18-55mm lens
    • Canon’s 70D – $ 949 body only
    • Sony’s a6000 – $ 548 body only

    Watch as they put all four cameras through their paces doing a portrait in studio, outdoor landscape photography, and a sports simulation (action photography).

    Each camera has pros and cons, so there is no one perfect choice. It’s about knowing what your needs are and selecting the one that is right for you.

    googletag.cmd.push(function() {
    tablet_slots.push( googletag.defineSlot( “/1005424/_dPSv4_tab-all-article-bottom_(300×250)”, [300, 250], “pb-ad-78623” ).addService( googletag.pubads() ) ); } );

    googletag.cmd.push(function() {
    mobile_slots.push( googletag.defineSlot( “/1005424/_dPSv4_mob-all-article-bottom_(300×250)”, [300, 250], “pb-ad-78158” ).addService( googletag.pubads() ) ); } );

    The post Camera Showdown: the Nikon D5500 and D3300, Canon 70D and Sony a6000 Compared by Darlene Hildebrandt appeared first on Digital Photography School.


    Digital Photography School

  • DEAL: Photo Magic ebook – at the magic price of $7!

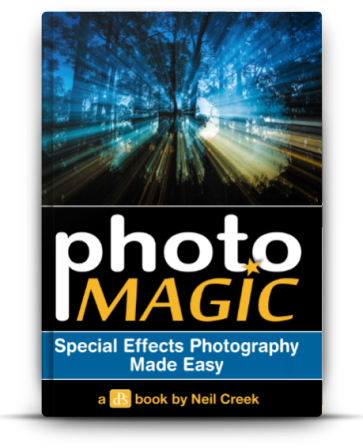
    photomagic-363x448It’s the 4th of July and time for deal #4 in the dPS summer sale.
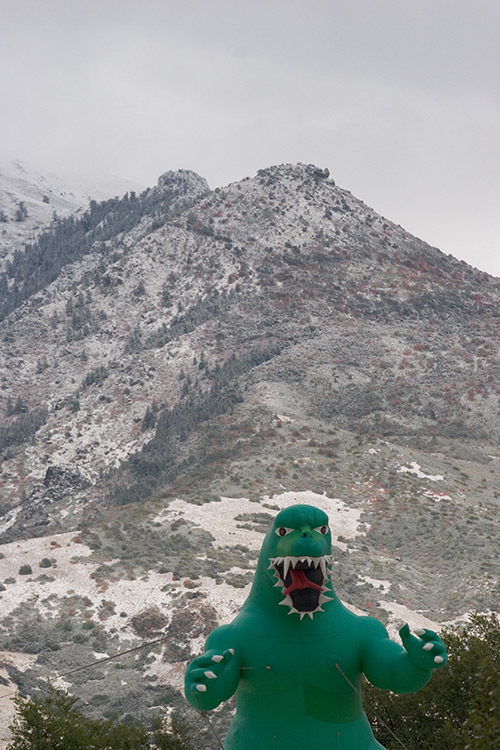
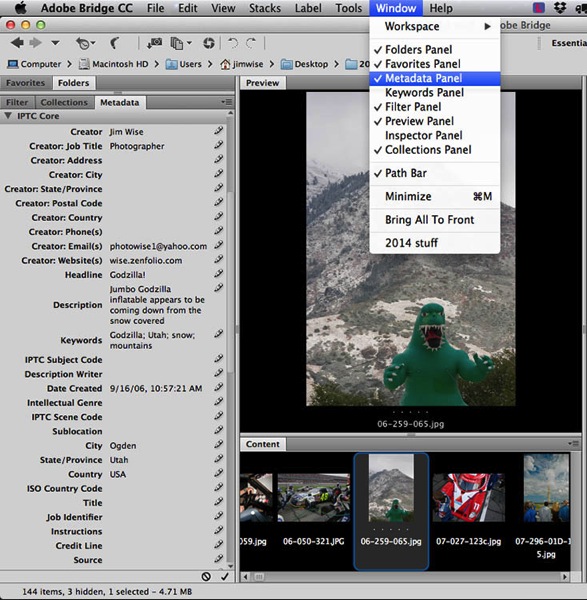
    Today you can pick up a copy of our Photo Magic ebook for just $ 7 here!

    At 65% off the normal price of $ 19.99, there’s no better way to learn the tricks and techniques for creating spectacular special effects images:

    • Zoom effect
    • 360 panorama
    • Flour hair flick
    • Light painting sparklers
    • Light painting steel wool
    • Little world
    • Mixing ambient and flash
    • Multiple exposures
    • Star trails
    • Water droplets

    And best of all, you don’t need expensive high-end equipment or advanced skills in Photoshop to pull these off — they can all be done with the most basic DSLR.

    It’s photography magic, at the magic price of just $ 7… for the next 24 hours only!

    Get your 65% discount here.

    googletag.cmd.push(function() {
    tablet_slots.push( googletag.defineSlot( “/1005424/_dPSv4_tab-all-article-bottom_(300×250)”, [300, 250], “pb-ad-78623” ).addService( googletag.pubads() ) ); } );

    googletag.cmd.push(function() {
    mobile_slots.push( googletag.defineSlot( “/1005424/_dPSv4_mob-all-article-bottom_(300×250)”, [300, 250], “pb-ad-78158” ).addService( googletag.pubads() ) ); } );

    The post DEAL: Photo Magic ebook – at the magic price of $ 7! by Darren Rowse appeared first on Digital Photography School.


    Digital Photography School

  • How To Lead Your Viewer’s Focus to the Subject

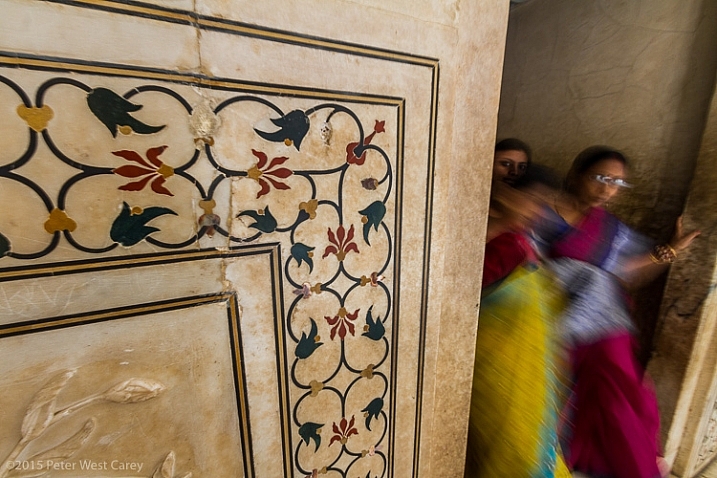
    Take a look at this photo and remember what your initial thoughts are:

    Inlaid Marble Detail Inside Taj Mahal, Agra, India, Asia

    Inlaid marble detail inside Taj Mahal, Agra, India, Asia

    Where was the first place you looked in the photo? What about the second?

    Some of the more interesting photos (and artwork in general) moves your view around the image, and often brings you back for more.

    When you take a photo, you know what you’re looking at and what is most important, but this doesn’t always come through in your picture, unless you make a concerted effort to help the viewer see the same thing. Luckily, as a photographer you have more than a few tricks to lead your viewers in your photos.

    Leading Lines

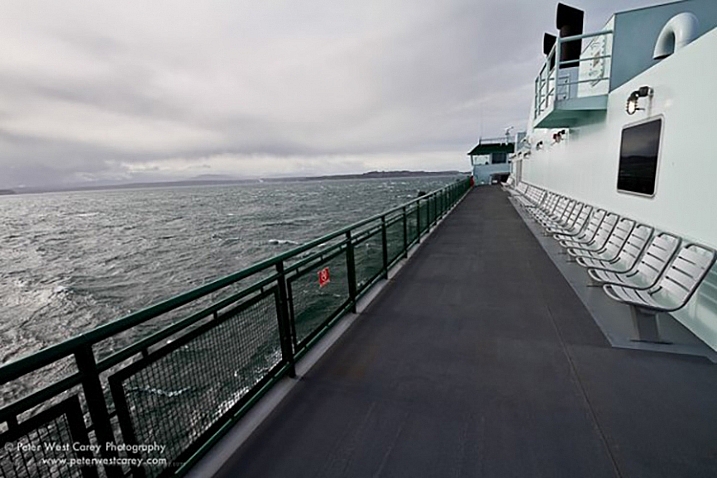
    The first technique is to simply point the way. As humans, we like lines that go somewhere and we tend to follow them. A trail, a road, repeating patterns; they are all fodder for the technique of leading lines.

    PWC-2011-0207-0588

    Crossing to the Olympic Peninsula, Washington, USA

    Prayer Wheel Wall, Kathmandu, Nepal

    Prayer wheel wall, Kathmandu, Nepal


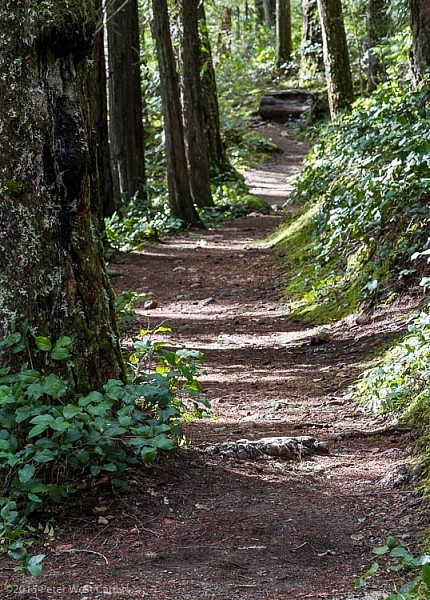
    Leading lines, when stretched far, can also give your image greater depth by taking viewers into your scene. The lines need not be straight. They can be as meandering as a forest path.

    PWC-110402-153640-3017

    Meandering path, Cascade Mountains, USA

    Non-traditionally, I consider a repeating pattern, moving in a particular direction, to be a form of leading line. Such as with this line of bridge braces.

    Across The Bridge

    Wooden bridge in Olympic National Park, Washington, USA

    Selective Focus

    Selective focus seems so simple, but can be tricky if you haven’t mastered the use of aperture in your photography. Selective focus is also useful when you have a subject far on the edge of your photo. By habit we tend to look at the middle of a scene first and it’s quite easy to use selective focus to move your viewers to the edge, and the main subject.

    PWC-100815-070403-0541

    Sunrise on South Sister Mountain, Oregon, USA

    It’s also another way to help your viewers ignore the distractions in the scene and find the main subject.

    Alaska Rainforest Floor, Glacier Bay National Park, Alaska, USA

    Alaska Rainforest Floor, Glacier Bay National Park, Alaska, USA

    There is a great article here: How to Use Leading Lines for Better Compositions by Anne McKinnell, that expands on this topic.

    Colors

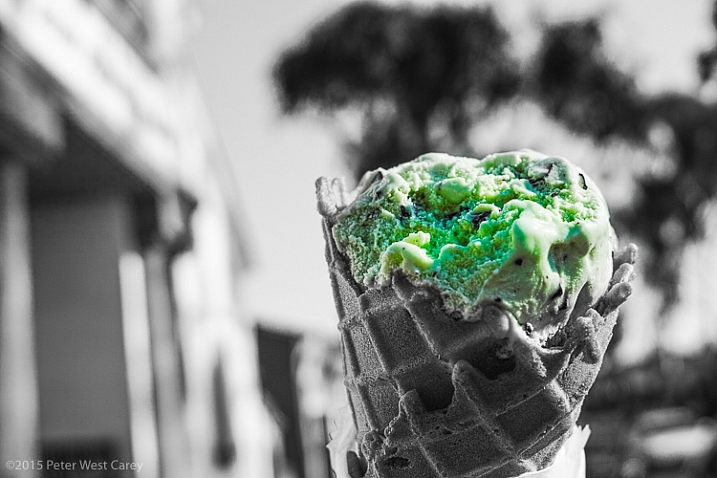
    We’ve all seen this technique that became quite popular many years ago.

    Chocloate Chip Mint Icre Cream Cone, Balboa Island, California, USA, North America

    Chocolate chip mint ice cream cone, Balboa Island, California, USA, North America

    You might have just cringed or you might have liked the technique, but there is no doubting where you looked in the photo.

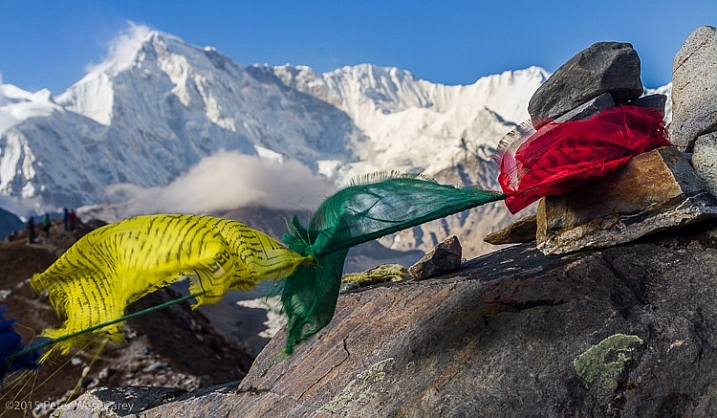
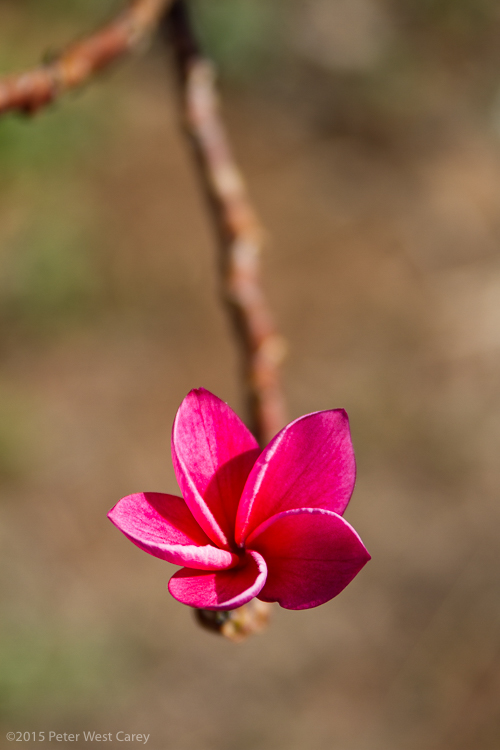
    But color need not be a single instance amongst black and white. Simply having a splash of color in a fairly monotone scene helps move the viewer to your main subject.

    Prayer Flags And Cho Oyu, Gokyo, Nepal, Asia

    Prayer flags and Cho Oyu, Gokyo, Nepal, Asia

    Plumeria flowers, outdoors

    Plumeria flowers, outdoors

    Coffee Cherries Sit Ripe For Picking In Hawaii, USA

    Coffee cherries sit ripe for picking In Hawaii, USA

    Contrast

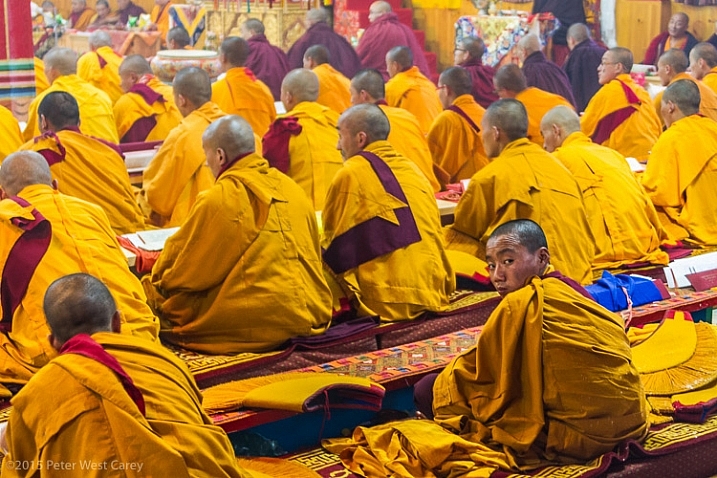
    Something or someone going against the grain also brings focus and attention to that point.

    PWC-Bhutan2013-0321-6240

    Buddhist monks, Jakar, Bhutan

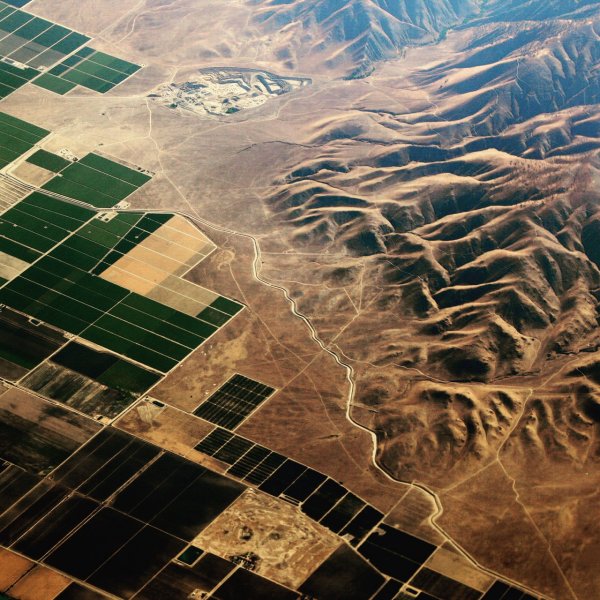
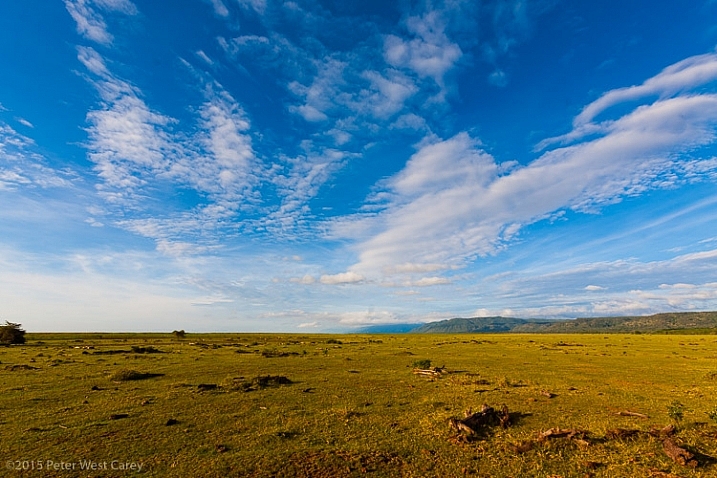
    It can also be a contrast in colors or patterns.

    High above California's Central Valley, USA

    High above California’s Central Valley, USA

    The wide open spaces of Serengeti National Park beckon, Tanzania, Africa

    The wide open spaces of Serengeti National Park beckon, Tanzania, Africa

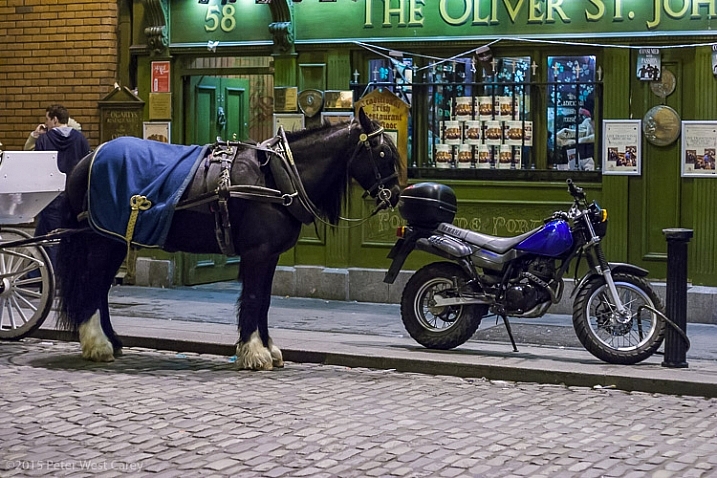
    Or it can be a juxtaposition that is the contrast; old and new, youth and elders, fast and slow, etc…

    PWC-040318-215251-9790

    Old:New; Slow:Fast, Natural:Man-made – Dublin, Ireland

    Eyes

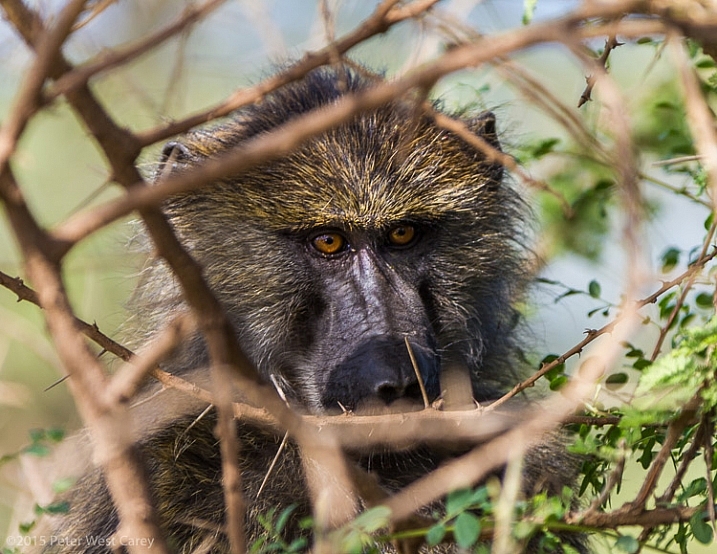
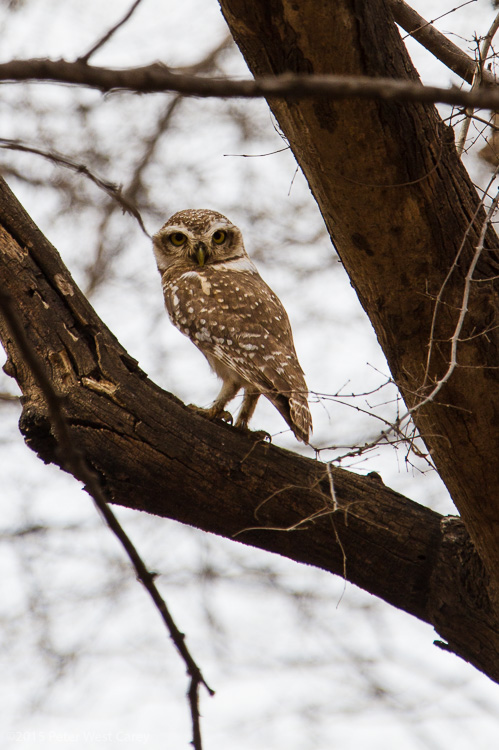
    Eyes are an easy way to draw focus. So easy, it almost seems like cheating. We naturally connect with eyes, be they human or animal. We can look around a scene and find eyes faster than most objects.

    Use that to your advantage!

    Close-up of monkey - East Africa - Tanzania

    A baboon in the thicket, Serengeti National Park, Tanzania

    PWC-India2012-0418-7848

    Pygmy owl, Ranthambhore National Park, India

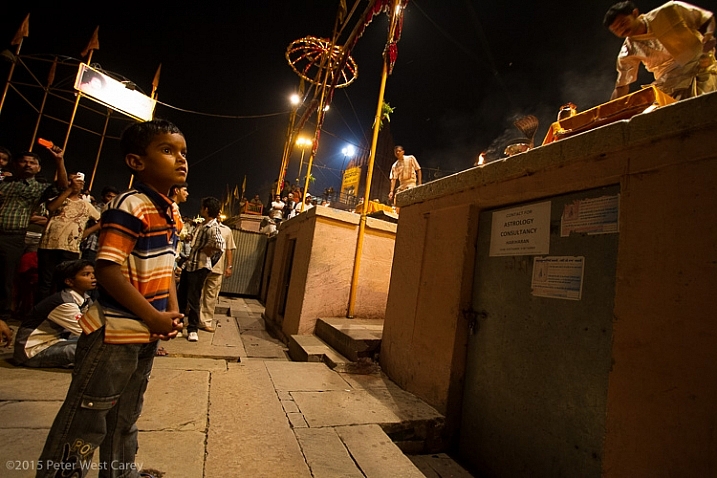
    Eyes can also be used to point a way. I have often stated that we don’t like eyes looking off the edge of the photo because we want to know what the person is looking at. But eyes looking toward the middle of an image invite exploration.

    PWC-India2012-0422-8911

    Child watching Ganga Arti Celebration, Varanasi, India

    Frozen Action

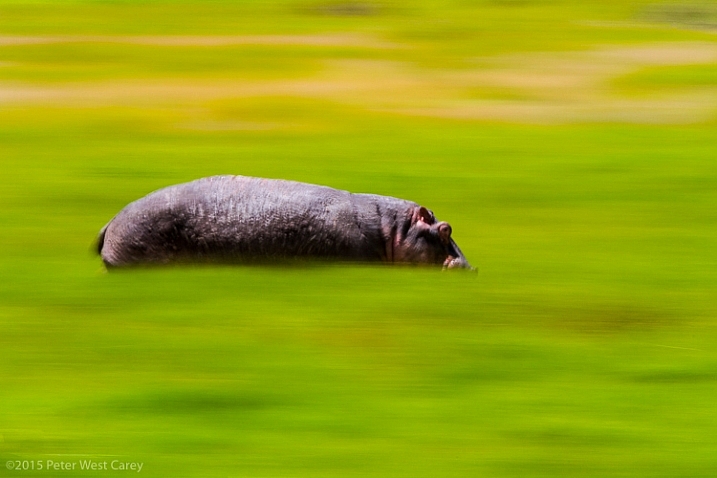
    Panning blur is a simple technique to freeze action on your subject, while letting the rest of the image blur. This is a type of selective focus, when we get right down to it, but used in a unique way.

    Hippos are amazingly fast animals, deceptively so. I had heard about this before heading to Africa in 2010, but once I witnessed just how fast they can run, and how mean they can be, I made sure my daughter and I were always close to, or in, a vehicle larger than a hippo when they were around. Ngorongoro Conservation Area, Tanzania.

    Hippos are amazingly fast animals, deceptively so. I had heard about this before heading to Africa in 2010, but once I witnessed just how fast they can run, and how mean they can be, I made sure my daughter and I were always close to, or in, a vehicle larger than a hippo when they were around. Ngorongoro Conservation Area, Tanzania.

    The technique not only leads viewers directly to the main subject as it is the only thing in focus, but also has them looking back where the subject came from, and asking why is there movement.

    For more on this technique, check out: Mastering Panning – Photographing Moving Subjects.

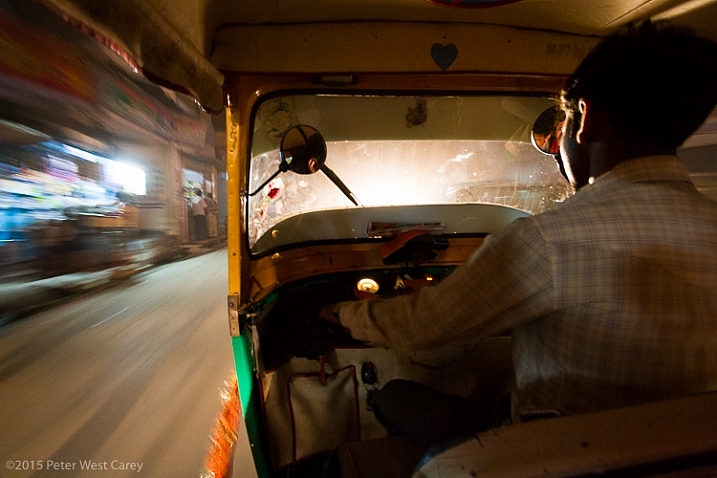
    It can also be used when inside a moving object to emphasize speed, while also giving focus to the stationary objects of interest.

    Speeding through the night streets of Varanasi, India

    Speeding through the night streets of Varanasi, India

    Going Into Your Photo

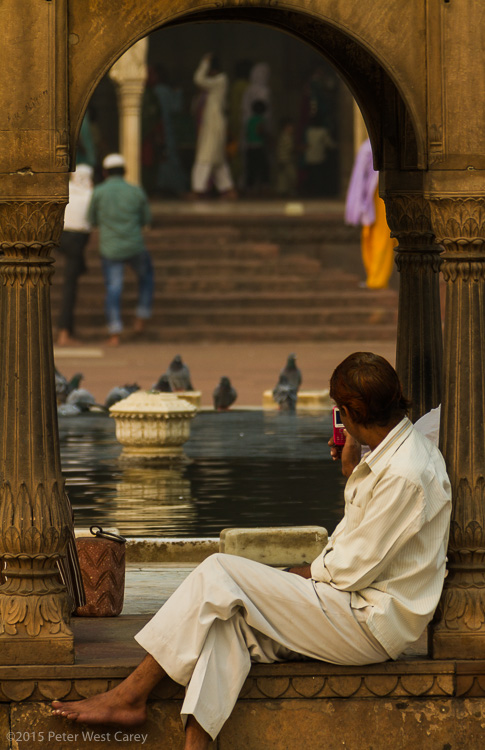
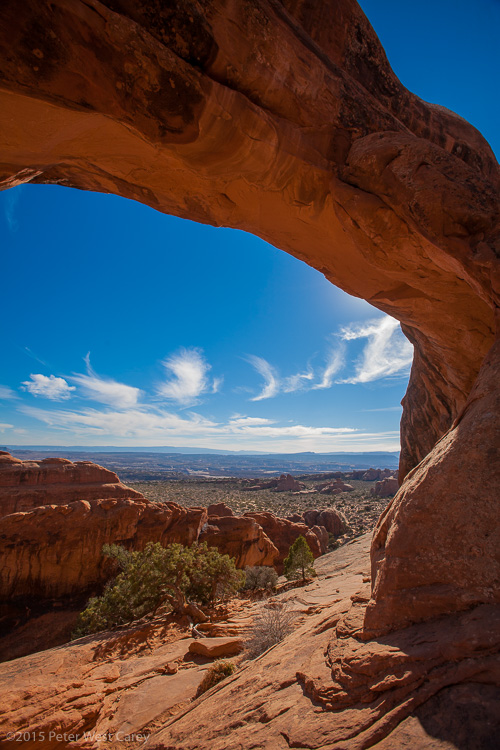
    Arches, doorways, tunnels…these are all things that naturally make us want to go “into” a photo. We want to progress from the outside in. Craft your images by having more than one layer, in a three dimensional sense.

    PWC-India2011-1031-9584

    Taking photos at Masjid-i Jah?n-Num?, Delhi, India

    Through The Arch

    Arches National Park, Utah, USA

    Conclusion

    Postcard shots are certainly a fine use of a digital camera. They capture a whole scene and make things static. But if you want to move your viewers around your images and have them coming back for more, think about how you are composing your photos.

    googletag.cmd.push(function() {
    tablet_slots.push( googletag.defineSlot( “/1005424/_dPSv4_tab-all-article-bottom_(300×250)”, [300, 250], “pb-ad-78623” ).addService( googletag.pubads() ) ); } );

    googletag.cmd.push(function() {
    mobile_slots.push( googletag.defineSlot( “/1005424/_dPSv4_mob-all-article-bottom_(300×250)”, [300, 250], “pb-ad-78158” ).addService( googletag.pubads() ) ); } );

    The post How To Lead Your Viewer’s Focus to the Subject by Peter West Carey appeared first on Digital Photography School.


    Digital Photography School

  • Weekly Photography Challenge – Bright Colors

    In this image roundup I gathered a set of images that contain bright colors, more specifically the colors of summer.

    James Blunt

    By James Blunt

    Your challenge this week will be to do similar.

    Weekly Photography Challenge – Bright Colors

    The real challenge with incorporating bright colors into your photography is to make sure you have a clear subject. Of course the subject can be color itself as well, but you need to still showcase the subject. Keep that in mind as you tackle this one.

    Even if it’s not summer in your part of the world, go find some bright colors and make some good photographs.

    Liam Moloney

    By Liam Moloney

    Dean Hochman

    By Dean Hochman

    Sergiu Bacioiu

    By Sergiu Bacioiu

    Peddhapati

    By peddhapati

    Share your images below:

    Simply upload your shot into the comment field (look for the little camera icon in the Disqus comments section) and they’ll get embedded for us all to see or if you’d prefer upload them to your favourite photo sharing site and leave the link to them. Show me your best images in this week’s challenge. Sometimes it takes a while for an image to appear so be patient and try not to post the same image twice.

    googletag.cmd.push(function() {
    tablet_slots.push( googletag.defineSlot( “/1005424/_dPSv4_tab-all-article-bottom_(300×250)”, [300, 250], “pb-ad-78623” ).addService( googletag.pubads() ) ); } );

    googletag.cmd.push(function() {
    mobile_slots.push( googletag.defineSlot( “/1005424/_dPSv4_mob-all-article-bottom_(300×250)”, [300, 250], “pb-ad-78158” ).addService( googletag.pubads() ) ); } );

    The post Weekly Photography Challenge – Bright Colors by Darlene Hildebrandt appeared first on Digital Photography School.


    Digital Photography School

  • DEAL: 100 Lightroom* presents for just $10!

    NewImageIt’s day 3 in our Mid Year Sale and today we have the return of a deal that went absolutely bananas during our Christmas sale last year.

    100 Lightroom* presents for just $ 10!

    These normally go for $ 89, so this is your chance to save a whopping 88%.

    Grab yours here before they’re gone.

    Have you ever looked at a stunning image and wondered, “why don’t mine look like that”?

    While taking a great photo is definitely the first step, great editing can be equally as important and is a pro secret for enhancing the beauty of your shots.

    With these professionally-developed presets from Mike Newton at Hacking Photography, you’ll be able to convert your photos from average to amazing with just one click, saving you a whole lot of processing time.

    Split into four collections, you get:

    • 25 color blast presets — stunning, vivid, rich, buttery colors in every image
    • 25 black and white presets — for a stark, sharp effect that’ll give your images the soul they could be missing
    • 25 old school color presets — roll back the clock for a vintage appearance
    • 25 night color presets — to add different colored street, building and ambient lights

    We don’t need to say much more than at $ 10 for the next 24 hours, these are a true photography bargain.

    Pick yours up here.

    Don’t miss out!

    Please Note: to use these presets, Adobe Lightroom is required.

    googletag.cmd.push(function() {
    tablet_slots.push( googletag.defineSlot( “/1005424/_dPSv4_tab-all-article-bottom_(300×250)”, [300, 250], “pb-ad-78623” ).addService( googletag.pubads() ) ); } );

    googletag.cmd.push(function() {
    mobile_slots.push( googletag.defineSlot( “/1005424/_dPSv4_mob-all-article-bottom_(300×250)”, [300, 250], “pb-ad-78158” ).addService( googletag.pubads() ) ); } );

    The post DEAL: 100 Lightroom* presents for just $ 10! by Darren Rowse appeared first on Digital Photography School.


    Digital Photography School