Category: Photography

  • ANKR $25 for Piece of Mind

    ANKR

    I just installed an ANKR in my camera bag. Over the past 10 years I’ve had this reoccurring dream about my camera gear and my backpack being stolen. I’ve actually had two cameras stolen over the years unfortunately.

    When you use your camera every day like I do, it’s a hazard to have to deal with. My friend Trey Ratcliff was jacked of his camera bag earlier this year. So I was very pleased to learn about ANKR. ANKR is a new product that alerts you when you become separated from your gear. The ANKR itself is super small, not much thicker than a quarter. I hid mine in a hidden area of my backpack and now if my backpack and I become separated I’ll get an immediate alert. It boggles my mind why somebody did not come out with such a helpful and useful tool 5 years ago.

    Although I’m sure an ANKR is not foolproof, it’s at least a first line of defense against your gear being taken or stolen. I frequently walk around with over $ 10,000 worth of gear in my backpack and I would just be crushed if I lost it. $ 25 seems like a very small price to pay for piece of mind.

    Setting up ANKR was super easy. I turned the ANKR on, downloaded the ANKR app and it found it right away. It created a “safe zone” so that I will never get an alert if my camera bag is at home (you can set up more safe zones as well), but if I’m out and about and become separated from my bag I’ll get an alert. I can also see on a map exactly where my bag was when we were separated which might be helpful for me to recover it.

    ANKR is a wonderful new tool to help combat theft. I have a feeling I’m going to be purchasing a few more of these. I think I’d like to attach one to my camera strap itself, in case my camera is out of the bag and stolen. I can see lots of other applications for this tech as well (kids, car keys, car, wallet, luggage, etc.). Hopefully the more tech like this is used, the less successful thieves will be with stealing stuff.


    Thomas Hawk Digital Connection

  • 26 Nice Bright Colors and Some Greens of Summer to Liven up Your Day

    Paul Simon said it best in Kodachrome:

    Kodachrome – give us the nice bright colors. Give us the greens of summers, makes you think all the world’s a sunny day.

    For those of us old enough to remember and know what Kodachrome is – and the song – this is for you.

    T

    By T

    Okay, enough strolling down memory lane. Yes it’s summer in the northern hemisphere and we better enjoy it while it lasts. Let’s see some images of those great colors that summer gives us:

    Photograph Precious Love by Sue Hsu on 500px

    Precious Love by Sue Hsu on 500px

    Photograph Green Summer Rain by Max Ellis on 500px
    Green Summer Rain by Max Ellis on 500px

    Photograph Winds of Summer by Alex Greenshpun on 500px

    Winds of Summer by Alex Greenshpun on 500px

    Photograph *** by Laura Pashkevich on 500px
    *** by Laura Pashkevich on 500px

    Photograph First Hunt by Suzy Mead on 500px

    First Hunt by Suzy Mead on 500px

    Photograph Towards the Sun II by Alexey Sizov on 500px
    Towards the Sun II by Alexey Sizov on 500px

    Photograph Curious cows by Troels Klausen on 500px

    Curious cows by Troels Klausen on 500px

    Photograph Poppies by Bess Hamiti on 500px
    Poppies by Bess Hamiti on 500px

    Photograph Dandelion clock in morning by Bess Hamiti on 500px

    Dandelion clock in morning by Bess Hamiti on 500px

    Photograph Motherhood by Eleonora Di Primo on 500px
    Motherhood by Eleonora Di Primo on 500px

    Photograph endless summer by neriman ozder on 500px

    endless summer by neriman ozder on 500px

    Photograph Canada by Marco Bocelli on 500px
    Canada by Marco Bocelli on 500px

    Photograph sunflower by Reto Imhof on 500px

    sunflower by Reto Imhof on 500px

    Photograph Not afraid of heights by Edina Szalai on 500px
    Not afraid of heights by Edina Szalai on 500px

    Photograph Shades of Blue!!! by Jay Sabapathy on 500px

    Shades of Blue!!! by Jay Sabapathy on 500px

    Photograph Red flowers by Maja Top?agi? on 500px
    Red flowers by Maja Top?agi? on 500px

    Photograph Summer Colors by Leif Erik Smith on 500px

    Summer Colors by Leif Erik Smith on 500px

    Photograph Summer - time colors by Dmitry Doronin on 500px
    Summer – time colors by Dmitry Doronin on 500px

    Photograph Lonely Heart by Chad Briesemeister on 500px

    Lonely Heart by Chad Briesemeister on 500px

    Photograph Swans by Senna Ayd on 500px
    Swans by Senna Ayd on 500px

    Photograph Buff-tailed Coronet by Jess Findlay on 500px

    Buff-tailed Coronet by Jess Findlay on 500px

    Photograph Lunenburg Blue by Kursat Barin on 500px
    Lunenburg Blue by Kursat Barin on 500px

    Photograph Ferris Wheel by John Velocci on 500px

    Ferris Wheel by John Velocci on 500px

    Photograph Umbrellas by caie143 on 500px
    Umbrellas by caie143 on 500px

    Photograph Color Run by Vassili Broutski on 500px

    Color Run by Vassili Broutski on 500px

    Photograph Above the head... by Braulio Cosme on 500px
    Above the head… by Braulio Cosme on 500px

    googletag.cmd.push(function() {
    tablet_slots.push( googletag.defineSlot( “/1005424/_dPSv4_tab-all-article-bottom_(300×250)”, [300, 250], “pb-ad-78623” ).addService( googletag.pubads() ) ); } );

    googletag.cmd.push(function() {
    mobile_slots.push( googletag.defineSlot( “/1005424/_dPSv4_mob-all-article-bottom_(300×250)”, [300, 250], “pb-ad-78158” ).addService( googletag.pubads() ) ); } );

    The post 26 Nice Bright Colors and Some Greens of Summer to Liven up Your Day by Darlene Hildebrandt appeared first on Digital Photography School.


    Digital Photography School

  • Night Life: Tips for Photographing Live Events at Night

    Event photography can be a lot of fun. If you love taking photos, and you enjoy attending social events, then it would only seem natural that you’d enjoy taking photos at social gatherings, such as parties, concerts and night clubs. There are plenty of opportunities for intrepid young photographers (and photographers of other ages, as well) to make some money Continue Reading

    The post Night Life: Tips for Photographing Live Events at Night appeared first on Photodoto.


    Photodoto

  • Ads on Social Networks Suck. ello.co — San Francisco, CA

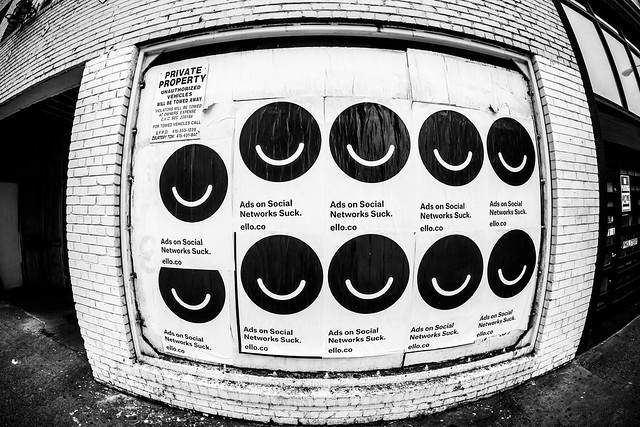
    Ads on Social Networks Suck

    Are you on Ello yet? If not you are missing out on the best photography community on the web right now. It’s a wonderful ad-free social network where your photos are published *BIG* like they are meant to be seen. Some truly amazing photographers are publishing some truly amazing work there right now.

    This is some Ello street art I photographed out on 7th street earlier today.

    Come check it out and let’s be friends there too. You can find me at Ello here: http://ello.co/thomashawk

    :)


    Thomas Hawk Digital Connection

  • Become a Composition Master with This Great Guide: 60% Off Today Only

    Deal #2 in our massive Mid Year Sale has just gone live – and it’s a goodie!

    Iics hero shot discount

    Today only you get 60% off Photography Concentrate’s Incredibly Important Composition Skills.

    For the next 24 hours and only $ 19.98 (an exclusive dPS price), you’ll get:

    • A comprehensive 225-page ebook — filled with everything you need to know to come away with a deep understanding of composition and the practical know-how to put it to good use
    • 7 bonus videos — looking at examples of theories and techniques and how they influence the look and feel of each photograph, to bring all the concepts covered together
    • A printable pocket field guide — with the most essential composition information laid out, for you to print out, fold up and slip in your camera bag

    Check out the video on the Photography Concentrate site to meet Lauren, the author of this tutorial, and learn more about how Incredibly Important Composition Skills will totally transform your photography!

    Composition

    This deal is an unbelievable amount of value.

    Especially because building your composition skills is one of the fastest and most lasting ways to transform the quality of your images.

    You see, people view images in predictable ways. And when you discover these patterns, you can use them to your advantage to create photographs that best communicate your desired message.

    So are you ready to become a master in composition and gain real skills that you’ll use in every single shot you take?

    Head to Photography Concentrate to snap up this amazing deal!

    No Risk: Your Satisfaction is Guaranteed

    Your satisfaction with this deal is guaranteed. For a full 60 Days, and if you don’t feel like you have stronger composition skills you’ll get 100% of your money back with no questions asked.

    googletag.cmd.push(function() {
    tablet_slots.push( googletag.defineSlot( “/1005424/_dPSv4_tab-all-article-bottom_(300×250)”, [300, 250], “pb-ad-78623” ).addService( googletag.pubads() ) ); } );

    googletag.cmd.push(function() {
    mobile_slots.push( googletag.defineSlot( “/1005424/_dPSv4_mob-all-article-bottom_(300×250)”, [300, 250], “pb-ad-78158” ).addService( googletag.pubads() ) ); } );

    The post Become a Composition Master with This Great Guide: 60% Off Today Only by Darren Rowse appeared first on Digital Photography School.


    Digital Photography School

  • 5 Ways to Create Dramatic Landscape Photos at Midday

    Outdoor photographers are repeatedly taught to plan their scenic photography excursions early in the morning or late in the day. These magic hours we’re told, is the only light worth shooting in. Yet, what about those situations when being on location at sunrise or sunset isn’t possible? You can pack up your bags and go home with an empty memory card, or make the most out of every opportunity. Allow me to let you in on a little secret not found in most photo magazines. Some of the best landscape opportunities can be found at midday when the sun is high over head.

    Here are five tips to help you create dramatic landscape photos at midday:

    1) Work with the sun

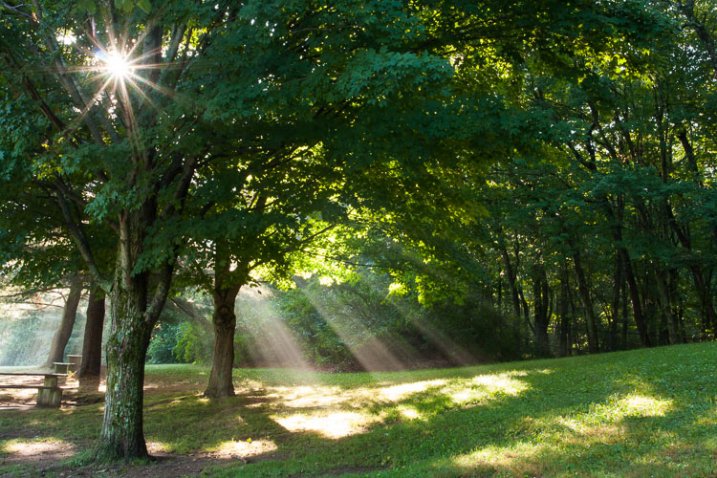
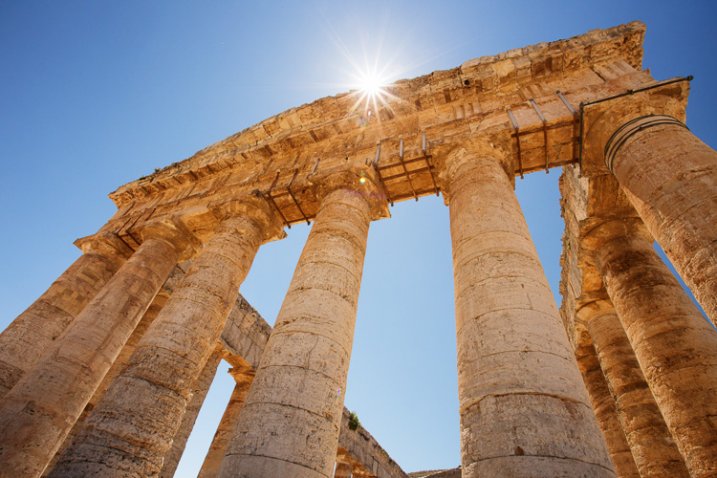
    Rather than avoiding the sun, use it to add visual interest in your composition. This technique is not overly complicated but does take a bit of trial and error to master. Start by setting a very small aperture opening such as f/22. Then, while looking through the viewfinder, position yourself so an object partially blocks the sun. It should not be entirely obscured, so you may have to rock back and forth ever so slightly to find the optimal point. When you see the beams of light spilling through the obstruction, take the shot. The results can be quite dramatic and potentially aided by subtle hints of colorful flare.

    2) Give your wide angle lens a rest

    The contrast found midday makes it difficult to hold the detail in the sky while properly exposing a foreground. Rather than resorting to an HDR shot, use the occasion to simplify your composition. Does that bright sky really add to the overall scene? If not, give your wide angle lens a break and switch to a medium telephoto lens.

    Before pressing the shutter, check all four corners of the frame for any unwanted bright areas. The human eye tends to focus on these areas first. As you eliminate these distractions, the design of the photo will become more evident. Just remember, if you are hand holding the camera with a telephoto lens, opt for a slightly faster shutter speed to prevent camera shake. At these greater magnifications, even the slightest imperfections become more noticeable.

    3) Find more people

    Sunny days can also be useful for creating salable prints and stock photos. Images of people enjoying the outdoors are popular with a wide variety of clients; from those looking for home decor, or pharmaceutical companies, clothing lines, the parks department, etc. In the afternoon, you’ll find infinitely more people than you would at sunrise or sunset. This is a good thing, as it opens the door to a whole new series of photographic possibility. By including a human element, the image will have greater reach as viewers can relate to it personally.

    4) Slow the shutter speed down with black glass

    Believe it or not, you can shoot long exposures even on a bright sunny day. The trick is add a round neutral density filter to your bag. Sometimes dubbed “black glass”, these dark screw-on options block a great deal of light from entering the lens.

    For example, if the proper exposure gave you 1/125, f/22, ISO 100, the water motion (below) would be largely frozen. By adding a nine stop ND filter, you can keep the aperture and ISO the same, but drop the shutter speed all the way down to four seconds. This will create that dreamy effect previously limited to low light situations.

    5) Go easy on the polarizer

    If you have a short layover in a distant location, you can use the opportunity to capture some of the sites mid-afternoon. Perhaps the most important tool will be the circular polarizer. Some may disagree here, but it does not need to be a multi-coated, super high-end filter. A basic model from Hoya or Tiffen will be just as effective. With it, you can take a pale blue sky and make it pop. This is especially true when the sky is dappled with clouds.

    Be warned however, the technique is so powerful it’s easy to go overboard. As a tip, I’d recommend that you find the maximum strength of the filter, and then cut the intensity slightly. This will provide you with more natural results.

    Do you have any additional tips for shooting at midday? Please share in the comments below.

    googletag.cmd.push(function() {
    tablet_slots.push( googletag.defineSlot( “/1005424/_dPSv4_tab-all-article-bottom_(300×250)”, [300, 250], “pb-ad-78623” ).addService( googletag.pubads() ) ); } );

    googletag.cmd.push(function() {
    mobile_slots.push( googletag.defineSlot( “/1005424/_dPSv4_mob-all-article-bottom_(300×250)”, [300, 250], “pb-ad-78158” ).addService( googletag.pubads() ) ); } );

    The post 5 Ways to Create Dramatic Landscape Photos at Midday by Chris Corradino appeared first on Digital Photography School.


    Digital Photography School

  • 6 Tips to Find Undiscovered Photography Locations in Your City

    This location was discovered by walking BEYOND the main public area and exploring nearby dirt paths.

    This location was discovered by walking BEYOND the main public area and exploring nearby dirt paths.

    There’s nothing quite like the rush of finding a nook, a cranny, a wall, a corner, or a building that looks amazing in photos but has not been fully discovered by others just yet. Ask any photographer about unique locations, and most likely they will cringe a bit at the thought of giving up their secret spots. How, then, do you find new locations for yourself? It’s not always necessary to go outside of your city (or even your neighborhood!) to find a great photography location.

    Here are several tips for how to find those hidden gems you crave:

    1. Break routine

    Do you have a usual way to drive home from work? How about that super fast shortcut that you love to take when meeting friends for dinner? Set some time aside to go a different route, and really look at your surroundings as you drive by. Take note of things like texture, if there is a lot of shadow or direct sun on a wall, if there are bright colors, and if certain areas have easy access from the road. Are there any buildings that stand out to you? How about the landscaping – any beautiful trees that provide a dramatic canopy or a large flowering bush that has bright colors?

    Use this designated time to explore, stop spontaneously when something speaks to you, and take some quick sample photos (even if with your phone!) to keep on file for future reference.

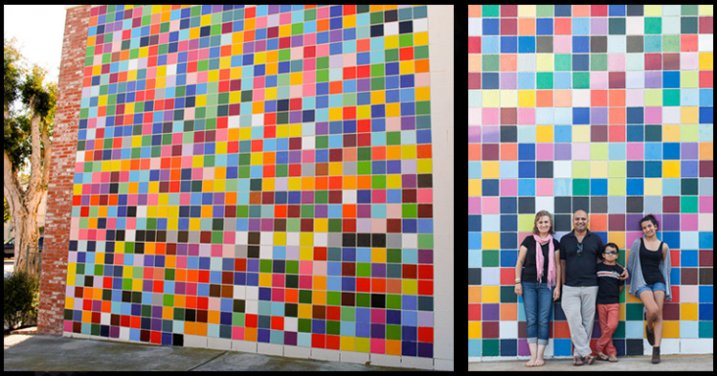
    Cell phone shot while exploring is on the left.  Finished photo for a family portrait is on the right.

    Cell phone shot while exploring is on the left. Finished photo for a family portrait is on the right.

    2. Leave the car at home

    This may sound extremely basic, but if you are like most people, you’re used to driving everywhere. While this is a huge time-saver, it also causes you to not SEE your surroundings in as much detail. When you walk, you see the cracks in the sidewalk, the nooks full of graffiti in the small alley behind the shops, or the vantage points that can be seen at eye level. Changing your perspective is an instant way to re-evaluate your surroundings. If you’re not able to walk, consider riding your bike. It’s still a more leisurely way to explore the details than by car would be, and it’s much easier than a car to stop repeatedly and explore.

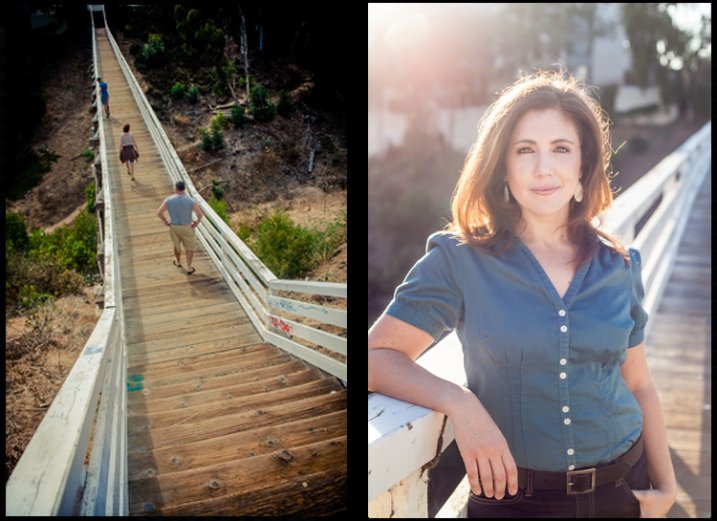
    Not visible from the street, this pedestrian bridge gets overlooked from a car.

    Not visible from the street, this pedestrian bridge gets overlooked from a car.

    3. Ask

    Sounds simple, right? Yet, how many of us actually do this? Most of us will search online, scan the forums and Facebook groups, and explore on our own. All this, we do instead of simply asking those around us. Next time you go into a small local store, ask the clerk if they have any favorite spots for photos, or ones that offer a fantastic view. Reach out to other local photographers you know; ask them if they have any locations they love going back to time and time again, and if they would be willing to take you there sometime. Ask your friend or relatives if they have any spots in town that they’ve always thought would be great for photos. Their answers may surprise you. Oftentimes, all you need to do is ask.

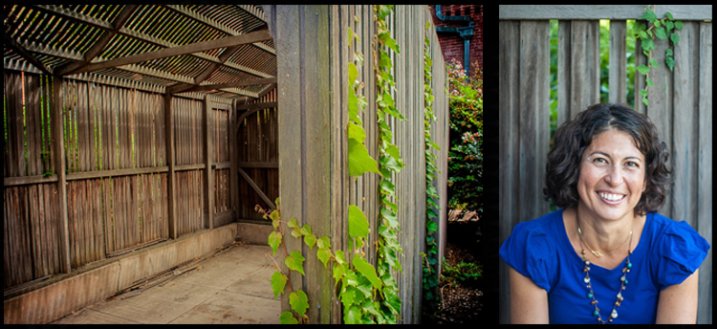
    Many locals recommend this property, but few use the old carports as backdrops. Cell phone shot on left, final portrait on right.

    Many locals recommend this property, but few use the old carports as backdrops. Cell phone shot on left, final portrait on right.

    4. Create an assignment

    It can be overwhelming to just get in your car and drive without knowing what you’re seeking. To make things easier, give yourself a specific type of location that you’re looking for that day. Perhaps you want to find a beautiful skyline view of your city, or you want to find a wall that has colorful graffiti for a backdrop. Maybe just give yourself a theme – industrial buildings, or lush bright flowering landscapes, or open pastures, or patterns.

    Having a goal in mind can give you some direction as to where to start looking. Looking for rustic and open? Head out of the city and into wide open spaces. Looking for urban and gritty? Go straight for urban neighborhoods and industrial areas of town.

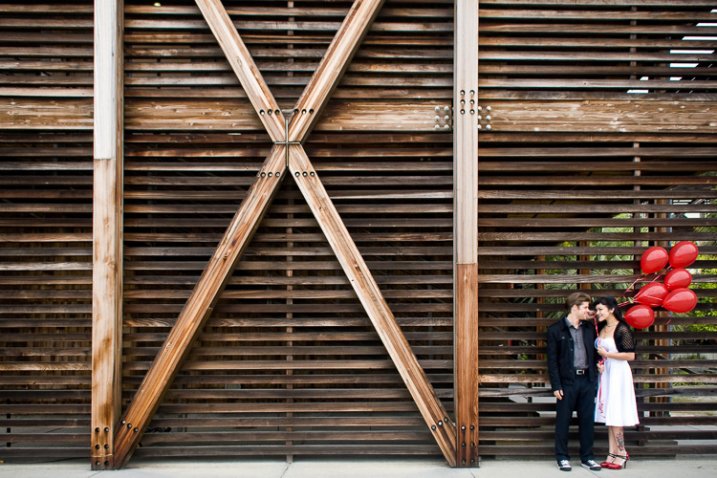
    On a search for great texture and patterns, this wall was discovered. It is part of a research facility at a local university.

    On a search for great texture and patterns, this wall was discovered. It is part of a research facility at a local university.

    5. Yes, asking Google can help, too

    Let’s face it, we go to Google for all our questions these days, and that’s okay. Do a bit of online research, keeping in mind some parameters for what you’re seeking. If you’re looking for old industrial buildings, be sure to enter that into your search. Be as specific as you can be, then get more general as needed to widen the net. There are also a good number of websites and books about “weird places” or “abandoned places”, all of which would have loads of appeal to photographers. If you do seek out abandoned or off-the-beaten-track locations, be sure to take all safety precautions possible to ensure a safe return.

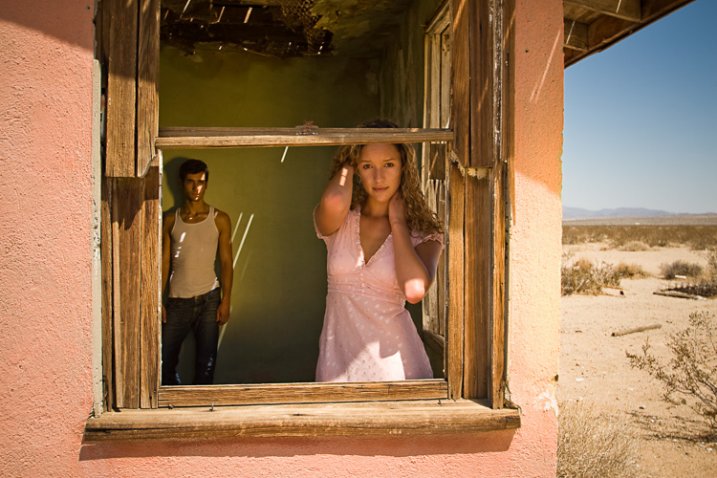
    Researching abandoned locations in the desert resulted in this location near a major attraction.

    Researching abandoned locations in the desert resulted in this location near a major attraction.

    6. Keep records of your discovered gems

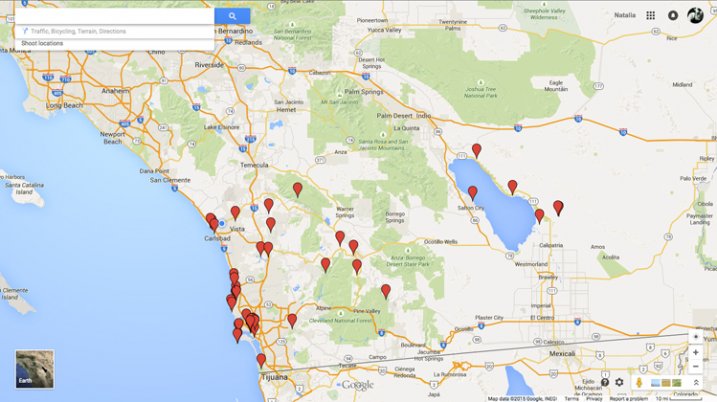
    This is a tip about finding locations, but more about making sure to remember them. Find a system that works for you to keep track of locations you like, what type of work they may be suited for, any outstanding characteristics, and any sample photos you snapped while exploring. While everyone will have a slightly different way of organizing this information, Google Maps is highly recommended for marking locations on a map and adding notes.

    If you have a Gmail account, you can go to Maps and create your own. After each outing, you can add pins to locations you want to remember, name them whatever you’d like, and even add a few notes. In addition to this, I would recommend keeping a folder on your computer that is specifically for sample photos of locations. This comes in handy, not only for remembering a location yourself, but also for showing a potential subject and convincing them of your vision for their photos.

    An ongoing project - the personalized Google Map.

    An ongoing project – the personalized Google Map.

    Have you found tucked away locations that you are proud of? What tactics did you use for stumbling upon these spots? Please share in the comments below.

    googletag.cmd.push(function() {
    tablet_slots.push( googletag.defineSlot( “/1005424/_dPSv4_tab-all-article-bottom_(300×250)”, [300, 250], “pb-ad-78623” ).addService( googletag.pubads() ) ); } );

    googletag.cmd.push(function() {
    mobile_slots.push( googletag.defineSlot( “/1005424/_dPSv4_mob-all-article-bottom_(300×250)”, [300, 250], “pb-ad-78158” ).addService( googletag.pubads() ) ); } );

    The post 6 Tips to Find Undiscovered Photography Locations in Your City by Natalia Robert appeared first on Digital Photography School.


    Digital Photography School

  • How to Take Great Photographs at the Fairground

    Packed with people, bright lights and fast-moving rides, fairgrounds can provide photographers with loads of opportunities to take some colourful and creative images. So, why not grab your camera, head to your nearest fair and try out some of the following ideas for yourself.

    Somethingwicked750

    When to visit

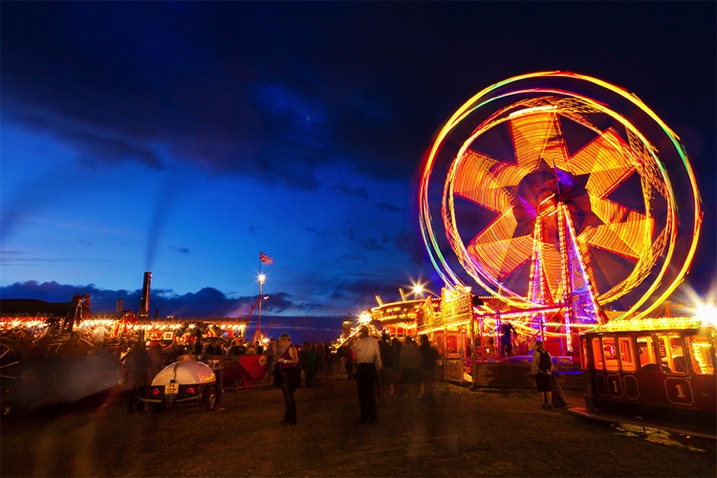
    Fairgrounds can be fun to take pictures of, whether you go in the daytime, or at night. However, with their bright lights, they really come alive once the sun has gone down. My preferred time to arrive is around one hour before sunset, as this allows you to take a look around before it gets dark, and gives you time to plan your shots.

    Arriving at this time will also enable you to shoot during the crossover period – the part of the evening where the sun has set, but there is still light and colour in the sky. The deep, dark blue sky provides a striking contrast to the bright, colourful lights and can often look better in photographs than a fully black night sky. In my opinion, this is the optimum time to capture fairgrounds in all their vibrant glory.

    What to take with you

    Whatever lens you choose to take, there should be some great photo opportunities awaiting you. However, if possible, take a variety of lenses to expand the range of shots you can take. A wide-angle will be useful for capturing the action of fairground rides and a telephoto will enable you to crop closer into details, or people on the rides. The accompanying shots were taken using 24-105mm and 70-200mm lenses. When visiting the fair with friends and family, I have also found it useful to take a 50mm (f/1.8) lens so that I cAN take some pictures of them enjoying themselves.

    If you’re planning to capture the fairground rides after sunset you are going to need a tripod due to the slow shutter speeds that you will be using. A remote shutter release will also come in very useful to reduce the risk of blurred images from camera shake.

    Photographing fairground rides

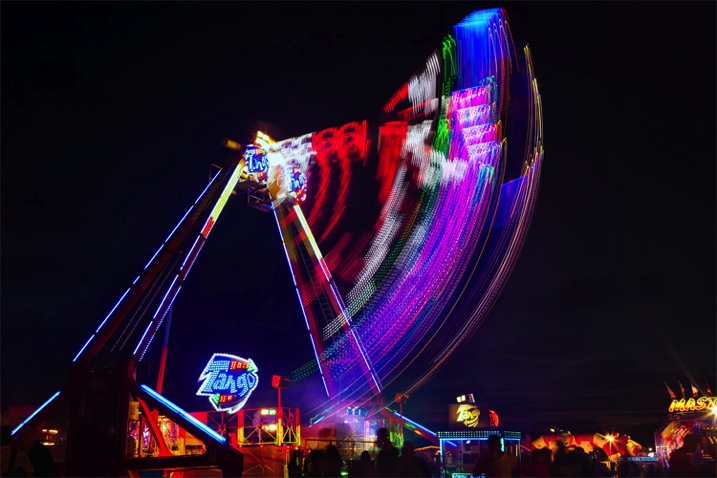
    Tango750

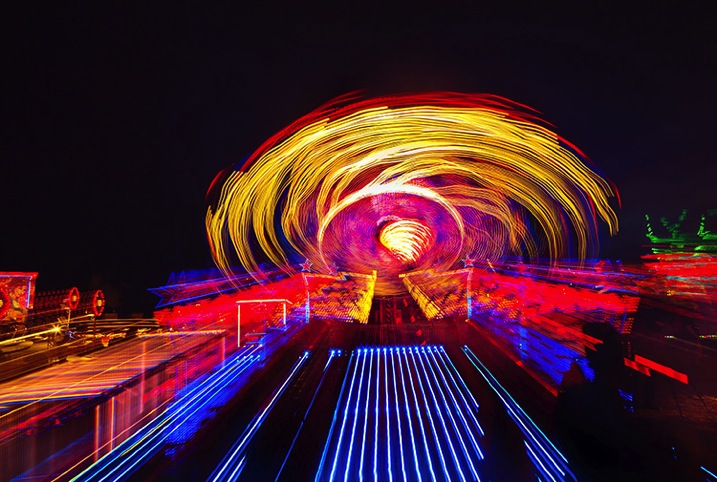
    The most dynamic and exciting photographs of fairground rides aim to convey a sense of speed and movement. Slow shutter speeds are used to capture the colourful trails and patterns created by the fast-moving lights. They’re fun to take, and you can get some dramatic shots relatively easily.

    Once you have decided which ride to shoot, fix your camera to your tripod and fit a remote release. (Remember to turn off Image stabilization if your lens has this.) Shutter speed is the most important aspect of getting the correct exposure in this instance, so set your camera to shutter-priority or manual mode. The amount of movement you capture in the image will vary on a number of factors, not least the speed of the ride itself, but a good place to start is with a shutter speed of one second.

    Set the ISO to the lowest setting available and the white-balance to Auto, as this should be effective in most situations. (For long-exposure shots such as these, I would recommend shooting in RAW so that you will be able to change the white balance settings during post-processing if necessary.) Autofocus may struggle in low-level light, so manually focus on a part of the ride when it is not moving.

    Take a test shot using these settings while the ride is stationary to check the exposure. Pay particular attention to the sky and, if necessary, use exposure compensation. Then, as the ride begins to move, play around with the shutter speed to see what works best. Anything longer than ½ second should produce a decent amount of motion blur and light trails, the effect does depend on the speed of the ride. Keeping the shutter open for a longer time means that you can capture more light trails and patterns – although sometimes this can result in images with messier light trails and a lack of clear, distinct shapes. Ultimately, your choice of shutter speed will depend on the nature of the ride (how fast and how much it moves – vertically, horizontally, diagonally etc.) and your creativity (personal preferences between clean light trails or chaotic swirls of colour).

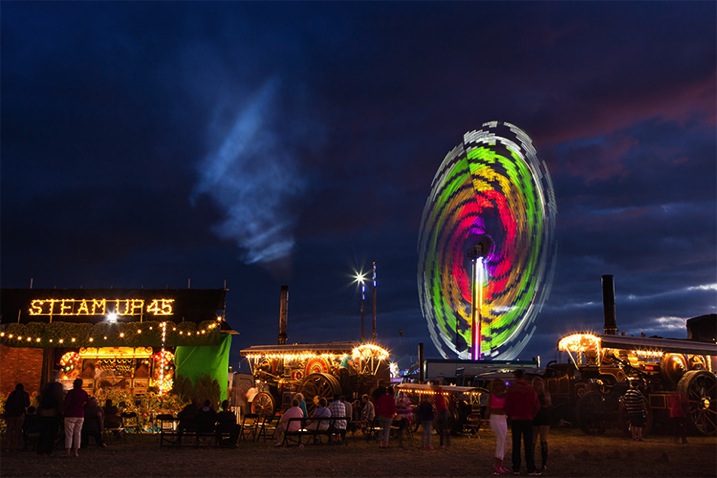
    When composing your shot, give some thought to the angle you are taking it from. Try to get in close and shoot from a low angle, looking up at the ride to minimize distracting backgrounds, but always stay a safe distance from moving rides. Remember to leave enough space in the frame to capture all of the movement so that you don’t inadvertently cut anything off. Spend some time watching how the ride moves before taking a shot. Also, with all the movement going on, try to include a still element in the frame to help ground the image. Signage, fairground stalls, or even (non-moving) spectators can add to the story you are telling in your final image.

    Photographing people at fairgrounds

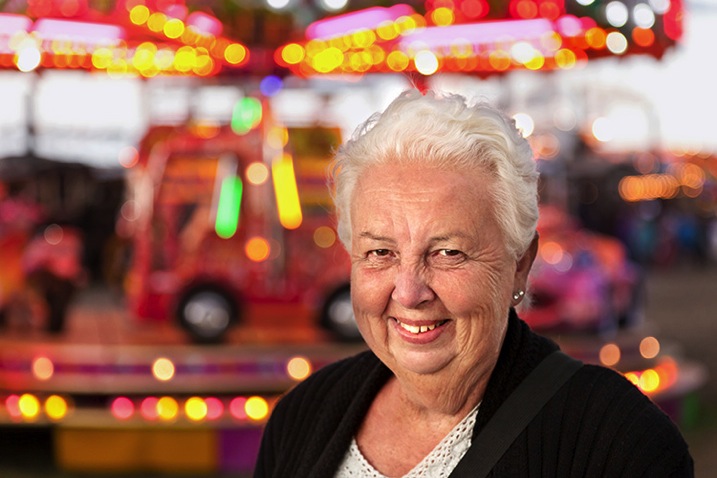
    Fairgroundportrait750

    Fairgrounds are not just about the rides. By providing great lighting and a fun-filled atmosphere, they’re the ideal place to try out some candid photography. Candid shots of people engaging in activities around the fair will be more interesting than shots of people sitting around doing nothing and often will add an element of story to your image. Also, by being focussed on the activity, your subject is less likely to focus on you taking their photograph. This can produce better candid shots because as soon as a person knows they are being photographed, their natural behaviour tends to disappear quite quickly. Why not take advantage of all the activities on offer at the fair, and try to capture people’s reactions to the action – whether that is trying to win a prize on a fairground stall, eating one of the many sugar-based treats on offer, or even waiting in line for a ride.

    When taking candid pictures, set your camera to continuous shooting mode and take a number of shots in quick succession to stand a better chance of perfectly capturing the reaction you want from your subject. Use a wide aperture to let in lots of light. It may also be necessary for you to increase the ISO setting to get the correct exposure. A telephoto lens with a focal length of around 200mm should enable you to capture the (often extreme) reactions of people on fairground rides for some particularly dramatic candid shots.

    The lighting at fairgrounds can also be great for illuminating people for some posed shots. Colourful lights can produce great background bokeh for fun portrait shots of friends and family. Simply put, bokeh is created by out-of-focus light so you will need a shallow depth of field. Using a very wide aperture will help, but you will also need to think about the distance between the subject and the light sources (the further away the better) and the distance between the subject and your camera (stand close to the subject and use a reasonably long focal length). There is often enough light available from other sources to fully illuminate the subject, but a flash with a diffuser may also come in handy.

    Get creative

    Superbowlzoom750

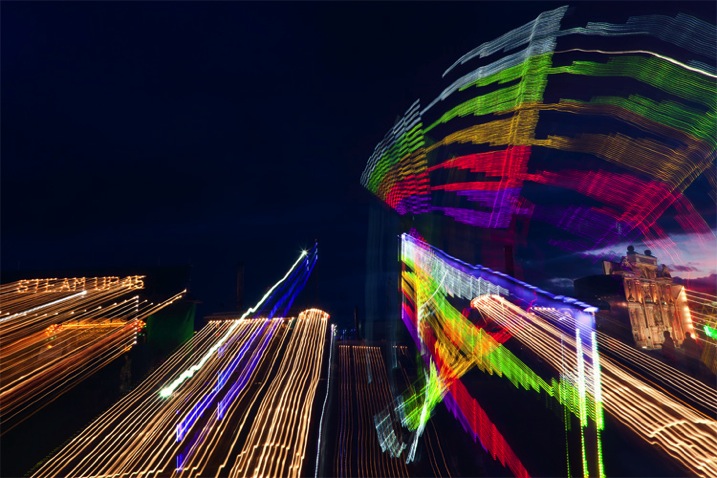
    One of the best reasons to take pictures at fairgrounds is that they’re a great place to get really creative as a photographer and experiment with a range of techniques. You can add movement and drama to your images, even when the rides are not moving. For instance, try to create a zoom burst effect in-camera. Use the slow shutter speed settings detailed previously, then manually change the zoom on the lens, while the shutter is open. Experiment with different shutter speeds and staggered zooms; you may be surprised at how the effect changes. For even wilder shots, try the zoom effect on a ride that is moving – to illustrate the type of effects you can achieve, the two shots below show the same moving fairground ride with the zoom burst technique applied to the second image.

    Steamup452750

    Steamup45zoomburst750

    A good way to add an increased sense of speed to a slower ride, such as the dodgem cars or carousel, is to take a panning shot by moving your camera in line with the moving subject during exposure. The aim is to keep the subject (carousel horse) as sharp as possible and the background as blurry as possible. Shoot in shutter-priority mode and select a speed of 1/30th of a second to start. You can then experiment with slower speeds depending on the level of light and the speed of the subject. Make sure to shoot in continuous shooting mode and, if your camera has it, use automatic focus tracking. Press the shutter half way to activate the focus tracking when the subject enters the frame. Lock focus on the subject and, as smoothly as possible, pan your camera to match the movement of the subject and take your shots.

    Funfairhorsepanning750

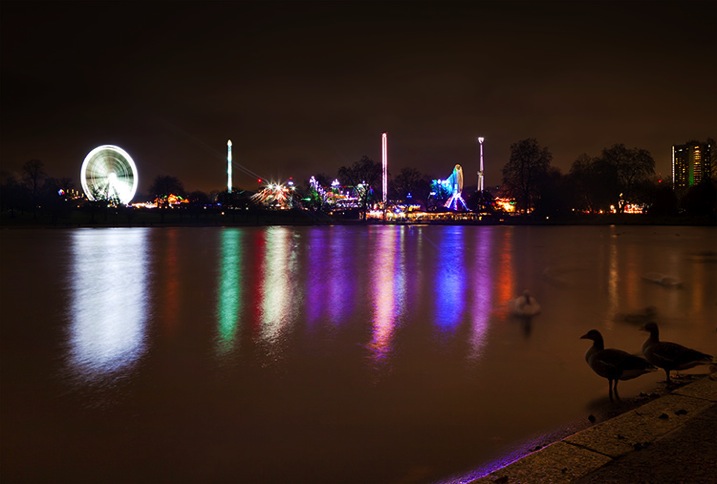
    Finally, when leaving the fair, try to capture the fairground lights as part of a wider landscape shot if possible. If the fair is anywhere near water (on a seaside pier, for example) look out for the creative potential of reflected fairground lights.

    Have fun!

    When taking pictures at the fairground, like at any other busy event, stay safe, keep an eye on your kit and remember to have some fun while you are there!

    Geesespectators750

    googletag.cmd.push(function() {
    tablet_slots.push( googletag.defineSlot( “/1005424/_dPSv4_tab-all-article-bottom_(300×250)”, [300, 250], “pb-ad-78623” ).addService( googletag.pubads() ) ); } );

    googletag.cmd.push(function() {
    mobile_slots.push( googletag.defineSlot( “/1005424/_dPSv4_mob-all-article-bottom_(300×250)”, [300, 250], “pb-ad-78158” ).addService( googletag.pubads() ) ); } );

    The post How to Take Great Photographs at the Fairground by Richard Beech appeared first on Digital Photography School.


    Digital Photography School

  • 7 Incredible Tips for Beginner Photographers

    19 7 Photography Tips For Beginners by Prathap Photography Nature Phootography Simplified

    As a beginner photographer, I was swaying around too much at times not knowing what was good and what was not. It took me several years, and countless hours, to really understand the right path and to focus my energy on the right techniques. If this sounds familiar to you, then here are seven incredible tips that will help relieve you of the dilemma a beginner faces in photography.

    Note: These tips are in no way comprehensive but are definitely a good starting point

    1. Buy an Affordable Camera

    One of the biggest mistakes you could do is to invest all your savings to buy expensive gear. It will soon prove to be a burden and you might end up selling it if you are not able to pull out photographs that are good enough.

    Will you be able to make good photographs from the very beginning? Chances are quite low. Even if you do, you may not be able to justify your purchase, because you do not know if it was the right choice for you or not. Only with experience, will you know which is the best camera or the lens for your photographic needs.
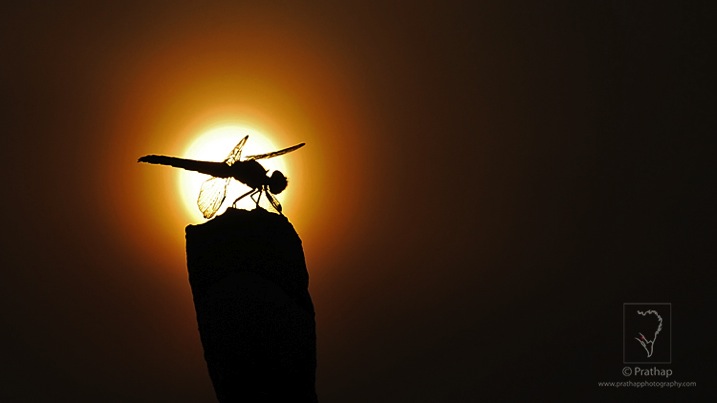
    01 7 Incredible Photography Tips For Beginners by Prathap Photography Nature Phootography Simplified

    My recommendation would be to buy a camera that is affordable to you, and focus your time and energy in building your photography skills as a beginner. That will go a long way in your photography journey.

    2. Learn the Basic Settings

    Settings found on cameras, especially DSLRs, can be overwhelming. To be honest, I haven’t used more than handful of settings to date. Why? Because that’s all I have needed to know!

    Most important of the settings are:

    • Focusing Modes – AF-S (Nikon)/One-Shot AF (Canon), AF-A (Nikon)/AI-Focus AF (Canon), AF-C (Nikon)/AI-Servo (Canon)
    • Camera Metering Modes – Evaluative (Canon)/Matrix (Nikon), Center-weighted Average, Spot, and Partial (Canon)
    • Auto ISO Settings
    • Shooting Modes – Manual, Aperture Priority and Shutter Priority

    If you learn to use the above settings without even thinking, then you will make your camera an extension of yourself, thereby having much more time for creative expression.
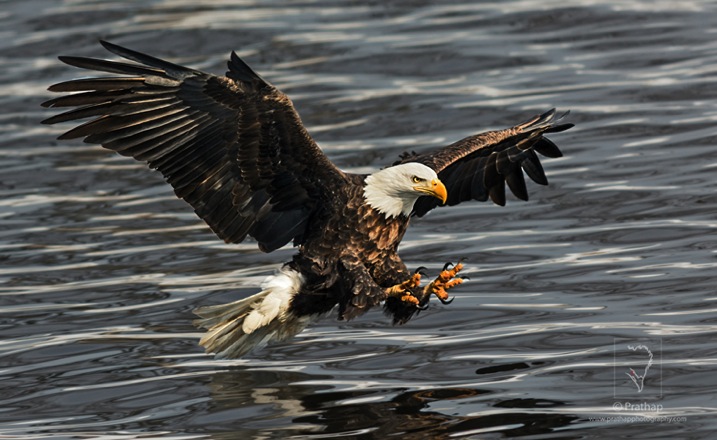
    02 7 Photography Tips For Beginners by Prathap Photography Nature Phootography Simplified jpg

    3. Understand Exposure

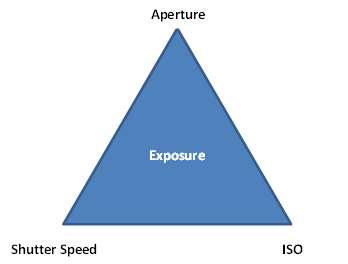
    Making a proper exposure under any conditions is the key to making good quality photographs. Exposure is a combination of three pillars of photography called Aperture, Shutter Speed, and ISO. Exposure Triangle below depicts it in an easier way.
    02 5 7 Photography Tips For Beginners by Prathap Photography Nature Phootography Simplified jpg

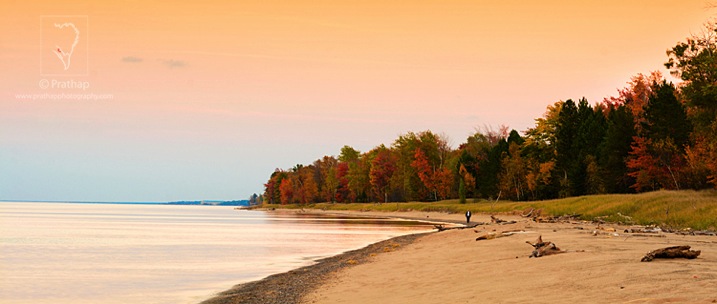
    The amount of light passing through the lens opening (Aperture) for a specified duration of time (Shutter Speed) for which the camera sensor, set at a particular sensitivity (ISO), is open is called the Exposure.
    03 7 Photography Tips For Beginners by Prathap Photography Nature Phootography Simplified jpg

    Changing the value of any of these parameters, results in a change in exposure. That is why it is very important to understand aperture, shutter speed, and ISO to get a strong hold on exposure.

    4. Make Use of Semi-Automatic Modes

    DSLRs are generally precision machines that give you more control than other compact cameras. You must take control of it, and get it to work the way you want.

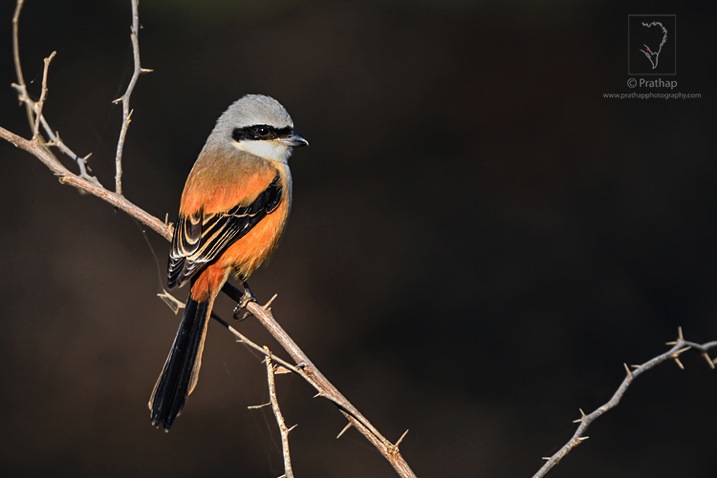
    Learn semi-automatic modes like Aperture Priority or Shutter Priority to get out of Auto mode. Aperture Priority mode allows you to change the aperture while the other settings like shutter speed and ISO (if it is on Auto ISO mode) are chosen by the camera. Learn the effects of aperture on the end results using Aperture Priority. See the impact of depth-of-field as you change the aperture.
    04 7 Photography Tips For Beginners by Prathap Photography Nature Phootography Simplified jpg

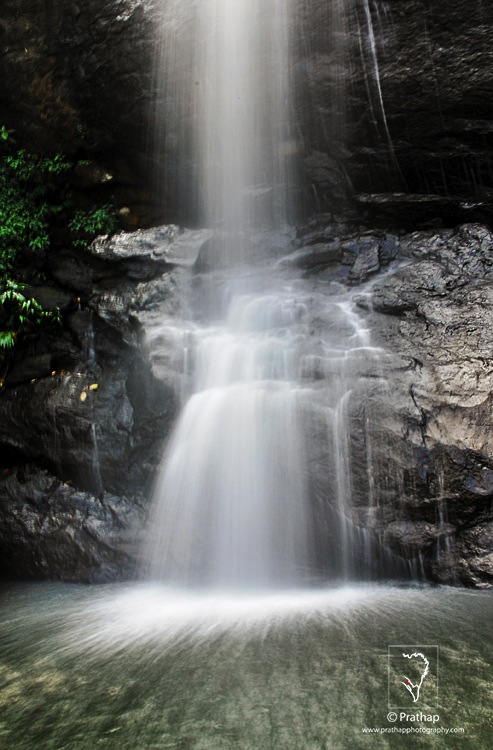
    Shutter Priority mode allows you to change the shutter speed while the other settings like aperture and ISO (if it is on Auto ISO mode) are chosen by the camera. See how Shutter Priority helps you to change shutter speeds and see the effect of motion blur and freeze the action.
    05 7 Photography Tips For Beginners by Prathap Photography Nature Phootography Simplified jpg

    Sometimes, you may end up getting an overexposed or underexposed image while using semi-automatic modes. Exposure compensation technique allows you to compensate for the exposure.

    Once you are comfortable with Aperture and Shutter Priority, getting proficient with Manual mode is quite easy. Manual mode gives you complete control of all three parameters – aperture, shutter speed, and ISO – to make an exposure.

    5. Shoot in RAW Mode

    One of the most overlooked feature of DSLRs, and some advanced compact cameras, is the RAW file format mode. In RAW mode, there is no compression applied to the sensor data, nor there is processing done (except little bit in some cases) like color saturation, contrast and sharpness.

    JPEG format, the default mode, is compressed with different settings offering FINE to NORMAL quality. Compression means there is loss of data since it reduces the size of the photograph (or data) drastically. For instance, if your camera RAW file is 24 MB then you might end up getting a 8 or 9 MB file if you use FINE JPEG mode and it may be just 4 or 5 MB in NORMAL JPEG mode.

    The amount of detail that a RAW file has may give you best possible result in terms of details in the shadow as well as in the highlight regions, considering that you have exposed the scene properly. Though there is an overhead of post-processing needed to convert a RAW file to a readable format like TIFF or JPEG in software, the end result is well worth the effort.

    Another important aspect of using RAW format is that you can set the exposure compensation (within limits) and the white balance in post-processing without actually losing any data.

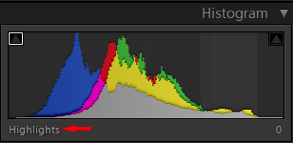
    The image below has overexposed highlights as shown in the histogram.
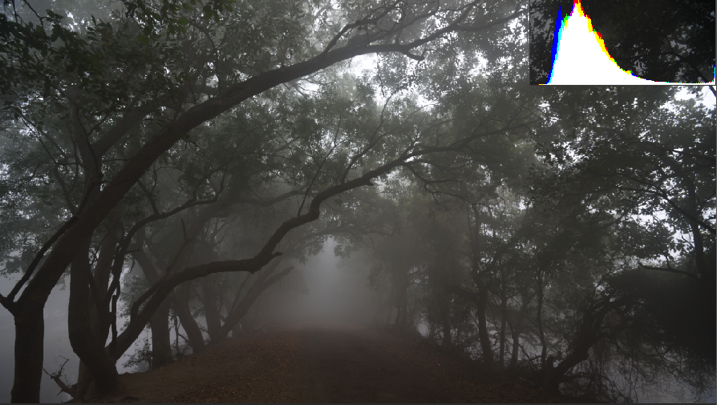
    06 7 Photography Tips For Beginners by Prathap Photography Nature Phootography Simplified jpg

    Using the Exposure Compensation tab I have recovered all the highlights, keeping the details in shadow intact. Also, I have changed the White Balance to Cloudy to get a warmer tone to the entire photograph.
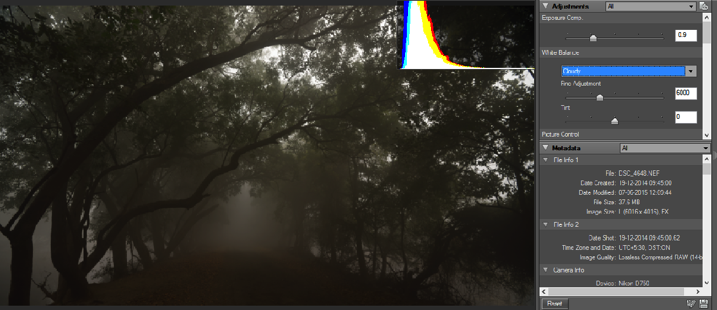
    07 7 Photography Tips For Beginners by Prathap Photography Nature Phootography Simplified jpg

    Here is the processed photograph from of the RAW file shown above. Isn’t it amazing to see how much information a RAW file can hold!
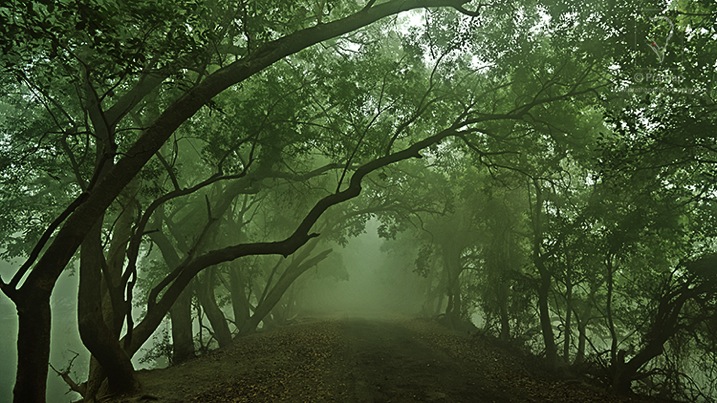
    08 7 Photography Tips For Beginners by Prathap Photography Nature Phootography Simplified jpg

    As a beginner photographer, this might sound overwhelming but it is very easy if you consider the numerous advantages of using RAW format over JEPG format.

    6. Learn to Use Histograms

    Histograms are probably the most useful tool, apart from TTL (Through The Lens) metering, that digital cameras possess.
    A histogram is a graphical representation of the light or color distribution in a photograph. It is a plotted with x-axis showing the light intensity value or the color value (usually a number between 0 and 255) and y-axis showing the frequency of occurrences of that particular value.
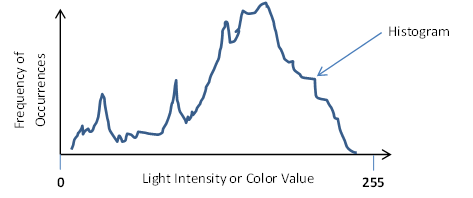
    09 7 Photography Tips For Beginners by Prathap Photography Nature Phootography Simplified jpg

    Your camera’s LCD shows the histogram next to each photograph that you’ve taken. Though you could make out if the photograph is properly exposed or not by looking at it, it does not always tell you the details present in different areas of the image. Also, it isn’t possible to make out the clipped blacks (no details in the darker regions) or washed-out highlights (no details in the brighter regions) on the small LCD display, especially on bright sunny days.
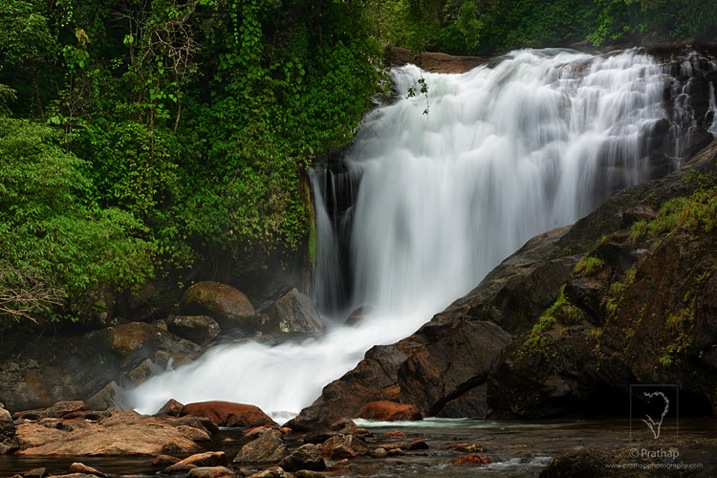
    10 7 Photography Tips For Beginners by Prathap Photography Nature Phootography Simplified jpg

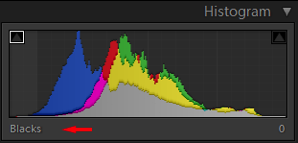
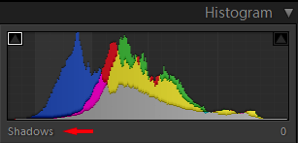
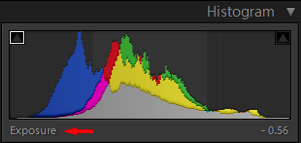
    The histogram, on the other hand, gives you a fair idea of the distribution of the details in dark, shadow, mid-tone, highlight and bright regions. Below screenshots show one such example:
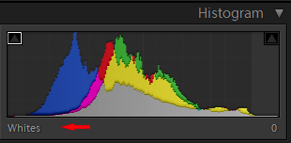
    11 7 Photography Tips For Beginners by Prathap Photography Nature Phootography Simplified jpg 12 7 Photography Tips For Beginners by Prathap Photography Nature Phootography Simplified


    13 7 Photography Tips For Beginners by Prathap Photography Nature Phootography Simplified 14 7 Photography Tips For Beginners by Prathap Photography Nature Phootography Simplified


    15 7 Photography Tips For Beginners by Prathap Photography Nature Phootography Simplified

    If the histogram is skewed towards the extreme left, then the image is underexposed.
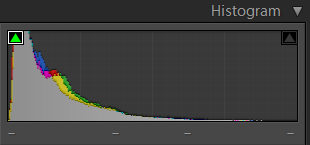
    16 7 Photography Tips For Beginners by Prathap Photography Nature Phootography Simplified

    If the histogram is skewed towards the extreme right, then the image is overexposed.
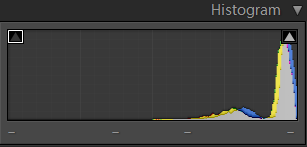
    17 7 Photography Tips For Beginners by Prathap Photography Nature Phootography Simplified

    A properly exposed histogram is the one which does not have the clipped blacks (extreme left) or overexposed highlights (extreme right).
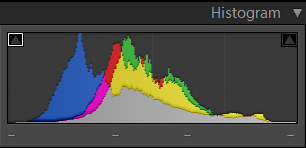
    18 7 Photography Tips For Beginners by Prathap Photography Nature Phootography Simplified

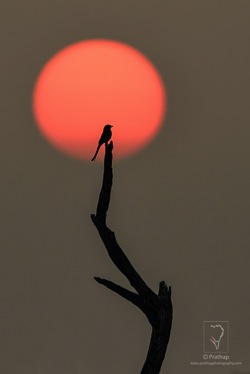
    Though at times an image could be intentionally underexposed (to get a dark background in case of portraits) or overexposed (in case of sunrise/sunset photography where capturing details in the sun is not be possible) to get certain artistic impact.

    7. It’s All About Light and Composition

    One of the most often committed mistakes of beginner photographers is to spend a whole lot of time reading, debating, dreaming about the camera and accessories.

    But photography is all about light and composition. If there is no light, there is no photograph. No matter how advanced or expensive your equipment is, at the end of the day it is you who have to take the photograph. At the end of the day, how you take the photograph, matters more than the camera or the lens you use.

    If you see a masterpiece of Ansel Adams, would you ask which equipment did he use, or would you immerse yourself in the beauty of the photograph?

    The skillful use of light and composition is what makes a great photograph. Learning to see the light and how it models the scene around you should be the first step in learning photography. Take note of how light changes the look and feel of the same subject in the course of the day.

    Light has quality and direction.

    Quality of light is best during early (two hours post sunrise) and late hours (one hour before sunset) of the day. Pre-dawn and post-dusk hours can help you witness, and photograph, some of the most spectacular landscape photographs.

    Direction of the light could be frontal, side or backlit depending on where the sun is located relative to the subject. Each has its own application and should be studied thoroughly.
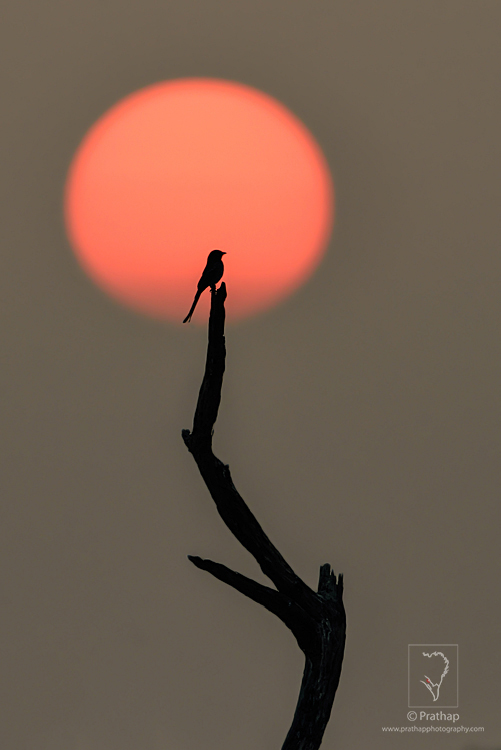
    19 7 Photography Tips For Beginners by Prathap Photography Nature Phootography Simplified

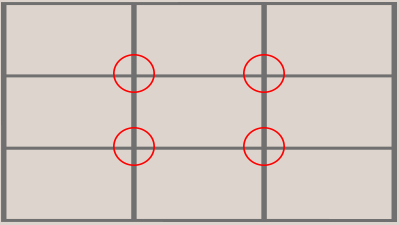
    Composition is the key differentiator between a bad and a good photograph. A photograph that is carefully composed demands viewers’ attention as opposed to a snapshot. Photography composition is a way of organizing the elements in a scene to make a statement that is understood by the viewer. The Rule of Thirds is one of the best photography composition techniques that will quickly improve your photography.
    20 7 Photography Tips For Beginners by Prathap Photography Nature Phootography Simplified

    By keeping the subject on one of these four power points (circled in red) will yield a more dynamic photograph, because there is a visual tension created due to uneven negative space.
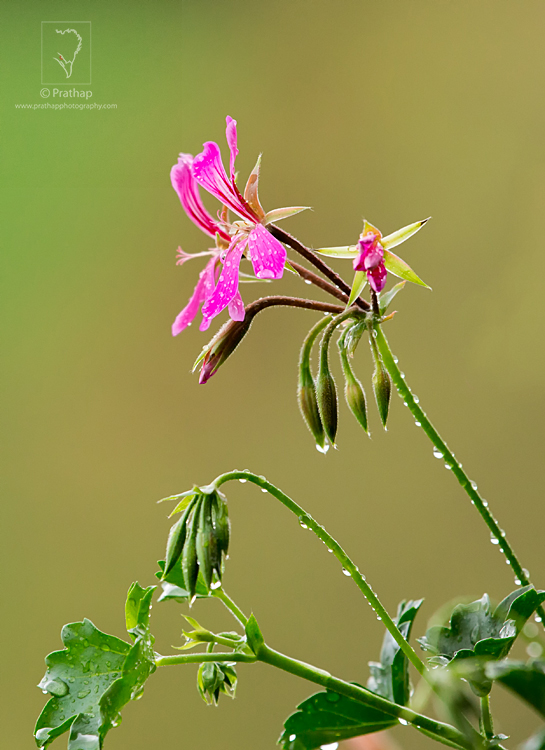
    21 7 Photography Tips For Beginners by Prathap Photography Nature Phootography Simplified

    Conclusion

    I hope you enjoyed reading this article and got some good ideas about the concepts that you should focus on as a beginner in photography. Have a great time!

    googletag.cmd.push(function() {
    tablet_slots.push( googletag.defineSlot( “/1005424/_dPSv4_tab-all-article-bottom_(300×250)”, [300, 250], “pb-ad-78623” ).addService( googletag.pubads() ) ); } );

    googletag.cmd.push(function() {
    mobile_slots.push( googletag.defineSlot( “/1005424/_dPSv4_mob-all-article-bottom_(300×250)”, [300, 250], “pb-ad-78158” ).addService( googletag.pubads() ) ); } );

    The post 7 Incredible Tips for Beginner Photographers by Prathap DK appeared first on Digital Photography School.


    Digital Photography School

  • 8 Tips for Gorgeous Fashion Photography

    Most young photographers are convinced that fashion photography is an impossible dream. The glamorous international lifestyle, the huge audience, the awe-inspiring photoshoots and the high-paying checks are only some of the reasons why this sought-after profession seems inaccessible. But while there are no easy checklists or sure-fire plans to ensure your success, there are certain small steps to bring you Continue Reading
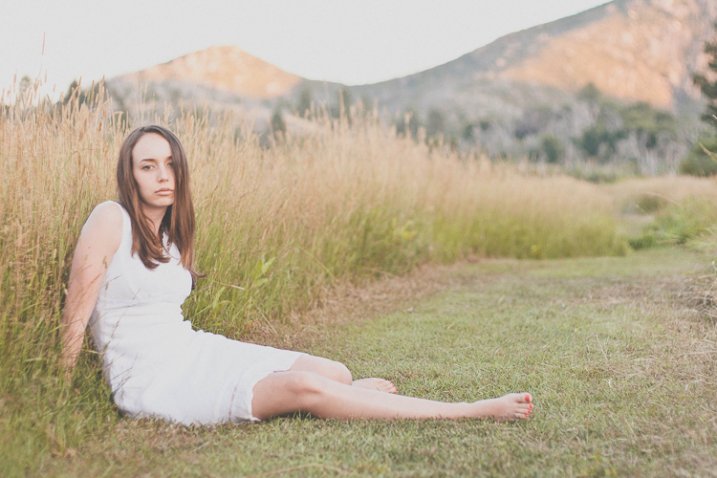
    The post 8 Tips for Gorgeous Fashion Photography appeared first on Photodoto.


    Photodoto