Category: Photography

  • Weekly Photography Challenge – Shadows

    To have a strong shadow you must have a hard light source, one that is small and harsh. That includes:

    • Direct sunlight
    • A spotlight
    • A bright flashlight
    • Streetlights

    Have a look on an overcast day – you cannot see your own shadow.

    Oiluj Samall Zeid

    By Oiluj Samall Zeid

    Weekly Photography Challenge – Shadows

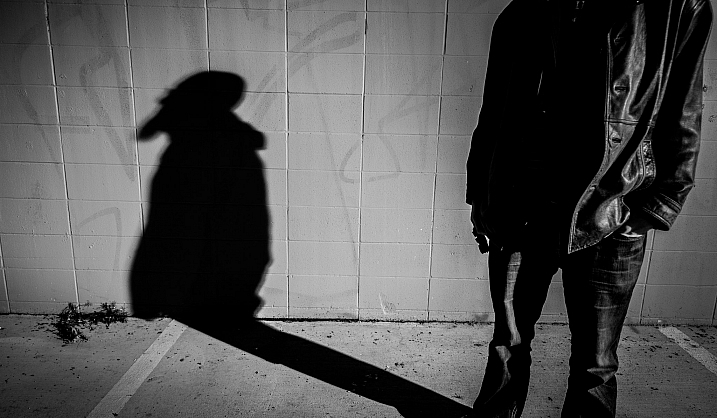
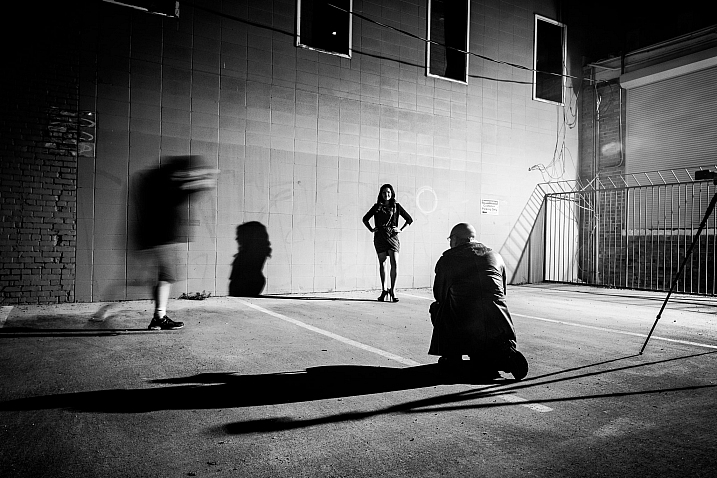
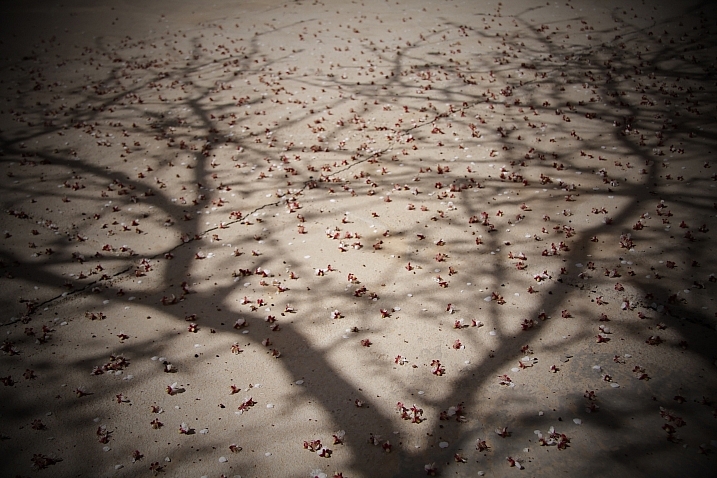
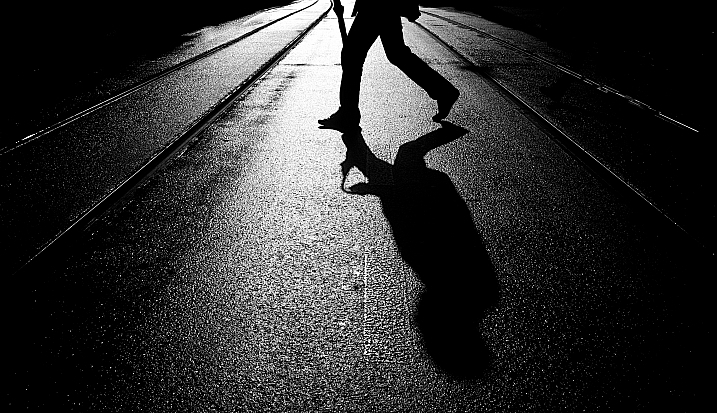
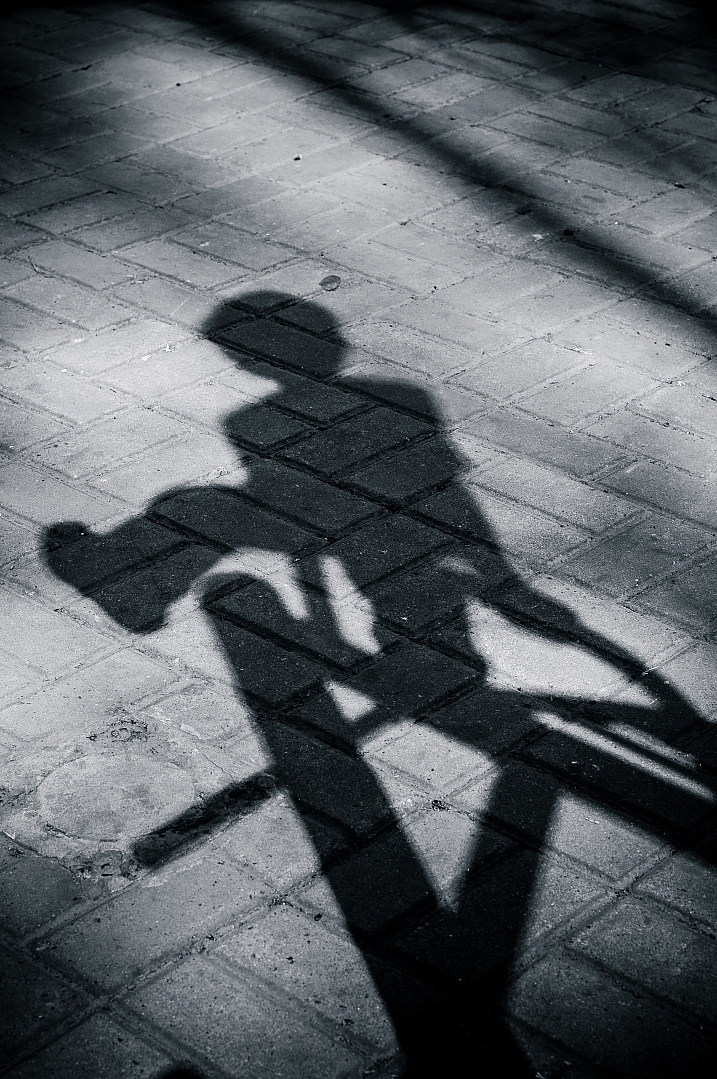
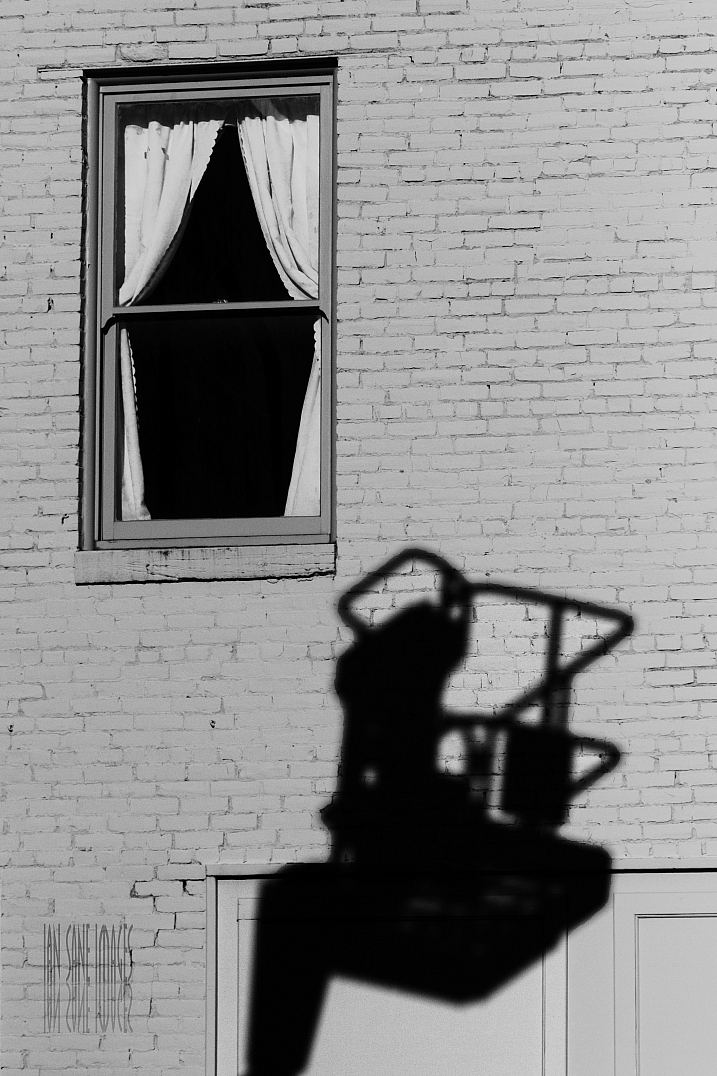
    This week it’s your job to find and photography some shadows (like these). Keep in mind what a good shadow photograph is:

    • Shows the shape of something easily identifiable
    • Dramatic
    • Graphic
    • About shapes and form
    • Often found late in the day or early morning when the sun is low and the shadows are longer

    On the other side of the coin also consider what is not a shadow:

    • A silhouette
    • A reflection
    Hernán Piñera

    By Hernán Piñera

    The image above is a silhouette not a shadow. The light is coming from behind the subject and while there is a shadow the outline of the subject is the actual person not a shadow. This is the key difference.

    Stefano Corso

    By Stefano Corso

    In the image above the outlines are reflections, not shadows.

    Be clear on the difference between the three when you head out to shoot your shadows like these:

    Marina Del Castell

    By Marina del Castell

    TumblingRun

    By TumblingRun

    Loren Kerns

    By Loren Kerns

    Shadow selfies work great sometimes too. Watch for them as you go about your day:

    KimManleyOrt

    By KimManleyOrt

    Todd Lappin

    By Todd Lappin

    Hernán Piñera

    By Hernán Piñera

    John Sonderman

    By John Sonderman

    Scott Schiller

    By Scott Schiller

    Ian Sane

    By Ian Sane

    Share your images below:

    Simply upload your shot into the comment field (look for the little camera icon in the Disqus comments section) and they’ll get embedded for us all to see or if you’d prefer upload them to your favourite photo sharing site and leave the link to them. Show me your best images in this week’s challenge. Sometimes it takes a while for an image to appear so be patient and try not to post the same image twice.

    Stefano Corso

    By Stefano Corso

    Kumar's Edit

    By Kumar’s Edit

    Evelyn Berg

    By Evelyn Berg

    Ruben Steeman

    By Ruben Steeman

    googletag.cmd.push(function() {
    tablet_slots.push( googletag.defineSlot( “/1005424/_dPSv4_tab-all-article-bottom_(300×250)”, [300, 250], “pb-ad-78623” ).addService( googletag.pubads() ) ); } );

    googletag.cmd.push(function() {
    mobile_slots.push( googletag.defineSlot( “/1005424/_dPSv4_mob-all-article-bottom_(300×250)”, [300, 250], “pb-ad-78158” ).addService( googletag.pubads() ) ); } );

    The post Weekly Photography Challenge – Shadows by Darlene Hildebrandt appeared first on Digital Photography School.


    Digital Photography School

  • 24 Dark and Mysterious Shadow Images

    Light and shadow are key in photography. You cannot have one without the other, and how light is used in the image set the tone and mood of it. Images with high contrast, and strong shadows can be very dramatic.

    Have a look and see if you agree that these shadow images have a certain mystique about them.

    I’ll start off with a few of my own images taken on a “shadows” themed photo walk a couple years ago:

    Darlene Hildebrandt

    By Darlene Hildebrandt

    Darlene Hildebrandt

    By Darlene Hildebrandt

    Darlene Hildebrandt

    By Darlene Hildebrandt

    Hapal

    By hapal

    Magdalena Roeseler

    By Magdalena Roeseler

    Bryon Lippincott

    By Bryon Lippincott

    Ian Sane

    By Ian Sane

    Photograph O O by Jianwei Yang on 500px

    O O by Jianwei Yang on 500px

    Photograph Round shadows by Junichi Hakoyama on 500px
    Round shadows by Junichi Hakoyama on 500px

    Photograph Living Shadows by Jorge Pena on 500px

    Living Shadows by Jorge Pena on 500px

    Photograph Lead or Follow? by Krystian Olszanski on 500px
    Lead or Follow? by Krystian Olszanski on 500px

    Photograph Afternoon Shadow by Joe Josephs on 500px

    Afternoon Shadow by Joe Josephs on 500px

    Photograph Untitled by Spyros Catramis on 500px

    Untitled by Spyros Catramis on 500px

    Photograph shadows of people by Mister Mark  on 500px

    shadows of people by Mister Mark on 500px

    Photograph They also get along by Ignasi Jansà on 500px

    They also get along by Ignasi Jansà on 500px

    Photograph Love by Candle Light by Ticknor Photo on 500px

    Love by Candle Light by Ticknor Photo on 500px

    Photograph Salsa Shadows by Joan Herwig on 500px

    Salsa Shadows by Joan Herwig on 500px

    Photograph Shadow dancing by Didier Vanspranghe on 500px

    Shadow dancing by Didier Vanspranghe on 500px

    Photograph dancing with lights by nave aviani on 500px

    dancing with lights by nave aviani on 500px

    Photograph ????? by umedust ?? on 500px

    ????? by umedust ?? on 500px

    Photograph Shadowdance by Alex Noriega on 500px

    Shadowdance by Alex Noriega on 500px

    Photograph Protector ! by Mardy Suong Photography on 500px

    Protector ! by Mardy Suong Photography on 500px

    Photograph 58/365  Bottle Neck by Monika Bigelow on 500px

    58/365 Bottle Neck by Monika Bigelow on 500px

    Photograph Fork Shadow by Michaël Luitaud on 500px

    Fork Shadow by Michaël Luitaud on 500px

    googletag.cmd.push(function() {
    tablet_slots.push( googletag.defineSlot( “/1005424/_dPSv4_tab-all-article-bottom_(300×250)”, [300, 250], “pb-ad-78623” ).addService( googletag.pubads() ) ); } );

    googletag.cmd.push(function() {
    mobile_slots.push( googletag.defineSlot( “/1005424/_dPSv4_mob-all-article-bottom_(300×250)”, [300, 250], “pb-ad-78158” ).addService( googletag.pubads() ) ); } );

    The post 24 Dark and Mysterious Shadow Images by Darlene Hildebrandt appeared first on Digital Photography School.


    Digital Photography School

  • Are Your Photo Backups Rock Solid?

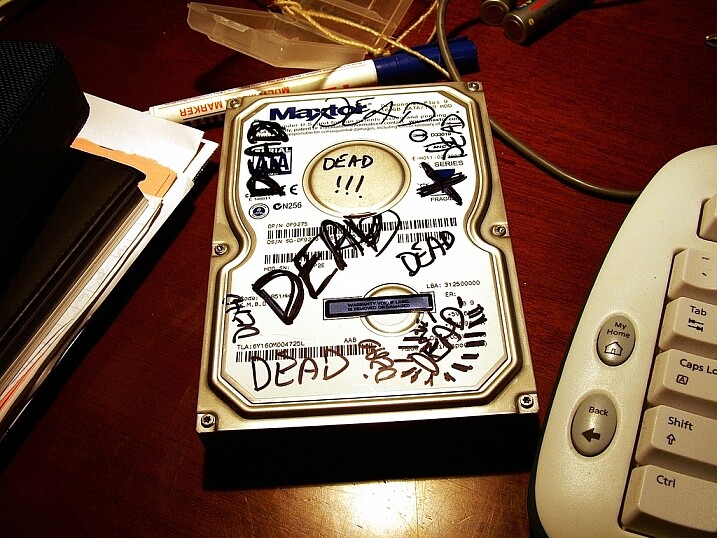
    What would you do if your main computer was stolen, permanently lost, or just completely died?

    Did you just get shivers up your spine? If not, you probably have some form of a backup system for your data and photos. That’s great!

    Rust.bucket

    By rust.bucket

    If you got shivers, then you best start thinking about backing up your images, pronto. Let me suggest Backing Up and Saving Your Images: Part 1 as a place to get started.

    Even if you are religiously backing up your photos, are you testing those backups? How often?

    This article is intended to get you thinking about how precious your images are to you, and if you are doing what you can to ensure they don’t go POOF, and are gone forever.

    A Moment to Give Pause

    My iMac was recently stolen. I got lucky, real lucky. The thieves did not take my external Network Attached Storage (NAS), its backup disk, nor my iMac backup disk.

    It’s because those items were left behind (which were valued at more than my old iMac) that I am not still crumpled into the fetal position, crying my life away in the corner of the basement.

    One thing I learned from this experience is that Time Machine, Apple’s native backup facility, is not perfect. I was not able to use the graphical interface to restore my old profile to my new machine, and that’s not even talking abut the photos themselves. In the end I had to fall back on my days as a systems administrator and relearn Unix command line tools to find and copy the files from my backup, over to my main machine.

    Keep More Than One Copy

    First, if your images are highly valuable to you, you should be keeping more than one copy of all of them (and any associated catalogs like Lightroom). This means at least another disk, or group of disks, backing up your originals.

    Think to the future when buying backup discs. If you currently have 500GB of images, I would buy at least a 2TB backup device, like an external harddrive. A four times multiplier should be used at least, depending on your rate of photo capture (and your ability to filter photos as they come in). If you are on a tight budget, go for two times your current size, and trust that harddrives get cheaper as time goes on.

    Either way, do the best you can to capture all of your images on a single backup device.

    Keep Them Separate

    Second, if you can afford it, and if the level of protection you need warrants it, keep a third copy of your files off-site. I mentioned getting lucky that the thieves saw no value in my external storage devices and I intend to never have to be so lucky again.

    347561757_200a98ca5c_b

    Photo by: wonderferret/flickr

    Some backup services, like Apple’s Time Machine feature, make it easy to plug in two backup drives and let the software automatically make backup copies of not only pictures, but all computer files to both discs. Once a full backup is built on both drives, you take one drive off-site. A relative’s house, a friend’s house, or even a safe deposit box. Then, on a regular schedule (mine is once a week), swap the drives.

    This way, at worst, you lose a week’s worth of changes if both your main computer and your backup drive go missing, or are caught in a house fire, flood, or other disaster.

    Consider Online Storage

    Online. The Cloud. That jargon is shorthand for “someone else’s computer”. It can be helpful when considering where to keep a backup of your images.

    There are now a plethora of services that, after you hand them some cash, will store your images for you. I suggest doing this as only a backup, but for casual users it might be handy for all your storage. Just remember, those images are on someone else’s computer.

    PC magazine often does a decent job of reviewing products and they have a useful list of online backup solutions here. Also don’t forget other services like Amazon and Google’s Picasa which currently have unlimited photo storage (certain restrictions apply).

    Understand What a Recovery Will Entail

    Now that you have your photos backed up, do you know what it will take to bring them back to life if everything goes south?

    Many of us are okay with storing our data on other people’s servers (the cloud), but fail to remember it will possibly take a couple of days to recover the images if things fail. What about a partial failure? Can your backup and recovery software detect a partial loss of data and fill in the gaps? Or will you be left to manually sift through the figurative ashes and fill the holes?

    Get to know your backup software not “when I have a moment”, but today. Maybe tomorrow, but no later! You don’t have to obtain guru status, but you should know your way around recovering photos (and other data) while things are calm. I can tell you from experience that when the stuff hits the fan, and the panic of losing all your work sets in, that’s no time to be learning new software.

    Screen Shot 2015-06-23 at 3.54.21 PM

    Learn your backup and recovery software

    Schedule Tests of Your System

    There’s only one way to know if your backups work – test them!

    The systems administrator in me says you should test your backups monthly. But the realist in me knows few of you will ever do that unless you have an intern, or are making $ 10,000 per month from your photography business, or both.

    Be realistic, and again, it will depend on how important your photos are to you. Realistically I suggest one test every three months. Once a season. That keeps your recovery skills fresh enough (hint: write out the steps you take for recovery so you don’t have to learn it new each time) that an honest recovery won’t take too long.

    So tell me, are your photo backups rock solid?

    If photography is your livelihood, or even if you just take family pictures, it’s best to find out right now with a test rather than find holes in your system after things have gone wrong.

    googletag.cmd.push(function() {
    tablet_slots.push( googletag.defineSlot( “/1005424/_dPSv4_tab-all-article-bottom_(300×250)”, [300, 250], “pb-ad-78623” ).addService( googletag.pubads() ) ); } );

    googletag.cmd.push(function() {
    mobile_slots.push( googletag.defineSlot( “/1005424/_dPSv4_mob-all-article-bottom_(300×250)”, [300, 250], “pb-ad-78158” ).addService( googletag.pubads() ) ); } );

    The post Are Your Photo Backups Rock Solid? by Peter West Carey appeared first on Digital Photography School.


    Digital Photography School

  • Natural Versus Artificial Light: Which Do You Prefer Working With?

    Many photographers at one point or another are faced with this question; is it better to use natural or artificial light when taking photos? There is definitely not a right or wrong answer, although as a photographer, you’re sure to have your own strong opinions. In this article, we’ll review the key differences between natural and artificial lighting sources, as well as the pros and cons of using them.

    Defining Natural and Artificial Light

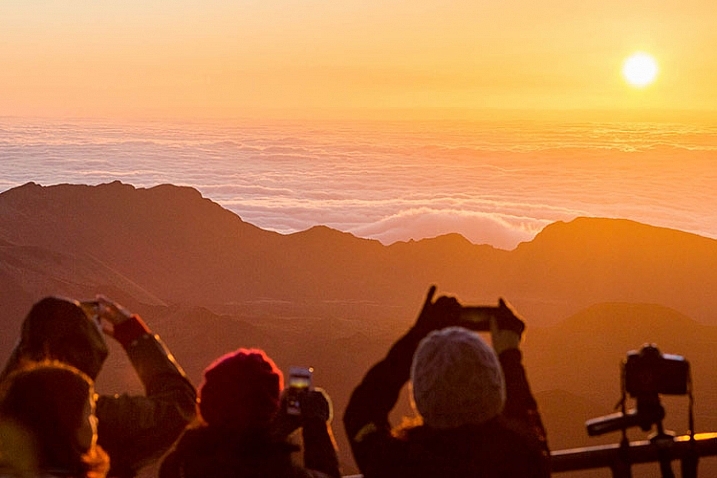
    To begin, let’s clarify the definitions of natural and artificial lighting. To keep things simple, natural lighting can also be thought of as available light, such as that produced by the sun or the moon. Artificial lighting is produced via another source, such as a studio strobe, speedlight, LED light, your camera’s pop-up flash, or even a streetlight or lamp.

    Natural light2

    Benefits of Using Natural Light

    The biggest benefits of using natural lighting is that it is free, abundant, and very easy to find. There’s no need to make huge investments in lighting equipment to find gorgeous natural light to pull off brilliant shots. All you need is a camera and some sun or moonlight, and you can begin shooting immediately! If you ever choose to upgrade your natural lighting approach, the tools of the trade are also very cheap, consisting mainly of reflectors and diffusers to bounce or manipulate the available light. Due to the ease of use and acquisition of natural lighting, it’s generally recommended that beginning photographers start experimenting with natural light before introducing artificial light to help understand how light works.

    Cons of Using Natural Light

    While natural lighting is abundant and easy to incorporate into photography, it can be challenging for the simple fact that sunlight varies greatly. Depending on location, season, weather, and time of the day, natural lighting can produce differing colors and contrast in your images. For example, midday sun tends to produce neutral white colors and extremely high contrast, while golden hours of sunrise and sunset have very warm colors and medium contrast. Thus, the look you’re going for will determine the time and location of your photo shoot, unless you harness additional tools such as reflectors, diffusers, and lens filters.

    Natural light1

    Benefits of Using Artificial Light

    If you’re a fan of being able to manipulate and control every aspect of your photo shoot, artificial light will better suit your needs. Since artificial lighting has little to do with natural sources, it is a ceaseless light source that is available at any time of the day, meaning you don’t necessarily have to plan your photo shoot around the weather, or availability of sunlight. Depending on the artificial light source you choose, sunlight or even moonlight can be replicated, creating images that appear to have been shot with natural light, but at a time of your choosing.

    While artificial light may have a reputation for sounding complicated and expensive, there’s a wide range of lighting gadgets available for photographers; ranging from cheap DIY solutions to top-of-the-line professional grade strobes, and lots of options in between. Some lights can have tricky settings, but many are relatively straightforward, especially continuous lighting sources such as LED lights that have simple dimming switches.

    Off camera flash portrait photography

    Off-camera flash portrait photography

    Cons of Using Artificial Light

    Even though artificial light sources offer you more control over photo shoots, it comes with the burden of needing more gear, and time to set it all up. Unlike the sun, artificial lighting costs money, even if you opt for DIY solutions such as candles or desk lamps. Professional grade artificial lighting sources will also need to be held in place with light stands, and possibly even modified with umbrellas, beauty dishes, and soft boxes.

    Depending on the photo you have in mind, you may need multiple artificial light sources to balance your image out. There are also other accessories needed such as batteries or power cables and plugs, and you’ll need a dedicated studio or space to set your lights up. Long story short, artificial lighting can adds lots of extra moving parts to your photo shoot, that cost additional time and money, not to mention require lots of practice.

    When to use Natural or Artificial Lighting?

    What type of lighting you use will ultimately come down to your personal preference and experience as a photographer, as well as your budget and the ideal image you’re trying to create. Artificial lighting typically takes some time and practice to begin using properly; whereas natural lighting is much easier to get started with from the get-go. There are of course exceptions to these rules, but generally natural lighting is usually easiest to use for documentary, street, or run-and-gun photography when you don’t have a lot of time to set up a controlled photo shoot. On the flip side, artificial lighting is usually preferred for commercial, product, and fashion photography when there’s both a budget, and ample resources to create the photo.

    Off camera flash portrait photography

    Which do You Prefer?

    As noted earlier, there are very strong opinions for and against using natural and artificial lighting for photography. Which camp do you fall into, and why?

    googletag.cmd.push(function() {
    tablet_slots.push( googletag.defineSlot( “/1005424/_dPSv4_tab-all-article-bottom_(300×250)”, [300, 250], “pb-ad-78623” ).addService( googletag.pubads() ) ); } );

    googletag.cmd.push(function() {
    mobile_slots.push( googletag.defineSlot( “/1005424/_dPSv4_mob-all-article-bottom_(300×250)”, [300, 250], “pb-ad-78158” ).addService( googletag.pubads() ) ); } );

    The post Natural Versus Artificial Light: Which Do You Prefer Working With? by Suzi Pratt appeared first on Digital Photography School.


    Digital Photography School

  • 6 Easy Steps for Post-Processing a Low-Light Photo in Lightroom

    The word photography comes from the ancient Greek words for “light” and “drawing”. With the presence of light being a rather important constituent in the making of a photograph, it is no wonder that low-light conditions are often a photographer’s nemesis.

    While so many other lighting variables have an immense impact on your images – the quality, direction, color temperature, and intensity – but if you don’t have enough light to begin with, none of these really matter.

    This article will walk you through my approach to post-processing an image taken in poorly lit conditions.

    A poorly lit image after editing.

    With a little Lightroom sorcery, poorly lit images can be brought back to life.


    The key is to start with as strong a foundation as possible, which is to maximize the quality of the image captured in camera. For more detailed advice on how to accomplish this, have a read of:

    • How to Shoot in Low Light – 9 Commonly Asked Questions
    • A Guide to Shooting Outdoors in Low Light Conditions
    • Another great resource to bookmark is Cheat Sheet: What Gear and Settings to Use for Low Light Photography

    It is also worth noting that, as far as I’m concerned, the debate over whether to shoot in RAW or JPEG does not apply here. If you are shooting in low-light conditions, shooting in RAW is imperative. You want to ensure that you have as much latitude as possible to maximize post-processing efforts.

    I will also echo the sentiments of others when I say, you should not rely on editing software as a crutch. Don’t be lazy. Make every effort to use lower ISO settings, noise reduction (NR) features, use slower shutter speeds, etc., in camera first.

    What is low-light?

    So what do I mean by low-light anyway? I believe this is one factor which contributes to the confusing nature of this topic to begin with. When I think of shooting in low-light, I imagine a scenario where I have a hard time seeing well enough to frame the shot, the camera may struggle to find focus, and without some work, the final image will make it apparent that shooting conditions were challenging.

    This is when having better quality equipment pays off. Those of you with camera bodies which can produce clean shots at high ISO settings (just take a look at the Sony A7s) have a distinct advantage from the get go. Throw in a wide aperture, fast, lens and the quality of images these device can capture in near pitch dark is absolutely incredible – especially compared to 10 years ago.

    With experience, you will learn the limits of your equipment and editing software to achieve the results which you consider acceptable.

    Example

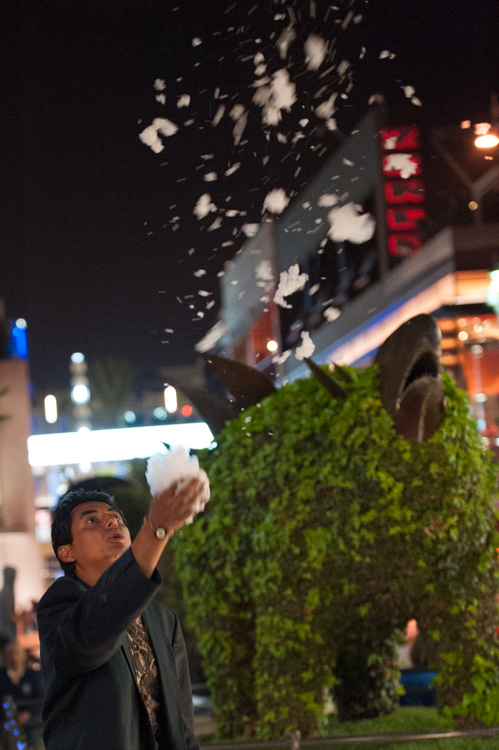
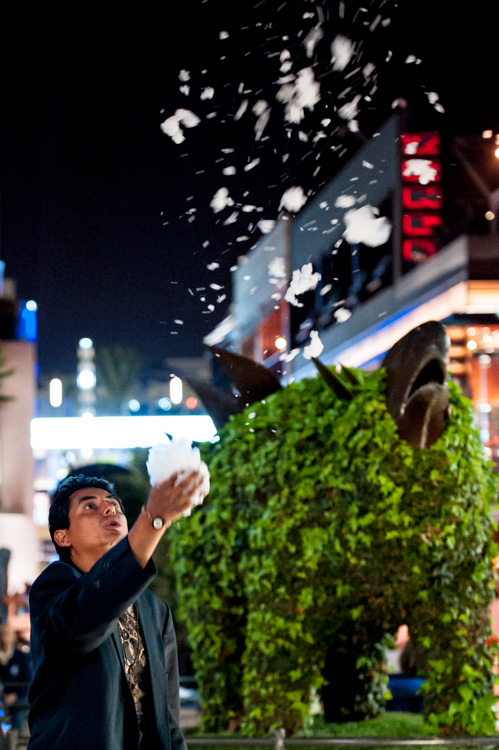
    I will work with this street photo I snapped in Santa Monica, California as an example. It was taken long past sunset, with only some dim illumination from distant store windows and street lights. Some hoodlums had dumped soap into a fountain which had then churned into a frothing mess when this passerby stopped, grabbed a handful and blew the suds into the air.

    A night shot taken in poor lighting with a Nikon D700 at 70mm, f/2.8, ISO 4,000 and 1/60th of a second.

    A night shot taken in poor lighting with a Nikon D700 at 70mm, f/2.8, ISO 4,000 and 1/60th of a second.

    The combination of the image being a RAW file, and the less-than-ideal conditions it was taken in, has resulted in an image that is flat, has inaccurate color temperature, is low contrast, and has some noise. There is no exact process that can be replicated on every image, but I will walk you through the steps I toook to bring this photo back to life.

    1. Check for clipped highlights, shadows

    You can do this in two ways:

    1. Hold the Alt key while clicking on the highlights or shadows slider
    2. Hover the mouse over the small triangles in the upper corners of the histogram.

    This will quickly and easily identify the areas of the photo which contain no information, and therefore no details to recover.

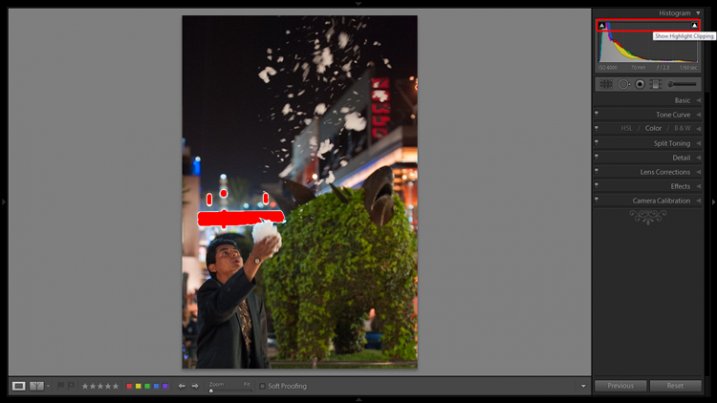
    Clipped highlights are shown in red

    Hovering the mouse over the triangle in the upper right corner of the histogram will illuminate all clipped highlights.

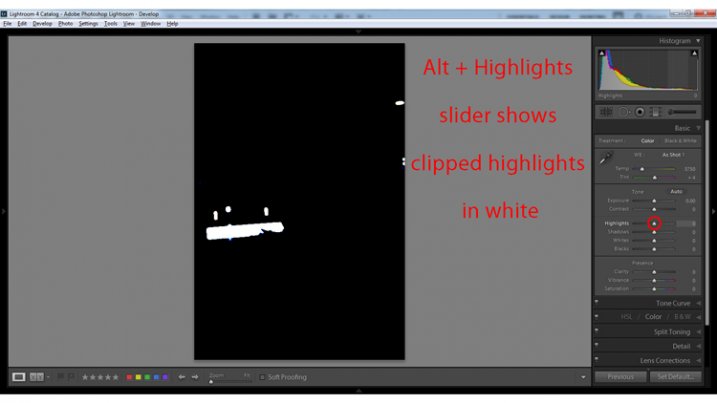
    Alt + clicking on the Highlights slider shows clipped highlights

    Alt + clicking on the Highlights slider shows clipped highlights

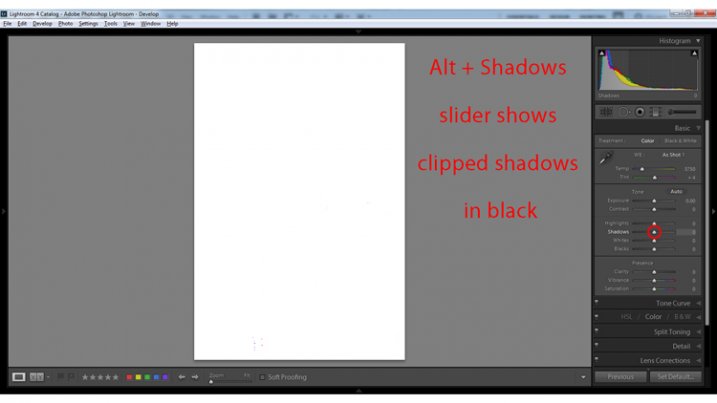
    Alt + Shadows slider shows all clipped shadows.

    Alt + Shadows slider shows all clipped shadows. This photo has no clipped shadows.

    For shooting in low light, you will most often be concerned with clipped shadow areas. If details important to the image are clipped, it may not be salvageable – this is a judgment call to make on an individual basis.

    Although it is underexposed, the image has no clipped shadows, and only a small bit of clipped highlights.

    2. Adjust exposure correctly for the subject

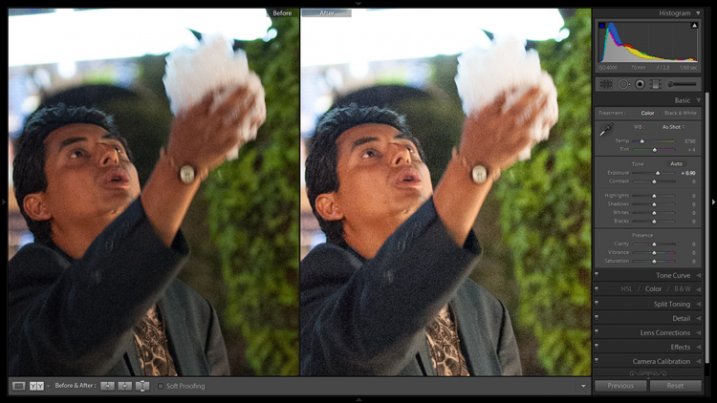
    For this image, the person is the subject so I want him to be properly exposed therefore I will zoom in on him and set the exposure. I want his face to be a bit brighter and clearer so I’ve increased exposure 9/10 of a stop (+0.90).

    Before and after of exposure adjustment.

    The exposure was increased to brighten the subject. Before and after of exposure adjustment.

    3. Increase contrast

    This is going to involve a process of trial and error, adjusting several sliders, and analyzing the effects they have on the image in combination with one another.

    From what the histogram showed me, and what is obvious by looking at the image, there are significant portions of the image that are dark – the sky, the subjects jacket, etc. These dark areas have nothing to add to the image and after increasing the exposure, have become a lighter shade of gray and have created more noise.

    Therefore, I am going to purposefully clip some of these shadowed areas by decreasing the Blacks slider value. I prefer to drag the slider all the way to -100, and start increasing it until the image looks good. At -70 the shadows obscure unimportant details which brings more attention to highlighted areas.

    Contrast can be adjusted further in the Tone Curves panel. If this is uncharted territory for you, the article Lightroom’s Tone Curve Explained is a good place to start.

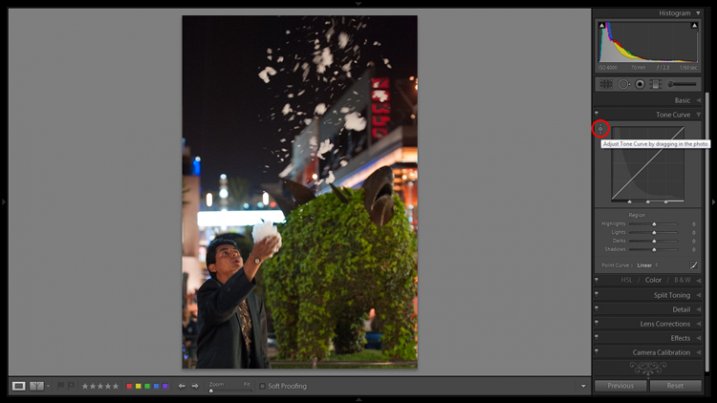
    Image showing location of drag and adjust tool in Tone Curve panel

    A shortcut for adjusting all similar tones in an image can be found in the Tone Curve panel.

    TIP: Using the click and drag tool in the upper left hand corner of the Tone Curves panel is a quick and easy way to adjust tones in your image. Click the tool to activate it; place it over the tone in the image that you wish to adjust (shadows, highlights, etc.); click and drag the tool up or down and it will adjust all similar tones in your image automatically.

    4. White balance

    As exposure and contrast affect the colors in an image, I prefer to make those adjustments before dialing in the white balance. There are two ways to accomplish this:

    1. Click and drag the Temp slider
    2. Use the Eye Dropper (targeted adjustment) tool to let LR attempt to correct the white balance automatically
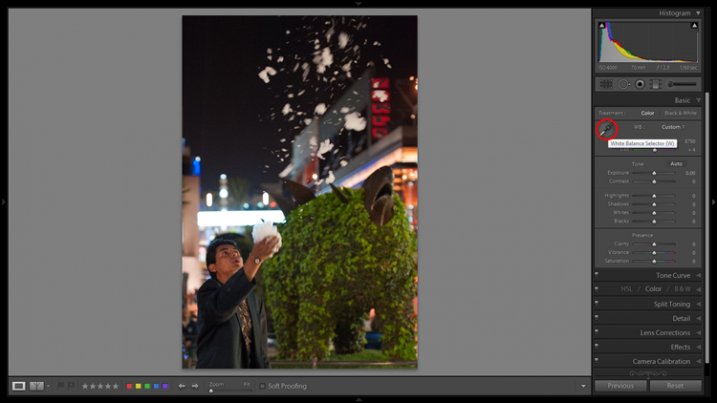
    Image showing the location of the Eyedropper tool.

    The Eyedropper tool is an automated feature that will approximate correct white balance for you.

    The key to the Eye Dropper tool is to select an object in your image that should be pure white (or anything that you know is a neutral tone like black or gray). I find the tool can sometimes give you a starting point from which to work, but very rarely gives you an accurate result straight away.

    As a result of the sodium vapour street lights, this image is far too warm, has turned the subject’s skin orange, and has made the greens too yellow. I’ve reduced the white balance color temperature from 3,750 degrees to 3,300.

    TIP: In the Develop Module, the forward slash key toggles between before and after, so you can quickly see the adjustments you have made. You can also click the the box in lower left with two Y’s, which shows a before and after side-by-side comparison (if that tool bar is not showing, click T on your keyboard to show/hide it). Although this can help guide any changes you make to your image, I find it particularly useful to toggle back and forth when correcting white balance.

    5. Clarity

    The Clarity slider changes local contrast, especially in the midtone areas of your image. Increasing clarity can help define the edges of objects and add depth to an image, while decreasing clarity will soften details and add a dreamy glow.

    Raising the Clarity slider to +25 adds a bit more pop to this image. Adding too much clarity can accentuate blemishes in portraits and dull colors, so use it sparingly.

    6. Noise Reduction

    Noise and color noise are the downfall of many lo- light photos, especially those taken on less capable cameras. Noise adds a general grainy haze, and color noise shows up as little little specks of random colors, which can look like big splotches on shadowed areas.

    It’s often most noticeable in the dark areas of an image but can wreak havoc on skin tones as well. Luckily, it’s easy to fix in LR and doesn’t decrease image quality too much. It does have its limits so always shoot at the lowest ISO possible.

    Since this photo was taken on a camera with legendary low-light capabilities (in its day), noise levels aren’t too bad even at ISO 4,000.

    The Noise Reduction slider is found in the Details panel underneath the Sharpening sliders. For this image I increased the Luminance slider to +30 and the Color slider to +15.

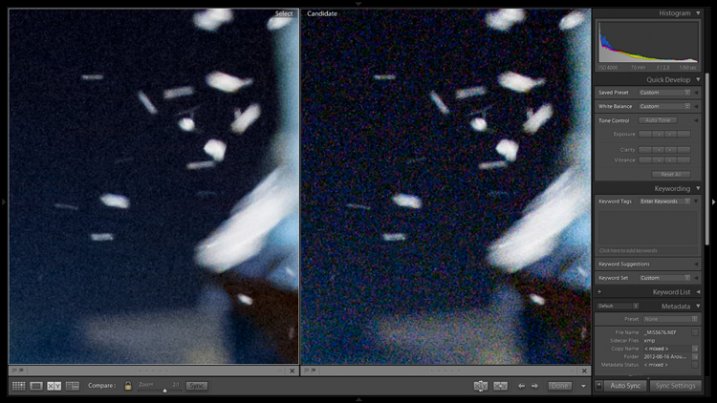
    Image showing before and after noise reduction.

    The noise is this image was fairly minimal and Lightroom easily reduces it. Image showing before (right) and after (left) noise reduction.

    A side effect of noise reduction is decreased detail so don’t be too heavy handed.

    Image before edits.

    The original image before any post-processing.

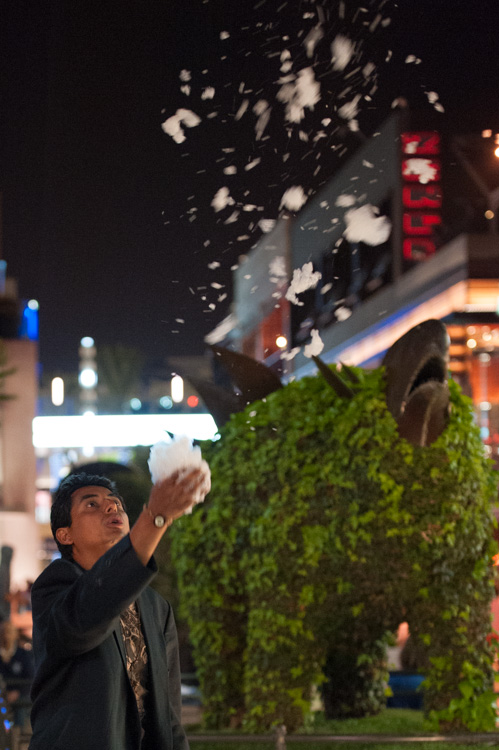
    Image after edits.

    The original image after post-processing.

    That is a basic walk-through of my approach to a photo shot in low-light, or poor conditions. Although the editing process could go much further and get more technical, this is a good starting point to breathe some life back into poorly lit shots.

    Do you have any other good post-processing tricks for low-light images to share?

    googletag.cmd.push(function() {
    tablet_slots.push( googletag.defineSlot( “/1005424/_dPSv4_tab-all-article-bottom_(300×250)”, [300, 250], “pb-ad-78623” ).addService( googletag.pubads() ) ); } );

    googletag.cmd.push(function() {
    mobile_slots.push( googletag.defineSlot( “/1005424/_dPSv4_mob-all-article-bottom_(300×250)”, [300, 250], “pb-ad-78158” ).addService( googletag.pubads() ) ); } );

    The post 6 Easy Steps for Post-Processing a Low-Light Photo in Lightroom by Jeremie Schatz appeared first on Digital Photography School.


    Digital Photography School

  • How to Get Started with Off-Camera Flash Photography – Start With One!

    I was prompted to write this article in the hope of answering the many questions I get asked about flash photography: “I find flash photography very confusing…What do all those numbers mean at the back of the flash…What does TTL mean…What does flash-sync mean?”

    This article isn’t about explaining all the technical ins and outs of flash photography, far from it. Instead, I hope to show you how to get started using off-camera flash, by using ONE flash essentially. Okay, you will need a few other items but I’ll get to that shortly.

    Emmet-on-car-bonnet-with-flash

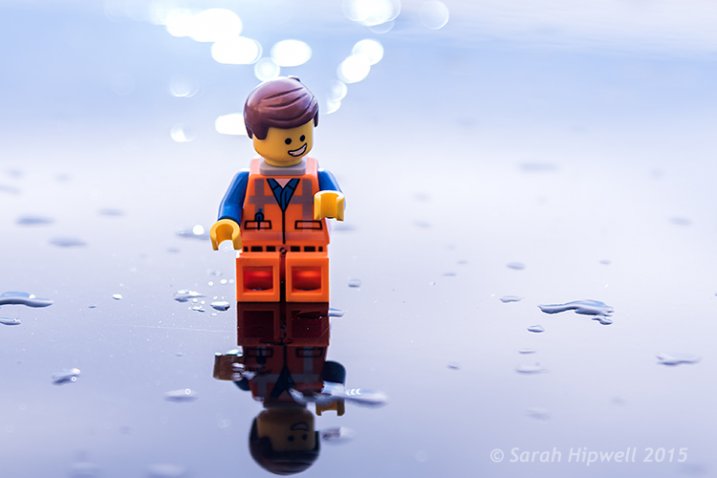
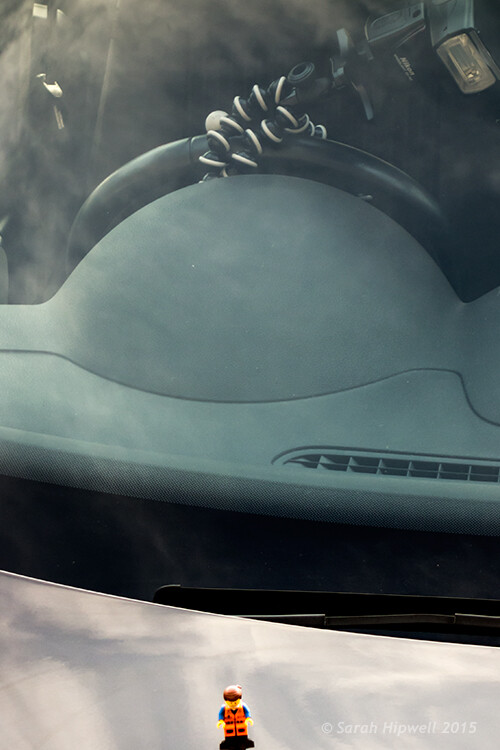
    Emmet sitting on the hood of a car. Background created using one speed light attached to the steering wheel inside the car.

    I like using speedlights because of their portability. When I use these small flashes, particularly outdoors, I am able to scope and think more on my feet. I am physically moving about and placing the flash, that’s on a light stand, in different positions relative to my subject or object. This allows me to visualise the type of shot I want to achieve. For the purpose of this article, I will use the same gear for all the techniques.

    Camera Settings

    In order to keep things simple, and not get bogged down in too much technicality, your camera settings can only use ONE aperture setting and ONE shutter speed. The flash can only use ONE power level. Flash level is stated in fractions of full power, such as on my flash: 1/128. 1/64, 1/32, 1/16, 1/8, 1/4, 1/2, up to full power, or 1/1. The camera and the flash are going to be set to manual mode.

    When shooting outside, the ambient exposure, which is the available light (sun) is controlled by the shutter speed (and technically the aperture too). Just remember that the ambient light isn’t fixed (like in a studio setup with continuous lighting) so it’s constantly changing.

    The flash, being instantaneous, is controlled by the aperture. I’m going to ignore ISO here. Well, I’m not quite ignoring ISO but I’m going to leave it at 100 for quality. Set your flash sync-speed to its maximum, usually 1/200th or 1/250th depending on the camera you are using (check in the manual for your camera if you aren’t sure). This will allow you to use the widest possible aperture.

    Exposure

    You will need to have a good understanding of exposure and how to change aperture, shutter speeds and ISO settings. See Darren Rowse’s article, Learning about Exposure – The Exposure Triangle for a refresher. Bear in mind that this article isn’t aimed at photographers who are new to photography but photographer’s who are new to off-camera flash.

    What gear will you need?

    • A camera and a lens: For the following shots, I used a Nikon D750 with a 24 – 120mm f/4 lens.
    • A stand-alone flash unit that can be adjusted manually.
    • Wireless flash triggers: Nikon has the CLS system, which can fire an external flash remotely.
    • A light stand: I also used a Joby Gorilla tripod as a light stand.
    • A diffuser, or light modifer of your choice: I used a white shoot through umbrella.

    Low-light conditions

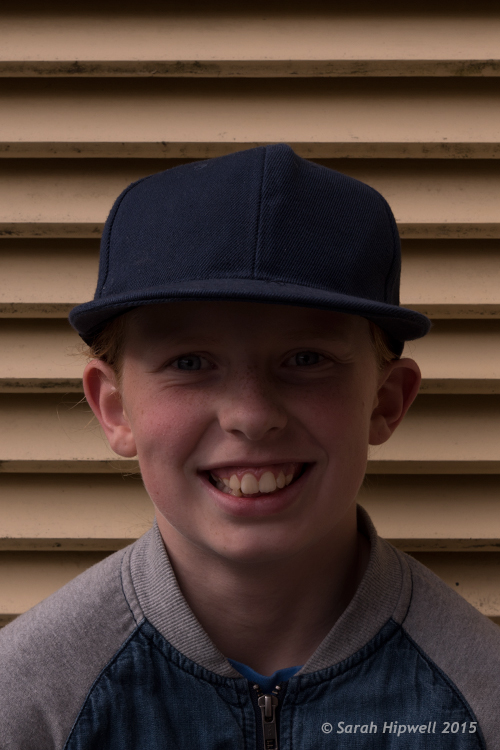
    Amy-no-flash

    My daughter taken in low-light.

    I literally grabbed my daughter and went outside our house to take the following shots. The first shot, as you can see, was taken with no flash. This was about 5:20pm in the evening.

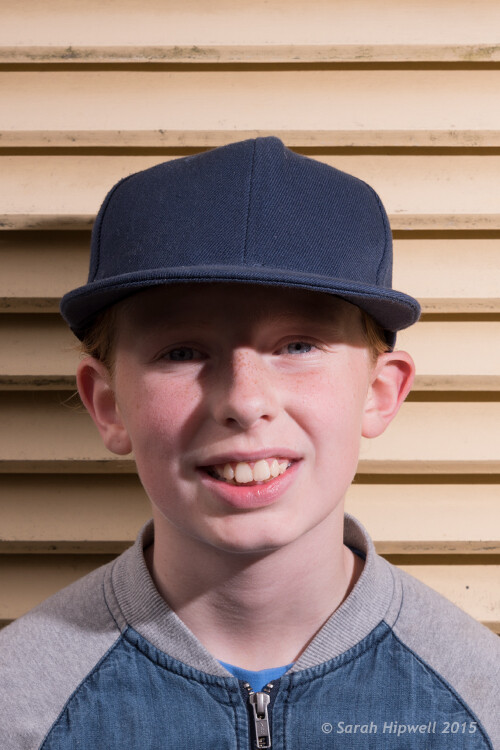
    Amy-with-flash-no-diffuser

    The flash is on a light stand, 2-3 feet away on the subject’s left side. The angle is about 35 degrees set to flash level 1/8 power.

    For the second shot, I set my flash to 1/8th power, which is where I generally start. I had the flash on a lightstand 2-3 feet away to the left of my model, roughly at 35 degrees angle, with no diffuser on the flash. As you can see, the shadows are too harsh. I wanted to take another shot and move the light stand further back. Unfortunately, the weather changed and it started to rain!

    Amy-with-flash-umbrella

    I added a shoot-through white umbrella to the flash. Umbrellas are a great modifier to create a much softer light.

    This shot was taken the following day, same time and setup. But I added a white shoot-through umbrella on to the flash, to illustrate how effective this modifier is. Umbrellas are so inexpensive, and work really well to create a soft light. You can see that the shadows have become softer but they are still too strong (dark). However, my daughter’s patience ran out and no amount of bribes would make her stay for more shots!

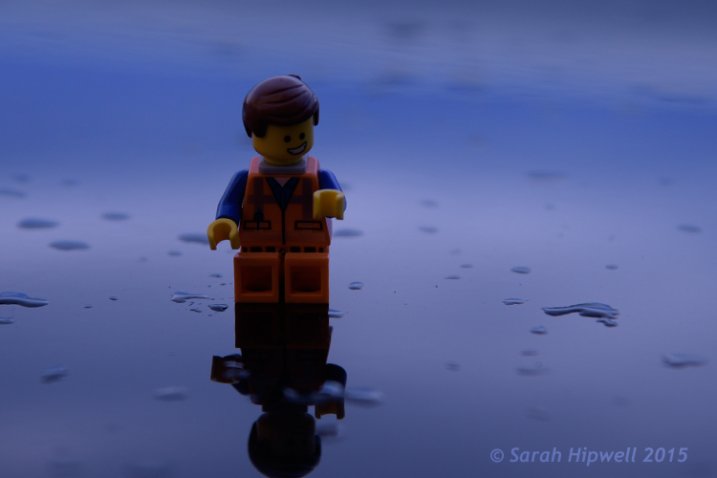
    So I took the advantage of the rain and the low light conditions. Instead of a real model, I improvised with Emmet and put him on top of the hood of the car. I attached my flash to the steering wheel inside of the car with a Joby Gorilla tripod. That way, I wasn’t concerned if it started to rain while I was shooting. I had the flash power set to ¼, as I knew the hood of the car would provide a nice bounce. I had never tried this before so it was an experiment for fun; I was happy with the end result.

    Emmet-on-car-bonnet-no-flash

    Emmet on the hood of a car – no flash fired in this shot.

    Emmet-on-car-flash-on-wheel

    Flash attached to the steering wheel on the inside of the car.

    Title-Emmet-on-car-bonnet-with-flash

    Overcast dull days

    When days are overcast and dull, it is a good opportunity to get out and start using off-camera flash. The light is even and it acts like a big diffuser. This helps you to concentrate on balancing the ambient light with the flash.

    Wilson-overcast-day-no-flash

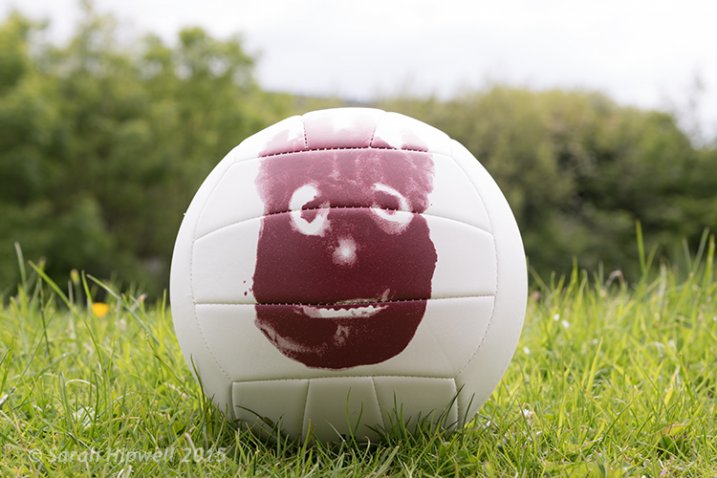
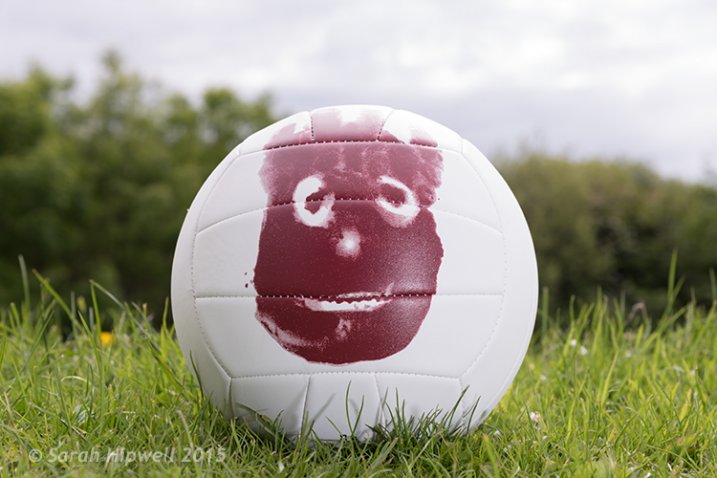
    Wilson shot on an overcast, dull day – background overexposed, sky detail is lost. No flash fired.

    I placed the flash (on a Joby tripod) to the left of Wilson, roughly 4-5 feet away with an opaque plastic diffuser on. I wanted the light from the flash to be directed at the same level as Wilson. By adjusting the shutter speed, I was able to expose the background better. I had the flash set to 1/8th power, I wanted just enough fill light from the flash to give Wilson more depth.

    Wilson-overcast-day-with-flash

    I increased the aperture to bring back some detail in the sky. The flash acted as a nice fill-in or balance against the ambient light.

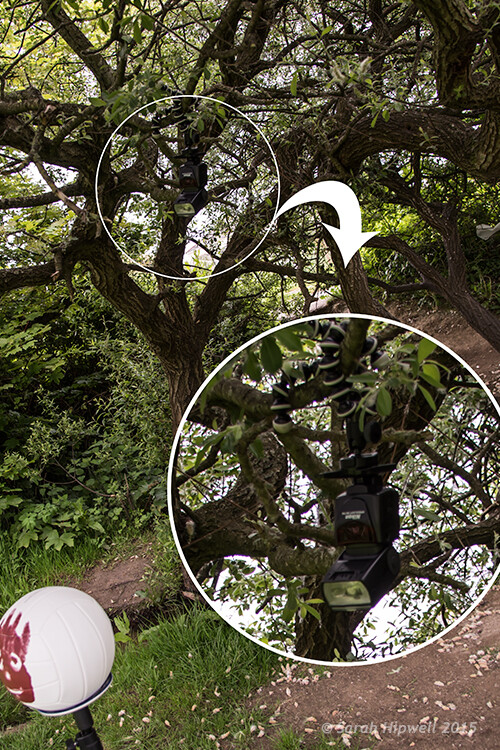
    I moved to a different location but it was the same overcast conditions. This time, I wanted to change the direction of the flash and create a different shot. So I put the flash, still attached to the Joby Gorilla tripod, high up on a branch of a tree.

    flash-in-tree

    I still had my flash attached to the Joby Gorilla tripod from the previous shot. I then hung it upside-down and wrapped it around the branch of a tree.

    Wilson-sun-dapple-no-flash

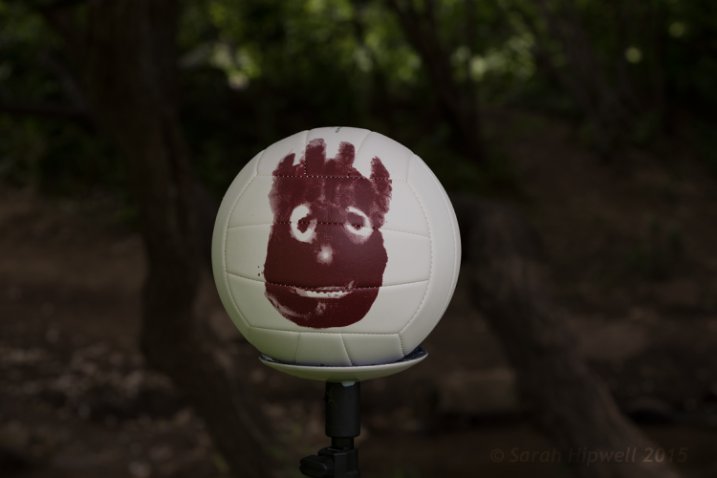
    Wilson set against a backdrop of a woodland. No flash fired.

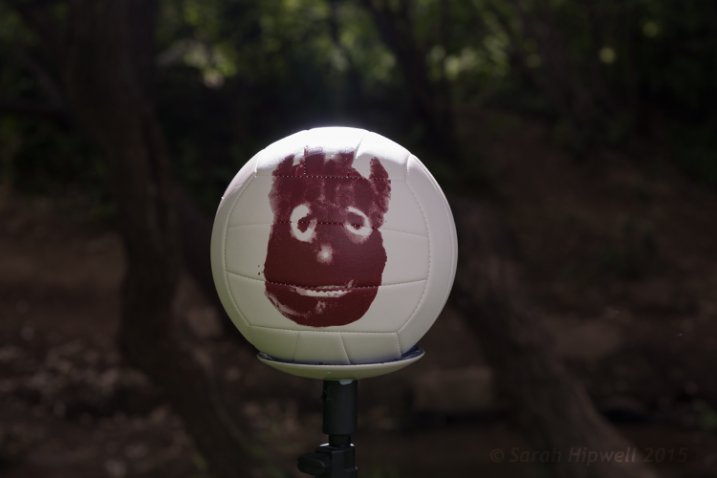
    I wanted to appear as if the sun was shining down through the trees on Willson. By placing the flash high above, and behind Wilson, I was able to achieve this effect. I had the flash power set to ½ and took off the plastic opaque diffuser. I had to take a few shots before I was happy with this one. That’s the fun in this type of shooting, you are experimenting and learning as you go.

    Wilson-sun-dapple-with-flash

    By hanging the flash high up in the tree, it created a sun-dapple effect on Wilson.

    Bright Sunny Days

    I love the sun. Especially when there are blue skies and only a tiny whisper of a white cloud. However, in photography terms, this light is too harsh. In the middle of the day, the sun shines directly overhead and usually casts strong shadows on your subject (usually the face). If you face your subject looking into the sun to eliminate these strong shadows, your subject has to squint from the glare of the sun! So, by placing your subject with the sun behind them, your camera metering exposes the background correctly and your subject is too dark. Hence, you meter your subject for a correct exposure and then your background is overexposed.

    This is where your external flash comes in handy. I brought Wilson to the beach. The day was sunny and it was late afternoon. I placed Wilson on the sand with the sun behind him.

    Wilson-on-beach-no-flash

    Wilson at the beach with the sun high and slightly behind him. No flash fired.

    The flash was placed to the right of Wilson about four feet away. I had the diffusion plastic dome on the flash.

    I didn’t achieve the shot I wanted when I reviewed my photos later on the computer. I noticed a slight hotspot on Wilson which is always a dead giveaway that you have used a flash. I wanted a nice balance between the ambient and the fill-in light from the flash. In hindsight, I should have experimented more by taking shots with the flash moved back or changed the direction slightly. As the day was very bright, I had set the flash power to ½, so I could have dialled it down! A good tip here, would be to take notes of your setup, so that you have a benchmark for similar future setups.

    Wilson-on-beach-with-flash

    Flash was to the right of Wilson, four feet away with a transparent dome diffuser on. Flash power set to 1/4.

    Wilson-on-beach-rushes-no-flash

    Another shot of Wilson on the beach. No flash fired.

    Wilson-on-beach-rushes-with-flash

    I placed the flash to the right of Wilson and the flash had to fire through the grass.

    Tips:

    • Experiment with the distance of your flash relative to your subject as well as the direction.
    • If you are using an umbrella, get lots of sand bags to weigh the stand down firmly, or preferably get somebody to hold it. This is especially important on a breezy, or windy day. The light stand will take off like a kite with the umbrella attached. This happened to me. The umbrella broke but thankfully my speedlight suffered no damage. After all, umbrellas are way cheaper to replace than flashes.
    • Start with a low power level on your flash, such as 1/16 or 1/8th.
    • Put the flash sync-speed to the maximum to give you more latitude with your aperture.
    • Keep practicing before you’re ready to move on.

    Conclusion

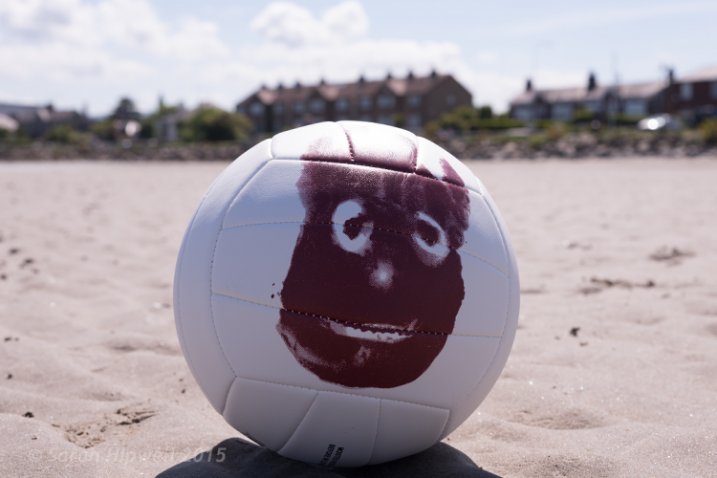
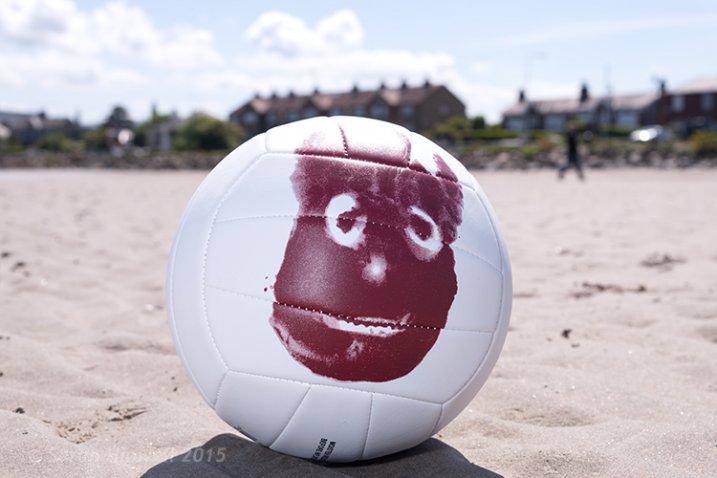
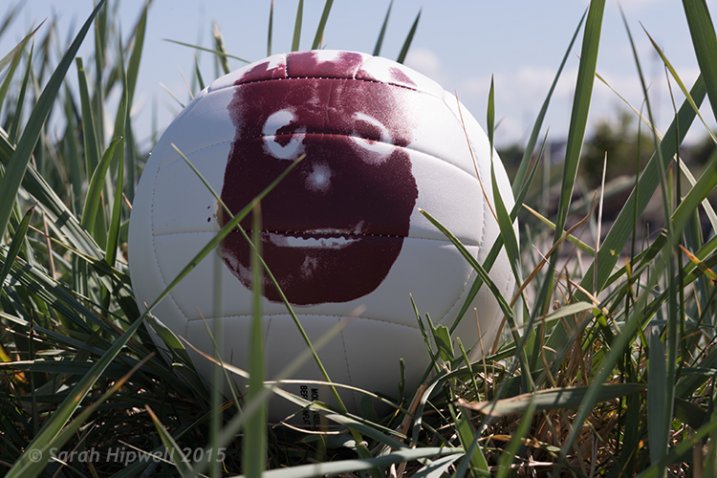
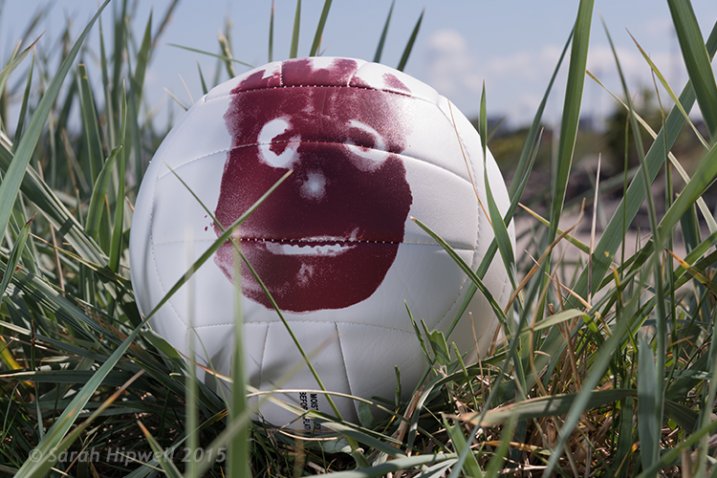
    I hope that I’ve convinced you that off-camera isn’t as daunting as it may seem. However, it isn’t a one-click effect. It does take a bit of mastering. Don’t be afraid of not getting it right first time. If you can’t get a willing subject or model, go get yourself a Wilson! I chose a ball as it’s round and is a good substitute for a face. (Plus you don’t need to bribe a ball).

    Do you use off-camera flash? Have any other tips for beginners? If so please share in the comments below.

    googletag.cmd.push(function() {
    tablet_slots.push( googletag.defineSlot( “/1005424/_dPSv4_tab-all-article-bottom_(300×250)”, [300, 250], “pb-ad-78623” ).addService( googletag.pubads() ) ); } );

    googletag.cmd.push(function() {
    mobile_slots.push( googletag.defineSlot( “/1005424/_dPSv4_mob-all-article-bottom_(300×250)”, [300, 250], “pb-ad-78158” ).addService( googletag.pubads() ) ); } );

    The post How to Get Started with Off-Camera Flash Photography – Start With One! by Sarah Hipwell appeared first on Digital Photography School.


    Digital Photography School

  • The Art of Photojournalism: Tell a Story with Your Image

    Many people don’t think of photojournalism as being an artistic pursuit. In many ways, it isn’t. Documentary photography is often utilitarian in nature; the photographer’s job is to tell a story plainly, honestly and efficiently. A person might argue that approaching this job with other intentions, such as producing great art, could potentially sully the images. That is, if the Continue Reading

    The post The Art of Photojournalism: Tell a Story with Your Image appeared first on Photodoto.


    Photodoto

  • Product Review: F-Stop Gear Lotus Backpack

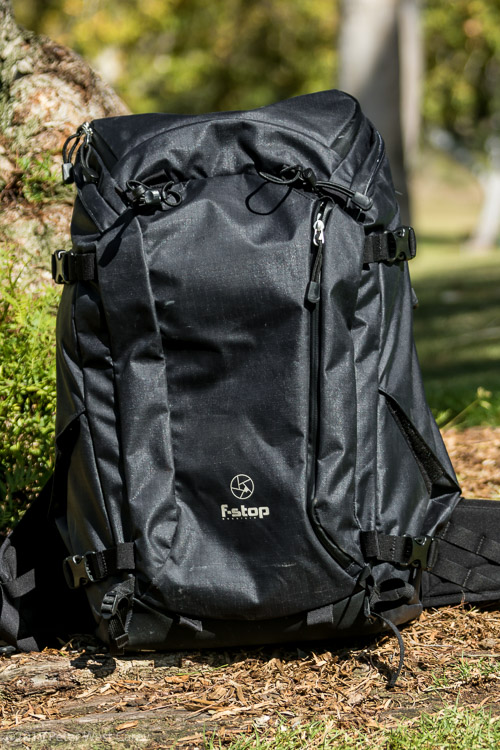
    PWC-Lotus2015-0622-0001Rather than run down the long list of the Lotus Backpack’s features, I’m going to point you to f-stop’s webpage which has far more complete specs. To sum up this pack; it is built for the serious outdoor photographer who wants an all-weather backpack for their camera. They don’t want to spend all weekend out in nature (f-stop has larger packs for that) and they will be carrying a camera, maybe two, a few lenses and a flash, plus food and clothes.

    Let’s dive right into what works and what doesn’t with this backpack.

    The Good – F-Stop Gear Lotus Backpack

    Weather and sand protected

    The Mountain Series from f-stop is all about getting into the elements and keeping your photography gear safe. The water resistant fabric sheds downpours but also helps to keep other elements off your gear. It’s not entirely waterproof as the back access panel is foam and nylon, so I wouldn’t use this pack as a primary on rafting trips. But for trekking the backcountry and scaling peaks, it is nice to not have to deal with a separate pack cover.

    PWC-Lotus2015-0622-0024

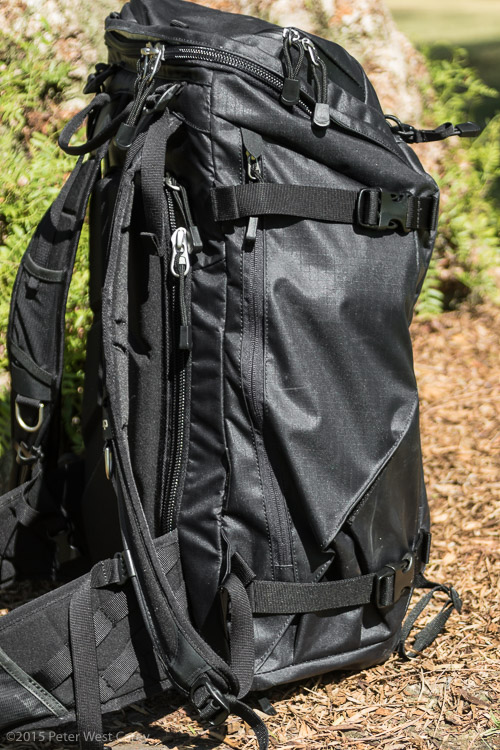
    The thicker hide of this pack gives it some heft, but a lot of protection as well.

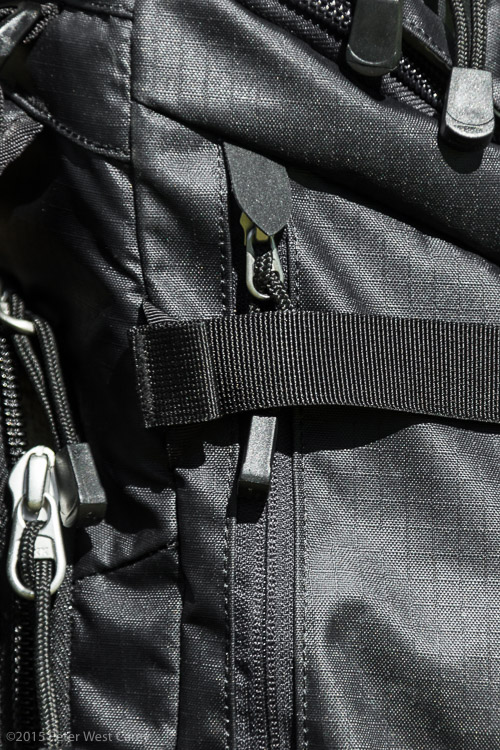
    Easy, big zippers and it holds a medium sloped ICU

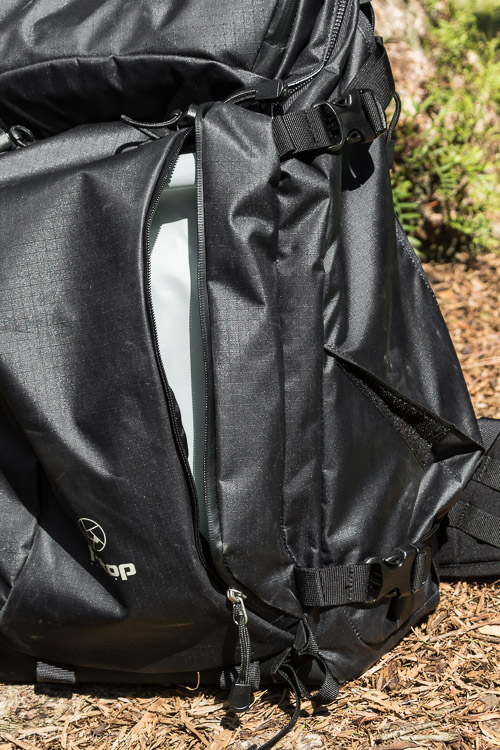
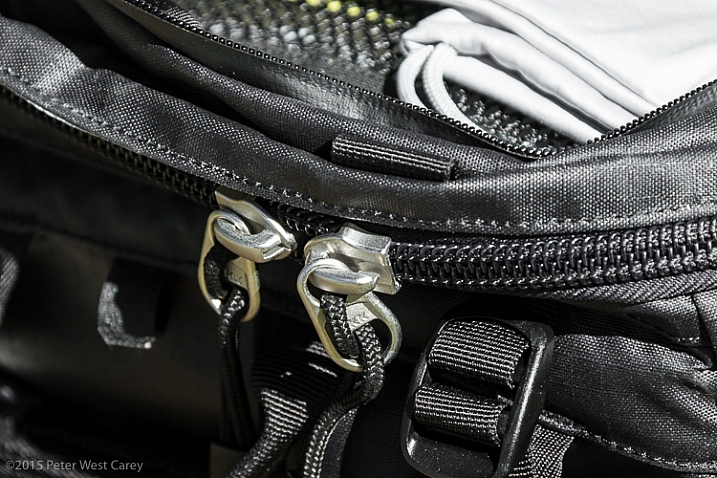
    I have a couple of other f-stop packs and I can say without a doubt that the large zippers for the back access panel, and top access are an improvement. They work well with one hand, which is important while handling gear, and they round the corners with ease.

    PWC-Lotus2015-0622-0021

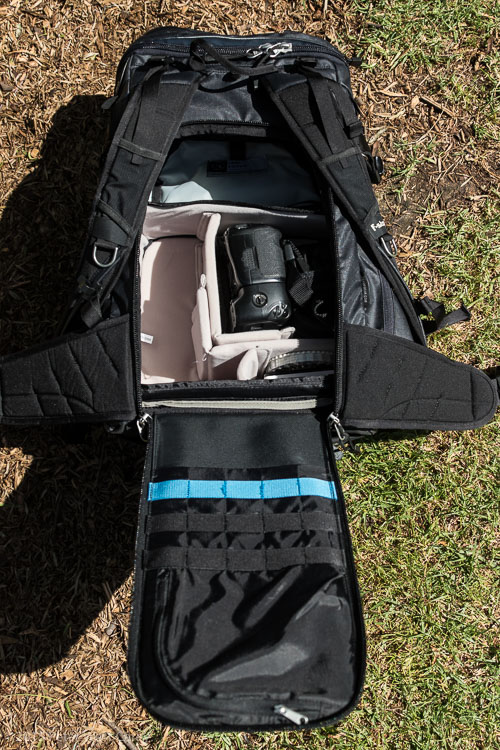
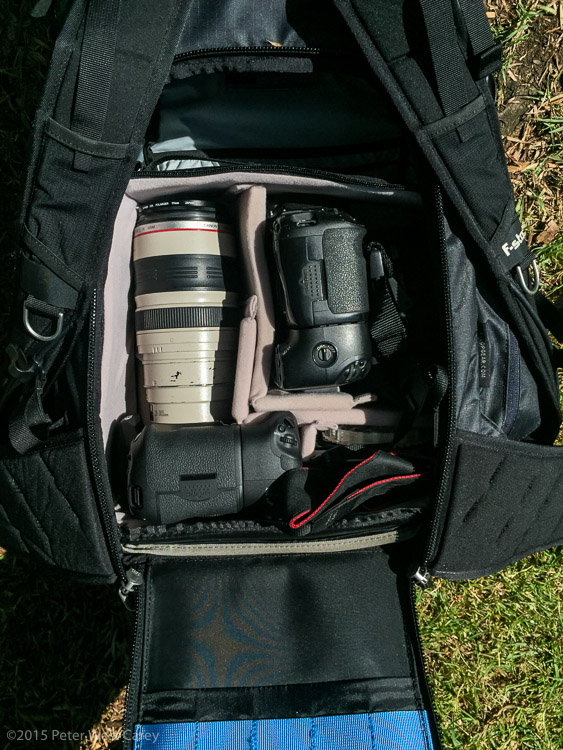
    Behind one set of large zippers and the back panel is just enough room for the f-stop medium sized sloped ICU (Internal Camera Unit). F-stop uses interchangeable inserts to hold your camera gear, which I have found optimal for maximizing space inside the pack depending on how much gear I want to bring. Sometimes I travel light (camera and two lenses) and a small ICU works fine, leaving me more space inside the pack for food and hiking gear.

    PWC-Lotus2015-0622-0016

    The sloped medium ICU will hold two DSLR bodies and two lenses, including lenses equivalent to a 70-200mm f/2.8 (pictured here is the Canon 28-300mm L lens, which is the same size as a Canon or Nikon 70-200mm f/2.8) and battery grips, laid on their side. This makes me quite happy.

    PWC-Lotus2015-0622-9298-2

    Canon 7D Mark II w/28-300mm L and Canon 7D w/10-22mm, both with power grips. Plus rooms for filters and batteries.

    Super comfortable

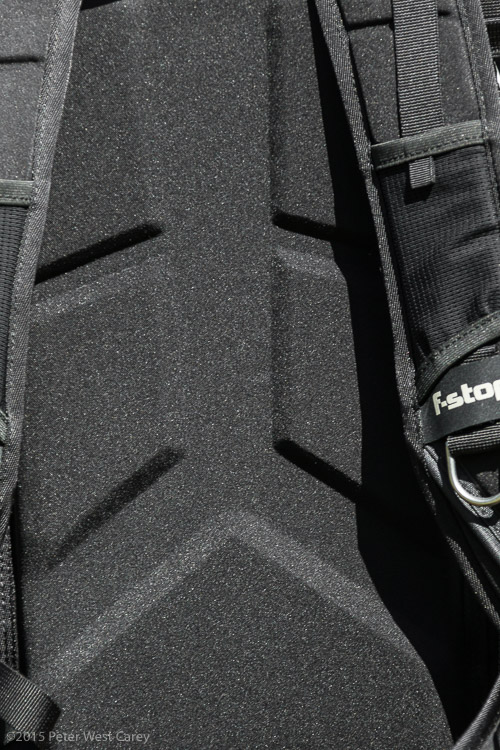
    Every pack manufacturer tries to make their bags comfortable; some resort to gimmicks and odd designs. I thought f-stop was doing this with their back support and its multiple channels leading away from the center. It turns out, that center channel is just deep enough to brace your spine and add support to the rest of your back. The hip belt, while not robust (a plus for travel and fitting in overhead bins) gets the job done with enough fabric to take 100% of the pack weight while remaining comfortable. When overstuffed, the hip belts can be lacking, but keep the load under 40lbs/18kg and you should be fine.

    PWC-Lotus2015-0622-0033

    PWC-Lotus2015-0622-0034

    PWC-Lotus2015-0622-0009

    Garbage pocket

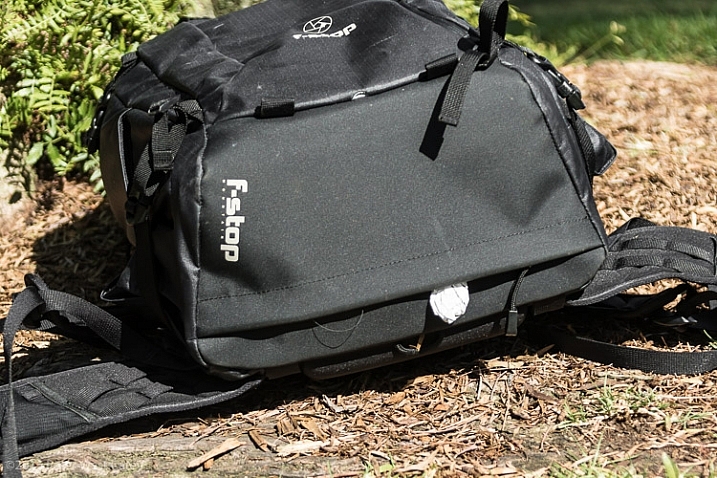
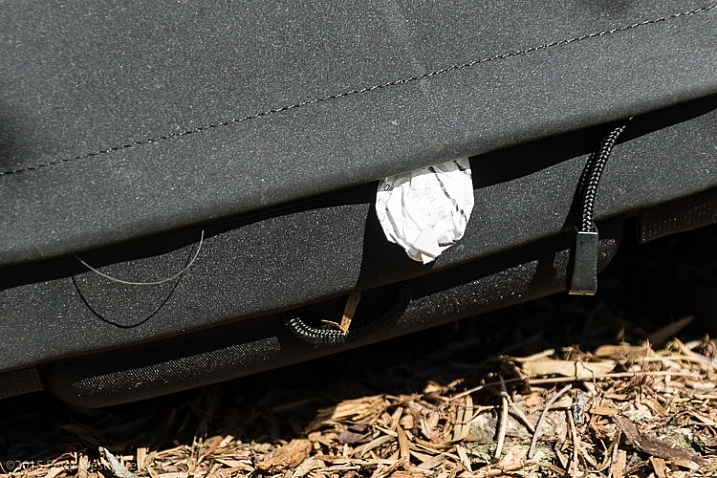
    I’m one of those hikers who likes to keep nature clean and the bottom zippered area of the pack is perfect for garbage. It’s not easy to get into with the pack on and it could have other uses, but as it will constantly get crushed when the pack is set on the ground, I have chosen to take a clue from f-stop’s other packs and keep this area reserved for trash.

    PWC-Lotus2015-0622-0014

    PWC-Lotus2015-0622-0015

    All the add-on space

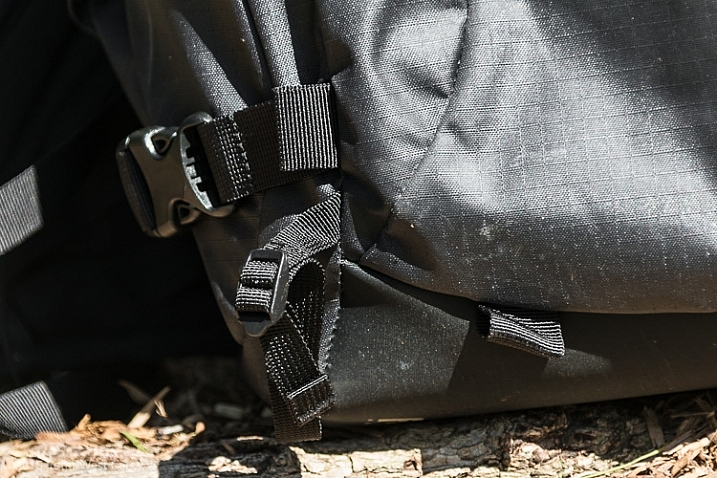
    F-stop makes sure you are not limited when their bags can’t contain all of your gear. The hipbelt has loops for an extra lens case or accessory pouch. On the back and sides are loops for f-stop’s Gate Keeper system. While company promo pictures show people strapping snowboards and skis in these location, they also work great for tripods, hiking poles and a wet raincoat.

    PWC-Lotus2015-0622-0005

    PWC-Lotus2015-0622-0025

    The small tab is for f-stop’s Gate Keeper add on straps

    Ice axe loops

    After I note you probably won’t strap a snowboard to the back of this pack, I do have a soft spot for adventure backpack companies who include ice axe loops. Seemingly eons ago I climbed mountains and used those loops regularly. Were I to scale another mountain, I would greatly appreciate their inclusion on this pack. You can kind of use them for trekking poles or a monopod as well.

    PWC-Lotus2015-0622-0002

    Just enough pockets, maybe one more though?

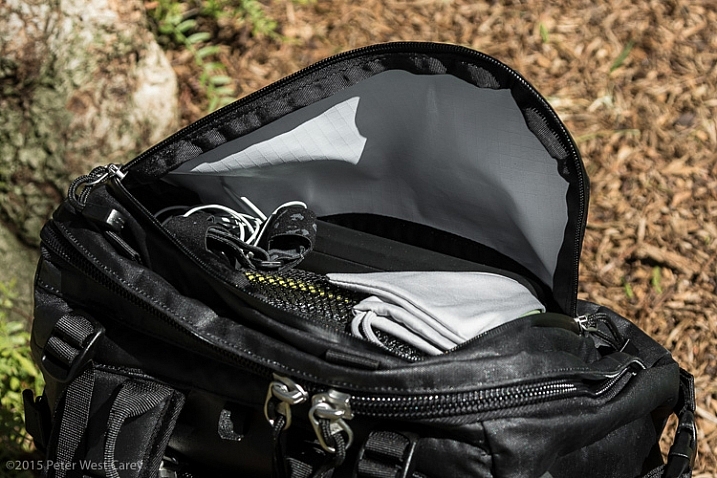
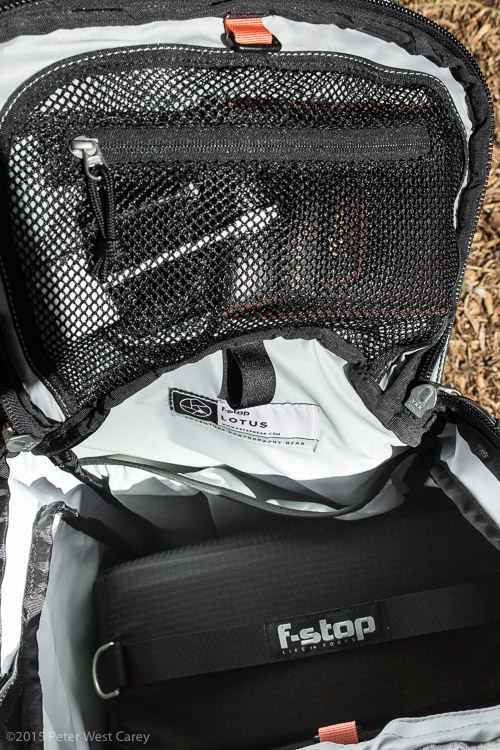
    Inside and out, the Lotus has a fair number of pockets. I appreciate the divider in the top compartment and the pocket for either a tablet or a water bladder (complete with discrete opening in the top of the bag to route a drinking tube) on the inside of the pack. There is a small pocket on the inside of the main back panel that can hold just a filter or some cards. Under the top lid is another mesh pocket that holds a couple of filters at most.

    PWC-Lotus2015-0622-0020

    PWC-Lotus2015-0622-0029

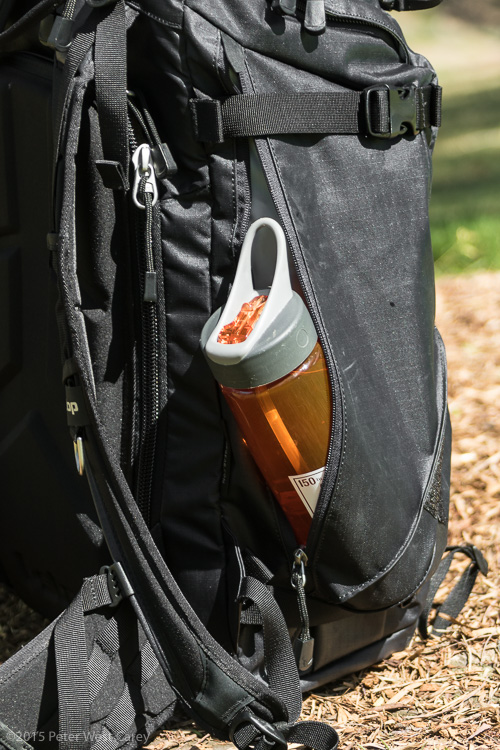
    On the front of the bag is an ample, lengthy, zippered pocket great for maps or tablets or other long, thin items. It can hold a lightweight jacket as well. The sides have these odd little pockets. I see what I think they were trying to do here (economize space and streamline the sides so they don’t stick out) but it makes the pockets, well, odd. I can shove in a water bottle if the pack is not filled to capacity on the inside, so they work in that regard.

    PWC-Lotus2015-0622-0024

    PWC-Lotus2015-0622-0013

    Not easy access, but it works.

    For my liking I’d like to see at least one more pocket for items larger than a filter. I’m not sure where it would go, but I have grown accustom to enough pockets on my Mindshift Gear Rotation180 Pro and my f-stop Satori EXP that this pack certainly feels like a downsize in terms of pockets. Given the real estate and target market, that is understandable though.

    Good range on the sternum strap

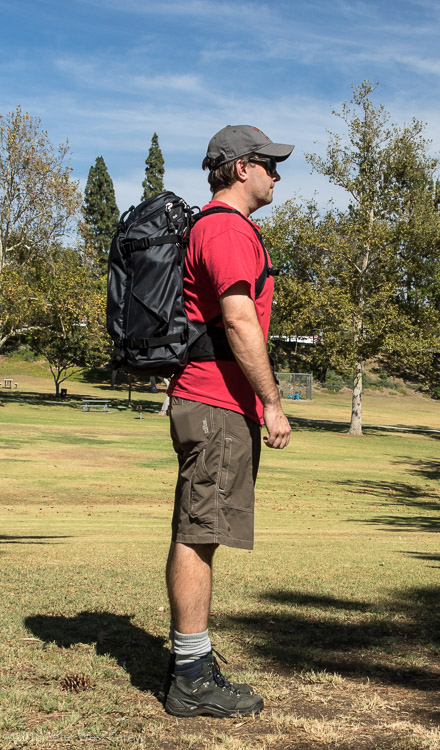
    I love the sternum strap on this pack. I’m weird that way, but I also have a long torso and most packs have a sternum strap that ranges from choking me to just about choking me. The Lotus understands a longer torso and the sternum straps extend down further than most packs. As is often the case, the clip for the strap contains a whistle for signaling in the backcountry.

    PWC-Lotus2015-0622-0032

    Fits under an airplane seat

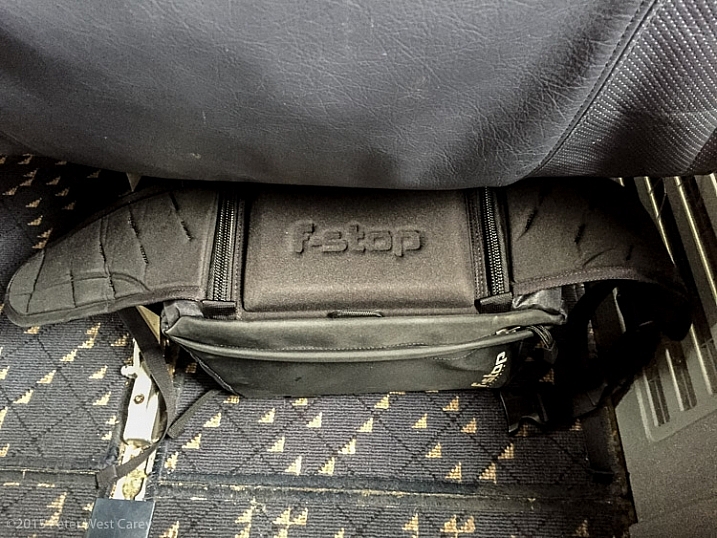
    Lastly, this pack fits under the seat of most average planes! Here it is pictured under a seat in a 737-800. Not much room for your feet (I could fit one foot on one side) but the nice part is being able to get to cameras, or other items, easily while flying. Even when fully packed it also fits comfortably in overhead bins.

    PWC-Lotus2015-0603-8562

    Loops, clips and sneaky pockets

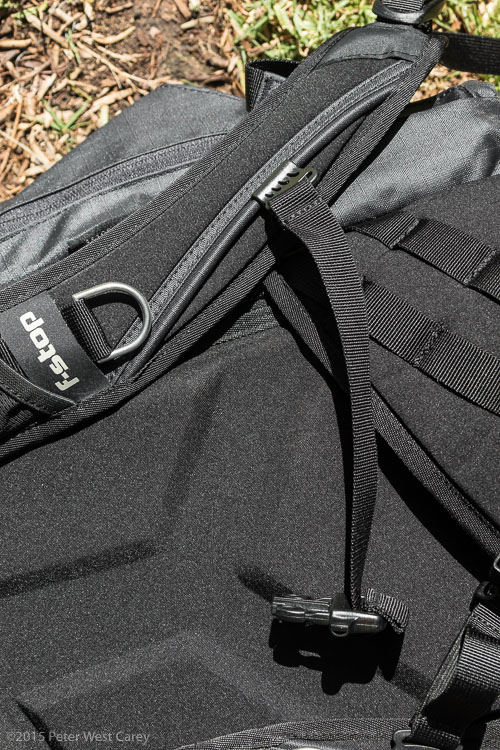
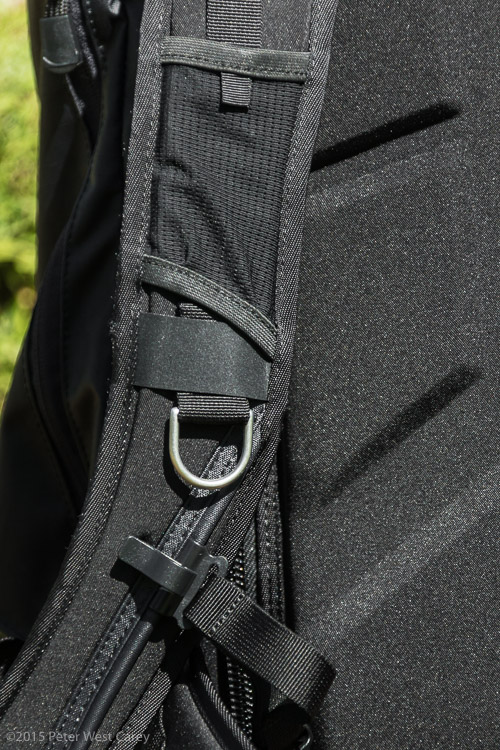
    The metal attachment loops on the shoulder straps are easy for clipping spare gear to, and there is a clip on the right shoulder strap to help with routing a hydration tube. There are also two mini-pockets on the hip belt for small items, like a pocket knife, spare memory card or chapstick.

    PWC-Lotus2015-0622-0008

    What about the bad?

    Side zippers get covered by compression straps

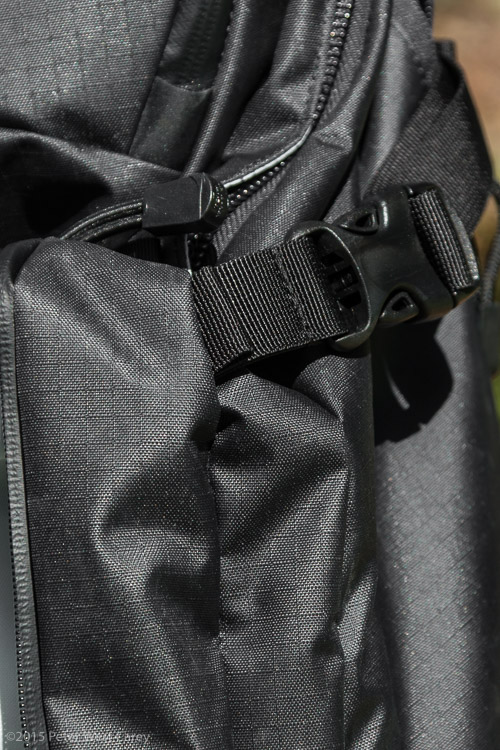
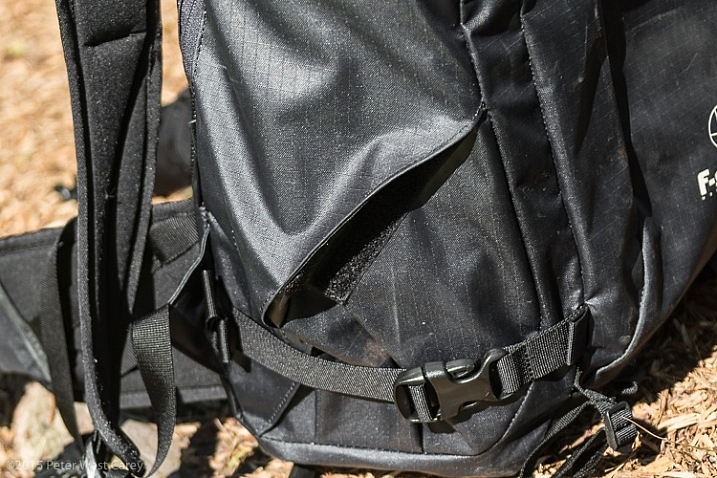
    Those side pockets with the funky velcro gussets? The zippers for those pocket start at the top of the pack and are usually covered by the side compression straps. It’s a little annoyance but sometimes requires using both hands to get to a water bottle, or other items stored within.

    PWC-Lotus2015-0622-0010

    PWC-Lotus2015-0622-0012

    PWC-Lotus2015-0622-0011

    A little loud (crinkly)

    I kept trying to place the sound of this pack. It makes a crinkle noise, as the material for the pack is stiffer for waterproofness. I finally figured out the sound is the same as that for a SCUBA BCD, the jacket you see divers wearing that helps keep them neutrally buoyant. If you plan to use this pack for silent ninja work, you might want to think again.

    No water bottle, quick pockets

    Getting a water bottle in and out of this pack is not a quick affair (see above). I enjoy the side mesh pocket of other packs for this purpose, and the Lotus is missing them. Again, this is probably to keep the bag streamlined. I might get a pouch to keep a bottle up front on the hip belt as an alternative.

    Small zippers are a little stiff, certainly need two hands

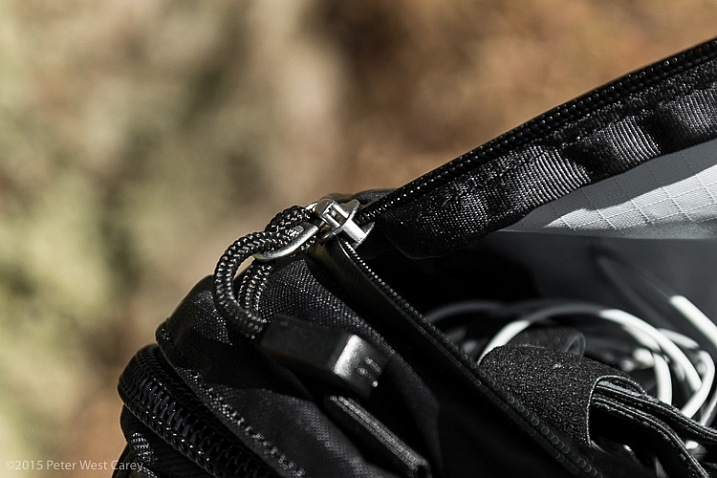
    While the big zippers on the back panel are heaven, the smaller pocket zippers are tough, at least when the bag is new (ask me again in a year for an update). This is just the nature of the beast when wanting a zipper to keep out the elements, I suppose. I have to use two hands when opening the top most compartment, or jerk the zipper around multiple times. Same goes for the side zippers.

    PWC-Lotus2015-0622-0022

    Top pocket a little shallow

    I don’t like the top pocket because of its shallowness, and tendency to allow items to spill out. There is a velcro patch and a net inside this pocket which does help keep valuables in place (sized perfectly for a Moleskine notebook or a passport) and there is a detachable clip for keys. But overall, I worry about things easily falling out of this pocket each time I open it.

    Conclusion

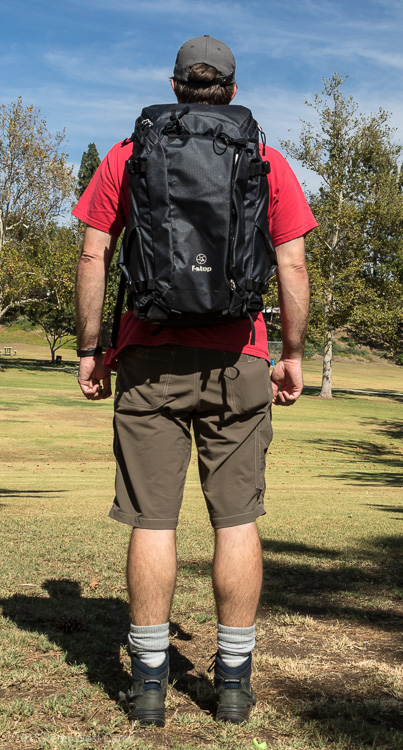
    F-stop knows what they are doing, and this bag fills the need for a smaller day pack that is protected against the elements. Some things aren’t as convenient as on other packs of this size (water bottle access, small zippers are stiff) but when compared to employing a pack cover and the trouble that brings, it is a fair tradeoff. I’m 6’1″ and I loved how well the bag is sized for my torso; how well it stuck with me as I climbed over rocks or dashed through the airport.

    If you want a day pack where you don’t have to worry about the weather ahead, and you desire hours of comfort while traversing mountain ridges, the f-stop Lotus is worth a look. With its interchangeable, padded camera carriers and room for the 10 essentials, this bag ensures you and your gear will get out there to get the shot in comfort and style.

    Disclaimer: f-stop furnished me with a test model for this review which I was allowed to keep. The opinions above are entirely my own and they know I will call them out if their gear stinks. I don’t want any of our readers to pick a bad camera bag.

    googletag.cmd.push(function() {
    tablet_slots.push( googletag.defineSlot( “/1005424/_dPSv4_tab-all-article-bottom_(300×250)”, [300, 250], “pb-ad-78623” ).addService( googletag.pubads() ) ); } );

    googletag.cmd.push(function() {
    mobile_slots.push( googletag.defineSlot( “/1005424/_dPSv4_mob-all-article-bottom_(300×250)”, [300, 250], “pb-ad-78158” ).addService( googletag.pubads() ) ); } );

    The post Product Review: F-Stop Gear Lotus Backpack by Peter West Carey appeared first on Digital Photography School.


    Digital Photography School

  • 13 Great Subjects for Urban Night Photography

    The great thing about night photography is that subjects that appear commonplace during the day take on a new, interesting appearance at night. Urban scenes are lit (or not lit) at night in fundamentally different ways that our eyes are not used to. The long exposure times required in night photography allow you to use different techniques to capture the scenes in creative and often dramatic ways. Plus you aren’t beholden to the sun’s rays and the changing daytime light.

    Nevertheless, you may struggle with finding good subjects when you do have opportunities to get out and shoot at night. Further, you may not know what subjects lend themselves to great photographs at night, or overlook great scenes and subjects in your own city. Therefore, this article is designed to help you pick out some good subjects that might be right around the corner.

    Obviously, the point here is not to limit your subject matter, but rather to show you things that might be nearby next time you are stumped for ideas. I hope you’ll use these subjects as starting points for your own thinking, and the go well beyond the ideas presented here.

    1. Reflections

    Great Subjects for Urban Night Photography - St. Paul reflection example

    St. Paul’s Cathedral, London (Shutter speed: 1.3 seconds; Aperture f/8; ISO: 200).

    Most cities have plenty of modern office buildings made of glass and steel. These are often not particularly photogenic subjects in themselves, but the glass and steel provide great opportunities for capturing reflections of anything nearby. At night, the glass can appear particularly reflective. The bright lights of the city at night will show up clearly in the glass of nearby buildings. The next time you are downtown, keep an eye out for reflections in those glass buildings.

    Of course, water presents a great opportunity for capturing reflections as well. A very slow shutter speed will remove any ripples from the water and make the reflection show up more clearly. Using a slow shutter speed will not usually be a problem at night because your camera will be struggling to capture more light to achieve a proper exposure, but if it is just add a mild neutral density filter to your lens.

    Keep in mind that the water with the reflection doesn’t have to be a lake or a river (although those often work great); sometimes just a puddle will do.

    2. Streaking Lights
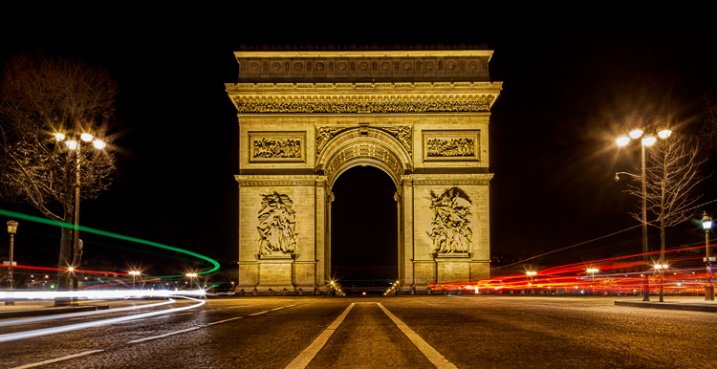
    Great Subjects for Urban Night Photography - Arc de Triomphe example

    Arc de Triomphe, Paris (Shutter speed: 30 seconds; Aperture f/22; ISO: 50).

    Streaking headlights and taillights from passing vehicles are a great way to deal with the problem of traffic in your picture, and as a bonus, it adds a sense of movement to your scene.

    To include streaking lights, start by using a slow shutter speed. You will typically set a shutter speed of at least 15 seconds to allow enough time for the vehicles to move through your frame. Set a mid-range aperture (around f/8) and a low ISO (100) to accommodate the long shutter speed, then adjust from there depending on conditions. After that, just wait until traffic is about to enter your frame and trip the shutter. The shutter will stay open during the time the traffic moves through the frame and only the headlights and taillights of the passing vehicles will show up in your picture.

    Where should you go to find good places for streaking lights? That depends. If you just want the streaking lights to accentuate a picture of something else, then you can go anywhere. If you want the streaking lights to be the cneterpiece of the photo, however, you will need to find a place where you can overlook a highway or major street. Bridges and overpasses work great for this. In addition, parking garages that are next to a highway can work great as well (if you can access them).

    3. Skylines

    Great Subjects for Urban Night Photography - NYC skyline example

    Midtown Manhattan, taken from Roosevelt Island (Shutter speed: 10 seconds; Aperture f/8; ISO 100).

    Skyline shots nearly always look great at night. In every city, the buildings will be lit, and will contrast against the black sky. Further, you don’t have to worry about a lot of things that cause problems during the day. For example, there will be no glare from front-lit buildings, or shadows from backlit buildings. For the most part, cloud conditions do not matter.

    The key is to find a good vantage point. If your city has a river or bay your can shoot across, those make great spots. Another good choice is a high spot overlooking the skyline (look for overpasses of highways leading into downtown). Make liberal use of Google Maps’ street view to find good vantage points.

    4. Monuments

    Great Subjects for Urban Night Photography - Alamo example

    The Alamo, San Antonio, Texas (Shutter speed: 13 seconds; Aperture f/16; ISO: 100).

    The best part about photographing monuments at night is that they are usually well-lit. Further, the night provides a different perspective on a monument that might otherwise be commonplace.

    The worst part about monuments is that, even at night, they can attract a lot of people. The long exposures required at night can help you eliminate them though. By using an extremely long shutter speed (over 30 seconds, so you will need to use Bulb mode), any people that happen to walk through your view will not show up in the final picture. Of course, if the people happen to stop walking and stand around in your frame, they will show up and you will have to use the Clone Stamp tool in Photoshop later to get rid of them.

    Remember that many times the lights of monuments are not kept on all night. They seem to go out around midnight.

    5. Fireworks

    Great Subjects for Urban Night Photography - St. Louis fireworks example

    St. Louis, Missouri (Shutter speed: 6 seconds; Aperture f/3.5; ISO: 100).

    It doesn’t have to be the 4th of July or some major celebration to find a fireworks display. Many cities and towns now have fireworks displays on a regular basis as a means to draw people to local business. For example, the picture above of fireworks over St. Louis was taken on a random weekend. In addition, I live near a lake in Texas that has fireworks every weekend during the summer. See if you can find a fireworks display near you.

    The key to capturing fireworks displays is to use the right shutter speed, and time the explosions. A shutter speed of around 10-15 seconds seems to work the best. That provides enough time for the fireworks to fully explode, but is not so long that the fireworks don’t show up well. Trigger the shutter when you see the dot of the firework going up. That way your picture will capture the explosion from beginning to end. After a while, you’ll develop a feel for when things are about to happen based on the rhythm of the fireworks show and you can trigger the shutter then.

    6. Individual Buildings

    Great Subjects for Urban Night Photography - Dallas example

    Building in downtown Dallas, Texas (Shutter speed: 13 seconds; Aperture f/16; ISO: 200).

    Don’t overlook shots of individual buildings. I know . . . it sounds boring. If you photographed an individual building during the day, you would end up with something really uninteresting. But you’ll be surprised at how certain buildings look at night, be on the lookout for ones with interesting lights. There is no better way to find them than to just pound the pavement.

    Don’t look just for brightly-lit buildings either. Industrial buildings and scenes have great shapes and textures to them, often better than anything modern. While you might not want to be trolling around in an abandoned factory, there are plenty of historical public structures or working factories you can photograph from the street.

    7. Streetlights

    Great Subjects for Urban Night Photography - London lights example

    Gates and streetlamps between Green Park and Buckingham Palace, London (Shutter speed: 1.3 seconds; Aperture f/8; ISO: 800).

    If you can find a row of streetlights, it will often make a great subject. It can also be a great way to accentuate a picture of something else.

    Sometimes you will want to create a starburst effect to the lights. To do that, stop down your aperture to a very small setting, somewhere in the range of f/16 – f/22. The lights will appear to twinkle in the result.

    8. Carnivals

    Great Subjects for Urban Night Photography - State Fair example

    State Fair, Dallas, Texas (Shutter speed: 10 seconds; Aperture f/22; ISO: 100).

    Carnivals are all about bright lights, vibrant colors, and movement. As such, they can be great places for the prepared night photographer.

    Carnivals don’t happen every day, so you’ll need to plan ahead. Most metropolitan areas have publications listing all upcoming events. If nothing else, you can check a guidebook for your city.

    Once you are there, set your exposure so that your shutter speed is in the range of 8-15 seconds. That will capture the movement of the carnival in your shot. This will usually allow you to use a low ISO to keep noise under control and a moderate aperture so that you will have a sufficient depth of field.

    9. Museums

    Great Subjects for Urban Night Photography - Louvre example

    The Louvre, Paris (Shutter speed: 1/8 second; Aperture f/4; ISO: 3200) Note: these settings were used because I was forced to hand hold this shot.

    Museums are places that cities want to show off. As a result, most museums present dramatic facades, and are well lit at night. They are an easy way to find a good subject for night photography.

    In addition, you will not have to search for museums. All museums will be listed in every guidebook or tourism website for your city. There are often several museums to choose from. Just find the most attractive one and check it out.

    Once you get there, the key to success is composition. Start with the obvious frontal shot, and then work the scene from there, trying out different angles and perspectives.

    10. Neon

    Great Subjects for Urban Night Photography - Times Square neon example

    Times Square, New York (Shutter speed: 3 exposures at .6, 1/6, and 2.5 seconds; Aperture f/16; ISO: 100).

    Flashing signs are everywhere, and can be easily overlooked. Next time you are out, make a point to include the signs in your picture.

    11. Overlooks and Views
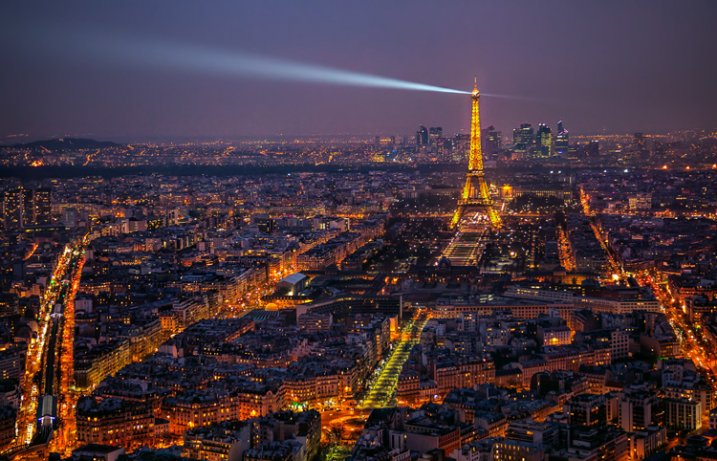
    Great Subjects for Urban Night Photography - Paris example

    Paris at Night, Taken from the Montparnasse Tower (Shutter speed: 1/4 second; Aperture f/4; ISO: 800).

    A good view can present a great opportunity for photography at any time, and nighttime is no exception. Be careful though – a great view does not necessarily make a great picture. The key to success often lies in the foreground. Make sure there is something of interest in the foreground draw your viewer into the great view.

    Finding a great view can be difficult. This is particularly true at night, since often the parks or towers from which you capture the view are closed. The best way I have found to find great views is to use guidebooks for your city. Sometimes the guidebook will actually have a section on the best views. If that doesn’t work, take a look at the map on 500px to see what views others have found.

    12. Bridges

    Great Subjects for Urban Night Photography - Golden Gate Bridge example

    Golden Gate Bridge from Marin Headlands, San Francisco (Shutter speed: 4 seconds; Aperture f/9; ISO: 800).

    When in doubt, find a bridge to photograph at night. While your city may not have the Brooklyn Bridge or the Golden Gate Bridge, I can almost guarantee you that it will have a bridge, and that it will be well lit at night. Almost every city is built on a river or a bay, meaning there will be bridges. They are always lit.

    The key is to find the best vantage point to view the bridge. In your quest to find this, there is no greater tool than the street view function of Google maps. Using Google maps, find the main bridge(s) of your city and then, at either end, virtually walk around using street view. Be sure you find a place to park as well, as this is often tricky around bridges.

    Take special notice of the water under the bridge. There will be two effects related to the water. First, the long exposure time will smooth out the water. In rivers it will sometimes show a smooth current. Second, the lights from the bridge will often create reflections in the water. As such, if you can maneuver to use the water as your foreground, you may be rewarded.

    When photographing a bridge, don’t overlook the passing traffic. You might be able to incorporate streaking lights from the cars as an element of the shot. As mentioned above, make sure you time the exposure right so that you start it right as traffic is about to enter the frame.

    13. Fountains

    Great Subjects for Urban Night Photography - Trafalgar Square fountain example

    Fountain in Trafalgar Square, London (Shutter speed: 13 seconds; Aperture f/10; ISO: 100).

    Many central plazas and squares are centered around a fountain, and these are usually brightly lit at night. They are great places to start when looking to photograph a city a night. What’s more, photographing at night works to your advantage when you find such a fountain. The slow shutter speeds that are required by the low-light scene allow the water to flow while your shutter is open. This makes the water appear smooth.

    Start with a low to mid-range ISO (100-400) and a moderate aperture (around f/8). Start with these settings, then adjust your shutter speed to get the correct exposure ought to result in a sufficiently slow shutter speed to create the smooth, flowing water you want.

    Conclusion

    Night takes up roughly half of each day. Further, it is often easier to get out and shoot at night because most of our work and family obligations take place during the daylight hours. So get out and shoot in your town. Even if you do not live in a major city – many moderate-sized metro areas have most, if not all, of the same subject matter.

    When you do start planning night photography, you’ll be surprised how many of the subjects above are near you. It just takes a little effort and advance thought. So check out the available subjects nearby and get after it.

    googletag.cmd.push(function() {
    tablet_slots.push( googletag.defineSlot( “/1005424/_dPSv4_tab-all-article-bottom_(300×250)”, [300, 250], “pb-ad-78623” ).addService( googletag.pubads() ) ); } );

    googletag.cmd.push(function() {
    mobile_slots.push( googletag.defineSlot( “/1005424/_dPSv4_mob-all-article-bottom_(300×250)”, [300, 250], “pb-ad-78158” ).addService( googletag.pubads() ) ); } );

    The post 13 Great Subjects for Urban Night Photography by Jim Hamel appeared first on Digital Photography School.


    Digital Photography School

  • Pet Photography: 5 Simple Tips for Animal Photographers

    For armature or professional photographers who use their skill for weddings, portraits, engagement, maternity or any other popular family photography, adding “pet photography” to your business card can be an added rise in business for you. How can a family photo be complete without Fido in the picture? Doing pet photography, or just understanding how to photograph a pet for Continue Reading

    The post Pet Photography: 5 Simple Tips for Animal Photographers appeared first on Photodoto.


    Photodoto