Category: Photography

  • Lens Comparison 24-70mm f/2.8 – Canon Versus Tamron

    If you’re looking to upgrade from your kit lens the 24-70 f/2.8 lens is a common choice. It’s got a good range zoom and wide largest aperture of f/2.8 for the entire range. But which one to choose? Brand name or third party?

    In this video Matthew Gore does a really comprehensive lens comparison between the brand name Canon brand name version, and the Tamron third party one. He takes a look at focusing and how much noise each produce, sharpness at different focal lengths and apertures and chromatic aberration.

    There is a significant price difference, as he mentioned. Take a look at both:

    • Canon EF 24-70mm f/2.8L II USM Standard Zoom Lens – $ 1899 USD
    • Tamron SP 24-70mm Di VC USD – $ 1299 USD

    Also available are:

    • A Nikon version – the Nikon 24-70mm f/2.8G ED AF-S Nikkor – $ 1887 USD
    • A Sigma version which can be purchased for many different camera bodies (as can the Tamron) – $ 385 USD (make sure you read some reviews on this lens if you decide you want to go for this option)
    • Sony 24 -70mm f/2.8 Carl Zeiss Vario Sonnar T Zoom Lens – $ 1998 USD

    At $ 600 more (almost 50% higher) is it worth it to you? See which he recommends in the video and which he would purchase and why.

    Do you own one of these lenses? Which one and why did you select it? Please share your thoughts in the comments on whether you feel the third party lenses measure up to brand name ones.

    googletag.cmd.push(function() {
    tablet_slots.push( googletag.defineSlot( “/1005424/_dPSv4_tab-all-article-bottom_(300×250)”, [300, 250], “pb-ad-78623” ).addService( googletag.pubads() ) ); } );

    googletag.cmd.push(function() {
    mobile_slots.push( googletag.defineSlot( “/1005424/_dPSv4_mob-all-article-bottom_(300×250)”, [300, 250], “pb-ad-78158” ).addService( googletag.pubads() ) ); } );

    The post Lens Comparison 24-70mm f/2.8 – Canon Versus Tamron by Darlene Hildebrandt appeared first on Digital Photography School.


    Digital Photography School

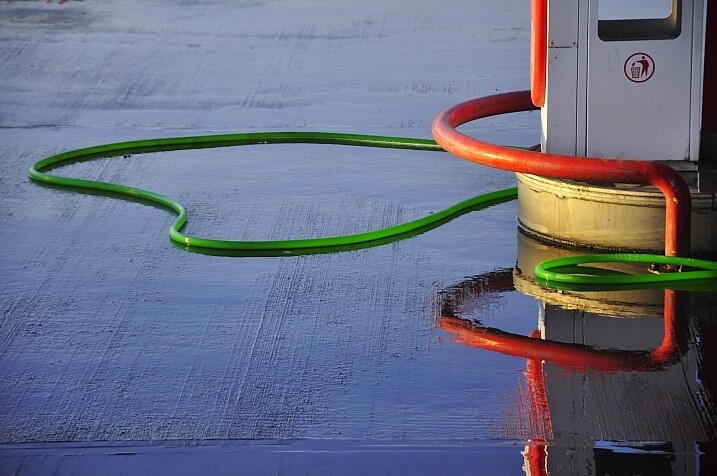
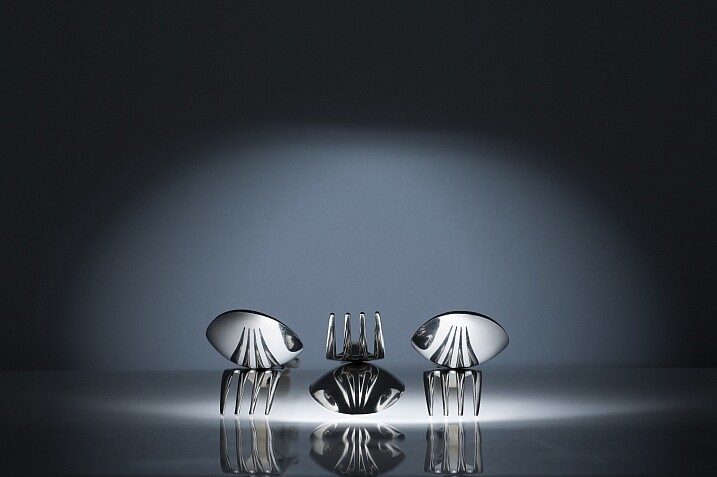
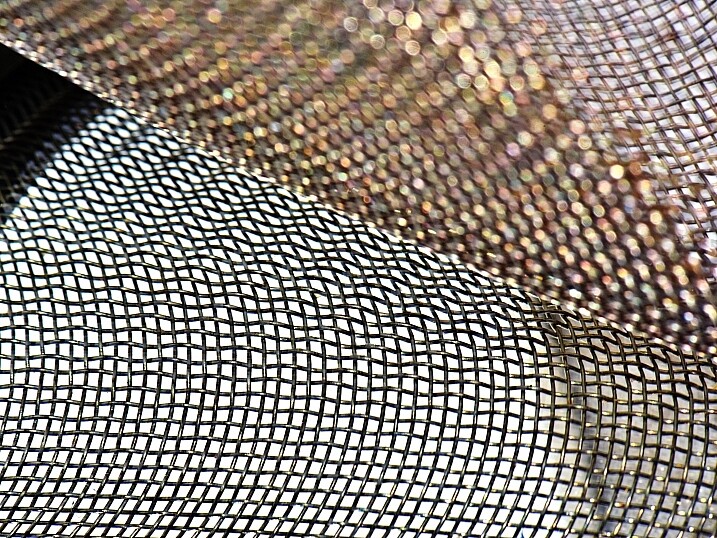
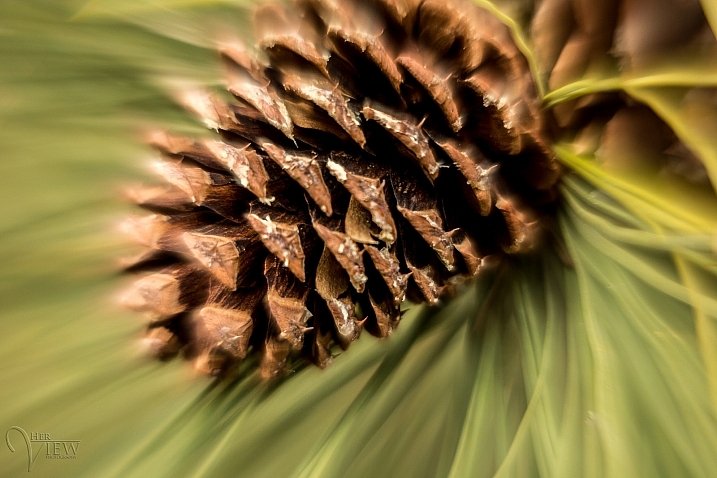
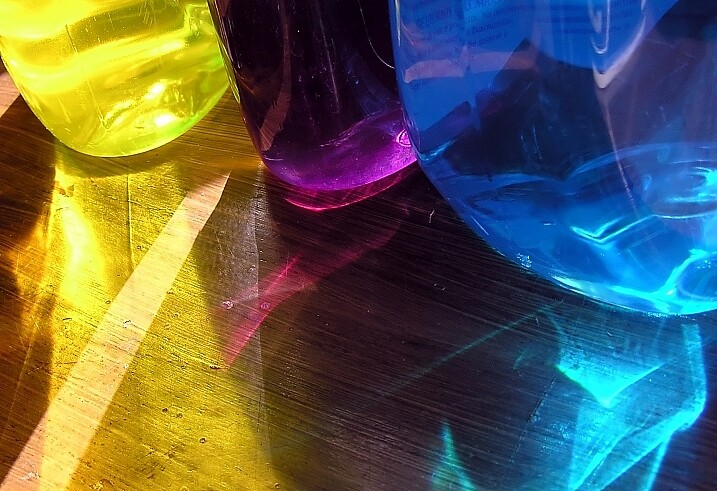
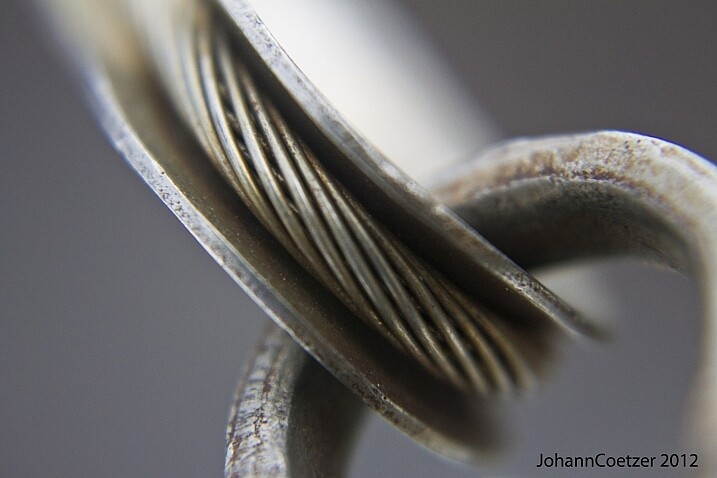
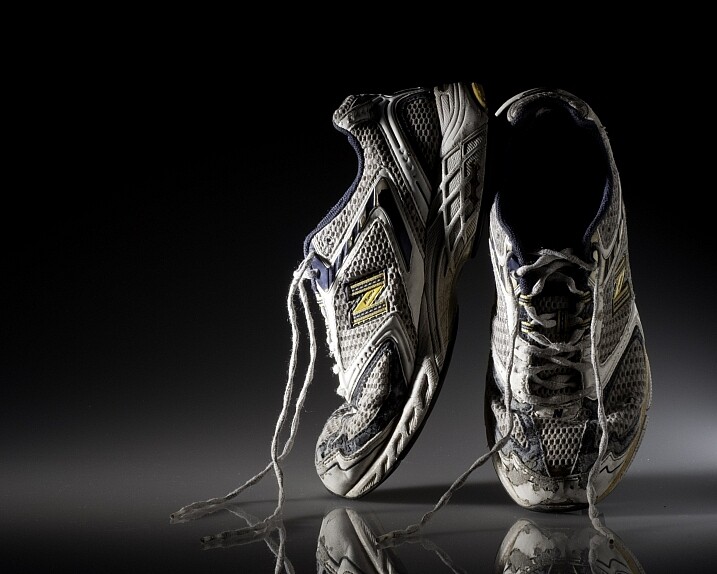
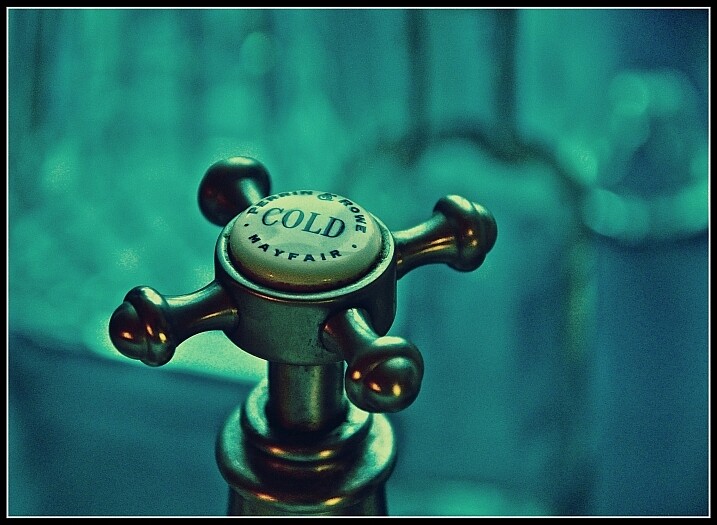
  • 28 Refreshing Photos of Ordinary Things

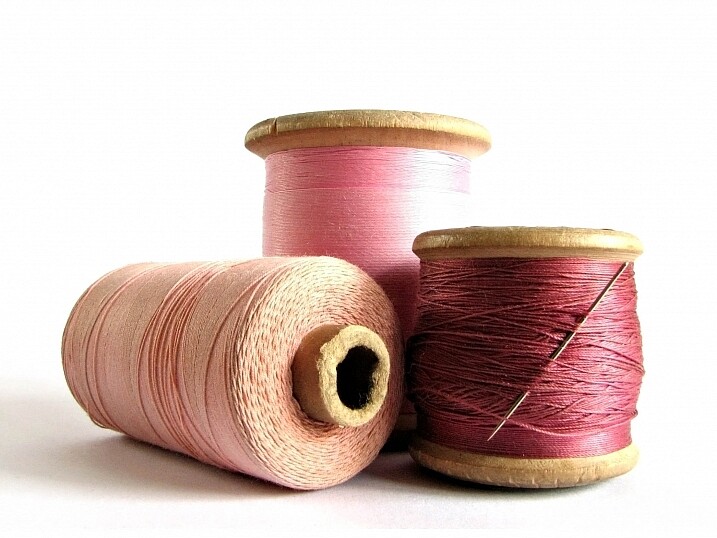
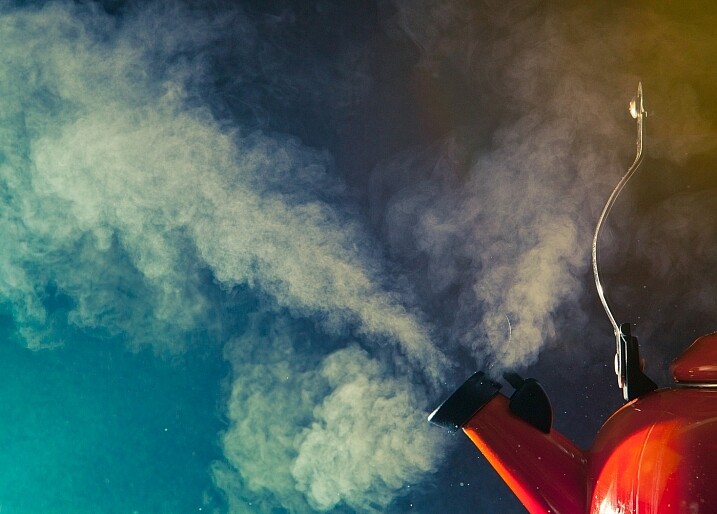
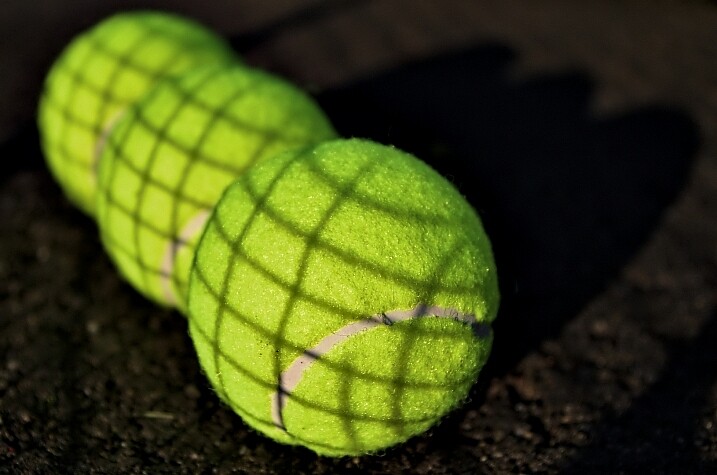
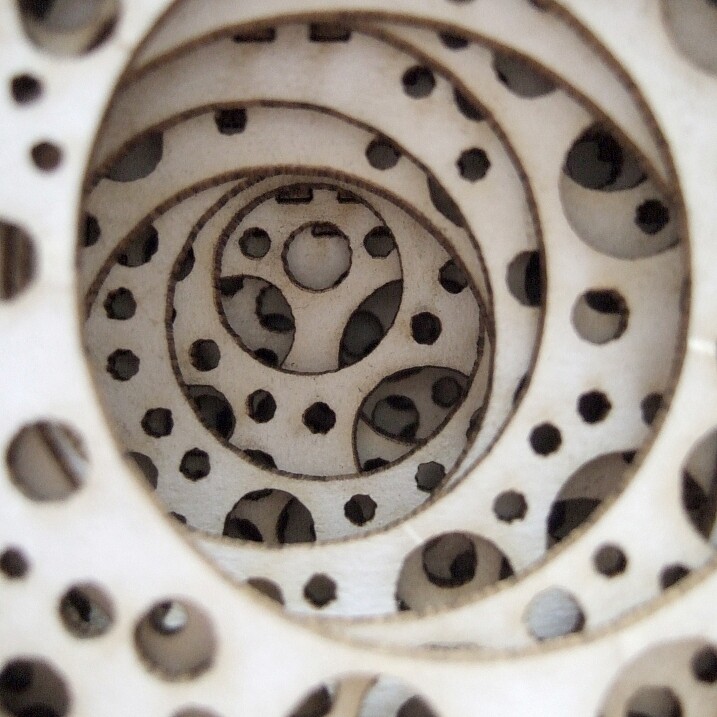
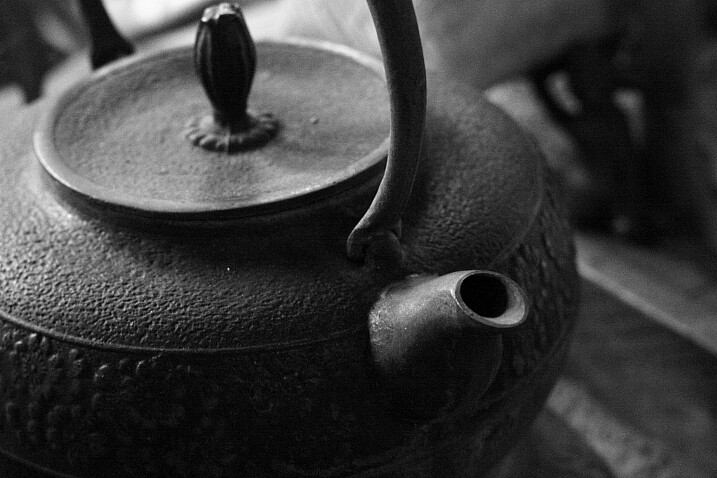
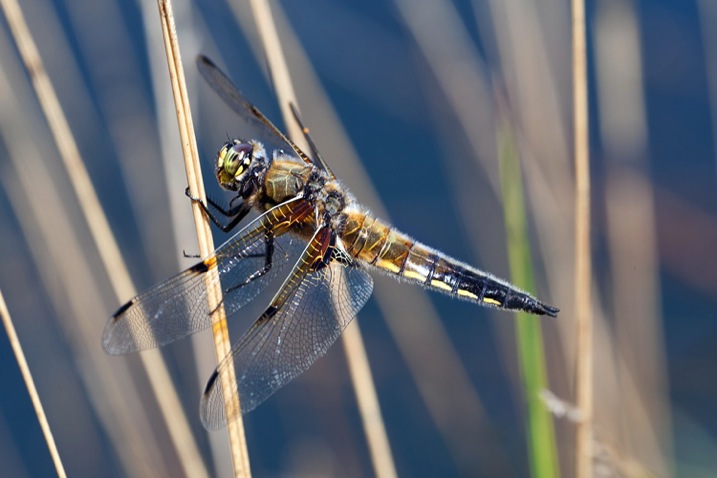
    As photographers we like to get out and travel to find unique and interesting things to photograph. But there are photographic subjects everywhere – all you need to do is look around and get creative.

    Here are some photos of every day, ordinary objects – where the photographers have gotten creative with lighting, cropping, and composition. Take note – you can do this too!

    ~lzee~bleu~

    By ~lzee~bleu~

    JLS Photography - Alaska

    By JLS Photography – Alaska

    Maria Teresa Ambrosi

    By Maria Teresa Ambrosi

    Hiroyuki Takeda

    By Hiroyuki Takeda

    Holley And Chris Melton

    By Holley And Chris Melton

    Giusi Barbiani

    By Giusi Barbiani

    Flavio~

    By Flavio~

    Theilr

    By theilr

    Darlene Hildebrandt

    By Darlene Hildebrandt

    Tom Roeleveld

    By Tom Roeleveld

    Jo Christian Oterhals

    By Jo Christian Oterhals

    Michael Porter

    By Michael Porter

    Harry (Howard) Potts

    By Harry (Howard) Potts

    Johann Coetzer

    By Johann Coetzer

    Herr Hans Gruber

    By Herr Hans Gruber

    DorkyMum

    By DorkyMum

    Caro Wallis

    By Caro Wallis

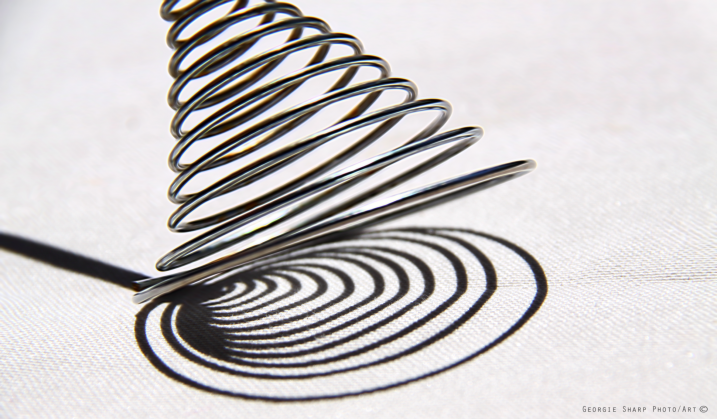
    Georgie Sharp

    By Georgie Sharp

    Roland Peschetz

    By Roland Peschetz

    Benjamin Lehman

    By Benjamin Lehman

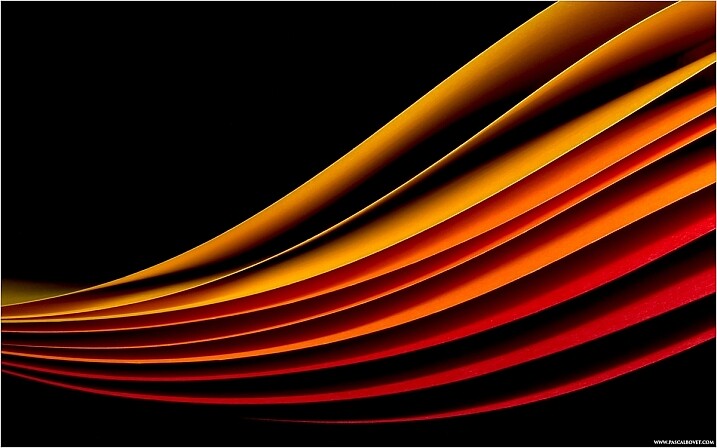
    Pascal Bovet

    By Pascal Bovet

    Michael Pardo

    By Michael Pardo

    Mbgrigby

    By mbgrigby

    Jared Tarbell

    By Jared Tarbell

    IMorpheus

    By iMorpheus

    William Warby

    By William Warby

    Daniel Wehner

    By Daniel Wehner

    Javier Morales

    By Javier Morales

    googletag.cmd.push(function() {
    tablet_slots.push( googletag.defineSlot( “/1005424/_dPSv4_tab-all-article-bottom_(300×250)”, [300, 250], “pb-ad-78623” ).addService( googletag.pubads() ) ); } );

    googletag.cmd.push(function() {
    mobile_slots.push( googletag.defineSlot( “/1005424/_dPSv4_mob-all-article-bottom_(300×250)”, [300, 250], “pb-ad-78158” ).addService( googletag.pubads() ) ); } );

    The post 28 Refreshing Photos of Ordinary Things by Darlene Hildebrandt appeared first on Digital Photography School.


    Digital Photography School

  • Weekly Photography Challenge – Ordinary Objects

    The grass is always greener on the other side of the fence. There are always more interesting photography subjects somewhere else other than the place we live. Or are there?

    Now is your chance to make photos from ordinary things you find in and around your own house and neighborhood.

    Darwin Bell

    By darwin Bell

    Eduardo Mueses

    By Eduardo Mueses

    Weekly Photography Challenge – Ordinary Objects

    So go find some old shoes, bottles, bottle caps, string, tools, kitchen utensils – anything that might make an interesting photo. The key to making great a photo of something you see every day is to use good lighting, camera angle, choose the right lens, and camera settings.

    Perhaps you could try some macro photography, or black and white, or a new post-processing technique. The more you shoot near home and practice and experiment – the better you’ll be equipped for situations that present themselves later. Only putting in your 10,000 hours will get you to “expert” status.

    Marco Monetti

    By marco monetti

    Nic Taylor

    By Nic Taylor

    YJ Khaw

    By YJ Khaw

    JD Hancock

    By JD Hancock

    JD Hancock

    By JD Hancock

    Caroline

    By Caroline

    Share your images below:

    Simply upload your shot into the comment field (look for the little camera icon in the Disqus comments section) and they’ll get embedded for us all to see or if you’d prefer upload them to your favourite photo sharing site and leave the link to them. Show me your best images in this week’s challenge. Sometimes it takes a while for an image to appear so be patient and try not to post the same image twice.

    googletag.cmd.push(function() {
    tablet_slots.push( googletag.defineSlot( “/1005424/_dPSv4_tab-all-article-bottom_(300×250)”, [300, 250], “pb-ad-78623” ).addService( googletag.pubads() ) ); } );

    googletag.cmd.push(function() {
    mobile_slots.push( googletag.defineSlot( “/1005424/_dPSv4_mob-all-article-bottom_(300×250)”, [300, 250], “pb-ad-78158” ).addService( googletag.pubads() ) ); } );

    The post Weekly Photography Challenge – Ordinary Objects by Darlene Hildebrandt appeared first on Digital Photography School.


    Digital Photography School

  • 24 Frames Per Second: Finding Photographic Inspiration From Cinema

    I don’t believe that, as a photographer, it didn’t occur to me for quite some time to look to movies for inspiration and lessons I could use in my own art. But as I’ve grown as a consumer of movies and art, I’ve learned to look more closely at the choices filmmakers have selected in order to convey information to Continue Reading

    The post 24 Frames Per Second: Finding Photographic Inspiration From Cinema appeared first on Photodoto.


    Photodoto

  • Flickr Brings Back Pro

    Thomas Hawk, Pure Pro

    “It’s about time we started to take photography seriously and treat it as a hobby.” Elliott Erwitt

    “Hell hath no fury like that of a ‘professional’ photographer scorned.” Thomas Hawk

    A few years ago, shortly after Marissa Mayer joined Yahoo, Flickr did away with their paid pro account. Existing pros could keep this distinction (and pay for it) and were grandfathered, but new pro accounts could not be opened.

    Announcing that decision Mayer took a bunch of heat for suggesting that there really wasn’t much of a distinction between professional and amatuer photographers anymore — a statement which she later clarified. As Bart Simpson might say, aye caramba senora Mayer!

    Nothing pisses off so called professional photographers more than to minimize their self-important “pro” moniker and lump them in with every Tom, Dick, and Harry, or these days Jane, Jill and Mary as just another shutterbug with an iPhone 6+ or a Canon 5D Mark 3. The truth of the matter is though that the economics of photography have been changing for years now and much to the chagrin of the “professional,” the economics of photography have never been more disbursed. Between microstock, macrostock, laughingstock, micro four thirds and Getty Images, about 10 million more people are in the game than were a few decades ago — and yes even those iPhone shooters on EyeEm.

    All of which has nothing to do with Flickr and their pro accounts, which was just a title given for paid vs. free accounts.

    In the early days, Flickr offered two levels of service, pro or free. Free accounts were limited to sharing only their last 200 images, while pro accounts got unlimited photos on the site. It was a way for people to try Flickr before committing to paying for it, or as Michael Arrington put it back in 2011, a way for Flickr to hold your photos hostage. Most people didn’t pay, but the most serious users did and were recognized with a special little badge labeling them as a cut above the rest. They also didn’t have to look at ads or have ads appear on their photos for others.

    Mayer did away with the pro account at Flickr in 2013 and granted every free user a full terabyte of storage on the site with no 200 photo limitation. Flickr opened up and become free and unlimited for 99.999% of potential users (1 terabyte is a lot). This was a *huge* move on Flickr’s part. Replicated enterprise storage is not cheap and I suspect today has become one of the most significant costs for Yahoo in running Flickr.

    Well all that changes today with the return of the pro account at Flickr. The new pro is a little different than the old pro, but I think it’s great that Flickr is bringing back pro and think it still represents terrific value for the serious pro or amateur photographer.

    Before we get into the new pro, it’s important to point out that for those of us lucky birds who have been grandfathered into the old pro account nothing changes. We still keep our unlimited photo storage, ad free status for both our photos and our browsing, and heck, what a deal, $ 24.99/year! We will also even get a brand new pro account badge back on our accounts like the new pros.

    So what about this new pro account, how does the new pro account work?

    Well for starters it’s more expensive than the old pro. The new Flickr pro account will cost you $ 49.99/year. If you want to you can choose more of a pay as you go model at $ 5.99/month, but if you do the math that will be considerably more expensive than committing for a year.

    For that money you get a few things.

    First you get the distinction of a pro icon on your Flickr account. This may sound dumb but really it’s not. Especially on a social network where anonymous trolls can easily create throwaway accounts and blocking tools are really bad, when you see a pro icon on Flickr you will be taken more seriously. You are invested.

    More significantly, in my opinion, you get the same ad free status for your own photos and for your own browsing. If you are pro you can rest assured that Aunt Millie will not have to see ads when she looks at your photos of this year’s 4th of July barbecue. Likewise, as you browse Flickr yourself you’ll be completely exempt from having to view any advertising. This alone is worth the price of pro. Any path out of having to view ads is worth it in my opinion. If only Facebook could see the light.

    Another interesting deal is that by signing up for pro you can get a 20% discount off of Adobe’s Creative Cloud offer (for the annual subscription only). That’s actually a pretty good bargain. Most serious photographers use Lightroom and Photoshop. At $ 120/year for Adobe’s Creative Cloud software this pays for about half of your pro account if you use Lightroom and Photoshop.

    And then there are stats. I love my pro stats on Flickr. I look at them every day. Maybe it’s just pure vanity or maybe it’s just curiosity about where my Creative Common Non-Commercial licensed Flickr photos are appearing elsewhere online, but I love stats. Not only do pros get access to a sophisticated stats panel, it’s now been improved to give you even more information about your photos.

    Finally, you get free shipping on any Flickr merchandise ordered domestically or 50% off shipping for international orders — and just in time for that special Labor Day photo book you were going to make up for your sister-in-law this year — just kidding, but, you know, Yom Kippur will be here before you know it.

    Of course the biggest missing feature of the new pro over the old grandfathered pro (lucky me), is the promise of unlimited photo storage. New pro accounts are still limited to the 1 terabyte (which in fairness is more than 99.999% of photographers will ever need, but as someone who has used up 970GB of my 1,000GB by only age 47, I’m glad I still get unlimited). I’m planning on publishing 1,000,000 high res photos to Flickr before I die.

    By the way, if you really, really, really want pro but don’t want to pay for it, I suggest you strike up a friendship with Pacdog. I swear that guy has probably bought and given out like 50 pro accounts for his friends over the years. He’s the most humble Donald Trump type character on Flickr pro and very generous with his paid upgrades for his best friends on Flickr.

    If you want more info on how to upgrade to pro on Flickr you can find that here.

    Thomas Hawk = PURE PRO! You can find me on Flickr here.


    Thomas Hawk Digital Connection

  • 4 Steps to Help You Start a Documentary Photography Project

    The thing you need to do for getting good ideas which are actually possible, is to weigh the game in your favour.

    You need to be selective in your project choices, research well, and demonstrate an intense curiosity when pitching your project idea.

    The four steps in this article will help you:

    • Use your interests to research and learn about a subject.
    • Demonstrate your curiosity to those who hold the key. These are the gatekeepers.
    • Gain access.
    • Start a documentary photography project.

    Peter David Grant dps submission 1 of 7
    Primarily a street photographer, using this method I transitioned into documenting places hidden behind closed doors, as you can too.

    Step #1. What are you interested in?

    The first thing to ask yourself is, what are you actually interested in? Grab your pen and pad, write down “What Interests Me?”, then number lines, 1 to 20.

    Without thinking too much, fill in all the way down to the bottom of the list. The goal here isn’t to think about where your interests might go, but rather to give you a reference from which to work.
    Peter David Grant dps submission 2 of 7
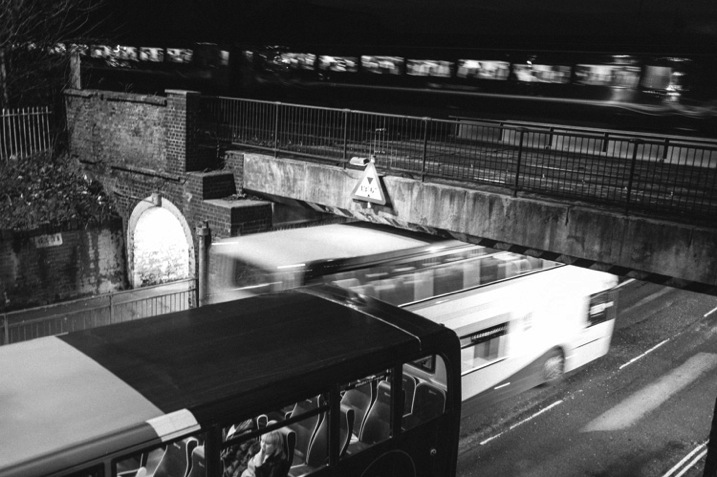
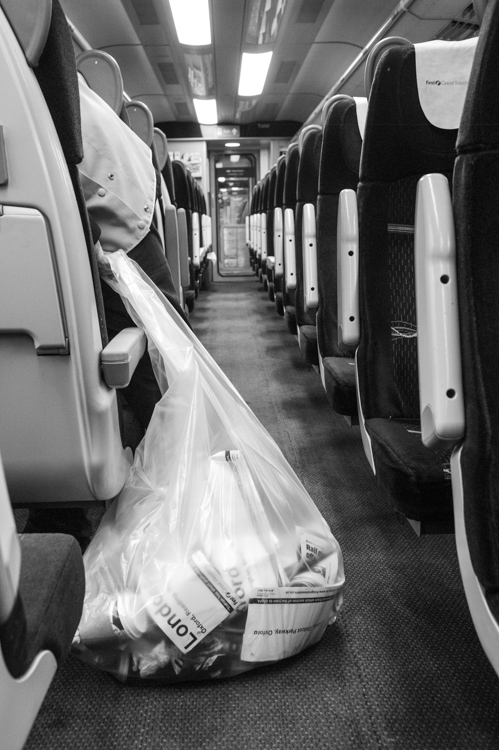
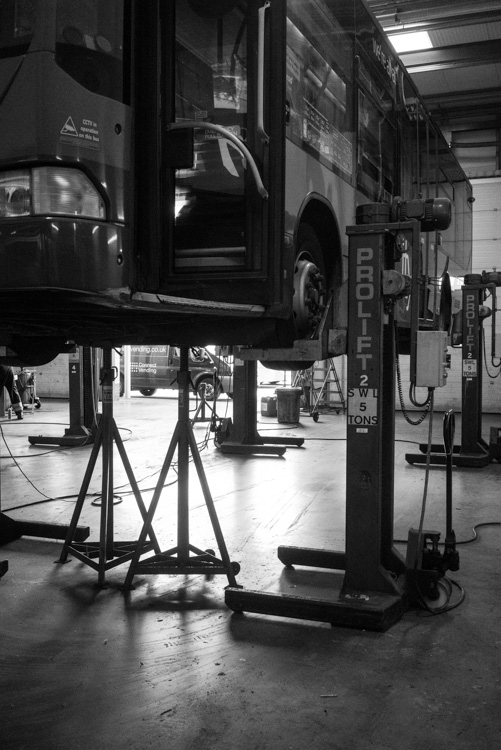
    Look back at your photographs and see what you like to capture. Lots of street photographs like these were coming about due to my interest in transport. I’ve now started projects about the local train station, and a local bus company.

    Step #2. Whittle down your list

    Now that you’ve got your list of 20 interests, the next thing you need to do is get rid of those which are not visual in nature, or are impractical. For example, you should cross off astronaut training from your list, or following your favourite sports star around the world, as they do their thing. It just isn’t realistic, at least not in the early days.

    Your goal here is to have a list of potentially visually stimulating interests which are readily accessible (assuming you gain access) to go back to over many visits. A key part about documentary photography is understanding what is going on, and picking up on the subtleties of the situations. You need to be able to go back again and again, build rapport, and blend in – because it is at that point that you’ll start producing quality photographs.

    With the list reduced to those that are practical, which also have a visual interest, you should select three that you believe will be most interesting to others. This is important for a couple of reasons:

    1. You’re starting to think about what your audience will be thinking. This will be useful when it comes to talking to the gatekeepers, to use as a reason why you should document the subject.
    2. You’re thinking about what the gatekeepers find interesting. You need to be able to demonstrate empathy with the people you contact.

    Finally, of those three interests, which one do you feel you know the most about? This makes the next step easier.
    Peter David Grant dps submission 3 of 7
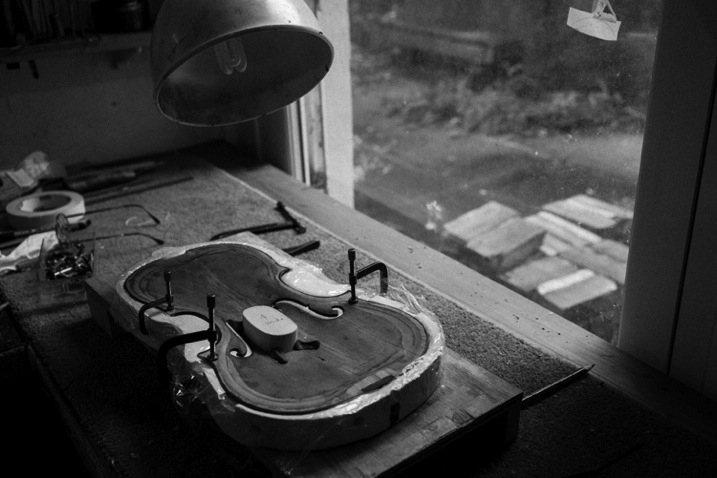
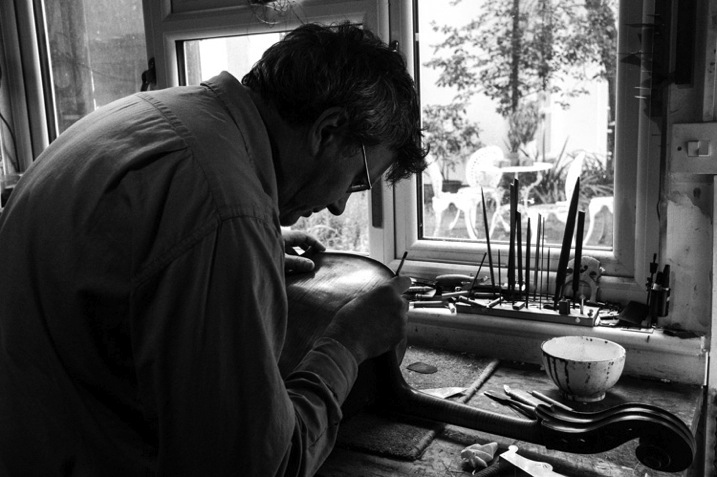
    Don’t forget to think laterally. While I’m as musical as a crumbling wall, being an engineer, I could appreciate the design and material aspects of violin making.

    Step #3. Research your interest and finding out who to contact

    Once you’ve chosen your interest, you should further your understanding. Get your notebook again, start researching and make notes. Some suggestions:

    • Google your interest, and read the top three or four links.
    • Read the related Wikipedia article, making sure you follow any links that stand out.
    • If you’re researching a company, devour their website. Click every single page. Read everything.
    • Search on Google News for your interest.

    While reading, in addition to anything that grabs your interest, keep an eye out for:

    • A name for someone you might be able to contact.
    • Something time sensitive which is changing. Part of documentary photography is recording something for historic purposes.

    All of this collected information will form ammunition for your first contact, showing your knowledge, interest, and understanding of the subject. Remember this should be interesting stuff to you. If it feels like a chore, you’ve probably chosen the wrong interest as a subject, or aren’t connected with it.
    Peter David Grant dps submission 4 of 7
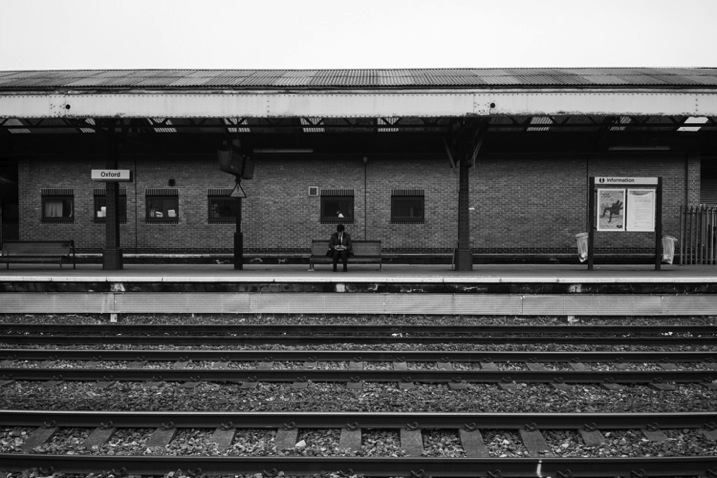
    You should be deeply interested in the subject. I had no problem spending hours, upon hours, researching the local train station, because I wanted an all-access pass so badly.

    Next, you should consider your close friends and family. Do any of them have links to your interests? Those who do, are they in a position to give you the access you’re after? If so, great! They’re going to be who you contact. If they’re not, you should still talk with them about your interests, and desires. They might be able to put you in contact with a connection.

    After you’ve found the person you’re going to contact, you should look for their details. It might be as easy as looking at their contact page online, or through finding someone else’s email address at the company, working out their structure, and taking a punt.

    For example, if you wanted to contact John Doe to ask about documenting Company XYZ, through some Googling, or looking at XYZ’s PR or HR page, you might find an email address like john.doe@XYZ.com. It wouldn’t be too difficult to imagine john.doe@xyz.com. I’ve used this in the past to great success.
    Peter David Grant dps submission 5 of 7
    Guessing an email address allowed me to access the Oxford Train Station which I’m currently documenting as they redevelop.

    In large organizations, you might find the assistant to the gatekeeper is the person you’re going to be contacting. LinkedIn is also a brilliant resource.

    One final piece of research to do, is to look for example photographs you can show the person you’re making contact with. These can either be your own work, or the work of other photographers (be sure to credit them though). What you’re looking for is something that visually explains the kind of thing you’re seeking to achieve.

    At this point, you should have a chunk of research about the organization, relevant news articles, an idea of who you’re going to contact, and some example photographs to show them.

    Step #4. Making contact – demonstrating your interest and knowledge

    It is now time for you to put it all together in an email. Your email should include:

    1. Why you’re emailing that particular person. This is about understanding why they are the gatekeeper to the project, showing that you care about the subject, and demonstrating your understanding.
    2. Show your curiosity and understanding of their role within the organization.
    3. Tell them what you want to do. Make your request clear and straightforward. Note: don’t ask for everything at once. If you think what you want to ask is too much, dial it down, and ask for something smaller. Once you’re in, and have gained their trust, they’ll open things up for you. As well as explaining what you want to do, you should also explain why you want to produce and show your audience the photographs at all. Mention the examples you’ve attached.
    4. Tell them what they can do with the photographs. Give them permission to use those that you’re going to take. It is the least you can do. Make suggestions where they can use them, for example in their monthly newsletter (if you can somehow find out what they call the newsletter, make sure to include that too) or on their social media.
    5. Tell them what you want to do. Explain your intentions for the photographs, e.g., are they for an exhibition (don’t worry if you’ve not arranged one, if the work is good that will sort itself out later), a book, or just your website. Be honest about your intentions.
    6. Understand the difficulties. This will impress them. You’re once again demonstrating your understanding of what they do. You’re effectively saying, “I know there are problems that me being there will bring, but I think they’re worth overcoming”. Bring it back to why you want to do the project in the first place, so that they can see the benefits, and why they outweigh the difficulties.
    7. Summarize all of the above and suggest what the next action step. You could say something like, “If this sounds interesting to you Mr. Doe, it would be great to discuss this further when it suits you sometime”.
    Peter David Grant dps submission  6 of 7
    Don’t be scared to chase emails either. If you don’t hear from them within the week, send a follow up email or phone call. Without it, I wouldn’t have shot at Oxford Violins.

    In addition, you should make it clear that none of your ideas are set in stone, and that you’re open to their input (remember, it is highly likely that they are more knowledgeable than you are).

    Finally get someone to check it. Before you do though, make sure you don’t prime them as to your intentions. You’re looking to find out if your request is obvious, clear, straightforward, that you’ve demonstrated your curiosity, and that there is a single next step that is easy to understand.

    Now send it.

    Step #5. What do you do next?

    Once you’ve got your foot through the door, you need to show your face, be confident, demonstrate your knowledge, ask questions, and show your curiosity. Assuming that all goes well, the rest should pan out nicely. Start shooting, see how the project develops, and learn as you go.

    This is where the joy starts. You’ve used your interest, and your camera, to get into somewhere that is fascinating to you. Enjoy yourself. Make friends, and click that shutter.
    Peter David Grant dps submission  7 of 7
    Before you know it, you’ll be behind the scenes in places you couldn’t have imagined yourself being.

    Bio: Peter David Grant has produced an exclusive ebook of the emails he’s used to get access to many of his projects for dPS readers. He’s deconstructed them, explaining why each bit is in there, and provides templates for you to use. You can get it here.

    googletag.cmd.push(function() {
    tablet_slots.push( googletag.defineSlot( “/1005424/_dPSv4_tab-all-article-bottom_(300×250)”, [300, 250], “pb-ad-78623” ).addService( googletag.pubads() ) ); } );

    googletag.cmd.push(function() {
    mobile_slots.push( googletag.defineSlot( “/1005424/_dPSv4_mob-all-article-bottom_(300×250)”, [300, 250], “pb-ad-78158” ).addService( googletag.pubads() ) ); } );

    The post 4 Steps to Help You Start a Documentary Photography Project by Peter David Grant appeared first on Digital Photography School.


    Digital Photography School

  • 10 Tips for Photographing Dragonflies

    Dragonflies and damselflies are fascinating insects which can be particularly photogenic due to their bright colours and striking patterns. As with any type of wildlife, dragonflies can be challenging to photograph because they can scare easily and never seem to keep still. However, it may be easier than you think to get some great shots of these amazing insects. Here are 10 tips to get you started.

    HhhdragonflyDPS

    1. Choose the right equipment

    As they are slightly larger than other insects, dragonflies can be photographed with anything from a point-and-shoot to a DSLR. The accompanying images have been taken with a DSLR. However, many of the principles remain the same whatever equipment you use.

    A good zoom lens (100-400mm) can produce decent results, but a dedicated macro lens has the advantage of providing closer focus for high magnification. If you are using a zoom lens, fitting an extension tube to the lens will allow it to focus closer and should produce good results. This is a cheaper option than buying a dedicated macro lens. However, if you plan to photograph insects on a regular basis, a macro lens may be a worthwhile investment as you will be able to take frame-filling shots from a comfortable working distance so as not to scare away the dragonflies. The macro lens used to take the majority of the shots here was the Sigma 150mm f/2.8.

    2. Find a good location

    During the summer months, dragonflies can be seen anywhere there is water. Certain species may be found in your garden pond, while others could be found near rivers or streams. Damselflies, for instance, are often weaker fliers and tend to stay close to the water surface, whereas dragonflies can be seen flying further away from the water, sometimes perching at eye level.

    Taking the time to research your native species of dragonfly, and their preferred habitats, before you go out will make you much more successful in photographing them. Be prepared to get a bit muddy as you may need to get low to the ground near the water’s edge. Wear appropriate clothing and respect the environment that you are working in.

    3. Study their behaviour

    Once you have spotted a dragonfly, take some time to watch its behaviour. You will quickly learn where it flies and where it likes to perch; some dragonflies prefer the ground, but others prefer to perch on grass or rocks.

    Matingdamsels2DPS

    Photographing dragonflies in flight can be pretty tricky. So, for starters, I would recommend trying to get some shots of dragonflies at rest. Rather than chasing a dragonfly around with your camera, I have found it better to watch out for a spot where they land, set up the camera nearby, and then wait. If you see a dragonfly perched on a stick approach slowly and carefully and avoid sudden movements. You should be able to get quite close. However, if the dragonfly does fly off, remain still and wait for a few minutes. It may well return to land on the same spot. Patience is key.

    If you are lucky enough to find a dragonfly that is eating, you may be able to get closer as they seem to focus more on their meal rather than you.

    Something that I have tried with some success is to take your own perch – a stick or reed – and place it near the water, close enough for you to take some shots should the dragonflies decide to land on it. Adding a couple of water drops could encourage them to land.

    4. Get up early

    Dragonflies are more active during the hottest part of the day as they require the heat from the sun to warm them enough to fly. If possible, I would recommend going out earlier in the morning, when it is slightly cooler and the sunlight is not as harsh as it would be around midday. You may not find as many dragonflies as you would later in the day, but those you do spot will likely stay still for longer, allowing you to get closer. You may even be lucky enough to get a shot of them covered in early morning dew, if you go out first thing.

    DragonflybluepoolDPS

    5. Control the aperture for sharp images

    Sharpness is vital in macro photography, and to ensure you get sharp images you will have to use the aperture to control the depth of field. You will need to have as much of the dragonfly in focus as possible and one way that you can maximize this is to photograph the dragonfly sideways on. Making sure that the camera’s sensor is parallel to the body of the dragonfly will enable you to use a wider aperture to blur out any distracting background while keeping the whole of the dragonfly in focus.

    Getting such a clear, side-on shot of a dragonfly will not always be possible. In such instances, you can increase the depth of field by reducing the aperture. I have found it useful to start off with an aperture of f/5.6, then take a series of shots working down to around f/11 or smaller, changing the shutter speeds and ISO accordingly. However, always ensure that the eyes are in focus and as sharp as possible. Your images will be poorer without this.

    6. Get the correct exposure

    Getting the correct exposure can be tricky, particularly if you are shooting in bright sunlight. You will get softer, diffused light by shooting earlier in the day or in slightly cloudier conditions.

    Even when perched, dragonflies can make a lot of fast movements such as flicking their wings or twitching their heads. Therefore, you will need to work with relatively fast shutter speeds. I would recommend shooting in bursts of three or four frames, as when you are reviewing your shots, you may find one is particularly sharper than the others. You could increase the ISO setting slightly to allow faster shutter speed and smaller apertures, but probably no more than 400 to maximize the quality of your images. A tripod may come in useful if you do have to use slightly slower shutter speeds, however the locations where dragonflies are found are not always too tripod-friendly. If you decide to shoot while hand-holding the camera, make sure you keep a steady hand, maintain a good footing, and ensure image stabilization is switched on (if available).

    7. Switch off autofocus

    You will often get sharper shots of dragonflies by switching off the autofocus and focusing manually.

    One useful (and inexpensive) piece of kit when shooting down low to the ground, is a right angle viewfinder, which attaches to your camera and allows you to look down into the viewfinder rather than having to lie flat on the ground. You could also try using your camera’s live view and zoom in on the detail to make sure the focus is as accurate as possible.

    BluedragonflyDPS

    8. Pay attention to the background

    When lining up your shot, pay attention to the background. Ideally, an uncluttered background of a contrasting colour to the dragonfly will produce shots full of impact. However, some damselflies will land in vegetation closer to the water surface making a clean background almost impossible. Larger apertures will help blur out any distracting backgrounds; this works well if you can take them sideway-on, as previously mentioned. A wider aperture will also help to produce bokeh in the background (circles of light from out-of-focus highlights) depending on your personal tastes.

    If possible, when selecting a spot to set up, try to place the subject as far away from any potentially distracting vegetation in the background. Moving a perch, or taking your own with you, may help with getting a cleaner background.

    9. Think about composition

    With such fascinating subjects, you have a range of options when thinking about composition. Try shooting the dragonfly from a range of angles (sometimes this helps to identify the species when you get home). It is not always necessary for the whole dragonfly to be included in the frame. If you can get close enough, you could attempt an extreme close-up on the eyes or part of the wing detail.

    Alternatively, you could capture the dragonfly within its surrounding environment. For example, iridescent demoiselles can look great when perched low down on a riverbank. This works particularly well with slightly larger dragonflies, and as the insect does not have to dominate the image, a dedicated macro lens may not be required.

    DragonflyeyesDPS

    10. Try to capture some behaviour

    Dragonflies look great at rest, but if you can, try to capture some of their behaviour for some unique shots. For example, damselflies mating can make shapes that look a bit like a heart (see above under #3), which can make for a pleasing image. Or, if you are up for a challenge, try to shoot a dragonfly in flight. For this, I would recommend using a telephoto lens of 300-400mm with an extension tube. Spend a few minutes watching how the dragonfly moves as they often follow the same path repeatedly. Once you have observed them flying, focus on a spot on their flight path and wait for the dragonfly to enter the frame. There is an element of luck with this type of shot. I have tried on many different occasions and sometimes the dragonfly will vary its flight patterns seemingly at random. Don’t give up though – patience is key with all wildlife photography and just enjoy the process of observing and photographing these amazing insects.

    DragonflyingDPS

    I’ve included several dragonfly shots taken in the UK. Please feel free to add your own as a comment below.

    googletag.cmd.push(function() {
    tablet_slots.push( googletag.defineSlot( “/1005424/_dPSv4_tab-all-article-bottom_(300×250)”, [300, 250], “pb-ad-78623” ).addService( googletag.pubads() ) ); } );

    googletag.cmd.push(function() {
    mobile_slots.push( googletag.defineSlot( “/1005424/_dPSv4_mob-all-article-bottom_(300×250)”, [300, 250], “pb-ad-78158” ).addService( googletag.pubads() ) ); } );

    The post 10 Tips for Photographing Dragonflies by Richard Beech appeared first on Digital Photography School.


    Digital Photography School
  • Shooting Indoors in Ambient Light: Yoga Photo Session

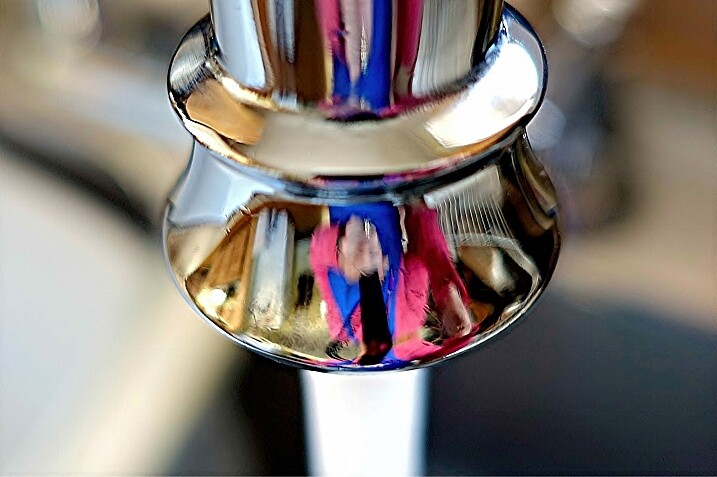
    Shooting indoors is always a challenge unless you have a professional lighting setup with you. The light is usually low, so it’s hard to get any kind of depth of field. Lightbulbs inside of lamps tend to glow orange, while overhead florescent lights show up on the greenish side, and aren’t very pretty. So what do you do? Let your Continue Reading

    The post Shooting Indoors in Ambient Light: Yoga Photo Session appeared first on Photodoto.


    Photodoto

  • How to Use Your Tablet or SmartPhone as a Light Source for Photography

    In the early 90s I was just a kid, and I remember watching a VHS tape about photography lighting with the great Dean Collins. I was truly amazed with the way things were arranged in the studio and how he placed the light. This was magic to me, and Dean Collins was the magician.

    I watched it over and over, trying to find the little tricks behind everything he was doing. Since that day, every time I see a picture, I try to understand how it was done and how the light was placed, the quality of the light, the reflections, and the shadows it casts. What I’ve learned along the way is that a lot of the commercial images you see are done with some really simple lighting setups, and not in the big studios with the big production sets that you might imagine.

    The next image is an example.

    01

    This image might look like a complicated and high-end lighting setup, but in fact, the only light sources used here were simply a tablet and a smartphone.

    02

    This is a typical light painting image, where the camera is placed on a tripod and the image shot at ISO 50, f/5.6 and a 4 second exposure time. I used the lowest ISO so I could make the image as clean and noiseless as possible. F/5.6 was the chosen aperture to give me the depth of field effect I was looking for, and after a couple of test shots, I realized that 4 seconds was the correct exposure time for the light I was using. It also gave me a comfortable time-frame in which I could move the light around and create the desired effect. An infrared remote shutter release was used to avoid touching the camera and keep it as steady as possible.

    Light painting is a technique I use a lot in my work. I used to do it mostly with small lanterns and led light panels, but I realized that a tablet screen light and a smartphone camera led light are fantastic tools to use as light sources in this type of images. There are a few apps that can help to control what shows up on the screen, and transform your device into a mean light-painting machine, but you don’t really need them.

    What I’ve done is to create my own masks in Photoshop which I have in my iPad Mini Retina’s camera roll to use when I need. Here are some examples of masks I’ve created.

    03

    These masks control the shape and colour on the screen, and the brightness can be easily controlled in the device’s screen definitions.

    I took some readings with a colour meter. The iPad screen is around 5,500k and the iPhone camera LED light is around 6,500k, so it’s easy to adjust your camera to match the light source’s colour temperature or use different colours on the device’s monitor to create colour effects in the image.

    The light from these screens is usually soft; you can make it even softer with some tracing paper in front of the screen and you can control the spread of light with some black card flags.

    In this case I was holding the device by hand and moving it around, but you can buy cheap tablet and phone holders with ¼” thread connectors that can be mounted onto tripods, magic arms or even handles that make it easier to hold.

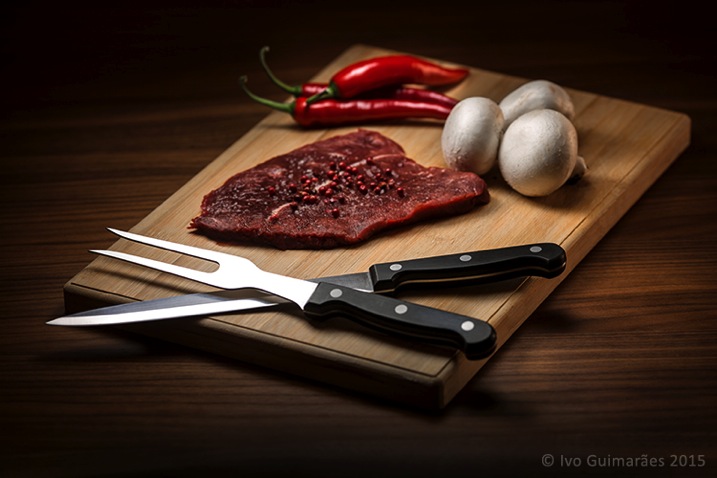
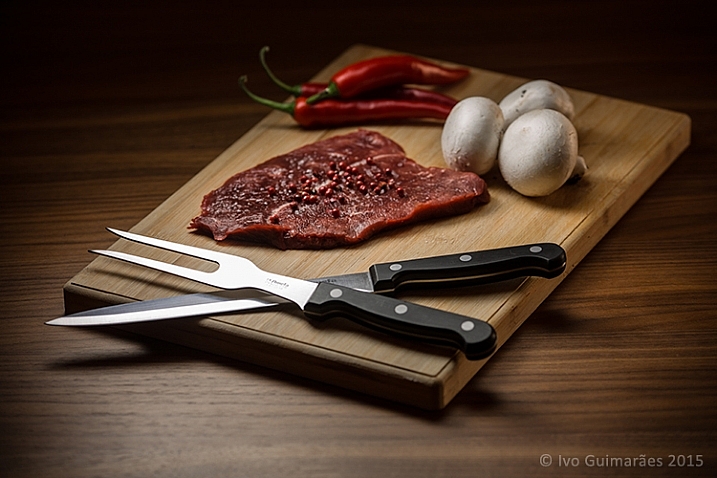
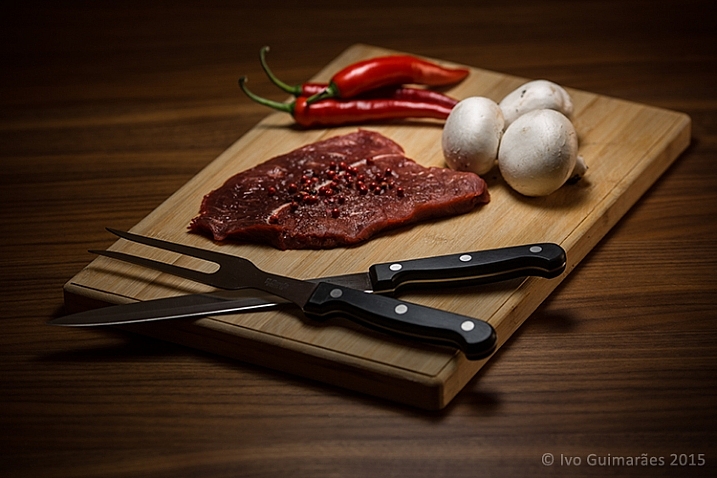
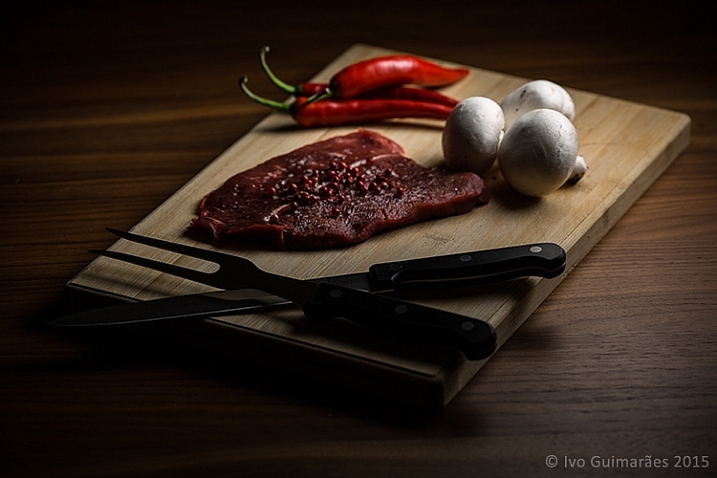
    This particular image could have been done with only one exposure, but I decided to take it a bit further with a composition of three images with three different types of light.

    04

    04a

    The first image (above) was created with perfect light on the knife and fork, with the iPad positioned at an angle, and with a white screen for a nice light reflection.

    The second image (below) has the perfect light on the steak, chilies and mushrooms, with a circular faded mask on the iPad screen.

    04b

    The third image (below) gives a vignette effect and some dramatic light with the LED camera light of the iPhone which is a much harder (smaller) light and therefore casts harder shadows.

    04c

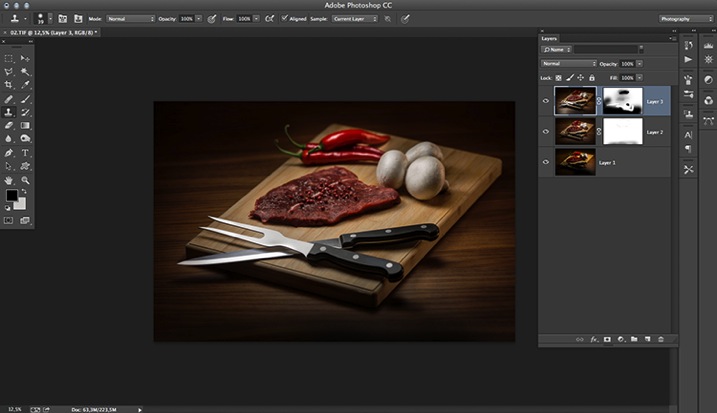
    Now it’s just a matter of composing the final image in Photoshop using the best that each of these images has to offer.

    05

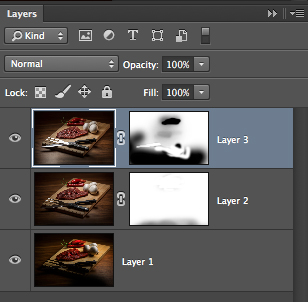
    The idea here is to stack the three images and use layer masks to show the good light spots and hide the bad ones. Here is a closer look at the layers with associated masks for each one.

    06

    These lighting and composition techniques are not exactly new. This was done long before Photoshop and digital photography were around. Film with multiple exposures or darkroom masking techniques were used with similar effects a long time ago. Nowadays, things are just a lot easier with the digital advent, but the fact is that the basics and references are still there, and understanding this puts you on the right path to be a better photographer.

    Have you tried this technique before? Give it a go and post any comments or questions you have below.

    googletag.cmd.push(function() {
    tablet_slots.push( googletag.defineSlot( “/1005424/_dPSv4_tab-all-article-bottom_(300×250)”, [300, 250], “pb-ad-78623” ).addService( googletag.pubads() ) ); } );

    googletag.cmd.push(function() {
    mobile_slots.push( googletag.defineSlot( “/1005424/_dPSv4_mob-all-article-bottom_(300×250)”, [300, 250], “pb-ad-78158” ).addService( googletag.pubads() ) ); } );

    The post How to Use Your Tablet or SmartPhone as a Light Source for Photography by Ivo Guimaraes appeared first on Digital Photography School.


    Digital Photography School
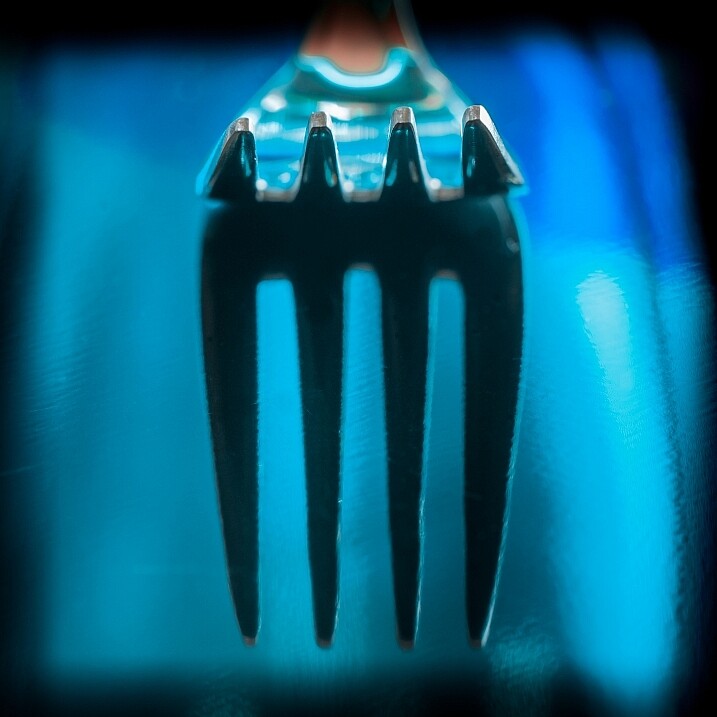
  • How the Switch from DSLR to Mirrorless Changed How I Edit Photos

    When I started in photography more than 10 years ago, the only viable option for editing images was Adobe Photoshop. At that time, 100% of my photo editing was done there.

    A few years later, Adobe introduced Lightroom and I embraced it right away for its speed and organizational features. I immediately adopted it into my photo processing workflow and it was the first big transition that drastically changed my processing.

    The next big change in my processing happened when I discovered HDR photography. As a photographer with a background in graphic design, I quickly saw the potential in the new processing technology and, again, I incorporated it into my workflow.

    Images How Switch to Mirrorless Change Photo Edit 1

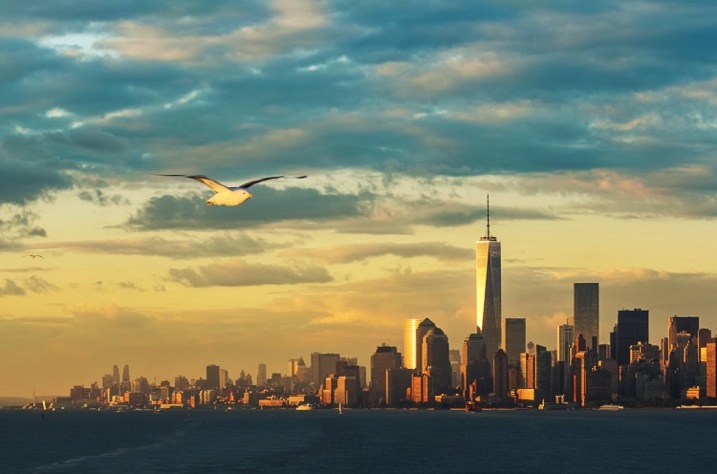
    Canon 60D, HDR processed

    By the end of 2014, after 10 years of shooting with a Canon DSLR, I had established my own photo editing workflow – one that I was comfortable with, that reflected my style of photography, and covered different scenarios of travel and landscape photography. Below is a list of four main processing techniques in my editing workflow, with the percentage of the total use for each.

    HDR Processing in Photoshop HDR Pro and Lightroom – 50%

    The foundation of my natural looking HDR photography style, this technique is based on merging bracketed photos in Photoshop HDR Pro and later editing the new HDR image in Lightroom. The beauty of this method is that Photoshop HDR Pro does not change the pixels (luminosity, contrast, saturation) of the original images. Instead, it combines data from the bracketed photos into one enormous 32-bit TIFF image.

    I outlined this technique in detail in one of my previous articles: Natural Looking HDR in Photoshop and Lightroom in 5 Easy Steps.

    Images How Switch to Mirrorless Change Photo Edit 2

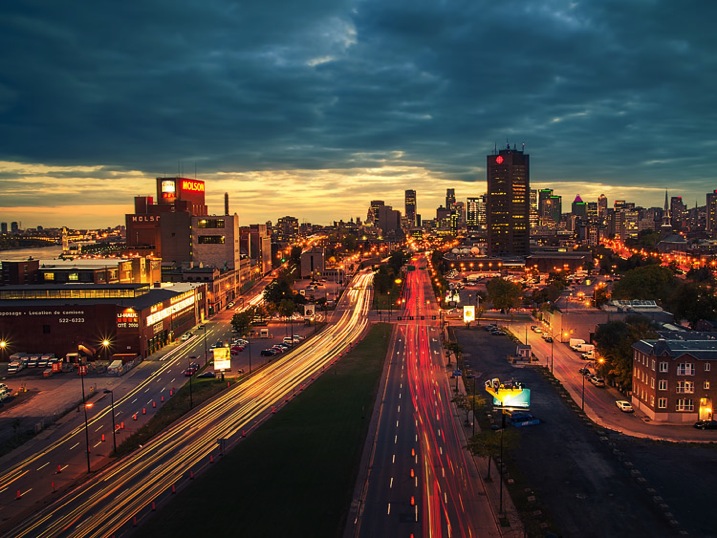
    Canon 60D, HDR processed with Photoshop HDR Pro

    HDR Processing in Photomatix – 30%

    Photomatix is the most popular, and matured standalone HDR program. It has a completely different approach compared to Photoshop HDR Pro. Besides standard HDR features like image alignment, de-ghosting and merging for HDR, it has unique image editing tools that allow me to create distinctive looks in my photographs.

    Images How Switch to Mirrorless Change Photo Edit 3

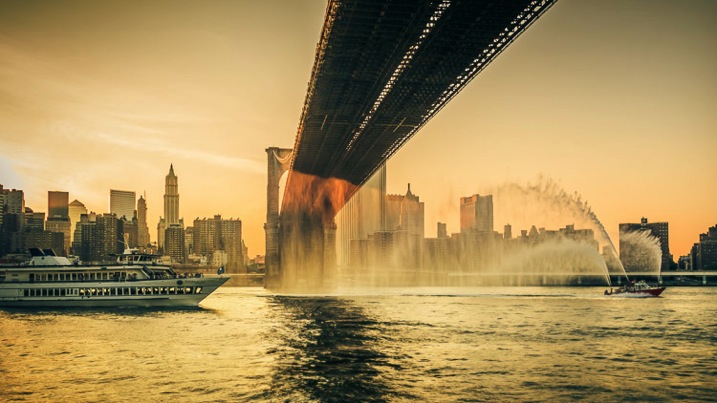
    Canon 60D, HDR processed with Photomatix

    Luminosity Blending in Photoshop – 10%

    This technique is based on blending multiple images together in Photoshop using transparency masks. It gives me the most flexibility and control over image processing but, at the same time, it is the most involved and time consuming. I use it in the most complex cases when everything else has failed.

    Images How Switch to Mirrorless Change Photo Edit 4

    Canon 60D, digital blending with Luminosity Masks

    Single RAW processing in Lightroom – 10%

    When the light is not very dynamic, I use a single image and process it in Lightroom.

    Images How Switch to Mirrorless Change Photo Edit 5

    Canon Digital Rebel, single RAW image processed in Lightroom

    The Switch

    The biggest change in my photography happened at the end of 2014 when, after shooting with a Canon DSLR for 10 years, I switched to Sony mirrorless. It was quite an adjustment. After shooting for so long with one brand, I had become extremely comfortable with it. During the switch, I had to learn how to work with something very different (more details on that topic here: 5 Lessons Learned Switching from DSLR to Mirrorless for Travel Photography).

    But, I did not expect that the brand switch would dramatically change my editing. I was wrong.

    After I returned from my first photography trip to Hawaii and California, where I put my new equipment through the test of real life scenarios of travel photography, I had 3000 brand new photos shot with the Sony a6000.

    When I started to edit the new photos, I could see some differences. In general, the images were much cleaner and sharper with a higher amount of detail. These changes did not surprise me because the a6000 has a new generation sensor with a higher pixel count, and in combination with quality lenses from Sony and Zeiss, it could easily resolve a staggering amount of detail.

    What surprised me was how the images behaved when I started to edit them. I could immediately see that the images were more responsive, meaning that I could push them much further, with more aggressive editing, and that I could recover more shadows and highlights from a single RAW image. I realized that I could process some images without using HDR techniques, which was not possible before.

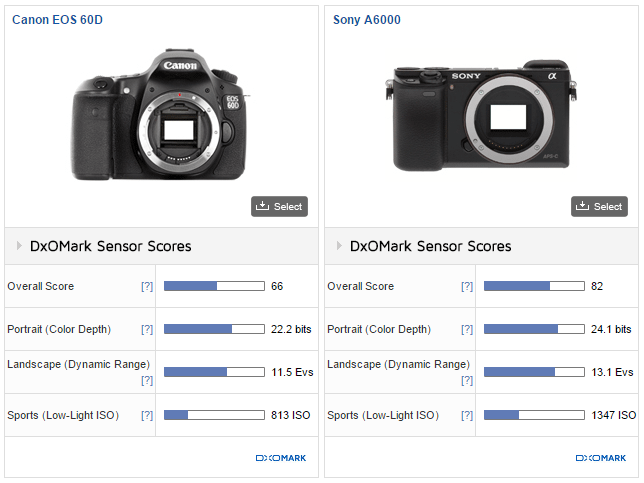
    This is when I started to look around trying to find the reason for the different behaviour. I found my answers on the DoX Mark website when I compared camera sensors. The dynamic range of the Sony a6000 sensor is wider by almost 2 stops (11.5EV vs 13.2EV) or 14%.

    Images How Switch to Mirrorless Change Photo Edit 6

    The difference is probably not a big deal if you are a wedding or street photographer but, for someone like me who specializes in travel and landscape HDR photography, this was a game changer. I saw the opportunity to streamline and optimize my digital techniques once again.

    Now, six months later, below is my new modified digital photography workflow.

    Single RAW Preset Based Lightroom Processing – 50%

    A major shift toward the single RAW Lightroom editing made me realize that it could be the perfect opportunity to optimize my workflow in order to save time on processing. I organized my Lightroom presets into four collections: Landscapes and HDR, Cross Processing, People and B&W. Now, I start the process of editing by applying different presets to the image trying to find the right look. When I find the one I like the best, I tweak it with standard Lightroom and Photoshop editing tools.

    Images How Switch to Mirrorless Change Photo Edit 7

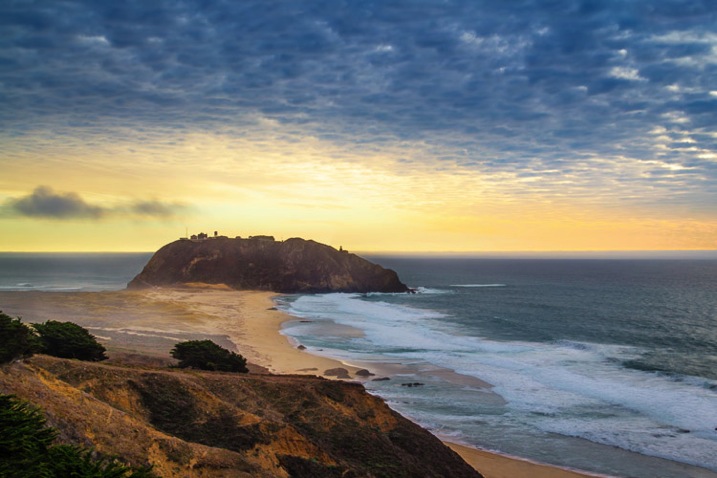
    Sony A6000, Sony 10-18mm lens, Lightroom Preset Based Processing

    HDR Processing in Photoshop HDR Pro and Lightroom – 20%

    With Adobe introducing Merge to HDR in Lightroom 6, I find myself using it more and more but I still use Photoshop HDR Pro.

    Images How Switch to Mirrorless Change Photo Edit 8

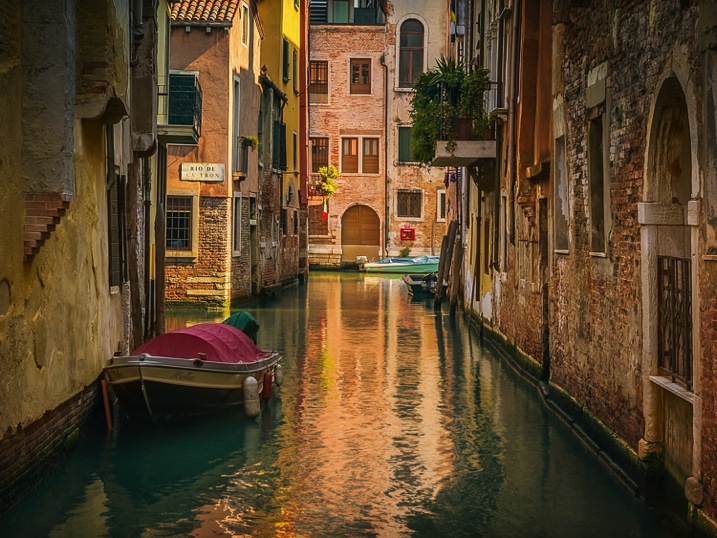
    Sony A6000, Zeiss 16-70mm lens, Lightroom 6 HDR Processed

    HDR Processing in Photomatix – 20%

    Cleaner digital files allow me to push the images even further in Photomatix.

    Luminosity Blending in Photoshop – 10%

    Nothing has changed here.

    Conclusion

    The switch from Canon DSLR to Sony mirrorless had unexpected consequences that drastically changed the way I edit my photos. In the end, the change was very positive, it allowed me to save time on processing and editing photos. Also, the extended dynamic range of the new sensor resulted in me taking fewer photos. I do not have to take five or seven bracketed shots anymore; in most cases, three brackets are all that is needed.

    Have you made the switch? Have you noticed any changes in your processing workflow? Share with us your thoughts in the comments below.

    googletag.cmd.push(function() {
    tablet_slots.push( googletag.defineSlot( “/1005424/_dPSv4_tab-all-article-bottom_(300×250)”, [300, 250], “pb-ad-78623” ).addService( googletag.pubads() ) ); } );

    googletag.cmd.push(function() {
    mobile_slots.push( googletag.defineSlot( “/1005424/_dPSv4_mob-all-article-bottom_(300×250)”, [300, 250], “pb-ad-78158” ).addService( googletag.pubads() ) ); } );

    The post How the Switch from DSLR to Mirrorless Changed How I Edit Photos by Viktor Elizarov appeared first on Digital Photography School.


    Digital Photography School