Category: Photography

  • Photo History Club: Pop Art Photography

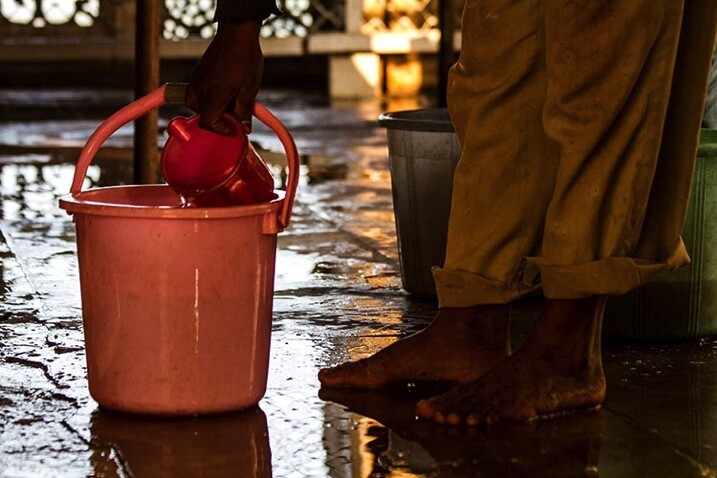
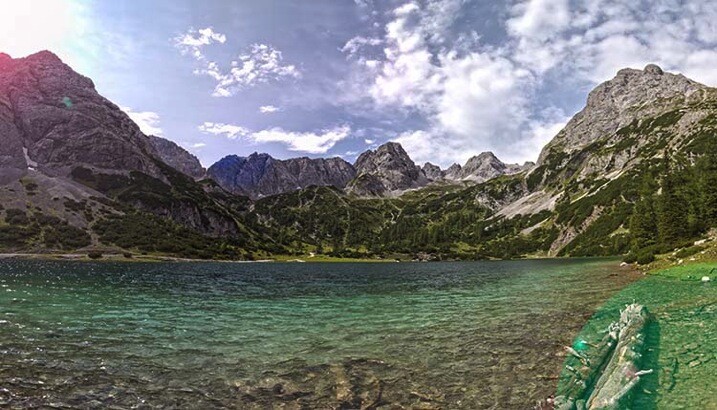
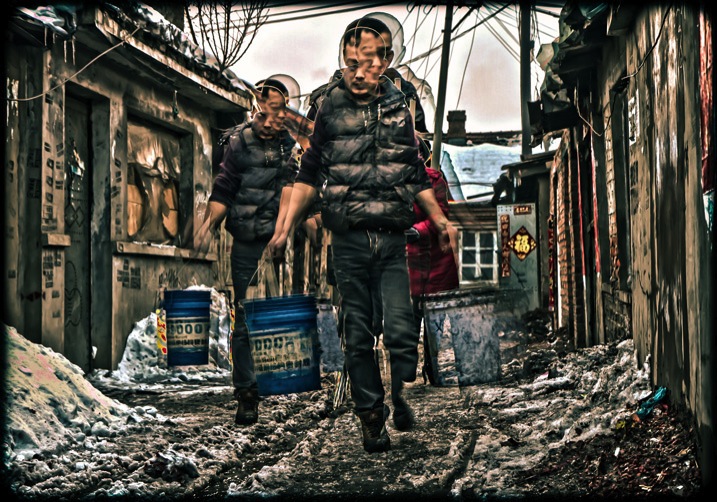
    I believe one could argue that the general population as a whole has historically had a messy, sometimes turbulent, relationship with art. As artists throughout time have sought to interpret their different realities and experiences as a human being, the end results we call “art” have, at times, ventured into increasingly esoteric realms. That is to say, difficult to understand Continue Reading

    The post Photo History Club: Pop Art Photography appeared first on Photodoto.


    Photodoto

  • 10 Items You Need for Your Night Photography Kit

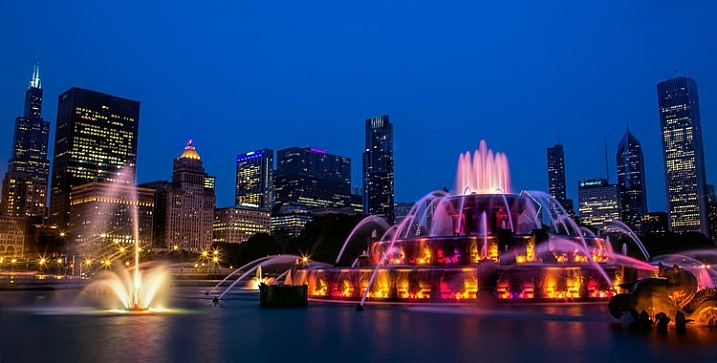
    Night Photographers Toolbox - Buckingham Fountain in Chicago

    Buckingham Fountain, Chicago (Shutter Speed: 10 seconds; Aperture f/18; ISO 100; focal length 21 mm)

    Louis Pasteur famously said that “chance favors the prepared mind.” This statement definitely applies to photography, as there is always an element of chance, with the odds of success growing with preparation. The quote seems particularly applicable to night photography, which has unique requirements for exposure and stability. Preparation is everything.

    Your odds of getting a great night photograph are greatly improved if you have taken the time make sure you have the tools needed to get the job done. In this article, you’ll learn the tools of the trade for the night photographer. You many not need all of these, but you will find most of them helpful – and some essential – for getting great pictures at night.

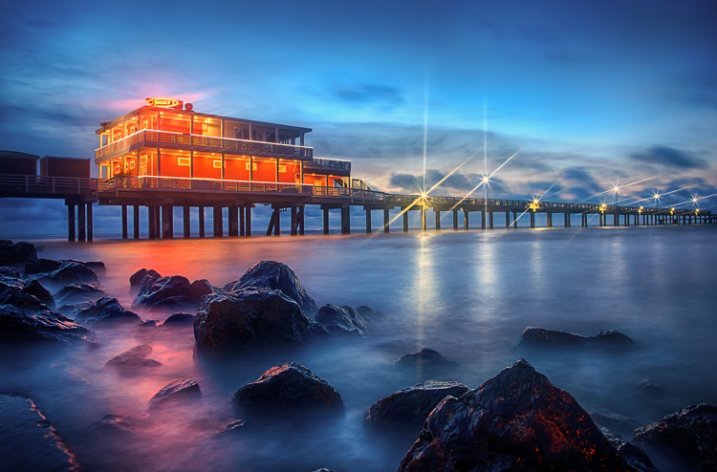
    Night Photographer's Toolkit - Galveston fishing pier photo

    Fishing Pier, Galveston, Texas (Shutter Speed: 3 image bracketed HDR of 5, 13, and 30 seconds; Aperture f/16; ISO 200; focal length 24 mm)

    1. The Right Camera

    It is perfectly obvious that you will need a camera for your night photography. But not just any camera will do. The adage that “the best camera is the one you have with you” does not apply to night photography. The first part of making sure you have the right camera is ensuring that it gives you the right amount of control. You will need one that:

    • Is capable of Raw capture, so that you can get the best image quality possible and keep digital noise to a minimum
    • Has manual controls, including manual exposure settings and manual focus, as sometimes it will be too dark for your camera’s auto-focus to work
    • Has Bulb mode for taking super-long exposures.

    Beyond that, you will need a camera with good low-light performance. How do you tell that? It isn’t really that simple, and there is no particular specification you can check. Even if your camera is capable of shooting at high ISOs, that doesn’t necessarily mean that your pictures will look good at those levels. In other words, it doesn’t matter if your camera is capable of shooting at ISO 25,600 if pictures shot at ISO 1600 are full of digital noise.

    Fortunately, there has been some testing done of cameras and their low light performance. Check out the testing done by DxO mark and DP review (check the review on their site for your particular model) to make sure your camera measures up.

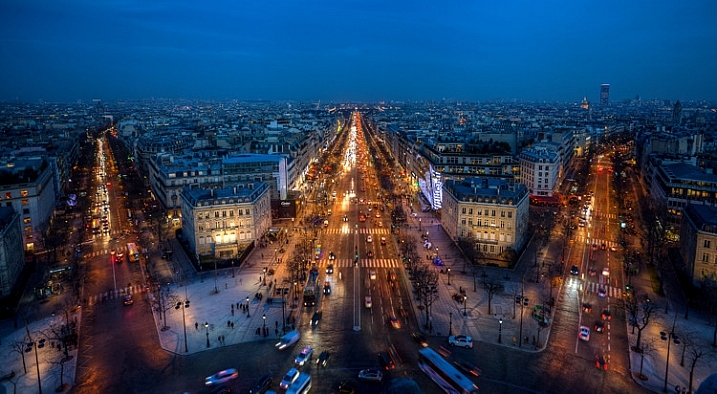
    Night Photographers Toolkit - Champs Elysees from the Arc de Triomphe

    Champs Elysees from atop the Arc de Triomphe, Paris (Shutter Speed: 3 image bracketed HDR of 1/4, 1/15, and 1 seconds; Aperture f/5.6; ISO 200; focal length 17 mm – note that these settings were used only because tripods are not allowed here)

    2. A Small Flashlight

    The next thing you’ll need is a flashlight. This will serve many purposes, one of which is helping you see your camera’s controls. That said, you should become extremely familiar with your camera before heading out, such that you can use the controls without even looking. You might even test yourself in a dark room before going.

    In any case, having a flashlight with you will help with a variety of things, whether it be finding something in your bag, setting up your tripod, dealing with straps and other attachments, etc. There is no end of uses for a small flashlight, and flashlights are cheap, so you should definitely stash one (or perhaps a few) in your bag.

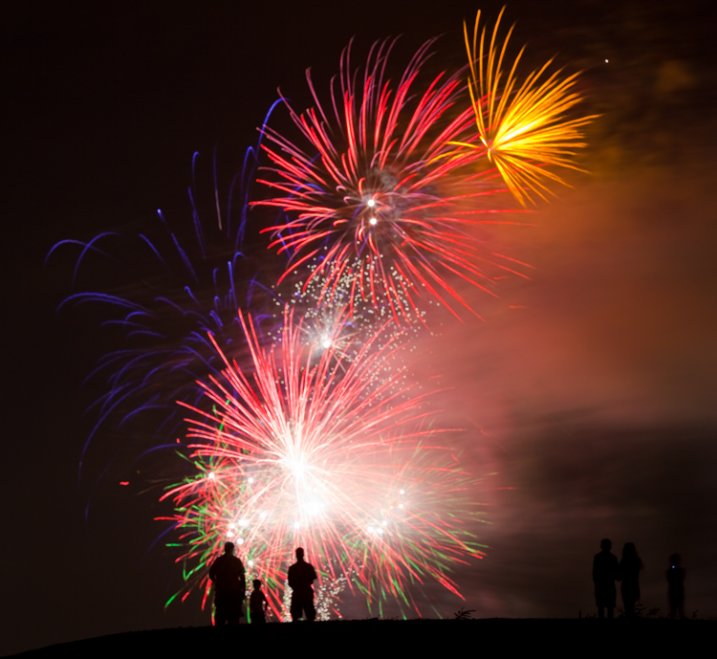
    Night Photographer's Toolkit - fireworks picture

    Fireworks in Southlake, Texas (Shutter Speed: 8 seconds; Aperture f/14; ISO 100; focal length 135 mm)

    3. Spare Batteries

    The long exposures that are inherent in night photography drain your camera battery at an alarming rate. In addition, when photographing at night, quite often you will be shooting using Live View, which will cause batteries to drain even faster. If you are dealing with cold temperatures, the battery power will be further limited. Therefore, night photography always calls for spare batteries.

    Even if you have a battery grip with two fully-charged batteries, bring a couple of spares. Don’t take any chances. There is no getting around dead batteries – it means your night is over.

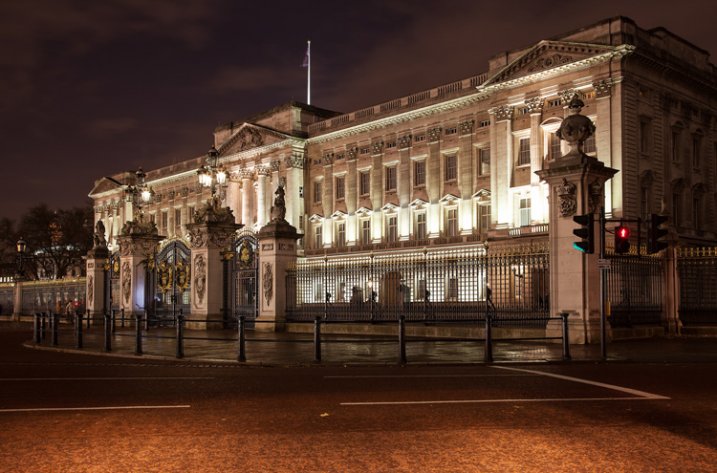
    Night Photographer's Toolkit - Buckingham Palace picture

    Buckingham Palace, London (Shutter Speed: 3 image bracketed HDR of 1.3, 5, and 20 seconds; Aperture f/8; ISO 400; focal length 35 mm)

    4. Tripod

    It is probably already obvious that you will need a tripod for your night photography, in order to keep the camera steady during the long exposures necessary due to the low light conditions. But what kind of tripod?

    Most will recommend that you buy a very expensive, large, carbon-fiber tripod to keep your camera as steady as possible. To be sure, those sorts of tripods work great. In fact, if you aren’t going to do much walking – and you can afford it – you should definitely invest in a tripod like that.

    Oftentimes, however, night photography involves a lot of walking around. Lugging around a big tripod when you are walking for miles is difficult, and limits your mobility as well. Why not start out with a lightweight, smaller, cheaper tripod? Check out something like a Me-Foto travel tripod or a Manfrotto BeFree. Unless you are using big, heavy lenses, they will hold your rig steady and are supremely portable. They don’t cost that much either. If you later decide you need a bigger, more substantial tripod (and you might) one of these smaller models will still make a great travel tripod.

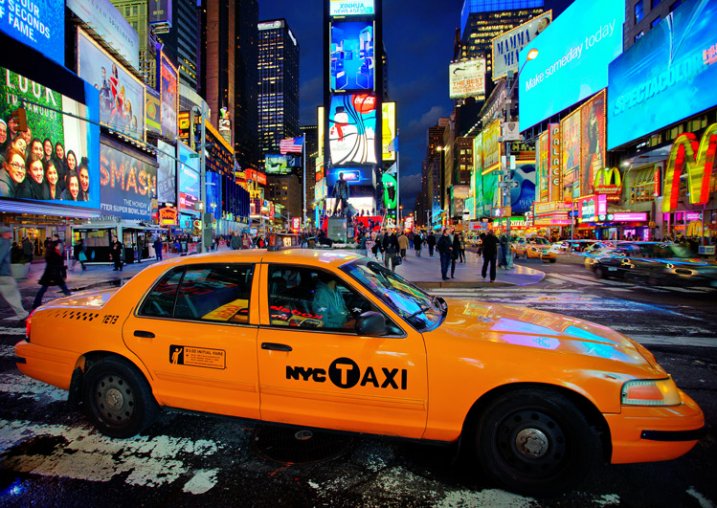
    Night Photographer's Toolkit - Times Square picture

    Times Square, New York (Shutter Speed: 1/100 seconds; Aperture f/4; ISO 800; focal length 17 mm – note that I used these settings only because I was forced to hand hold during this picture)

    5. Remote Shutter Release (or intervalometer)

    The idea behind a remote shutter release is that you are able to trigger the shutter without touching the camera, thereby avoiding shaking the camera during the exposure. They are a necessity for many photographers – especially night photographers.

    The good news is that these are relatively cheap (really cheap if you don’t buy the Canon or Nikon models). What’s more, while they used to be nothing more than a way to click the shutter, there are models available now with many additional features, such as:

    • Timers and Exposure Length: These are useful when shooting in Bulb mode, which does not have a timer for shutter speed.
    • Intervals: Most models provide for shooting at intervals, which will also allow you to do time-lapse and star trails photography.
    • Delay: They will allow you to set delays (besides the 2 and 10 second delays built into most cameras).

    6. Lens Hood

    Night photography often involves harsh lights coming from different directions. Light hitting the front lens element from the side can lead to unwanted lens flare. A lens hood is designed to avoid this problem.

    Many lenses came with a hood, but some do not. If your lens did not come with one, you can order one from the manufacturer or pick one up at a camera store. They are not too inconvenient to carry because you can store them on the lens by attaching it in a reverse position when you are not using it. When it comes time to shoot, turn the lens hood around to its proper position.

    In addition, remember that a lens hood may do more to protect your lens than a UV filter. They protect the lens in the event that it is dropped or you bump into something.

    7. Neutral Density Filters

    googletag.cmd.push(function() {
    tablet_slots.push( googletag.defineSlot( “/1005424/_dPSv4_tab-all-article-bottom_(300×250)”, [300, 250], “pb-ad-78623” ).addService( googletag.pubads() ) ); } );

    googletag.cmd.push(function() {
    mobile_slots.push( googletag.defineSlot( “/1005424/_dPSv4_mob-all-article-bottom_(300×250)”, [300, 250], “pb-ad-78158” ).addService( googletag.pubads() ) ); } );

    The post 10 Items You Need for Your Night Photography Kit by Jim Hamel appeared first on Digital Photography School.


    Digital Photography School

  • 8 Factors to Look at Before You Choose a New DSLR or Mirrorless Camera

    Not too long ago, the path to choosing your gear was very clear. If you wanted to take professional quality images, the DSLR reigned supreme. Yet, the landscape of available camera gear is constantly evolving, and today there are more options than ever before. Instead of just one or two dominant companies, you now have outstanding systems from no less than seven manufacturers. Mirrorless cameras have matured from a niche product to a complete solution, while DSLRs have been further refined. This may sound daunting at first, but with a bit of research, it’s possible to find a model that meets your specific needs. Here are the main points to review when considering whether you get a DSLR or mirrorless camera next.

    1) Availability of Lenses

    Buying a high megapixel camera body won’t spare you from the the negative effects of a poor lens. In fact, more resolution can bring greater attention to the lens’s optical flaws. For example, if you pair a full frame sensor with a kit lens you’ll have soft corners and mushy detail. Alternatively, high quality lenses can maximize every pixel of your camera’s sensor providing tack sharp focus from corner to corner. There may be some who will argue this theory and point to studio tests and technical charts. Yet in practice, a camera with a smaller sensor and less megapixels paired with a stellar lens can provide more clarity than a high resolution full frame coupled with an average lens. For this reason, the selection of available lenses is the first consideration when deciding on a camera.

    Sharpness is not the only part of this decision, but also the speed in which the lens achieves focus. A constant aperture is also a nice convenience for low light shooting as opposed to slower variable aperture lenses that span from f/3.5 to f/5.6. Finally, if you envision a super shallow depth of field in your images, f/5.6 will not be as desirable as f/2.8. Map out your kit with each manufacturer using your dream scenario. For example, can you build a system with f/2.8 lenses that span from ultra wide to super telephoto? How much would this cost for each manufacturer, and what would it weigh? While it’s true that DSLR users once enjoyed a significant advantage in lens availability, that gap is quickly closing. Most mirrorless systems now offer a complete line of professional quality glass that is of equivalent quality to a DSLR counterpart.

    2) Image Quality

    Ultimately, the image quality from a camera is only as good as the person controlling it. The best photographers in the world can capture stunning imagery, with the most basic cameras. Simply put, they know how to maximize the potential of any situation, and work around the limitations to get the shot.

    Ideally, you want to find a camera that doesn’t get in the way of your creative process. If you’re fumbling with confusing menus and buttons, chances are you will miss a number of fleeting opportunities. Still, photography is also a game of confidence, and you want to feel as if the photo you are capturing will have all of the detail you need it to. I have good news for you! Nearly every DSLR and mirrorless camera today has more than enough resolution for professional work. Whether you are shooting for large prints, billboards, magazine spreads, stock submissions or your own personal satisfaction, today’s modern cameras are up to the task. This is a game changer, as a DSLR is no longer a prerequisite for professional work.

    3) Sensor Size

    At the same effective focal range and aperture, the actual depth of field each format provides will appear different based on sensor size. For example, a full frame camera at f/2.8 dramatically throws a background out of focus. This is ideal for reducing distractions and bringing attention to the subject. To achieve the same look with an APS-C sensor you would need to open the aperture to f/1.8. With micro 4/3, you’d need f/1.4. Clearly, this makes shallow depth of field easier to achieve with a full frame. Having said that, micro 4/3 users can create similar results with fast lenses like the Voigtlander 42.5mm f/0.95.

    While larger sensors enjoy a slight advantage for shallow depth of field, the opposite happens with great depth of field. This means f/5.6 on a micro 4/3 camera provides the equivalent depth of field to f/8 on APS-C and f/11 on a full frame model. This provides the micro 4/3 user with 1-2 extra stops of light while still creating sharp focus from near to far. As a result, the ISO doesn’t need to be as high, providing better image quality. For the same exposure and equivalent depth of field, here is an example of how the sensor size would affect the settings.

    • Micro 4/3: 1/125, f/5.6, ISO 200
    • APS-C: 1/125, f/8, ISO 400
    • Full Frame: 1/125, f/11, ISO 800

    This is summed up nicely by Cambridge in Colour who noted, “Larger sensors (and correspondingly higher pixel counts) undoubtedly produce more detail if you can afford to sacrifice depth of field. On the other hand, if you wish to maintain the same depth of field, larger sensor sizes do not necessarily have a resolution advantage.”

    4) Features and Functionality

    The technology you’ll find, in even the most entry level mirrorless camera, can make a DSLR feel like stepping back in time. This is not solely due to the weight, but the glaring absence of useful features that make simple tasks more convenient. No longer do you need to stand beneath a shaded tree to check your images on the LCD. The quality of EVF in today’s mirrorless cameras is astonishing. It’s similar to using live view, but the image appears in the viewfinder where the display is not affected by harsh sunlight. Without removing your eye from the viewfinder you can check critical focus and exposure while viewing the histogram, highlight alert, and exposure settings.

    With in-viewfinder image magnification and focus peaking, manual focus has never been easier or more accurate. Tapping the shutter lightly will activate the shooting mode so you’re always ready to capture the action. This can certainly reduce time spent chimping, and helps one remain focused on the subject in front of them. Depending on the model, you may enjoy other features like double exposures, silent electronic shutter, keystone correction, live time, time-lapse, touch screen autofocus that covers most of the frame, and built-in wifi. It’s these little things that ultimately make the shooting experience more enjoyable.

    For those who are struggling with depth of field, the EVF on mirrorless cameras offers a huge advantage. As you look through the viewfinder and adjust your aperture, you will see a real-time look at how the depth of field will alter your image. This makes it so convenient to establish your settings for any given shot. In fairness, some DSLRs have a DOF preview button, but its functionality is far from ideal. Using that method the screen gets very dark, and you have to really look hard to determine what will truly be sharp. The EVF simplifies all of this as what you see is what you get.

    5) Size and Weight

    A DSLR is a commitment. You make a decision to take pictures, pack your gear, and head out. This has proven to be an effective formula for a very long time. Yet, I’ve spoken with countless photographers who leave their DSLR home to avoid carrying extra weight. Some even purchase expensive telephoto zoom lenses only to complain they’re too much of a hassle to bring along. If you do the math, DSLRs are about twice as heavy as mirrorless cameras and approximately 40% bulkier. When you’re traveling to distant places, or hiking deep into the woods, every ounce matters. I’ve been on small international airplanes with a strict 25 pound luggage limit, which included personal items.

    Advances in technology can allow us to go places that were previously inaccessible. No longer do you need to leave important things behind. That’s one of the reasons carbon fibre tripods have become the preferred choice for many. Since they are much lighter than aluminum models, you can go further. Couple this with a lighter camera system, and it’s possible to reach remote locations faster, giving you the competitive edge.

    6) Familiarity

    15 years ago, on countless pages of photography magazines, experts debated the topic of film versus digital. What followed was undoubtedly one of the biggest revolutions in the history of photography. Despite some of the early limitations, digital imaging forged ahead, ultimately winning over many of the initial naysayers. While this current shift in camera gear may not be quite as dramatic, there are many who are still resistant to change. Yet, as George Bernard Shaw said, “Progress is impossible without change, and those who cannot change their minds cannot change anything.” If you’ve never tried a modern mirrorless system, you are short changing yourself. Visit a local camera store and have a look, or better yet, rent one for a weekend photo adventure. It may take a real world test to experience the benefits that don’t translate well on paper.

    7) Durability and Battery Life

    DSLRs take the crown when it comes to battery life. Where one DSLR battery can go a full day with 1000 plus shots, a mirrorless camera will require approximately three batteries. The obvious workaround is to carry several spares, but it’s worth noting as it is one definitive area that requires improvement. The issue is largely due to the heavy power demand from the EVF. As a result, it’s a concern for all mirrorless manufacturers with no one brand having a distinct advantage.

    If you’re looking for a camera that’s weather sealed and built like a tank, both types of cameras have models to check out. Still, in order to enjoy a fully weatherproof system, the lenses need to have the same level of durability. With a DSLR this build-type is often reserved for the professional models. These are typically more expensive and heavier than non-sealed lenses. Alternatively, Sony, Fuji and Olympus all have rugged systems that boast features like splash, dust, and freeze resistant. If you find yourself in extreme situations often, this may be the better option for you.

    8) Cost Savings

    Do you rely on image stabilization as part of your photography routine? With a DSLR, this convenience comes at a significant cost. Lenses with this feature are often priced hundreds of dollars more than a non-stabilized model. Perhaps a more cost effective method would be a camera with built-in 5-axis stabilization. This will work on any lens you mount, making it possible to capture sharp hand held images at 1/15th of a second or slower. If you’re skeptical, as I certainly was, there are a myriad of tests that prove its accuracy.

    This is an important development that changes the way you works in low light scenarios. For example, if you’re photographing a dark interior where tripods are not allowed, a typical setting would be around 1/125, f/4, ISO 6400. That same shot with 5-axis IS could be captured at 1/15, f/4, ISO 800. Noise won’t be nearly as prevalent at the lower ISO, and you’ll still have a tack-sharp image. This cutting edge feature gives photographers yet another tool to solve common everyday problems.

    Conclusion

    There have never been as many viable options as we have right now. It is indeed a great time to be in the market for a new camera. The system you decide on will certainly have a big impact on your work, so do thorough research and choose wisely. Remember, the ideal selection should not be based on what everyone else is doing, but what will allow you to realize your unique vision. This can only be decided by you, not a salesperson, or forum chatter. Above all, your next camera should be one that inspires you to pick it up and use it more often.

    As for my gear, I don’t leave the house without my Olympus OMD EM1. Sometimes I also carry an EM10 as a backup body. I recently sold a Canon 40D, retired the old 10D, and am still determining the fate of my Canon 6D.

    googletag.cmd.push(function() {
    tablet_slots.push( googletag.defineSlot( “/1005424/_dPSv4_tab-all-article-bottom_(300×250)”, [300, 250], “pb-ad-78623” ).addService( googletag.pubads() ) ); } );

    googletag.cmd.push(function() {
    mobile_slots.push( googletag.defineSlot( “/1005424/_dPSv4_mob-all-article-bottom_(300×250)”, [300, 250], “pb-ad-78158” ).addService( googletag.pubads() ) ); } );

    The post 8 Factors to Look at Before You Choose a New DSLR or Mirrorless Camera by Chris Corradino appeared first on Digital Photography School.


    Digital Photography School

  • Kinda Genius: The LP742 LightSwitch

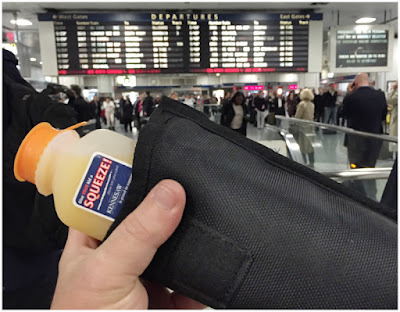
    See that? That's the high water mark to date for my dual-purpose creativity with a speedlight case. Being padded, I use it as a thermos for my station-purchased beverage when home-bound from New York City on the train.

    (Works totally ace, BTW.)

    But that bar just got seriously upped today by the LumoPro LP742 "LightSwitch" speedlight case.

    Read more »
    Strobist

  • 10 Tips for Photographing Strangers

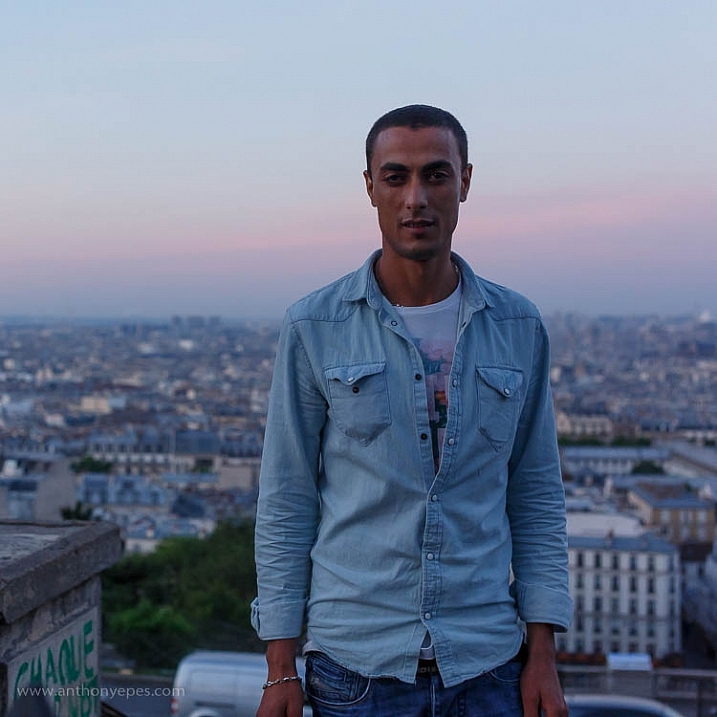
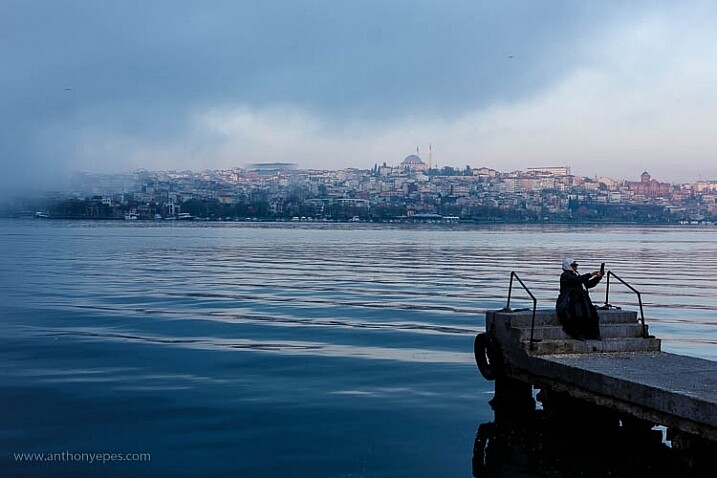
    I do a lot of wandering at dawn, taking photos of the city as it wakes. Mostly I am on my own, but occasionally I come across someone, a worker or a person coming home from a party. In Paris, a few summers back, I came across this guy.

    AEP_DPS_strangers_001

    “Take my photo, friend!” he said to me.

    So, of course, I did. He was brash, but when I was done he hugged me and carried on with his early morning adventures.

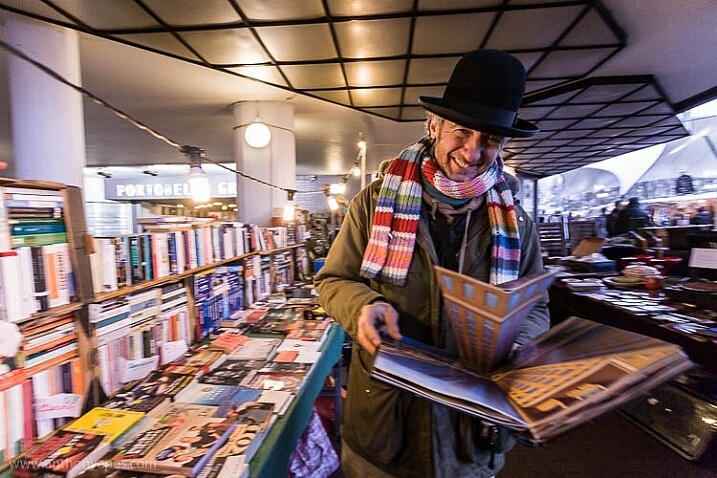
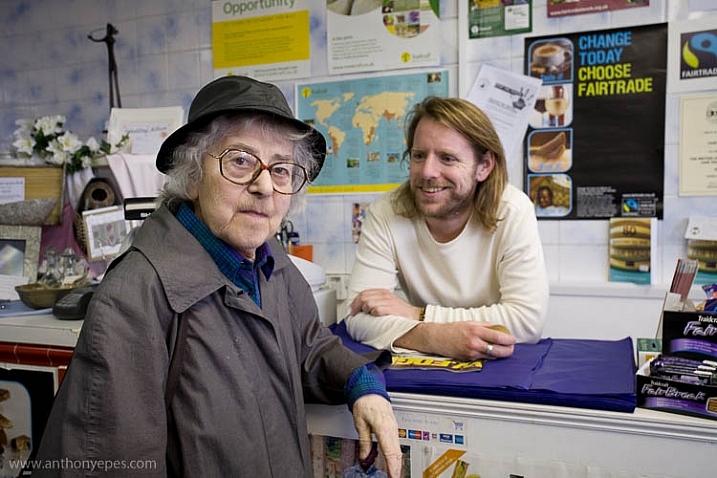
    If only all interactions with strangers, when I’m out with my camera, could be that easy! But, unfortunately, they are not. So when you don’t have random strangers accosting you on the street, here are some thoughts on how to get amazing shots of people you don’t know.

    Tips for photographing strangers

    Let’s start with what holds most people back from approaching that cool looking stranger, or from raising their camera when they see a great shot of interesting people.

    1 – Dealing with your fear

    Having fear come up when you are approaching strangers to photograph is totally normal. All photographers who do this have experienced fear, and may continue to. Sometimes we give in to fear and walk away without the shot, but if we can get through it and push ourselves to do what we love, then gradually the practice of photographing strangers becomes much easier.

    When you look up the definition of fear it says it is: an unpleasant emotion caused by the threat of danger, pain, or harm. Now I have occasionally been shouted at when out and about – usually in situations I would expect to be shouted at, like in an Italian market where people were selling fake designer handbags – but I’ve never had a threat of danger. So I like to think – “Okay fear, there is nothing that is likely to cause me pain or harm, I’ll just let you hang around until you feel the urge to go.” It probably sounds weird talking to your fear like that, but it works for me. Just letting it be there until it drifts away on its own.

    AEP_DPS_strangers_009 EXTRA PHOTO

    2 – The secret

    But actually there is a secret to this – most people are not just happy to be photographed, they love to be noticed. It’s a massive compliment to them that you have sought them out and want to take their picture. This is your secret key!

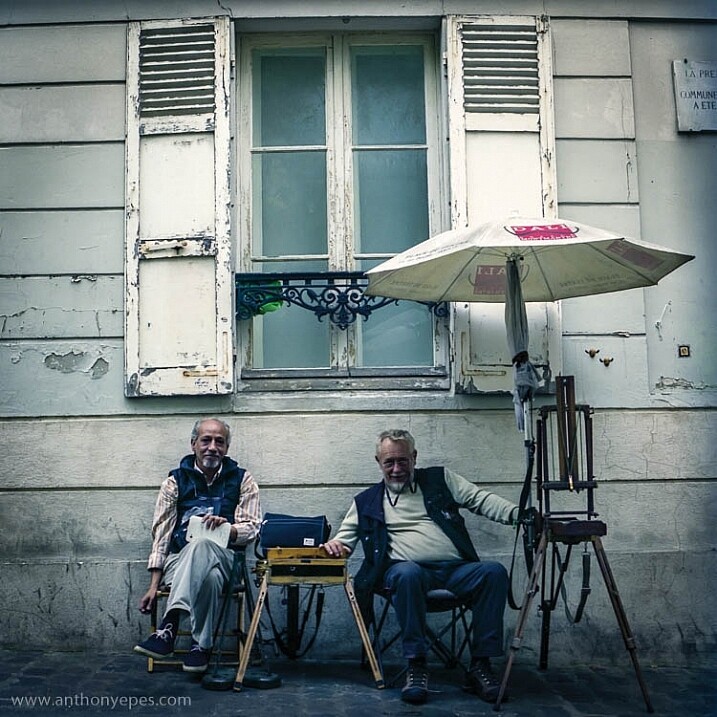
    I was wandering around Montmartre in Paris about 5 a.m. and walked past two men having their early morning coffee and chatting. They looked at me curiously, and to be honest I faltered. I walked straight past them. A language barrier can sometimes add to the intimidation. But I knew if I didn’t go back I’d be kicking myself all day. So even though I’ve been doing this for twenty years, even though I’d photographed hundreds, if not thousands of strangers, the fear does sometimes return. Just don’t let it get in the way of taking shots of those awesome strangers that you see!

    So I went back and smiled at them. They smiled back, and I gestured to my camera. They both nodded and I took a few shots. It took a minute or two at most, and I loved the result:

    AEP_DPS_strangers_002

    3 – Break down your fear into bite sized chunks

    Diane Arbus talked a lot about her fear of photographing strangers. She described spending a summer hanging around a park in the hope of getting up the courage to talk to a group of people who hung out there most days. Gradually over days and weeks she started to get to know them. Her constant proximity helped to make them trust her and she started to chat to them. Over time, she developed a relationship, and it was only then that she introduced the camera. Because they trusted her she was able to get some stunning portraits of people.

    “If I were just curious, it would be very hard to say to someone, ‘I want to come to your house and have you talk to me and tell me the story of your life.’ I mean people are going to say, ‘You’re crazy.’ Plus they’re going to keep mighty guarded. But the camera is a kind of license. A lot of people, they want to be paid that much attention and that’s a reasonable kind of attention to be paid.” Diane Arbus

    4 – Be genuine, be human

    I’ve had a few occasions where people have been sticking cameras in my kids’ faces, snapping away without asking me or my wife, and it has really irked me. There are photographers who seem to think that anything and everything are your subjects, regardless. I know that the law is on your side in most countries (see note at the bottom) but I don’t think it’s respectful to just treat everyone as a subject regardless – and I think people can feel if you are being respectful of them as human beings.

    I will always show the subject the photo if they want to see it and give them my business card or take their details so I can send them photos.

    AEP_DPS_strangers_EXTRA PHOTO

    5 – How to approach strangers

    It doesn’t matter what you say to people, the most important aspect of approaching people is being genuine, warm, friendly and calm. People will read your body language before you open your mouth, so if you come off as tense they will probably think you are shifty. If you are not smiling, people are going to think you’re unfriendly. Of course being a bit nervous is natural, I still get nervous too. It’s totally normal. But the more you practice, the calmer you’ll become. Then you’ll settle into yourself more, get a little pattern going and it’ll be much easier. It doesn’t matter much what you say, how you say it, or what you are working on, how people react to you is almost 100% because of your body language and the feelings you have when you approach them.

    “You can find pictures anywhere. It’s simply a matter of noticing things and organizing them. You just have to care about what’s around you and have a concern with humanity and the human comedy.” Elliott Erwitt

    6 – Be quick, be prepared

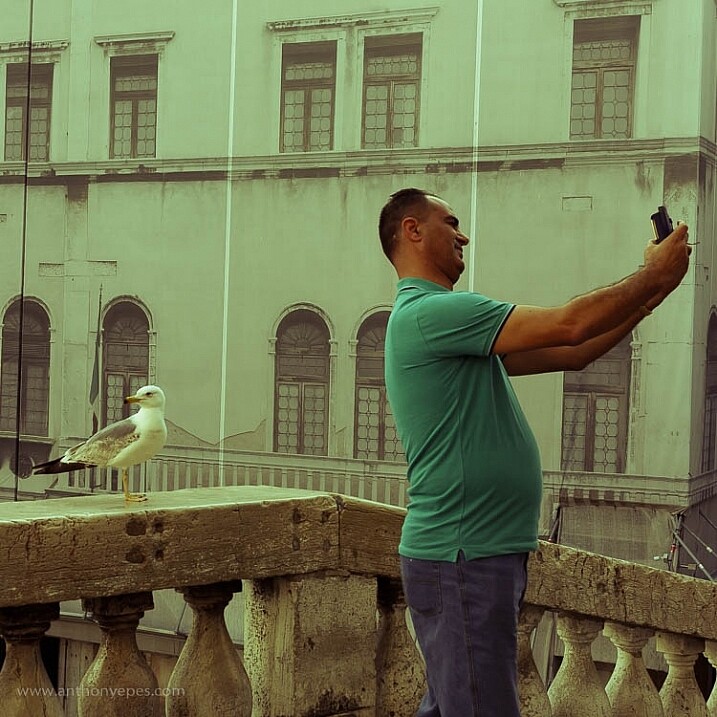
    That’s not to say I won’t take a good anonymous portrait – I love them. At the moment I seem to be having a good time with this selfie trend:

    AEP_DPS_strangers_003

    I took the photo above in Venice a few months back. I was walking up some steps with a group of students and bang, there it was. Because I was prepared with my camera, and because I always see what’s going on around me, I was able to capture it straight away.

    AEP_DPS_strangers_004

    I also liked this photo because for me selfies feel a bit vacuous, and the background was not of Venice but a large photo of Venice covering a building. Both the background and the selfie seem to me to speak of how most people see the world, just on its surface. We photographers have to be prepared to get deeper and see more of what’s really going on.

    7 – Have a project and be professional

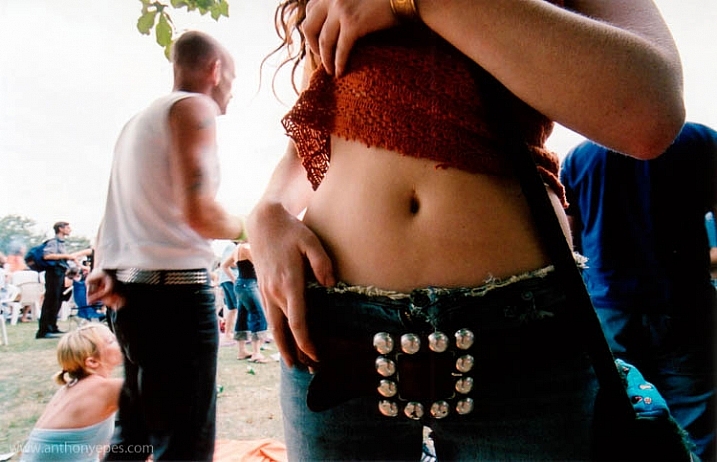
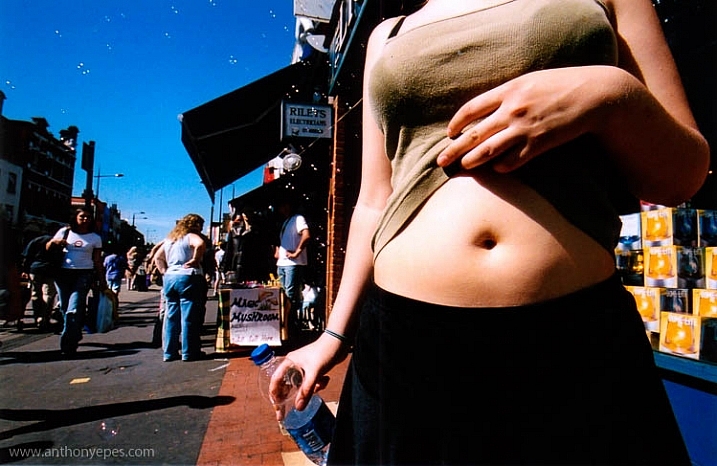
    Over the past several summers I’ve been working on a project, photos of people’s bellies. I always felt it was quite an under-appreciated part of the body and I wanted to see how people felt about theirs. So I started out experimenting by asking people if I could take photos of their bellies.

    Now for this kind of project it’s a harder sell. I was asking people to reveal a part of their body that they mostly keep covered up. So the way that I did it was I would look for people on the street who were on their own (because for some bizarre reason people are usually more receptive to strangers taking their photo when they are alone and they seem relaxed). I would approach them, explain what I was doing, and give them a business card that I had made about the project – which had all of my business details on one side and a bunch of belly photos on the other.

    Image from The Belly Project by Anthony Epes photography

    Image from The Belly Project by Anthony Epes Photography

    I also got people’s photos by hanging out at my local cafe, hanging around summer festivals, anywhere really where I could just hang out and chat to people. It’s a brilliant way to fall into conversation with people, so the approach can be more subtle and relaxed.

    I am not a super chatty guy. I am not known in my private life to fill the space with epic conversation. You do not need to be a master of conversation – you just need to be genuinely curious and people will feel that, and start to open up to you. Most people love talking about themselves, and they love people who are interested in them. It’s a human trait that photographers must be aware of. Once you’ve approached someone, or when you are just hanging out – ask people questions about themselves. “Worked here long? What’s this festival all about? That’s an awesome t-shirt, where did you get it?”

    8 – Your background is your second subject

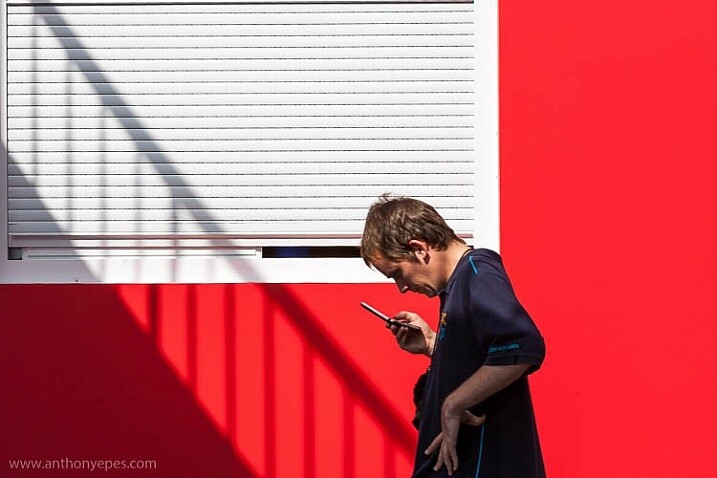
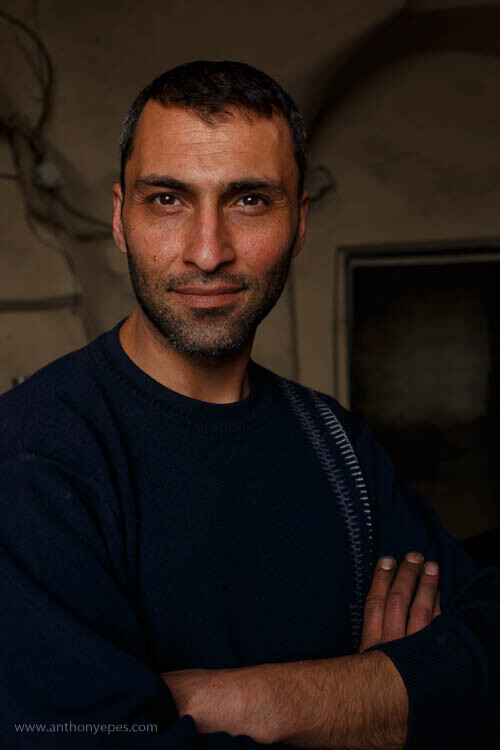
    What I hope you see in my shots is that the person is not the only subject – where you place your subject, the colours, the lines, the light – all of that will enhance, or detract from the portrait. Ideally you want to find a background that adds to the portrait in someway – almost like a comment on the appearance or pose of your subject. Ask yourself – what does this background add to the photo?

    AEP_DPS_strangers_006

    I find that many people use backgrounds that are too busy, so the subject gets lost. The camera can’t distinguish between the layers of a background the way that your eye can, so you almost want to over simplify the background to create the maximum impact for your viewers. Break down the elements that you see, and work out how a person would affect that.

    If you are shooting posed portraits this is easier, but before you go about approaching people, get your background organized first. I often wander around looking for interesting locations, interesting elements out on the street, and then once I’ve found something I like, I wait around to see who comes along.

    Image from The Belly Project by Anthony Epes Photography

    Image from The Belly Project by Anthony Epes Photography

    9 – What story are you telling with your photos?

    When you are taking someone’s portrait, you are not just putting together an interesting combination of colour, light and shape – you are doing that as well – but there is something else too. You have an amazing opportunity to tell a story, and to communicate the emotion and feeling of your subject. The human face and body are the most expressive and revealing things on this planet.

    “A picture of a guy in the street in New Guinea, with a bone through his nose is interesting to look at. But for it to be a really good photograph; it has to communicate something about what it is like to live with a bone through your nose. It is a question of the moment to reveal something interesting and profound about the human condition.” Steve McCurry

    10 – How do you get people to reveal their emotions?

    When you hold a camera up to a person, you will see that they start out with one emotion, but quite quickly that will change. After a few seconds most people start to get uncomfortable looking into a camera lens, then once they pass through that, other emotions start to appear as their minds move on to thinking about other things – perhaps how uncomfortable they are in the heat, the shopping they have to pick up later. People’s thoughts move at an alarming speed and their faces reveal it all. So just being with them, looking at them, photographing them, you’ll start to see how they peel like an onion.

    AEP_DPS_strangers_008

    Summary

    So to sum up – be friendly, smile, enjoy yourself. Remember this is fun what we do! I have stayed in touch (through Facebook and the like) with a bunch of my subjects whom I’ve met on my travels. It’s a great way to get to know people and create really compelling photographs.

    A note about usage and permission

    In most countries you only need people’s permission if you are going to sell the photos, or use them for commercial gain. Photos for art and editorial usage usually don’t require individuals’ permission (but there are exceptions – like Hungary where it’s now illegal to photograph anyone without their permission). There are exceptions, especially for children, so always check out the law in the country you’re in, and remember laws change all the time.

    Plus, when you are travelling it’s important to be aware of cultural sensitivities before you blaze out there, camera in hand. There is a ton of info out there on the web. Load up on knowledge and that will also help you feel confident as you go out to shoot.

    googletag.cmd.push(function() {
    tablet_slots.push( googletag.defineSlot( “/1005424/_dPSv4_tab-all-article-bottom_(300×250)”, [300, 250], “pb-ad-78623” ).addService( googletag.pubads() ) ); } );

    googletag.cmd.push(function() {
    mobile_slots.push( googletag.defineSlot( “/1005424/_dPSv4_mob-all-article-bottom_(300×250)”, [300, 250], “pb-ad-78158” ).addService( googletag.pubads() ) ); } );

    The post 10 Tips for Photographing Strangers by Anthony Epes appeared first on Digital Photography School.


    Digital Photography School

  • How to Creatively Alter the Light in Your Photo Using Lightroom

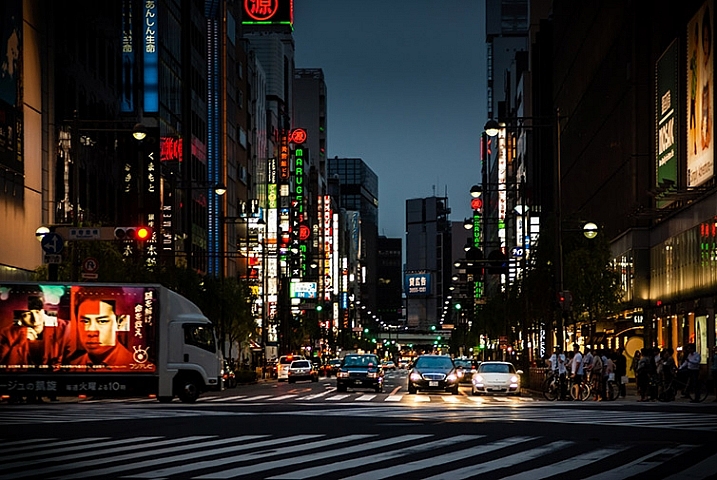
    photo of a Tokyo streetscape after being fixed in Lightroom

    Learn how to fix problem light and enhance your vision for your photos in Lightroom.

    If you’re like most of us, you’ve taken photos from time to time that you’ve had high hopes for, only to realize later on that they didn’t turn out the way you’d hoped. Often what looks like awesome light when you captured the image, just doesn’t translate to great light when you view the photo on your computer screen.

    When the photos you’ve captured are once in a lifetime memories they deserve better than this. Thanks to Lightroom they can be improved, fairly quickly and easily. In this video you’ll see how to relight a photo in Lightroom. You’ll learn techniques that you can use on your photos to move the light from where it is now to where you want it to be.

    You will see how to use the Graduated Filter to darken skies, how to use the Radial Filter and the Adjustment Brush to bring light and saturation to where you want it to be.

    Don’t get me wrong, I’m a big advocate of using the correct settings and capturing a good photo right in the camera. I’m also pragmatic and I know that, despite the best of intentions, the photos you capture don’t always look as good you’d like. Lightroom can help.

    So here’s how you can use Lightroom’s tools to improve a photo. This rather lifeless Tokyo streetscape is improved so it is a crisper, shinier image with light and saturated color where it should be. This is something you can do too.

    We’d like to see what you do with these tools and your photos, so feel free to show us in the comments below.

    googletag.cmd.push(function() {
    tablet_slots.push( googletag.defineSlot( “/1005424/_dPSv4_tab-all-article-bottom_(300×250)”, [300, 250], “pb-ad-78623” ).addService( googletag.pubads() ) ); } );

    googletag.cmd.push(function() {
    mobile_slots.push( googletag.defineSlot( “/1005424/_dPSv4_mob-all-article-bottom_(300×250)”, [300, 250], “pb-ad-78158” ).addService( googletag.pubads() ) ); } );

    The post How to Creatively Alter the Light in Your Photo Using Lightroom by Helen Bradley appeared first on Digital Photography School.


    Digital Photography School

  • 7 Easy Ways to Rock Your Photo Collages

    Sometimes one photo just isn’t enough—we know. Photo collages are gaining momentum in the social media universe, but there’s a lot of untapped potential in the art of collage making. With tons of photo collage apps out there, you can pretty much do anything you want with a smartphone and an Internet connection. With all of the different options available Continue Reading

    The post 7 Easy Ways to Rock Your Photo Collages appeared first on Photodoto.


    Photodoto

  • How to Become a Professional Travel Photographer – Two Paths

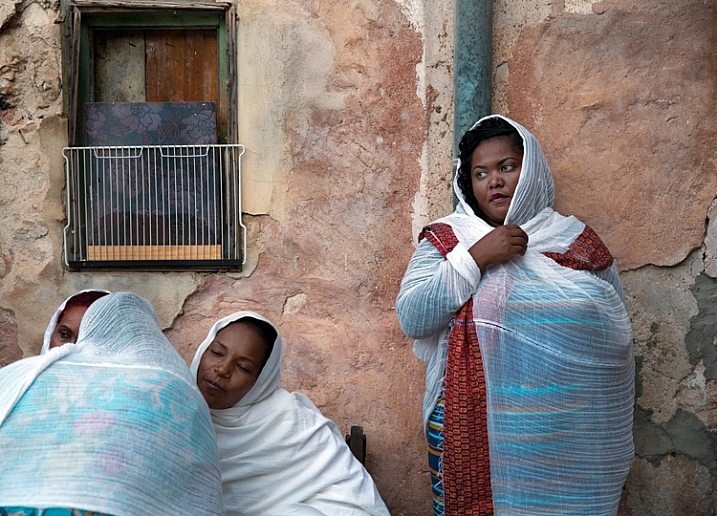
    Ethiopian Meskel festival - By oded wagenstein

    Ethiopian Meskel festival – by Oded Wagenstein

    Many people are mistaken in thinking that travel photography is just about traveling and making photos. While, although that sounds like a dream job, not many people will pay you to just travel and take nice looking photos. Like any job, travel photography is work –  and usually, it’s very demanding.

    Yes, you get to go to amazing places, meet exciting people, and the world is your office. But, it also has many downsides: sleeping in flea-infested guesthouses, never-ending bus rides from hell, harassment from corrupted policemen, loneliness, and lack of job stability to name a few.

    Are you still here? Good! Let’s talk about how to become a travel photographer. There are two ways to approach this: finding a client, or finding a job that allows you travel.

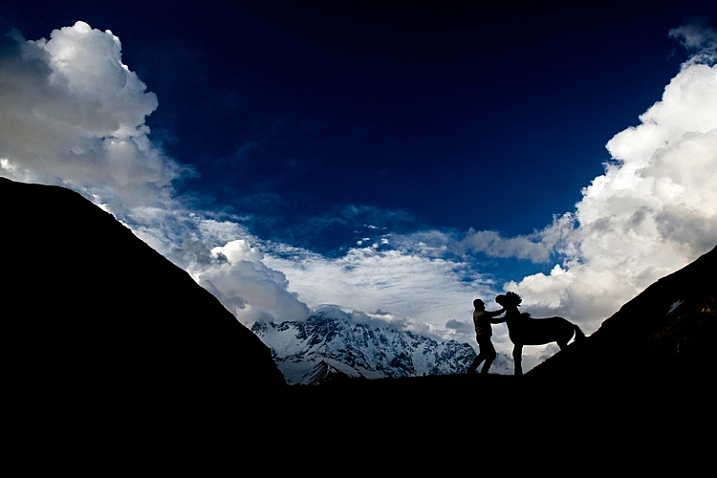
    Georgia - by oded wagenstein

    Aperture f/5.6, shutter speed 1/6000th, ISO 400. Exposure Compensation: -1.3
    -Image by Oded Wagenstein-

    First option – Find a client

    As a travel photographer, you have many potential clients. Here I will discuss the most common: Governmental tourism organizations, NGOs, Commercial organizations and Media

    Governmental tourism organizations

    Many governments strive to promote tourism in their countries. To do so, they need photographs to show the things and activities tourists can see and do in their country. Budget-wise, they have usually deep pockets.

    Pros: This is the most organized option, the client has a big-budget, and gives you access to places closed to the public.

    Cons: It’s very hard to get your foot in the door. Usually these organizations prefer to work with big, well known magazines and newspapers that can promise not only good photographers, but wide exposure to their audience of readers.

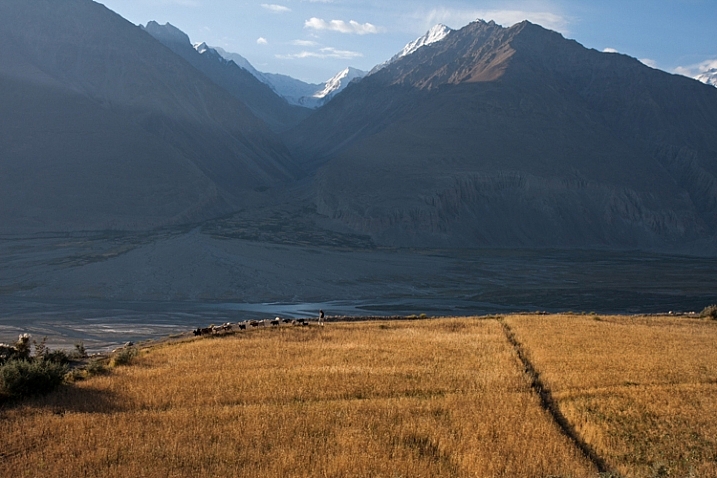
    hindukush - By oded wagenstein

    hindukush – by Oded Wagenstein

    Tip from a pro: Instead of trying to work with a large media organization like a magazine or newspaper, become a small media icon yourself. If you have a large and influential presence on social media, such as Facebook and Twitter, you might be more appealing to these organizations than old school media. So, start a blog, gain followers, and who knows, you could be their next photographer.

    Taking the first step: In most cases, working with governmental tourism organizations will never be your first career step. But starting a working relationship with a travel magazine or newspaper, or starting a blog and a Facebook page is a good idea. It’s best to specialize in a specific area of travel, such as adventure, food, etc.

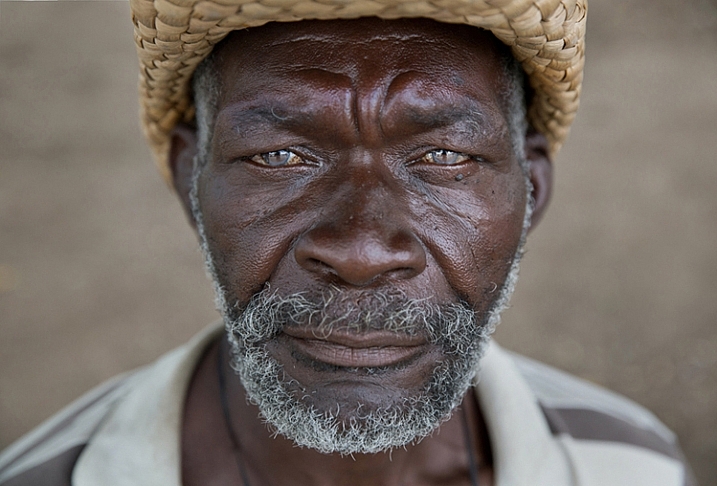
    Portrait from Cuba - By oded wagenstein

    Aperture f/4, shutter speed 10th, ISO: 500, Exposure Compensation -0.3
    -Image by Oded Wagenstein-

    NGOs

    Some large NGOs (non-governmental organizations) need visual material to help them support their cause and attract donations.

    Pros: It depends on the organization, but the work usually deals with super interesting projects on subjects like: animal rights, public health, or any other hot topic that demands the world’s attention.

    Cons: This is not the job where you will be asked to shoot lovely landscapes and flowers, as many NGOs need photography as visual proof of their cause. This means you might be asked to get photos of matters that the local government wants to hide from the public eye (animal abuse, theft of natural resources, child abuse, etc.)

    Tip from a pro: You can start by volunteering with an NGO that supports a cause you believe in. Then, through your working relationships with people from the inside and demonstrated photography skills, you might get to become the official photographer of the organization.

    Taking the first step: You don’t always have to start somewhere far away. If this is your first time doing volunteer work, it would be wise to start locally. A nursing home or an animal shelter are good examples. You will start establishing your portfolio, and work for a good cause at the same time.

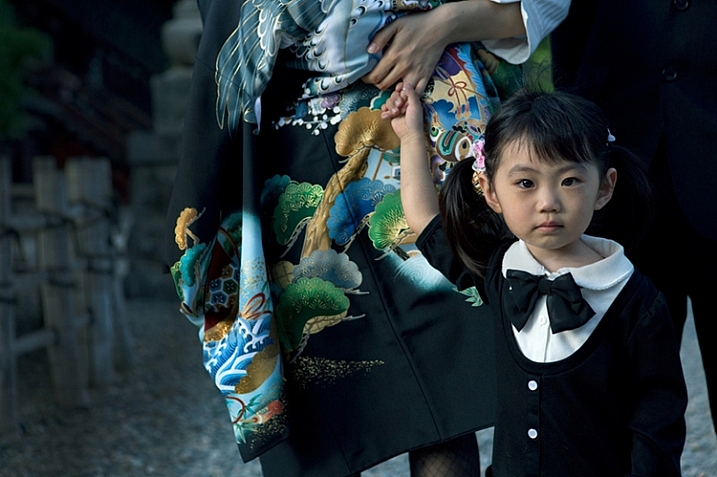
    japan - By oded wagenstein

    Aperture f/4, shutter speed 100th, ISO: 320, Exposure Compensation -1.7
    -Image by Oded Wagenstein-

    Commercial organizations

    If you are a top notch, worldwide known photographer, it is very likely that customers from all over the world will want to use your services (for fashion, events, sports, architecture, products etc.). But as we are focusing on travel photography, commercial organizations that deal with traveling and tourism are more likely to hire you. Notable examples are hotels, tour companies, airlines and so on.

    Pros: The commercial brands who hire a travel photographer are usually worldwide, and that can mean traveling a lot.

    Cons: As traveling for free and shooting tourist destinations is a dream job for almost anyone, the fees offered for the job can be quite low. It’s common the photographer only gets paid with benefits like free flights or accommodation.

    Tip from a pro: To work with the big brands, you need to market yourself in a way that will appeal to these types of clients. The kind of architectural or food photography a hotel chain needs is very different from what a tour company that specializes in extreme travel. Don’t try to work in all genres and styles. That’s a good path to becoming an inadequate photographer. Focus only on the genre and style you love and put all of your heart and effort into it.

    Taking the first step: Approach the client with already made photos. Visited a nice hotel during your last vacation? The hotel’s management will probably be very happy to publish your images if they are good. Most likely they won’t pay you as they did not order the images from you, but they will give you a credit under the photo. But this would be a good start as you’re now published and have a working relationship with a known brand for your CV.

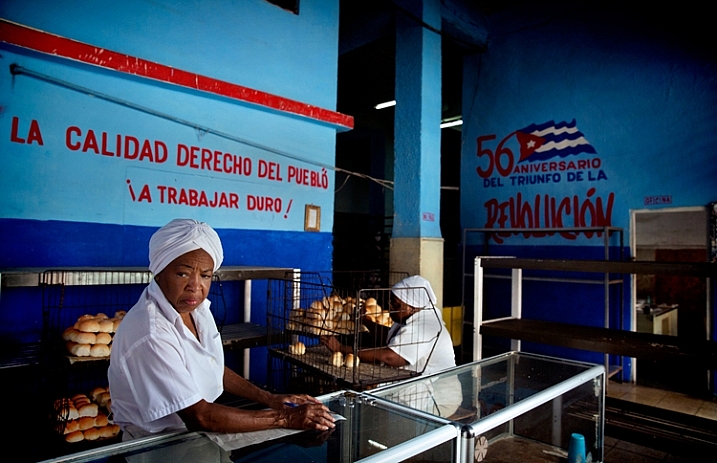
    Bakery in cuba - by oded wagenstein

    Aperture f/4, shutter speed 10th, ISO: 1000, Exposure Compensation -0.7
    -Image by Oded Wagenstein-

    Media

    Having your travel photography printed on a glossy page of a well-known magazine…if that’s not a childhood dream, then what is? I will divide “media” into three areas: magazines and newspapers, digital platforms, and stock photography agencies.

    Magazines and newspapers: Although they tend to be seen as old fashioned and don’t pay as well as other industries mentioned here, working for a newspaper (if you are into photojournalism) or a travel magazine is sure to be an interesting and creative job.

    Digital platforms: These days digital platforms and websites are the leading source of information for most people. Although most well-known websites prefer to work with stock agencies (explained below) rather than directly through freelance photographers, some do have their own regular contributors and might send you to cover a story.

    Stock photography: Shooting for stock photography is a subject for a different article (or five of them) but you can see stock agencies as the middle man between provider (the photographer) and buyer (magazines and websites). In order for news agencies or image bank websites to send you on assignment, you’re required to be a contract photographer. Each organization has its own contract and demands.  But some photo agencies will be willing to pay for your independent travel images if they are sellable. Do not expect large amounts. But hey, it’s better than nothing.

    Thailand - by oded wagenstein

    Pros: Dealing with the most interesting stories and places around the globe.

    Cons: Of all the other clients, this one will probably pay far less than the commercial world. But hey it’s not all about the money, right? The work is usually as a freelancer as well.

    Tip from a Pro: In order for a magazine or news agency to pay for your trip and fee, they need to be positive that you can deliver the job. Establishing a strong portfolio is a must.

    Taking the first step: Again, like in other cases, starting locally is best. Ask to contribute photos, or propose a travel story, to your local newspapers.

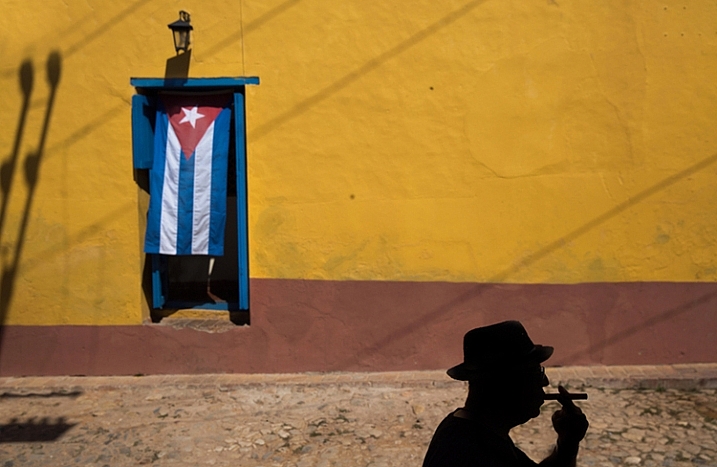
    Trinidad, Cuba - by oded wagenstein

    Aperture f/5, shutter speed 100th, ISO: 100, Exposure Compensation -2.7
    -Image by Oded Wagenstein-

    Second option – Find a job that requires traveling or relocation

    If the instability of the freelance photographer’s way of life isn’t for you, you can always find a day job that involves traveling. Then you can go to lots of places, be paid for it through your job, and do travel photography in your spare time. Jobs like flight attendant, global salesperson, English teacher (or a spy!) are just several of many professions that let you visit your dream locations, without being too risky on the financial side.

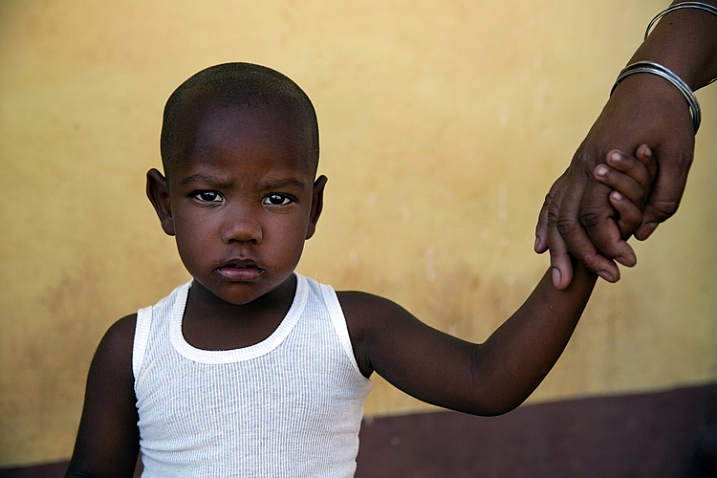
    portrait of a dark boy - by oded wagenstein

    Aperture f/3.5, shutter speed 100th, ISO: 200, Exposure Compensation -1
    -Image by Oded Wagenstein-

    Conclusion

    This all may sound hard or even impossible. But, like in most arts, you need to be really good at what you do in order to make a living from it. You need to devote at least 50% of your time to marketing your portfolio, and above all, love your craft with all your heart.

    Uzbekistan - by oded wagenstein

    Aperture f/4, shutter speed 10th, ISO 160, Exposure Compensation 0
    -Image by Oded Wagenstein-

    The author would like to thank Nicholas Orloff for his assistance in writing this article

    googletag.cmd.push(function() {
    tablet_slots.push( googletag.defineSlot( “/1005424/_dPSv4_tab-all-article-bottom_(300×250)”, [300, 250], “pb-ad-78623” ).addService( googletag.pubads() ) ); } );

    googletag.cmd.push(function() {
    mobile_slots.push( googletag.defineSlot( “/1005424/_dPSv4_mob-all-article-bottom_(300×250)”, [300, 250], “pb-ad-78158” ).addService( googletag.pubads() ) ); } );

    The post How to Become a Professional Travel Photographer – Two Paths by Oded Wagenstein appeared first on Digital Photography School.


    Digital Photography School

  • 4 Tips on How to Be Creative in Undesirable Photography Conditions

    How many times have you arrived at a place and it just is not up to your expectations? There is nothing worse than wasting your time, especially when it was all planned out to be a good day. What a letdown. But, what if you could turn that around and produce something amazing? What if you can do it, and make a great photographic experience out of it? Well you can and it doesn’t take a lot of work, or a lot of camera equipment.

    When We Were Young 717px

    There are likely many times as a photographer where you have prepared all your gear and scouted your location, only to arrive at your destination and find that it was not all what you thought it was going to be. Maybe the light is not what you imagined, maybe the building was demolished, or maybe there are numerous people when you thought you would be the only photographer there. Many scenarios could come up, and that is why as a photographer you need to think on your toes and improvise.

    So, how do you make a bad day of photography, turn into something meaningful that you can still be proud of? Unless you are in a studio, photography is a balance between action and inaction. What are the things you can control and what are the things out of your control? And in the moment of interaction between the two, how do you see and create your vision? The best photographers in the world don’t control more in the situation, they SEE more. So how do you see more in a bad situation?

    1. Flip the script

    Be flexible in your photographic visions. You may have a favorite type of photography like landscapes or portraiture, but that shouldn’t prohibit you from enjoying other aspects as well. If you expected to shoot people and the streets are empty, then shoot the buildings. If you expected sun and it rains, then shoot the boy playing in the puddles. Don’t struggle to create what the place or situation is not. Change your own narrative to fit the situation. This mindset means you are not always reacting, rather that you can be proactive in a new direction and creative in your story.

    001 IBQ 3729 RESIZED

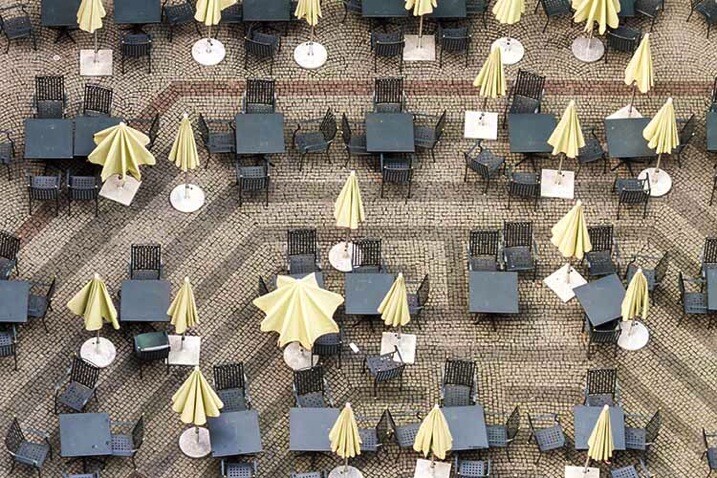
    A rainy day in the famous Glockenspiel square of Munich. From the tower above you get a very different feel of the space.

    2. Get up close

    When you change your perspective there is a new world to be discovered. The easiest way to do this is by getting close, and that means to get down on your knees and elbows. There are always amazing creatures, delicate flowers, and wildly uncommon structures in tiny forms below our feet. So, when heading into unfamiliar environments bring your macro lens. In cases where the scenery or situation is really unappealing, something on the micro level will surely amaze you. The opposite of this would be to get further away to obscure the subject and give it a new setting. The point is to change the perspective.

    002 When We Were Young  6 RESIZED

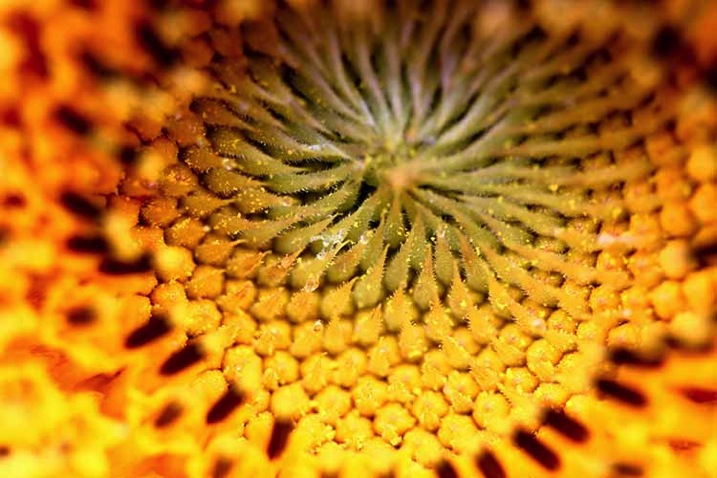
    Macro photo of a sunflower in the mountains of NE China. You would never know how awful the weather was for the whole week.

    3. Get in touch with your reaction

    Allow yourself to feel the letdown or disappointment between what you originally hoped to find and what you are actually presented with. But, don’t let it decide your photographic destiny. This means do find creativity in the presented emotions. What are the emotions that are being portrayed in the scene? This could actually be done figuratively in an abstract way by photographing negative space to define your images. Or it could be done by finding images that literally match your mood. What is most important is that you are open to opportunity, not confined or limited by what your expectations were. By getting in touch with your photographic feelings you are freeing your photographic expressions.

    003 IMG 3087 RESIZED

    A splendid view of the Taj Mahal from Fort Agra was closed for cleaning. A real disappointment or an opportunity for a new story to be told?

    4. Experiment

    If you are not working professionally, and don’t need to get a specific shot that your customer has commissioned you to do, then you are free to experiment. When doing so, will you come home with some images that are going straight to the recycle bin? Yes. But, you will also learn something in the process. Thus, you will be increasing your photographic experience, discovering new techniques, and pushing your creative self.

    Experimenting might mean going from Aperture Priority mode to fully Manual. Or it may mean that you will take some bracketed exposures even though you really don’t know how to combine them in an HDR software (yet). Or how about focus stacking? It could mean that you are adding light by using a flash. Whatever level you are at, or whatever gear you have purchased, think about how it could be used. When conditions don’t present themselves perfectly, it is a perfect situation to experiment.

    004 IBQ 4683 Edit Edit 2 RESIZED

    An HDR panoramic in the midday sun in the Austrian Alps. The sun was behind the mountains and high noon is not the best time for landscapes, so HDR was a possibility. A sun flare was also added in post-processing to experiment more with the image.

    IMG 3836 Edit 2 Double Dip 717px

    Double exposure experimentation

    The grass is always greener on the other side of the fence. But that doesn’t mean you must be in the green pasture to get great results. There will always be conditions that are not ideal, and as alluded to above, great photographers don’t see constraints in difficult situations they see creative opportunity. So can you. Creativity is not spontaneous; it is habitual. Any creative person will tell you that their successes are predicated upon effort; so too, is much of photography. There are so many variables, that each time you go out with your camera, you really never know what you will get.

    Stop thinking about how lucky you are if you get a perfect sunset, but how incredibly lucky you are when you need to be a constructively creative photographer and how you can turn a bad day of photography into a great series of images. So, no more excuses — go out and be the great photographer you are.

    googletag.cmd.push(function() {
    tablet_slots.push( googletag.defineSlot( “/1005424/_dPSv4_tab-all-article-bottom_(300×250)”, [300, 250], “pb-ad-78623” ).addService( googletag.pubads() ) ); } );

    googletag.cmd.push(function() {
    mobile_slots.push( googletag.defineSlot( “/1005424/_dPSv4_mob-all-article-bottom_(300×250)”, [300, 250], “pb-ad-78158” ).addService( googletag.pubads() ) ); } );

    The post 4 Tips on How to Be Creative in Undesirable Photography Conditions by Branson Quenzer appeared first on Digital Photography School.


    Digital Photography School

  • 3 Steps to Photoshop Retouching for Natural Looking Portraits

    In the world of photography, editing and retouching are just as important as the imagery itself. Every image that you see published has been through its fair share of post-processing before it is seen by the public. If photographers didn’t retouch their images, it would be like a painter presenting his sketches instead of the finished painting.
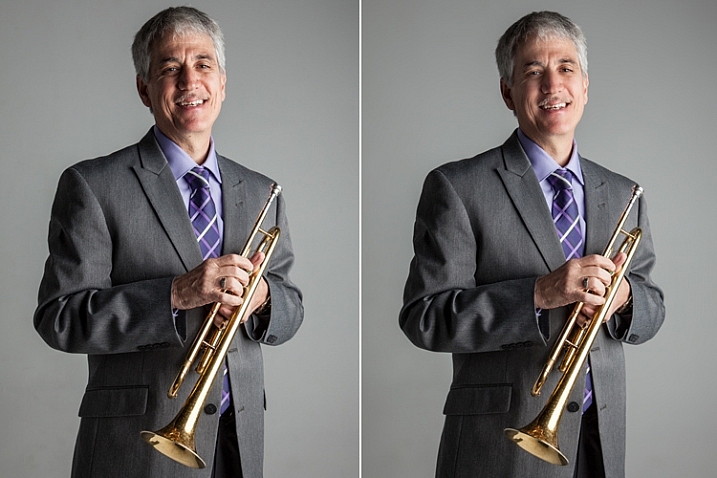
    portrait retouching techniques

    With the fast moving technology of today, extraordinary images are everywhere, every day. Even with perfect lighting, and preparation work, a final image always receives some post-production attention. The trick to post-processing is to make it look as if it hasn’t been retouched at all, or as I call it, “refreshed”.

    With the endless possibilities of Photoshop retouching techniques available, how do you know what tools to use when, and why? In this article, you will learn professional photoshop tricks that work for any portrait, any time. This is a simple recipe to give your subjects a naturally refreshed look, letting their genuine beauty shine, while keeping the integrity of their expressions, their features, and the clarity of the digital image itself.

    Key Steps in the Refreshing Process

    1. Evaluate
    2. Eliminate
    3. Reduce
    4. Repeat

    The specific tools and techniques discussed here are tried and tested with over 10 years of retouching experience. It is best to experiment with these concepts, and with practice, develop your own style of retouching.

    This process has been designed as a routine that will eventually create habits in your mind, train your eyes to see the details more clearly, and create an overall efficient and effective retouching process. The goal is to spend less time in front of the computer and more time behind the lens (where the real magic takes place).

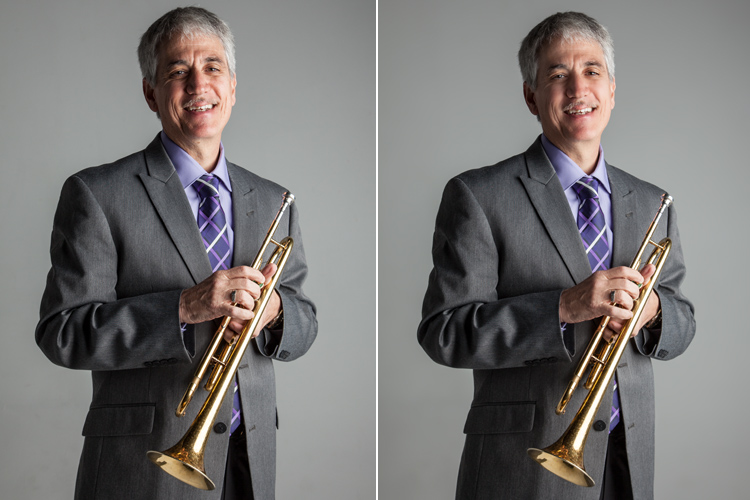
    Let’s look at each one of these steps in order. We will use a studio image of a musician as the example throughout this article.

    A great tip to keep in mind during this entire process is that with each new step, or even sub-steps, it is best to duplicate your layer before beginning to use the next tool. This way you are creating a back-up of each step for you to return to, if you notice that you are retouching too much on any particular step. It also allows you to see the progression of your workflow in Photoshop.
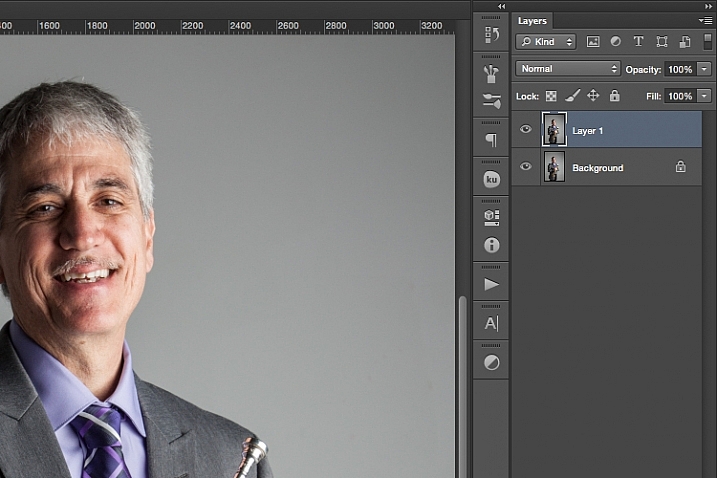
    portrait retouching techniques

    Step One: Evaluate

    Immediately analyze the image you are about to retouch. How is the lighting? How do the subjects look? What is going on in the background?

    When you see the areas of the image that will need your attention ahead of time, you can quickly assess what you will want to accomplish with the retouching process. This is the beginning of training your eye to seek out the details, and look at your image differently, than when you first took the shot.

    Look at your image as if it’s not a photograph of a person, but instead consider that it is just shapes, colors, and light. Identify where the light is coming from and how it is affecting the subject.

    In this example, the direction of the light is causing more definition, creating harsh shadows across the subject. This was done intentionally to give a more characterized, artistic portrait for this musician.

    However, its effect can be overpowering at times and cause distraction to the viewer. This is noticeable in the darker shadows around his right eye, and the highlights shining across the left side of his face.
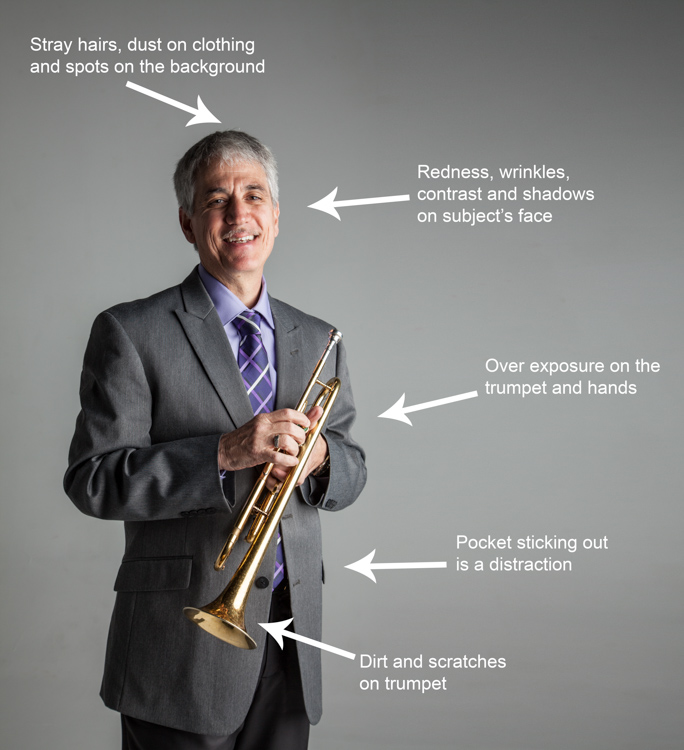
    portrait retouching techniques
    Here are some additional elements to be aware of.

    • Different textures: The subject is an older man wearing a suit and playing an instrument. All of these textures are different and will require various tools and techniques when the retouching process happens in those areas.
    • Zoom in close: As with any image, zooming in close will allow us to see any skin imperfections, dirt, dust, or scratches that you will want to eliminate all together.
    • Make judgements on distracting elements: There are some parts of the image that could stay or be eliminated, it becomes your choice as the retoucher. What is a distraction? What is a part of the purpose of the image? For instance, the scratches on the trumpet and the left side pocket sticking out could potentially be distractions, but maybe this client would like them to stay.

    Once you identify the elements that need attention, decide if each will be removed altogether, or if it needs to be reduced. For instance, the stray hair and the dust on his jacket need to be removed, but the redness and wrinkles are only to be reduced, not eliminated completely. This difference is important for the next steps in the process. So ask yourself, will it be eliminated or reduced?

    Step Two: Eliminate

    Once you have made your initial evaluation of the image, you can begin the elimination process. This includes but is not limited to: dust, dirt, scratches, pimples, food in teeth, and anything else that doesn’t belong. Zoom in and examine your image up close. Think of each area as shapes and color, allowing yourself to be as accurate as possible when removing these details.

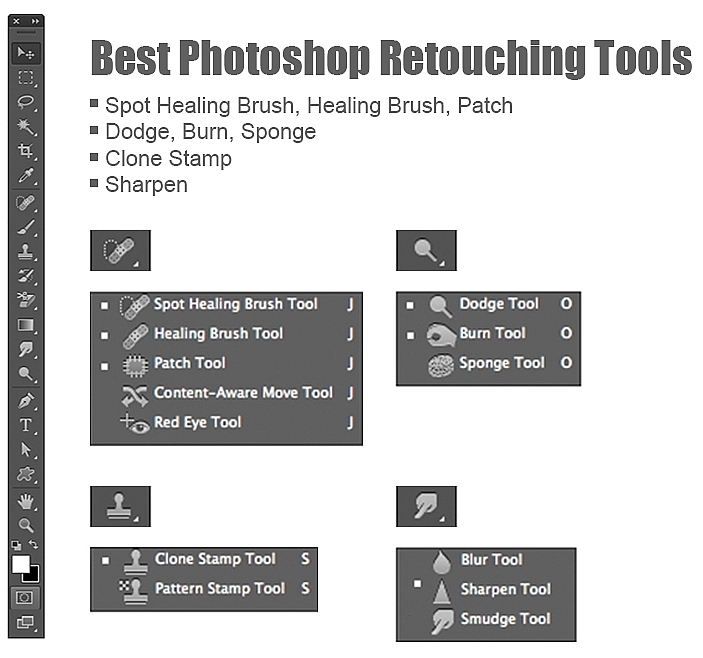
    For this first elimination step, it is best to use the spot healing brush, the healing brush tool, the spot tool, the patch tool, and/or any other tool that completely removes things. Don’t rely on just one. Learning how each tool works different will help you use a combination of these removal tools effectively, and efficiently.

    For instance, the clone stamp tool copies exactly what you click. The healing brush blends the color and texture of what you click on, with the area you want to fix. The spot healing brush is a genius tool. It has its own way of deciding if you want to blend the area you click on, or remove the unusual pixels within that area (like a stray hair against a solid background).
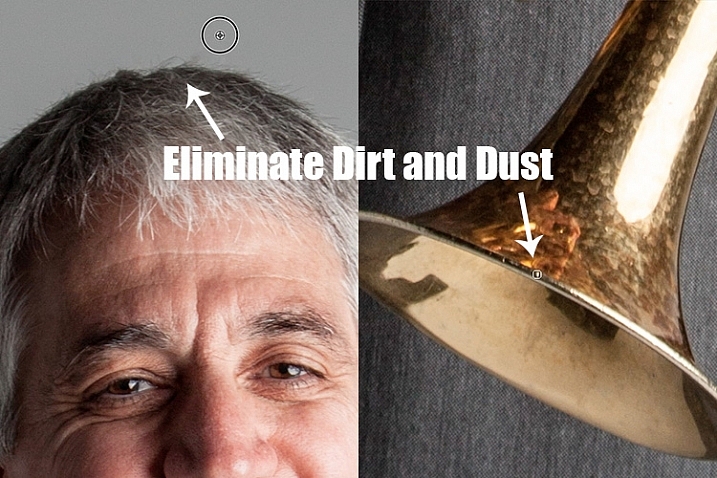
    portrait retouching techniques

    The more you make effects to a digital image, the more destructive you can be to the clarity of the final file. Using these tools is crucial to the integrity of the image. If you can click it away in less than a few clicks, then this is the time to do it.

    Once the “spots” are removed, you can focus your attention on reducing or “refreshing” the imperfections we all know we have, but don’t want to notice in the permanence of a photograph.

    Step Three: Reduce

    This is where your artistic eye, and attention to detail come into play. Pimples go away, dust and dirt are just distractions, but our wrinkles, smile lines, scars and facial expressions are the details that make each of us unique. Those are the things you will focus on in this stage of the “refreshing” process.

    Every subject you see in an image has great qualities that they might not be confident about accentuating. It is your job as the retoucher to keep not just the integrity of the digital image, but the integrity of the special moment and the emotional expressions that have been captured in that image.

    For this reason, this second step is crucial. Train yourself to pay attention to the details, the purpose of the image, and the personality of your subject. If you are retouching a very smiley bride who laughed a lot, you don’t want to remove her laugh lines, but you do want to reduce the shadows and shine as her makeup wears off and the night wears on.

    In this specific example of the musician, the character lighting has created great contrast that add to the personality of the subject. But in some areas it over accentuates his wrinkles by creating deep shadows and harsh highlights of overexposure.

    The Best Trick in Portrait Retouching
    portrait retouching techniques

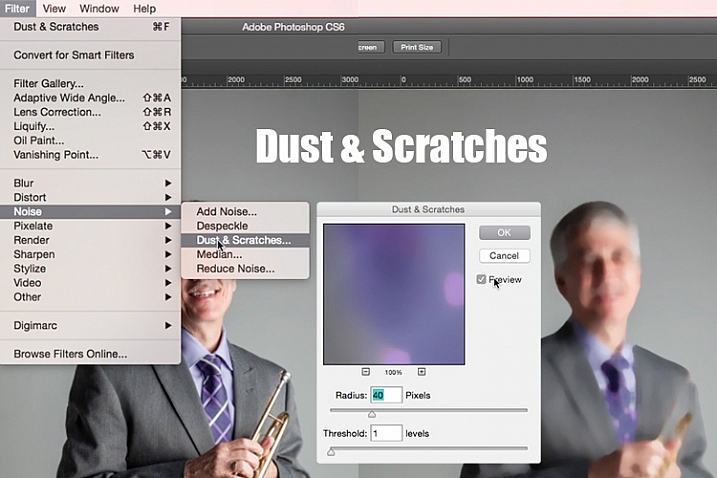
    Duplicate your layer after completing step one. With this new top layer highlighted, select from the main photoshop menu: Filter > Noise > Dust & Scratches. A window will pop-up with settings options, and you will notice the image behind that window now shows a preview of this filter effect.

    In the Dust & Scratches window, change your Radius to 40px and Threshold to 1. Experiment with these settings and see what works best for your images.

    Once you have applied the Dust & Scratches filter (on the top, duplicated layer), you will notice how it blurs the image. But, this is not like using the blur tool. The method that this filter uses specifically identifies differences between pixels and their surrounding area. The Radius is what removes the “dust” and the Threshold is what brings back the details. Dissimilar pixels are modified to achieve a balance between sharpening and hiding defects.

    The Dust & Scratches filter provides a more powerful way to remove noise from an image than any other noise removal tool. This is key to keeping the integrity of the textures, color, and overall feel of the digital image as you see it in print or on a screen.

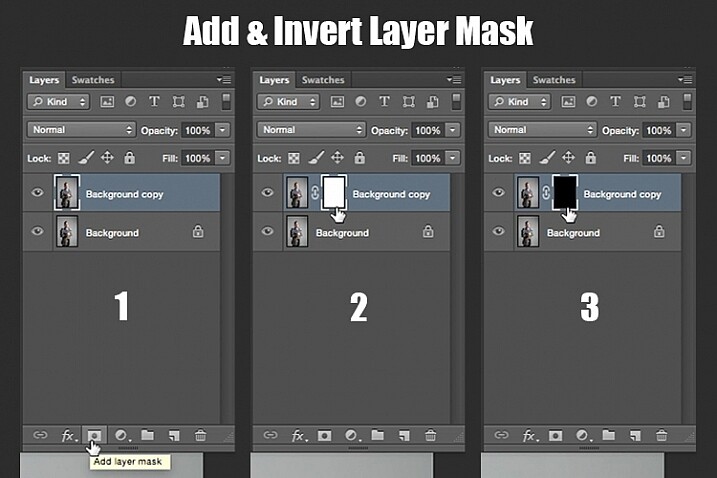
    Now that you have a layer with the right effect applied, you are going to add a layer mask to this newly altered layer, and invert the mask. Do this by clicking the icon “Add layer mask” at the bottom of your layers panel. Notice the layer mask shows up as a white box next to your highlighted top layer. Now invert this layer mask by holding the command button and clicking the letter, “i”. This will now change the layer mask to black and bring the original image come back into view.
    portrait retouching techniques

    Step 1: duplicate the layer
    Step 2: add a layer mask
    Step 3: invert the mask so it is black

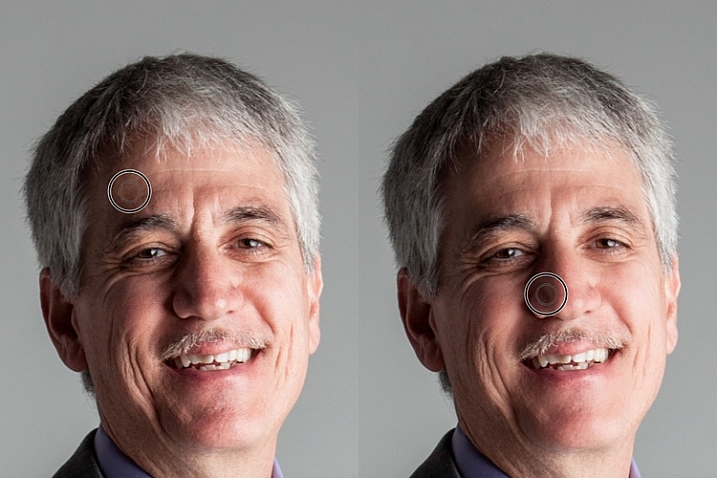
    You can see how the image looks unaffected by the Dust & Scratches filter. Really, it is just hidden under the layer mask. Now you can paint back into the areas where you want to reveal the Dust & Scratches filter. The trick is to do this precisely, and not too much.

    Select your brush tool (keyboard shortcut is B). Making sure the layer mask is selected (not the layer – square brackets will show around the mask when it is selected like shown above), noticing its color is black, paint with the color white to bring back the Dust & Scratches filter effect.

    The key to using the brush tool on an inverted layer mask is to experiment with the brush opacity strength. When focusing on the skin areas, start by brushing back at only 30% opacity. Remember, you can always brush back over an area again more or less by toggling back and forth between painting with black or white. Painting with white will reveal the effect, while painting with black with hide it.

    Steer clear of teeth, lips, eyes, nostrils, ear folds, and edges like the jaw line and hair lines during this time. These areas have specific edges and textures that are important to the overall image.

    Once you have completed the skin areas, you can smooth the background. Change the opacity to 100% to completely smooth out this solid color background. This only works on solid backgrounds that are seamless. Using the brush at 100% will remove any dust spots that show up from the camera lens, or dirt that is actually on the studio backdrop.
    portrait retouching techniques

    Tips to Keep in Mind During This Step

    1. In general, keep your brush below 50% when painting the effect on skin. This allows more than 50% of the original textures and features to still be noticeable. If you paint more than 50% in these areas, you will see a putty-like effect starting to take over, causing your image to be more retouched than refreshed.
    2. Using the bracket keys on the keyboard [ and ], frequently change the size of your brush as you paint. Keep your brush hardness at 0 unless absolutely necessary. This allows you to move in and around smaller and larger areas of the skin and background with more efficiency and accuracy.
    3. The zoom tool is your best friend during this part of the refreshing process. Remember, instead of thinking of this image as a portrait, consider that you are just seeing shapes, color, and light. Zoom in close and pay attention to the changes you are creating. Force yourself to go too far with some brush strokes so that you know the limit. When you have gone too far, just toggle back to painting with black (set your opacity to 100%) and remove that last brush stroke all the way before beginning again (or use Command+Z to undo the last step).
    4. Be careful around fingers and edges of arms and legs where there are small curved areas. If you paint near these edges the Dust & Scratches will run over the edge and remove the curved areas all together, altering the look of elbows, fingers, shoulders, ankles and knees.
    5. Men can have beards and tend to have rougher looking skin than women. Be careful not to soften too much on a man’s skin. The same goes for grandparents.
    6. With babies and children, who have much smaller features, it is important to be aware of the shadow areas that you paint over. If you change the shape of their skin too much, it will no longer look like them. This is particularly important around the nose, eyes and mouth – their tiniest features.

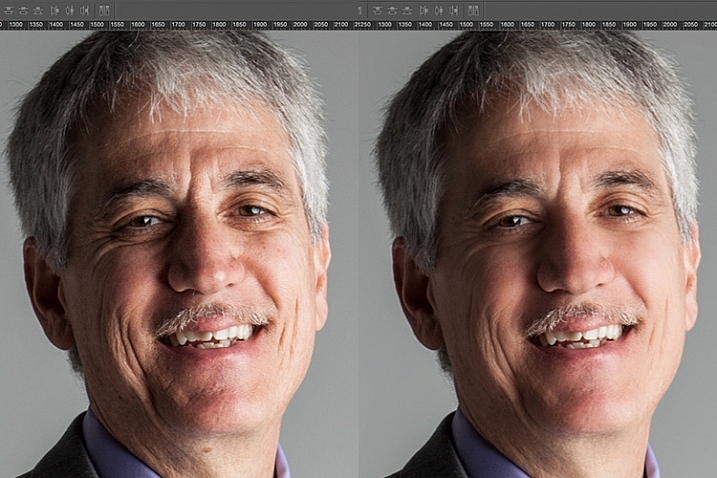
    Here is the before and after of the Dust & Scratches filter effect on the musician’s face:
    portrait retouching techniques

    Notice the softening of the skin and reduction of the shadows in the wrinkles, yet he still looks untouched with most of the original texture still visible.

    Now that you have completed the most important task of this post processing technique, it is time to repeat the steps from the beginning. Start again by evaluating the image as a whole. Notice any other areas that need attention. Remember to duplicate the top layer once you have completed any step in the process. Allow yourself to duplicate your layers as many times as you want. It’s always a safe bet.

    Next, eliminate. This is your chance to eliminate any larger parts of the image that take more time. Elements to consider removing are:

    • Some (not all) of the scratches across the trumpet.
    • His left-side jacket pocket.

    After eliminating for the final time, move on to step three again. In this case, instead of using Dust & Scratches as your reduction tool, you can use other popular items in the toolbox. Tools to consider using are the Healing and Spot Brushes, Dodge and Burn, and Sharpen and Saturate/Desaturate.
    photoshop brushes for portrait retouching

    Eliminate then Reduce – Repeat.

    First, don’t forget to duplicate your layer before starting this step! If you don’t duplicate, this step will not work.

    To lighten the shadowed area of the musician’s right eye, the Dodge Tool used at 50% on shadows would look too overly processed. But by allowing it to be over done on this newly duplicated top layer, you can then reduce the opacity of the layer to bring back the layer underneath at 50% or more. Now the over processed shadows look naturally lighter than the original.

    This technique is great for all the tools mentioned above. The Sharpen tool can be used on eyes and jewelry. The Healing and Spot tools can be used for under eyes, and shadows that need a bit more attention. Desaturate and Dodge tools can be combined to whiten teeth. Anytime you want to reduce using these tools, just remember to duplicate the layer; make your changes, then reduce the opacity of that newly affected layer until the effect looks natural.

    At this point in the retouching process, you have walked through each step of the process twice. It is time evaluate your finished image. This is where all those duplicated layers comes in handy. Keeping the top most layer turned on and the bottom original layer on, turn off every layer in between. Then zoom-in to 100% (accurate view of pixels), and click on and off of your top layer to see all the changes you have made.

    If necessary make any other slight adjustments, like cropping to the correct size, then save your image. It’s best to always save the Photoshop layered copy (save as a PSD file) as well as a flattened JPG file, in the quality size you want.

    We all know photoshop is full of endless possibilities, and we all love to learn. If you have other techniques that are great for “refreshing” your portraits, please share.

    As with all things in life, this process takes practice to perfect. With practice you will gain accuracy, efficiency and train your eyes to see your images (before and after post-processing) in a whole new light, giving you better control over the look and feel of your retouched portraits.
    portrait retouching techniques

    Remember, as you learn and grow as a photographer, the goal is to always create your best images in the camera, and not just assume that you can just fix it in post. Keep this in mind, and with every click of the shutter you will become a better photographer, and spend less time in front of the computer.

    Of course, you will always edit and retouch your very best images. When you do sit down to do so, now you will have a whole new range of techniques you can apply.

    googletag.cmd.push(function() {
    tablet_slots.push( googletag.defineSlot( “/1005424/_dPSv4_tab-all-article-bottom_(300×250)”, [300, 250], “pb-ad-78623” ).addService( googletag.pubads() ) ); } );

    googletag.cmd.push(function() {
    mobile_slots.push( googletag.defineSlot( “/1005424/_dPSv4_mob-all-article-bottom_(300×250)”, [300, 250], “pb-ad-78158” ).addService( googletag.pubads() ) ); } );

    The post 3 Steps to Photoshop Retouching for Natural Looking Portraits by Danielle Werner appeared first on Digital Photography School.


    Digital Photography School