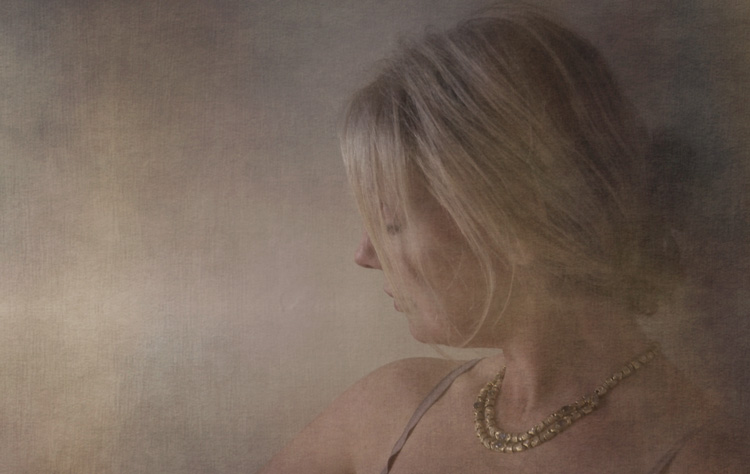
Category: Photography

  • 5 Tips for Golden Hour Photography

    It’s pretty much an accepted fact that the earlier and later parts of the day are best for photography, but if you want the absolute richest, warmest, most beautiful light, the hours directly following sunrise and leading up to sunset – known as the golden hours – are prime time for natural light.

    This is when the subtle golden light from the low-hanging sun bathes the world in a warm glow, and shadows become long and dramatic, but not harsh.
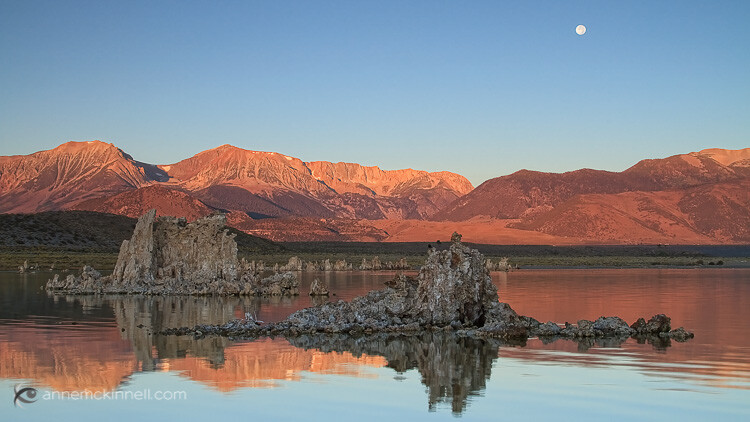
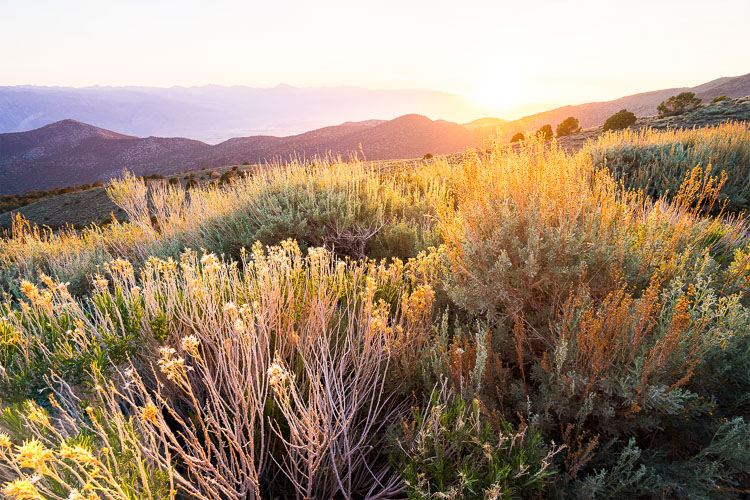
    Mono Lake, California, by Anne McKinnell

    Those hours can be short-lived, though as once the sun starts to rise or set, it isn’t long before it climbs too high, or disappears altogether. To help you get every second out of each golden hour, consider these tips when you go out shooting.

    1. Be There

    The first step to making the most of the golden hours is knowing exactly what time that magic light is going to happen. Because the golden light is caused by our view of the sun, the timing will change with the seasons. Exactly what time the sun passes over the horizon depends the time of year and your location.
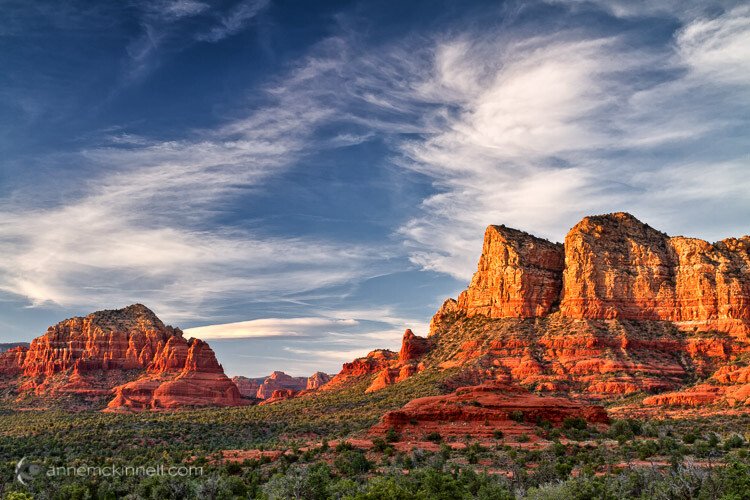
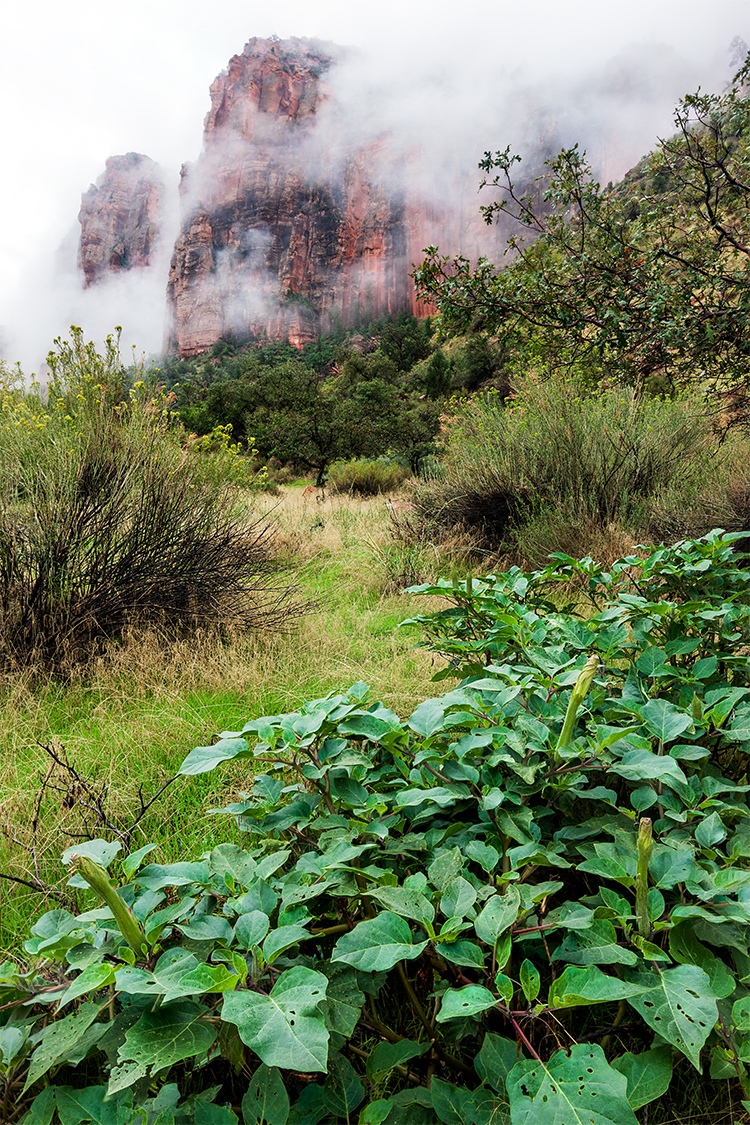
    Sedona, Arizona, by Anne McKinnell

    The time of sunrise and set is easy to find in your newspaper or online and that is a good place to start to calculate when the golden light will happen. But golden hour may not be anywhere near as long as an hour depending, on the season and your location. For example, near the equator, the sun rises quickly and you may only get golden minutes. On the other hand, in far northern locations the sun may not rise very high in the sky at all and you might get golden light all day.

    You also need to watch how the clouds are forming throughout the day, since clouds on the horizon will cut your golden hour short.

    2. Prepare Early

    The golden hour (or minutes) can pass very quickly, so if you’re not already out shooting when the golden light starts, it’s likely to be over by the time you find your subject, choose a composition, set up your camera, and take the shot. If you know in advance what time you need to be there, you can plan ahead. Go out a couple of hours beforehand so you’ll have time to get to your location, get set up, and be ready to take the photo by the time the horizon starts to glow.
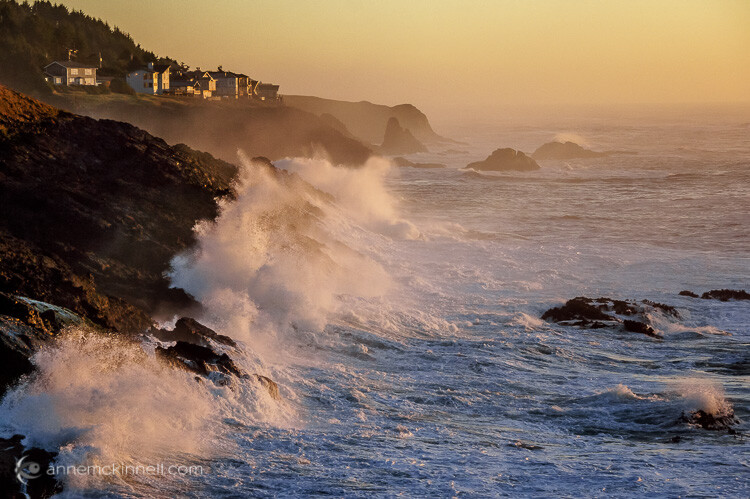
    Depoe Bay, Oregon, by Anne McKinnell

    By doing this, of course, you have to think into the future a bit. Rather than compose your image based on where the sun is, you must arrange your frame according to where the sun will be. To do this, think about the path the sun takes through the sky. It rises in the east, so you know where you can expect to see it first, and because it sets in the west you know which direction it’s moving. You can even find out the exact position where the sun will set on the horizon using various website and apps. Plan your shots with this information in mind. A compass will come in handy. Compose your photograph where the sun is going to be, then just relax and wait for the moment to present itself.

    3. Balance the Exposure

    The contrast between light and shadow isn’t as extreme during the golden hours as it is in the middle of the day, but there can still be a huge tonal range between highlights and lowlights (shadows). Especially if you’re trying to capture the sky itself in the picture, its brightness will almost certainly overpower the scene below it.

    There are many ways to balance a difference in brightness between two parts of your composition. Bracketing your shots is a good start – use your camera’s exposure compensation feature (+/- button) to take several pictures of a scene with different levels of brightness. There might be a perfect exposure setting that captures both light and shadow areas.

    Organ Pipe National Monument, Arizona, by Anne McKinnell

    If you shoot in your camera’s uncompressed RAW format you’ll be able to individually adjust your photo’s highlights and lowlights in post-processing, reducing the contrast while preserving as much detail as possible. This way, if one area of your photo is too dark and another is too bright, you can tone down the whiter shades while bringing up the darker shades to create a well-balanced image. This level of control isn’t possible with compressed JPG files, which don’t save the subtle information in those areas.

    If the sky is consistently too bright in your photos, consider using a graduated filter that is tinted at one end, but fades out and is transparent on the other. This will reduce the exposure on only half of the image. By putting the tinted half at the top it will darken the appearance of the sky.

    Another option is to take your bracketed shots and combine them in post-processing to make a high dynamic range (HDR) image (Merge to HDR in LR or another method).

    4. Use Fill-Flash

    Rather than take light away from the brighter areas, your other option is to add light to the darker parts instead. You can do this with a continuous light source like a lamp. Moving the light closer to the subject will make it brighter, and pulling the light away will dim it.
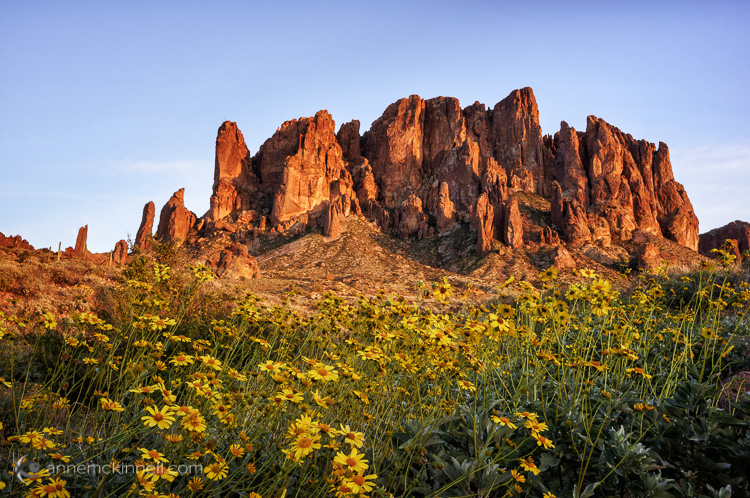
    Superstition Mountains by Anne McKinnell

    Of course, if you’re outside you probably don’t have a lamp on hand. What you probably do have, though, is your on-camera (or off-camera) flash. Flash doesn’t always have to act as the main light source in a picture – it can enhance an existing light source (such as the sun) by simply adding light into the shadow areas of a photograph.

    Flashes also don’t have to be used at full power. Nearly every camera will have a Flash Compensation option. This gives you the ability to turn the brightness of your flash up or down. A dimmer flash will still add light to your scene, but it won’t be strong enough to overtake the primary light source and create new shadows of its own. Using it in this way is known as fill-flash. When your subject is backlit, such as by a fiery sunset, use this method to prevent silhouetting. Bracket your shots using different flash settings to achieve the right balance of brightness between the foreground and background.

    5. Set the Colour Temperature

    Combining two light sources can cause other complications though – particularly with the white balance. Every light source has a different hue, or colour temperature. Incandescent bulbs have a yellow/orange (warm) cast, while fluorescents are sort of blue/green (cool). Our eyes adjust to those slight shifts on their own, but a camera has to measure the balance of the light so it can alter its colours, and ensure that a white object looks white and not yellow/orange or blue/green. Modern cameras can do this automatically, or you can manually select what kind of light to balance the camera to (daylight, indoor light, candlelight, etc.).
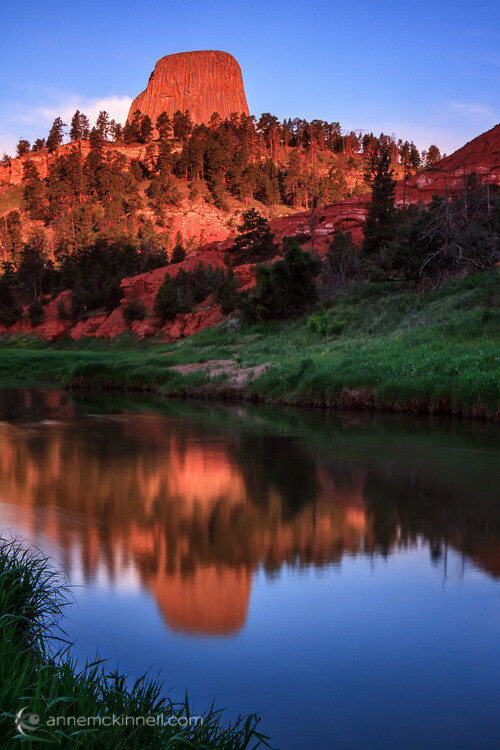
    Devils Tower, Wyoming, by Anne McKinnell

    The golden hours have a lot of warm coloured light, so if left on auto white balance, the camera will adjust its colours to be a little more blue to compensate. However, if you add in the light of a flash, which is cool in tone, one of two things will happen: the camera will keep the same white balance setting as before, and the flash’s light will appear even more blue, or the camera will re-adjust itself to the white balance of the flash, causing it to look normal but the rest of the picture to appear more orange.

    When using two different light sources, it’s important to notice the colour temperature of each. Then, decide which of them you want to appear neutral, and which one should retain its natural colour. Rather than keeping your camera on auto white balance, set it to the type of light you want neutralized. If you shoot in RAW format, this can also be changed in post-processing.
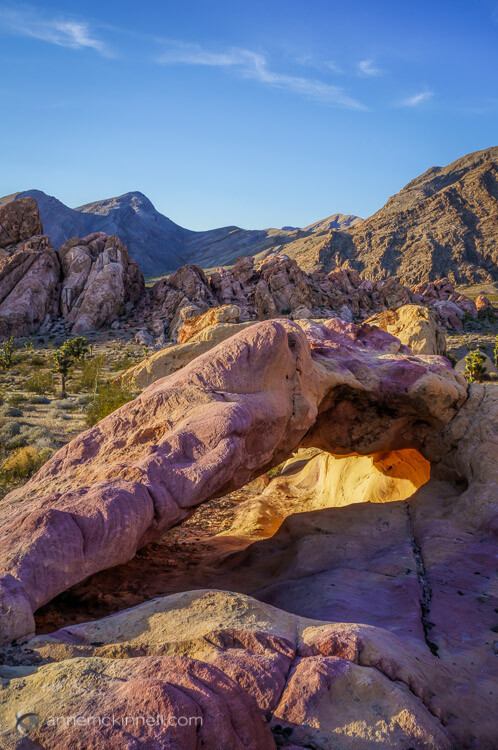
    Arch at Whitney Pocket, Nevada, by Anne McKinnell

    Remember, golden hour is not sunset or sunrise, but shortly before and after those times when your subject still has direct light falling on it. The magical golden light will transform your photos from ordinary to extraordinary. It’s all about the light!

    googletag.cmd.push(function() {
    tablet_slots.push( googletag.defineSlot( “/1005424/_dPSv4_tab-all-article-bottom_(300×250)”, [300, 250], “pb-ad-78623” ).addService( googletag.pubads() ) ); } );

    googletag.cmd.push(function() {
    mobile_slots.push( googletag.defineSlot( “/1005424/_dPSv4_mob-all-article-bottom_(300×250)”, [300, 250], “pb-ad-78158” ).addService( googletag.pubads() ) ); } );

    The post 5 Tips for Golden Hour Photography by Anne McKinnell appeared first on Digital Photography School.


    Digital Photography School

  • How To Transform Your Photos In Just One Click

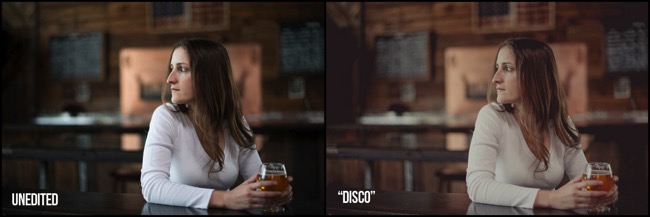
    We’re super-excited to let you know about a brand new dPS product that’s just launched, to help you transform your photos into stunning images with a single click:

    A mega pack of 101 Lightroom® presets (Please note: a copy of Adobe Lightroom is required to use these presets.)

    NewImage

    Best of all, for a limited time, the pack can be yours for the special introductory price of just USD $ 20 (that’s 60% off).

    Check it out now!

    Final Portraits 1

    Following the incredibly popular preset offerings in our 12 Days of Christmas and Mid-Year Summer sales, we’ve been inundated with requests for more…

    So we decided to bring in pro photographer and Lightroom expert, Cole Joseph, to handcraft the first ever dPS set, including 7 high quality collections:

    • Plush Portraits – bring the “wow” factor to your portraits while preserving natural skin tones
    • Lively Landscapes – add vibrance to your lush landscape images
    • Street Grit & Grunge – give your photos a unique and cutting-edge look
    • Bangin’ Black & White – for images with classic charm, romance and soul
    • Sleek Sepia – stylize with a cross-toned black and white edit
    • Classic Vintage – step back in time and relive the good ol’ days
    • Quick Adjustments – quick and easy fine-tuning to simplify your editing process

    Final quick adjustments

    With 101 presets to choose from, Cole’s done the hard work for you so you can get the perfect edit for every photo without any fuss.

    Simply apply the effect and adjust as desired… It’s that easy!

    Final Vintage 2

    You’ll save a whole heap of processing time, while giving your images an instant “pop”.

    See Cole demonstrate in this video:

    If you haven’t used presets before? No worries. Full instructions are included in the pack and as with all our products if you pick it up and don’t find it’s for you – you can ask for your money back anytime within 60 days and we’ll give you a full refund.

    Transform your photos in just one click.
    Pick up our 101 Lightroom Presets Pack today!

    *Please note: a copy of Adobe Lightroom is required to use these presets.

    googletag.cmd.push(function() {
    tablet_slots.push( googletag.defineSlot( “/1005424/_dPSv4_tab-all-article-bottom_(300×250)”, [300, 250], “pb-ad-78623” ).addService( googletag.pubads() ) ); } );

    googletag.cmd.push(function() {
    mobile_slots.push( googletag.defineSlot( “/1005424/_dPSv4_mob-all-article-bottom_(300×250)”, [300, 250], “pb-ad-78158” ).addService( googletag.pubads() ) ); } );

    The post How To Transform Your Photos In Just One Click by Darren Rowse appeared first on Digital Photography School.

    Digital Photography School

  • Put the Fun Back into Your Photography with a Cow Safari

    Whether you are a pro photographer or a dedicated amateur, sometimes when you are photographing a lot you can get so caught up in achieving the perfect image, that you lose the sense of fun that got you interested in the first place.

    Actively putting the fun back in can not only help you to enjoy your regular photography work more, and assist in getting your photo mojo back, but can inspire new ideas you otherwise might not have come up with. My favourite way to do this is a Cow Safari. It’s kind of like an African safari, but with cows.

    Fun-photography-safari-01
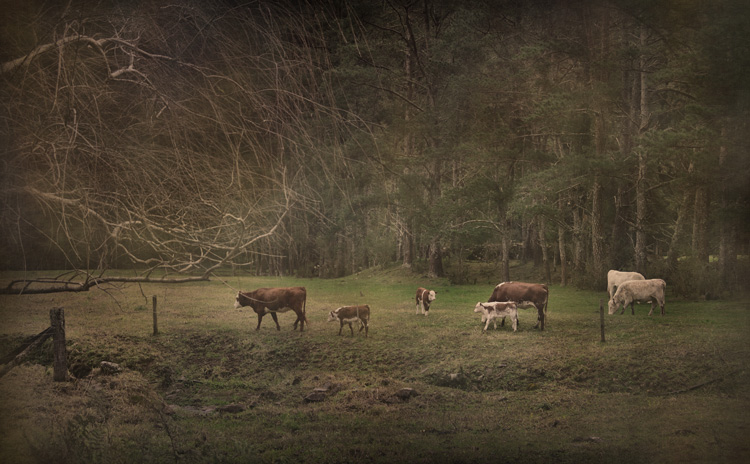
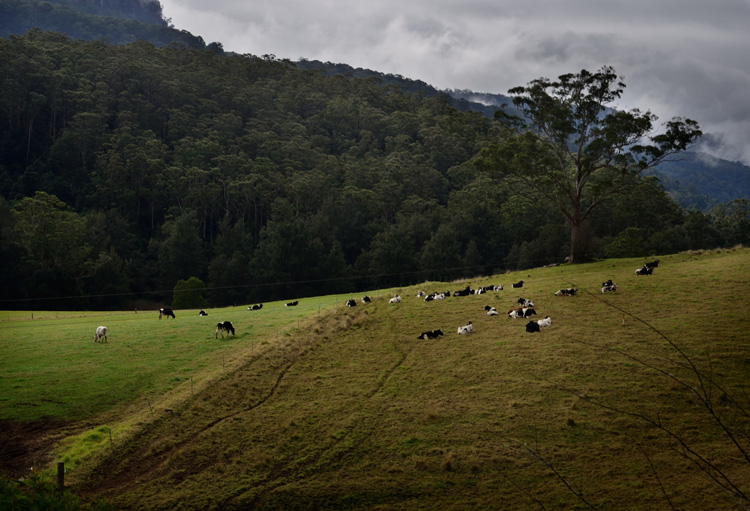
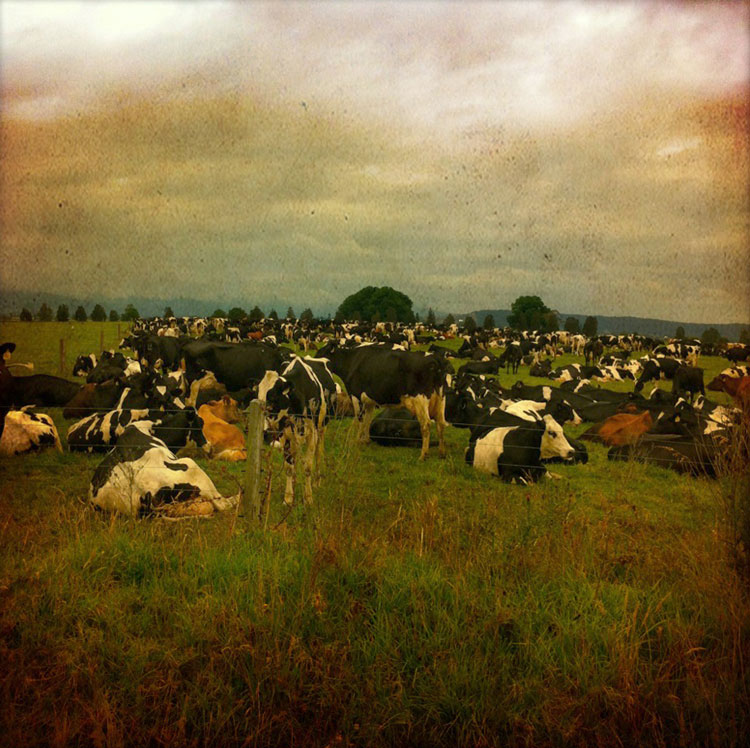
    Why cows? Well, for a start they tend not to eat you as much as lions and it’s much cheaper than a trip to Africa. Cows are not the most athletic of creatures, they tend to just stand around a lot and are not well camouflaged, so are pretty easy to capture in a photo. They generally hang out in very picturesque areas, perfect for a day out photographing.

    Cows generally hang out in very photogenic areas.

    Cows make a great safari subject and are generally vegetarian so your risk of getting eaten by one is fairly low. Can’t say the same for lions.

    However, if you don’t live close enough to a cow hang out, you can make up your own safari. For example; if you’re in the city, maybe a pigeon safari, or seagulls if are near the beach. Perhaps a people walking their dogs safari, or even a flower safari – it doesn’t really matter, just so long as you can find your subject in various different places that you can travel around to easily over a few hours, a day, or even a road trip weekend.

    My first safari was some years ago by the seaside with my father, the subject was seagulls. We set up a small wager, winner gets bragging rights. There has been no definitive winner, because the safari still continues years later. Even when we’re in different parts of the country, there is an occasional exchange of seagull photographs. It’s been inspirational, I’ll be bogged down in the photographic process and my phone will light up with something like this:

    It's all about fun with these safaris.

    A photograph sent to me by my father while on a seagull safari. I don’t think that seagull is very well, in fact I don’t think it is actually a seagull, I suspect foul play! Photo credit: Chris Hawkins

    The main point of the safari is to step away from your usual photography routine and just enjoy taking photographs for the sheer sake of doing so. No planned images, no trying to achieve anything or get that perfect shot, just fun photographic play time with the idea of loosening and lightening up a bit as a photographer, and not taking yourself or your images too seriously.

    Once you take the trying hard part out of the picture, you can get back to experimenting, and maybe surprise yourself, just like you did when you first fell in love with photography. Of course you may not end up with anything worth saving, and that’s not the point of the exercise. But, then again, you never know what you might come across in your travels.

    You never know what you might find on your safari.

    Had I not been out on a cow safari, I may have missed the opportunity to capture this cow doing a remarkably good impersonation of a horse.

    Your safari is a great time to experiment with things you might not normally try when you’re too busy trying to get that perfect shot. Try the lens you haven’t really played with yet, test out some of the features on your camera you haven’t gotten around to trying. If you are a pro who is dedicated to manual setting, maybe just try out some of the Scene Modes, or vice versa, play with manual settings if it’s something you have not really tried. Maybe even pick up one of those cheap disposable film cameras, or test out some different mobile phone apps.

    A safari is a great time to experiment with your gear.

    Use the photographic time-out to slow down and experiment with things like mobile phone photography apps. 

    How to Conduct Your Safari

    Step 1: Grab a fun friend or two

    They don’t necessarily need to be photographers, although I’m willing to bet they’ll end up taking a shot or two on their phones. Encourage them to bring a camera, or bring one for them. They could also come in handy as a model.

    Take some friends, photographers or non photographers, it doesn't matter, it's about fun!

    Safari fun is best shared.

    Step 2: Bring some supplies

    Depending on where you conduct your safari, you may not be close to a convenient cafe or food place, so why not take your own. Pack a few sandwiches or a whole picnic.

    Supplies are a good idea, less time hunting for food places, more time to photograph.

    Maybe pack a healthy picnic for your safari. It’s all healthy as long as there’s some fruit right?

    Step 3: Get out there and have fun

    Jump in the car, on your bikes, the train, or get your walking shoes on and head out. You can map your trip beforehand, or perhaps toss a coin for which direction to go, as you step out the front door. Just so long as you travel around a bit, and have a few different spots to stop and take some photographs.

    Taking time out to have photographic fun with friends or family  is worth it, and not just for your own photography.

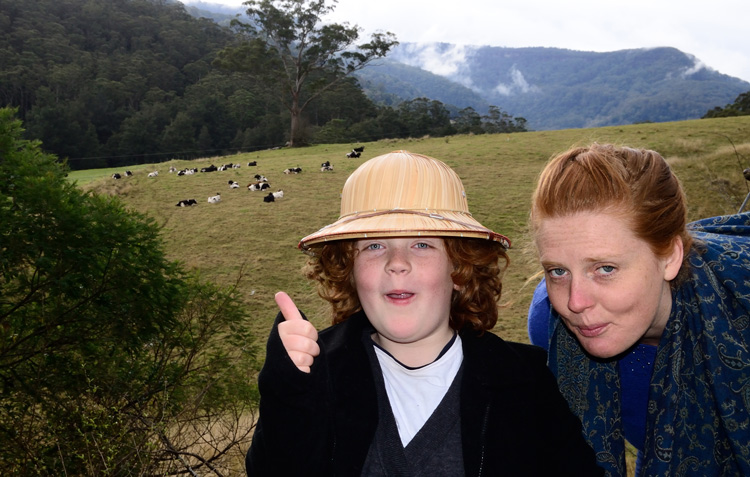
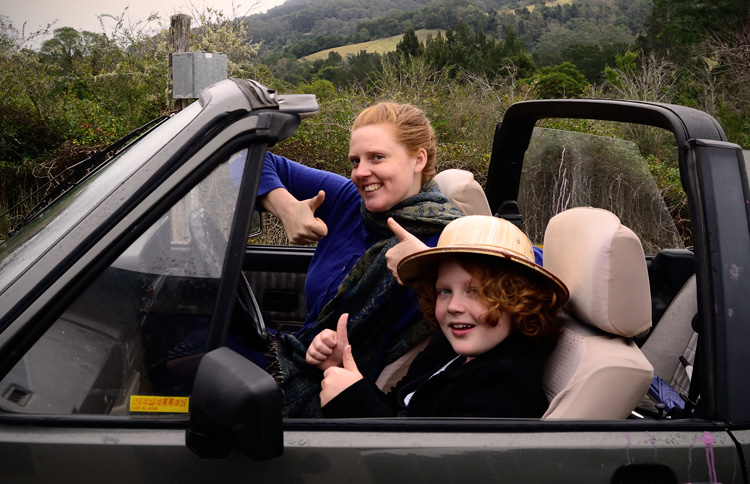
    It’s thumbs up for the cow safari. My little friend here really got into the spirit of the day. He even took some great photographs and video on his portable gaming device. By the end of our safari he wanted to know how much he had to save up to buy a camera. Safari success!

    Safari Tips:

    • Experiment: Use the safari to experiment with different lenses, settings, or cameras.
    • Go Mobile: Don’t disregard the phone camera, even if you are not a fan of phone photography.
    • Do variations: Try all versions of the above at each place you stop. See how each setting/lens/app deals with the same situation.
    • Don’t trespass on properties, as much as you might be tempted to slip under a fence to get that perfect cow shot, these animals can be dangerous, as can farmers who don’t appreciate trespassing.
    • Don’t hassle the cows. If they are close to the fence, keep a distance and approach very slowly. If they start to get up and move, back off. No shooting off a flash in their moo-ey faces.  The same applies to other subjects. Just be kind and respectful.
    • Set up a challenge with your co- safarians (I think I just made that word up), such as best, funniest, or worst pic of the day. Just don’t get too serious about it!
    • Keep it going in the processing stage: The fun doesn’t have to stop when you get home from your safari, take the same approach to editing. Use some of your images from the day to experiment in your editing program with different effects and techniques that you wouldn’t normally try.
    • Take it global: You could do your safari with online friends, just set up a date or an event on Facebook. In this day and age of instant online access, you can safari with friends from around the world.
    Get out there and start having some photographic fun!

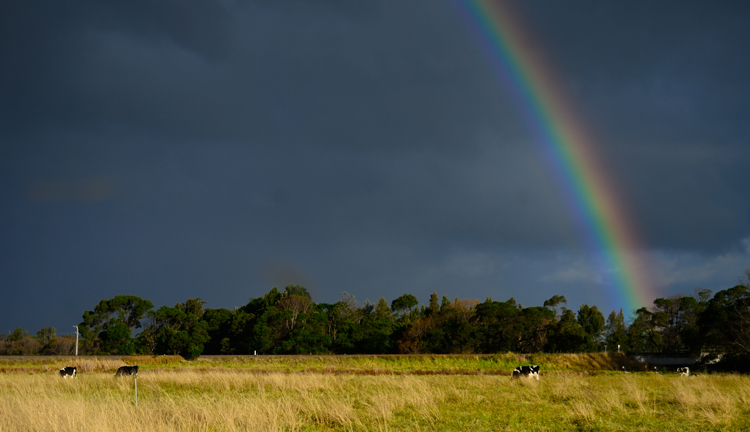
    The final shot on our cow safari, taken through the car window on the way home.

    Above all, have fun, relax, enjoy, laugh, play. This is about taking a photographic break of sorts and getting outside your normal photography practice. You never know, you may end up with that coveted perfect shot in the process. Or, maybe not. It doesn’t matter, as long as you were having fun with your camera. Although I am sure you will end up with at least one shot that makes you smile, and I would love to see that shot or any others you take on your safaris.

    Please do share in the comments below, any safari shots inspired by this article or from a previous safari, or any tips or safari ideas you might like to share with fellow safarians (yup, it’s a word now). They don’t have to be great shots! It’s about sharing the experience and having fun with your photography.

    googletag.cmd.push(function() {
    tablet_slots.push( googletag.defineSlot( “/1005424/_dPSv4_tab-all-article-bottom_(300×250)”, [300, 250], “pb-ad-78623” ).addService( googletag.pubads() ) ); } );

    googletag.cmd.push(function() {
    mobile_slots.push( googletag.defineSlot( “/1005424/_dPSv4_mob-all-article-bottom_(300×250)”, [300, 250], “pb-ad-78158” ).addService( googletag.pubads() ) ); } );

    The post Put the Fun Back into Your Photography with a Cow Safari by Lea Hawkins appeared first on Digital Photography School.

    Digital Photography School

  • One One-Thousandth of a Second: Shooting Sports and Fast Action

    Whether you’re a sports fan or not, if you’re a photographer, you’ll probably find yourself taking photos of some fast-paced competitive action at some point. If you’re used to shooting in a nice, controlled environment, like a studio, or if you’re used to street photography, where your subjects are probably walking at a normal, relatively slow pace, shooting a sporting Continue Reading

    The post One One-Thousandth of a Second: Shooting Sports and Fast Action appeared first on Photodoto.


    Photodoto

  • Beginners Guide to Using TTL Off-Camera Flash

    So you want to use off-camera flash. But why? Your camera has that hot shoe there for a reason, right?

    There are two things that you may not realize:

    1. That many DSLR-speedlight combos are capable of wireless off-camera flash using through-the-lens (TTL) metering without any additional equipment
    2. That using off-camera flash can take your photography to an entirely new level both in quality and creative potential.

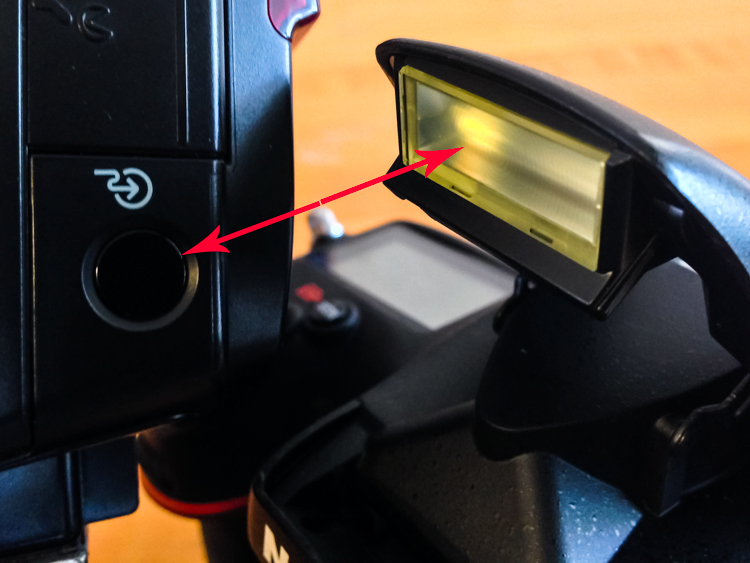
    Many references to off-camera flash talk about sync cords and wireless transmitters, when in fact, many DSLRs with a built-in pop-up flash have the ability to wirelessly control a speedlight. Likewise, many hot shoe mounted speedlights are fitted with an optical receiver to be wirelessly triggered.

    Image of pop up flash and speedlight optical receiver

    Look, no wires! On camera pop-up flashes are often capable of optically triggering speedlights.

    The least painful way to cross the proverbial bridge into the realm of wireless off-camera flash – often referred to as a remote or slave flash – is by utilizing your camera’s ability to act as a remote trigger for a flash combined with TTL metering.

    Most Nikon cameras from the D70, and flashes from the SB-R200 and up; and Canon cameras from the 600D (T3i) and flashes from the Speedlite 90EX and up offer these features, but check the manufacturer’s website to be sure what setups will work. There are also a wide selection of other brands of flash, often less expensive, that offer similar features.

    A TTL-equipped flash is manufacturer specific. The TTL feature of a Nikon dedicated flash will only work with Nikon, however, it could possibly still be used in manual mode.

    In a nutshell, TTL is the way that the camera sets the exposure and flash intensity automatically by firing a nearly imperceptible pre-flash, taking an exposure reading, and adjusting settings accordingly. Nikon calls it i-TTL and Canon has dubbed it e-TTL but it’s basically the same deal.

    For wireless off-camera flash functionality, the built-in flash on your camera is set to send an optical signal to your flash which triggers it.

    Photo taken with a hot shoe mounted flash

    This photo was taken simply with a hot shoe mounted flash set to TTL metering and the camera set to aperture priority. Shot at 200mm, f/5.6 at 1/60th of a second with the flash pointed at a low white ceiling. Nice soft, even lighting.

    Photo taken with off camera wireless flash

    Exact same settings as the photo above except the flash was setup off-camera in remote mode, with TTL metering. It was placed at 45-degree from the subject and aimed towards the food. Voila! Directional, moody lighting.

    First time users of this method will think they just discovered sorcery. Partly because it’s such a cool trick and partly because it is easy to achieve awesome results right away. Manually controlling an off-camera flash isn’t the end of the world but it requires more thought and consideration to balance the flash and camera settings to achieve desired results.

    If you have a camera and a hot-shoe-mounted flash unit that are capable and you haven’t taken advantage of it yet, this is the point where you should start getting excited.

    Setup for Nikon Equipment

    Camera Settings (menu locations may vary depending on camera model)

    1. Open the Custom Settings Menu
    2. Scroll down and select menu “e” – Bracketing/flash
    3. Choose e3 on the list – Flash cntrl for built-in flash
    4. Choose the last selection on this list – Commander mode
    5. The first line item is Built-in flash, scroll right to highlight the Mode column. If you haven’t messed around with this it will probably be set to TTL.
    6. Scroll down until it reads – –. This means that the camera’s built-in flash will only trigger the off-camera flash and won’t add any additional light to your exposure.
    7. No need to change it but note what channel is selected as your flash will need to be set to the corresponding channel.
    8. Press OK.
    9. Pop open the built-in flash.

    Flash Settings (varies depending on flash model)

    Photo showing SB-600 remote flash setting

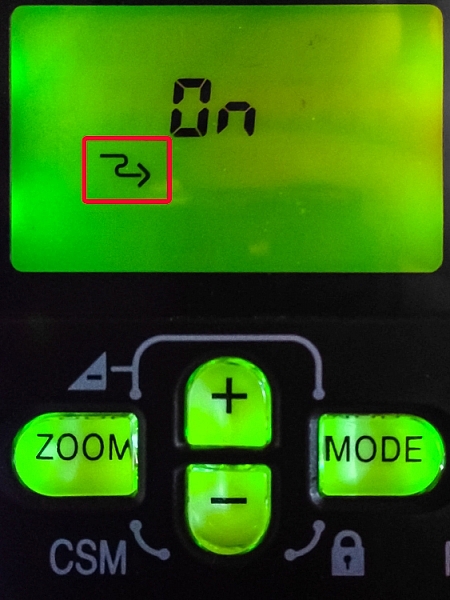
    Users of Nikon speedlight models SB-600 and SB-800 are looking for this symbol indicating the flash is ready to be wirelessly triggered. The SB-800 selection is also marked Remote.

    On some Nikon flashes you are looking for a curved arrow symbol that signifies it is set to be controlled wirelessly. On some models like the SB-600 and SB-800 this is accessed in the Custom Settings menu while the SB-700, SB-900 and SB-910 have a dedicated switch to set the flash to Remote.

    Setup for Canon Cameras

    Camera Settings (may vary depending on camera model)

    1. Press the Q button to open the menu.
    2. Cycle through until you reach the Built-in flash func. menu setting identified by a flash symbol. Press the Set button to select.
    3. Choose the middle menu item called Easy wireless flash shooting. This setting can also be found in the first page of the shooting menu under Flash control.
    4. No need to change it but note what channel it is set to as your flash will need to be set to the corresponding channel.
    5. Pop open the built-in flash

    Flash Settings (varies depending on flash model)

    On Canon a flash you need to set it to slave mode. Some Speedlite models have a dedicated switch for this setting, and others require you to hold down the zoom button to switch it on.

    The system is an optical one, meaning that the receiver on the speedlight needs to “see” the signal from the on camera flash. A direct line of sight is recommended but I have found that you can often hide the speedlight slightly behind a wall or other object, and it will still receive the signal.

    Other than the signal being interrupted by physical objects, it can also be finicky in bright daylight, and the range is limited compared to radio frequency triggers.

    Food photo with off camera flash

    Simply getting the flash off of the hot shoe and a couple of feet to the side casts more visible shadows and gives the photo more dimension.

    Editor’s Note: If you have a system other than Canon or Nikon consult your camera and flash manuals for the settings. We apologize if you feel left out, but we are not able to cover every brand and combination in the scope of one article. 

    Notwithstanding the limitations of the system, it’s an ideal introduction to off-camera flash with minimal investment of time or money – especially if you have the equipment already.

    These are the very basics. Both Nikon and Canon systems are very flexible, and expandable, with the ability to adjust flash intensity from the camera, add additional flashes in groups, and in some cases, trigger other flashes from a master flash adding more versatility and utility.

    After you get the system working its magic and have officially entered the  realm of off-camera flash, there are innumerable adjustments to make both on the flash and camera to gain more control, and fine tune your lighting to create the photo you see in your mind.

    A Few Quick Tips

    • Very bright ambient light and flashing lights can interfere with the optical triggering
    • For best results, point the receiver window on the flash (usually covered with red plastic) toward the camera and rotate the flash head if necessary
    • If the background is too dark, try decreasing (slowing) shutter speed and/or increasing the ISO

    If you want your subject and background to have more even lighting, take a look at Dragging the Shutter: Balancing Fill Flash with Ambient Light

    For more technical information about flash placement, have a read of Working with Off Camera Flash and TTL.

    Just starting out with off-camera flash? Let’s hear about your experience and see your results in the comments below.

    googletag.cmd.push(function() {
    tablet_slots.push( googletag.defineSlot( “/1005424/_dPSv4_tab-all-article-bottom_(300×250)”, [300, 250], “pb-ad-78623” ).addService( googletag.pubads() ) ); } );

    googletag.cmd.push(function() {
    mobile_slots.push( googletag.defineSlot( “/1005424/_dPSv4_mob-all-article-bottom_(300×250)”, [300, 250], “pb-ad-78158” ).addService( googletag.pubads() ) ); } );

    The post Beginners Guide to Using TTL Off-Camera Flash by Jeremie Schatz appeared first on Digital Photography School.

    Digital Photography School

  • How To Quickly Focus Stack an Image in Photoshop

    Four-image focus stack of sunset in Bishop, California. The foliage in the foreground was just inches away from the camera.

    Four-image focus stack of sunset in Bishop, California. The foliage in the foreground was just inches away from the camera.

    When you take into account all the different ways to get a tack sharp image, it can be quite overwhelming. I’ve been photographing landscapes as a full time photographer for six years now, and have tested just about every method out there. Focus stacking is just one more option, but it is one of my favorites, if the conditions are right.

    Focus stacking is a life saver when you have a foreground subject that is very close to the frame, and a background subject that is equally important to the image. This happens quite a bit in landscape photography when using super wide angle lenses! Some will argue that hyperfocal calculations work in these situations too, and while they certainly can, I personally don’t like hassling with the charts and measurements unless I really have to.

    Two image focus stack of Lily Lake near Estes Park, Colorado.

    Two image focus stack of Lily Lake near Estes Park, Colorado.

    One of the most important things you can do out in the field is to inspect your shots instead of just assuming you nailed it. You’ll find articles all over the place making fun of photographers for chimping, but the ability to zoom in on all the tiny details of your shot is a major advantage over the film days.

    When I’m taking pictures of a magnificent sunset, I’m working fast and keeping my head on a swivel. When I take a shot, I’ll quickly review it and zoom in all the way on my main subject. Then, I’ll zoom in on the other parts if they need to be sharp as well (sometimes they don’t). If you have a really close foreground subject and it’s tack sharp, but the mountains in the background are just a bit soft; this is a good time to consider focus stacking.

    Two image focus stack at Great Sand Dunes National Park in Colorado. One for the sand that was less than a foot from the lens, and one for the background.

    Two image focus stack at Great Sand Dunes National Park in Colorado. One for the sand that was less than a foot from the lens, and one for the background.

    The best part about focus stacking is that it’s super easy! Just put your camera on a tripod and set your lens to manual focus. I use live view on the back of my camera to zoom in as close to my subject as possible and turn the focus ring on my lens until I see the subject become tack sharp. Once you’ve gotten that shot, scroll around the image and see what is soft in the background. If the mid-ground is soft, turn your focus ring until it’s sharp and take the same picture with the same settings. Then, dial the focus ring for the background and take another shot. That’s it until post processing!

    Stacking the Images Together in Photoshop

    Final image from the video. Three image focus stack from Zion National Park.

    Final image from the video. Three image focus stack from Zion National Park.

    When Focus Stacking Doesn’t Work

    In all the images above that had foliage in them, there was virtually no wind at the time I took the shots. The foliage was perfectly still. If the wind is blowing and the leaves are swaying back and forth, focus stacking is going to be a nightmare, and isn’t even worth bothering with in most cases.

    It’s also important to note that having the entire image in sharp focus isn’t always the best artistic approach to a scene. Sometimes having your subject sharp and the background soft will do a much better job of drawing the viewer’s eye where you want. It really just depends on the situation.

    Conclusion

    Focus stacking is just one trick to have in your bag, and this is just one method of doing it. There are also third party programs like Helicon Focus to consider. I personally haven’t used the program but have heard great things about it.

    Have anything to add to the article? Let me know in the comments below!

    googletag.cmd.push(function() {
    tablet_slots.push( googletag.defineSlot( “/1005424/_dPSv4_tab-all-article-bottom_(300×250)”, [300, 250], “pb-ad-78623” ).addService( googletag.pubads() ) ); } );

    googletag.cmd.push(function() {
    mobile_slots.push( googletag.defineSlot( “/1005424/_dPSv4_mob-all-article-bottom_(300×250)”, [300, 250], “pb-ad-78158” ).addService( googletag.pubads() ) ); } );

    The post How To Quickly Focus Stack an Image in Photoshop by James Brandon appeared first on Digital Photography School.


    Digital Photography School

  • 6 Ways to Use Color for Eye Catching Compositions

    A painter only needs to look at their palette before applying color to the canvas. Photographers have a different challenge, as they must locate their tones by studying a scene. Of course, this can be easy to bypass when you’re thinking about shadow, highlight, depth of field, shutter speed, and all of the other technical details that go into a photo. Still, as the great painter Kandinsky said, “Color is a power which directly influences the soul.” To use it in your compositions can infuse your work with a new level of sophistication.

    1) Background Separation

    To maximize the effect of bold colors, you’ll want to start by looking for dark, muted backgrounds. This type of stark contrast will deemphasize the surrounding areas, bringing the viewer’s attention directly to the subject. Of course, mixed lighting can trick even the most sophisticated metering systems. For the most accurate exposure, use the camera’s internal spot meter to take a reading of the brighter part of the scene. By purposely underexposing by approximately half a stop, vibrant colors will take on a deep, rich tonality.

    2) Just a Dab of Color

    If you want to draw people into your photograph, try including just a small amount of color. This subtle method gives your subject importance by allowing it to stand out from the rest of the frame. These thoughtful compositions are aided by a different approach to photography. Instead of working to add more visual interest, you want to eliminate any competing colors, and simplify the frame. While looking through the viewfinder, check all four corners carefully for distracting elements.

    3) Cut the Glare

    Each autumn, brilliant displays of fall foliage attract scores of photographers looking for that classic outdoor landscape. Yet, in many of these scenes, the glare of wet shiny leaves will actually detract from the desired color. An inexpensive solution is to add a circular polarizer to your kit. As you rotate the front element of the filter, you’ll actually see the surface reflection disappear to reveal only color. For added warmth you can even adjust the white balance using the cloudy or shade preset.

    4) Make it Glow with Backlighting

    Of all the directions light can come from, perhaps there’s no finer option than shooting directly into the sun. This is particularly true when working to emphasize color. When lit from behind, your subject will appear to glow. If the contrast is too great, eliminate the sun from the frame. This will make for a more even exposure, while still providing the dramatic benefit of backlighting. If you’re not comfortable with metering manually, take several shots using exposure compensation. Bracketing this way is a quick way to handle an otherwise tricky scenario.

    5) Set the Mood

    For added impact in your outdoor photography, consider using complementary colors. Although blue and yellow reside on opposite sides of the color wheel, they can be used together with outstanding results. On one side of the spectrum, blue is ideal for creating a quiet introspective mood. Warmer tones however, will infuse your subject with a dynamic energy. Each are effective on their own, but when used simultaneously, the contrast will bring attention to your main subject.

    6) Use the Silhouette

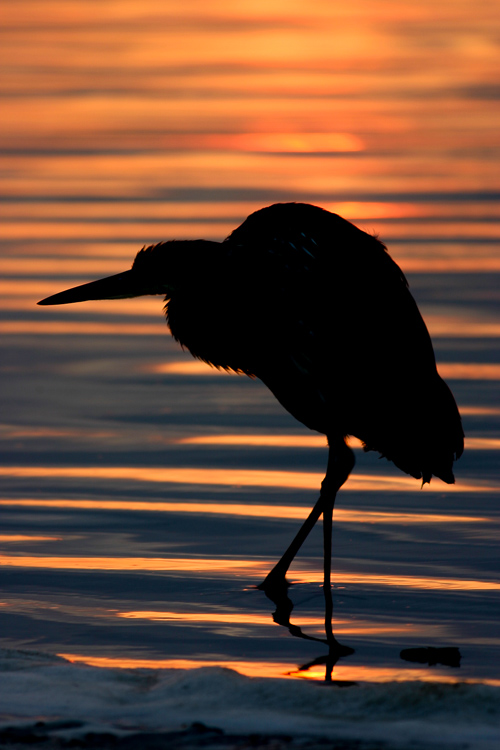
    During the magic hours around sunrise and sunset, you’ll enjoy a splendid display of color in the sky. Meanwhile, your subject will likely be in heavy shadow. If you properly exposed the subject, the sky would become pale, or even washed out. One simple option to retain the vibrant color is to create a silhouette. This is especially useful with moving subjects when HDR is less than ideal. To do this, simply expose for the sky, and let the subject’s tonality fall to black.

    Conclusion

    To fine tune your vision, give yourself an assignment where capturing a specific color is the only goal. For example, head out for a photo walk with no specific objective besides seeing and shooting – red. Rather than looking at subjects literally, you will be thinking in color. By studying the world around you with this in mind, you may be surprised at just how many opportunities reveal themselves. With practice, you’ll soon recognize color as an essential element of composition.

    googletag.cmd.push(function() {
    tablet_slots.push( googletag.defineSlot( “/1005424/_dPSv4_tab-all-article-bottom_(300×250)”, [300, 250], “pb-ad-78623” ).addService( googletag.pubads() ) ); } );

    googletag.cmd.push(function() {
    mobile_slots.push( googletag.defineSlot( “/1005424/_dPSv4_mob-all-article-bottom_(300×250)”, [300, 250], “pb-ad-78158” ).addService( googletag.pubads() ) ); } );

    The post 6 Ways to Use Color for Eye Catching Compositions by Chris Corradino appeared first on Digital Photography School.

    Digital Photography School

  • Enter Summer Landscape Photo Contest, Win Premium Photography Resources!

    Summer is a perfect time for travelling and improving your photography skills. Therefore, we decided to run a summer landscape photography contest on Photodoto. Use this great opportunity to challenge your creativity and grow as a photographer. You can win some exciting prizes too! Read on for details. Sponsors and Prizes There are going to be 5 winners in this Continue Reading

    The post Enter Summer Landscape Photo Contest, Win Premium Photography Resources! appeared first on Photodoto.


    Photodoto

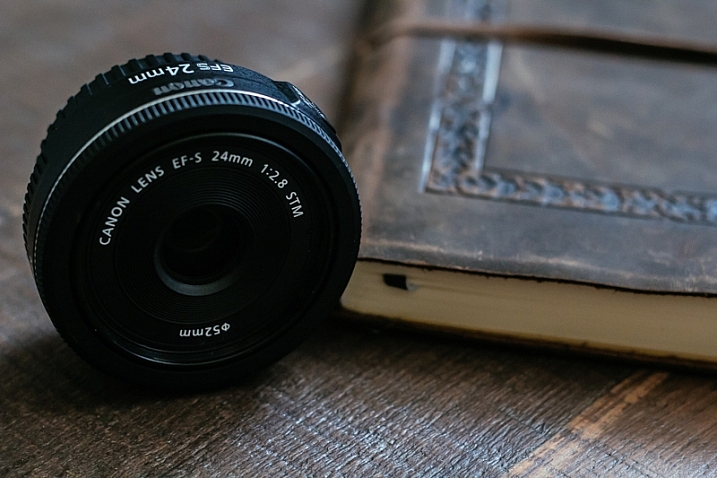
  • Canon EF-S 24mm f/2.8 Pancake Lens Review

    In November of 2014, Canon introduced us to its newest member of their low-cost prime lens family, the EF-S 24mm f/2.8 STM pancake lens. Canon gave us the 40mm version in 2012, and hoped to up the stakes by adding a wide-angle version this past year.

    Sitting at the extreme end of what can be considered wide-angle, the EF-S 24mm (full-frame equivalent of 38mm on an APS-C sensor) does so in the form of a small, light, and inexpensive prime lens that is easily accessible to all Canon enthusiasts.

    24mmPancake

    The first features that will strike you about the 24mm are its inconspicuous qualities; the lens is incredibly thin at only 2.75 inches, and weighing under five ounces. Street shooters wanting a wider angle of view will be pleased at how reserved the profile of this glass is, as it makes even a large camera body appear smaller, and less noticeable.

    In addition to being visually unobtrusive, the STM (stepping motor) feature of this lens allows for faster, and much quieter autofocusing, compared to the USM (ultrasonic) motor system used on many other lenses. Manual focus is available in full, and Canon maintains this lens is capable of a minimum focusing distance of six inches.

    Aperture: f/4.0  Speed: 1/800  ISO: 200

    Aperture f/4.0, Shutter speed 1/800, ISO 200

    For filter users, the lens uses a standard 52mm fitting, and will accept all filters of that size. Also keep in mind that as this lens is part of Canon’s EF-S line, it cannot be used on full-frame systems, such as the Canon 6D, and will only fit APS-C (crop sensor) cameras.

    Aperture: f/4.5  Speed: 1/400  ISO: 250

    Aperture f/4.5, Shutter speed 1/400, ISO 250

    As far as my personal experiences with the lens, they were generally very positive, despite my preconceived worries about image quality that were bolstered by rather mixed pre-release reviews. I was pleasantly surprised to find that the 24mm pancake performed admirably well in this area, giving me very sharp and accurate photos throughout the full range of aperture stops.

    Aperture: f/8  Speed: 1/640  ISO: 250

    Aperture f/8, Shutter speed 1/640, ISO 250

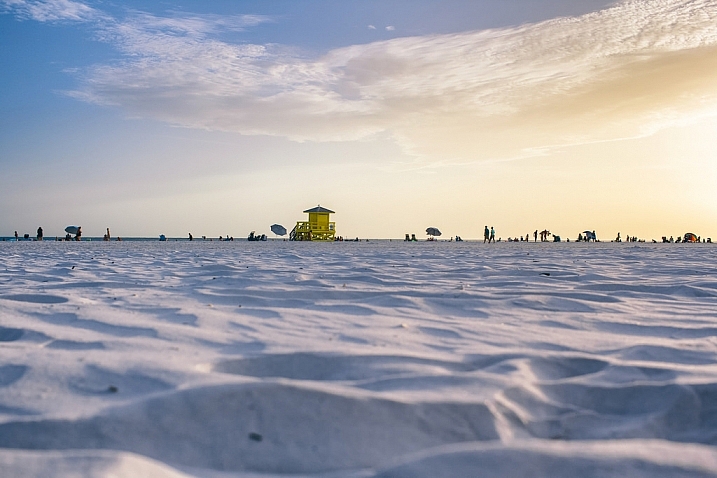
    The shot above showcases the clarity of the 24mm pancake. The beachgoers far to the back of the frame are sharp, details are well-defined, and I was still able to create a soft blur on the sand directly in front of the camera.

    Aperture: f/3.2  Speed: 1/2000  ISO: 200

    Aperture f/3.2, Shutter speed 1/2000, ISO 200

    The image above highlights how well the 24mm pancake handles blurring and bokeh at wider apertures, especially for a wide-angle lens. I usually take this shot with my 50mm f/1.8, but I wanted to see what the 24mm could do. The foreground blurring, sun glare, and porch details were all handled in a pleasant manner.

    Aperture: f/8  Speed: 1/200  ISO: 100

    Aperture f/8, Shutter speed 1/200, ISO 100

    Textures are captured very accurately with this lens, as you can see with the water in the picture above. Ripples and the smoothness of the surface translate well also, and great tonal range helps define the lake from front to back.

    Aperture: f/8  Speed: 1/50  ISO: 1250

    Aperture f/8, Shutter speed 1/50, ISO 1250

    Colors are deep and accurate, as shown in the photo above. Other than sharpness, noise reduction, and a bit of contrast adjustment, this image is as it appears right from the camera. I didn’t have to go crazy with the noise reduction, and had a great looking image even with sensitivity set at ISO 1250.

    Obviously, being a wide-angle affair, this lens doesn’t produce bokeh or blurring as easily or smoothly as my 50mm f/1.8. This isn’t an issue as I’m usually doing landscape shots using a smaller aperture.

    This little jewel is available (at the time of this writing) for $ 149.00. I’d highly recommend giving this lens a try, especially if you’re in the need of a backup at this focal length, or even an affordable wide-angle starter lens.

    Have you shot with the 24mm f/2.8 STM? What did you think? Share your experiences with us below!

    googletag.cmd.push(function() {
    tablet_slots.push( googletag.defineSlot( “/1005424/_dPSv4_tab-all-article-bottom_(300×250)”, [300, 250], “pb-ad-78623” ).addService( googletag.pubads() ) ); } );

    googletag.cmd.push(function() {
    mobile_slots.push( googletag.defineSlot( “/1005424/_dPSv4_mob-all-article-bottom_(300×250)”, [300, 250], “pb-ad-78158” ).addService( googletag.pubads() ) ); } );

    The post Canon EF-S 24mm f/2.8 Pancake Lens Review by Tim Gilbreath appeared first on Digital Photography School.

    Digital Photography School

  • Beginners Guide to Creating and Applying Texture Overlays Using Photoshop

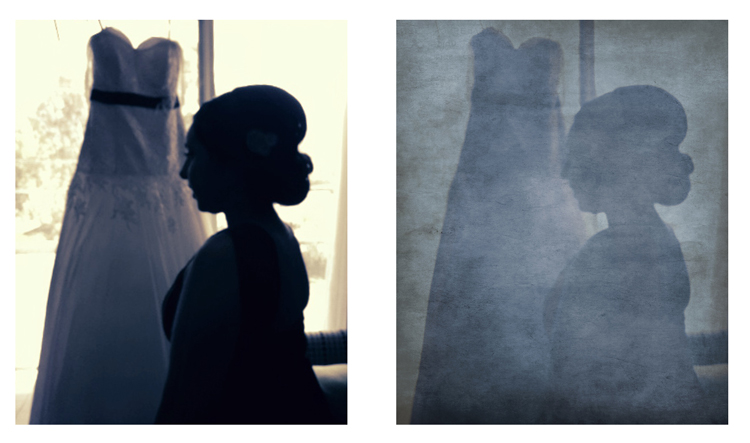
    Creating and applying textures is surprisingly simple and fun to do.

    Adding texture to photographs was happening long before the invention of Photoshop and other editing programs. In the days of the darkroom, we would scratch negatives with pins, sand paper them, stain the photographic paper with fixer before exposing, layer two negatives on top of each other in the enlarger, or push our film ISO to increase grain. These days, with editing programs being our digital darkroom, we simply have yet another way of adding texture to photographs.

    What is a texture?

    In digital photography terms it’s simply another layer added to your photograph in an editing program, usually an image of some sort of textural surface, such as paper, wood, concrete, etc., but anything at all can be a texture. They can be photographed, scanned or even made in Photoshop.

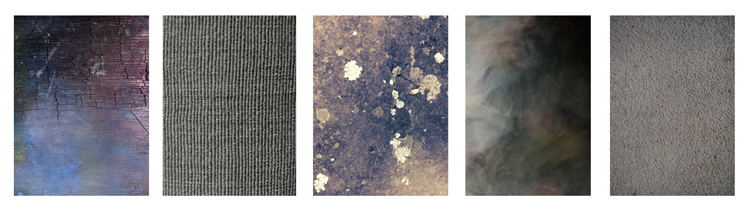
    Almost anything can be used as a texture.

    Some examples of textures. A friend’s work bench, a close-up of my lamp shade, a mossy rock, fog from a smoke machine, and some very ugly carpet.

    Why use textures?

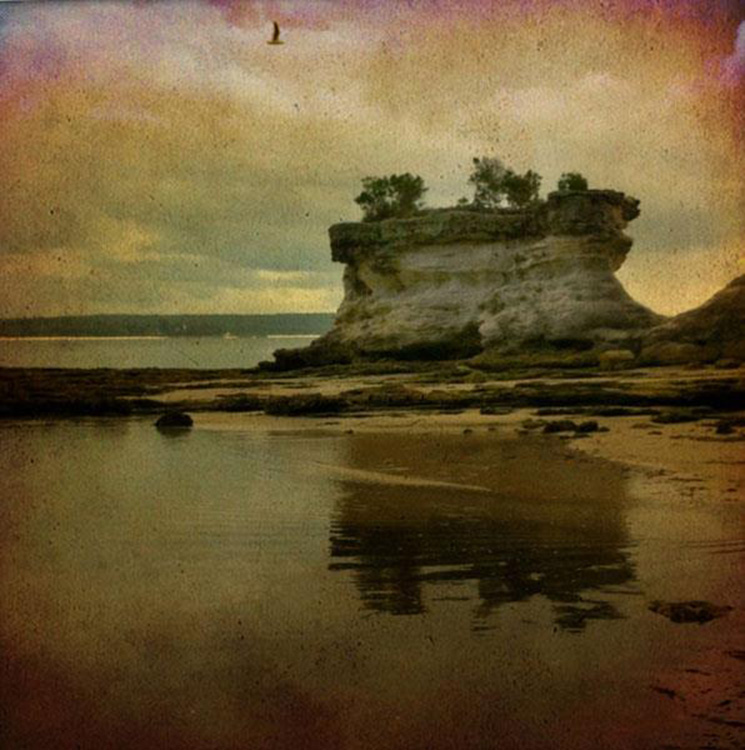
    With the right texture overlay, and application of it,  you can add an extra level of depth and feeling to your photograph. You can use them for anything – from adding a vintage or grunge look to your photographs, to creating fine art pieces.

    One of the best uses is to rescue a photograph that just isn’t quite working. I’ve been told no texture overlay will save a terrible photograph. While this is true for the most part, sometimes it can transform an otherwise unusable image to something more promising.

    A texture can transform an otherwise unusable image into something more promising

    A texture can transform an otherwise unusable image into something more promising.

    Textures can be added to almost any kind of image. If you’ve ever downloaded a photography app for your Smartphone, you have most likely had them add a texture with the app’s built-in filters.

    Some mobile phone apps add texture for you

    If you’ve ever used a filter on a mobile phone app, you have probably already had textures added for you.

    Getting started

    You don’t need to create your own texture to get started. There are many pre-made, free textures available on the internet. A quick Google search will bring up a bunch of free texture sites. But not all textures are created equally, or usable legally. You need to look for textures that are a decent size and resolution, a 200px/72dpi texture over a 3200 px/300dpi image probably isn’t going to work so well.

    You’ll also want to make sure the texture has the right copyright permissions. Sites like deviantart.com have many stock textures offered free by their artists for personal use. These artists ask that you simply return the favor by sending them a link to the image you created using their work. Other sites like freetstocktextures.com offer their images copyright free for personal and commercial use, as long as you aren’t reselling the texture images themselves.

    Creating your own textures

    Creating your own textures is as simple as taking a photograph. Why do that, when you can download free ones? Because it’s fun, your work is then completely all yours, and you can tailor your textures to suit your images. For example; if you’re photographing skateboarders at a skate park, you could also gather some shots of the concrete they skate on, or graffiti around the place to create original textures that work with, and possibly add to, the story of your subject matter.

    create your own textures to add more story to your image

    Textures can add a bit more of a story to your images.

    The image above is of my daughter asleep after a day at the beach (many years ago) combined with texture of the water I took that day, to add to the story and memory of the day, and give the photo an extra dream like feel.

    Create a texture with your scanner

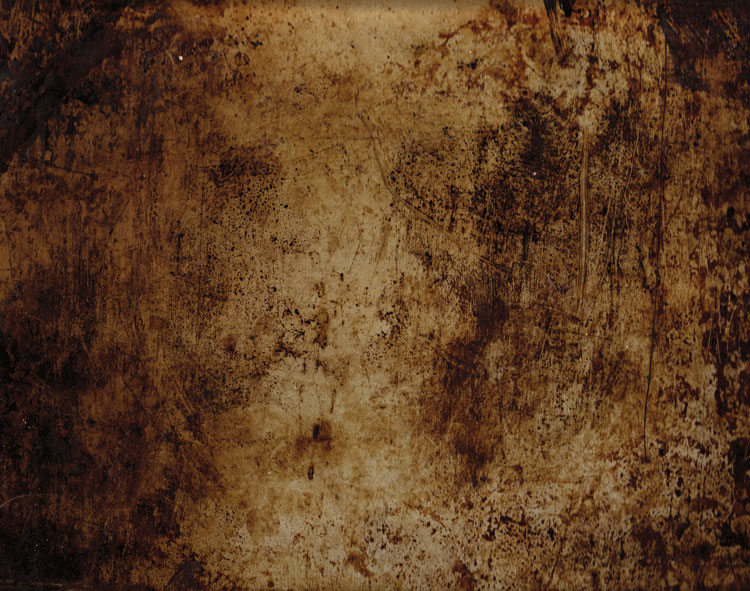
    Below is the first texture I created, one that I still use years later. It was created by scanning the bottom of an old baking tray. Scanning works well for textures of papers and other small flat surfaces.

    You can also use a scanner to create textures. Thiis is a scan of the bottom of an old baking tray

    Scanned texture from an old baking tray.

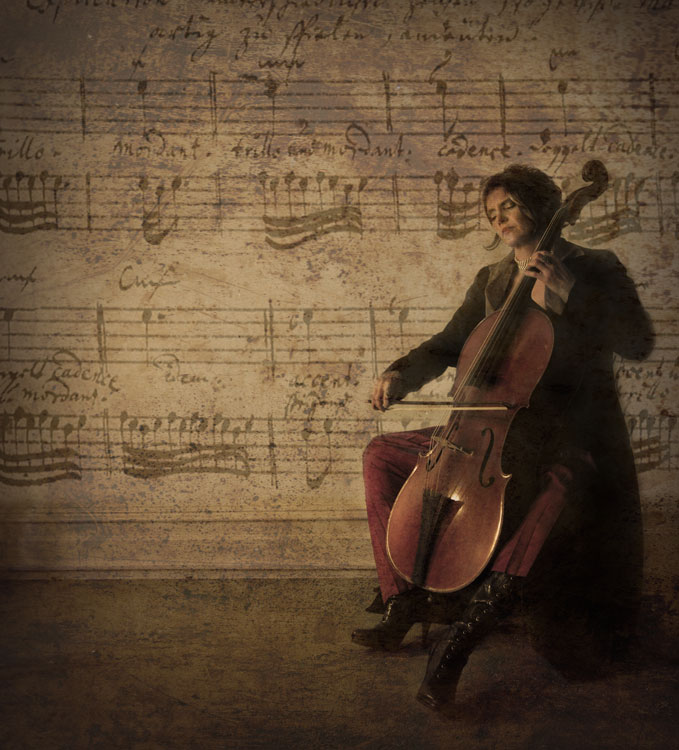
    The baking tray texture was used in the image of the cello player at the beginning of this article, in combination with a manuscript image of the music she played on the day. I also used it in the image below; one of a series of images created in collaboration on album artwork with Canadian singer songwriter Sora. The texture was used to tie all the photographs in the album together even though some were taken by other photographers. Yet another use for textures!

    Baking tray texture in combination with a few other textures.

    Textures can be used to tie a series of images together.

    Create a texture in Photoshop

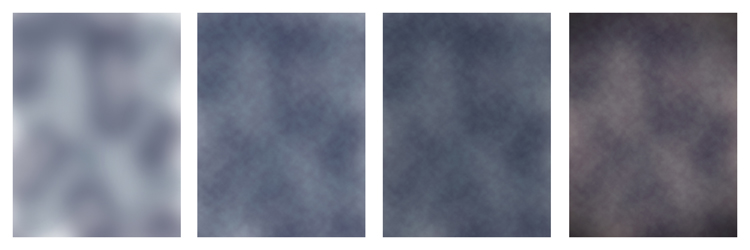
    You don’t need to understand complex Photoshop processes to create a texture quickly and easily. Here are a few simple steps to create a basic texture in a few minutes:

    1. Open a new file the size and resolution you require
    2. Brush around a couple of colors
    3. Add a Render Clouds filter
    4. Adjust levels for a bit of contrast
    5. Add a vignette and a color filter
    Creating a texture in photoshop takes only minutes.

    Paint in some colors, add Render Clouds Filter, some contrast, then some colour and vignette. Easy!

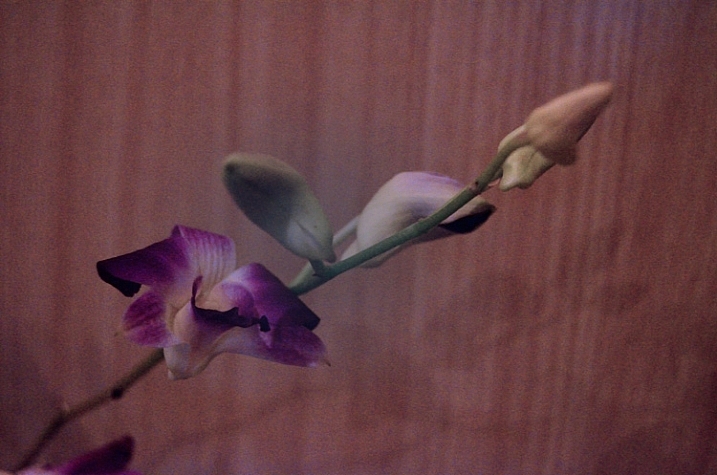
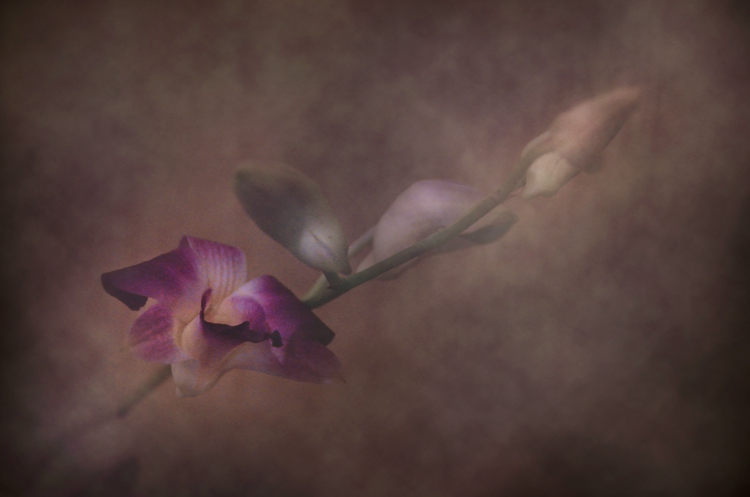
    Instead of a Render Clouds you could use the Blur Tool to swirl your colors around, or try some of the other filters in Photoshop to get different effects. I tested it out on what was originally a rather terrible photograph of this orchid.

    creating-and-applying-textures13

    The texture, plus a few color adjustments and a warming photo filter, and it’s a whole different image.

    create-and-add-textures09

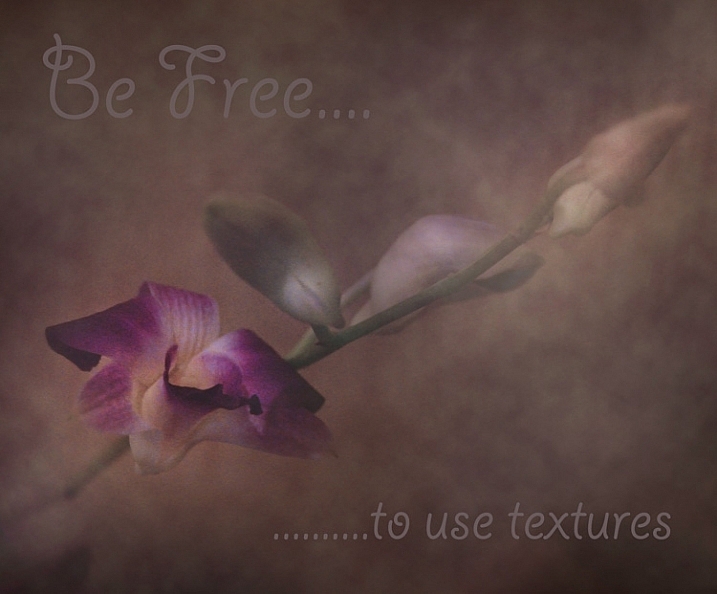
    While it does look a little like something you might see on your Facebook stream with a positive affirmation written across it in an awful font, it took me less than five minutes to do for this demonstration to show you how simple it can be to create a texture from scratch.

    create-and-add-textures10

    Applying your texture

    It is really very easy to apply your texture. There are some more technical articles on adding textures here on dPS, but here is a quick guide to get you started.

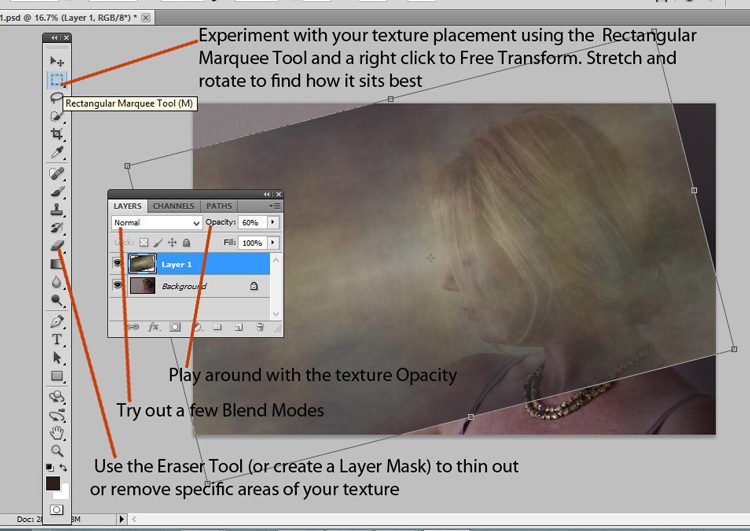
    Click and drag your texture thumbnail in the Layers palette over onto your original image. Your texture becomes layer 1 in your original image’s Layer palette. Choose your level of transparency with the Opacity Slider and use Free Transform Tool to move the texture about. Turn it around, enlarge or stretch. See where it sits best.

    create-and-add-textures11

    Then it’s simply fine tuning the Opacity, maybe putting Eraser Tool on a low opacity and painting out unneeded parts of the texture. Alternatively use a layer mask to paint out some areas, as well as back in, if you accidentally paint out too much.

    create-and-add-textures12

    Have fun with it and experiment. Try a few different layer blend modes, add multiple textures, or add the same texture image a few times, perhaps with each layer having a slightly different hue. There are no rules.

    Have you created a texture that you love? Share it and its use (your images) in the comments below.

    googletag.cmd.push(function() {
    tablet_slots.push( googletag.defineSlot( “/1005424/_dPSv4_tab-all-article-bottom_(300×250)”, [300, 250], “pb-ad-78623” ).addService( googletag.pubads() ) ); } );

    googletag.cmd.push(function() {
    mobile_slots.push( googletag.defineSlot( “/1005424/_dPSv4_mob-all-article-bottom_(300×250)”, [300, 250], “pb-ad-78158” ).addService( googletag.pubads() ) ); } );

    The post Beginners Guide to Creating and Applying Texture Overlays Using Photoshop by Lea Hawkins appeared first on Digital Photography School.

    Digital Photography School