Category: Photography

  • A Street Photographer’s Guide to New York City

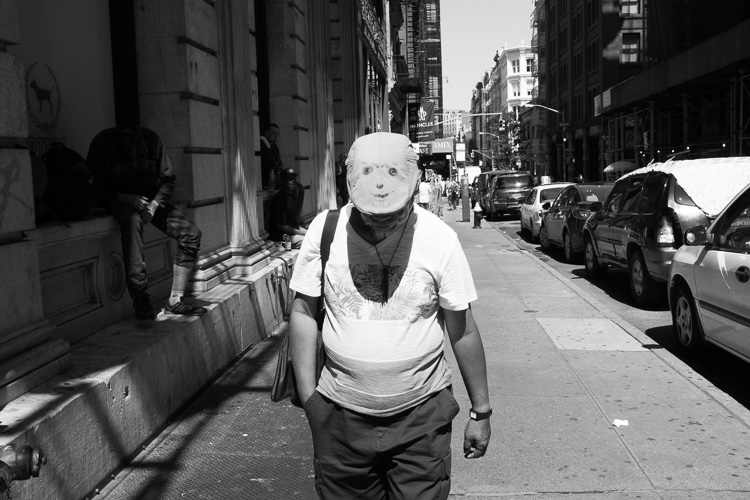
    Smiley Face, SoHo, NYC.

    Smiley Face, SoHo, NYC.

    Street photography and New York City are terms that often go hand in hand. New York is a diverse city of nearly 8.5 million eclectic and vibrant souls, all packed into a tiny island and its surrounding boroughs. Each area of the city has its own unique character and flavor, and there are so many interesting, unique moments that you can see here on a daily basis. It is one of the great locations in the world for this genre of photography.

    As a lifelong New Yorker, let me state that it can also be very easy to overrate this city. Street Photography can, and should, be done everywhere and the fact that an image has been taken in New York does not make it any more interesting than an image taken anywhere else. The fact that millions of images are taken here each day makes it that much more difficult to create an one that stands out from the rest, but that is also part of the appeal.

    If you live in a less populated place, or are tentative about trying street photography, New York is one of the best places to come to get over those fears. The streets are packed with people who are all in a rush, tourists are constantly photographing so you will not stand out, and most importantly, a lot of people move to, or visit this city, to be noticed. It is an environment ripe to practice and improve street photography.

    Here are nine suggestions to keep in mind for doing street photograph in New York City (keep in mind these tip can be applied elsewhere as well).

    1. Slow down and don’t try to photograph it all at once
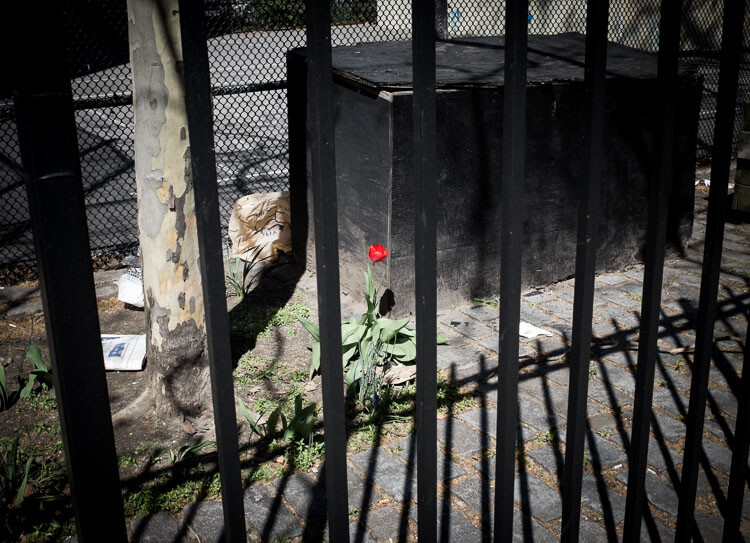
    Red Flower, East Village, NYC.

    Red Flower, East Village, NYC.

    Up, down, left, right, tall buildings everywhere – it is so easy to become trigger happy here. You should experiment and take a lot of images, however, that is also one of the easiest ways to miss the most interesting moments. Sometimes the best moments will be subtle, or they will come upon you in an instant. Look with your eyes first and locate something of interest, then capture it with the camera. Don’t just stick your head in the viewfinder and start shooting away.

    Watch your surroundings and take it all in. Explore. Find interesting compositions, look at the light, and get a feel for the people walking around. Try to go beyond only capturing the grand or iconic aspects of the city. Go beyond the images that you have seen in books. Seek out the little details and let the streets surprise you.

    2. Put yourself in the middle of the commotion and take what comes to you
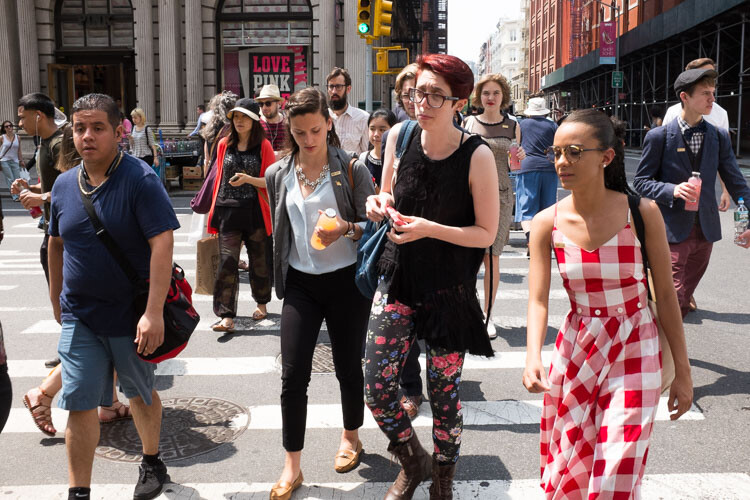
    The corner of Prince and Broadway, SoHo.

    The corner of Prince and Broadway, SoHo.

    Busy street corners are a beautiful thing. Head to one, pick a spot, and suddenly people will start coming at you from every direction. They will start intersecting and interacting with each other. It is what Jane Jacobs referred to as a ballet,

    “The ballet of the good city sidewalk never repeats itself from place to place, and in any once place is always replete with new improvisations.”

    It you are tentative, choosing a spot in this manner will allow your subjects to enter your personal space, instead of you entering theirs. Since you will not be walking, and your camera will be ready in your hands, it will also make you more able to notice interesting moments and able capture them before they disappear.

    Each street corner has a different flavor to it. If you go to SoHo, you will find the trendier crowd. If you go to Wall Street, you will get businessmen. If you go to Times Square, you will get the tourists and people in cartoon costumes harassing young children. Usually, you will get a mix of all types of people, but each corner will have its own identity. Spend a little time each day on a few corners capturing what happens around you.

    3. Cut out the preconceived notions of what the city should look like
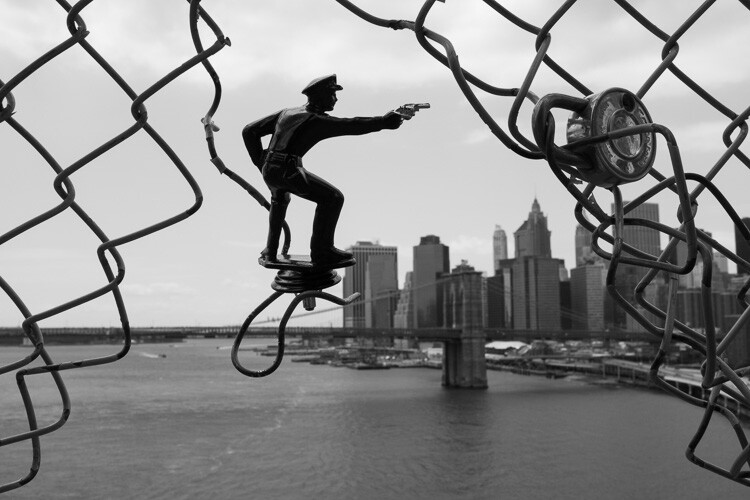
    Police, Manhattan Bridge.

    Police, Manhattan Bridge.

    You’ve probably seen movies and read books about the city, and have expectations for how it is supposed to look and act. The TV shows Friends and Sex and the City are just not realistic interpretations of what New York is actually like.

    It can be a good idea to scout images ahead of time, to have an idea how an area looks. It’s also fun to try and recreate images that you love. But on a day to day basis, try to also get those images out of your head. A once in a lifetime image is one that will surprise you, it will be different in some way from all the rest. Allow yourself to notice those serendipitous moments.

    There is so much to see here. No matter how much time you have, you can’t see it all. But you haven’t truly seen New York City until you’ve spent at least half a day wandering around, with no end point. Carve out some time, pick a direction or a location, and just walk.

    4. Rent a small camera or a prime lens
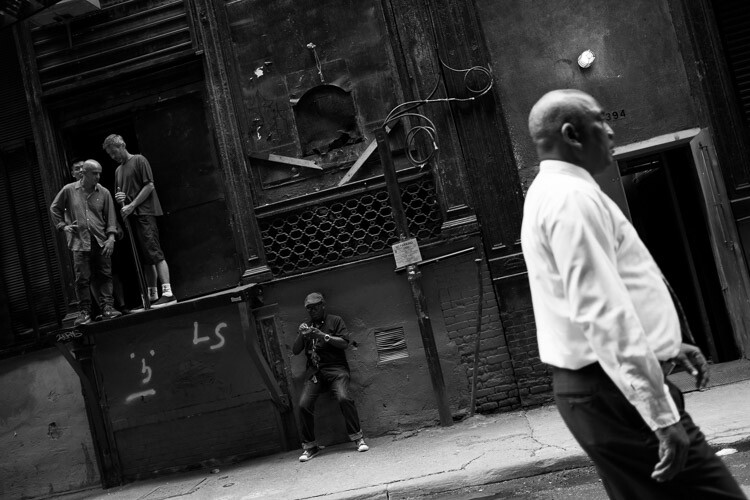
    Cortlandt Alley, NYC.

    Cortlandt Alley, NYC.

    Note: If you have a larger DSLR and a zoom lens, I shot street photography for a long time this way, and it is very possible to do so successfully. However, larger cameras can make it more difficult and cumbersome, and can make things more uncomfortable for your subjects.

    New York has an array of great camera shops where you can rent either a light prime lens for your DSLR or am entirely different smaller camera. A light 35mm lens is my favorite tool for street photography. Go for the f/2.8 version over the f/1.8, since it is much smaller and lighter. If you are very nervous about getting close to your subjects, rent a 50mm so you can shoot from a little further away. (Note: If you’re using a cropped or APS-C sensor a 50mm f/1.8 and an 85mm f/1.8 would be equivalent).

    Consider trying a mirrorless or micro four thirds camera. See how you like it, and you may never go back. I suggest the Fuji X100 line, but there are a variety of cameras that will do the trick.

    Some recommended camera rental shops in NYC are: Foto Care, CSI, and Adorama.

    5. Set up your camera to catch fast moving scenes

    The streets of New York move quickly. Interesting moments will appear, and disappear, all around you that is why it is important to set up your camera so that it can freeze scenes successfully. You want to set it up in such a way that you no longer have to worry about the settings, and can just shoot with ease.
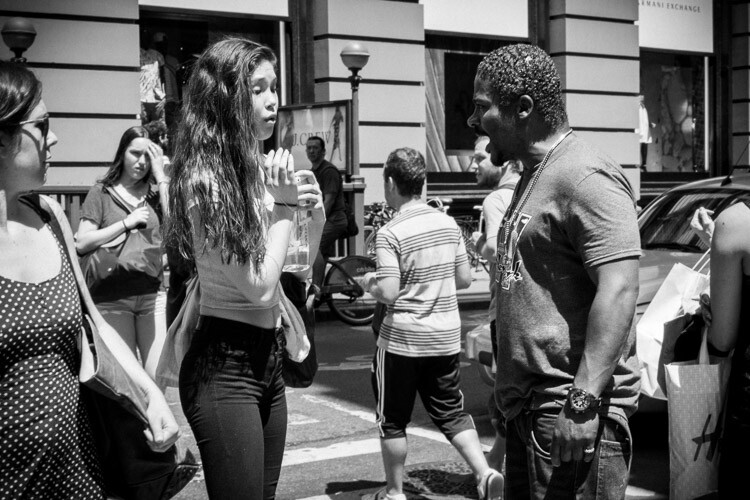
    Encounter, SoHo.

    Encounter, SoHo.

    I prefer using shutter priority for street photography. Many people prefer aperture priority, but the reason for shooting in shutter priority is to have the most control over your aperture. I know that sounds counter-intuitive, but hear me out. To freeze motion, I will usually set the camera to 1/320th or 1/250th of a second. In the bright sun of summer my shutter speed is usually at 1/320th or 1/400th, otherwise I am usually at 1/250th. At dusk and into the night I will go all the way down to 1/125th if it is absolutely necessary. The next step is to raise your ISO. I usually shoot anywhere from ISO 800 to ISO 3200 (and ISO 6400 outside at night). In bright summer sunlight, I am usually around ISO 400.

    The goal is to be able to use the smallest possible aperture, while still having a shutter speed that is fast enough to freeze the scene. The smaller the aperture, the more depth of field you will have. This will give you a lot of flexibility if you happen to miss focusing on the subject, which happens frequently. In addition, if you are combining multiple subjects or complex scenes with interesting elements all over the frame, it will make sure that as much of the scene as possible is sharp. Whenever the light is strong enough, I prefer to be at least at f/8, and ideally between f/11 and f/16.

    When you become comfortable with all of this, the next step is to try zone focusing. I would suggest that you start with your normal method of focusing until you get comfortable, then give zone focusing a try. When I walk out the door with my Fuji X100S I usually turn the autofocus off and have the camera pre-focused to 2.7 or 3 meters (8.75-9.75 feet). I will then adjust with the focusing ring accordingly (closer or further away) as I come across images, or turn on autofocus to capture scenes where nothing is moving.

    6. Try street portraiture

    Did I mention that New Yorkers like to be noticed? Find people that catch your eye, and tell them you are creating a photo project of the city. You will be surprised at how many people will allow you to photograph them. This is a great way to get more comfortable on the street, and with portraiture in general. Once you get a couple people to say yes, you will find yourself feeling so much better.

    Flattery is always a good idea when asking to take a portrait, and I usually try to spend about 30 seconds getting my shots. Don’t take just one quick photo and run away, but don’t take too long either. Take a quick look at the lighting and the background to make sure that you get a complete image, and try to capture them with an interesting expression if possible.

    7. Photograph at night
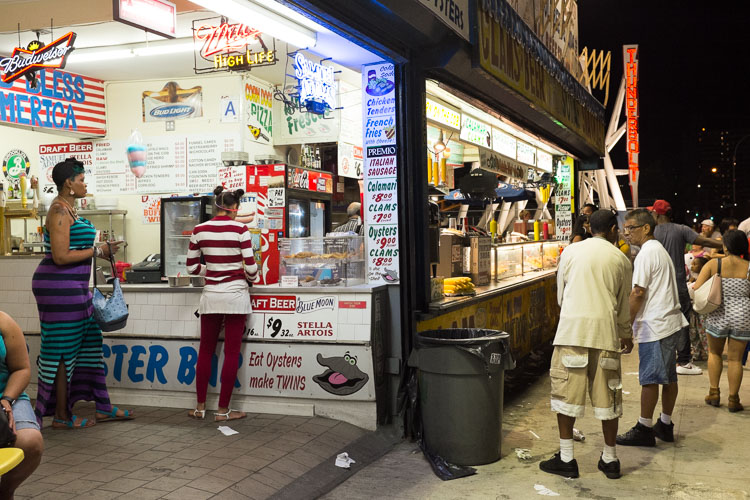
    Coney Island at Night.

    Coney Island at Night.

    Set your camera on 1/160th of a second and ISO 3200 or 6400 and wander. The city glows at night and everything looks more interesting. Forget the heavy tripod unless you are doing architecture images. Instead, find areas that are lit by store signs or street lights, and create your images that way.

    New York is extremely safe these days and I photograph at night by myself all the time, but be smart about it. Particularly if you do not know where you are going, it can’t hurt to take a friend along or to stick to high traffic areas. But the areas where most people visit in Manhattan are all very safe at night.

    8. Some areas to explore
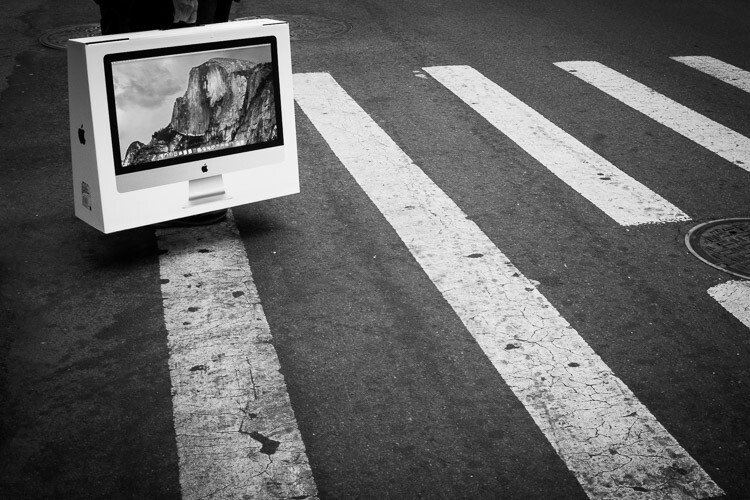
    Yosemite, SoHo.

    Yosemite, Corner of Prince and Broadway, SoHo.

    My favorite locations in NYC are:

    • SoHo: Stop on the corner of Prince and Broadway, one of the busiest and most fashionable corners in the city, and then walk over to Greene Street and head south to see some gorgeous cast-iron architecture.
    • 5th Avenue below Central Park: Stop on each corner from 58th Street to 53rd Street for some of the busiest and most interesting corners in the city. You might bump into the famous fashion street photographer, Bill Cunnigham.
    • The East Village and Lower East Side: Young hipsters, old punk rockers, and about a hundred other demographics gel together in these vibrant neighborhoods. The buildings are old and beautiful, and the streets are interesting and weird. Some great street art is there as well. Stop at VolaVida gallery on 4th Street and Avenue B to purchase an affordable and authentic street art piece.
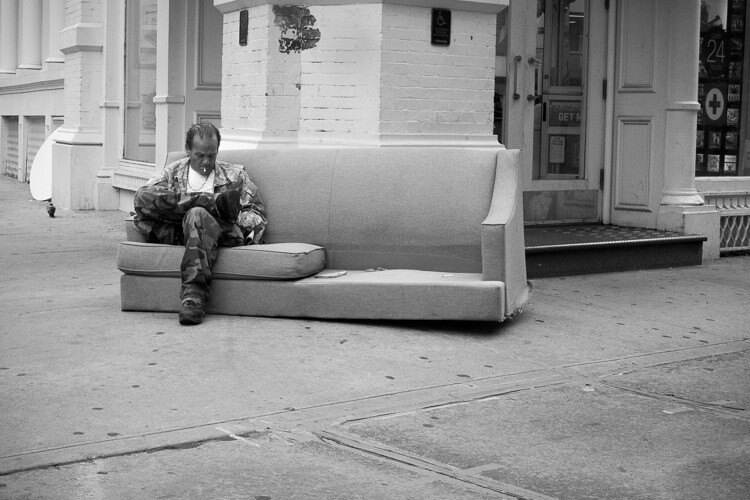
    East Village, NYC.

    East Village, NYC.

    • Anywhere on Broadway: Literally anywhere. Start at Columbus Circle and walk all the way down Broadway until your feet hurt.
    • Chinatown and Columbus Park: Chinatown has some of the most beautiful streets in New York. Eat dumplings while you photograph and visit Columbus Park, where people go to gamble. Be respectful while you photograph there. Afterward, visit Pell Street and Doyer’s street (nicknamed The Bloody Alley for its nefarious past). These are two of the most beautiful streets in all of New York.
    • Coney Island: One of the most vibrant places in the city, particularly in the warmer months. Photograph the boardwalk and beach, eat a hotdog, and go on a few rides.
    • Grand Central and the 42nd Street subway station: Photograph in Grand Central, then take the shuttle to the 42nd Street station. Walk back, stopping to photograph at Bryant Park and on the steps of the New York Public Library. Pop into the lobby of the Chrysler Building while you are there.
    • Bushwick (Brooklyn): This is one of the centers of street art in New York. Take the L train to Morgan Avenue and explore a handful of blocks in every direction. When you get hungry, stop at Roberta’s for some pizza.

    9. Take the typical tourist photos
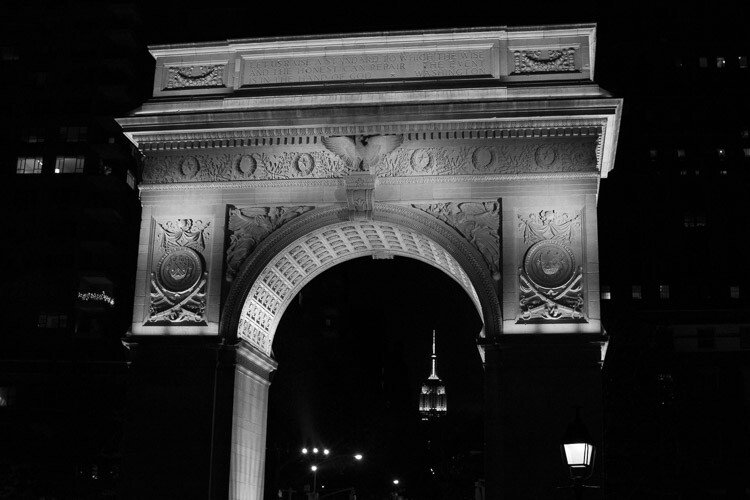
    Arch and Empire State Building, Washington Square Park.

    Arch and Empire State Building, Washington Square Park.

    You are visiting the city for a reason. The architecture and the sites are awe-inspiring, beautiful, and they deserve to be photographed well. History is around every corner. Do not apologize or feel bad, for taking the typical tourist and architecture images of the city. However, whenever possible, try to think of a way to make them stand out in some way. This is not always possible, but occasionally it is, and when you are able to figure out how to take an image like that, it is a special moment.

    Just don’t take a selective color photo of a yellow taxi with a black and white background. I beg you. Please, please don’t do that!

    googletag.cmd.push(function() {
    tablet_slots.push( googletag.defineSlot( “/1005424/_dPSv4_tab-all-article-bottom_(300×250)”, [300, 250], “pb-ad-78623” ).addService( googletag.pubads() ) ); } );

    googletag.cmd.push(function() {
    mobile_slots.push( googletag.defineSlot( “/1005424/_dPSv4_mob-all-article-bottom_(300×250)”, [300, 250], “pb-ad-78158” ).addService( googletag.pubads() ) ); } );

    The post A Street Photographer’s Guide to New York City by James Maher appeared first on Digital Photography School.

    Digital Photography School

  • Composition After the Fact: Cropping for Maximum Impact

    It may at first seem simple. You took the shot a little wide, or a sneaky branch that you didn’t notice found its way into the edge of your photo. In Lightroom (LR) it’s just a quick press of the R key to activate the crop tool, hold down the shift key to constrain the crop so you don’t get a weird aspect ratio, and your task is complete.

    A cropped portrait

    The crop tool – simple, yet powerful.

    On the contrary, cropping is one of the more powerful tools that you have at your disposal to dial in the composition of your images. Prime lens users will also find that the limited versatility (compared to zoom lenses) can result in the need for cropping more often.

    First, let me make the caveat that many aspects of photography are highly subjective. Some of the information and advice offered in this article is my personal opinion, and is the approach I take to create images that fit my style. Personal preference always prevails. Anything called a rule is only so because a common pattern was identified within compositions that are considered especially attractive.

    In many respects cropping echoes the fundamental principles of composition. Luckily, if you didn’t get what you wanted the first time around, when you took the photo, you get a second chance, albeit limited, to recompose your images in post-production for maximum impact.

    The Basics

    The very first thing I look for, and correct, in any photograph that I edit is straight lines. Horizon lines and any vertical lines that are near the edges of the image, should be straight. It absolutely drives me crazy when I see photos with crooked lines.

    That being said, lines can be crooked, but it better be obvious that was the intent, otherwise it just looks like careless composition or lazy editing. In the right context a skewed horizon can add drama, and make an image more dynamic.

    Photo cropped with crooked horizon.

    Crooked horizons can make viewers cringe unless the intent is obvious.

    Make this your first step in cropping, because depending on how radically you have to rotate the image you may be forced to crop the edges of the image.

    If you have the time when composing the shot, and your camera has a built-in virtual horizon feature for levelling, by all means do so. I have delegated a customizable button on the front of my camera for activating this feature, and I use it all the time.

    With the crop tool activated in LR (keyboard shortcut R) there are a few ways to straighten out an image:

    • Drag the Angle slider left or right
    • Click on the value to the right of the slider and drag left or right (scrubby slider)
    • Click on the numerical value and enter whatever you want
    • Hold the CTRL key while dragging along a straight horizontal or vertical line (will correct on either axis) and LR will fix it automatically
    • Also new in LR6 (LR CC) is the “Auto” feature for the crop tool. Just click it and see how it does – then tweak as necessary.

    Elimination

    A senior photojournalist at a newspaper I once interned for, gave me a memorable piece of advice while critiquing my photos, he said, “crop until it hurts.” It was his way of telling me that I was leaving too much dead or negative space in my compositions.

    To this day his advice always resurfaces in my mind when I’m editing images, especially with portraits or other photos with people in them. Fight the urge to become attached to pixels. Crop out half of the photo if need be. Unimportant areas of a photo are not precious real estate.

    Cropping to isolate the subject.

    You can’t always get as close to the action as you would like (or it is safe to do so) and heavy-handed cropping can make all the difference.

    The fact of the matter is that simple is better. We all suffer from attention deficit disorder, and viewers usually don’t want to spend too much precious time analyzing a photo to get the story. Consider the allure of silhouette images. When cropping look for simple compositions and try to distill the scene down to its essence.

    Once the image is rotated and you’ve been forced to chop off some of the edges, look for elements that detract, distract or add little to the image. You may not have a choice but to include them, but it’s good practice to be cognizant of them and it may help guide the rest of your editing process or future compositions.

    You see many images where the photographer is too conservative when cropping portraits or photos of people. Again, each photo is different, and there is no magic formula, but for example, I find that tight profile shots of people grab my eye more when they are cropped in really close. I am not afraid to cut off the back of the subject’s head, putting their ear in the upper corner of the image, or even cropping the ear out.

    Tight cropped portrait

    Cropping in very tight can sometimes create a more powerful image.

    Negative space can play an important role, especially if shooting for a publication where they need space for text. But, the nice thing about having post-processing options is that you can always revert back to the original. If you compose your images super tight in camera, you can’t get that negative space back.

    Leading Lines

    Although thoughtfully composing your shots through the viewfinder is one of the more rudimentary skills in photography, there are often distractions. You may find surprises when you pull up the final image on your computer screen.

    In photography, as well as painting and other forms of art, you should always be thinking about the arrangement of elements in the image that are going to draw in the viewer’s eye. A compelling subject is just that, but it is your job as photographer to strive to portray that subject in the most powerful, or striking way possible.

    Utilizing leading lines to draw in the viewer's eye.

    It’s easy to overlook compositional elements while shooting moving subjects. Post -processing cropping reveals additional possibilities for framing your shots like using leading lines to draw in the viewer’s eye.

    When we talk about leading lines it’s not always an obvious straight line. Often it is an invisible thread that takes the viewers’ gaze hostage and leads it through the scene. Think of a series of elements that create a pattern.

    Diagonal lines which stretch towards the subject are a common, and effective, way to create interest and tension in an image.

    Using Crop Overlays as Guidance

    In all of its ingenious glory, LR has included several overlays in the Crop tool to help guide your cropping endeavors. There is a basic grid, the Rule of Thirds, the Golden Ratio, the Golden Triangles, diagonals and the Golden Spiral. With the Crop tool active, the keyboard shortcut O cycles through the various overlays and Shift+O rotates the overlay where applicable.

    Personally, I find myself using the Rule of Thirds overlay most often. The Rule of Thirds says that when two horizontal and two vertical lines are drawn across the frame to divide it into equal thirds, the subject or elements of interest, should be placed on, or near the intersection of those lines.

    Example of the rule of thirds.

    The rule of thirds suggests that the subject be placed at the intersection of lines that separate the image into thirds.

    An easy mistake to make is placing the horizon line right in the middle of the frame. This is generally considered a no-no, and is a significant compositional faux pas. The Rule of Thirds overlay gives you those handy horizontal lines for recomposing your photo.

    The Golden Ratio and Golden Spiral overlays are closely related. There are a bunch of names for this formula including Phi, the Golden Mean and Fibonacci’s ratio. The Golden Ratio grid employs the same basic concept as the Rule of Thirds. I find that the Golden Spiral really isn’t much different, and is more useful to consider in your original composition, instead of trying to apply it after the fact.

    The Golden Triangles overlay shows a diagonal line drawn from one corner to another with two branching lines to the other two corners separating the image into four triangles. This gives you a guide for aligning diagonal leading lines, and a suggested location for the subject at the intersection of the lines.

    The diagonal overlay calls for placing elements of interest along 45-degree lines drawn across the image. Although the overlay is meant to fine tune this alignment in post-processing, it has been found that artists tend toward this layout intuitively.

    The Moral of the Story

    Cropping in post-processing is far more than just a simple tool to tighten up composition. Experimenting with various crops of the same image can help you develop an eye for the hidden compositions in a photo.

    After you familiarize yourself with the possibilities, you will likely find yourself looking back through your photo library to revisit old images, in order to give them fresh compositions.

    Photography is all about seeing, not just looking, and sometimes instead of taking a step back to see the big picture, you need to take a step forward to discover the small one.

    What is your thought process when cropping in post-production?

    googletag.cmd.push(function() {
    tablet_slots.push( googletag.defineSlot( “/1005424/_dPSv4_tab-all-article-bottom_(300×250)”, [300, 250], “pb-ad-78623” ).addService( googletag.pubads() ) ); } );

    googletag.cmd.push(function() {
    mobile_slots.push( googletag.defineSlot( “/1005424/_dPSv4_mob-all-article-bottom_(300×250)”, [300, 250], “pb-ad-78158” ).addService( googletag.pubads() ) ); } );

    The post Composition After the Fact: Cropping for Maximum Impact by Jeremie Schatz appeared first on Digital Photography School.

    Digital Photography School

  • Photography Etiquette – What’s the Right Approach?

    Whether you have a DSLR, a pocket camera, or simply use your mobile phone to take snapshots, there are some simple rules of photography etiquette that you can follow to make the shooting experience more enjoyable for you, as well as everyone else around you. Some of these tips might seem obvious, but even if you think you already know what to do, or not to do, when taking pictures it might be worth reading just as a refresher.

    It’s easy to notice the speck of sawdust in your brother’s eye and note when other people are violating simple rules of etiquette. But sometimes it’s difficult to recognize the plank in yours, and see if you have a few habits that could be changed. These are short and simple lessons that I have learned the painful way over the years. I hope you can benefit from my mistakes and avoid these pitfalls in your own photography.

    photography-etiquette-tips-fishing

    Be discrete (i.e. don’t be the center of attention)

    I can recall being at weddings and parties where I thought I was the king of the room just because I had a camera, however, all the while I was only making other people annoyed or frustrated because of my behaviour. One of the most difficult thinks for new photographers to realize is it’s not about you. It’s about everyone else, and you just happen to be the one documenting things.

    Have you ever stood up in the middle of a wedding to get a shot of the bride and groom? Have you muscled your way to the front of a group of kids so you could capture little Timmy opening his birthday present? Have you found yourself running back and forth on the sidelines of a high school football game trying to photograph some highlights, while pushing a few players and coaches out of the way? If so, you might have indeed gotten a good picture, but you might also have unknowingly caused some hurt feelings in the process.

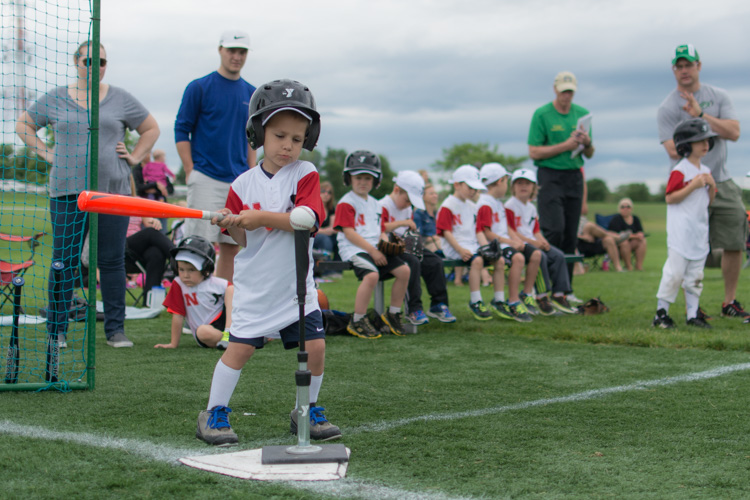
    photography-etiquette-tips-baseball

    This might be a decent shot, but to get it I had to work my way through the crowd and potentially block the view of people behind me. I’m not sure it was worth the trade-off.

    As photographers it can be tough to take a more discrete approach, but often that is exactly what we should be doing. It might sound counterintuitive, but staying out of the way can often yield the best results because we are taking other people into consideration. This goes double if you’re not even the official photographer, you just happen to be in attendance with your camera. Everyone around you is trying to enjoy the experience, and couldn’t care one whit about whether or not you have a camera. They just want to watch the wedding, see Timmy open his present, or experience the game-winning goal along with everyone else. From their point of view, a person with a camera who is running around frantically or blocking their field of view is an annoyance, not an asset.

    A while back I went around taking pictures at a high school production of "Pride and Prejudice." I thought people would excuse my actions since I had a camera, but in reality I was likely bothering the audience and possibly even distracting the performers.

    A while back I went around taking pictures at a high school production of “Pride and Prejudice.” I thought people would excuse my actions since I had a camera, but in reality I was likely bothering the audience and possibly even distracting the performers.

    To remedy this situation, try to find alternative viewpoints that won’t ruin the experience for other people, but still yield good pictures. It might be good to buy or rent a zoom lens for special occasions, or do some searching online for how people have taken photos in similar situations without being rude or disruptive. You might actually find yourself getting more interesting photos, and looking at things from new angles that you had never considered, which could not only benefit you as a photographer and be a pleasant surprise for the individuals whose pictures you are taking.

    Ask for permission before taking pictures

    Here’s a bit of information no one told me when I first got into photography as a serious hobby – not everyone wants their picture taken. Years ago when I was a wet-behind-the-ears photographic newbie I took my camera everywhere, and photographed everything and anyone. If I was shooting landscapes or nature this was not a problem at all, but when we had friends over, or went to events, it became a bit of an issue. One that I hope you might be able to avoid.

    The more I got into photography the more I realized that not everyone likes being on camera, and not every event demands hundreds of snapshots. I can recall times when we were out with friends or at a party or social event, and having people around me freeze-up or give me the cold shoulder, because I had morphed from friend to photographer. I thought that my camera gave me some kind of unwritten license to take pictures of everyone around me, but in truth most of them just wanted to go about their business and not have a camera in their face. Simply asking for permission would have solved a lot of problems, and avoided some hurt feelings along the way. Even though it can be a bit awkward, it’s worth the trouble if it avoids animosity down the line.

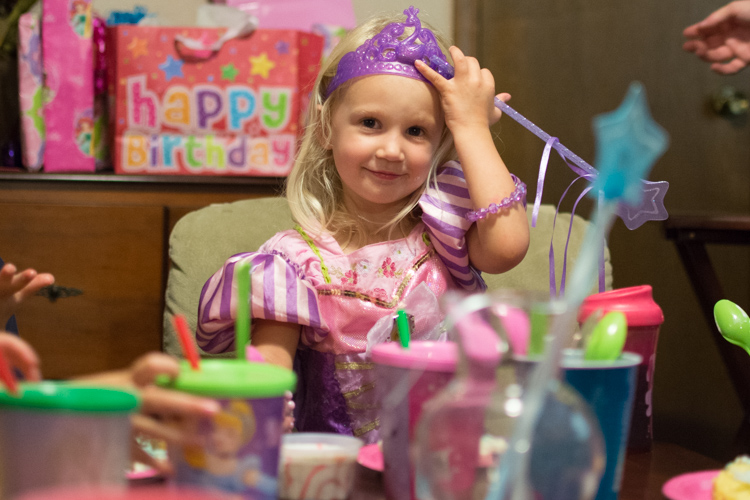
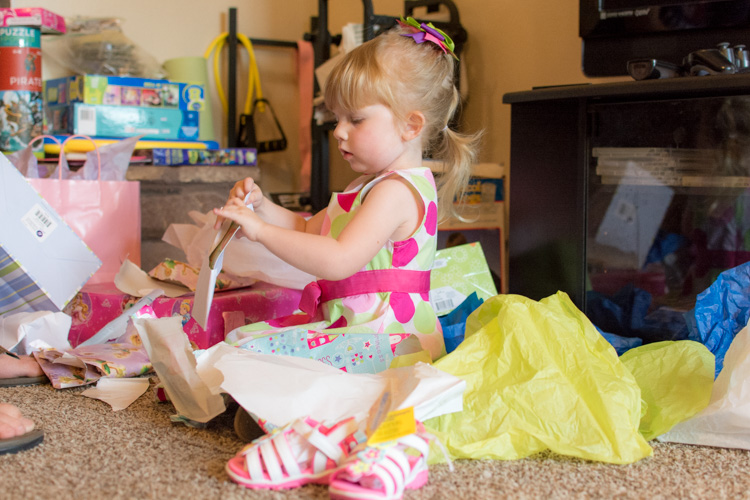
    photography-etiquette-tips-birthday

    I checked with the parents before getting my camera out and snapping pictures at this birthday party.

    The next time you’re at a party, celebration, or sporting event, take a minute and ask the hosts or some of the other guests if they mind you taking photos. It takes almost no time at all, and can reap incredible rewards throughout the event – Uncle Bob, notoriously shy around cameras, might appreciate that you were willing to ask his permission and not only grant it, but loosen up a bit as a result. Coach Taylor will be glad you asked, could point you to some of the better spots on the sidelines, and be willing to accommodate some special requests you might have. Grandma Agnes might not want her photo taken at all, and even though you won’t get as many good shots, you will help the rest of the guests ease up and enjoy the evening a little more.

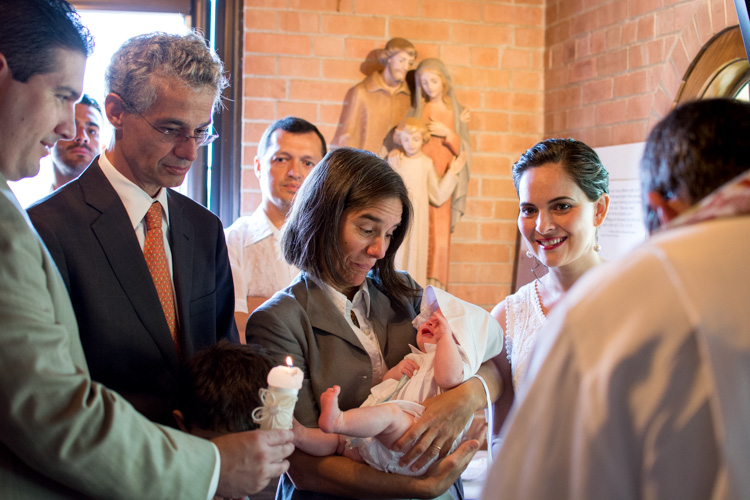
    photography-etiquette-tips-baptism

    A baptism is a solemn and formal affair – definitely not the time to be annoying others with a camera. Get permission first, take a few good shots (without the flash, if at all possible) and put your camera away.

    On a related note if you are a guest at a major event like a wedding it’s a good idea to check with the official photographer before you get up and start taking your own shots. He or she has likely been paid hundreds, or thousands of dollars, specifically to get good pictures. So while you may enjoy walking around with your camera and getting some pictures, you might by unwittingly annoying the couple, or the guests by your actions. My advice is to sit back and just enjoy the event or ceremony, and let the people whose job it is to capture amazing pictures do their work.

    Ask for permission before sharing pics

    We live in a time when almost everything is shared online, and nearly everyone has some sort of social media presence on Facebook, Twitter, Instagram, Flickr, Tumblr, and many others. The key word here is almost: not everyone is online, and not everyone wants their photos shared on social networks. Even though you might be well within your legal rights to snap pics of other people (especially in public places) and post them to your social networks, you might be inadvertently hurting some feelings, or damaging your close relationships by doing so. The solution here is simple, and only takes a few seconds – ask permission before posting. Not only is it simply a nice thing to do, it can actually help strengthen whatever bond you do have with the people in your pictures. They may have had other people post their picture online and been upset by it. Whereas, there is a very real chance that you could impress them with your honesty and candor by asking if it’s okay to share their photo online.

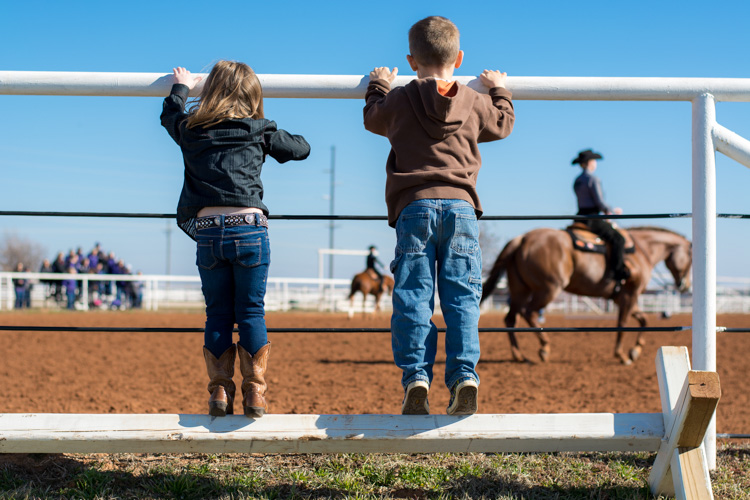
    Even though you can't see these kids' faces in this picture, I still asked their parents for permission before sharing this picture. They appreciated the gesture and gladly agreed.

    Even though you can’t see these kids’ faces in this picture, I still asked their parents for permission before sharing this picture. They appreciated the gesture and gladly agreed.

    Be a participant, not a photographer

    In his song “The Gambler,” the American country singer Kenny Rogers crooned,

    You’ve got to know when to hold ’em, know when to fold ’em, know when to walk away. 

    His logic can be applied to photography also. You’ve got to know when to take pictures, and when to put your camera away. It’s entirely possible, and I would say quite likely, that the people around you at any given event or situation don’t want someone running around snapping pictures. Were you invited to your neice’s piano recital? Great! Keep your camera in your pocket, sit back, and enjoy her performance. If you really want a few pictures you can ask her to pose by the piano after the event is over. Are you going on a road trip with some friends? Awesome! But remember they invited you because they enjoy your company and conversation, not because they wanted to see you constantly snapping pictures and inviting them to look at the screen on your camera. You might be saying things like, “Check out this great shot I just got!” but the message you’re sending to your friends is, “My camera is more important than you.”

    Sometimes less is more. We were invited to a birthday party for our friend's daughter, and rather than spend the whole time on my camera I fired off a few shots here and there and spent the rest of the time visiting with adults, playing with kids, and just enjoying the celebration.

    Sometimes less is more. We were invited to a birthday party for our friend’s daughter, and rather than spend the whole time on my camera I fired off a few shots here and there, then spent the rest of the time visiting with adults, playing with kids, and just enjoying the celebration.

    A lot of these etiquette rules walk a fine line. It’s up to you to gauge each situation and decide where the boundaries should be placed. The bottom line is that you may want to reexamine your approach to photography in some situations, and decide if a different course of action might be better for you and everyone else involved.

    What about you? What are some of the tips and etiquette rules you have learned over the years? Share your thoughts in the comment section below.

    googletag.cmd.push(function() {
    tablet_slots.push( googletag.defineSlot( “/1005424/_dPSv4_tab-all-article-bottom_(300×250)”, [300, 250], “pb-ad-78623” ).addService( googletag.pubads() ) ); } );

    googletag.cmd.push(function() {
    mobile_slots.push( googletag.defineSlot( “/1005424/_dPSv4_mob-all-article-bottom_(300×250)”, [300, 250], “pb-ad-78158” ).addService( googletag.pubads() ) ); } );

    The post Photography Etiquette – What’s the Right Approach? by Simon Ringsmuth appeared first on Digital Photography School.

    Digital Photography School

  • Hands-on Review – Nissin Di700A Speedlight and Wireless Trigger Kit

    Following the big bang that introduced capable and affordable digital cameras, the digital photography universe has been expanding at an astounding rate. So much amazing imagery is being produced, and equipment manufacturers are working tirelessly to develop, and improve upon, the products you use to create those images.

    Despite the tendency of some photographers to not even consider third party brands, that market exists and is flourishing. It seems that there are more players in it than ever before, and the competition is stiff.

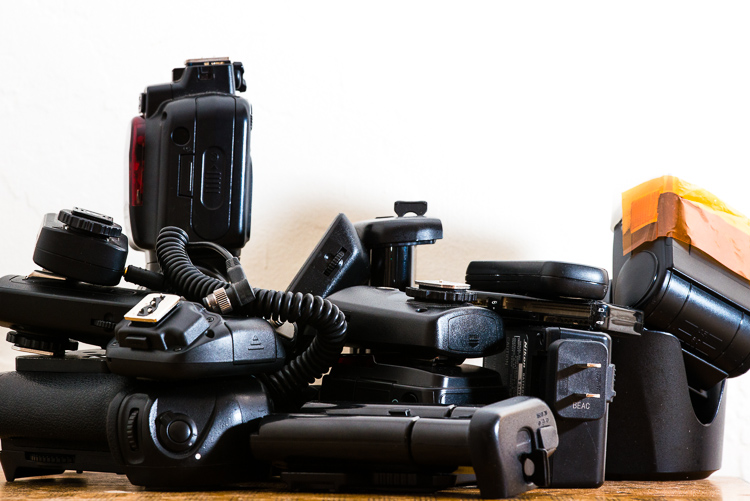
    Photography accessories

    The market for third party photography equipment and accessories is bustling.

    If you are considering adding a speedlight to your arsenal of gadgets, it’s definitely worth having a look at third party brands. Don’t make the mistake of assuming that a product is inferior because it’s not the same brand as your camera.

    Although the industry dominators (Nikon and Canon) have a large array of speedlights to choose from, you just might find that you have to pay for features which you will never use, or their products may not have the features you need.

    One company that has gained some ground, making a name for themselves in the third party sector, is Japan-based Nissin. They are a dedicated photographic lighting company who just released a new flash system for Nikon and Canon (Sony version coming in September) and one just showed up on my doorstep.

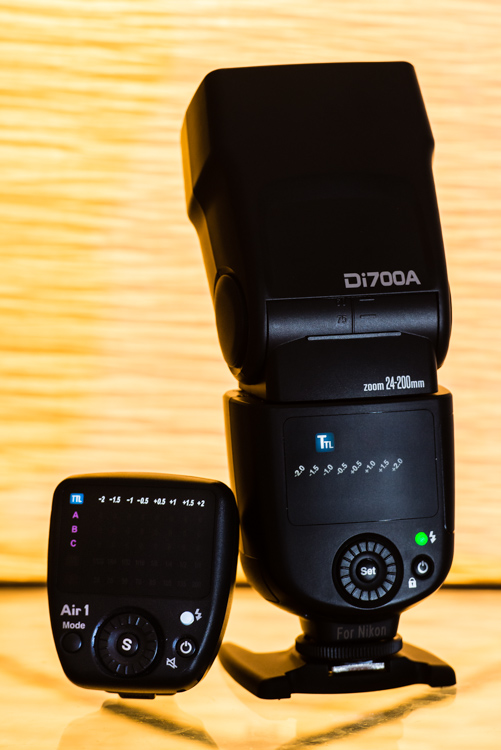
    The Nissin Di700A speedlight shown with the Air 1 wireless commander.

    The Nissin Di700A speedlight shown with the Air 1 wireless commander.

    I shoot Nikon so they sent me the dedicated Nikon system but don’t worry, the Canon and Sony versions are similar, so this review is still worth reading even if you’re not a Nikon shooter.

    First of all, this is exciting for us Nikon shooters. Unlike Canon, Nikon doesn’t have any flashes with radio triggers built-in, only optical. Why? Good question. Get it together Nikon.

    First Impressions

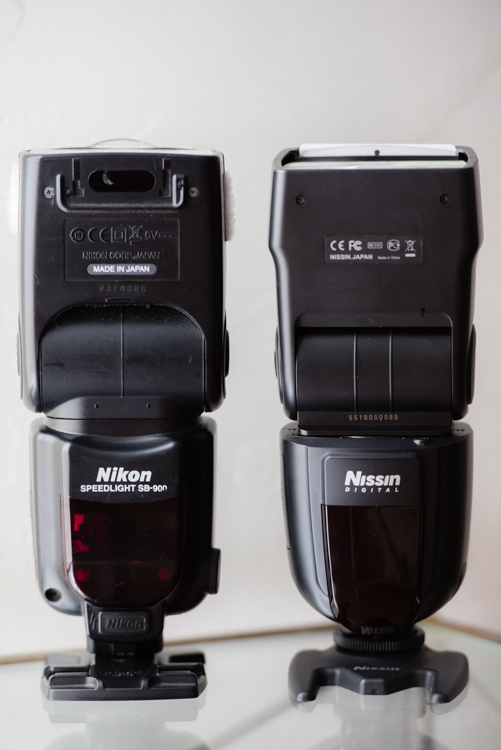
    Excavating the Nissin Di700A out of its packaging – yes, that’s the alphabet soup name they gave this unit – it was instantly apparent that it is meant to rival the SB-900/910, at least in size and weight.

    Side by side comparison of the Nissin Di700A and the Nikon SB-900

    The Nissin is in many ways comparable to the Nikon SB-900.

    A quick inspection of the unit shows it to be sleek, simple, and solid. The plastic seems heavy-duty and I suspect it would survive some abuse. The locking head swivels and swings into the same positions as its Nikon counterpart – 7-degrees down, 90-degrees up and 180-degrees left and right (as every flash should).

    On the back, below the matte-finish LED screen, is a dial with a Select button in the middle, a flash test button, and the power button. They went for the minimalist approach which I applaud. It has a small rubber cover on each side; one with a socket for a battery pack hiding behind it, and the other with a PC cable and auxiliary sync inputs.

    The metal hot shoe mount is a welcome sight but the circular threaded disc for tightening the flash onto the hot shoe seems a bit archaic. A slide-out diffuser and reflector panel are also familiar features.

    You may have noticed that earlier I called this a camera system. The kit they sent me comes with a radio trigger called the Air 1 Commander. The hot-shoe-mount Air 1 matches the flash in most respects, but has an extra Mode button. It automatically locks into place when slid onto the hot shoe, and has a button which is held in to release it. Personally, I would have preferred the same button on the speedlight instead of the threaded disc.

    Firing it up

    I popped in four AA batteries, hit the power button, and a kaleidoscope of colorful lights sprung to life on the rear panel. However, the flash was effectively frozen and would not work at all. Come to find out, the Eneloop XX rechargeable batteries that I prefer to use for all of my speedlights do not work in this unit. I swapped them out for the regular Eneloops which work fine. The only difference that I’m aware of is the XX are 2,500 mAh compared to the regular’s 2,000 mAh (any electrical engineers out there please chime in).

    Following the thread of simplicity that Nissin has going, I just tightened that baby down onto my hot shoe and it did what it is supposed to do, fired away in TTL metering mode.

    I instantly fell in love with the rear display. Various bright, vivid colors, clearly visible in any lighting conditions, indicate the six different menu settings:

    1. A (automatic)
    2. TTL (through the lens metering)
    3. M (manual)
    4. SD (slave digital)
    5. SF (slave film)
    6. And the wireless setting identified by a little radio tower symbol

    A few things I liked immediately were: a quick press of the power switch locks all functions of the flash so you don’t inadvertently change settings, the tactile feel of the buttons and wheel are soft but feel very sturdy, and changing modes and adjusting exposure compensation is quick and easy.

    Another issue I encountered was that the zooming flash head feature didn’t work. It zooms all the way out when deploying the small diffusion panel but did not respond when changing the zoom on any of my lenses as the manual says it should, nor does it respond to the manual zoom control feature of the Air 1. We’ll assume I got sent a defective unit. To play devil’s advocate, this can happen to any brand so I’m not going to throw them under the bus just yet.

    The controls on the Di700a are intuitive and very easy to adjust to get the exposure just how you want it.

    The controls on the Di700A are intuitive and make it quick and easy to adjust and get the exposure just how you want it.

    A detail that could prove handy is the standalone battery magazine. Spares can be purchased which can be pre-loaded for easy swapping. This can save you time and prevents fumbling around for batteries in the heat of the moment.

    Perusing the instruction manual divulged that the flash has an overheating circuit which supposedly shuts it down for 15 minutes, to recover after firing 20 to 30 times (presumably at full power). This is a significant detail as 15 minutes might as well be an eternity for professional shooters. I immediately had flashbacks of the SB-900 which would overheat and shutdown often, and at the most inopportune times.

    The system supports all of the nifty features found on the camera body: high-speed sync (FP for Nikon and HSS for Canon) to 1/8,000th of a second, red-eye reduction, slow and rear -curtain shutter, and on-camera exposure compensation which is added onto the unit’s own exposure compensation, covering two stops in both directions.

    The Nissin Di700A not only has a built-in wireless receiver, but can also be optically triggered by the camera’s built-in flash. This is cool because you can mix and match flashes that have optical receivers. The Di700A and the Air 1 can be purchased separately. The Air 1 wireless commander claims a 100 foot effective range. Although this may seem generous, and plenty for most applications, the Cactus transmitters I use boast three times the range but do not support TTL metering, so it’s a trade off.

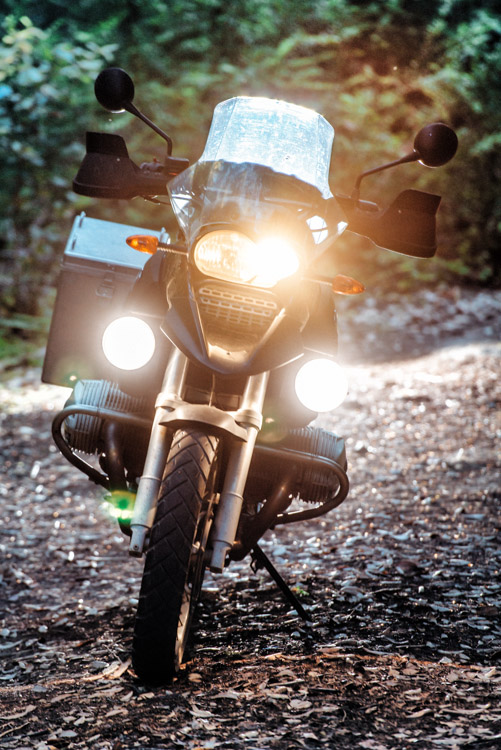
    Using the Air 1 with the Di700A proved undependable. My first attempt at about 50 feet, with the flash behind a motorcycle for backlighting, was met with intermittent results. The signal seemed weak, and I had to move around to get the flash to finally fire.

    Testing the Nissin Di700a and Air 1 commander.

    I had mixed results using the Air 1 to trigger the Di700A. The system struggled having the motorcycle between the flash and transmitter at about 50 feet.

    The Air 1 can also support three groups of flashes, on eight separate channels, with exposure compensation for each group in half stop increments.

    I would certainly recommend the kit to beginning through intermediate shooters, but despite Nissin’s efforts to offer some pro-level features, it falls a little short to meet the demanding needs of working photographers.

    All in all, for a sub $ 300 kit, that is sleek and easy to use, versatile, and capable of wireless TTL shooting, the Nissin kit is definitely a strong contender.

    googletag.cmd.push(function() {
    tablet_slots.push( googletag.defineSlot( “/1005424/_dPSv4_tab-all-article-bottom_(300×250)”, [300, 250], “pb-ad-78623” ).addService( googletag.pubads() ) ); } );

    googletag.cmd.push(function() {
    mobile_slots.push( googletag.defineSlot( “/1005424/_dPSv4_mob-all-article-bottom_(300×250)”, [300, 250], “pb-ad-78158” ).addService( googletag.pubads() ) ); } );

    The post Hands-on Review – Nissin Di700A Speedlight and Wireless Trigger Kit by Jeremie Schatz appeared first on Digital Photography School.

    Digital Photography School

  • Tips for Using Speedlights to Create the Right Lighting for Outdoor Portraits

    In these two video tutorials brought to us by ExpoImaging, NYC photographer Erik Valind shows two different tips:

    #1 – How to create artificial sun with a speedlight

    #2 – Creating soft light during midday harsh light

    Gear and things mentioned in the videos:

    • ExpoImaging ROGUEGELS-U Rogue Photographic Design Rogue Gels Universal Lighting Filter Kit
    • Rogue Photographic Design ROGUERELG2 FlashBender 2 Large Reflector, Bounce Flash, Snoot, Gobo (Black/White)
    • Other things available from Rogue Photographic Design

    googletag.cmd.push(function() {
    tablet_slots.push( googletag.defineSlot( “/1005424/_dPSv4_tab-all-article-bottom_(300×250)”, [300, 250], “pb-ad-78623” ).addService( googletag.pubads() ) ); } );

    googletag.cmd.push(function() {
    mobile_slots.push( googletag.defineSlot( “/1005424/_dPSv4_mob-all-article-bottom_(300×250)”, [300, 250], “pb-ad-78158” ).addService( googletag.pubads() ) ); } );

    The post Tips for Using Speedlights to Create the Right Lighting for Outdoor Portraits by Darlene Hildebrandt appeared first on Digital Photography School.

    Digital Photography School

  • Weekly Photography Challenge – Feet

    Feet are an important part of our human body. They take us where we want to go. They hold us upright. They can be all different sizes and styles, decorated or plain, even covered in fur (think pets). But they are often overlooked in photographs or even cropped off.

    Shandi-lee Cox

    By Shandi-lee Cox

    Weekly Photography Challenge – Feet

    This week we challenge you to go out and photograph only feet and crop off the body! They could be your own feet (foot selfie?), a friend’s, your cat’s, or a total stranger’s feet. It’s about looking at things differently and seeing something you may otherwise miss or pass over.

    Juan Antonio F. Segal

    By Juan Antonio F. Segal

    Khánh Hmoong

    By Khánh Hmoong

    Mauren Veras

    By Mauren Veras

    Michelle Tribe

    By Michelle Tribe

    Raúl González

    By Raúl González

    Tobias Lindman

    By Tobias Lindman

    Share your images below:

    Simply upload your shot into the comment field (look for the little camera icon in the Disqus comments section) and they’ll get embedded for us all to see or if you’d prefer upload them to your favourite photo sharing site and leave the link to them. Show me your best images in this week’s challenge. Sometimes it takes a while for an image to appear so be patient and try not to post the same image twice.

    googletag.cmd.push(function() {
    tablet_slots.push( googletag.defineSlot( “/1005424/_dPSv4_tab-all-article-bottom_(300×250)”, [300, 250], “pb-ad-78623” ).addService( googletag.pubads() ) ); } );

    googletag.cmd.push(function() {
    mobile_slots.push( googletag.defineSlot( “/1005424/_dPSv4_mob-all-article-bottom_(300×250)”, [300, 250], “pb-ad-78158” ).addService( googletag.pubads() ) ); } );

    The post Weekly Photography Challenge – Feet by Darlene Hildebrandt appeared first on Digital Photography School.

    Digital Photography School

  • 5 Simple Tips for Mastering Outdoor Photography

    While it is relatively easy to go outside and just “point and shoot,” there are better ways to take pictures in the great outdoors. Snapping photos in the outdoors rather than indoors brings a whole new list of considerations to deal with. From the weight of your pack to the eventual downpour, there are certain preparations you can take before Continue Reading

    The post 5 Simple Tips for Mastering Outdoor Photography appeared first on Photodoto.


    Photodoto

  • 28 Curious Images of Feet

    This week for an image collection I bring to you – FEET!

    What can you tell about the person, their life, and their emotions by looking at their feet? What do these feet tell you?

    If the eyes are the windows to the soul – what do the feet tell us?

    Photograph Tiny Feet by Lisa Holloway on 500px

    Tiny Feet by Lisa Holloway on 500px

    Photograph "They say stay in the lines, but there's always something better on the other side." (John Mayer) by Anita Vela on 500px

    “They say stay in the lines, but there’s always something better on the other side.” (John Mayer) by Anita Vela on 500px

    Photograph Splash ! by Joan  Le Jan on 500px

    Splash ! by Joan Le Jan on 500px

    Photograph Feet by Marc Braner on 500px

    Feet by Marc Braner on 500px

    Photograph In safe hands by Ron Schilling on 500px

    In safe hands by Ron Schilling on 500px

    Photograph Nogi , nogi... by Ewa Frye on 500px

    Nogi , nogi… by Ewa Frye on 500px

    Photograph movement by kip garik on 500px

    movement by kip garik on 500px

    Photograph Além by Fabio Stachi on 500px

    Além by Fabio Stachi on 500px

    Photograph Baby feet by Bart Vaelen on 500px

    Baby feet by Bart Vaelen on 500px

    Photograph armonia by  GrenOuille   on 500px

    armonia by GrenOuille on 500px

    Photograph Twin by Manuel Orero on 500px

    Twin by Manuel Orero on 500px

    Photograph Happy feet by Tatiana Avdjiev on 500px

    Happy feet by Tatiana Avdjiev on 500px

    Photograph Marie by Laurent KC on 500px

    Marie by Laurent KC on 500px

    Photograph Bath IV by Pepe Pont on 500px

    Bath IV by Pepe Pont on 500px

    Photograph Octopus by Michaël Fournier on 500px

    Octopus by Michaël Fournier on 500px

    Photograph Talk to the Paw by Holly Kuchera on 500px

    Talk to the Paw by Holly Kuchera on 500px

    Photograph i have cleaned my paws by Dave Binyon on 500px

    i have cleaned my paws by Dave Binyon on 500px

    Photograph Here I am! by Zuzia Paluch on 500px

    Here I am! by Zuzia Paluch on 500px

    Photograph foots and ball... by Partha Das on 500px

    foots and ball… by Partha Das on 500px

    Photograph || Dribbler || by Souvik Metia on 500px

    || Dribbler || by Souvik Metia on 500px

    Photograph Gymnastic foot by Luigi Fardella on 500px

    Gymnastic foot by Luigi Fardella on 500px

    Photograph 2. Position by Jean Claude  Castor on 500px

    2. Position by Jean Claude Castor on 500px

    Photograph Beach Volleyball Sand Feet Jump by Jamie Roach on 500px

    Beach Volleyball Sand Feet Jump by Jamie Roach on 500px

    Photograph 'Foot'ball by Mattia Pasotti on 500px

    ‘Foot’ball by Mattia Pasotti on 500px

    Photograph Cool man wearing roller skating shoes by fabio_barstar on 500px

    Cool man wearing roller skating shoes by fabio_barstar on 500px

    Photograph Wet feet :) by Bram Linderman on 500px

    Wet feet :) by Bram Linderman on 500px

    Photograph Bird tracks in sand of a beach crossing human footprints. by Maciej Bledowski on 500px

    Bird tracks in sand of a beach crossing human footprints. by Maciej Bledowski on 500px

    Photograph Sandals on the Beach by Ben North on 500px

    Sandals on the Beach by Ben North on 500px

    googletag.cmd.push(function() {
    tablet_slots.push( googletag.defineSlot( “/1005424/_dPSv4_tab-all-article-bottom_(300×250)”, [300, 250], “pb-ad-78623” ).addService( googletag.pubads() ) ); } );

    googletag.cmd.push(function() {
    mobile_slots.push( googletag.defineSlot( “/1005424/_dPSv4_mob-all-article-bottom_(300×250)”, [300, 250], “pb-ad-78158” ).addService( googletag.pubads() ) ); } );

    The post 28 Curious Images of Feet by Darlene Hildebrandt appeared first on Digital Photography School.


    Digital Photography School

  • Tried and Tested Tips for Photographing Kids

    Why are kids so seemingly magical to adults? What is it about those young, wild, expressions in photographs that makes us love them so much? It’s their honesty and unwavering outlook on life.

    Kids show their emotions freely, and share their feelings with genuine truthful expressions that we love to see. Whether they are excited or frustrated, they are always being honest and letting their personalities shine as they push their limits of learning in any new experience.

    Tips-Photography-Kids-45

    Though it’s something we witness in all children most the time, it is rare to capture a child’s magic in a photograph, the way we actually see it with our eyes. In this article you’ll learn about the psychological aspect of photographing children, with tips and tricks to show you how to create the perfect opportunities to capture those magical expressions and great personalities of kids.


    Learn to Control the Scene

    As with most photography, before you pick up the camera, become aware of what’s going on in your scene. When photographing children, it is important to know how much control you already have, or can possibly create.

    Here are a few things to consider:

    1. Location: Are you outdoors or indoors?
    2. Limiting movement: Is the area confined to a single space with toys the child can play with?
    3. Allowing free movement: Are they running around in a big backyard with open space?
    4. Distractions: What in the environment could become a distraction or problematic?
    5. Get their attention: What can you use in this environment to help get the child’s attention?

    Tips-Photography-Kids-4

    Many times you can capture children before they really notice, you if you plan it right. This gives you the chance to witness the way they act while they are in their own little worlds, with their big imaginations. Be careful not to let the camera become a distraction. If they see you photographing, you don’t always know what immediate reaction you are going to get.

    Assess your scene, and start to plan ahead, by preparing for the way you will introduce yourself. First impressions are important. Kids attach to their first instinct all the time. Get down on their level to say hello. The next thing to keep in mind is that you want to force the control as little as possible. This means the more natural the scene is, the more genuine their expressions.

    How is the child reacting to you?

    • Do they acknowledge you?
    • Are they playing with you?
    • Are they playing on their own?
    • Are they really hyper active, or are they quiet?

    You want to engage with them by relating to them in the moment. Begin by mirroring their behaviour. If the child says hello and wants to play right away, then you’re ready for a game. Sometimes children will be shy or unsure at first. It may take a few minutes before they are willing to trust. This is normal, and it is actually a good thing. So act that way too.

    The Best Secret to Photographing Kids

    For the purpose of a photo shoot, during your entire interaction with the child, you want to pretend like you are playing a game. Whether it’s a game you make up, or one they already know, make it objective and give the game a winning goal. Be enthusiastic about playing with them.

    A game is fun and engaging; it is also a great distraction. Decide what type of game is best for the moment. You can always change the game in a split second. This is good to keep in mind as kids tend to change their behaviour, and mood in a split second.

    Tips-Photography-Kids-38

    It is always a fun challenge to see how well you can create a specific scenario in a scene. When playing the game, give it a twist or a surprise, addition to working in a benefit for your photo shoot. For example, you may want to direct them towards more light. Depending on the positions you want the kid to be photographed in, you can add that direction as a command into the game.

    With a game, the beauty of photographing children is knowing you are getting a wide range of expressions and emotions. Sometimes they will be pouty, grumpy or not listening. Other times they can absolutely surprise and amaze you. No matter what, the kid’s personality will shine, and you will be prepared to capture whatever spontaneous reaction they give.

    Fun Games to Play

    A ball. A single game of rolling or tossing the ball. Always in conversation with them and full of enthusiasm, say, “One… two… three!” and pass the ball as you say three. When you act, notice how they react. When the time is right and it is your turn, alter the moment by giving a small command.

    Try asking them to sit a little to the left after a few rounds of tossing the ball, pointing to the spot where you want them to sit. See if they listen to the direction. Say, “Okay, now lets try sitting right there (point the the spot). Great job, are you ready? One… two… three!” Then toss the ball. Doing this will psychologically instill a listening pattern any time in the near future when you say, “Three!”.

    photographing children photography tips,

    Keep using this method of adding in a twist to offer directions. Once you have them in the right place and pose, you can use the 1-2-3 method to grab their attention for the shots you want. When you get the ball, hold it at camera height and say it again. On three, snap the shot. Something always happens on Three!

    Other Great Games

    Simon Says: This works well with children four and up. Be animated with them as you participate. Make the moves simple and funny such as, “Simon says – pinch your nose”. Be ready for laughs with this one. Again, continue to test the waters and direct them with small commands during the game.

    One toy at a time. If they have their own toys, or you give them ones to play with, let them choose whichever is most interesting to them. Make that toy seem like the coolest thing you’ve ever seen before. Turn it into a game. Use the method of 1-2,-3 in the game to prepare for the pause.

    Tips-Photography-Kids-7

    Use the camera as a story. It’s a magic camera. Make up a trick. Can you see my eye in this camera? What color is my eye? Is it purple? Be interesting and funny. Give them a reason to react to your words.

    Create interest in your scene, and see how they react to what is going on. Point out something interesting around you. Find your point of excitement and go with it until they loose interest. No matter what game you choose to create in the moment, remember you are using it to take control of the situation as naturally as possible.

    When all else fails, be a kid!

    Ignore the camera to just play for a little while. Walk away and stop playing altogether. Remember you can mirror their actions. Act like them, and you will get a reaction that will make them relate and engage. Just play, don’t think about shooting for a few minutes. It’s all about engaging with their true personality to bring out the best in each kid.

    Playing the first game for at least a minute or two before testing your chance to take a photo, is the best way to build trust with a child, especially if you’ve just met them. If you’re photographing your own children, or if the child is more stubborn and/or shy, it might take as long as 10 minutes of playing a game before they are comfortable, and being themselves, even if they are engaging with you.

    Your goal is to be engaged without totally taking over the scene, just controlling the moments that are necessary to prepare for a natural expression to capture. You are building trust. Don’t loose patience. Take your time. It’s important to remember you are creating a simple game that allows you to gain control for just long enough (and in the right position) to snap the shutter.

    No Games Needed

    Tips-Photography-Kids-44

    Sometimes the best games are the ones they make up. Always set guidelines for playing but let kids be kids. Ask them what they want to do. Remember to mirror their behaviour, body language, and expressions when you can. As you build that trust you create great photo opportunities for moments coming up.

    Many times you don’t even need a game at all. If they are entertaining themselves, that gives you a unique opportunity to become more intimate, and allow their surroundings to just be as they are without needing control. Photograph around the kids without asking for their attention. Instead just have a conversation, or say nothing at all, and watch expressions change.

    What expressions do you notice? Often the best ones are not necessarily big, joyful smiles. Look for the soft, serious expressions as you engage by asking questions.

    Get your camera ready

    Up until now we have discussed very little about the actual process of taking photographs. The above information is the most important part. Once you master patience and the technique of controlling the scene, you are guaranteeing yourself beautiful, and unique portraits of kids. But what’s equally as important, is your role as the photographer.

    photographing children photography tips,

    As the game is being played, you have the responsibility of making sure your camera is set, and you are in the right position capturing the right angle at any given moment. These tricks will help better prepare you for that role.

    First thing is first. Camera settings must be accurate. If they aren’t on point, all those beautiful expressions disappear in the blink of an eye. Most of the time, the important camera setting when photographing children is aperture. The next most important aspect is always the light.

    Try this:

    Set your aperture between f/2.8 and f/4.5. This is a a very wide aperture which gives you a soft, shallow depth of field. This depth of field bring focus to the child while also allowing for more light to come in through the lens.

    From there, choose your ISO based on the lighting conditions, and then find a shutter speed that balances the light to create a proper exposure. Remember, keep your ISO as low as possible to avoid noise, and choose a shutter speed as high as possible to freeze the movement of playful kids.

    Tips-Photography-Kids-47

    Once proper exposure is achieved, you shouldn’t have to change your settings unless your intention, or the light changes. For example, if you decide want to capture the movement of a scene, your camera settings may change. 

    Tried and Tested Tips

    There are many simple things that you can control anywhere anytime even if you can’t control the kid in a photo shoot.

    1. Wear comfortable clothes. Clothes can get in the way when you’re trying to move around with a playful kid. Be prepared to move a lot. Wear clothes that you don’t care about getting dirty, and that have pockets to hide things.
    2. Think about the child’s size in relationship to you and the entire scene. Think about their relationship to what they are doing, or playing with. Use these elements to your advantage when shooting.
    3. Get down on their level and when possible, shoot up at them making them look bigger than life.
    4. Change your angles to create interesting view points that are unique to the scene, and incorporate more or less of the scene to add elements that accentuate the child’s size.
    5. Get in close. Zoom in, or walk close and capture their tiny features. When a child is distracted by a toy this is a perfect opportunity to get up-close and personal.
    6. Do your best to be the only one who is giving commands. Politely prepare the parents for not helping unless you ask for it. Then only ask for their help as a last ditch effort.

    How Do You Stop “CHEESE!” ?

    Tips-Photography-Kids-16

    In the digital world we live in today, most kids are used to cameras, and many times they will create habits of specific, forced facial expressions, and fake poses that aren’t always so cute to capture. While smartphones and tablets are here to stay, so are the fearless kids who use them as a chance to over exaggerate, and get attention.

    First, don’t acknowledge it as a bad thing. Don’t even mention it. Instead, change the game. Change the question. Change the whole topic. Give them something else to think about. When they do continue to over exaggerate, you can make it a game to not smile, then your challenge is to make them laugh, with your camera ready to go at a moment’s notice of course.

    Be patient with them, and with yourself. Think like them. When they are upset, give them space. If they ignore you, ignore them. Stand back, capture them from afar as you slowly gain trust. All most kids ever want is a little attention. During a photo shoot, you are creating a special time when you can use these tried and tested tricks to give them just that, your undivided attention.

    As you gain their trust by playing these games to naturally control the scene, you are creating the perfect scenario to capture real natural expressions, emotions and behaviours that we all love to witness in children. That’s how you capture their magic.

    Tips-Photography-Kids-41

    Kids are one of the most challenging, yet rewarding subjects, to photograph. I am always up for learning new techniques. Do you have any other great tips or tricks for photographing kids by engaging with them and bringing out their unique personalities and magical expressions?

    googletag.cmd.push(function() {
    tablet_slots.push( googletag.defineSlot( “/1005424/_dPSv4_tab-all-article-bottom_(300×250)”, [300, 250], “pb-ad-78623” ).addService( googletag.pubads() ) ); } );

    googletag.cmd.push(function() {
    mobile_slots.push( googletag.defineSlot( “/1005424/_dPSv4_mob-all-article-bottom_(300×250)”, [300, 250], “pb-ad-78158” ).addService( googletag.pubads() ) ); } );

    The post Tried and Tested Tips for Photographing Kids by Danielle Werner appeared first on Digital Photography School.

    Digital Photography School

  • Is Photoshop a Bad Word?

    How many times have you posted or shared a dramatic image only to have someone ask, “Did you Photoshop that?” First of all, let’s get one thing straight – Photoshop is not a verb! Photoshop hall of famer Vincent Versace put it this way:

    “Photoshop is not a verb. It’s a noun. It is the means to an end, not the end itself.”

    Photoshop has been taking a lot of heat lately with all the retouched tabloid images of models, who with the help of some clever manipulation, look unbelievably perfect. But Photoshop is not to blame for these exaggerated images. Yes, it is the tool used to create them, but it’s not the culprit.

    Just because a photographer post-processes images with software such as Photoshop doesn’t mean that the image isn’t showing what the photographer actually saw or felt when they released the shutter. There are many image processing software products available today to post-process your images, but these are considered means of retouching  images. In this article we will refer to Photoshop, but any software being used for post-processing could be included as well.

    Composite image of fireworks. Several images were layered together in Photoshop changing the blending mode of the layers to lighten allows the images to blend into what appears to be one image.

    Composite image of fireworks. Several images were layered together in Photoshop, and changing the blending mode of the layers from Normal  to Lighten allows the images to blend into what appears to be a single image.

    Get it right in-camera!

    Have you ever heard or even said, “Oh, I will fix that later in Photoshop.”? While sometimes it is a necessity to post-process an image, you never want to rely on Photoshop to be the fix-all for every image you shoot. It is still a good practice to get it right in-camera as much as possible. Still, almost every image can benefit from a few adjustments.

    Is Photoshop a necessity?

    Maybe not, but many photographers say, “I don’t use Photoshop. I prefer my images straight out of the camera.” But guess what? If you are one of these photographers, you may not realize that if you are shooting in JPG straight out of your camera, your images are being processed by your camera. Your camera will sharpen, add saturation and contrast, and remove noise. A JPG shot straight out of the camera is also a compressed file, which means digital information about your image is lost and can’t be recovered.

    If you are shooting in RAW mode, post-processing is almost always a must. None of the camera adjustments mentioned above are applied to your image, with the exception of white balance (which can also be adjusted in post-processing). If you ask almost any professional photographer whether or not they post-process their images, you will find that nearly 100 percent of them use Photoshop for various amounts of processing.

    Original

    Original

    DSC_0456_Edit_new

    Final image, after cropping and adding contrast and sharpening.

    DSC_8861_ORG

    BW_silo

    Black and white conversion can also be done using Photoshop. Capture your original image in full color, which will provide more image data to use during the conversion process.

    Is Photoshop cheating?

    Is using Photoshop cheating, or is it just a method of finishing an image? It is very true that Photoshop can be used to manipulate images in a negative or false way.

    Sharing images Straight Out Of Camera is great for photographers who are mainly into taking snap shots of family and friends, but is that the only acceptable method for all photographers? No, many camera-savvy shooters want to perfect their images to create works of art, and Photoshop is the tool to make this happen. Is there really such a thing as a perfect image SOOC? It’s safe to say that almost every image can use some sort of enhancing, and programs such as Photoshop are a great tool to perfect your photos.

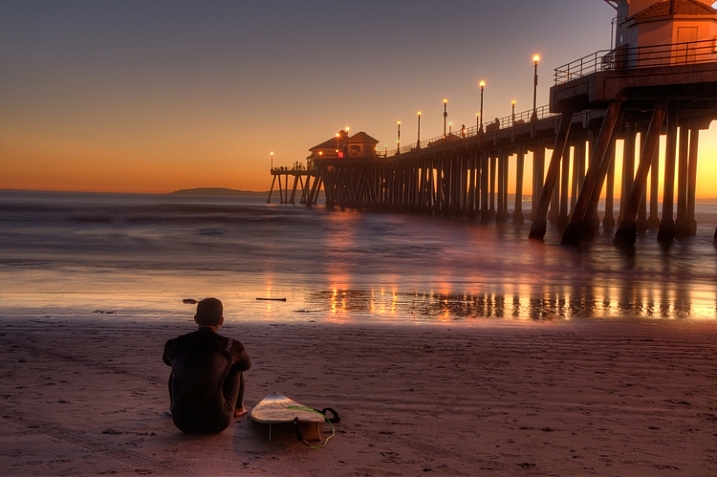
    Original

    Original

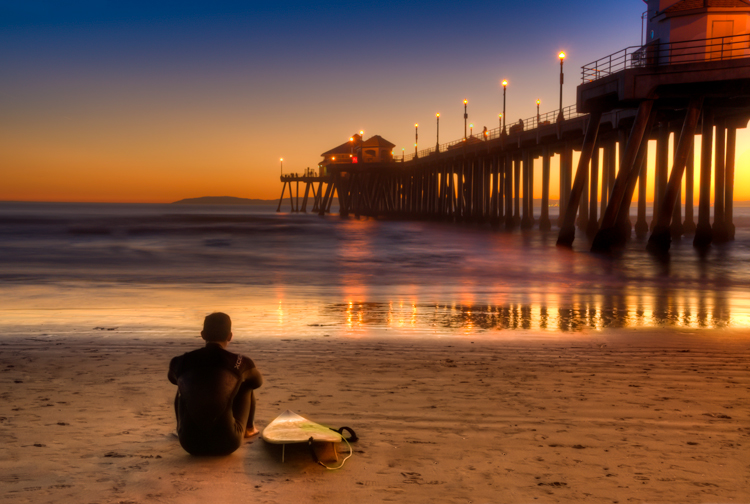
    Final image, color correction made to bring out more of the color of the scene, Removed tire tracks in the sand and also dark spot that was coming out of the head of the surfer.

    Final image, color corrected to bring out more of the color tones of the actual scene. Tire tracks in the sand were removed, as well as the distracting dark spot close to the head of the surfer.

    Photoshop is not magic!

    I once heard the story about a person who stopped by a print shop with a photo of a dairy farmer working behind his cow. Upon showing the picture to the proprietor, she explained that it was the only picture she had of her grandfather. Then she asked, “Could you Photoshop this image and remove the cow so I can see what my grandfather looked like?”. This story is a funny example of how Photoshop can be misunderstood, and how its powers seems to be magical.

    Why use Photoshop?

    When you shoot in RAW mode, your camera saves only the information of the image, no adjustments are made in camera. So why not shoot in RAW and use Photoshop to take control of the processing of your image yourself? Some great uses for Photoshop include, but are not limited to:

    • Cropping
    • Color balancing
    • Contrast adjustments
    • Black and white conversion
    • Removing distracting objects from an otherwise great image
    • Dodging and burning
    • Compositing
    • Watermarking

    Photoshop is the new darkroom

    Retouching images is not something new to photography. In the early days of photography all adjustment to photos had to be performed in the darkroom, via the processing of film and the exposures of the prints.

    The famous photographer Ansel Adams was a master of the darkroom. If you’ve ever seen a straight print of one of his images, (no darkroom adjustments made) you might be surprised to realize the level of manipulation Adams applied to create the final image as he had pre-visualized it. Many of the processes available in Photoshop have their origins from processes performed in the early darkrooms.

    Original image

    Original image

    Here the final image is cropped and the corners of the image were darken in true Ansel Adams style to keep the views eye from wander out of the image.

    The final image shown here is cropped, with the corners of the image darkened (in true Ansel Adams style) to keep the viewer’s eye from wandering out of the image.

    Don’t be afraid of Photoshop

    So why do some photographers have such a fear or dislike of Photoshop?

    • It costs too much – True, for years the cost of Photoshop could’ve been a major deterrent for some photographers. However, now with Photoshop Creative Cloud ($ 9.99/month), the cost is not nearly the issue it once was.
    • Photoshop is too hard to learn – There is a lot to learn with Photoshop, but there are many online sources (like here on dPS) to help you use and master it. Challenge yourself!
    • What if I ruin my photo?  If you shoot in RAW mode you will always have your RAW file to go back to. Any changes made to RAW files are only attached, not applied.

    Writing off the use of Photoshop for any of these reasons could be limiting your potential as a photographer.

    Conclusion

    Is Photoshop for everyone? Probably not, but is Photoshop detrimental to the craft of photography? Most definitely not! Can Photoshop be used to falsify images? Yes, and this article is in no way the complete answer to its basic usages. Is Photoshop a bad word? Is Photoshop a form of digital trickery, or is it a tool that helps photographers create better images?

    What do you think? Comment below. (Please be respectful of other’s opinions and keep it friendly!)

    googletag.cmd.push(function() {
    tablet_slots.push( googletag.defineSlot( “/1005424/_dPSv4_tab-all-article-bottom_(300×250)”, [300, 250], “pb-ad-78623” ).addService( googletag.pubads() ) ); } );

    googletag.cmd.push(function() {
    mobile_slots.push( googletag.defineSlot( “/1005424/_dPSv4_mob-all-article-bottom_(300×250)”, [300, 250], “pb-ad-78158” ).addService( googletag.pubads() ) ); } );

    The post Is Photoshop a Bad Word? by Bruce Wunderlich appeared first on Digital Photography School.

    Digital Photography School