Category: Photography

  • How to Be Respectful and Safe Photographing Wildlife

    Hang in there

    Photographing large, dangerous wildlife can be extremely fun to do, but there are some unique factors to consider when your subjects are wild animals, in their natural habitat. Your adrenaline may be pumping, but you must keep your wits about you at all times, and not get caught up in the excitement! Here are a few things to consider when photographing dangerous animals in the wild.

    Safety first

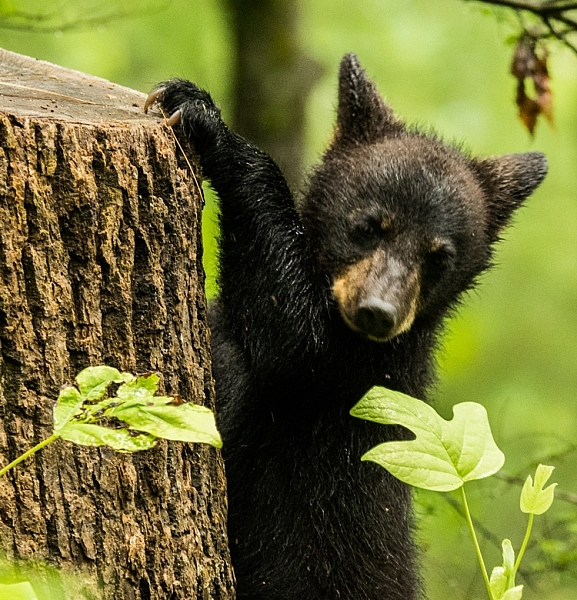
    When photographing wild animals (such as black bear in the Great Smoky Mountains National Park, as featured throughout this article), naturally the most important factor is safety, both yours and the subject’s. Getting too close to one of these animals is never a good idea. Most national parks will post the distance that you should keep from their animal attractions for your safety. Obey them! If no guidelines are posted, as a general rule, remember – if you are close enough to an animal that they are aware of your presence, and change their behaviour because of it, you are too close.

    You may think a large animal will be a slow mover and that you’ll have no problem escaping from it, but adult bears, for example, can run up to 30 MPH, and you won’t stand a chance. (You may have heard the joke that you don’t have to outrun the bear, just the guy behind you!) Getting too close to these animals is not only life-threatening to you but also to the animal, because an animal that attacks a human, or even shows aggressive behaviour to people that get too close, will likely be targeted to be euthanized. Another thing you must never ever do is put yourself between a mother and her offspring, probably the most dangerous situation you can find yourself in. So, keep your distance, and never put yourself in that position.

    Litter is an issue

    A third safety issue for both you and the animal, often underestimated, comes in the form of littering. Litter may become a dangerous food source for these animals, because it has human scent on it. If and when the wild animals begin to relate the human scent with a food source, these animals may also have to be euthanized for human safety. Even biodegradable items, such as an apple core, should not be thrown down. So please dispose of your trash properly! Do not carry any food on your person, as most wild animals have a very good sense of smell, and this may put you in grave danger if the animal is really hungry.

    It is so tempting to get caught up in the moment while photographing these beautiful creatures, but you must keep safety as your top priority, and abide by the rules that are posted for your safety and the animals’.
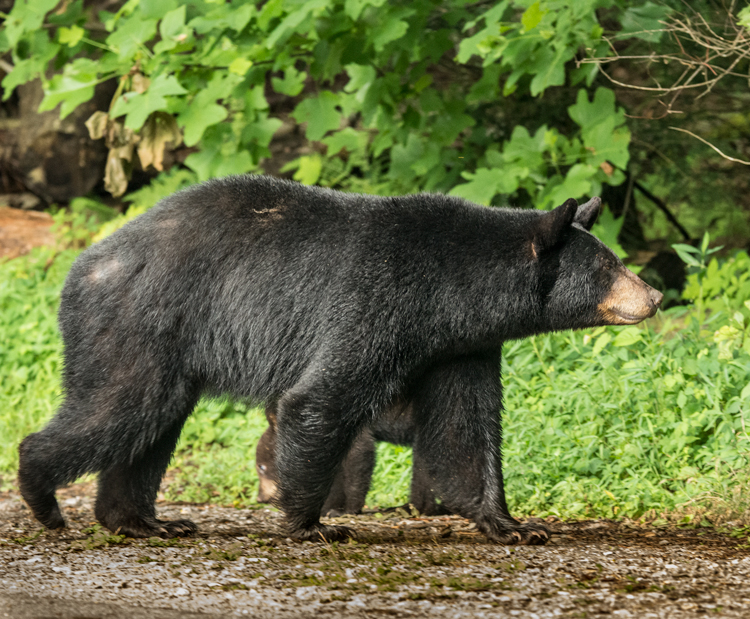
    Mother Bear

    Recommended equipment

    • DSLR camera, preferable to your cell phone. If you are close enough to get a great cell phone image, you are too close!
    • Lens with a long focal length: A must, because as mentioned above, getting close to untamed subjects can be dangerous. The images in this article were taken with a Tamron 150-600mm zoom lens.
    • Monopod or tripod: Because large lenses can become heavy and difficult to hold steady over a long period of time, a good monopod is a great asset, as it’s quickly and easily transportable.
    • Window mount or pad for the lens: It’s good to have something firm to brace your lens on, if you end up shooting from your vehicle window.

    Do your homework

    Before you head out to your chosen park or nature preserve, do your homework. Having an idea of the lay of the land is very useful before you arrive in the area, so you don’t waste time getting to know it. Download maps of roads and trails for the area. Research the wildlife you expect to photograph, learning the facts about their habitats, food sources, and what time of the year the babies appear. Learn the animals’ habits, such as what time of the day they are most active; and what, when and where they feed. One of the best ways to find this information is talk to park rangers or local residents, as they will know exactly where to locate the wildlife. I recently asked a park ranger “What is the most asked question you get as a ranger?” I had a pretty good idea what his answer would be, and it was, “Where are the bears?”
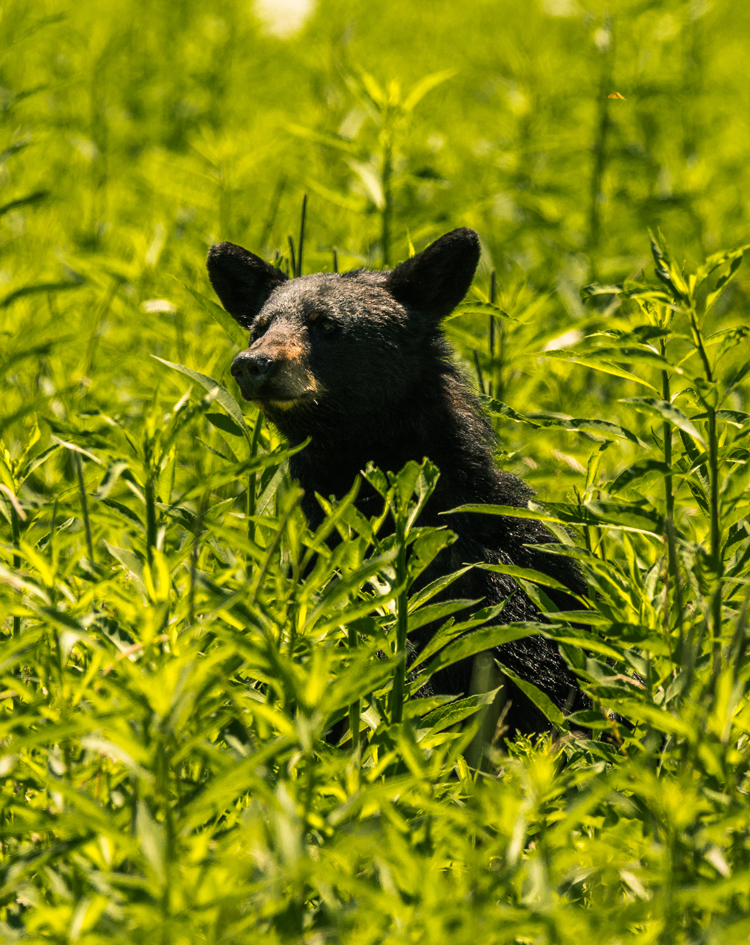
    A rare sighting of a mother bear in the midday sun. The harsh lighting creates a very contrasting image.

    A rare sighting of a mother bear in the midday sun. The harsh lighting creates a very contrasty image.

    Be observant

    The hardest part of photographing wildlife is finding them, because they often avoid contact with sight-seers and paparazzi.  Most wildlife is not likely to be found out in the open, during the heat of the day. Early morning or late afternoon are the best times to find animals moving about. During the day, look for them in shady areas or near water where they can stay cool. Don’t forget to look up, as bears and other animals will climb trees, and if they sense danger they will also send their little ones into the canopy for safety. One time as I was trying to photograph an encounter between a mother bear and a coyote, I later found out I had walked right by the tree that the mother bear had sent her cub up into for safety. A missed opportunity for a memorable photograph!
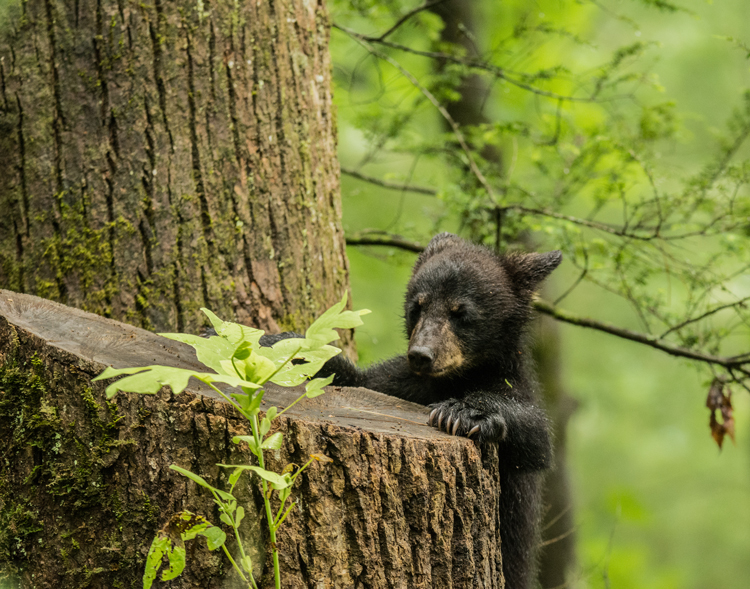
    bear cub playing

    Designated driver

    In many cases, when you are scouting for wildlife to photograph, so are hundreds of other photographers, and park visitors, who also crave the experience of seeing an animal in the wild. When one or more are spotted, a great traffic jam may occur along the road, and by the time you get to the place the subjects were first noticed, they have moved on. If you have a willing companion, take them along for the adventure as a “designated driver”, so when traffic stops you are free to jump out with your camera and get to the animal sighting before they have disappeared.

    Parks have rules about not stopping in the road, but people often get excited and just stop their vehicles to get out and get a good look. Be courteous if you are the first to come upon an animal sighting, and pull your vehicle off the road if you want to stop and photograph. Depending on the animal you are photographing, it could be dangerous to get out of your car, so be extremely careful.
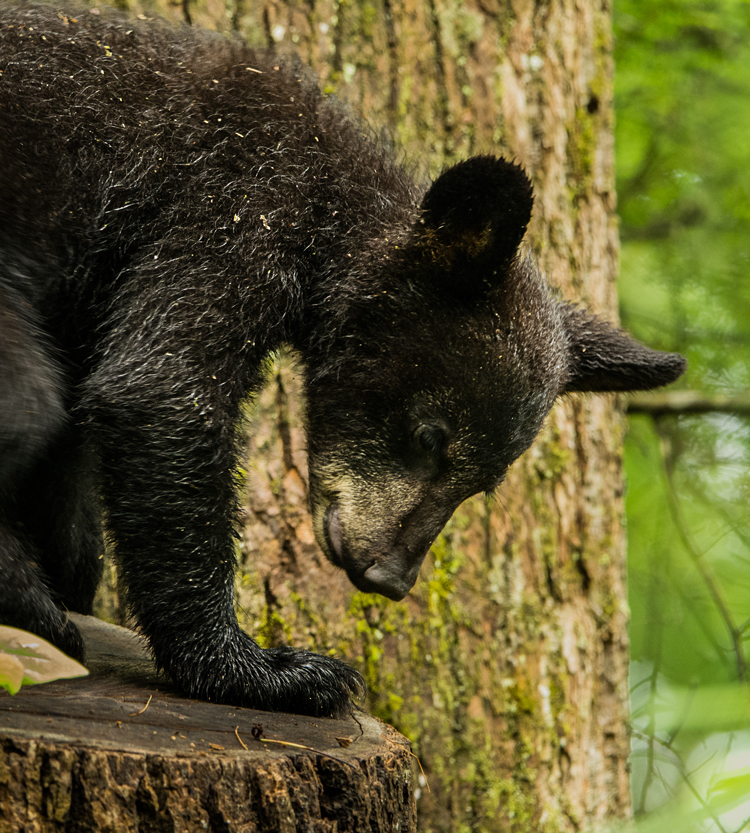
    bear cub

    Focusing

    Focusing your camera can be one of the more challenging issues in photographing creatures in the wild. You must be careful when focusing that your camera doesn’t lock on a foreground object, instead of your intended subject. Getting a clear shot may be difficult to achieve with undergrowth, tall grass, and other distractions competing with your subject for the focus lock.

    Of course, just as with any other animal, your aim is to focus on the subject’s eye. One way this can be accomplished very effectively is by using back button focus. Once your focus is locked, you are ready to shoot without worrying until your subject moves. Then you can refocus and shoot again.
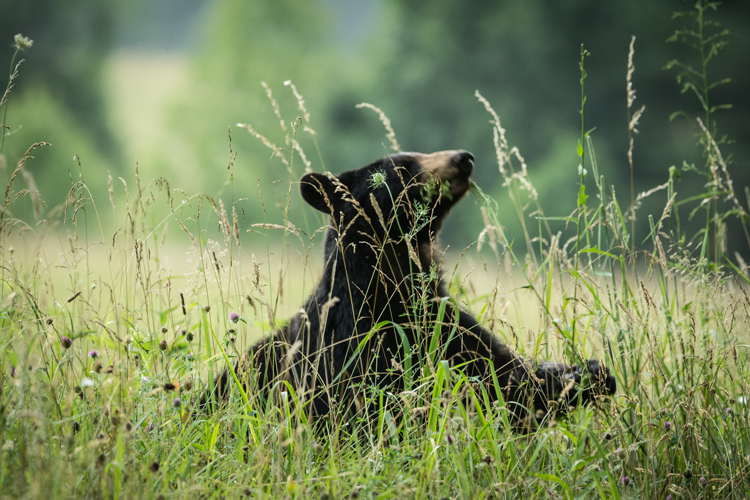
    In this image the grass in the foreground made focusing difficult. Notice that the grass in in focus but the bear is out of focus.

    In this image the grass in the foreground made focusing difficult. Notice that the grass is in focus, but the bear is out of focus.

    Camera setting suggestions

    Spotting wildlife in the bright sun of the day is, in most cases, a dream shot. Many times you are going to be faced with low-light situations with the animals in the cover of the forest. Keep in mind the exposure triangle and get the best possible combinations to achieve a good exposure.

    Using a long focal length such as 600mm requires that you use a fairly fast shutter speed of around 600th of a second (depending on if, and how fast, your subject is moving, you may need an even faster shutter speed). To set your Aperture, depending what you want for depth of field, you should shoot wide open if you’re looking for a very shallow DOF to blur the background, or you may prefer to stop down to the lens’s sweet spot around f/8. Now adjust the ISO to get the proper exposure for the available light. In low light this could mean you have to adjust the ISO very high, which causes concern about digital noise, but it may be a choice between noise or no image at all.

    Don’t worry about the noise, just take the shot! Most of the newer DSLR cameras do a very good job set at higher ISOs. What noise does affect your images can be removed in post processing with programs such as Photoshop, Lightroom or Nik Dfine 2.
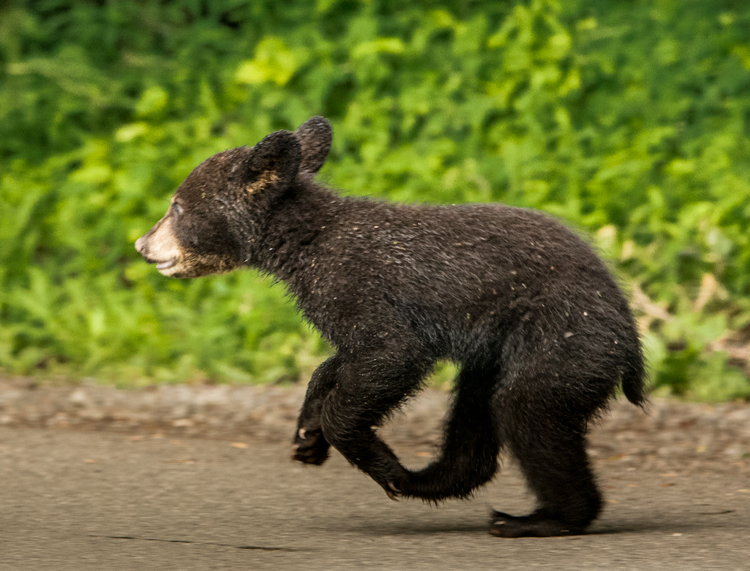
    bear cub

    Conclusion

    While it is fun to photograph these beautiful animals, don’t forget about your safety, and also that of the animal. Be prepared and patient! Always remain calm, and treat all wildlife with respect so they are available for everyone to enjoy.

    googletag.cmd.push(function() {
    tablet_slots.push( googletag.defineSlot( “/1005424/_dPSv4_tab-all-article-bottom_(300×250)”, [300, 250], “pb-ad-78623” ).addService( googletag.pubads() ) ); } );

    googletag.cmd.push(function() {
    mobile_slots.push( googletag.defineSlot( “/1005424/_dPSv4_mob-all-article-bottom_(300×250)”, [300, 250], “pb-ad-78158” ).addService( googletag.pubads() ) ); } );

    The post How to Be Respectful and Safe Photographing Wildlife by Bruce Wunderlich appeared first on Digital Photography School.
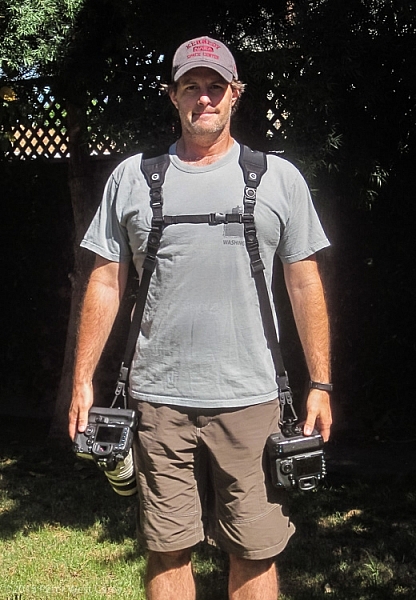

    Digital Photography School

  • Custom SLR Dual Camera Strap – Product Review

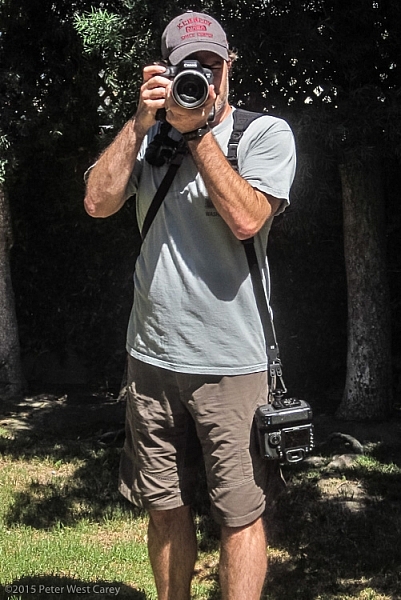
    CustomSLR-Dual-Strap-DPS-PWC2015-0805-1314To be honest, I thought the Custom SLR Dual Camera Strap looked like a dorky idea when I was first asked to review it. The idea is simple: sometimes you need to carry two cameras (especially heavy cameras) and the logistics of such a feat have always been cumbersome. One strap over this way and the other maybe off of the other shoulder? Double criss-cross?
    Custom SLR, a company that got its start thanks to a number of successful Kickstarter campaigns, crafted a solution using one of their best selling camera straps, times two. They sent me a copy of the Dual Camera Strap to test during a small boat cruise with UnCruise Adventures in Alaska last month. I was excited for the trip as it would mean I could take both my cameras and long lenses (28-300mm and a rented 150-600mm) for both close and distant images of marine wildlife. Having that range from 28mm-600mm (on crop factor cameras) always available was important to me so I was willing to try the Dual Camera Strap, with hopes I wouldn’t always be fumbling for the right camera.

    What is it?

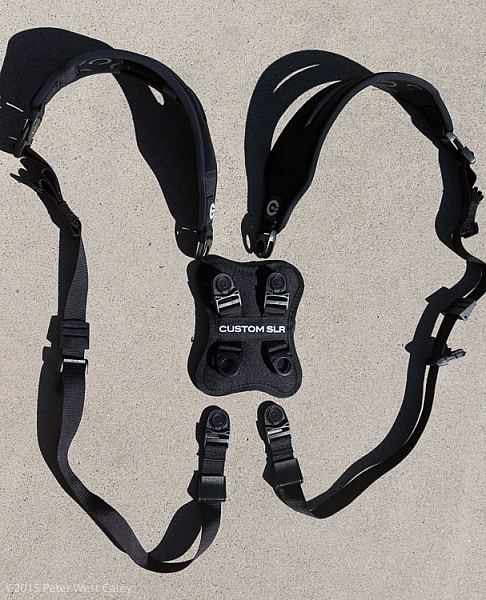
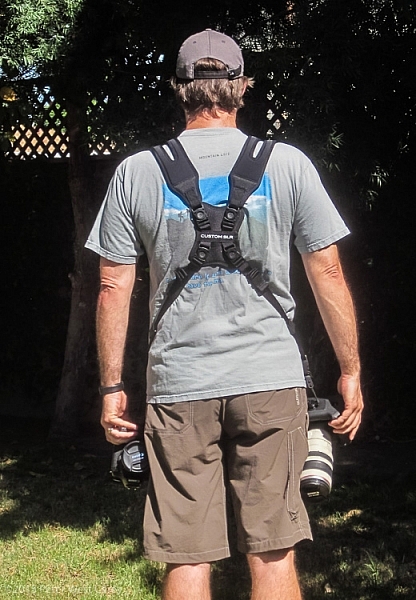
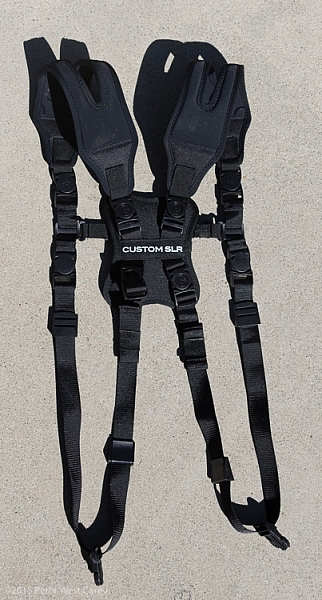
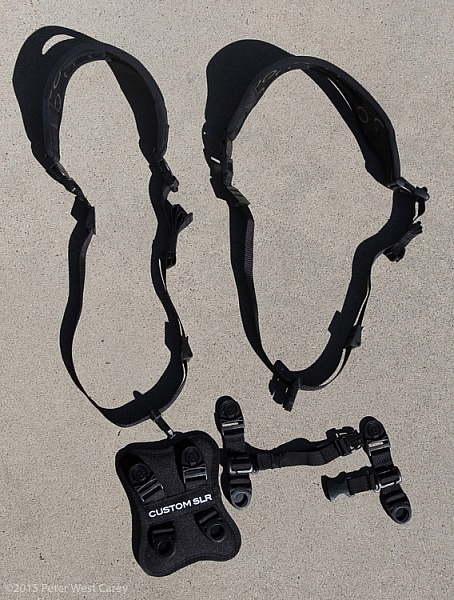
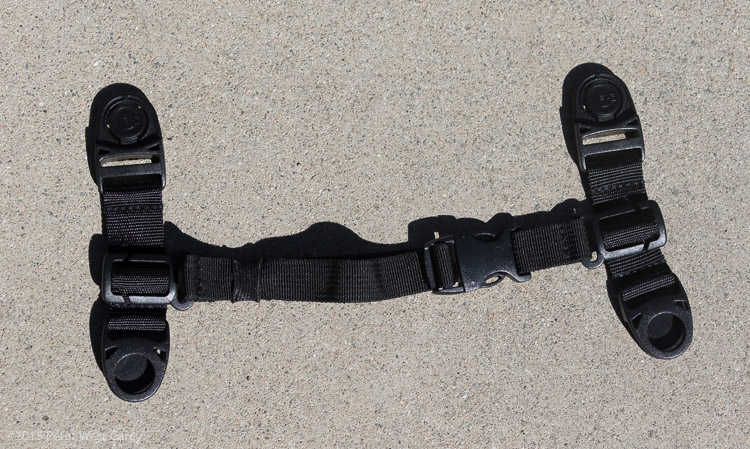
    The unit is really five parts in one. Two of those parts are copies of the traditional Glide One Strap System by Custom SLR, meant to hold one camera, over one shoulder. Then they introduced a unique buckle connector that fits in the middle of your back. Lastly, there are two small pieces of webbing that add a sternum connector.

    CustomSLR-Dual-Strap-DPS-PWC2015-0805-5547

    The great thing about this setup is it uses two straps that can work alone. You’re not stuck with always using the dual setup when you only want to use one camera.

    Let’s take a look at how it all fits together then I’ll tell you about my experience with the setup.

    Anatomy of a Dual Camera Strap

    The setup starts with the individual straps. Each has a piece of split neoprene to help evenly distribute weight on your shoulder. On the underside of the the split strap is a silicone print to provide traction, ensuring the strap doesn’t move around your shoulder.

    CustomSLR-Dual-Strap-DPS-PWC2015-0805-5550

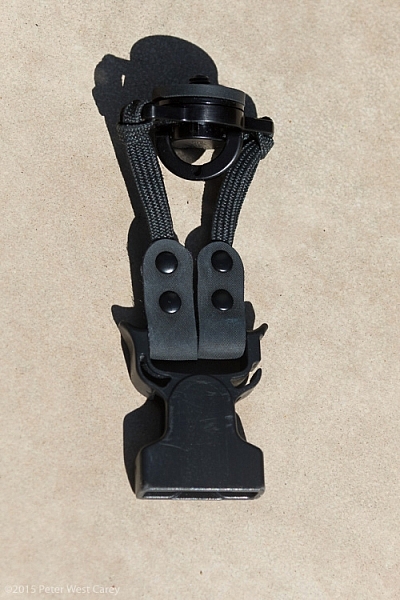
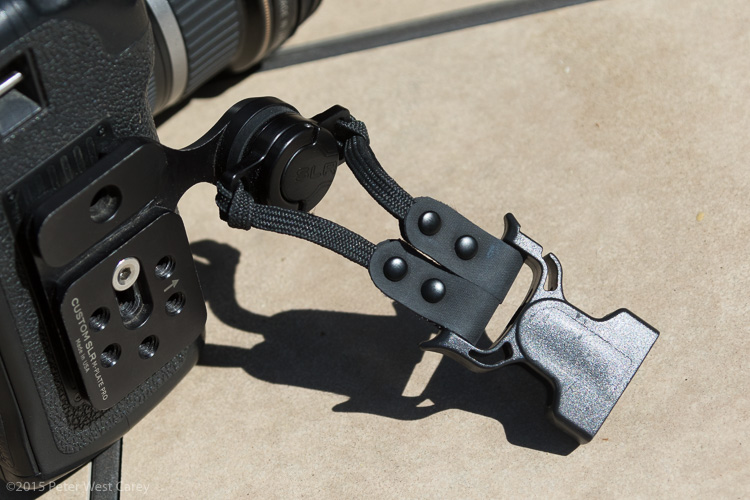
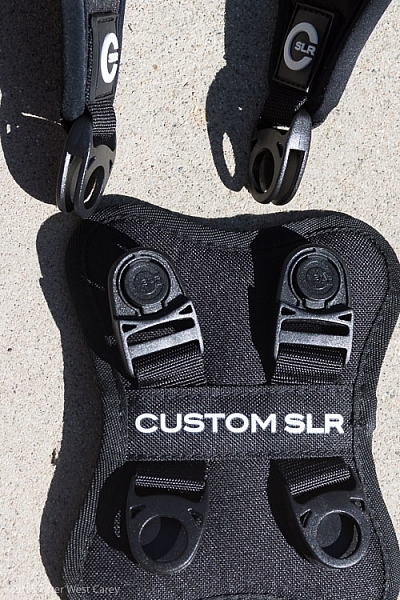
    Cameras are connected to a strap via a beefy quick-release clip attached to a tripod screw, with a loop to make hand-tightening possible (no need for tools). I have used one of these single straps in my daily photography and travels to over a dozen countries for the past three years. It’s now getting a little frayed but never once has the screw mount or quick-release failed.

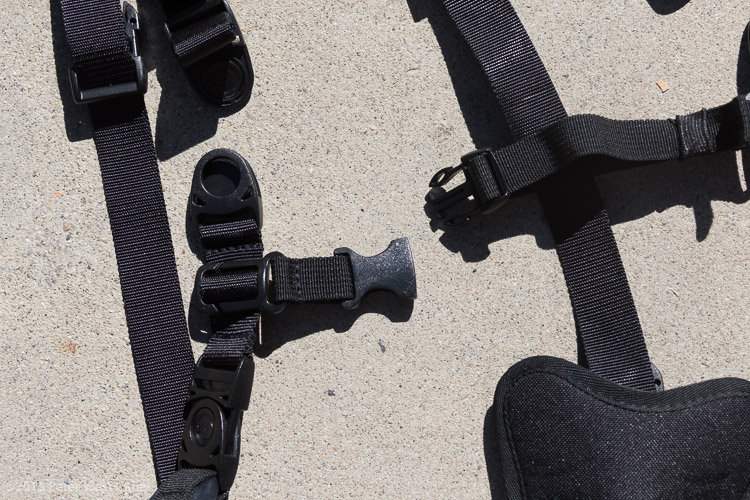
    Next there is a connector that attaches the two straps in the middle of your back. Simply disconnect each single strap and clip them into the connector. The clips are one-way, making the process fairly idiot-proof.

    CustomSLR-Dual-Strap-DPS-PWC2015-0805-5555

    Lastly, to keep the system stable, you need to insert a sternum strap that clips the two single straps together in the front.

    CustomSLR-Dual-Strap-DPS-PWC2015-0805-5551

    Having received my unit already setup, I took it apart, jumbled up the pieces, and tried to put it all together at a leisurely pace. It took me one minute and 50 seconds to go from two single straps to the Dual setup, and that included making a small error and correcting it. It’s pretty easy.

    CustomSLR-Dual-Strap-DPS-PWC2015-0805-5554

    CustomSLR-Dual-Strap-DPS-PWC2015-0805-5556

    Attach Your Cameras

    When changing from single straps to dual, the straps first need to be shortened. This is because each strap is simply looping around one shoulder and not across your body.

    Next, screw in the tripod mount, called a C-Loop, to each camera. As Custom SLR likes to create a whole inter-functioning ecosystem, the C-Loop also works with their M-Plate tripod quick release system. This additional plate gives better stability when using long lenses, but is sold separately (shown in second photo).

    CustomSLR-Dual-Strap-DPS-PWC2015-0805-5553

    CustomSLR-Dual-Strap-DPS-PWC2015-0805-5552

    Suiting-Up – Harness First, Then Cameras

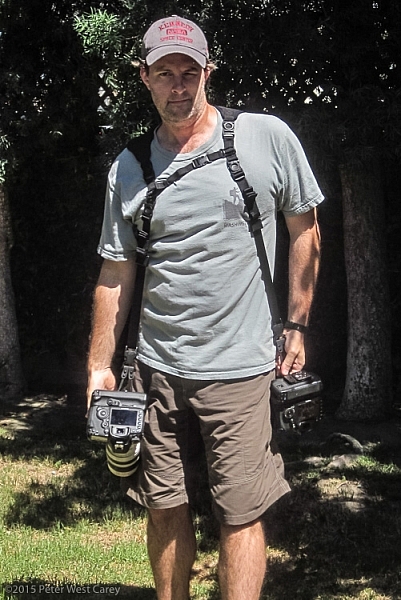
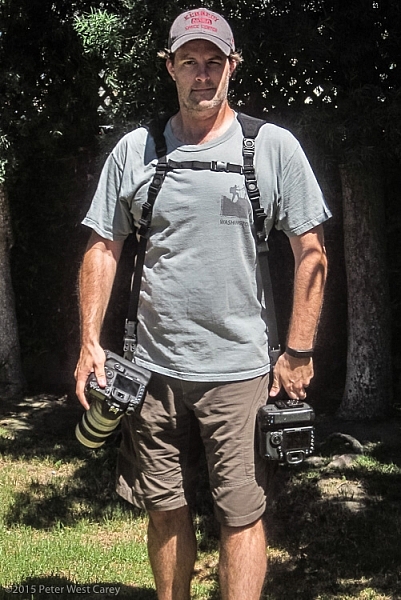
    Now to put it all together! It’s best to put on the harness first before attaching cameras. It can be done the other way around, but it is quite clunky and will bang up your cameras. Then, clip each camera into your preferred side.

    CustomSLR-Dual-Strap-DPS-PWC2015-0805-1314

    CustomSLR-Dual-Strap-DPS-PWC2015-0805-1317

    How Does it Feel?

    What I enjoyed about the Dual Strap was how comfortable it was with the weight. I was wearing about 16lbs (7.2kg) of gear and it was no different than using a solid backpack with cameras stowed inside. In fact, short of a waist belt, this setup is just like a backpack with two comfortable stretchy neoprene shoulder straps.

    How Does it Work?

    In practice the unit takes some getting used to during initial setup. Having two cameras dangling from your hips also takes a different sense of awareness when maneuvering in crowds, or around hard surfaces. Keeping your hands on your cameras helps with stability.

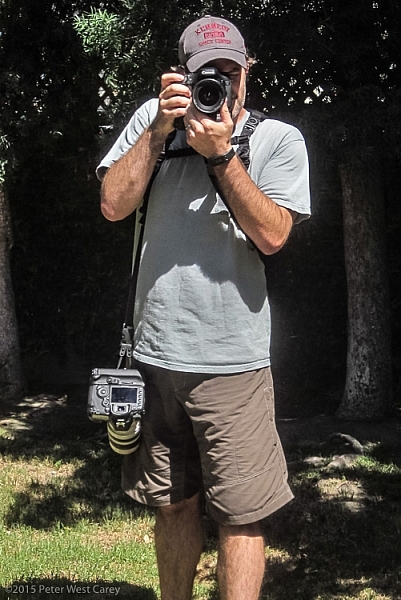
    Each camera is free to glide up and down its own strap, yet is kept ready at your fingertips. When one camera is held up and the weight on that strap lessened, the second camera stays in place, without swinging to the side or sliding off your shoulder, as has been my case before using this strap.

    CustomSLR-Dual-Strap-DPS-PWC2015-0805-1348  CustomSLR-Dual-Strap-DPS-PWC2015-0805-1349

    CustomSLR-Dual-Strap-DPS-PWC2015-0805-1351 CustomSLR-Dual-Strap-DPS-PWC2015-0805-1352

    I realize I look a little odd with this setup on my body. But the comfort and ease of use, quickly quieted my ego from worrying too much about what others think.

    In short, the Dual Camera Strap now goes with me wherever I take both my camera bodies. I can break it down quickly for single camera use (I typically leave the sternum strap section attached to make setup quicker) and when I know I want both cameras at hand, there is simply no replacing this unit.

    Additionally, I could still wear my F-Stop Lotus backpack over this setup, although range of motion was slightly lessened, but not enough to stop me from using the two together.

    Conclusion

    Dorkiness be damned, this thing works, and it works well. I wore the strap for more than 40 hours in a month, and after I figured out the best way to put it on (straps first, then attach cameras), it was a piece of cake.

    There is something empowering having two cameras at the ready, and no longer worrying about one of them slipping off your shoulder. The Custom SLR Dual Camera Strap performs as advertised, and is a great solution if you have a two camera carrying problem.

    Disclaimer: This product was provided to the author by the manufacturer for the purposes of doing a review. All reviews on dPS are 100% unbiased and based on the author’s opinions only. 

    googletag.cmd.push(function() {
    tablet_slots.push( googletag.defineSlot( “/1005424/_dPSv4_tab-all-article-bottom_(300×250)”, [300, 250], “pb-ad-78623” ).addService( googletag.pubads() ) ); } );

    googletag.cmd.push(function() {
    mobile_slots.push( googletag.defineSlot( “/1005424/_dPSv4_mob-all-article-bottom_(300×250)”, [300, 250], “pb-ad-78158” ).addService( googletag.pubads() ) ); } );

    The post Custom SLR Dual Camera Strap – Product Review by Peter West Carey appeared first on Digital Photography School.


    Digital Photography School

  • Custom SLR Dual Camera Strap – Product Review

    CustomSLR-Dual-Strap-DPS-PWC2015-0805-1314To be honest, I thought the Custom SLR Dual Camera Strap looked like a dorky idea when I was first asked to review it. The idea is simple: sometimes you need to carry two cameras (especially heavy cameras) and the logistics of such a feat have always been cumbersome. One strap over this way and the other maybe off of the other shoulder? Double criss-cross?
    Custom SLR, a company that got its start thanks to a number of successful Kickstarter campaigns, crafted a solution using one of their best selling camera straps, times two. They sent me a copy of the Dual Camera Strap to test during a small boat cruise with UnCruise Adventures in Alaska last month. I was excited for the trip as it would mean I could take both my cameras and long lenses (28-300mm and a rented 150-600mm) for both close and distant images of marine wildlife. Having that range from 28mm-600mm (on crop factor cameras) always available was important to me so I was willing to try the Dual Camera Strap, with hopes I wouldn’t always be fumbling for the right camera.

    What is it?

    The unit is really five parts in one. Two of those parts are copies of the traditional Glide One Strap System by Custom SLR, meant to hold one camera, over one shoulder. Then they introduced a unique buckle connector that fits in the middle of your back. Lastly, there are two small pieces of webbing that add a sternum connector.

    CustomSLR-Dual-Strap-DPS-PWC2015-0805-5547

    The great thing about this setup is it uses two straps that can work alone. You’re not stuck with always using the dual setup when you only want to use one camera.

    Let’s take a look at how it all fits together then I’ll tell you about my experience with the setup.

    Anatomy of a Dual Camera Strap

    The setup starts with the individual straps. Each has a piece of split neoprene to help evenly distribute weight on your shoulder. On the underside of the the split strap is a silicone print to provide traction, ensuring the strap doesn’t move around your shoulder.

    CustomSLR-Dual-Strap-DPS-PWC2015-0805-5550

    Cameras are connected to a strap via a beefy quick-release clip attached to a tripod screw, with a loop to make hand-tightening possible (no need for tools). I have used one of these single straps in my daily photography and travels to over a dozen countries for the past three years. It’s now getting a little frayed but never once has the screw mount or quick-release failed.

    Next there is a connector that attaches the two straps in the middle of your back. Simply disconnect each single strap and clip them into the connector. The clips are one-way, making the process fairly idiot-proof.

    CustomSLR-Dual-Strap-DPS-PWC2015-0805-5555

    Lastly, to keep the system stable, you need to insert a sternum strap that clips the two single straps together in the front.

    CustomSLR-Dual-Strap-DPS-PWC2015-0805-5551

    Having received my unit already setup, I took it apart, jumbled up the pieces, and tried to put it all together at a leisurely pace. It took me one minute and 50 seconds to go from two single straps to the Dual setup, and that included making a small error and correcting it. It’s pretty easy.

    CustomSLR-Dual-Strap-DPS-PWC2015-0805-5554

    CustomSLR-Dual-Strap-DPS-PWC2015-0805-5556

    Attach Your Cameras

    When changing from single straps to dual, the straps first need to be shortened. This is because each strap is simply looping around one shoulder and not across your body.

    Next, screw in the tripod mount, called a C-Loop, to each camera. As Custom SLR likes to create a whole inter-functioning ecosystem, the C-Loop also works with their M-Plate tripod quick release system. This additional plate gives better stability when using long lenses, but is sold separately (shown in second photo).

    CustomSLR-Dual-Strap-DPS-PWC2015-0805-5553

    CustomSLR-Dual-Strap-DPS-PWC2015-0805-5552

    Suiting-Up – Harness First, Then Cameras

    Now to put it all together! It’s best to put on the harness first before attaching cameras. It can be done the other way around, but it is quite clunky and will bang up your cameras. Then, clip each camera into your preferred side.

    CustomSLR-Dual-Strap-DPS-PWC2015-0805-1314

    CustomSLR-Dual-Strap-DPS-PWC2015-0805-1317

    How Does it Feel?

    What I enjoyed about the Dual Strap was how comfortable it was with the weight. I was wearing about 16lbs (7.2kg) of gear and it was no different than using a solid backpack with cameras stowed inside. In fact, short of a waist belt, this setup is just like a backpack with two comfortable stretchy neoprene shoulder straps.

    How Does it Work?

    In practice the unit takes some getting used to during initial setup. Having two cameras dangling from your hips also takes a different sense of awareness when maneuvering in crowds, or around hard surfaces. Keeping your hands on your cameras helps with stability.

    Each camera is free to glide up and down its own strap, yet is kept ready at your fingertips. When one camera is held up and the weight on that strap lessened, the second camera stays in place, without swinging to the side or sliding off your shoulder, as has been my case before using this strap.

    CustomSLR-Dual-Strap-DPS-PWC2015-0805-1348  CustomSLR-Dual-Strap-DPS-PWC2015-0805-1349

    CustomSLR-Dual-Strap-DPS-PWC2015-0805-1351 CustomSLR-Dual-Strap-DPS-PWC2015-0805-1352

    I realize I look a little odd with this setup on my body. But the comfort and ease of use, quickly quieted my ego from worrying too much about what others think.

    In short, the Dual Camera Strap now goes with me wherever I take both my camera bodies. I can break it down quickly for single camera use (I typically leave the sternum strap section attached to make setup quicker) and when I know I want both cameras at hand, there is simply no replacing this unit.

    Additionally, I could still wear my F-Stop Lotus backpack over this setup, although range of motion was slightly lessened, but not enough to stop me from using the two together.

    Conclusion

    Dorkiness be damned, this thing works, and it works well. I wore the strap for more than 40 hours in a month, and after I figured out the best way to put it on (straps first, then attach cameras), it was a piece of cake.

    There is something empowering having two cameras at the ready, and no longer worrying about one of them slipping off your shoulder. The Custom SLR Dual Camera Strap performs as advertised, and is a great solution if you have a two camera carrying problem.

    Disclaimer: This product was provided to the author by the manufacturer for the purposes of doing a review. All reviews on dPS are 100% unbiased and based on the author’s opinions only. 

    googletag.cmd.push(function() {
    tablet_slots.push( googletag.defineSlot( “/1005424/_dPSv4_tab-all-article-bottom_(300×250)”, [300, 250], “pb-ad-78623” ).addService( googletag.pubads() ) ); } );

    googletag.cmd.push(function() {
    mobile_slots.push( googletag.defineSlot( “/1005424/_dPSv4_mob-all-article-bottom_(300×250)”, [300, 250], “pb-ad-78158” ).addService( googletag.pubads() ) ); } );

    The post Custom SLR Dual Camera Strap – Product Review by Peter West Carey appeared first on Digital Photography School.


    Digital Photography School

  • A 10 Step Personal Development Strategy for Photographers

    In this article I want to lay some foundations, on which I will build in future articles. I am not talking here about image development, but your personal and professional development as a photographer. As a full-time working photographer, I am well aware of the 10,000 hours I have invested in my art and craft – not just once, but many times over the last two decades – and it doesn’t end. This is ongoing and if you don’t continue to invest in your personal development, you will not improve and remain static.

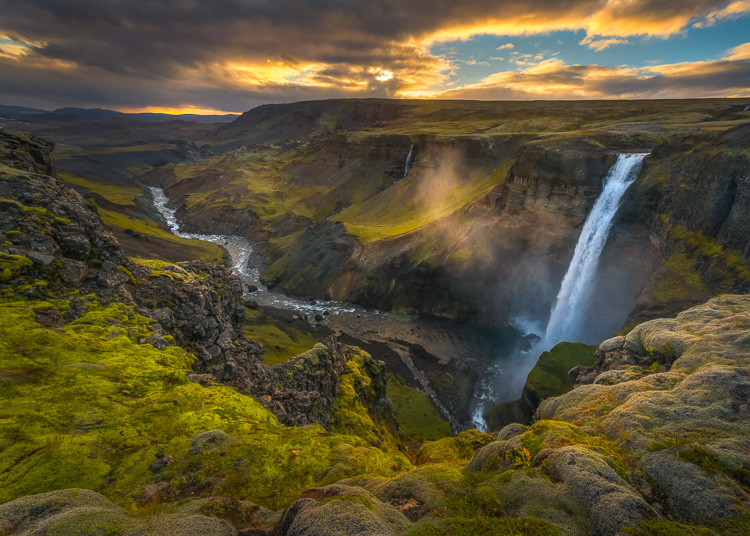
    Hidden Kingdom

    Regardless of whether you are at the start of your journey, having just recently picked up a camera, or have been working in the field for decades, this overview will apply and help you improve.

    “If you don’t know where you’re going, don’t complain about the destination!”

    1: Nobody is born brilliant

    Pick any field: from music, sports, arts, academia, whatever, and pick the best-known people in any of them. They started off as babies playing in mud and sucking their thumbs. Yes, they applied themselves and made life choices to get where they are, but they are all the product of hard work and dedication. We all have a capacity to be brilliant in our own way.

    2: Education should never stop

    You invest the best part of your childhood in school and the better part of your 20’s and 30’s climbing ladders at work – whatever that may be. This is normal; you accept it as the necessity of making a living.

    When it comes to hobbies and pastimes we vary in our commitment to study. There are plenty of folks who only do photography to wind down on the weekend and get away from the stress of a professional career. If that’s you, don’t worry, as I often say, “Learning should be Fun.”

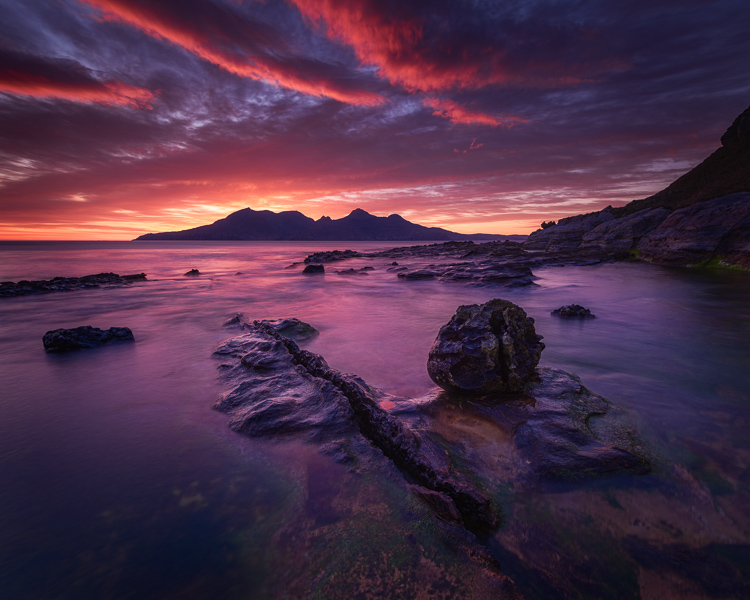
    Into the West

    3: Effortless development

    Be inspired – surround yourself with excellence. When I started to get serious about wanting to become a better photographer, I sought out the very best photography in the fields that interested me. This can be found in many of the excellent online forums these days – images are everywhere and you need to find the best.

    Why? Excellence inspires excellence. It allows you to set the bar for yourself and establish a standard for which you aspire. I don’t mean to offend, but if you surround yourself with mediocrity, it will drag you down and create a “that’s good enough” mentality.

    Inspiration should be used to help seek out styles you gravitate towards, themes, moods and forms of expression. Plagiarism is a great way to grow, we all do it, but I would recommend trying to develop your own style as soon as you can, rather than copying others. Why, because you’re the best in the world at being you!

    4: Truly evaluate where you are right now

    This is actually harder than it sounds, as you are trying to compare yourself to a massive spectrum of talent out there in the world. Many times I have gotten to the stage where I thought, “Hey, I’m not bad at this.” Only to find the work of some unknown guy from Romania, whose work blew me away! Honest evaluation can be very humbling.

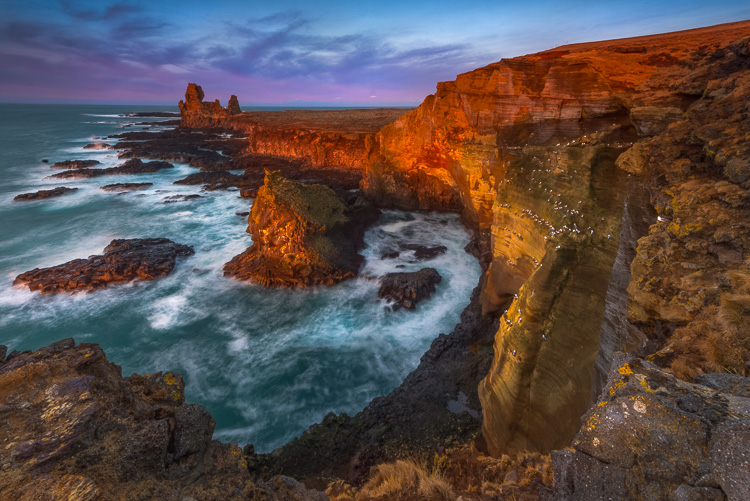
    Life on the Edge

    Remember when you were a kid and you used to get your height measured with a pencil mark on the kitchen wall? Remember that feeling when you’d grown an inch over the summer? That’s what photographic development is like – you can feel the inspirational creative muscles stretching and growing.

    5: Ask yourself WHY?

    I can answer one question about every one of my images, “Why did I make it?”

    To be honest, those reasons have changed significantly over the years, especially now this is my career. But typically the more you understand why you are making (or taking) photographs, the sooner you can begin to channel purpose, and specific expression into your work.

    I have been through every stage of WHY in my own development. I know when I am forcing it and making images just because I have a camera in my hand. I know when I am making contrived compositions, because I feel I have to make images, even when I don’t feel like it. Equally, I know when I am on fire, running on instinct in the fast lane, charged up with a lot of technique and subconscious understanding.

    Professional photographers often talk about utility, having a preset use for an image even while it is being envisaged. For example, while I am in the field, I may be thinking, “That image can be used to advertise a workshop, that one will work well in an eBook or article, that’s a portfolio image to showcase my work, that one is great for Social Media” and so on.

    Symphony of Light

    6: What is photography?

    I am well aware that you could ask a million people and get a million different answers, but this is mine!

    “Photography is a visual language: its aim is to communicate something to another person. That something is in the voice of the person who made the photograph. The clearer the photographer’s intention, the more likely the viewer will understand the intent.”

    As with spoken language, the more articulate you are, the better you can be understood – by people who understand your language!

    Leading on from the why in point #5 above, you have to ask yourself what? – “What am I trying to say with this photograph?”

    7: Speak the language of photography

    When you admire an image, think about words that explain why you like it. I would imagine the majority of those words would be adjectives, for example: Moody, evocative, dramatic, calm, reflective, soothing, energetic, sad, happy, etc.

    Only photographers use technical language to describe photographs. Shutter speeds, exposures, apertures, noise, depth of field, etc.

    When you make your images, concentrate on the adjectives. If you make an image to be moody, you can bet the viewer will think it is moody too. Advertising agencies do this all the time, they manipulate their viewers with subliminal messages in film, photographs to make them more likely to buy a product.

    This was one of the biggest developments in my own images – I always try and instil a very distinct mood, or feeling, into my work. Start to think in terms of key words that describe your work.

    The Wester Isles

    8: Understand the creative cycle

    Many people describe photography as a process – as if it is linear and follows a set path. In some regards this is true, and certainly from a teaching point of view it is the only way to explain it without melting your student’s brain.

    However, recall what it was like learning to drive a car, especially a manual transmission with a stick shift. All those things you have to learn to do simultaneously: steering, mirrors, signals, brake, accelerator, clutch, gears, changing lanes, avoiding pedestrians and cyclists. Now, you manage it with ease, totally subconsciously while having in depth conversations with passengers, kids in the back, or on a hands-free phone to the office.

    Photography is the same – the trick is to determine what can become subconscious, and what needs to be at the front of your mind. I call it the creative cycle because there is feedback.

    You are unique, because when you look at one of your own photographs, it triggers memories for you – you were there when it was taken and you crafted it in-camera and in processing. When you see the final image, you get it. Other viewers only get what you show them – they have no experiential perspective. You need to be super-articulate with your images to allow a viewer to feel something.

    The photograph itself forms an emotional bridge between the event experienced by a photographer and a viewer who only experiences it second hand – but gets it!

    9: Disciplines

    The First Dawn

    Again, I’ve seen the whole process written in many ways, with lots of subsets. For me it is this:

    Seeing – Shooting – Expressing

    You see something; you organize it, get the light in the camera and then use a computer (typically these days anyway) to make it look the way you want. You can hold up that image and compare it to what you wanted to say about that moment in time, and determine how successful you have been in your expression.

    How other people feel about it is a product of how well you get that message across.

    The shooting phase is mostly technical and you should become very adept with your camera. Know what it does, know how to expose well and get the light into the computer where it’s useful.

    10: Aim for second impressions

    The world is full of images. We see thousands every day, and every one we see sparks a snap decision in our brains.

    • First Impression – Wow/Yuk – I like/don’t like that (formed in maximum two seconds)
    • Second Impression – Wait a minute, there is something about this one! (10-30 seconds)
    • Third Impression – This image changes my view of the world, inspires me, makes me want to change, etc. (one minute to the rest of your life)

    The Heart of Me

    If you are going to open your mouth, you normally think before you speak. It saves a whole lot of trouble. Do the same before you post an image online. You’re still saying something – just with an image instead of words. It represents you; it is a statement from you. Value your work and value what you have to say – then others will too.

    googletag.cmd.push(function() {
    tablet_slots.push( googletag.defineSlot( “/1005424/_dPSv4_tab-all-article-bottom_(300×250)”, [300, 250], “pb-ad-78623” ).addService( googletag.pubads() ) ); } );

    googletag.cmd.push(function() {
    mobile_slots.push( googletag.defineSlot( “/1005424/_dPSv4_mob-all-article-bottom_(300×250)”, [300, 250], “pb-ad-78158” ).addService( googletag.pubads() ) ); } );

    The post A 10 Step Personal Development Strategy for Photographers by Alister Benn appeared first on Digital Photography School.


    Digital Photography School

  • A Guide to Black and White Conversion in Lightroom

    Vintage, retro, moody, classic are all adjectives that might be used to describe black and white photographs. It may seem counter-intuitive in an age where cameras are lauded for their abilities to render colors and skin tones in super accurate or pleasing ways, to just go and eliminate all the colors in post-processing. Nevertheless, the timeless qualities of grayscale images continue to persist, and the alluring beauty shows no sign of subsiding.

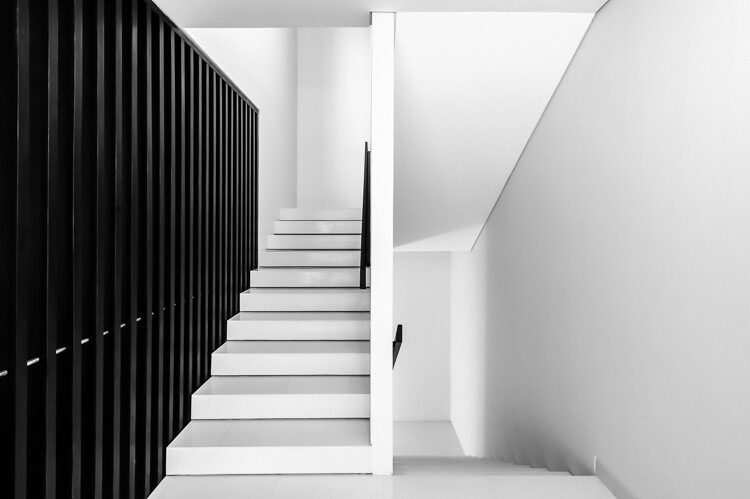
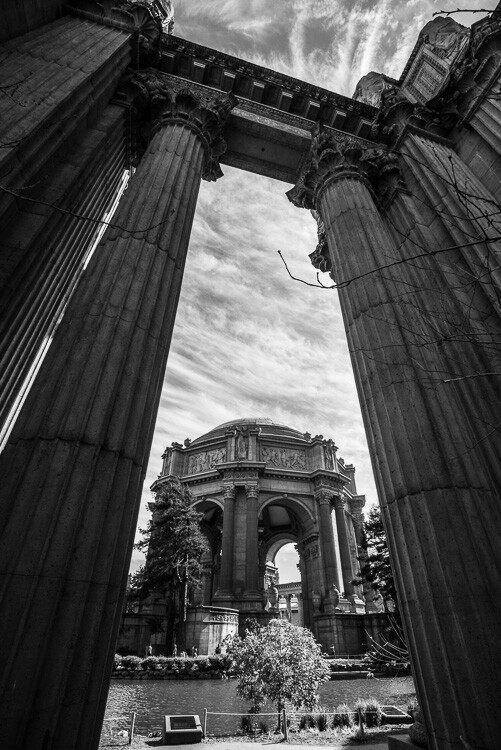
    A black and white architectural photo

    Since most of us see in color, black and white images seem to be inherently abstract.

    In Lightroom (LR), the transformation of a photo from color to black and white is simple – drag the Saturation slider all the way to the left. The end.

    I’m only half-joking. Although this will drain all of the color from the photo, there are many other considerations to mull over, various entry points to begin the process, and an immense amount of control and fine-tuning to explore.

    Image Selection

    Naturally you will need to start with a photo, so the decision as to which photo is a good candidate to make the transformation to black and white is your first task.

    There are a few characteristics in a photo that would make it qualify as a good candidate. Obviously any photo that has strong colors, which add strength or appeal may not make the cut. You would be doing yourself a disservice by taking a beautiful, saturated sunset shot only to rob it of its finest feature.

    I prefer to convert photos which have a lot of repetitive detail, high contrast, or have an inherent look that would be accentuated by converting to black and white. Architectural shots work well, and sweeping landscapes with puffy clouds against a blue sky stretching off into the horizon can be dramatized tastefully.

    Without any colors to lean on, black and white images must have other strengths. Your black and white images just may have to rely a tiny bit more on the subject, composition, emotion or lighting. This is a good thing. Thinking in black and white can help train your eye to look for other photographic strengths which will make your color images that much stronger as well.

    Where to Start

    In Lightroom there are several features built-in that enable you to control the look of your black and white images. Let’s take a look at their dedicated black and white converter.

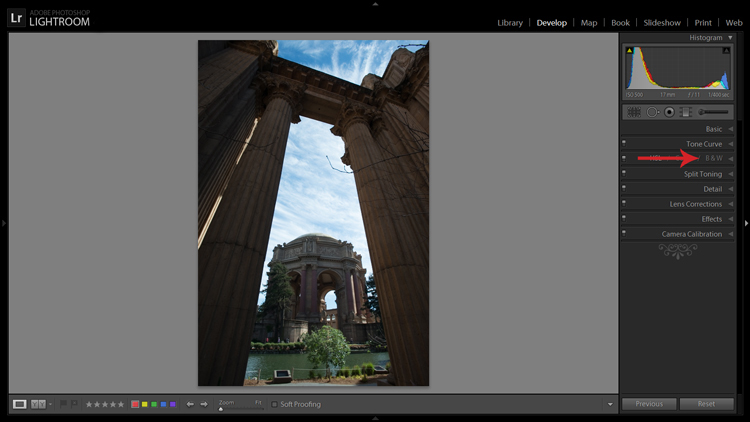
    LR-bw-conversion

    The B&W sub-panel gets your images to grayscale in one click.

    If you simply click on the B&W panel in the Develop module, LR converts the image to gray scale. The same thing can be accomplished at the top of the Basic panel where it says Treatment by selecting Black & White.

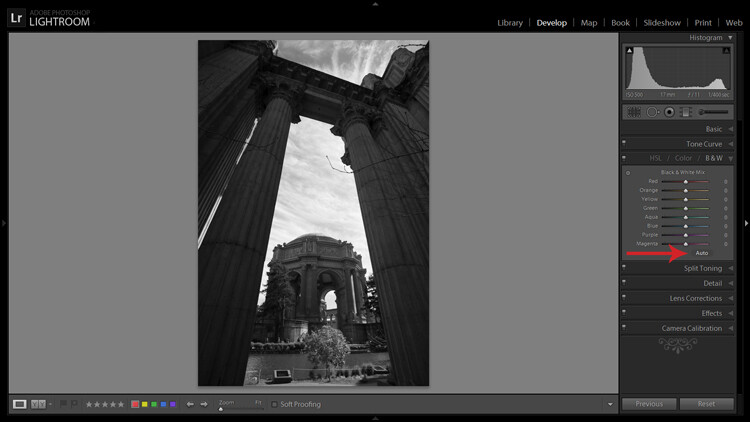
    Note that when you do this the eight Black & White Mix sliders are all zeroed out. You may also note that there is a curious little oval-shaped Auto button hanging out underneath the sliders. What might this do? In case you didn’t guess, LR will use its own infinite wisdom to evaluate your image and adjust the color tones to what it thinks is appropriate. I’ve never clicked that button and said “wow” but you never know.

    LR-bw-conversion-2

    The Auto button adjusts tones as LR sees fit, but I find further editing is usually necessary.

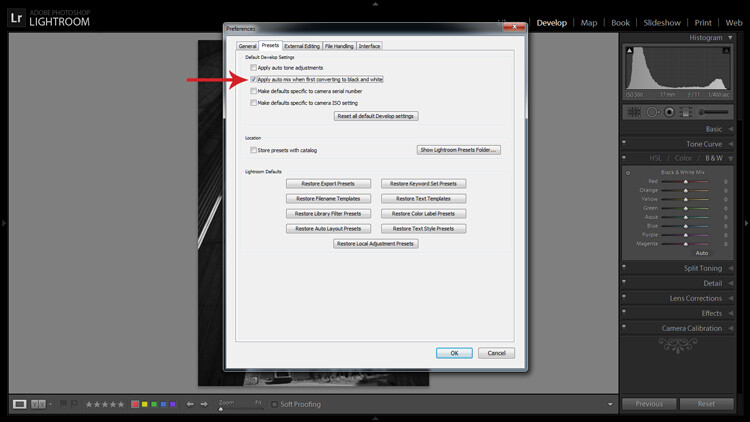
    If you like the settings that LR chooses for you with the Auto setting you can have it applied automatically every time you convert an image to black and white by navigating to Edit>Preferences and under the Presets tab, check the box that says: Apply auto mix when first converting to black and white, as shown below.

    LR-bw-conversion-3

    You can have LR instantly apply its automatic black and white settings upon conversion by navigating to Edit>Preferences and checking the appropriate box.

    Filters

    Before you open Pandora’s Box and start dragging sliders all over the place, let’s see what other kind of shortcuts LR has to offer.

    Within the Navigator panel is the handy Presets menu. The first three selections are dedicated black and white preset menus including Filter Presets, Presets and Toned Presets. The 25 presets found within these menus are pretty cool and are way more powerful one-click options than the Auto button.

    A sample of LR's black and white filters

    LR is loaded with 25 black and white presets to give you some quick conversion options.

    The filters can also be used as jumping-off points from which to work in your editing endeavours.

    Start with the Basics

    I would like to preface this section with something to keep in mind when converting an image to black and white and processing it: LR edits that may appear to affect colors only, also effect tones and contrast in grayscale images. For example, although I never change them in my black and white processing, the White Balance and Tint sliders are active, and can be used to alter tones in your black and white photo.

    The rest of the sliders, in both the Basic and Tone Curve panels, do the same for a black and white image as they do for a color one. You can be more zealous with contrast since there are no colors to be over/under saturated. I also find that the Clarity slider works especially well to tease out tons of detail in black and white images. Beware, however, that it can be unkind to wrinkles and blemishes in portraits, unless that is the look you are going for.

    Simply increasing the Clarity on a black and white image can add a lot of drama. No other edits have been made to the above photo except increasing the Clarity to 100 per cent.

    Simply increasing the Clarity on a black and white image can add a lot of drama. No other edits have been made to the above photo except increasing the Clarity to 100 per cent.

    The HSL/Color/B&W Panel

    I briefly touched on this earlier when mentioning the the Auto setting. So what happens when you start messing around with all of those sliders? Well, if you’re anything like me when I was fumbling my way through LR back in the day, you’ve already gone through and started indiscriminately throwing sliders all over the place.
    What they do is increase or decrease the luminosity of the corresponding color in the original image, which is now represented in various shades of gray. If you’ve already applied one of LR’s black and white filters these sliders may not be zeroed out any longer.

    In addition to adjusting the individual sliders, there is also a click and drag (target adjustment) tool similar to the one found in the Tone Curve panel, and it’s pretty sweet. Once you activate the tool, click on an area in your image and start dragging, you will notice that LR will not only adjust one slider, but will combine multiple sliders to pinpoint the tones you wish to adjust.

    LR-bw-conversion-4

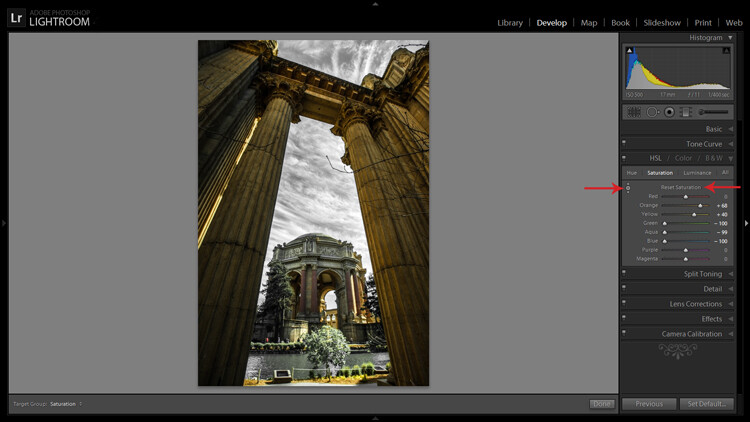
    The Targeted Adjustment Tool (left arrow) works well to isolate colors to desaturate. Holding the Alt key presents you with the option to reset all the sliders at once to start fresh (arrow on the right) – this option is available in many of LR’s adjustment panels.

    Another approach to this whole black and white post-processing thing can also be initiated in the HSL/Color/B&W panel. If you select HSL and choose the Saturation sub-panel, you will be presented with another set of eight color sliders.

    These sliders provide you a quick and easy way to achieve selective color effects. You can start by dragging all of the sliders down to -100 and then add the colors you want to preserve. You also have a click and drag tool that works the same sort of magic as the one mentioned earlier.

    You can also select the All sub-menu which reveals all of the Hue, Saturation and Luminance sliders. Adjusting the Luminance sliders gives you control over the brightness of individual colors now represented in black and white.

    Utilizing the controls found within the Camera Calibration panel can give you similar, yet much more limited, control over your black and white tones.

    Split Toning

    If you’re looking to add a radical tint to your black and white images, the Split Toning panel is where you want to be. Okay, so it doesn’t have to be too radical but a little tinting can help alter the mood of your image.

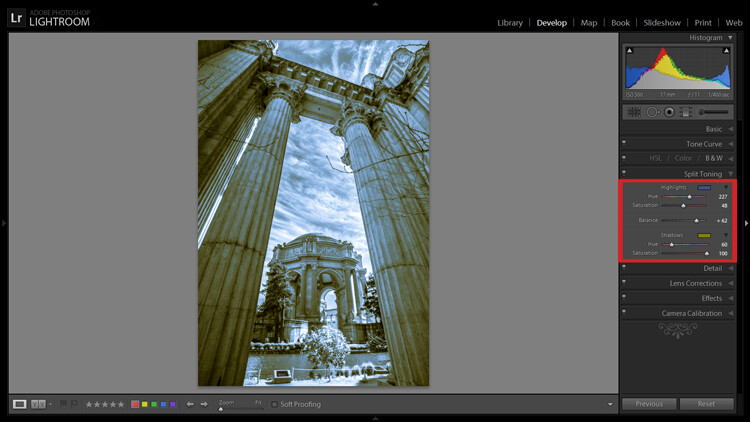
    The tool gives you control over the intensity of highlight and shadow tint colors, and the ability to balance the two however you wish. Subtle use of this effect can be a fantastic way to sneak a hint of color back into your photo, while still maintaining the charm of black and white.

    Split Toning allows you to tint an image's highlights and shadows different colors.

    Split Toning allows you to tint an image’s highlights and shadows different colors.

    The Split Toning panel is also where you can apply, and fine-tune, sepia toning effects to get that warm antique look that gives images a grungy and elegant look at the same time.

    As you have probably found out by this point, LR does a pretty thorough job at giving you a ton of control processing black and white images – from big global adjustments to small tweaks to tease out just the look you are going for. Don’t forget that you can get really creative by throwing the Adjustment Brush and Gradient tools into the mix, not to mention the plethora of plugins available on the market that give you even more options.

    Have you been met with some success in black and white conversion with Lightroom? Show off your results in the comments below.
    googletag.cmd.push(function() {
    tablet_slots.push( googletag.defineSlot( “/1005424/_dPSv4_tab-all-article-bottom_(300×250)”, [300, 250], “pb-ad-78623” ).addService( googletag.pubads() ) ); } );

    googletag.cmd.push(function() {
    mobile_slots.push( googletag.defineSlot( “/1005424/_dPSv4_mob-all-article-bottom_(300×250)”, [300, 250], “pb-ad-78158” ).addService( googletag.pubads() ) ); } );

    The post A Guide to Black and White Conversion in Lightroom by Jeremie Schatz appeared first on Digital Photography School.


    Digital Photography School

  • 9 Helpful Apps for Photographers

    Hopefully I’m not the only photographer in the world that tends to get quite excited when I discover a new app, or software that could definitely be used in my career. Yes I’m a bit geeky, but you know what – geeky is the new cool. Anyway, throughout my four years as a professional I’ve come across some really great Apps that you could use for your photography, even if you’re not a pro. What makes this more interesting, is that these Apps are not commonly talked about, so chances are they are probably new to you.

    So, let’s get to it:

    Quick Disclaimer: I am in no way affiliated with, paid by, or asked to list any of these apps/programs. I am not rewarded in any way from any of the software creators. This is purely a list of apps that I have found useful, besides the all too famous ones like Photoshop and Lightroom.

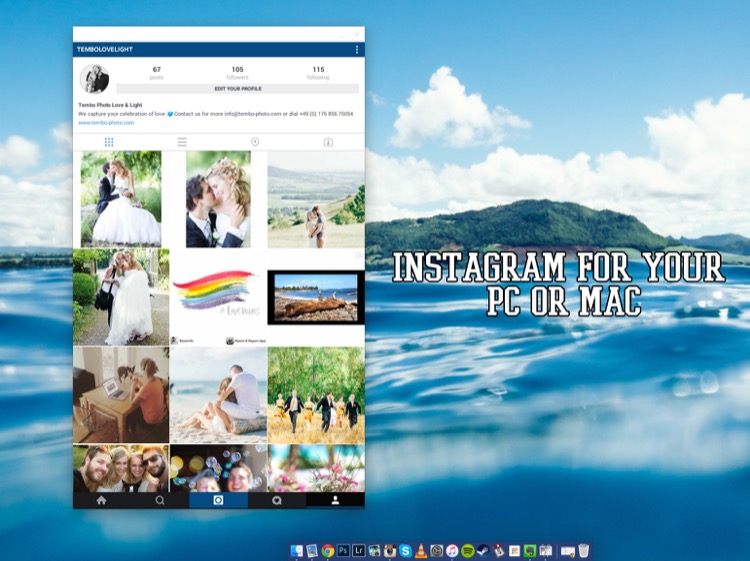
    1) Instagram (Mac and PC – $ 0.00)

    Instagram

    To get this app to work you need to download and install both parts:

    • ARC Welder extension for Google Chrome
    • Instagram App Direct Download:

    Have you ever wanted to share some of your photographic work on Instagram? Well, with this little app, it all becomes possible. Besides the occasional bugs here and there, it does its job just like it would on a phone – and makes sharing your work a real pleasure.

    Love:

    • Posting images from my computer. It’s easy, accurate, and can be a huge plus to your workflow as a photographer.
    • How simple it is to set up and get running
    • You can comment, like, post, and update your profile – just like you would on your phone.

    Love not so much:

    • Occasional bugs where it doesn’t load correctly.
    • I use a 27” screen, and it works there perfectly. However, when I’m using the 15” display on my MacBook, I cannot resize the window to show the bottom part (the most important part of the window). I’m sure there’s a solution for that somewhere. It does bug me sometimes, but a simple closing and reopening of the app normally fixes it.

    Conclusion: Definitely worth testing as I’m sure they will release updates to fix the issues so, it’s worth having it and following along.

    2) Blogo ($ 29.99 Mac Only in the App Store)

    Blogo

    If you’re not familiar with WordPress as a place to build and hold your website, I’d definitely recommend you go and check it out. It’s such a great platform to host a website (although, there is a bit of a learning curve). But, you are already familiar with WP, then Blogo is for you, especially if you love to write articles on your blog.

    Blogo presents you with a stylishly clean writing panel, with the ability to add images where you like, as well as easily add Alt-tags, descriptions, links, and other SEO necessities you would normally do directly in WordPress. The best part is, you can write away online and offline, travelling or at home. A simple Publish button will send your post directly to your website and voila, it’s done. Now, the cherry on the cake = it is INCREDIBLY easy to set up. It takes less than one minute to get up and running, plus, their support is second to none.

    Love:

    • The clean, stylish writing panel.
    • The features and its offline ability
    • Adding images and SEO tweaks to your images has never been easier
    • Previewing your post on your website (from within Blogo) without actually publishing it
    • Top notch support
    • Very fair pricing

    Love not so much:

    I personally had some issues with WPML (A multilingual plugin for wordpress that allows me to have a German and English website). But, they were right on top of it and are keeping me updated weekly (via personal emails) to let me know how it’s going.

    3) JPEG Mini (Free Trial, $ 19.99, Mac and Windows)

    Jpegmini

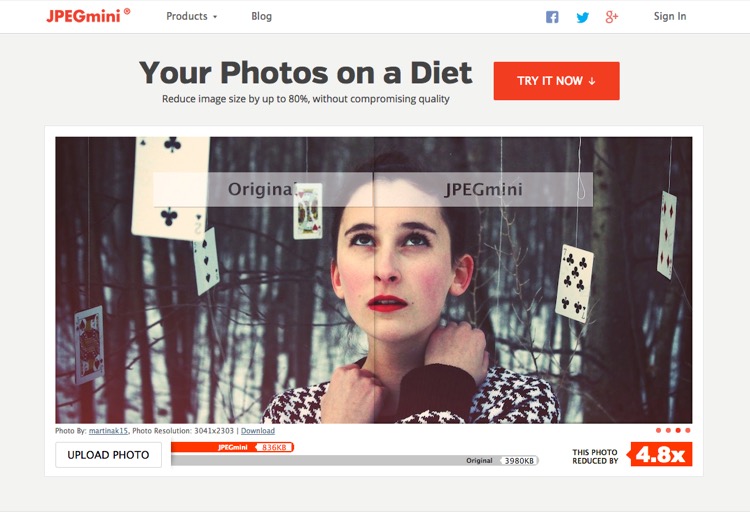
    While we’re on the topic of websites, if you take pride in your website and use it as a highly-valuable business tool, chances are you’ve come across the dilemma of choosing between high-quality, sharp images OR website load speed. Putting it in the simplest form, the higher quality the image, the bigger the file size. The bigger the file size, the longer the page takes to load. So, catch 22? Not with JPEGmini.

    JPEGmini does an incredible job of reducing the size of your JPEGS, yet retaining a very acceptable image quality. The best thing is, it’s an application so you can optimize your images on your desktop, offline, and get them ready to be uploaded. I use this program religiously for our website.

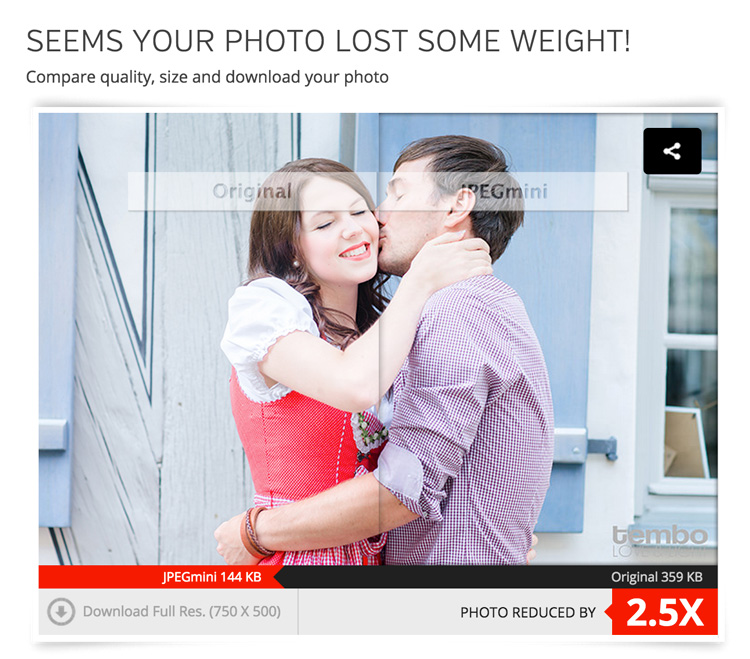
    750px size original image - 368kb

    750px size original image – 359kb

    750px-jpegmini

    JPGmini version 750px - 148kb

    JPEGmini version 750px – 144kb

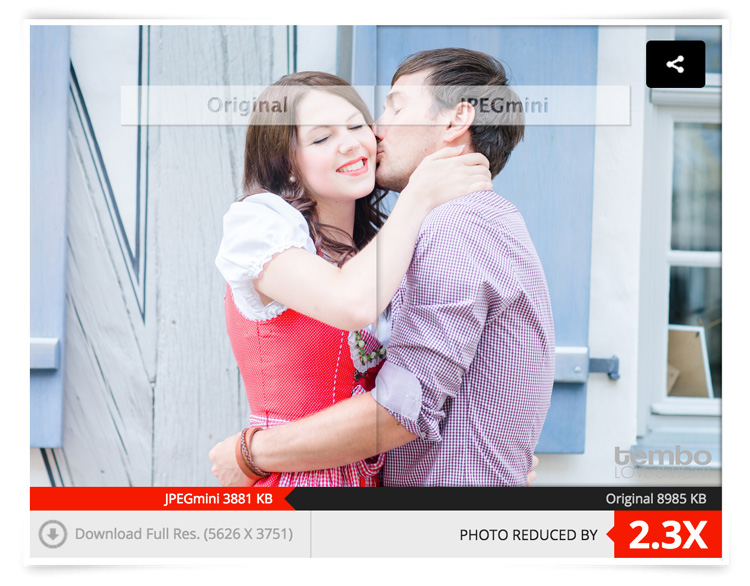
    This original image was 359kb (fairly big for an image online). After JPEGmini = 144kb!!! Notice a difference in quality? Here’s what it did with the full sized file:

    fullsize-jpegmini

    Love:

    • Their lossless compressions and the speed at which it works
    • Bulk optimizing. Drag as many images you want into the window and it’ll get right to work, showing you how much you’re saving
    • Fair pricing (especially if you’re going to use it a lot)
    • Options included to either overwrite the original file or make a copy of it.
    • Lightweight program that works offline
    • So easy to use
    • Mac and PC compatible
    • Free Trial
    • Lightroom Plugin

    Love not so much:

    I can’t find anything wrong with it.

    Conclusion: 100% worth it if you’re into blogging, and want to optimize images for your website, while keeping a fine ratio between size and quality. Do yourself a favor and at least try it, it’s quite incredible.

    4) Pixieset (free options as well as paid subscriptions for more features and storage space)

    Pixieset

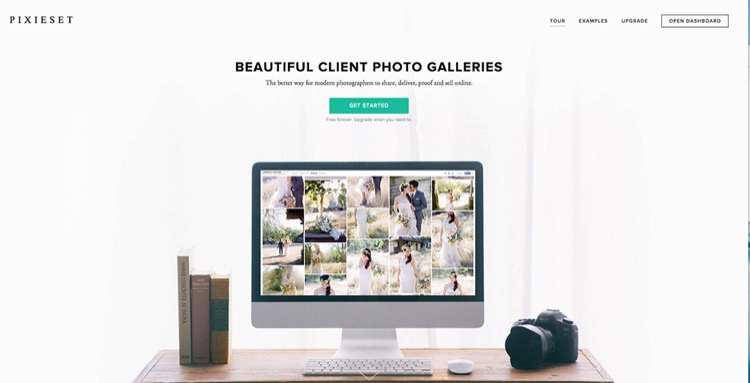
    There is a familiar battle between Pixieset versus PASS as there is the Nikon versus Canon debate. Both are great in their own ways, and both do the same thing. However, I personally use Pixieset. I have not really tried PASS, so please do not think I’m being negative towards it. I just found Pixieset to do exactly what I need, when I need it, perfectly every time. Why would I look for something else?

    So, what is Pixieset? It’s a stunning, clean, and professional way to create client galleries and send them out. It is so good, that 100% of my clients love it (no lie)! You upload the high-resolution files (pro version only) to the online gallery, design it with a few clicks and some information, and voila, it’s done. It’s responsive, easy to use for anyone (even grandma), and allows your clients to download the high-resolution files (pro version only) or smaller web sized images whenever they want.

    Love:

    • The responsiveness: Works amazing on computers as it does on mobile devices.
    • Allows downloads a range of file sizes (from Web, to high resolution, to Full resolution).
    • Let’s face it, the world has shifted to Digital mediums. This is the perfect solution to delivering your work to your clients.
    • Has a Lightroom plugin to automatically upload a set to Pixieset.
    • Frequent updates and features being added.
    • Password protected galleries to make them private.
    • Clients can favorite images and send that list to you, as the photographer, very easily. Perfect for when clients choose images for albums, or to make adjustments on files.
    • The above favorite list can be easily added into your Lightroom catalog to show only those files. Saves you having to manually go and choose the files.
    • Amazing support! These people love their customers.

    Love not so much:

    You can’t really edit offline, but that’s okay, it’s not to serious. That’s it.

    5) Automator (Built into OS X)

    Automator

    Ever stumbled upon this awesome little robot guy? Well, believe it or not – he’s actually very useful. Remember how I mentioned I always resize my images before compressing them with JPEGmini? Well, Automator is my go-to tool to resize (if I don’t want to do it in LR or PS). Why? Because it’s simple. That’s why. It does its job and it does it fast, and well.

    How does it work?

    Setting up Automations may seem a bit daunting at first, but it’s really simple once you get the hang of it. Here is the step by step guide:

    1. Open Automator on your Mac (I use spotlight, so CMD+Space and type in Automator)
    2. You’re presented with a drop down window giving you a list of documents you can create. For this purpose (resizing), create an Application
    3. Now, you need to add something to this Application. Above the list of all the options you can choose, there’s a search box. Type in SCALE. The last choice, Scale Images, is the one you want.
    4. Drag it over to the right into the open space.
    5. You will be asked if you want to add another function to the application about creating copies of the original file. Add it if you like, or don’t, it’s up to you. I don’t, I normally copy my High Res from their HD place, put them in a folder on the desktop and resize/rewrite over them. Simple. Just make sure you have them all in full resolution saved somewhere else!
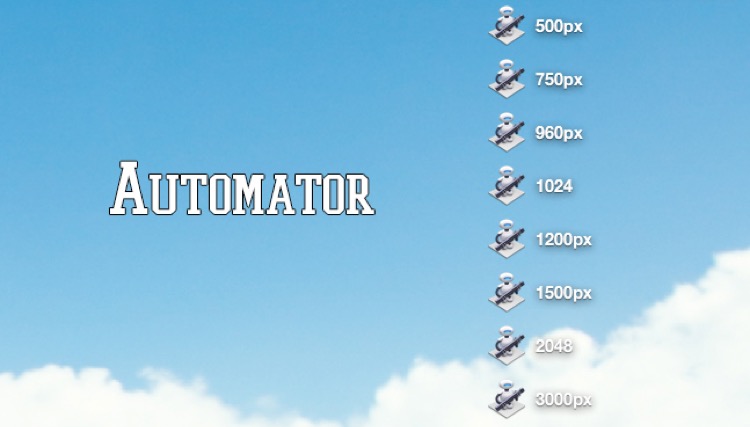
    6. Under the Scale Images options on the right, you can choose between: To Size (pixels) or To Percentage (%). Choose Size, then simply type in how big you want your images to be (on the longest edge). I’ve created eight different sizes and saved them all on my desktop. This way, if I need a 750px image, I have the automation there already. If I need 2048px for Facebook, it’s there.
    7. Choose your size and finally click on File > Export > Give it a Name > Choose Location > and BAM! There you go.
    8. To use it, simply drag your image files onto the actual icon of the Automator and away it goes. Resizing all the images you dragged (it supports bulk drag too, awesome huh?).

    6) Smart Albums 2 (free to try, $ 299.00, Mac and PC compatible)

    Smartalbum

    Before you run away after seeing the above price tag, just hear me out. If you’re into designing albums for your clients, be it Wedding Albums that you sell, or session albums, Smart Albums fixes that all-to-common problem of using really bad, boring, slow and unappealing design software that 99% of the printing companies offer. I mean, some of them are appalling.

    Smart Albums links up to some of the most popular printing companies around the world and lets you design your album the way you want, according to the sizes, spreads, and specifications of your chosen printing company. It does this in a beautiful, fast, and very easy to understand way. Yes, it’s expensive, but if it’s a business that you are running, you’ll make it back after one sale. Totally worth it, given the amount of time you save and how much more efficient the whole thing becomes. Of course, it’s free to try so give it a go before you decide if it’s really for you or not.

    They have over 30+ printing agencies that are compatible with Smart Albums, on an international level. They work in the USA, Europe, Africa and Asia. They’re constantly adding new agencies to their list, so the chances are high that your favorite printers will be listed.

    Love:

    • The simplicity of the program and how easy it is to use.
    • The humungous list of agencies that they can work with.
    • The support. Great help from their team.
    • Mobile support.

    Love not so much:

    The price is pretty heavy. But, the good thing is that it’s a one-off payment. No need to pay yearly (unless you want their cloud storage).

    7) AstroPad (Mac and iOS only: Free, or $ 20 for Pro Features)

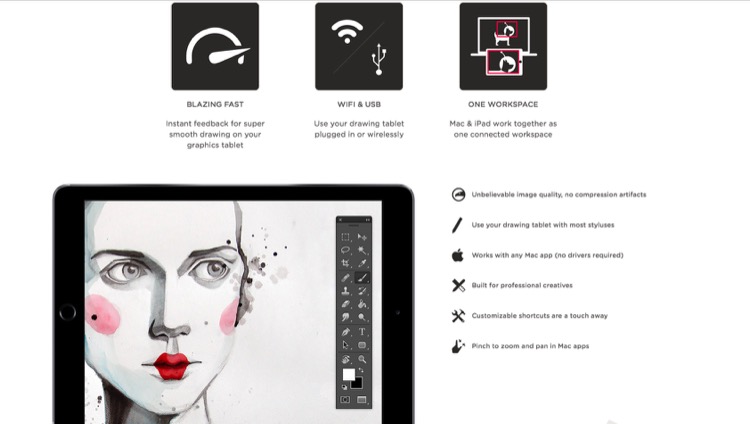
    Astropad

    Own an iPad? Want a graphics tablet to edit your photos with, like a Wacom? Want a free solution that works surprisingly well? Then, AstroPad is for you. After downloading the App both on your Mac and your iPad, you can pretty much control your entire computer from your iPad. Using touch gestures and special movements, you can set this app up to work for you, not against you. If you happen to have a stylus for the iPad, then you’re even closer to having a free graphics tablet. Definitely worth trying, as it’s free, and you may even improve your post-processing, especially if you need delicate movements with the brush tool.

    Love:

    • The idea of using an iPad as a graphics tablet.
    • That you can see your image on the iPad and paint/adjust/edit directly on it.
    • That it’s free.
    • That you can control more than just Photoshop.
    • Use it wirelessly (Wi-Fi) or plugged in (when you don’t have Wi-Fi).

    Love not so much:

    It can have a little delay in terms of what you do on the iPad and what comes out on the computer – only slightly, but enough to notice.

    8) Sunseeker ($ 9.99 iOS only)

    Sunseeker

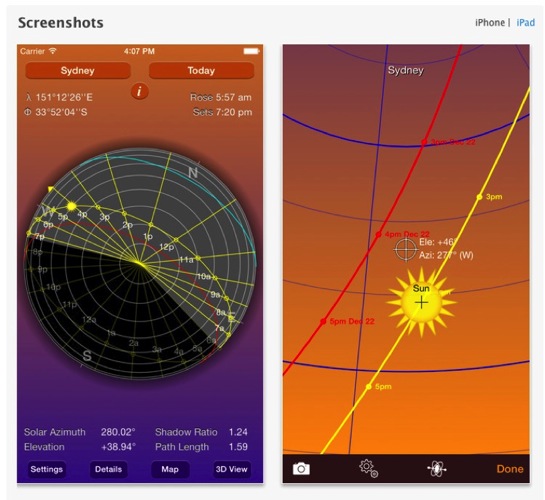
    Sunseeker is an app for the iPhone or iPad that augments reality into its software to track the sun. It’s surprisingly accurate, and is a perfect tool for photographers who rely on the sun for their shoots. It’s a great way to plan where the sun will be in the sky at a certain point in time. Can you imagine how easy it would be when location scouting?

    Simply point the phone up to the sky and follow the trail until you find where the sun will be. You can move a slider to change the position of the sun at a certain hour of a certain day. What’s great is that it uses your camera and projects its overlay on top of what you’re seeing. So, if there’s a building in front of you, you’ll see at what point the sun will just start to hide behind it; giving you valuable planning information as to when is the best time to do something.

    Love:

    • That it uses the camera to project the sun’s future and past placement.
    • That it’s simple, easy to use, and fits in your pocket (iPhone only).
    • A great planning tool that you should have with you. Even if you don’t use it too often, it does come in handy from time to time.

    Love not so much:

    The sliders to change the time of day, and the position of the sun are quite small, and to pin point an exact day can be quite frustrating as you almost always overshoot it.

    9) Tave (Free to try, $ 24 – $ 49 per month subscription)

    Tave

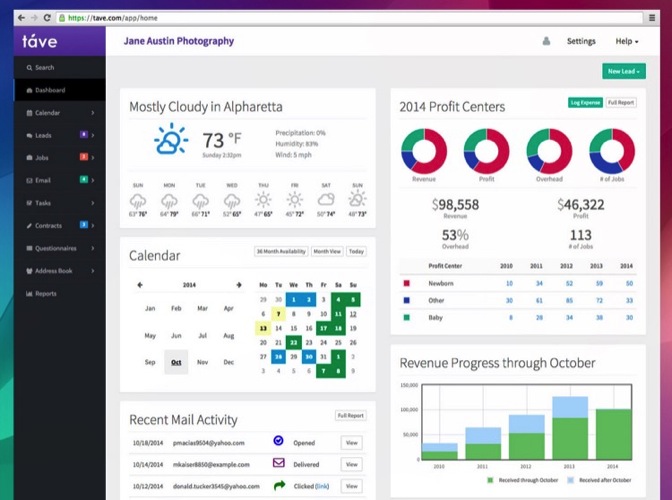
    Running a photography business can be quite chaotic if you don’t have a decent system or workflow. Keeping track of your clients, their anniversaries and important dates, logging your expenses and income, tracking weather, and planning the shoots can all add up to the mess. Tave solves that and 99+ things more. I was hooked on it the moment I set everything up.

    Love:

    • A complete business management tool that sits safely online, and can be accessed by more than one person (if you choose).
    • Amazing reports and financial tracking.
    • Huge customizations.
    • Great support. Offers live Chat right in your dashboard.
    • You can create questionnaires to send to your clients that will automatically record their answers, and place them in their respective job areas.
    • Verified by accountants.
    • Works internationally.
    • Works on mobile devices.
    • Tons of features!

    Love not so much:

    • It does require a fair amount of time investment to set it up. But once you do, it’s groovy.
    • It doesn’t work offline.
    • A little bit of a learning curve, but they have really great support, and are more than willing to help you along the way.

    Conclusion

    Those are the nine apps that I personally recommend and use. I hope that I’ve introduced you to some great things that you can use for your own photography. Again, I gain no benefit from listing these apps besides the satisfaction of actually sharing some information with you.

    What are your favorite apps for photography that aren’t talked about too often? I’m not talking about Editing Apps, as they’re everywhere, but any apps that you know of that are worth checking out? Let me know in the comments below.

    googletag.cmd.push(function() {
    tablet_slots.push( googletag.defineSlot( “/1005424/_dPSv4_tab-all-article-bottom_(300×250)”, [300, 250], “pb-ad-78623” ).addService( googletag.pubads() ) ); } );

    googletag.cmd.push(function() {
    mobile_slots.push( googletag.defineSlot( “/1005424/_dPSv4_mob-all-article-bottom_(300×250)”, [300, 250], “pb-ad-78158” ).addService( googletag.pubads() ) ); } );

    The post 9 Helpful Apps for Photographers by Shayne Thomas appeared first on Digital Photography School.


    Digital Photography School

  • 7 Tips to Help When You’re Stuck with Only a Prime Lens

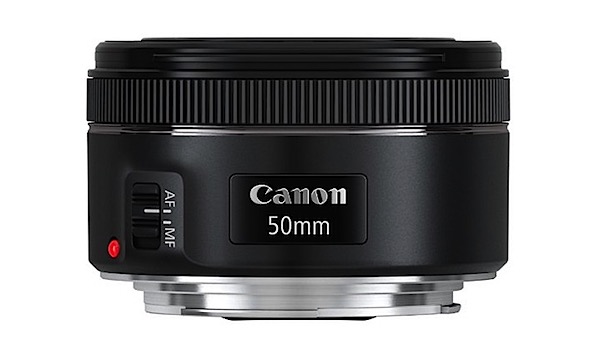
    As a photographer you must have flip-flopped back and forth between prime and zoom lenses. “Should I choose a prime today, or a zoom for its advantages?” If you have not done this for a purchase, you must at least have read the numerous articles which weigh the pros and cons of each. But what about when you are stuck with a lens that is not ideal for an event? For the sake of discussion and for this learning opportunity, let’s choose the 50mm prime lens, which is one of the most popular and affordable primes, and is made for every camera body known to man.

    Canon-EF-50mm-f1.8-STM-Lens.jpg

    If something comes up that is unexpected, that’s a good thing! Not ideal if you don’t have a long enough zoom or wide enough lens, BUT it could be worse. What if you didn’t even have your camera at all? So stay upbeat and realize with some ingenuity you can overcome the confines of being stuck with a prime lens.

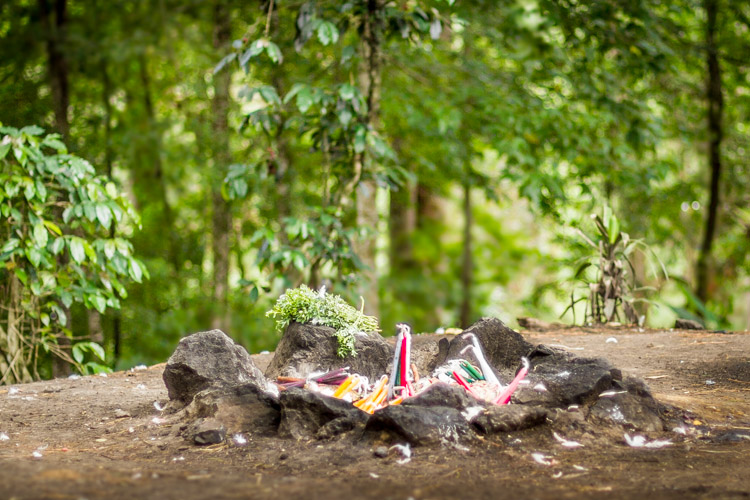
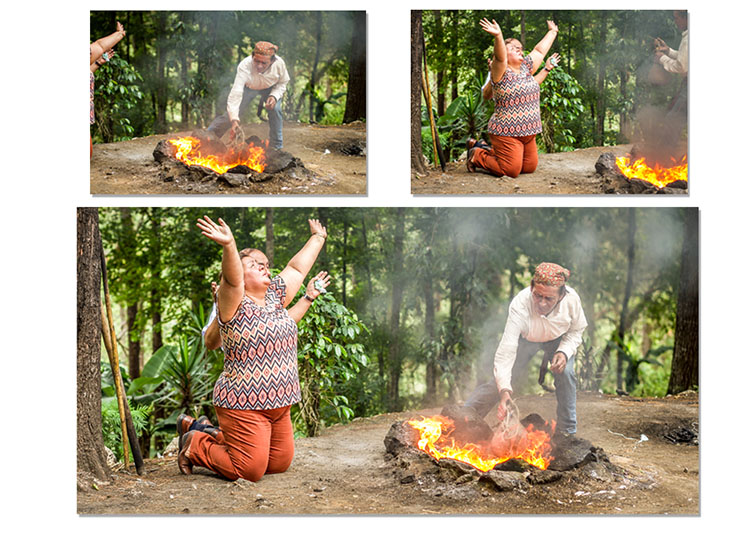
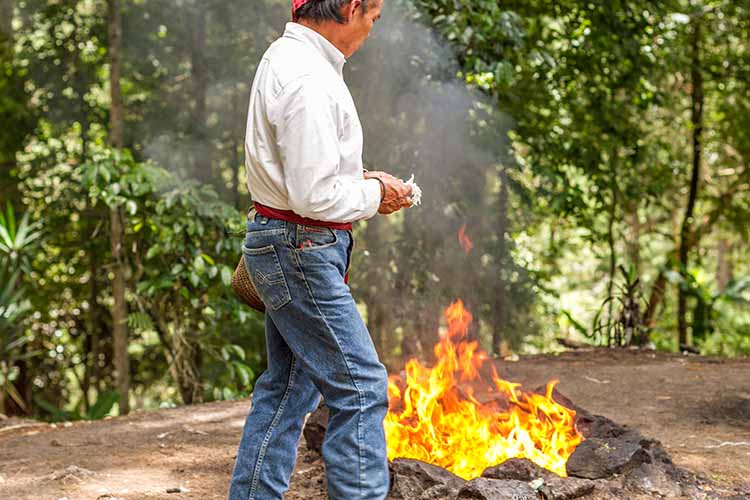
    As a personal note: This tutorial was inspired by a real event in Guatemala. I had chosen my 50mm for a walk-around lens as it is light, and I wasn’t expecting much as I went out to get a cup of coffee. Well, with a caffeine buzz I climbed a hill, and at the top an ancient Mayan ritual of sacrifice was being conducted for the dead. Maintaining cultural sensitivity I knew that it would be totally inappropriate to get my lens in their face. It was pertinent to maintain my distance for respect.

    1. Use shallow depth of field

    Prime lenses are known for being sharp, especially when you close down your f-stop. Yet when you are confined, or have limitations about how close you can get, or how agressive you can come across as a photographer, using your lens creatively is important. Thus, you may sacrifice some sharpness, add a little chromatic aberration (CA), etc., but you will also get a different style of shot from a lens that inherently has focal length limitations. Go for bokeh.

    001 F1.4 landscape resized from Lightroom (750px)

    2. Panorama for wider angles

    Use panorama techniques to combine images later in post-processing. If you can’t get a wide angle view, make one. Yes the feeling of the final composition will not be exactly the same as a true wide angle, as your foreground and background compression will be greater, but you will be able to give a cinematic effect. Combining images is an easy way to encompass more into your scene when you are limited by your focal length.

    006 Panorama resized 1

    These two images were combined to show the whole event of the shaman and the fire along with the family members.

    3. Shoot with the intention of cropping

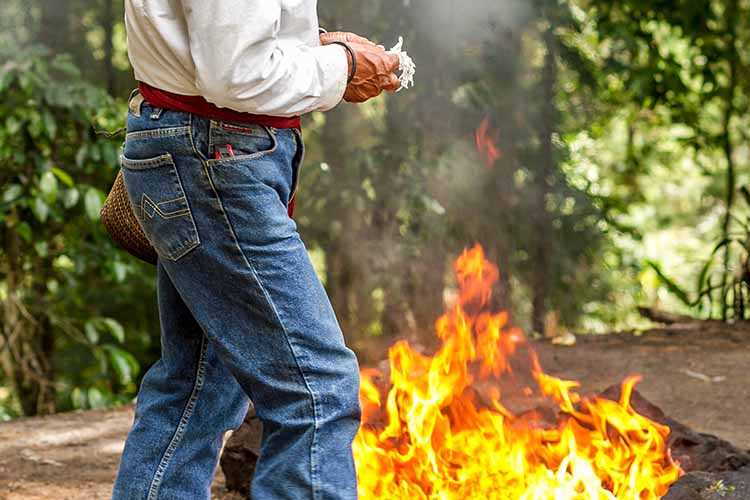
    Be conscious that cropping is available to you in post-processing. Don’t worry if a hand creeps into your frame, or there is a plastic bottle in the corner. If you consciously shoot for a crop to be performed later you can zoom-in on something specific. This again gives you flexibility and diversity. If you combine this with a shallow depth of field (suggestion number one) you will find that you can achieve a telephoto effect.

    003 Crop Before resized

    003 Crop After resized

    This image was shot for a crop, so cutting off the top of the head is not a problem if you know you will crop in closer in post-processing.

    4. B-roll footage

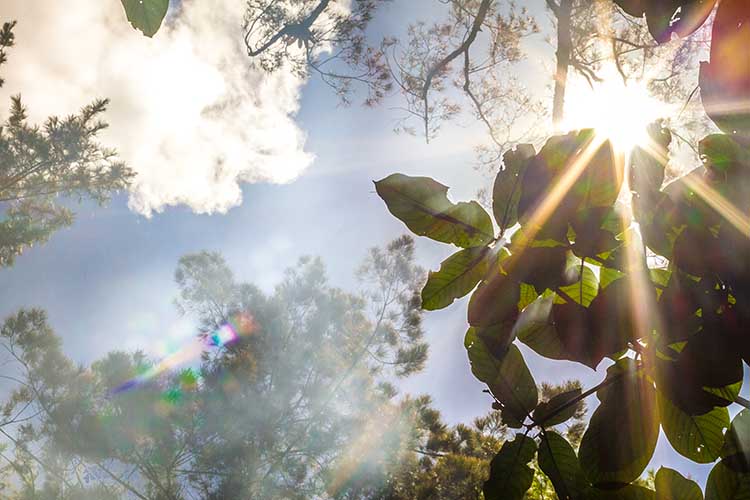
    Get photos of activities, reactions, or environmental surroundings which will add to the narrative of the event. If you can’t get any closer, and you have pushed your boundaries of being discreet, then look up, down, and turn around. In film (movies), these are generally called B-roll shots, which helps to transition from one camera angle to another, while also telling the story.

    004 B roll resized

    The smoke rising up, into the sun, amongst the trees, gives a feeling of the environment around the ceremony.

    5. Frame your subject with something in the foreground

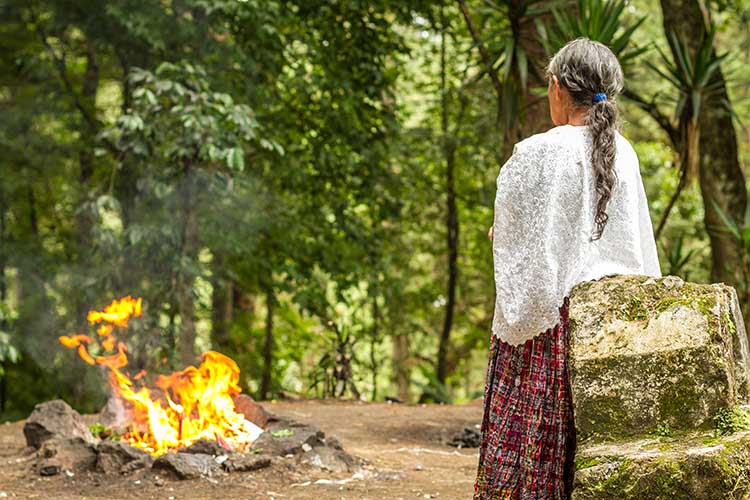
    Use a leaf, a stone or even another person to cut into the frame, which will both highlight your subject, by leading your eye to what you want the viewer to look at, and it will also create layers in the photograph. Layers add a sense of style and depth to your photography. Trying to use different techniques to create different perspective styles will really improve the overall quality of the group of photos you finally decide to keep.

    005 Layer resized

    The gravestone, then the grandmother, and finally the fire give layers to the photograph.

    6. Use both horizontal and vertical photographs

    Again this is about creating diversity in a final product. So turn the camera sideways and you definitely have a different style going for you. Some people get stuck in horizontal mode, or in vertical mode. This is a great opportunity to make a change of pace. When your eye sees a photo it follows a pattern, generally starting in the top left corner then moving, left to right (just as you read) looking for areas of light, contrast, lines, color and patterns. A vertical photo will automatically create a different reading experience to the photo. Or why not crop them into a square even?

    002 Verical resized

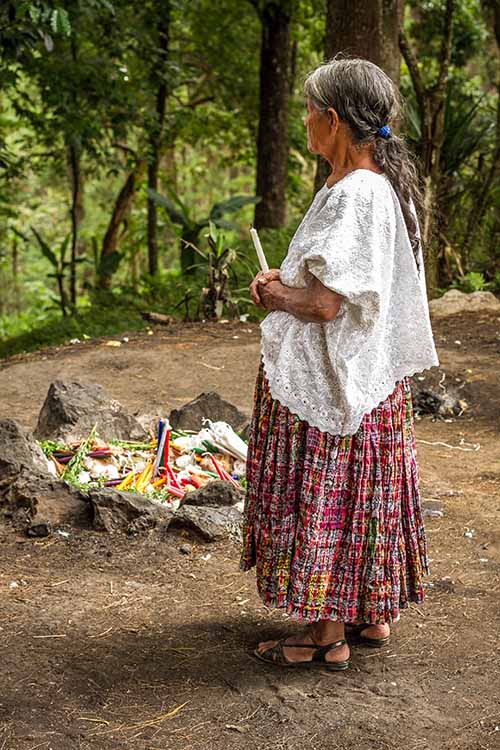
    A simple vertical photo changes the pattern during your final composition. Think both horizontally and vertically.

    7. Just enjoy the event

    See the event not only through your camera, but also with your own eyes. Experience the event, and it will not only give you great memories, but will allow you to feel the mood as well. Understanding the event will give you insight into what out-of-the-box shot may really highlight the event.

    Summary

    The general idea is to work with what you have, don’t lament what you left at home. If you do, you might just start lugging around simply too much gear to enjoy yourself. Think of how to diversify your perspectives. By confining yourself (in this instance, when confines are placed upon you) there is great opportunity to use your most advantageous feature… your creative brain!

    For most people, photography is a hobby turned passion, and enjoying photography should really be priority one. Photography is always a game of tradeoffs, which can be simply exemplified by the basic lesson of the exposure triangle. By gaining one thing you lose another. So begin gaining something even when you are stuck with just a prime lens.

    Maybe we could say, you are challenged to be better at what you love!

    googletag.cmd.push(function() {
    tablet_slots.push( googletag.defineSlot( “/1005424/_dPSv4_tab-all-article-bottom_(300×250)”, [300, 250], “pb-ad-78623” ).addService( googletag.pubads() ) ); } );

    googletag.cmd.push(function() {
    mobile_slots.push( googletag.defineSlot( “/1005424/_dPSv4_mob-all-article-bottom_(300×250)”, [300, 250], “pb-ad-78158” ).addService( googletag.pubads() ) ); } );

    The post 7 Tips to Help When You’re Stuck with Only a Prime Lens by Branson Quenzer appeared first on Digital Photography School.


    Digital Photography School

  • How to Improve Your Chances of Winning a Photography Contest

    My name is Andrew Suryono and I’m an amateur travel photographer. When you read the title, you may feel funny that an amateur photographer like me is writing this article. “Shouldn’t winning a photography contest be reserved only for the professionals?” you may ask.

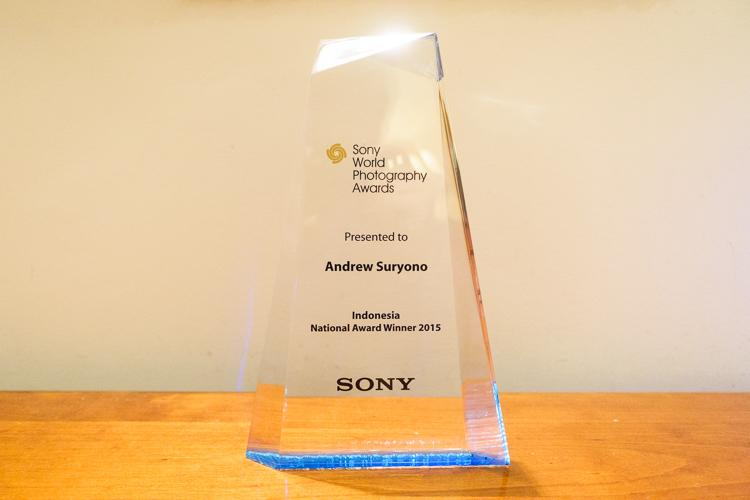
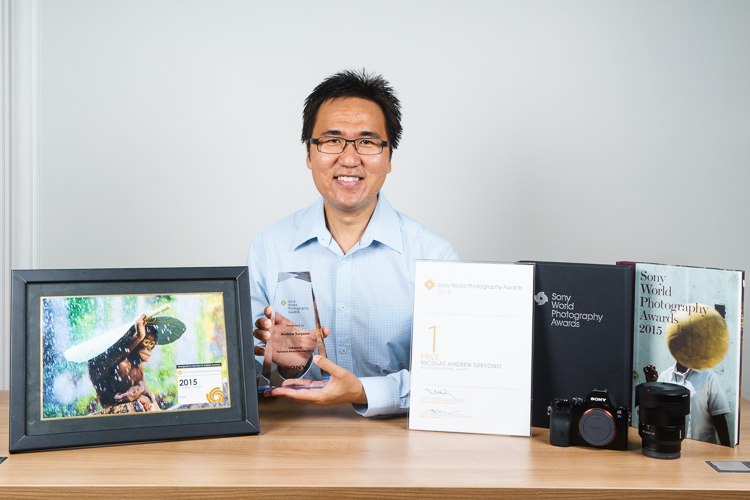
    Well, speaking from my experience, the answer is no. I’m one of many amateur photographers in the world that have won photography contests. This year is special for me because I won first place in the world’s largest photography competition, the Sony World Photography Award (Indonesia National Category).

    Image 1 andrew suryono trophy

    I’m writing this article to share my experience and give my personal tips to you on how to increase your chance in winning a photography competition. Yes, YOU can win in a photography contest!

    Why enter photo contests?

    Before we start though, let’s look at some of the benefits of joining a photo contest.

    Get exposure

    The first benefit of joining a photography competition is you can get exposure for your work quickly. The bigger the photography competition, the quicker and the more exposure you’ll get. By submitting your photos to a contest, you give easy access to people all over the world to view your work. If you’re struggling to get people to look at your photography website or portfolio, try joining a photography competition.

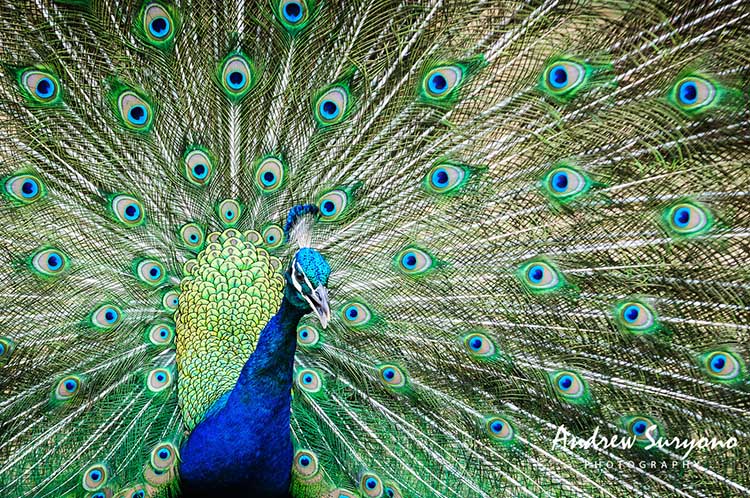
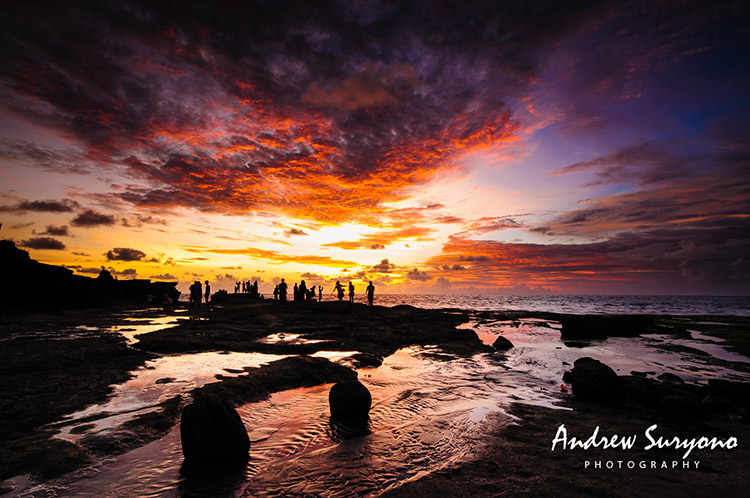
    andrewsuryono-peacock

    This image appeared in Bryan Peterson’s newsletter

    Market your work

    By giving yourself lots of exposure, you also increase your chance to market your work. If people are interested in your work, they might contact you to buy some prints or strike licensing deals. After joining several photo competitions, I got contacted by many people who wanted to do licensing deals for books, magazines, greeting cards and many other things. To my surprise, my work not only attracted small publishers, but also big ones like National Geographic.

    You really never know who is looking at and interested in your work!

    Measure your work against others

    A photo competition is a good way to measure your work against other photographers’ work. You’ll have a chance to look at other their images and see how your works compares. It’s important that you don’t judge your work too harshly when you do this. See what you
    find interesting from other people’s work, like how they use of composition or color, and learn from it.

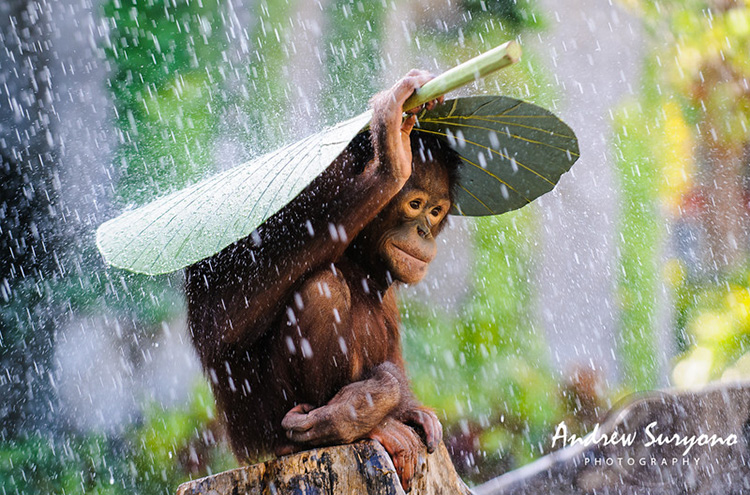
    Image 2 andrew suryono orangutan in the rain

    Winning image!

    Make new friends

    Finally, a photo competition is a good way to make new friends and connections. Through photo competitions, I’ve gotten many like-minded friends who I enjoy speaking to, and sharing my work with regularly. We even went on to create a private Facebook group where we share our work to get each other’s feedback, helpful online tips that we find, and many more.

    Are you already feeling excited? Great!

    How to increase your chances of winning

    Now that you know all the benefits of joining a photo competition, let’s look at some ways to increase your chance of winning one.

    The first and the most important thing that you should do before joining a photo contest is spend some time to know the rules inside out. Here are some things that you should pay attention to:

    Copyright ownership

    I decide whether I enter a photo contest or not based on this information alone. Make sure you retain full rights and ownership of your photos before joining in any contests. Personally, I would avoid any photo contests that want me to give any rights to them. I want to keep all rights to myself and they must ask me for permission if they want to use my photos for anything.

    Appeared in Bryan Peterson's newsletter

    Appeared in Bryan Peterson’s newsletter

    Image dimensions

    Pay attention to the image dimension that they require you to submit. Typically, a lot of photo contests are bombarded with image submissions
    from all over the world, so they only require you to submit a small resolution version of your image. Make sure to resize your image according to their specification. Some photo contests are so strict that they’ll immediately disqualify your image if it’s not submitted according to their specifications.

    Submission deadline

    This is pretty explanatory, but still worth mentioning. Make sure you pay attention to the submission deadline. Photo contests won’t let you
    submit images once the deadline has passed. Mark your calendar and set reminders!

    Research

    After you’re done going through all the contests’ rules and regulations, it’s time to do some research. You’ll need to research and study previous winners’ work, and the judges’ work if you want to increase your chance of winning in the competition.

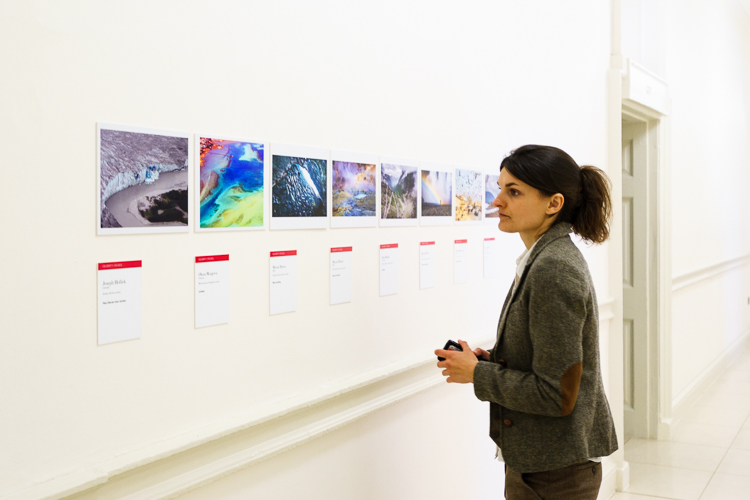
    Image 3 study judges work

    By looking through the previous winners’ work, you’ll get a sense of how they won the contest. Pay attention to the composition, color and most importantly the message that they’re conveying through their photos. Pay close attention to their post-processing work, and look at how it strengthen their images.

    Photography contests are judged by humans. It’s subjective by nature. By looking at the judges’ work, you’ll get a sense of their style and what kind of works they like to see. For example, if you find that most judges in the contest love strong black and white images, you’d better think twice about sending images with bright, saturated, and punchy colors.

    Image selection

    After you’re done with your research on the previous winners and the judges’ work, you’ll need to select images for submission based on your findings.

    Go through your portfolio of images and see which images stand a chance of winning the competition. Be very selective with your own work. I know it’s hard criticizing and selecting your own work, but doing this will dramatically increase your chance of winning a photo contest.

    Pick photos that you personally think are better than the previous winners’ photos, match with the judges’ style, and strongly show
    your unique photography style. Then, submit your images, cross your fingers, and wait for good things to happen!

    Image 4 andrew suryono pictures trophy

    Remember that I can’t guarantee you win will any photo competition, but at the very least, I have given you some tips that you can use to increase your chances.

    Don’t get discouraged if you submit an image and it doesn’t win. Remember that a photography competition is always subjective by nature. If one image doesn’t win in one competition, it doesn’t mean it won’t win in another. Also, there are also plenty of benefits that you can get by joining a photo contest, even though you didn’t win it.

    Follow the guidelines above, enter as many photography contests as you possibly can, and hopefully you get to win in some of them. It’s a number’s game!

    Keep shooting and don’t forget to have fun!

    googletag.cmd.push(function() {
    tablet_slots.push( googletag.defineSlot( “/1005424/_dPSv4_tab-all-article-bottom_(300×250)”, [300, 250], “pb-ad-78623” ).addService( googletag.pubads() ) ); } );

    googletag.cmd.push(function() {
    mobile_slots.push( googletag.defineSlot( “/1005424/_dPSv4_mob-all-article-bottom_(300×250)”, [300, 250], “pb-ad-78158” ).addService( googletag.pubads() ) ); } );

    The post How to Improve Your Chances of Winning a Photography Contest by Andrew Suryono appeared first on Digital Photography School.


    Digital Photography School

  • 5 Photoshop Tips You Probably Didn’t Know

    In this video tutorial from the Photoshop Training Channel, Jesús Ramirez goes over five Photoshop tips – you may not know! I have to admit I didn’t know a few of them myself. The things he covers include:

    • Advanced blending options in the layer style panel
    • Add a precise lens flare (using x and y coordinates to place it exactly where you want)
    • Using advanced options for Render Clouds, to get clouds with more contrast
    • Using the Black and White Adjustment layer to control color tones
    • How to open the same image in two windows, one zoomed in and one zoomed out

    Do you have any other little known Photoshop tips to share? Please do so in the comments below, I’d love to hear your tips and tricks.

    googletag.cmd.push(function() {
    tablet_slots.push( googletag.defineSlot( “/1005424/_dPSv4_tab-all-article-bottom_(300×250)”, [300, 250], “pb-ad-78623” ).addService( googletag.pubads() ) ); } );

    googletag.cmd.push(function() {
    mobile_slots.push( googletag.defineSlot( “/1005424/_dPSv4_mob-all-article-bottom_(300×250)”, [300, 250], “pb-ad-78158” ).addService( googletag.pubads() ) ); } );

    The post 5 Photoshop Tips You Probably Didn’t Know by Darlene Hildebrandt appeared first on Digital Photography School.


    Digital Photography School

  • 27 Images of Powerful and Practical Machinery

    If you live in an urban area there is probably some construction and/or machinery around, somewhere. Machines can make interesting photographic subjects. Let’s see what some other photographers found:

    Photograph Cog wheels by Jaromír Chalabala on 500px

    Cog wheels by Jaromír Chalabala on 500px

    Photograph Toronto Distillery District 01 by Brian Carson on 500px

    Toronto Distillery District 01 by Brian Carson on 500px

    Photograph stopped time by jacek tomczak on 500px

    stopped time by jacek tomczak on 500px

    Photograph hand by ÖmerCan Can?dar on 500px

    hand by ÖmerCan Can?dar on 500px

    Photograph Usine S - Contrivance by Maarten Tummers  on 500px

    Usine S – Contrivance by Maarten Tummers on 500px

    Photograph The Requiem of Machinery by Christian Boss on 500px

    The Requiem of Machinery by Christian Boss on 500px

    Photograph Old machinery by Luca Gaverina on 500px

    Old machinery by Luca Gaverina on 500px

    Photograph Building Construction with Cranes in the evening. by SAMART BOONYANG on 500px

    Building Construction with Cranes in the evening. by SAMART BOONYANG on 500px

    Photograph Constructing landcapes by Luke Chung on 500px

    Constructing landcapes by Luke Chung on 500px

    Photograph Toronto: City of Cranes by Evgeny Tchebotarev on 500px

    Toronto: City of Cranes by Evgeny Tchebotarev on 500px

    Photograph Oil worker silhouette by Zoran Orcik on 500px

    Oil worker silhouette by Zoran Orcik on 500px

    Photograph Clouds Adjustment by trynidada on 500px

    Clouds Adjustment by trynidada on 500px

    Photograph Construction Workers by Ognian Medarov on 500px

    Construction Workers by Ognian Medarov on 500px

    Photograph Votecrab II. by Peter Majkut on 500px

    Votecrab II. by Peter Majkut on 500px

    Photograph The backhoe foot by Phoomin Karagate on 500px

    The backhoe foot by Phoomin Karagate on 500px

    Photograph The beast on the beach by Morgan Tiphagne on 500px

    The beast on the beach by Morgan Tiphagne on 500px

    Photograph backhoe/retroexcavadora by sairacaz (Abad Torres) on 500px

    backhoe/retroexcavadora by sairacaz (Abad Torres) on 500px

    Photograph Edit by Chatrawee Wiratgasem on 500px

    Edit by Chatrawee Wiratgasem on 500px

    Photograph ABSTRACT YELLOW CRANE by imageaddition on 500px

    ABSTRACT YELLOW CRANE by imageaddition on 500px

    Photograph Hard Work by Joop Snijder on 500px

    Hard Work by Joop Snijder on 500px

    Photograph Chain by Faruk Barabhuiya on 500px

    Chain by Faruk Barabhuiya on 500px

    Photograph (machine) by Gerhard Speck on 500px

    (machine) by Gerhard Speck on 500px

    Photograph Schwader by Tobias Müller on 500px

    Schwader by Tobias Müller on 500px

    Photograph Camera Gear by Phoomin Karagate on 500px

    Camera Gear by Phoomin Karagate on 500px

    Photograph wood & metal by Lucage Photography  on 500px

    wood & metal by Lucage Photography on 500px

    Photograph IVZN6 by Peter Majkut on 500px

    IVZN6 by Peter Majkut on 500px

    Photograph Cutter by Jack Daugherty on 500px

    Cutter by Jack Daugherty on 500px

    googletag.cmd.push(function() {
    tablet_slots.push( googletag.defineSlot( “/1005424/_dPSv4_tab-all-article-bottom_(300×250)”, [300, 250], “pb-ad-78623” ).addService( googletag.pubads() ) ); } );

    googletag.cmd.push(function() {
    mobile_slots.push( googletag.defineSlot( “/1005424/_dPSv4_mob-all-article-bottom_(300×250)”, [300, 250], “pb-ad-78158” ).addService( googletag.pubads() ) ); } );

    The post 27 Images of Powerful and Practical Machinery by Darlene Hildebrandt appeared first on Digital Photography School.


    Digital Photography School