Category: Photography

  • Weekly Photography Challenge – Yellow

    Yellow is a fun color – have a look at these images using it in their compositions.

    Stratman² (2 Many Pix!)

    By stratman² (2 many pix!)

    Jamie McCaffrey

    By Jamie McCaffrey

    Weekly photography challenge – yellow

    This week is your chance to find something yellow and create a composition around it.

    Nick Hobgood

    By Nick Hobgood

    Richard Ricciardi

    By Richard Ricciardi

    Danny Plas

    By Danny Plas

    If you are like me and live in the northern hemisphere it shouldn’t be too hard to find some yellow in all the fall colors. The trick is to make an image using it that works, isn’t overpowered by the bold color and still grabs the viewer’s attention.

    Using complementary colors to add contrast can help like these:

    Tim Samoff

    By Tim Samoff

    Hiroyuki Takeda

    By Hiroyuki Takeda

    KellarW

    By KellarW

    Mirai Takahashi

    By Mirai Takahashi

    Share your images below:

    Simply upload your shot into the comment field (look for the little camera icon in the Disqus comments section) and they’ll get embedded for us all to see or if you’d prefer upload them to your favourite photo sharing site and leave the link to them. Show me your best images in this week’s challenge. Sometimes it takes a while for an image to appear so be patient and try not to post the same image twice.

    googletag.cmd.push(function() {
    tablet_slots.push( googletag.defineSlot( “/1005424/_dPSv4_tab-all-article-bottom_(300×250)”, [300, 250], “pb-ad-78623” ).addService( googletag.pubads() ) ); } );

    googletag.cmd.push(function() {
    mobile_slots.push( googletag.defineSlot( “/1005424/_dPSv4_mob-all-article-bottom_(300×250)”, [300, 250], “pb-ad-78158” ).addService( googletag.pubads() ) ); } );

    The post Weekly Photography Challenge – Yellow by Darlene Hildebrandt appeared first on Digital Photography School.


    Digital Photography School

  • The Multiple Personalities of Yellow in Images

    The color yellow can represent many different things – feelings and emotions – ranging from happy (the iconic yellow happy face), sunshine, and spring to the evil side of the color like jealousy, cowardice, caution, and illness. Of course there is also a lot of yellow at this time of year as autumn is upon us in the northern parts of the world.

    Let’s have a look at how these photographers used the color yellow in their images.

    Tobi Firestone

    By Tobi Firestone

    Vinoth Chandar

    By Vinoth Chandar

    Andreas Levers

    By Andreas Levers

    Peter Liu Photography

    By Peter Liu Photography

    Zitzitoune

    By Zitzitoune

    Loïc Lagarde

    By Loïc Lagarde

    Vicki DeLoach

    By Vicki DeLoach

    Brad Smith

    By Brad Smith

    Jenny Downing

    By jenny downing

    KellarW

    By KellarW

    Fabrizio Furno'

    By Fabrizio Furno’

    Darlene Hildebrandt

    By Darlene Hildebrandt

    Amanda Tipton

    By amanda tipton

    Daniel Zimmel

    By daniel zimmel

    Mike Beales

    By Mike Beales

    Matt Artz

    By Matt Artz

    Roo Reynolds

    By Roo Reynolds

    Scott Robinson

    By Scott Robinson

    Dennis Jarvis

    By Dennis Jarvis

    By 8#X

    Yasser Abusen

    By Yasser Abusen

    MaxGag

    By MaxGag

    Boris Brückhäuser

    By Boris Brückhäuser

    Jeremy Brooks

    By Jeremy Brooks

    Mirai Takahashi

    By Mirai Takahashi

    googletag.cmd.push(function() {
    tablet_slots.push( googletag.defineSlot( “/1005424/_dPSv4_tab-all-article-bottom_(300×250)”, [300, 250], “pb-ad-78623” ).addService( googletag.pubads() ) ); } );

    googletag.cmd.push(function() {
    mobile_slots.push( googletag.defineSlot( “/1005424/_dPSv4_mob-all-article-bottom_(300×250)”, [300, 250], “pb-ad-78158” ).addService( googletag.pubads() ) ); } );

    The post The Multiple Personalities of Yellow in Images by Darlene Hildebrandt appeared first on Digital Photography School.


    Digital Photography School

  • Add Contrast to Your Images by Using Complementary Colors

    When looking at something as cognitive human beings, we naturally get a response. These responses could be emotional, physical, intellectual, etc. There is a whole range of how we respond. This range of reactions is essential for the photographer, no matter if you are shooting wedding photos professionally, landscapes for a hobby, or street photos as a traveler. Just as there is a range of photographic intentions there are ranges of how we interpret what we see. So, how do you see, and what makes you more likely to push the shutter button here and not there?

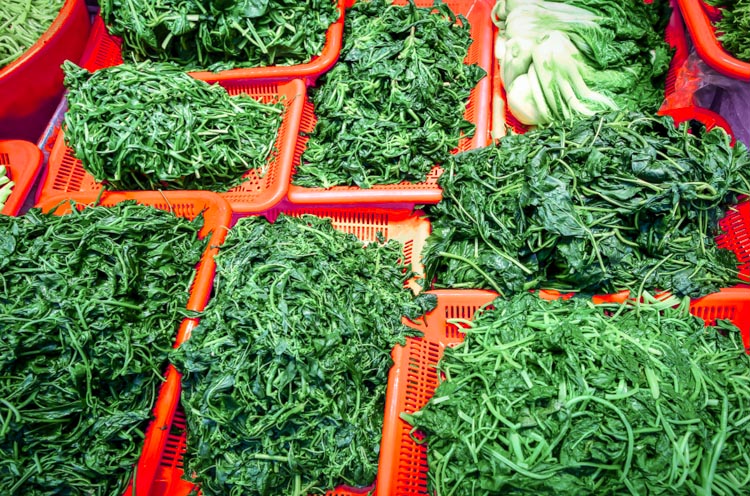
    001 Red and green

    From a market in Korea this green sea veggie and the red baskets they are placed in show how saturation can be achieved through color contrast

    One reason is color! Colors can be striking, bold, subtle and muted, or they could be vibrant, luscious, and soft. The descriptions of colors goes on and on, as does the names of colors. Pick up an elementary school crayon box and what you’ll notice that what used to have eight colors when I was young, doubled to 16 and now there are even boxes with 152 different colours (I did look back into Crayola history and found they were sold in metal tins of 48 crayons). So again, we could make this as complicated as possible, but I can’t keep track of all those color names, can you? Nor do I want to. I just want better images.

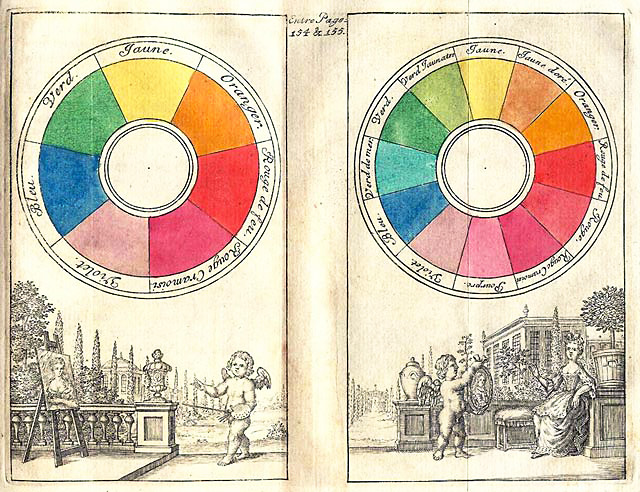
    To keep it straight forward and simple we will look at the traditional color wheel. Color wheels for printing and or mixing colors (e.g., oil painting), are not the same, so our focus is simply on what looks good to us, not the pigment mixing of paints, for painters and printers. If you look at the traditional color wheel, the complementary colors are the ones opposite of each other. When these colors are both present, called contrast, then it is pleasing to the eye.

    Why, because the different colors excite different cones (or color receptors) in our eye which in turn sends signals to our brain giving us a feeling. As mentioned above colors are described in a variety of ways, as too are feelings. Sometimes complementary colors are more soothing, and sometimes they are more powerful. That often depends on the context and perspective that the colors are in (the surrounding colors), along with their tone (dark or light). Simply put, complementary colors vibrate themselves and give us feeling.

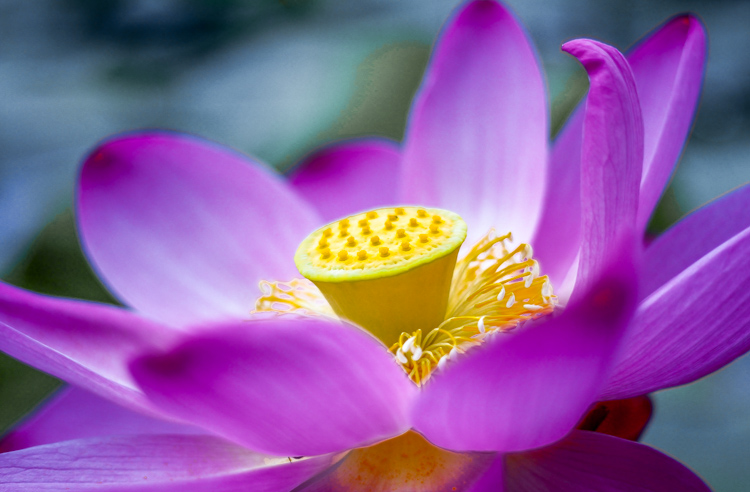
    002 Yellow and purple

    The contrast of the yellow to the purple direct the eye towards the center of the water lily along with selective focus. Combine color with other techniques to help guide the viewer. From Changchun China International statue park.

    One reason that complementary colors tug our hearts in one direction or another is because the complementary color is actually a blend of the other two primary colors. Thus, each primary color has one complementary color which is a mix of the other two primary colors. The traditional complementary colors are red and green, yellow and purple, and blue and orange. Red is a primary color and its complement is green (i.e. a mix of yellow and blue—the other two primary colors). Thus when using complementary colors you are actually stimulating all of your color receptors but in a slightly deceiving way. If we look at the complement of yellow, it is purple. What are the two primary colors that create purple? You got it, red and blue.

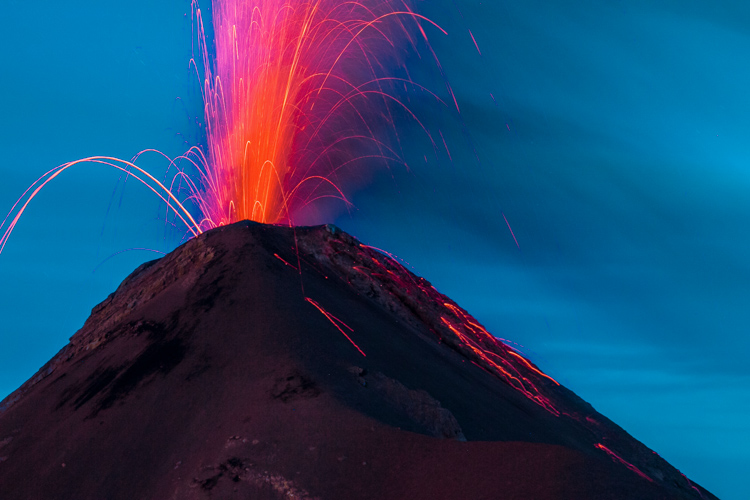
    003 Blue and orange

    The blue background of the volcano after sunset in Guatemala really highlights the orange lava bursting out. A much different feeling would be created if the picture had been taken at golden hour, rather than blue hour.

    If we look at many Dutch master painters they were very skilled in the art of light and dark. Using lighter areas to attract your attention to certain areas of the photo, and using darker tones to push areas back into the shadows. If we move forward in the impressionist era, Monet definitely shows his use of complementary colors in his painting Impression, Sunrise (Impression, Soleil levant) in 1872, of the orange sun with the blue seascape. In the post-impressionist era, Van-Gogh’s Starry Night in 1889 of the yellow stars, and the purple night sky is maybe one of the most famous examples of the use of complementary colors.

    So back to photography, what does this all mean? Well for one, print out a color wheel and put it in your camera bag. You can never look at color enough. Even back in ancient Greece, Aristotle pondered color and how it seemed to change based on the light around it. Moreover, if you look in the shadow of a primary color you will see hints of its complement. Color is one of the most subjective forms of visual art, and thus, it is very much open for interpretation and experimentation. Like most concepts in photography it is best to know the “rules” then to learn how to break them.

    004 No blue

    No blue: by subtracting one of the primary colors you can still achieve vibrant and dynamic results.

    005 No Red

    No Red: Because there is no red, the other colors seem to create more contrast.

    006 No Yellow

    No Yellow: In a very colorful scene, eliminating one primary color brings continuity to the photo.

    Go out and see the world, armed with a little more understanding of what and how we perceive the world around us. Don’t be afraid of color in the natural world. But don’t expect to get it right by just ramping up the saturation slider in post-processing. Colors are vibrating wave forms all around us. Placing complementary colors next to each other gives your photo a little bit more energy.

    Looking for the right colors might help you broaden your portfolio and prevent you from over-valuing leading lines or the rule of thirds. It might also help add punch to your textures, rather than sliding that saturation bar all the way up. Complementary colors naturally create contrast so you don’t need to try to create it in post-production. Let complementary colors complement your other strengths as a photographer.

    007 color circle from 1708

    Traditional Color wheel from the early 1700’s.

    Please help continue the tradition by sharing your thoughts and photos below.

    googletag.cmd.push(function() {
    tablet_slots.push( googletag.defineSlot( “/1005424/_dPSv4_tab-all-article-bottom_(300×250)”, [300, 250], “pb-ad-78623” ).addService( googletag.pubads() ) ); } );

    googletag.cmd.push(function() {
    mobile_slots.push( googletag.defineSlot( “/1005424/_dPSv4_mob-all-article-bottom_(300×250)”, [300, 250], “pb-ad-78158” ).addService( googletag.pubads() ) ); } );

    The post Add Contrast to Your Images by Using Complementary Colors by Branson Quenzer appeared first on Digital Photography School.


    Digital Photography School

  • 8 Tips to Help You Come Home with Great Travel Photos

    In this article I will talk about travel photography and how you can take great images of everything when you travel. I’m not talking about camping out at sunrise with bags full of lenses and filters to take epic landscape photographs; I’m talking about taking really nice shots of EVERYTHING! The food, people, details and landscapes combined – and all without turning your holiday into a photo shoot. With some simple tips you can come home with an album full of memories that stretches beyond a few hero shots.

    Editor’s Note: The following article is written to be a fun guide to different types of documentary style travel photography. The author was exploring Vietnam as a guest of Helloworld Australia and Insider Journeys. She considers herself a jack-of-all-trades, master of none in the photography world.

    8 Tips for great travel photos

    #1 Landscape photography

    1DaytimeLandscape

    As much as I love waking up for a sunrise and utilizing all of the photography tools available to me to get a killer shot, sometimes I just want to take some snaps and have them be nice. When shooting landscapes during the day I look for vibrant colors, leading lines and simple compositions.

    If you want to come home with a handful of nice landscape images from your holiday but you don’t want to spend all your time out in the field at the break of dawn then look for simple compositions, vibrant colors and leading lines. Using the most basic techniques like the Rule of Thirds (imagine your photo broken down into thirds both horizontally and vertically, and place points of interest on these third lines, for example the horizon) and the light that is available to you, it’s possible to come back with some keepers. Good examples can include the narrow laneways of old Dubai, the canals of Venice, the rivers of Alberta and the irrigation lines of the rice fields of Vietnam.

    #2 Photographing the locals

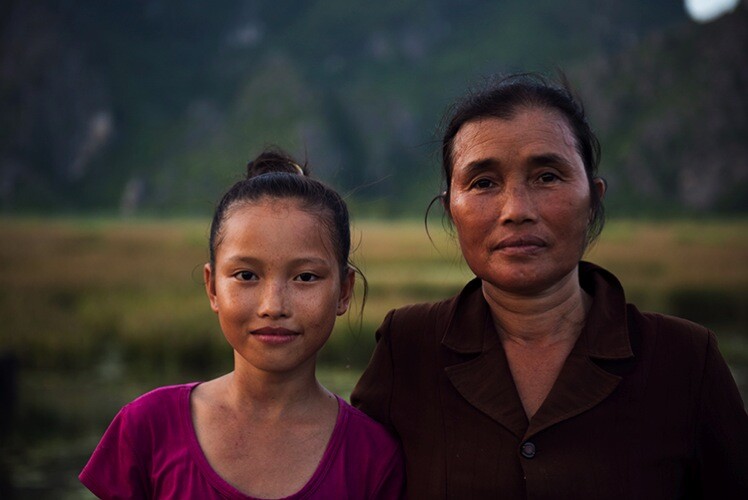
    I’m sure that you love to meet the locals from whichever exotic location you’re visiting, but find it can be intimidating to ask for a photo. The trick to photographing locals is to have your camera absolutely ready to go before you even ask. I’m talking the right lens, the right light, and the right settings. Photographing strangers often means you don’t have the benefit of multiple shots to get it just right. A great focal length for photographing people is 85mm, it’s very flattering and it also means you don’t have to be in people’s faces when you shoot. Shooting in the morning or late afternoon means you’ll have soft, consistent light, on your subjects’ faces, and f/2.8 is a great aperture for shallow depth of field. For handheld shooting keep your shutter speed above 1/200th to minimize camera shake.

    2PortraitOfLocals

    I desperately wanted to take a photo of a mother and daughter I had just watched rounding up their water buffalo in Ninh Binh, but I knew the chances of them speaking English were slim. I didn’t have my portrait lens with me so I made do with my 24-70 f/2.8 at 70mm, and I had it ready to go for the ambient light before I even asked. I snapped off three quick bursts and nabbed a keeper.

    #3 Shoot the details

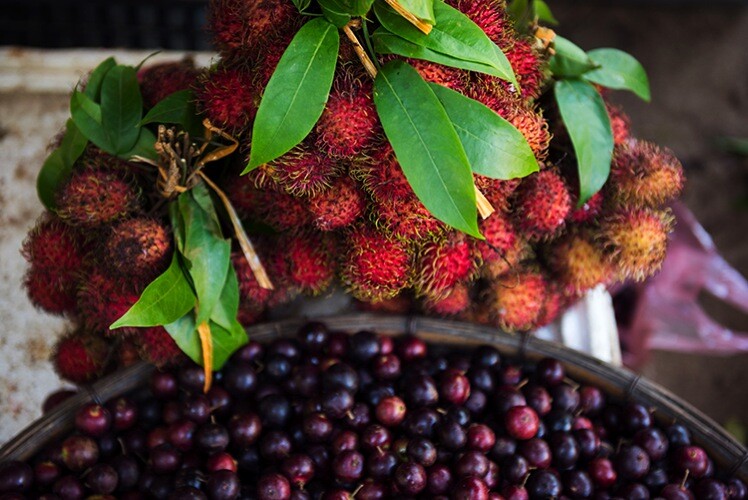
    If you ever find yourself quietly admiring the small details of a new destination, then you might like to play around with isolating and photographing them. A great place to try your hand at detail shots is the local market. Using a shallow depth of field (f/2.8 – f/5.6) you can play around with photographing all manner of small details; the textures of a new fruit, a close-up of a flower, or even a line of colorful fabrics. Some photographers consider these filler shots but you might find they bring back wonderful detailed memories after time has passed.

    3TDetailsMarkets

    I personally love the small details of a new destination and often take my most favorite shots at bustling markets, or in the garden of a palace, instead of the palace itself. I always look for bright colors and new textures, then isolate what I love from a cluttered background by either zooming in or using shallow depth of field.

    #4 Use juxtaposition

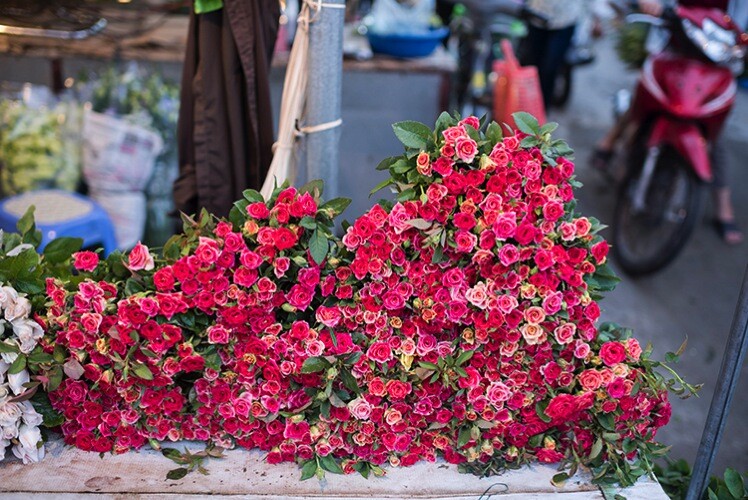
    In a new destination you can’t help but notice that often things aren’t the same as they are at home, and sometimes a fun way of photographing that is through juxtaposition. This is when two very different things are shot close together of contrasting effect, for example ice cream with a steak, or a beautiful field of wildflowers with an urban factory in the middle. New locations can offer unlimited potential for photographing two things with juxtaposition together, that you might not see at home. Think new versus old, natural versus artificial, nature versus industry, etc.

    4JuxtapositionStreetScenes

    During an incredible morning exploring the Hanoi flower markets I enjoyed photographing the juxtaposition of the flowers besides the scooters, rubbish and chaos of Hanoi.

    #5 Photograph animals

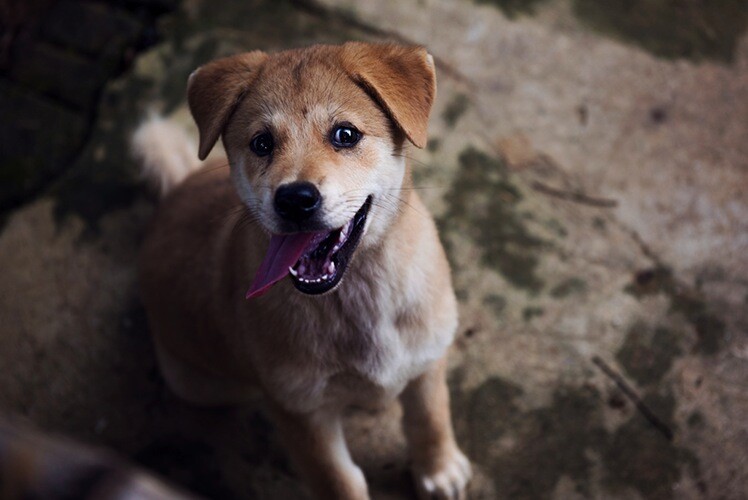
    You might be fortunate on your travels to make some furry friends. This is often the case in South East Asia where cats and dogs roam the streets freely, and the smart ones know how to get a scrap of food or a cuddle. Photographing animals can be tricky at the best of times, let alone photographing animals that you don’t know very well. The first thing to remember if you want to increase your chances of getting a clean shot is to have a fast shutter speed, 1/1000th is ideal. Animals also benefit exceptionally well from having a sharp focus on their eyes, so a single focus point trained on the eye closest to you will work wonders. Other than that it’s really a matter of a little patience to capture a personality trait, or cute moment.

    5FurryFriends

    I don’t consider this photo a triumph of photography, by any stretch of the imagination, but I thought this puppy was adorable. I was able to quickly shoot a sharp image of him looking goofy, with a fast shutter speed and shallow depth of field.

    #6 Photograph your resort or accommodation

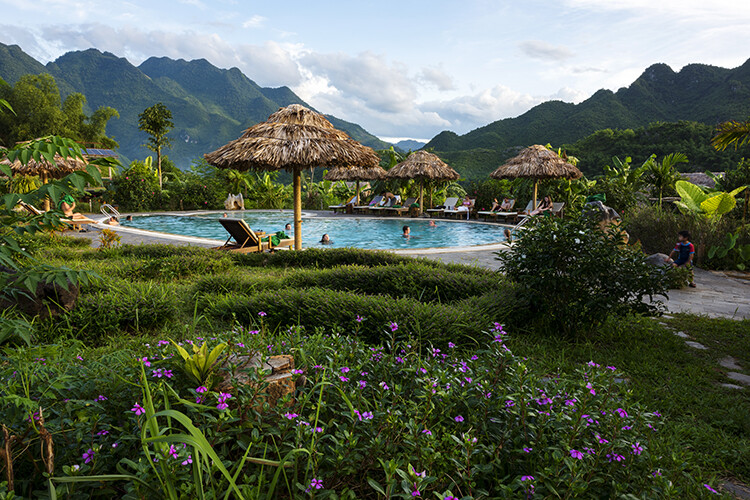
    If you want to take a great photo of your resort to show off to friends and family you might quickly notice that resorts are usually quite populated. Rather than waiting for scores of people to move out of your way it’s possible to make them a part of your image without being the focus of your image and you can do this by using a distracting foreground. Rather than straight out taking a photo of the pool, garden, or communal area of your accommodation, scout around for a nice foreground such as a garden bed, a great path, grass or flowers or even a reflective puddle.

    6YourResortGrounds

    In Mai Chau I stayed at the stunning Eco lodge in Mai Chau valley, and I desperately wanted to photograph the pool, but hordes of swimmers weren’t going anywhere. After playing around with various compositions I realized that the flowers planted around the pool made a distracting foreground when I focused on them, but used a fairly wide depth of field using f/11.

    #7 Food photography

    If you are a foodie, and let’s face it aren’t we all these days, then you’re going to want to take photos of some of the delicacies that await you when you travel. Food photography can be very hard, or very easy, depending on what you are trying to achieve – but for holiday snaps you should K.I.S.S. (keep it simple silly).

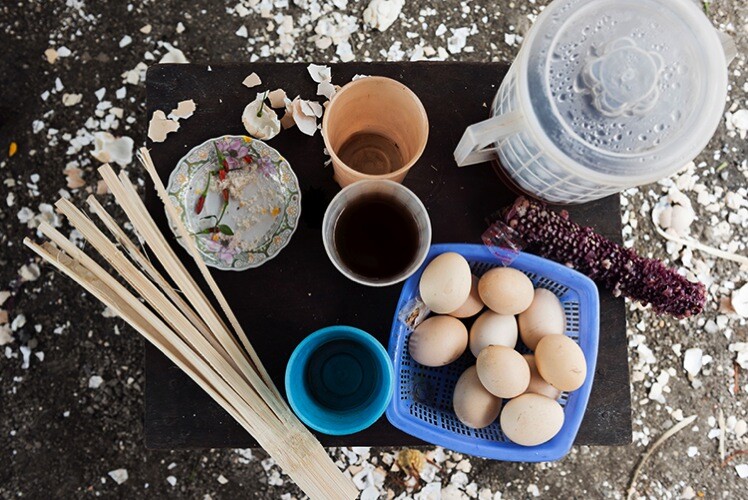
    The hottest food photography trend to hit the market these days is the flat lay, or simply photographing food from above. You can do this with a simple snapshot, or take a few minutes to improve your shot. Firstly a single focus point trained on a plate of food nearest to the middle is best. Unless you want to stand on a chair and lean precariously over the table the best way to get this shot is by holding your camera above the table facing straight down. A reasonable depth of field like f/5.6 will mean you’ll still get enough food in focus, even if you slightly miss your planned focus point. Taking a few minutes to arrange the food and utensils on the table can also pay off in the final shot.

    7Food

    I am a massive fan of the flat lay. I think it looks great in most instances, plus it has the added bonus of showing everything you’re eating and drinking in a single frame. In Vietnam we made a roadside stop and I enjoyed boiled eggs, sticky rice in a bamboo pipe, purple corn on the cob and fiery hot bird’s eye chilies. I loved all the broken eggshells on the dirt floor and worked them into my composition with a wider vantage point.

    #8 Photograph your travel companions

    I’ve saved the best for last, photographing your family, friends, or loved ones. I’m sure you love the simple gift of taking a nice photograph of your travel companion(s) in an exotic location, without making a major production out of it.

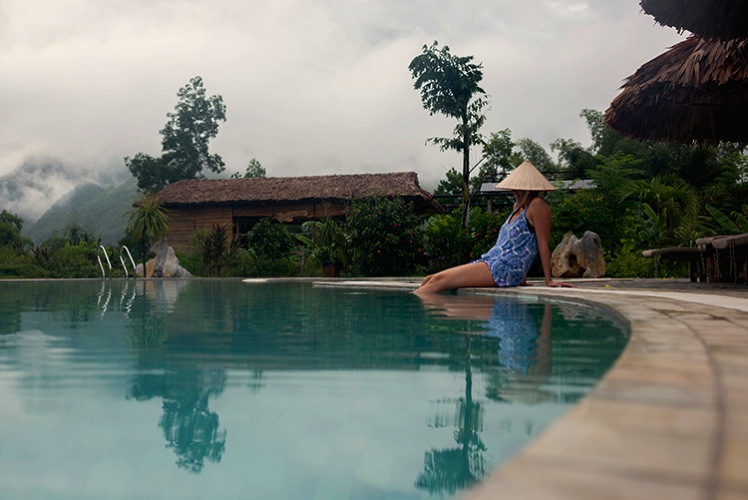
    The best way to do this is by beating the crowds, just that. Wake up early and have the pool, beach, or street to yourself, and get the shot you want without the distraction of hordes of people. Take a minute to think about composition so that your subject is well framed by the location; use local props if you want to be a real tourist. Then it’s a matter of referring back to basic portraiture rules like flattering focal lengths and good light, a given if you make the effort to wake up early.

    8FriendsOrFamily

    In Mai Chau I wanted a nice shot of my travel companion, Simone, and I wanted the scene to be noticeably Vietnamese. We borrowed a hat from the resort, and set an early alarm hoping for mist in the valley. We weren’t disappointed.

    So there you have it: How to take great photos of just about anything while you’re traveling, without destroying your holiday to do it. Always keep a camera close at hand, and enjoy showing off the many aspects of a new destination through your own unique photography: people, landscapes, food, animals, details and all the special moments that pass you by.

    googletag.cmd.push(function() {
    tablet_slots.push( googletag.defineSlot( “/1005424/_dPSv4_tab-all-article-bottom_(300×250)”, [300, 250], “pb-ad-78623” ).addService( googletag.pubads() ) ); } );

    googletag.cmd.push(function() {
    mobile_slots.push( googletag.defineSlot( “/1005424/_dPSv4_mob-all-article-bottom_(300×250)”, [300, 250], “pb-ad-78158” ).addService( googletag.pubads() ) ); } );

    The post 8 Tips to Help You Come Home with Great Travel Photos by Lauren Bath appeared first on Digital Photography School.


    Digital Photography School

  • 10 Common Bird Photography Mistakes and Their Solutions

    Do you commit mistakes in photography?

    I bet you do. I have made mistakes. As a matter of fact I have committed many. But we all learn from our mistakes. What you don’t have to necessarily do is to re-invent the wheel. Instead of learning about these common mistakes the hard way, why not learn from other’s mistakes? That sounds awesome, doesn’t it?

    Sandhill Crane Family Flying on a Beautiful Autumn Morning in Jasper-Pulaski Fish and Wildlife Area in Medaryville in northwestern Indiana. Every year around 10,000 Sandhill Cranes migrate to this location during Autumn. The calls of thousands of Sandhill Cranes that reaches several miles is an experience that is next to none. It is one of the best locations to photograph them as they fly past the Autumn trees at the Sunrise to feed in the close by farms.

    Sandhill Crane Family Flying on a Beautiful Autumn Morning in Jasper-Pulaski Fish and Wildlife Area in Medaryville in northwestern Indiana. Every year around 10,000 Sandhill Cranes migrate to this location during autumn. The calls of thousands of Sandhill Cranes that reaches several miles is an experience that is next to none. It is one of the best locations to photograph them as they fly past the autumn trees at sunrise to feed in the nearby farms.

    Here is the list of 10 common bird photography mistakes and their solutions. If you learn and apply these bird photography tips you would see the results immediately in your images.

    #1 BAD EXPOSURE

    This is the biggest mistake. A bad exposure would ruin the photograph. Most common is overexposed (blown-out) highlights.

    01-The-Most-Useful-Bird-Photography-Tips-for-Beginners-by-Prathap-Nature-Photography-Simplified

    Overexposed – highlights blown out.

    The issue is that your camera has much less dynamic range than your eyes. This means you can see the details in both brighter and darker regions of a scene, but the camera doesn’t.

    You have to make a choice whether to keep the details in the brighter or the darker region. Your choice would almost always be to keep the details in the brighter region. Because our eyes are more sensitive to brighter areas (or highlights).

    02-The-Most-Useful-Bird-Photography-Tips-for-Beginners-by-Prathap-Nature-Photography-Simplified

    Correctly exposed for the highlights.

    In short – always expose for the highlights.

    #2 BAD LIGHT

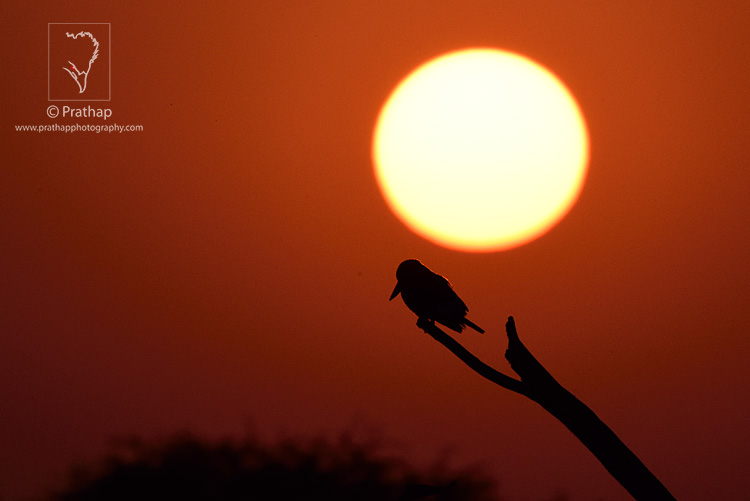
    Photography is painting with light. If you underestimate the light, then you are bound to get bad photographs. It’s not an exaggeration to say most photographers seem to ignore it.

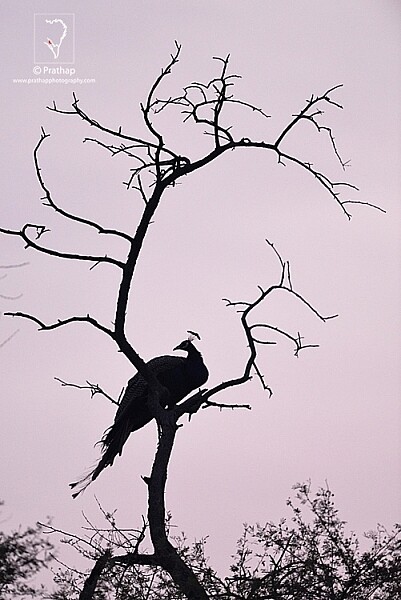
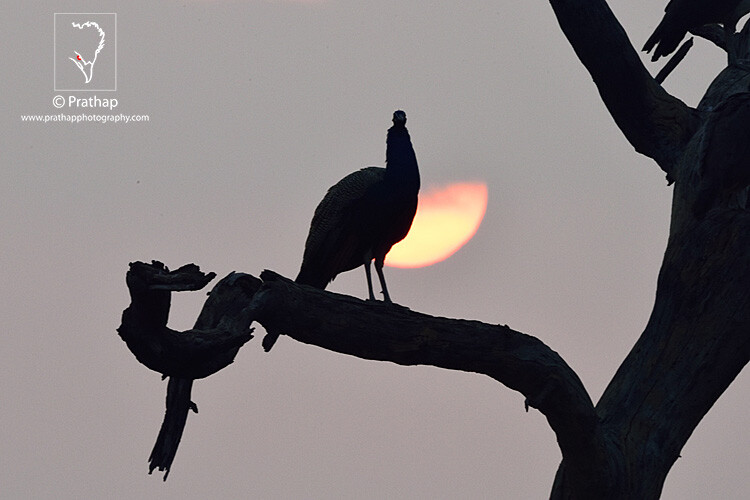
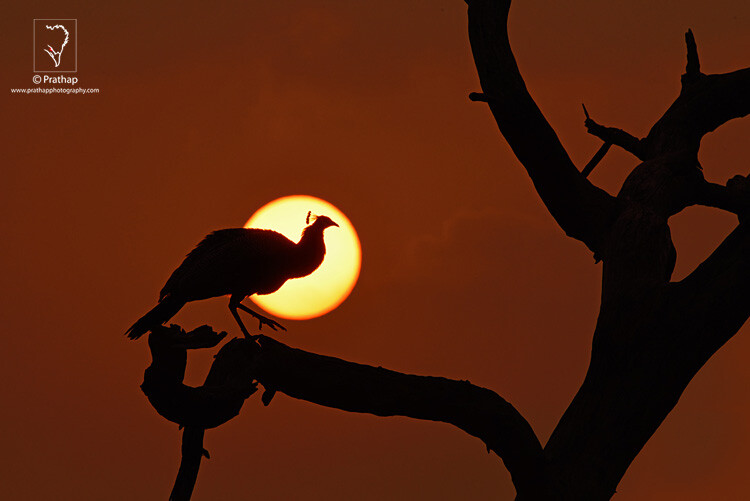
    More the time is spent debating about equipment, than studying the light. No equipment can save your photograph if the light is not favorable. Look how boring this silhouette of an India peafowl is.

    03-The-Most-Useful-Bird-Photography-Tips-for-Beginners-by-Prathap-Nature-Photography-Simplified
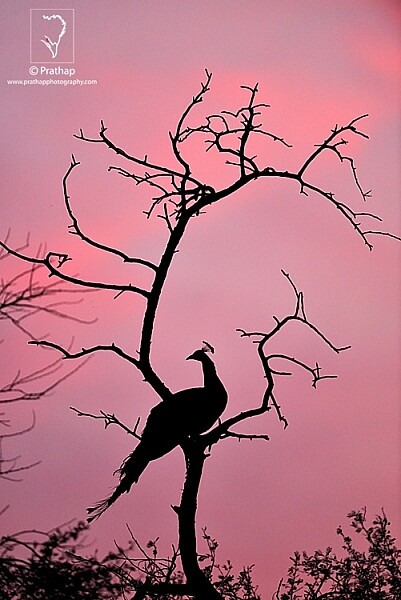
    Just before minutes, it was like this.

    04-The-Most-Useful-Bird-Photography-Tips-for-Beginners-by-Prathap-Nature-Photography-Simplified

    Isn’t it evident? Learn to see the light. It’s all about light.

    #3 BAD COMPOSITION

    Bird photography is not demanding in terms of composition. Even so, a lot many bird photographers don’t seem to understand simple techniques. All that you need to know is the rule of thirds, the rule of spaces, and fill the frame composition techniques.

    How many times have you seen a photograph like this? A subject in the center!

    05-The-Most-Useful-Bird-Photography-Tips-for-Beginners-by-Prathap-Nature-Photography-Simplified

    Just by following the rule of thirds, this is what I got.

    06-The-Most-Useful-Bird-Photography-Tips-for-Beginners-by-Prathap-Nature-Photography-Simplified

    Next time you are out in the field, remember to compose well.

    • Place the bird off-centered and give enough it breathing space.
    • Or, fill the frame with the bird.

    That is as simple as it gets.

    #4 BAD FOCUS

    Blurry bird photos are everywhere. Birds are always active, making it harder to achieve sharp focus. But that doesn’t mean you don’t recognize it. If you rely heavily on your LCD monitor, this is what happens.

    07-The-Most-Useful-Bird-Photography-Tips-for-Beginners-by-Prathap-Nature-Photography-Simplified
    Nothing seems to be wrong in this photograph, right?

    Wrong. It’s a blurry photograph. Can you see the out of focus eye now?

    08-The-Most-Useful-Bird-Photography-Tips-for-Beginners-by-Prathap-Nature-Photography-Simplified
    Fixing it is easy. Check for the critical focus by zooming in on your LCD monitor. If it’s not sharp, make the adjustments until you get the focus perfect. The initial focus was on the bird’s body. By shifting the focus point to the eye of the bird, I got this tack-sharp image.

    09-The-Most-Useful-Bird-Photography-Tips-for-Beginners-by-Prathap-Nature-Photography-Simplified
    #5 WRONG POINT OF VIEW

    How do you see your world? From your eye level…isn’t it? But, how does the bird see its world? You got the point. But more than 90% of the bird photographers do not seem to understand this simple concept. They shoot from their eye level. Can you believe that?

    10-The-Most-Useful-Bird-Photography-Tips-for-Beginners-by-Prathap-Nature-Photography-Simplified
    If you are doing it too…stop it right now. It’s not your portrait but the bird’s.

    11-The-Most-Useful-Bird-Photography-Tips-for-Beginners-by-Prathap-Nature-Photography-Simplified

    Get down and shoot from a bird’s point of view, and see the magic unfold.

    #6 WRONG HEAD ANGLE

    Your eyes follow the lead. You will follow the line of sight of a bird. If the bird looks left, your eye will move in that direction and vice versa. If your eye is lead in an interesting way, then your image works.

    What doesn’t work is when the bird looks away. It’s not uncommon to see such photographs everywhere on the web.

    12-The-Most-Useful-Bird-Photography-Tips-for-Beginners-by-Prathap-Nature-Photography-Simplified
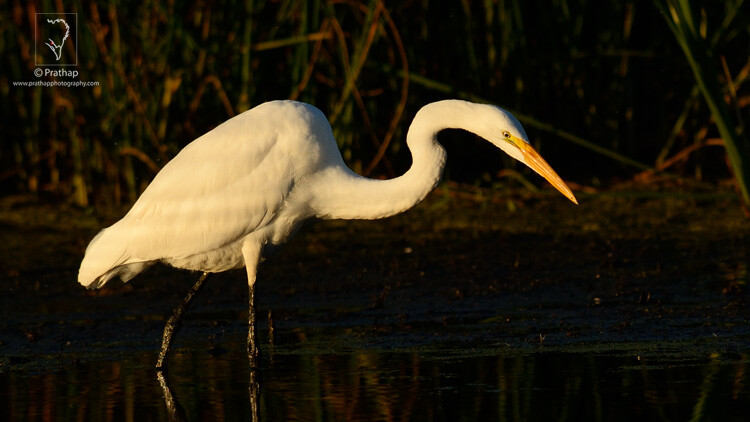
    Wait for the right head angle. Take photograph when bird is actively looking for its prey. Or, when it is sensing an impending danger.

    13-The-Most-Useful-Bird-Photography-Tips-for-Beginners-by-Prathap-Nature-Photography-Simplified
    With just the right head angle, the image became more interesting. The Great Egret is actively searching for its prey. The head angle is diagonally inclined adding dynamism to the photograph.

    #7 WRONG BACKGROUND

    Do you care for the background? Most often bird photographers just don’t care about anything other than the bird. Why? Are you saying because it’s a bird photograph after all! Do you know it’s the background which makes the picture?

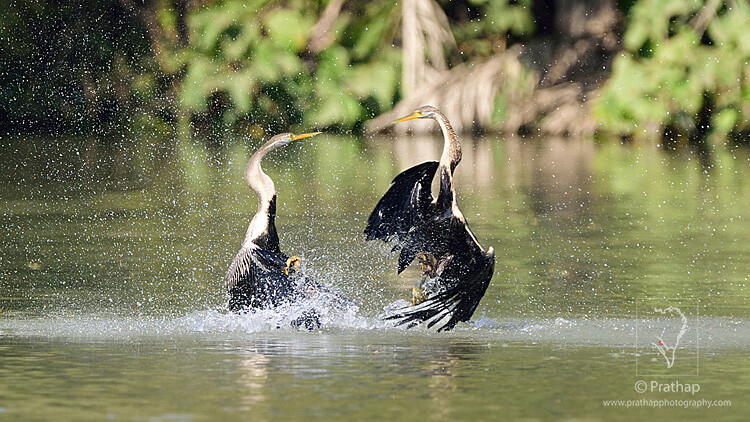
    Okay, take a look at this bird photograph.

    14-The-Most-Useful-Bird-Photography-Tips-for-Beginners-by-Prathap-Nature-Photography-Simplified
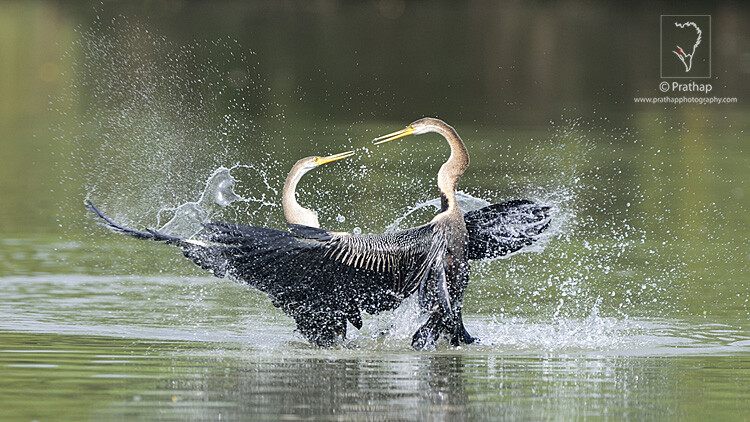
    That’s a fantastic action shot of two Indian Darters or Snakebirds fighting. But, is it amazing? Take a look at this one now.

    15-The-Most-Useful-Bird-Photography-Tips-for-Beginners-by-Prathap-Nature-Photography-Simplified
    You see how beautiful the action is. It just couldn’t get better. Here’s the best bird photography tip I can give you – put more importance on background than the bird and you’ll make great bird photographs.

    #8 BAD PROCESSING

    Is post-processing good? There’s probably a hot debate around every corner about this topic. If you do post-process here’s what you shouldn’t do.

    Here’s a simple and useful post-processing tip for bird photography. Don’t over process your image. Over sharpening and extreme noise reduction are typical mistakes of many bird photographers.

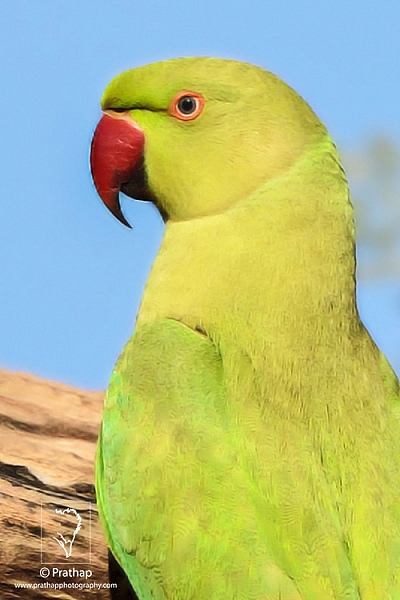
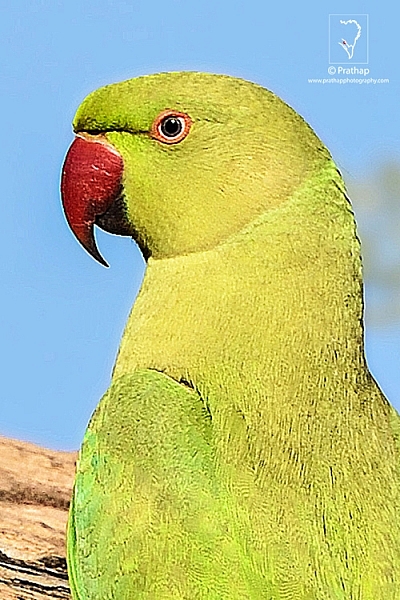
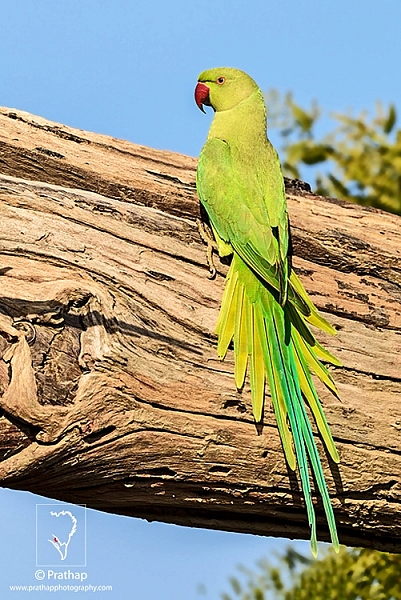
    Rose-Ringed Parakeet displaying all its color in soft Sunlight in Bharatpur Bird Sanctuary. I sm so lucky to have been able to capture this beautiful parakeet. I love it!

    This one has too much noise reduction

    Rose-Ringed Parakeet displaying all its color in soft Sunlight in Bharatpur Bird Sanctuary. I sm so lucky to have been able to capture this beautiful parakeet. I love it!

    This one is over sharpened.

    It destroys your image. It makes it either look like a wax statue or a wired toy.

    Take it easy. Keep your processing to a minimal. Just do enough processing to bring back the details and colors in the bird. Reduce noise only in the background. Sharpen only the bird with just enough to bring out detail.

    Rose-Ringed Parakeet displaying all its color in soft Sunlight in Bharatpur Bird Sanctuary. I sm so lucky to have been able to capture this beautiful parakeet. I love it!

    Rose-Ringed Parakeet displaying all its color in soft Sunlight in Bharatpur Bird Sanctuary. I sm so lucky to have been able to capture this beautiful parakeet. I love it!

    #9 WRONG PLACE

    Do you know that location really matters? In fact, it can make or break your image. It’s a very important bird photography tip to remember. If you end up photographing a species in a wrong place, then you’ll end up with bad results.

    18-The-Most-Useful-Bird-Photography-Tips-for-Beginners-by-Prathap-Nature-Photography-Simplified
    Find the right location where there are enough birds, good light, good feeding ground, and a good background. Assuming that you know important bird photography tips, you’ll most certainly make the best bird photographs.

    19-The-Most-Useful-Bird-Photography-Tips-for-Beginners-by-Prathap-Nature-Photography-Simplified
    #10 WRONG EXPECTATIONS

    Not many photographers talk about this. But here’s the thing: If you think that a professional or experienced bird photographer goes to a place, points their expensive gear at the birds, and take home loads of amazing photographs, then you are wrong.

    20-The-Most-Useful-Bird-Photography-Tips-for-Beginners-by-Prathap-Nature-Photography-Simplified
    This is far from the truth. The truth is they are the ones who go to the place before anyone. Stay there until there’s no light. Come back to the same place again, and again, and again until they get what they want.

    21-The-Most-Useful-Bird-Photography-Tips-for-Beginners-by-Prathap-Nature-Photography-Simplified
    My friend, it’s not magic. It’s bird photography. Everyone needs to pay their due respect. Birds never differentiate.

    CONCLUSION

    Bird photography is fascinating.

    Birds attract us like crazy. They make us forget about the world around us. But, you have to get over this. You have to see beyond the bird. You have to pay close attention to everything in the frame – the bird, the background, the placement, the light, exposure, etc.

    It’s easy to be a bird photographer. Not that easy to be a good bird photographer.

    These 10 bird photography tips should give you a fair idea of what makes a good bird photograph. Understand them. Practice them. Your bird photographs are bound to improve.

    Let me know if you have any questions. I would love to answer them.

    googletag.cmd.push(function() {
    tablet_slots.push( googletag.defineSlot( “/1005424/_dPSv4_tab-all-article-bottom_(300×250)”, [300, 250], “pb-ad-78623” ).addService( googletag.pubads() ) ); } );

    googletag.cmd.push(function() {
    mobile_slots.push( googletag.defineSlot( “/1005424/_dPSv4_mob-all-article-bottom_(300×250)”, [300, 250], “pb-ad-78158” ).addService( googletag.pubads() ) ); } );

    The post 10 Common Bird Photography Mistakes and Their Solutions by Prathap DK appeared first on Digital Photography School.


    Digital Photography School

  • How to Organize Your Photos in Lightroom

    The Lightroom Catalog is a database containing all the relevant information that Lightroom needs about your photos in order to process your images and sit at the centre of your workflow.

    Lightroom is a digital asset management (DAM) tool – you can use it to organize and search your photos, as well as process them. This is the main difference between Lightroom and Photoshop, which is a powerful image editor, but has no database capabilities.

    Even if you use Photoshop for all your processing you can still use Lightroom to view, organize, and search your photos. That’s why the two programs come together if you subscribe to Adobe’s Creative Photography Plan (and why Photoshop no longer comes with Adobe Bridge). This article will walk you through some of the tools inside Lightroom to help you organize your photos.

    Using Collections

    Lightroom uses Collections to organize your images. A Collection is a virtual folder that exists in the Lightroom Catalog. You can create as many Collections as you like within Lightroom and use them for whatever purpose you see fit. The more you use them, the more you will find better ways to use them.

    There are several types of Collections in Lightroom:

    Collections: Virtual folders to which you can add any photo that you have imported into Lightroom.

    Collection Sets: Another type of virtual folder to which you can add Collections, but not photos. Collection Sets are used to keep your Collections organized.

    How to organise photos in Lightroom

    This screen shot shows the icons used to represent Collection Sets and Collections in Lightroom. Xi’an – Terracotta Warriors (red arrow) is a Collection Set. Full Selection (green arrow) is a Collection. The icon is indented because it is inside the Collection Set.

    Smart Collections: Collections that are populated automatically according to the rules that you set. For example, you could create a Smart Collection containing all photos taken in 2015, tagged with the keyword phrase “New York” to find all photos that meet those criteria. A Smart Collection is really a way of searching for images, and retaining the result indefinitely.

    Published Collections: Beyond the scope of this article, Published Collections are created in Lightroom’s Publish Services. You can learn more about Published Collections in my article How to Upload Photos to Flickr and 500px Using Lightroom 5 (the information applies to Lightroom 6 and Lightroom CC as well).

    Book and Print Collections: These are created in the Book and Print modules. My articles How to Create a Simple Blurb Photo Book in Lightroom and How to Create a 2015 Calendar in the Lightroom Print Module go into more detail.

    For the purposes of this article we are interested in Collections and Collection Sets.

    Creating Collections and Collection Sets

    If this is your first time using Lightroom you won’t have any Collections yet (apart from the Smart Collections that it already contains). So let’s get started! I’m assuming that you have already imported your first photos into the Lightroom Catalog.

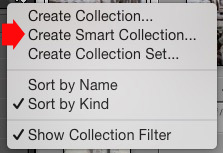
    Go to the Collections panel and click on the plus icon you see in the top right corner. Select Create Collection Set.

    How to organise photos in Lightroom

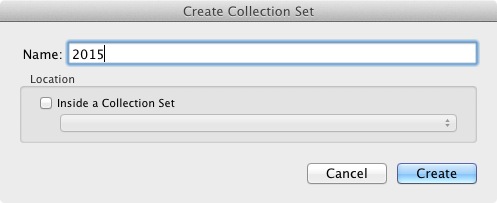
    The Create Collection Set window appears, where you can give the Collection Set a name.

    How to organise photos in Lightroom

    I’ve named this one 2015. The idea is that it will house all the Collection Sets containing photos taken in the year 2015 (remember that Collection Sets can only contain Collections, not photos).

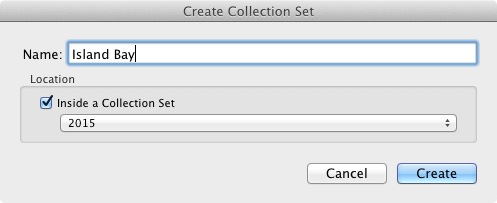
    Now right-click on the Collection set you just created and choose Create Collection Set. Lightroom prompts you for a name. I’ve called this Island Bay because it’s the Wellington suburb where the photos in my last import were taken (and have saved it inside the 2015 Collection Set).

    How to organise photos in Lightroom

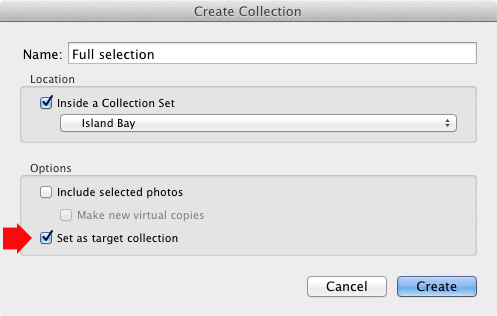
    Right-click on this new Collection Set (Island Bay) and select Create Collection. The Create Collection window opens. This is slightly different and gives you more options. Name the Collection “Full selection” (I’ll explain why in a minute), tick the Set as Target Collection box and click Create.

    How to organise photos in Lightroom

    Now go to the Catalog panel and click on Previous Import. Lightroom displays the last set of imported images in the Content window. Go to Edit > Select All to select all the photos and press the B key. Lightroom adds all the selected photos to the Target Collection – the Collection called Full Selection that you just created. Congratulations, you have just created your first Collection!

    How to organise photos in Lightroom

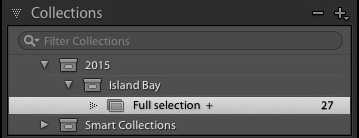
    This is what the Collection Sets and Collection I created in the example above look like in the Collections panel in the Library module. The plus icon next to the Collection Full Selection indicate it is the Target Collection. The number 27 on the right tells you how many photos are in the Collection.

    Collections and workflow

    Of course, you are probably wondering why I asked you to create such a strange name as Full Selection. To find out why read my article Use Lightroom Collections to Improve Your Workflow. It shows you how to use Collections to help you decide which photos from a shoot you are going to process. All will become clear when you do so.

    Flags, Ratings and Color Labels

    The Lightroom database (called the Catalog) lets you assign Flags, Ratings, and Color Labels to your photos. There seem to be as many ways of using these as there are photographers, but if you have read my article about using Collections to improve your workflow you will understand that I favour a very simple system, which is this:

    Use Flags to indicate which photos you are going to process.

    I ignore Ratings and Color Labels and don’t use them. Of course, you may wish to use them and there is nothing wrong with that. Workflow is a personal thing, and ultimately you will figure out what works best for you through trial and error.

    Let’s take a closer look at Flags, Ratings, and Color Labels. The easiest way to see them is in Grid View, which you can go to from any Lightroom module by pressing the G key on the keyboard. Read my article Making Sense of Lightroom’s Grid View to learn more.

    Flags

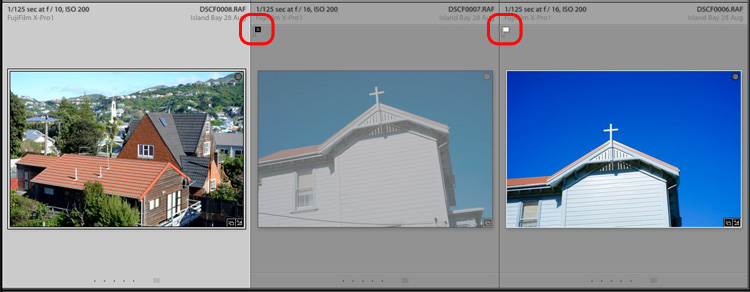
    Every photo in your Lightroom Catalog is either unflagged (the default), flagged as a Pick (indicated by a white flag) or flagged as a Reject (marked by a black flag with a cross in it).

    The quickest way to flag a photo as a Pick is to select and it and press the P key. You can remove the flag by pressing the U key or mark it as a Reject by pressing the X key. Flags are generally used to indicate which photos you would like to process (Picks) and which you would like to delete (Rejects).

    How to organise photos in Lightroom

    The middle photo has been flagged as a Reject. It is marked with a black flag (circled left) and the thumbnail is greyed out, making it easy to pick out in Grid View. The right photo has been flagged as a Pick and is marked by a white flag (circled right). The left photo is unflagged. There is no flag icon, but Lightroom displays a grey one when you mouse over the thumbnail.

    Ratings

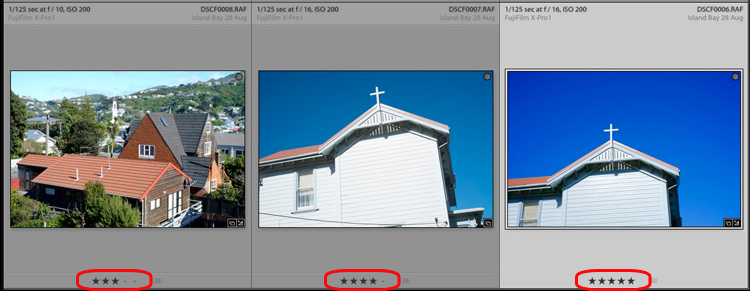
    Every photo in your Lightroom Catalog is either unrated (the default) or has a one, two, three, four or five star rating. You can apply these ratings by selecting a photo and pressing the corresponding number key (1, 2, 3, 4 or 5).

    Ratings are generally used as a way to indicate which photos are your favourites. Give your best images a rating of 5, and use the other numbers for the rest.

    How to organise photos in Lightroom

    Here, the three photos have been given a rating of three, four and five stars respectively. The star rating of each photo is displayed under the thumbnail in Grid View.

    Color Labels

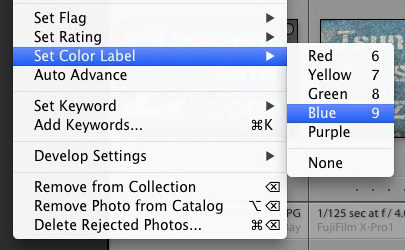
    You can also assign a color label to your photo by selecting it, going to Photo > Set Color Label and choosing from Red, Yellow, Green, Blue, Purple or none. You can also use the 6, 7, 8 and 9 number keys as a shortcut to applying Red, Yellow, Green and Blue color labels.

    How to organise photos in Lightroom

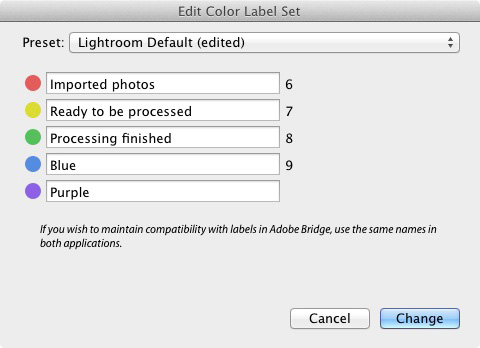
    Colour labels are designed to be adaptable so you can use them for whatever you want. Go to Metadata > Color Label Set > Edit to assign a meaning to each color label. In this example I have entered a purpose for three of the color labels. It’s just an example to show you the possibilities – in reality I prefer to keep things simple and not use them.

    How to organise photos in Lightroom

    Hopefully this article has given you a good overview of the process of using Lightroom as a digital asset management tool. The next article in this series will show you how to get started in the Develop module. Meanwhile, if you have any questions about organizing your photos in the Library module then please let me know in the comments.


    Mastering Lightroom Book One: The Library Module

    Mastering Lightroom ebookMy latest ebook Mastering Lightroom Book One: The Library Module (second edition) is a complete guide to using Lightroom’s Library module to import, organise and search your photo files. You’ll learn how to tame your growing photo collection using Collections and Collection Sets, and how to save time so you can spend more time in the Develop module processing your photos.

    googletag.cmd.push(function() {
    tablet_slots.push( googletag.defineSlot( “/1005424/_dPSv4_tab-all-article-bottom_(300×250)”, [300, 250], “pb-ad-78623” ).addService( googletag.pubads() ) ); } );

    googletag.cmd.push(function() {
    mobile_slots.push( googletag.defineSlot( “/1005424/_dPSv4_mob-all-article-bottom_(300×250)”, [300, 250], “pb-ad-78158” ).addService( googletag.pubads() ) ); } );

    The post How to Organize Your Photos in Lightroom by Andrew S. Gibson appeared first on Digital Photography School.


    Digital Photography School

  • How to Capture a Photo of a Bubble Bursting

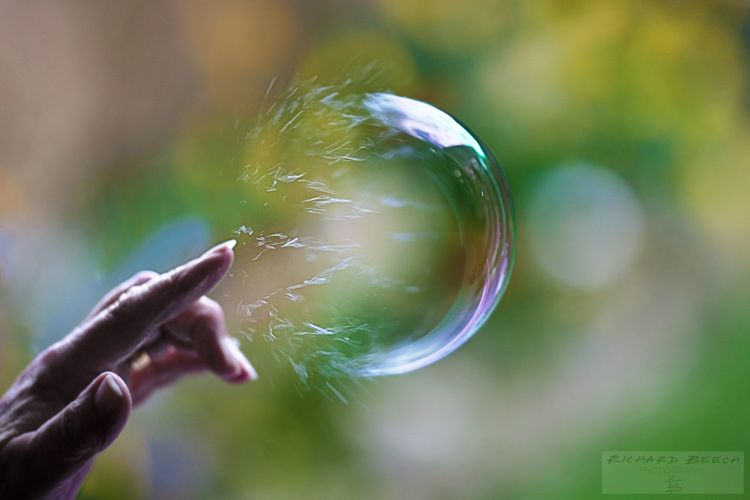
    Set yourself a high-speed challenge: Capture a bursting bubble

    bubbledps1
    I have always loved the idea of photography as being a way of taking an instant out of time, and preserving that moment forever. By freezing time in this way, a photograph can show something that may not normally be seen in day-to-day life, and can make an ordinary subject extraordinary.

    So, when going through a bit of a creative lull a couple of years ago, I felt that I needed to set myself a challenge to restore my motivation. I decided that I was going to capture the exact moment of a bubble being burst. After some internet research, I came to the conclusion pretty quickly that I did not have the necessary budget for a super slow-motion camera to achieve this. I did, however, become determined to capture a bubble in mid-burst using only equipment I already owned – my DSLR, various lenses and a flashgun (speedlight).

    The challenge was lengthy and often frustrating, but when I did successfully take a photograph of a bursting bubble, it was incredibly satisfying. By freezing a moment, the photograph showed something that could not normally be seen by the human eye – a soap bubble with one half completely intact and the other half made up of separate swirls of liquid. The bubble was collapsing in on itself in mid-air. Friends and family who saw the photograph showed surprise and commented that they, like me, had assumed that a bubble just disappeared when popped. A photograph had changed their view of the world simply by freezing a single moment of time and I was reminded just how powerful photography can be.

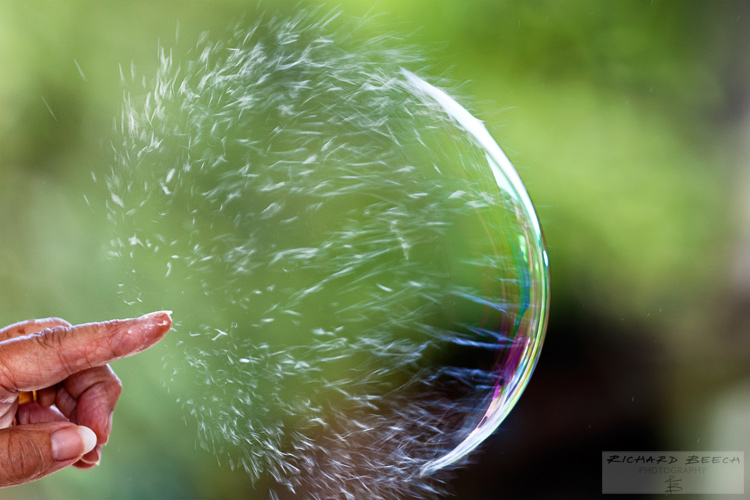
    bubbledps2

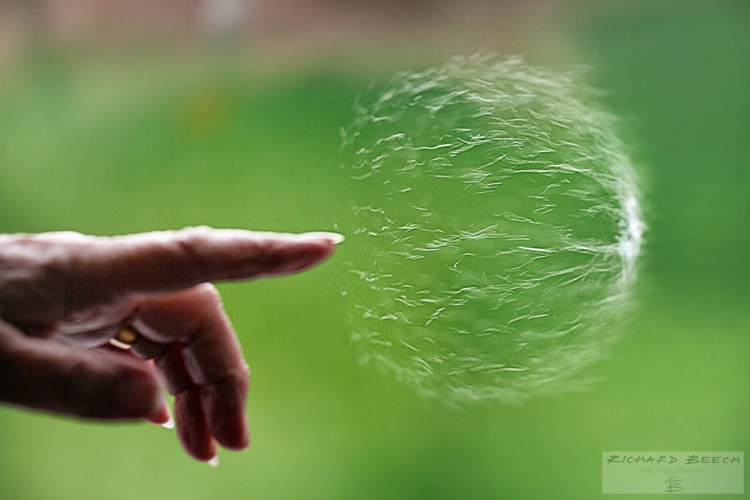
    With my motivation fully restored, I progressed further and attempted to capture a sequence of shots to show the entire process of a bubble collapsing. One of the shots has even been included in an international exhibition for scientific images. I have included some of these shots here but there are many more on my website at the link shown below in my bio.

    I would definitely recommend this challenge to anyone, particularly if you may be in need of a creative boost or maybe need to rediscover your passion for photography. If you do decide to take up this high-speed challenge, here are some things that I learned along the way. I hope that they will be of help to you when capturing a bursting bubble.

    1. Use large bubbles

    Larger soap bubbles will be easier for you to focus on than small bubbles, and they will also be easier to burst. Additionally, the composition of your shot can really benefit from using larger bubbles – you should be able to get a frame-filling shot of a bubble bursting without the need to crop.

    I have previously used a kids’ bubble toy set (purchased for around £1) that came with a bubble wand of around 5cm (2 inches) in diameter. I found this to be ideal for blowing one or two medium-to-large size bubbles, that stayed in the air long enough to capture them being burst. Smaller wands tended to produce streams of little bubbles which were (a) difficult to burst and (b) cluttered up the final shot.

    2. Get a friend to help you

    You are probably going to need somebody else to help you with this project unless you have superhuman reaction times! Blowing the bubble, bursting the bubble, and setting up the shot was just too much for me to complete on my own. Having someone to blow and burst the bubble for you, allows you to compose and focus your shot without distraction.

    3. Shoot indoors

    If possible, shoot indoors so that you can limit the movement of the bubble. I have taken a number of shots outdoors, but any slight breeze will cause the bubbles to fly away pretty quickly, making it much harder to set up your shot.

    I have found it very useful to shoot in front of a floor-to-ceiling window facing onto a garden. This provides lots of natural light and some pleasing, natural colours for the backdrop, which was the look I was after. Just remember to leave some space between the bubbles and the window to reduce any reflections or glare that you may get from the glass.

    4. Use a zoom lens

    Even when shooting indoors, the movement of the bubbles will still be somewhat unpredictable. For this reason, I have found it useful to use a zoom lens when shooting bubbles, so that I can adjust the focal length as necessary to focus and compose the shot while the bubble is in mid-air. I have usually taken the bursting bubble images with a Canon 70-200mm f/2.8 lens set to between 100-150mm. A further advantage of using this lens is that it helps to create some pleasing bokeh (blurry out-of-focus highlights) in the background while keeping the bubble details sharp when the focal length is increased.

    bubbledps3

    5. Shoot in full manual mode

    Shooting in full manual mode will give you the control over the settings that you will need to get good results. Firstly, you will need to set as fast a shutter speed as you can get away with, depending on the available light. The action of a bubble bursting is extremely fast and so you will need to set your camera to a shutter speed of 1/1000 second or faster to freeze the action – the faster the better.

    With such fast shutter speeds, you will need to use a wider aperture (lower f-number) or a higher ISO setting. However, given the unpredictability of the bubble’s movements, you do not want to have such a wide aperture (and, therefore, shallow depth of field) that you end up with most of the bubble out-of-focus. For this reason, I prefer to increase the ISO setting before dialling in a wider aperture as some additional noise to the image is easier to manage (and can be corrected to a certain extent during post-processing) than an image where the bubble is largely out-of-focus.

    If the available natural light is not sufficient to allow fast shutter speeds, a flash can be used to help to freeze the action. However, I would recommend using a diffuser or reflector with any flash, particularly if shooting indoors in front of a window.

    6. Focus manually

    I have tried to capture bursting bubbles with and without the use of autofocus. My preference is definitely without. My best results have been when I focused manually on the bubble floating in mid-air and pressed the shutter release button as soon as the bubble was to be burst. On several occasions, the autofocus was too slow and I missed the shot as the camera struggled to find focus. If nothing else, this project will give you a lot of practice in manual focusing!

    7. Keep calm and carry on

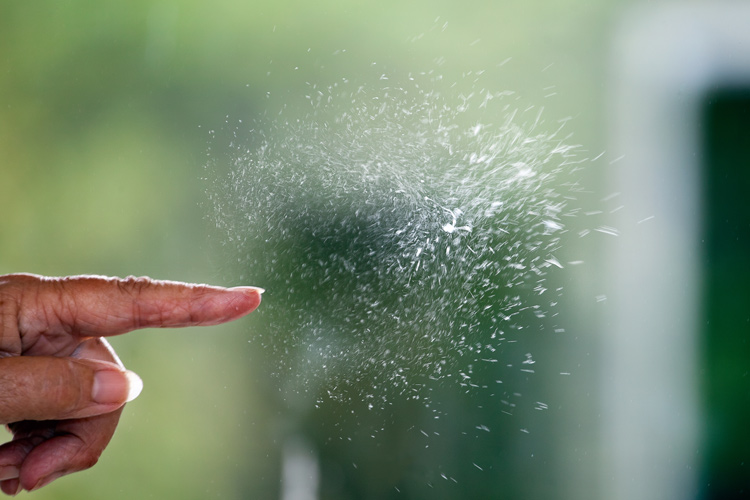
    bubbledps4

    The speed at which the bubble bursts means that you will probably have to try this many times to get the timing exactly right. Patience is key. Don’t give up on the challenge. Accept that it is going to be slightly frustrating but know that, when you get the timing spot-on, your final image will be much more satisfying.

    googletag.cmd.push(function() {
    tablet_slots.push( googletag.defineSlot( “/1005424/_dPSv4_tab-all-article-bottom_(300×250)”, [300, 250], “pb-ad-78623” ).addService( googletag.pubads() ) ); } );

    googletag.cmd.push(function() {
    mobile_slots.push( googletag.defineSlot( “/1005424/_dPSv4_mob-all-article-bottom_(300×250)”, [300, 250], “pb-ad-78158” ).addService( googletag.pubads() ) ); } );

    The post How to Capture a Photo of a Bubble Bursting by Richard Beech appeared first on Digital Photography School.


    Digital Photography School

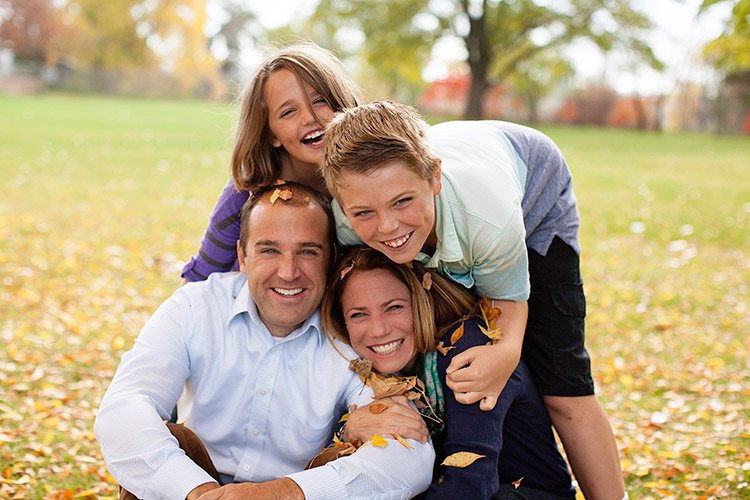
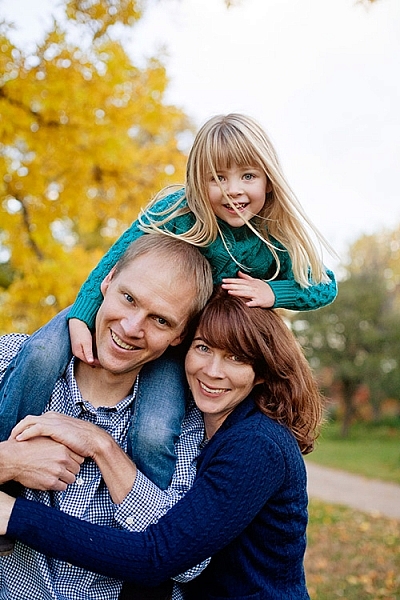
  • 7 Ways to Take Advantage of Autumn in Your Portrait Photography

    Fall is my favorite. At least it used to be before it was Pumpkin Spice Everything. I’m so tired of Pumpkin Spice Everything, but I’ll never tire of chilly weather, or scarves, or leaf piles. Or even shorter days, mainly because long summer days are just too much pressure for me.

    lynseymattingly1

    I like everything about fall including, maybe especially, that it’s ripe for portraits. Here are seven ways to help you take advantage of all of autumn’s goodness in your portrait photography.

    lynseymattingly2

    1) The light is phenomenal 

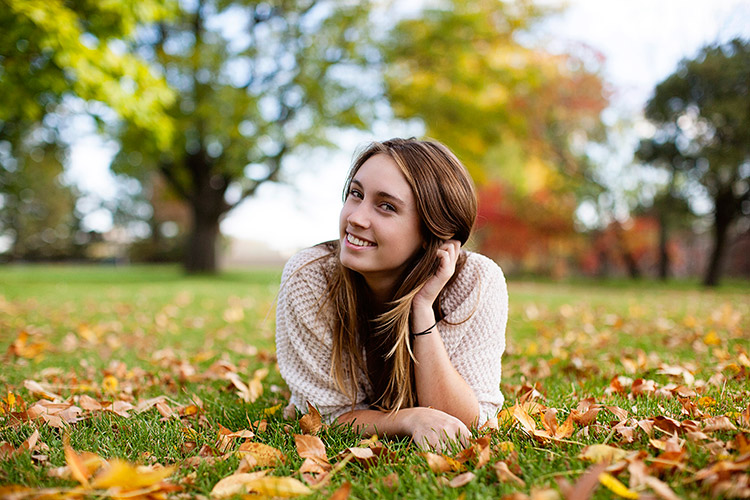
    Yes, there is less of it, but it is so golden and delicious. I’m sure there is a very scientific reason for that, which of course I know and understand exactly, but I don’t want to bore you. I like a warmer image, so to get one without having to add a filter is fantastic. I prefer to shoot in the morning and early evening hours but in the fall, the light reflecting off of the warmer tones in the trees make even the deadest of shady patches come alive.

    While people don’t normally wear yellows and oranges for picture day, the golden tones found in nature compliment all skin tones. This is why I always tell my clients to dress in colors that are found naturally outside—not only does it keep people from showing up in lime green, but the palette works for whatever background we find that day, and this time of year dressing in earth tones can really make a portrait pop.

    lynseymattingly4

    2) Clients dress in their finest

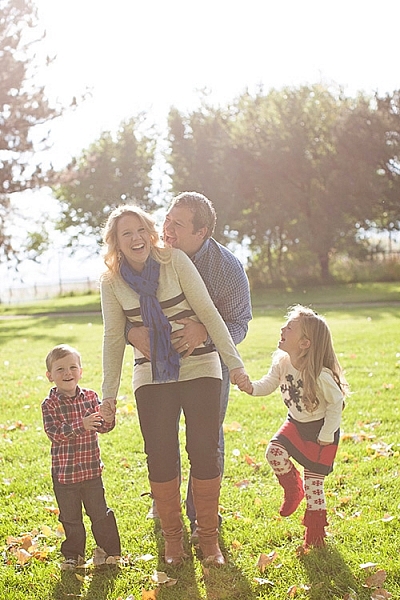
    I’m not big on fancy clothes, but even I agree that flip flops take a back seat once we can bust out boots and scarves. Fall is when people tend to take it up a notch, plus it’s layering season. Layering is the best way to achieve portraits that look high-end or even fashion shoot-like. You won’t ever find me in boots, a t-shirt, a jacket, a skirt, tights, a scarf and a hat in real life….but on picture day, I’ll happily dress everyone in five layers and make them stick with it for 20 minutes if it makes my ragamuffin family look like we bathe regularly. I’ve found that my clients feel the same. Which is not to say that my clients are ragamuffins, I’m sure they always look as sharp as they do on picture day.

    lynseymattingly3

    3) Fall adds a playful feature to portraits

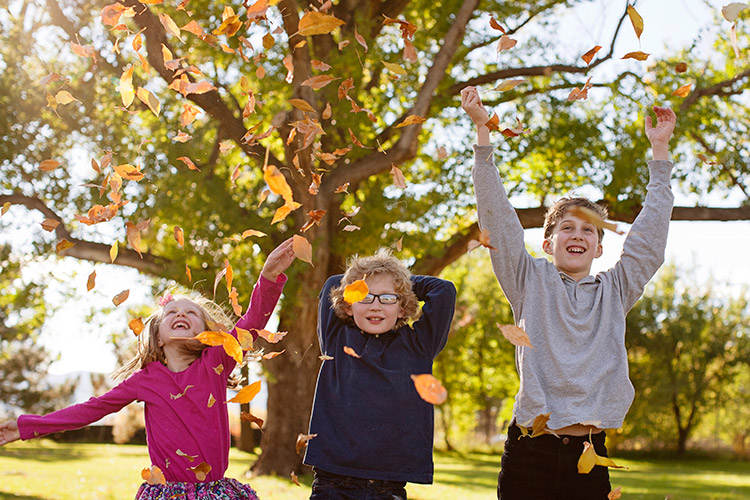
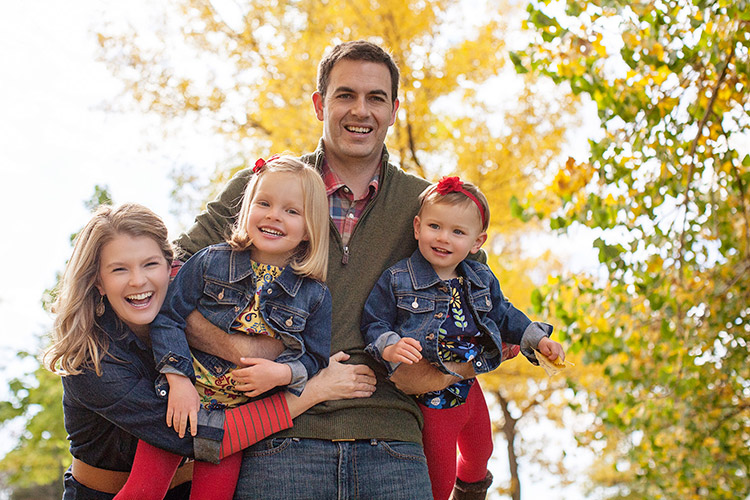
    I don’t like traditional posing so fall adds so many more options: throw leaves, lay on leaves, climb in colorful leaves, throw leaves at me! (Try to watch out for sticks please) You get the idea. The colors are almost like an extra family member that matches everyone, and isn’t making things more difficult. Use it to your every advantage. It’s not possible to look like you’re miserable in five layers of fancy-pants clothes when you are having a leaf fight. I know, I’ve done the research.

    lynseymattingly5

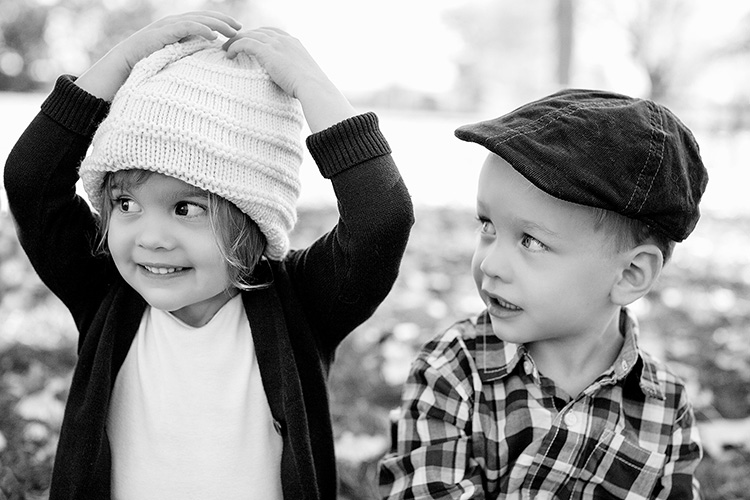
    4) Don’t forget black and white

    While the changing fall season offers colors, it also offers texture. Black and white portraits can still feel the magical spell of autumn through texture, tone, and playfulness. Plus, that phenomenal light thing goes for black and white too (see #1). I love black and white portraits, and while I am likely to do more color this time of year, I still proof a few black and whites for all of my clients.

    lynseymattingly6

    5) Compensate for the warmer tones

    Sometimes if I am hitting the light just right, and my subjects are in perfect clothes, and the moon isn’t void of course, I find that images can get too warm. I know that sounds crazy, but it can happen. A custom white balance can help you on the front end, but if you didn’t notice it until after, don’t despair. An auto color run (under Image in Photoshop) or a cooling filter can fix everything. For as much as warm tones are flattering, no one wants to look like a seasonal gourd.

    lynseymattingly9

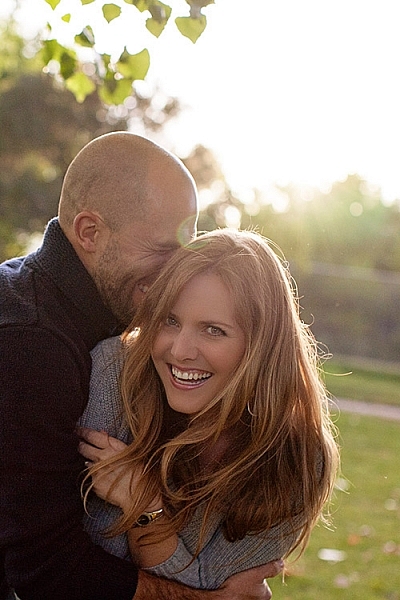
    6) Fall weather is perfect for cuddling

    Now I’m not one to cuddle, much to my husband’s dismay; I can’t take people in my personal space for an extended period of time. Last weekend a client that knows how I feel about hugging and all that, giggled at how often I tell people to “snuggle up” when I’m shooting family portraits. I guess I figure that most people enjoy it. Or are at least willing to pretend they do for the sake of the pictures (even I am willing to do that for a good Christmas card), especially if it’s not 100 degrees F (30c) outside. And a snuggle feels like a lot less pressure than cuddling, now doesn’t it?

    lynseymattingly8

    7) The holidays are around the corner

    In the US, the changing colors of the trees means that winter is almost here, which puts portrait photographers square into Holiday Card Season. Most of the clients I photograph this time of year are planning on using their images for sending out cards, or even creating holiday gifts.

    So this is the only time of year I’m likely to offer a sale or special on portrait sessions, and every time I do, they sell out. That also means that this is the time of year that I can lose my mind in a pile of editing if I am not careful. To try to prevent both a nervous breakdown and spending a month staring at my computer screen, I usually offer mini sessions—10 to 15 minute shoots where I promise five or so pictures that I deliver as high resolution files. This takes any printing or card creating out of the equation, and also limits the amount of images I promised, rather than a full session which for me can be 50 or more. In turn, my clients get a few choices of images for their holiday cards and gifts, including that one great picture that was likely the whole reason they wanted portraits anyway. And I don’t have a nervous breakdown. Probably.

    lynseymattingly7

    So throw back a pumpkin spice latte and put on a pair of boots and go shoot some portraits, even if you usually don’t. Everything is on your side in the fall – great light, fabulous surroundings, and more clients than any other time of year. That doesn’t happen very often (well, it happens once a year, but still).

    lynseymattingly10

    googletag.cmd.push(function() {
    tablet_slots.push( googletag.defineSlot( “/1005424/_dPSv4_tab-all-article-bottom_(300×250)”, [300, 250], “pb-ad-78623” ).addService( googletag.pubads() ) ); } );

    googletag.cmd.push(function() {
    mobile_slots.push( googletag.defineSlot( “/1005424/_dPSv4_mob-all-article-bottom_(300×250)”, [300, 250], “pb-ad-78158” ).addService( googletag.pubads() ) ); } );

    The post 7 Ways to Take Advantage of Autumn in Your Portrait Photography by Lynsey Mattingly appeared first on Digital Photography School.


    Digital Photography School

  • The Camera Bag of a Professional Traveler

    “Travel is the best teacher.”

    Have you ever heard this saying? As a photographer, travel teaches you more than you could ever imagine. It requires a lot of preparation and attention to details. Yet, it also requires you to be open, ready for the unexpected, and willing to take risks sometimes to get the best shots!

    Whether you are traveling into your backyard or across the globe, knowing what to put in your camera bag can be daunting. There are so many great gadgets out there.
    travel-bag-photographer

    How do you know what’s most important to bring? How do you know what not to bring?

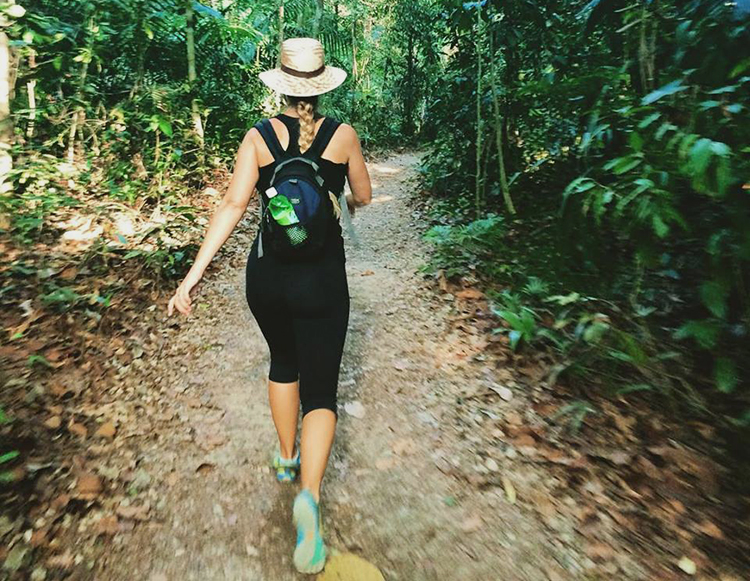
    Choosing the best equipment to pack for any kind of adventure is challenging. It’s not about being the next national geographic photographer, it’s about being ready to create awesome experiences and capture those moments at the same time. You are first a traveler, second a photographer.

    No matter where you go, what goes in your camera bag is just as important as what goes in your suitcase – maybe even more important! Too much equipment, or the wrong equipment, can make or break your memory making experiences.

    Depending on your photography focus, you want to have a wide range of gear options, that take up as little space and weight as possible. That’s the number one goal. After traveling the world for over a year with only one 30 liter backpack and my camera bag, I’ve learned what’s absolutely necessary to bring, and what I can leave behind the next time. Let’s breakdown the camera bag of a professional traveler and lifestyle photographer.

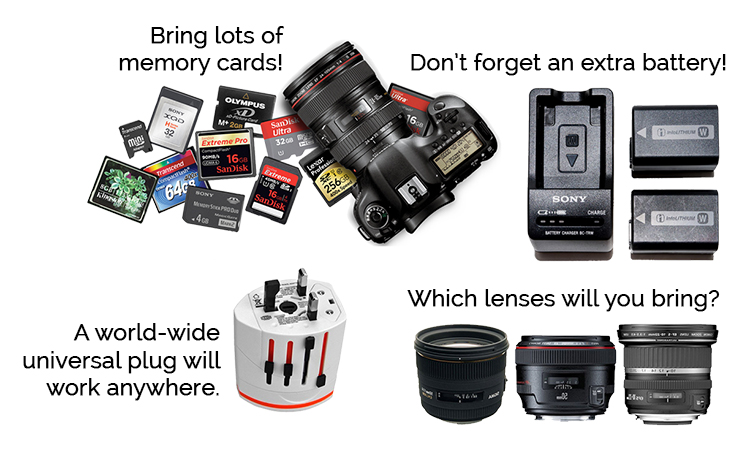
    The obvious equipment to pack:

    • Memory cards
    • Batteries
    • Camera charger
    • Universal Plugin
    • Camera body
    • Lenses

    obvious-equipment-travel-camera-bag

    These are the items you always want to carry as a photographer. Besides the camera body and lenses, these things are fairly light weight and don’t take up too much room.

    Memory Cards:

    Consider having multiple smaller memory cards instead of one big one. Carrying four 8GB memory cards is a safer bet than carrying one 32GB memory card. You don’t want to risk carrying all of your images on one card because there is always a possibility of that card being corrupted or lost.

    Charger and Plug:

    When we travel, we tend to take more photos than if we were just at home. Your camera battery will run through a full charge much quicker on the road. Make sure you bring backup batteries, and don’t forget your battery charger. Consider where you are traveling and the outlet plug necessary. A universal port with surge protection is not something to skimp on!

    Camera Body:

    This is personal preference. All of the best camera manufacturers have developed amazing high-end digital cameras that are light-weight, fairly small in size, and perform beautifully. Do your research ahead of time and choose the best option for you. These days, even the lower-end DSLR camera models perform beautifully compared to just a few years ago. Consider purchasing a mirrorless camera. These are the latest technological advance in the photography industry.

    Lenses:

    This is another personal preference, so which lenses are best for you? Many people choose to bring a telephoto lens for travel experiences. They allow you to zoom in to things really far away and capture details you can not see from a distance. But these are the heaviest lenses on the market, and when traveling you will use it way less than you think. I say skip the telephoto lens and stick to using portrait (medium telephoto) and wide angle lenses for your travel experiences.

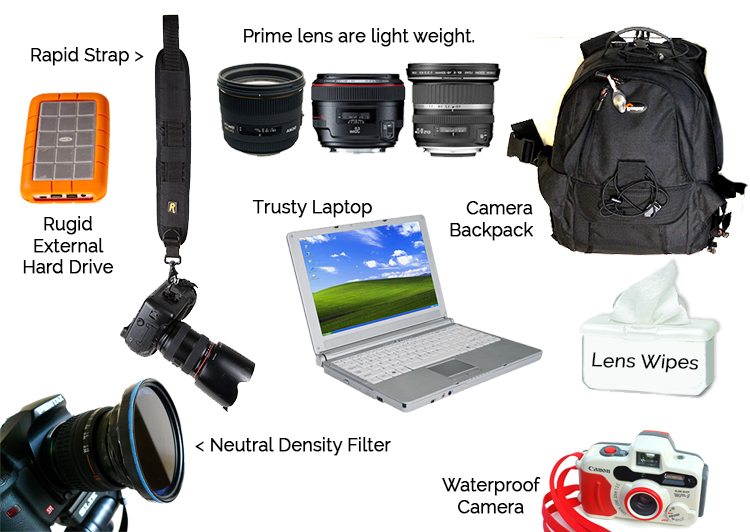
    The not so obvious equipment:

    • Prime lenses
    • Rapid Strap
    • Lens wipes
    • Graduated Neutral Density Filter
    • Backup hard drive
    • Laptop computer
    • Backpack camera bag
    • Waterproof camera
    • SmartPhone and photography apps

    not-obvious-items

    A Prime Lens:

    I carry two lenses when I travel. As a portrait and landscape photographer it is important to carry lenses with focal lengths of 24mm or smaller for landscapes and 35-85mm for portraits. A fixed lens, like the 35mm or 50mm is, in my opinion, the very best lens to carry for any travel trip. It’s lightweight and very small. With a wider aperture of  f/1.2 – f/2.8, this lens will allow more light to come in, which is important when photographing in low-light scenarios. The wider apertures will create a shallow depth of field, giving you much more creative freedom to become truly connected to your scene.

    The challenge with a fixed lens is that there is no zoom. This is where your adventurous mindset comes into play! Your feet become your zoom. You will explore more of the area because you must move around to capture different angles and areas. Indoors, or out, close-up or far away, a prime portrait lens is the ideal traveling lens.

    A wide angle zoom is also a great addition to add to your traveling camera bag. Any 10mm-24mm wide angle lens will allow you to capture those fabulous landscapes that can’t be photographed as well with your portrait lens.

    Rapid Strap:

    The rapid strap is the best camera strap on the market today. This is absolutely worth the investment of about $ 100. Giving you the flexibility of a shoulder strap and a secure, safety harness, this camera strap never left my body for nine months! Use it to save your neck from the pain of the heavy camera, and to feel secure and safe knowing your camera will always hang right by your side.

    Lens Wipes:

    Lens wipes are great when traveling, I use Zeiss Wipes brand. They clean everything streak free and protect your camera and glass from dust and dirt. Use one every time you take the lens cap off. Plus you can use them to clean more than just camera equipment! Don’t leave home with out these little guys.

    ND Filter:

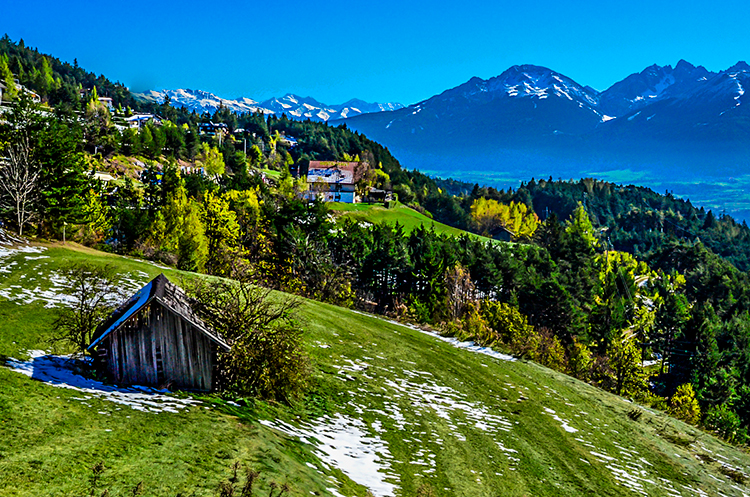
    Filters are also extremely lightweight and take up no room at all. They are a great addition to any photographer’s bag, traveling or not. Having different kinds of filters to use on your adventure will give you an even wider range of unique options for photographing your experience. My favorite is the Graduated Neutral Density Filter (GND). It is an inexpensive addition to your bag that opens up a world of exposure options, no lens can do on its own. GND filters reduce the amount of light that can pass through a lens, allowing you to expose more evenly for extreme lighting scenarios.

    For instance, if it’s midday and the sky is really bright, but the valley in the landscape is much darker, you can use a GND filter to darken the exposure of the sky, while the lens reads the proper exposure for the valley.
    travel-photography-germany

    Backup Hard Drive and Laptop:

    I carry a 2TB Western Digital Passport External Hard Drive and my reliable Macbook Pro everywhere I go. As a traveling photographer, the most important thing is to be able to upload and backup my images immediately. Although many photographers decide to leave these heavy items behind for obvious reasons, I say pack them and use them regularly. Make a habit of spending some time after each adventure to backup and edit your images. You will become a better photographer as you study your photos right away, and see what worked and what didn’t. This will make your entire adventure a great learning experience too!

    Camera Backpack:

    Backpack style camera bags are ideal. You can wear it on your back for easy transportation and hiking. You can carry it in front of you when traveling from one location to another, to keep your equipment safe and secure during your journey. Choose a backpack style that fits all of your equipment, and is also easy to unzip to get into right away. You will save a lot of time and energy by having a camera bag that is specifically designed for traveling.

    Waterproof Camera:

    One thing that I wish I had during this last trip was a smaller waterproof, shock proof camera. Though it might only be used a few times when jumping off waterfalls or out on a boat, these are experiences I don’t have photographs of because I didn’t have that extra piece of equipment.

    If your budget allows for it, buy a nice point-and-shoot waterproof camera that fits in your pocket. You will be happy you did.

    Smartphone and Apps:

    Everyone has a smartphone now that takes pretty decent images. Although these gadgets will never be as great as your DSLR camera, they are convenient and always available. Don’t leave home with out your smartphone and check out these awesome photography apps:

    • Instagram – The most popular way to share your travel photography with the world.
    • Flipagram – Fun photo videos stories set to music you love. Share on many social media platforms.
    • Light Meter – On the go professional light meter with an easy interface to use on the go.
    • Dropbox – Easily sync and back up everything on your smartphone without having to do a thing.
    • Manual – Turn your smartphone into a DSLR with full control over Aperture, ISO and Shutter Speed and more.
    • Snapseed – Amazing editing on the go. Send your editing images directly to your favorite social media app right from Snapseed.
    • Hyperlapse – Amazing timelapse app by Instagram (iOS only). This app is addicting and will get you loving video!

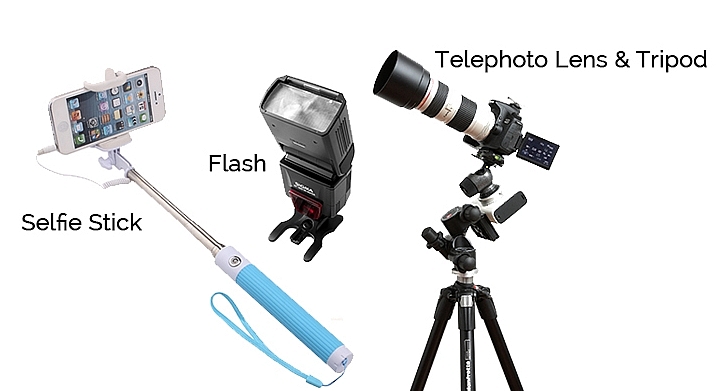
    The things to leave behind:

    • Big telephoto lens
    • Tripod
    • Selfie stick
    • Flash

    leave-items

    As a traveler, you want to minimize what goes in your camera bag. These are the things I recommend leaving behind.

    Telephoto Lens:

    Carrying all your lenses to capture the entire focal length range (8mm or less to 500mm or more) is unnecessary. Most people consider bringing a telephoto lens because you can zoom in really close to things that are far away. I say skip it. The point of travel is to explore, and create memories by enjoying each moment. Use your feet as your zoom, go to those places far away! You will be glad that you are not carrying this heavy lens and love the new fun things you discover along your journey.

    Tripods:

    I might get some negative feedback on this one. If you want to capture night scenes and long exposures, you might want one. However most of the time you can easily find something to set your camera on to capture these scenes just as well without a tripod. Tripods are heavy, awkward to carry, and tend to get in the way. Leave it at home and save yourself the trouble. Challenge yourself to find a make-shift tripod while out on your journey.

    Selfie stick:

    Use a make-shift tripod to capture yourself in a shot by looking for a nearby table, rock or ask a friendly traveler around to take the photo for you.

    Every time a selfie stick comes out, you are bound to miss the beauty of the moment. I noticed this in every city I traveled to. Remember being a traveling photographer is all about balancing the experience of being in the moment and capturing it at the same time. Stay in the moment! Quickly capture a creative selfie of yourself and then capture the scene through your DSLR most of the time to stay connected to your entire experience.

    Flash:

    If you are a comfortable shooting with a flash, bring it. There is always an opportunity to use one. But, if you are not keen on using a flash regularly, don’t bring it just for the trip. I did not use a flash once while traveling the world. Capturing adventure and travel photography is about the beauty of nature and the diversity of cultures around the world. Using natural light and becoming intimate with your your scenes and subjects is the best way to create realistic and artistic images.
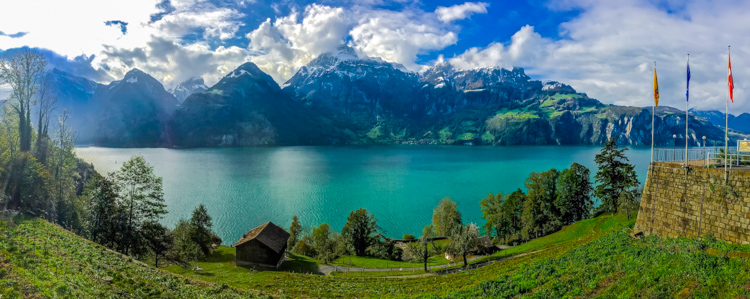
    switzerland-lake

    Traveling really is the best teacher. Being a traveling photographer challenges you to stay in the moment and capture it at the same time. Make this easier on yourself by packing light and taking risks. Pack your camera bag like a professional traveler and your adventures will become the best memories of your life.

    I am on an endless journey to experience the world, and share it through my lens. As technology advances and more people take off on big adventures, there will always be new amazing things to consider adding (or removing) from your camera bag.

    Do you have any other awesome tips for being a traveling photographer? I’d love to hear them! Share your thoughts in the comment section below.

    googletag.cmd.push(function() {
    tablet_slots.push( googletag.defineSlot( “/1005424/_dPSv4_tab-all-article-bottom_(300×250)”, [300, 250], “pb-ad-78623” ).addService( googletag.pubads() ) ); } );

    googletag.cmd.push(function() {
    mobile_slots.push( googletag.defineSlot( “/1005424/_dPSv4_mob-all-article-bottom_(300×250)”, [300, 250], “pb-ad-78158” ).addService( googletag.pubads() ) ); } );

    The post The Camera Bag of a Professional Traveler by Danielle Werner appeared first on Digital Photography School.


    Digital Photography School

  • 13 Effective Interior Photography Tips for Dummies

    How often have you seen great properties being completely ruined by awful photography? That’s right – terrible interior and exterior photos are a norm, especially when made by average camera users who know next to nothing about composition, lighting or specifications. But the truth is that taking nice rental property photos is within your reach, even if you’re new to Continue Reading
    The post 13 Effective Interior Photography Tips for Dummies appeared first on Photodoto.


    Photodoto