Category: Photography

  • 8 Common Landscape Photography Mistakes

    As photographers, we know that there are literally hundreds of small things that need to be done in each scene, that add up to the final magnificent shot. Sometimes when we get behind the camera, and the light becomes amazing, it’s very easy to forget one or two things, and the result is that the shot is not as good as it could have been. There are lots of details to remember, but there often some obvious things that have been forgotten. These are the common mistakes I see in many landscape images. If they were corrected at the time, the image would have been much more dramatic and powerful.
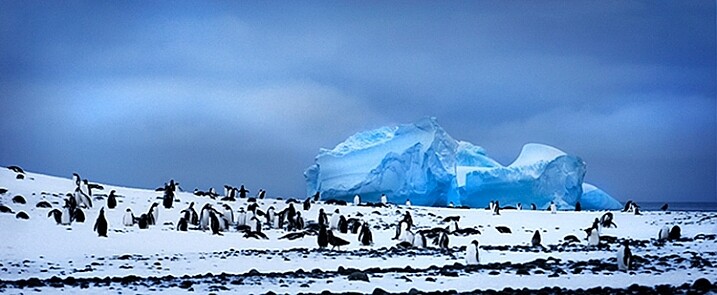
    Penguins and iceberg in Antarctica.

    Penguins and iceberg in Antarctica.

    So here are the eight top landscape photography mistakes make so you can avoid them and improve your images:

    1. Stability – use a tripod

    In creative images, blurriness can be very interesting. In landscape images however, you usually want your image to be sharp all the way through. The best way to be sure that your image is sharp is to use a tripod. If you are shooting in low light (you mostly will be if you are shooting landscapes) then you absolutely need to be using a tripod.

    Now, there are tripods and there are tripods. For landscape photography, you might want to invest in a more heavy-duty one. The small light-weight tripods might do the trick for a while, but if you are shooting on a location and it’s windy, your tripod may get blown over, or might move because of the strength of the wind. A good tripod will also last a long time and take a beating, so buy the best tripod you can afford, and make sure you keep your camera as still as possible when shooting.

    Another good piece of equipment to buy is a cable release. You don’t need to buy one of the expensive ones with the intervalometer built-in, no, just a simple cable release. Once you are set up and ready to take your shot, step back from the camera and press the button. There will be no vibration from you pressing the shutter release and your image will be nice and sharp. If you don’t have a cable release, you could use the built-in self timer to release the shutter too.

    2. Get the horizon straight

    This almost goes hand-in-hand with using a tripod. Many a good landscape image has been damaged by a skewed horizon. Fortunately, this can be easily fixed in Photoshop or Lightroom, so it’s not a very big worry, but you might have to crop out some details to get that right. The idea however, is to get the shot right in camera first, then edit.

    You can use a few different tools to make sure your horizon is straight. Firstly, switch on the grid in your camera viewfinder, line up the horizon with the horizontal line, and you should be good. Some tripod heads have a built-in spirit level, make sure this is level and your horizon should be fine. Lastly, use the live view function on your camera, and if you have it, bring up the false horizon dial on the back of your screen, level your camera, and you are done.

    I prefer levelling my horizon in camera, as it helps to save time in post production. If you need to straighten the horizon afterwards, you will need to crop the image as I noted earlier, which means your composition may change slightly. I prefer not to crop as far as possible, so getting it level in the camera is a good goal.
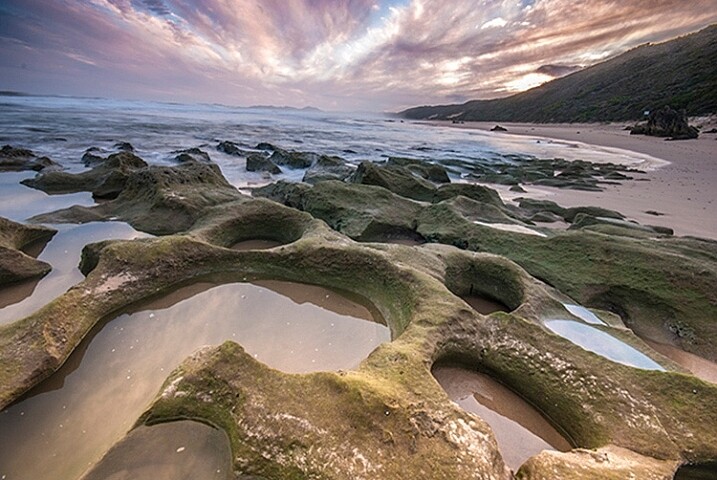
    A crooked horizon is distracting.
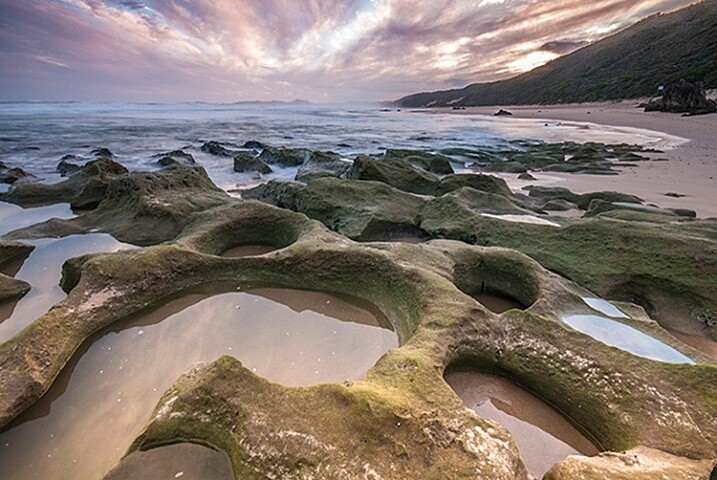
    A crooked horizon is distracting.

    Looks better now that the horizon is straight.

    Looks better now that the horizon is straight.

    3. Shooting only in landscape format

    Many photographers assume that they should shoot a landscape scene in landscape (horizontal) format. This is normally not a bad idea, but in some cases, a portrait orientation (vertical) can work really well. Think of a forest or mountain scene. If the subject shape is more vertical than horizontal, try it in the portrait format, it can add a dynamic feel to the scene.
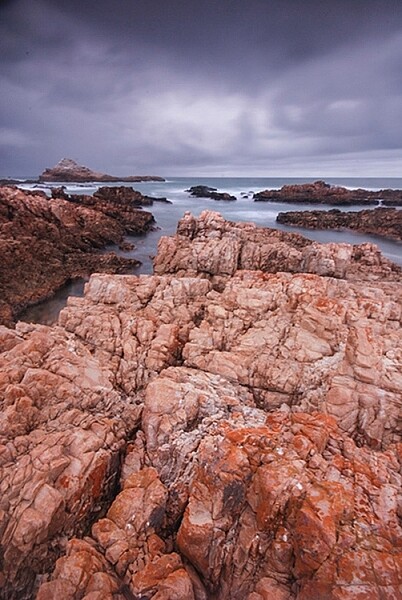
    Shoot in portrait format too!

    Shoot in portrait format too!

    4. Not thinking about the aperture

    I truly believe that aperture is a composition tool. When you are setting up a scene, you should be thinking about your depth of field. Do you want everything from the foreground to the background to be in focus? Generally, in landscape photography, this will be the case.

    If that is what you want, make sure your aperture is f/8, f/11 or higher. That way, you will ensure that everything is in sharp focus. If you are at f/2.8, and you focus on the foreground, the background will be out of focus, and the middle of your scene will be soft. This should be one of your key checkpoints when you set up the shot. If you are using a wide aperture and the mountains in the distance are out of focus, this cannot be fixed afterwards in Photoshop…not yet anyway!
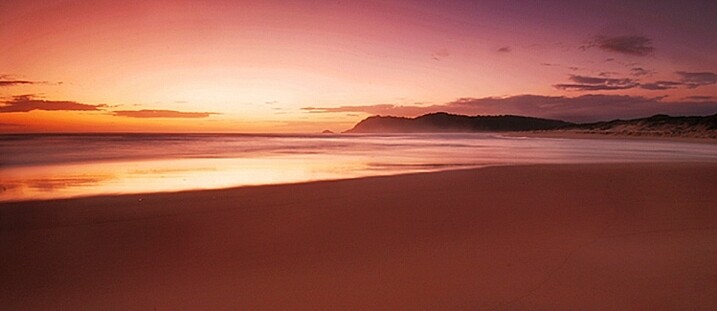
    In a landscape image, you will likely want everything in focus.

    In a landscape image, you will likely want everything in focus.

    5. Shooting using the camera’s landscape mode

    Yes, you may have a landscape setting in the scene modes on your camera. As much as possible, try not to use it. Why? Well, it’s not great at making the exposure look good for your scene. What it will do is set your aperture to f/8 or even f/11, but it may not render the scene as effectively as you could do using manual settings. The scene settings are designed to work within certain parameters and in low-light conditions, they are not always the best choice. Try and shoot your landscapes on manual settings as far as possible, that means that you control ISO, shutter speed and aperture.

    6. Standing next to other photographers

    If you see a group of photographers standing on the top of a hill, it might be a good idea to shoot from somewhere else. This is not to say that other photographers have got it wrong, rather what I mean is, you want to go home with a different image to the others. Sometimes, the best composition or vantage point is at one particular spot, that’s fine, take a shot from there, but look for other places to get a great shot too.

    It’s a good idea to scout a scene before you shoot it. Go and take a walk around the day before, look at where the sun will be setting, and decide on your position. Don’t simply follow the crowd, then your images will look like the rest of the images taken there.
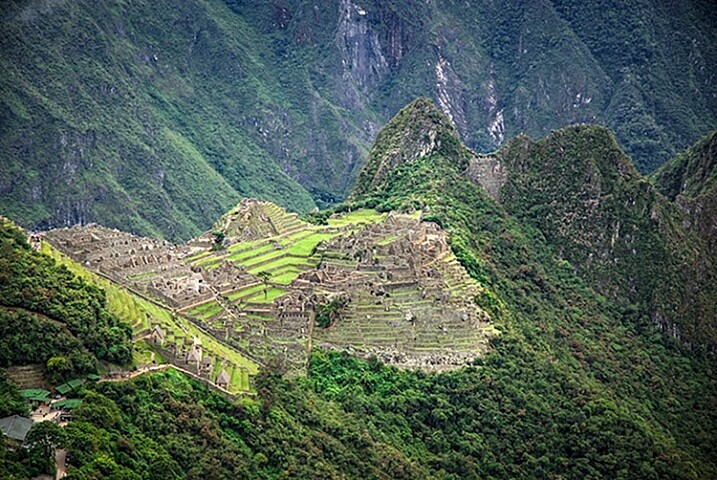
    A different vista of Machu Picchu.

    A different vista of Machu Picchu.

    7. Uninteresting negative space

    Negative space is the space that surrounds your subject. This space can truly make, or break, your image. In most cases, the sky is the negative space in a landscape scene. A clear blue sky looks great, but some wispy soft clouds can really make the scene dramatic. If the sky has no clouds and is clear, this can make the scene seem uninteresting.

    If you find that in your scene, make the sky a smaller portion of your image, if there are some great looking clouds, give it more space in your scene. Sometimes, you don’t have a choice, you may only be able to get some shots on a particular day. In that case you need to get what you can. If you don’t have this constraint, try to go back on another evening, when there are some clouds in the sky. Clouds give the sky detail, they reflect the sunlight, and can look yellow orange against a blue sky. This makes for a much more interesting scene.
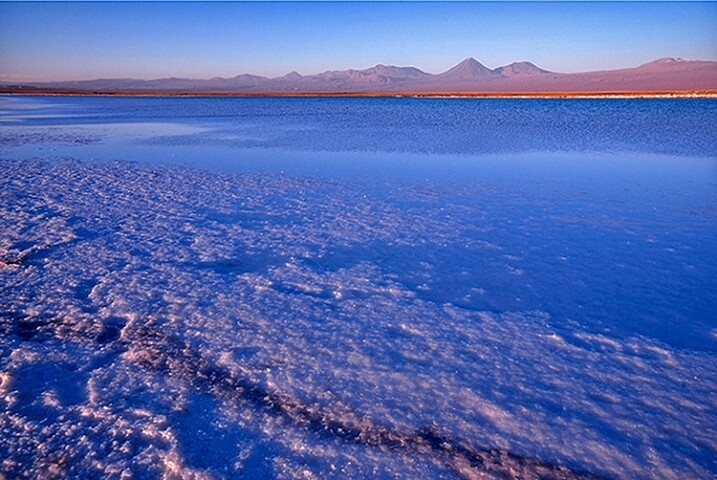
    The sky had no clouds, so I made it a small part of the image.

    The sky had no clouds, so I made it a small part of the image.

    8. No clear subject

    It sounds crazy, but it is very easy to have an unclear subject in landscape photography. Most often, landscape photography is of a natural scene, mountains, forest, river, seascape, deserts, etc. Whichever one it is, make sure that it is clear to your viewer.

    If you are photographing a mountainous scene, make sure you use a lens that works for that scene. Landscape photographers are tempted to think that every image needs to be taken with the wide angle lens. Sometimes, this can cause the mountain range in the background to seem small and insignificant. The same can be true in any of the other types of landscape photography. Be sure that your viewer knows what they are supposed to be looking at, and show them that, and the beauty that surrounds the subject. Get close to your subject, as close as possible, and if it’s not close enough, maybe you need to use a different lens to get closer. A 50mm lens can be used in landscape photography, so can a 200mm lens, it all depends on what you want the viewer to see.
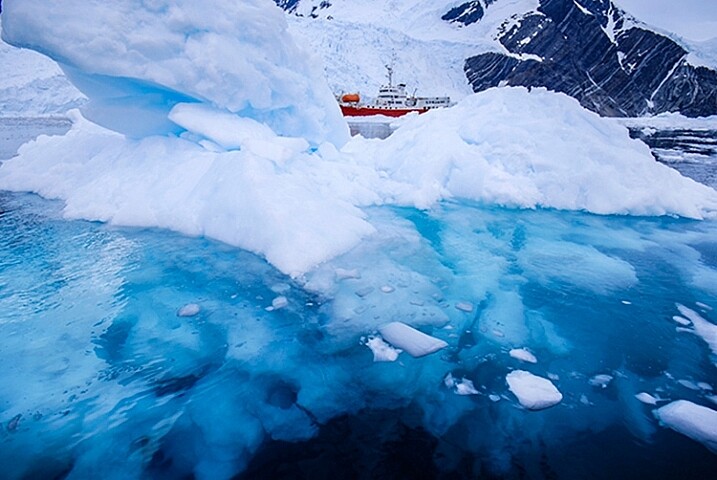
    Subject-2

    The iceberg in front of the ship is clearly the subject here.

    Next time you are planning a landscape photo shoot, run through these points quickly and see how it works out for you. If anything, you will be more mindful and deliberate about what you are shooting, and that will immediately improve your images. Enjoy.

    googletag.cmd.push(function() {
    tablet_slots.push( googletag.defineSlot( “/1005424/_dPSv4_tab-all-article-bottom_(300×250)”, [300, 250], “pb-ad-78623” ).addService( googletag.pubads() ) ); } );

    googletag.cmd.push(function() {
    mobile_slots.push( googletag.defineSlot( “/1005424/_dPSv4_mob-all-article-bottom_(300×250)”, [300, 250], “pb-ad-78158” ).addService( googletag.pubads() ) ); } );

    The post 8 Common Landscape Photography Mistakes by Barry J Brady appeared first on Digital Photography School.


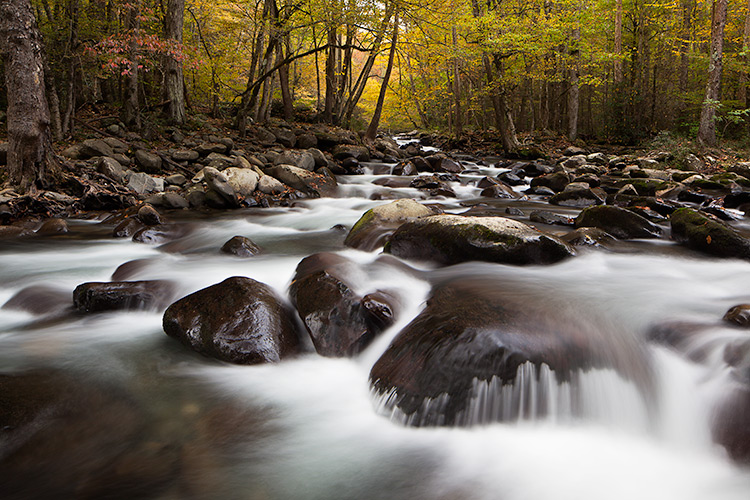
    Digital Photography School

  • 8 Tips for Fall Landscape Photography

    Fall is a fantastic time of year for you to photograph the landscape and really push your creativity. The colors, textures, and soft light provide an amazing palette to create compelling photographs. It’s really easy though to just point your camera at the color and hope the image comes together without thinking about the composition. Here are just a few tips to take with you into the field to make the most of the colorful season in your fall landscape photography:

    1. Use a longer focal length lens

    Dd tip1

    It’s tempting to photograph grand scenes with a wide angle lens, but using a longer focal length lens, 200mm or longer, can really help simplify the scene and make the subject about more than just color. You can also use the longer focal length lens to photograph the intimate details of a forest interior. Look for elements in the scene where there is a break in the pattern or use negative space to help isolate the subject.

    2. Use a wide aperture to isolate the subject

    Dd tip2

    Pick a wider aperture, around f/2.8 or f/5.6, to isolate your subject from its surroundings. This will help create visual contrast between the sharp subject and the background, which will be softer and more abstract. This also adds tension between the real and the unreal, providing you with an image that’s more dynamic and expressive. Experiment with different subjects and backgrounds and get creative with your choices. Pay close attention to your subject and make sure that you have the desired amount of the subject in focus when using a wide aperture.

    3. Make fall color the secondary subject

    Dd tip3

    The temptation is for you to make the primary subject all about the fall colors. Find other primary subjects such as streams and waterfalls that are accented by the fall colors, to make images that have more depth and complexity. Although the color may attract your eye to the scene, ask yourself what the subject might be other than color.

    4. Look for patterns and textures

    Dd tip4jpg

    Color is an obvious design element that you’ll be working with in your images but look, for others like pattern and texture, to create satisfying compositions. Learning to see the world around you as elements of 2-D design (line, pattern, texture, etc.) will help you move forward in your composition skills.

    5. Be patient and wait for interesting or dramatic light

    Dd tip5

    Patience may be the best tool in your camera bag. Fall colors are wonderful, but can be even more stunning when combined with the right light for your subject. Patience usually is a big factor between a good image and a great image. Many times the best light can be short lived, so think through your composition in advance, and be ready for the light to work some magic.

    6. Experiment with intentional camera movement

    Dd tip6

    Definitely experiment with moving your camera vertically as you release the shutter to blur the scene and create an abstract image of lines, textures, and colors. Experiment with different shutter speeds, and the pace of moving your camera, until you find the right amount of blur. This is a great opportunity for you to take your camera off the tripod and just play with camera movement. Darker elements that work well include a rock face, canyon walls, or deep shaded areas in the forest.

    7. Look for elements that contrast the fall color

    Dd tip7

    Fall colors are usually bright and have texture and pattern. Look for opportunities to place the fall colors against darker elements so you can create an image with some dramatic tension.

    8. Don’t forget to look up

    Dd tip8

    The interior of a forest can be an amazing and colorful place to photograph, but it’s often difficult to isolate a subject. If you’re having trouble, look up and explore the canopy. Images that contrast the fall colors with the deep blue sky can be really pleasing and make interesting wide angle photographs. Don’t forget to use smaller apertures like f/22, to create a starburst effect as you shoot through the forest toward the sun.

    Summary

    Hopefully these tips will help you make the most of your time photographing the amazing colors of the fall season. Take the list with you into the field so you can slow down, think through your compositions, and return home with some compelling photographs.

    googletag.cmd.push(function() {
    tablet_slots.push( googletag.defineSlot( “/1005424/_dPSv4_tab-all-article-bottom_(300×250)”, [300, 250], “pb-ad-78623” ).addService( googletag.pubads() ) ); } );

    googletag.cmd.push(function() {
    mobile_slots.push( googletag.defineSlot( “/1005424/_dPSv4_mob-all-article-bottom_(300×250)”, [300, 250], “pb-ad-78158” ).addService( googletag.pubads() ) ); } );

    The post 8 Tips for Fall Landscape Photography by Dusty Doddridge appeared first on Digital Photography School.
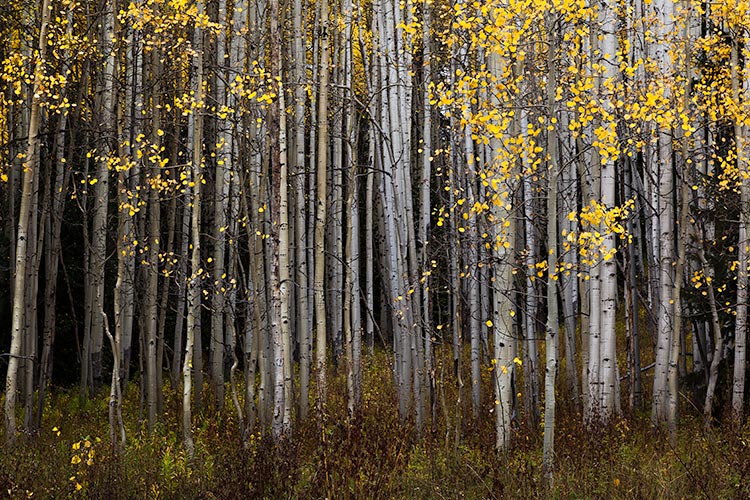

    Digital Photography School

  • 4 Ways the Time of Day Affects Your Photographs

    You have probably heard the saying, “The early bird gets the worm,” and in some ways that phrase can be repurposed to apply to photographers as well. “The early photographer gets the picture” isn’t always true in a literal sense, but learning to recognize changes that happen throughout the day, and how they affect your pictures is critical to developing a deeper understanding of photography in general. If you’re looking for a way to enhance your own photography, get better shots, or just try something new, getting up early to take some photos in the morning hours can have a dramatic impact on your pictures.

    morning-vs-afternoon-flower-morning

    What you will see below is a collection of shots that are similarly-composed, but taken at different times of the day. The idea is not necessarily to see which picture is better, but to help you visualize and understand how much impact the time of day has on your outdoor pictures.

    1 – Colors and Shadows

    One advantage of shooting in the morning is that the sun is not directly overhead, which means light is diffused in the sky, and essentially coming from all directions. This helps your subjects have more even  lighting, and makes it easier to get a good overall exposure since there isn’t the same degree of high contrast between light and dark areas that happens later in the day. This picture of some flowers in the morning illustrates the concept, and shows how diffused morning light can affect not just the shadows, but the color and vibrance of the picture as well.

    morning-vs-afternoon-flowers-730am

    Flowers at 7:30am: 50mm, f/1.8, ISO 200, 1/180th of a second

    Revisiting the same scene later in the day revealed an image that is similar in overall composition but quite different in some significant ways. The colors on the orange flower are not as rich and vibrant as they are in the morning photo, and the individual petals create harsh shadows that can be somewhat distracting.

    Flowers at 1:45pm: 50mm, f/1.8, ISO 200, 1/6000 second

    Flowers at 1:45pm: 50mm, f/1.8, ISO 200, 1/6000 second

    While taking photos later in the day often means you have more light available, it comes with an important tradeoff: the midday sun often often leads to a greater degree of contrast with brighter highlights and darker shadows.  However, this is not to imply that shooting later in the day is an inherently bad idea. Learning to shoot at different times of the day is not just about knowing how things are lit, but understanding how nature itself changes. Different times of day are not necessarily better or worse, but each has its own set of opportunities and challenges.

    Notice how the pink flower has opened up and is much more vibrant than in the morning. No amount of early sunlight can coax a flower into full bloom, and sometimes you simply have no choice but to shoot later in the day if you want to get a particular picture. Wildlife shooters often take pictures in the morning or evening, but not necessarily because of the light. They do it because many animals are simply much more active at that time, than in the middle of the day.

    One of the best solutions, which is not always possible but does offer some creative opportunities, is when you can get pictures in the middle of a cloudy or overcast day. That scenario gives you the nature advantages of shooting in the middle of the day, with the lighting advantages of morning or dusk. In this final picture, which was taken during a moment of thick cloud cover, you can see how the pink and orange flowers are in full bloom, while the light is much more similar to the morning image. The shadows are soft and diffused, which lends a warm and pleasant feeling to the image.

    morning-vs-afternoon-flowers-1215pm

    Flowers on an overcast day: 50mm, f/1.8, ISO 400, 1/6000 second

    2 – Background Elements

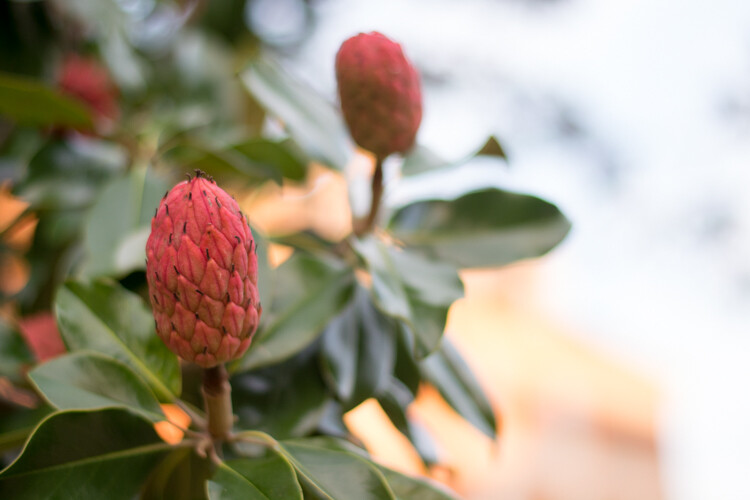
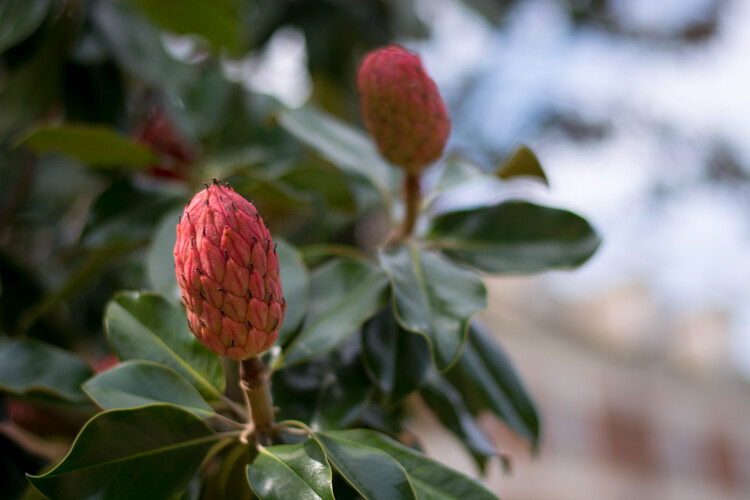
    One nice thing about shooting pictures in the morning is how the early sun can cast a nice even light on your subject. But, there are other elements of a photographic composition to take into account as well. Here are two pictures of some seed pods on a magnolia tree, taken a few hours apart. In these examples you can see that the morning light doesn’t just affect the color and shadows on the subject, but has a notable impact on the background elements, and other parts of the picture as well.

    In the first image the subject (i.e. the seed pod in the foreground) is evenly lit, with nicely saturated colors, and the composition has a nice warm tone overall. There are a few drawbacks though – the building in the background which faces to the east is so brightly lit it’s distracting, and the sky does not yet have the rich blue tones that can happen later in the day.

    morning-vs-afternoon-magnolia-735am

    Magnolia seed pods at 7:30am: 50mm, f/1.8, ISO 400, 1/500 second

    Here’s the same composition taken a few hours later, which illustrates that shooting in the bright sunlight has some tradeoffs tradeoffs that are both good and bad. While the building in the afternoon photo is not overexposed and the sky has more of a pleasing blue tint, the subject is somewhat backlit which causes a bit too much contrast for my liking.

    morning-vs-afternoon-magnolia-1435pm

    Magnolia seed pods at 2:35pm: 50mm, f/1.8, ISO 100, 1/1500 second

    Again, the message here is not about why taking pictures at a particular time of day is better or worse, but understanding the effect it will have on your images. Some of the problems with the afternoon picture could be mitigated if I simply took the picture from a different angle or used another subject. I could also have used the pop-up flash on my camera as a fill flash which would have fixed some of the shadows on the subject. These challenges also become a little easier to work with if you are taking pictures of people and not immovable inanimate objects because you can tell them where to go, bring umbrellas, or use structures to manipulate the light.

    3 – Even Lighting

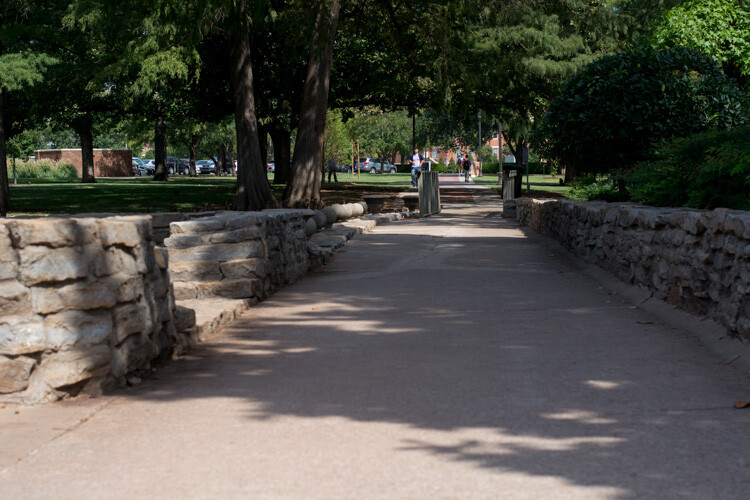
    I already gave some examples of how the early morning sun can have a pleasant effect on a single subject, but it can also cast an entire scene, or even a landscape, in an entirely different light compared to the afternoon. This image of a path on the Oklahoma State University campus is one of the most pleasing examples of how shooting in the morning can give you an incredible advantage when it comes to just working with light. The entire scene is evenly lit, and even the undersides of the tree branches are green. There are no harsh shadows and the morning light creates a warm and welcoming feeling overall.

    morning-vs-afternoon-path-730am

    Path at 7:30am: 50mm, f/4, ISO 400, 1/60 second

    In the next image you can clearly see evidence of some of the challenges posed by midday sunlight. The image is awash with contrasting areas of light and dark, and the shadows on the path are disjointed and distracting. There is no one clear focal point for the image, and the undersides of the leaves are so dark they are almost unrecognizable. It looks like an entirely different scene, even though it was the same location.

    morning-vs-afternoon-path-1345pm

    Path at 1:45pm: 50mm, f/4, ISO 200, 1/1500 second

    The final image in this series illustrates one additional hurdle that must be overcome when shooting during the day – other people. In most parts of the world, and especially on a college campus, there simply is not much human activity in the early morning. Later in the day you will usually find yourself contending with workers, pedestrians, students, tourists, children playing, or a variety of other types of individuals who might inadvertently get in the way of letting you take the picture you want.

    morning-vs-afternoon-path-1215pm

    Path at 12:15pm: 50mm, f/4, ISO 400, 1/1500 second

    Almost any outdoor photographic situation will have far fewer people around in the wee hours of the morning, which can not only give you better pictures, but a greater sense of peace and calmness as you go about the business of taking photos. The other point to note about the image above with the students walking, is that even though there was plenty of cloud cover which meant nice evenly-diffused lighting, the undersides of the trees are much darker than in the 7:30am photo. This illustrates how even though cloudy and overcast days are great for photos, there are still some aspects of shooting in the morning or evening that can be advantageous.

    4 – The Human Impact

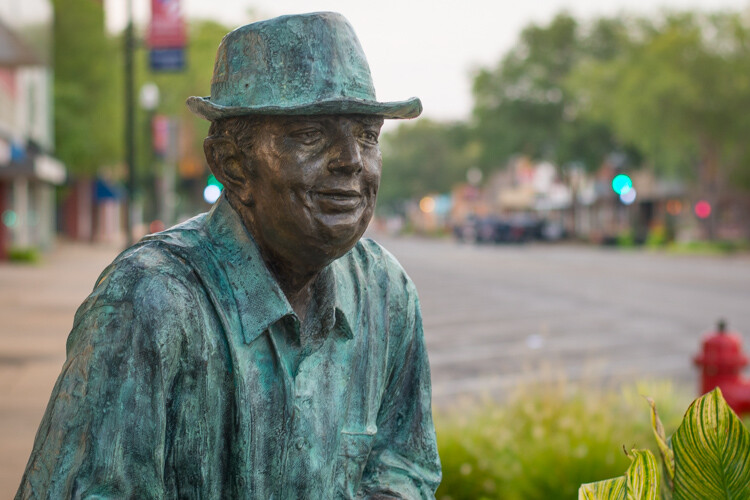
    Finally, here’s one more example of how pictures in the morning can be much different than pictures later in the day. This bronze statue is a friendly sight for shoppers and drivers in downtown Stillwater, Oklahoma. Taking his photo as the sun is creeping over the horizon yields a well-lit image with a hometown feel, as the shops of main street recede into the background. Colors are even and not overly-saturated, and there is neither too much, nor too little, contrast on the statue itself.

    morning-vs-afternoon-bronze-730am

    Bronze Man at 7:30am: 50mm, f/2.8, ISO 200, 1/60 second

    The same photo in the late afternoon looks dramatically different, but not just because of the lighting. In the second picture (below) the light is clearly coming from overhead, as the top of his shoulders and side of his hat are much brighter and the contrasting light is creating much deeper shadows on his overcoat. This is not necessarily a bad thing, as the result is an image that shows more texture on the statue, even though one of the tradeoffs is that the side of his head is shrouded in shadow. However, the most critical difference here is the background, which is now filled with passing shoppers and parked cars. The picture seems cluttered, the focal point is less obvious, and instead of a friendly small town main street it now seems like a sterile commercial shopping center.

    morning-vs-afternoon-bronze-415pm

    Bronze Man at 4:15pm: 50mm, f/2.8, ISO 200, 1/1500 second

    Hopefully these examples give you a better idea of how the time of day in which you take pictures can dramatically affect not just the lighting, but many aesthetic elements of your photographic compositions as well. What are your favorite tips for shooting at different times of the day? Leave your thoughts in the comments below.

    googletag.cmd.push(function() {
    tablet_slots.push( googletag.defineSlot( “/1005424/_dPSv4_tab-all-article-bottom_(300×250)”, [300, 250], “pb-ad-78623” ).addService( googletag.pubads() ) ); } );

    googletag.cmd.push(function() {
    mobile_slots.push( googletag.defineSlot( “/1005424/_dPSv4_mob-all-article-bottom_(300×250)”, [300, 250], “pb-ad-78158” ).addService( googletag.pubads() ) ); } );

    The post 4 Ways the Time of Day Affects Your Photographs by Simon Ringsmuth appeared first on Digital Photography School.


    Digital Photography School

  • How to Improve Your Long Exposure with Photo Stacking

    Recently long exposure photography has been quite popular, mainly in the landscape photography arena. One of the reasons (among the others) is that through a long exposure it is possible to visualize a scene with much more softness and harmony in respect to a standard exposure.

    Thanks to the rapid evolution of digital cameras, we are now able to take really long exposures without getting so much digital noise, due to sensor overheating. Moreover, the improvements in neutral density filter quality allow us to take pictures with almost no color cast, and no decrease in sharpness.

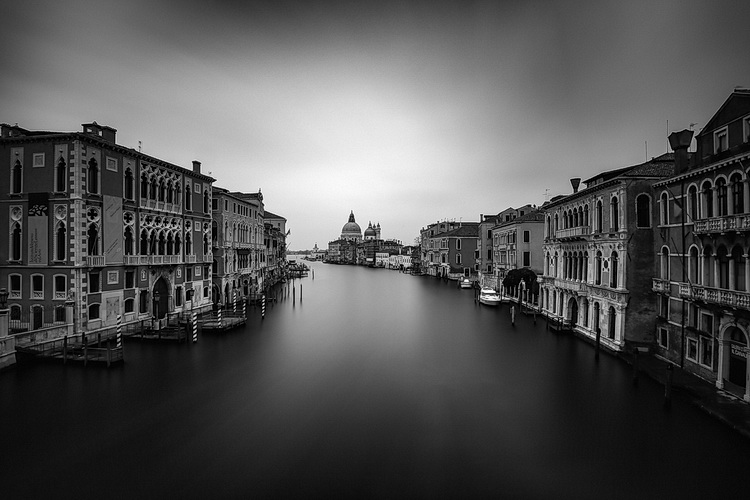
    Dps les venezia

    Venezia by Luca Libralato: stacking of 3 x 260s exposures for a total of 780s (13 minutes)

    If you love long exposure photography and you would like to push the exposure time to the edge, this technique of long exposure photo stacking is for you.

    Here is the quick explanation of the Long Exposure Stacking technique: by taking several pictures (usually at least 30 seconds each for the purpose of this technique) you can blend them to get a result the equivalent of a long exposure photo with a total exposure time equal (or almost equal) to the sum of the single exposure frames.

    This technique is mostly useful, and recommended for landscape photography, but some of the benefits may also be used in other types of photography, where you need maximum quality with several minutes of exposure. The step by step guide will be focused on landscape photography.

    The advantages of using this approach are several:

    • Increase the total exposure time.
    • Reduce digital noise and hot pixels (shorter exposure pictures have less digital noise and hot pixels).
    • Reduce vignetting (you will be using a lower ND power per shot with this technique, resulting in less vignetting).
    • Minimize the risk of wasting time and photos (tripod shocks, sudden light change, etc.).
    • Possibility to decide later on the strength of the long exposure effect.
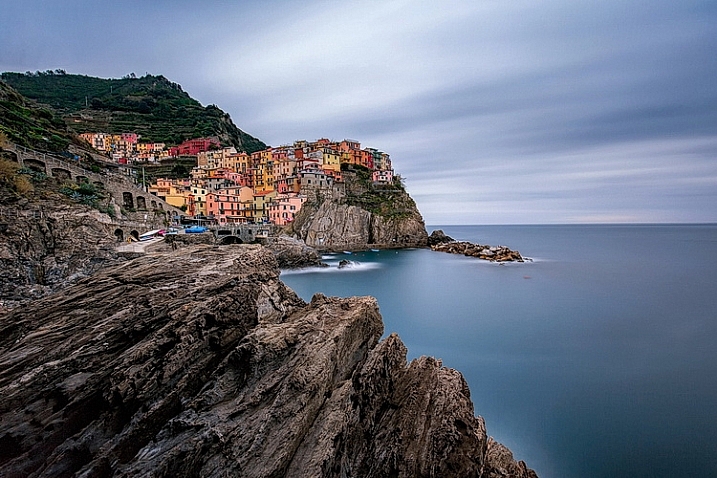
    dps_les_manarola

    Manarola by Luca Libralato: stacking of 3 x 260 second exposures for a total of 780 seconds (13 minutes)

    The disadvantages are:

    • You don’t have a single exposure and this is something which some competitions/contests rules don’t like.
    • Some post-processing skills are required to blend the several exposures.
    • If you are a purist – you may not like this technique.

    When this technique should be used:

    • If you want to push the exposure time to some really high values.
    • If your camera sensor is adding a lot of digital noise due to overheating.
    • If you are not sure about the final result of a very long exposure. Since this techniques is based on the sum of several short exposures, you can easily decide later how long the final exposure shall be (check also here for a similar approach: Long Exposure Photography Without a Tripod).
    • With hostile ambient/weather conditions, you can use this technique to minimize the risk of wasting exposure time.
    • If you want to maximize the probability to not miss the right moment in a fast changing light (the right moment can last few seconds, if you are exposing for several minutes, you can miss it for wrong exposure time for example).

    Before going over the explanation of the technique, there are at least a couple of required skills you should have (apart from the basics for taking pictures with your camera):

    1. How to perform standard long exposure photography: you can check this awesome tutorial by Francesco Gola to improve your long exposure skills: Step-by-step Guide to Long Exposure Photography.
    2. Basic knowledge of Adobe Photoshop or similar photographic software which allows you to work on images using layers.

    Let’s get on with the fun part: the implementation of Long Exposure Stacking!

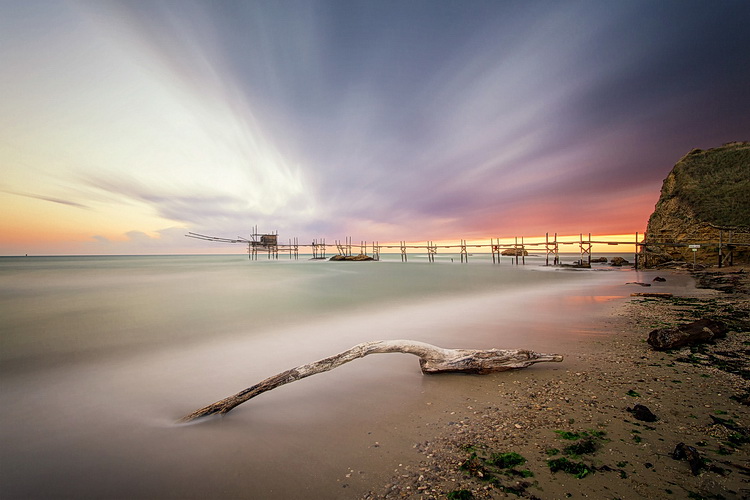
    dps_les_punta_aderci

    The Magic Of Punta Aderci by Luca Libralato: stacking of 2 x 260 second exposures for a total of 520 seconds (8:40 min)

    Step 1: Gear

    The photographic gear needed for this technique is luckily the same gear needed for taking long exposure photos. So if you are already familiar with long exposure photography, you are set. Otherwise here is a short list of all the tools:

    • Digital Camera (which allows long exposure) + Lens (which allows you to mount neutral density filters)
    • Tripod
    • Remote trigger (optional, but suggested)
    • Neutral density filters (optional if you shoot when it’s dark)

    For further details about taking long exposure photography, you can check the related resources listed at the bottom of the article.

    Step 2: Plan the shot

    Never hit the shutter without having properly planned the photo. Of course there are a lot of variables involved, but planning can really play the most important part in a good photo. Do not underestimate the power of accurately planning a landscape photo – because luck can help you once, but planning your photography consistently, will increase the probability that you’ll be ready when the right conditions are present.

    dps_les_santa_marinella

    Rips Of Darkness by Luca Libralato: stacking of 5 x 120 second exposures for a total of 600 seconds (10 minutes)

    Step 3: Take the shots

    Once you have planned your photo and you are on location, you should then decide the two most important things in any photo (at least this kind of photo): composition and exposure (supposing you are taking landscape photography, depth of field should not be a variable in most cases). Composition is up to your taste, while exposure is a complex matter and depends upon different factors.

    First thing every landscape photographer usually does before taking any picture, is metering the light to decide the exposure time. The final exposure time depends on several factors, such as strength of the wind, the movement of the clouds, water flow, and so on. The question at this point is, “How long shall I expose for?”.

    If the light is changing suddenly, or there is a strong wind which can shake your camera/tripod during exposure, you may decide to avoid really long exposures (to avoid wasting shots or missing the right light). This is where this technique comes to your rescue.

    Suppose you would like to have a total of eight minutes of exposure, instead of taking one single long exposure file you can split the total exposure time into four consecutive shots of two minutes each (for example). You can freely decide the final length of each exposure and the total number of shots, just keep in mind that you should keep the gap of time between the different photos to a minimum, if you are planning to do stacking. Needless to say that you should be careful in avoiding moving the tripod and the camera between each shot of the sequence. Once you have your consecutive shots, in the next step you will understand what to do in post-processing.

    Before you start shooting: make sure you focused correctly and your tripod is stable (avoid sand or uneven floors where possible).

    After the shot: make sure your histogram is fine and your picture is properly exposed, or exposed to the right.

    Dps les 01 Dps les 02
    Dps les 03 Dps les 04
    Dps les 05 Dps les 06

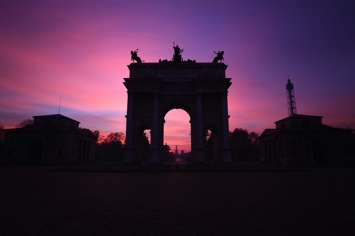
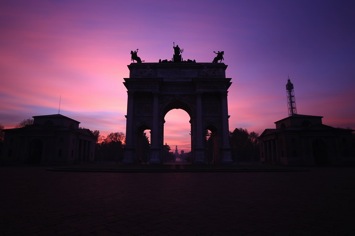
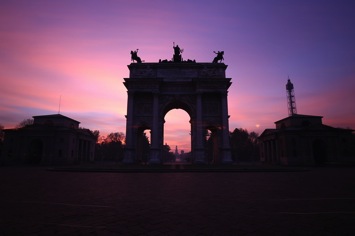
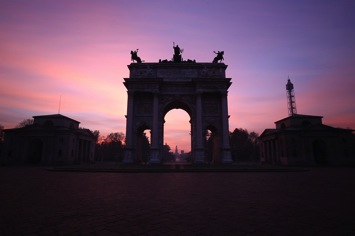
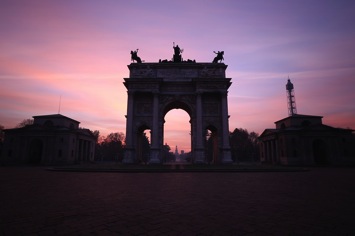
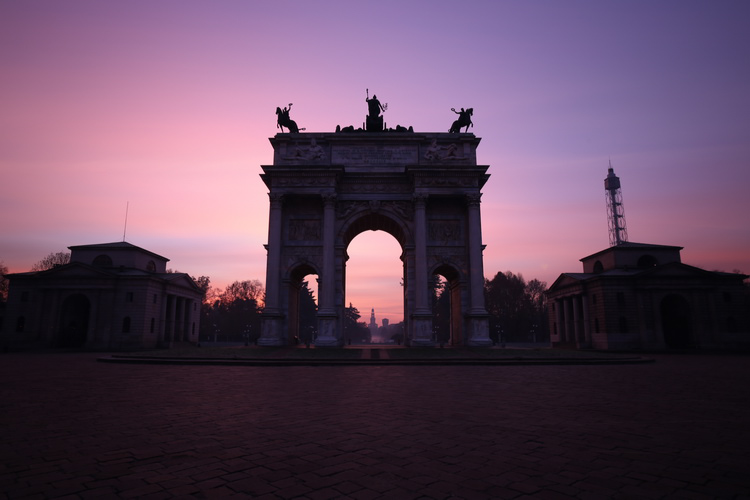
    Arco Della Pace by Luca Libralato: 6 x 130 second exposures, for a total of 780 seconds (13 minutes)

    Step 4: Image Stacking

    You should now be at home, or in your favourite cafe/pub with your laptop, and hopefully a coffee/beer. You should have downloaded all of your shots and selected the ones you would like to stack.

    The stacking process will be shown for Adobe Photoshop (almost any version supports the feature) but you can use any software of your choice, which allows the use of layers. In Photoshop there are two different methods that can be used to stack files, with the goal to merge them into a simulated longer exposure:

    1. Load files into stack function (Files > Scripts > Load Files into Stack)
    2. Manual stacking

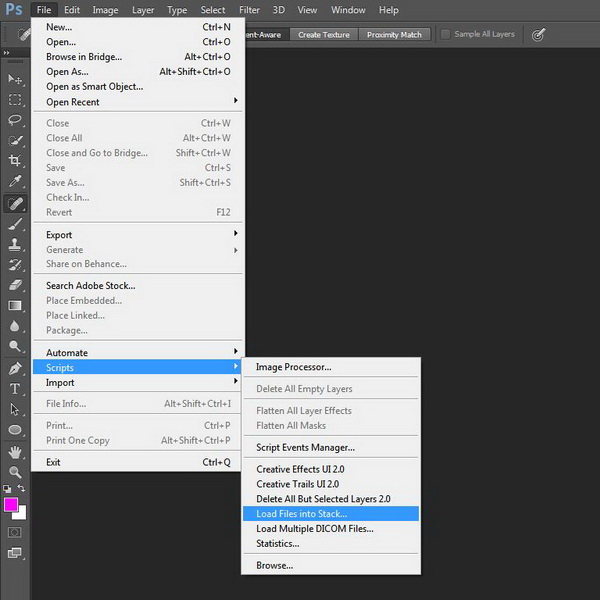
    4.1 Load files into a stack

    With the first method the procedure is semi automated, since you just need to go to Files > Scripts > Load Files into Stack

    Dps les ps stack 01

    Photoshop: Load Files into Stack

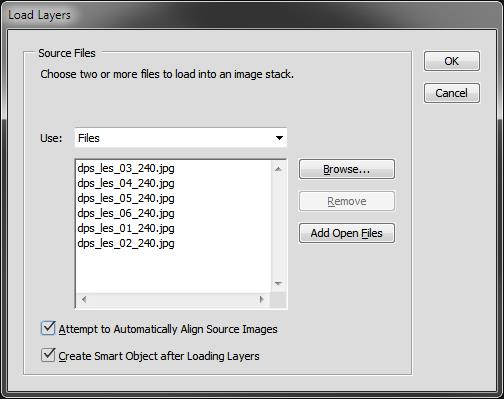
    All you have to do is then select the single long exposure, flag the boxes to Automatic Align Source Images and Create Smart Object.

    Dps les ps stack 02

    Photoshop: Select files and create Smart Object

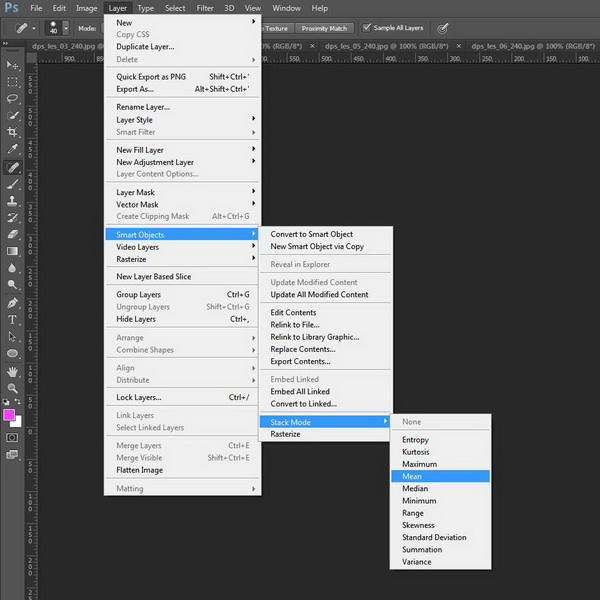
    Once you have a new document with the Smart Object selected, all you have to do is go to menu Edit > Smart Objects > Stack Mode > Mean. This will weigh all images embedded into the Smart Object, rendering them as a new image which similar to what you would have obtained with a single long exposure of a total time equal to the sum of the single exposure.

    Dps les ps stack 03

    Photoshop: Set Stack Mode to Mean

    You can check the result on the image below.

    Dps les ps stack result

    Photoshop: Result after stacking

    4.2 Manual stacking

    By using the second method (which I trust can be used with every software which allows layers) the blending process is manual. The rule is that you have to fine tune the opacity of each layer by decreasing it after each shot.

    The mathematic rule is as follows: each shot should have an opacity equal to 1 divided by its position in the stack. Here is a table which shows the rule:

    • First photo (the one at the bottom) 100% (1/1)
    • Second photo 50% (1/2)
    • Third photo 33% (1/3)
    • Fourth photo 25% (1/4)
    • Fifth photo 20% (1/5)
    • Sixth photo 17% (1/6)
    • Nth photo 1/N

    This process will exactly replicate the first method (the result will be identical to an automatic Stack in Mean mode).

    Step 4: Post processing workflow

    At this point, all you have to do is follow your typical post-processing workflow:

    • Clean dust spots, straighten the image, crop
    • Adjust dynamic range with other exposures (3 or 5 bracketing shots for static underexposed parts)
    • Adjust exposure and contrasts
    • Adjust colors
    • Add finishing touches to suit your taste
    • Export

    Here is the final result of the example

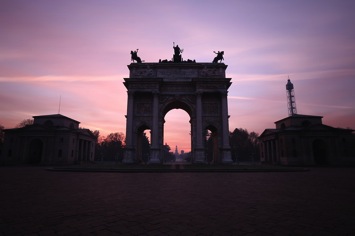
    Dps les arco della pace

    Arco Della Pace by Luca Libralato: stacking of 6 x 130 second exposures for a total of 780 seconds (13 minutes)

    Conclusions

    This technique is very useful sometimes because of its flexibility. Moreover you should consider the benefit in increasing the final quality of your file because of the stacking. It has been proven that by stacking images you can benefit by reduction in random digital noise equal to the square root of the total photos used. So for example if you use four photos, you will have in static part of the photo a reduction by half of the total random digital noise, which is a great achievement especially for underexposed portions. This technique is used a lot (even if with some different variations and implications) in astrophotography or in other fields when increasing the exposure time of a single shot is not suitable.

    Don’t hesitate to ask questions in the comments box below if you need help or further explanations.

    Related Resources:

    • Step-by-step Guide to Long Exposure Photography by Francesco Gola
    • Long Exposure Photography Without a Tripod by Viktor Elizarov
    • How to do Long Exposure Photography and Light Trails at Night by Barry J Brady
    • 11 Accessories for Long Exposure Photography by Scott Wyden Kivowitz
    • 5 Tips for Better Long Exposure Landscape Photography by David Cleland
    • 8 Tips for Long Exposure Photography by Elliot Hook
    • 5 Tips for Getting Sharper Images When Doing Long Exposures by Kevin Choi

    googletag.cmd.push(function() {
    tablet_slots.push( googletag.defineSlot( “/1005424/_dPSv4_tab-all-article-bottom_(300×250)”, [300, 250], “pb-ad-78623” ).addService( googletag.pubads() ) ); } );

    googletag.cmd.push(function() {
    mobile_slots.push( googletag.defineSlot( “/1005424/_dPSv4_mob-all-article-bottom_(300×250)”, [300, 250], “pb-ad-78158” ).addService( googletag.pubads() ) ); } );

    The post How to Improve Your Long Exposure with Photo Stacking by Luca Libralato appeared first on Digital Photography School.


    Digital Photography School

  • 3 Newborn Posing Setups Anyone Can Master

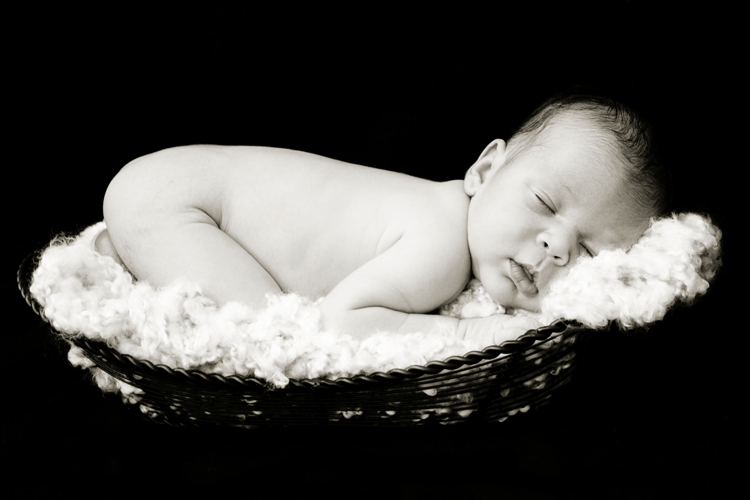
    newborn-posing-setup

    Are you interested in trying newborn photography, but just aren’t sure where to start in terms of posing? Have you ever looked at a newborn photo and been totally unsure how the photographer set it up?

    In this article, I’ll walk you through three easy newborn posing setups. We’ll start with pull-backs (behind the scenes shots) of each posing setup, along with brief instructions as to how you can recreate it at home. Then I’ll show you what the final images might look like from that setup. All three setups are simple, versatile, and I promise that absolutely anyone can master them. All three also have the benefit of being setups that you can typically use even in small spaces, which is a huge benefit if you ever shoot in clients’ homes, and don’t know what you’re walking into until you get there.

    Setup #1: The Crib Mattress

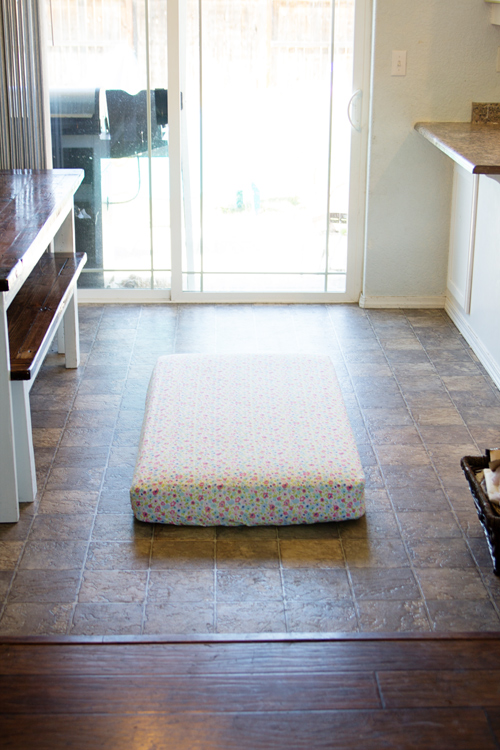
    newborn-posing-setup-1

    This setup really could not be any easier. Simply take a crib mattress, find a fun fitted sheet for it, and put it on the floor near a window, or sliding glass door. My preference is always to set up the crib mattress at about a 60 degree angle to the window. Sometimes the space may easily allow you to set up exactly as you would prefer, and sometimes like in the case of my very small kitchen above, it may require thinking outside the box.

    For this particular session, I kept the mattress at a 90 degree angle to the window, as mom walked over and placed the sleeping baby on the mattress. Once baby was warm and settled, I sat on the floor and pivoted the mattress just enough so that I’d be able to achieve some shadows and depth in the photo.

    newborn-posing-setup-2

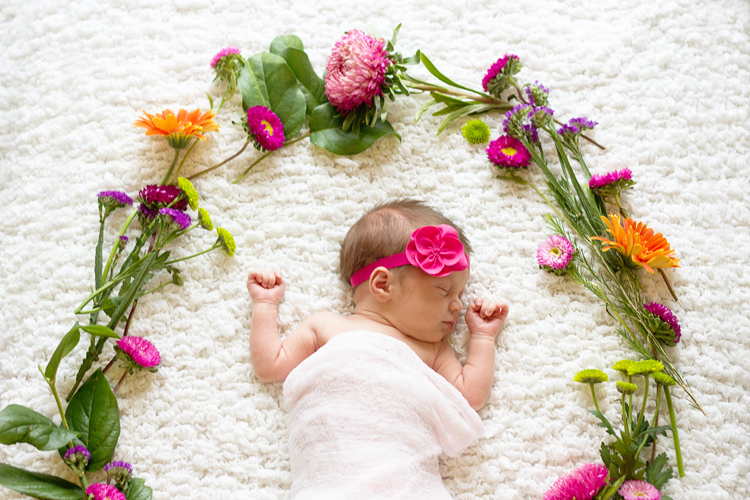
    This is also the setup that I typically use whenever I am incorporating flowers, greenery, or sports equipment into the photo because it gives me a nice flat surface to work with, and it’s also low to the ground, so it’s easier to shoot from above.

    newborn-posing-setup-3

    Setup #2: The Black Sheet

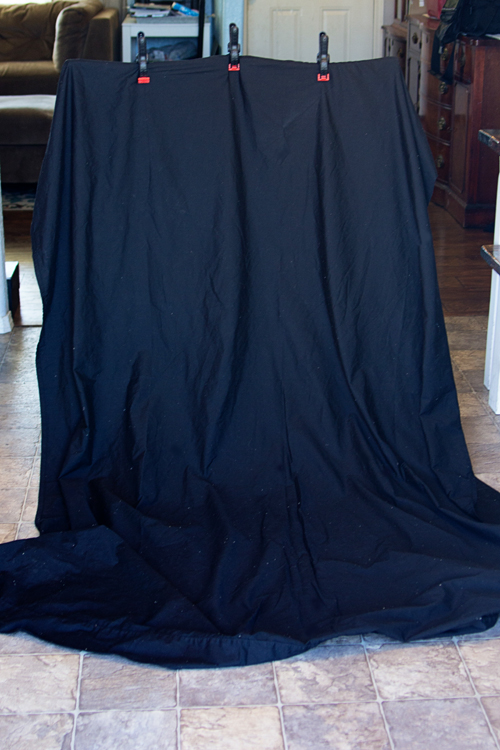
    newborn-posing-setup-4

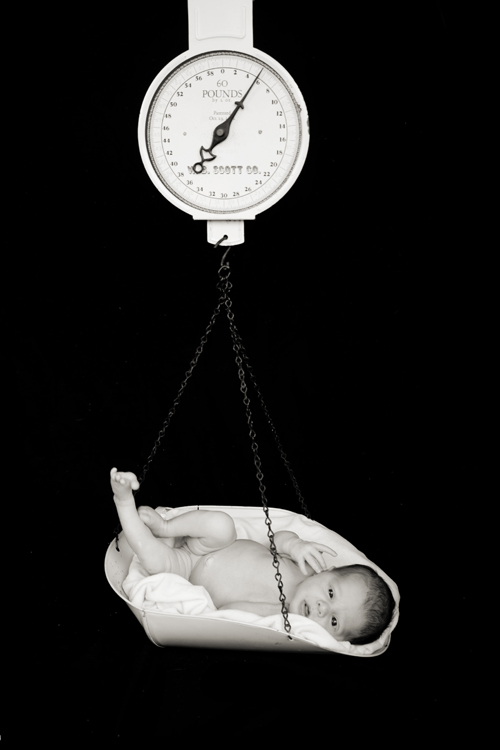
    Next, try taking a twin or full sized black sheet and clamping it to the back of some chairs. I prefer to use bar stools whenever possible, but a regular high backed chair will also work. If you can’t track down a chair, simply have mom and dad hold the sheet up in the air, and let it pillow at the ground. Again, place yourself near a large window. Then you can place the baby in a basket on top of the sheet on the floor, or even have mom or dad stand in front of the sheet and hold the baby in his or her arms.

    Bonus Tip: Use a lint roller on your black sheet before you start taking photos – it will save you a ton of time in post-processing!

    newborn-posing-setup-6

    I find this particular setup to be really versatile, and it’s an easy way to create a high-contrast photo that has a more formal look, compared to the first setup which usually tends more towards lifestyle images. This setup does require a bit more time in post-processing to get that nice uniform black background, but it is absolutely worth the investment!

    newborn-posing-setup-5

    From a safety perspective, this is a great setup to use any time you want a shot where it appears that the baby is hanging in the air. In the above photo, the scale that the baby is on was actually sitting directly on the black sheet on the floor. I had grandma hold the hook of the scale taught as I took the photo.

    Even as newborns, babies are wiggly and will sometimes try to shoot themselves off a prop, so I just don’t think it’s worth the risk to actually allow a newborn to hang from something in the air during a session. This particular setup is a nice alternative for parents who would like to achieve that look, while also greatly minimizing the risk involved.

    Setup #3: The Beanbag

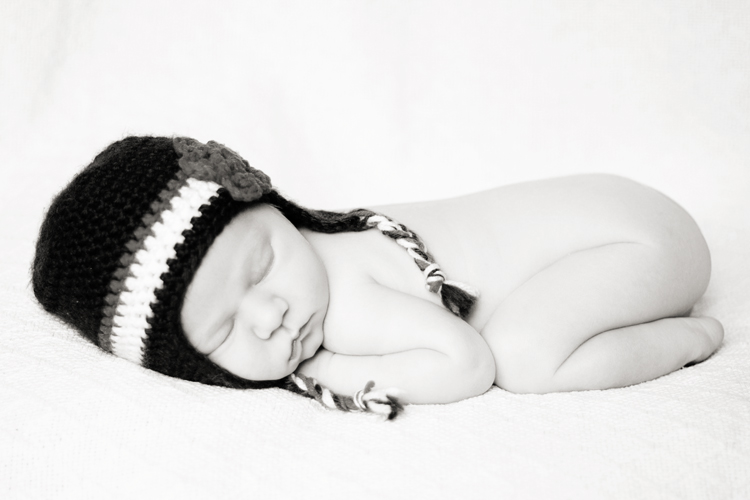
    newborn-posing-setup-7

    The beanbag is by far the most common approach for newborn photography. You’ll want either a beanbag specifically designed for photography, or extra “beans” to over stuff a standard beanbag. Trust me on this one! Place the beanbag on the floor and drape a large blanket over it, once again clamping to some tall-backed chairs near a light source. If you think that you’ll primarily be using this setup for a session, you can also layer multiple blankets over the beanbag before clamping.

    Bonus Tip: If you layer blankets on the beanbag, I highly recommend putting diaper changing pads (or piddle pads for pets) in between each blanket on the bean bag just to be safe!

    newborn-posing-setup-8

    This setup is a great option if you have a baby that’s having a difficult time settling, and can be very versatile in terms of the number of photos you can achieve from just one pose. You could easily swing a portrait, closeup of fingers and/or toes, and a full-body pullback without moving the baby at all using this set.

    newborn-posing-setup-9

    The world of newborn photography is so nuanced, and there are so many tips, tricks, and safety precautions to know, and be aware of. This particular post is really just the tip of the iceberg, but will hopefully give you a good starting point in terms of understanding how to execute three newborn posing setups, as well as what types of images you may be able to achieve with each one.

    Have you tried any of these newborn setups before? Which is your favorite? Share your images and any other posing setups you’ve used in the comments below.

    googletag.cmd.push(function() {
    tablet_slots.push( googletag.defineSlot( “/1005424/_dPSv4_tab-all-article-bottom_(300×250)”, [300, 250], “pb-ad-78623” ).addService( googletag.pubads() ) ); } );

    googletag.cmd.push(function() {
    mobile_slots.push( googletag.defineSlot( “/1005424/_dPSv4_mob-all-article-bottom_(300×250)”, [300, 250], “pb-ad-78158” ).addService( googletag.pubads() ) ); } );

    The post 3 Newborn Posing Setups Anyone Can Master by Meredith Clark appeared first on Digital Photography School.

    Digital Photography School

  • A Beginner’s Guide to Buying a Camera

    iPhone camera

    Sadly, you may one day grow out of your cell phone camera.

    So you’ve decided it’s time to buy a real camera? Maybe the cell phone camera just isn’t cutting it anymore, or you read an inspiring travel blog bragging about how they quit their day job, and now roam the planet selling snapshots they take along the way.

    Either way, the decision has been made, and now it’s time to take the next step and figure out what gear you’re going to need to support this new endeavour.

    The photographic gear market isn’t lacking in options, and it’s all talk about megapixel this and shutter speed that, but without a bunch of technical experience, how do you know where to start? There really isn’t a one-camera-fits-all option or we would all be using it.

    Let’s take a look at some of the considerations you are going to want to keep in mind as you attempt to navigate the consumer minefield of cameras and photographic equipment when selecting and buying a camera. We will look at the major features shared among most cameras, and how they may influence your decision.

    Price

    Expensive camera equipment

    Brace yourself: High-quality photography equipment often requires a significant investment.

    That’s right, cameras all cost money, and sometimes lots of it. This is a logical place to start, unless, of course, money is of no consequence, in which case order a couple of Leica M Series cameras – one for you and one for me.

    The easiest approach to budget is to come up with as narrow a budget window as possible. If you think you want to spend under $ 1,000, you will likely be overwhelmed with choices, while if you decide to look at the $ 800-$ 1,000 range, your options will be much more manageable to compare.

    While you’re mulling over your photography budget, note what other accessories you may need or want. Don’t blow your entire budget on a camera body with no lens to mount on it. Do you want to acquire a tripod, external flash or even extra batteries and memory cards?

    Types of Cameras

    Generally speaking, there are point-and-shoot style cameras, mirrorless cameras and DSLRs (digital single lens reflex), but keep in mind that the lines can be pretty blurry between these.

    Nikolaj F. Rasmussen

    By Nikolaj F. Rasmussen

    Point-and-shoot cameras are mostly compact and convenient. The constant with them is that the lenses are built-in and non-interchangeable, but usually cover a wide zoom range. Quality-wise they run the gamut from cheap with uninspiring quality, to pretty sweet ones like the Canon G1.

    Mirrorless systems are all the rage and most of them have interchangeable lenses like the big DSLRs, at a smaller size. They are a great compromise of quality and versatility. Some are super classy like the Olympus OM-D and others deliver high resolution like the Sony A7S.

    DSLRs are the classic, fancy-looking cameras, with all the buttons and big lenses (sometimes). Lower-end ones offer good quality, and give users a ton of control. There is a mind-boggling assortment of lenses and flashes available, as well as a myriad of other gadgets to achieve all sorts of creative effects.

    Sensor

    This is the part of the camera that replaced the film. The reason we care about these is because they range in size, resolution (megapixels) and sensitivity to light.

    ZEISS Microscopy

    By ZEISS Microscopy

    As you’ve probably already deduced, big sensors with high resolution that are more sensitive to light are pricey. The biggest sensors in the camera types we are talking about are called full frame, and are the size of a 35mm negative (film). The majority of cameras on the market use a variety of smaller versions that we usually call cropped frame (DX for Nikon and APS-C for Canon). There are other size but these two make up the lion’s share of the market.

    Right now camera companies are in a death match to out-resolution one another. While the average camera might boast 16-20 megapixels, some models are double that.

    What do all those megapixels get you? You can think of it as the same as film grain, or the resolution of your TV. If you have a 36-megapixel camera, you can crop out 2/3 of the photo taken with that camera and still have a 12-megapixel photo. Higher resolution=finer grain.

    Sounds like the more the merrier, but not necessarily. Lower-megapixel cameras are often more sensitive to light and work better in dark conditions. Also, resolution is directly correlated to file size so you will fill up your memory cards, and computer hard drive much quicker. Often times lenses for full-frame cameras are more expensive as well.

    Memory cards

    High-megapixel cameras come at a price as they eat up storage on your memory cards and hard drives.

    ISO

    This may sound familiar because when you had a film camera (if you are old enough) you probably used 400 ISO film. This is a measurement of the sensor’s sensitivity to light (short meaning, the long one is very technical).

    If you want good results shooting in low-light conditions without a flash, you want to look at cameras that not only shoot at high ISO (1600 or greater), but can do so while producing decent shots. The Fujifilm X-T1, Nikon D800, Canon 5D Mark 3 and Sony RX100 get high marks in this category, but be warned, it’ll cost you.

    Lenses

    A sensor is only as good as the lens that you put in front of it. I just made that up but it’s true. Everything has to pass through the lens to get to the sensor.

    If you’re going to go with a point-and-shoot camera, compare the zoom range (a number in millimeters) between several cameras. There are some that cover ridiculous ranges like the Nikon Coolpix P610 which zooms from 24-1,440mm. However, don’t be fooled by big numbers as you may never need that kind of range and another camera may have other features that are more useful to you.


    The Fujifilm X100T's lens

    Some cameras are equipped with a permanent fixed-focal-length lens like the Fujifilm X100T. Some photographers prefer simplicity.

    Be aware that there are two types of zoom: optical and digital. Optical zoom is what the actual lens is capable of, while the latter digitally crops the photo and image quality is degraded significantly.

    Some cameras like the Fujifilm X100T and the Sony RX1 are quality cameras which have permanently attached 35mm lenses. No changing lenses, no zoom. Some people love them, some people think it’s a stupid idea. In the end, it depends on your shooting style and your personal preference.

    With DSLRs, the options for lenses are nearly endless. Original manufacturers make plenty, third party brands abound, and you can even get adapters to attach almost anything to almost anything else. Many DSLRs are offered as kits that come with the camera body and lens. Usually the lenses are of lower quality but can certainly produce good results.

    canon-current-EF-lineup-2012

    Image courtesy of Canon

    Some lenses are big and expensive because they let in a lot of light and work better in low-light conditions, produce very sharp undistorted images, have long focal lengths allowing you to take pictures of far away subjects, and are built to more exacting and durable standards or any combination of these features.

    The lens department is where mirrorless cameras fall a little short. For most casual photographers, there are enough good choices to fulfill your needs, but fewer choices for professionals, or those wanting to focus on niche genres like macro or sports.

    The Other Stuff

    I know you wish the things mentioned thus far were the only things to consider, but there is plenty more. With so much competition out there, even simple cameras keep getting more complex. On that note, if you find a camera you’re interested in, find out how long that model has been on the market as the manufacturer might be about release a new version.

    Raymond Bryson

    By Raymond Bryson

    Other features to look for in a camera:

    • WiFi connectivity
    • Built-in flash
    • Hot shoe (for an external flash)
    • Touch screen
    • Articulating screen
    • Dual memory card slots
    • Image stabilization (in-camera or in-lens)
    • RAW file support (gives you more control in post-processing)
    • Video capabilities (HD, 4K, etc.)
    • External microphone support
    • Shooting speed (frames per second)
    • Minimum focus distance or macro mode
    • Shooting modes (for creative effects)
    • Weather sealing
    • Battery life
    • Weight

    Conclusion

    Of course this is not an exhaustive list, but it’s a good place to start. These days there are cameras as varied as the photographers using them so it will really pay off to do your research.

    googletag.cmd.push(function() {
    tablet_slots.push( googletag.defineSlot( “/1005424/_dPSv4_tab-all-article-bottom_(300×250)”, [300, 250], “pb-ad-78623” ).addService( googletag.pubads() ) ); } );

    googletag.cmd.push(function() {
    mobile_slots.push( googletag.defineSlot( “/1005424/_dPSv4_mob-all-article-bottom_(300×250)”, [300, 250], “pb-ad-78158” ).addService( googletag.pubads() ) ); } );

    The post A Beginner’s Guide to Buying a Camera by Jeremie Schatz appeared first on Digital Photography School.


    Digital Photography School

  • Using Your Photography to Create Social Change

    There are images that immediately come to mind if someone mentions them. For instance, the image of the man being shot in the head during the Vietnam War, or the girl running naked down the road (also in Vietnam) after being burned by a napalm bomb. I don’t want to use the word iconic, but they are well-known, and very emotive images. The Vietnam War was like no other, and these images helped to show the devastation.

    An image of an event, or a place, can create a lot more connection than written words or stories; humans are visual and we relate to visual cues. But images don’t have to be about war to generate a response from people.

    In late-1970s Australia, the government wanted to dam part of a river in Tasmania. It was something that upset many people. It would mean that many parts of stunning rainforests in the area would be drowned and lost forever. When I think back to that time, there is a beautiful image of the place that immediately comes to mind. It is an image of the river by photographer Peter Dombrovskis, and its catchphrase was that it would be submerged by the dam.

    peter-dombrovski-franklin-river

    Rock Island Bend, Franklin River, South West Tasmania, by Peter Dombrovskis, National Library of Australia, an6631500 (Bib ID#2899361)

    Here I am 30 years later, and this image is still strong in my mind; it says, “This image stopped the Franklin Dam”. Images can very powerful. Who wouldn’t want to have an image that changed the world – well, at least helped save a small part of it? With so many images in existence now, it may be hard to imagine that any could have the same impact. With the world of digital perhaps we are in image overload.

    It doesn’t mean you can’t try. There is no reason why you can’t highlight a cause that you are passionate about, using your photography.

    In the area around where I live, there is a large green belt that follows the Yarra River, which is the main source of water for the City of Melbourne. It is wonderful that the land has been preserved and not given up to development. Parts of the area were still being farmed until very recently, around 2o years ago.

    Cole-social-change-photography0374

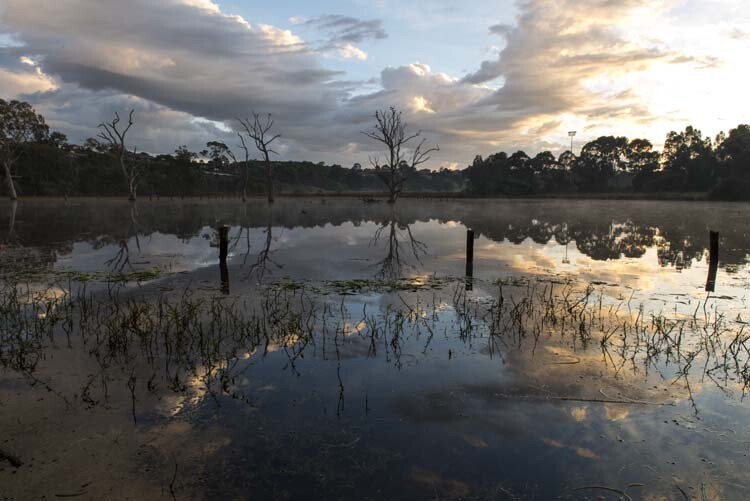
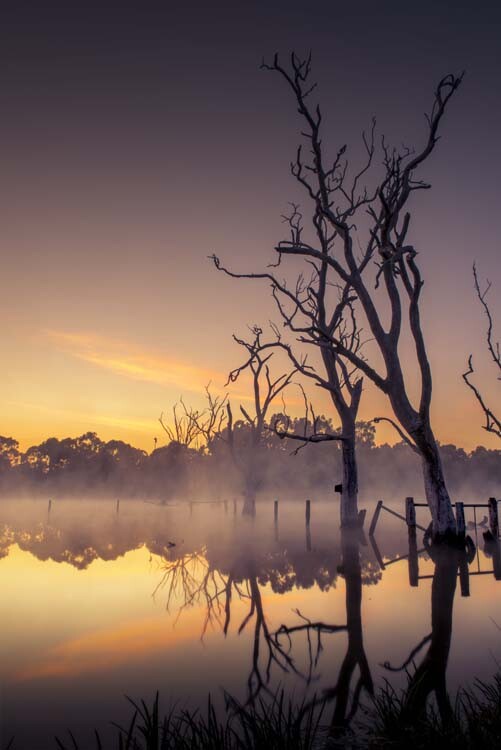
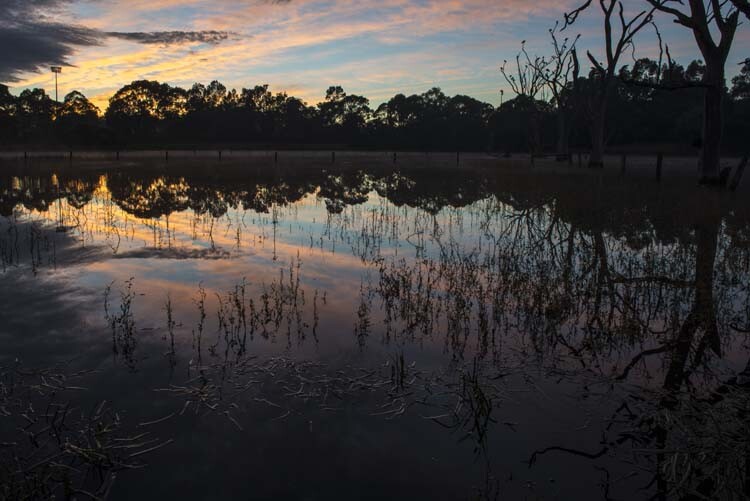
    Morning Light over Banyule Flats. The area has been allowed to return to its natural state as it would have appeared over 250 years ago.

    Part of the area is a swamp (wetland) and was here before European Settlement. Once the land was claimed, the swamp was drained and the water course moved so it didn’t fill anymore. Fences were put up, and cattle grazed there for over 150 years.

    Cole-social-change-photography0376

    Early Autumn Mists on the Water.

    Eventually, the land was sold to the local council, and they have helped the area recover over the last 20 years by revegetation, and putting the water course back, so the swamp would fill again. It did – and it has become a place rich with native birds and plants. The fence posts are still there, but the trees that grew while it was dry have since died from being waterlogged.

    The area is ecologically and communally important and is in constant use – but there is a problem. Banyule Flats is situated right in the middle of where they want to connect two freeways. This is an area that I love and want to help protect, so I started thinking about how I could use my photography to help stop the freeway.

    Cole-social-change-photography0375

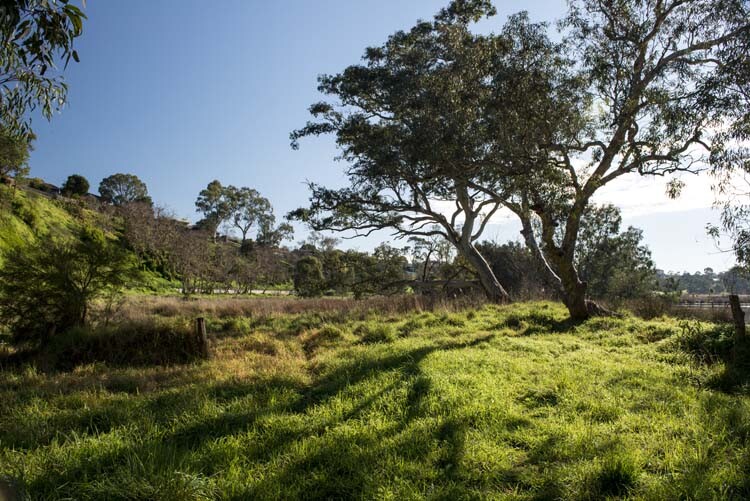
    Winter Sun Casting Long Shadows.

    My first thought was to start putting photos up on my blog. If I could get people from around the world to build a connection with Banyule Flats, perhaps I could get a whole lot more people to fight for its survival.

    About 12 months ago my local council, Banyule City Council, was offering Environment Grants and I wondered if I could get one to do a book on the area using my photography. I rang the coordinator for the grants and spoke to her about my idea for the book. She seemed to really love it, and gave me ideas of what to put in the proposal. I had to join the Warringal Conservation Society to be eligible for it, but that was never a problem, and I have loved being a member.

    The grant was approved, and I will use the photos I have been taking for two years now. It is time to put the book together and work out what is the best way to present the images. We can’t just put them all together with no story because, it has to be interesting.  It has to be done in a way that people find not only beautiful, but helps build a connection to the area so they won’t want to see it destroyed.

    This is an opportunity to use photography to bring about social change. If you can help people build a relationship or feel something for a cause, then that gives you a lot more people who want to fight for it with you. Your case becomes stronger, and there’s power in numbers.

    Cole-social-change-photography0377

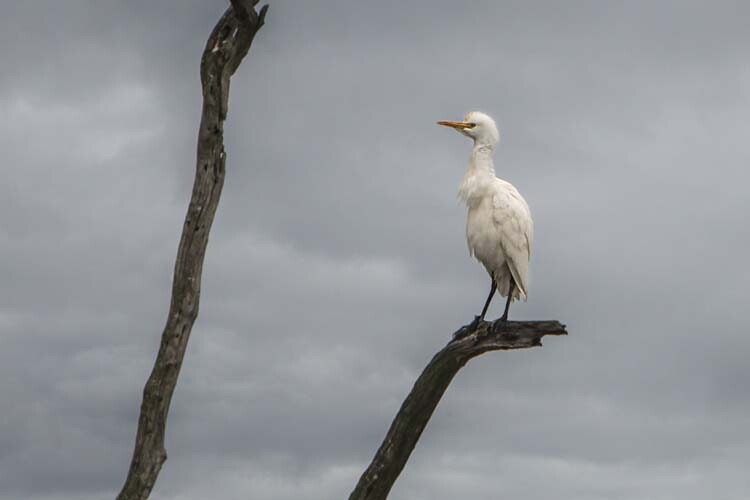
    Cattle Egret Surveying the Water Below. One of many birds that inhabit the area.

    One thing that is happening with the book on Banyule Flats is that we are inviting the Wurundjeri Elders and people to be involved. They are the traditional owners of this land, and having their input will help highlight the area, give the book a unique look, and help showcase part of their culture. Of course, I will not take advantage of them and will make sure that proper credit is given, and they will get a share in the royalties as well.

    If we can make the book show off the area, we hope that more local people will get involved in the fight for the Flats, and we can then introduce the area to a much wider, potentially worldwide, community.

    The book is going to be visual, have lots of photos throughout showing the area through the seasons, and contain big landscapes, as well as macro images of the flora that grow there. The photos have to be powerful to get our message accross: there will be no freeway through Banyule.

    Cole-social-change-photography0378

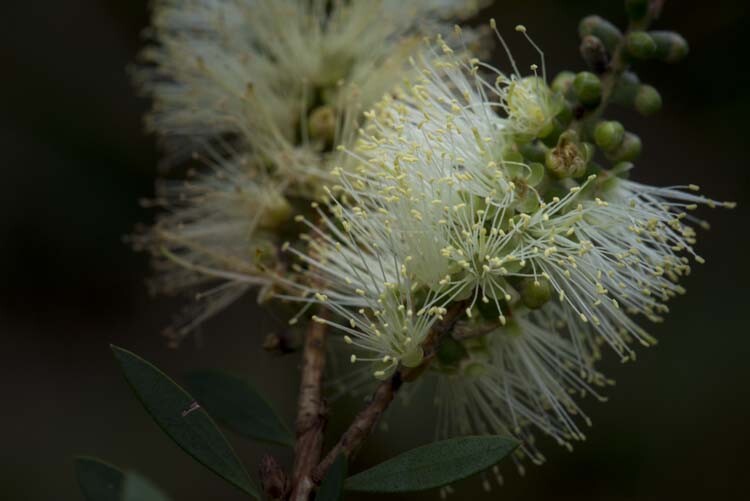
    Bottle Brush. One of the indigenous plants at Banyule Flats.

    Images are very strong. If I just tell you about the area then you are not going to want to protect it, but if I show you what it looks like then you start to feel a connection. Beauty has to be seen, and that is where photography becomes very powerful.

    Think back to causes you have felt very passionate about. Do you think of them in words, or in images?

    Cole-social-change-photography0373

    Sunrise Around the Back of Banyule Flats.

    When I think about the Vietnam War, images come to my mind, like the two I already mentioned. The Franklin Dam project was one of the first major campaigns that I have a really good memory of.  The image of the Franklin River gave people an understanding of what they were going to lose if the dam went ahead.

    If you have a cause that you want to assist or save, use your photography to help. Get the best photos that you can, and show people what you want them to see. The stronger your photography is, the better the effect it will have. You want to create images that people will remember. In the years to come when people talk about Banyule Flats and how we stopped the freeway, I want them to think of my images in the book.

    googletag.cmd.push(function() {
    tablet_slots.push( googletag.defineSlot( “/1005424/_dPSv4_tab-all-article-bottom_(300×250)”, [300, 250], “pb-ad-78623” ).addService( googletag.pubads() ) ); } );

    googletag.cmd.push(function() {
    mobile_slots.push( googletag.defineSlot( “/1005424/_dPSv4_mob-all-article-bottom_(300×250)”, [300, 250], “pb-ad-78158” ).addService( googletag.pubads() ) ); } );

    The post Using Your Photography to Create Social Change by Leanne Cole appeared first on Digital Photography School.

    Digital Photography School

  • Backing Up Your Digital Photos: Is Cloud Storage Right for You?

    In today’s digital era, it’s so simple to copy your photos onto your laptop hard drive and forget about them, thinking they’ll be there whenever you need them. But if your laptop crashes or gets stolen, and you haven’t backed up your photos in another place, then they’re gone forever. Most forms of digital storage are unreliable in the long term. Hard drives crash, computers die, and CDs and DVDs get scratched up and become unusable.

    If you want to preserve your digital photographs then it is important to develop a strategy to back them up. Many people have started looking to the cloud as a place to store their photos. Could cloud storage be right for you?

    2015 08 24 providence 8

    Here are a few questions you should ask yourself if you’re considering cloud storage:

    • Do you want to use a free storage service, such as Google Photos or Apple Photos? Or are you willing to pay for a service with more features? If so, how much are you willing to pay?
    • Do you want to use cloud storage as a backup solution for all of your photos or just some key ones? How much data do you have? How often will you need to access your photos?
    • What types of files do you have? Camera raw files? Tiff files? JPEGs? All of the above?
    • How fast is your internet connection? Uploading files to the cloud can be very slow.

    There are a few free applications, such as Google Photos and Flickr. These services could be a good option to back up your digital photo library if you don’t want to spend any money. The problem with a lot of them is that they either compress your photos, which means a loss in resolution and quality, or dditionally they don’t support RAW or TIFF files. So if you’re a raw shooter then this isn’t a great solution for archiving your photo library.

    Luckily there are a number of services which will store your digital photographs for a small fee. There are many different companies that provide cloud storage, so I’ve decided to focus on only a few in the rest of this article. Be sure to do your research and find a service that fits your backup needs.

    A Few Options for Cloud Storage

    Google Drive

    Google Drive is a relatively cheap and reliable cloud storage service. All Google accounts are given 15GB of free storage. From there you can pay as little as $ 1.99/month for 100GB, $ 9.99/month for 1TB, and up to $ 299.99/month for 30TB. Google Drive allows you to organize your own folders and supports all photo file types.

    Amazon Cloud Drive

    Amazon Cloud Drive touts an impressive unlimited photo storage plus 5GB for video and other file types for only $ 11.99/year. Additionally, if you have an Amazon Prime account, then this service is already included as part of your subscription. The one catch is that file uploads are limited to 2GB per individual file, so if you have files that are larger than that then you may not be able to upload them.

    Microsoft One Drive

    Microsoft One Drive has plans that offer 15GB for free, 100GB for $ 1.99/month, and 200GB for $ 3.99/month. Additionally, Microsoft is currently running a deal where you can get the Office 365 application package and 1TB of storage for $ 6.99/month. A big disadvantage to this service is that you cannot store more than 200GB without purchasing additional apps from Microsoft. But if you have less than 200GB, then One Drive is a really cheap option for back up.

    Dropbox

    The Basic plan gives you 2GB of storage for free. Upgrading to a Pro account will give you 1TB of storage for $ 9.99/month. The highest level plan is a Business account which will give you unlimited storage for $ 15/month per user. Dropbox doesn’t offer the most competitive prices among cloud providers but it’s a popular option that you may find reliable. However, if you have more than a terabyte of data, and files that break the size limits of some of the other unlimited providers, then Dropbox may be the best option for you.

    Mediafire

    Mediafire is one of the cheapest cloud storage options among the major players in the market. They offer 10GB of storage for free and up to a terabyte for only $ 2.49/month. Most impressively, their Business accounts offer up to 100 terabytes of storage for $ 24.99/month. If you’re looking to get into cloud storage for relatively cheap, then Mediafire is definitely a good bet.

    2015 07 01 chestnut hill reservoir 19

    Alternatives to Cloud Storage

    Cloud services are not the only option you should investigate as a place to store your digital photos. Like any other digital backup, cloud storage isn’t full-proof. A quick internet search will show you numerous horror stories of peoples’ data being lost in cloud storage glitches and failures. This section of the article will explore a few other possibilities for saving your digital photos.

    External Hard Drives

    External hard drives are a good option if you need a lot of readily accessible storage for an affordable price. I use one terabyte Toshiba drives that only cost about $ 60. There are many other brands that offer similarly priced drives. One advantage external hard drives have over cloud storage is speed of access. You can store these files and keep them in your home or office, meaning they are readily accessible. Trying to download files you have stored on the cloud can be extremely time consuming.

    Another advantage is cost; hard drives are relatively cheap when compared to continuously paying for monthly fees for cloud storage over the longterm. The drawback of hard drives is that they will eventually fail. Many are only reliable for 2-5 years, so it is important to back up your files to multiple places. But if you can’t afford a RAID hard drive system and you have a lot of data to backup, external hard drives are a good place to start.

    2015 08 27 tufts obsoletemedia 5

    Flash Drives

    USB flash drives are another option for backing up data in your home or office. Prices are continually dropping on flash drive storage. Flash drives don’t have a lot of storage capacity, but 16GB flash drives are as cheap as $ 6. This makes them one of the most inexpensive options to back up your most prized images. I use them to back up my portfolio and store the memory sticks at a relative’s house. It’s not a solution for all of my data, but it gives me an added layer of backup that could save some of my best photos in the event of a disaster.

    CDs/DVDs

    You can also back up your data on CDs or DVDs, but at this point I wouldn’t recommend it. This kind of media is quickly becoming obsolete, and while it’s cheap, CDs and DVDs are easily damaged or corrupted. Additionally, you can’t store that much data on discs. Most CDs have a capacity of 700MB and DVDs cap out at less than 5GB. On top of this, many computer manufacturers, such as Apple, aren’t including disc drives in a number of their products. This means you’ll have to purchase an external drive just to read your discs in the future. You’re better off storing files on a hard drive or flash drive with a USB connection.

    2015 06 03 alaskaday05 matanuskaglacier 22

    Conclusion

    Ultimately, there is no holy grail, one-size-fits-all solution for backing up your digital photos. The main theme is that you should not rely on a single source of backup because it can easily become a point of failure. If you haven’t stored your photos in more than one place and that one backup fails, you’re likely going to be out of luck.

    Backing up your photos doesn’t need to be expensive; it just requires that you be strategic. I believe that cloud storage is best utilized as part of an overall storage strategy for your digital photographs, rather than the only point of backup.

    Is cloud storage right for your backup needs? That is for you to decide. I hope this article gives you a starting point to get you on the path to reliably backing up your digital photos.

    googletag.cmd.push(function() {
    tablet_slots.push( googletag.defineSlot( “/1005424/_dPSv4_tab-all-article-bottom_(300×250)”, [300, 250], “pb-ad-78623” ).addService( googletag.pubads() ) ); } );

    googletag.cmd.push(function() {
    mobile_slots.push( googletag.defineSlot( “/1005424/_dPSv4_mob-all-article-bottom_(300×250)”, [300, 250], “pb-ad-78158” ).addService( googletag.pubads() ) ); } );

    The post Backing Up Your Digital Photos: Is Cloud Storage Right for You? by Dan Bullman appeared first on Digital Photography School.

    Digital Photography School

  • Poll: Have you bought a mirrorless camera yet?

    I asked this same question regarding mirrorless cameras about 18 months ago, and thought it would be an interesting comparison to see what the split is now. Here are the stats from last time (March 2014)

    Screen Shot 2015-09-28 at 2.01.23 PM

    Mirrorless poll 2015

    So let’s run the exact same questions again and see how the answers compare. I’m interested to see how they change.  GO!


    Note: There is a poll embedded within this post, please visit the site to participate in this post’s poll.

    googletag.cmd.push(function() {
    tablet_slots.push( googletag.defineSlot( “/1005424/_dPSv4_tab-all-article-bottom_(300×250)”, [300, 250], “pb-ad-78623” ).addService( googletag.pubads() ) ); } );

    googletag.cmd.push(function() {
    mobile_slots.push( googletag.defineSlot( “/1005424/_dPSv4_mob-all-article-bottom_(300×250)”, [300, 250], “pb-ad-78158” ).addService( googletag.pubads() ) ); } );

    The post Poll: Have you bought a mirrorless camera yet? by Darlene Hildebrandt appeared first on Digital Photography School.

    Digital Photography School

  • 5 Trends to Take Your Photography Business to the Future

    As an owner of a photography business, you need to have the ability to wear many different hats; you need to be a marketer to promote your brand, a designer to create and update your site, and a tech-savvy person to understand the innovation and new products that are constantly appearing on the market.

    In this article you’ll learn some of the trends in digital marketing, web design, and mobile technologies that any smart photographer needs to be familiar with.

    Sergey Galyonkin

    By Sergey Galyonkin

    Digital Marketing

    In the following years we can expect a growing number of desktop and online software solutions geared at photographers. Tough competition in this market constantly gives birth to many interesting offerings.

    For instance, Defrozo is looking to be a one-stop, free platform for photographers to update their website and blog, proof images and sell prints online, as well as manage their client base in a built-in CRM (customer relations management). Snapizzi is another interesting tool which uses a smart QR-code scanning technology to enable photographers to automatically upload and sort out event photos for online sales, literally in minutes. And if you’re looking for an album proofing tool that could be integrated with your existing website AlbumParrot is here to help.

    These are just a few of the new apps and services worth your attention, you can discover more photography startups on Betalist.

    Dickson Phua

    By Dickson Phua

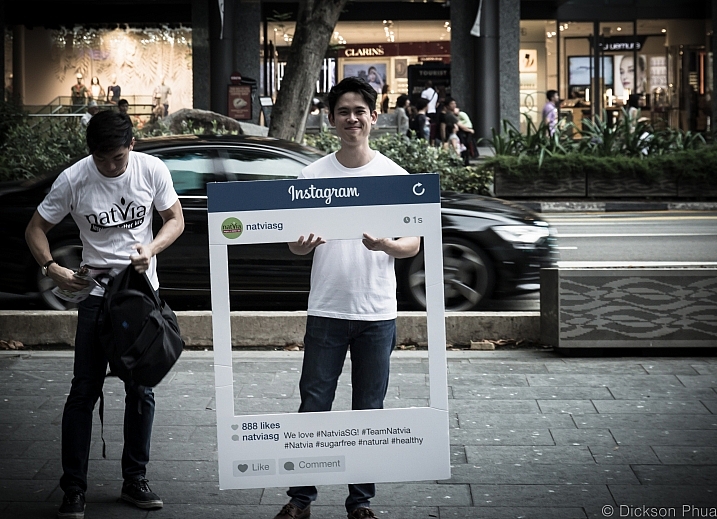
    With advertising coming to Instagram, and Facebook limiting its organic reach in favor of paid-for posts, email marketing becomes even more attractive for small business, and photographers are no exception. Some of the major trends in this area are personalization and automation, with most services like MailChimp and MadMimi extending and improving their functionality in this area. As a result, it gets quite easy to create a sequence of emails that will be triggered when someone subscribes for your updates, or send out your special offers to small segments of your contact list in order to maximize relevancy and click-throughs.

    The popularity of visual storytelling will continue to grow which is obviously great news for photographers. Big companies will be employing professional photography to communicate their brand philosophy and aesthetics. So consider adjusting your proposition to accommodate corporate clients.

    Web Design

    Talking about web design, there are a few standards you might want to take into account while updating your photography portfolio.

    Image-focused design featuring clean typography and ghost buttons is going to be a winner, just like last year. Sticking to the storytelling trend in content marketing, full-size videos and images will take the world by storm contributing to a website’s interactivity, and increasing return visits.

    David Joyce

    By David Joyce

    Moreover, custom photo galleries and slideshows available for mobile viewing will become more and more popular. Don’t forget to make your site mobile-friendly this year, if you have not done it yet. In 2016 a mobile version of your portfolio will rock, otherwise you run the risk of losing over 40% of your potential clients.

    Mobile

    While there’s a lot of buzz around the revolutionary potential of mobile payments, it’s unlikely that the photography industry is going to adopt this trend too soon. However, mobile payments are definitely something to keep your eye on since mobile is conquering nearly every sphere of our life.

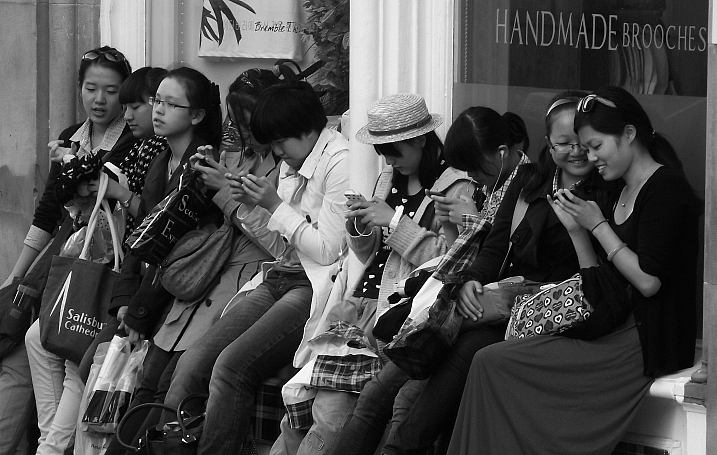
    Mobile usage is going to increase even more. For example, the latest data shows that the U.S. users spend 51% of their media time on mobile compared to 42% on desktop.

    Byronv2

    By byronv2

    This means mobile Internet users should be kept at the forefront, whenever you start a marketing campaign. Planning to print a solid pack of flyers for an upcoming tradeshow? Consider putting a QR code on it. Do you know image editing inside out? Think about creating your own mobile app, or figure out a mutually beneficial arrangement with app developers. Smartphones and tablets will keep their leading position in the coming years, so make the most out of this growing trend.

    Technology

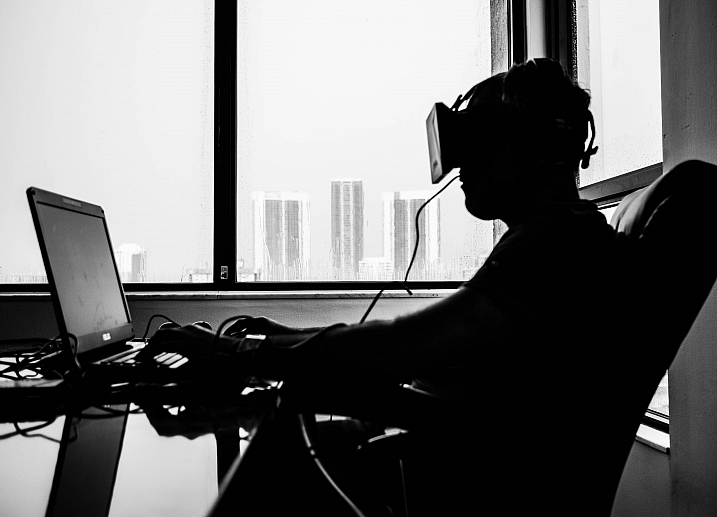
    Wearable devices are by far one of the most exciting trends to follow. With the competition fuelled by Apple Watch, this market is about to bring photographers a lot of neat capabilities via wearables.

    Sdu7cb

    By Sdu7cb

    Drones are another major trend in the tech field. A lot of models with features ranging from built-in cameras shooting 12 megapixel RAW, to smartphone app remote control, were on display at this year’s CES.

    CES 2015 also brought a few interesting solutions to the ever-increasing problem of image storage. Thus, Canon has introduced Canon Connect Station CS100 that connects wirelessly to phones and Wi-Fi enabled cameras, and uploads images to be displayed on a TV. Another potentially interesting technology was presented by Toshiba. The new memory cards from this manufacturer can be read with a NFC-enabled Android phone. This invention is rather raw at the moment, but it hints at advancing possibilities in the near future.

    Printing

    A printer about the size of a smartphone, that doesn’t require ink, and is controlled via your smartphone? Any event or wedding photographer could utilize a thing like that. Well, it’s actually a reality now. Meet Polaroid Zip. Presented at the CES 2015, this neat device is a glance into the future of compact printers which definitely moves towards compactness, wireless connection, and fast work.

    Son Of Groucho

    By Son of Groucho

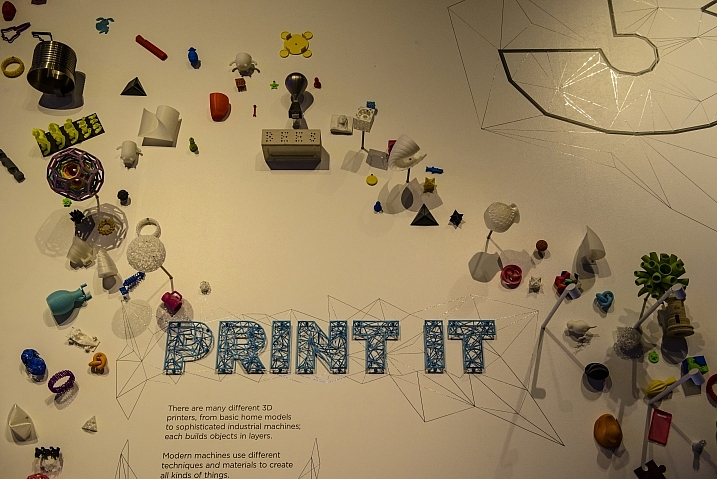
    3D printing is becoming more accessible for end consumers and opens new opportunities for photographers. For instance, Amanda Ghassaei created amazing 3D prints that feature subtle texture and high precision, when backlit with a diffused light. If you’d like to utilize this one-of-a-kind method before it hits the mainstream, the artist shared the instructions on how to do it.

    Interior Design

    The meeting room climate can make or break your deal, so knowing what design elements get people hooked these days is a must for a savvy photographer, no matter whether you meet clients in your studio or apartment.

    Paulisson Miura

    By paulisson miura

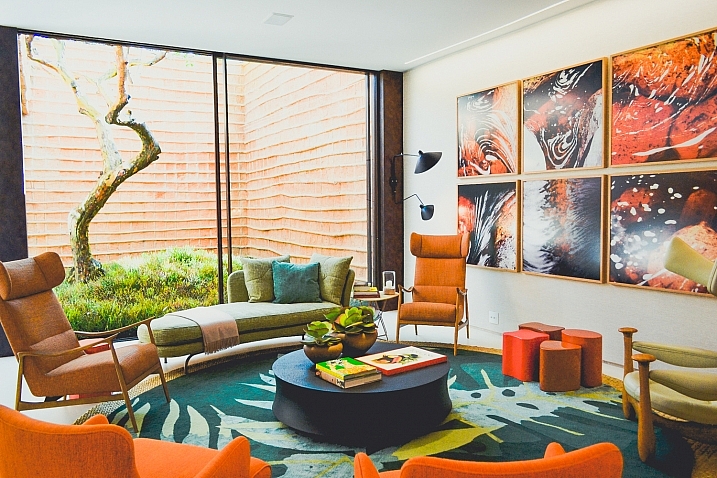
    In 2015 electric modern vibe and unexpected textures are finding their way out. More sophisticated looks featuring natural textures, gold hardware, and mid-century modern undertone are the latest fashion. For example, one sophisticated idea of the kind is a cowhide rug, which would be a perfect decoration for your meeting room.

    Wallpapers with natural flowers and textures have come back this year too. Blue seems to be one of the most popular colors for interior decorations. Taking into account the latest trends, you can create a cool, impressive look for your office or spice up your home interior.

    Bottom Line

    Staying informed about the modern novelties and trends in different areas of our life can be a great way to single out your photography brand, and differentiate you from the competition while taking your career to the next level.

    What recent trends do you find most exciting and promising? Let us know your thoughts by leaving a comment below.

    googletag.cmd.push(function() {
    tablet_slots.push( googletag.defineSlot( “/1005424/_dPSv4_tab-all-article-bottom_(300×250)”, [300, 250], “pb-ad-78623” ).addService( googletag.pubads() ) ); } );

    googletag.cmd.push(function() {
    mobile_slots.push( googletag.defineSlot( “/1005424/_dPSv4_mob-all-article-bottom_(300×250)”, [300, 250], “pb-ad-78158” ).addService( googletag.pubads() ) ); } );

    The post 5 Trends to Take Your Photography Business to the Future by Julia May appeared first on Digital Photography School.

    Digital Photography School