Category: Photography

  • How to Create 5 Different Looks Using Lightroom

    Most often you may strive to capture photos which most closely reflect the scene the way it looks to your eye.
    On the other hand, with having powerful editing software at your fingertips and an insatiable creative streak, sometimes you may find yourself experimenting with altering your images to create different “looks”.
    setting moods in lightroom

    Lightroom gives you ample opportunity to experiment with creative effects.

    Some photographers find the idea of strong post-processing edits to be an unfair alteration of reality, but let’s face it, it can be loads of fun to play around with photos in Lightroom (LR) or Photoshop (PS) and the results can be stunning – even if they don’t accurately reflect the shooting conditions.

    It’s important to keep in mind that edits don’t have to be super-strong or over the top, and just a few fairly minor changes can work wonders to create a mood that fits the photo. Naturally, what works and what doesn’t is subjective. That being said, it’s likely you wouldn’t want to use a soft, bright effect on a portrait of prison inmate, or a dark gritty effect on photos of a newborn.

    The extent to which you are able to apply these effects will be largely influenced by the original file type. If you are working with JPEG, you are going to run into problems with color rendition, saturation, noise and other issues. If you plan on processing your photos with editing software, I recommend shooting RAW files 100 percent of the time.

    #1 Add Warmth
    setting a warm mood in lightroom

    The warming effect works best to boost an already warm photo, but can also be created.

    When trying to create a certain mood in a photo, it makes it easier if some of the characteristics of that mood are already present, and you can just accentuate them. This is especially true if you want to create a warm feeling in a photo.

    The first slider you’re going to want to visit for this is color temperature. Increasing the color temperature is going to give the entire image a warmer tint, which can be exaggerated by increasing vibrancy.

    Another way to boost the warmth is in the HSL/Color/B&W panel. HSL stands for hue, saturation and luminance which can be adjusted for eight different colors. You will work with the first three – Red, Orange and Yellow. I prefer to start with the Luminance tab, and find that decreasing luminance, and then sometimes increasing saturation slightly, works pretty well with many images.

    Although you don’t have access to the HSL panel, don’t forget the power of the graduated filter to increase the warming effect in skies – particularly in sunset photos.

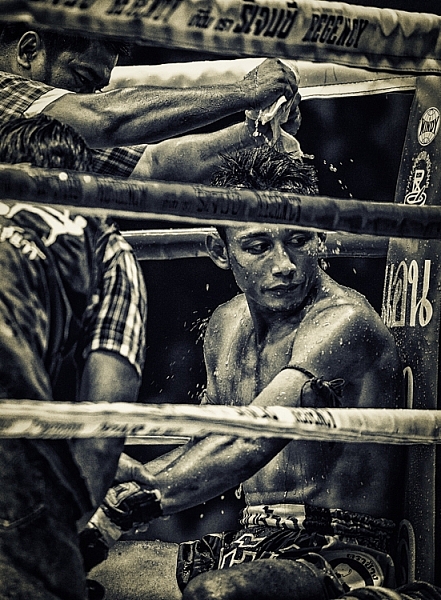
    #2 Dark and Gritty
    dark and gritty mood

    The dark and gritty mood adds a brooding look and highlights detail, while taking the focus off of colors.

    To achieve various levels of this effect, I work with various combinations of the following:

    • Increasing Clarity, sometimes more than 100 per cent by using graduated filters or the adjustment brush
    • Increasing Contrast, and decreasing Highlights and Whites
    • Further tweaking contrast with the Tone Curve sliders
    • Decreasing Saturation and Vibrance, or converting to black and white
    • Adding grain in the Effects panel

    #3 Light and Airy
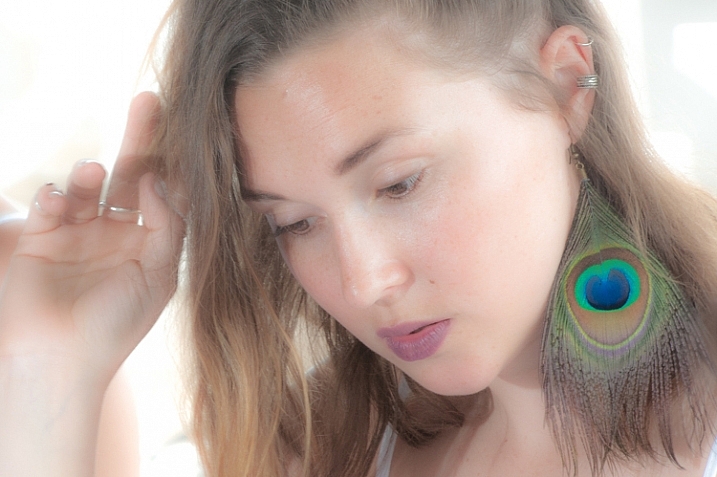
    light and airy look

    Light and airy is a good look for soft portraits, where super sharpness isn’t desired.

    For this look, the idea is to make the image soft without any harsh shadows. Here are some steps to take that will start to produce this mood:

    • Lower Contrast
    • Increase Highlights and Whites sliders
    • Decrease Shadows and Clarity

    Also note that a light hand with the sharpening slider should be used here to maintain the softness. If you add sharpening, try using a high value for masking to lessen the global affect.

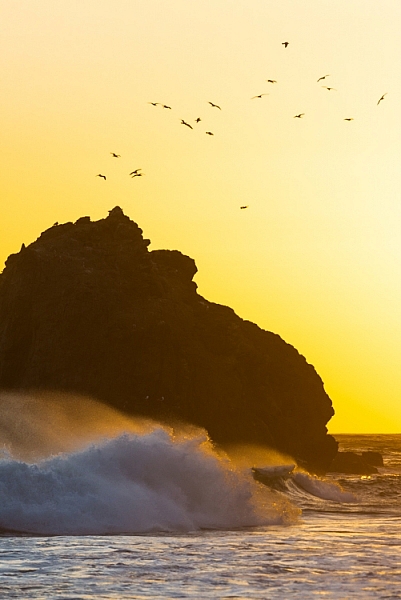
    #4 Silhouette

    silhouette look

    Silhouettes help to simplify your photo.

    You certainly can’t create this effect in just any photo – nor should you. Look for elements in the image that would be enhanced by a reduction in detail. Do the areas of the image that are going to be reduced to black contain details that are important to telling the story?

    Here are some adjustments that will get you moving in the right direction:

    • Increase Contrast
    • Decrease Shadows and Blacks sliders
    • You can decrease the darks and shadows sliders in the Tone Curve panel if needed

    Depending on your image, you likely want to avoid the clarity slider as this will bring back shadow details that you’re trying to get rid of.

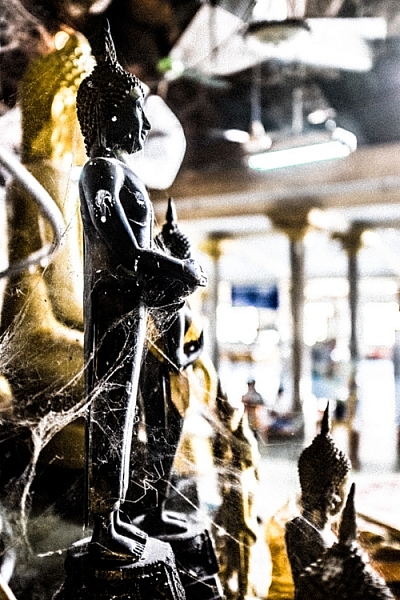
    #5 Bright and Clear
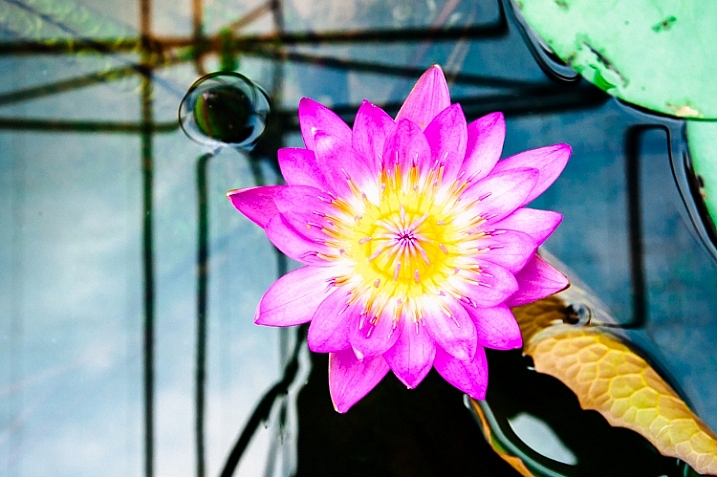
    bright and clear look

    The bright and clear look makes your photos pop with lots of detail.

    Along similar lines to the light and airy effect, you are looking to boost lightness while maintaining contrast and retaining detail and color. Here are some of the edits I start with while aiming for this look:

    • Boost Contrast
    • Increase Shadows
    • Increase Whites – you usually have to decrease highlights a bit as well to avoid clipping
    • Visit the Tone Curves panel if you need to work on the contrast more

    The trick here is that after making these adjustments, the colors can get a bit washed out. A visit to the HSL panel, some tweaking of the luminance and saturation of the dominant colors in your image, will help you dial it in.

    Conclusion

    In case this hasn’t crossed your mind already, creating presets of these settings can save you oodles of time later on. Of course, all of the adjustments I’ve outlined above may not work on your original image (depending on exposure, contrast, saturation, subject matter, etc.), and the same goes for any presets which typically only serve as a starting point.

    What tricks do you have up your sleeve for creating different moods in post-processing?

    googletag.cmd.push(function() {
    tablet_slots.push( googletag.defineSlot( “/1005424/_dPSv4_tab-all-article-bottom_(300×250)”, [300, 250], “pb-ad-78623” ).addService( googletag.pubads() ) ); } );

    googletag.cmd.push(function() {
    mobile_slots.push( googletag.defineSlot( “/1005424/_dPSv4_mob-all-article-bottom_(300×250)”, [300, 250], “pb-ad-78158” ).addService( googletag.pubads() ) ); } );

    The post How to Create 5 Different Looks Using Lightroom by Jeremie Schatz appeared first on Digital Photography School.
    Digital Photography School

  • For Women Photographers: Review of the Madison Camera Bag by Aide de Camp

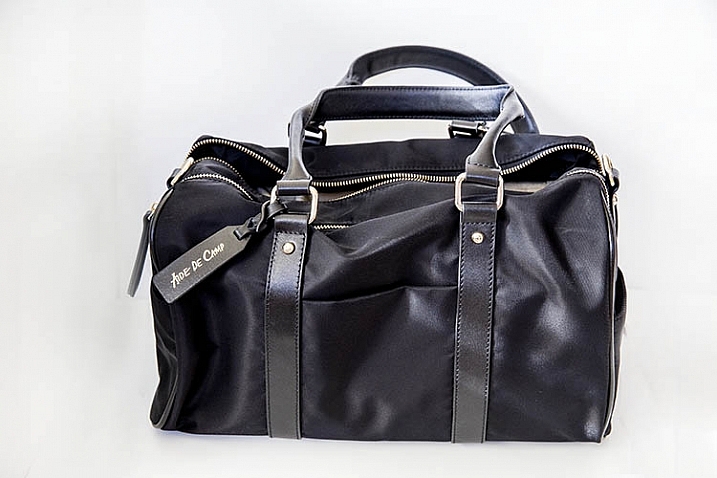
    Last weekend, I went out on a photo date with Madison, and came home swooning. In a world where camera bags largely take the form of backpacks, shoulder sling bags, and messenger bags, finding a vessel to transport camera gear is notoriously difficult for women who would rather carry something that appears more feminine.

    That is the problem identified by Michele Ng, a former marketing executive who founded Aide de Camp with the intent of producing attractive camera bags for busy and active women. The result is a collection of bags that, on the surface, resemble purses or totes that a woman would be proud to flaunt on her shoulder, yet on the inside are padded and structured to keep expensive camera gear safe. I took Madison, one of Aide de Camp’s flagship bags, on a test run and was very pleasantly surprised with the results.

    Suzi-Pratt-Madison-6

    Impressive from the get-go

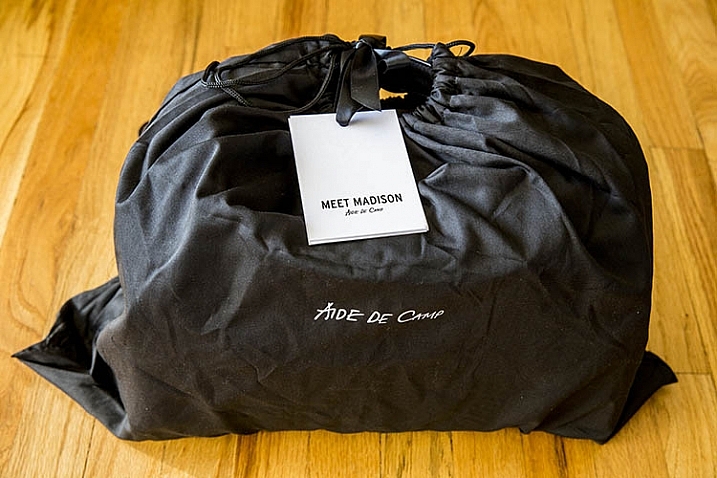
    Aide de Camp’s products impress from the moment you open their packaging. Instead of the distinctly unstylish cardboard and bubble wrapped items we’ve come to expect from most other retailers, the Madison camera bag arrived at my doorstep in a sturdy black cardboard box and black fabric pouch, both totally solid enough to reuse in other ways. It was like unwrapping a Christmas present, and it set the tone for the pretty, yet functional, product inside.

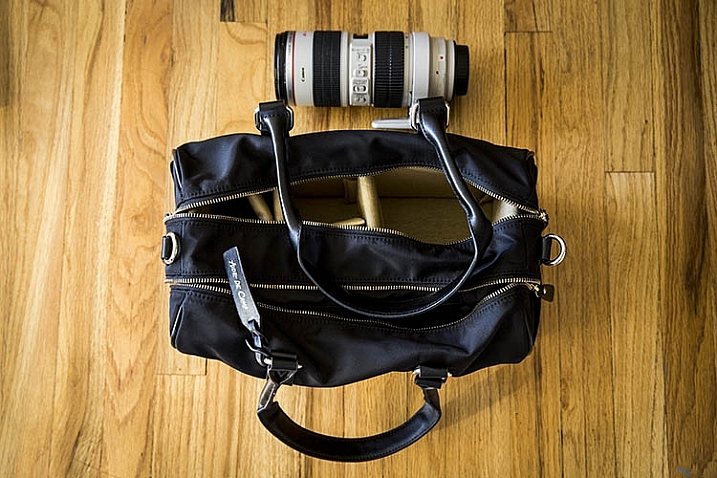
    fashionable camera bag

    Surprisingly large

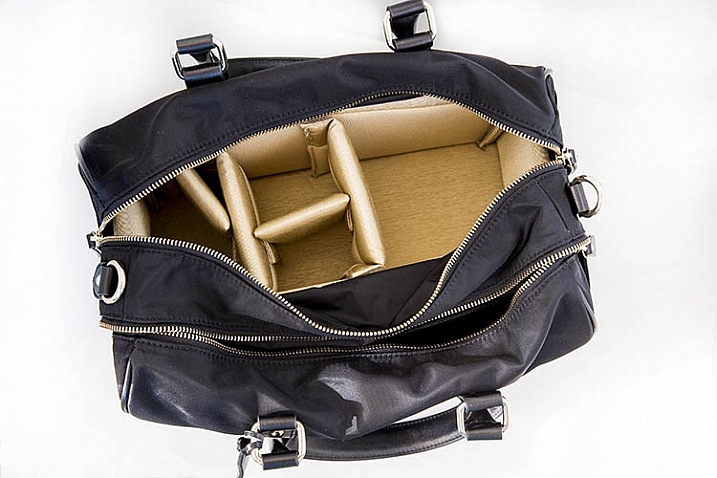
    Madison’s approximate dimensions are 14.5″W x 8.5″H x 8″D, making it a pretty sizable shoulder bag, as pictured below with a Canon 70-200mm f/2.8 in the frame as a reference to its size. The bag has two main compartments; one with a thickly padded, removable camera insert box, and the other with thinner compartments for holding everyday items such as a wallet, tablet, e-reader, etc.

    The spacious, easily accessible, secondary pocket was a definite perk as many other camera bags seem to add extra pockets as an afterthought, making them impossibly thin and difficult to access. Also, the removable insert is sold on its own item on Aide de Camp’s website, making it easy to convert just about any spacious bag into a camera bag. Given the fact that Madison, and most Aide de Camp bags, come with a removable camera insert, this bag could easily double as a weekend or overnight bag.

    Suzi-Pratt-Madison-4

    Suzi-Pratt-Madison-5

    Fits more gear than you would expect

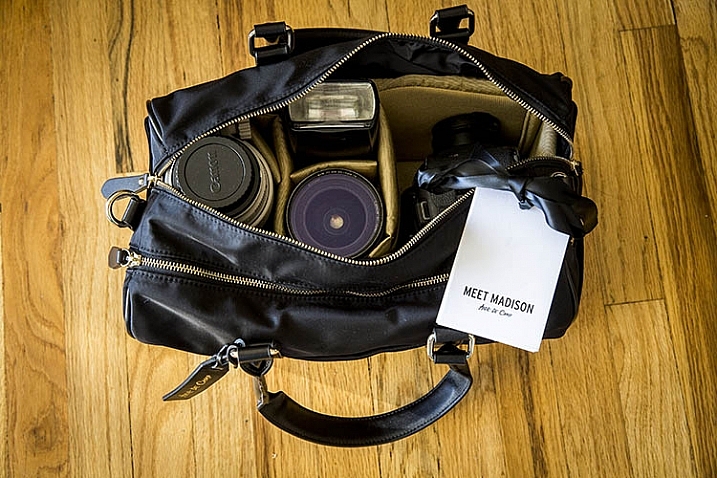
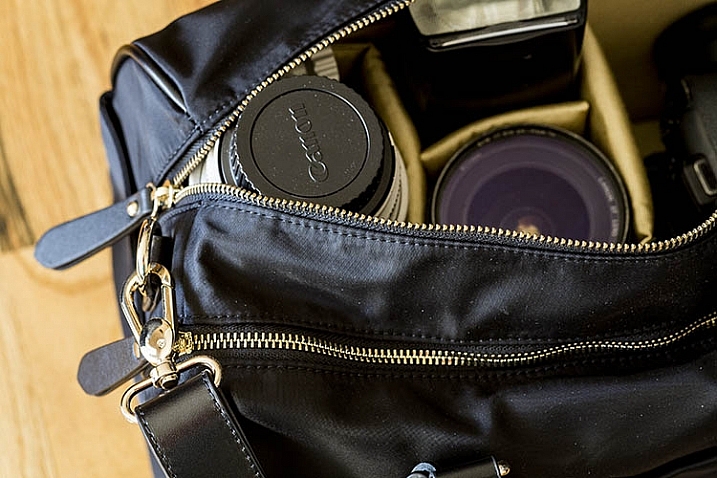
    Given Madison’s ample size, it should come as no surprise that you can pack almost all of your essential camera gear in this bag. The bag’s website promised that both mirrorless camera systems and small DSLR cameras could fit, yet I was amazed when even my larger Canon 5D Mark III with a 50mm f/1.4 lens attached was able to comfortably sit in Madison’s camera insert box without feeling too cramped. I was also able to put a Canon 580 EXII flash, a Canon 16-35mm f/2.8, and Canon 70-200mm f/2.8 lens in the camera section of the bag and zip it up without too much of a hassle, although the telephoto lens was just barely able to fit. Even with the camera section fully maxed out, the secondary pocket was still pretty spacious and I could easily slip a tablet, e-reader, and other essential items in with no problem.

    Suzi-Pratt-Madison-2

    Made of premium materials

    After unwrapping Madison, I was struck by how solidly built the bag was, while at the same time maintaining a sleek, rich appearance. Madison’s exterior is composed of water-resistant lightweight nylon along with genuine leather handles and trim, and 14-karat gold plated zippers. The bag itself has two short 9″ long handles, but it also comes with an optional cross body strap that is adjustable from 34-53 inches in length.

    Suzi-Pratt-Madison-1

    Only one feature to be wary of

    For all of Madison’s fashionable and practical features, there is one glaring detail that is hard to notice: the bag’s straps are not padded, making it not very ergonomic if you were to pack the bag with heavy camera gear. In that sense, it’s wise to follow Aide de Camp’s recommendation and only put mirrorless or compact DSLR camera gear in this bag if you plan to carry it for a long time.

    Over to you

    Do you think there’s a demand for camera bags that appear more feminine and fashionable? If so, would you give Madison a try? Have you tried other similar brands? What did you think?

    googletag.cmd.push(function() {
    tablet_slots.push( googletag.defineSlot( “/1005424/_dPSv4_tab-all-article-bottom_(300×250)”, [300, 250], “pb-ad-78623” ).addService( googletag.pubads() ) ); } );

    googletag.cmd.push(function() {
    mobile_slots.push( googletag.defineSlot( “/1005424/_dPSv4_mob-all-article-bottom_(300×250)”, [300, 250], “pb-ad-78158” ).addService( googletag.pubads() ) ); } );

    The post For Women Photographers: Review of the Madison Camera Bag by Aide de Camp by Suzi Pratt appeared first on Digital Photography School.

    Digital Photography School

  • Photographer’s Guide to Using Graphic Tablets for Lightroom Editing

    There are several gadgets we can use to improve our performance in Adobe Lightroom, if our intent is to post-produce images quickly and neatly with professional results. However, there is no better tool for a talented photographer than a good graphic tablet. Read on to learn how a graphic tablet can be used with Adobe Lightroom and how it can Continue Reading

    The post Photographer’s Guide to Using Graphic Tablets for Lightroom Editing appeared first on Photodoto.


    Photodoto

  • The Who What Where When Why How of Doing a Photowalk

    Recently I was privileged, for the first-time, to be a walk leader as part of the Scott Kelby Worldwide Photowalk. It was a great experience for me, one I plan to repeat again, and one in which I encourage all photographers of every skill level to participate. While a photowalk is something you may choose to do by yourself, I recommend taking some friends along with you. German photojournalist Alfred Eisenstaedt (1898-1995) once said, “It is more important to click with people than to click the shutter.” I agree! Let’s take a look at some FAQs concerning photowalks.

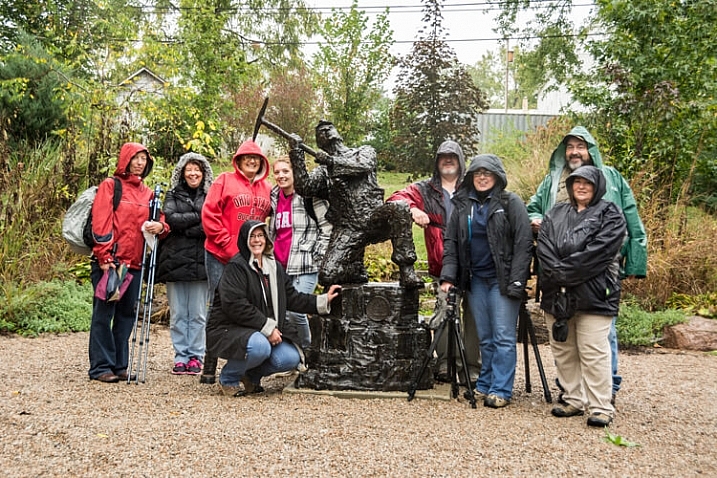
    Group picture from World Wide Photowalk. The group is dressed in rain gear as it was raining at the beginning of our walk.

    Group picture from the 2015 World Wide Photowalk I led. The participants are dressed in rain gear because it was raining when the event began.

    Just what is a photowalk?

    Wikipedia defines photowalk as: the act of walking with a camera for the main purpose of taking pictures of things that a photographer might find interesting. Obviously, but a photowalk can be so much more than that! If you invite friends or others who share your passion for photography to walk with you, it can be a social event. It can be a source of inspiration if you feel like you’re in a photography rut, and it can also be a time of learning new techniques and sharing your own knowledge and ideas with fellow photographers.

    Look for shapes and colors

    Take a close look for interesting shapes and colors.

    Why should you attend a photowalk?

    One of the main reasons to photowalk is to practice your skills as a photographer, and to stretch your skills by trying new things and learning from others. Photographers of all skill levels can benefit from a photowalk, as participants can observe and learn from those more advanced, or help and encourage those who are just beginning to develop their interest in cameras and photography. Don’t be afraid to experiment and try new accessories or techniques; rather, practice using them on a photowalk! For example, perhaps you have never tried back button focusing before, so use the time on your walk to give it a try and have another photographer that uses it help you to get familiarized with this option.

    If you are a member of a photography club, a photowalk can be a memorable outing. Some groups even set them up intentionally as a form of friendly competition. Photowalking can also be an opportunity to network with other photographers who share the same interest, or photography ambition as you.

    The act of photowalking needn’t be just about the pictures –  in fact, one activity you might try is a photowalk without your camera. Sounds crazy, I know! As you see things that you would have photographed if you had your camera with you, discuss with others in the group how to photograph the object or scene. Sharing these opinions might help you see the subject more creatively.

    After the walk, create a social media page, on sites such as Facebook or Flickr, where the group can share the images they captured during the walk. This is a way of staying in touch with the friends, new and old, you may have made during your walk.

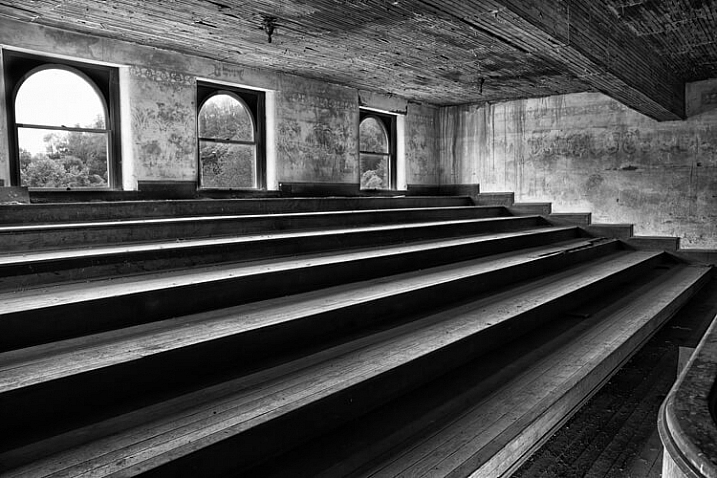
    Look for unique angles.

    Unique angles create a striking image in an abandoned theater balcony.

    What time of day is best?

    This is a trick question, because any time of the day is a fine time for a photowalk. You just need to use the elements presented to you, as even the harsh mid-afternoon light can be an ideal time to shoot silhouettes. Or try a night walk in a safe downtown area of a local city, because that can be an opportune time to shoot some really awesome streetlight or headlight images. As American pioneer photographer, Alfred Stieglitz (1864-1946) stated, “Wherever there is light, one can photograph.”

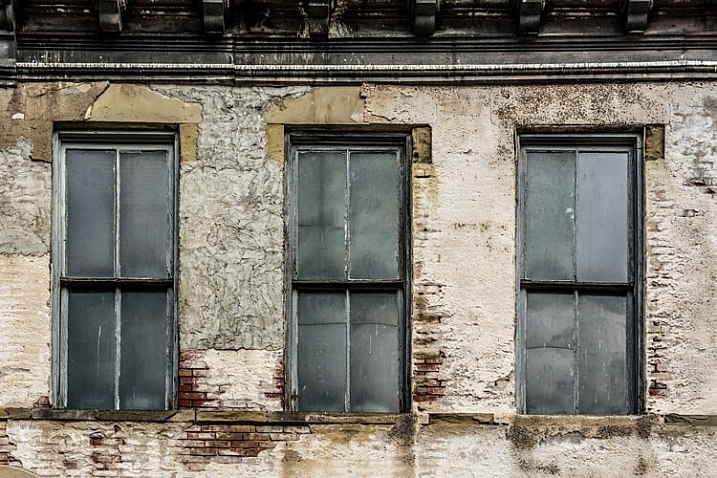
    Look for patterns

    Patterns appear in aging structures. These three windows lend themselves to a balanced composition.

    What are the best locations?

    Anywhere there is something interesting to photograph can be a perfect spot for a photowalk, from a city park to one’s own backyard. If you are organizing a more formal photowalk for a group, be sure to choose a venue or area that is spacious enough to handle the number of participants, without making them feel crowded. Look for a location that might present a wide variety of photo ops such as: macro, landscape, architecture, portraiture, still life or even wildlife. Keep the walk to a reasonable time and distance (two hours of shooting is sufficient for a photowalk). Some ideas for locations are:

    • A short sidewalk or street loop in a city or town
    • A city or public park
    • A hike in the woods
    • Walk a long a river or lakeshores
    • A zoo
    • Your own neighborhood

    Whichever location you choose for your walk, try to do some pre-shoot scouting, either via internet or with a personal visit, in order to be aware of the area. If you are leading the walk, try to find out as much information about the area before-hand as you can, maybe even enlisting a local guide to show the group the most picturesque spots or points of interest. Remember to give participants maps or other heads-up information so they can make the best use of their time.

    Dramatic details can be found when looking beyond the obvious subject.

    What if the weather is bad?

    Check the weather forecast before you leave for your walk, and be prepared for adverse weather conditions. If you are leading a walk, making plans for an alternative indoor location could make for a more pleasant experience for everyone participating.

    What equipment should you carry?

    Well, of course, the most important equipment is a camera! Do you need a high-end camera for a photowalk? Absolutely not! Your camera can range from an iPhone to a point-and-shoot or a DSLR. Challenge yourself to shoot with a limited amount of equipment, and you may find this helps stimulate some very creative shooting.

    Pack light, because doing a photowalk with a heavy pack of equipment on your back will not only get old quickly, but will also limit your mobility. Leave the bulky camera bag at home, and take only what you can carry along in your pockets:

    • Camera: Try walking with just one camera and one lens.
    • Tripod: A sturdy light-weight tripod or monopod can do double-duty as a photography tool and as a walking stick.
    • Batteries: Make sure you have a fully charged battery in your camera, or carry an extra in your pocket.
    • Microfiber cleaning cloths: As you will be walking with your lens cap off most of the time, carrying a lens- cleaning wipe in your pocket is helpful to keep the lens dust-free.
    • Extra memory card: If you plan to shoot a large number of images, a spare memory card often comes in handy.
    • Business cards: As photowalks are a great networking tool, be sure to carry business cards with you if you have them.
    • Photography vest: This option allows you to carry a few more items on the walk, such as filters or even possibly a second lens if you feel so inclined.
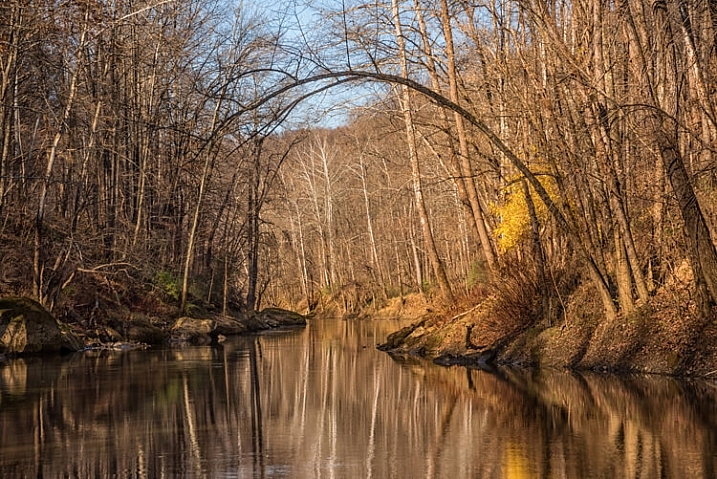
    On a fall Photowalk along a river was a great locations for reflections

    On a fall Photowalk, a spot along a river was a great locations for reflections

    What should you photograph?

    Whatever subject you are drawn to as you photowalk, try to look past the obvious and seek out details. Find interesting angles and perspectives to capture images of subjects you’ve never noticed before. Look for objects with unique colors, shapes, textures, patterns or reflections. Challenge yourself and/or your group members to look for certain subject matter, such as: photograph anything red. Also, by all means if you are a walk leader, take a group picture on location so you can share later on social media!

    Look for objects that might tell a story about the location of your walk.

    Look for objects that tell a story about the location of your walk.

    So get out there and walk

    Walking is great exercise. Photowalking is also valuable exercise for camera-buffs. Have some fun and experiment with some new techniques, while networking with other photographers.

    Have you ever participated in an organized photowalk? If so, what kind of subjects did you shoot, and were you pleased with the results? Please share your experience and pictures in the comments below.

    googletag.cmd.push(function() {
    tablet_slots.push( googletag.defineSlot( “/1005424/_dPSv4_tab-all-article-bottom_(300×250)”, [300, 250], “pb-ad-78623” ).addService( googletag.pubads() ) ); } );

    googletag.cmd.push(function() {
    mobile_slots.push( googletag.defineSlot( “/1005424/_dPSv4_mob-all-article-bottom_(300×250)”, [300, 250], “pb-ad-78158” ).addService( googletag.pubads() ) ); } );

    The post The Who What Where When Why How of Doing a Photowalk by Bruce Wunderlich appeared first on Digital Photography School.

    Digital Photography School

  • Photoshop Tip: Using the High Pass Filter to Sharpen Images

    If you’ve used Photoshop, you are likely aware by now that there are many ways to accomplish the same tasks. One of the more important ones that should be done to almost every digital image is sharpening. This is necessary because most digital camera sensors make use of an anti-aliasing filter, which very slightly blurs the image, to reduce the chances of moire occurring in the image. This slight blurring, generally only one pixel in size, causes a slight loss of detail in an image. To correct for the slight blurring, tools such as Unsharp Mask are used. For a good tutorial on Unsharp Mask, check out How To Sharpen Photos: An Introduction.

    High Pass Sharpening

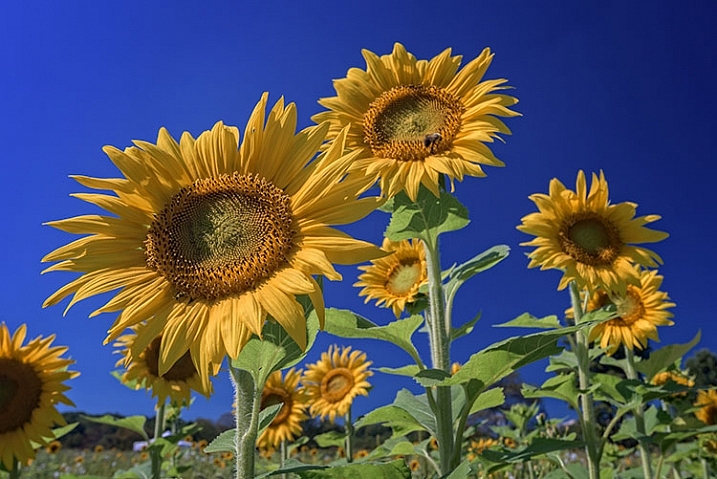
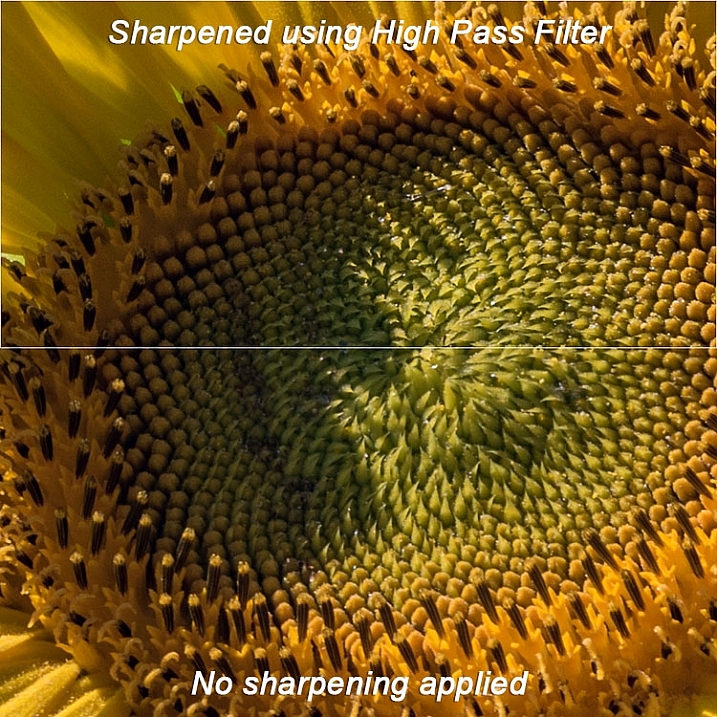
    This shot of sunflowers benefited from the High Pass filter by sharpening the fine detail in the center of the flower.

    Another easy way to sharpen your images is with a filter that’s not even found in the Sharpen menu under Filters in Photoshop. It’s relegated to the Other category at the bottom of the Filters menu, and is called High Pass. The High Pass filter is a bit easier to use than Unsharp Mask, in that it only has one slider to worry about, and the technique for using it allows for some experimentation even after it’s applied, so you can get your image looking exactly as you want.

    Note: I am using the latest version of Photoshop, version 2015.0.1 in Creative Cloud.

    Step 1: Edit your image, then flatten it

    Before you use the High Pass filter, you’ll first want to process the image to your liking. Generally speaking, sharpening should be the final step in image editing, because it is directly dependent on image size. You will sharpen an image sized to 5×7″ differently than one sized to 13×19″. Once your image is edited, flatten all layers by going to the Layer menu and selecting Flatten Image. Then adjust your image size as needed if you’re going to print or to display online.

    Step 2: Duplicate Layer

    Now that your image is flattened, duplicate that layer by pressing <CTRL + J> (in Windows) or <CMD + J> (on a Mac). You’ll then want to zoom in to view the image at 100% by pressing <CTRL + 1> (in Windows) or <CMD + 1> (on a Mac), or just double clicking the magnifying glass in the toolbox. You’ll want to be at 100% so you can see the detail of the image clearly.

    Step 3: The High Pass Filter

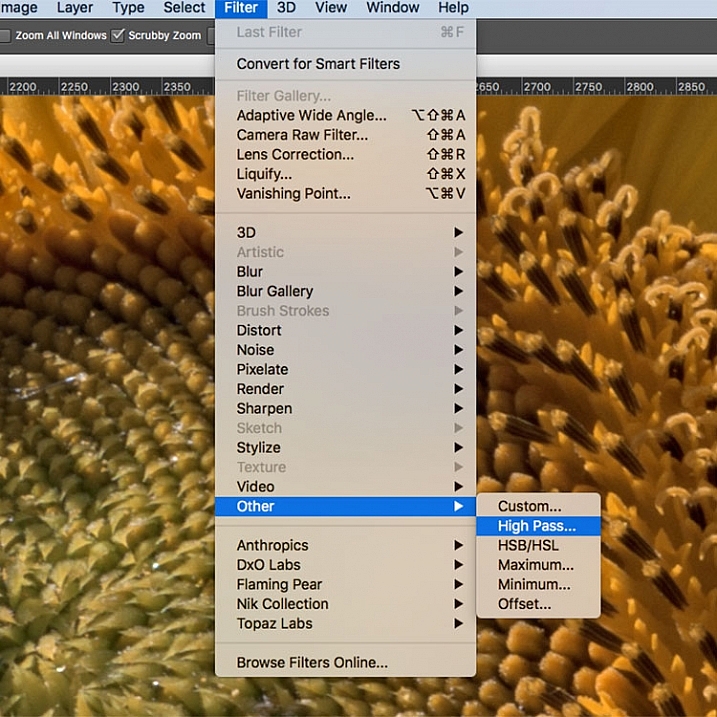
    High Pass Filter Selection

    In the Filter menu, select Other, then High Pass.

    Go to the Filter menu and select Other, and then High Pass. You will see the entire image turn a flat grey color. Not to worry, as this will allow you to see what the filter is doing.

    Step 4: Adjust the amount of sharpening

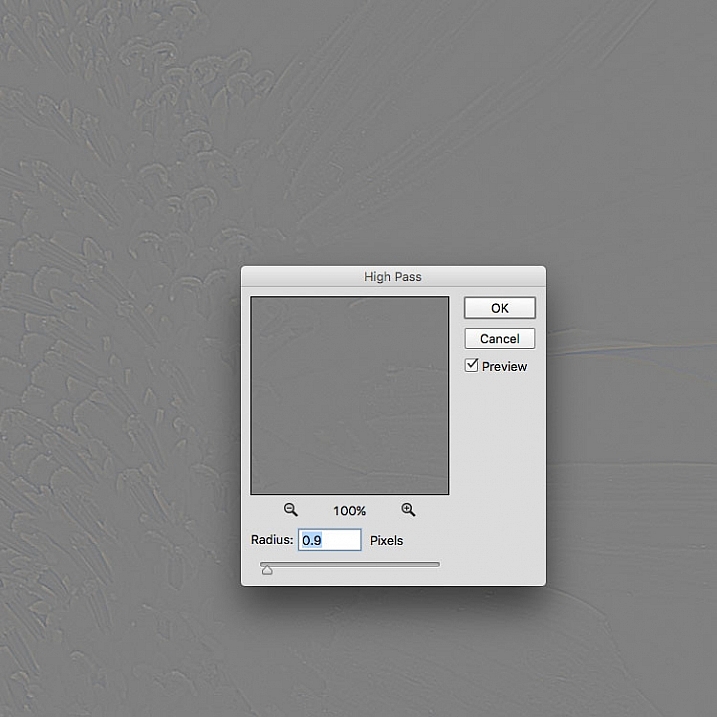
    high pass filter sharpening

    Once the High Pass filter dialog box pops up, use the slider to adjust the radius.

    Once you run the filter, you’ll see a dialog box open up, showing a preview along with a radius slider. In addition, the image behind the dialog box will have turned grey, with some edge lines showing.  This allows you to see exactly what is being sharpened. The High Pass filter only sharpens edges, so anything that’s not an edge becomes flat grey. The amount of sharpening you do will largely be image dependent, as well as size dependent.

    For this image of the sunflowers, I was making a large print, using the full resolution of the image. When doing so, I’ve found my radius amount will usually fall somewhere between 0.5 and 5 pixels. You need to be careful here, as too much sharpening will introduce unwanted artifacts and noise into the image. I use the preview as my guide. I want to see thin black lines over the grey areas, with little to no white. Once you see any white, it means you’ve begun to get a halo, which you want to avoid. The final effect will be a subtle sharpening, not a drastic pop. For this image, I used a radius of 0.9. You can see above that there are only black lines around the edges of the flower, with very little halo. Click OK when ready.


    Step 5: Adjust Layer Blending Mode

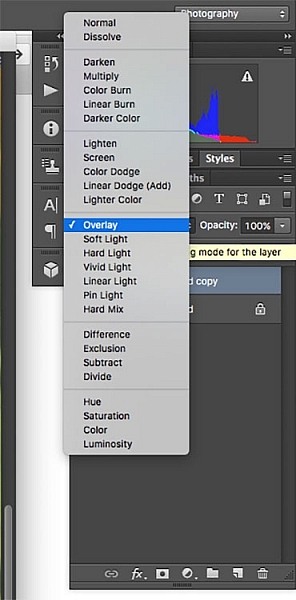
    High Pass filter layer blending modeOnce you’ve applied the High Pass filter, it’s time to get rid of that flat grey image and bring your photo back to life. Go to your Layers palette and select the Blending Mode drop-down menu and set it to Overlay. Your image will regain its color, and you can toggle the sharpened layer off and on, to compare the image with and without sharpening.

    You can also experiment with different blend modes, including Soft Light, Hard Light, Vivid Light, Linear Light, and Pin Light. In addition, you can use the Layer Opacity setting to reduce the effect a bit, if you decide the sharpening is a bit too strong. The beauty of this technique is that it’s completely adjustable (non-destructive) after you’ve applied the filter, and because you’ve worked on a separate layer, you can easily undo the sharpening and start over again if needed. Also, again because you’re working on a separate layer, if there are certain areas in the image where you want the sharpening to be applied, you can use Layer Masks to hide or show it.

    Final results

    High pass filter comparison

    In this comparison image, the top half has been sharpened using the High Pass filter, while the bottom half has not been sharpened.

    The High Pass filters allows a lot of flexibility in sharpening photos and is simple to use. It’s a great way to give your images a sharper, crisper look before uploading or printing. Give it a try and let me know what you think!

    googletag.cmd.push(function() {
    tablet_slots.push( googletag.defineSlot( “/1005424/_dPSv4_tab-all-article-bottom_(300×250)”, [300, 250], “pb-ad-78623” ).addService( googletag.pubads() ) ); } );

    googletag.cmd.push(function() {
    mobile_slots.push( googletag.defineSlot( “/1005424/_dPSv4_mob-all-article-bottom_(300×250)”, [300, 250], “pb-ad-78158” ).addService( googletag.pubads() ) ); } );

    The post Photoshop Tip: Using the High Pass Filter to Sharpen Images by Rick Berk appeared first on Digital Photography School.

    Digital Photography School

  • Beginner’s Guide to Photographing Horses


    Equine-photography-3b

    There are two main aspects to consider when beginning to attempt any variety equine photography, the photographic side (technical and creative) and the dealing with horses side (sometimes unpredictable and dangerous).

    Lets start with the animal side, in this beginner’s guide to photographing horses.

    Equine-photography-4

    I am not a horse person, but I have photographed a lot of them, and have spent a fair bit of time around them, their owners, and trainers, who have all taught me a lot.

    Horses have distinct personalities which can range from extremes such as: a tendency gallop across a paddock to attack you on one end of the scale, to willing to defend you at their own expense at the other end. Their main instinct is flight, and they can be easily spooked by just about anything – including cameras.

    There is a whole horse language involving their ears, leg stance, and head movement. The horse owners I have worked with prefer certain positioning of these things in photographs. For example, they really don’t like images where the horses ears are pinned back, which means the horse is not very happy. I would suggest spending some time googling horse body language before you set out on your first equine photo session – not only to know all the best positions, but to also know if a horse is about to attempt to do you some serious damage.

    Equine-photography-1

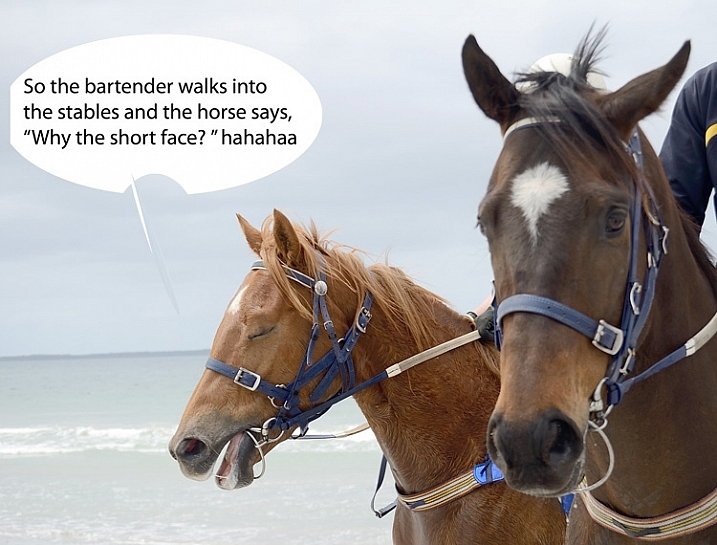
    Ears forward but relaxed means the horse is happy, where as ears like the other guy in the above image, can mean the horse is confused.

    Never stand behind a horse. Never catch a horse by surprise. Make sure horse knows where you are, they don’t like people jumping out from behind bushes, or sudden movements. Never run up to a horse. One owner trainer tells me that even wearing bright colors can startle some horses.

    Horses and cameras

    Unless you know that a horse is very used to flash, using one could endanger you, the horse, or the handler/rider. I would avoid it at all costs. The sight and any sound of your camera can be enough to startle them, even just the slap of the mirror.

    I recommend having a chat with owner or handler about the horse’s personality – is he flighty, bite-y? Loves to kick? Hates photographers? Has never seen a camera? Know all that before you go in camera blazing.

    Equine-photography-10

    If the horse is calm enough, have the handler introduce you. Let the horse approach you, sniff the camera, and move slowly, talk softly and calmly, and if it’s all okay to do so, give it a pat. If you’re unsure how the horse will react to camera sounds (or use silent mode if your camera has it), organize with handler to do a few test shots while the horse is calm, and you are all in safe positions, should the horse start bucking and kicking.

    Pretty much all my horse photographs have been taken with a standard 18-55mm kit lens. That’s all we had at the local newspaper to photograph every kind of event, equestrian or otherwise. Regardless of what style of equine photography you are attempting, I would recommend a zoom lens so you can get in close on detail, without getting too close to the horse.

    The photography

    You’ll want a fairly fast shutter speed, even for portraits – those ears move fast. I’d recommend a minimum of 1/250th  for general photography, faster if the horse is moving at high speed. Generally you want good horse shapes where you can see all four legs, and the animal has its ears forward.

    Equine-photography-12

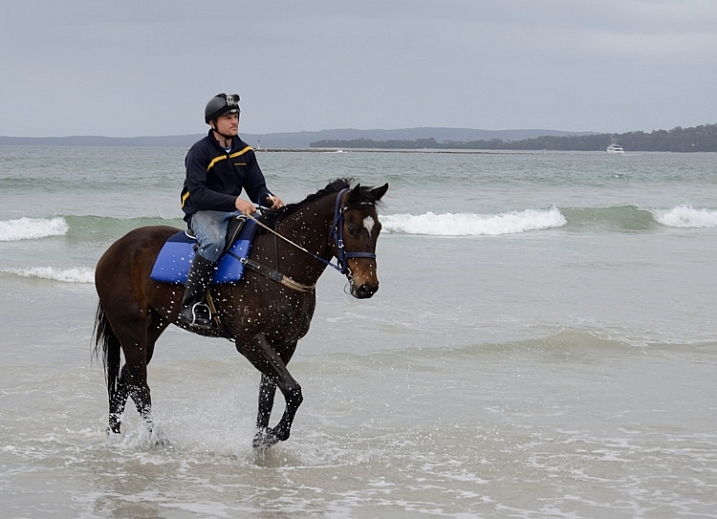
    Race horse trainer Ritchie Butler on Tom.

    Events

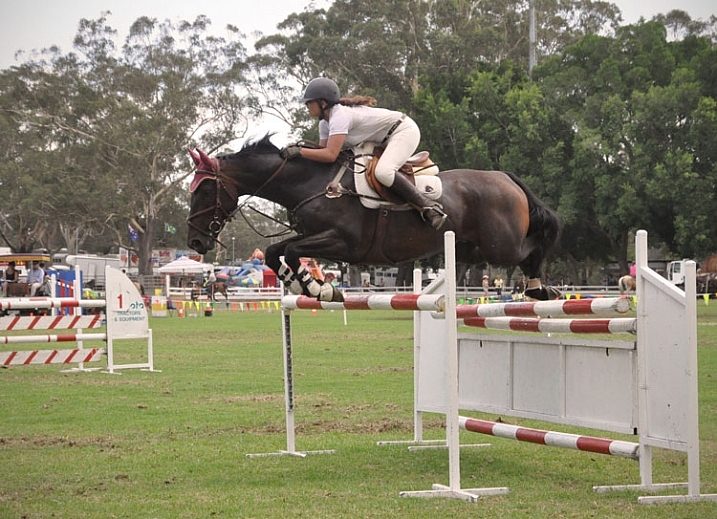
    When photographing equine events, like show jumping, you aren’t necessarily that close to the horse, but the same rules apply. Make sure you find a safe spot where the horse can see you from a distance, and don’t keep moving about. Remember not to move towards the horse and rider, and do not use flash. Check with any officials before you start.

    An image that involves horse and rider in mid-jump, with all legs off the ground and front legs tucked under, is generally preferred by riders and owners. You’ll need a fairly fast shutter speed, somewhere around 1/650th – 1/800th is a good place to start. Set your camera to continuous release (burst) mode, and press the shutter just as the horse lifts off.

    Equine-photography-7b

    Photographs mid-leap, all feet off the ground and front legs tucked in, are preferred by show jumpers.

    The races

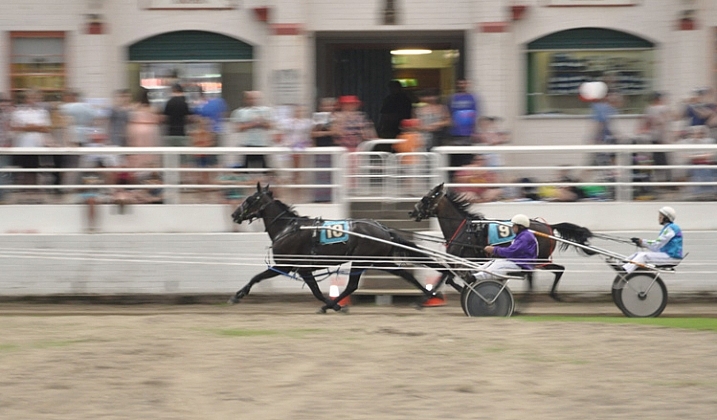
    When photographing horse racing I’d recommend the fastest shutter speed the light will allow, and again using continuous release mode. At some smaller race meets, it’s possible to get permission to get fairly close to finish line. For the shot below I asked officials if there was a safe position I could stand near the finish line, as well as capture horse and winners in the ring. They were happy to oblige once I told them I don’t use flash, and am aware that horses are very easily spooked.

    Equine-photography-8

    You don’t need super zooms or high-end gear to get a winning post shot, just access to a good position on the track.

    The races is a good time to try your hand at some panning shots. Panning helps to capture the sense of movement and speed, by moving your camera along with your subject, creating a blur of motion in the background.  It can be a bit tricky at first, but here is a great article to help get you started with this technique.

    Equine-photography-9

    Panning to create a sense of movement.

    Equine-photography-6

    Portraits

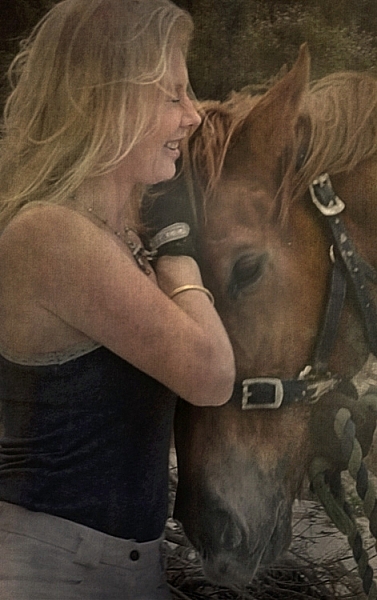
    Horse people generally not only love their animals, but are also obsessed with them, and have a strong connection to them. Aim to capture the love between horse and person.

    The tender moments when horse and rider have forgotten about you and your camera, often happen at the beginning or end of your photo session, while getting the horse organized.

    Details

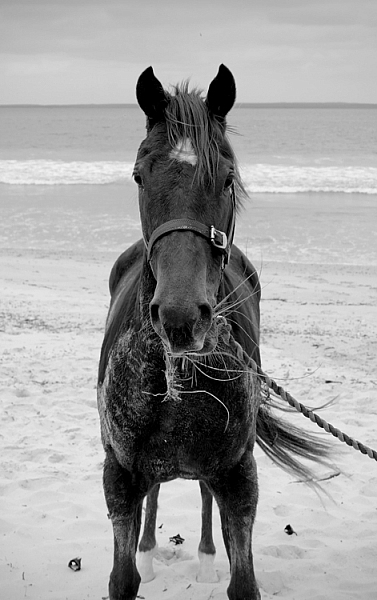
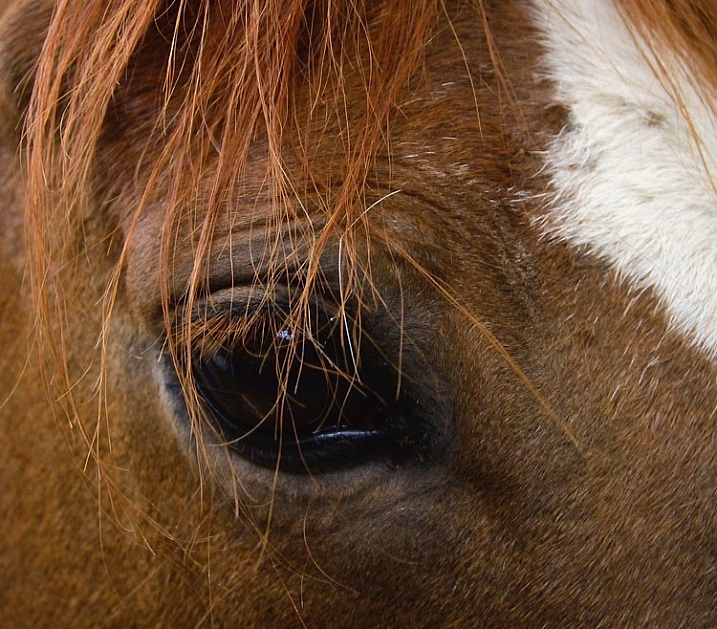
    Horses are great for detail shots. Owners often have favorite parts of their horse, like the star on a forehead or other markings, or the way the horse’s mane sweeps. A zoom lens would be handy for this, unless you, the horse, and your camera, get on well enough to get up close and personal.

    Equine-photography-11

    I didn’t need a zoom to get a close detail of this horse. This is Monty, I used to feed and blanket him twice a day for a several months, so we are old pals. His only concern about my camera was whether or not it was edible.

    Take your time

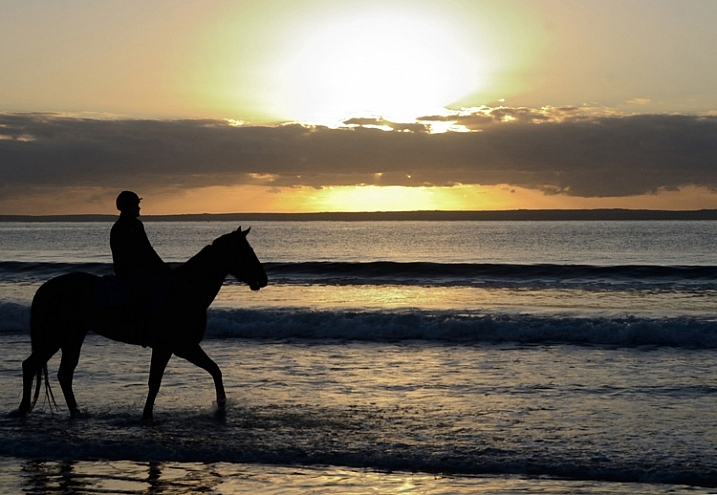
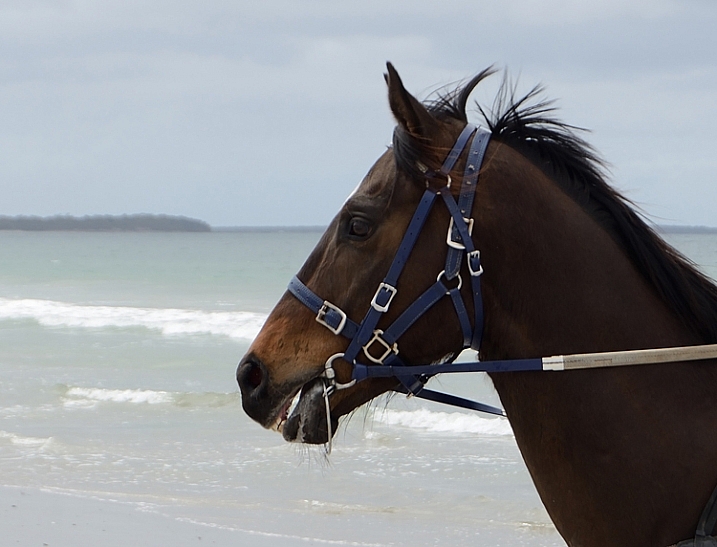
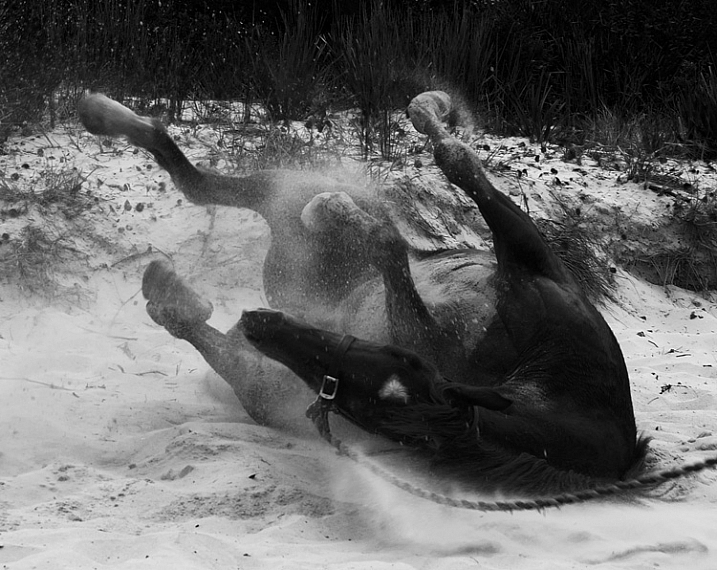
    Spend as much time as you can with both horse and owner. Take a whole day if you can. Slow down enough to notice opportunities like interesting backgrounds or light. Ask questions about the horse’s favorite things to do. A horse might get really happy after being taken out for the day, and like to jump around in the paddock afterwards, where you can grab some interesting images. The photo below was taken after horses were exercised on the beach. Once the saddle was removed, they threw themselves in the sand and rolled around delightedly.

    Equine-photography-5

    It’s a lovely thing to see and photograph happy horses.

    Horses are wonderful to photograph, sometimes challenging, and with a wide scope of photographic styles and skills involved.  I highly recommend giving it a go. Just stay safe, be respectful of the horses, get creative, and have fun.

    Equine-photography-2

    Are you a horse person? I’d love to hear any more tips from you if know these creatures well, or have experience photographing them. We’d also love to see more horse photography from you, so post away in the comments below.

    Giddy up!

    googletag.cmd.push(function() {
    tablet_slots.push( googletag.defineSlot( “/1005424/_dPSv4_tab-all-article-bottom_(300×250)”, [300, 250], “pb-ad-78623” ).addService( googletag.pubads() ) ); } );

    googletag.cmd.push(function() {
    mobile_slots.push( googletag.defineSlot( “/1005424/_dPSv4_mob-all-article-bottom_(300×250)”, [300, 250], “pb-ad-78158” ).addService( googletag.pubads() ) ); } );

    The post Beginner’s Guide to Photographing Horses by Lea Hawkins appeared first on Digital Photography School.

    Digital Photography School

  • Upgrading? Here are Some Good Cameras Under $1000

    Thinking of upgrading to a newer camera but don’t want to spend a fortune?  Here are two videos that will give you some options for both DSLR and Mirrorless in the under $ 1000 USD price range.

    Best Mirrorless Camera Under $ 1000

    The one they recommend in the video about is the Fuji X-T10 which comes in at $ 999 with the 18-55mm kit lens.

    Other Cameras Under $ 1000

    The guys at Digital Rev TV do a humorous comparison between the Canon 700D (T5i) at $ 649 with the 18-55mm lens, and the Panasonic Lumix DMC-GM5 at $ 669 USD with the 12-32mm kit lens.

    An alternative choice

    Or you could take the approach in the video below (he’s talking about doing video but the same applies to sill photography). You could save your money, and work on your photography education instead. This is a great place to start right here on dPS – do a search for topics you’re interested in, invest in some ebooks or a video course.

    googletag.cmd.push(function() {
    tablet_slots.push( googletag.defineSlot( “/1005424/_dPSv4_tab-all-article-bottom_(300×250)”, [300, 250], “pb-ad-78623” ).addService( googletag.pubads() ) ); } );

    googletag.cmd.push(function() {
    mobile_slots.push( googletag.defineSlot( “/1005424/_dPSv4_mob-all-article-bottom_(300×250)”, [300, 250], “pb-ad-78158” ).addService( googletag.pubads() ) ); } );

    The post Upgrading? Here are Some Good Cameras Under $ 1000 by Darlene Hildebrandt appeared first on Digital Photography School.


    Digital Photography School

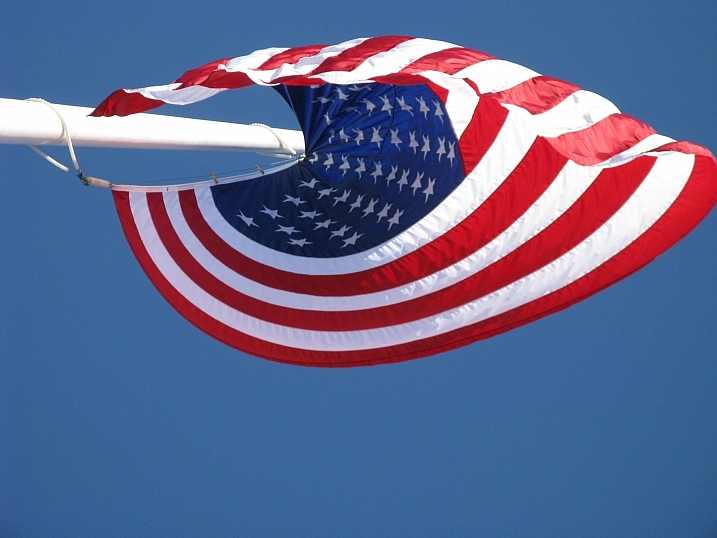
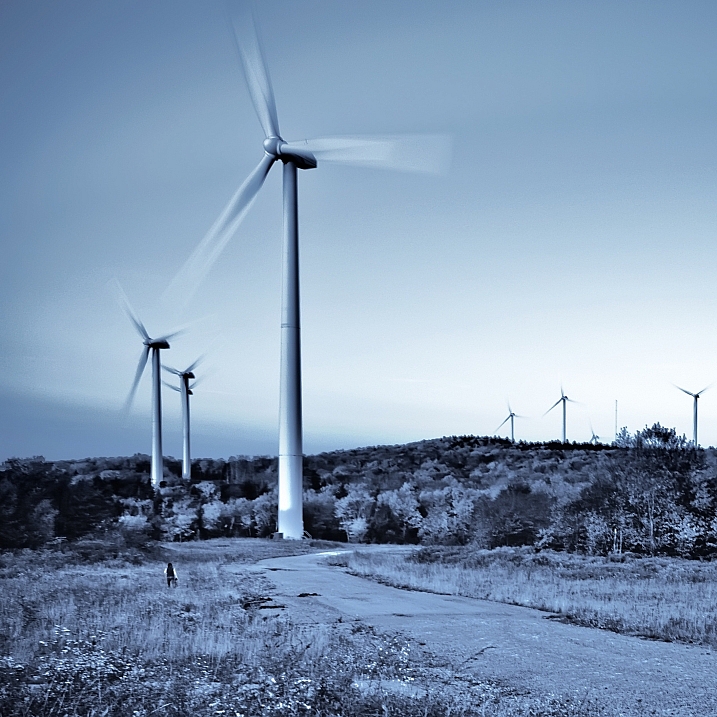
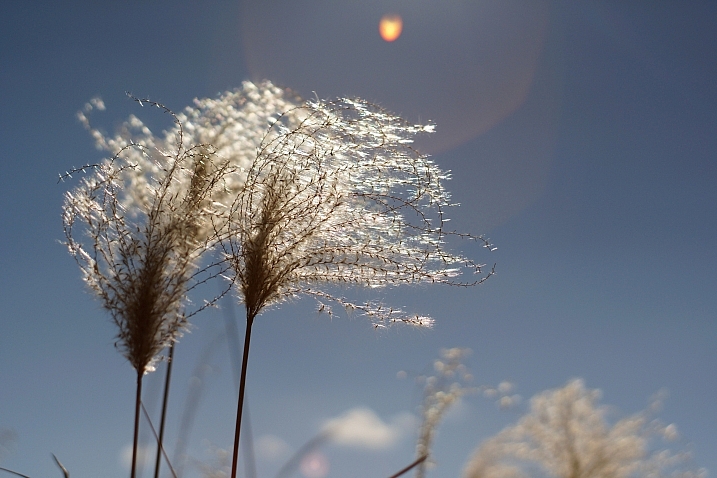
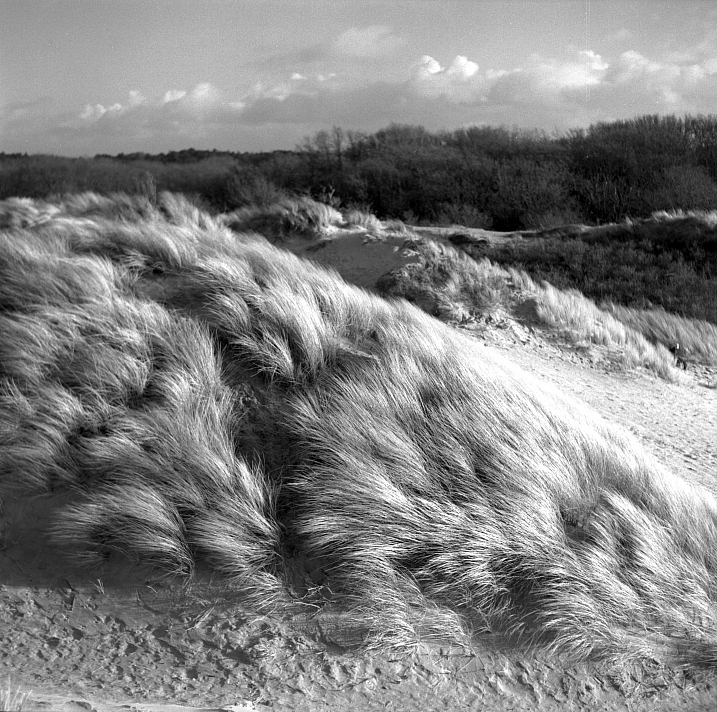
  • 24 Easy Breezy Images that Represent Wind

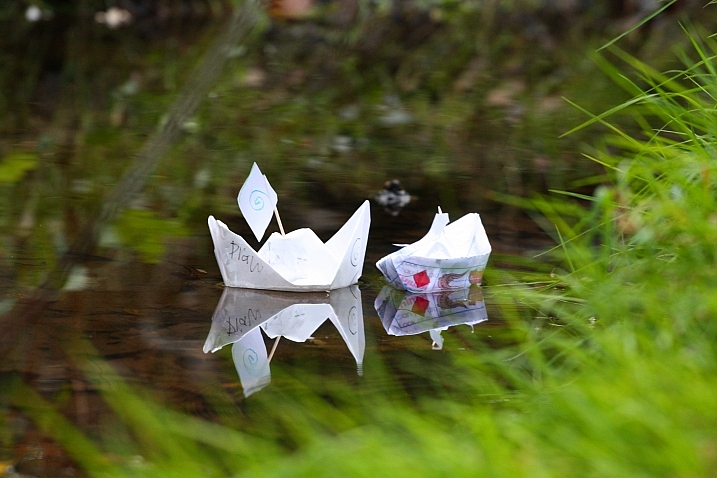
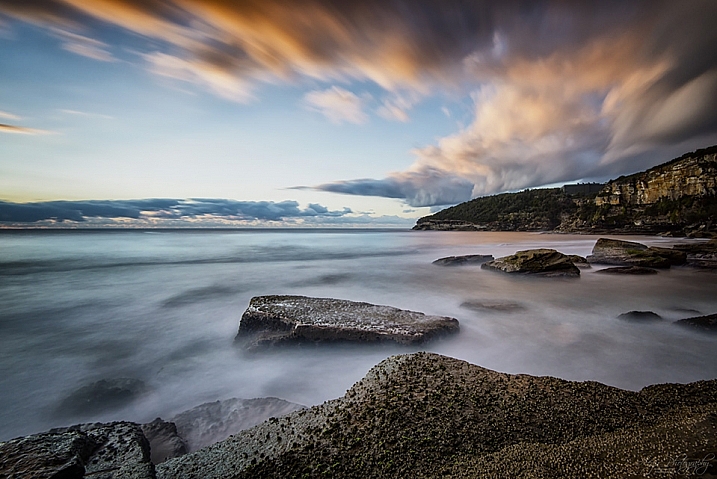
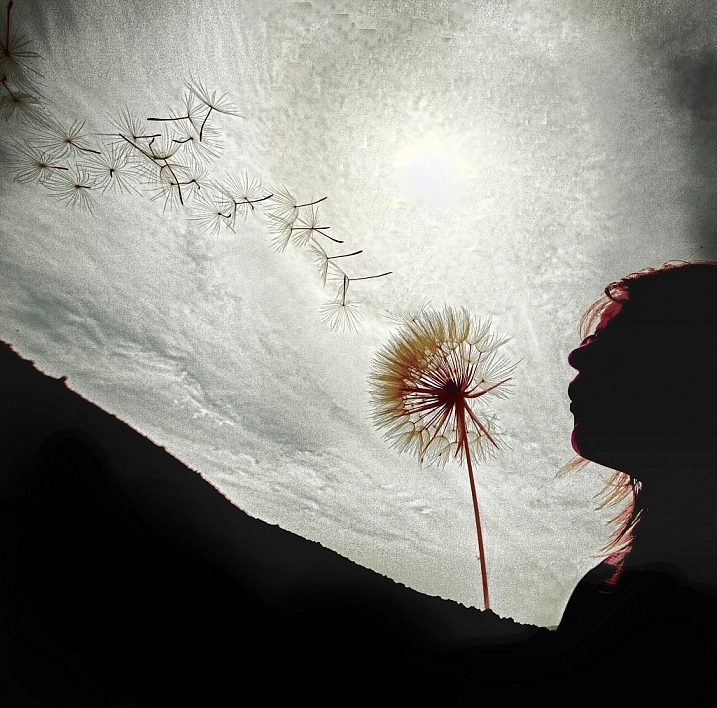
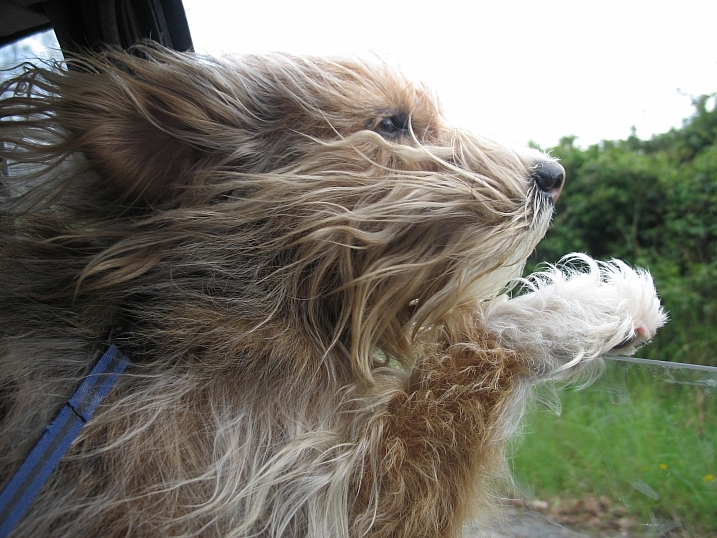
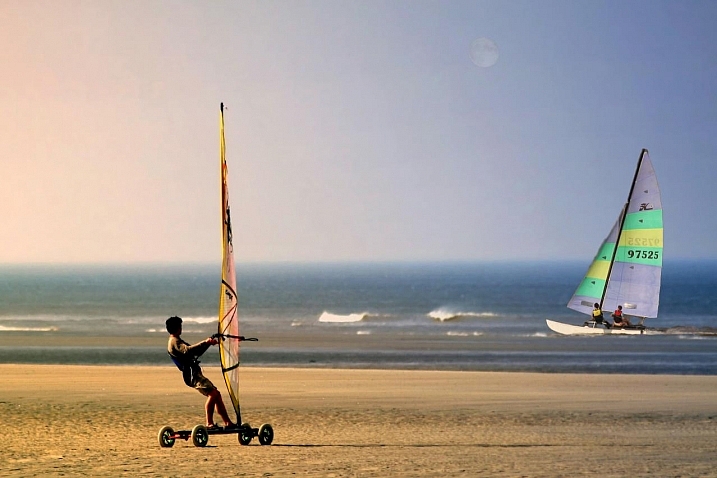
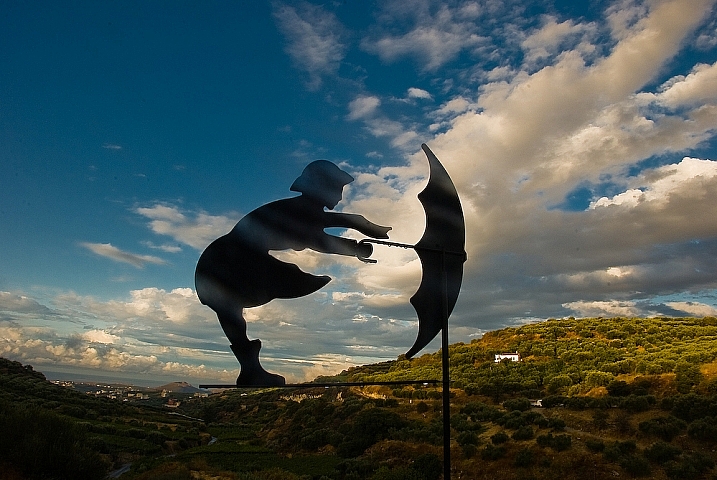
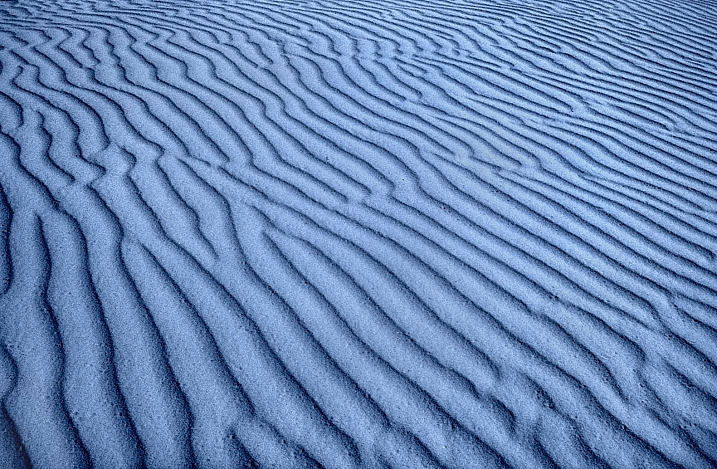
    Wind is an interesting subject to try and photograph because you can’t see it. So how do you capture a photo of air or a feeling like wind?

    Let’s see how these 24 photographers did it:

    Chriscom

    By chriscom

    Meena Kadri

    By Meena Kadri

    Daniel Parks

    By Daniel Parks

    Andrew Fysh

    By Andrew Fysh

    GraceOda

    By GraceOda

    Jacob Surland

    By Jacob Surland

    Ken Douglas

    By Ken Douglas

    Darwin Bell

    By darwin Bell

    John Morgan

    By John Morgan

    Crouchy69

    By Crouchy69

    George Agathos

    By George Agathos

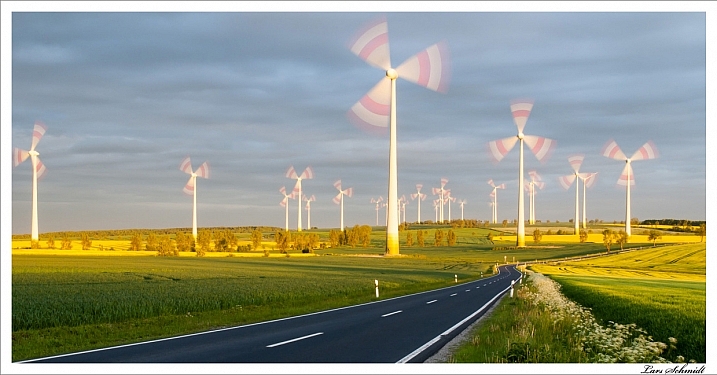
    Lars Schmidt

    By Lars Schmidt

    Peter Nijenhuis

    By Peter Nijenhuis

    Ben Raynal

    By Ben Raynal

    Isabel

    By Isabel

    Andy Cull

    By Andy Cull

    Jakob Grunig

    By Jakob Grunig

    Photophilde

    By photophilde

    Christos Tsoumplekas

    By Christos Tsoumplekas

    Mark

    By Mark

    Brave Heart

    By Brave Heart

    Bill Dickinson

    By Bill Dickinson

    Takashi .M

    By Takashi .M

    Mark Dries

    By Mark Dries

    googletag.cmd.push(function() {
    tablet_slots.push( googletag.defineSlot( “/1005424/_dPSv4_tab-all-article-bottom_(300×250)”, [300, 250], “pb-ad-78623” ).addService( googletag.pubads() ) ); } );

    googletag.cmd.push(function() {
    mobile_slots.push( googletag.defineSlot( “/1005424/_dPSv4_mob-all-article-bottom_(300×250)”, [300, 250], “pb-ad-78158” ).addService( googletag.pubads() ) ); } );

    The post 24 Easy Breezy Images that Represent Wind by Darlene Hildebrandt appeared first on Digital Photography School.

    Digital Photography School

  • Weekly Photography Challenge – Wind

    Earlier I shared a set of images that represent wind here.

    Garry Knight

    By Garry Knight

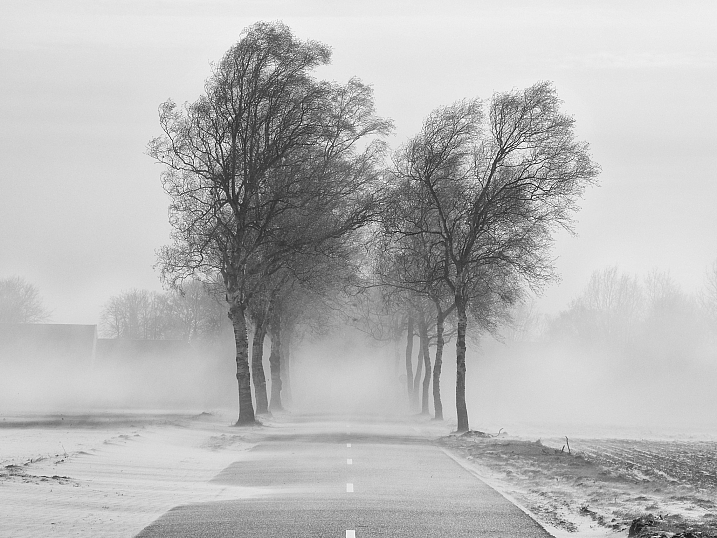
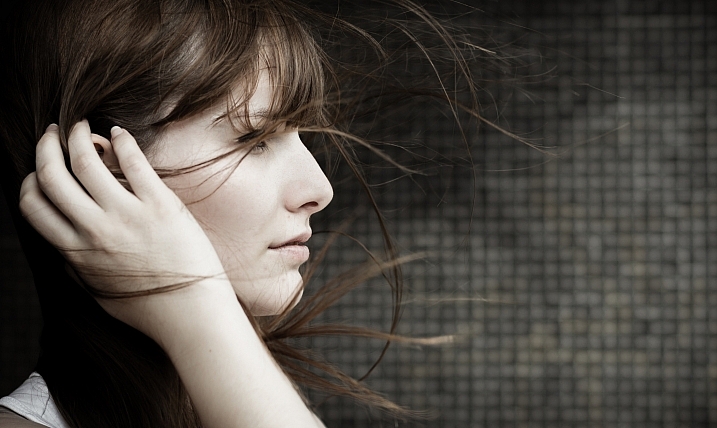
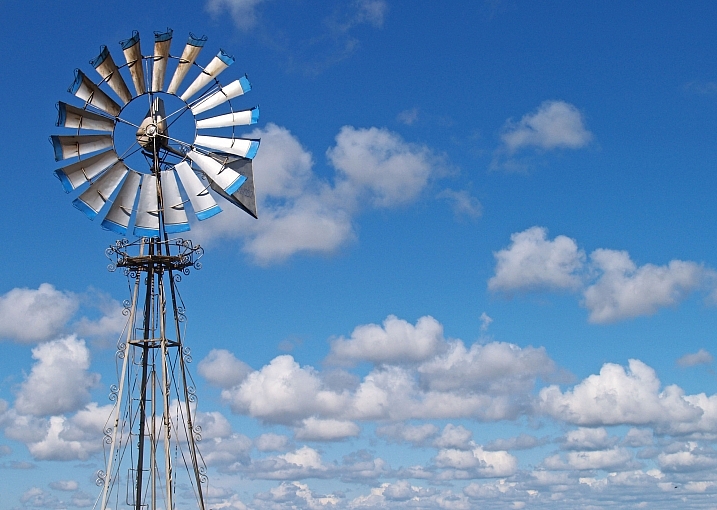
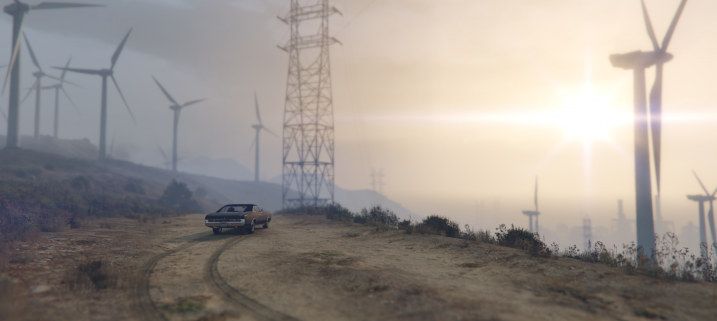
    It is one of those tricky concepts or subjects to photograph because it’s sort of invisible. So what can you do to capture an image of it? How about these ideas:

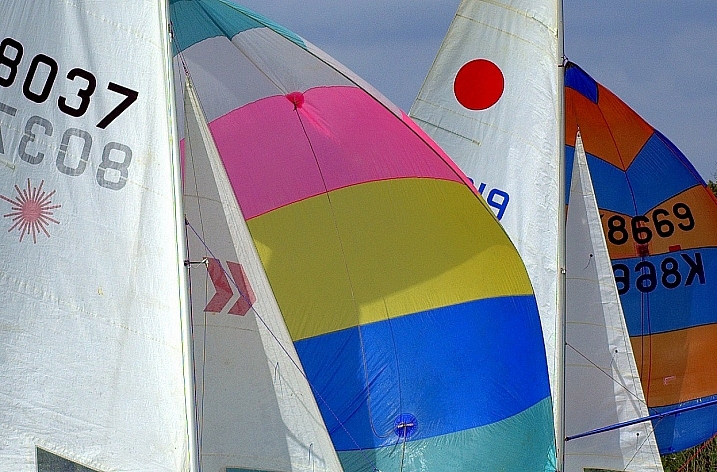
    • Sailing or sailboats
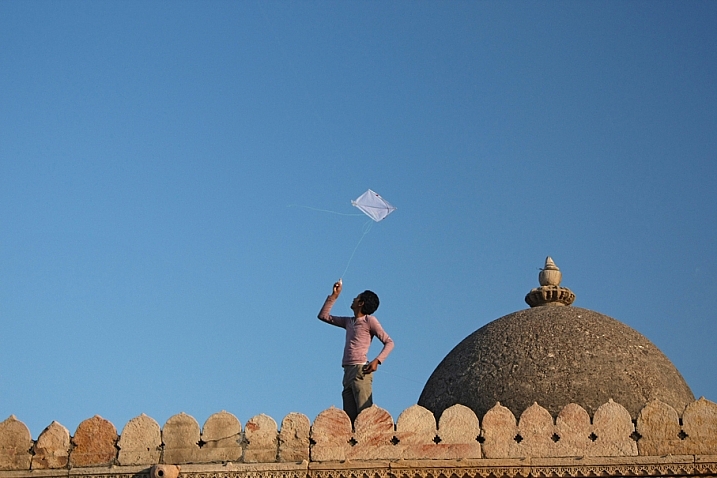
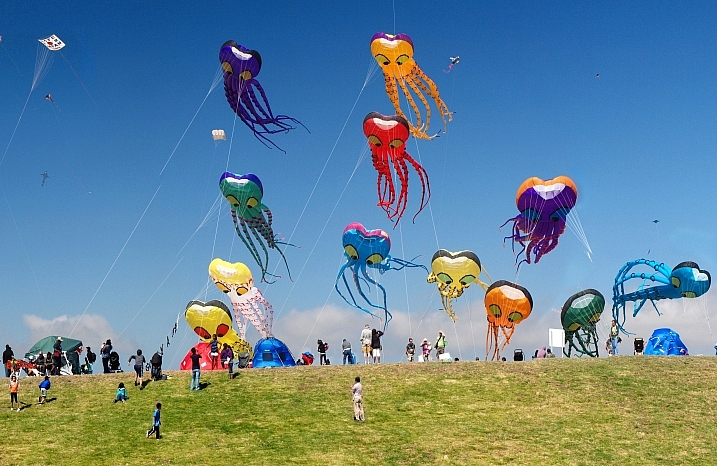
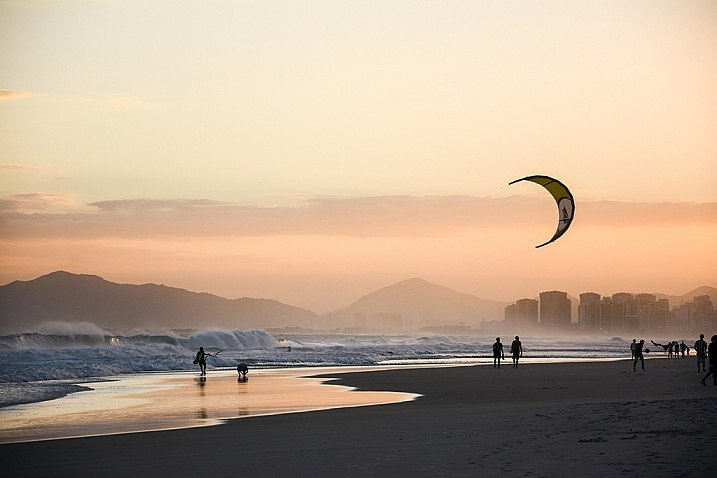
    • Kites
    • Trees, flowers or grass blowing in the wind
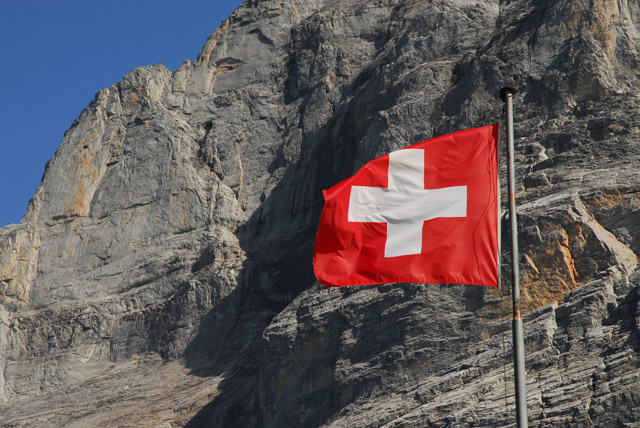
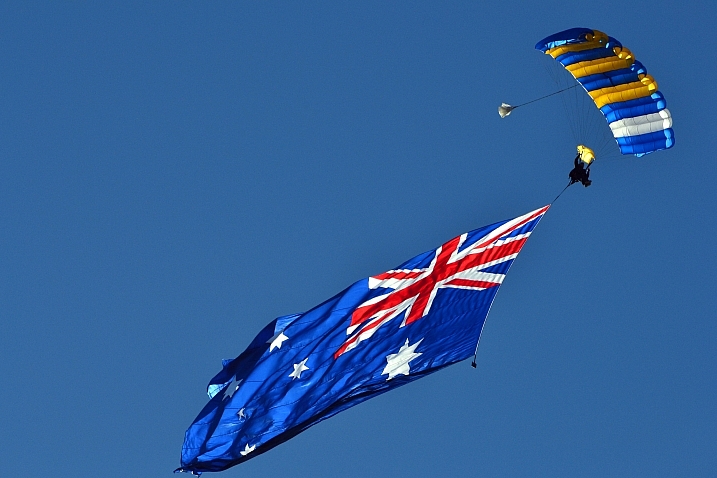
    • Flags
    • Clouds moving quickly across the sky
    • Windmills or turbines
    • A person’s hair blowing off or across their face
    • Weathervanes

    Weekly Photography Challenge – Wind

    Your challenge this week is to go and photograph something that shows the viewer it is windy. Use your imagination and get creative with it.

    Mikko Kaaresmaa

    By Mikko Kaaresmaa

    Beverley Goodwin

    By Beverley Goodwin

    John Sonderman

    By John Sonderman

    Shahadat Hossain

    By Shahadat Hossain

    Share your images below:

    Simply upload your shot into the comment field (look for the little camera icon in the Disqus comments section) and they’ll get embedded for us all to see or if you’d prefer upload them to your favourite photo sharing site and leave the link to them. Show me your best images in this week’s challenge. Sometimes it takes a while for an image to appear so be patient and try not to post the same image twice.

    googletag.cmd.push(function() {
    tablet_slots.push( googletag.defineSlot( “/1005424/_dPSv4_tab-all-article-bottom_(300×250)”, [300, 250], “pb-ad-78623” ).addService( googletag.pubads() ) ); } );

    googletag.cmd.push(function() {
    mobile_slots.push( googletag.defineSlot( “/1005424/_dPSv4_mob-all-article-bottom_(300×250)”, [300, 250], “pb-ad-78158” ).addService( googletag.pubads() ) ); } );

    The post Weekly Photography Challenge – Wind by Darlene Hildebrandt appeared first on Digital Photography School.

    Digital Photography School

  • 5 Ways to Use Lightroom Virtual Copies Better

    Virtual Copies in Lightroom

    Virtual Copies in Lightroom

    Imagine that you have just processed a colour image and you are happy with the result, but you’d also like to experiment with it a little. Perhaps you’re curious to see how it will look if you convert it to black and white. Maybe you’d like to apply a Develop Preset or two, or crop to the square format, or even all three.

    It’s easy in Lightroom. All you have to do is make a Virtual Copy and experiment.

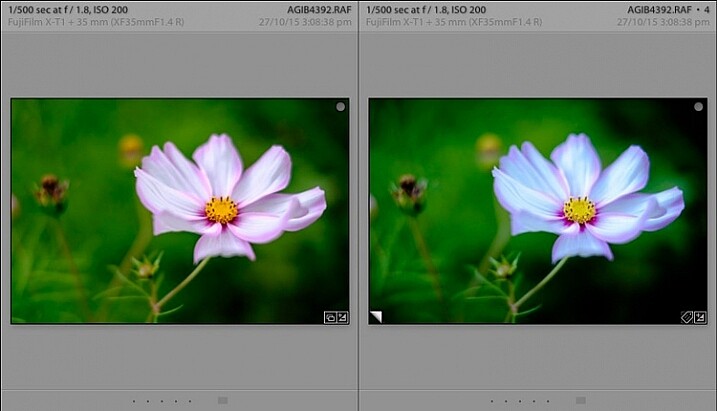
    A Virtual Copy is an exact replica of the original photo, including all edits made in Lightroom. Once you have made a Virtual Copy you can process it any way you like without affecting the original.

    Virtual Copies are a fantastic tool because they let you make multiple copies of a single image, while using very little hard drive space (it only makes a new thumbnail it doesn’t duplicate your image file). You can try out different techniques, and keep all the results. Each Virtual Copy exists as a set of text commands in the Lightroom Catalog, an addition measured in kilobytes rather than megabytes.

    You can review this by reading A Brief Introduction to Lightroom if you are unsure how it works.

    Are you making the most of Virtual Copies? Here are five ways to use them better in Lightroom.

    Creating Virtual Copies

    There are four ways to create a Virtual Copy.

    Start in Grid View in the Library module (press the G key to go there from any part of Lightroom). Select the image (or images) that you want to make Virtual Copies of:

    1. Go to Photo > Create Virtual Copy. Lightroom creates the Virtual Copies and places them in the same Collection as the original images.

    2. Alternatively, use the keyboard shortcut. If you’re using Windows press Ctrl plus apostrophe (Ctrl + ‘), on a Mac press Command plus apostrophe (Cmd + ‘).

    3. Alternatively, right click on one of the selected photos and choose Create Virtual Copy.

    Virtual Copies in Lightroom

    When you create a Virtual Copy it appears alongside the original in Grid View, and is identical in every way. You can make as many changes to the Virtual Copy as you lik,e without affecting the original.

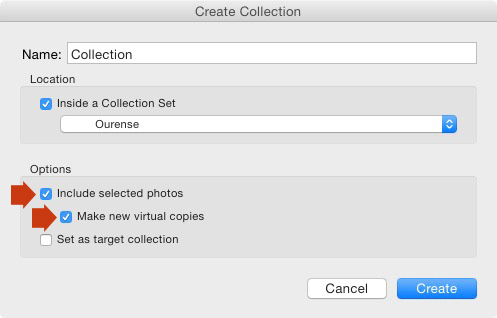
    4. The fourth way is to go to Library > New Collection. The Create Collection window opens. Under Options, tick the Include Selected Photos and Make New Virtual Copies boxes. Lightroom creates a new Collection (with the name you give it), and adds Virtual Copies of the selected images.

    Virtual Copies in Lightroom

    Using Virtual Copies Better

    Now you know how to create Virtual Copies, let’s look at some ways you can use them better in Lightroom.

    1. To create multiple versions of the same photo

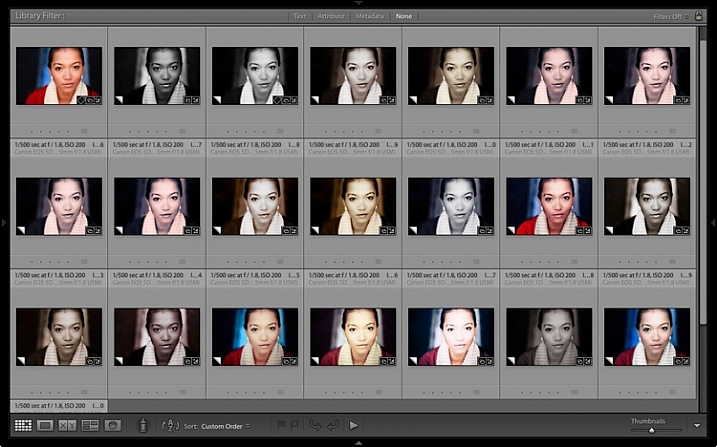
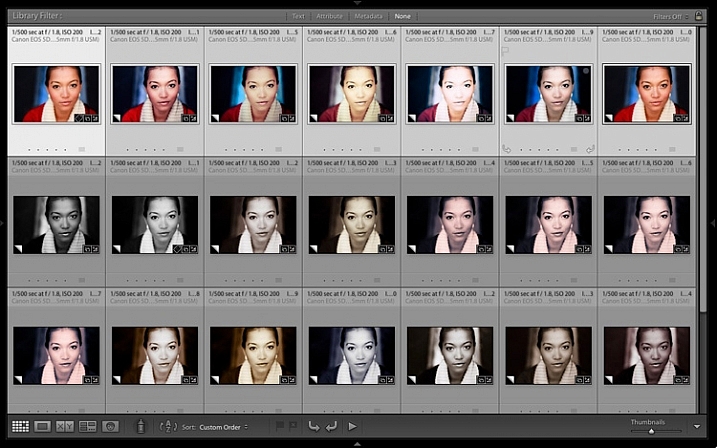
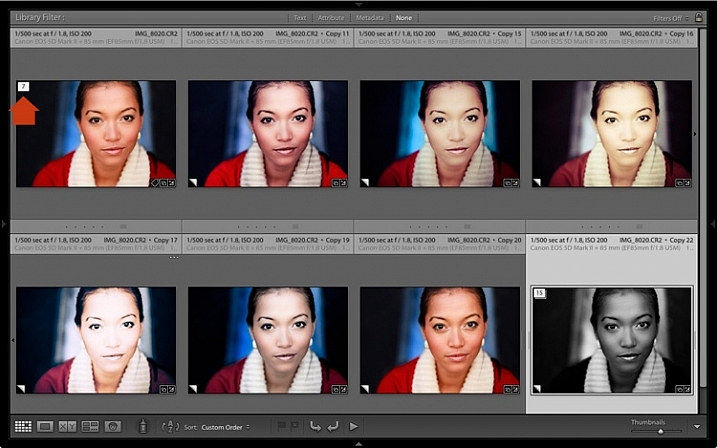
    This is the main reason that you would want to create Virtual Copies – so you can process the same photo, a number of different ways. The photo shown below is a great example. I created a colour version first, then made a Virtual Copy and converted it to black and white. Then I made some more Virtual Copies and experimented with different Develop Presets and split tones. I ended up with 22 different versions in a mixture of colour and black and white.

    Virtual Copies in Lightroom

    2. Stacking Virtual Copies

    You can use Stacks to simplify the thumbnails displayed in Grid View. In this example I’m going to create two Stacks – one containing colour photos, and the other black and white.

    • Select the photos you want to place in the same stack. Click and drag thumbnails to rearrange them in Grid View if you need to. Here, I grouped all the colour photos together.

    Virtual Copies in Lightroom

    • Go to Photo > Stacking > Group into Stack. You can also find this option by right-clicking a thumbnail. Or use the keyboard shortcuts, Ctrl+G (Windows) or Cmd+G (Mac).

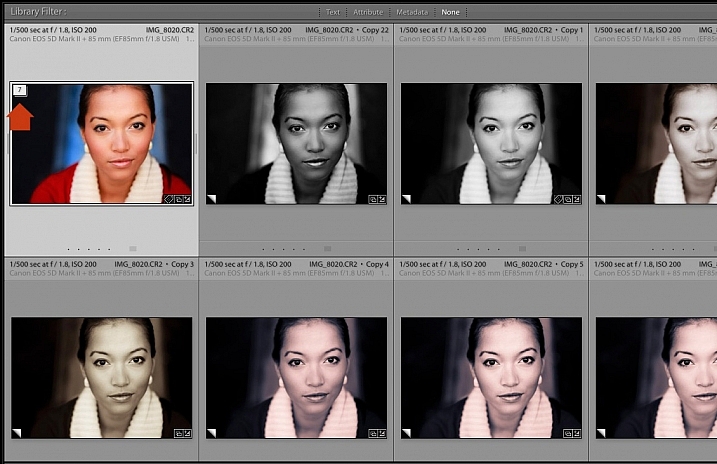
    Lightroom places the photos into a Stack. The first photo in the selection is used as the cover image. The Stack icon is displayed in the top left corner of the thumbnail (marked below). The number inside tells you how many photos are in the Stack.

    Virtual Copies in Lightroom

    Repeat if you want to group other Virtual Copies into another stack. Below, you can see that I did the same with the black and white versions.

    Virtual Copies in Lightroom

    To view the photos in a Stack, click on the Stack icon in the thumbnail. Click it again to hide the stacked photos.

    Virtual Copies in Lightroom

    3. For working with plug-ins and Photoshop

    If you want to send a photo to a plug-in or Photoshop, the recommended approach is to process it in Lightroom first (applying at least basic settings such as Camera Calibration, Lens Corrections and tonal adjustments in the Basic panel).

    Before the export, make a Virtual Copy and send the Virtual Copy to the plug-in or Photoshop. Then, when you return to Lightroom, you can compare the two. You can also make more Virtual Copies from the original to send to other plug-ins, or to work on in Lightroom.

    4. Set up View Options to show which images are Virtual Copies

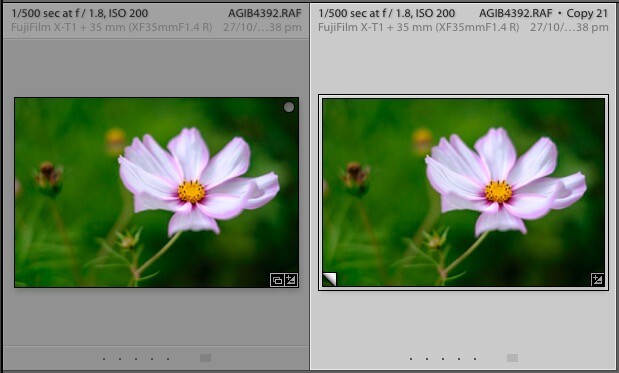
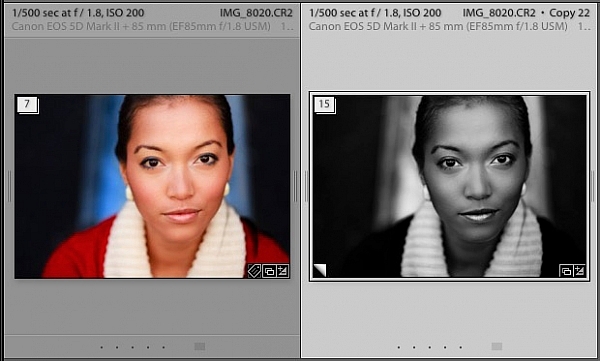
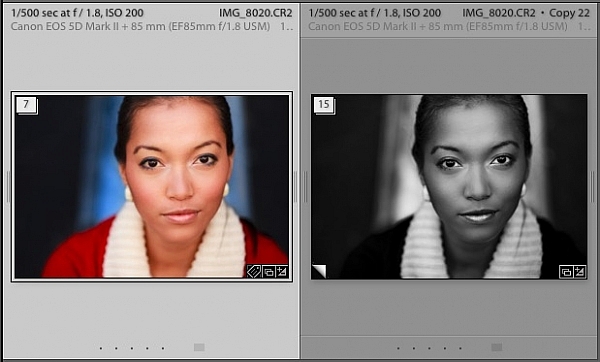
    In the screen shot below, you can see that the image on the right is a Virtual Copy as it is labelled Copy 22. The image on the left is the original and just has the file name.

    Virtual Copies in Lightroom

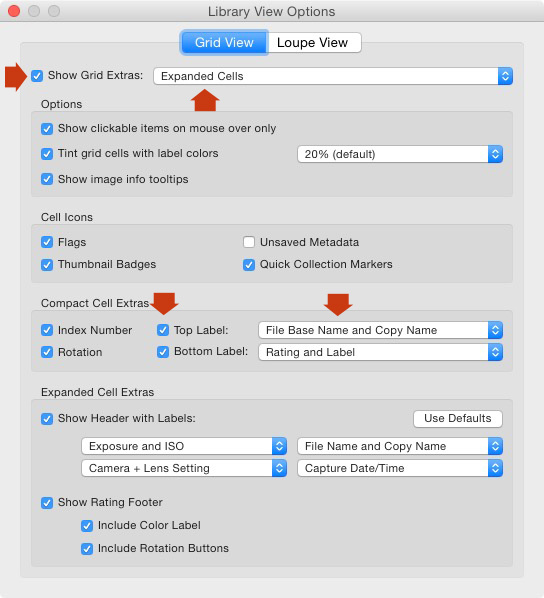
    You can set this up in View Options (View > View Options or Ctrl+J/Cmd+J). Tick the Show Grid Extras and Top Label boxes (marked below). Set Show Grid Extras to Expanded Cells and set Top Label to File Base Name and Copy Name (the other options in the same section do a similar thing).

    Virtual Copies in Lightroom

    5. Use the Excessor plug-in to create a Collection of photos processed with different Develop Presets

    The Excessor plug-in creates Virtual Copies and applies a different Develop Preset to each one. This is how to use it:

    • Go to the Capture Monkey website and download the Excessor plug-in. It is available on a shareware model – you can download and use it, and if you find it useful, you are encouraged to pay a one time registration fee of $ 10. Add it via the plug-ins manager (my article Useful Lightroom Plug-ins explains how – scroll to the bottom for instructions).
    • Select the photo you want to work with. Go to Library > Plug-in Extras > Excessor.
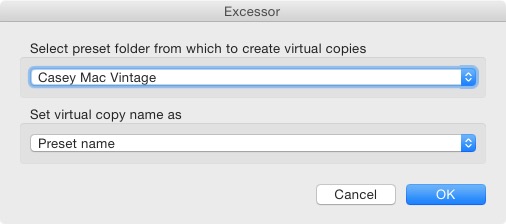
    • The Excessor window opens. Use the top menu to select a Develop Presets folder. Select Preset name from the bottom menu to give each Virtual Copy the name of the Develop Preset used to process it. Press OK.

    Virtual Copies in Lightroom

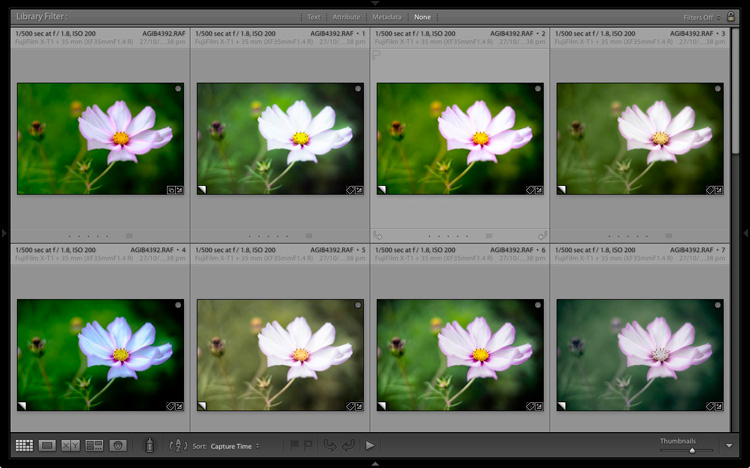
    • Lightroom creates a Virtual Copy for each Develop Preset in the selected folder.

    Virtual Copies in Lightroom

    Tip: Create Preset folders containing your favourite Develop Presets. You can create different folders for different subjects: e.g., a folder for portraits, another for landscapes, another for black and white, another for vintage presets, and so on. Then you can use the Excessor plug-in as a shortcut to applying your favourite presets to a photo.

    Your turn

    These are my five suggestions for using Virtual Copies better in Lightroom, but how do you use them? Have you come up with anything that I haven’t thought of? Let me know in the comments.


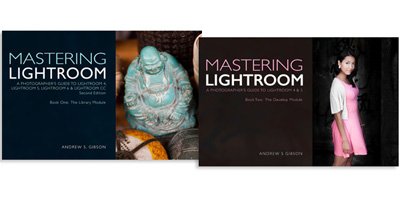
    The Mastering Lightroom CollectionMastering Lightroom ebook bundle

    My Mastering Lightroom ebooks are a complete guide to using Lightroom’s Library and Develop modules. Written for Lightroom 4, 5, 6 and CC  they  show you how to import and organise your images, use Collections, creatively edit your photos and how to work in black and white.

    googletag.cmd.push(function() {
    tablet_slots.push( googletag.defineSlot( “/1005424/_dPSv4_tab-all-article-bottom_(300×250)”, [300, 250], “pb-ad-78623” ).addService( googletag.pubads() ) ); } );

    googletag.cmd.push(function() {
    mobile_slots.push( googletag.defineSlot( “/1005424/_dPSv4_mob-all-article-bottom_(300×250)”, [300, 250], “pb-ad-78158” ).addService( googletag.pubads() ) ); } );

    The post 5 Ways to Use Lightroom Virtual Copies Better by Andrew S. Gibson appeared first on Digital Photography School.

    Digital Photography School