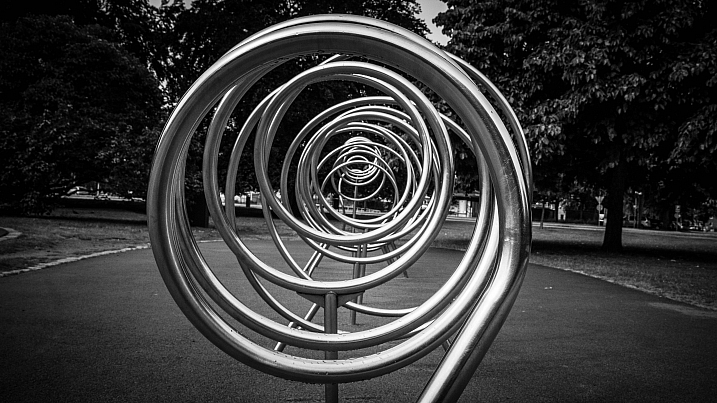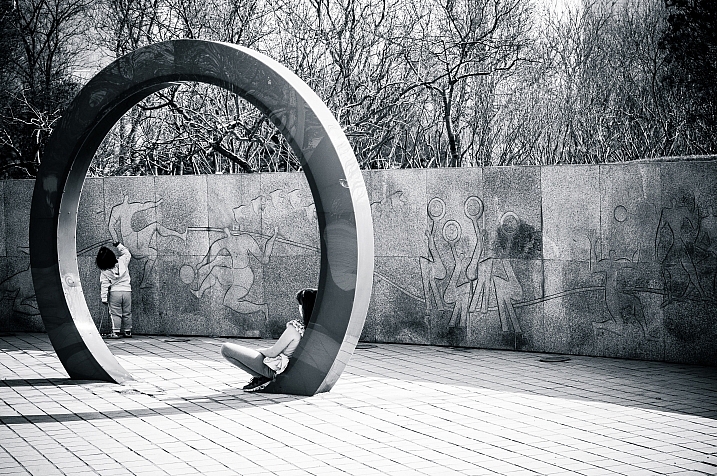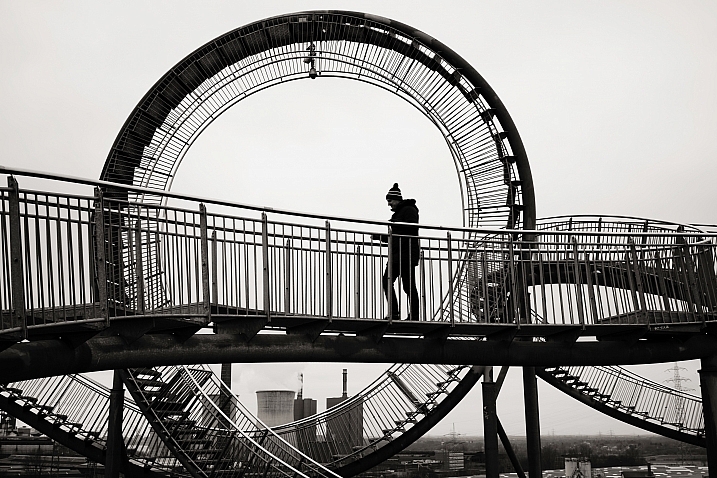
Category: Photography

  • 6 Tips for Using ISO Effectively With Your Camera

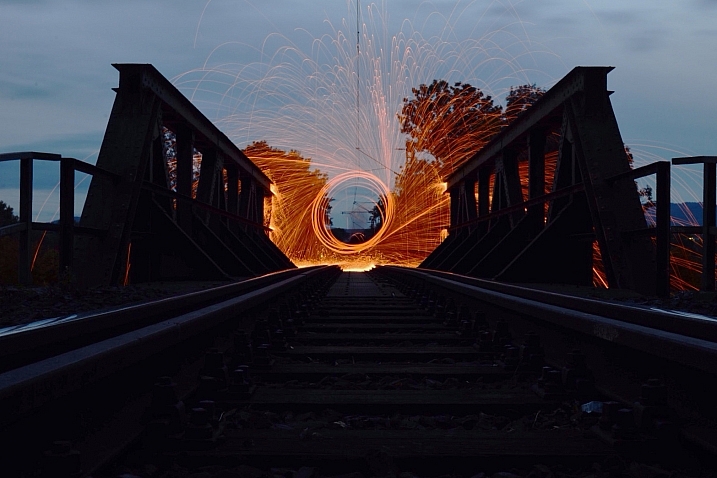
    Taken at ISO 800 (shutter speed of 30 seconds and aperture at f/8.0)

    Taken at ISO 800 (shutter speed of 30 seconds and aperture at f/8.0)

    ISO has long been called the third corner of the exposure triangle, but was it really? In the film days you couldn’t even change your ISO, except by changing your film. In the early days of digital, you could change your ISO after each shot, which was a definite improvement. But, if you dared to increase the ISO, your picture would probably end up with a lot of digital noise in it. The reality is that most of us were confined to a very narrow range of ISO values when making our exposures.

    Times have changed though. Newer cameras offer a lot more flexibility when it comes to ISO. First of all, they are capable of taking pictures at higher ISOs. Cameras now will routinely shoot at ISO 25,600 (and higher), which was almost unheard of just five or six years ago. Secondly, when newer cameras do shoot at higher ISOs, they produce less digital noise. Check out this chart from DxO Mark showing the ability of cameras to shoot at higher ISOs without being ruined by noise:
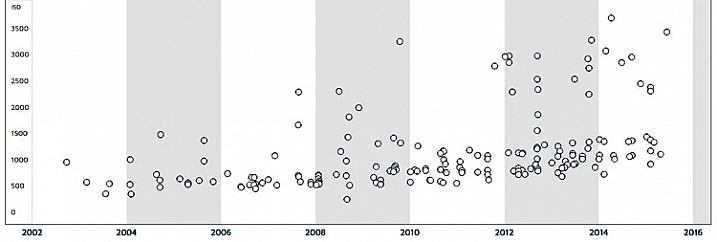
    DxO-aging-chart

    The chart shows the maximum useable ISO for given cameras introduced over the last 12 years. Notice how the dots are higher on the chart the further you go to the right.  The newer cameras are to the right of the graph and the tests show that they can shoot at higher ISO values with less digital noise.

    In addition, seemingly mindful of the desire of photographers to change their ISO more frequently, camera manufacturers have made it easier to change ISO on the fly. Some, like Fujifilm, have even put ISO on par with shutter speed and aperture by giving ISO its own dial. As a result, it is easier to change the ISO and it truly has status as an equal partner in the exposure triangle.

    Even beyond cameras, however, we now have a much greater ability to remove digital noise from our pictures. Much of this improvement is thanks to Lightroom. With a quick slider adjustment, we can eliminate much digital noise from our pictures, without making them blurry. Further, if you have a severe noise problem, there are dedicated plug-ins like Noiseware and Photo Ninja, designed to reduce noise in your pictures, which have continued to improve.

    As a result of all of this, you have a lot more flexibility when it comes to ISO. But how does this really impact your photography? And where should you set your ISO in different situations?

    If you are just getting started, you might be bewildered by the numbers, or perhaps don’t even know where to start. If you have been shooting for a long time, you may be locked into some habits that were engrained before all these changes in technology. Either way, here are some tips to help you put ISO to work, to improve your photography.

    Tip 1: Start with ISO 200

    If you have been shooting for a long time, you might be in the habit of keeping your ISO at 100 to keep noise out of your pictures. As mentioned above, given the state of camera technology, this was a prudent practice. Now, however, there is almost no discernible difference between a shot taken at ISO 200 and ISO 100 in most cameras. You may as well use ISO 200 as a default to give yourself an extra stop of light. It will result in better pictures. How so? In one of two ways:

    • It will allow you to use a faster shutter speed, which will make your photos sharper if you are hand holding
      AND/OR
    • It will allow you to use a larger aperture to increase your depth of field

    By using ISO 200 instead of 100, you will enjoy a little extra flexibility in your exposure settings, without an increase in digital noise. It is pretty much a case of something for nothing.

    Tip 2: Use ISO 400 for clouds or dusk

    Do not hesitate to move the ISO up to 400 (or even higher depending on your camera) when the need arises. If you are outdoors and there are any clouds, or if the sun is starting to move toward the horizon, go ahead and move to ISO 400. You will find there is very little increase in digital noise in most cameras at this level.

    Even though this was a bright, sunny day, the need for a super-fast shutter speed meant that I needed to increase my ISO to 400 to get this shot.

    Even though this was a bright, sunny day, the need for a super-fast shutter speed meant that I needed to increase my ISO to 400 to get this shot. Exposure info: 1/8000th, f/2.8, at ISO 400

    Tip 3: Crank it up to stop the action

    Previously, you faced a dilemma when trying to stop the action. Should you:

    1. Increase the ISO and risk having the picture ruined by noise, or
    2. Keep the ISO low and risk having the picture ruined by blur because of the slower shutter speed you would be forced to use?

    Obviously, neither choice was ideal. But now, with better cameras and noise reduction tools, there is no reason not to increase your ISO when you are photographing action (assuming you are not trying to blur it). In that case, start by moving the ISO up to 800.

    Tip 4: Start with ISO 1600 indoors

    As soon as you move indoors, increase your ISO to 1600 if there is reasonably good light. Move it even higher if the lighting is poor. There is a lot less light indoors, even though it often doesn’t look that way to you (your eyes adjust very quickly).

    It was not possible to use a tripod in the Opera Garnier in Paris. Hence, ISO 3200 for this picture (actually pictures, since it is many pictures stitched together)

    It was not possible to use a tripod in the Opera Garnier in Paris. Hence, ISO 3200 for this picture (actually pictures, since it is many pictures stitched together)

    Note: If you have, and can use a tripod then keep your ISO lower if possible (there is no moving subject).

    Tip 5: Don’t be afraid to use 6400

    I was recently trying to take pictures of a high school play, featuring my daughter. I faced a toxic combination of extremely low light, and a moving subject (flash was not allowed). I had a pretty fast lens, opened all the way up to f/2.8. To keep the subject from being blurred, I needed to use a shutter speed of at least 1/400th of a second. To get a proper exposure, I required ISO 6400. I used it, and then gave it a dose of Lightroom noise reduction later, to get the following picture.

    Hannah-Play

    Exposure info: 1/500th, f/2.8, at ISO 6400

    Perfect? No. But if I had hedged at all, it would have been blurred and completely ruined. The point is that ISO 6400 might not get you perfection, but it will get you a shot, when the alternative is no shot at all.

    Tip 6: The same applies for higher ISOs

    Nobody wants to use very high ISO values. But when you’re faced with the choice of a shot at ISO 6400 or 12,800 (which will probably have a noise problem), versus a blurry shot from using too slow of a shutter speed, take the noisy picture every time. You have some hope of curing a noisy picture in Lightroom. You have no hope of fixing a blurry subject.

    This was shot through a window from inside the Louvre, and using a tripod was not possible. Since I was hand holding, I needed to use ISO 3200. I didn't like using an ISO that high, but it beats not getting the shot at all (or having it blurry from too slow of a shutter speed)

    This was shot through a window from inside the Louvre, and using a tripod was not possible. Since I was hand holding, I needed to use ISO 3200. I didn’t like using an ISO that high, but it beats not getting the shot at all (or having it blurry from too slow of a shutter speed). Exposure info: 1/8th, f/4, at ISO 3200

    Conclusion

    I recognize that, in a sense, this entire article could be summarized as: It is okay to increase your ISO. There is more to it than that though, and that is particularly true if you are just starting out, or getting used to a new camera. I have used hard values in this article to give you default numbers, for some different scenarios. That said, of course, every situation you will face as a photographer is different. Just use these as starting points and adjust from there. In time you will get your own starting points.

    Further, your use of ISO will depend on your camera as well. Obviously, newer and more expensive cameras have better low-light performance. How does yours stack up? You can check the DxO Mark rating to start. The best thing to do is to test your camera, which is easily done by taking the exact same picture at different ISO values (while adjusting shutter speed to keep the exposure the same) and then comparing them on your monitor (at 100%). Having done so, you will be well poised to use ISO to improve your pictures.

    googletag.cmd.push(function() {
    tablet_slots.push( googletag.defineSlot( “/1005424/_dPSv4_tab-all-article-bottom_(300×250)”, [300, 250], “pb-ad-78623” ).addService( googletag.pubads() ) ); } );

    googletag.cmd.push(function() {
    mobile_slots.push( googletag.defineSlot( “/1005424/_dPSv4_mob-all-article-bottom_(300×250)”, [300, 250], “pb-ad-78158” ).addService( googletag.pubads() ) ); } );

    The post 6 Tips for Using ISO Effectively With Your Camera by Jim Hamel appeared first on Digital Photography School.
    Digital Photography School

  • dPS Writer’s Favorite: Sigma 24-105mm F4 Lens

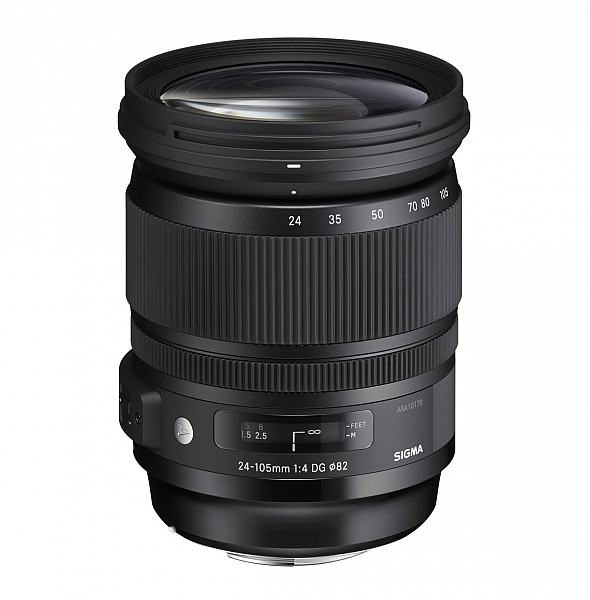
    24-105mm-f4-dg-os-hsm-a-635-e73

    Image: Sigma Photo

    Perhaps you’ve heard of Sigma’s Art series of lenses? After years spent making relatively mediocre lenses, the Japanese manufacturer has stepped up their game to create some beautiful gems that outshine the lenses made by the camera companies themselves.

    The 50mm f/1.4 and the 35mm f/1.4 were both on my list, but I seem to have ended up with the Sigma 24-105mm f/4 Art lens, and while my artistic conscience might try to persuade me of the superiority of prime lenses, it’s currently my favourite.

    Zoom versus Prime Lenses

    The prime lenses I like are big and heavy, because of the large maximum aperture. Assuming that my assistant carried them everywhere and could change them instantly, I might be less keen on the versatility of the Sigma. But that’s not the case, and often a zoom is the better choice. Zoom lenses used to be too much of a compromise. The Sigma 24-105mm lens compromises just enough, and delivers a lot. It’s a slow lens at f/4, but the optical stabilization is good, and the high ISO capabilities of current cameras means that I’ve never felt too limited by this. It’s certainly a compromise compared to a prime, but at f/8, I bet you couldn’t tell the difference. The bokeh for this zoom, necessarily a matter of personal taste, and not as amazing as some of the prime lenses, is good enough too.

    Sigma 24-105mm lens

    Bokeh at f/4, 105mm

    But I want Nikon/Canon, I want the best…

    Canon has an equivalent 24-105mm f/4 lens from their premium L-series. It’s a versatile lens, and I know several professional photographers who use it almost exclusively. I use Nikon, but I’ve seen comparisons that demonstrate that optically, the Sigma Art series lens is sharper. The Canon is weather-sealed though, which the Sigma is not. Nikon has a 24-120mm lens that isn’t as sharp as the Sigma either. If image quality is what you want most, the Sigma is the best among the three lenses. Of course, both Nikon and Canon make 24-70mm lenses that are sharper, though at the expense of the longer telephoto reach.

    Sigma 24-105mm lens

    We photographers love our lenses

    Why choose the 24-105mm focal length over a 24-70mm?

    Forgetting prime lenses, the main competition for my affections were the Nikon 24-70mm and the Tamron 24-70mm lenses. There’s also a Tokina 24-70mm available that I didn’t consider. I decided against the Nikon because it doesn’t have optical stabilization (OS). While the larger f/2.8 aperture is attractive, it doesn’t make as much difference in low light for static subjects as the OS on the Sigma. Moreover, the stabilization is useful for on-the-go filming too. The Tamron however, has the larger f/2.8 aperture and is also stabilized.

    I chose the Sigma lens because of the longer reach. 70mm, for me, is not as flattering for headshot portraits as the 85-105mm focal lengths that the Sigma provides. I find I use the extra reach quite often. On the other end, 24mm seems to be wide enough for the majority of situations on a full-frame body. If I need a larger field of view, or shallower depth of field, I can often stitch multiple photos together.

    Sigma 24-105mm lens

    That 105mm short telephoto is useful

    Space for a whinge

    It’s not a perfect lens, and there are a few omissions that I’d like to have a moan about to help round out the My Favourite Lens angle. While the lens is sharp, it does have noticeable distortion and a fair bit of vignetting too, especially at larger apertures. This is an issue that I’m happy to accept because the RAW photo conversion software does a good job of correcting these flaws.

    The bigger issue is the lack of weather sealing, which I’d have happily paid a bit more for. It makes you think twice when photographing in the rain or by the sea. The thoughts are usually, “I wonder if the lens will survive this?” and, “I wonder if I’ll buy the Nikon if it doesn’t?”. Showers aside, the lack of weather sealing does mean that the lens attracts more dust – it veritably sucks it up, and distributes it liberally amongst its inner optics, safe from my lens cleaning cloth. The build quality is good, but not as solid as the Canon L-series lens, for example, and after some abuse, the focal length numbers on mine wore off as they are not etched into the lens. Sigma were good about fixing this though.

    Sigma 24-105mm lens

    Distortion and Vignetting even At 62mm, f/8

    Conclusion

    I’ve tested a huge number of lenses, and also read pretty much most of reviews of the others, to keep up to date. I chose to buy the Sigma 24-105mm f/4 OS, and it lives on my camera pretty consistently. It’s photographed a range of genres from landscapes, to portraits, and fashion, and the image quality has been good.

    As photographers, there’s a tendency to fuss over MTF charts and such like; but having the right focal length available immediately is far more important, and as for overall sharpness and rendering compared to primes, it’s usually only experienced photographers who, occasionally, may notice the difference.

    DSC_2741

    googletag.cmd.push(function() {
    tablet_slots.push( googletag.defineSlot( “/1005424/_dPSv4_tab-all-article-bottom_(300×250)”, [300, 250], “pb-ad-78623” ).addService( googletag.pubads() ) ); } );

    googletag.cmd.push(function() {
    mobile_slots.push( googletag.defineSlot( “/1005424/_dPSv4_mob-all-article-bottom_(300×250)”, [300, 250], “pb-ad-78158” ).addService( googletag.pubads() ) ); } );

    The post dPS Writer’s Favorite: Sigma 24-105mm F4 Lens by Ben Evans appeared first on Digital Photography School.

    Digital Photography School

  • How to Understand and Use Lightroom’s Loupe Info Overlay

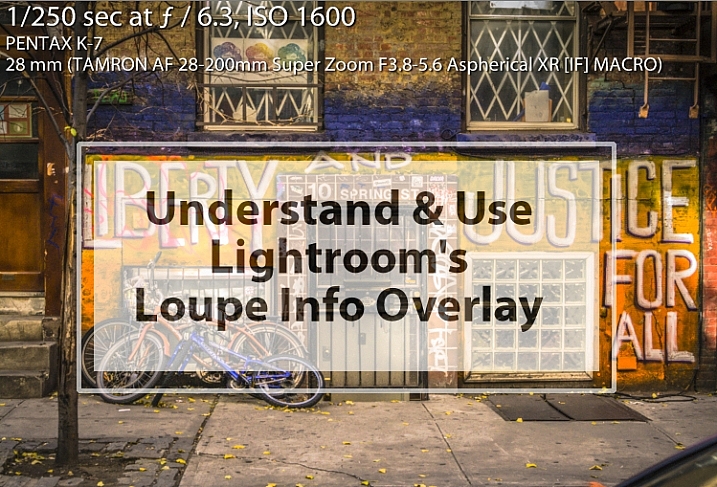
    Lightroom Loupe Info Overlay intro image

    The Lightroom Loupe Info Overlay feature provides valuable information about your photos. Used intelligently it can help you find your photos, and can even help you improve your photography skills. I’ll explain what it is, how to enable and disable it, how to configure it, and some reasons why the Loupe Info Overlay is such a valuable feature.

    What is the Loupe Info Overlay?

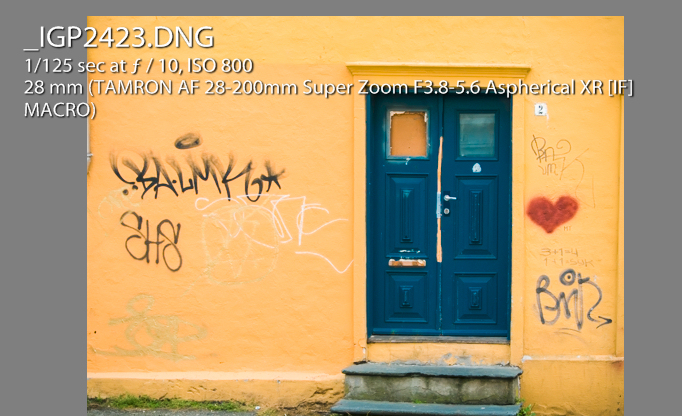
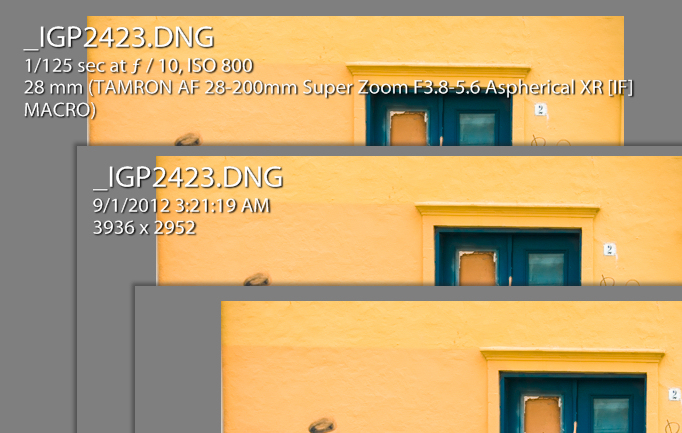
    Loupe Info Overlay is a small text overlay which appears in the top left corner of your images in the Develop module inside Lightroom, and when you are viewing images in Loupe view in the Library module. The Loupe Info Overlay confuses many first time Lightroom users when they turn it on, often accidentally, and then struggle to turn it off again.

    What Lightroom Loupe info overlay looks like

    Turning the Overlay Off and On

    To view the Loupe Info Overlay you must be viewing an image in the Develop module, or in the Library module in Loupe (or single image) view. To display the Loupe Info Overlay, tap the I (i) key on your keyboard. Tap the i key repeatedly (but slowly so you can see what you are doing) to rotate through the three options for the Loupe Info Overlay.

    They are: (1) Loupe Info Overlay off; (2) Loupe Info 1; and (3) Loupe Info 2. You will see that there are two different overlays which can be separately configured to show a range of information about your images.

    The three states of the Lightroom Loupe Info Overlay

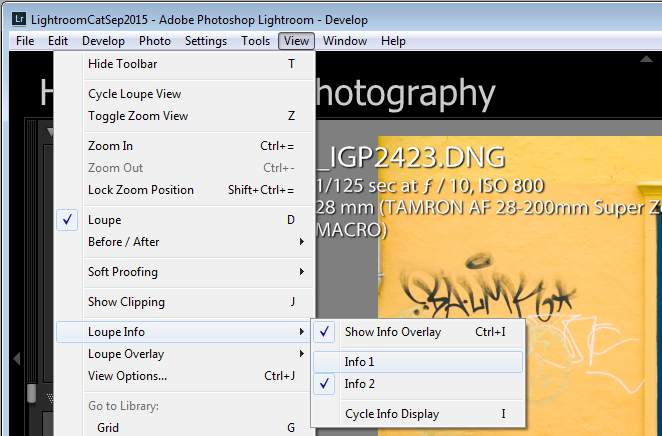
    You can also display the Loupe Info Overlay using the Lightroom menus: choose View > Loupe Info and then select Info 1 or Info 2 to display one of the two overlay options. If Show Info Overlay is selected then selecting it again will hide the Loupe Info Overlay.

    How to turn the Loupe Info Overlay on and off

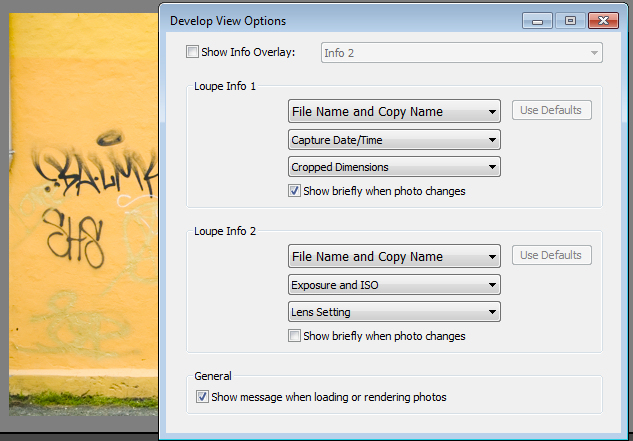
    Each Info Overlay is comprised of three lines of information, and you can select only one piece of information from a list of options for each line. The defaults for the Loupe Info Overlays are:

    Loupe Info Overlay 1:

    • File Name and Copy Name
    • Capture Date/ Time
    • Crop Dimensions

    Loupe Info Overlay 2:

    • File Name and Copy Name
    • Exposure and ISO
    • Lens Setting

    Default settings for the Loupe Info Overlay

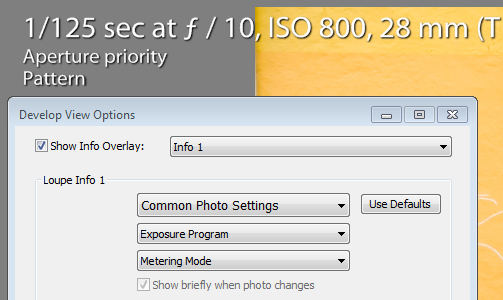
    These items can be changed if you select View > View Options, and in the Library Module click the Loupe View tab. Select the Show Info Overlay checkbox and then choose the Info Overlay to show from the dropdown list – it’s a good idea to show the one you are going to change so you can see what it looks like and if the information you are seeing is what you want to see.

    To change the information that appears in any of the three lines of the Info Overlay click the appropriate dropdown list – there are three for Loupe Info 1 and three for Loupe Info 2, all in the order they appear on your screen.

    Some settings for the lines of information in the Loupe info overlay

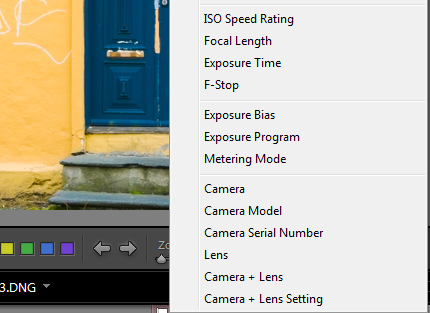
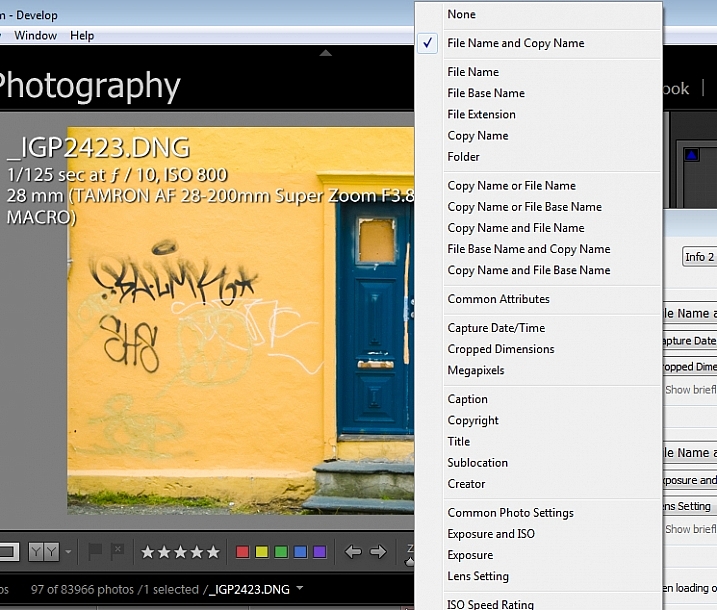
    From any of the lists you can select None to turn that line off so nothing displays there, or choose from any of the options on the list. These include a range of file name options, Common Attributes (whether the image is flagged, rated, has a label, or is a virtual copy), the crop dimensions and megapixels.

    Also in the list are various items which are extracted from the image metadata such as Copyright, Title, Creator, and Common Photo Settings which include Shutter Speed, Aperture, ISO, the Lens, and the Focal Length. These are also available as individual options so, if you don’t want to see all that detail, you can choose to see Exposure Time, ISO, F-stop, Exposure Bias, Exposure Program, Metering Mode, or Camera + Lens Settings.

    More settings for the Loupe info overlay

    Of the options available, Common Photo Settings is a good one to use if you want to see a lot of information about each shot.

    How the Loupe Info Overlay can make you a better photographer

    If you plan to use the information from the Loupe Info Overlay to improve your photography, then consider setting the options for one of the Loupe Info Overlays to include Common Photo Settings, Exposure Program and, for example, Metering Mode. This will give you valuable insight into your camera settings at the time you took each shot.

    Suggested settings for loupe info overlay that can help you troubleshoot problem shots

    I use the Info Overlay to help photographers who are having issues with their photos. If you set the Loupe Info Overlay to show the camera settings you can determine why, for example, an image is out of focus, too light, or too dark. An out of focus shot may be caused by a shutter speed that is too slow, so that the subject or camera has moved while the shot is being captured. Being able to see the shutter speed will help you determine if it is the reason your photos aren’t sharp.

    If you are shooting in manual mode and the shots are too dark (underexposed) it may be that you’re using too fast a shutter speed, too small an aperture, or a combination of both. An overly light (overexposed) image can be caused by too large an aperture, too slow a shutter speed, or both. Displaying aperture, shutter speed and ISO may help you troubleshoot your exposure issues.

    Overexposed and underexposed images can also be caused by an incorrect exposure compensation setting. It’s not uncommon for a beginner photographer to set an exposure compensation value without realizing the impact of what they have done. If you set the Loupe Info Overlay to display Exposure Bias you can see if exposure compensation is the cause of incorrect exposure.

    The Loupe Info Overlay is a useful tool which can display a wealth of information, some of which can help you troubleshoot problems you are having with your photos.

    Now it’s over to you: do you use the Lightroom Info Overlay and, if so, what information do you set it to display and why?

    googletag.cmd.push(function() {
    tablet_slots.push( googletag.defineSlot( “/1005424/_dPSv4_tab-all-article-bottom_(300×250)”, [300, 250], “pb-ad-78623” ).addService( googletag.pubads() ) ); } );

    googletag.cmd.push(function() {
    mobile_slots.push( googletag.defineSlot( “/1005424/_dPSv4_mob-all-article-bottom_(300×250)”, [300, 250], “pb-ad-78158” ).addService( googletag.pubads() ) ); } );

    The post How to Understand and Use Lightroom’s Loupe Info Overlay by Helen Bradley appeared first on Digital Photography School.

    Digital Photography School

  • How to Get the Most out of Membership in Facebook Photography Groups

    You can’t avoid them. Photography Facebook communities are everywhere now. Most photographers belong to at least one. You don’t even get a choice – people just add you to groups, and before you know it your newsfeed is just one long stream of photography chatter. And, let’s face it, the quality varies!

    Becoming an active member of a great Facebook group can be a fantastic source of inspiration, support, motivation and friendship. It can be a wonderful, life-enhancing experience. I have met true, like-minded friends via these groups over the years.

    04

    I used to be a member of a zillion Facebook groups. I tried to engage with all of them before realizing that I was losing weeks of my life interacting with stuff that didn’t really add any value to my photography, or to my life in general. So, I made the decision to cull the groups that I didn’t get much from, and just removed myself without a second thought.

    Out of the groups that remained, I chose just three in which to be active. These were the groups I felt strongly connected to. I had become a core member of each and truly enjoyed the people and the chats.

    This left a small number of groups in which I decided to become a silent member. I didn’t feel a bond with the group, but I was still getting value from the content. Yes, in some groups, I am one of the lurkers.

    I don’t contribute. I might click Like occasionally if I see something wonderful, but I don’t post, but I am not alone. In larger Facebook groups the majority of members are silent. However, you are looking and reading, this doesn’t make you any less important. In fact, nothing could be further from the truth. I am admin for a fabulous Facebook group of learning photographers, and I often get private messages of thanks from members who have never once contributed to a thread. These lurkers are actually very important to me. I know they are quietly consuming the content in the background.

    01

    But there is another type of member. They attempt to engage but others don’t respond. They post sporadically in different groups, get dejected, and sometimes even defensive when their posts do not get the engagement that other active members enjoy. No one commented. No one even pressed Like.

    Some will grump in silence and decide never to post there again. Some are a little noisier about it…

    It is human nature to feel this way. If we go to the effort of putting ourselves out there, then of course we hope for a positive response. When we don’t get one, we feel disappointed, or even rejected. They may think:

    • They are cliquey.
    • They are unfriendly.
    • They have not accepted me.

    Sometimes stuff just gets missed. People are busy, posts get buried – that’s life. However, often the reason for the lack of response (or maybe the negative response) is much more to do with you than you might want to believe.

    Let’s say you have found a photography Facebook group that you like. It just ‘fits’. You feel an affinity with the other members, the ethos of the group works for you and the content is pitched at your level. Maybe you have just joined or maybe you have been lurking for a while and now you would like to enter the fold.

    How do you go about doing that? Especially in a well established group?

    06

    I have seen many newbies join Facebook groups and become much-loved members within a few weeks. However, I have also seen others try, only to crash and burn. Here is what I have learned from those who manage to succeed.

    1. Take your time. Don’t ask for something straight away.

    I see this all the time. A newbie’s first ever post is asking for something from the other members. It might be a request for critique, or a question about a challenge they are having.

    Asking for something at this point is not ideal. The other members don’t know you. They don’t feel compelled to help you yet. Not because they don’t like you, but because you haven’t given them a reason to want to help you.

    So how do you make people want to help you?

    2. Introduce yourself (but your life story isn’t necessary).

    Tell everyone who you are, that you are glad to be there, and that you’re looking forward to getting involved. Don’t post an image. Don’t ask for anything at all.

    Keep it short and sweet. No one wants to read a random stranger’s autobiography on their newsfeed, however interesting you may think it is.

    05

    3. Give of yourself and watch it come back.

    If you don’t take the time to respond to others, why would you expect them to respond to you?

    Find images you genuinely like and compliment the photographer, or ask them a question about how they achieved it. Photographers love to be congratulated on their work and they enjoy talking about how it was created.

    If there was a question posted that you know the answer to, then take some time to craft a response.

    If you can identify with a challenge someone else is having, say so. Empathize. The person on the receiving end of your time will be grateful, and they will remember.

    4. Engage selectively.

    Don’t misinterpret number three above. I am not saying that you should hop onto every thread gushing about everyone’s images, answer every question, and agree with every statement. People-pleasers never win. Not only would other members see right through this, but you would also have no time left in the day for anything else.

    Engage with posts which add value to the group and ignore the nonsense (there will be some). Be present in interesting discussions, and frame your responses with respect and intelligence.

    You will be remembered.

    02

    5. Reach out to like-minded individuals.

    We live in a new world. A world where it is actually possible to have good friends you have never met in person. Making friends online can be similar to making friends the traditional way, in that we gravitate towards those we have something in common with.

    Look for those people in the group. Maybe they have a similar style to you, or they seem to get your dry sense of humour. Perhaps, like you, they love to geek out on equipment specifications, or they are struggling with the same issues that you are.

    Connect with them within the group at first (in a non-stalker way) then later send them a friend request.

    6. When posting or commenting, consider motive, wording and tone.

    So let’s say you have done everything in numbers 1-6 above. Now your fellow members are much more likely to respond positively to you! They have seen your name pop up for some time now, alongside your considered comments. Maybe they have even been on the receiving end of some of your genuine praise.

    They still have to feel inclined to engage with you though. Your motive, wording and tone will all contribute to whether other members interact positively with you.

    That, however, is a whole other article…

    03

    Do you belong to a Facebook photography group? What makes you decide whether to become a part of that group, whether to remain a lurker or whether to leave?

    googletag.cmd.push(function() {
    tablet_slots.push( googletag.defineSlot( “/1005424/_dPSv4_tab-all-article-bottom_(300×250)”, [300, 250], “pb-ad-78623” ).addService( googletag.pubads() ) ); } );

    googletag.cmd.push(function() {
    mobile_slots.push( googletag.defineSlot( “/1005424/_dPSv4_mob-all-article-bottom_(300×250)”, [300, 250], “pb-ad-78158” ).addService( googletag.pubads() ) ); } );

    The post How to Get the Most out of Membership in Facebook Photography Groups by Julie Christie appeared first on Digital Photography School.

    Digital Photography School

  • 4 Tips for Connecting and Photographing Kids More Naturally

    We’ve all seen family photos where everyone is happy, kids are smiling, and the whole brood looks like they are having the time of their lives. Photos like this seem so natural that it’s easy to think they required almost no work at all, when in reality the photographer was likely working like crazy behind the scenes trying to get the perfect pictures.

    Shooting photos of adults is one thing, but working with kids brings a whole new set of challenges to the table. Whereas adults generally take directions and respond to requests, kids can be running all over the place, and getting kids to cooperate can be a bit like trying to herd cats. If you have ever had an experience like this, or if you are thinking about getting into family photography, here are four tips for photographing kids that might come in handy.

    photographing-kids-girl-purple-dress

    These usually help when I’m doing a family photo session, and if you struggle when taking pictures of kids, some of these tips might be just the ticket for that elusive perfect photo.

    Get to know the children

    Anyone who has spent time doing family photos already knows this rule, but I have seen plenty of photographers fail to get the shots they were aiming for, because they did not do this simple initial step. The first thing I do when taking family pictures is spend a few minutes getting to know the kids. I ask them what their names are, their age or year in school, and have them tell me a little bit about their lives. Ask them specific questions, otherwise you’ll get answers that are too general and unhelpful. “Do you have pets? What are their names? What’s your favorite kind of ice cream? What’s your favorite movie?”

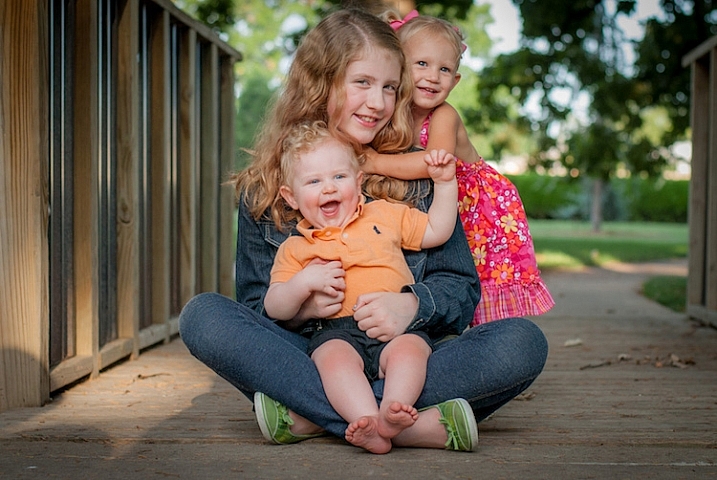
    photographing-kids-bridge

    By learning a bit about these kids they felt more comfortable working with me and I got much better pictures as a result.

    Don’t stop there though. Use these first few minutes as a chance to build a relationship with the kids, and tell them a bit about yourself too, so they see you as a friendly photographer, and not a scary adult with a giant camera lens. One trick to doing this is answering the questions you pose to them after they have had their turn. I like to get a little goofy and set a fun tone for the shoot by giving fake answers that usually make kids laugh. “I’ve got a pet iguana named Mr. Pickles. I like peanut butter and green bean ice cream.” You might feel a bit silly doing this, but it accomplishes two very important things:

    1. It helps establish a relationship and sense of trust between you and the kids, making them much more likely to cooperate during the rest of the session.
    2. It shows the parents that you care about their kids, which can make all the difference between a successful shoot, and a series of awkward moments that will haunt you for weeks.

    photographing-kids-two-boys

    Have them bring something special

    Once you have a foundation built with the little ones, it’s time to actually take some pictures. This can be a little difficult because kids aren’t used to doing things that you usually want them to do when taking photos. You might have a specific pose or composition in mind, but the kids would much rather be running around or climbing trees.

    One of my favorite tricks is to have children bring artifacts from their own lives such as books, stuffed animals, or a favorite toy. Not only will it give them something on which to focus their attention during the photo shoot, but it gives you something you can talk about to build a good working relationship for your brief time together. Have them tell you a bit about their stuffed animal, ask if you can read a few pages from the book, or spend a minute playing with their toys together.

    It may seem silly to have thousands of dollars of camera gear sitting idle while you and the kids are pretending to play house with stuffed bunnies, but think about the big picture (ha!) here: by doing this you are sowing the seeds for a successful session and impressing the adults at the same time. And that can be worth a lot when they call you for more pictures in the coming years.

    photographing-kids-boy-book

    This boy’s grandfather told me this was his favorite photo of his grandson, partially because of the book which was a family favorite.

    Take some information and twist it

    One of my favorite tactics to get kids to smile and laugh, is taking something they already told me when I was getting to know them, and asking about it later on, but with a twist. I purposely get some basic facts incorrect.

    If a little girl brought along her favorite toy truck, ask her about her airplane. “It’s not an airplane, it’s a truck!” she will often reply with a huge grin. If a boy told you he is five years old, ask him how he likes being seven. When he corrects you, tell him you’ve always been bad at math so you might keep forgetting.

    My favorite trick is to make up my own words. A couple of kids brought their well-worn copy of the children’s classic Green Eggs and Ham, but when I talked with them about it I pronounced it Green Freggs and Fram. These little intentional screw-ups almost always make the kids laugh and smile, and it also gives them a chance to teach you something in return, which kids almost always like doing. Let them correct your mistake and show you how to do it properly, and they will start to feel like they have a true back-and-forth relationship instead of seeing you as just another adult bossing them around. In doing so you will find the kids to be much more cooperative when you really do have instructions for them to follow.

    photographing-kids-girl-smiling

    Embrace the absurdity

    As adults we have all too many inhibitions when it comes to expressing ourselves. We worry about what people will think, how our clothes look, and what everyone around us is doing, and as a result we generally don’t like to make waves, cause a ruckus, or deviate from the norm. Most kids have no such filters, and the results can make for some hectic and stressful photography sessions – if you let it. If you’re the kind of photographer who relishes control and order, perhaps photographing kids is not your particular cup of tea. If you can learn to accept the absurd serendipity of kids, you will not only get some better photos as a result, but you and your clients will have a much better time as a result.

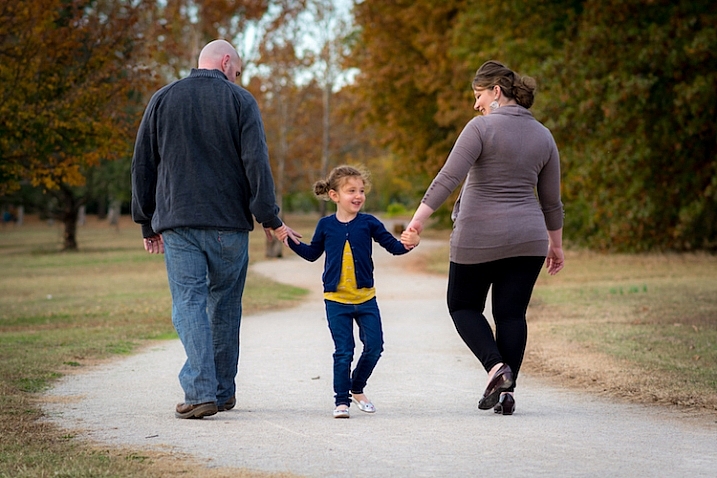
    photographing-kids-family-walking

    This girl was so bubbly that she rarely stood still, and by embracing her goofiness I got some pictures that her parents were thrilled with.

    Rather than telling kids what to do and how to pose, let them just be themselves and capture pictures in the moment. Shots of them playing, goofing around, and jumping on each other might not be what you had in mind initially, but these are the kind of pictures parents, family, and friends often enjoy the most. If your clients do want some specific poses try to get them done first, and then let the kids have fun and loosen up a bit.

    photographing-kids-boys-flowerpot

    “Mr. Ringsmuth, can we take some photos in a flower pot?” “Sure boys, why not?”

    One point to remember is that you’re not just taking pictures but creating and capturing memories. Months down the road when clients show your photos to their friends and family, they will often discuss the photo session itself, and how you treated them and their kids. Even if your photos are stunning, your clients will often sour the moment with a bit of commentary about you as an individual. “Yeah this photo is nice but the guy who took it was such a jerk! He practically yelled at our kids to get them to smile.” You want them to be saying things like “We are so happy with the pictures, and our kids had such a fun time with the photographer. She really connected with them and made them laugh.” Not only are your clients more likely to appreciate their pictures, they will be more willing to book future sessions with you, and sing your praises to their acquaintance,s which will often lead to more customers.

    What about you? What are your favorite tips and tricks for taking pictures of little ones? Share your thoughts in the comments below, along with any examples of your favorite kid photos.

    googletag.cmd.push(function() {
    tablet_slots.push( googletag.defineSlot( “/1005424/_dPSv4_tab-all-article-bottom_(300×250)”, [300, 250], “pb-ad-78623” ).addService( googletag.pubads() ) ); } );

    googletag.cmd.push(function() {
    mobile_slots.push( googletag.defineSlot( “/1005424/_dPSv4_mob-all-article-bottom_(300×250)”, [300, 250], “pb-ad-78158” ).addService( googletag.pubads() ) ); } );

    The post 4 Tips for Connecting and Photographing Kids More Naturally by Simon Ringsmuth appeared first on Digital Photography School.

    Digital Photography School

  • 8 Creative Ways to Make Money with Your Photography

    Photography doesn’t just have to be a hobby, in fact, it can be a brilliant way to gain some extra money – and quite a lot at that! I’ve put together a list of my favourite ways of making money through photography, and with the ideas ranging from a couple of hours a week to a part-time project, you may find something that catches your eye.

    1. Shoot Microstock

    Picture 0

    Stock image – © Olly Stabler

    There are many different microstock sites out there, including Shutterstock and iStock Photo, and by uploading your images you may well be able to earn some extra money. If you excel at taking commercial images, this will be a great idea for you as these are the types of photographs that sell the most. If you are considering this option, make sure you don’t let your passion for photography die out, through a focus on sales statistics and selling stock shots.

    2. Network to be a Second Shooter

    Through networking using social media, events, and photography clubs, you can build relationships with other photographers. Opportunities will often arise through the relationships you have built, such as requests to work as a second shooter on a project. It may be that a fellow photographer is working an event, and needs you to join them to take photos to build a complete portfolio of photographs from the day. Weddings are probably the most common occasions that require second shooters, so keep an eye out for these jobs.

    Picture 1

    Me as a second shooter – © Scott Choucino

    Alternatively, those you have networked with may have to turn down work that is too low-budget for them, and will ask you to work on them instead. Never underestimate the job opportunities that will become available to you through networking. This article tells you everything you need to know about the importance of being a second shooter.

    3. Sell Prints

    Picture 2

    The first of my photos to make it to print – © Olly Stabler

    There are many different ways you can sell prints; choose framed copies for larger amounts of money, print on canvases to create a professional look, or prints on their own for those who want to spend less. This will also open up the opportunity to place your work in stores and exhibitions. Having hard copies of your photographs will prove helpful whether you have already received sales, or are searching for prospects.

    If you shoot in a studio, I would advise hanging your prints on display, and the larger the prints, the better. Your clients will always take note of them hanging in your studio and these prints will showcase the work you can create, encouraging sales. Upselling to your clients can create big money, with bigger prints bringing in big profit margins. To ensure that your photos print perfectly, check out Image Size and Resolution Explained for Print and Onscreen.

    4. Become a Photo Booth Service

    Photo booths are a similar price to a full frame DSLR body plus lens, and are extremely easy to operate. There are an unlimited amount of events and options available if you choose this route including parties, weddings, corporate affairs and events. Offering a photo booth service might not be the best option for a budding photographer as artistic photo opportunities are extremely limited, but nevertheless, it is a surefire way to earn money through photography.

    Chris Guillebeau

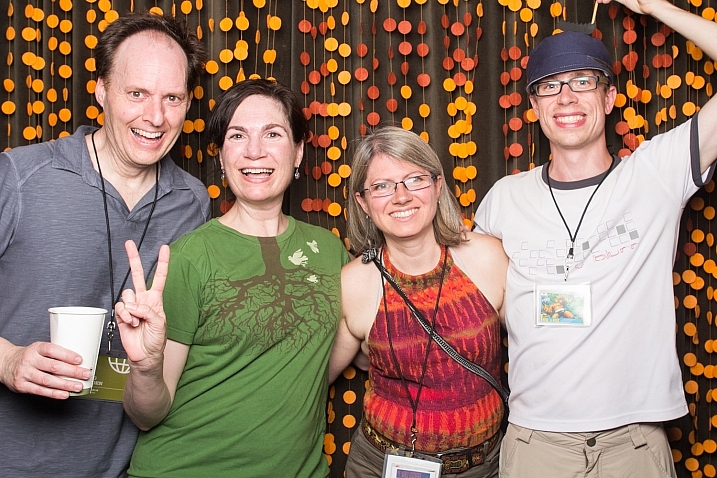
    By Chris Guillebeau – Yes that is your very own Managing Editor Darlene Hildebrandt in a Photo Booth at an event in Portland in 2012

    IMG 0653

    Same group, same event – 2015!

    5. Sell an eBook

    If you want to share your passion with others by talking about your experiences and discussing hints and tips, creating an eBook may be the way forward for you. This idea will involve little costly investment, but will require a lot of time. There are many benefits of writing an eBook including the fact that it will help you to make a name for yourself within the industry. The best way to encourage the success of your publication would be to outreach to bloggers and ask for reviews; the power of word of mouth is invaluable.

    6. Hold a Portrait Party

    Picture 3

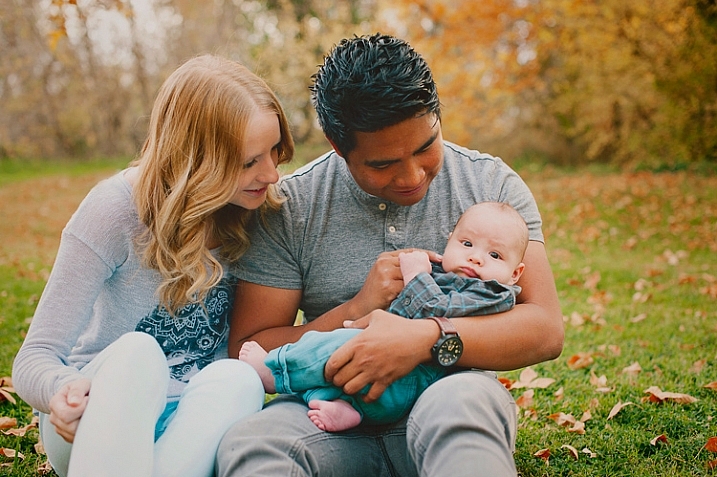
    A headshot taken in my studio – © Olly Stabler

    The idea is simple. Invite friends, bloggers, colleagues, and clients to your studio and tell them to bring a couple of friends. This concept will also work in your lounge, your friend’s front room, or pretty much any location you fancy. Shoot portraits of them all throughout the night, you can even put on a show with entertainment and food.

    You can then give them the option to buy their photographs, or book a session. Giving out a few free prints will also work in your favour, as you are thanking them for their time; this will also give them examples of your work to show people they know, and could end up resulting in a lot of business.

    7. Photograph in Nightclubs

    Picture 4

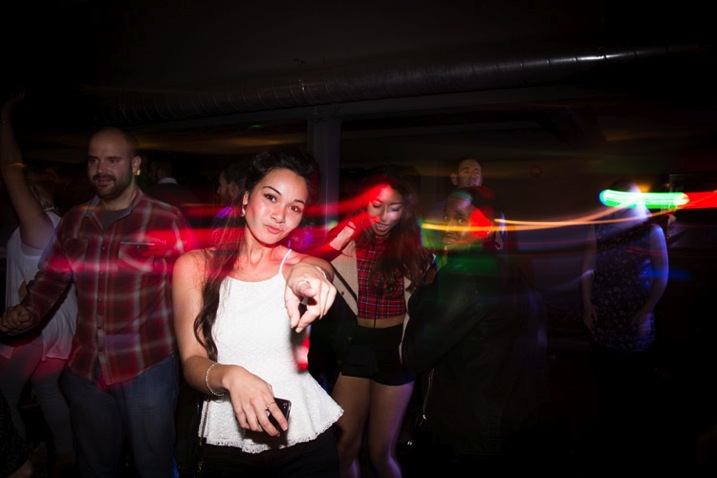
    A photograph taken from my nightclub days – © Olly Stabler

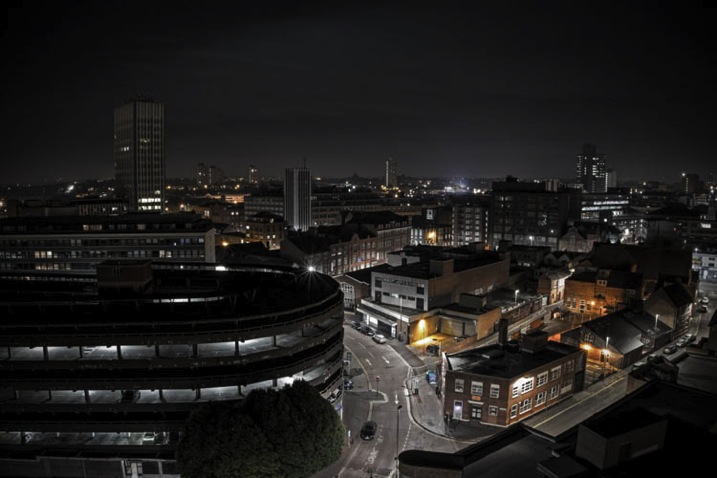
    Photographing in clubs will help you to learn a lot of skills that you will need for higher paid and more complex jobs. If you are reasonably new to photography, and want to earn extra money as well as build your skill set, this is the one for you. Although the pay isn’t brilliant, you can end up earning a decent amount if you photograph a few student nights a week in university towns and cities. This will also help you to build confidence as a photographer as you will be forced to interact with a lot of people at the same time – an essential quality for a photographer.

    Becoming a nightclub photographer is extremely easy to get into, you just need to make sure you have a flash – you can find my recommended products on Amazon.com. The cheaper versions of these flashes do not work with ETTL, which means you will learn how to control flash manually, giving you a full understanding of how flash lighting works – something that is essential if you want to move into higher paying work.

    8. Enter Competitions

    There are plenty of photography competitions floating around, all with various prizes dependent on those running the feature. Try looking for those that offer a cash prize and enter as many as you can. If you are regularly photographing, you should have a portfolio of images you can enter into competitions. You only need to spend an hour each day searching and applying for these, which may make this option a favourite if you only have a small amount of time to spare. A good place to start is by utilizing databases such as this photo competition website. Remember though, this idea does not guarantee a payout and can be an unpredictable way of making money.

    Editor’s note: be sure and read How To Evaluate Photo Contests Before Submitting Your Images And Cash before you enter any contests.

    So those are just a few ways you could use your photography to make a little extra money, or start to make the move towards full-time professional. Do you have any other ideas or things you’ve tried? Please share in the comments below.

    googletag.cmd.push(function() {
    tablet_slots.push( googletag.defineSlot( “/1005424/_dPSv4_tab-all-article-bottom_(300×250)”, [300, 250], “pb-ad-78623” ).addService( googletag.pubads() ) ); } );

    googletag.cmd.push(function() {
    mobile_slots.push( googletag.defineSlot( “/1005424/_dPSv4_mob-all-article-bottom_(300×250)”, [300, 250], “pb-ad-78158” ).addService( googletag.pubads() ) ); } );

    The post 8 Creative Ways to Make Money with Your Photography by Olly Stabler appeared first on Digital Photography School.

    Digital Photography School

  • Getting the Most Out of Each Portrait Location Spot

    159

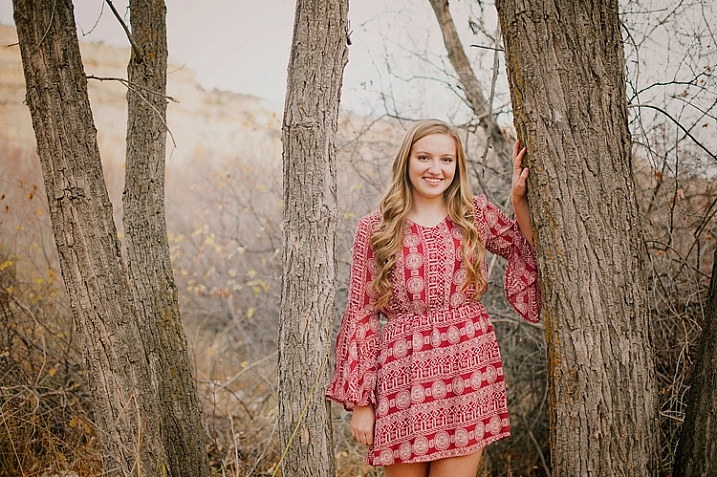
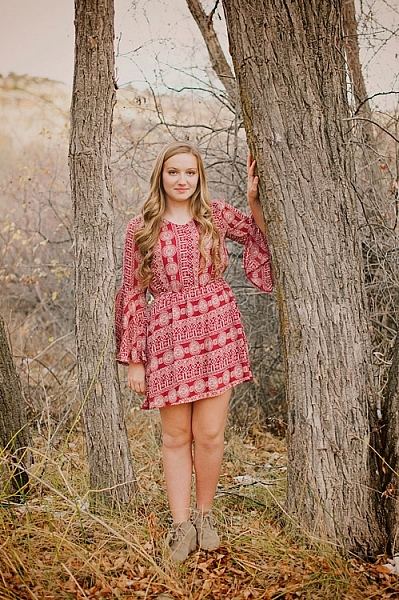
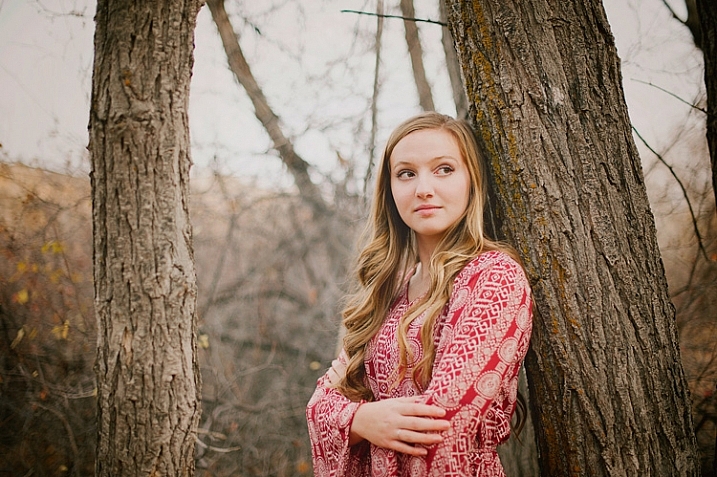
    Some photographers are very inefficient when it comes to shooting in a portrait location. They will take a photo here by this tree, then move over to another tree, then by the pathway, and one at the rock. Then they can’t figure out where to shoot next, because they’ve already used every “backdrop” they can see in that area, and they only have a handful of shots to show for their efforts.

    I’d like to share a few tips with you for using your locations fully and completely, without leaving any leaf, tree, stone, or pose unturned. You’ll speed up your sessions, and get a lot more useable photos by adopting these habits.

    158

    First, find a background that you like. Look for good light, elements that frame your subject, colors that complement, something to lean or sit on, etc. Once you’ve found a spot or background to start with, use it completely and quickly before you move on to a new spot.

    161

    I’ve created a few lists that can help you remember all the ways that you can pose your subject(s), and use a background fully, before you move on. Use these ideas to create your own list that you can carry with you until “wearing each spot out completely” becomes second nature.

    All subjects with any background

    • Standing
    • Seated
    • Smiling
    • Serious
    • Laughing
    • Looking away
    • Close-up
    • Far away
    • Portrait (vertical) orientation
    • Landscape (horizontal) orientation
    • Full body
    • Head shot
    • With a prop
    • Without a prop
    • Unexpected composition (such as subject on the very edge of the frame, subject centered right in the middle, etc.)

    162

    Families, couples, or groups with any background

    • All looking at the camera  and smiling
    • Looking at each other
    • Hugging
    • Laughing
    • All sitting
    • All standing
    • Some sitting, some standing
    • Parents
    • Kids
    • Boys
    • Girls
    • Parent with child
    • Individual portraits of each family member
    • Couple hugging facing each other
    • Couple hugging, one behind the other
    • Holding hands
    • Walking towards you
    • Walking away from you

    171

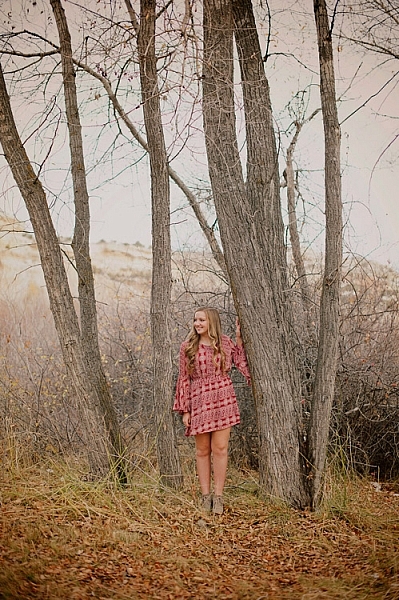
    Individual with trees or walls (something to lean against)

    • Shoulder leaning on a wall or tree
    • Back to the wall or tree, looking at the camera
    • Hand to the tree or wall
    • Head leaning on the tree or wall
    • Arms folded
    • Hands in pockets
    • Hand on hip
    • Sitting against the tree or wall
    • Any of the above, looking away from camera
    • Funny/silly looking around tree or wall

    169

    If you move quickly through each of these poses, your subject won’t feel like she’s stuck in one place forever, but you will have so many options to choose from when you are sorting through the photos later. You might not choose to edit every pose, in every location. But, you may find as you go through the photos later, that you really like the serious face in one location, and you really love the close-up in a different location. Shooting so many options in each location at that moment gives you that choice, instead of being stuck with the one and only option you thought of in that moment.

    168

    Some of your photos may end up looking very similar to each other, but you may decide that you really like the full body pose better than the tighter shot. If you had only shot that location with a cropped pose, you wouldn’t have that option. Alternatively, if you don’t shoot a cropped-in pose at that time, youhave the option to crop it later, but you will lose photo quality by cropping it the file smaller.

    173

    As you learn to use each location fully, you will find that you can get many more useable photos in much less time, with less effort, and in locations that you might not have even noticed before. One tree and one person could be one photo, or it could end up being a hundred photos if you are extremely creative and efficient.

    Give yourself a challenge to figure out at least 10 different photos in one location spot, and share a couple of your favorites in the comments! I’d love to see what you come up with.

    googletag.cmd.push(function() {
    tablet_slots.push( googletag.defineSlot( “/1005424/_dPSv4_tab-all-article-bottom_(300×250)”, [300, 250], “pb-ad-78623” ).addService( googletag.pubads() ) ); } );

    googletag.cmd.push(function() {
    mobile_slots.push( googletag.defineSlot( “/1005424/_dPSv4_mob-all-article-bottom_(300×250)”, [300, 250], “pb-ad-78158” ).addService( googletag.pubads() ) ); } );

    The post Getting the Most Out of Each Portrait Location Spot by Melinda Smith appeared first on Digital Photography School.

    Digital Photography School

  • Hands on With the Fujifilm X100T

    I’m surprised it didn’t happen sooner, but after being bombarded by gushing hype about mirrorless cameras for years, I finally broke down and bought one.

    It’s hard for photographers to buy a camera these days. There are so many good options, and it can be difficult to pull the trigger, knowing that some manufacturer’s new model just might be the Holy Grail.

    I debated at length as to which direction to go with my next camera. Sony has the nice full frame bodies, Olympus has the petite and swanky OM-D and Panasonic has a couple nice models, but they are geared a little more towards video than I care for.

    Eventually, I decided that Fujifilm was going to get my money. At first, the X-T1 started to win me over. The technical specs seemed to tick many boxes: the weather-sealed body is a big plus, along with several high-quality weather-sealed lenses to accompany it, not to mention the classic retro look.

    x100t sample image

    The X100T’s simplicity is easy to fall in love with.

    The problem was that I didn’t really want to add a whole other camera system to my current Nikon kit. I could use my Nikon lenses with an adapter, but that kind of defeats the purpose of going with a smaller system. So after figuring out exactly what I intended to use the camera for – travel, portraits, a little landscape and to accompany my D800 during shoots– I settled on the Fujifilm X100T.

    If you’re not familiar with it, the X100T is a rangefinder-style mirrorless camera, with a fixed 35mm lens, APS-C sensor, and a bunch of nice features.

    First Impressions

    There’s no doubt about it, it’s a sexy looking camera. To tell you the truth, that means very little to me in the end – we all know that a sexy camera does not necessarily equal sexy photos.

    x100t sample image

    Images straight out of the camera often look great and need little post-processing.

    I immediately liked the size of it, and weighing in at only 440 grams (about a pound), there is no excuse to ever leave it at home. However, the feel in the hand is somewhat unrefined. There is the tiniest of nubs to get your right-hand middle finger wrapped around for grip. I bought the camera with a low-profile, more pronounced grip that also protects the bottom of the camera – probably a necessity for many.

    It feels solid and of high-quality build. The shutter speed and exposure compensation dials are stiff, which is good, so it isn’t always spinning around when you don’t want it to. I wish I could say the same of the rear thumb dial which feels very plastic-y and has almost no resistance. The on-off switch also has almost no resistance as well, which results in the camera constantly ending up in the On position draining the tiny battery.

    Shooting with the X100T

    Focus

    I popped in a memory card and battery while sitting in a coffee shop, fired up the camera, and took a few shots.

    Surprisingly (to me at least) the camera had a hard time finding focus in the not-so-dimly-lit shop. It slowly searched several times before the autofocus locked on. I thought maybe the settings just needed to be tweaked, but after a few months of shooting with it, I’ve found the autofocus to be a bit slow and it needs a ton of contrast to find focus.

    Switching on macro mode allows you to get 10 centimeters (about four inches) from your subject, which is pretty good. On the downside, images have a severe lack of sharpness while shooting wide open in macro mode. Facial recognition is hidden in there, and does a great job.

    x100t close focus

    The X100T’s close-focusing allows you more latitude for creative compositions.

    Set to manual focus, the camera offers you the option of a zoomed focus peaking feature, to help you nail sharp images. I find the focus ring to be too unresponsive and it seems to take way more twisting than necessary to adjust the focus – definitely impractical for moving subjects.

    Composition

    The X100T gives you the option of composing the image through a rear LCD display, straight through the viewfinder, or with the electronic viewfinder (EVF). The rear LCD is stunning and functions really well in low light, showing minimal noise. The EVF features a small inset image, that can be toggled off or on, which shows a magnified portion of the shot for focus confirmation – pretty slick.

    Exposure Control

    One thing I really love about this camera is the fact that it has both a built-in neutral density (ND) filter, and an electronic shutter that can shoot at 1/32,000th of a second. This gives you the ability to shoot at wide apertures under bright conditions without overexposing the image. The tricky thing is that you can’t use the on-camera flash, or the hotshoe as a trigger, with the camera set to either electronic or electronic+mechanical shutter modes.

    x100t neutral density filter

    The combination of a built-in neutral density filter and an electronic shutter allow to shoot at wide apertures in bright conditions.

    I’m a big fan of the exposure compensation dial front and center, and use it often.

    If you are using the X100T in Manual or Aperture Priority mode, you’re going to have to fumble around to get ahold of the aperture ring, which is right up against the body. It has two little nubs which aim to assist, but unless you have dainty little fingers, you are likely to have difficulty here. There is a spot on my wish list for the ability to adjust aperture with the rear dial instead of on the lens.

    Noise, contrast, and color saturation/rendition are all fantastic well into the ISO 3,200 range. I mainly shoot with a Nikon D800, which has stellar low light capabilities, and in comparison, the X100T really holds its own; in truth, it’s better than I expected.

    x100t low light example

    The X100T handles low light situations with ease.

    Image Quality

    The X100T simply takes beautiful images.

    x100t sample image

    Images taken with the X100T seem to always have a pleasing look to them.

    The way that the camera records the information, and processes it, (and it appears that even the raw files are processed to some extent) yields very pleasing results. There’s a type of dreamy, silky look, to the images that is very subtle but works.

    I always shoot in RAW, and will sometimes play around with the camera profiles in Lightroom (although I never use them in-camera). The Provia setting – a nod to Fuji’s infamous color film – works really well for some photos, and even their version of Kodachrome (Classic Chrome) can be attractive.

    provia profile sample image

    Although I’m usually not a fan of in-camera filters, I have a soft spot for the Provia profile.

    Conclusion

    I had reservations about buying a fixed lens camera. However, I have found that the simplicity of the Fuji X100T leaves you no choice, but to focus more on composition.

    My strongest motive to acquire a camera like this, was to have something that I wouldn’t think twice about bringing with me when I walk out of my house. By no stretch of the imagination is the X100T a replacement for my D800, but it compliments it brilliantly.

    PROS

    • Compact and lightweight
    • Above average image quality
    • Impressive list of practical features
    • Great low-light performance
    • Built-in neutral density filter
    • Flash sync speed up to 1/4000th of a second
    • Fantastic results using the built-in flash
    • Built-in WiFi
    • Built-in RAW converter
    • Can charge the battery in the camera

    CONS

    • Short battery life
    • Sensitive on/off switch
    • Aperture ring difficult to adjust
    • Some controls are unresponsive when first turning on the camera
    • Video quality is laughably bad
    • No weather sealing

    In the end, I have no regrets buying this camera. On one hand I feel that a camera as this price point should have faster and more accurate autofocus, and I hope to see the slow startup issue fixed in a firmware update. On the other hand, I have found the positives far outweigh the negatives, and I am really looking forward to shooting more this great little camera.

    Do you have an X100T? How has your experience been with this camera?

    Would you consider getting a camera like this? Why or why not?

    googletag.cmd.push(function() {
    tablet_slots.push( googletag.defineSlot( “/1005424/_dPSv4_tab-all-article-bottom_(300×250)”, [300, 250], “pb-ad-78623” ).addService( googletag.pubads() ) ); } );

    googletag.cmd.push(function() {
    mobile_slots.push( googletag.defineSlot( “/1005424/_dPSv4_mob-all-article-bottom_(300×250)”, [300, 250], “pb-ad-78158” ).addService( googletag.pubads() ) ); } );

    The post Hands on With the Fujifilm X100T by Jeremie Schatz appeared first on Digital Photography School.

    Digital Photography School

  • 5 Questions to Help You Make sure Your Photos are Safe Inside Lightroom

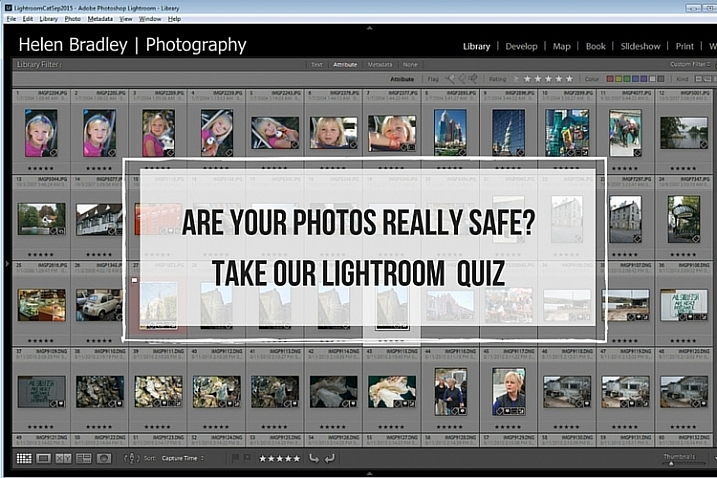
    Lightroom quiz lead image

    New Lightroom users often get into trouble because of a lack of understanding as to how Lightroom works. Unfortunately the result of these misunderstandings is often that their precious photos are lost, either permanently or temporarily. When you are new to Lightroom it can help if you understand some basics about how Lightroom works to ensure that your precious photos are safe.

    Here’s a quick five question quiz to see if your photos are safe in your hands.

    Question 1: True or False?

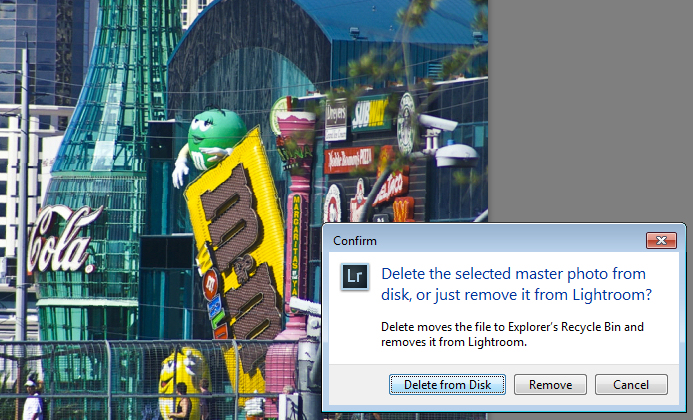
    Lightroom stores a copy of your photos for you. When you delete a photo from Lightroom even if you opt to delete it from disk, the original is still safe.

    What happens when you select to Delete from Disk in Lightroom

    Answer: False

    Lightroom simply keeps an record of where your images are on your hard disk. It does not actually store any images. So, if you remove a photo from Lightroom, and when prompted select Delete from Disk, then then you’re deleting the original of that image. If that was your only copy you’ll have deleted that forever.

    Question 2: True or False?

    You have deleted all the photos from a folder inside Lightroom. This means that there are no photos left in that folder so it’s safe for you to open Finder or Windows Explorer and delete the folder itself.

    Is an empty folder in Lightroom really empty?

    Answer: False

    Lightroom can only handle photo and video file formats. Even if you delete all the photos and videos from a folder in Lightroom there may still be other files in that folder that Lightroom can’t handle, such as PDF files, Microsoft Word, Excel and Quicken files. You cannot know that a folder is empty of files unless you check it by opening it in Finder or Windows Explorer.

    Question 3: True or False?

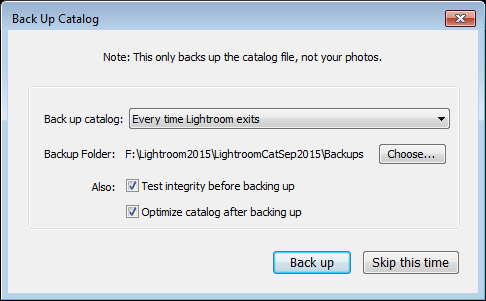
    Your photos are safe because every time you see a prompt to backup Lightroom you always click to do so.

    Does Lightroom backup your photos when you select to Backup?

    Answer: False

    When you choose to backup upon exiting Lightroom, all you’re doing is backing up the Lightroom catalog, NOT your photos. Your photos are never backed up by Lightroom, so you will need to set up some other routine for backing up your image files. Also note that, in most cases, Lightroom saves the catalog backup on the same drive as the original catalog is stored so, if your drive crashes, you’ll lose the original catalog and all backups – so make sure you change it to save the backup on an external drive. (Note: you can only do this in the dialog box above when it pops up)

    Question 4: True or False?

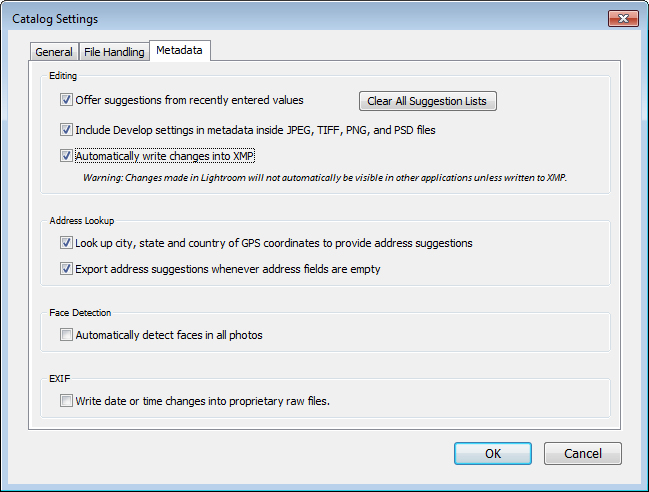
    When you make changes to a file in Lightroom those changes are written to the file so, if you open the file in Bridge, Photoshop or some other graphics program you will see the image as it was edited in Lightroom

    Are edits always saved to your Lightroom files

    Answer: Not necessarily True

    Whether or not the changes that you make to a photo in Lightroom are written to the photo files will depend on how your Lightroom preferences are configured. Choose Lightroom > Catalog Settings (Edit > Catalog Settings, on the PC) and select the Metadata tab. There are two settings of concern here: Include Develop settings in metadata inside JPEG, TIFF, PNG, and PSD files and Automatically write changes into XMP – for the edits you make in Lightroom to be written to the files themselves, both checkboxes should be checked.

    Question 5: True or False?

    You have moved or renamed some folders on your drive which contain photos. When you next open Lightroom you see that Lightroom can’t find those photos any longer. You must now reimport those photos into Lightroom.

    how to resolve issues where you changed files outside Lightroom

    Answer: False

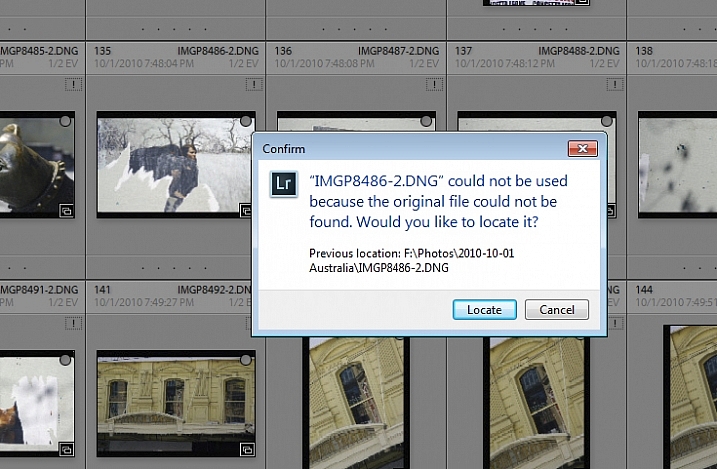
    When you move or rename folders outside Lightroom it is true that Lightroom will report the images as missing. However, instead of importing the images again, you simply need to tell Lightroom where the images now reside. To do this, click the exclamation mark icon, and choose Locate. Navigate to the folder that you renamed or moved, and select the image that matches the one that was missing (you need to find the exact image that was marked as missing). Click the image, and make sure that the Find nearby missing photos checkbox is checked, then click Select. The Lightroom catalog will be updated with the new location of the image and any other images that are in close proximity to it.

    Note: You can also do this by right-clicking on a missing folder in the left panel of the Library module. Then navigate to find the entire folder and relink it to Lightroom.

    In future, it is best to move images and folders, as well as rename folders, inside Lightroom. Changes such as this, that you make inside Lightroom, are written to your drive automatically. The benefit is that when Lightroom makes the changes, it always knows where your photos are, and won’t report them as being missing.

    How did you do?

    If you answered any of these questions incorrectly, your lack of understanding of how Lightroom works might be putting your photos at risk. Spending some time learning how Lightroom operates will help you keep your photos safe.

    Now if you got all these questions right and if you are a Lightroom expert – what questions would you ask of a new user to help them keep their photos safe? We invite you to pose these as True/False questions – but remember, to help folks out – you should give them the answer, as well as pointing them in the direction of keeping their photos safe.

    googletag.cmd.push(function() {
    tablet_slots.push( googletag.defineSlot( “/1005424/_dPSv4_tab-all-article-bottom_(300×250)”, [300, 250], “pb-ad-78623” ).addService( googletag.pubads() ) ); } );

    googletag.cmd.push(function() {
    mobile_slots.push( googletag.defineSlot( “/1005424/_dPSv4_mob-all-article-bottom_(300×250)”, [300, 250], “pb-ad-78158” ).addService( googletag.pubads() ) ); } );

    The post 5 Questions to Help You Make sure Your Photos are Safe Inside Lightroom by Helen Bradley appeared first on Digital Photography School.

    Digital Photography School

  • 27 Images Around the World of Circles

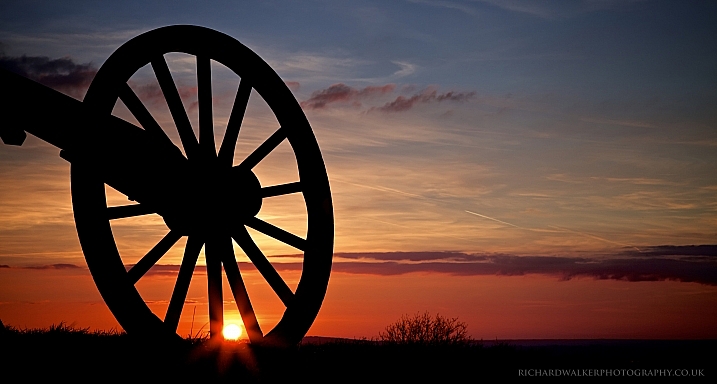
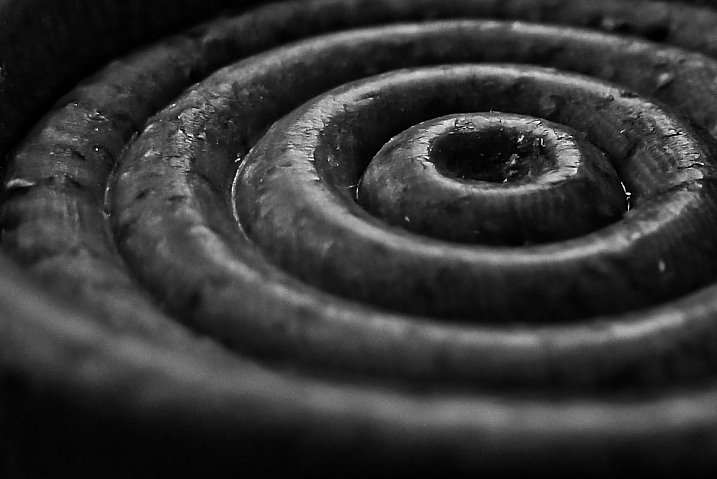
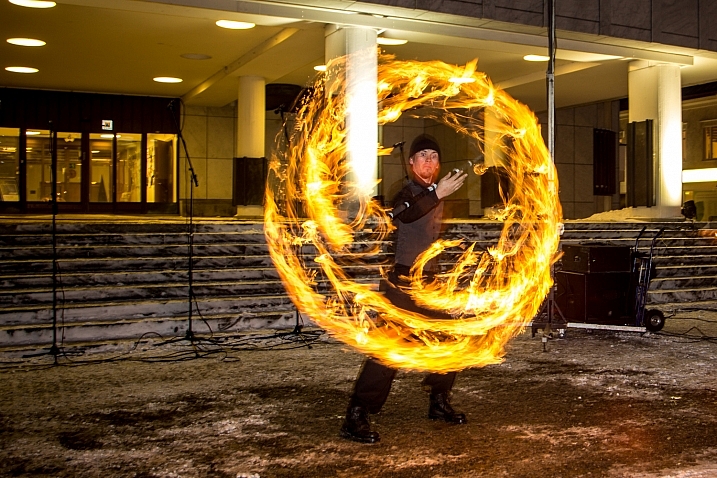
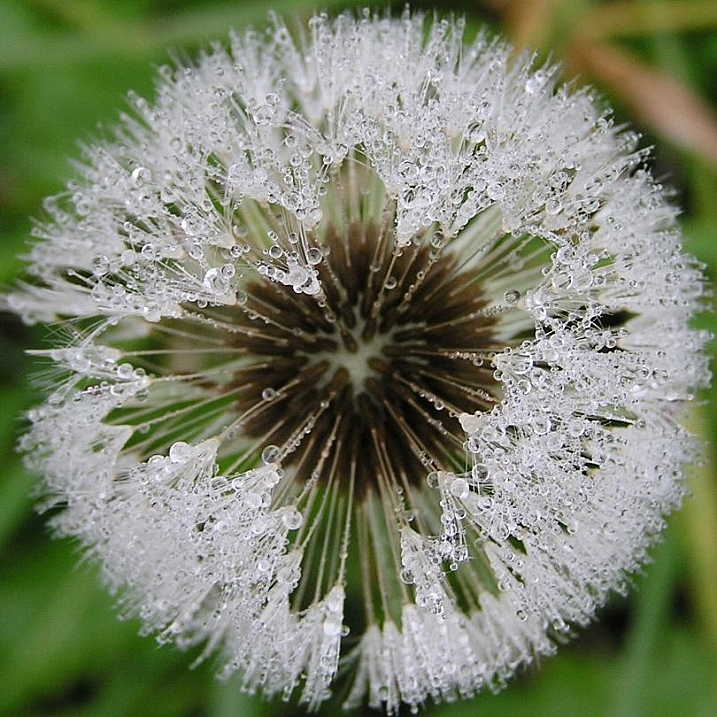
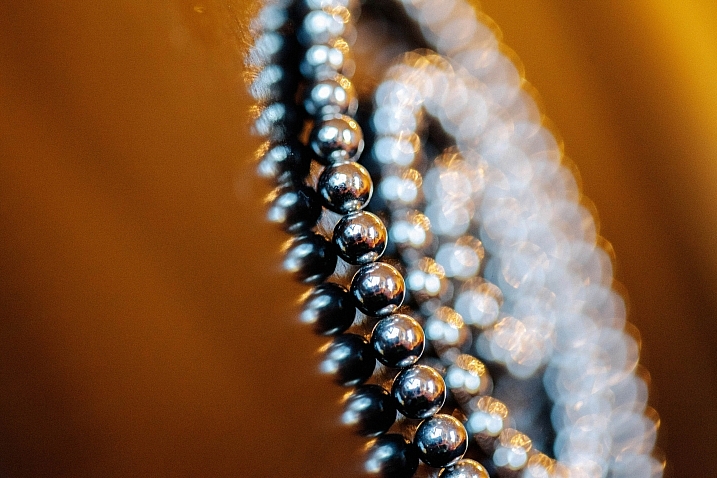
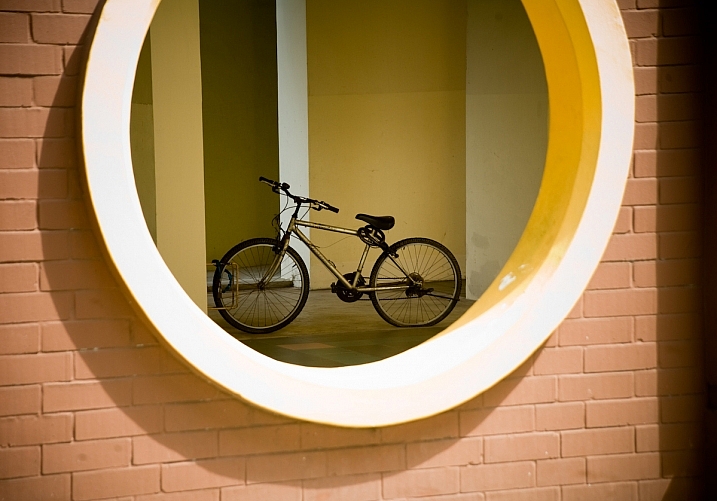
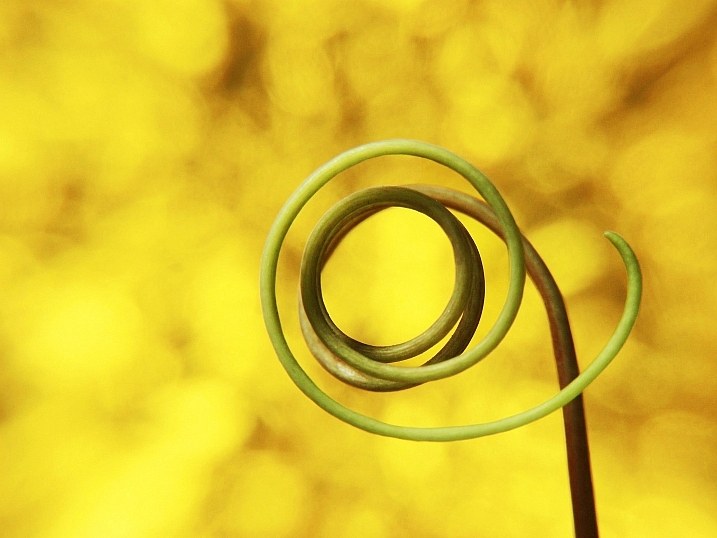
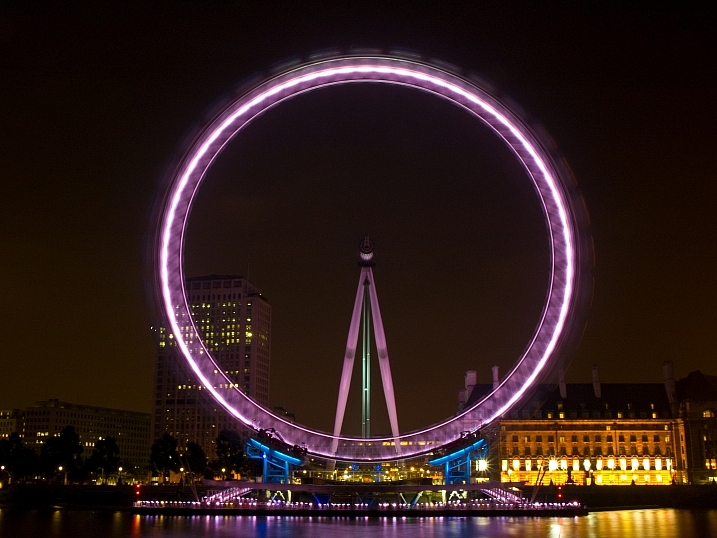
    Shapes can be seen everywhere, in everything. Look closer to find the circles in these images:

    Sama093

    By sama093

    Michael Orth

    By Michael Orth

    Novofotoo

    By novofotoo

    Abbey Hambright

    By Abbey Hambright

    Richard Walker

    By Richard Walker

    Steve Johnson

    By Steve Johnson

    Magdalena

    By magdalena

    Joakim Berndes

    By Joakim Berndes

    Yamanaka Tamaki

    By Yamanaka Tamaki

    J J

    By J J

    Bob Farrell

    By Bob Farrell

    Wasile

    By Wasile

    Simon Harrod

    By Simon Harrod

    Fleetingpix

    By fleetingpix

    Ben O'Bryan

    By Ben O’Bryan

    Catface27

    By Catface27

    Davide D'Amico

    By Davide D’Amico

    Sonny Abesamis

    By Sonny Abesamis

    Darlene Hildebrandt

    By Darlene Hildebrandt

    Tanakawho

    By tanakawho

    William Warby

    By William Warby

    Hernán Piñera

    By Hernán Piñera

    Susanne Nilsson

    By Susanne Nilsson

    Bryon Lippincott

    By Bryon Lippincott

    Thomas Hawk

    By Thomas Hawk

    TheGiantVermin

    By TheGiantVermin

    Karl Reif

    By Karl Reif

    googletag.cmd.push(function() {
    tablet_slots.push( googletag.defineSlot( “/1005424/_dPSv4_tab-all-article-bottom_(300×250)”, [300, 250], “pb-ad-78623” ).addService( googletag.pubads() ) ); } );

    googletag.cmd.push(function() {
    mobile_slots.push( googletag.defineSlot( “/1005424/_dPSv4_mob-all-article-bottom_(300×250)”, [300, 250], “pb-ad-78158” ).addService( googletag.pubads() ) ); } );

    The post 27 Images Around the World of Circles by Darlene Hildebrandt appeared first on Digital Photography School.

    Digital Photography School