Category: Photography

  • A Helpful Checklist to Use Before Photographing Anything

    If you are reading this you probably find photography exciting, maybe even so exciting that from time to time you forget changing your camera settings according to the subject you’re shooting. You have probably already missed at least one amazing shot, just because you forgot to change the ISO or shutter speed.
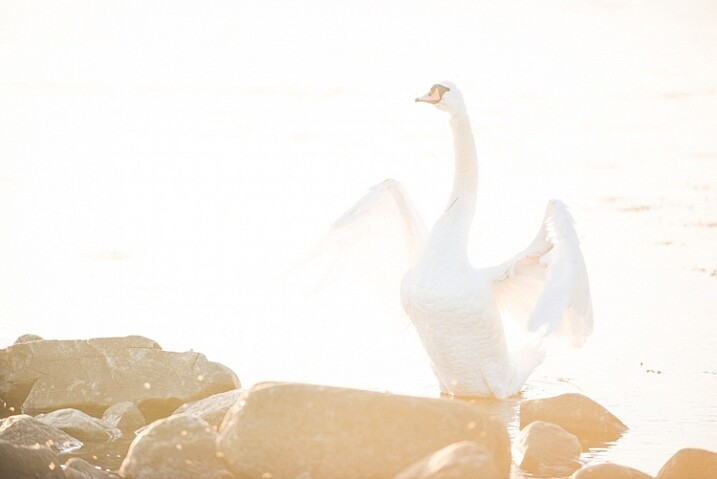
    Image2

    You are not alone. This happens to both amateurs and professionals, however there are a few simple tricks to avoid ever missing that shot again due to unpreparedness. In this article I’m going to share with you the simple steps I follow before going out to photograph, the steps I have learned the hard way. A helpful checklist to use before photographing anything.

    Why do you need a checklist?

    Okay, before I start sharing the steps, let’s briefly talk about why you need a checklist. The reason I need a checklist might be different than yours, and it all comes down to your needs. What are you photographing? Are you photographing to make huge prints? Are you capturing a moment that only lasts a brief second?

    My main field of photography is landscapes and nature. It is rare that my window of opportunity only lasts for a brief second, meaning that I often have the time to find the best settings. However, if you are more into wildlife photography, travel, or perhaps street photography, your window of opportunity is much shorter, ergo you must be able to quickly take up your camera, and fire off some shots without spending much time fiddling with your settings.
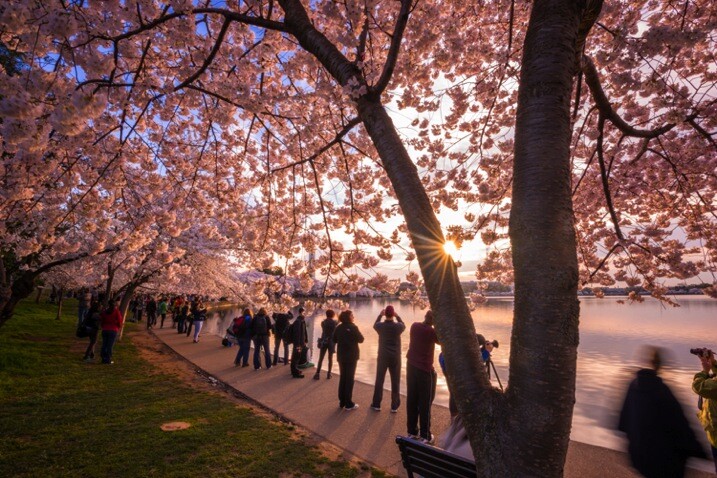
    Image7

    The feeling of coming back home after an amazing evening, importing your photos, and realizing all the shots are ruined as a result of forgetting to change the settings is a feeling I don’t wish upon anyone. No matter what type of photography you do, quality is the most important.

    Point one – Before you leave

    Step one takes place before even leaving your home. This might very well be the most important step, and I know for a fact it’s one that many often forget.

    Part one of the checklist consists of four basic, yet crucial elements to check:

    • Are your batteries charged?
    • Is your memory card full?
    • Did you clean your equipment?
    • Is all your gear packed?

    Are your batteries charged?

    You may laugh and think, “Do’h, obviously I won’t go out with empty batteries”. Well, that’s exactly what I thought too until one time when I drove seven hours to the west of Norwa,y where I would spend the weekend in a tent photographing epic landscapes. After one hour of shooting my first battery died, and I realized that all my spare batteries where empty too. Since I was camping I did not bring a charger.

    In deep frustration I ended up driving the seven hours back home, as I did not want to spend the weekend in some of the greatest nature of Norway without my camera (Yes, I should have stayed and enjoyed the nature – but my thoughts where not rational at the time). Luckily I managed to pull off one descent shot from that evening, which I did not realize before writing this article!
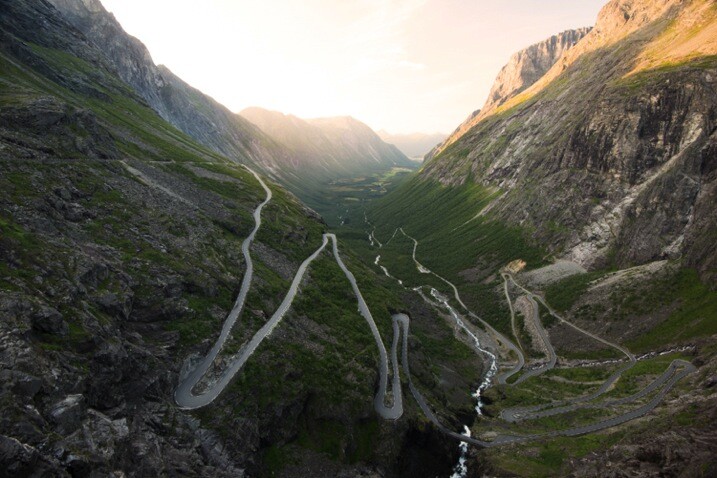
    Image5

    I have made a habit to always set my batteries to charge as soon as I get home from photographing, yet I also double check that all batteries are charged when I leave on trips.

    Is your memory card full?

    Now, leaving home with a full memory card is not as critical as not having any battery time. However it is rather annoying to get the message “Memory card full” after taking 10 pictures. You then have to waste time deleting images one-by-one. Make sure there is enough free space on the card when you head out on your adventures!

    Is your equipment clean?

    Most of us are guilty of not cleaning our equipment from time to time. It’s more exciting to process your images when you get back home rather than clean your gear, right?

    Regardless of what is fun or not, cleaning your equipment needs to be done, especially after photographing in rough conditions or by the sea. I recommend always bringing a microfiber cloth, air blower, and some cleaning spray when you are out, but the more you clean at home, the more time you have to photograph when you’re out.

    Personally, in my earlier days I had a couple shots ruined due to forgetting to clean my filters after being out photographing by the ocean.

    The image below is a typical example of what your files might look like if you forget to clean your lens before shooting. This shot was luckily not ruined, but it took some time removing all dust spots.
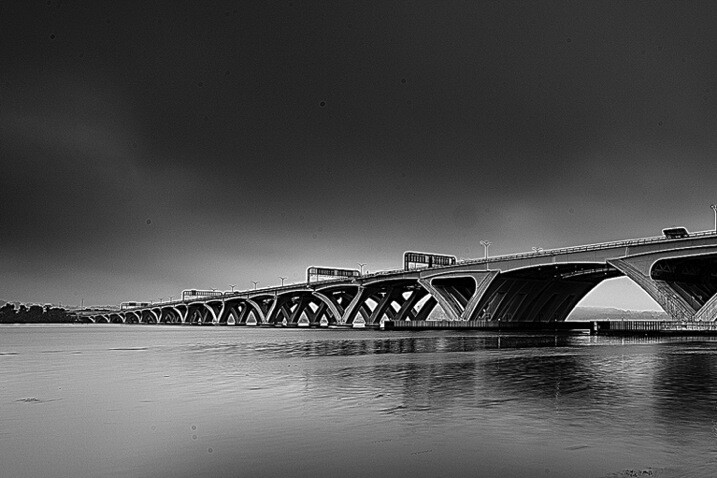
    Image1 DustSpots 2

    Did you pack all your gear?

    This is something I have yet to experience myself, probably due to my paranoia of forgetting something. But it’s happened more than once that I have been out with someone who forgot their memory card, remote shutter, or even their camera. So make sure that all of the equipment you need is in your backpack when you exit the door!

    Point two – In the field

    Now that your batteries are charged, your memory card has available space, your gear is cleaned, and the equipment you need is packed, let’s head out to capture some beautiful images! But don’t get too excited, remember to go through these quick steps first:

    Determine the subject you are about to photograph

    Before you look into the settings themselves, start by reflecting upon the subject you are going to photograph. Is it a landscape, animal, people, or something else? By spending a few seconds becoming aware of what you are about to photograph, it will be much easier for you to remember to set your settings accordingly. You will then avoid photographing a bird with a narrow aperture when you want to blur the background.

    At this stage I would also recommend putting some thought towards what lens you will need most. If you’re photographing birds, you normally need a long zoom, more than the wide angle. Prepare the correct equipment right away, so you avoid having to change lenses while you watch the bird fly away.
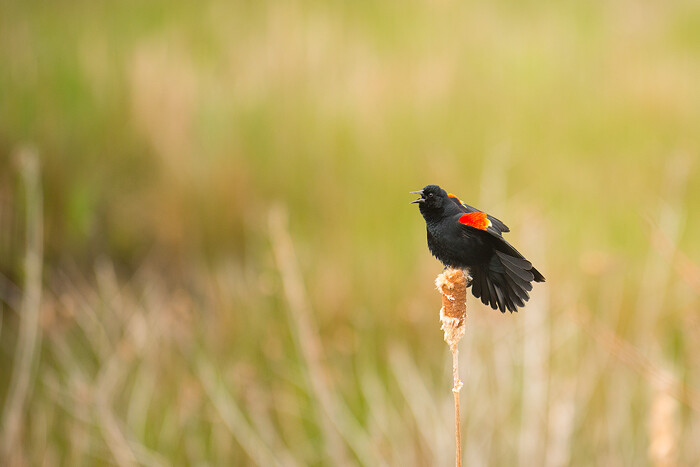
    Image4 Bird

    Check your ISO

    If you are a landscape photographer like myself, you want the ISO to be as low as possible in most situations. However, you are also outside photographing sunrise, daytime, sunset and nighttime. These hours often require different settings.

    It sucks to photograph a beautiful sunrise, just to come home and realize you forgot to change the ISO from 1600 after photographing the stars last night.

    As a default I always check that my ISO is set to 100 when turning my camera on, as this is the setting I use for most of my shots. If you are photographing wildlife you might use 400 as a default to make sure you freeze the moment.The image below is a unfortunate example of one time I forgot to reset my settings from the night before. This resulted in me missing that small moment when the bird spread its wings.
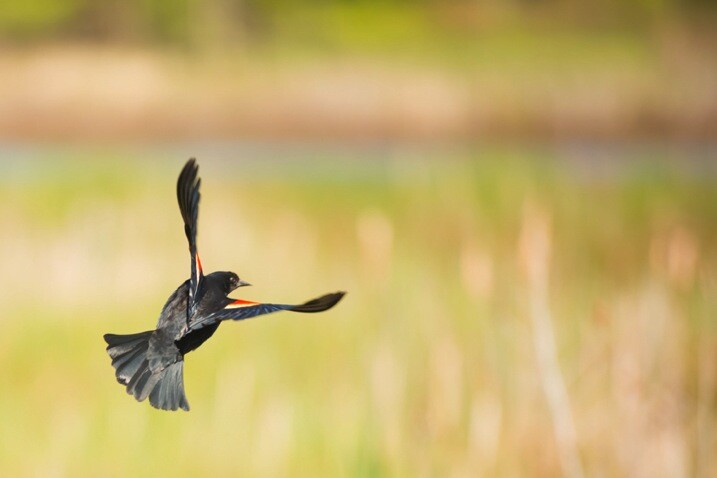
    Image4

    Check your White Balance

    Most of us look at the image preview after firing of a couple shots so we quickly become aware of any visible mistakes we have made, such as not setting the White Balance. Sure, the White Balance is easy to fix in post processing, but I prefer to make the shot as complete as possible in the camera. Quickly check that the White Balance is set to what you normally use (even if it is Auto, Cloudy or any other pre-made setting).
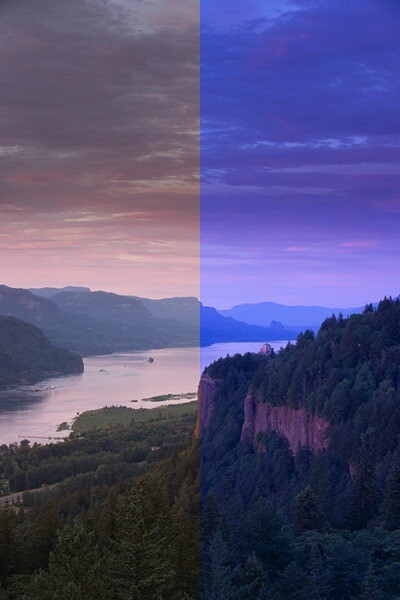
    Image3 WhiteBalance 2

    Don’t forget the focus!

    Have you ever quickly taken up your camera to photograph the bird that just passed you, and later noticed that the image is out of focus because you forgot to change to Autofocus? It’s an easy mistake to make, so before you start photographing, be aware of how you have set the focus.

    This also applies for the other way around as well. Say you are about to photograph a long exposure, you set the focus perfectly and slide on the filters. Then, just as you are about to start taking the picture, your autofocus starts going. No, it’s not a disaster, just simply annoying.
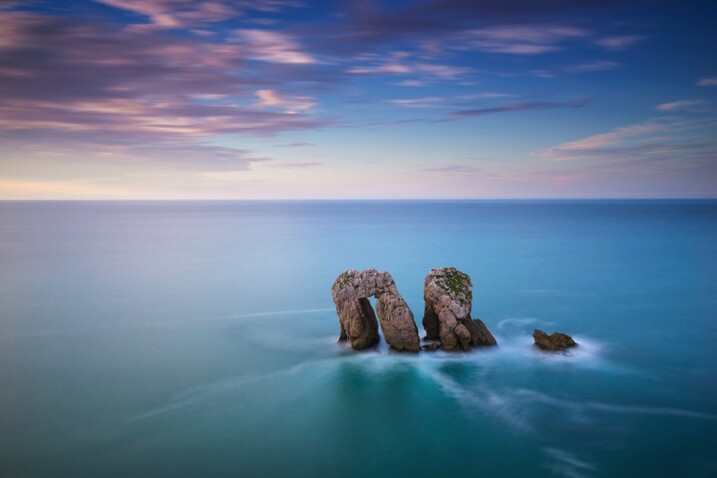
    Image6

    Point three – Back home

    At this point your memory card is hopefully filled with amazing images. This is the last step, and it loops right back to point one. Now it’s time to set your batteries to charge, import your photos, and clean your equipment. If you make a routine of doing this after every session, you will avoid making the mistake of heading out unprepared.

    That’s it for this checklist, and I hope it helps the next time you are out photographing. These steps don’t take much time to follow, and you don’t need to spend hours in post-processing trying to save a image anymore.

    Do you have any “rituals” you do before going out to photograph? Please share in the comments section below.

    googletag.cmd.push(function() {
    tablet_slots.push( googletag.defineSlot( “/1005424/_dPSv4_tab-all-article-bottom_(300×250)”, [300, 250], “pb-ad-78623” ).addService( googletag.pubads() ) ); } );

    googletag.cmd.push(function() {
    mobile_slots.push( googletag.defineSlot( “/1005424/_dPSv4_mob-all-article-bottom_(300×250)”, [300, 250], “pb-ad-78158” ).addService( googletag.pubads() ) ); } );

    The post A Helpful Checklist to Use Before Photographing Anything by Christian Hoiberg appeared first on Digital Photography School.

    Digital Photography School

  • Tips for Getting Started with Still Life Photography

    breakfastW

    When photographing a still life subject, you are creating an image rather than capturing a moment. You are constructing your photograph; from background, to subject, to lighting. With the subject matter being inanimate objects, their tendency to stay very still allows you to take time to refine your lighting, and experiment with your composition. It’s a very pleasant way to photograph, and you don’t need any fancy gear. It’s also a great way to learn about lighting and composition, the key elements to any photographic style.

    Here are some tips to get you started on still life photography:

    Subject matter

    Subject matter doesn’t really matter. Generally the words “still life photography” conjures the image of traditional paintings of a vase of flowers, and a few carefully arranged items. But essentially as long at it stays still, it is a still life.

    Still life photography

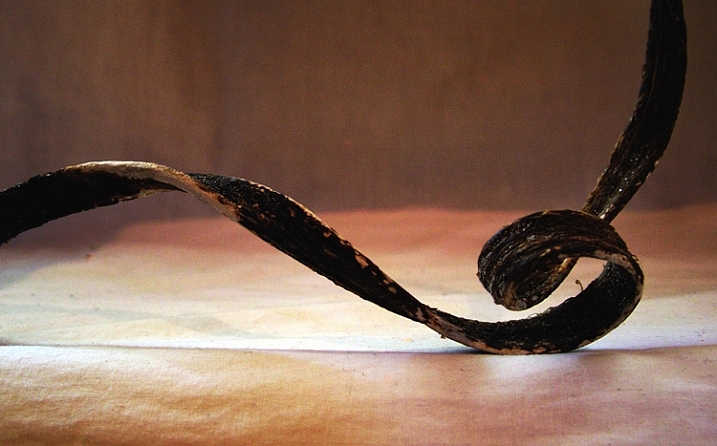
    As long as it is still, technically it is a still life. This is a piece of dried seaweed on some calico.

    You could group a bunch of items together simply because you like them, or they look pleasing, or you can gather related items to tell a story. The image at the beginning of this article tells the story of my breakfast.

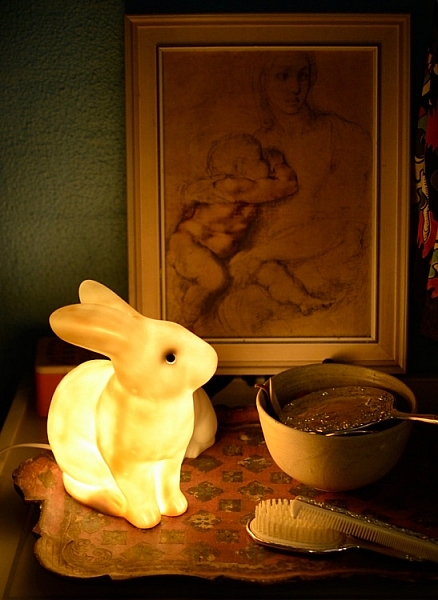
    Or you can find still life arrangements that already exist, their story or mood already set up for you.

    Still Life Photography

    A arrangement on a friend’s bedside table of heirloom items, made for an already set up still life image.

    You can use things that are simply visually pleasing, or you can make it personal. If you’re stuck for a still life subject, I suggest finding some things that are personal and important to you, give the photograph some meaning. Plus, then you’ll have a photograph of this important thing. Bonus!

    Backgrounds

    A good background can really make a still life. Fabric, cardboard or paper, or an existing wall, are all easily accessible backdrops. For the image of my breakfast I used old potato sacks. Just make sure whatever you use is not too distracting from your subject matter. Keep it simple. If you’re using fabric, make sure you iron it first! Few things are more distracting than a wrinkled backdrop.

    Still Life Photography

    I like to call this one, Still Life With Slightly Wrinkly Backdrop.

    A bright color, or busy backdrop, can pull too much attention away from your subject matter. Plain, neutral-toned, backdrops are a good place to start, then experiment from there. You may be surprised what backdrop will end up making your image really pop.

    Still Life Photography

    After trying different colored, plain backdrops for this image, I experimented with some reflective cardboard, which worked much better.

    You can also experiment with focus and depth of field, having the whole image completely sharp or certain elements, such as the background, in soft focus. A blurry background could help out, should you not have an iron handy, or if you are not handy with one and need to knock back that wrinkly background.

    Lighting

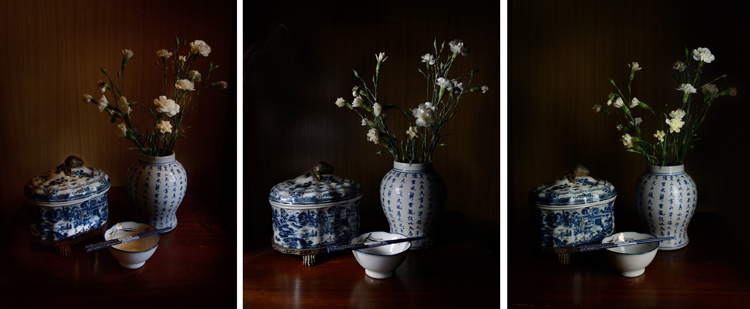
    You don’t need anything fancy to light a still life. Natural light from a window will do the trick. A lamp, light painting with a torch, or a makeshift soft box are great fun to experiment with. A bunch of tips on these lighting methods and more in my DIY  lighting using household items article.

    Still life photography works well for longer exposures, allowing you to use a really subtle light source, such as single candle. You’ll need a tripod, or to steady your camera on a solid box, or pile of books. You can literally paint your still life with light using light painting, and all you need is a small flashlight.

    Still Life Photography

    A quick setup of different lighting. From left: Natural light from nearby window, light painting with a flashlight, and lighting from a single soft box.

    Your subject matter is still life, it’s not going to dash off on you, so take your time here and really play with your lighting.

    Try out different intensities of light, by either a curtain if using window light, or moving your light source in and out. You can also combine different light sources such as a small flashlight to fill in any dark spots when using natural light, or perhaps use both a lamp and a candle. (Just be aware of different colors of light each may produce)

    How you angle your lighting is important. Experiment with different positions for your light source. If you’re using natural light you’ll obviously have to move your subject to change angles, much easier than rebuilding your window! With a movable source, start with some side lighting, and then try a few different angles. Pay attention to where the shadows fall, as well as what happens with any reflective surfaces. You don’t necessarily want to turn your still life into a self-portrait, with a reflection of yourself and your camera staring back at you.

    Composition

    Good composition skills go a long way with still life, and is as important as good lighting. There are many wonderfully informative articles here on dPS on the basics, and sometimes not so basics of composition. Understanding things like the rule of thirds can be very helpful, even if you choose to then ignore it.

    With still life photography, if you just keep moving your arrangement around, you will find one that works. Don’t just settle on the first one you set up. Keep your eye out for overly empty gaps, or too much going on. Placing an item on an angle will lead the eye in that direction, does the item lead the eye nowhere, out of the frame, or subtly towards another part of the arrangement? A small tweak of the angle of your subject’s placement can make all the difference.

    Also try photographing from different angles, even if you need to shoot directly front on, try raising or lowering your camera for a few shots, then zoom in or out a bit and see what happens. It might work, it might not, you won’t know until you try.

    Editing

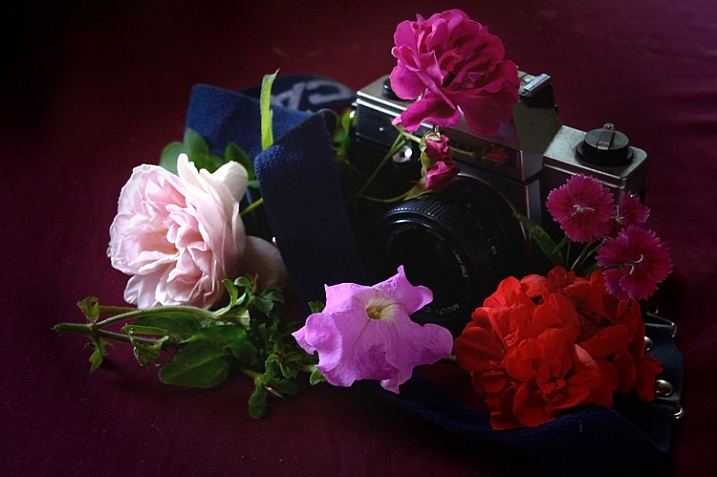
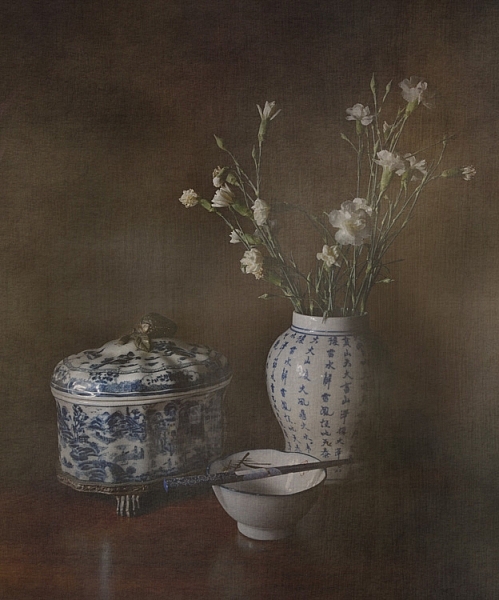
    There is loads of fun to be had in the editing stage. Different processes can completely change your still life image. HDR is a popular process for still life photography, and can be very effective. Or you could play with layer masks with a couple of different exposures, and paint in and out certain areas of your image. I like to add a texture to give the image a painting-like look. Here’s a link to a beginners guide to applying textures.

    Still Life Photography

    Adding a texture in the editing stage can give a painting like effect

    Experiment and enjoy

    Unlike most other forms of photography, when photographing still life you can really slow down and take your time, and enjoy the process . You don’t have to limit yourself  to the traditional still life, experiment with subject matter as well as your lighting and editing. Indulge in a little photographic play time!

    Still Life photography

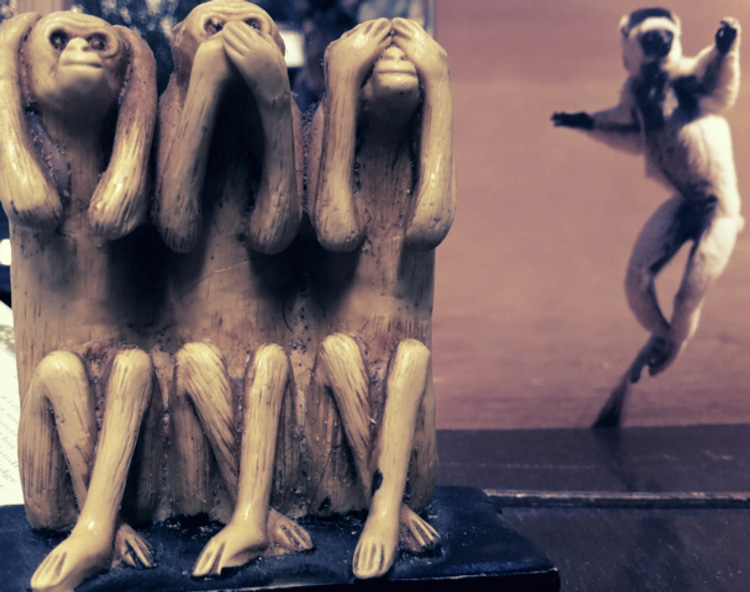
    An arrangement of this monkey sculpture next to a post card made for an interesting still life image.

    Try a still life today. Share your photographs or any further still life tips you’ve learned along the way in the comments below.

    googletag.cmd.push(function() {
    tablet_slots.push( googletag.defineSlot( “/1005424/_dPSv4_tab-all-article-bottom_(300×250)”, [300, 250], “pb-ad-78623” ).addService( googletag.pubads() ) ); } );

    googletag.cmd.push(function() {
    mobile_slots.push( googletag.defineSlot( “/1005424/_dPSv4_mob-all-article-bottom_(300×250)”, [300, 250], “pb-ad-78158” ).addService( googletag.pubads() ) ); } );

    The post Tips for Getting Started with Still Life Photography by Lea Hawkins appeared first on Digital Photography School.

    Digital Photography School

  • How to Identify Three Common Image Problems and Fix Them in Lightroom

    I hear it over and over, “I have a nice camera but my pictures just don’t come out as good as I expect.”

    What ensues is an interrogation first about equipment selection, settings, and general technique. More often than not when we finally get down to the nitty gritty, the fact is that many people not only have a difficult time identifying what’s wrong with their photos, let alone determining how to prevent it, or fix it in post-processing.

    jumping through hoops

    Common problems that plague your images might be able to be fixed, but you might have to jump through some hoops to do it.

    Although there are two sides to this topic (one side being nailing the shot in-camera), we are going to take a look at some common image problems that might be plaguing your photos, and ways to fix them in post-processing. This may be helpful if you want to revisit images you have in your library that may be salvageable.

    I’ll be referring to Lightroom (LR) as the post-processing software, although the general adjustments can be adapted for use in other software.

    #1 Washed Out

    The term washed out refers to a photo which seems to have been shot through a translucent fabric. There is a uniform haze which reduces color saturation, sharpness, clarity, and contrast. There are several factors that can contribute to your pictures being washed out. It could be anything from poor quality lenses, to ghosting from shooting directly into a light source (lens flare).

    The good news is that with the features and power that we have in LR, this problem can often be overcome.

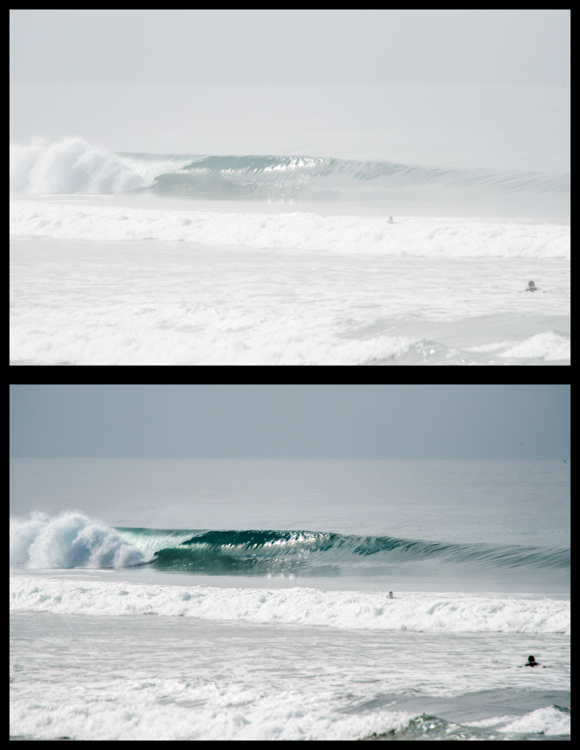
    Let’s look at this photo of a beautiful wave, shot early in the morning. It was shot at 200mm with a 2x teleconverter (an effective focal length of 400mm). Teleconverters increase focal length, but are notorious for eating light, and reducing contrast and sharpness.

    washed out image

    Although teleconverters can wreak havoc on your images, all is not lost.

    As you can see, the original shot is not very appealing. In an attempt to bring it back from the brink of unacceptability, I have made the following adjustments:

    Basics panel

    • Contrast increased (+)
    • Highlights decreased (-)
    • Shadows decreased (-)
    • Whites increased (+)
    • Blacks decreased (-)
    • Clarity increased (+)
    • Vibrance increased (+)
    • Saturation increased slightly *+)

    Tone Curve panel

    • Lights decreased
    • Darks decreased
    • Shadows increased

    The trick here is to go back and forth between the different sliders that control darks and lights. For example, I will adjust the Highlights and Whites sliders, go to the Tone Curve panel and adjust the Highlights and Lights, then return to the Highlights and Whites again to fine tune how I want that end of the spectrum to look.

    #2 Color or Tint

    In my opinion, this is one of the strongest arguments for shooting in RAW format. Shooting in RAW allows you way more control correcting White Balance in post-processing, opposed to other file formats – and incorrect White Balance is the primary cause of off-colored images, or ones with a color tint.

    If you haven’t developed an eye for identifying this problem, you might miss it. I see many really nice photos that have a slight tint, which is unintentional. The key is to look at areas of the image which are a neutral color, or white – this is where it is easiest to notice the off-color tint. Note that editing on a monitor which is not color calibrated may limit your ability to achieve correct White Balance.

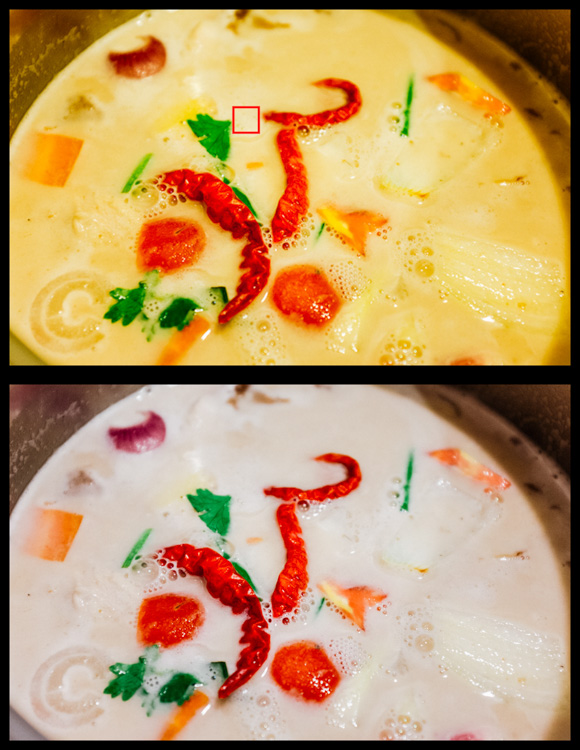
    incorrect white balance and tint

    Sometimes noticing if an image has incorrect White Balance, or a color tint, can be tricky. I used LR’s White Balance eye dropper tool where the red square is (top image) – it got pretty close, but still a bit too magenta.

    The first line of defence is to give LR’s Auto White Balance tool a shot. I find it to be somewhat inaccurate, but a good starting point nonetheless. Once activating the eye dropper tool, a pop-up window will show a magnified view to allow you to select pixels as close to a neutral color as possible.

    From this point, you can use the White Balance and Tint sliders to fine tune the image. If there are people in the photo, your goal should be making the skin tones look as natural, and pleasing as possible.

    #3 Too Much Variation in Contrast

    Being confronted with a drastic contrast range is one of the most common problems you are likely to face in your shooting. After all, this is why many photographers are equipped with a polarizing filter, and why new camera models strive for an expanded dynamic range.

    Luckily, you are not stuck with the image that you download onto your computer. If you are shooting in RAW there is a lot of information about details, color, etc., which you can exploit in post-processing.

    Let’s take a look at this photo I snapped from inside a bookstore. It was pretty dark inside with the midday sun shining outside the window. Sure, I could have shot bracketed photos to merge into an HDR (high dynamic range) image, used a flash to balance the dark interior with the lighter exterior, or used a polarizer to darken the window portion of the scene. But I only had my camera with one lens, just grabbing some snapshots while out and about for the afternoon, so I didn’t have the means.

    high contrast image

    The camera struggled with this high contrast scene, but a little work in LR breathed new life into it.

    So to what extent can this image be salvaged?

    As you can see, the camera actually captured a lot of information, and it was just a matter of telling LR what to do with it. Here is a list of changes made to this image to give you an idea of how to do this yourself:

    Basics panel

    • Contrast decreased slightly (-)
    • Highlights decreased (-)
    • Shadows increased (+)
    • Whites decreased (-)
    • Blacks decreased (-)
    • Clarity increased (+)
    • Vibrance increased slightly (+)
    • Saturation increased slightly (+)

    Tone Curve panel

    • Highlights decreased
    • Lights decreased
    • Darks increased
    • Shadows decreased

    Lastly, I used the Adjustment Brush to mask off the window portion and made these adjustments:

    • Exposure decreased (-)
    • Contrast increased (+)
    • Highlights increased (+)
    • Shadows decreased (-)
    • Clarity increased (+)

    Conclusion

    Of course, there are a host of other problems you can run into while out shooting, but these are a few of the most common you’re most likely to encounter. Don’t overlook the fact that you should try and get the best image possible while out in the field. Although editing software is very powerful, you will get best results when you don’t have to push the limitations of your editing software.

    Hopefully this article has given you some guidance on how to salvage images that you may once have considered lost. Show us some examples of photos that you have saved in the comments below.

    googletag.cmd.push(function() {
    tablet_slots.push( googletag.defineSlot( “/1005424/_dPSv4_tab-all-article-bottom_(300×250)”, [300, 250], “pb-ad-78623” ).addService( googletag.pubads() ) ); } );

    googletag.cmd.push(function() {
    mobile_slots.push( googletag.defineSlot( “/1005424/_dPSv4_mob-all-article-bottom_(300×250)”, [300, 250], “pb-ad-78158” ).addService( googletag.pubads() ) ); } );

    The post How to Identify Three Common Image Problems and Fix Them in Lightroom by Jeremie Schatz appeared first on Digital Photography School.


    Digital Photography School

  • Your Guide to Creating Unique Conceptual Photography

    What is conceptual photography? Have you heard about it, but not been able to work out what it is? Who are the artists doing it? How can you do it? If you have asked yourself any of these questions, then read on and see if they can be answered for you.

    Conceptual photography is a type of fine art photography. Like the latter, everyone you ask will give you a different definition. It is an art form that has been around for as long as people have been making art. It seems to be something that people have only started talking about in the last 10 years or so.

    leanne-cole-conceptual-photography-046

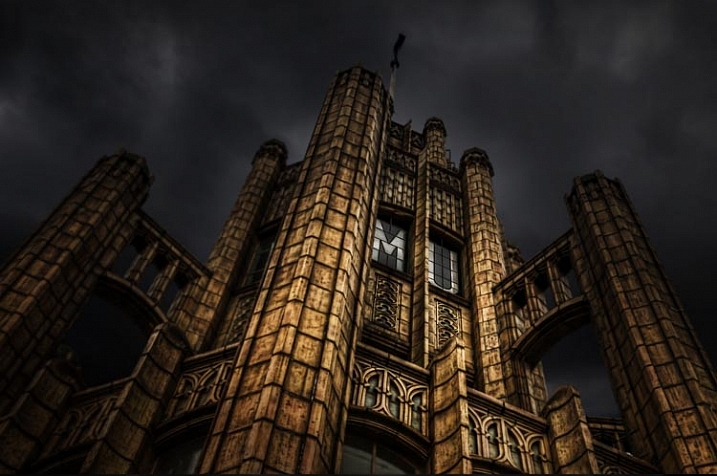
    The Tower of the Manchester Unity Building where the brief was to make it look like Batman lived there. So the sky was replaced and a lot of processing was done.

    What is Conceptual Photography?

    When I tell people about work that is conceptual the first thing many ask is, “What is it?”

    Conceptual photography is often very imaginative. It seems unreal. Often reality in the photos is distorted, and what you know as normal, is completely changed. Then there are also some people who are doing things that aren’t as imaginative. They are changing some things, or exaggerating reality to a lesser degree.

    Conceptual photography is about work that starts with a concept or an idea. In many instances, photography normally starts with an image or a place. You go out somewhere that you think will be interesting and take photos. Once you get home you put the photos on your computer, and for a lot of people, that is all besides some basic post-processing. There is nothing wrong with working that way, but conceptual photography starts out differently.

    In conceptual photography you start with an idea, or the concept, of what you want to do. At this stage you start working out what you want your final image to be about. You are working in the dark so to speak, as you won’t know the final result until you have processed it.

    leanne-cole-conceptual-photography-045

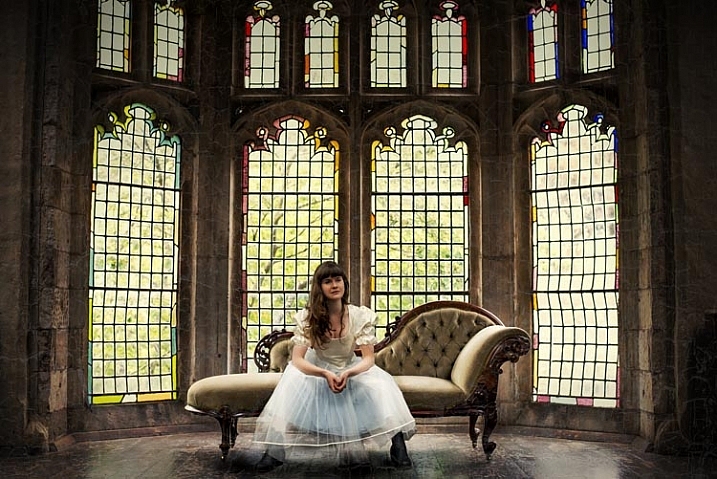
    A popular place in an artist retreat, but you can’t take photos with models. So this image was composited from the original, and one of the girl taken at a different time and place.

    Artists working conceptually

    Other artists (who aren’t photographers) often work this way. Sculptors have an idea of what they want to sculpt, but it isn’t until it is completed that they know if it will be any good. Many painters work the same way, especially abstract artists. The way they work can be fluid, but they have an idea of what they are trying to achieve. Again, it isn’t until the painting is finished, that the artist can judge whether it was successful.

    There is no reason why photographers cannot work the same way. Many photographers do, and if you like that kind of work, you can as well.

    It is about using your imagination, and seeing what you can envision. If you search Conceptual Photography in Google Images you will find many examples. There are some inspirational photos there as well. They are often clever, and usually highly processed. That does not mean you have to be really good at photo processing, but you do need to have a good imagination.

    Adobe Photoshop used to say, “If you can dream it you can create it with the software”. I don’t know how true that is, but you can do a lot in Photoshop, and if you can imagine it, then you should try to create it.

    leanne-cole-conceptual-photography-043

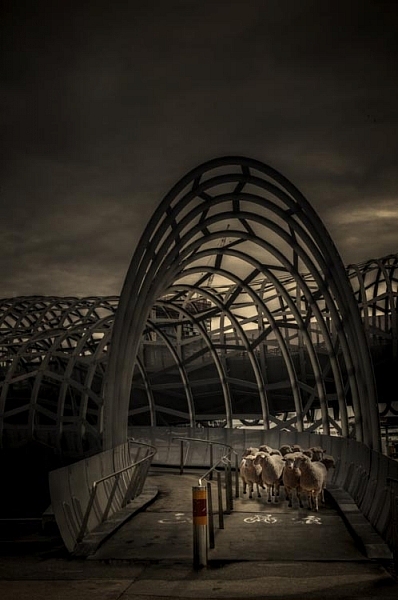
    Another composite of a popular walking bridge in the city and some sheep. The sheep were placed on the bridge in Photoshop.

    It’s all about imagination

    That is a big part of this type of photography. It is about imagination and ideas, planning and getting what you need to create the image, and finally the creation of the image.

    Most conceptual work you see is created around portraits. There are many photographers in the world who specialize in fine art portraiture. They would also be considered conceptual artists. You can’t take a person out and simply take their portrait, you need to plan the whole session. Long before you have your model, you need to have an idea of what you want to do; what costumes you may need, and where you want to take the photos. That is how it starts.

    leanne-cole-conceptual-photography-044

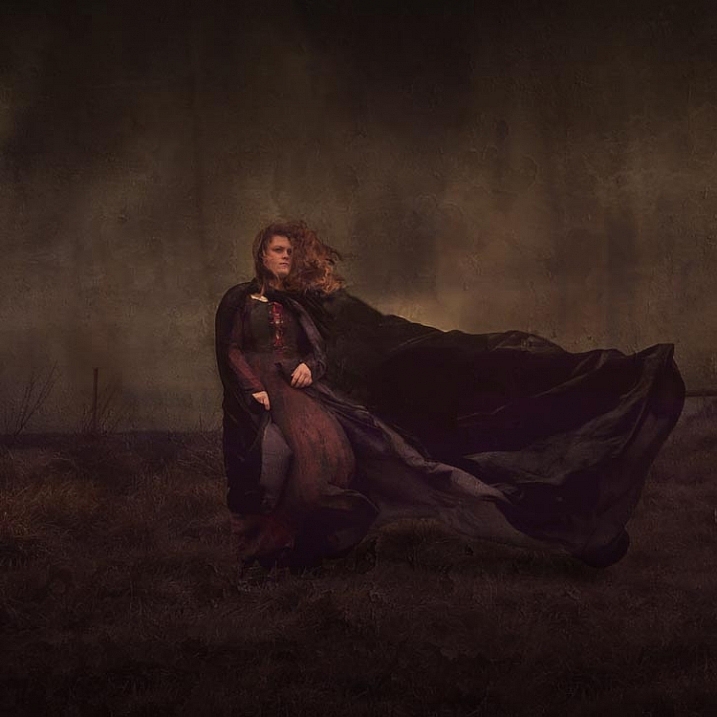
    Trying for a Wuthering Heights look. A hill was found on a windy day and the model put into a costume. The cloak was made to look larger as it blew in the wind.

    Not all conceptual work is portraiture though. There are many photographers working in landscape or architecture who are creating their own realities.

    You might want to put your cat on top of a large building, so it looks like King Kong. You may have seen images where there is a house floating in the air, or someone is put inside a glass jar. These all started with the artist thinking about “what if”.

    Some specific conceptual photographic artists

    There are some incredible conceptual photographers and artists who are working now.

    Rick Amor is an Australian painter. He often paints his environment around him, but not as we see it. He visits places and takes lots of photos. When he gets back to his studio, he goes through those photos to work out which ones he can paint. He will take a little from one image, and something from another, to create a new scene or a new reality. They aren’t straight copies, and he often distorts the sizes and views as well. A statue that is normally six feet tall might appear to be 30 feet tall in one his paintings.

    Brooke Shaden is a fine art photographer whose work also fits into the category of conceptual art. She does portrait style images, but they are all more than a portrait of a person sitting in front of the camera. Before she starts, she plans what she wants first. She works out: what the colour scheme will be, what props she will need, if any, and then the location. The model is also important, and has to be someone that will fit the mood of the image she wants to create. Finally, she finishes the image by using Photoshop to give it her unique look.

    Canadian Photographer Renee Robyn is also a conceptual artist. She does a lot of fantasy or ethereal images. Again, they would be images that start with an idea or concept. If you look at her website, you can see the before and after photos which makes it is clear that she works with a plan in mind. The models are photographed in a way so that they can then be put into other scenes on the computer.

    leanne-cole-conceptual-photography-048

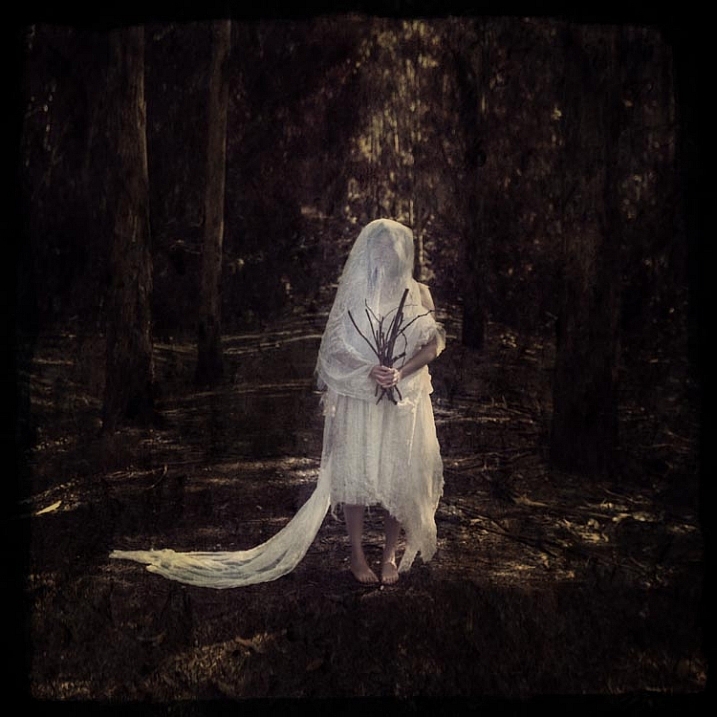
    The Woodland Bride – Started with the idea of a bride dressed in rags in the forest. The bouquet of sticks came later.

    Another artist that is gaining popularity for his incredible conceptual images, is Erik Johansson. He has an amazing ability to turn the world around him upside down. He manages to turn the ordinary into something extraordinary, to make you see the world in a new way. His imagination is amazing. The ideas he comes up really show how talented he is.

    All these artists work differently. You may identify with one of them. You may want to find your own conceptual artists that work in a way that you admire, who you can gain inspiration from. It is important to find other photographers that give you motivation, to work and try new things. You shouldn’t copy them, except to learn, but look at the work and see if you can find your own style.

    How can you do conceptual photography?

    You need to start thinking conceptually. If you want to create images like the ones mentioned and shown here, then you need to start using your imagination. Think about how you can twist the world around you, or finding some interesting things you can do with it.

    Think about how you are going to achieve the final result that you are after. Do you have to take specific photos for it? You need to make sure when you are taking the photos that everything will work together. It should look like it really is possible.

    For most images you have to know how to composite. How to take something from one scene, then place it into another. As you put everything together, you start to see whether or not it has worked.

    leanne-cole-conceptual-photography-047

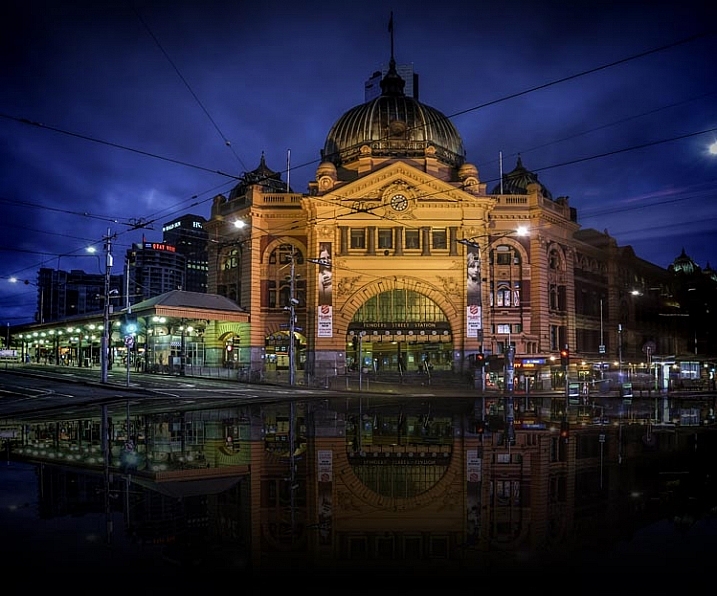
    Flinders Street in Melbourne Flooded. A process done on the computer to make a place look like water is everywhere.

    Working conceptually

    Making conceptual images can be a rewarding way of working. It can help you stand out from many other photographers. It is not easy to do, and patience and time are often needed to learn it. However, if you have the drive, then a whole new world could be there for you.

    Are you interested in learning more about how to do conceptual photography? What would you like to learn? Have you done any or have any favorite conceptual photographers you’d like to share? Please do so in the comments below.

    googletag.cmd.push(function() {
    tablet_slots.push( googletag.defineSlot( “/1005424/_dPSv4_tab-all-article-bottom_(300×250)”, [300, 250], “pb-ad-78623” ).addService( googletag.pubads() ) ); } );

    googletag.cmd.push(function() {
    mobile_slots.push( googletag.defineSlot( “/1005424/_dPSv4_mob-all-article-bottom_(300×250)”, [300, 250], “pb-ad-78158” ).addService( googletag.pubads() ) ); } );

    The post Your Guide to Creating Unique Conceptual Photography by Leanne Cole appeared first on Digital Photography School.

    Digital Photography School

  • Review of the Wacom Intuos Photo Pen and Touch Tablet

    Intuos Photo Creative Pen and Touch Tablet

    Intuos Photo Creative Pen and Touch Tablet

    In this article I’ll review the Wacom Intuos Photo Creative Tablet Small. Wacom brought out this model, and three other similar ones, back in September 2015. The only difference is they come bundled with different software. Otherwise the specs are the same.

    Can you benefit from using a tablet?

    The short answer to this question is, yes. Do you actually need one? Possibly not. But, if your workflow demands a lot of retouching to your images, then you will indeed benefit from using a tablet. The pen (stylus) essentially replaces your mouse, and allows for more precise actions where pinpoint accuracy, especially pressure sensitivity, are indispensable.

    I’ve being using a Wacom tablet for a number of years. Although, I will admit when I first got my Graphire4, I took it out of the box and thought, “Hmm that looks nice” and put it straight back into the box. Long story short, some time later, I was about to give it away when I decided I’ll give it another go. Initially, it did take a little bit of getting use to. Whereas now, I would find it difficult resorting back to a mouse for editing my images.

    The Graphire4 served me well even though it had only 512 levels of pressure sensitivity. So it was time for an upgrade.

    two-tablets-side-by-side

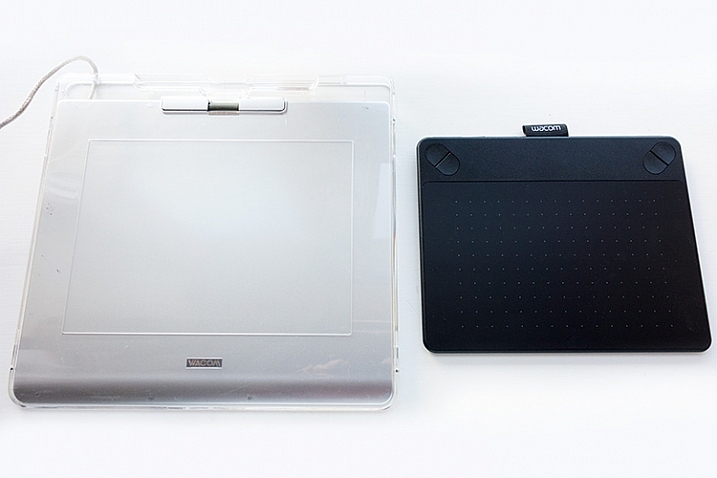
    The Graphire4 tablet on the left versus the new Intuos Photo Small on the right

    The new Intuos Photo has 1024 levels of pressure, which was immediately noticeable, and very responsive. It has four Express Keys (the Graphire4 had only two) which you can configure to whatever shortcuts you choose. There also two buttons on the stylus, which offer the same customization.

    ExpressKey

    There are 4 ExpressKeys on this tablet, two on the left and two on the right, which can be customized for shortcuts.

    I didn’t notice any lag time when moving the stylus across the surface, and the pen feels so intuitive, just like a real pen. It’s is very responsive and doesn’t have that scratchy feel when using broad brush strokes, you might expect because the surface is matte.

    Features and design

    This tablet is small, slim, and lightweight, which makes it very portable. Although it is light, it does feel solid.

    slim-tablet

    I’m holding the Intuos Photo between my fingers to illustrate how slim it is.

    It has multi-touch gestures, which operate in the same manner as a trackpad. I wouldn’t use this feature, as I use my keyboard for shortcuts, but it’s cool nonetheless. There is a switch at the back to turn this feature off. My hand would activate the zoom feature, which was distracting.

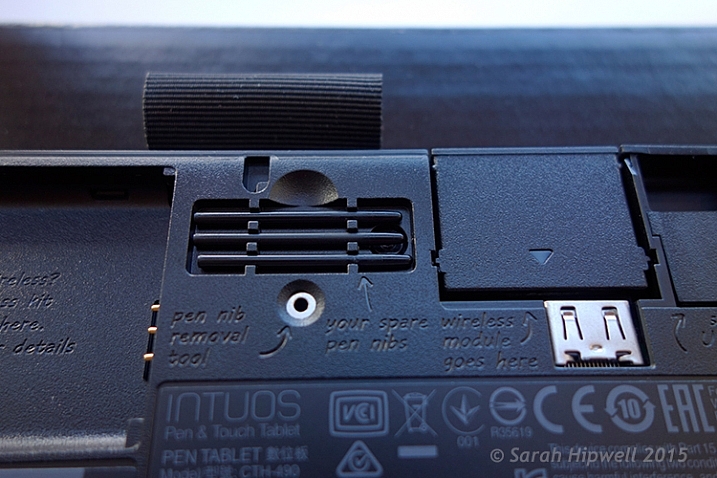
    If you turn the tablet upside down and slip this portion of the base off, you will find slots for the Wireless bits to go. You have to purchase the Wireless Accessory Kit separately. You get four spare pen nibs tucked away neatly, saved for when you need them.

    back-off

    Back of the Intuos Photo where the Wireless kit goes (sold separately).

    I did find the engraved instructions neat. It did appeal to my sense of aesthetics!

    stylus-spare-nibs

    Close up to show the four spare nibs for the pen (stylus). Notice the neat engraved instructions.

    Size can matter!

    Before I purchased the Intuos Photo Small, I wasn’t sure whether to choose this size (6 x 3.7 inches) or go for the medium size. The medium is called the Wacom Intuos Art Pen and Touch Tablet Medium (8.5 x 5.3 inch active area). The larger model retails at $ 199.95.

    The price wasn’t just the only determining factor for me. I have a 24” monitor so I wasn’t sure if this size tablet would match the monitor? I’ve found no issue, the size is good for me. However, if I had a bigger monitor, I would probably have gone with the medium tablet. Another factor to consider is how much space do you have on your desk? The Intuos Photo is small and compact.

    What software is included?

    • Macphun Creative Kit
    • Corel AfterShot Pro (Mac)

    In order to get the software, a download key is printed on the inside of the box. I have downloaded the Macphun Creative Kit (Tonality Pro, Intensify Pro, Snapheal Pro, Noiseless Pro) but that’s as far as I got. I haven’t tested out the software yet.

    My verdict

    Wacom tablets are a leading brand. Their Intuos Pro range are expensive. However, the Pro range offer 2048 levels of pen pressure sensitivity, wireless connectivity, and other features. So this makes the Intuos Photo Small a really good deal for the price. I find the pressure sensitivity levels suffice for my workflow.

    Another plus, if you suffer from RSI (Repetitive Stress Injury) issues, especially if you spend a considerable amount of time in front of your computer editing your images, I certainly find holding a pen preferable to gripping a mouse for any length of time.

    To sum up, if you have a (much) older Wacom tablet, I would recommend the Intuos Photo as an upgrade. If you haven’t used a tablet before and are thinking of buying one. This model is a good place to start and it is competitively priced.

    Cons (or maybe quirks)

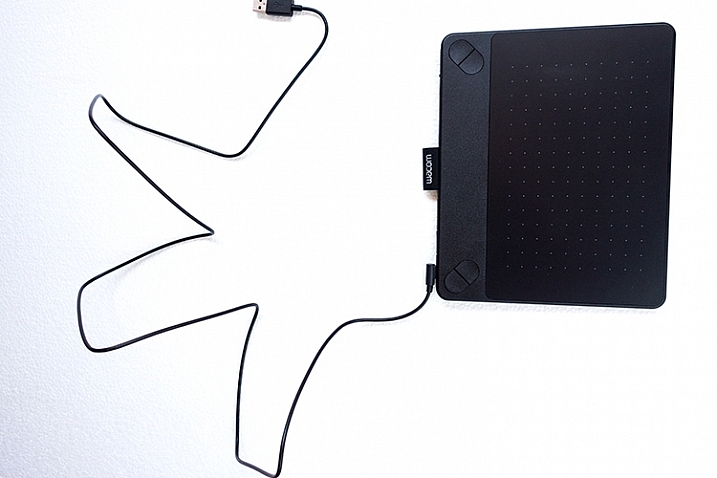
    This is more of an observation rather than a gripe. The USB cable supplied is 148cm (58 inches) in length! Not sure of the rationale behind this…maybe a ploy to get you to buy the Wireless Accessory Kit, which is sold separately.

    USB-cable-very-long

    USB cable measuring 148cm(58 inches) in length.

    The stylus is much lighter and slimmer compared to the chunkier and heavier model I was more use to. It does feel a little cheap.

    I’ve found the pen inclined to roll between my thumb and fingers, so that at times, I had to keep rolling the pen around again to where the two buttons are at the side to access them. This was getting quite irritating. I feel a rubberised moulding would help in preventing the pen from rolling around. Similar to the rubber grip found on ordinary pens. So I came up with my own inexpensive solution to modify the pen.

    DIY hack for the stylus

    I bought these pen grips at a local stationary shop. I cut one in half and rolled it up until it reached just below the two buttons. This way, I can grip the pen better, and roll it more easily, so that the two buttons rest next to my thumb for easy access. The four in a pack came to less than $ 2USD.

    pen-grips

    Ordinary biro pen grips that are sold in stationary shops.

    DIY stylus holder hack

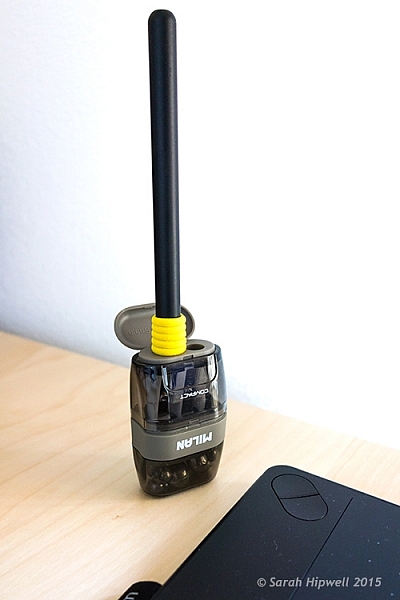
    The Intuos Photo has a fabric sleeve to house the pen, which I presume is for when you’re transporting this tablet in your bag. The sleeve is tight fitting, so this is not practical for everyday use while sitting working at your desk. The tablet doesn’t come with a pen holder.

    So, while I was in the same stationary shop to get my pen grips, I spied this pencil sharpener with eraser holder and thought that would make a great stylus holder. It was a perfect fit (see photo below). Again, this item cost less than $ 2! Just to add a little weight stability, I put fishing lead balls in the bottom part, only because I had them anyway.

    Stylus-hack-holder

    DIY stylus holder hack from a pencil sharpener with an ordinary pen grip on the stylus.

    Do you use a tablet or a mouse? Which is your preference for editing your photos? Share in the comments below.

    googletag.cmd.push(function() {
    tablet_slots.push( googletag.defineSlot( “/1005424/_dPSv4_tab-all-article-bottom_(300×250)”, [300, 250], “pb-ad-78623” ).addService( googletag.pubads() ) ); } );

    googletag.cmd.push(function() {
    mobile_slots.push( googletag.defineSlot( “/1005424/_dPSv4_mob-all-article-bottom_(300×250)”, [300, 250], “pb-ad-78158” ).addService( googletag.pubads() ) ); } );

    The post Review of the Wacom Intuos Photo Pen and Touch Tablet by Sarah Hipwell appeared first on Digital Photography School.

    Digital Photography School

  • Weekly Photography Challenge – Kids

    Kids! Gotta love them. I don’t have any myself but I enjoy being around them, and taking in their energy and freedom they exhibit. They say what’s on their mind and aren’t afraid of what other people think when they dance, sing, do art, etc. We adults can learn a lot from them.

    Jessica Lucia

    By Jessica Lucia

    Weekly Photography Challenge – Kids

    So how can we capture the essence of what being a kid is all about in our photographs? These recent dPS articles may help you:

    • 5 Tips for Photographing Your Own Children Stress-Free
    • Tried and Tested Tips for Photographing Kids
    • 4 Tips for Connecting and Photographing Kids More Naturally
    • 10 Tips for Taking Stunning Winter Portraits of Your Kids

    Now go photograph some kids. Your own, or borrow the neighbor’s kids.

    Note: be very conscious of photographing kids in a public place, especially if you are male. It could be seen as creepy and you could get in big trouble. Make sure you have a parent’s approval first if you do so. 

    Motiqua

    By motiqua

    Paolo Marconi

    By Paolo Marconi

    Rafal Zych

    By Rafal Zych

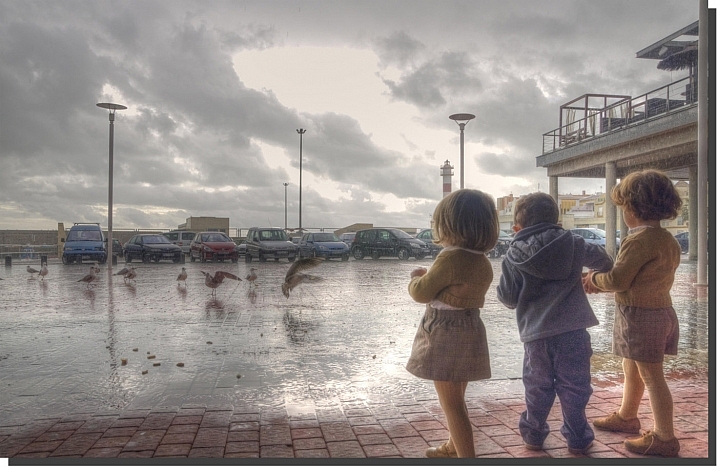
    Susana Fernandez

    By Susana Fernandez

    Toni Verdú Carbó

    By Toni Verdú Carbó

    Rakesh JV

    By Rakesh JV

    Share your images below:

    Simply upload your shot into the comment field (look for the little camera icon in the Disqus comments section) and they’ll get embedded for us all to see or if you’d prefer upload them to your favourite photo sharing site and leave the link to them. Show me your best images in this week’s challenge. Sometimes it takes a while for an image to appear so be patient and try not to post the same image twice.

    Fergus Macdonald

    By Fergus Macdonald

    Tony Alter

    By Tony Alter

    Clappstar

    By clappstar

    googletag.cmd.push(function() {
    tablet_slots.push( googletag.defineSlot( “/1005424/_dPSv4_tab-all-article-bottom_(300×250)”, [300, 250], “pb-ad-78623” ).addService( googletag.pubads() ) ); } );

    googletag.cmd.push(function() {
    mobile_slots.push( googletag.defineSlot( “/1005424/_dPSv4_mob-all-article-bottom_(300×250)”, [300, 250], “pb-ad-78158” ).addService( googletag.pubads() ) ); } );

    The post Weekly Photography Challenge – Kids by Darlene Hildebrandt appeared first on Digital Photography School.

    Digital Photography School

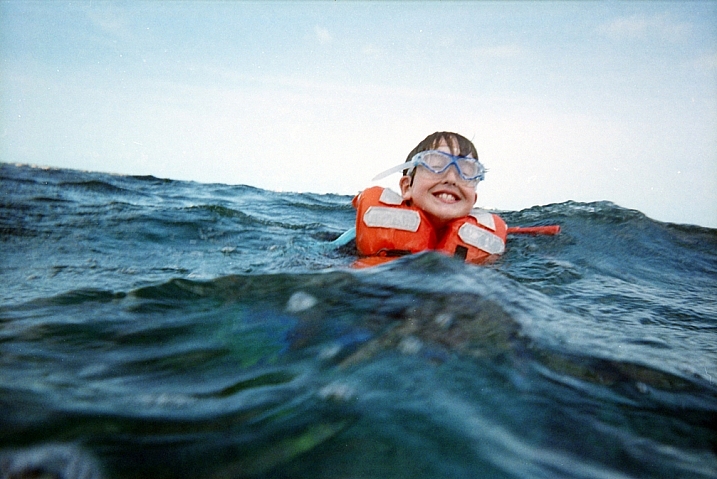
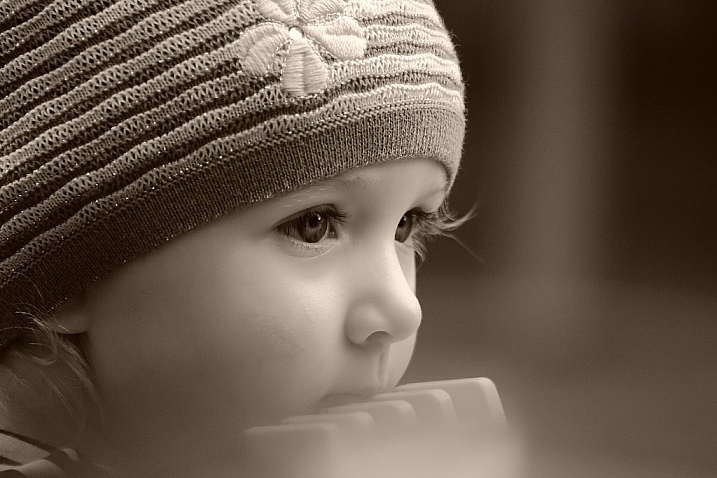
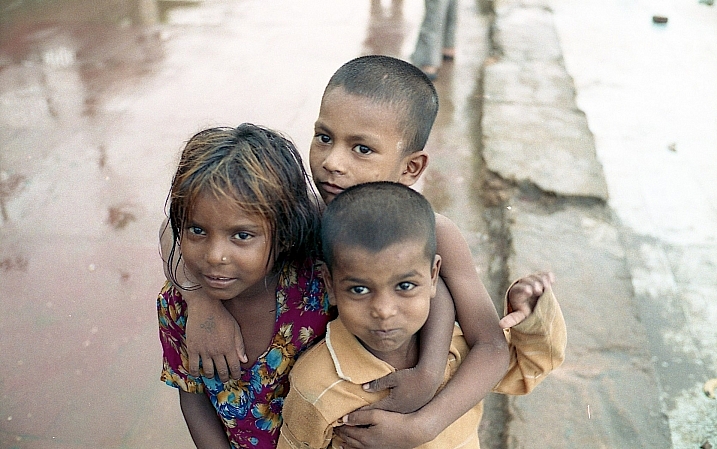
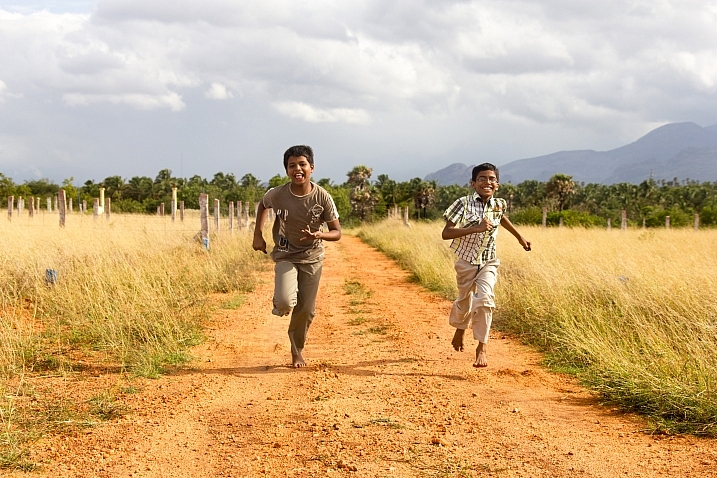
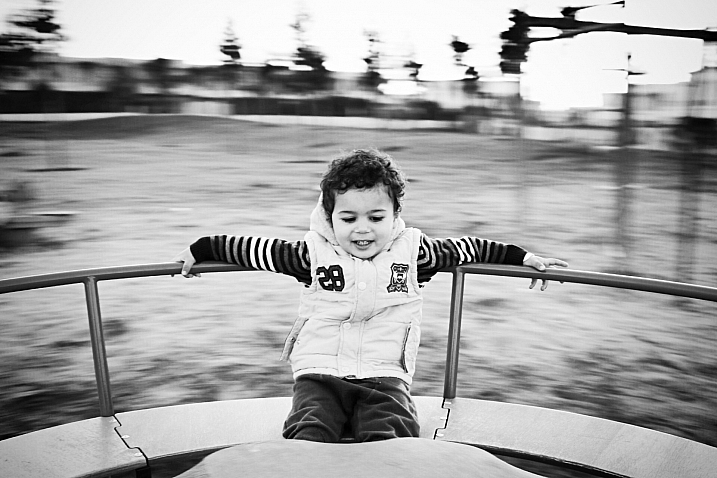
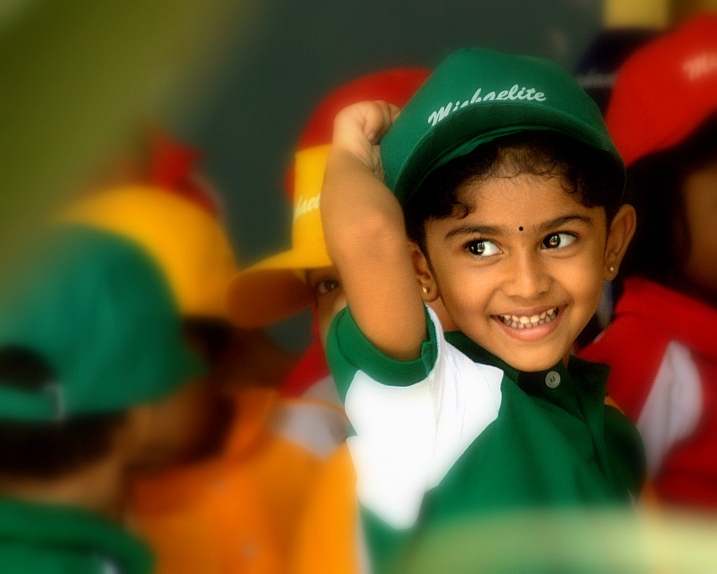
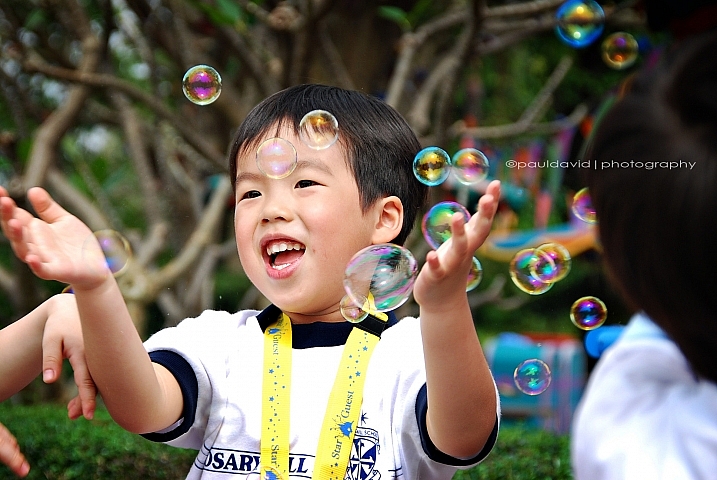
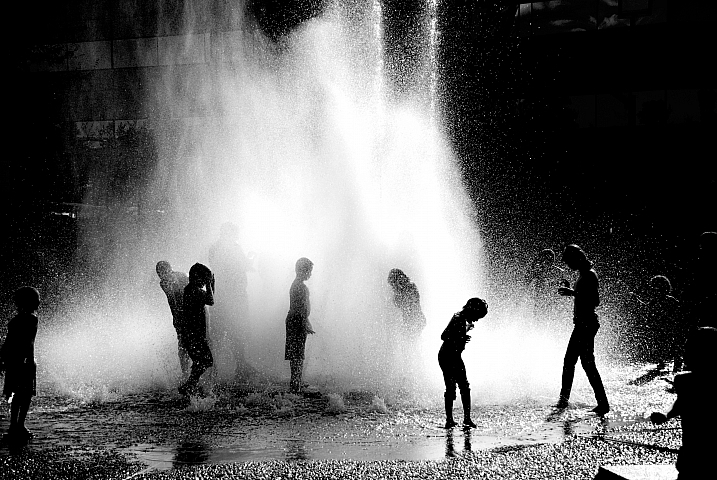
  • 29 Unencumbered Images of Kids Being Kids

    Kids have a natural free spirit about them. They don’t sensor themselves and they do what they want, how they want, when they want to – usually.

    Let’s see some images (you’ll notice that a few of these are my own images) that capture this essence of what it is to be a kid:

    Benurs - Learning And Learning...

    By Benurs – Learning and learning…

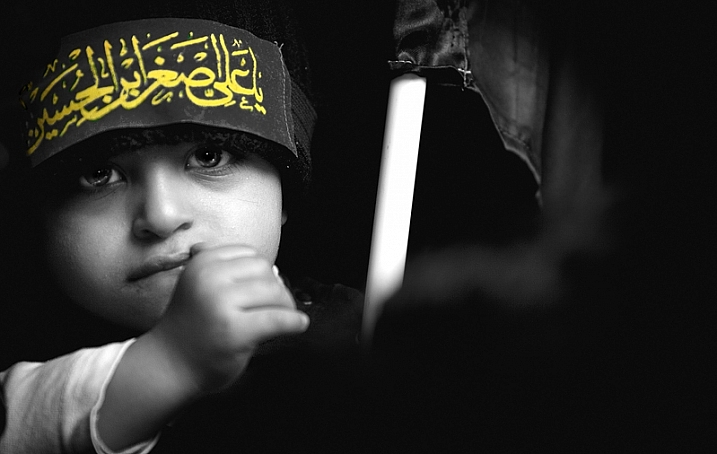
    Maitham Rushaidan

    By Maitham Rushaidan

    Adoephoto

    By adoephoto

    United Nations Photo

    By United Nations Photo

    Marcin Moga

    By Marcin Moga

    Attila Siha

    By Attila Siha

    Brighter Than Sunshine

    By brighter than sunshine

    Premnath Thirumalaisamy

    By Premnath Thirumalaisamy

    ThomasLife

    By ThomasLife

    Robbert Van Der Steeg

    By Robbert van der Steeg

    Donnie Ray Jones

    By Donnie Ray Jones

    Darlene Hildebrandt

    By Darlene Hildebrandt

    Darlene Hildebrandt

    By Darlene Hildebrandt

    Darlene Hildebrandt

    By Darlene Hildebrandt

    Steve Evans

    By Steve Evans

    Steve Evans

    By Steve Evans

    Darlene Hildebrandt

    By Darlene Hildebrandt

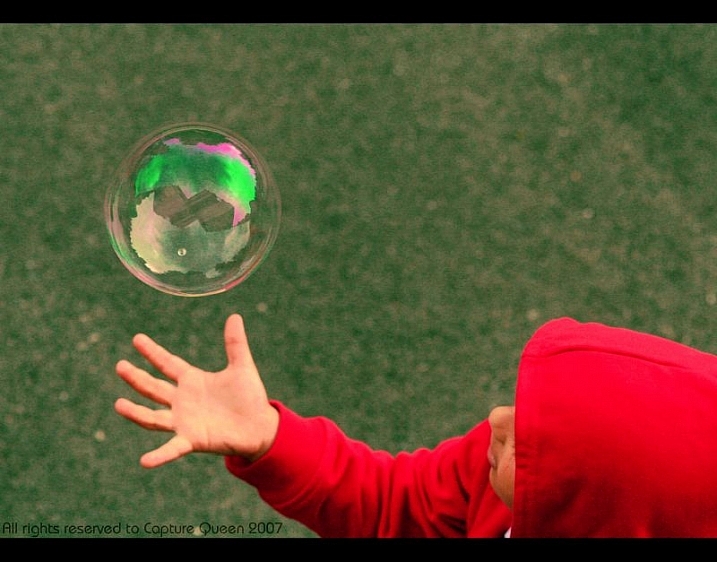
    Capture Queen

    By Capture Queen

    ZOBEL *

    By ZOBEL *

    Kevin Conor Keller

    By Kevin Conor Keller

    Darlene Hildebrandt

    By Darlene Hildebrandt

    Darlene Hildebrandt

    By Darlene Hildebrandt

    Darlene Hildebrandt

    By Darlene Hildebrandt

    Amina Tagemouati

    By Amina Tagemouati

    Ilavanji Ilavanji

    By ilavanji ilavanji

    Paul David

    By Paul David

    Brittany Randolph

    By Brittany Randolph

    Peter Roome

    By Peter Roome

    David Guyler

    By David Guyler

    googletag.cmd.push(function() {
    tablet_slots.push( googletag.defineSlot( “/1005424/_dPSv4_tab-all-article-bottom_(300×250)”, [300, 250], “pb-ad-78623” ).addService( googletag.pubads() ) ); } );

    googletag.cmd.push(function() {
    mobile_slots.push( googletag.defineSlot( “/1005424/_dPSv4_mob-all-article-bottom_(300×250)”, [300, 250], “pb-ad-78158” ).addService( googletag.pubads() ) ); } );

    The post 29 Unencumbered Images of Kids Being Kids by Darlene Hildebrandt appeared first on Digital Photography School.


    Digital Photography School

  • Create Your Own Watermark using a Custom Shape in Photoshop

    Transparent-watermark

    Big transparent type copyright watermark that you would use send to clients for proofing.

    I know there are many ways of creating a watermark. Using the Watermark Editor in Lightroom for example allows you to add your own text or graphic to your images. In general there is a lot of debate whether or not to add a watermark to images.

    This article isn’t going to discuss the pros and cons of watermarking your images. Instead, I will demonstrate a step-by-step tutorial using the Custom Tool in Photoshop.

    Whether you upload your images to the various social media platforms, or you want to send a client a high resolution image for proofing. This easy tutorial will show you how to create your own watermark using the custom tool in Photoshop.

    For a while, my method was opening an image file where I had my own custom copyright information on a text layer. So that I could easily drag and drop this text layer onto a new image. This made more sense and took less time to add a watermark image rather than creating it every time. That is until one day, I couldn’t find the file!

    Here are my four easy to follow steps to creating your own custom watermark using the Custom Tool in Photoshop. I prefer to use a custom shape over a custom brush. Shapes are vectors which means they scale up or down without losing quality.

    Step 1 – Create a new document

    Open Photoshop and create a new document. Make it 1000 pixels wide, by 300 pixels high.

    Step 2 – Add text

    Press the letter D on your keyboard, to make sure your foreground color is black. Choose whatever font you like, then press T to select the type tool. Hold down ALT key on a Mac and press G (Alt+0169 on a PC). This brings up the copyright symbol, add a space and type your name and year.

    Alt+G-type-your-name-and-year

    Holding down the ALT key on a Mac and press G brings up the copyright symbol (Alt+0169 on a PC).

    Step 3 – Convert the layer to a shape

    Go over to the layers panel. Right click on the text layer and go down to Convert to Shape.

    Convert-text-layer-to-shape

    When you have typed your watermark. Right click on the layer and select Convert to Shape.

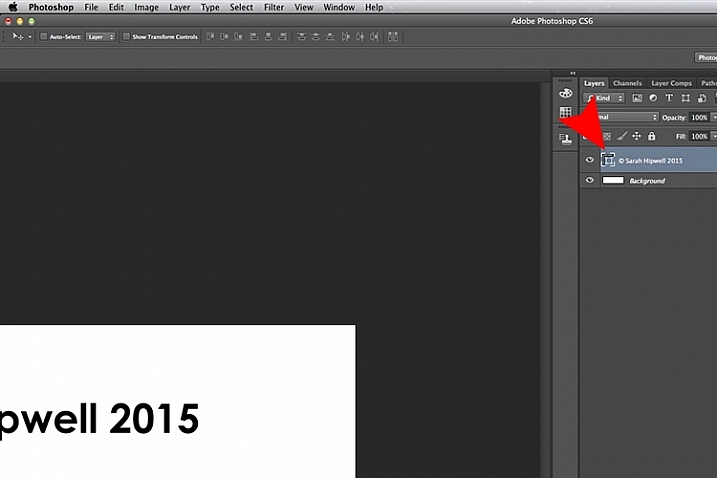
    This icon appears in the thumbnail to show that the layer is now a shape layer.

    This-icon-shows-the-layer-is-a-shape

    This icon in the thumbnail layer tells you that this is now a shape(vector) layer.

    Step 4 – Save as a custom shape

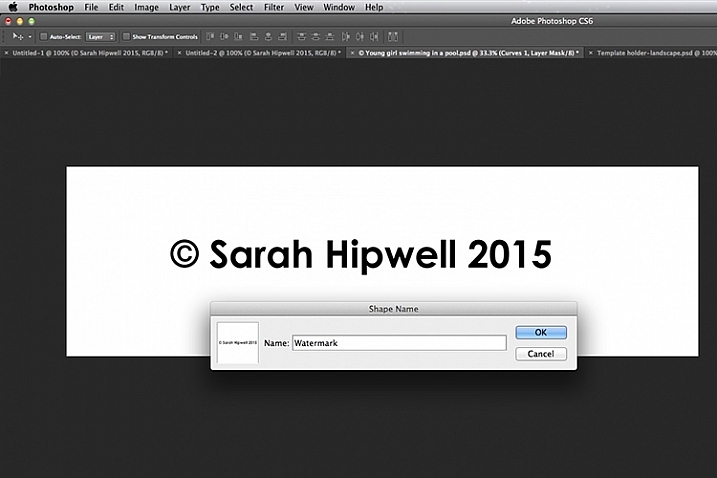
    Go up to Edit menu and select Define Custom Shape. A Shape Name dialog box appears – type in Watermark and click OK. This now adds your type as a custom option in your Shape Presets Library.

    Define-custom-shape-under-edit

    This is how you save your watermark custom shape in the presets library to use again and again.

    Shape-name-dialog-box

    Give your watermark a name so that you can find it easily. Plus you may decide to have a few.

    That’s it. It took just four steps to create your own custom copyright watermark. Let me show now how to access, and add it to your images.

    Apply your watermark to images for online viewing

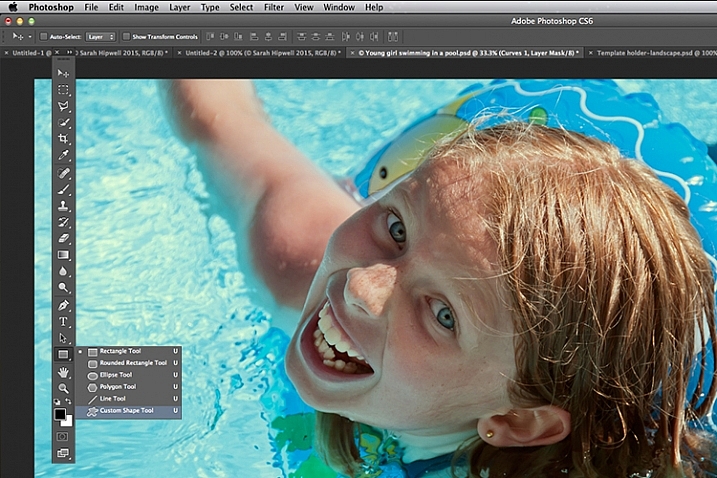
    Open an image that you want to share on Facebook, Flickr, etc. Create a new layer in the Layers Panel. Choose the Custom Shape tool in the toolbar (press Shift+U)

    Custom-shape-tool-highlighted-in-toolbar

    This is where you find the Custom Shape Tool in the Toolbar.

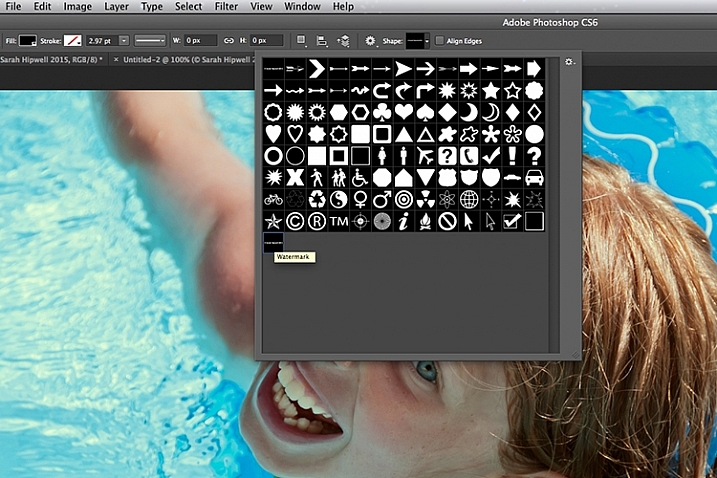
    Go up to the Options Bar and click on the thumbnail next to the word Shape. This brings up the Shape Presets Library dialog box. At the very bottom, you will find the shape called Watermark.

    Watermark-shape-at-the-bottom-in-presets-library

    Custom shapes will always appear at the bottom in the presets library.

    Now press and hold the Shift key, click and drag the watermark shape across your image. The Shift key ensures the shape remains in proportion. Don’t worry about the size just yet. Place it in position – in this case, I placed the watermark bottom right.

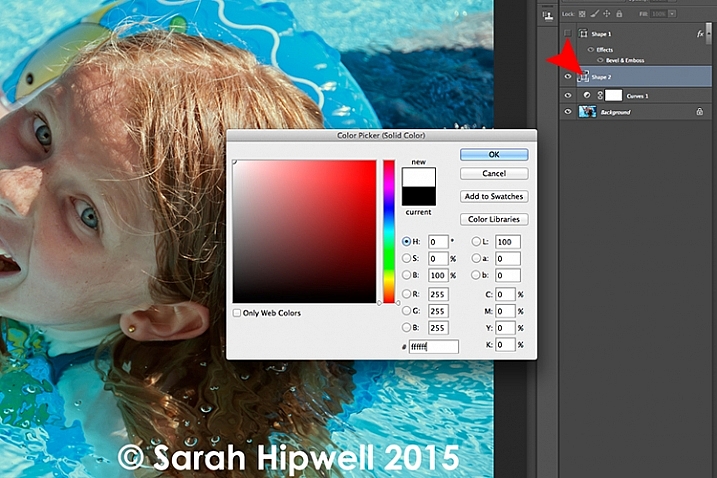
    Now as the foreground color was set to black, I want to change the color to white. Go up to the Layers Panel and click on the Layer thumbnail and the color picker dialog box appears. You can choose whatever color you want here.

    Changing-color-of-watermark-to-white

    You can customise your watermark shape with any colour or style effect.

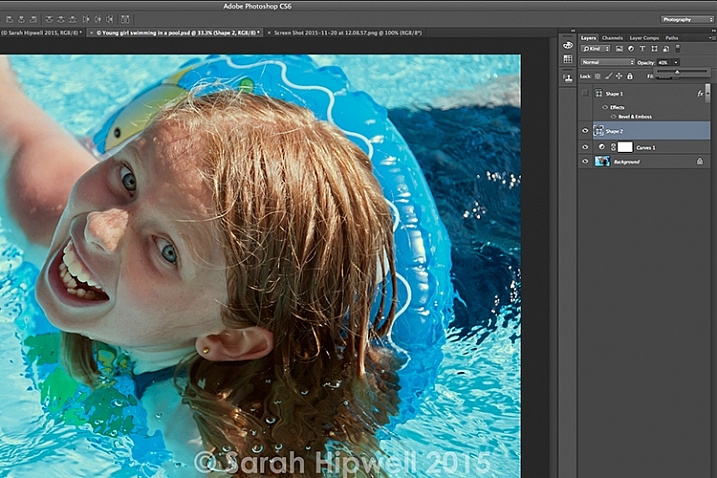
    Go back up to the Layers Panel and reduce the opacity to your desired setting. I chose 40%.

    Opacity-reduced-to-40-per-cent

    Reducing the opacity allows for your watermark to be more discreet.

    I now want to reduce the size of the watermark. Go up to the Edit menu and choose Free Transform Path (Cmd+T on a Mac). Holding down the Shift and Alt keys, drag any of the corners of the transform handles in towards the centre. This reduces the size while keeping the aspect in proportion. Press Enter or the Commit Transform button up in the Options Bar. Go up to File and Save for the Web.

    Apply to high res images for proofing

    Okay, so let’s say you want to send a higher resolution image to a client. Open up the image. Click on the Custom Shape Tool (Shift+U). The watermark shape is already selected, so hold the Shift key and click and drag right across the image. Leave the color as it is.

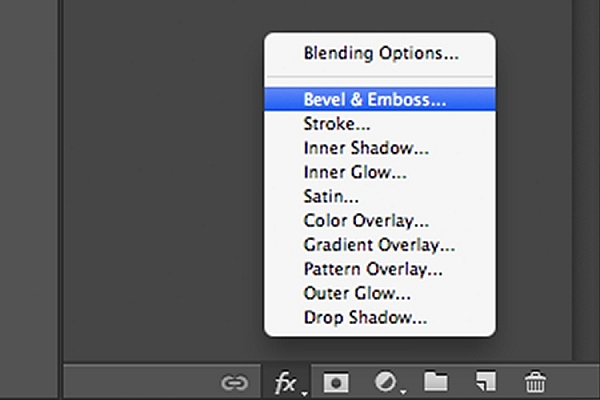
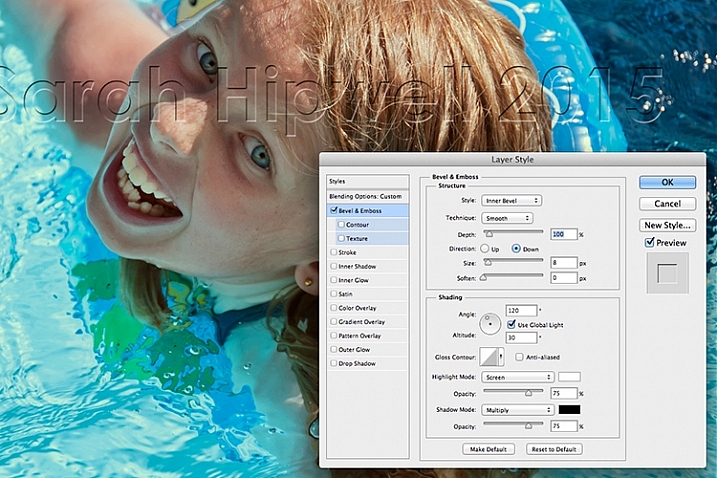
    This watermark is going to be transparent. Click on the Add a Layer Style icon at the bottom of the Layers Panel and select Bevel and Emboss. The Layer Style dialog box appears. Increase the size to 8 pixels and change the direction to down.

    Bevel-and-Emboss-layer-style

    Layer styles can be found by clicking on this icon at the bottom of the layers Panel. Alternatively, go up to Layer menu and choose Layer Style.

    Bevel-and-Emboss

    The Bevel and Emboss is a good effect to add to your watermark if you want to make more transparent, while still protecting your image.

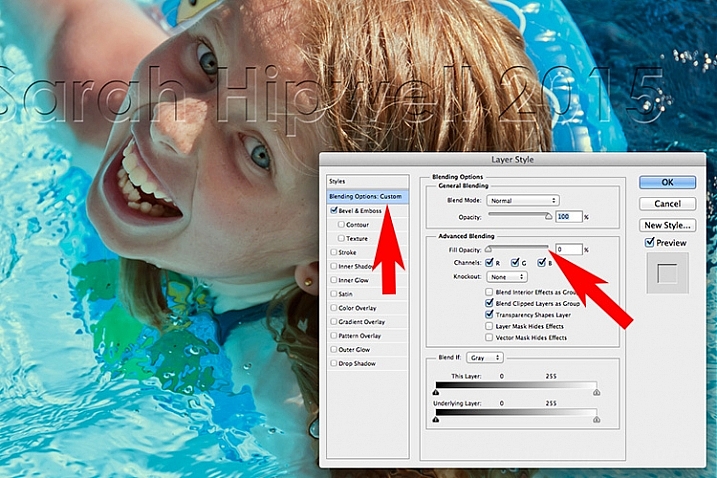
    Next go over to the left and click on the Blending Options: Custom, which is directly above the Bevel and Emboss. Under Advance Blending bring the Fill Opacity slider down to zero and click OK. Go back up to Opacity in the Layers Panel and reduce to 68%.

    Blending-Options-Custom-2

    Reducing the Fill Opacity hides the colour and just leaves the effect.

    Tip:

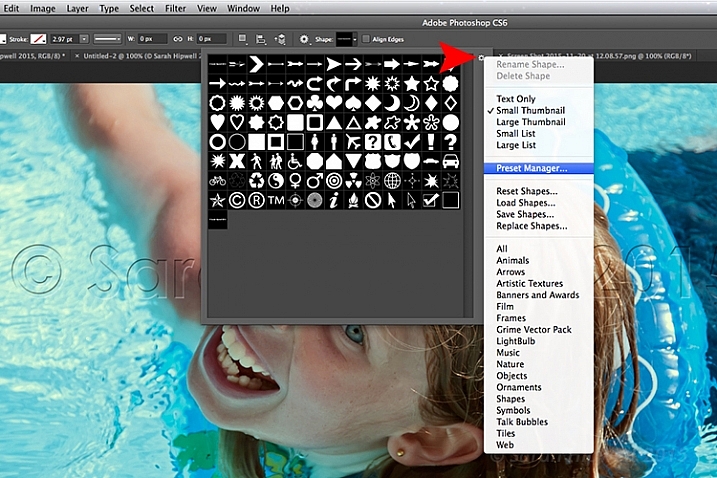
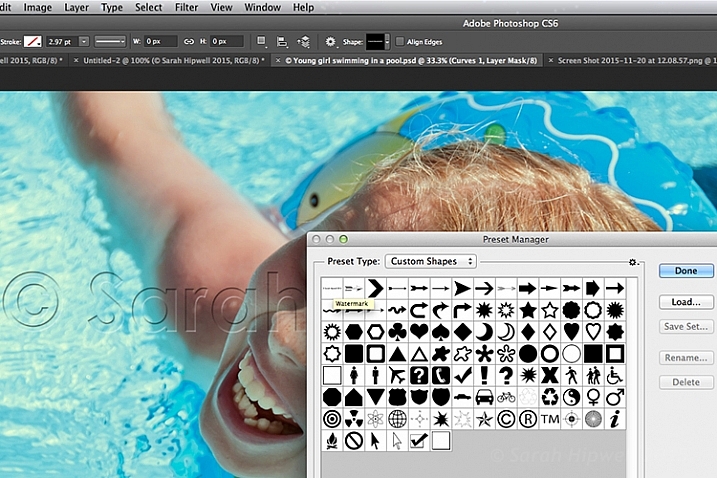
    To place your Custom Watermark Shape at the top in the Presets Library, click on the thumbnail right of the word Shape in the Options Bar. The Shape Presets Library dialog box appears. Click on the gear icon and select Preset Manager, the Preset Manager dialog box appears with all the shapes. The Watermark shape is the very last one, click and drag it up to the top and click the Done button.

    Location-of-Presets-Manager

    By clicking on the gear icon, the pop-out menu where the Preset Manger is located appears.

    Moving-watermark-shape-to-top-Presets-Manager

    Here in the Preset Manager, you can rearrange the shapes inside of the dialog box. Just click on any shape and drag it where you want it. I moved the watermark shape to the top for easy access.

    Do you use watermarks on your images? Why or why not?

    What techniques do you use? Please share in the comments below.

    googletag.cmd.push(function() {
    tablet_slots.push( googletag.defineSlot( “/1005424/_dPSv4_tab-all-article-bottom_(300×250)”, [300, 250], “pb-ad-78623” ).addService( googletag.pubads() ) ); } );

    googletag.cmd.push(function() {
    mobile_slots.push( googletag.defineSlot( “/1005424/_dPSv4_mob-all-article-bottom_(300×250)”, [300, 250], “pb-ad-78158” ).addService( googletag.pubads() ) ); } );

    The post Create Your Own Watermark using a Custom Shape in Photoshop by Sarah Hipwell appeared first on Digital Photography School.

    Digital Photography School

  • 10 Tips for Taking Stunning Winter Portraits of Your Kids

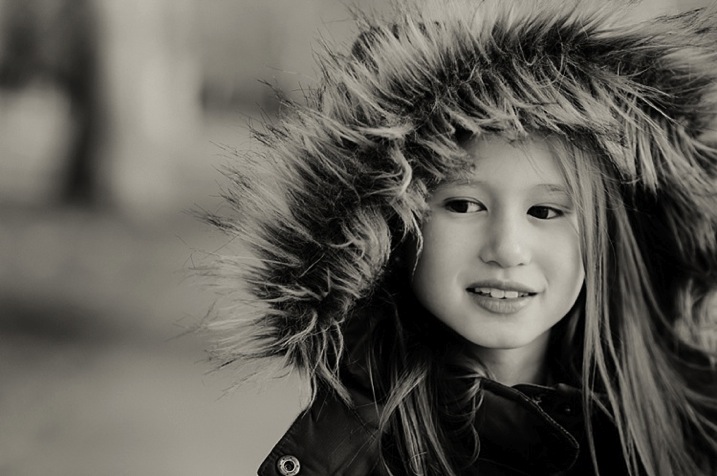
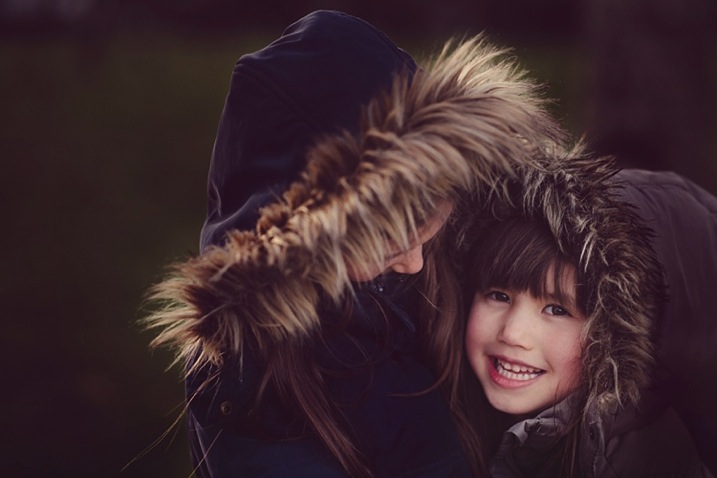
    Just because it’s winter doesn’t mean we can only shoot indoors. It may be cold (and rainy if you’re in London) most days, but when the winter sun shows its face, it fills the earth with a beautiful warm glow, especially late in the day. This bring us to what is known as the golden hour – typically about an hour before sunset. The further you are from the equator, the more time you would need, in my case about 1 – 1.5 hours, before sunset.

    Winter portrait1

    Here are my 10 top tips on how to get stunning winter portraits of your own kids:

    #1 Choose the right day and time

    Choose a sunny day and plan to get to your shooting location a good hour or so before sunset.

    #2 Dress them warmly and make it fun

    Wrap your children up nice and toasty so they won’t complain. Tell them you are taking them out for one hour to the park or the playground (or your chosen location) but that you would like to take a few photos of them before you get to the actual promised site. The easiest for us was the playground, as we have to walk about 10 minutes from the entrance to the park to get to there. It is a good idea to choose a halfway point to stop.

    Winter portrait3

    #3 Have warm beverages during or after the session

    Either bring a snack or warm drinks in a thermos (keep it light and simple though), promise to take them for a nice warm drink in a nearby cafe after your little trip to the playground, or make them hot chocolates when you get home (whatever works for you).

    #4 Find the good light and start shooting

    Halfway to the playground, your kids would already have been having fun running and chasing each other. Remind them of the photos you want to take, and show them the light is so beautiful and perfect. Ask for their suggestions where you could stop and take some nice picture. Make sure there is light coming from one side, but that they are fully in the shade of a tree (open shade) to avoid hotspots and mottled faces.

    Winter portrait2

    #5 Be fast

    Keep it quick! Kids get bored if you take too long so just aim for a few portraits. Ask them to stand, cuddle and tickle, or make each other laugh, swap places, do their own poses and click away like nobody’s business.

    Techie tips: If shooting in semi-automatic mode, choose a wide aperture or set it to Aperture Priority (and choose a large aperture, small f-number) so you get the blurry background effect. Always focus on the child’s eyes if possible.

    Winter portrait5

    #6 Use backlight to your advantage

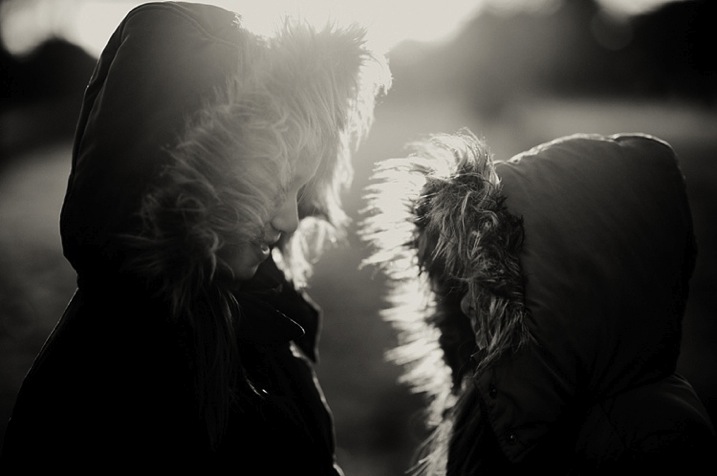
    Shoot with the kids backlit. The best time to do this is during the golden hour. The sun is low, the sky is a reddish blue and the light is softer, more diffused, and indirect.

    Shooting backlit is really quite a difficult technique which requires some mastering. This is when the sun or light source is in front of your camera, and behind your subject. The late sun gives stunning soft light, that illuminates your child’s hair or clothing like it has just been kissed by the sun.

    Winter portrait4

    You would also need either a really wide aperture, a flash, or a reflector to bring light back into your child’s face. A reflector can be a large white/silver/gold sheet that you angle towards their face, to bounce the light back into it. Or, you can choose a location with a natural reflector such as a white, or light coloured wall, facing the sunset and position your child in front of it, at an angle, so that part of their face gets the reflected light. I suggest a wide aperture for portraits as that helps give a nice glow to the skin, spot metered, and focused on the eyes.

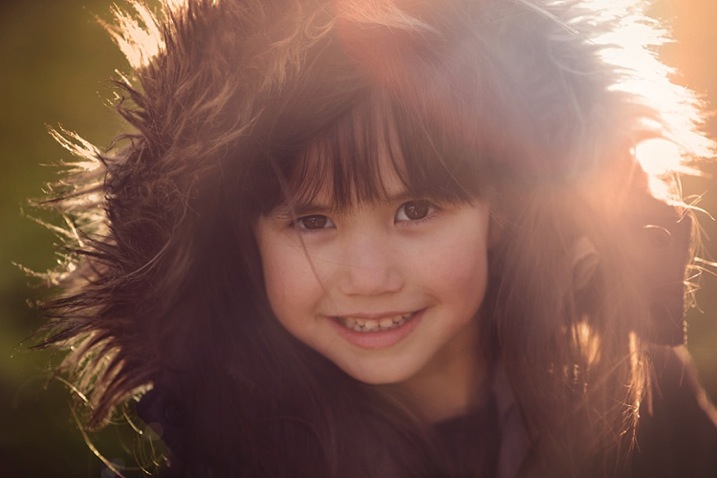
    #7 Go for lens flare

    This is really quite difficult as you don’t want to be looking straight at the sun. When you see the sun’s rays streaming through the viewfinder of your camera, that’s a sure sign that you are capturing flare. Flare floods your camera with light and everything else becomes a muddy, hazy silhouette. So try to get only a very small bit of flare right at the top or side of the viewfinder, and you will still get some good details, rather than a completely hazy image, devoid of any definition or detail.

    Winter portrait6

    #8 Embrace the imperfections

    From personal experience, my imperfections, mistakes, and lack of skills fuel creativity. So don’t be afraid to make mistakes and have imperfections; they are a blessing. Use them and learn from them.

    Winter portrait7

    #9 Capture some scene details after the portraits are done

    When the portraits are done, capture some contextual details such as the sky, trees, plants, grass, flowers, etc. Years down the line, when you look back at these photographs, details will help you remember the mood, the time, and the emotions of that day. Now that there’s no need to rush and the kids are playing, take your time and choose which details grab you, and take your breath away.

    Techie tips: Don’t forget to change your aperture when shooting the sky and trees to a much smaller one, in this case around f/5.6 or smaller. I find that while you can shoot wide opened it is more prone to have chromatic aberration than if you shoot at a smaller aperture. Really, it’s personal preference, but this is what I recommend.

    Winter portrait10

    #10 Last but definitely not least, reward and celebrate

    Promise your kids not just the playground, but extra treats like snacks and hot drinks, and even a small surprise. It reinforces having a photoshoot as a positive experience, and ends it on a happy note. Then top it with a movie night at home!

    Have you done any winter portraits of your kids? Please share your images and any other tips you have in the comments below.

    googletag.cmd.push(function() {
    tablet_slots.push( googletag.defineSlot( “/1005424/_dPSv4_tab-all-article-bottom_(300×250)”, [300, 250], “pb-ad-78623” ).addService( googletag.pubads() ) ); } );

    googletag.cmd.push(function() {
    mobile_slots.push( googletag.defineSlot( “/1005424/_dPSv4_mob-all-article-bottom_(300×250)”, [300, 250], “pb-ad-78158” ).addService( googletag.pubads() ) ); } );

    The post 10 Tips for Taking Stunning Winter Portraits of Your Kids by Lily Sawyer appeared first on Digital Photography School.

    Digital Photography School

  • Mastering the Exposure Triangle for Newbies

    When I first got my digital camera, words like Aperture and ISO were foreign to me, and it took me a couple of weeks of reading and studying a lot before the lightbulb turned on in my head. You might be feeling a little confused, and you may even feel like you will never get your camera out of Auto mode, because it’s just too hard to understand.

    exposure-triangle.jpg

    So, if you are unfamiliar with your camera, or just starting out, you might appreciate a little explanation of the basics. Sometimes reading about these things in slightly different words helps something new to click each time.

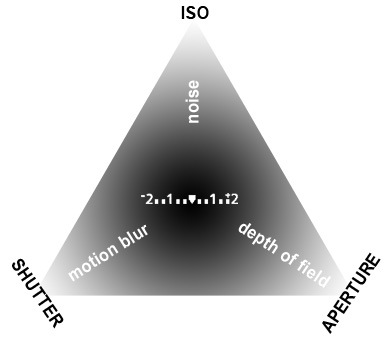
    Introducing the Exposure Triangle: Aperture, Shutter Speed, and ISO

    These three things work together to expose your picture perfectly, and after experimenting for a while, you may even find that you can use your knowledge of these three things to manipulate your picture for different effects.

    APERTURE

    The aperture or f-stop is how wide open your lens is. Imagine a hole: if it’s open just a teeny bit, there won’t be very much light coming through. If it’s a big hole, lots of light will come through. The tricky thing with aperture is that often confusing numbering system.

    • SMALL numbers (like f/1.8) = wide open aperture (large opening).
    • BIG numbers (like f/22) = small aperture (teeny opening).

    That confused the heck out of me at first, but now it’s second nature. It will become second nature to you too, after some practice!

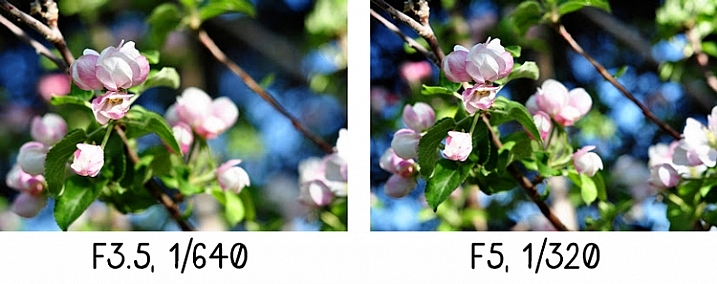
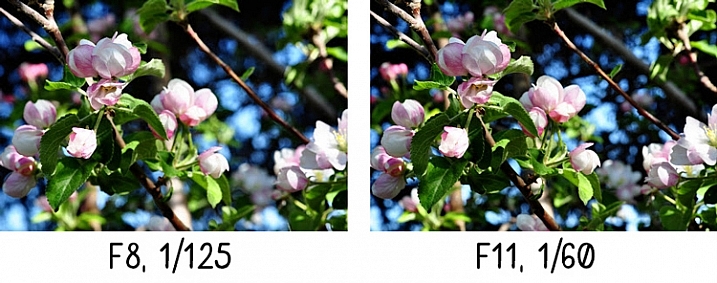
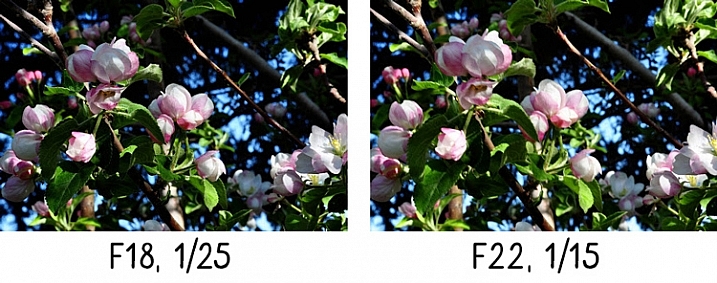
    Another thing that can be affected by aperture is depth of field, or how much of your picture is in sharp focus. A wide open aperture (small number) will make less in focus, and a closed down aperture (big number) will make more in focus. Let’s look at some photos that demonstrate depth of field:

    aperture-1

    With the aperture set to f/3.5 on the left, you have a blurrier background (my favorite). Also notice that the shutter speed (1/640th) is fairly HIGH, we’ll get to this later.

    aperture-2

    A little bit smaller aperture (bigger number), makes the background come into focus a bit more, and the shutter speed is slowed down.

    aperture-3

    See what I mean? If you want to play around with Aperture, try putting your camera in Aperture Priority mode (A on Nikon, Av on Canon – if you have a different camera, check your manual).

    Now, remember that all three parts work together? You probably started seeing how if you noticed the shutter speed changing with each of those different aperture values in the pictures above.

    SHUTTER SPEED

    The shutter speed is how fast the shutter opens and closes. If the shutter is open longer, more light is let into the camera. If it opens and closes really fast, less light is let in.

    If you have a wide open aperture, your shutter speed will need to be faster, because you’re already letting a lot of light in the lens opening. If your aperture is small, your shutter will need to move slower, so there is more time for light to get to the sensor.

    If you want to freeze the action, or hand-hold your camera, then a faster shutter speed is needed. If you want to create blur, then you need a slower shutter speed. For example:

    Shutter-Speed

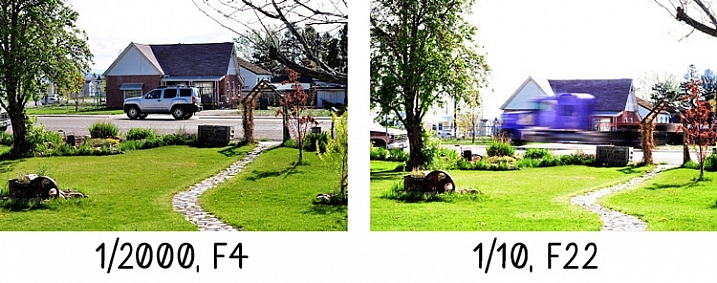
    The vehicle in the photo on the left was driving past my house quite fast, but since I had the shutter speed set to 1/2000th of a second, it froze the action. It looks like the vehicle could be sitting still in the middle of the road.

    The truck on the right is a blur going past, but everything else is still. 1/10th of a second was slow enough to blur the truck as it sped past. Notice the f-stop. Since the shutter was open for so long, the opening in the lens needed to be smaller to balance the exposure.

    Try putting your camera in Shutter Priority mode (S on Nikon, Tv (time value) on Canon) to experiment with different shutter speeds. As you play with these different priority modes, notice what the camera chooses for the rest of your settings. The more you pay attention to these things, the more knowledge you’ll have to be able to set everything yourself in the future.

    Okay, so now you’re probably asking, how does ISO fit into all of this?

    ISO

    The ISO is your camera’s mood. It can be all uptight and picky, or it can be easy-going and laid back. If you have the ISO set to a low number (100) your camera will want light, and plenty of it, because it’s going to take a smooth, crisp picture, and this requires perfect conditions. If you have your ISO set to a high number (3200) it can handle low light, because it’s not going to work as hard – a noisy (grainy) picture is good enough for Mr. High ISO.

    So, how does this apply to your photography? Let’s say you wanted to take a picture in the evening, and you don’t want to use a flash. Just bump the ISO up, and it will allow you to have a faster shutter speed, or a smaller aperture (bigger number) and still accept the light conditions to expose correctly. Or, if you’re taking pictures at a sporting event, and you want to make sure you catch that action, but the light isn’t great, bump the ISO up. Or you may even want that moody grainy effect (it can be really cool)!

    If you ever get frustrated because there’s just not enough light, and your pictures are blurry because the shutter speed isn’t fast enough, and you’re about to scream – just remember to bump the ISO. You could also leave this on Auto, but I usually don’t. My camera always seems to choose a higher ISO than I feel it needs. However, don’t forget to put it back down after you’re done. You don’t want to take a whole bunch of photos in the middle of the day at a 3200 ISO because you forgot to change it after your evening indoor party photos the night before.

    Here’s a little demonstration:

    ISO3200clock

    ISO 3200

    The photo above was taken in a very dimly lit room. Notice the digital noise?Notice the crispness of the photo below?

    ISO100clock

    ISO 100


    Conclusion

    Well, that’s the exposure triangle in a nutshell. I hope this helped, especially if these three exposure factors have been confusing to you in the past. Please ask any questions in the comments, and I’ll answer them the best I can.

    googletag.cmd.push(function() {
    tablet_slots.push( googletag.defineSlot( “/1005424/_dPSv4_tab-all-article-bottom_(300×250)”, [300, 250], “pb-ad-78623” ).addService( googletag.pubads() ) ); } );

    googletag.cmd.push(function() {
    mobile_slots.push( googletag.defineSlot( “/1005424/_dPSv4_mob-all-article-bottom_(300×250)”, [300, 250], “pb-ad-78158” ).addService( googletag.pubads() ) ); } );

    The post Mastering the Exposure Triangle for Newbies by Melinda Smith appeared first on Digital Photography School.


    Digital Photography School