Category: Photography

  • Weekly Photography Challenge – Circles

    Do you see circles everywhere?

    The world itself is a circle, they naturally occur in nature, and man-made objects are full of them.

    Andreas Jalsøe

    By Andreas Jalsøe

    Weekly Photography Challenge – Circles

    Your assignment for the weekly challenge is to actively look for them and photograph circles. When you train your focus, attention and eye on one thing you will see more of them than ever before.

    Take a photo walk and see how many circles you can photograph!

    Chechi Peinado

    By Chechi Peinado

    The Idealist

    By the idealist

    Darren Hester

    By Darren Hester

    Stanley Zimny (Thank You For 15 Million Views)

    By Stanley Zimny (Thank You for 15 Million views)

    Andrés Nieto Porras

    By Andrés Nieto Porras

    Share your images below:

    Simply upload your shot into the comment field (look for the little camera icon in the Disqus comments section) and they’ll get embedded for us all to see or if you’d prefer upload them to your favourite photo sharing site and leave the link to them. Show me your best images in this week’s challenge. Sometimes it takes a while for an image to appear so be patient and try not to post the same image twice.

    googletag.cmd.push(function() {
    tablet_slots.push( googletag.defineSlot( “/1005424/_dPSv4_tab-all-article-bottom_(300×250)”, [300, 250], “pb-ad-78623” ).addService( googletag.pubads() ) ); } );

    googletag.cmd.push(function() {
    mobile_slots.push( googletag.defineSlot( “/1005424/_dPSv4_mob-all-article-bottom_(300×250)”, [300, 250], “pb-ad-78158” ).addService( googletag.pubads() ) ); } );

    The post Weekly Photography Challenge – Circles by Darlene Hildebrandt appeared first on Digital Photography School.


    Digital Photography School

  • Tips for Creating Outdoor Portraits

    On now at Snapsdeals is Wayne’s ebook: Portrait Tips and Techniques: Timeless Portraits. Sale ends December 8th (2015) get it now and save 20%.

    These tips are a follow-up to my previous article about 6 Tips for Taking Better Natural Light Classic Portraits, and the process of creating simple posing and composition for outdoor portraits. To me, these things are what refines a portrait. You can have the perfect lighting conditions and location, but if the subject looks awkward or the composition is unbalanced, the image will fail aesthetically.

    Each of these images will give you some tips and understanding of the creative process for creating outdoor portraits:

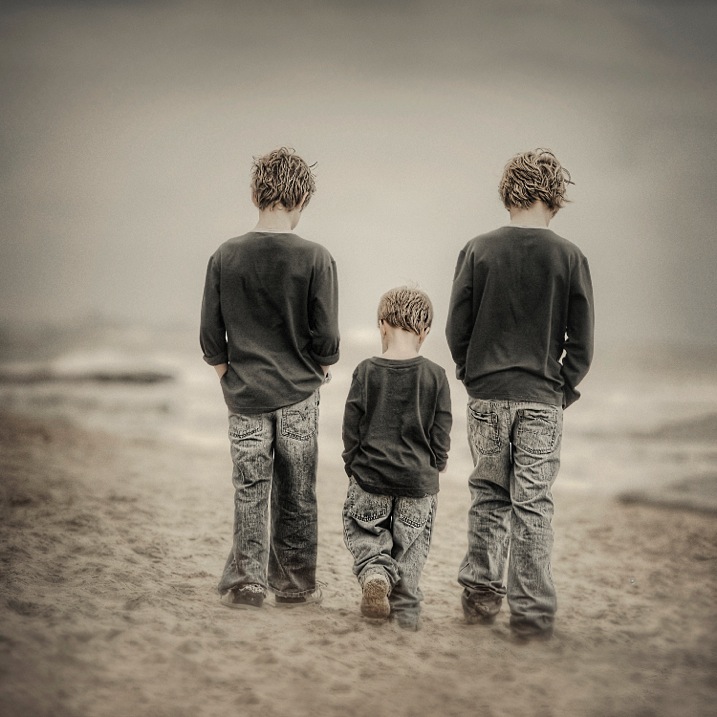
    #1 – Creating back-view portraits

    DPS 1

    Creating interactive back-view portraits is fairly easy. In the portrait above I asked the two older boys to put their hands in their pockets, and start walking slowly in a specific direction. Of course the youngest one followed and mimicked his big brothers.

    Ideally you want to get your subjects to talk to each other while walking and watch for the unexpected reactions. Getting them to talk about sports, school holidays or any interests they have, will make them more cooperative and loosen them up, making the portrait more natural looking.

    I suggest you use continuous autofocus and a zoom lens for these types of portraits. This was taken with a 70-200mm lens at f/4. The original image of the three boys was the normal 3:2 rectangle, but in post production I decided on a square.

    #2 – Interactive poses

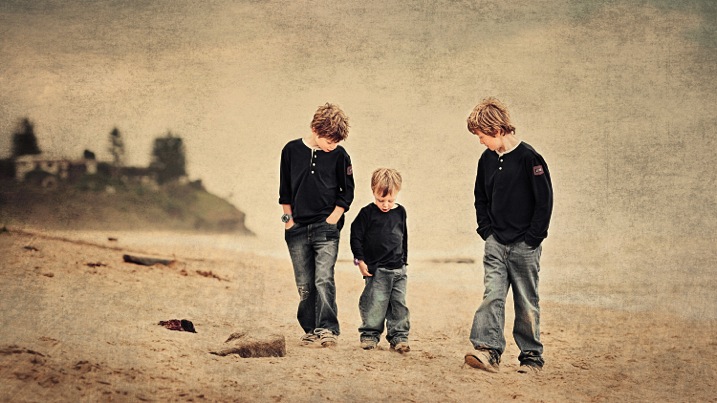
    DPS 2

    Same three boys in an interactive pose. I set this shot up like a movie director, by simply giving them some direction of what to do, then let them go, and recorded their reactions. Just letting them walk around and happy snapping doesn’t work for me. I prefer to place them in the scene I want, based on background and lighting, tell them what to do and then record their natural reactions.

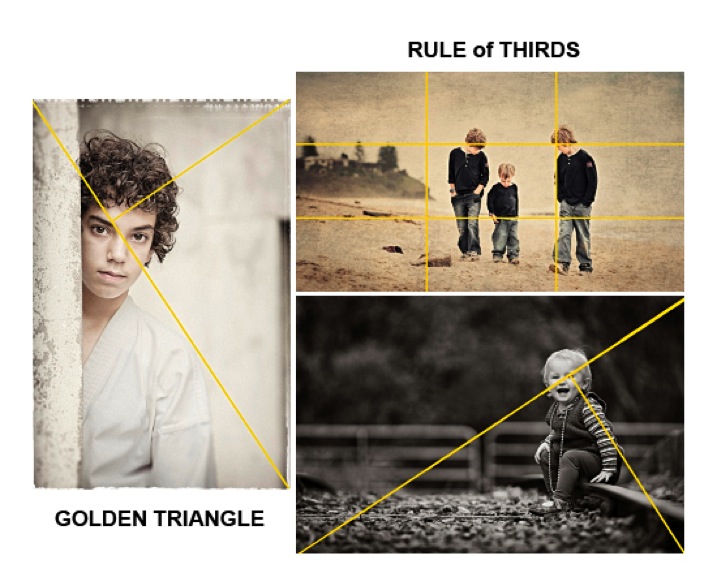
    In this study I placed the boys away from the headland, so they were against the sky, and let them kick a piece of driftwood around. A ball would have been another option. The composition I used is the Rule of Thirds which can be seen at the bottom of this article.

    When doing these types of environmental portraits, I suggest you create it like a landscape, then place the subjects into it.

    #3 – Find the light and pose for the subject

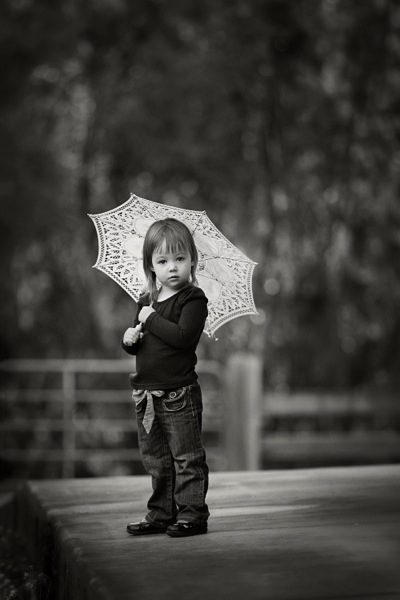
    DPS 3

    After establishing the location, background, and direction of light, I placed the the young girl near the edge of the path, her body turned away from the camera at approximately 45 degrees to the camera, her head turned back to camera.

    There was a building to her left, which was subtracting light from the left hand side of her face. The umbrella was the client’s prop, which I decided to use. I felt that her hair would have blended into the background otherwise, but this way her head is framed by the contrast of the umbrella. I like the way she was holding on to the umbrella, it simplifies her hands from being a distraction.

    If she had been older, I would have asked her to bend her front knee, therefore placing her weight on the back foot, creating an s-curve through her body. There was a temptation to place her to camera right, thereby in the RH third, but I chose the opposite side for a different look. No right or wrong reason, just my preference.

    #4 – Connect people to each other and the background with posing

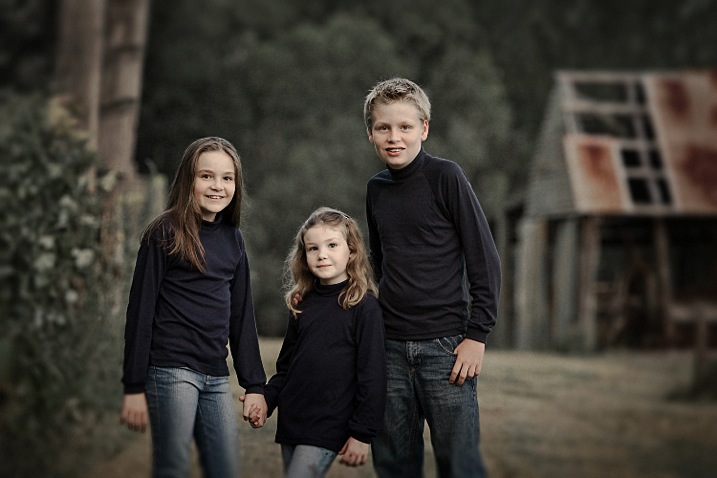
    DPS 4

    In the portrait of the children above, I wanted to place them between the old shed and the fence line, allowing their heads to appear against the soft muted tones of the out of focus trees. Having secondary backgrounds like the shed and fence against the distant background of trees can add extra depth, giving a more three dimensional look.

    The pose is natural, with a small amount of refinement. I like the subjects to turn away from the camera, then look back, rather than shoulders square on to camera. Also by leaning the outside subjects to the centre, it creates more emotion through body language, which also creates a slightly more triangular composition (by luck matching the shed roofline).

    The varying heights of the children allows each of them to have their own space. Often you will see heads in a row on the same plane. Note the simplicity of the hands, curled away from camera or in their pockets, not draped over the shoulders. Also with the two girls holding hands, and the youngest one leaning across towards her brother, it creates a connection within the group.

    #5 – Match tones for high or low key portraits

    DPS 5

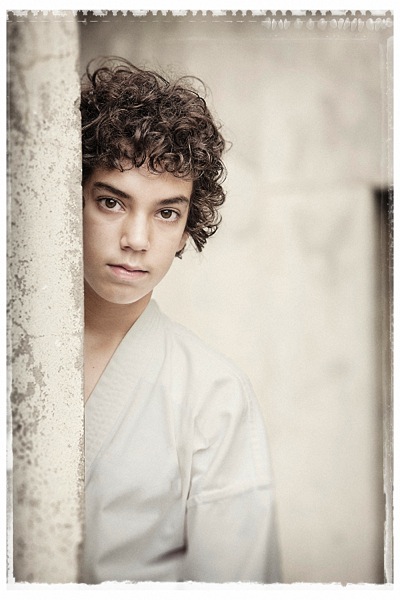
    When creating high key or pastel portraits, it’s important to “key-in” the clothing colours to the background. For example: white against white, or cream against cream, or soft muted tones against other muted tones, NOT light on dark. The idea is to be drawn to the face, not the contrast between backgrounds.

    This young boy (above) has great eyes, so we don’t want to be looking anywhere else but his face. His karate outfit is white, but for my artistic license, I changed it slightly to harmonize more with the background. In the black and white version for the client, I left it white.

    The pose is simple, and he is square to camera, with his body and head leaning more to his left. His head is also tilted slightly down, which allows us to see the full roundness under his eyes. I find this pose more engaging for him. Composition is close to the Rule of Thirds but I do prefer the Golden Triangle. (See below)

    #6 – Camera angle is important

    DPS 6

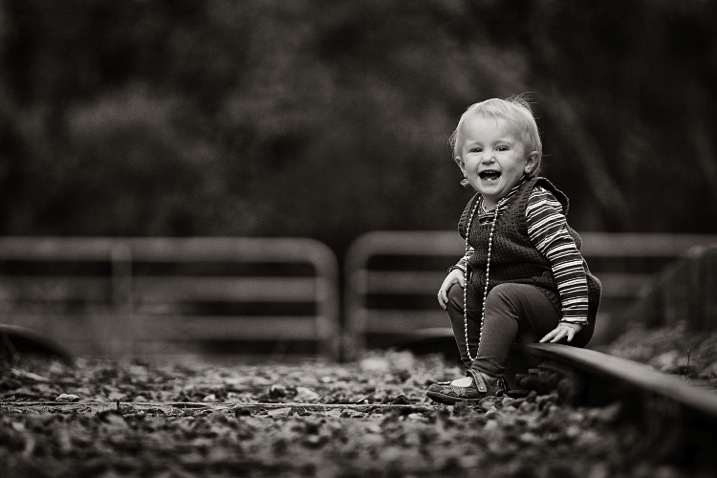
    A low camera angle was selected for this portrait to bring the viewer down to the child’s level. Also by lowering the camera, this places her head above the gates in a neutral uncluttered area, allowing her face to stand out from the background. Another advantage is that the low angle causes the lens to blur the foreground so much, that it leads you directly to the sharp subject.

    Again the subject is angled away from the camera and her head is turned back to camera. Her hands are naturally placed.

    It’s very important to remember when posing children or adults, to turn the body and legs away from the camera to avoid unflattering crotch shots of all ages. If you don’t know how to pose hands, give a child something to hold, failing that, hide them as much as possible. Personally I recommend learning how to pose them to look natural, and then you will recognize when they’re not correct, and be able refine the pose.

    Summary

    DPS 7

    • Avoid the body and face being posed in the same direction.
    • Try keeping the face at about 45 degrees to the body as a starting point.
    • When seated, avoid knees and feet/shoes pointing directly at the camera. Turn them away.
    • Direct children to do natural things when creating interactive portraits such as talking to each other, kicking a ball, reading, etc. This will create realism.
    • Always watch your background, and give your subjects their own space to avoid a busy image.
    • Use hands to touch, and overlap bodies to create poses that have a connection between people. (E.g. the three kids above)
    • Try to shape poses to replicate objects that may be in the composition.
    • When possible, key-in clothing colours to harmonize or compliment background tones. (E.g. photo # 5)
    • Select a low camera angle when photographing kids. Get down to their level or below.
    • Use foreground blurring to make your subject pop. (E.g. photo #6)
    • Use the Rule of Thirds or the Golden Mean as a starting point for improving your composition.

    On now at Snapsdeals is Wayne’s ebook: Portrait Tips and Techniques: Timeless Portraits. Sale ends December 8th (2015) get it now and save 20%.

    googletag.cmd.push(function() {
    tablet_slots.push( googletag.defineSlot( “/1005424/_dPSv4_tab-all-article-bottom_(300×250)”, [300, 250], “pb-ad-78623” ).addService( googletag.pubads() ) ); } );

    googletag.cmd.push(function() {
    mobile_slots.push( googletag.defineSlot( “/1005424/_dPSv4_mob-all-article-bottom_(300×250)”, [300, 250], “pb-ad-78158” ).addService( googletag.pubads() ) ); } );

    The post Tips for Creating Outdoor Portraits by Wayne Radford appeared first on Digital Photography School.


    Digital Photography School

  • 5 Tips for Photographing Your Own Children Stress-Free

    As a mother to three little ones, I can say without any doubt nor a moment’s hesitation, that my kids are my most difficult subject – ever. My usual tips and tricks with other families, simply do not work with my own kids, and I have to employ new strategies along with controlling my own emotions. So yes, I do fully understand, despite my profession, the despair and frustration many of you parents go through when capturing photos of your very own children.

    But, fear not! Below are my top five tips for taking the stress out of photographing your own children.

    Stress free photography tips03

    1. Prepare yourself mentally

    Keep your expectations realistic so that even if only one photo comes out decent, you can consider the shoot a success!

    2. Plan the photoshoot

    Plan the shoot in advance – a long way in advance. The first step in planning is visualizing the photoshoot. Schedule the shoot in your diary. Do mental and physical preparations weeks before; raid the wardrobes to see what clothes the kids can wear, accessories they can use, what might you need to buy to add to the clothes if necessary. Decide which areas of your home you want to use for the shoot, and choose well-lit one, or if you are going to the local park plan the spot ahead of time. What toys and props, if any, can they play with that goes with the tone and colour of the shoot – for example favourite teddy, lego, craft sets, etc?

    Stress free photography tips01

    3. Talk about it with your kids – also way in advance

    Chat informally to your kids about it far in advance, so they know it is happening at some point, and will not be taken by surprise. Slip it in conversation casually like it’s no big deal (of course it’s a huge deal) and that you are going to have some fun during the photoshoot.

    4. On the day of the shoot

    Leverage novelty and adventure.

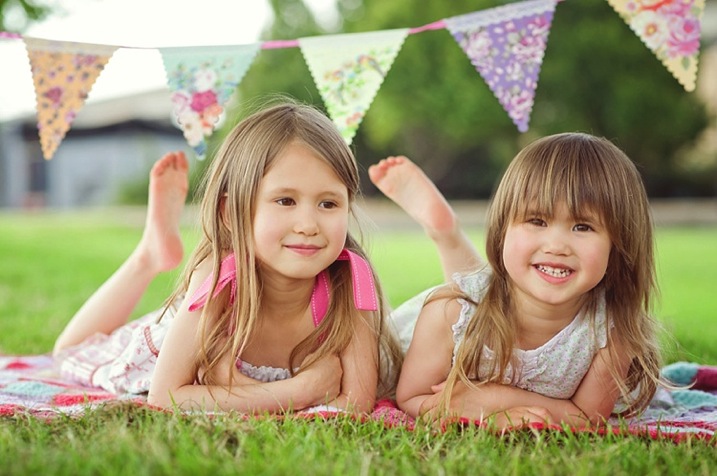
    If doing the shoot in your garden or patio set it up nicely so it’s a novelty. Keep it a surprise too, so you can capture their excitement. Use a tent for example or some buntings or teepee. Or better yet, take them to your local park for a little adventure or picnic. The important thing is to make the photoshoot a special experience for them.

    Stress free photography tips04

    De-clutter if doing the shoot in your home

    Clear and prepare the areas you want them to sit in so they are free of clutter, and other objects you don’t want to be in the photos. Choose a spot with ample natural light, somewhere next to a window for example. Put some favourite toys in a bag nearby. Get your camera settings ready and put your camera to one side. Make a clear space where you want your child to sit, and a clear space for yourself as well. Take out one toy from the bag you have already prepared, and put it in the space for your child. Invite your child to play with it.

    Look towards the light

    Make sure your child is either facing the light, or that at least half of their face is in the light. Whatever camera you use, especially if you are not using manual mode, the more light there is – the less the chance of getting blurry photos. If you shoot in semi-automatic mode (such as Aperture or Shutter Priority), just make sure you set a minimum to your speed so that it’s fast enough, at 1/125th or higher to avoid blurry photos. You can also bump up your ISO to make your camera more sensitive to light. If you can change your aperture, change it to a low number (larger opening) such as f/3.5 or lower, so you let in more light and also get the blurry background effect.

    Cheese…NOT!

    It’s always nice to have a mixture of candid shots, and portraits, and your child need not smile at all. Steer clear of making them say “cheese”, as that almost always gets a fake-looking smile. Trying to get a genuine smile or laughter captured on camera isn’t always easy.

    Stress free photography tips02

    With younger children five and under, singing their favourite tunes and rhymes work well. If you have someone with you, get them to do silly things like crazy dancing, making bunny ears with their fingers behind your head, playing peek-a-boo and making toys dance behind you to some silly singing. The noisier, the sillier, the crazier – the better.

    With older kids, talking about things they find hilarious is the key. Get in close so you can capture those expressions, the gappy teeth, the precious look in your child’s eyes. Ask them about their favourite activities and things that they LOVE, and you see those eyes begin to sparkle as they start talking candidly.

    Use flash or a reflector if shooting backlit

    If you want to shoot with a backlit effect so that your child is facing away from the light, you will need to use a flash or a reflector, otherwise you will end up with a silhouette. If there is some clear profile of the face or outline, a silhouette could be a very nice photo too.

    Direct your flash

    If there is not much light available, turn your camera’s flash on, but stick a card around the flash so that it directs the flash somewhat sideways, rather than firing the flash straight on which flattens the face and creates harsh shadows under the chin and jawline. Directing the flash provides light and shade. Bouncing the flash upwards or backwards gives you a natural look, as you are just using the flash as a little fill-light.

    Take time to play

    Play a little game with your child, talk, cuddle, create a relaxed atmosphere. Take some photos while your child is playing with the toys you have prepared. Interact with your child so you get photos of your child looking at you, as well as looking away, which are great candid shots.

    Stress free photography tips05

    Top tip: give your child an activity and make your child laugh. Be mindful of your child’s attention span.

    The younger your child is, the shorter the attention span. Don’t offer all the toys at once. Stick to one area for a quick photoshoot, or if your child gets bored take the adventure into another spot nearby, and start fresh but keep that quick too.

    If your child has had enough, it’s probably better to stop and continue another day. In my experience, the ages between one and three years are the most difficult time to get clear, sharp, and good photos of your own children. But don’t forget to take a snap or two of those pouts and long faces – the images may come in handy at their wedding reception many years down the line, as well as being a special memory.

    5. Celebrate!

    Stress free photography tips07

    Stress free photography tips06

    Have some snacks and little treats ready so you can celebrate afterwards. Even if you only manage to get ONE decent photo, it’s always good to celebrate. It makes the photoshoot a positive experience and will work in your favour at your next photoshoot. If you ended up with nothing, still celebrate that you had some play, snuggle, and cuddle moments together.

    If the shoot does not go well at all, well there is always a next time…

    Do you have any photos of your kids, or some other tips and tricks that have worked well for you? Please share in the comments below.


    googletag.cmd.push(function() {
    tablet_slots.push( googletag.defineSlot( “/1005424/_dPSv4_tab-all-article-bottom_(300×250)”, [300, 250], “pb-ad-78623” ).addService( googletag.pubads() ) ); } );

    googletag.cmd.push(function() {
    mobile_slots.push( googletag.defineSlot( “/1005424/_dPSv4_mob-all-article-bottom_(300×250)”, [300, 250], “pb-ad-78158” ).addService( googletag.pubads() ) ); } );

    The post 5 Tips for Photographing Your Own Children Stress-Free by Lily Sawyer appeared first on Digital Photography School.


    Digital Photography School

  • The 20 Most Popular DSLR Lenses Among our Readers

    Over the last few days we’ve published a post revealing the most popular DSLRs among our readers (based upon what they’ve been buying in the last few months).

    Today we’re looking at the best selling and most popular DSLR Lenses*.

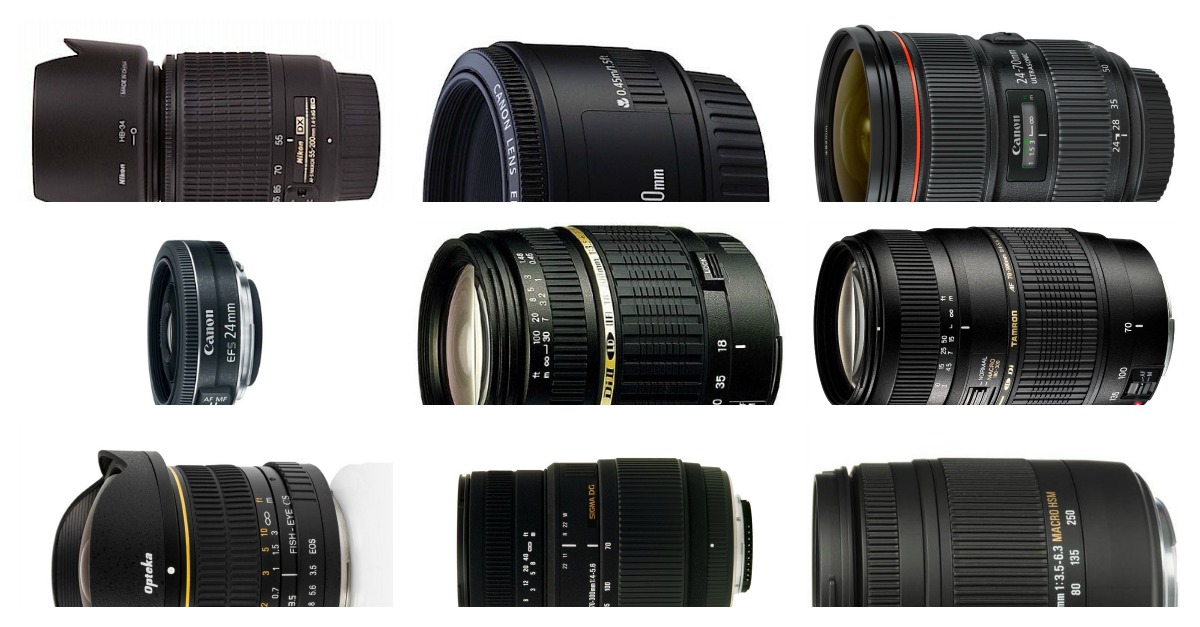
    popular lenses

    This list is completely dominated by Canon and Nikon lenses so we’ve decided to break them out separately into two lists and then have put the 6 other lenses (from a variety of manufacturers) into a third list.

    Note: at this stage we didn’t see any major trends in lenses for compact camera systems which is why we’ve not featured any hear. We expect this market to grow as the mirroless/compact system cameras continue to grow in popularity.

    Lastly: Amazon currently have some great specials at the moment on cameras and gear as part of their Holiday Promotions.

    Canon DSLR Lenses

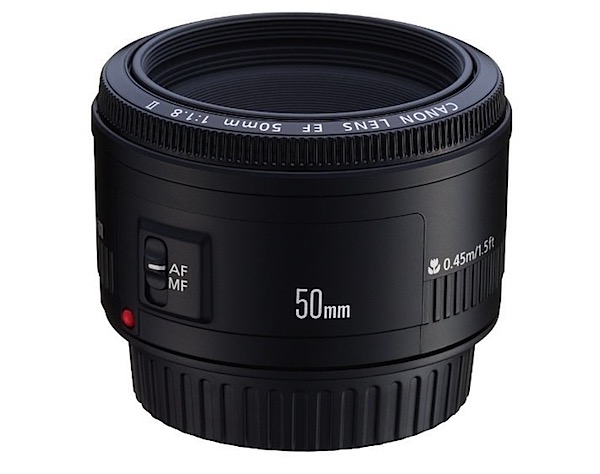
    1. Canon EF 50mm f/1.8 II Camera Lens

    71BuU2ZyOeL._SL1500_.jpg

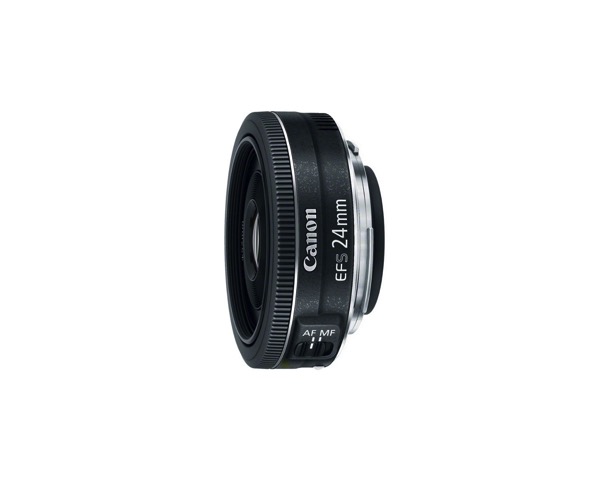
    2. Canon EF-S 24mm f/2.8 STM Lens

    61 egfIh2BL SL1500

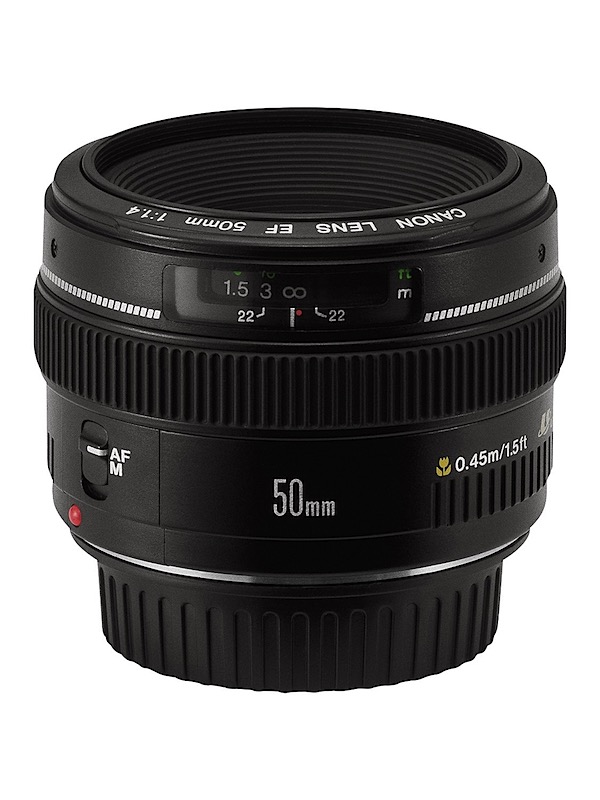
    3. Canon EF 50mm f/1.4 USM

    91fYqb6yGBL._SL1500_.jpg

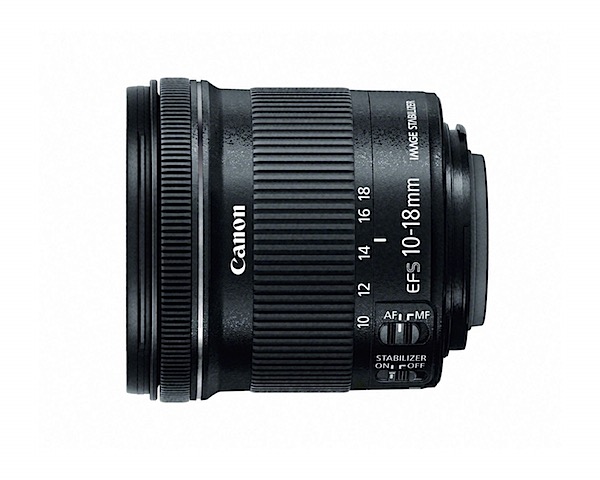
    4. Canon EF-S 10-18mm f/4.5-5.6 IS STM

    81bWpDA6EyL._SL1500_.jpg

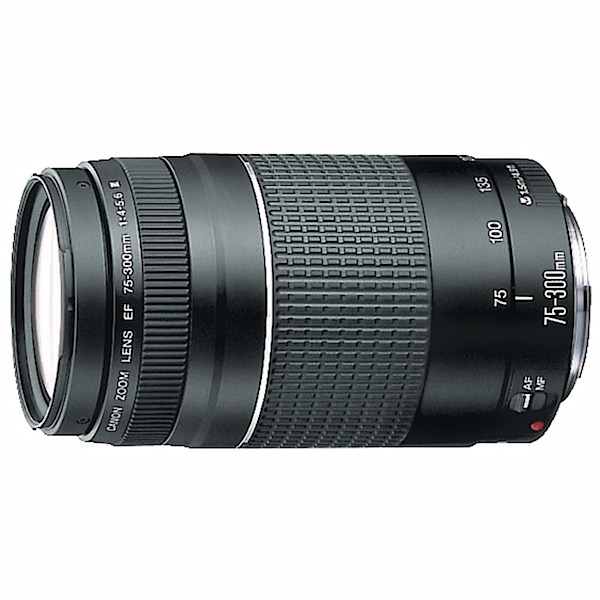
    5. Canon EF 75-300mm f/4-5.6 III

    71qY4hAxpoL._SL1500_.jpg

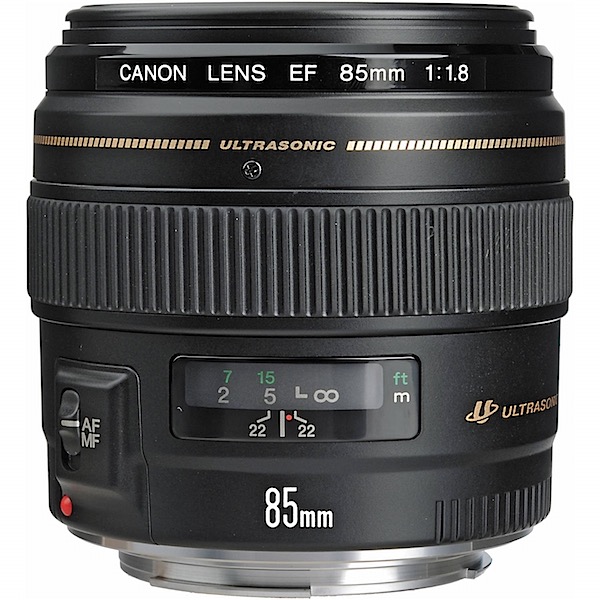
    6. Canon EF 85mm f/1.8 USM

    81XPZ7sQqsL._SL1500_.jpg

    1. Canon EF-S 55-250mm f/4.0-5.6 IS II Telephoto Zoom Lens
    2. Canon EF 40mm f/2.8 STM Lens
    3. Canon EF 24-70mm f/2.8L II USM Standard Zoom Lens
    4. Canon EF 70-200mm f/2.8L IS II USM Telephoto Zoom Lens
    5. Canon EF 100mm f/2.8L IS USM Macro
    6. Canon EF-S 18-55mm f/3.5-5.6 IS II SLR Lens
    7. Canon EF 16-35mm f/2.8L ll USM Zoom Lens
    8. Canon EF-S 17-55mm f/2.8 IS USM
    9. Canon EF 24-105mm f/4 L IS USM
    10. Canon EF 50mm f/1.2 L USM

    Nikon DSLR Lenses

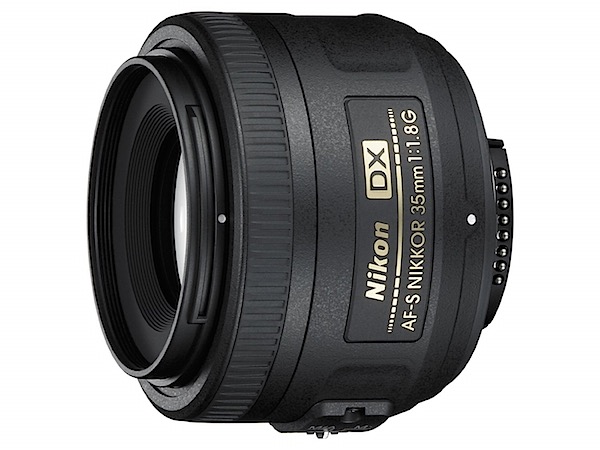
    1. Nikon 35mm f/1.8G AF-S DX

    71dJUbFOcEL._SL1500_.jpg

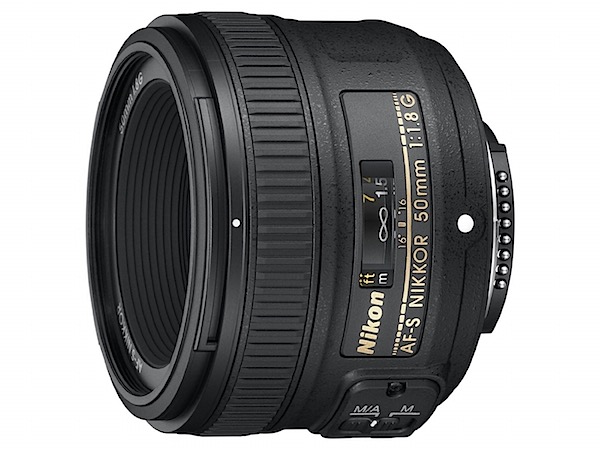
    2. Nikon 50mm f/1.8G AF-S NIKKOR FX

    712T0jBdPhL._SL1500_.jpg

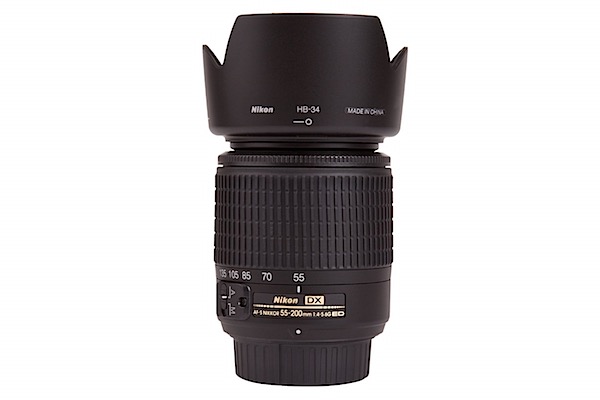
    3. Nikon 55-200mm f/4-5.6G ED IF AF-S DX

    71Ehi1XZoxL._SL1500_.jpg

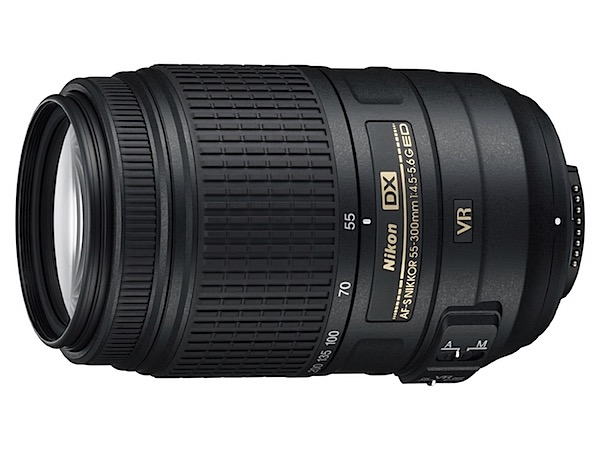
    4. Nikon 55-300mm f/4.5-5.6G ED VR

    71dAI8JvOTL._SL1500_.jpg

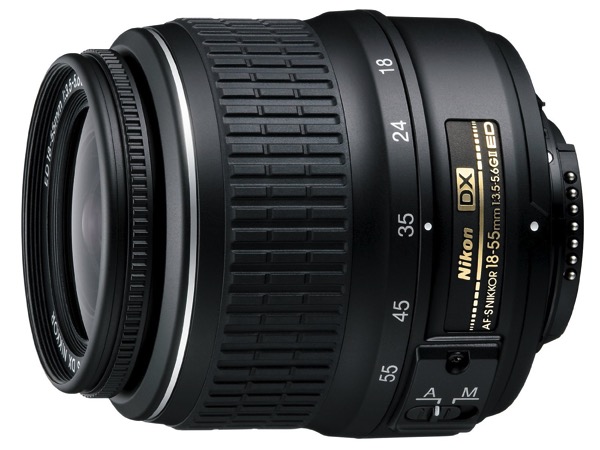
    5. Nikon 18-55mm f/3.5-5.6G VR II AF-S

    81WvLB071IL SL1500

    1. Nikon AF-S FX NIKKOR 200-500mm f/5.6E ED Vibration Reduction Zoom Lens
    2. Nikon 70-300mm f/4-5.6G AF
    3. Nikon AF-S FX NIKKOR 200-500mm f/5.6E ED Vibration Reduction Zoom Lens
    4. Nikon 50mm f/1.4G SIC SW Prime AF-S
    5. Nikon 18-300mm f/3.5-6.3G ED VR AF-S DX
    6. Nikon 85mm f/1.8G AF-S
    7. Nikon AF-S DX NIKKOR 18-55mm f/3.5-5.6G Vibration Reduction Zoom Lens
    8. Nikon 18-200mm f/3.5-5.6G AF-S ED VR II
    9. Nikon 28-300mm f/3.5-5.6G ED VR AF-S
    10. Nikon 40mm f/2.8G AF-S DX Micro

    And also worth noting are the following other lenses made by other manufacturers.

    Other DSLR Lenses

    1. Sigma 70-300mm f/4-5.6 SLD DG Macro. (for Nikon DSLRs) Also available for Canon,Minolta and Sony and Pentax cameras.
    2. Sigma 18-250mm f3.5-6.3 DC MACRO (For Canon DSLRs). Also available for Nikon and Sony cameras.
    3. Opteka 6.5mm f/3.5 HD Aspherical Fisheye for Canon DSLRs.
    4. Tamron AF 70-300mm f/4.0-5.6 Di LD Macro (for Canon DSLRs). Also available for Nikons, Konica Minolta and Sony and Pentax cameras.
    5. Tokina 11-16mm f/2.8 AT-X116 Pro DX II (for Nikon DSLRs). Also available for Canon and Sony and Minolta cameras.
    6. Tamron AF 18-200mm f/3.5-6.3 XR Di II (for Canon DSLRs), Nikon, Konica Minolta and Sony and Pentax.

    *Note: as with our previous best seller lists this list was compiled from reports supplied to us from Amazon.com where we are affiliates. One of the ways dPS is able to cover its costs and be a sustainable business is that we earn a small commission when readers make a purchase from Amazon after clicking on our links (including those above). While no personal details are passed on we do get an overall report from Amazon about what was bought and are able to create this list.

    googletag.cmd.push(function() {
    tablet_slots.push( googletag.defineSlot( “/1005424/_dPSv4_tab-all-article-bottom_(300×250)”, [300, 250], “pb-ad-78623” ).addService( googletag.pubads() ) ); } );

    googletag.cmd.push(function() {
    mobile_slots.push( googletag.defineSlot( “/1005424/_dPSv4_mob-all-article-bottom_(300×250)”, [300, 250], “pb-ad-78158” ).addService( googletag.pubads() ) ); } );

    The post The 20 Most Popular DSLR Lenses Among our Readers by Darren Rowse appeared first on Digital Photography School.


    Digital Photography School

  • How to Save Images Using Export in Lightroom

    Reader feedback tells me that some people are confused by Lightroom’s Export process. I think the confusion is caused by not completely understanding how Lightroom works, especially when processing Raw files. So let’s start by recapping the process that a single Raw file goes through when you import it into Lightroom.
    How to export photos from Lightroom

    1. Lightroom adds the Raw files to the Catalog

    The Catalog is a database containing information about all the photo files you have imported into Lightroom (for further clarification on this process read my article How to Import Photos into Lightroom). Lightroom keeps track of the location (where it is saved on your hard drive) and metadata of each imported Raw file.

    2. Open the Raw file in the Develop module and process the photo

    The key thing to understand here that Lightroom keeps track of every single edit you make in the Develop module by storing them as a series of text commands in the Catalog. This means that (a) the Raw file itself remains unchanged and most importantly that (b) at this stage even though you can see it on your computer screen, you haven’t yet converted the Raw file into another format that other programs can use. This is where the Export function comes in.

    JPEG and TIFF files

    By the way, it’s a similar process if you are processing a JPEG or TIFF file. Lightroom saves the edits you make in the Lightroom Catalog, and doesn’t change the original file in any way. This only happens at the export stage, where you create a new version of the file that incorporates the changes. This is important to note, because it is different from the way Photoshop and Photoshop Elements work.

    Exporting image files

    All this means is that if you want to view or use your photos in a program other than Lightroom, you need to export them first and save them in a format that other programs understand.

    There’s just one exception to this. If you go to Catalog Settings > Metadata and tick the Automatically write changes into XMP box, Lightroom will save the Develop settings in a .xmp file in the same folder as the original file. These files can be opened successfully using Adobe Camera Raw in Photoshop.

    Note: Export in Lightroom simply means: Save As! Just like in MS Word or any other program. 

    The Export process

    Now that you understand why you have to export photos, let’s see how to do it.

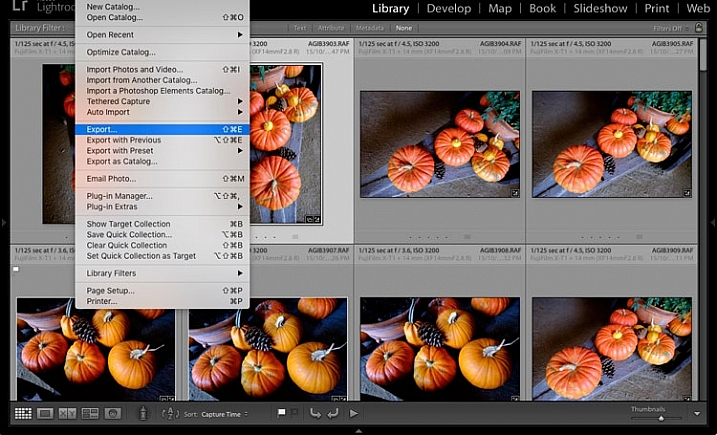
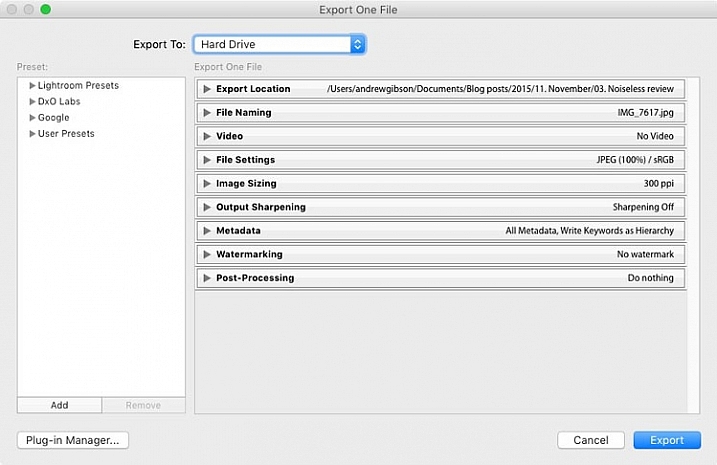
    Start by selecting the photo, or photos, to be exported. It is easiest to do this in Grid View. Then go to File > Export to start the export process and bring up the Export window. This is what it looks like.
    How to export photos from Lightroom

    The Export to menu at the top defaults to Hard Drive. You can also choose to export the photos as email attachments, burn them to a CD/DVD or export them to a plug-in. For this article I am going to work on the basis that you have selected Hard Drive. The settings change slightly if you choose one of the other options.

    Export Location

    This is where you tell Lightroom where to save the exported files. Select “Ask what to do” or “Choose a new name” for the exported file from the Existing Files menu, to avoid accidentally overwriting existing files with the same name. Tick the Add to This Catalog box if you want to add the exported images to the Lightroom Catalog. This saves time that would otherwise be spent re-importing the new images.
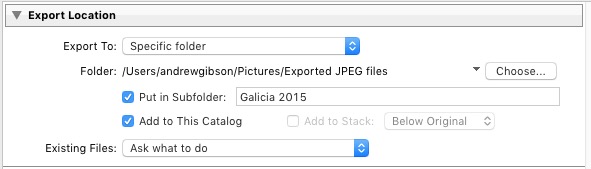
    How to export photos from Lightroom

    File Naming

    When exporting you can opt to keep the original file names, or create new ones. What you choose to do here depends partially on whether you created new file names at import, or kept the original names made by your camera. The most obvious use here is creating a naming format for images to be sent to clients. If you are exporting photos to send to a stock library, for example, the stock library will have its own file naming requirements that you need to stick to. You have the option of selecting one of Lightroom’s naming presets, or you can create your own by choosing Edit from the Rename To menu.
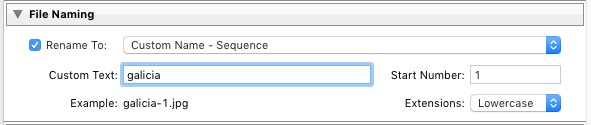
    How to export photos from Lightroom

    Video

    Only applies if you are exporting video.

    File Settings

    This is where you select the format, quality, and colour space of exported files. It is important to get these settings correct, otherwise you risk creating files that are unsuitable for the intended purpose. There are five Image Format options to choose from:

    JPEG: This format is for creating small files for sending to other people or uploading to websites.

    For web use: Set Quality to between 60 and 80 and Color Space to sRGB. You may also wish to tick the Limit File Size box to ensure that files are below a certain size. If you are exporting photos to use on a web page, restricting file sizes to less than 150kb will help the page load faster in a browser. You also need to set the pixel size of the exported files under the Image Sizing heading.

    For full size images: Set Quality to 100 and Color Space to sRGB. You should only select a Color Space other than sRGB if you instructions to do so (for example, you are sending the files to a magazine publisher who wants them in the AdobeRGB (1998) colour space).
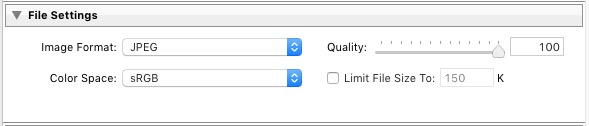
    How to export photos from Lightroom

    PSD: This is for creating PSD files to work on in Photoshop. For maximum quality set Color Space to ProPhoto RGB and Bit Depth to 16 bits/component. This gives Photoshop all the available information for that image, and the highest quality possible.
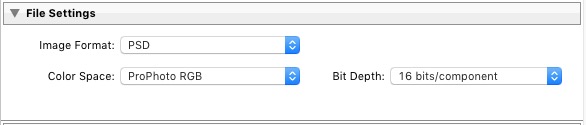
    How to export photos from Lightroom

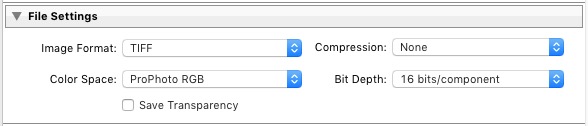
    TIFF: These files are large, 16 bit files similar to PSD files. For maximum quality set Compression to None, Color Space to ProPhoto RGB and Bit Depth to 16 bits/component. The assumption here is that you are creating the file to work on in Photoshop or another plug-in.
    How to export photos from Lightroom

    Note that the reason I recommend using ProPhoto RGB for both TIFF and PSD files is because I’m making the assumption that when you’re finished editing the photo you will then convert it to either sRGB or AdobeRGB (1998) afterwards. If you’re not sure what colour spaces are or how they work then my article Everything You Need to Know About Lightroom and Colour Space will help.

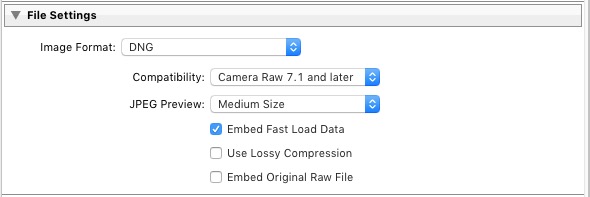
    DNG: Use this setting to convert native Raw files to the DNG (Digital Negative) format. Tick the Embed Fast Load Data box to create DNG files that load faster in Lightroom.
    How to export photos from Lightroom

    Original: Retains the original photo file format. If the original is a Raw file, Lightroom exports the unmodified original, with a sidecar .XMP file containing the changes made in Lightroom.

    How to export photos from Lightroom

    Image Sizing

    This option lets you alter the size of the image and set the resolution. Use this to upscale the photo for printing, or to create a smaller file for uploading to a website. If you simply want to export a full size version of your photo, you won’t need to alter any settings here.

    How to export photos from Lightroom

    Output Sharpening

    Lets you add sharpening for display (Screen) or printing (Matte Paper and Glossy Paper). Select from three levels: Low, Standard and High. There is no need to sharpen if you are exporting photos to edit in another program such as Photoshop.

    How to export photos from Lightroom

    Metadata

    Here you choose whether to include all metadata in the exported image, or just some of it. You may want to leave out Person Info (keywords that include people’s names) for privacy reasons, and Location Info for security or privacy reasons (for example, if you post a photo of your home online).

    How to export photos from Lightroom

    Watermark

    Tick the Watermark box to add a watermark to your images. Select Edit Watermarks from the menu to create your own watermark. The main purpose of this is to add a copyright logo to photos that are going to be published online.

    How to export photos from Lightroom

    Post-Processing

    Tell Lightroom what to do after exporting the images. Do Nothing is the most appropriate setting most of the time, but you may find the other options useful from time to time.

    How to export photos from Lightroom

    Export Presets

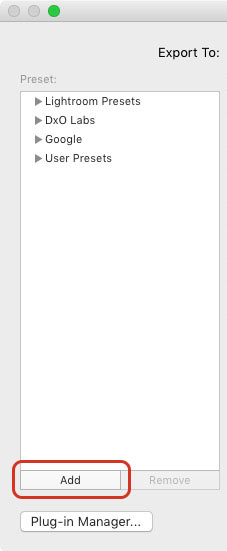
    If you find yourself using the same export settings a lot, you can save them as a User Preset. Click the Add button in the bottom left corner of the Export window to do so. You’ll be prompted to enter a name for the Preset, and to select the folder to save it in (the default is User Presets).
    How to export photos from Lightroom

    As you can see, the export process in Lightroom is quite simple. If you have any questions about it, or indeed any questions about Lightroom, please let us know in the comments.


    The Mastering Lightroom CollectionMastering Lightroom ebooks
    My Mastering Lightroom ebooks will help you get the most out of Lightroom. They cover every aspect of the software from the Library module through to creating beautiful images in the Develop module. Click the link to learn more or buy.

    googletag.cmd.push(function() {
    tablet_slots.push( googletag.defineSlot( “/1005424/_dPSv4_tab-all-article-bottom_(300×250)”, [300, 250], “pb-ad-78623” ).addService( googletag.pubads() ) ); } );

    googletag.cmd.push(function() {
    mobile_slots.push( googletag.defineSlot( “/1005424/_dPSv4_mob-all-article-bottom_(300×250)”, [300, 250], “pb-ad-78158” ).addService( googletag.pubads() ) ); } );

    The post How to Save Images Using Export in Lightroom by Andrew S. Gibson appeared first on Digital Photography School.


    Digital Photography School

  • The 19 Most Popular Compact System and Mirrorless Cameras with Our Readers

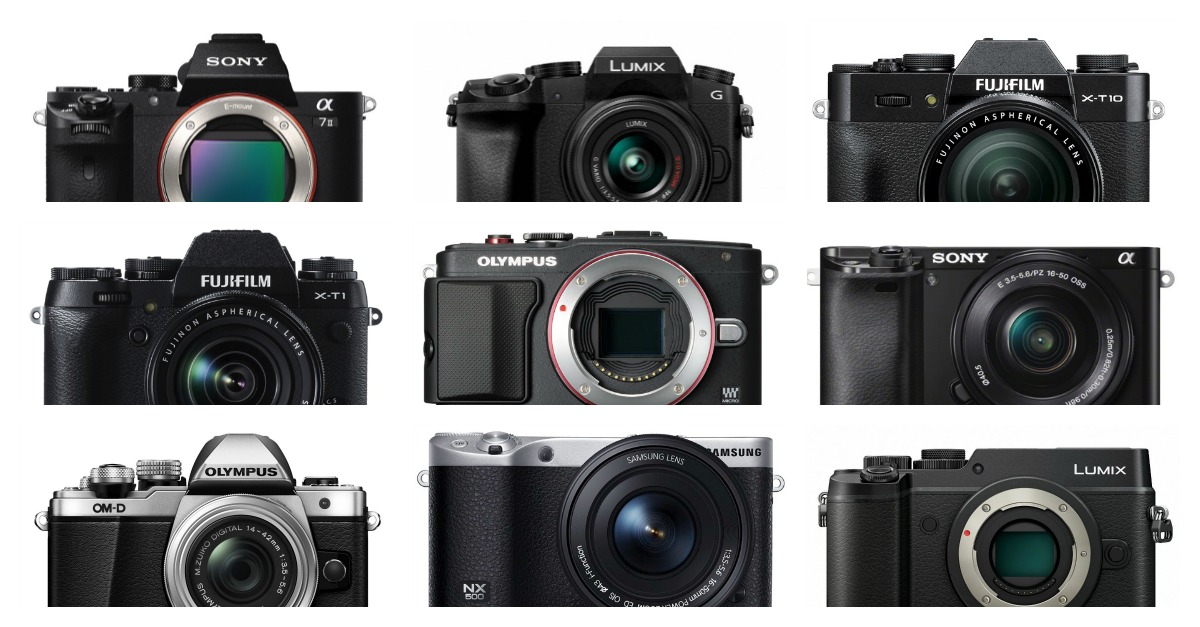
    Earlier in the week we revealed the DSLRs that were best selling among our readers as well as the most popular DSLR Lenses in our community over the last few months. While DSLRs are still the most popular type of readers among our readers this last quarter has seen a big rise in the number of you using compact system/mirrorless cameras.

    popular mirrorless cameras

    Here are the most popular compact system cameras among our readers!

    Note: we’ve only included cameras with interchangeable lenses in this list. While other cameras like Fujifilms X100 series are sometimes classified in this way we’ll include them on a future list with other fixed lens cameras.

    Lastly: Amazon currently have some great specials at the moment on cameras and gear as part of their Holiday Promotions.

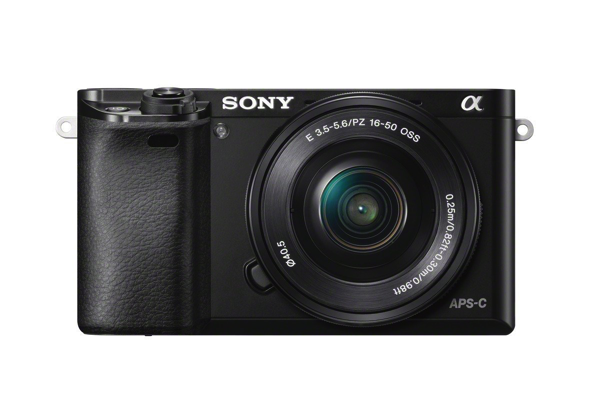
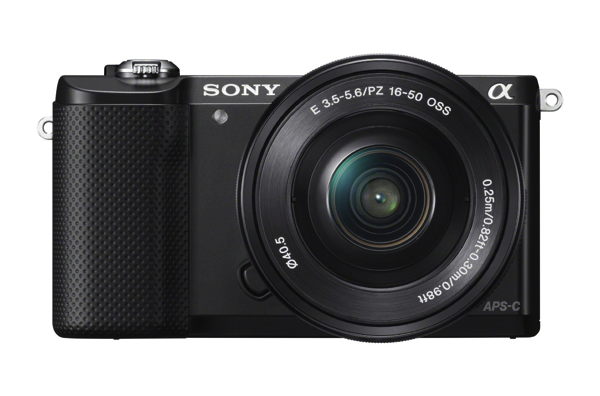
    1. Sony Alpha a6000

    NewImage

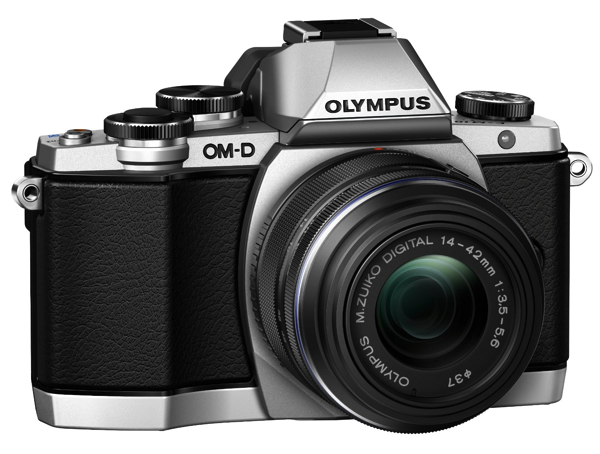
    2. Olympus OM-D E-M10

    NewImage

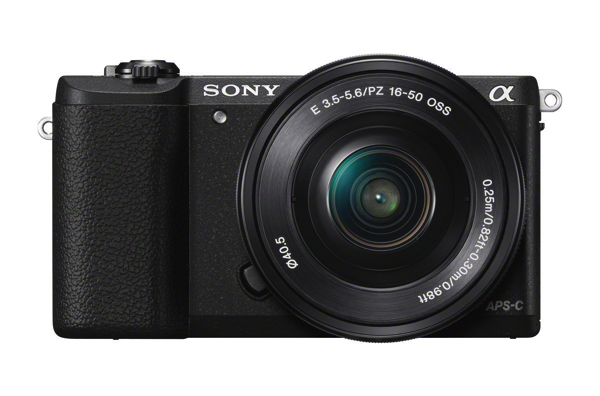
    3. Sony a5100

    NewImage

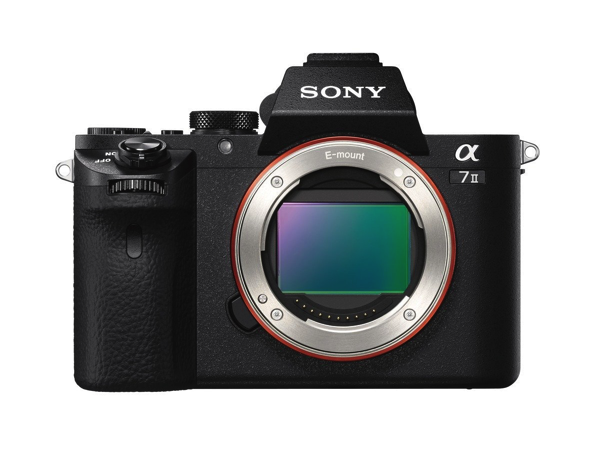
    9. Sony Alpha a7II

    NewImage

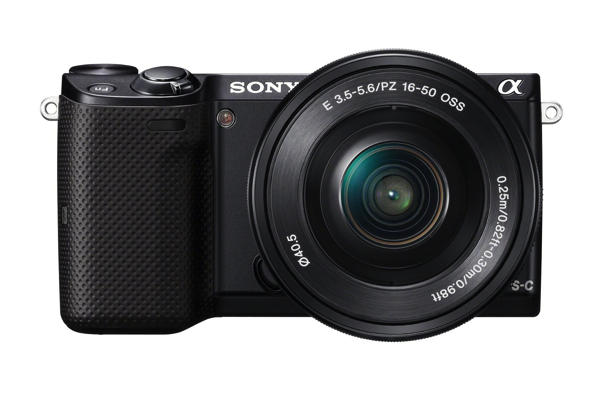
    3. Sony NEX-5TL

    NewImage

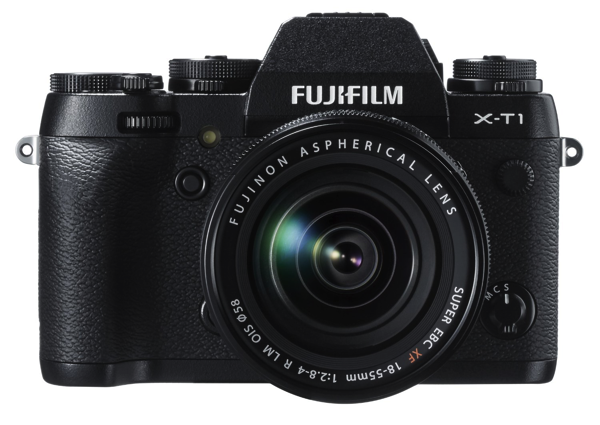
    4. Fujifilm X-T1

    NewImage

    5. Sony Alpha a5000

    NewImage

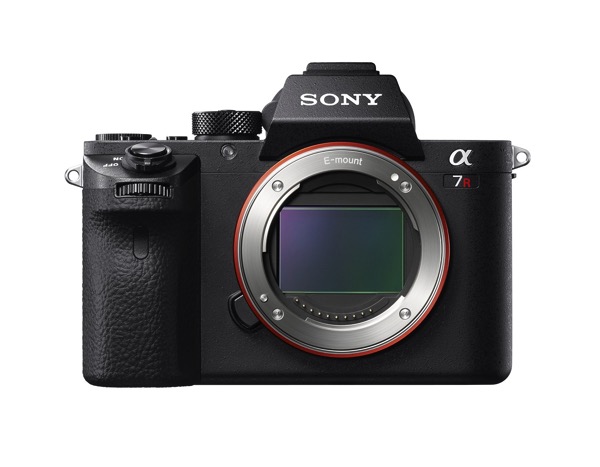
    6. Sony a7R II

    81 rf9B7cML SL1500

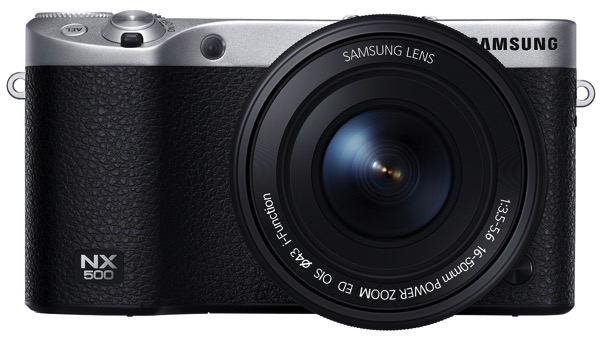
    7. Samsung NX500

    91f 4dtUbjL SL1500

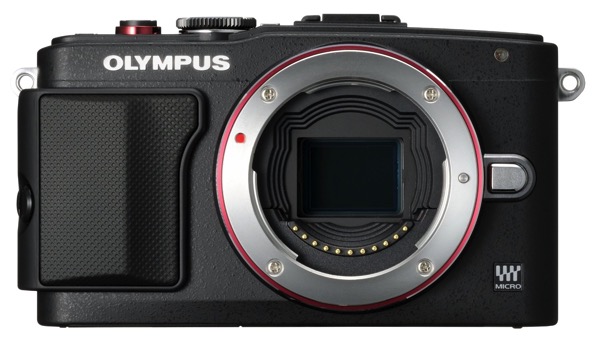
    8. Olympus PEN E-PL6

    81srU2SK2OL SL1500

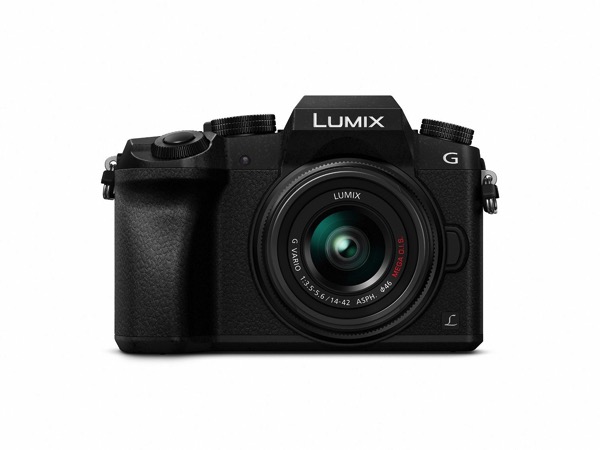
    9. Panasonic LUMIX DMC-G7KK

    81UUhvqyviL SL1500

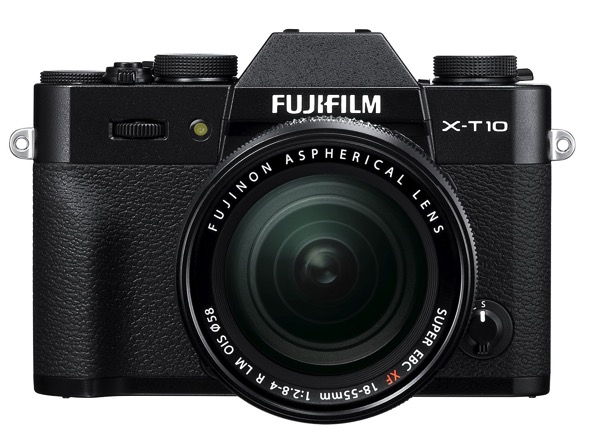
    10. Fujifilm X-T10

    91hN9jCE1cL SL1500

    That’s our top 10 – here are the next 9 most popular compact camera systems.

    1. Canon EOS M3
    2. Olympus OM-D E-M10 Mark II
    3. Panasonic LUMIX DMC-GX8K
    4. Olympus OM-D E-M1
    5. Olympus OM-D E-M5 Mark II
    6. Sony Alpha a7S
    7. Sony a7
    8. Samsung NX30
    9. Panasonic LUMIX DMC-GM5KK

    *Note: this list was compiled from reports supplied to us from Amazon.com where we are affiliates. One of the ways dPS is able to cover its costs and be a sustainable business is that we earn a small commission when readers make a purchase from Amazon after clicking on our links (including those above). While no personal details are passed on we do get an overall report from Amazon about what was bought and are able to create this list.

    googletag.cmd.push(function() {
    tablet_slots.push( googletag.defineSlot( “/1005424/_dPSv4_tab-all-article-bottom_(300×250)”, [300, 250], “pb-ad-78623” ).addService( googletag.pubads() ) ); } );

    googletag.cmd.push(function() {
    mobile_slots.push( googletag.defineSlot( “/1005424/_dPSv4_mob-all-article-bottom_(300×250)”, [300, 250], “pb-ad-78158” ).addService( googletag.pubads() ) ); } );

    The post The 19 Most Popular Compact System and Mirrorless Cameras with Our Readers by Darren Rowse appeared first on Digital Photography School.


    Digital Photography School

  • Happy Thanksgiving for All Paddling and Photographing Friends

    Happy Thanksgiving greeting card - text in vintage letterpress wood type blocks against rustic weathered wood with winter squash

    Happy Thanksgiving !

    This is one of my new Thanksgiving greeting cards created this year. You can find more similar images with Thanksgiving, Halloween, Christmas and New Year themes in my stock photography portfolio. They available as royalty free images ready for digital download and licensing.

    Selected holiday pictures are also available at FineArtAmerica. They can be ordered as fine art prints, posters, cards and other art products, e.g. iPhone cases.


    paddling with a camera

  • Best Black Friday & Cyber Monday Deals for Photographers 2015

    While Black Friday was born in the United Sates, people from all over the world now wait for this day to do some serious shopping too, and photographers are no exception. The Friday after Thanksgiving has become popular everywhere marking the beginning of the winter holiday season. So are Black Friday deals really a “big deal” for photography enthusiasts? Yes, Continue Reading

    The post Best Black Friday & Cyber Monday Deals for Photographers 2015 appeared first on Photodoto.


    Photodoto

  • The 20 Most Popular DSLRs Among our Readers

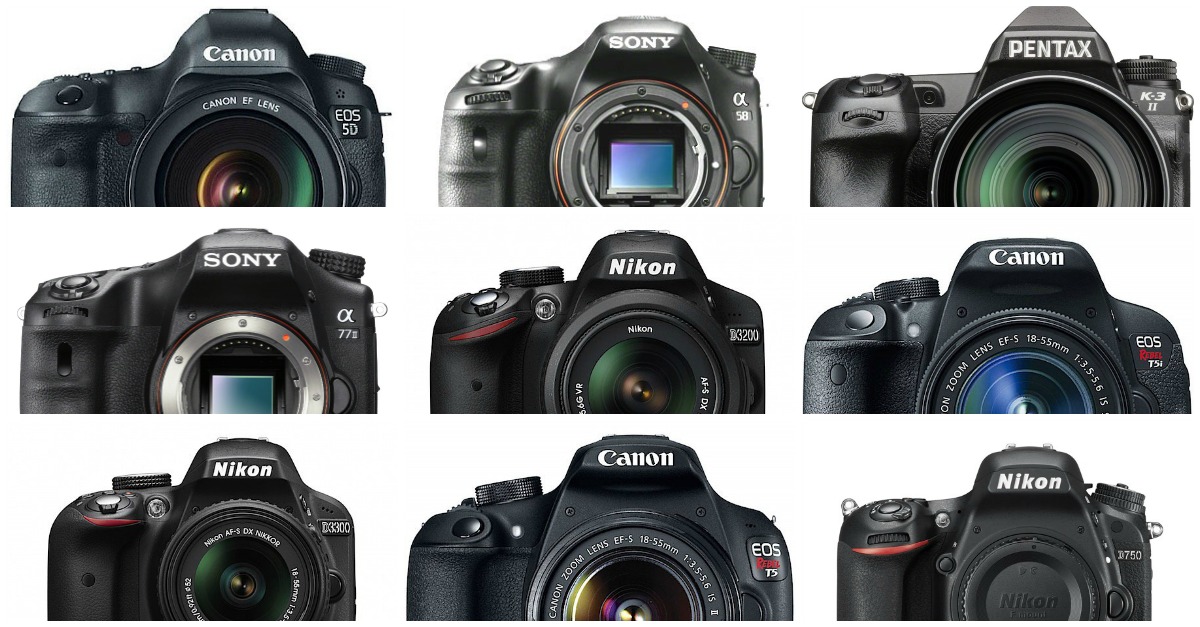
    Every few months we like to report back to the dPS community which cameras (and other gear) are most popular with our readers. Today we’re going to take a look at the highest selling DSLRs among our readers over the last 4 months (as ranked by the reports that Amazon gives us*).

    popular dslrs

    As usual you’ll see it is largely a battle between Canon and Nikon (who dominate this class of camera).

    Further down the list we see a few contenders from other brands. As usual we’ll share another list later this week of mirrorless cameras which is a growing class of cameras among our readers.

    Note: Amazon currently have some great specials at the moment on cameras and gear as part of their Holiday Promotions.

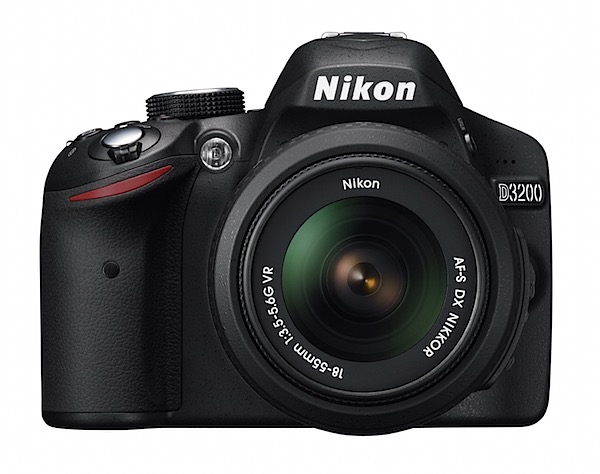
    1. Nikon D3200

    91WSe2OKasL._SL1500_.jpg

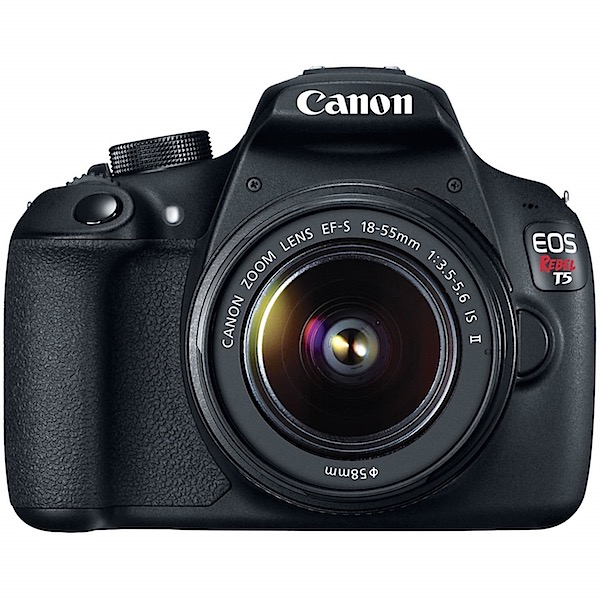
    2. Canon EOS Rebel T5

    71tz63oxXqL._SL1500_.jpg

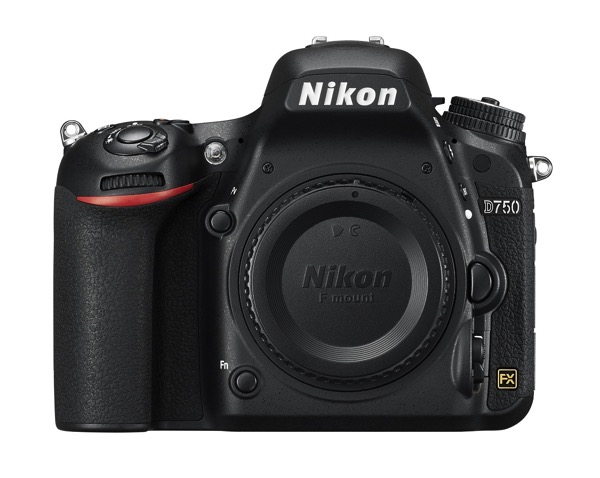
    3. Nikon D750

    Nikon d750

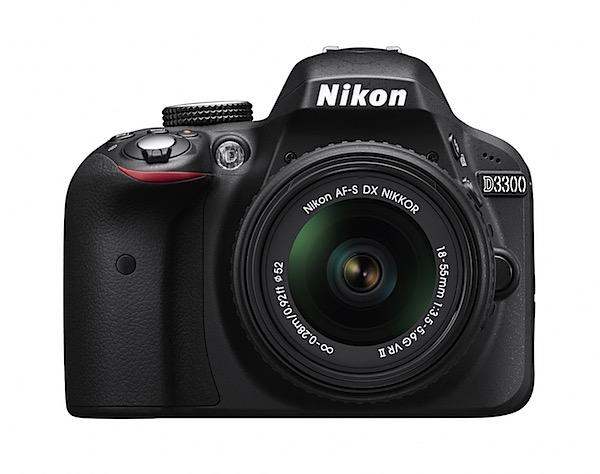
    4. Nikon D3300

    81aLEVAFXnL._SL1500_.jpg

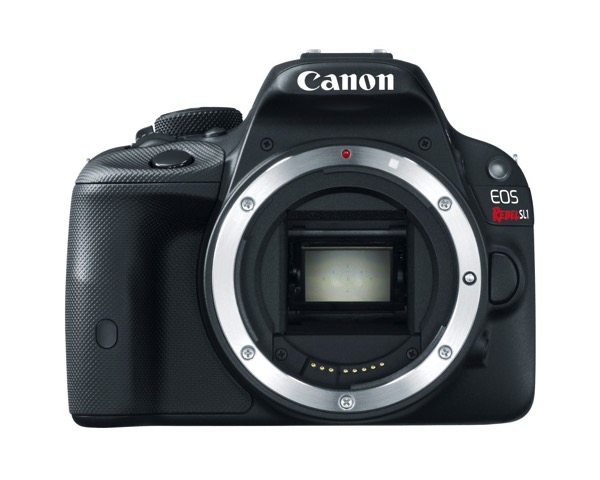
    5. Canon EOS Rebel SL1

    Canon SL1

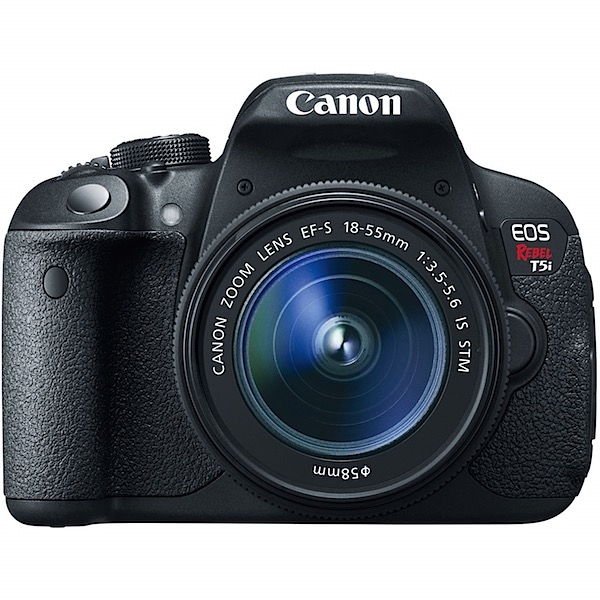
    6. Canon EOS Rebel T5i

    t5i.jpg

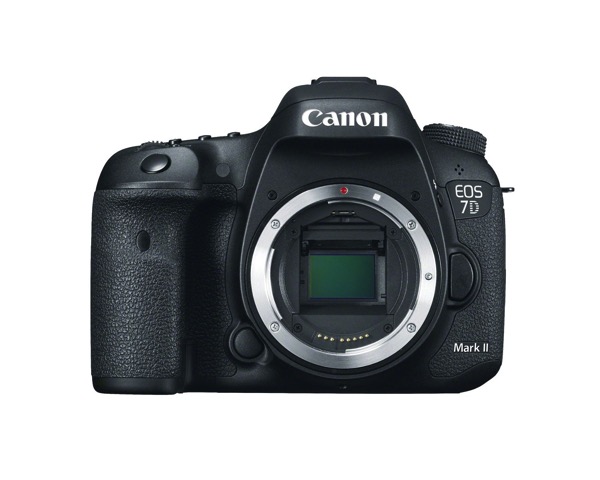
    7. Canon EOS 7D Mk II

    Canon 7d mk II

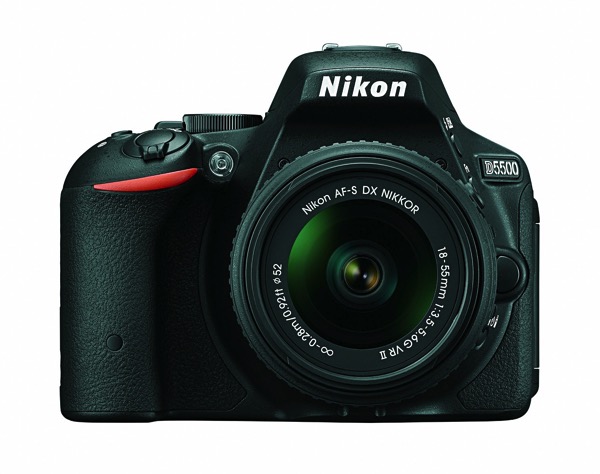
    8. Nikon D5500

    Nikon D5500

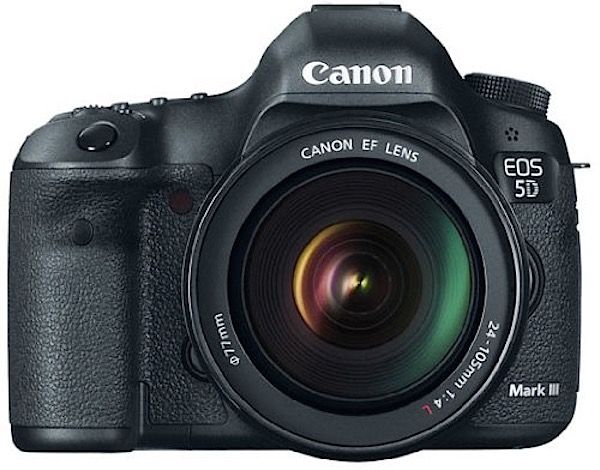
    9. Canon EOS 5D Mark III

    51a0nRQhFzL.jpg

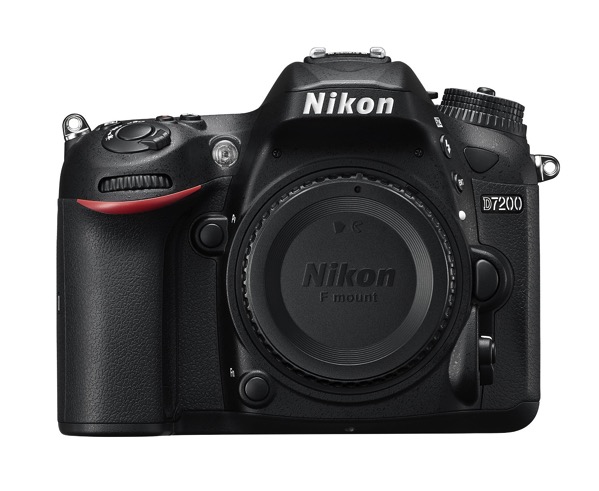
    10. Nikon D7200

    Nikon d7200

    Here’s the next 10 most popular DSLRs.

    1. Canon EOS 6D
    2. Nikon D7000
    3. Nikon D5300
    4. Nikon D7100
    5. Sony SLT-A58K
    6. Nikon D3100
    7. Canon EOS Rebel T3i
    8. Sony A77II
    9. Canon EOS Rebel T6s
    10. Pentax K-3II

    *Note: this list was compiled from reports supplied to us from Amazon.com where we are affiliates. One of the ways dPS is able to cover its costs and be a sustainable business is that we earn a small commission when readers make a purchase from Amazon after clicking on our links (including those above). While no personal details are passed on we do get an overall report from Amazon about what was bought and are able to create this list.

    googletag.cmd.push(function() {
    tablet_slots.push( googletag.defineSlot( “/1005424/_dPSv4_tab-all-article-bottom_(300×250)”, [300, 250], “pb-ad-78623” ).addService( googletag.pubads() ) ); } );

    googletag.cmd.push(function() {
    mobile_slots.push( googletag.defineSlot( “/1005424/_dPSv4_mob-all-article-bottom_(300×250)”, [300, 250], “pb-ad-78158” ).addService( googletag.pubads() ) ); } );

    The post The 20 Most Popular DSLRs Among our Readers by Darren Rowse appeared first on Digital Photography School.


    Digital Photography School

  • Using Emotions to Take Storytelling Images

    A forgotten woman and her daughter – tips for storytelling

    If you travel to remote places you will be sure to get extraordinary photos. Be brave, take a risk, and allow the warm winds of far off places take you on a journey you won’t forget. I’m always looking for opportunities that allow me to visit people and places that are off the usual tourist trail. I travel with an open mind and heart, and am often rewarded by meeting extraordinary people in the most unlikely places.
    51K1433

    My interest is photographing landscapes and portraits. I especially look for people that are indigenous to the countries and the remote areas I visit. Their faces and traditional dress tell the stories of their ancestors, and I want to capture these people before they are no longer able to live as their forebears.

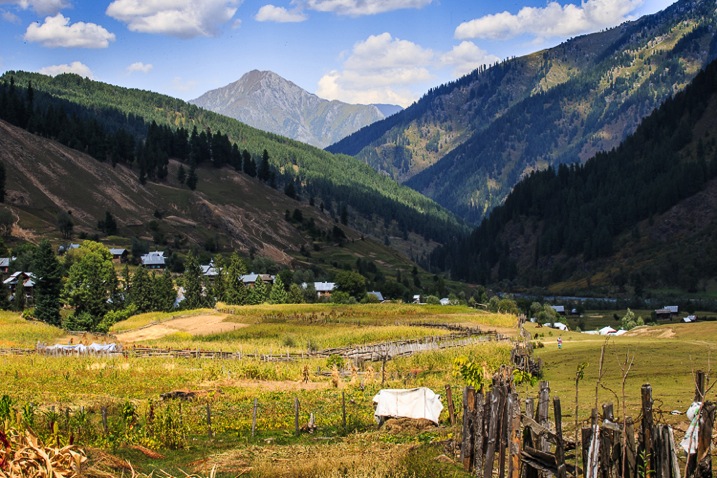
    Traveling along the rough, dusty roads on the border between India and Pakistan you are immediately reminded of just how volatile these two countries still are. You take a great risk to visit these regions where many armed soldiers are seen in camps, at river crossings, and in long convoys of trucks as they continually patrol, ready to defend their respective countries.

    Have patience and wait for opportunities

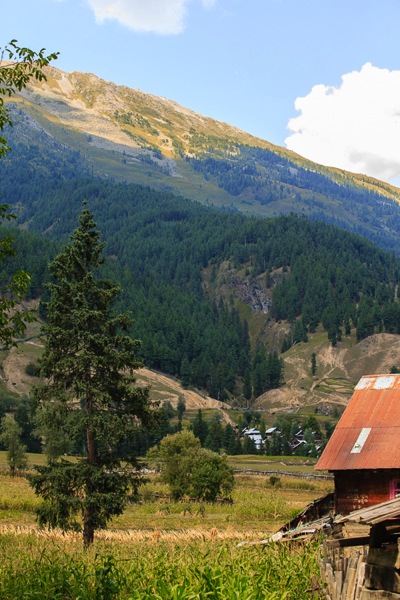
    If you are able to travel in this area during October you will be rewarded with the magnificent autumn colors on display throughout the countryside. My intention was to capture these colors in all their glory, and photograph the natural beauty of the landscape. However, I arrived a little too early. I had a choice: I could stay and wait another week or two, or I could return home. I decided to stay and take the opportunity to have some time to relax, and see what other stories might present themselves.

    It was the last day of my visit and I decided to take a walk, as I often do, to see if I could find a story by keeping an open mind, and a keen eye while I strolled.

    51K1389

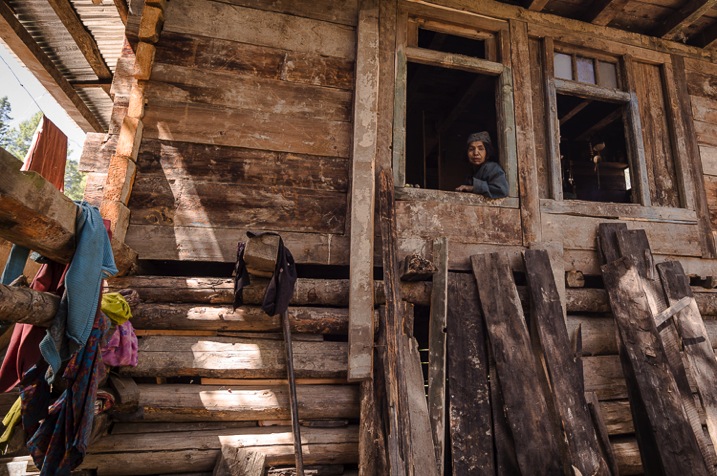
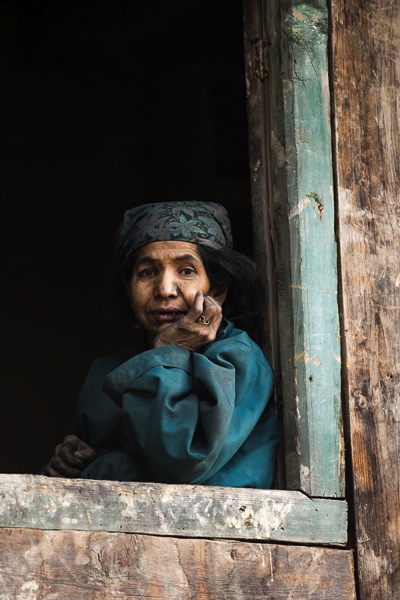
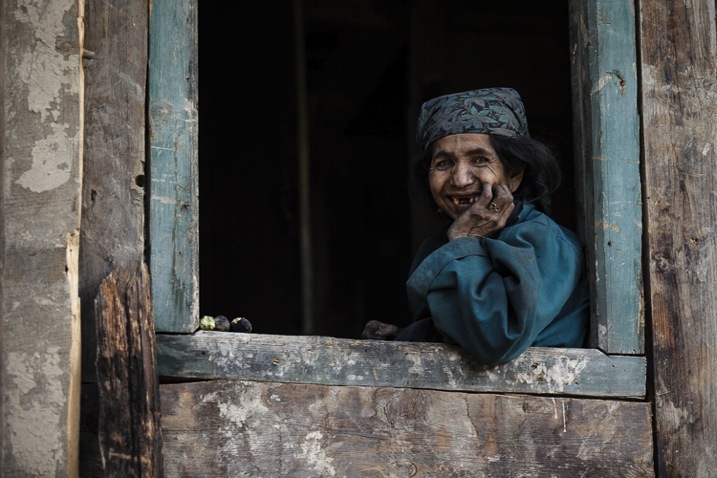
    I knew that in the next few days, this area would be totally cut off for six months during winter. I was feeling a bit low as I hadn’t taken any photos that I felt were of any substance. As I walked I noticed a lady sitting in the window of a very humble wooden house. She looked very sad and I felt drawn to go and speak to her.

    Note: To shoot in this region you need permissions and local guide, which I had. My first image of the story has shows me shooting from outside of her house. Next to me were people of that village and my local interpreter. She was watching me shoot from above. My objective was to talk to her and cheer her up. 

    Image 1

    51K1366

    Allow the story to unfold and follow your instincts

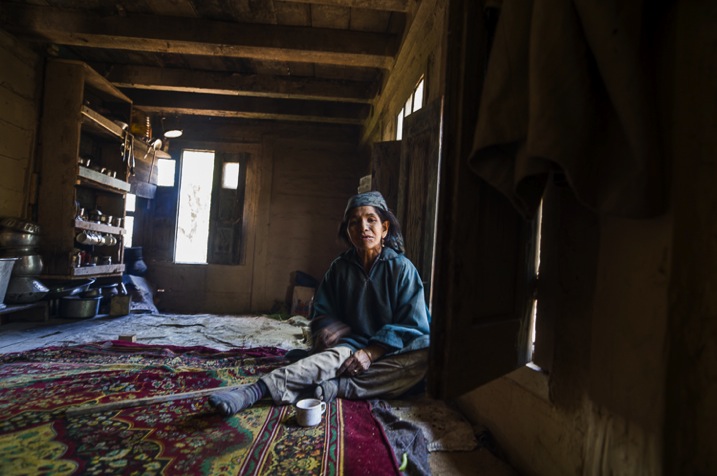
    As soon as I entered the house I thought why not test my new camera in this low light. Once inside, I’m sure you would get the same shock I did. In one corner was a small fire for cooking. The rest of the room was dirty and in complete disarray. Upon seeing me enter, she looked quite stunned, and started to use sign language – I realized she couldn’t speak or hear. I also had a feeling she was mentally challenged, so I thought I would give up the idea of taking some portraits of her. She was trying to talk and constantly moving her body.

    Image 2

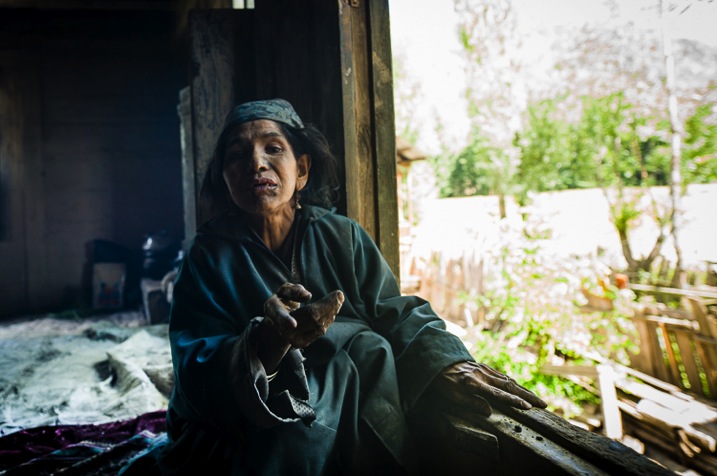
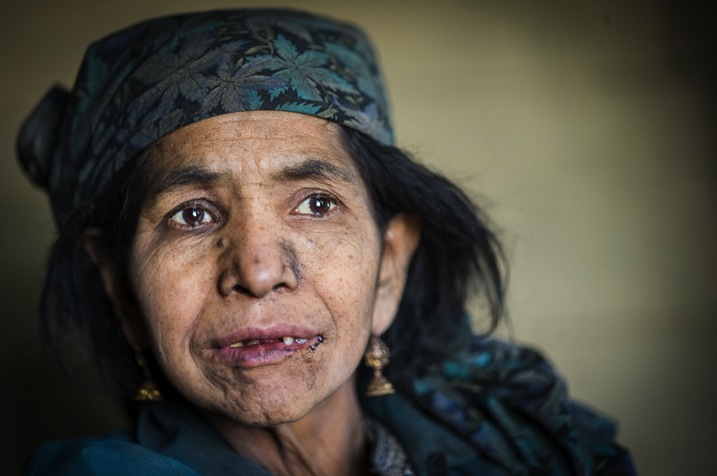
    I smiled and sat opposite her trying to show her my camera. I wanted to explain that I was a photographer so she wouldn’t be scared of me. Normally most of the strangers in this area are suspected militants, or a threat. As I tried to communicate with her, she continuously tried to sign violence and killing, which she must have experienced since birth. In sign language I tried asking her if I could photograph her, unfortunately it was my first try with sign language and she did not understand. Something inside me pushed me to take a few shots and leave. Somehow I managed to take some photos despite feeling low after spending time with her.

    Image 4

    L1000775

    Then her mother walked inside the house and told me the story of her daughter. She was deaf, and mentally challenged since childhood. They were living a very difficult life and there was nobody else in family. I listened and took one shot as she broke down. All I could do was put my hand in my pocket and give her whatever cash I had.

    Image 5

    Look for the emotion parts of the story

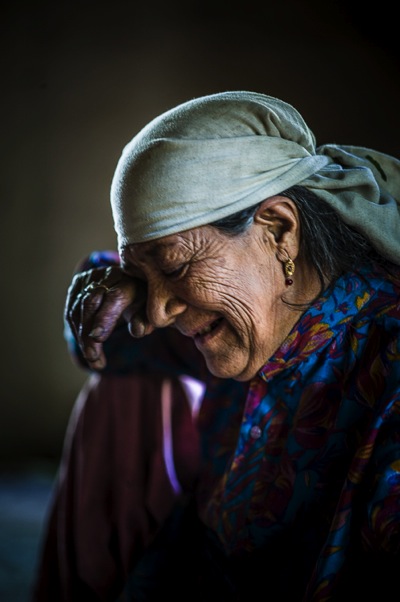
    When I left the house I felt heavy hearted. I looked back and saw the daughter smile as she was looking out from her window, and I smiled back at her. I clicked the picture as a memory and it turned out to be the best photo I had taken on this visit. If you keep an open mind and follow your instincts you may well find a story such as this.

    Image 6

    As I drove back her powerful smile did not leave my mind. I kept thinking about her, she had left an impression.

    Review

    Look at your images after you take them as I did. It’s only then that you will realize how powerful they are.

    Her smile started growing on me and I thought that perhaps I had made a small difference to her life. Her smile was so genuine. Even before arriving back home I decided to write about, and share her story. This story provoked my thoughts, altered my ego, and forced me to approach everyone with her story, whether they are my admirers or critics. I wanted to let the world know of her existence and those like her, as you will when you take those rare and unique photos and experience what I did. There are many such people on this earth for whom life is a day-to-day existence and there are only fleeting moments of happiness.

    Take a risk and go for it

    So… be brave, take a risk, and allow the warm winds of far off places take you on a journey you won’t forget. Trust me you won’t regret it!

    Do you have any images that you took that inspire you and tell a story? Please share them in the comments below.

    googletag.cmd.push(function() {
    tablet_slots.push( googletag.defineSlot( “/1005424/_dPSv4_tab-all-article-bottom_(300×250)”, [300, 250], “pb-ad-78623” ).addService( googletag.pubads() ) ); } );

    googletag.cmd.push(function() {
    mobile_slots.push( googletag.defineSlot( “/1005424/_dPSv4_mob-all-article-bottom_(300×250)”, [300, 250], “pb-ad-78158” ).addService( googletag.pubads() ) ); } );

    The post Using Emotions to Take Storytelling Images by Aarief appeared first on Digital Photography School.


    Digital Photography School