Category: Photography

  • 6 Advanced Composition Techniques to Improve Your Photos

    When you think of composition in photography, what is the first idea that pops into your head? Let me guess – the rule of thirds?

    Likely that was true for many of you who reading this, why do you think that is? The rule of thirds is probably the most widely known, and well used compositional tool in photography. Most often, it is the first composition tool we are taught (it was for me anyway). Once we know it, and use it, we don’t really think about it, or about any other compositional techniques.

    There are other methods though, using visual design techniques that talk about texture and colour, amongst others. Many photographers simply default to the rule of thirds and take the shot, without trying other compositions. These other techniques can make a difference in your images. This article is about six techniques you can use to improve your compositions, and your photos Some of these would be known as advanced techniques, but once you understand them, they are pretty self explanatory.

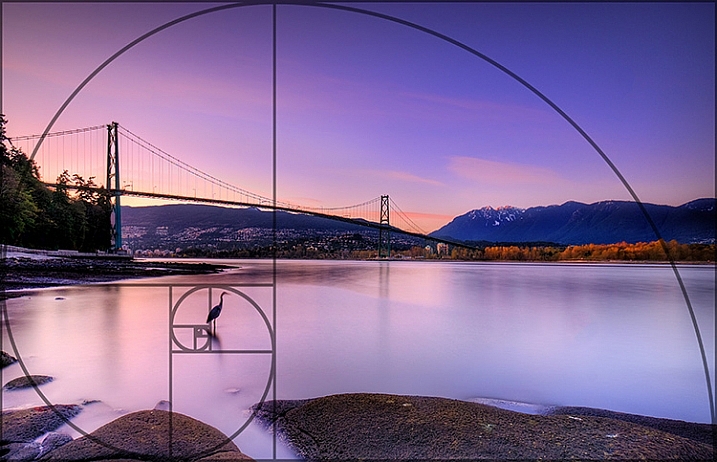
    1. The Golden Ratio or Fibonacci Spiral

    Use the Golden Ratio to enhance your composition

    Use the Golden Ratio to enhance your composition

    This is a tool that has been used for centuries, as a design principle. Many famous works of art use the Golden Ratio in their composition and it is often seen in nature’s own designs. Think of the spiral of a snail shell, how it curls in on itself. That shape conforms to the Golden Ratio. It is a ratio of 1:1.618 which seems to work really well in design and photography. To read much more detail about this technique check out: Divine Composition With Fibonacci’s Ratio (The Rule of Thirds on Steroids).

    2. Unity

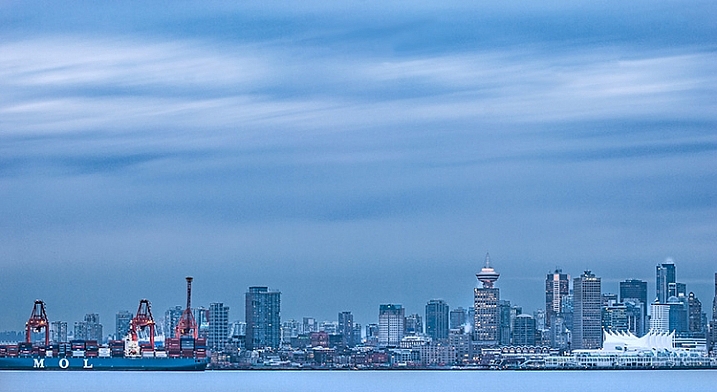
    Unity is about order. Repetition can be very powerful in this regard. You can repeat shapes, lines, or colours in your image. By doing so you create a unified view of the scene, and this in turn gives a very powerful compositional effect. Unity can bring a calming feel to the image, try and find a subject that portrays this.

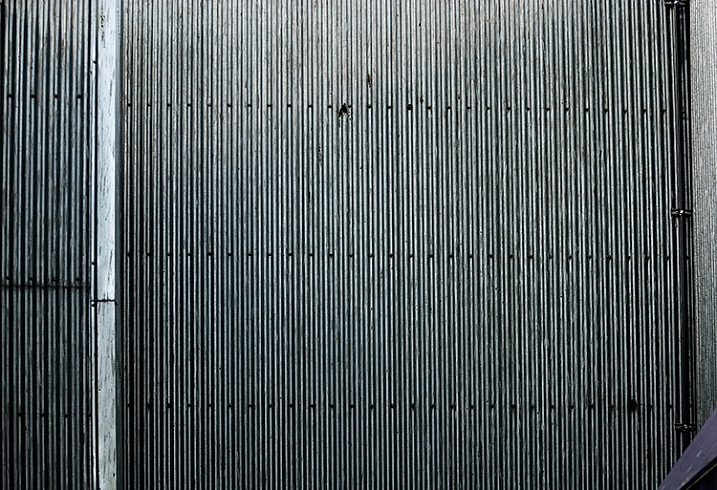
    The lines and the rivets in the image make it feel uniform, as does the lack of colour

    The lines and the rivets in the image make it feel uniform, as does the lack of colour

    3. Coherence

    Different from unity, coherence is more about similar types of elements or shapes in your scene. Think of a rocky river bed with similar sized rocks and pebbles. This scene would be coherent if the rocks and pebbles are a similar size, shape, and colour. Coherence appeals to the viewer’s sense of order, and can make for very interesting images.

    Similar shapes and colours make this image feel more coherent

    Similar shapes and colours make this image feel more coherent

    4. Balance and Rhythm

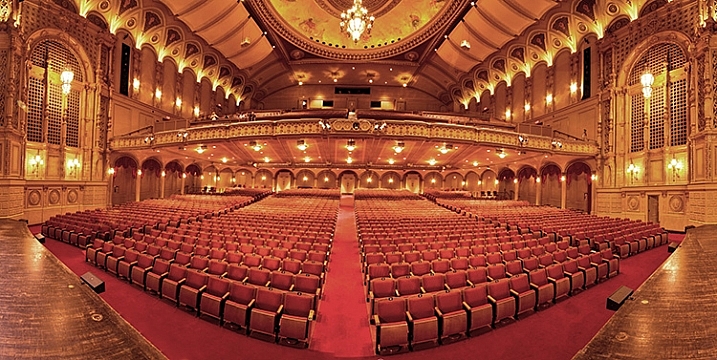
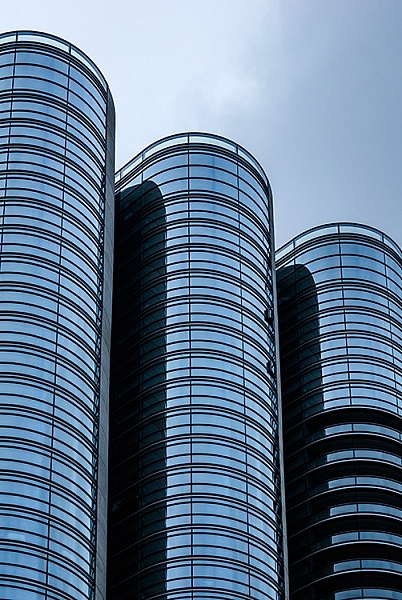
    Balance is pretty much as it says, the idea here is to try and arrange the elements in your scene so that the image is symmetrical. This can be done using lines and shapes. The ideas is to create a sense of equality in the scene. Rhythm is similar in a sense, but is about a repeating pattern in the scene. These are a little more difficult to find, but often a close up or abstract image can showcase this technique well.

    The centred composition of this image of a theatre shows the balance in the scene

    The centred composition of this image of a theatre shows the balance in the scene

    The curved shapes of the glass buildings gives a great sense of rhythm

    The repeated curved shapes of the glass buildings gives a great sense of rhythm

    5. Space

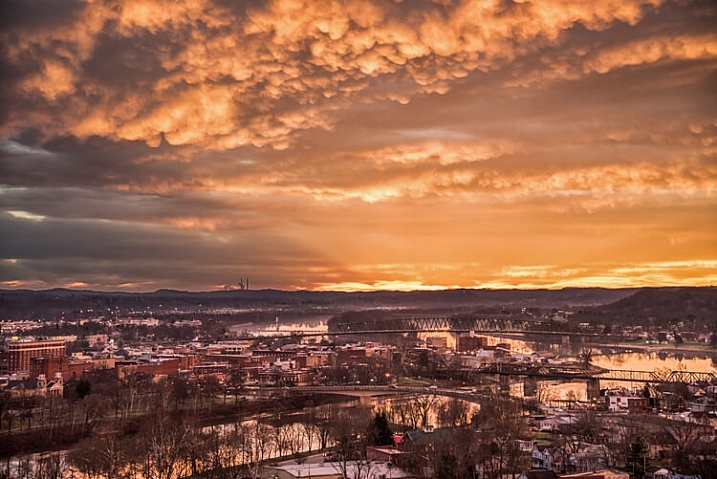
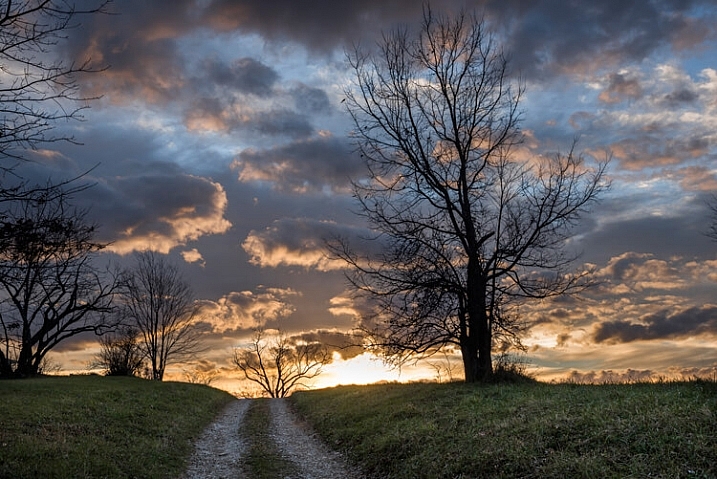
    Open, or negative space, in your image is sometimes as important as the subject. Negative space gives your subject context, and shows the viewer where or how your subject relates to its surroundings. Quite often, negative space is the sky. It can be tempting to ignore this one, but if it’s used correctly, this can be a very powerful compositional tool.

    The texture in the clouds in give this image some gravity. If the sky were simply blue, it would not be as impactful

    The texture in the clouds in give this image some gravity. If the sky were simply blue, it would not be as impactful

    6. Breaking the Rules

    Now that you have some new ideas about how to make better compositions. Knowing these techniques will certainly improve some of your images, but also, knowing how to break them is just as important. In some cases, it will be obvious which technique to use, in others, you may find that putting your subject in the middle of your frame works best. You need to decide what will work for your image. Try techniques like this and see if one works. If not, break the rules and do what you think looks good.

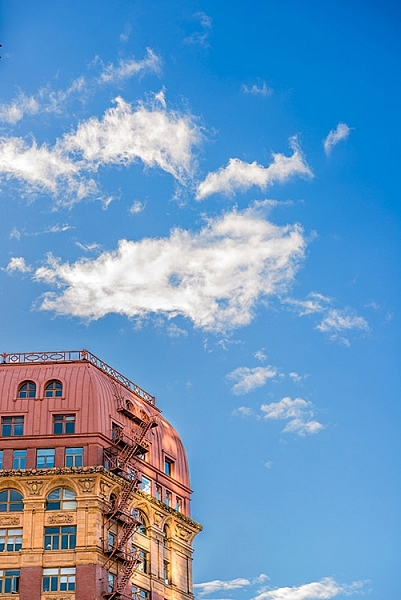
    By cropping the building quite aggressively, the image seems unfinished, but the colours and the sky make it work

    By cropping the building quite aggressively, the image seems unfinished, but the colours and the sky make it work

    googletag.cmd.push(function() {
    tablet_slots.push( googletag.defineSlot( “/1005424/_dPSv4_tab-all-article-bottom_(300×250)”, [300, 250], “pb-ad-78623” ).addService( googletag.pubads() ) ); } );

    googletag.cmd.push(function() {
    mobile_slots.push( googletag.defineSlot( “/1005424/_dPSv4_mob-all-article-bottom_(300×250)”, [300, 250], “pb-ad-78158” ).addService( googletag.pubads() ) ); } );

    The post 6 Advanced Composition Techniques to Improve Your Photos by Barry J Brady appeared first on Digital Photography School.


    Digital Photography School

  • Let’s Get Up Close with Extension Tubes

    If you want to get up close to your subject, closer than you can by setting your lens to its minimum focusing distance, then extension tubes are an excellent way of doing so.

    Extension tubes and close-up photography

    When you turn the focusing ring of your lens away from infinity, the front element moves out from the lens body. The distance between the front element and the sensor (or film) plane is called extension. When your lens is set to its minimum focusing distance, the front element can move no further forward. You have reached the limit of the lens’s design.

    An extension tube is a hollow tube that fits between your lens and camera body. It moves the lens further away, increasing the extension of the front element. In turn, this lets you move the lens closer to the subject, increasing magnification, and in some cases even matching the 1:1 magnification of a true macro lens.

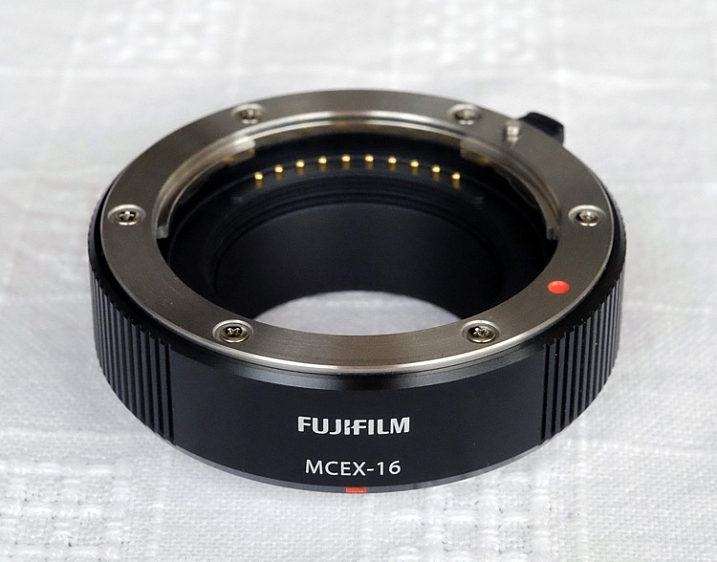
    This is the Fujifilm MC-EX 16 extension tube that I use. The electrical contacts, that allow the lens and camera body to communicate, are visible at the back (more on the importance of this later).

    Extension tubes and close-up photography

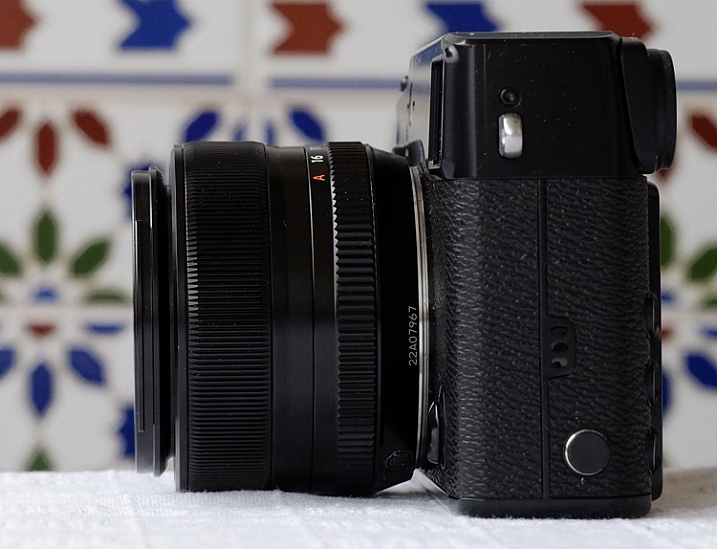
    This is the Fujinon 35mm f/1.4 lens mounted to an X-Pro 1 camera. The distance between the front lens element and the sensor plane is the extension. This figure helps determine the closest point the lens can focus on (in this case 28cm), and subsequently the magnification.

    Extension tubes and close-up photography

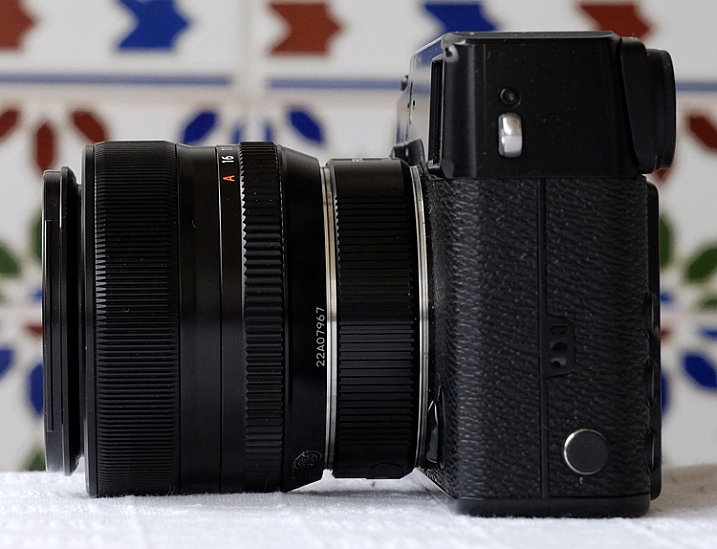
    Below is the same lens with the MC-EX 16 extension tube added. You can see that the front element of the lens is now 16mm further away from the sensor plane. Now the lens can focus on a much closer point.

    Extension tubes and close-up photography

    Extension tubes versus macro lenses

    Extension tubes are a great tool, but for the best possible optical quality and the most versatility you should choose a macro lens if you can. The reason for this is that increasing the extension of a non-macro lens means that you are using it outside the limits it is designed to work within. Macro lenses, on the other hand, are designed to give their peak optical performance at close focusing distances. They can also focus at infinity – whereas a lens fitted with an extension tube cannot.

    The main benefit of extension tubes is that they are small and light. You can carry them around in case you need them, and leave your macro lens (if you have one) at home. They are ideal for anybody who travels a lot, or who wants to keep the weight of their camera bag down.

    Cheap extension tubes versus good quality ones

    You can buy inexpensive extension tubes from Amazon or eBay. These may look like a great deal but they break the electrical connection between your camera and the lens. If your lens has an electronically controlled aperture that means, you can’t stop the lens down. The camera also can’t record the aperture setting in the EXIF data.

    Your camera will still work, and meter the subject to give you the correct exposure. But, given that depth of field at the widest aperture is incredibly narrow, and that you need to stop down to improve image quality, these cheap extension tubes are not of much practical use. They are only useful if you have a lens with a manual aperture ring.

    The best ones to buy are those made by your camera manufacturer, or by a third party like Kenko or Vivitar, who make extension tubes that maintain the electronic connection between lens and camera. There is usually a choice of two sizes. The widest will get you closer, and the narrowest will come in useful when you don’t need to be quite so close. You may want to start off buying one or the other, but will probably end up buying both to cope with different situations.

    Extension tubes and magnification

    Extension tubes are most effective when used with lenses of focal lengths between 24-100mm. They are not so effective when used with telephoto lenses (for these, use a close-up lens). You can’t use an extension tube with some wide-angle lenses as it becomes impossible to focus with it fitted.

    To see how much magnification an extension tube will give you with a specific lens, check the specifications on B&H Photo Video (United States) or Wex Photographic (UK). You may also be able to find the information on the manufacturer’s website. The instruction sheet that comes with the extension tubes also has this information, and you may be able to find a copy online.

    There’s an easy formula for calculating how much extra magnification an extension tube will give you:

    Increase in magnification = extension distance/lens focal length

    For example, my Fujinon 35mm f1.4 lens has a magnification of 0.17x at its closest focusing distance of 28cm (I found this information in the spec sheet). Adding a 16mm extension tube means the increase in magnification is 0.45 (16/35), giving a total of 0.62x (0.45 + 0.17). This figure is a little academic, but it’s useful for evaluating whether you can add an extension tube to your lens and reach the 1:1 (1x) magnification, offered by most macro lenses.

    Extension tubes in action

    These photos show you how much difference an extension tube can make.

    Extension tubes and close-up photography

    This first image was taken with my 35mm lens. This is the closest I could get to the flowers.

    Extension tubes and close-up photography

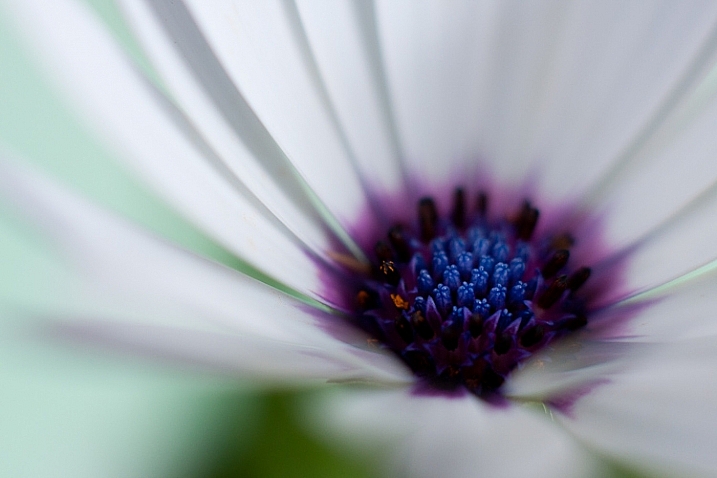
    This was taken with the 35mm lens plus 16mm extension tube. Look at the difference.

    Extension tubes and close-up photography

    This photo was taken with a Canon 85mm lens fitted with a 12mm extension tube.

    Extension tubes and close-up photography

    This was taken with the same lens fitted with a 25mm extension tube. It shows the huge difference a different sized tube makes to the magnification.

    Your turn

    Do you own an extension tube? Which ones do you have and how useful are they? Let us know in the comments, it will be useful for other readers who are thinking about buying some.


    Mastering PhotographyMastering Photography ebook by Andrew S. Gibson

    My ebook Mastering Photography: A Beginner’s Guide to Using Digital Cameras teaches you how to take your camera off automatic so you can take control and start creating the photos you see in your mind’s eye. Click the link to learn more or buy.

    googletag.cmd.push(function() {
    tablet_slots.push( googletag.defineSlot( “/1005424/_dPSv4_tab-all-article-bottom_(300×250)”, [300, 250], “pb-ad-78623” ).addService( googletag.pubads() ) ); } );

    googletag.cmd.push(function() {
    mobile_slots.push( googletag.defineSlot( “/1005424/_dPSv4_mob-all-article-bottom_(300×250)”, [300, 250], “pb-ad-78158” ).addService( googletag.pubads() ) ); } );

    The post Let’s Get Up Close with Extension Tubes by Andrew S. Gibson appeared first on Digital Photography School.


    Digital Photography School

  • How to Create Bokeh In-camera and Using Photoshop

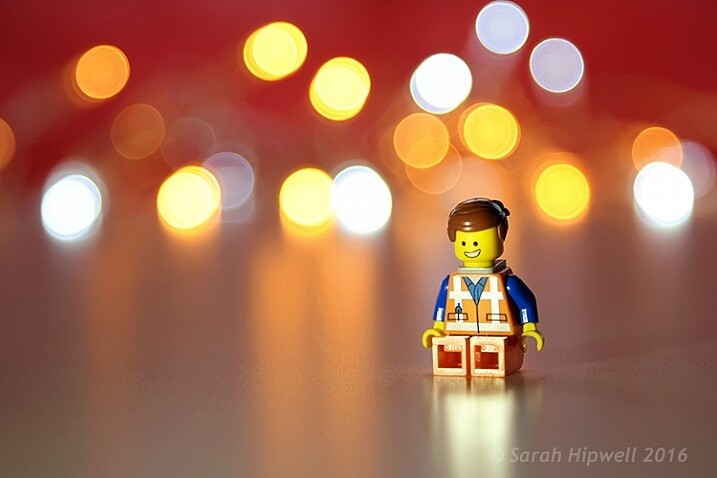
    Title-Emmet-with-Bokeh

    Emmet with background bokeh from small LED lights.

    As the holidays are over, I couldn’t resist taking a classic bokeh shot before putting away the lights and decorations for another year.

    In this article I’ll show you how you can create this effect in-camera in your own living room. Plus I’ll show you how easy it is to create a bokeh effect using Photoshop as well.

    What is Bokeh?

    Bokeh comes from the Japanese word boke, which means blur or haze, or the phrase boke-aji which is the blur quality. It isn’t just that any blur will do. It’s more to do with an aesthetic quality of the blur.

    What does Bokeh look like?

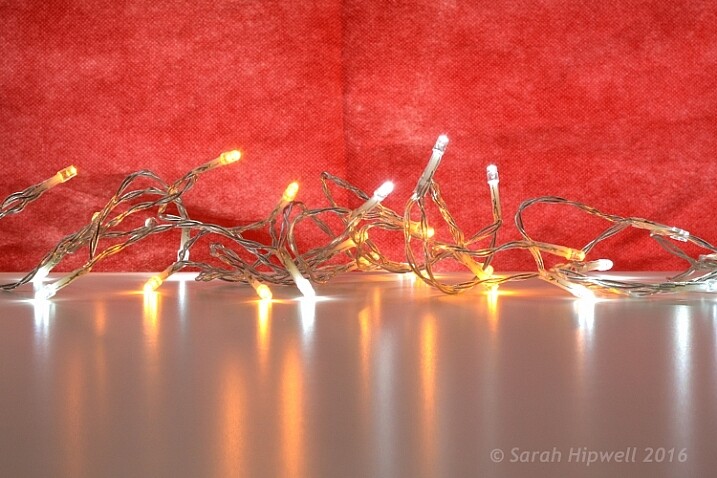
    The easiest way to see the shape of the bokeh is by taking a photo with small lights in the background, thrown way out of focus (see second image below).

    Small-LED-lights-with-window-in-background

    Small LED Lights placed in front of a big window with red see through fabric.

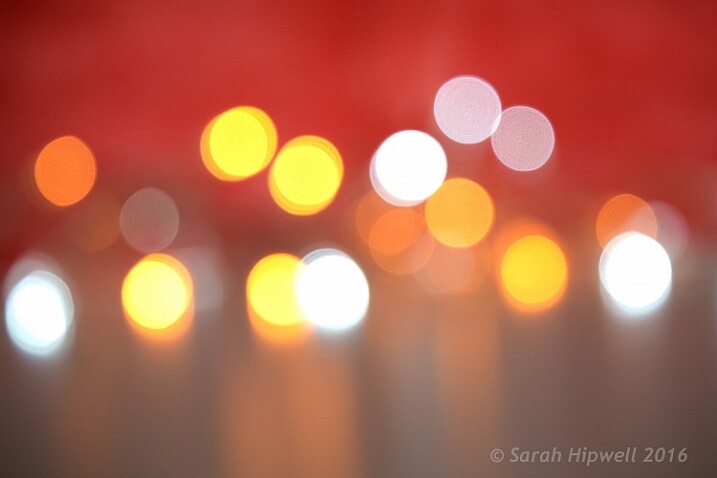
    Bokeh-effect-using-aperture-f4

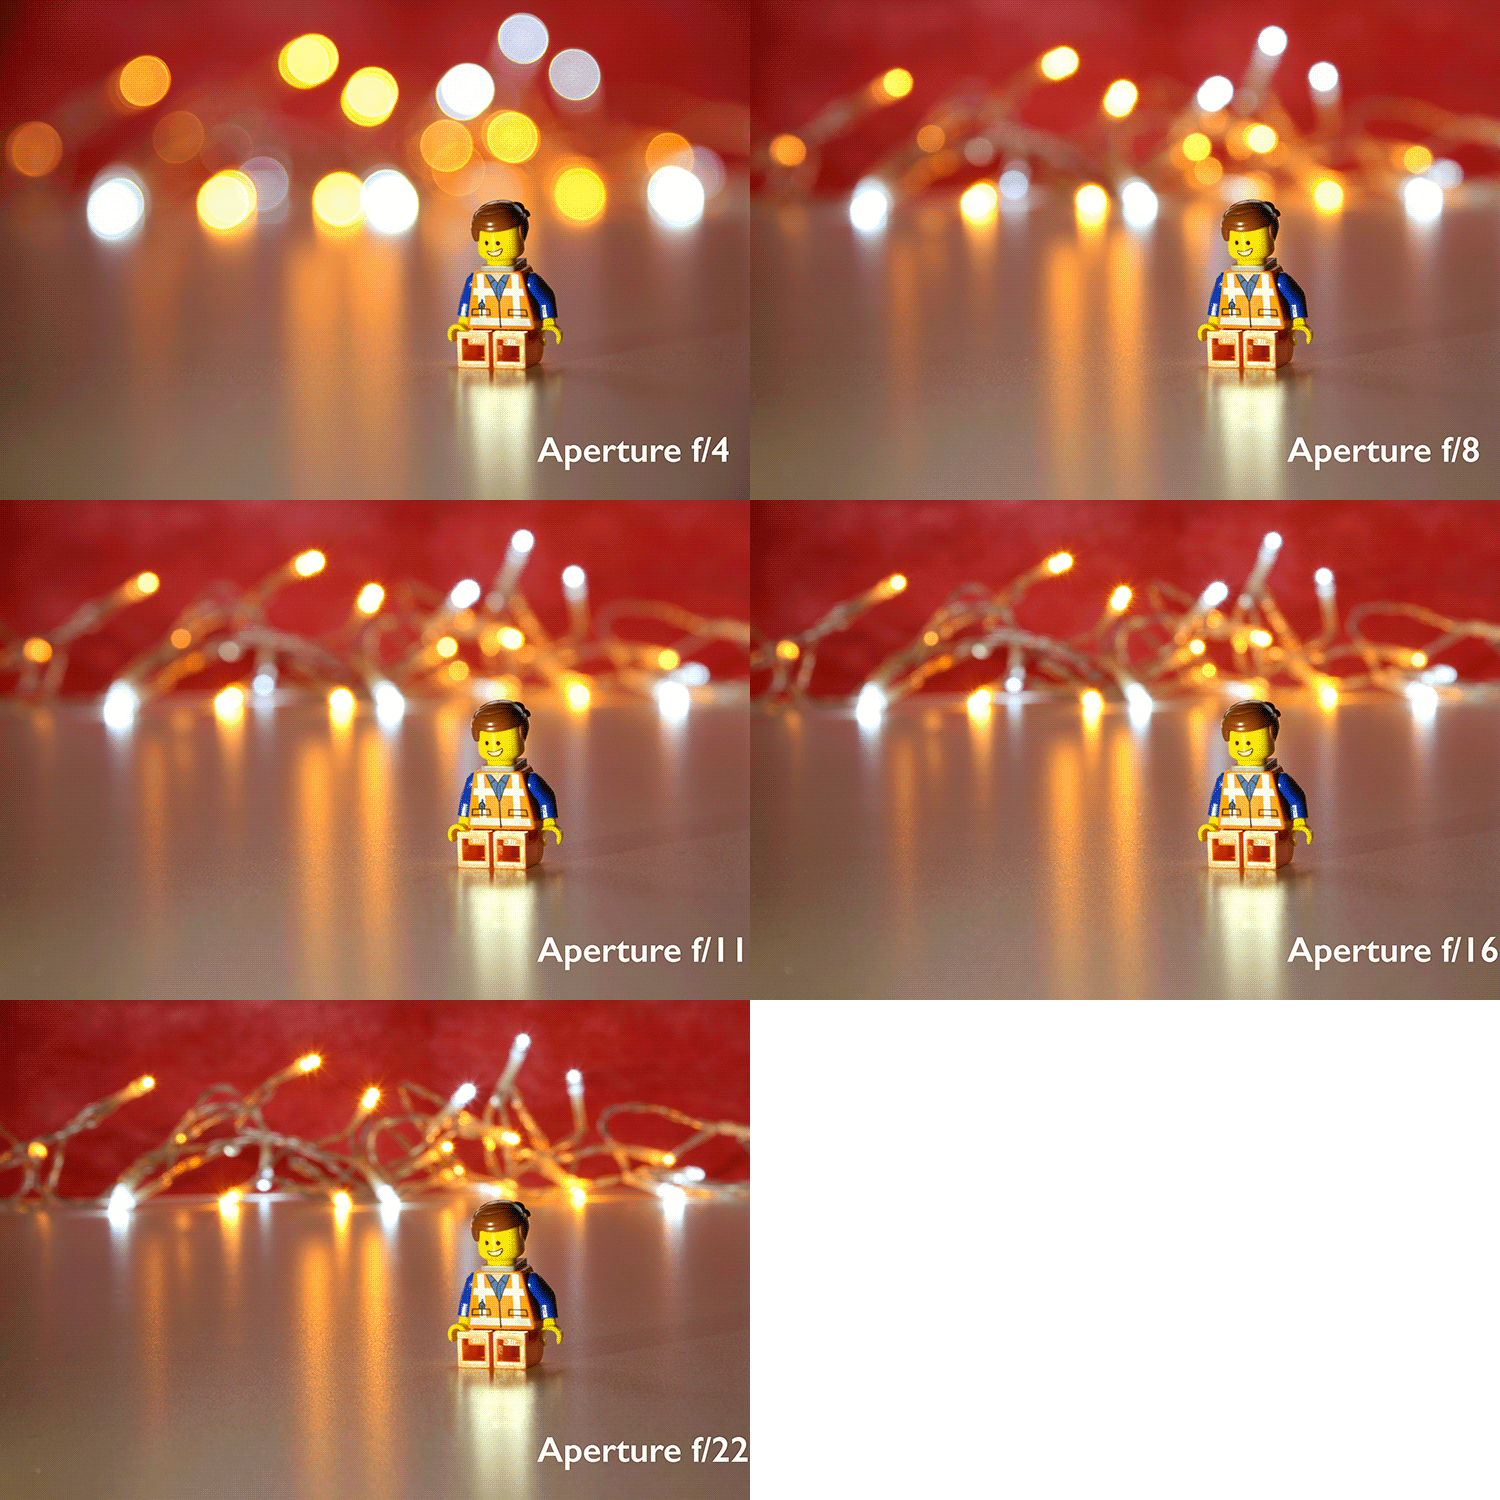
    Bokeh effect created in-camera using an aperture of f/4, with a 120mm focal length lens.

    Is shallow Depth of Field (DOF) the same as bokeh?

    No, but it is important to understand DOF and how it can play an important aspect in creating a bokeh effect. Depth of field (DOF) is the area of your image that is in focus.

    Shallow depth of field refers to the object or subject being in focus, but the areas in front, and especially in the background, are blurred. Whereas bokeh is the term that refers to the aspect of light sources that are blurred in the background or foreground.

    When discussing DOF, we need to take into consideration three other factors:

    • Aperture size
    • Distance from the lens
    • Focal length of the lens

    In practice, photographers who shoot portraits, will in general, use long focal lengths and a wide aperture setting (f/2.8-f/5.6). For example, when you are shooting outdoors with your model, and you don’t want the background in focus. Street lights, or interior building lights, can be used effectively for creating bokeh in the background of your subject.

    Aperture

    Bokeh is affected by the shape of the diaphragm blades (the aperture) of the lens. A lens with more circular shaped blades will have rounder, softer circles, of out-of-focus highlights. Whereas a lens with an aperture that is more hexagonal in shape, will reflect that shape in the highlights. Generally speaking, the faster the lens, the better the bokeh.

    In the following animated gif, you can see that the wider the aperture (the lower the f-number), the shallower your depth of field. The lowest aperture setting on my lens is f/4 but I zoomed out to its maximum focal length of 120mm.

    Aperture-animation

    Animated gif illustrating the different apertures and how they deal with the lights in the background being thrown out-of-focus.

    Create your own bokeh

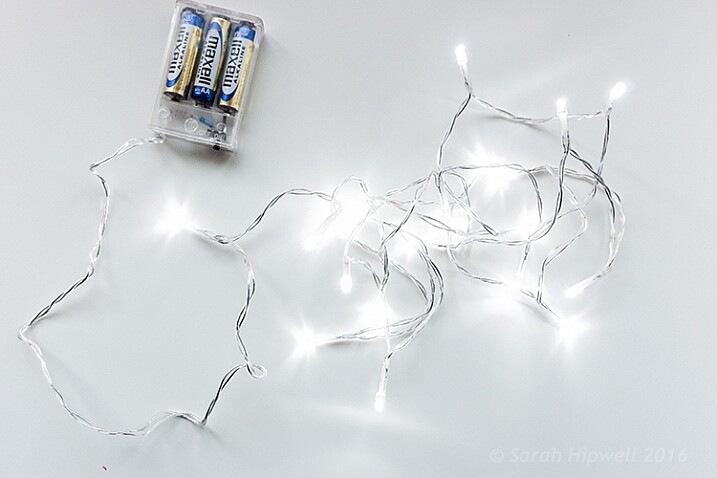
    This setup is really easy to try at home. Use whatever lens you have. Set your DSLR camera to Aperture priority or Manual mode ,and use a tripod. I used small LED christmas lights that were battery operated.

    Small-LED-lights

    Small battery operated LED lights.

    Place your object a good distance away from the camera, and in front of the lights. The distance will vary depending on the lens (focal length) that you are using, so it will be trial and error exercise. Your object must be as near as possible to the camera lens.

    Begin with the widest aperture on your lens. The objective is to get the circles of light as round, and as smooth as you can. You may need to experiment by moving the object further away from the lights.
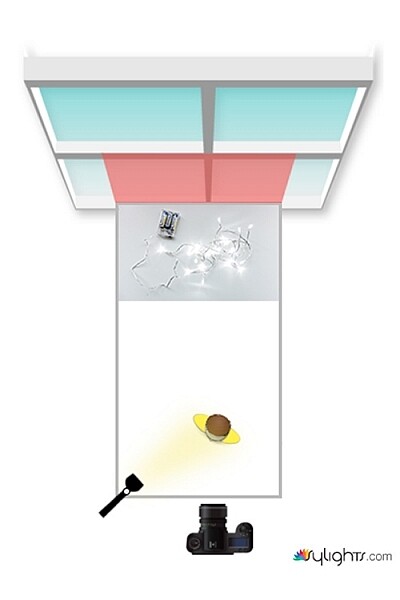
    The lighting I used for this setup was a big window light and a small small LED light on Emmet.

    Lighting-setup-to-create-Bokeh-in-your-own-home

    Lighting diagram to show the setup for doing bokeh shots in your own home.

    Creating bokeh in Photoshop

    Once I got my shot in-camera, I then decided to see if I could create a great bokeh effect in Photoshop.

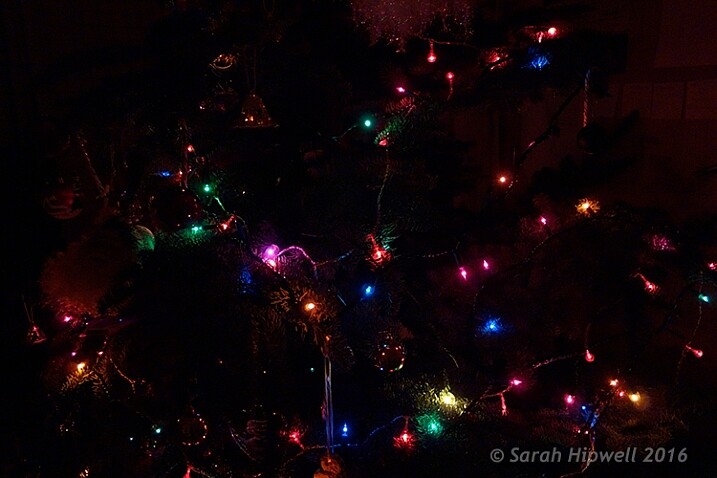
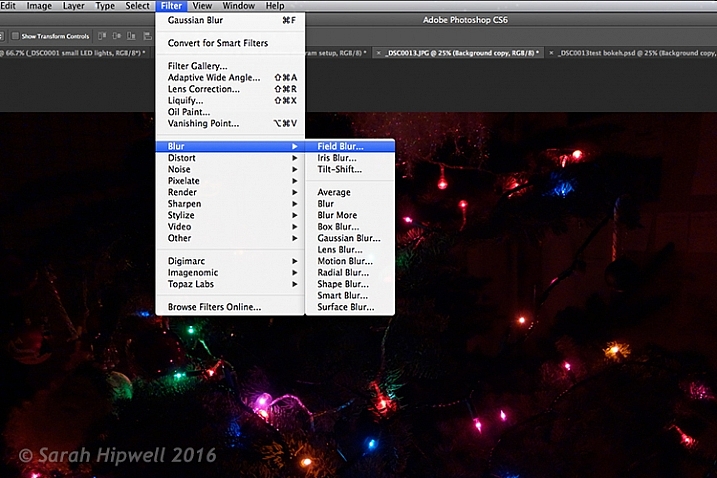
    In the Filter Gallery, under Blur is a fantastic option called Field Blur, which has a dedicated Bokeh feature. I took a few random close-up shots of my christmas tree. I focused only on the lights.

    Christmas-tree-with-lights

    Random shot of a christmas tree with lights.

    Next, I brought it into Photoshop (CS6). I used the image straight out of camera (SOOC), I didn’t do any other post-processing. Go to Filter > Blur > Field Blur.

    Filter-Blur-Field-Blur

    The Field Blur in the Filter Gallery in Photoshop has its own bokeh feature.

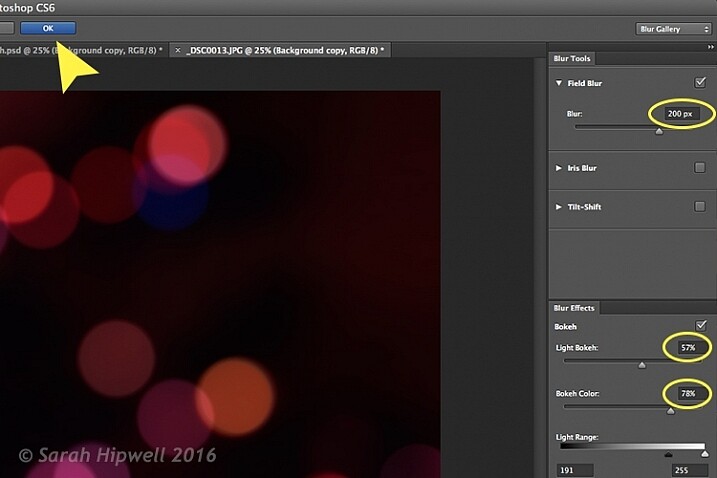
    Two panels appear on the right: Blur Tools and Blur Effects. Under Blur Tools, enter 200 px in the Field Blur option. Under Blur Effects, move the Light Bokeh slider to 57%, and the Bokeh Color slider to 78%. Then press the OK button. It takes a few seconds for the blur to take place. Et voilà!

    Field-Blur-dialog-options

    You can experiment with the input figures for the Blur and Blur Effects to get the desired bokeh. I chose these.

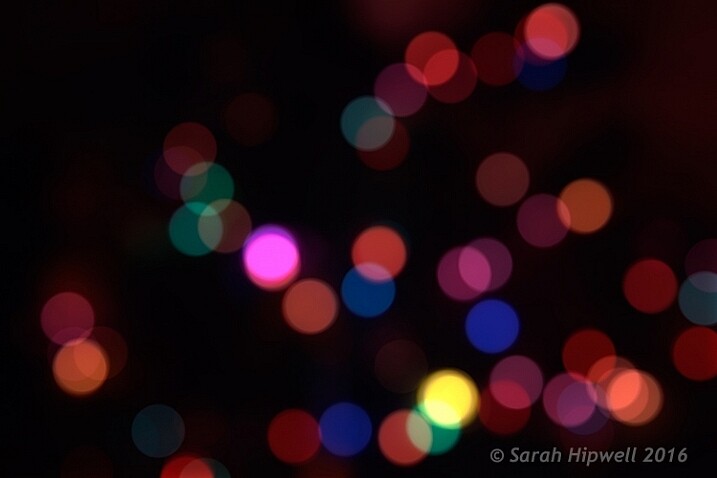
    Bokeh-from-christmas-tree-lights

    Bokeh effect created in Photoshop using the Field Blur.

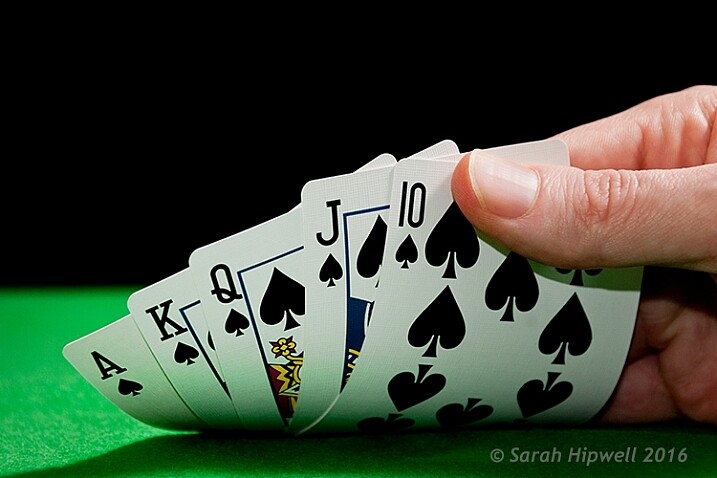
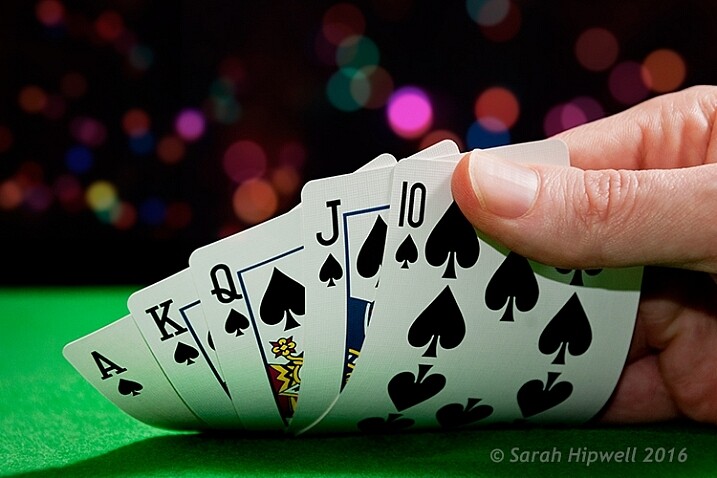
    Okay, so now what do you do with the image? Use it as a background. I shot a series of playing cards images against a black background.

    Playing-cards

    One of a series of images I shot against a plain black background.

    This is where the power of Blending Modes and Layer Masks comes into their own.

    By placing the bokeh image on its own layer. I duplicated it to make another copy. Then I reduced the size of the original and moved this over to the left side of the image. I changed the Blend Mode to Screen and reduced the Opacity. I wanted the lights to appear further away from the playing cards, to give it a better depth of field. The screen blend option eliminates the dark areas and makes the light areas show through, making the bokeh appear.

    For the copy layer, I left the size as it was and moved it over to the right. I increased the brightness by using a Levels Adjustment layer to match the light source. I also changed the Blend Mode of this layer to Screen. Lastly, I masked out any hard lines using Layer Masks.

    Playing-cards-with-bokeh-background

    Bokeh effect created in Photoshop and then applied to a background in this image.

    I was well pleased with the result.

    Now it’s your turn. Let’s see your images with “Bokeh-licious” images posted below.

    googletag.cmd.push(function() {
    tablet_slots.push( googletag.defineSlot( “/1005424/_dPSv4_tab-all-article-bottom_(300×250)”, [300, 250], “pb-ad-78623” ).addService( googletag.pubads() ) ); } );

    googletag.cmd.push(function() {
    mobile_slots.push( googletag.defineSlot( “/1005424/_dPSv4_mob-all-article-bottom_(300×250)”, [300, 250], “pb-ad-78158” ).addService( googletag.pubads() ) ); } );

    The post How to Create Bokeh In-camera and Using Photoshop by Sarah Hipwell appeared first on Digital Photography School.


    Digital Photography School

  • Top Photography Accessories to Have in 2016

    Photography is an expensive hobby, without a doubt. Some lenses or speedlights may costs even more than a camera body itself. After buying a DSLR camera you may need a few accessories to improve your workflow, keep your gear safe and secure. Thus, we decided to put together 30 extremely valuable photography accessories you may need while shooting. This collection Continue Reading

    The post Top Photography Accessories to Have in 2016 appeared first on Photodoto.


    Photodoto

  • 5 Things to Consider Before Deciding to Specialize or Not in Your Photography

    There comes a point in every photographer’s career where they ask themselves the proverbial question, “Should I specialize in a specific genre of photography? Or should I just keep photographing anything and everything that comes my way?” There are several schools of thought on this dilemma, depending on who you ask, and what you read. Ultimately the answer is very personal, and specific to each photographer. The point of this article is not to convince you, the reader, of one way verses the other. The objective here is to simply state my personal reasons for how I would answer that question, and leave the final decision making up to you.

    Memorable Jaunts DPS Article on Specializing in your photography

    #1 Jack of all trades, master of none

    I really believe in this age-old motto. I find that when you focus on multiple genres of photography, your photographic style and creative voice takes that much longer to develop. Different genres of photography require different strategies. What works well for family portraits, may not work well for still life. What works great for food photography, may not work for pet photos. Yes, the basic concepts of lighting rules, composition techniques, and technical camera knowledge, are mostly similar, but the style of photography varies depending on the subject. When you focus on multiple genres, there tends to be a mishmash of imagery in your portfolio, which may not be what you want in the long run.

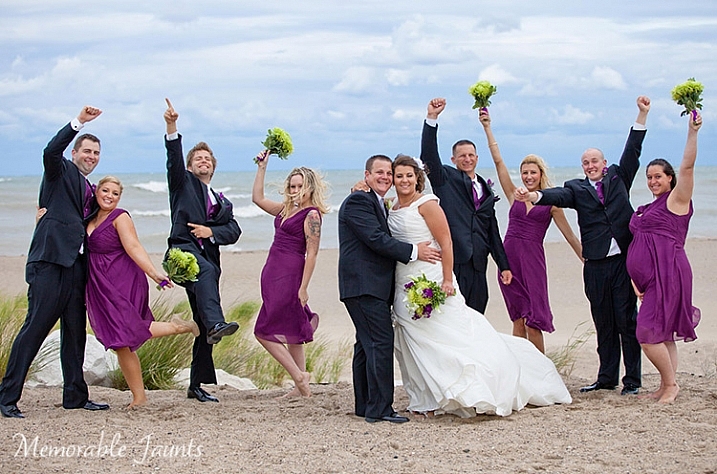
    Memorable Jaunts DPS Article Specializing in your photography Wedding Images 01

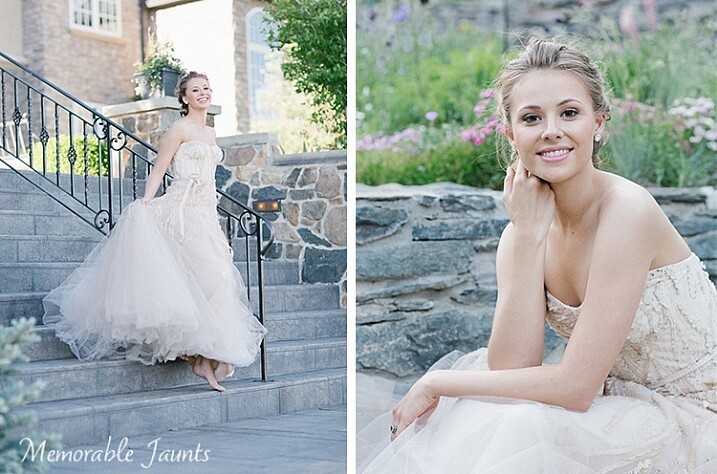
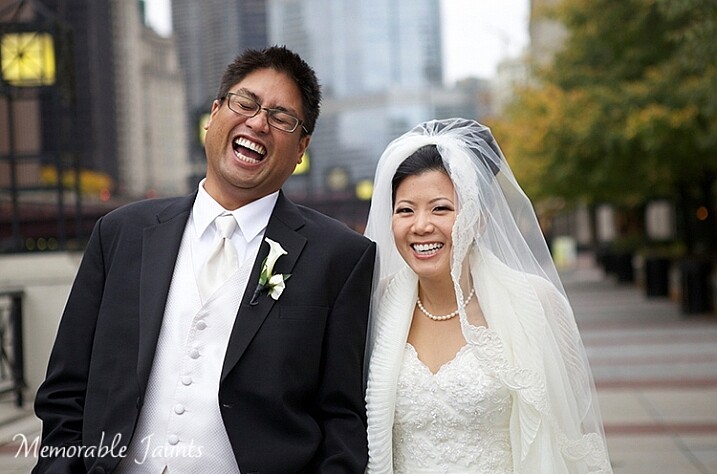
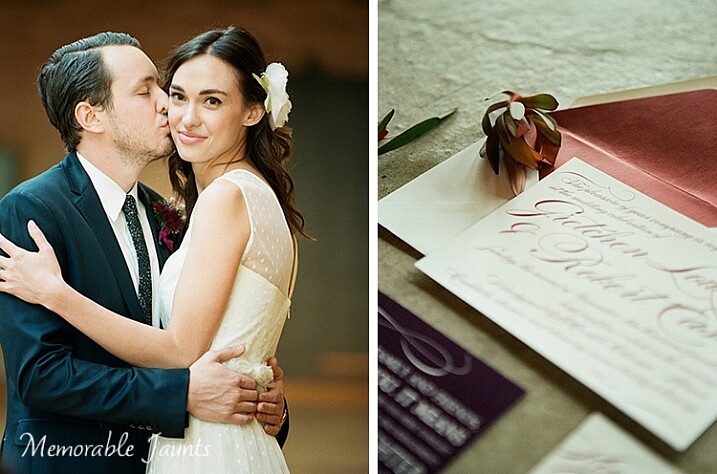
    I love capturing weddings and bridal portraits, some of my favorite genres of photography!

    #2 Attracting your ideal client

    In my mind, an ideal client is one who loves your work, and is willing to pay the right value for your services, no questions asked! Clients always demand and expect the best value for their money. When a client inquires for a particular job, they expect to find someone who is the best at what they are looking for.

    For example, a family looking for beautiful, timeless, annual family photos, will expect the photographer they hire to know what he or she is doing, not just from a photography standpoint but also in terms of posing, lighting, post-processing, and delivery. So, when they inquire about family photos, they are expecting to hire someone who has enough experience under their belt so as to make the client’s experience an enjoyable one. Imagine for a moment, they hire a photographer who has limited experience photographing families, but is great with still life or product photography. Now suddenly, halfway through the shoot, the kids decide enough is enough and start acting up. Will the still life photographer, who does not expect his subject to simply get up and walk away, really know how to handle the situation? It’s more than likely that photographer is going to panic, making the client extremely upset, and they will expect to be offered a full refund, no matter how the final images turn out. Remember a positive client experience is the number one priority of any professional photographer!

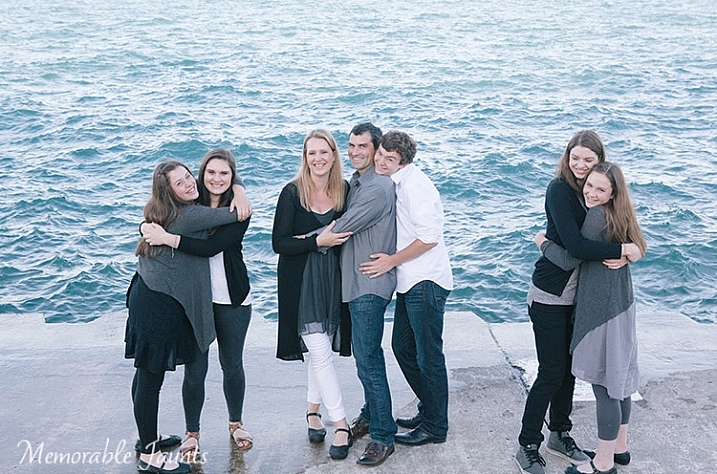
    Memorable Jaunts DPS Article Specializing in your photography Family Portraiture Images 02

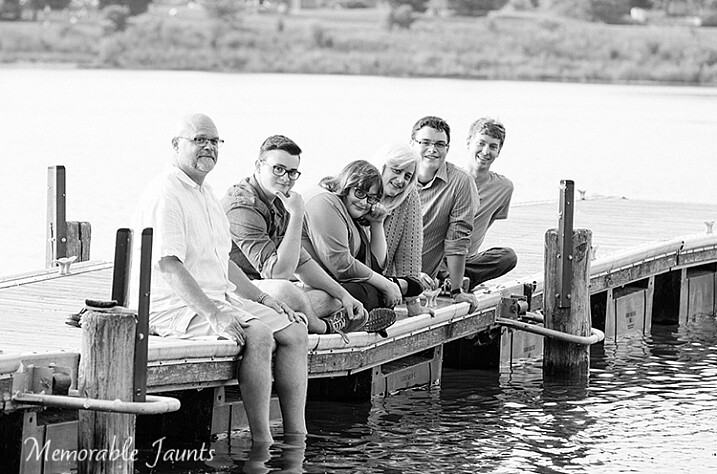
    This family session was a highlight of 2014 that got me several clients who wanted extended family photoshoots!

    Another family that loved the images from past sessions and moved schedules to accommodate me! - It felt awesome to be appreciated.

    Another family that loved the images from past sessions and moved schedules to accommodate me! – It felt awesome to be appreciated.

    #3 Understanding your own strengths and weaknesses

    I feel like this one is not just relevant for photographers, but for everyone in general. When I get asked what I like to photograph, I immediately know what to say. I love photographing people and travel (preferable with people in the images). I specialize in portraiture because I feel one of my key strengths lies in interacting with people, and getting natural emotions and expressions through my imagery. As an extension to this genre, I love photographing weddings, because it is such an emotional day for all concerned. Being able to document a couple’s special day, surrounded by family and friends, has been a wonderful experience for me.

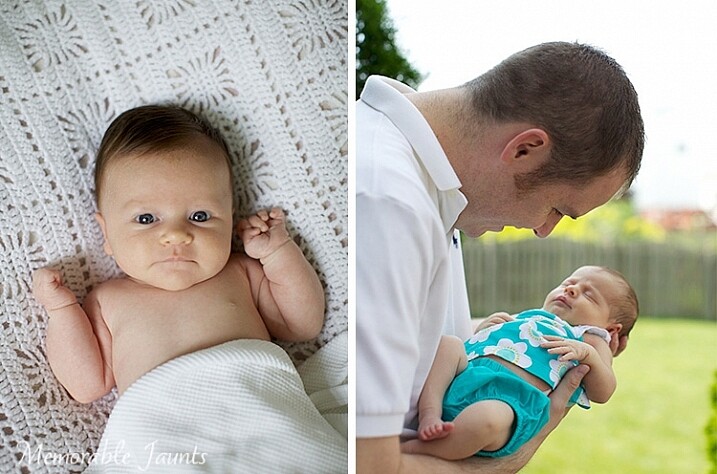
    Now, if you ask me what I don’t like photographing, I have an even faster response ready! Traditional newborn photography is something I absolutely run away from. Don’t get me wrong, I love kids, but there’s just something about hanging baskets, swaddled blankets, and twisted limbs that freaks me out. The only two newborn photo sessions I have done in my five year career, have been newborn lifestyle photoshoot which may not have been exactly what my clients wanted.

    My only attempts at Newborn Photography.

    My only attempts at newborn photography.

    I love the emotions captured here and it is one of my favorite genres of photography!

    I love the emotions captured here and it is one of my favorite genres of photography!

    #4 Paying the bills verses having a career

    Now you may question this one. Are they not the same? On the surface these two may be the same thing for most people, and I have to admit for a while this was true for me as well. When I was just starting off, while family portraiture was what I gravitated towards, I did take jobs like real estate photography and birthday events because they helped pay my bills. But over time, I realized that the time and effort that I was putting into these so called “bill paying jobs” was not really worth it. The time to get to the event, hire a baby sitter, rent or borrow event specific equipment like light stands and extra flashes, as well image processing time, all added up and when I factored in time-to-money ratio. It just was not bringing in the money I thought it was. Often times we don’t realize that time is more money than money itself.

    #5 Doing what you love

    This one falls in line with point #3 above. Most of us get into photography because we love taking photos. It is a field where creativity and motivation run high, when we do the things that we really enjoy. However, the moment photography becomes a chore, it looses its charm. We start to feel burdened, and lack motivation and creativity. We all know that photography is a field where a mediocre job is very apparent in the images we produce. Bad lighting, loose composition, and bad editing, very quickly become very apparent to all. But when we photograph things that we really enjoy, we tend to produce stellar imagery that we love.

    A blogpost about Film and feeling vulnerable as a photographer when using a film camera got me two wedding inquiries because the brides appreciated my honesty and loved the emotional appeal of the images!!

    A blogpost about shooting film, and feeling vulnerable as a photographer when using a film camera, got me two wedding inquiries because the brides appreciated my honesty and loved the emotional appeal of the images!!

    With all this being said, I don’t mean to imply that you should say no to jobs that are outside your expertise, especially if you are just starting out in this field. But don’t promote yourself as being the person who says “yes” to everything.

    Specializing also doesn’t mean you have to give up photographing all those other things out there. Go ahead and photograph those apples sitting on the counter with the warm mid-day sun streaming through your window, or get the action shot of your kids playing soccer, but those should not make their way to your portfolio. Don’t suddenly start marketing yourself as a sports photographer. It might just repeal that client who is looking for a fashion photographer, which is exactly how you want to be known.

    So, what is your speciality?

    googletag.cmd.push(function() {
    tablet_slots.push( googletag.defineSlot( “/1005424/_dPSv4_tab-all-article-bottom_(300×250)”, [300, 250], “pb-ad-78623” ).addService( googletag.pubads() ) ); } );

    googletag.cmd.push(function() {
    mobile_slots.push( googletag.defineSlot( “/1005424/_dPSv4_mob-all-article-bottom_(300×250)”, [300, 250], “pb-ad-78158” ).addService( googletag.pubads() ) ); } );

    The post 5 Things to Consider Before Deciding to Specialize or Not in Your Photography by Karthika Gupta appeared first on Digital Photography School.


    Digital Photography School

  • 8 Tips to Stay Motivated and Inspired by Your Photography

    Taking photos is one of the most inspiring and exciting of pursuits. It can encourage you to have adventures, see the world in a newer, fresher way, meet interesting people – all while creating something that is totally unique to you.

    “We are born makers, and creativity is the ultimate act of integration – it is how we fold our experiences into our being.” – Brene Brown
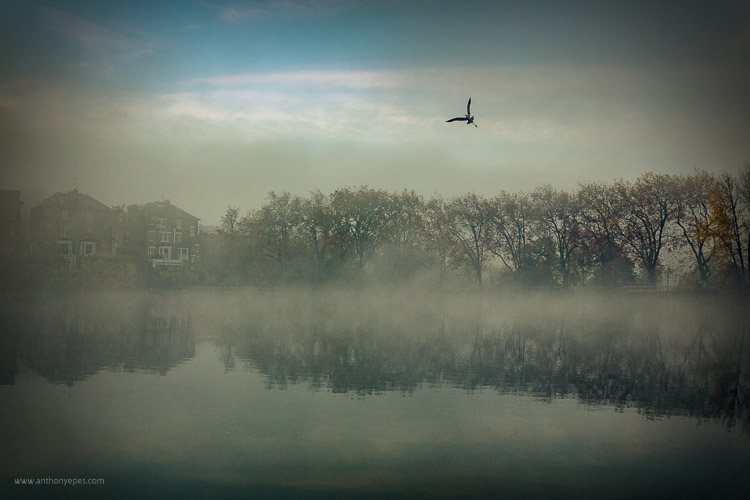
    DPS AnthonyEpes 01

    But what happens when your well of inspiration runs dry, when you can’t get excited by your images or you feel stuck in a rut? Most photographers, even professionals, have periods when creating feels like wading through glue. You get tired or bored with your own images.

    So, why do you (we all) get stuck?

    The destructive habit of habit

    As most of us, you are probably immersed in habit – you do almost the same things each day, every day. Making your coffee in the same way at the same time, going to work on the same route at the same time, eating the same kind of food each evening. It’s almost like you stop thinking and just do.

    “As long as habit and routine dictate the pattern of living, new dimensions of the soul will not emerge” – Henry van Dyke

    Your brain has made a great effort to get you into the state of habit. It makes life easier for you so that you don’t have to make tonnes of new decisions every day. But, if you are lost in habit you aren’t seeing new things, doing new things, or trying things in new ways. Habit will strangle your creativity.

    So how do you get out of this cycle?

    The way to fill your life with inspiration and motivation will be different than others – depending on how you create and what drives you. Here are some ideas:
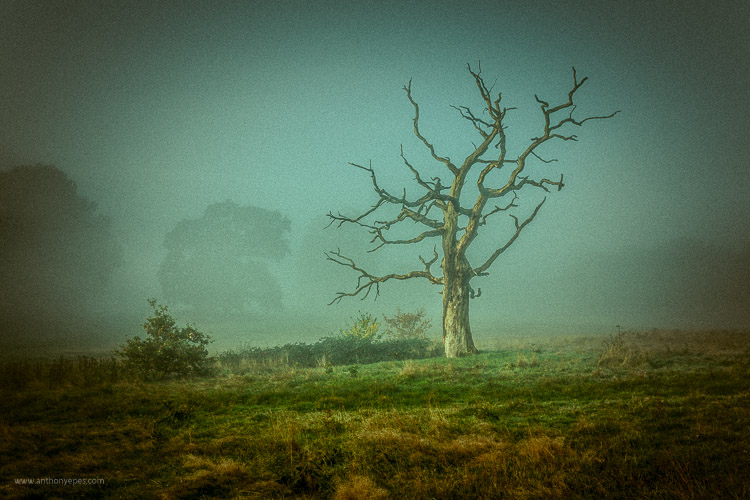
    DPS AnthonyEpes 02

    1 – Leave your camera at home

    If you’re someone who is always out and about with your camera, taking lots of photos – abandon it for a while. It’s easy to get carried away. Instead of taking time to see and compose, you are likely just taking shot, after shot, after shot. If you are bored with the photos you are taking – this is probably what’s happening to you.

    I would encourage you to start examining the world in a different way – not as a photographer, but as someone who hears, feels, smells, and absorbs the atmosphere around you. Using all of your senses is a wonderful way to help experience the same world, but in a different way. It will help you gain a different perspective.

    Sound is a particularly evocative sense for me – the crackle of dry autumn leaves under my feet, the low hum of trains on a railway line in the distance behind me, the vibrating thump of music in a bar, a conversation drifting past me. Tuning in to senses that you usually don’t prioritize (because we photo lovers tend to put our sight first, don’t we) will also help you anchor yourself into the present moment, pulling you away from your busy mind, and into the world so you can eventually see more interesting and unique things.

    Challenge: When you are ready to start taking photos again, set yourself the challenge of taking just three photos a day, for 15 days. If this sounds hard, then it’s the perfect challenge! This will help you be more precise and thoughtful in your approach. You will work harder to create a smaller number of better photos. So – what will you take with your three images?
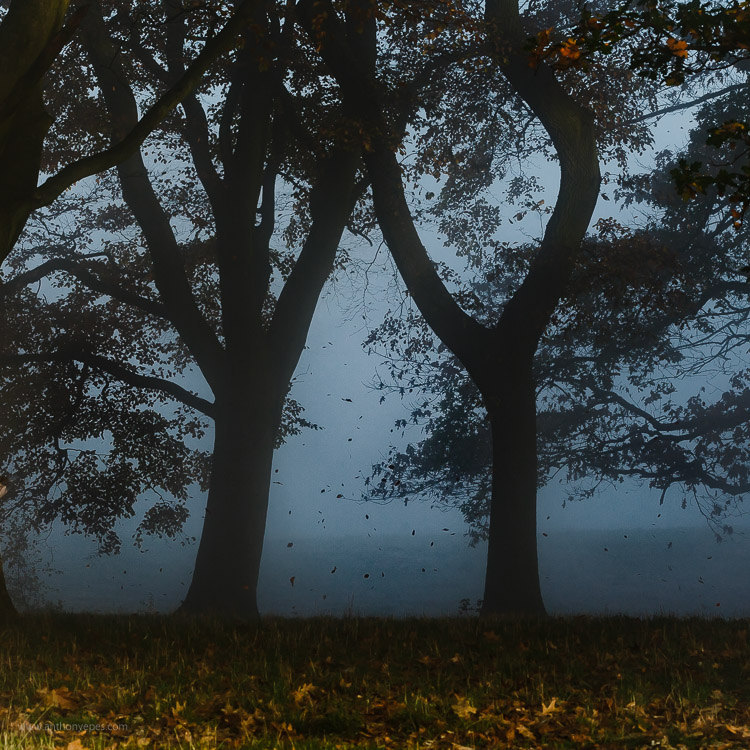
    DPS AnthonyEpes 03

    2 – Make taking photos a habit

    Now, let’s consider the reverse. You are someone who doesn’t take photos very often – maybe you wait for an occasion like a walk in a lovely area, good light, or a holiday – then my advice is the opposite. If photography is something that you pick up only now and again, you’ll never get into the rhythm of creating, you’ll never develop the skills of really seeing the world and composing great images. The act of creating is like a muscle – the more you do it the stronger it becomes.

    “You can’t use up creativity. The more you use, the more you have.” – Maya Angelou

    By creating a habit of creating, you are making a declaration to yourself that photography is a very important part of your life. It also helps to get your subconscious organized in a way that it knows you are going to be calling on it more regularly. It starts preparing. I know this sounds strange but it’s like anything you do regularly, your body and your mind get used to doing it. You are in the mood and the wonderful act of creativity starts to energize you in new and exciting ways.

    Challenge: If getting into the habit of taking photos is tough for you, then this is the challenge for you – take 50 photos every day, for 15 days. That will kick start your creativity, and imbue your day with the looking and seeing and noticing that is necessary to take great photos.

    3 – Take photos not to see the result, but to enjoy the process
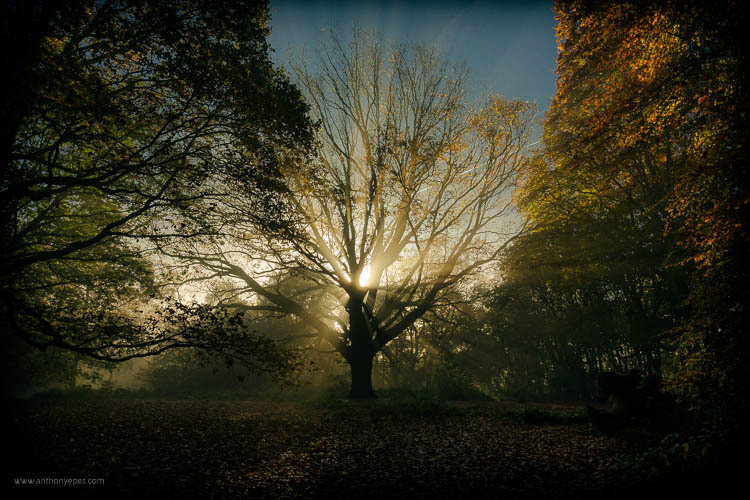
    DPS AnthonyEpes 04

    When you see small children making art there is a beautiful joy that they get by just doing it. From feeling the feathers before they glue them on an egg box, to painting wild splashes of colour on a sheet of white paper. In fact going out with kids, and watching them look at the world in such an open way, is great training on how to be present with the world around you.

    With kids there is a complete enjoyment in the process of making – and that is something we, as photographers, sometimes forget. Perhaps because the act of creating is so instant – the click – we forget that it’s our whole creative process which leads up to that click.

    “What moves me about… what’s called technique…is that it comes from some mysterious deep place. I mean it can have something to do with the paper and the developer and all that stuff, but it comes mostly from some very deep choices somebody has made that take a long time and keep haunting them.” – Diane Arbus

    I do my best work when I am totally present, totally in the zone, not thinking about emails, or jobs, my to-do list, or my kids – but looking with wonder at a beautiful cloud, or some rain dripping off of a leaf. And if you need encouragement – isn’t it just great to cut yourself off from all of your responsibilities and absorb yourself in the wildness, the peace, the craziness, the beauty of the world?

    4 – Start a project
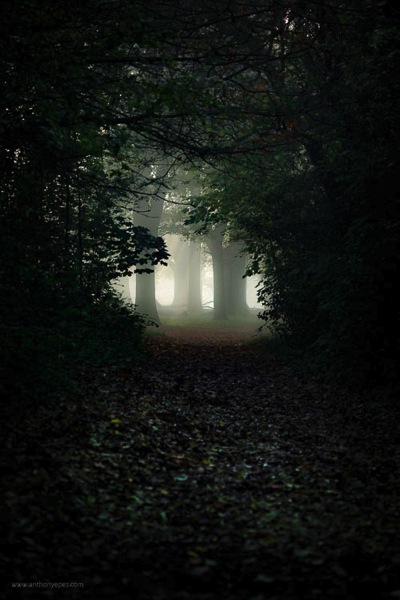
    DPS AnthonyEpes 05

    Sometimes I find my attention gets fragmented – with all of the work I do, my family, etc., so that I’m jumping from task to task, and not getting deeply involved in anything. A few photos here, a few photos there. This is when I like to jump into a project.

    Key advice for projects: Choose a subject that you are blown-away passionate about. It could be anything – the colour violet, armpits, salt mines, trees, your kids, men with mohawks – it doesn’t matter what it is, you can bring something new to a subject if you make the effort.

    “I wanted to photograph clouds to find out what I had learned in forty years about photography. Through clouds to put down my philosophy of life – to show that (the success of) my photographs (was) not due to subject matter – not to special trees or faces, or interiors, to special privileges – clouds were there for everyone…” Alfred Stieglitz

    The key point is that it’s not so much about technique, but the passion. Why? Because:

    • When you hit a roadblock or life distracts you, you’ll be less likely to abandon the project if you are really excited about it.
    • Passion will help drive you to create a new and interesting perspective on your subject.
    • When you feel something when you are taking photos, you are more likely to take a photo that contains feelings. Why is that important? Because you want people to notice your photo, to feel a connection with it. Most images we look at are flat and devoid of feeling. The best photos communicate both a visual idea and a feeling, we are moved in some way by it.

    “Photography for me is not looking, it’s feeling. If you can’t feel what you’re looking at, then you’re never going to get others to feel anything when they look at your pictures.” – Don McCullin
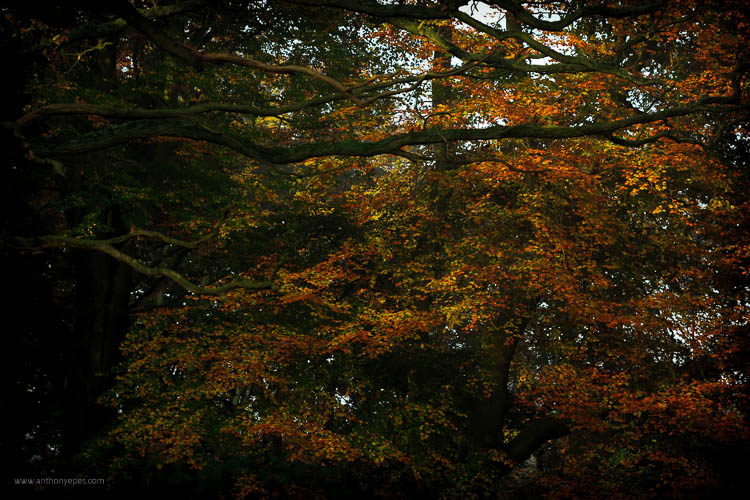
    DPS AnthonyEpes 06

    5 – Do something completely different

    I’ve talked about how habit can be a force of good for your photography – by making you commit to a regular practice, and exercise that creativity muscle. But it can also be a negative force – you get so used to your ways of doing things, or your lifestyle, that you don’t push yourself in new ways.

    Think about the kind of things you normally photograph. Now think of some you’d be terrified to photograph, and go and photograph them. So maybe you’re great at landscapes. You like photographing the odd person if they happen to be in the shot. But the idea of taking a close-up or a portrait of them terrifies you. So do that. Or you’ve always wanted to get up onto some rooftops and photograph your city from up high. But the idea of asking for permission, etc., makes you feel nervous. Just go for it!

    “You may never know exactly what you need to do, or exactly where you’re going. But if you are willing to start taking tiny steps, and keep going, the dots will connect over time to create something beautiful and fulfilling.” – Lori Deschene

    6 – Remind yourself why you take photos
    DPS AnthonyEpes 07

    It can be easy with your photography to get into that should way of thinking – “I should take more photos! I should be better!” But scolding yourself rarely gets you anywhere (with anything). Instead, I encourage you to think about what photography really means to you, what are the benefits beyond the fun of taking that photo. How does it enrich, energize and enhance your life?

    Ask yourself:

    • What does photography give me?
    • How do I want to be creative in my every day?
    • Which of my photos or projects am I really proud of?

    When you connect with the reasons why you do things, it’s so much easier to stay committed and motivated.

    7 – The trap of perfectionism

    Often we stop taking photos, or we start slowing down or moving off on a tangent when we are working on a project, because the feeling of not being good enough starts to insidiously infect us.

    “Perfectionism is the voice of the oppressor, the enemy of the people. It will keep you cramped and insane your whole life” – Anne Lamott

    Who cares if you try things that don’t work. Who cares if some of your photos aren’t great? Stopping yourself from doing something you love, before you’ve done it, is crazy. Recognize you have the fear, but don’t let that stop you. Fear goes away eventually.

    Be aimless and wander. Resist those urges to make your photo explorations productive. Ignore the output and focus instead on what you see. Listen. Follow things that spark your interest.
    DPS AnthonyEpes 08

    8 – Get inspiration – indirectly

    I really believe that inspiration for your photos can come from all kinds of places. It just so happens that my favourite photographer of all time, Ernst Haas, agrees (if you don’t know him, look him up). He said:

    “Beware of direct inspiration. It leads too quickly to repetitions of what inspired you… Refine your senses through the great masters of music, painting, and poetry. In short, try indirect inspirations, and everything will come by itself.”

    So fill your life with creative inspiration of anything that moves you. Beautiful music, looking at bizarre paintings, reading wild adventure books – it doesn’t matter what it is, if it excites and moves you then it’s right for you. The more you remind yourself what feeling excited and creative feels like, the more your body and mind will imprint that into yourself.

    Along that vein, I also like to remind myself of times when I have felt super creative, super in the flow, and I was taking great photos. It’s all too easy to fall into the trap of thinking that you’ll never take a good photo ever again (happens to me all the time, especially when I am starting a new book), but just think back to a time when you were taking great photos and in the zone. Remind yourself of that, and it will be easier to get back into that space.

    I hope those ideas help. I’d love to know if they do – and what you do when you get stuck. Comment below, I’d love to hear.

    googletag.cmd.push(function() {
    tablet_slots.push( googletag.defineSlot( “/1005424/_dPSv4_tab-all-article-bottom_(300×250)”, [300, 250], “pb-ad-78623” ).addService( googletag.pubads() ) ); } );

    googletag.cmd.push(function() {
    mobile_slots.push( googletag.defineSlot( “/1005424/_dPSv4_mob-all-article-bottom_(300×250)”, [300, 250], “pb-ad-78158” ).addService( googletag.pubads() ) ); } );

    The post 8 Tips to Stay Motivated and Inspired by Your Photography by Anthony Epes appeared first on Digital Photography School.


    Digital Photography School
  • Is it Time to go Full Frame? Weight These Pros and Cons Before You Decide

    Has anyone ever said to you, “That’s a nice photo, you must have an expensive camera!”?

    According to photography legend Ansel Adams, “The single most important component of a camera is the twelve inches behind it!”  

    Your camera is simply a tool, that you use to create your vision of the scene in front of you. A camera can only do what you tell it, so it’s not going to capture that “nice photo” all by itself. But, what if the camera doesn’t perform up to your expectations? Then, it may be time for an upgrade.


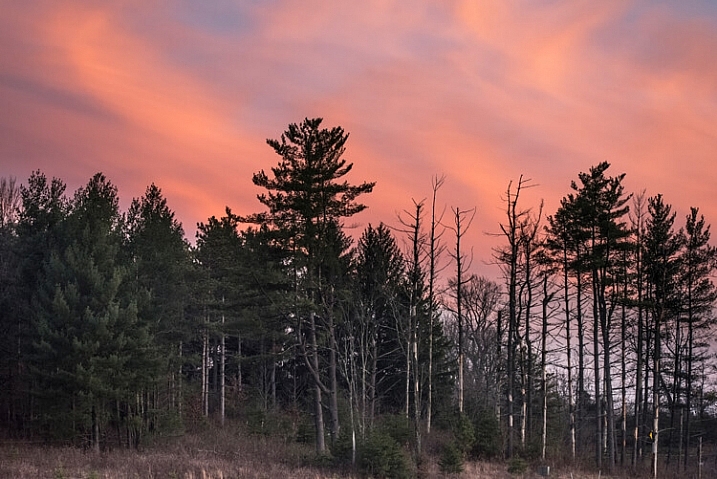
    Captured at ISO 6400 this image shows great tonal range with very acceptable noise levels.

    Captured at ISO 6400 on a Nikon D750 full frame, this image shows great tonal range with very acceptable noise levels.

    I recently made the jump from a cropped-sensor camera to a full frame body (a Nikon D750, used in all the images below). For the purpose of this article I am not going to get into a technical discussion about the differences between a crop sensor (APS-C), and full frame camera (the main one being is that the full frame has a larger sensor, the size of a frame of 35mm film).

    But how do you know if, and when, upgrading to a full frame camera is desirable? What follows are some points to consider if you’re on the fence.

    Advantages of full frame

    • Improved low light performance: Because of the larger sensor size, a full frame camera is able to capture more light, which allows it to attain focus in darker environments.
    • Higher ISO performance: The larger sensor of a full frame has larger pixels, which creates less digital noise at higher ISOs. In most cases you will get a one or two stop improvement in high ISO noise, over crop sensor cameras, though many new models of APS-C models have a much improved performance in noise reduction.
    • More control over depth of field: This is a commonly misunderstood benefit of full frame, because the larger sensor does not really affect the depth of field of an image. However, with the larger sensor of a full frame, you can move closer to the subject which causes the depth of field to become smaller. This, in turn, creates a smoother bokeh.
    • Improved dynamic range and color depth:  A full frame sensor can record more tonal range within shadows and highlights. Detail and color are much improved at both ends of the spectrum.

    Disadvantages of full frame

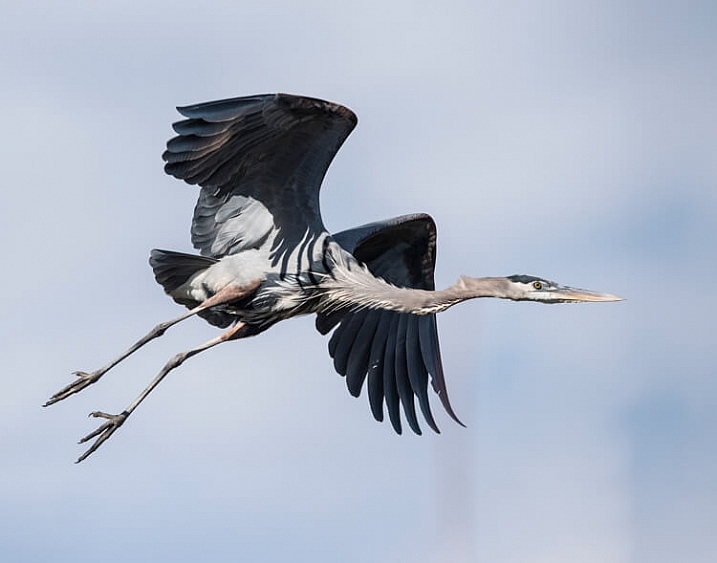
    Bird in fight was captured here at high ISO to achieve fast shutter speed to capture a very sharp image.

    This heron in flight was captured at high ISO to achieve the fast shutter speed needed to get a sharp wildlife image.

    • Expense: Not only is the cost of the full frame DSLR higher than a crop sensor, you will most likely need to make additional investment in compatible lenses.
    • Size and weight: Not only are the sensors larger in a full frame DSLR, the overall size and weight are as well. Also, the lenses have more glass elements, and are also larger and heavier. This may not matter to many photographers, but when carrying gear for long distances it could be a factor to consider.
    • No crop factor: The telephoto reach of a full frame DSLR is lessened by not having a crop sensor. For example: a 200mm lens on full frame doesn’t have the reach of the approximate focal length on a cropped sensor  camera (about 300mm).
    • Slow frame rate in burst mode: Because a full frame DSLR has a larger sensor, there is more information to record to the memory card. Therefore, it will take longer to save images to the card, resulting in fewer frames per second when you are shooting in burst mode.

    So, how do you know if you are ready to make the jump to a full frame camera? Ask yourself these questions:

    How much will it cost?

    As mentioned above, the cost of buying a full frame camera is significantly more expensive than a crop sensor one, plus new lenses will most likely need to be purchased. There isn’t much use in changing to full frame if you are not going use high quantity lenses designed for full frame cameras. If you plan to make the jump to full frame, you may want to begin by upgrading lenses to those compatible with full frame DSLRs.

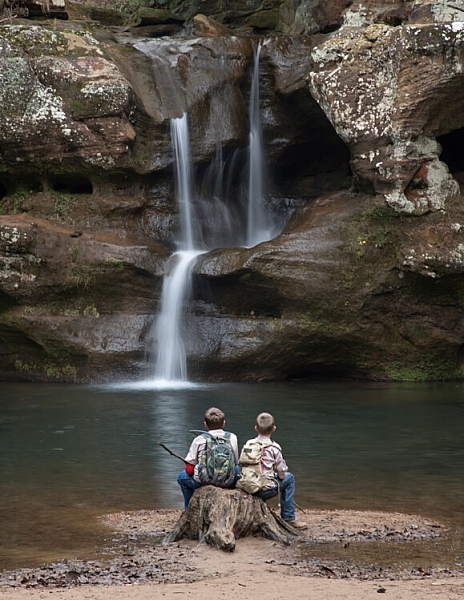
    Choosing a smaller aperture of f/22 gave enough depth of field to keep both the boys and the waterfalls in focus.

    Choosing a smaller aperture of f/22 produced enough depth of field to keep both the boys and the waterfalls in focus using a full frame Nikon D750.

    What type of photography do you enjoy shooting?

    Full frames have advantages and disadvantages for different types of photography.

    • Landscape: Low light performance, more detail and improved ISO performance are all great advantages of full frame for landscape photography. The only possible drawback here is the effectively shallower depth of field, but this can be compensated for by using a smaller f-stop.
    • Portraits: The larger sensor size of a full frame will result in a shallower depth of field. For portraiture this means the backgrounds can feature more blur and make the subjects stand out better.
    • Wildlife: A full frame camera loses the telephoto reach that a crop sensor has. Nevertheless, a lot of wildlife photography is shot in low light situations, where a full frame gives a much improved advantage.
    • Sports: As in wildlife photography, limited reach and low light factors apply to sports photography. Shooting with a full frame, the improved focusing in low light is a helpful benefit for sports. However, the slower frame rates of a full frame can be a drawback in photographing a fast moving sport.

    If you are a portrait or landscape shooter, there are many benefits that might convince you to make the switch to full frame.

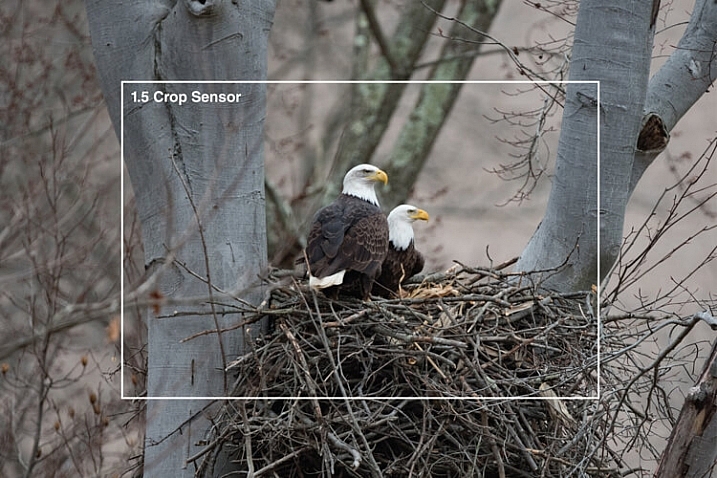
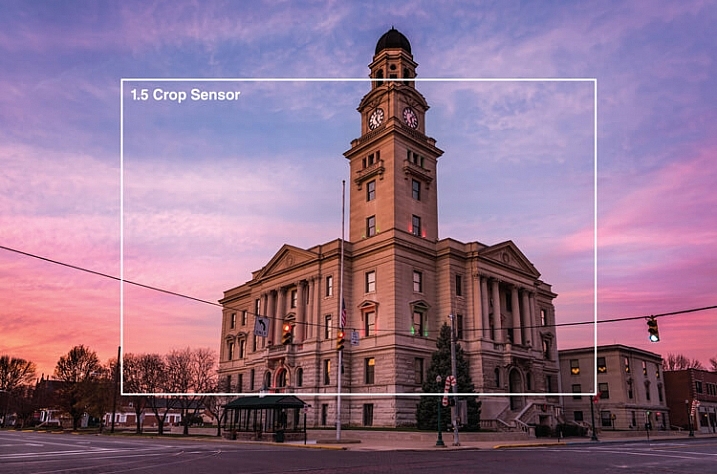
    This scene was captured with at 24mm on full frame Nikon D750. The white line shows how much of this image would be captured on a crop sensor from the same location.

    This scene was captured at 24mm on a full frame Nikon D750. The white line shows how much of this image would be captured on a crop sensor from the same shooting location.

    This image was captured at 600mm with a Nikon D750. The white line shows the extra reach that a crop sensor camera would give you. This image was also captured in low light conditions with ISO of 2000 with very acceptable noise level.

    This image was captured at 600mm with a full frame. The white line shows the extra reach advantage that a crop sensor camera would provide. Still, capturing this image in low light conditions with an ISO of 2000 results in a desirable noise level.

    Is your current camera holding you back?

    Every camera has a limited number of shutter releases, so if your camera is nearing the end of its life cycle, it might be time to consider an upgrade. If your older crop sensor DSLR is limiting your results in low light, and you are constantly frustrated by high levels of noise, you might benefit from an upgrade to full frame.

    Keep in mind that it’s convenient to blame a camera for taking poor images, but it may not be the camera holding you back. Many times photographers don’t get the results they expect by underutilizing high-end equipment. No matter what type of camera you shoot with, get to know it, and how all of its features work, before moving on to a different one.

    shooting here in low light, this shot was able to be captured in low light by increasing the ISO without adding digital noise to the image.

    This cityscape was captured with a full frame in low light by increasing the ISO, without adding digital noise.

    What is your level of photography experience?

    A full frame camera is probably not the best one to use as a beginner. Start shooting with a more entry level DSLR, and work up to a full frame model. If you are looking for a camera to take photos of family and friends, a crop sensor DSLR is a very satisfactory choice. Having a good handle on the exposure triangle (aperture, shutter speed and ISO) and how they work together is a must if you’re going to take advantage of all the benefits of full frame. You must be comfortable with shooting in manual mode. If you earn any part of your income from photography, you may benefit from switching to a full frame camera.

    Do you make large prints?

    A full frame sensor has a larger pixel size, which will capture more light and detail, which results in sharper images that are conducive to making large prints. If you never make any prints larger than 8×10″, then a full frame DSLR may not be of benefit to you.

    Here this sunrise shot has a nice range of tones without any noise in the shadows that you might get with some crop sensor cameras.

    Captured with full frame Nikon D750, this sunrise image reveals a nice range of tones, without any of the digital noise in the shadows likely to be present with some crop sensor cameras.

    Will purchasing a full frame make you a better photographer?

    You may have heard this quote, “Skill in photography is acquired by practice, not by purchase.”

    Do you need a full frame camera to capture great images? No, of course not! Most new crop sensor cameras on the market today are engineered to take beautiful images! But if you are an experienced photographer who makes money with your camera, you may gain an advantage by switching to full frame.

    The bottom line

    If you are thinking of upgrading from a crop sensor camera, be sure to consider the price, lens compatibility, and type of photography you do, before you make the change to full frame. Jumping to full frame can be quite a leap! But if you are ready for that big step, the results can be rewarding.

    Are you ready to go full frame? Please leave your comments below.

    googletag.cmd.push(function() {
    tablet_slots.push( googletag.defineSlot( “/1005424/_dPSv4_tab-all-article-bottom_(300×250)”, [300, 250], “pb-ad-78623” ).addService( googletag.pubads() ) ); } );

    googletag.cmd.push(function() {
    mobile_slots.push( googletag.defineSlot( “/1005424/_dPSv4_mob-all-article-bottom_(300×250)”, [300, 250], “pb-ad-78158” ).addService( googletag.pubads() ) ); } );

    The post Is it Time to go Full Frame? Weight These Pros and Cons Before You Decide by Bruce Wunderlich appeared first on Digital Photography School.


    Digital Photography School
  • On Assignment: Mum for Fuji

    For the last couple of years, I have been involved in the planning process for the Fuji X-Pro 2. I've been using a pre-production unit since October. One of the photos I did for them (the only one where I used flash, actually) is the miniature chrysanthemum seen above.

    Up for a quick game of Guess the Light? Then take a moment before reading on. And I'll give you this much: it's done with a single speedlight.Read more »
    Strobist

  • How to Use Anchor Colours to Challenge Your Photographic Eye

    It is a good thing to break from the norm once in a while, and do something different to challenge your personal photography. Limiting yourself to a few rules could help with this and encourages you to learn something new.

    One new thing to try, is to use anchor colours in your photography. An anchor colour could be any colour that does one or more of the following:

    • Dominates the picture
    • Makes the picture interesting
    • Draws the viewer to explore elements in your picture in more depth
    • Emphasizes the subject of your picture

    Set yourself a challenge. Perhaps on a family day out, ask your kids to choose a colour each, and get them to point out things with their colour choice for you to take photos of. This gets them involved in the activity, and at the same time challenges you to come up with a creative way to photograph the subject matter.

    0dominantcolour

    You can always decide on the colours yourself too, or ask a couple of friends to choose the colour for you, so it becomes more of a challenge, and there is no initial bias on your part. This will stretch your imagination and push you to look out for things you would otherwise not notice immediately.

    You can limit yourself to one or two colours, and do a series on each colour, or you can choose many colours. However, make sure each picture you take only has one anchor colour in it.

    It is important however, to add some limitations to this challenge, such as time, or location, or both. Take one day, or a few hours, to really focus your mind on anchor colours for this exercise, so there are boundaries and limitations to your options, which will force you to think and see more creatively than usual. The photos on this article were taken on a single day within a three or four hour span.

    1fillframe1

    Fill the frame

    It is easy enough to find an object of the colour choice and snap a picture of it. But that doesn’t mean your picture comes out creative, or any better than the average snapshot. To further hone your photographic eye, make it your aim to capture interesting images, and use your anchor colour to enhance your image within this context.

    Here are some tips on how to use anchor colour in an interesting way. With your anchor colour firmly in mind.

    1 – Symmetry

    Use symmetry, or asymmetry, be that with patterns, or arrangement of objects, to draw focus to your subject. Better yet break the rules and fill the frame with the subject matter.

    6symmetry

    Symmetry in action

    5assymetry

    Assymmetry in play

    2fillframe3

    Fill the frame

    2 Rule of thirds

    Use compositional elements like the rule of thirds, centred, and off-centred subjects. Adhering to the rule of thirds often gives a sense of balance to the picture, and is a very widely used composition practice. Centred compositions give an imposing and authoritative feeling to the picture. Sometimes it can take away any mystery from the image. Off-centred composition adds tension and can sometimes make for an unnerving image.

    7ruleofthirds

    9ruleofthirds2

    3 – Crop creatively

    Cropping creatively is a really fun tool that helps you engage with the viewer, or elicit some kind of a response from them. The main thing to remember when cropping an image of a person, is not to crop at the joints. Other than that use your visual and creative instinct.

    10creativecrop1

    11creativecrop2

    4 – Leading lines and perspective

    Even when the picture is full of colours, if you compose your picture so that the lines lead to the main colour you want to emphasize, or frame your picture so that the anchor colour is on the converging lines of the rule of thirds, then they will draw the eye and dominate the image.

    13leadinglines1

    14perspective

    5 – Framing

    Looking through an object so there is a foreground element to your picture – having a foreground frames your subject matter and directs focus to it. The foreground is closer to the camera, and therefore often appears blurry. This also creates a feeling that you are an indirect observer and evokes mystery, like you have just uncovered something new.

    Finding a good foreground is as easy as standing behind an object, so that the object stands between you and the subject matter, or hold something up in front of the edges of your lens. I use this technique a lot when shooting portraits. You can use a leaf, a magazine, a piece of fabric – anything that you can hold just ever so slightly within your lens’ view to add a sense of looking through something.

    15lookingthru

    A really good thing to use is a prism or plastic jewel because that reflects light or flare onto the lens so you get a light effect too.

    Have you used anchor colours in your images? Share them here in the comments below.

    googletag.cmd.push(function() {
    tablet_slots.push( googletag.defineSlot( “/1005424/_dPSv4_tab-all-article-bottom_(300×250)”, [300, 250], “pb-ad-78623” ).addService( googletag.pubads() ) ); } );

    googletag.cmd.push(function() {
    mobile_slots.push( googletag.defineSlot( “/1005424/_dPSv4_mob-all-article-bottom_(300×250)”, [300, 250], “pb-ad-78158” ).addService( googletag.pubads() ) ); } );

    The post How to Use Anchor Colours to Challenge Your Photographic Eye by Lily Sawyer appeared first on Digital Photography School.


    Digital Photography School

  • Tips for How to Find Lost or Missing Photos in Lightroom

    Lightroom is a popular choice for post-processing software for many photographers. There are many common mistakes newbies make when using it – and losing some of their photos is one of those.

    In this video Phil Steele will show you how to find lost or missing photos and prevent it from happening again:
    If you enjoyed that and want to learn even more about Lightroom you can check out Phil’s Lightroom course here.

    googletag.cmd.push(function() {
    tablet_slots.push( googletag.defineSlot( “/1005424/_dPSv4_tab-all-article-bottom_(300×250)”, [300, 250], “pb-ad-78623” ).addService( googletag.pubads() ) ); } );

    googletag.cmd.push(function() {
    mobile_slots.push( googletag.defineSlot( “/1005424/_dPSv4_mob-all-article-bottom_(300×250)”, [300, 250], “pb-ad-78158” ).addService( googletag.pubads() ) ); } );

    The post Tips for How to Find Lost or Missing Photos in Lightroom by Darlene Hildebrandt appeared first on Digital Photography School.


    Digital Photography School