Category: Photography

  • How To Photograph With Meaning

    DSCF0798web dps

    There comes a point, or a plateau, as in every photographer’s career (whether you are an intermediate or professional photographer) where you hit a wall. It’s a crisis of self that you are faced with when you have reached a certain point of technical proficiency. Well, basically you hit a plateau because you already know all the elements of photography from composition, to technical skills, to editing images, but somehow something is missing — substance, meaning, emotional connection, and finding your own style.

    So I invite you to forget what you know for a second, and take a look at your photography in a different light. Composition and technical prowess are certainly important factors in creating good photographs, but how do you create great photographs with meaning?

    To realize that there is more behind a photograph than just a visual representation of time, place, and subject, and it can be much more rewarding when you challenge yourself to find your voice, your perspective, and create an emotional connection for the viewer.

    Your photographs show your viewpoint and perspective of how you see the world. For example, if you put six photographers in a room and asked them to create a unique image, each photograph would turn out different. You already photograph with meaning, you just haven’t realized how much your subconscious adds your perspective onto your images.

    Meaning in action

    DSCF0867 dps

    Now that you’ve realized that photography is more than a GAS (Gear Acquisition Syndrome) stage, where you’re buying up the latest and greatest cameras, lenses, software, and miscellaneous items for photography, it’s time to evolve into a better photographer — one with purpose.

    “The real question is not what you look at but what you see.” – Henry David Thoreau

    So how do you separate yourself from the technical nature of photography? The skills you have inherited through tutorials, articles, classes, workshops, online videos, etc., are still there in the back of your mind. You are finally comfortable shooting in different lighting, setting up different lighting schemes, knowing your way around your camera, and all this will come in handy when you are cooking up your own voice or style of shooting.

    By setting those aside, you need to learn a new way of photographing, and that will take dedication and hard work, but ultimately it will be the most rewarding endeavor, especially if this is what you want to do for a living.

    Mimicry is the greatest form of flattery
    DSCF0966 dps

    Step one is to try to shoot in the style of your favorite photographer. By learning how they craft their images, you will be clued into their vision, which will inspire your own creative insights. You don’t have to exactly recreate an image perfectly like them, but just try to understand what they are doing, then try to recreate it.

    Step two is to take photo challenges. A photo challenge or assignment is a way to test out your technical, and artistic sides, combined to create a homework assignment that others will judge. Being peer reviewed by other photographers will not only give you helpful advice, but provide you with thick skin for future critique of your work.

    You may have a certain style of shooting that you are drawn to, like landscapes or street photography. But what if someone challenges you to do some macro shots, architectural, portraits, or anything different from what you’re used to? It takes you out of your comfort zone, and challenges your knowledge as a photographer, while also providing you with ideas to incorporate into your own work.

    20150315 DSCF0491 dps

    You are now using all your technical photography education, and putting it into practice. It finally makes sense that you need to know these technical skills to create something with more meaning. It’s just like a doctor fresh out their residency, learning how to become a surgeon. Would you trust this person to cut you open without learning from other, more experienced surgeons? It’s the same with photography, it’s on the job training.

    You need to learn it all, test it all, and learn different styles. Then, you can start to see your style peeping through, because you’ve slowly learned how to create your own vision, by studying those whose work you have a connection.

    Meditative composition

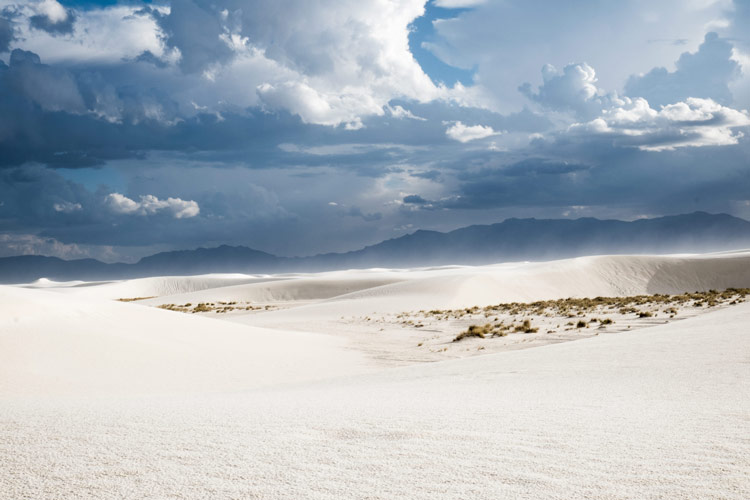
    I realized early on, my method was to find a subject, compose, take in the atmosphere, and wait patiently. While waiting, I absorbed all the things going on around me, without any sort of preconceived notions, but instead, just letting the world happen around me without trying to control it. It was a meditative state, where I had set up my easel (camera on a tripod) and waited for the decisive moment to shoot (putting the brush to the canvas).
    DSCF0902 dps

    I was in the White Sands National Monument near Alamogordo, New Mexico this past summer, sitting on a white sand hill, watching the sky turn from a deep hue of blue, to a dark sky, forming into a lightning storm. The winds began to pick up and the white sands began blowing. In my frame I saw the sky change into this deep magenta, and the sands moving almost in a tornado like swirl. I knew at the moment I must click the shutter, and was able to capture a special moment by composing and waiting.

    “But there is more to a fine photograph than information. We are also seeking to present an image that arouses the curiosity of the viewer or that, best of all, provokes the viewer to think – to ask a question or simply to gaze in thoughtful wonder. We know that photographs inform people. We also know that photographs move people. The photograph that does both is the one we want to see and make. It is the kind of picture that makes you want to pick up your own camera again and go to work.” – Sam Abell

    Equivalence
    DSCF2084 dps

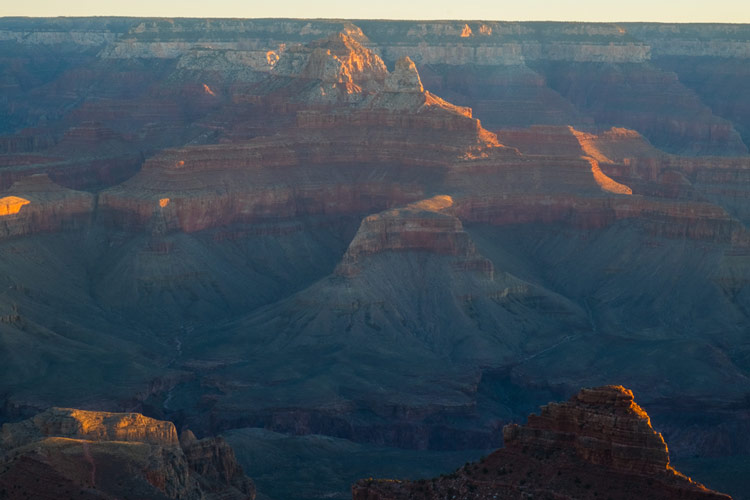
    Equivalence is a term that has been used since Alfred Stieglitz first started expressing his work as more than just a capture of reality, but instead the things he captured were emotionally connected to him, whether they were geometric patterns, people, etc.

    The term equivalence comes from the abstract painter, Wassily Kandinsky. His mission was to create more emotion with his painting, so that the audience who viewed his work could find, and feel, an emotional connection to his work. It was Stieglitz, who during a time where photography was simply documentation, incorporated the idea of equivalence into his photographic process. Boiled down to its simplest form, equivalence is the belief that colors, shapes, and geometric lines reflect one’s inner emotions. By studying Kandinsky he found meaning in his own work.

    So what does that mean for you, a photographer trying to create photographs with meaning? Photographic meaning isn’t a literal translation of an image. Instead, it is a way in which you use your voice or perspective, to create a work that doesn’t need to be explained, which also evokes something/anything in the viewer.

    This equivalence is what many great photographers have found, and when we see Dorothea Lange’s “Migrant Mother” or Robert Capa’s “The Falling Soldier” photographs we are instantly affected by them, and we don’t have to understand what is going on. We see the horror of war, and the look of uncertainty in a mother’s eyes as she holds her children.

    Connect the dots

    Bigsur dps

    The beauty of photography is that a single image can tell an entire story, or a photographic essay can piece together an important narrative. A story worth telling, is the same as photographing with meaning. Photographs are your way of showing your point-of-view, or that of your subjects, to an audience.

    We capture the human experience, whether that be a genocide, or the coming home of soldiers from war. It can be pain, beauty, grace, disgust, but photographs are visual storytellers, and those who understand how to make a story with their images become the most successful.

    “As far as I am concerned, taking photographs is a means of understanding which cannot be separated from other means of visual expression. It is a way of shouting, of freeing oneself, not of proving or asserting one’s own originality. It is a way of life.” — Henri Cartier-Bresson

    Each great photographer’s work was influenced by those who came before them. Some of us have a natural eye for composition and great timing, but does that mean that hard work won’t help those who lack these skills, to gain them?

    To photograph with meaning, there is a literal route to find this discovery. To hurry up that process it takes hard work, dedication, and humility. You need to burn up your memory cards, and take a look at each of your frames to see what works and doesn’t. You need to look at photo books of the masters to see their vision, to help cultivate your own, by recreating their works.

    DSCF2117 dps

    You need to be patient, reflective, and willing to subject yourself into uncomfortable, and sometimes even dangerous situations, to really push yourself toward to becoming a better photographer.

    Creating an emotional connection with your work is finding the equivalence that will speak volumes to your audience, without you even having to explain yourself. So, to make it clear, to find meaning in your photographs you must be willing to study, try, fail, and explore other genres of photography to find your place, your vision, and to take a deeper look inside yourself and the work you intend to create.

    By studying the forefathers of photography you can create something new that was influenced by powerful, meaningful photographs. It’s not plagiarism to combine techniques or processes of others. Besides that would be like telling someone who never read a book, and doesn’t understand plot, to write the great American novel.

    You must learn to walk before you can run.

    googletag.cmd.push(function() {
    tablet_slots.push( googletag.defineSlot( “/1005424/_dPSv4_tab-all-article-bottom_(300×250)”, [300, 250], “pb-ad-78623” ).addService( googletag.pubads() ) ); } );

    googletag.cmd.push(function() {
    mobile_slots.push( googletag.defineSlot( “/1005424/_dPSv4_mob-all-article-bottom_(300×250)”, [300, 250], “pb-ad-78158” ).addService( googletag.pubads() ) ); } );

    The post How To Photograph With Meaning by Adam T Crawford appeared first on Digital Photography School.



    Digital Photography School

  • 5 Steps to Creative Storytelling in Pictures with Your Kids

    image

    Creative storytelling in pictures need not be daunting nor time-consuming. You can easily set up something really simple at home to take pictures of and at the same time make new memories with your kids.

    The actual shoot must be kept really short, so as not to exasperate your kids too much, especially if they are very young, and therefore have relatively short attention spans. The real work is in the planning and thinking ahead.

    image

    The first rule to telling a good short story in pictures, is to keep it simple. Think of a singular plot: beginning, middle, and end. You can then fill in the gaps with interesting takes and angles. The biggest, and best, tip I give to anyone before taking on any creative project, is to imagine the emotion and feeling you want to evoke at the end of the project. Then work your way backward.

    Start planning and decide on a theme. Take for example a simple back to school theme.

    image

    Step 1. Plan ahead

    Think through the story you want to tell; decide on the details, picture the sequences in your head, and feel the story. Think through the items and characters that play a major role in the shoot. Half the battle is won by good meticulous planning, even if it’s just in your head.

    What is the overarching emotion, look, feel, and colour of the shoot that you want to achieve? Pare everything back that doesn’t fit in with that look and feel. This shoot below had three requirements: golden, sentimental, and rich in bokeh (background blur). So I planned everything to achieve those three specific requirements.

    image

    To get rich bokeh, you need to shoot with a wide aperture, between f/1.2 to f/3.2, if you have normal shorter focal length lenses. For longer lenses like 85mm upwards, you can stop down a bit more, as the longer the lens, the more compression there is in the background. Using a 200mm lens, for example, would still give you nice background bokeh even at f/5.6.

    To get golden images, use a gold reflector, and wait for the golden hour when you can get soft diffused yellow light. Golden hour usually happens about 1-2 hours after sunrise and before sunset depending on where you are in the world.

    image

    Step 2. Coordinate colours and props

    Reign in the colour palette, go for a family of colours like blues and greens, or reds and purples, or warm yellows and oranges. You can add a splash of contrasting colour for focus. But it is always good to reign in the colour palette keeping it to 3 or 4 colours maximum.

    Props need not be bought, or expensive. Use what you have at home; fruit, books, toys, cushions, quilts, etc. Just make sure they are colours that complement your chosen theme.

    image

    Step 3. Don’t be over ambitious

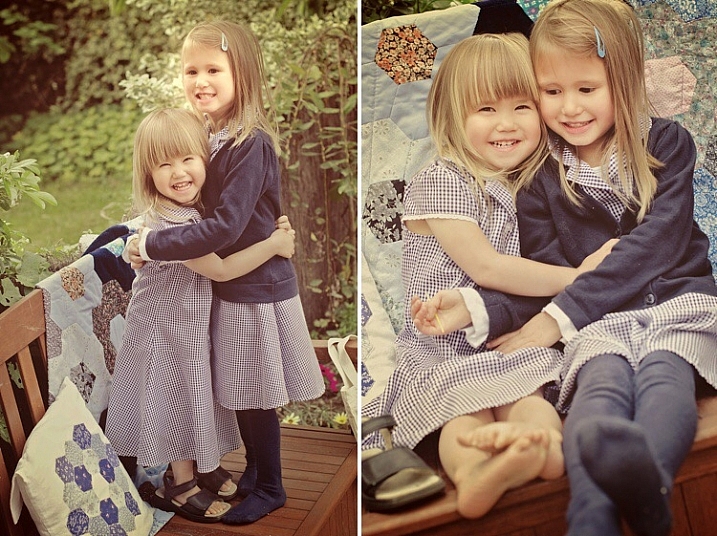
    Keep goals simple when it comes to photographing kids, especially if they are your own. It’s one of the most difficult things to do. Keep it short and sweet by focusing on one or two actions or scenarios, and make them super easy like reading a book, hugging, or laughing at a silly joke.

    A plot is not always necessary, you can even just aim for capturing some interactions between your kids. The props are to create some new context for them, hold their attention for a few short minutes, and keep them engaged during that time.

    image

    Step 4: Plan a beginning and end shot

    The beginning and the end are crucial to a story because they bring the theme together. Make sure you have an establishing first shot, and a feel good last shot. Details are always a good idea for a contextual or establishing shot. They not only enrich emotion, and reinforce a story, but also strengthen memories. Interesting close-ups, and expressions or unusual crops are also good for closing shots, and stay in the viewer’s memory for a second longer.

    image

    image

    Step 5: Edit your images with a plan

    If you edit your photos, edit them according to your vision. there is no one else to please but yourself. The photoshoot you planned is for you and your family, so be true to your original vision and be brave, then sit back and enjoy your creative story in pictures.

    image

    Have you taken images that tell a creative story of your kids at home or more tips to add? Share them in the comments below.

    googletag.cmd.push(function() {
    tablet_slots.push( googletag.defineSlot( “/1005424/_dPSv4_tab-all-article-bottom_(300×250)”, [300, 250], “pb-ad-78623” ).addService( googletag.pubads() ) ); } );

    googletag.cmd.push(function() {
    mobile_slots.push( googletag.defineSlot( “/1005424/_dPSv4_mob-all-article-bottom_(300×250)”, [300, 250], “pb-ad-78158” ).addService( googletag.pubads() ) ); } );

    The post 5 Steps to Creative Storytelling in Pictures with Your Kids by Lily Sawyer appeared first on Digital Photography School.


    Digital Photography School

  • Can the Skyfire App Predict Stunning Sunset Colors Days in Advance?

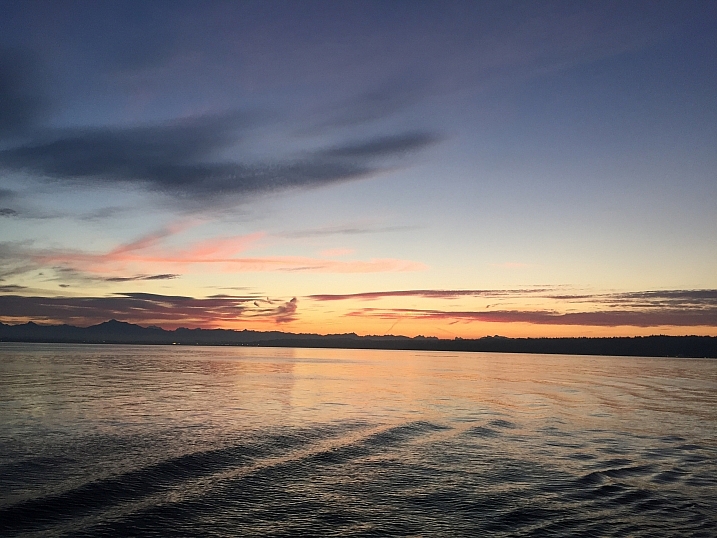
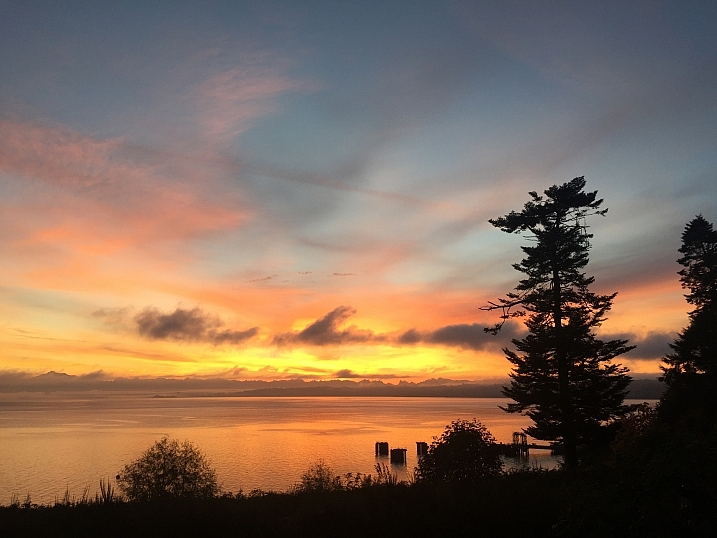
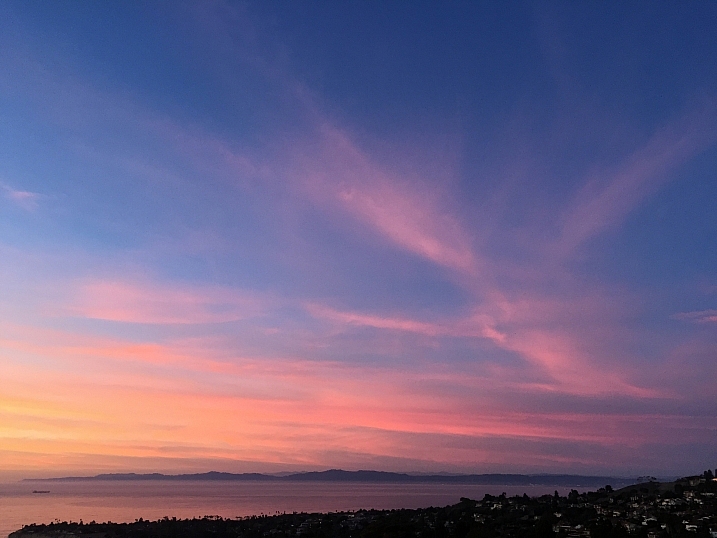
    Skyfire-Review-9What if you could predict beautiful sunset or sunrise colors? The colors we dream of when the word sunset crosses our mind; deep oranges, pinks, reds and streams of yellow, often against a deep blue sky.

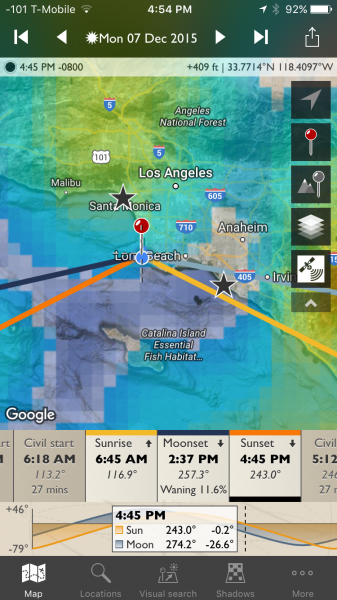
    Skyfire attempts to do just that for you, in app-form of course. Skyfire is a subscription product from the makers of The Photographer’s Ephemeris (TPE) that uses a host of data to help predict the probability of desirable sky colors for beautiful photos.

    What is Skyfire?

    Developed by Matthew Kuhns and a team of photographers, Skyfire is a subscription service that runs exclusively on TPE. Currently it only runs on TPE for iOS, but it will soon be ported over for Android as well. It uses a combination of data from weather monitoring and prediction stations, currently only in the lower 48 US states (plus minute amounts of the Canadian and Mexican borders). Correlating items like topography, cloud height and type, as well as gap light, (the amount of light coming in from under clouds that gives them their brilliant colors at sunset and makes it seem the sky is on fire, hence the name) Skyfire attempts to predict your odds of capturing beautiful sunset and sunrise colors in the clouds.

    Skyfire’s subscriptions and prices are $ 9.99 for a three month Basic subscription, or $ 29.99 for a year. The Plus version (explained in a minute) is $ 14.99 for three months or $ 44.99 for a year.

    Disclaimer about weather

    Skyfire-Review-17

    While technology has made bold strides in the meteorological world, it’s still not perfect – thus, Skyfire is not perfect. The app updates as new information comes in from weather services, and it updates itself four to six times a day on average. The app shows the latest update times so you will know if your current odds are based on recent data, or old info.

    Also, the localization of weather can be very fickle. While Skyfire attempts to consider items like the general topography (highs and lows in the elevation of the Earth), sometimes local weather patterns can make those predictions tricky.

    That is why Skyfire shows its predictions as a percentage chance of colors happening. This scale can be used to guess if it is worth heading to your local hotspot for an evening or morning shoot. The prediction capability will show the odds for either two or four days in advance, depending on the service you choose.

    Skyfire-Review-21

    How to use Skyfire

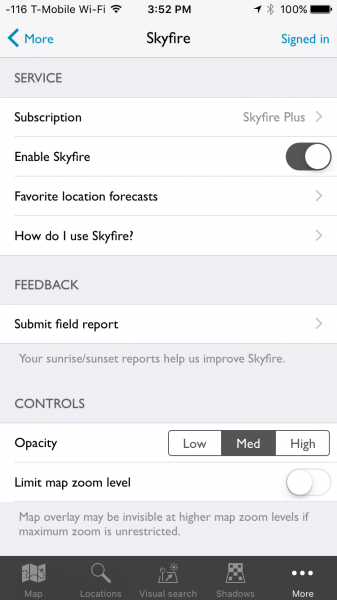
    The first step in using Skyfire is to sign up for the service. Inside the More menu item in TPE is the main Skyfire control panel. Here you will find an option to turn Skyfire off and on, as well as manage your subscription. Crookneck is nice enough to offer a 30 free trial so you can see if the feature works well for you, before buying. Subscribing to the service, even in trial mode, will require creating an account with Crookneck, which is all done in-app.

    Skyfire-Review-22

    Once you either sign up for the service or activate the trial period, Skyfire’s basic functionality is very easy to use. Select a date for which you want to see a prediction – Skyfire Basic allows predictions up to two days in advance while the Plus subscription will show four days in ahead. Date selection is done by tapping on the date at the top of the screen, then simply scrolling until the appropriate one is selected.

    Skyrife-Review-23

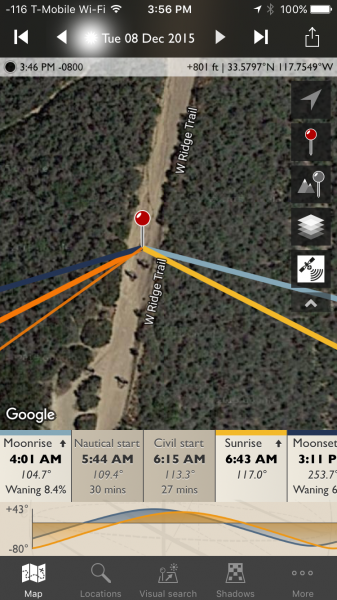
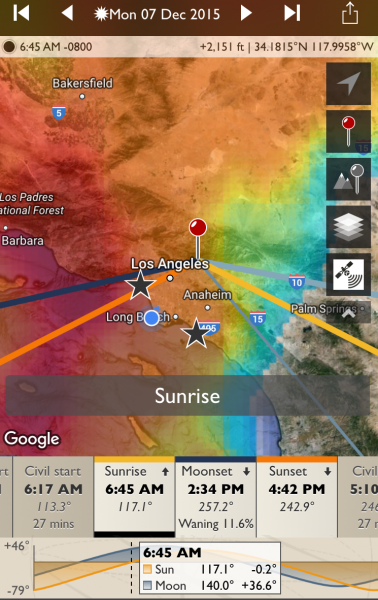
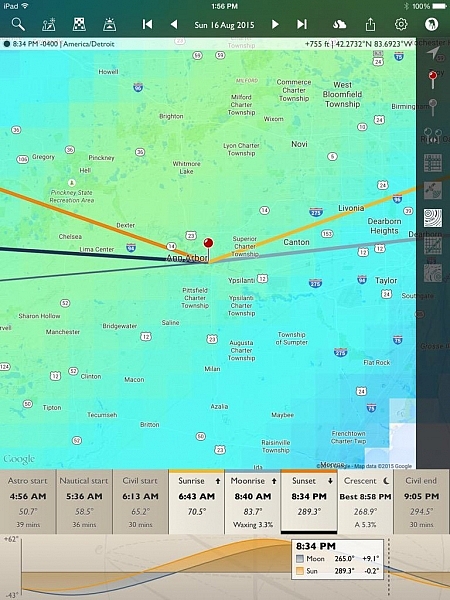
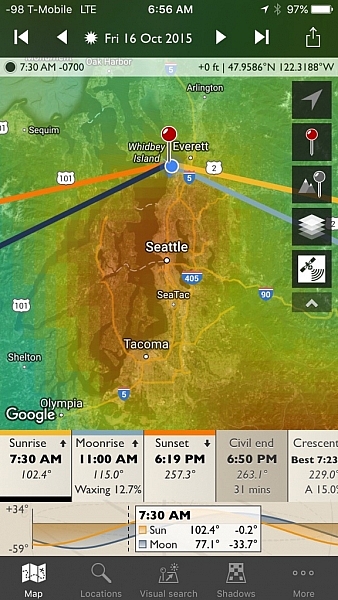
    With the correct date selected, tap either the sunrise or sunset icons, from the timeline on the bottom of the screen. If you are zoomed-in too far, Skyfire will tell you to zoom out. Once you are zoomed out (by using a pinching motion on the screen) to the appropriate level, a semi-opaque overlay will show up with varying colors.

    Skyfire-Review-24

    No color overlay means no chance color and clear skies (the bottom right corner in the example above). You’ll still see the sunset or sunrise at that location, but the odds are there will be no clouds to take on color. The scale then follows the colors of the rainbow, more or less, to show slim chance (lighter blue) to high chance (red). In between are varying shades of blues to greens, and yellows to red. White means there will be cloud cover but no colors, and you likely won’t even see the sunset or rise.

    It should be noted, the overlay color show the area where the greatest chance for sky color will occur. Meaning, it might be clear above you (no chance) but possibly red to the West. If you are deep in a valley you might not be able to see to the West, but if you’re on a mountain peak, you will know which direction works best.

    How well does it work

    While I don’t have hard stats from years of testing to document Skyfire’s accuracy, but I do have my own experience, and that of two other photographers in various locations around the US who’ve tried it. I’ve used Skyfire in both Orange and LA Counties, California as well as Seattle, Washington. Rachel Cohen has tested the app in Ann Arbor, Michigan, while Richard Wong uses the app in the San Francisco Bay Area of California.

    The short of it: Skyfire works well enough for my use as a professional photographer. I find its predictability to be within Crookneck’s stated goal of 80% accuracy (the app has an opt-in feature that allows users to send in photographic feedback of their experience which helps the company track accuracy and improve the product) and I have trusted it to get me out of bed early enough to catch pleasing sunrises.

    Rachel used the app nearly every day during her 30 day trial and Richard tried it several times, including a trip to Quebec, Canada (note, while Skyfire only states coverage for the Lower 48 US, areas close to the border often get coverage as weather knows no border). “It’s great for traveling, as I can look up to four days ahead and get an idea of how to position myself best for the sunset, and what to expect in general on how colorful it might be”, Rachel commented when asked what she liked best about the app. Richard offered, “I like that Skyfire helps with coming up with ideas for shooting locations at sunrise / sunset. This especially comes in handy for sunrises to determine whether or not to set the alarm the night before.”

    Skyfire-Review-25

    Knowing Skyfire is not perfect, Richard mentioned, “Wind conditions need to be accounted for, and mountains. I drove 2+ hours to Point Reyes National Seashore expecting good odds of an explosive sunset, but it was cloudless when I arrived, with none in sight in any direction because the clouds had blown inland.” Rachel found that it’s best to fiddle with the zoom depending on your location, “I’m not quite sure where it loses its accuracy, but I can be at, or near a location, then look at the Skyfire app. What I see in the sky might not always represent what’s actually happening. If I zoom way out on the map, it seems more accurate than limiting zoom. Usually I try it both ways. Especially if traveling any distance.”

    While the app shows the percentage for probability of photogenic cloud colors, it can’t predict just how amazing those colors will be. This type of knowledge comes with experience, and knowing local patterns.

    My Results

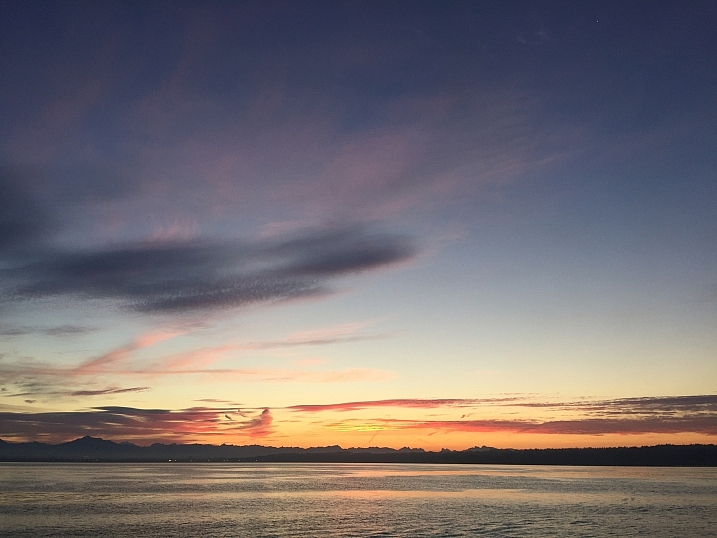
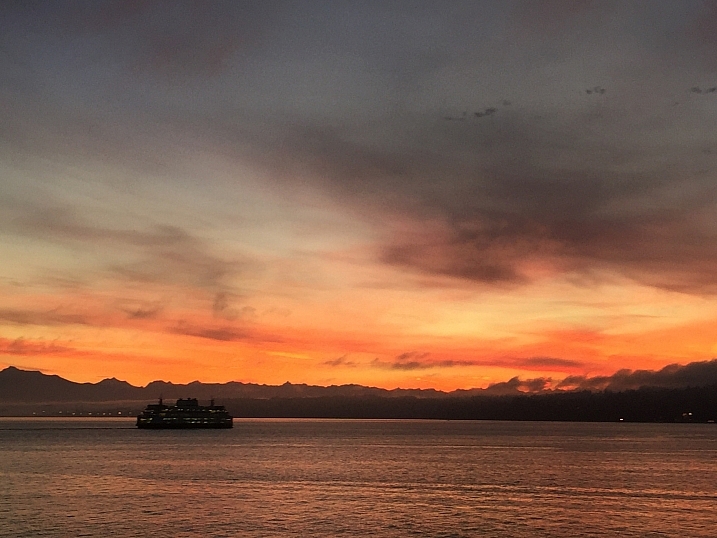
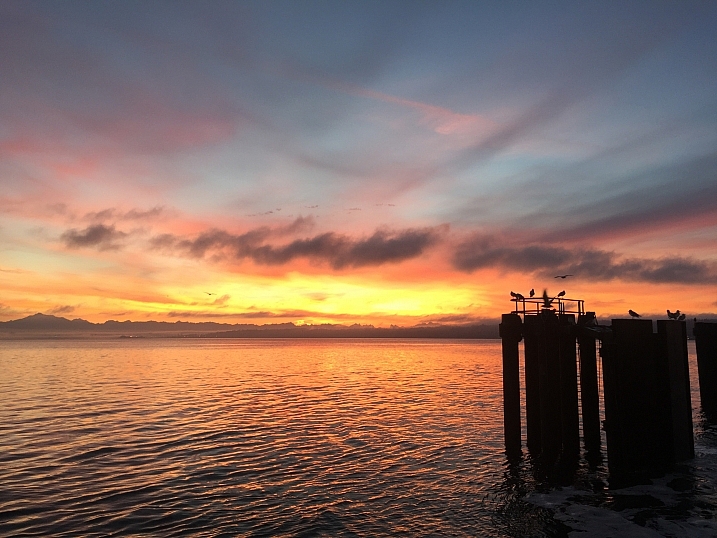
    I’ve been testing and using Skyfire for a few month,s and as I mentioned, I’ve been happy with the product. While access to it was given to me in order to perform this review, I had initially paid for a three month subscription because I found it useful. Below are some examples of my results.

    Skyfire-Review-9

    Skyfire-Review-6

    Skyfire-Review-7

    Skyfire-Review-15

    Skyfire-Review-16

    Skyfire-Review-9

    Skyfire-Review-10

    This last one is where Skyfire said there as a low chance, but the sky had different plans.

    Skyfire-Review-30

    Skyfire-Review-29

    Skyfire forecast push notifications

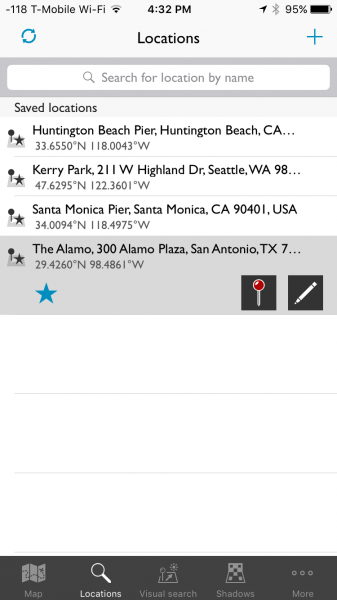
    One of Skyfire’s strongest features works when you forget to check the app. You can set up push notifications (Skyfire Plus subscription required) inside the app, and it will notify you, based on percentage thresholds you set, when there are particularly high odds of great sunrise/sunset colors. You first pick your favorite locations via a simple search.

    Skyfire-Review-28

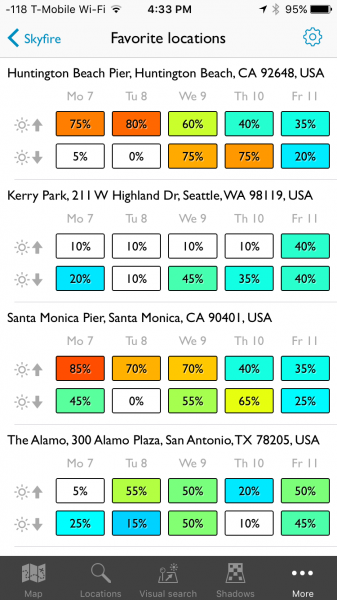
    Skyfire will then keep track of your favorite locations and can show you the current predictions for each one.

    Skyfire-Review-27

    I’m heading to San Antonio tomorrow and I enjoy that the app helps me plan my tourism and photography. I know, as of right now, the sunset chance on my day of arrive is low, but the next morning is 50/50. So, I will check back tomorrow night, but in the mean time, I plan on making that morning an early one.

    The notifications look like this:

    Skyfire-Review-26

    You can configure the notifications from one day in advance, to two or four days, depending on which subscription you opt-in for. Further, you can use the iPhone Do Not Disturb feature to make sure you aren’t receiving these texts when you are sleeping.

    What’s next for Skyfire?

    I got in touch with Matthew Kuhns and asked him what is next for Skyfire, he said:

    “We are currently working on expanding the coverage area to Europe and Canada, which is challenging in that it requires some new forecast models to be created. And simultaneously we are working on the Android release for The Photographer’s Ephemeris plus a few other secret yet really awesome new features! The core service is also being analyzed and improved through the hard work of the entire team thanks for the great user feedback and field reports we receive. 

    One hurdle many people don’t realize, is that most weather forecasts are broad stroke type predictions, and one of the biggest challenges with Skyfire is to take a broad forecast and nail down where the clouds will be exactly at sunset and sunrise, which is only a 20 minute window. Cloud forecasts are one of the trickiest parts of forecasting, and so developing ways to reliably analyze, interpret, and generate predictions based on these data sets is very challenging.

    Conclusion

    Skyfire is a robust feature inside TPE and for my money, it’s worth a yearly subscription. A hobbyist might opt for the Basic version, but as a professional who likes to hedge the bets in his favor, I prefer the Plus version. The push notifications are helpful for when I forget to check my phone. I have also found the app to be helpful for non-photography trips, such as the simple joy of enjoying a colorful sunset with my wife.

    More information about the nuts and bolts of how the app is built can be found on Skyfire’s site.

    Have you tried this app yet? What are your thoughts and results? Please share in the comments below.

    Disclaimer: Skyfire was provided to the writer at no charge for the purpose of this review/article, but he was happy enough with it to purchase a subscription to continue using it. All reviews here on dPS are 100% unbiased opinions of the writers. 

    googletag.cmd.push(function() {
    tablet_slots.push( googletag.defineSlot( “/1005424/_dPSv4_tab-all-article-bottom_(300×250)”, [300, 250], “pb-ad-78623” ).addService( googletag.pubads() ) ); } );

    googletag.cmd.push(function() {
    mobile_slots.push( googletag.defineSlot( “/1005424/_dPSv4_mob-all-article-bottom_(300×250)”, [300, 250], “pb-ad-78158” ).addService( googletag.pubads() ) ); } );

    The post Can the Skyfire App Predict Stunning Sunset Colors Days in Advance? by Peter West Carey appeared first on Digital Photography School.


    Digital Photography School

  • Tips for Using a Handheld Light Meter

    In modern DSLRs they all have a light meter built-in to the camera. But sometimes you want a more accurate reading, or to measure the amount of light when using flash (your camera can’t do that), in which case you would turn to a handheld light meter.

    Check out this video from Adorama TV (host Daniel Norton) for some light meter basics.

    This second video is more advanced. Once again from Adorama TV, with host Mark Wallace, this one covers how to meter for light ratios. Read more about ratios here: Lighting Ratios to Make or Break your Portrait.

    In the video above he is using the Sekonic L-358 light meter. Here are a couple other choices, also made by Sekonic. I personally use the L-308 and it works just fine. You don’t need one that’s really fancy but the one he used does have the memory storage for comparing the light, the L-308 does not. So if you want that feature you may want to opt for the L-358.

    Have you used a light meter before? If you are shooting with speedlights or studio lights you may find it necessary, but if you shoot landscapes and use mostly natural light you probably do not need one. Let us know your experience in the comments below.

    googletag.cmd.push(function() {
    tablet_slots.push( googletag.defineSlot( “/1005424/_dPSv4_tab-all-article-bottom_(300×250)”, [300, 250], “pb-ad-78623” ).addService( googletag.pubads() ) ); } );

    googletag.cmd.push(function() {
    mobile_slots.push( googletag.defineSlot( “/1005424/_dPSv4_mob-all-article-bottom_(300×250)”, [300, 250], “pb-ad-78158” ).addService( googletag.pubads() ) ); } );

    The post Tips for Using a Handheld Light Meter by Darlene Hildebrandt appeared first on Digital Photography School.


    Digital Photography School

  • Tips for Photographing Football (Soccer)

    Football (called soccer in some parts of the world) can be a very challenging sport to photograph. The ball is constantly moving quickly around the pitch, which may make it somewhat of a challenge to capture the action if you don’t have the right knowledge on how to do so. This simple guide will point you in the right direction to get more success at your next football match.

    football or soccer photography action

    Players contest the ball. © Daniel Smith / Getty Images.

    First, let’s start off with equipment, because heading to a game with the wrong kit is definitely not going to help you.

    Equipment

    For best results, an 18-55mm or similar lens will not be sufficient to cover a game of football; the players and the action will be too far away, and you will most likely end up being disappointed with the results. Using a 70-200mm or equivalent is a great starting point, and will be a fantastic range for areas closer to goal. However, if you do have anything longer in your bag that is always helpful; anything up to about 400mm will be perfect. Anything longer than that can get a little too tight on a football field, unless you want to photograph players at the other end.

    If you find that you’re current lens isn’t quite long enough, don’t feel like you need to run out and buy a longer one; cropping can always help quite a lot. With newer cameras having such high resolutions now, you won’t find too much of a drop in final image quality. Renting a lens for a day or two is always an option you may want to consider as well.

    Also, bringing a small camping stool will be of great comfort to you, and because you will be closer to the ground than standing, it will help you get less of the field in the frame.

    Fig 3

    Players competing for possession of the ball. © Daniel Smith / Getty Images.

    Settings

    If you’re comfortable with using Manual mode, the below will be a helpful guide to getting you started. If you’re not too comfortable with Manual mode just yet, using shutter speed priority set to 1/800th, or faster, should do the trick.

    Shutter Speed

    Football (soccer), as with the majority of sports, is fast paced. To be able to freeze the action you will need to use a fast shutter speed; 1/800th as a minimum, is a great starting point for more advanced players as they tend to move much faster than younger, junior players. If you’re photographing a very young age group match, you may find that 1/500th could be fast enough, however 1/800tj would be a safer option.

    Fig 5b

    A fast shutter speed was used here. © Daniel Smith / Getty Images.

    To add some variety, slower shutter speeds can create some fantastic images when done correctly. Shooting at around the 1/30th mark is a great starting point. If you find that there is too much blur in your images, then speeding the shutter speed up slightly will help. Conversely, if there is not enough blur, you may need to slow the shutter speed down.

    Fig 4b

    Try using a slower shutter speed to create motion blur showing speed. © Daniel Smith / Getty Images.

    Aperture

    For single player shots, f/2.8 would be ideal as it will isolate the player nicely. However, if photographing tackles, etc., where there is more than one player, it is best to use f/4 as this will give you a slight increase in depth of field (DoF), without sacrificing too much shutter speed. If your lens cannot got as wide as f/2.8 or f/4, that’s perfectly fine, just use the widest aperture your equipment offers.

    ISO

    Now that you have your aperture and shutter speed set, use the ISO to fill in for the exposure, or brightness, you want to have. Depending on what shutter speed/aperture combination you have, you may find ISO 400 on a bright day works, or on the other hand, if you’re in a low-light situation such as at dusk, night, or on a heavily overcast day, ISO 800 or higher may be required. Just be careful with how high you go on your particular camera as each model can perform differently at higher ISO’s. This is something that you may need to play around with a bit to explore.

    Autofocus

    Using the correct autofocus function on your camera will be a key element in ensuring you capture a sharp shot! Because you will be photographing moving subjects, One-Shot AF on Canon, or AF-S on Nikon, is not an appropriate focus mode to use, as it will not continually track the moving subject. In this situation, using AI-Servo on Canon, or AF-C on Nikon, would be the best solution as it will continually track a moving subject, so long as you keep the autofocus engaged. If you’re comfortable with manually selecting AF points, that will further help you control your camera’s focus even more; just select whichever autofocus point you wish your subject to be placed in the frame.

    Positions

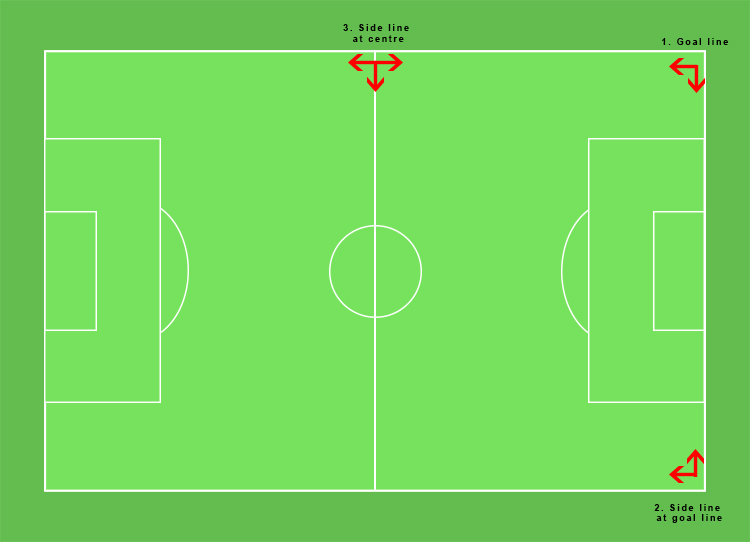
    As with any sport, sitting in the right position will increase your chances of getting the shot. For football (soccer), this is generally around the corners of the pitch or field.

    Fig 1

    An overview of a soccer pitch with a guide of seating positions. © Daniel Smith / Getty Images.

    • Position 1: Looking down the pitch (field) will give you some great shots of players as they run with the ball toward you. You can also get some great shots of goals here, too. This position is also the most versatile position as you can get a good mix of everything.
    • Position 2: Looking around the pitch (field) is fantastic for shots at goal, as you will generally be able to get the goal shooter, and keeper in the frame. From here, you will also be able to capture players running down the pitch (field), but they will not be as head-on if running down the wings.
    • For some variation, try shooting at position 3, as from there you will be able to get some great panning shots of players with the ball, as they run the length of the pitch. You generally won’t be able to get many great goal shots from here but you may find some great tackle opportunities if they happen around mid-field.

    Do not be tempted to run around the pitch following the ball – you will be forever running, and not photographing! It is much better to sit in one location and wait for the action to come to you. You can always move locations, such as at half-time, if you’re wanting to photograph a particular team.

    Fig 10

    A nice tackle here. A player hslid right under the other for the ball. © Daniel Smith / Getty Images.

    What to look for

    Here are some things for you to look for at your next game.

    Celebrations – This could be of the team that just scored a goal, or after the final whistle, capture the team that won the match.

    Fig 6

    Teammates celebrate scoring a goal. © Daniel Smith / Getty Images.

    Fig 12

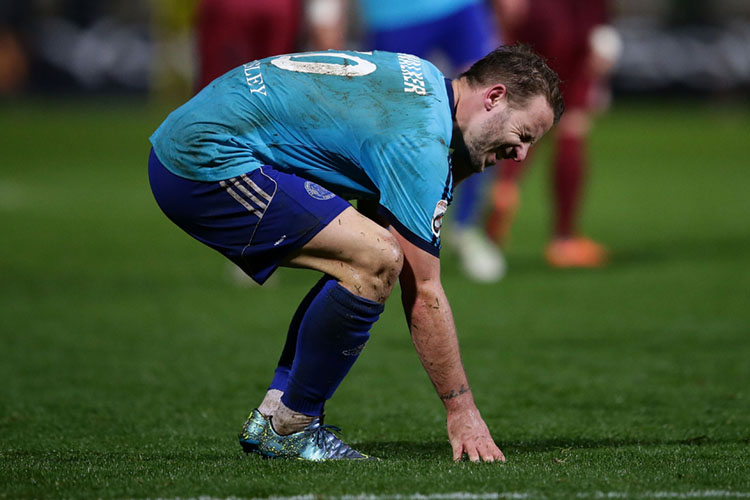
    A player shows the toll of losing a match. These images are also quite powerful, as the players can often have great expressions.

    Action – This will be a major part in the game. Football (soccer) has a lot of tackles, headers, dives, slides, not to mention goals, and goal deflections by the keeper. Staying focused is key to capturing these moments. Also bear in mind, that older players will generally play with a higher intensity than the younger players, so capturing dramatic tackles will happen more often. But be aware that older players also move a lot faster!

    Fig 2

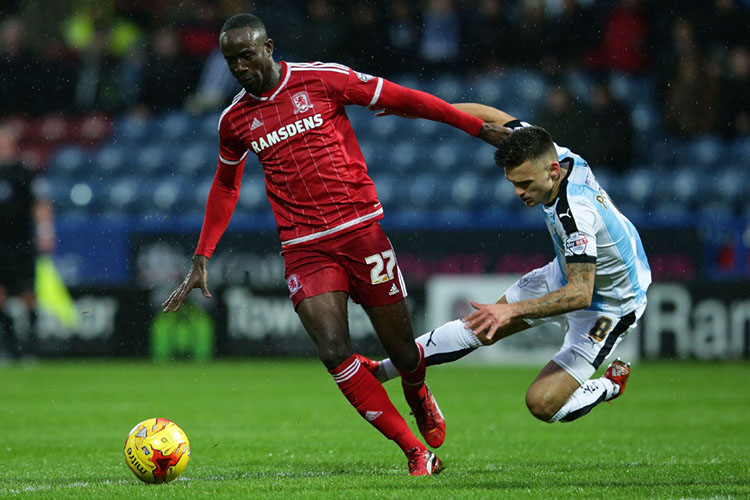
    Players falls from a push. © Daniel Smith / Getty Images

    Fig 7

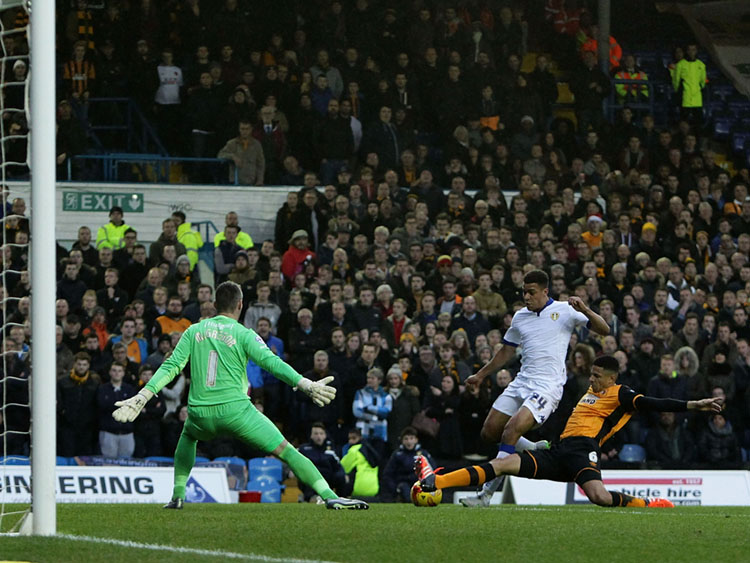
    A player took a shot at goal. Having the goal keeper, and the front goal posts in the frame, clearly illustrates that this is taking place at goal. © Daniel Smith / Getty Images.

    Fig 9

    Players heading the ball. Getting the ball close to their heads is key with these types of images. If the ball is too far away, it can get lost. Also, the players expressions are generally better when the ball has just hit their head! © Daniel Smith / Getty Images.

    The crowd – If the game you’re covering has a lot of supporters, don’t forget to get some shots of them, too, they can add some great atmosphere. Look for emotions on their faces; maybe they’re excited as their team just scored a goal, or they may be very quiet as their team is about to lose. The crowd is a great place for emotions.

    Conclusion

    Football (soccer) can be a very rewarding sport to photograph. As with any sport, the more you understand about the game, the more you know where to look for action, and will be able to follow it easier. However, if you’re not all that familiar with football (I’m not an expert on it by any meaning of the word) practice makes perfect.

    One thing I would suggest is if you are planning on heading down to your local club to photograph a game, as a courtesy ask any match officials or club president if they are okay with you doing so. They will appreciate it, and it will make it easier for future photographers. Happy shooting!

    googletag.cmd.push(function() {
    tablet_slots.push( googletag.defineSlot( “/1005424/_dPSv4_tab-all-article-bottom_(300×250)”, [300, 250], “pb-ad-78623” ).addService( googletag.pubads() ) ); } );

    googletag.cmd.push(function() {
    mobile_slots.push( googletag.defineSlot( “/1005424/_dPSv4_mob-all-article-bottom_(300×250)”, [300, 250], “pb-ad-78158” ).addService( googletag.pubads() ) ); } );

    The post Tips for Photographing Football (Soccer) by Daniel Smith appeared first on Digital Photography School.

    Digital Photography School

  • 5 Lightroom Develop Module Secrets Revealed

    5-lightroom-develop-module-secrets-revealed

    When you’re new to Lightroom, some features of the program aren’t immediately apparent, or easily discoverable. In this article I’ll introduce you to five Lightroom Develop module secrets that will help you get more out of photo editing in Lightroom.

    #1 Smarter Virtual Copies

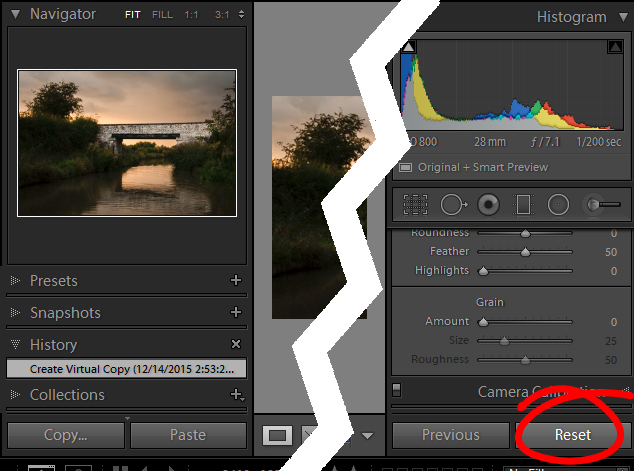
    Often when you’re working in Lightroom you’ll edit an image to look one way, and then decide you’d like to try to edit it in a different way – without losing your work. The trouble is, that once an image has been edited, any virtual copy that you create will use the current look of the image as its starting point. So the first entry in the History Panel will be the creation of the Virtual Copy and you can’t, using the History Panel, wind the photo back to how it looked out of the camera.

    You can, however, use the Reset button at the foot of the right panel of the Develop module. Click Reset to reset your new Virtual Copy, so it is the original out of camera image with all edits removed. Of course, the edits will remain on your original image (just the Virtual copy will be reset).

    reset a virtual copy to the original image state in Lightroom
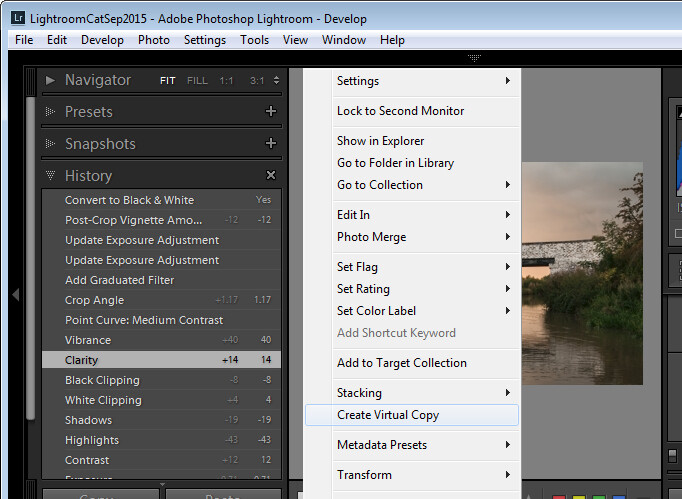
    So far, so good. But what if you want to create a Virtual Copy that starts partway through the editing process? Well, that can be done too. Start with the original image, open the History Panel on the left, and click on the entry which shows the image looking as you want for your virtual copy. Note that the most recent edit is at the top of the History panel.

    make a virtual copy from a partially edited image in Lightroom

    Notice the History panel is opened, and a state other than the current one is chosen to make the Virtual Copy.

    Now right click the image and choose Create Virtual Copy – Lightroom will create a new virtual copy and switch to it. Immediately after you do this, click back on the image that you made the copy from – the original image – and in the History Panel, click the topmost entry. This reinstates your edits to the original image, back to your last edit. It’s important to do this before you start working on the new Virtual copy as it is easy to forget to perform this step and, in doing so, you may lose your edits if you subsequently make changes to the original image.

    #2 Comparing Before and After

    In Lightroom you can compare the before and after editing state for an image by clicking on the image in the Develop module and pressing the backslash key on your keyboard (\). Press once to see the Before state and once again to return to the current edited state of the image.

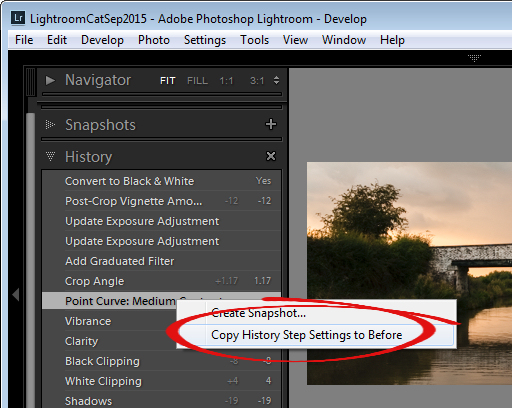
    So far, so good. But what if you want to compare the current edited state with an earlier edited state – not with the original out of camera image? You can do this if you open the History panel, then right click the entry in the History list that you want to compare with the current state of the image – you can choose any of the states in the list. From the popup menu choose Copy History Step Settings to Before. Now when you press the Backslash key to compare the before and after, you’ll be comparing a previous state but not the original out of camera image.

    change the starting point for a before/after comparison in Lightroom

    #3 Reverse Engineer Presets

    A Lightroom preset is a set of slider settings that have been saved in such a way that they can be applied to any image, at any time. That said, there is nothing that can be applied using a preset that you cannot also apply manually to an image, by using the tools in the Develop module. This means that Presets contain valuable information for editing images which you can discover by reverse engineering them. So, if you like a preset that ships with Lightroom, or if you have downloaded and installed other presets that you like, use the process that follows to learn how they work.

    Start with an image that is in its original out of camera state, and apply the preset to the image. Now look through the settings in the Develop module panels on the right to see what adjustments have been made to the image.

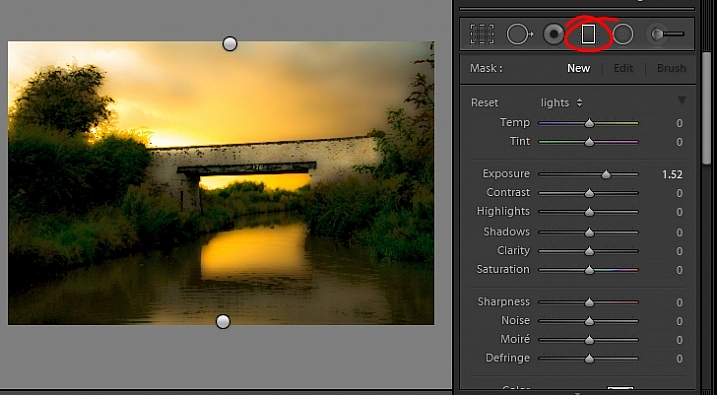
    To see if there are any Graduated Filter or Radial Filter adjustments included in the preset, click the Graduated Filter tool, set the Show Edit Pins setting to Always and see if any pins appear on the image. If so, click to see where they have been applied and what their settings are. Repeat this step with the Radial Filter to see if any radial filter adjustments have been made to the image. As presets cannot contain Adjustment Brush edits there’s no point in checking that tool.

    reverse engineer a preset in Lightroom

    It’s best to study presets without first making any changes to your image, except for applying the preset. This way you will know that all the edits that have been applied to the image are part of the preset, and none of them are your own edits.

    #4 The Alt Key works nearly everywhere

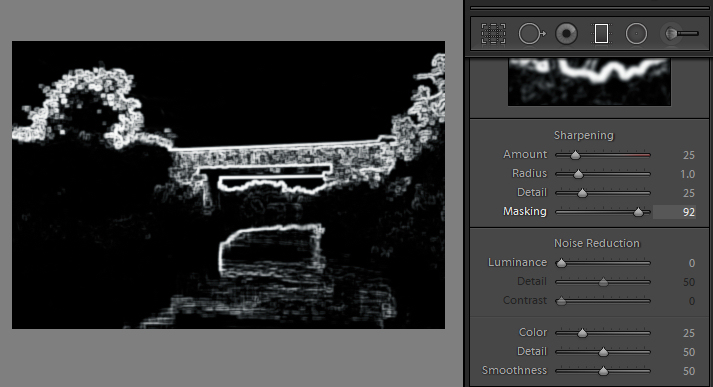
    The Alt key is the biggest hidden secret keystroke in Lightroom. When you press it, various things appear on the screen that previously were not visible. For example, in the Basic panel you can use the Alt key to display Reset Tone and Reset Presence options. The Exposure, Whites, Blacks and Split Toning sliders all display visual feedback when you hold the Alt key while adjusting them. So too do the sliders in the Sharpening panel. To learn more about using the Alt key in the Lightroom Develop module, check out this post: Lightroom Tips for the Develop Module – the magic Alt key.

    alt key provides visual feedback for many sliders in Lightroom

    #5 Keyboard Adjustments

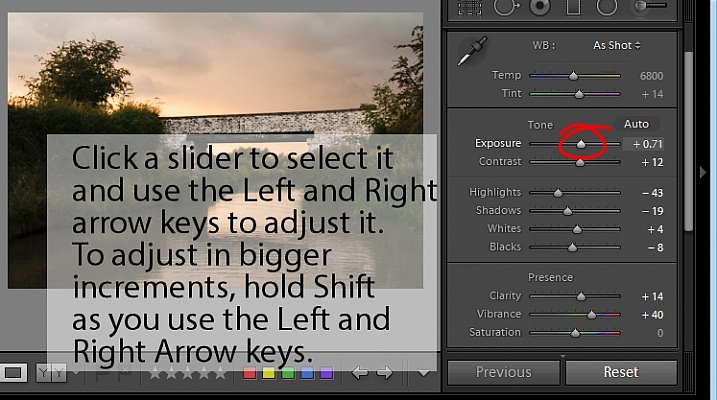
    If you find it difficult to adjust the sliders in Lightroom using your mouse, then try adjusting them using the keyboard instead. To do this, click on a slider to target it and then use the left and right arrow keys to adjust the slider in small increments. To move in larger increments hold the Shift key as you press the arrow keys. You will find that the Up and Down arrow keys work identically to the Left and Right arrow keys.

    adjust Lightroom sliders using the arrow keys

    If you want to continue to use the sliders to make your adjustments, but you find that they travel too fast for you to get an accurate adjustment, hold the Shift key as you drag on a slider. This slows its movement down and makes it easier for you to make small adjustments. You can also click on the numeric value that a slider is currently set to and use the Up and Down arrow keys to adjust the value in small increments.

    To reset a slider – double click its name and it will return to its default value for that type of image.

    Watch the video

    Here is a video version of this article so you can follow along as I walk you through each point.

    googletag.cmd.push(function() {
    tablet_slots.push( googletag.defineSlot( “/1005424/_dPSv4_tab-all-article-bottom_(300×250)”, [300, 250], “pb-ad-78623” ).addService( googletag.pubads() ) ); } );

    googletag.cmd.push(function() {
    mobile_slots.push( googletag.defineSlot( “/1005424/_dPSv4_mob-all-article-bottom_(300×250)”, [300, 250], “pb-ad-78158” ).addService( googletag.pubads() ) ); } );

    The post 5 Lightroom Develop Module Secrets Revealed by Helen Bradley appeared first on Digital Photography School.


    Digital Photography School

  • Weekly Photography Challenge – Lightweight

    Each week we try and come up with something interesting and different for the weekly photography challenge here on dPS. The images I shared earlier of: 25 Floaty Images of Lightweight Objects might give you a hint! If you haven’t already seen them, take a look.

    U.S. Army

    By U.S. Army

    Weekly Photography Challenge – Lightweight

    You could take the term literally, like the image above of lightweight boxers, or figuratively – the choice is yours. Get creative. What things around your own home could be considered lightweight? Something soft and fluffy like a kitten, a tissue, or a feather – or perhaps something even lighter like puffy clouds on a nice day, or marshmallows.

    John Watson

    By John Watson

    Patrik Nygren

    By Patrik Nygren

    Kate Ter Haar

    By Kate Ter Haar

    William Clifford

    By William Clifford

    Fatima

    By Fatima

    Chris Chabot

    By Chris Chabot

    Share your images below:

    Simply upload your shot into the comment field (look for the little camera icon in the Disqus comments section) and they’ll get embedded for us all to see or if you’d prefer upload them to your favourite photo sharing site and leave the link to them. Show me your best images in this week’s challenge. Sometimes it takes a while for an image to appear so be patient and try not to post the same image twice.

    (Seriously, how cute are these little guys?!)

    Tim Ebbs

    By Tim Ebbs

    Belal Khan

    By Belal Khan

    googletag.cmd.push(function() {
    tablet_slots.push( googletag.defineSlot( “/1005424/_dPSv4_tab-all-article-bottom_(300×250)”, [300, 250], “pb-ad-78623” ).addService( googletag.pubads() ) ); } );

    googletag.cmd.push(function() {
    mobile_slots.push( googletag.defineSlot( “/1005424/_dPSv4_mob-all-article-bottom_(300×250)”, [300, 250], “pb-ad-78158” ).addService( googletag.pubads() ) ); } );

    The post Weekly Photography Challenge – Lightweight by Darlene Hildebrandt appeared first on Digital Photography School.


    Digital Photography School

  • 25 Floaty Images of Lightweight Objects

    Some things really do float on air. How do you capture that in an image of things which are lightweight, and make the object look delicate and airy?

    Let’s see how these photographers did it:

    Kasia

    By Kasia

    Nicolas Raymond

    By Nicolas Raymond

    J P

    By J P

    Thomas Hawk

    By Thomas Hawk

    Partha S. Sahana

    By Partha S. Sahana

    Michael Levine-Clark

    By Michael Levine-Clark

    Kalvis

    By Kalvis

    RebeccaVC1

    By RebeccaVC1

    Ankakay

    By ankakay

    Karl Grenet

    By Karl Grenet

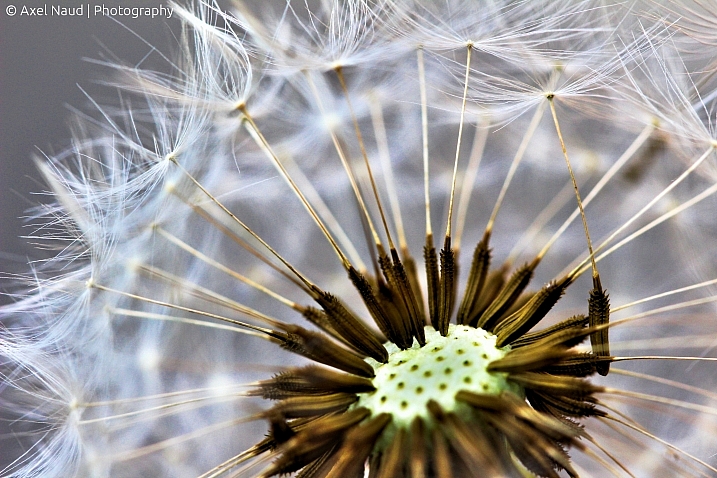
    Axel Naud

    By Axel Naud

    Pen Waggener

    By Pen Waggener

    Vivek Jena

    By vivek jena

    Joe

    By Joe

    Tanakawho

    By tanakawho

    Heather

    By Heather

    Casch52

    By casch52

    Alison Tomlin

    By Alison Tomlin

    Stuart Williams

    By Stuart Williams

    Phil

    By Phil

    Kailash Gyawali

    By Kailash Gyawali

    55Laney69

    By 55Laney69

    Alexey Kljatov

    By Alexey Kljatov

    Garrett Coakley

    By Garrett Coakley

    The World Through My Eyes

    By The world through my eyes

    googletag.cmd.push(function() {
    tablet_slots.push( googletag.defineSlot( “/1005424/_dPSv4_tab-all-article-bottom_(300×250)”, [300, 250], “pb-ad-78623” ).addService( googletag.pubads() ) ); } );

    googletag.cmd.push(function() {
    mobile_slots.push( googletag.defineSlot( “/1005424/_dPSv4_mob-all-article-bottom_(300×250)”, [300, 250], “pb-ad-78158” ).addService( googletag.pubads() ) ); } );

    The post 25 Floaty Images of Lightweight Objects by Darlene Hildebrandt appeared first on Digital Photography School.


    Digital Photography School

  • How to Use Blender Pen to Turn Your Photos Into Art Objects

    When you discover that you can easily transform your digital photos into some unique creative art with just the magic touch of a digital pen, it opens up a whole world of imaginative possibilities. In this article you can find some handy tips on how to use a blender pen for the best results. How it works If you remember Continue Reading

    The post How to Use Blender Pen to Turn Your Photos Into Art Objects appeared first on Photodoto.


    Photodoto

  • Secrets to Shooting the Northern Lights

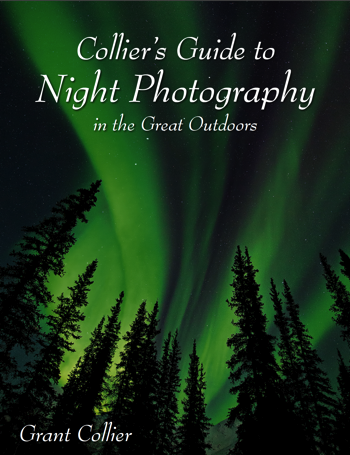
    One sale now 32% OFF at Snapndeals: Collier’s Guide to Night Photography in the Great Outdoors eBook. Now only until January 26th, 2016


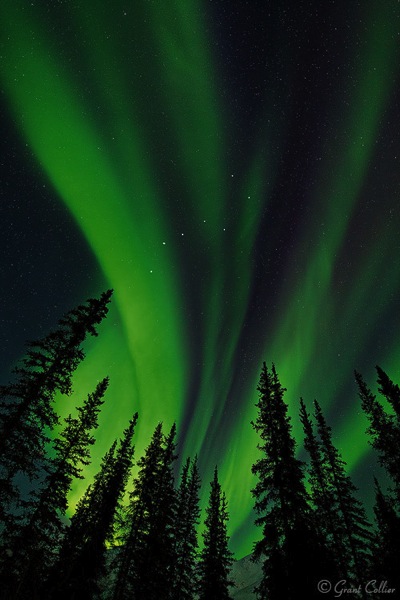
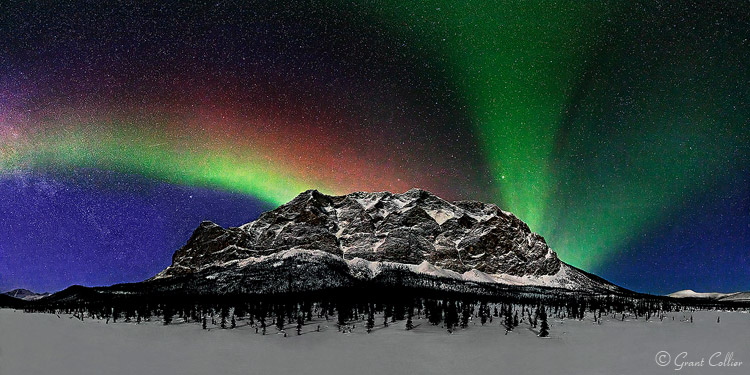
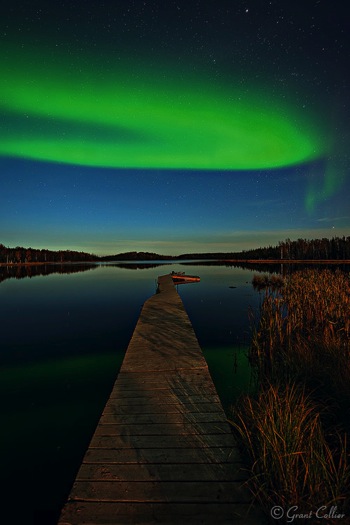
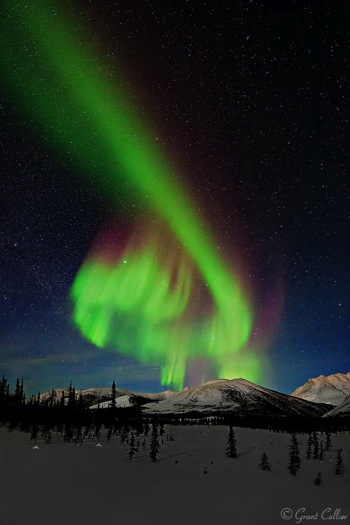
    Of all the phenomena you can view in the night sky, the Northern Lights may be the most spectacular. The lights are created by charged particles from the sun, interacting with gaseous particles in our atmosphere. These lights also appear in the southern hemisphere, where they are known as the Southern Lights. Another name for both is the Aurora Borealis.

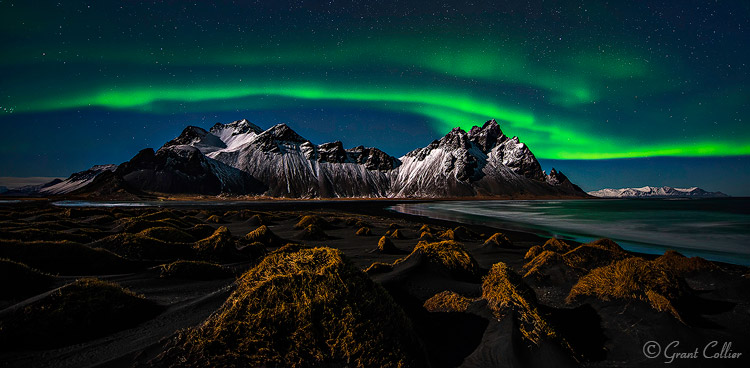
    Grant Collier Northern Lights 1

    Vesturhorn Mountain, Iceland – 14mm lens, f/2.8, for 10 seconds at ISO 1600

    How to find Northern Lights

    You can view a forecast for the Northern Lights online here. This website gives you a general idea of where the Northern Lights will be visible on any given night. For example, if you are in the northern continental United States, you might be able to see the Northern Lights if the forecast is 5 or higher. However, to get the best chance of viewing the Northern Lights, you’ll need to travel even farther north. To discover the best locations, try to find a day when the forecast on the above website is a 1 or 2. Anywhere within the bright green circle is a prime viewing spot for the Northern Lights. Some places that are somewhat easier to access in prime viewing areas are Wiseman, Alaska; Yellowknife, Canada; Iceland and northern Norway.

    What lens to use

    When shooting the Northern Lights, it is very helpful to use a fast lens that has an aperture of f/2.8 or wider. These lenses can let more light into the camera, which will yield higher quality images at night. A good option is the Rokinon 14mm f/2.8, which costs round $ 300. This is an ultra-wide angle lens, which is important when photographing something as expansive as the Northern Lights. Another option is the Nikkor 14-24mm f/2.8. This is a phenomenal lens, but it does cost almost $ 2,000.

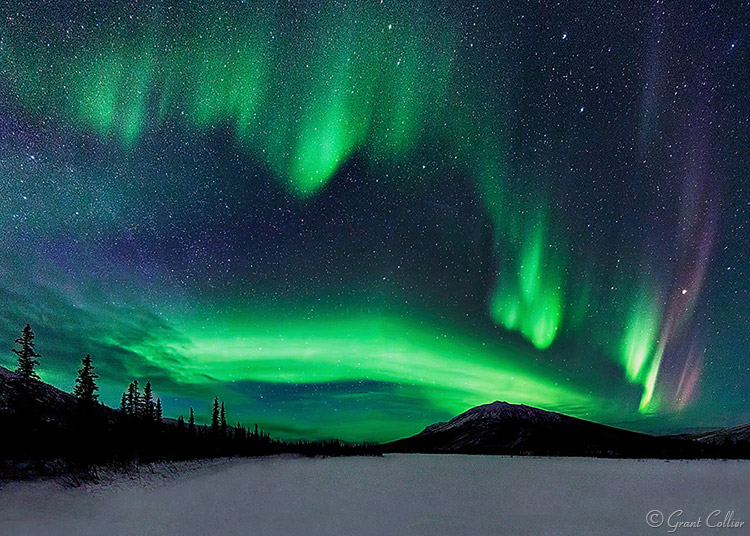
    Grant Collier Northern Lights 2

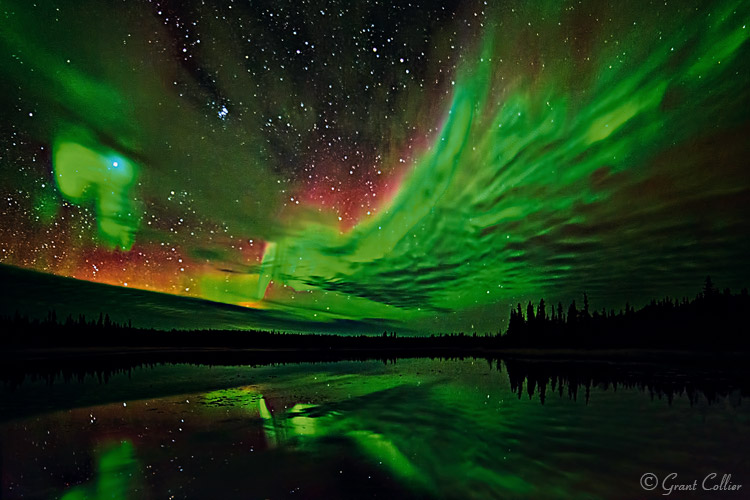
    Wiseman, Alaska – 14mm lens, f/2.8, 15 seconds, ISO 6400.

    Camera settings and exposure

    You’ll typically need to use the widest aperture on the lens, and for shutter speed, you’ll normally want to use exposures between 10-15 seconds. If the lights are moving rapidly in the sky, they can start to blur too much with longer exposures. If the Northern Lights aren’t moving rapidly, you can get away with exposures of 20-30 seconds. You should use the highest native ISO on your camera that doesn’t cause the highlights to be overexposed (a native ISO is one that is represented by a number, as opposed to letters, like H1 or H2). Be careful, though because when the Northern Lights become really bright, it is possible to overexpose the shot.

    I recommend underexposing the images a little, so that you won’t risk blowing out the highlights, if the lights suddenly brighten. You’ll want to frequently check your histogram to make sure you’re not coming close to clipping the highlights. If you are, you’ll need to lower the ISO or exposure length.

    Grant Collier Northern Lights 3

    Wiseman, Alaska – 14mm lens, f/2.8, 8 seconds, ISO 6400.

    Stitching images

    The Northern Lights can fill up most of the sky, and even ultra-wide angle lenses may only capture a portion of the display. To overcome this problem, you can create stitched images to capture more of the scene. A stitched image is one where you take multiple shots, each comprising a small part of the scene you want to photograph. You then later use computer software, like Lightroom or Image Composite Editor (Windows only), to stitch these images together, to produce an image of the whole scene. The great thing about stitched images is that they will also produce larger images with more detail, and less noise.

    If the aurora is bright and moving fast, you’ll typically want to use a very wide lens, like 14mm, to create a single-row stitched panorama. You’ll have to take all of the images pretty quickly, otherwise, the aurora can move so much that the images won’t stitch together seamlessly. If the aurora is relatively dim, it doesn’t tend to move as fast. In this situation, it’s possible to do multi-row stitched panoramas with up to 20 images. These large stitched images can help minimize noise, which is more noticeable when the aurora is fainter. I recommend a 24mm lens to capture such images.

    Grant Collier Northern Lights 8

    Supapak Mountain, Alaska – 24mm lens, f/2.8, 10 seconds, ISO 6400, 9 images stitched together.

    When to look for the lights

    The best time of the year to photograph the Northern Lights is near the spring and autumn equinoxes, in March and September. The Northern Lights tend to be somewhat more active during those months than others. Never plan a trip to photograph the Northern Lights between late-April and early-August. During this time, it isn’t dark for very long, if at all, at the far northern latitudes. If you plan a trip in December or January, it will be dark much of the day, if not all of the day. However, it can be bitterly cold during this time, so spring and autumn is still preferable for all but the most adventurous photographers.

    Grant Collier Northern Lights 5

    Yellowknife, Canada – 15mm lens, f/2.8, 30 seconds, ISO 1600.

    Grant Collier Northern Lights 7

    Brooks Range, Alaska – 14mm lens, f/2.8, 10 seconds, ISO 6400.

    Other considerations

    Since it can be so cold when shooting the Northern Lights, it’s possible that your lens will fog up over the course of the night. Lenses fog up much faster when they are taken from a warm location to a cold one. One way to prevent this is to keep your camera equipment cold, by storing it in the trunk of your vehicle rather than in a warm room. You will, however, want to store your batteries in a warm location, as cold batteries do not last as long as warm ones, so this can help maximize battery life. Another option to prevent a lens from fogging up is to attach hand warmers to the side of it using rubber bands to help keep it warm.

    Grant Collier Northern Lights 6

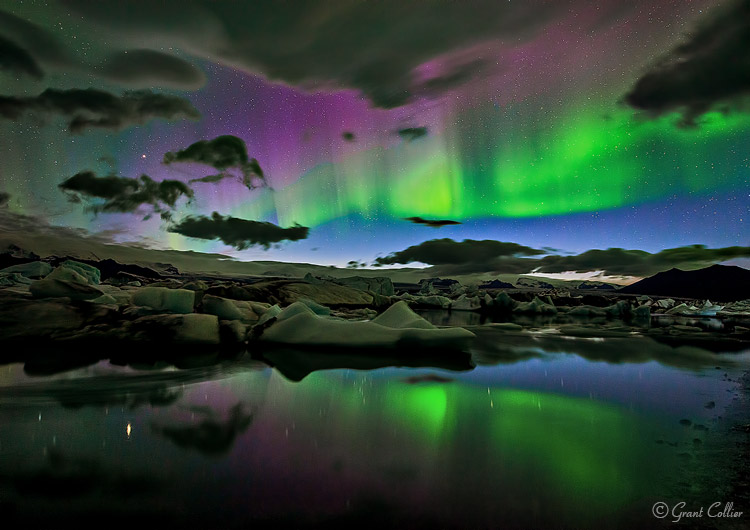
    Jokulsarlon Lagoon, Iceland – 19mm lens, f/2.8, 20 seconds, ISO 3200.

    You can shoot the Northern Lights under almost any moon phase. The aurora will be brighter under no moon, but any foreground in your shot will likely be rendered as a dark silhouette. Under a full moon, the foreground will be well-illuminated and the aurora will be fainter, but this may not matter. The Northern Lights are often so bright that they will be easily visible under a full moon. My favorite time to shoot the Northern Lights is under a moon that is 20%-50% illuminated. It will be dark enough to see the stars and aurora a little better than under a full moon, and you’ll still be able to render a lot of detail in the foreground. In order to be able to shoot under a variety of conditions, I recommend planning a trip so that you arrive near a new moon, and leave near a full moon.

    Grant Collier Northern Lights 4

    Yellowknife, Canada – 14mm lens, f/2.8, 15 seconds, ISO 6400.

    Practice near home first

    One mistake I’ve seen photographers make is to go on an expensive trip to see the Northern Lights without having done any night photography beforehand. They come away with subpar images that are out of focus, or improperly exposed. Unless you live in an area where you can see the Northern Lights, I recommend becoming proficient in night photography before paying for an expensive trip to see the aurora. Photographing the Northern Lights is more difficult than photographing most other night scenes. The lights can move fast and may not appear for very long, so you need to be able to make the most of your time when the lights are out. If you practice with easier subjects beforehand, you should be able to come away some great images!


    Screen Shot 2015 12 27 at 5 15 21 PMOne sale now 32% OFF at Snapndeals: Collier’s Guide to Night Photography in the Great Outdoors eBook. Now only until January 26th, 2016


    googletag.cmd.push(function() {
    tablet_slots.push( googletag.defineSlot( “/1005424/_dPSv4_tab-all-article-bottom_(300×250)”, [300, 250], “pb-ad-78623” ).addService( googletag.pubads() ) ); } );

    googletag.cmd.push(function() {
    mobile_slots.push( googletag.defineSlot( “/1005424/_dPSv4_mob-all-article-bottom_(300×250)”, [300, 250], “pb-ad-78158” ).addService( googletag.pubads() ) ); } );

    The post Secrets to Shooting the Northern Lights by Grant Collier appeared first on Digital Photography School.

    Digital Photography School