Category: Photography

  • Tamron Contest Winners Announced

    The Winners of the Tamron 16-300mm Di II VC PZD Macro All-In-One Zoom Lens and Tamron 18-200MM F/3.5-6.3 Di II VC All-In-One Zoom Lens are…

    A HUGE Thank You to everyone who entered our recent contest to win a 16-300mm Di II VC PZD Macro Lens from our friends at Tamron. Again, this was not actually a photography competition, but so many of you shared your beautiful photographs, we encourage you all to go back and scroll the comments section for some wonderful photos, and links to reader pages and sites.

    Yet again, the response was absolutely AMAZING with over 430 entries! But now…onto the winners! Drum roll please, and the winners are:

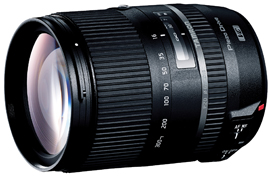
    Grand Prize16300VCPZD Tamron 16 300mm

    Tamron 16-300mm Di II VC PZD Macro:

    The grand prize winner is: Donna Read


    Tamron 16-300mm Di II VC PZD Macro – Value $ 629, for canon, Nikon or Sony small-sensor cameras.

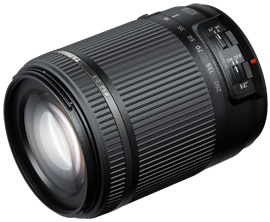
    Runner-up Prize18200 B018 Tamron 18 200mm

    Tamron 18-200mm Di II VC:

    The runner-up prize goes to: Morgan Ocker


    Tamron 18-200mm Di II VC – Value $ 249, for canon, Nikon or Sony small-sensor cameras.

    We were all thrilled with the entries, you tugged at our heartstrings, made us laugh, made us smile, but most importantly, you made us keep wanting to do more of what we are doing; providing you quality information and guidance to become a better photographer. We were so pleased to see that you came from every part of the world, young adults to grandparents, and everyone in between. Thank you all for your entries!

    Here are the posts from the winners of the Tamron 16-300mm Di II VC PCD Macro and 18-200MM F/3.5-6.3 Di II from our December, 2015 Contest:

    Donna’s entry (many of you felt she deserved to win):

    Last year I was homeless and living in my truck with my 3 cats. This year I’m living with my best friend and her son in the most beautiful place I could ever want. But I have to live on a very small pension of only $ 275 a month (I had to take it at 60 years old instead of waiting for 65) so what I had to do between then and now was the worst thing a photographer can imagine; I had to sell gear. I sold my main camera and a good bag, a 35mm 1.8 and then when my 17 year old cat was diagnosed with cancer, I sold 18-200mm as well so I could have him put down. I’ve been getting jobs finally but I’m having to shoot them with my old backup camera and an 18-55mm kit lens or my really nice 35-70mm 2.8. A longer lens would be a godsend for what I shoot! I mainly shoot non-traditional sports like kite surfing, skateboarding, rodeo and motocross etc. and I’m good at it.

    I’m in a good place now and am ready to get back in full swing and one of these lenses would be a huge help getting fully back on my feet. I’m 61 years old and, in the big picture view, I’m running out of time to accomplish all that I want to. 10-20 years isn’t the ‘long time’ it seems when you’re young!

    I hope you could consider me for one of these lenses. Thank you for taking the time to read my story.

    Morgan’s entry:

    I’m an amateur photographer in Texas and I am a 20 year old college student who has a burning passion for photography. I absolutely love this blog and have read most of the entries. It’s my go to when I have a question about my camera or photoshop or if I just needs a tip for something I’m wanting to shoot. I only have 2 basic lenses and I have really really wanted to get a new one but I just don’t have the money because I’m a college student with bills.

    I raise money and go on a medical mission trip to Zambia, Africa every year. The people that live in Zambia that we help don’t have mirrors so when I walk around with my camera, women and children often want me to take their pictures so they can see their beautiful faces. For many, that’s the first time they’ve ever seen their face. I would really really enjoy this new lens so I could capture some more beautiful moments of the people hold my heart, in the place I love almost, if not equally, to Texas, my second home.

    Special offer for dPS readers

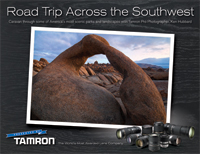
    Tamron Road Trip Image

    Now, for those of you that didn’t win, Tamron has invited ALL dPS readers download their 2015-2016 eBook Series! You can find those HERE!

    The winners will be emailed with details of how to collect their prizes. Please make sure to look for our email. Thanks you again for all the wonderful submissions and to Tamron for sponsoring this competition.

    Tamron Rebates

    For all of you residing in the USA, when you do purchase your next Tamron Lens, make sure to take advantage of the rebates* up to $ 150 off through February 29, 2016. Find additional information HERE!

    *Current rebate offers end January 29, 2016. US RESIDENTS ONLY.

    Tamron logo

    About Tamron

    Disclaimer: Tamron is a paid partner of dPS.

    googletag.cmd.push(function() {
    tablet_slots.push( googletag.defineSlot( “/1005424/_dPSv4_tab-all-article-bottom_(300×250)”, [300, 250], “pb-ad-78623” ).addService( googletag.pubads() ) ); } );

    googletag.cmd.push(function() {
    mobile_slots.push( googletag.defineSlot( “/1005424/_dPSv4_mob-all-article-bottom_(300×250)”, [300, 250], “pb-ad-78158” ).addService( googletag.pubads() ) ); } );

    The post Tamron Contest Winners Announced by Darlene Hildebrandt appeared first on Digital Photography School.


    Digital Photography School

  • How to Use a Gray Card to Get More Accurate Exposures and Color

    how-to-use-a-grey-card-1597

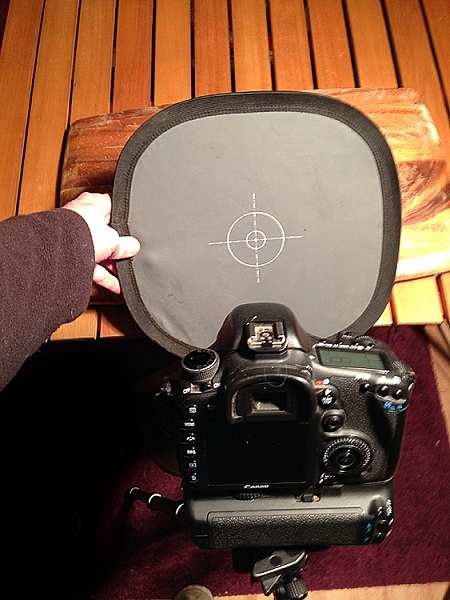
    High contrast scenes with delicate colors can prove tricky for your camera’s meter and white balance settings.

    If you’re familiar with the fundamentals of camera technique, then you know how much of an effect white balance can have on your images. Also, you probably have a basic understanding of how your camera’s meter works, or at least how to react to its output to change your settings appropriately.

    Just beyond these basics, there are a few simple techniques that will allow you to fin- tune your white balance, and get more accurate meter readings from your subject. To take advantage of these techniques, you only need to add a single cheap piece of equipment to your camera bag: a gray card.

    These humble accessories start at less than $ 10, yet the amount of control they give you over the final image, can be invaluable in tricky situations. For example, they allow you to obtain a good white balance reading from mixed light sources, or get an accurate exposure reading from your camera’s meter in a high contrast scene.

    What is a gray card

    A grey card is exactly what it says it is. A card that is gray. More specifically, it is middle gray, or 18% gray. This number is important because 18% gray is what your camera’s meter is trying to calculate when it meters to expose for a scene. This means if you put a grey card in front of your subject, and take a meter reading off it, you will get a correct exposure regardless of any tonal contrast in the scene.

    Additionally, when used in conjunction with a camera’s custom white balance feature, you can manually set a perfect white balance for everything you photograph. This becomes especially important when you need to faithfully recreate colors in your images, whether that may be for commercial purposes or record shots.

    Metering

    The more useful of these two techniques is metering. In this case, a gray card is the closest thing you’ll get to a magic bullet that will allow you to get a near perfect exposure, in almost any situation.

    Spot metering

    To get started, the first thing you’ll want to do is to set your camera to the spot metering mode. While this is not absolutely necessary, the fact that the camera will only be metering from a small section in the centre of the frame will help a lot, especially in circumstances where you cannot fill the entire frame with the gray card. It will also save you a lot of time if you use manual mode.

    Metering

    With your metering mode changed, all that you have to do now, to take advantage of this technique, is put the gray card in your scene, point the centre of the frame at it, dial in the exposure your meter gives you and then just take the gray card away. Providing that the light doesn’t change, you will now have an accurate exposure for any subsequent shots that you take in this setup.

    Taking a meter reading with a grey card.

    Taking a meter reading with a gray card.

    Hints

    There are a few things can do that will make this process easier and more accurate.

    First, you should make sure that your subject remains in a similar position relative to the light source, from where you took your gray card reading. For example, if you’re taking headshots outdoors and the sun is lighting your subject from the front; that is one exposure reading. If you turn your subject to the side, or completely around, that will affect your exposure and you will need to take another reading.

    The second tip is when you’re taking the exposure reading; fill the frame with the grey card as much as possible. This will help to ensure that your meter is only trying to expose for the card, and not anything around the edges.

    White balance

    Although the basic white balance settings in cameras can be pretty good, they do tend to struggle at times. For example, tungsten bulbs can vary greatly in color temperature, depending on their quality and power output. This may lead to the basic tungsten setting on your camera failing to give you an accurate representation of colors.

    There are two ways to use a gray card to set your white balance. The first is to use it to set your camera’s custom white balance. The second method will allow you to use Lightroom to set a white balance for your images after they have been taken. You can also use Adobe Camera Raw (inside Photoshop) if you don’t have Lightroom.

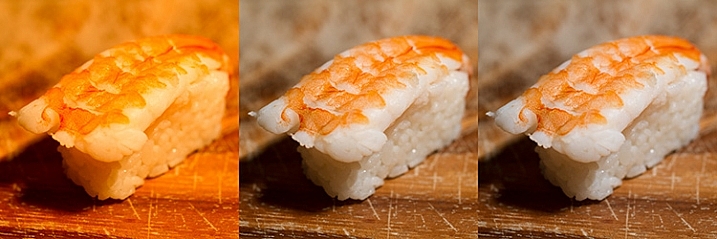
    Shifts in White Balance - Left: Daylight Center: Tungsten Right: Custom

    Shifts in White Balance – Left: Daylight – Center: Tungsten – Right: Custom

    In-camera custom white balance

    The technique described here is for Canon users. If you use Nikon, Sony, or any other brand, you will need to consult your manual for instructions on setting a custom white balance.

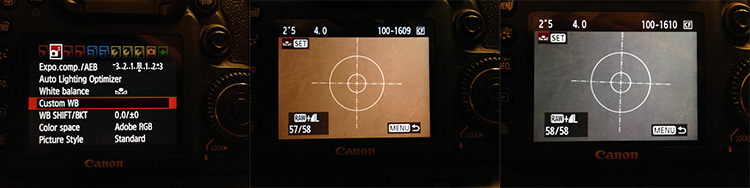
    • Step 1:  Take a photo of your grey card, ensuring that it fills the frame entirely. Try to make sure that it is flat in the frame and that it is lit evenly, and in the same way as your subject.
    • Step 2: Open the camera’s menu and find the option labeled “Custom White Balance” (or Custom WB). Press the select button and choose the photo of your gray card. Press select again and you have set your custom white balance. Set the camera’s white balance to use the new custom setting and start taking photos.

    how-to-use-a-grey-card-canon

    If something in your scene changes, such as the lighting, just repeat the steps above and all of your images should have an accurate white balance.

    Post-production custom white balance

    how-to-use-a-grey-card-1626

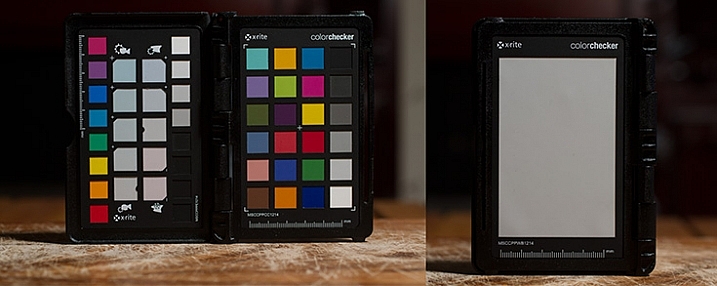
    The ColorChecker Passport offers even greater control over white balance, and also has a section for setting a custom white balance in-camera.

    For the post-production option, the only thing you need to do with your camera is to take a photo of your gray card in all of the scenes that you’re photographing. It may help with organization if you start off any sequence of photos with the gray card image. This way, you will always know which image to use to take a white balance setting from.

    Once you’re on the computer, and have your images loaded into Lightroom, the steps are quite straightforward:

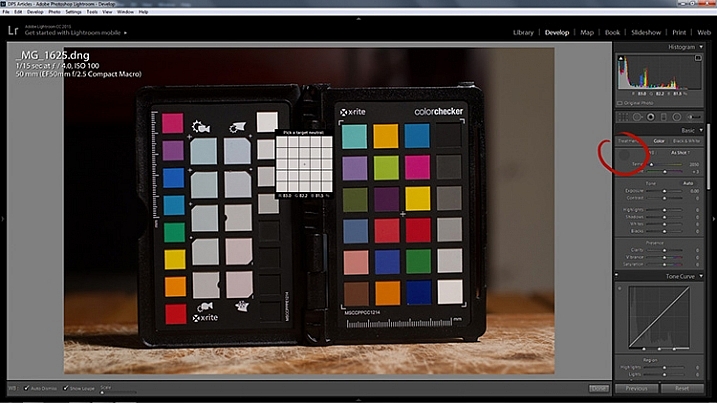
    • Step 1: Select the photo of a gray card that you want to take a white reading, from and enter the develop module.
    • Step 2: Select the eyedropper tool that’s next to the White Balance sliders in the right hand panel, and click anywhere on the image of the grey card. You should now have an accurate white balance setting.

    how-to-use-a-grey-card-lightroom-1

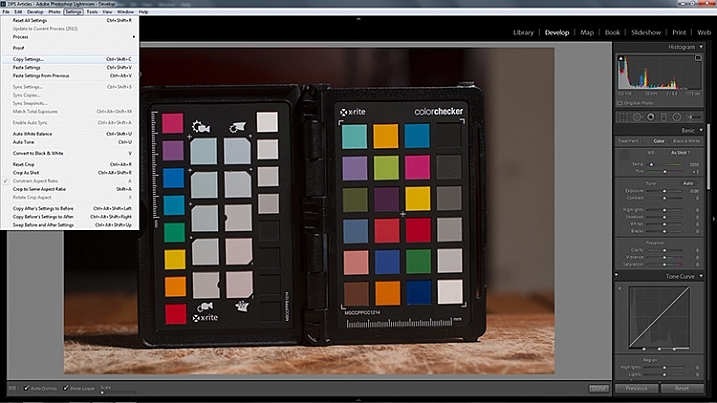
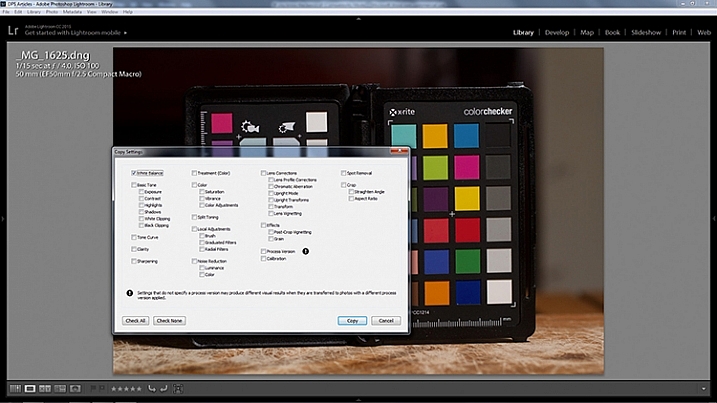
    • Step 3: In Lightroom, to copy your settings, press ctrl+shift+c (CMD+C on Mac) and check the White Balance boxes. Leave all of the other boxes unchecked.

    how-to-use-a-grey-card-lightroom-2

    how-to-use-a-grey-card-lightroom-4

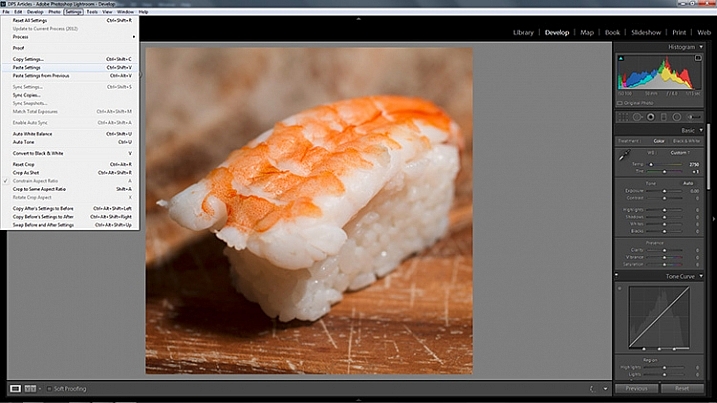
    • Step 4: In Lightroom, select all of the photos you want to correct (using the filmstrip at the bottom) the white balance on and press ctrl+shift+v (Cmd+V on Mac). Now all of photos you took should have a corrected white balance.

    how-to-use-a-grey-card-lightroom-3

    Summary

    All of the techniques outlined here are simple, and not very time consuming, yet the amount of extra control they give you over your camera makes a gray card one of the most cost effective accessories in any camera bag.

    Have you used one before? Do you have any other tips to add? Please share that or any questions you have below.

    googletag.cmd.push(function() {
    tablet_slots.push( googletag.defineSlot( “/1005424/_dPSv4_tab-all-article-bottom_(300×250)”, [300, 250], “pb-ad-78623” ).addService( googletag.pubads() ) ); } );

    googletag.cmd.push(function() {
    mobile_slots.push( googletag.defineSlot( “/1005424/_dPSv4_mob-all-article-bottom_(300×250)”, [300, 250], “pb-ad-78158” ).addService( googletag.pubads() ) ); } );

    The post How to Use a Gray Card to Get More Accurate Exposures and Color by John McIntire appeared first on Digital Photography School.


    Digital Photography School

  • 12 Common Newbie Photography Mistakes to Avoid

    None of us are perfect and we all make mistakes. While some photographers might be naturally gifted, and just do amazing work from the moment a camera is put into their hands, that is not the case for most of us. Chances are, if you are new to photography, you are going to muck things up. You shouldn’t feel bad however, as you can be sure that many newbies have done exactly the same things. Here are a number of very common mistakes that new photographers make. Learn to avoid them, and you will improve your images.

    1 – Centering everything in your images

    The horizon line is right in the middle, cutting the image in two.

    The horizon line is right in the middle, cutting the image in two.

    When most of us look back at our early images, we usually see the horizon line placed very much in the middle of the image (see photo above). This is one of the most common mistakes new photographers make when they start. Sometimes it’s a good thing to do, but not always. The problem is that it cuts the image in half, and leaves people looking at the image, unsure of which half to look at, which is the intended subject.

    When you take photos of landscapes, or anything with a horizon line, it is best to put the horizon on one of the third lines.The Rule of Thirds is one of the compositional guides for photography. As you get more into photography you will hear more and more about it.

    With the horizon in the top third most of the ground is showing, telling the viewer what to look at.

    With the horizon in the top third, more ground is showing than sky, telling the viewer where to look

    It’s the same idea for your subjects. If you are photographing a person, put them to one side of the image, on one of the vertical third lines. Which line you use is up to you. Sometimes it is better to do both and see which one looks better. Experimenting is the key to getting great photographs.

    2 – Taking attention away from the main focus in the image

    Without meaning to, you may include something in your frame, that takes the focus off the main subject in the image – things like bushes, or a light post that is just a line through the image. It goes back to the previous point about giving your subject so much attention, that you aren’t taking the time to look around it.

    3 – Cutting things off at the edge of the frame

    It is amazing how many times you can look at someone’s photo and ask, “Why have you cut off their feet?” They then look back at you blankly, saying they had never noticed it before.

    LeanneCole-common-newbie-mistakes-0029

    Be careful not to cut off parts of limbs, like feet, when you are taking photos.

    It is a very typical thing that newbies do. It may not be the feet, but it could be someone’s hand or the top of their head. It can happen in architecture and landscapes as well; the tip of a church dome will be missing, or the top of a tree.

    It is all about learning to look at your subject and making sure you concentrate on getting them all in the frame. If you can’t fit them in the image, then you need to make decisions about what you will include, and what to crop off. Often if you take more than two thirds of a leg away it looks deliberate. If you only take one third away it looks like you weren’t paying attention.

    Missing toes or feet.

    Missing toes or feet.

    Make sure to include feet.

    Make sure to include feet.

    4 – Thinking that having a great camera is enough

    “I bought this fantastic camera and I paid a lot of money for it, but my photos don’t look great.” There is an assumption that if you have a good camera, you will automatically take amazing photos. This is not the case.

    Just because you have a great camera, doesn’t mean you don’t need to learn photography. It is the person behind the lens that is responsible. If you see amazing photos by other photographers, that it is because they have learned about composition, and how to use their camera properly. Scroll to the bottom for links to more beginner articles to help you with this one.

    5 – Not looking behind your subject

    “Look at the tree coming out of that person’s head.” This similar to the previous point. You need to consider everything in the frame. You can usuallt remove the tree from their head by taking one or two steps to either side.

    LeanneCole-common-newbie-mistakes-0027

    Look behind your subjects and make sure there aren’t things like trees coming out of their heads.

    leannecole-newbiemistakes-portrait

    Slight camera reposition and no tree coming out of her head any more.

    6 – Taking only photo of a subject and from a common viewpoint

    We all see people who want to take photos of a building, they walk straight up to it, take one photo from the middle position, and that’s it.

    Think about other angles you can use as well. Try moving to the left, the right, or both. Take some from low camera angles and then some standing up. As you take more shots, you will learn what works and what doesn’t. Again, it is all about experimenting.

    LeanneCole-common-newbie-mistakes-0031

    Taking a photo of a place by standing right in front of it. 

    7- Having a really good camera and never learning how to use it properly

    If you get an amazing camera that is capable of so many things, and never take it off auto, you are missing out on a lot. Learning to use your camera is one of things you can never regret. While you may be able to get some great photos with it on automatic, if you learn about aperture, shutter speed, and ISO, you will have more control over your images. It is usually something that no one is ever sorry about doing.

    Once you have the basics worked out, you can then learn more advanced things like long exposures and HDR. The world of photography really opens up to you when you know how to use your camera to its full potential.

    8 – Not giving your camera enough time

    I was at an event once and I handed my camera over to friend to grab a few shots for me. When I got home and looked at the photos he had taken, they were all out of focus. I realized that he was pressing the shutter release without giving the camera time to focus properly.

    You have to learn how to let the camera focus for you and give it time to do that. They are fast, but not always fast enough. The same goes with exposure, you have to give it the time to get the correct exposure. It doesn’t ask for a lot, so just give it the time it needs.

    9 – Forgetting to check the settings you used the last time

    It’s common for newbies to go out to take photos, making adjustments on their camera for what they are shooting at the time. But, the next time they go out to shoot, they forget to look at how the camera was set up. Afterwards, when they put the images on the computer, they realize they have lots of photos that didn’t turn out, because the camera settings were wrong for that subject or situation.

    I was photographing a four day event a few years ago, and I couldn’t work out why some photos were really overexposed, while some were really dark. It took nearly three days to realize it was because my camera was set on auto bracketing (AEB). It was around that time I had just started taking photos at different exposures (bracketing) and had forgotten about it. Now I pick it up straight away.

    LeanneCole-common-newbie-mistakes-0028

    Checking your camera setting when you take photos in case the last time you were out your were underexposing or bracketing your images.

    Always look at the settings you have on the camera. Check what the aperture is set to. Work out if you have it on manual, shutter priority, aperture priority or auto. Be aware of what the ISO is at all times. It is a good habit to get into, to check them all every time you start.

    Make sure you have a memory card in the camera too. I have gotten into the habit of leaving the card out of my camera, and when I pack my gear to go somewhere, I put the card in the camera. It is part of my routine now, I also pack an extra as well.

    10 – Never turning the camera vertically

    One thing you often notice with new photographers is that they only use their camera in landscape mode. They never seem to consider turning their cameras up on the side, to shoot vertically. It isn’t always necessary to do so, but some subjects would benefit more from that orientation. When you are taking photos, try turning the camera into the portrait mode (vertical) and see if you can get a better image.

    leannecole-newbiemistakes-horizontal

    Don’t always have your camera in landscape mode, like this image, turn the camera up into portrait mode as well.

    Try vertical for a different perspective.

    Try vertical for a different perspective.

    11 – Not asking for help

    You should never be afraid of asking for help. Generally, photographers are more than happy to help someone who wants to learn. Don’t badger people with too many questions, but asking a few questions isn’t going to hurt.

    12 – Don’t panic

    A friend was telling a story about how she was in a Cathedral taking photos and they were all turning out black. She started to panic and couldn’t work out why. Once she calmed down she realized it was because her ISO was too low.

    If you get into a situation where your photos are not working, don’t panic. Think logically about it. In most cases it is going to be your aperture, shutter speed or ISO. Just take the time to think about them and check the settings. You will work it out.

    Have fun

    The best advice anyone can give you is to enjoy your time with your camera. Explore the world around you. Remember that the mistakes you make are being made by nearly everyone in your situation. You aren’t alone.

    googletag.cmd.push(function() {
    tablet_slots.push( googletag.defineSlot( “/1005424/_dPSv4_tab-all-article-bottom_(300×250)”, [300, 250], “pb-ad-78623” ).addService( googletag.pubads() ) ); } );

    googletag.cmd.push(function() {
    mobile_slots.push( googletag.defineSlot( “/1005424/_dPSv4_mob-all-article-bottom_(300×250)”, [300, 250], “pb-ad-78158” ).addService( googletag.pubads() ) ); } );

    The post 12 Common Newbie Photography Mistakes to Avoid by Leanne Cole appeared first on Digital Photography School.


    Digital Photography School

  • Do These 5 Quick Exercises to Learn What Your New Camera Can Do

    new=-camera-experiments-1Have you learned everything your new camera can do yet? If not, then you’ve found the right article.

    I present you with five quick exercises you can try right now, to help you better understand your new camera, and how it captures light. I’ll give you some hints about what is happening, but you will need to come to your own conclusions.

    If you get stuck after running the experiment, there are answers at the bottom of the article. Don’t cheat! You have to try to come to the conclusion yourself first, you will learn more if you can do that.

    To do these exercises your camera will need to have a shutter (although mirrorless cameras will work here), variable aperture, and adjustable ISO. It will also be helpful if you have a Program Mode, Aperture Priority, Shutter Priority, and Manual Mode. Check your user manual to see if these exist on your new camera.

    1. Play with depth of field using the aperture

    You might have learned a little about your camera’s aperture in this DPS article: Seeing in Depth of Field: A Simple Understanding of Aperture. If not, take a quick look.

    This first exercise is easy. I want you to line up three objects on a table in front of your camera. Make sure the objects are something easy to focus upon (have lots of lines or contrast). If you need to, borrow toys from your kids, I find those work best.

    During this exercise your camera will not move, so set it on the table in one spot. Place your first object directly in front of the camera, about two feet (0.6 meters) away. Your second object should be one foot (0.3 meters) beyond the first, and the third object, another foot beyond the second. It should look something like this:
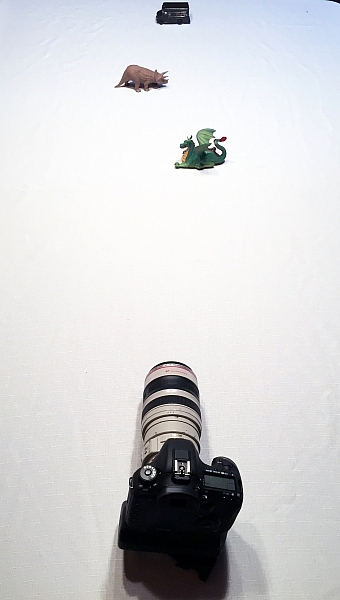
    new-camera-experiments-2

    The objects should be staggered sideways to ensure they are all visible from the camera angle.

    Set your camera to Aperture Priority mode. You may need to reference your camera’s user manual to find the setting. Usually it is the A or Av label on your camera’s main dial. Then set your ISO to Auto, and your focus dot to the camera’s central focus point. Again, you may need to reference the manual as all cameras are a different in how they choose focus points.

    Point your camera at the first object (so the active focus point is on it), so that your camera focuses there. Set your aperture to the smallest f-number your lens can achieve; it will around f/1.8 or f/3.5. If you are using a zoom lens, pick a focal length somewhere in the 40-60mm range.
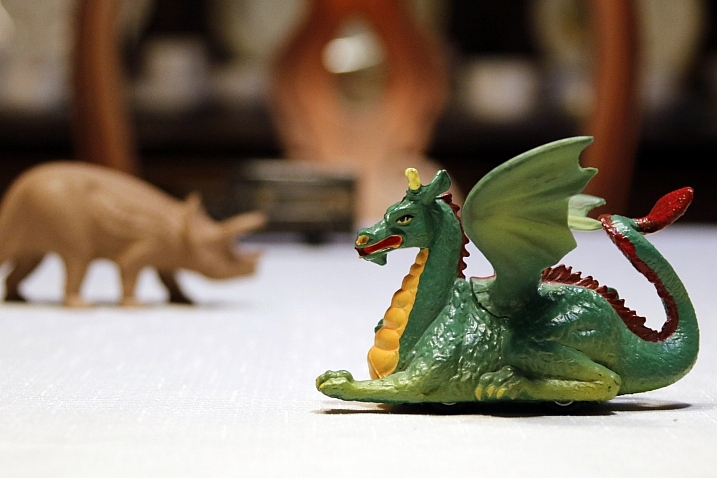
    new-camera-experiments-3

    Now take a picture. Without moving your camera, change the aperture to f/8. Take another picture. Then change your aperture to the largest number (smallest opening) your lens can achieve; this might be f/22 or even higher. Take a third picture.

    Next, point your focus point at the second object, so it is sharp, and repeat the steps above so you have three new images at a low number aperture (f/3.5), a medium number (f/8), and a high number (f/22).

    Lastly, focus on the third object and repeat the steps again.

    You should now have nine images; three of each of the objects in sharp focus, at three different apertures.

    The aperture on your camera controls the depth of field. What do you notice as the aperture number (or f-number) gets larger? Are more or less things in focus? What about when you focus on an object further away and look at the same aperture setting as a close object? Is more or less in focus?

    BONUS EXPERIMENT: Run this experiment again and set your focal length to a smaller number (wide angle view) such as 18mm. What differences do you notice now?

    2. Exposure compensation when the exposure is wrong
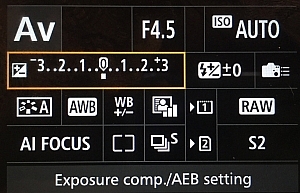
    new-camera-experiments-5This may be disappointing to find out, now that you have a fancy new camera; but your camera is often wrong with its automatic settings. I’m sorry, but it just is. It’s not human and it has limits, but you can get around them.

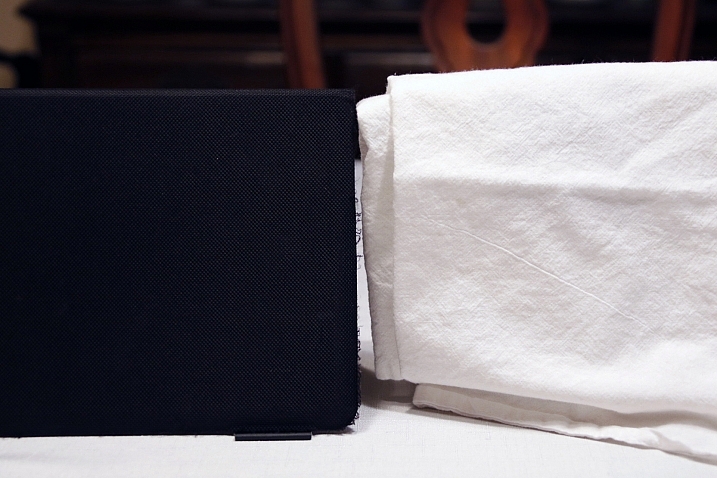
    Choose two objects for this experiment. One should be predominantly white, and the other should be predominantly black. Set them side by side. I chose a black iPad cover and a dish towel in this case.

    Set your camera to Aperture Priority and choose the lowest f-number you can (e.g. f/1.8 or f/3.5). Set your ISO to 400 and turn autofocus on. Reference your user guide to set your camera’s metering to Spot or Center Weighted. This is typically signified by a small circle in the middle of the viewing area.
    new-camera-experiments-4

    Set up your camera in one position so it doesn’t move much, and point that center metering spot at the black object, so it fills the entire metering area. If you are using Center Weighted metering, fill as much of the center area with the black object. Take a photo.

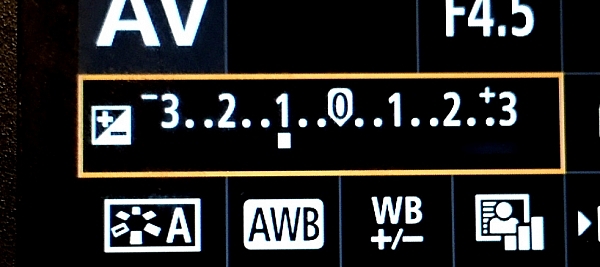
    exposure-compensationNow find the exposure bias (or exposure compensation) feature on your camera. It will look something like this:

    Change the exposure bias/compensation so it is set to underexpose by one stop. This will either look like “-1” or on some cameras there will be a scale with tick marks and one should be labeled “-1”. Move to that point. Take another identical photo of your black object.
    new-camera-experiments-6

    Reset your exposure bias to zero (0) and point your camera over to the white object, so that it fills the metering area; take a photo. Then change the exposure bias/compensation to “+1”.

    You now have four images. Looking at the two shots of the black object, which one makes the object look more like its actual color? What about the white object?

    3. Test your ISO

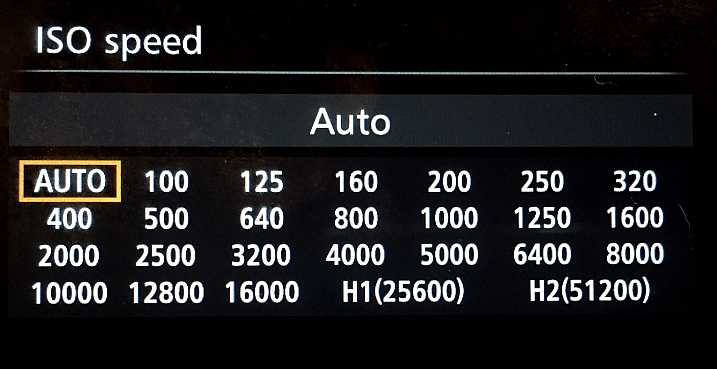
    Modern cameras have an awesome range of ISO settings, but they still have their limits. Don’t get fooled into thinking you can just shoot at ISO 6,400 in a dark room and things will be peachy. This experiment is set to help you understand what happens when you change ISO, and what your personal limits might be for your camera.
    new-camera-experiments-7

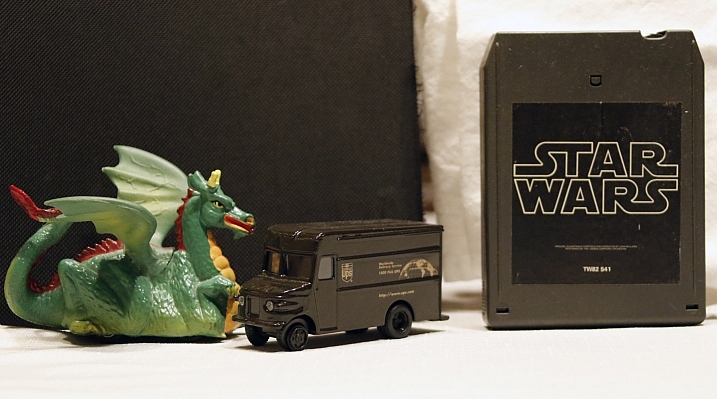
    Set up a few objects on a table, at one end, and set your camera at the other end. Zoom in so the viewfinder is mostly filled with the scene in front of you. Include white and black objects, and some other colors. Have a couple of lights on in the room so it is normally lit, make sure the camera’s flash does not fire for this exercise.

    Set your camera to Aperture Priority and your aperture to f/5.6. Set your ISO at 100 and take a photo. Without moving your camera much, change to ISO 200 and take another photo. Then ISO 400, take photo, ISO 800, take another shot, and so on (doubling the ISO each time) until you run out of ISO settings.

    Examine the images, preferably on a computer screen, or use the zoom feature when reviewing images on your camera. You want to zoom in on the darker areas.
    new-camera-experiments-8

    What do you see happening from low ISO settings to the higher ones? Do you notice a big difference between white areas as compared to black areas?

    If you need a hint about what is happening read: 6 Tips for Using ISO Effectively With Your Camera.

    4. Add some blur with a slow shutter speed

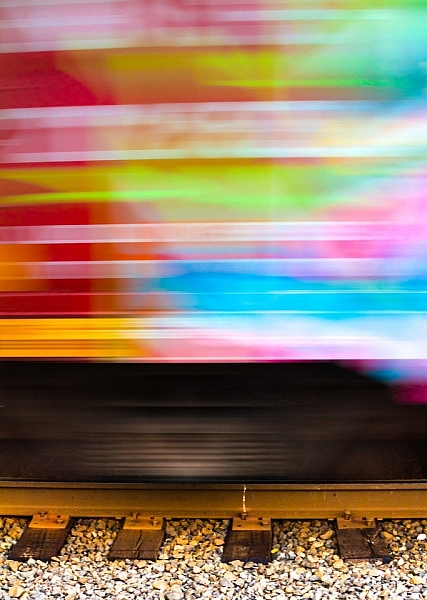
    This one is easy and quick. You may need a willing assistant, or you can find cars moving on a city street. You will want objects moving past your field of view, from side to side (not front to back) at a fairly consistent speed.

    Set your camera on a solid object; this can be a tripod, desk, the hood of a car, etc. Point your camera toward the moving objects. Set your camera to Shutter Priority (S or Tv) Mode, ISO should be 100, and set your shutter speed to 1/500th.

    Take a photo of the objects passing in front of your camera. Change your shutter speed to 1/60th and take another photo as the objects move.
    new-camera-experiments-9

    Lastly, set your shutter speed to 1/10th and take another photo. What do you notice happened in the three photos?

    BONUS EXPERIMENT: What happens when you keep the slow shutter speed of 1/10th and move with the subject while you shoot?

    5. White Balance is important for good color

    White Balance is very important if you shoot in a file format other than RAW, such as JPEG. Your camera will usually do a good job of guessing the correct White Balance settings, but it is important to know how to control your camera if it messes up.

    You will need a place with three different light sources to make this one work. It’s okay if they are not in the same spot, you can walk around. You will also need a piece of white paper with writing on it, to help focus.

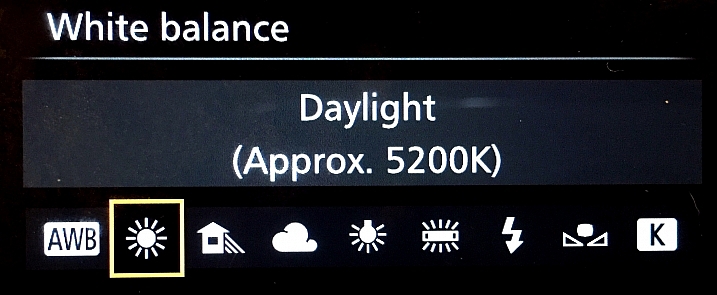
    Set your camera on Program Mode. This allows your camera to handle shutter speed, ISO and Aperture automatically, but you are going to take control of the White Balance. Again, you may need to reference your camera’s manual as each manufacturer handles these changes differently.
    new-camera-experiments-12

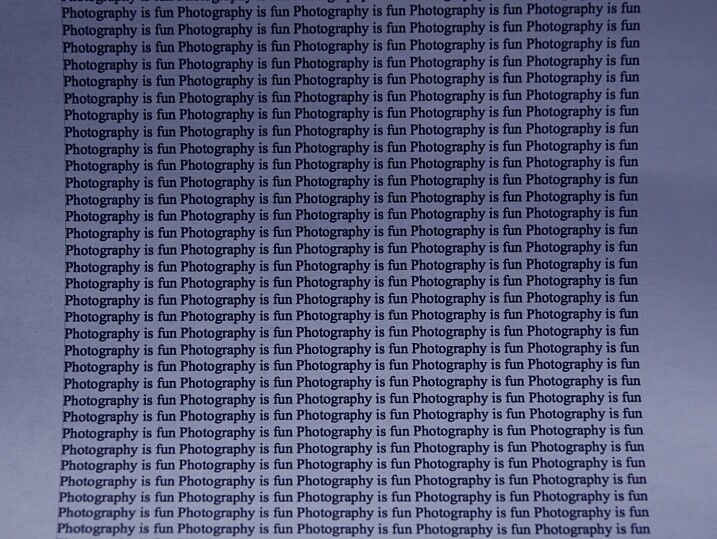
    First, find a scene that is lit by daylight. Set your camera’s white balance to the Daylight Preset. It’s setting looks like a little sun in the image above. Take a photo of your white paper with the daylight hitting it. If you can only manage cloudy daylight, that will be okay as well.

    Without moving much, set your White Balance to incandescent or tungsten (looks like a little lightbulb). Take the exact same photo you did before. Lastly, set your White Balance to shade (a little house icon with shade next to it). Take the exact same photo.
    new-camera-experiments-11

    Which White Balance preset under daylight conditions produces this color?

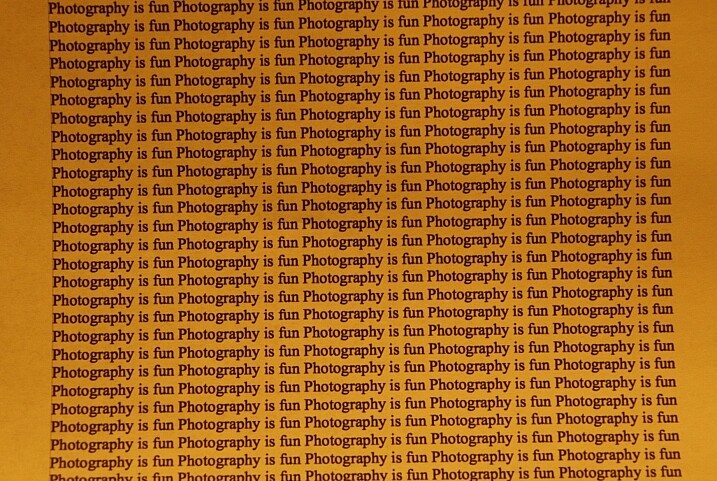
    Next, move to an area lit by incandescent or fluorescent light. This would also include compact fluorescent bulbs. You can hold your paper close to the light source for these next photos, just make sure the light is falling on the page and not coming through it.

    Run through the same three White Balance settings as before; daylight, incandescent and shade.
    new-camera-experiments-10

    Which White Balance preset under incandescent lighting produces this color?

    What happens to the color of the white paper when each of these changes are made? Its color changes, doesn’t it? When you shot with the shade setting, did things get more blue or more yellow? Think about  how you can use this in your photography once you understand how it works.

    Answers and Helpful Hints

    Now that you have played around a little, let me help clarify what you should have seen in each exercise.

    1. In the first exercise you should see more depth of field (more things in focus, front to back) as the aperture number increases. As you focus further away from the camera, the depth of field also increases at the same aperture. This might be hard to see in this limited of a test, but it is explained better here: How to Control Aperture and Create Images You Love.

    2. Your camera is set to expose the world as if it were 18% gray. This means objects that are black are exposed to make them more gray; the same goes for white things. If you are taking pictures of something already gray, like pavement, then there is no adjustment needed. Otherwise, to make white things white, you need to tell your camera to overexpose (that was the “+1”) and to make black things black, you need to under expose (“-1”). More info on exposure compensation is available here: Using Exposure Bias To Improve Picture Detail.

    3. As ISO increases, digital noise (not the same as grain in the days of film, but similar) increases. Noise is usually not desired but as time goes on, camera manufacturers get better at reducing it. That’s why camera owners five years ago were told not to go over ISO 800, or there would be too much noise. Now, I regularly shoot at ISO 2000 with results that work for me. It’s important to know the limits of your camera so you are okay with exceeding them in certain circumstances.

    4. As your shutter speed gets slower, the chance for blur increases. This can be blur from you moving the camera (we have all done this before) or from your subject moving. Blur is not an inherently bad thing, it can be used with great affect. But it’s important to know when, and how much, works best for you. Play around on this one a little with different subject speeds and shutter speeds.

    5. White Balance can be trickiest when there is more than one light source and it’s helpful to know which way to adjust the colors. A lower temperature (incandescent and fluorescent) give more of a yellow/green cast while cloudy and shady gives your more of a blue tone. If you want to eliminate that color cast in your images, move the White Balance toward those settings.

    The great thing about photography is it is highly reproducible. When you do this, that happens – and when you do this again, that happens again. That makes it a great art form, in which experimenting can teach volumes, if you keep control of the variables. You might note that only one variable was allowed to change in each of these exercises, that was on purpose.

    Go forth and experiment more with your new camera. The more you shoot and the more you experience through the lens of your camera, the more you will learn!

    googletag.cmd.push(function() {
    tablet_slots.push( googletag.defineSlot( “/1005424/_dPSv4_tab-all-article-bottom_(300×250)”, [300, 250], “pb-ad-78623” ).addService( googletag.pubads() ) ); } );

    googletag.cmd.push(function() {
    mobile_slots.push( googletag.defineSlot( “/1005424/_dPSv4_mob-all-article-bottom_(300×250)”, [300, 250], “pb-ad-78158” ).addService( googletag.pubads() ) ); } );

    The post Do These 5 Quick Exercises to Learn What Your New Camera Can Do by Peter West Carey appeared first on Digital Photography School.


    Digital Photography School
  • 6 Mistakes to Avoid in Long Exposure Photography

    Do you want to get better at creating long exposure photos? Long exposure photography is famous for tranquil and serene landscape shots, but when engaging in this type of photography there are many pitfalls that can ruin your shots. Below you will find a list of 6 common mistakes and how to avoid them. Shaken and Blurred Photos Even though Continue Reading

    The post 6 Mistakes to Avoid in Long Exposure Photography appeared first on Photodoto.


    Photodoto

  • Do This Before You Upgrade a Lens for Your New Camera

    new-camera-tips-5

    So, you just got a new camera! Congratulations! You’re in the right place, DPS is absolutely full of amazing tutorials that will help get you started, and point you in the right direction. As for me, if there’s one thing that I could say to someone who has just purchased, or received a new camera, this is it:

    If this is your first DSRL or mirrorless camera with interchangeable lenses, don’t buy any new lenses or gear for at least a month.

    I know, I know. You’ve probably heard that the kit lens is terrible. You’ve probably already been given a list of things that are “must-buys” in order to take amazing photos. You may have even tested out your brand new camera, and been disappointed that your images don’t quite look like you’d hoped they would after you upgraded.

    I understand, because I’ve been there. However, waiting to upgrade for at least a few months (get that you need like batteries and memory cards, but hold off on any major purchases like lenses) may actually benefit your photography in the long run. To explain why, let me tell you a little about me and my story.

    New-Camera-Tips-1

    I received my first DSLR, a Canon Rebel XS, in 2009. I’d done black and white film photography for years, so photography itself wasn’t new to me, but my old fully manual Pentax camera didn’t have things like white balance, or the ability to choose metering modes, and neither did my point-and-shoot digital camera at the time (at least not that I knew of), so there was definitely a big learning curve for me as I transitioned to a digital SLR.

    The image above was one of the first that I took with my new camera, and I remember being so frustrated. I hated how yellow it was. I hated the fact that it didn’t really look any better than the images I took with my point-and-shoot camera, and it might have even looked worse! It didn’t take much complaining on my end before well-meaning friends and family members started suggesting different lenses, flashes, and other gear that would help me achieve the look that I was hoping to achieve.

    Although I was confident that I’d need to upgrade lenses if I wanted to take my photography to a new level, my husband and I were still pretty newly married and money was tight, so I just kept on with my Rebel XS and Kit lens. I was really frustrated about not being able to upgrade at the time, but the truth was that I didn’t need a lot of new gear, I really just needed to learn how to utilize the gear that I already had.

    new-Camera-Tips3

    I was pretty sure that I was more interested in photographing landscapes and abstract items than I was photographing people. So, I’d take my camera to work with me and go on photo walks during lunch breaks, taking photos of whatever was around. I discovered how white balance worked, and started to chip away at learning a little more about how my camera functioned. The images still weren’t perfect, as you can see by the examples above and below, but I felt like I was making progress in terms of the overall aesthetic of the photos, and I was really starting to have fun. I was still itching to upgrade, but am forever grateful that we just couldn’t afford it at the time, because it turned out that the type of photography that I thought I was interested in, wasn’t actually my passion after all.

    New-Camera-Tips-2

    Over the course of the next year, I started taking photos of my nieces and nephew just for fun, and much to my surprise, discovered that I loved taking candid photos of kids. I had experience with portrait photography in high school and college, but thought I didn’t like it. As it turns out, most of my portrait experience had been in a studio setting with a professor who was very, very passionate about Rembrandt Lighting. I didn’t enjoy that kind of photography, but I discovered that I loved sitting in the grass in the backyard, and taking photos as my nieces and nephew played. I loved taking pictures while singing funny songs, and telling little jokes to see if I could make them laugh. Around the same time, I took a few senior portraits for some family friends, and discovered that it wasn’t just kids I enjoyed photographing. I loved taking pictures of people, and I especially loved taking portraits of people.

    I also really loved portraits that had a nice blurry background, which was hard (but not impossible) to achieve with my kit lens. I began to look into how I could achieve that effect more easily, and quickly came across Canon’s Nifty Fifty Lens (50mm f/1.8). I purchased that lens shortly before my first daughter was born. It stayed pretty permanently attached to my camera body for the next several years.

    New-Camera-Tips-4

    My love for portraits has only intensified, and though I have made a number of upgrades to my gear since 2010, I’m glad that it took me about a year to make my first purchase. Being forced to wait allowed me time to discover which type of photography I was really interested in. Had I upgraded right away, I probably would have purchased a lens that would be collecting dust in the back of my closet, because I would have gotten something targeted towards landscapes or macro, rather than something more appropriate for portraits. It’s not the end of the world to own a lens that you don’t use all that often, but it’s also something that can be avoided with just a little patience!

    new-camera-tips-6

    Waiting to upgrade also forced me to really learn to use the camera that I had, which was actually a great camera, kit lens and all! Still need a little extra convincing that the kit lens isn’t terrible? Check out this Flickr Group called Kit Lens Losers. There are some incredible images in there, all taken with the standard kit lens. You CAN take great images, right out of the box. I promise.

    When it did finally come time to upgrade to a new lens, I did so knowing that the upgrade was necessary in order to achieve something (better bokeh and the ability to shoot wide open), that my previous setup limited. The lens was important in helping me achieve the aesthetic that I like in photography, but it was only one piece of the puzzle. Learning about white balance, metering modes, shooting in RAW, and a whole slew of other camera settings were just as important as a new lens in terms of the overall affect on my photography.

    I’m not saying that you need to have a perfect understanding of your camera before you upgrade, but I firmly believe that we’re never done learning when it comes to photography. What I am suggesting is that if you spend some time really getting to know your camera and what it is capable of before you upgrade, you’ll be able to ensure that you’re spending your money intentionally, in ways that will allow you to continue to grow in your photography – and that’s always a good thing.

    new-camera-tips-7

    Have you upgraded you gear? If so, what was your first purchase? If you haven’t, please share what has made you decide to wait.

    googletag.cmd.push(function() {
    tablet_slots.push( googletag.defineSlot( “/1005424/_dPSv4_tab-all-article-bottom_(300×250)”, [300, 250], “pb-ad-78623” ).addService( googletag.pubads() ) ); } );

    googletag.cmd.push(function() {
    mobile_slots.push( googletag.defineSlot( “/1005424/_dPSv4_mob-all-article-bottom_(300×250)”, [300, 250], “pb-ad-78158” ).addService( googletag.pubads() ) ); } );

    The post Do This Before You Upgrade a Lens for Your New Camera by Meredith Clark appeared first on Digital Photography School.


    Digital Photography School
  • A Beginner’s Guide to Choosing the Right Post-Production Software

    When it comes to choosing your first piece of post-production software you may find yourself spinning in circles. There’s so much to choose from, and the whole idea of learning to do something new can be intimidating. This article will cover a number of the most well known software options available, and hopefully lead you towards the right decision for you.

    Adobe Photoshop CC

    Over the years no one has truly been able to displace Adobe’s dominance of the photography software market. Both Lightroom and Photoshop are hugely popular pieces of software and regarded as the go to platforms for professionals. Let’s break down both Lightroom and Photoshop individually to see what makes them so popular.

    Adobe Lightroom

    LR

    Lightroom is the most popular tool available for post-processing your images. It can be used as an all-in-one solution for post-processing, image storage, and printing. Due to this all-in-one nature, Lightroom becomes a convenient and powerful option for both new photographers and pros alike.

    One of the biggest differentiating factors of Lightroom verses other post-production tools is that it is widely supported by third party developers. What this means is that you can find a number of plugins for Lightroom that will allow you to extend your workflow beyond the core program. You’ll also be able to find a number of Lightroom presets, which can help you speed up your workflow by saving time for tedious edits. On top of that, sites like Smugmug and Zenfolio allow you to hook right into Lightroom, enabling you to share your photographs directly from your Lightroom catalog to your website.

    Finally, due to the popularity of Lightroom, there is no shortage of support for you on the web. If you have a question about something related to processing an image with Lightroom look no further than YouTube or the many eBooks written on a number of different aspects of Lightroom’s features (including Loving Landscapes, a dPS ebook about processing your landscape images in Lightroom).

    This whole package of features, extendibility, and resources, is why I’d suggest Lightroom as the first program for any new photographer looking to get into post-production. Not only are you getting a very capable program for editing and organizing your images, but you have the ability to extend the core features as your skills develop. You also have an endless supply of help from the many tutorials written on the platform over the years.

    Adobe Photoshop

    PS

    Lightroom may be the best place to start as a new photographer, but Photoshop is a close second. The only reason I place Photoshop second on this list is due to its complexity. You still get the same great community of professional photographers, which enables you to learn more quickly, and you’ll still find a wealth of Photoshop Actions to help you speed up your workflow, but the learning curve for Photoshop is quite a bit more challenging than that of Lightroom, making it harder to recommend to a total beginner.

    Adobe’s Creative Cloud platform is a subscription based model, which gives you access to both Photoshop and Lightroom for $ 10/month. The reason to pay the premium for Adobe’s products, over the ones I’ll list below, is not because they will perform better edits, but rather because of the way they integrate with other pieces of software, and the availability of tutorials on the web.

    Open Source Options

    If you’re not ready to invest money into your post-production workflow just yet, then these open source platforms are where I’d direct your attention.

    GIMP

    wilber_painterGIMP is the most well known Photoshop alternative out there. It has been around for years, works on both PC and Mac, and will provide you with many of the same tools that Photoshop offers. Being open source it doesn’t have the polish that Photoshop does, and won’t offer nearly as many third party options or tutorials. However, as a budget friendly way of processing your images, this is by far the best way to go.

    Darktable

    darktableDarktable is what I’d recommend if you’re looking for a RAW developer to substitute for Lightroom. Like GIMP, this is an open source option, which offers a number of features that will give you complete control of your images, and truly does compete with Lightroom in that area. Again where it’ll fall flat is that you’ll have less extendibility, and not as many resources to help you along the way. Note: Darktable does not work on Windows.

    Other Tools

    When it comes to post-production there are a number of what I’d call, supplemental tools available. These tools are designed to work in conjunction with Photoshop and/or Lightroom, and help you further refine your style as a photographer.

    TopazLabs

    logo_smallThe TopazLabs line of products includes 17 different pieces of software, each one specifically designed for its own unique purpose. These tools are designed to help you enhance and speed up your post-production workflow, but not necessarily replace Photoshop or Lightroom, although some of Topaz’s programs, like Impression and Texture Effects, do offer some standalone functionality that will let you create very different types of images.

    Nik Softwarenik-logo

    Like TopazLabs, Google’s Nik collection is a set of tools that will help you enhance and speed up your workflow. There aren’t as many different tools, and Google has a recent track record of killing off products that weren’t working for them without warning. But, the Nik collection is powerful, and will give you some great functionality beyond just Lightroom’s basic toolset.

    Photomatix

    photomatixPhotomatix has been the leader of the HDR post-production world for quite some time. Their product continues to produce some of the best controlled tone mapped images, and would be a great addition to your set of tools if you wanted to get deep into HDR photography.

    Aurora HDR

    aurorahdrAs an alternative to Photomatix, Aurora HDR is a newly released product from Macphun, in partnership with Trey Ratcliff. At the moment Aurora HDR is only for Mac and is an early stage product, so there’s bound to be some growing pains. That said, with backing from Trey Ratcliff, who’s made his name on HDR photography, this product could eventually get to where it wants to be – which is an all-in-one HDR tool, that doesn’t require Lightroom or Photoshop to produce images.

    Not a beginner? What else would you recommend?

    If your favorite piece of software didn’t make this list let us know why you like it, and why you’d recommend it over the others in the comments below.

    googletag.cmd.push(function() {
    tablet_slots.push( googletag.defineSlot( “/1005424/_dPSv4_tab-all-article-bottom_(300×250)”, [300, 250], “pb-ad-78623” ).addService( googletag.pubads() ) ); } );

    googletag.cmd.push(function() {
    mobile_slots.push( googletag.defineSlot( “/1005424/_dPSv4_mob-all-article-bottom_(300×250)”, [300, 250], “pb-ad-78158” ).addService( googletag.pubads() ) ); } );

    The post A Beginner’s Guide to Choosing the Right Post-Production Software by John Davenport appeared first on Digital Photography School.


    Digital Photography School
  • Camera Modes Explained for Newbies

    Okay, so for one reason or another you’ve decided to step up to a new, more capable camera. Maybe you’ve moved up from a point and shoot, or maybe your phone just doesn’t cut it for you anymore. But now what? There are all these buttons and dials to make sense of – where do you even start? Not to worry, read on!

    Your Mode Dial Explained

    Manual Mode is used to capture long exposure images such as this.

    The Camera Mode Dial

    Well, the first place to start, is by learning about camera modes. This is where you’ll tell the camera how you want to capture an image. Very likely, you’re looking at this dial, or it may be a display on the screen, and you’re wondering what all those different camera modes are.  I’ll explain all of that in a moment, but first I’ll need to go over a few definitions:

    Aperture

    This is the opening in the lens, that determines how much light enters the camera. The aperture also affects depth of field, which is the range of objects that are in focus – from those that are closest to you, to those farthest away. A smaller aperture setting will give you greater depth of field, while a larger aperture setting gives you shallower depth of field. Aperture settings work a bit backwards, in that the higher the number, the smaller the opening. For instance, f/4 is a larger aperture than f/11. Of those two, a setting of f/11 will give you greater depth of field. For more on how the aperture works, see How to Take Control of Aperture and Create Stronger Photos.

    Shallow-DOF

    Use of a large aperture creates a shallow depth of field as in this image, where only a small portion is in sharp focus.

    Shutter Speed

    The shutter speed determines the amount of time that light is allowed to enter the camera. It also determines how movement is recorded in an image. A faster shutter speed will freeze motion, while a slower one will blur motion. Faster shutter speeds are often referred to in fractions of a second, such as: 1/125th, 1/60th, 1/500th and so on – while longer shutter speeds can be one second, 5 seconds, or even 30 seconds long. For more on shutter speed, check out Demystifying Shutter Speed.

    ISO

    Your camera’s ISO determines how sensitive it is to light. Lower numbers, such as ISO 100 or 200, mean your camera is less sensitive, and are used in bright situations, such as outdoors on a sunny day. Higher numbers, such as ISO 800 or 1600, make your camera more sensitive to light, and are used when there is less available light, such as outdoors on a cloudy day, or indoors when you can’t use flash. Read 6 Tips for Using ISO Effectively With Your Camera for more on setting your camera’s ISO.

    Every camera’s mode dial is a bit different. The major manufacturers all tend to have the same, or similar basic modes, but each may have their own spin on things, or even throw in a few of their own special modes. In this article I’ll deal with the basic modes that are common to pretty much everyone.

    The Basic Modes

    Mode Dial

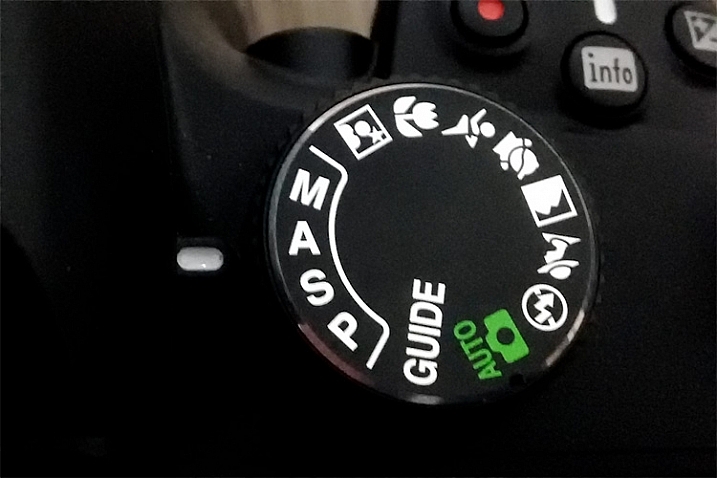
    The Mode Dial (a Nikon dial is shown here)

    Your camera will have a few basic modes, where the camera takes control of everything, and all you have to do is push the shutter button to take the picture. These modes can be a good place to start if you’re unsure of how to get a specific type of picture.  Keep in mind that when using these modes, the camera is controlling everything, including: color, contrast, white balance, shutter speed, aperture, and ISO. The most common of the basic modes are:

    Auto Mode

    Depending on your camera’s brand, this will be indicated in one of several different ways. Sony uses a green camera icon, Canon uses a green box, and Nikon uses a camera with the word Auto above it. What you need to know about this mode, is that the camera is making all exposure decisions for you. If the camera is a recent release, it may also be using a type of Intelligent Auto mode, where it analyzes the scene you are taking a picture of to determine the best settings. The flash may pop up if needed. The camera will set an appropriate aperture, ISO, and shutter speed to allow you to hold the camera and get a good exposure.

    Portrait Mode

    Portrait Mode is usually indicated by a head icon of some kind. When this mode is selected, the camera optimizes your settings for taking pictures of people. It will select color settings, choose a fairly shallow depth of field, and a fairly fast shutter speed, to ensure that your subject is not blurry. The camera may decide that flash is necessary, and fire if it is needed for exposure. Want to learn more about shooting portraits? See 10 Crucial Things You Need To Think About for Portrait Photography.

    Portrait Mode

    Portrait mode is great for capturing images of people. Be aware your camera’s flash might fire if there’s not enough light!

    Landscape Mode

    This mode is generally indicated by an icon containing mountains. When you select Landscape Mode, you are telling the camera you’re shooting scenery. The camera will record vivid colors, and set a small aperture for maximum depth of field. You may also need a tripod, as the shutter speed may be too slow to handhold the camera without blurring the image. The flash will not pop up in this mode. For more on photographing landscapes, take a look at 7 Landscape Photography Mistakes That Could be Ruining Your Photos.

    Landscape mode is used for scenes like this where you want a lot of depth of field.

    Landscape mode is used for scenes like this where you want a lot of depth of field.

    Sports Mode

    An icon of a running man indicates Sports Mode. This setting is best for capturing subjects that are moving, such as children playing, or a sporting event. The camera uses a faster shutter speed to freeze the motion of the subjects, and will use a wider aperture for shallower depth of field. The ISO may be raised to accommodate the faster shutter speed, and the flash will not fire. If catching action is your thing, Catching the Action: Photographing Youth Sports has some tips for getting started.

    Sports Mode

    Sports mode will set a shallow depth of field and a fast shutter speed to stop action.

    Night Portrait Mode

    That picture of the person with a star or moon behind them? That’s night portrait mode. This mode is used to capture pictures of people at night, usually firing the camera’s flash to illuminate them. However, the camera will also use a slightly slower shutter speed, and a higher ISO, to allow any ambient light to record in the image as well. Think of it this way – if you want to take a picture of someone at night in front of a neon sign, and you want the glow of the neon to show up in the image, this is the mode to use.

    Close-up Mode

    Almost invariably, an icon featuring a flower indicates Close-up Mode. Many people incorrectly call this Macro Mode. I say incorrectly, because macro generally means you are recording the objects you are photographing at life size, or larger. Close-up mode is used when you are photographing an object very close to the camera. Each manufacturer uses this mode a bit differently. While Nikon states that the camera will use a small aperture to maximize depth of field, Canon states that it will use a wide aperture to blur the background. The camera will also attempt to focus on the nearest subject to the camera. In each case a tripod may be necessary to work with a slower shutter speed.

    Close-up Mode

    Advanced Modes

    The advanced modes on your camera’s mode dial grant you more control over exposure choices to some degree, depending on which mode you select. In addition, you’ll have the flexibility to choose picture styles, white balance, and other settings as well. Let’s start with the more basic of the advanced modes, and move on from there.

    Program Mode

    Contrary to popular belief, the “P” on the mode dial does not stand for “Perfect”. It stands for Program, and is Auto Mode’s big brother. Program mode is a good general use option. The camera will select the ISO, aperture, and shutter speed for you. Sounds like Auto Mode, right? It’s similar, but in Program mode, you have the ability to choose the white balance you want, the picture style you want, and you have the ability to shift the exposure, so if the camera selects a shutter speed or aperture you don’t want, you can shift that setting, and the camera will adjust the others accordingly. Your Guide to Understanding Program Mode on Your Camera can provide further insight into this setting.

    Aperture Priority Mode

    Aperture-Priority

    Once you know how the advanced modes work, an image like this can be done a number of ways. Either Aperture Priority with a small aperture, or Manual mode with full control, could be used.

    On Canon or Pentax cameras, this mode is indicated by an Av on the dial, while other manufacturers simply use an A. This mode is exactly what it says – you choose the aperture setting you want, usually deciding on such a setting to achieve a specific depth of field, the camera will then set the appropriate shutter speed to achieve proper exposure. You will also be responsible for choosing an ISO setting. Many cameras now feature an AUTO ISO setting, which lets the camera choose the ISO, if you’d rather not be bothered with selecting it yourself.

    Aperture priority is best used when you know you want a specific depth of field for your image. For instance, if you’re shooting a landscape or grand vista, you’ll likely want the entire scene in focus, so you’ll want to choose a smaller aperture, such as f/16, to achieve that. The camera will then set the appropriate shutter speed for proper exposure. You’ll need to be aware of the shutter speed the camera selects, as you may need a tripod to keep the camera still if a slower shutter speed is necessary.

    Shutter Priority Mode

    The S on your mode dial (Tv if you have Canon or Pentax) stands for Shutter Priority mode. The Tv stands for Time Value, or the length of time the shutter remains open for exposure. This mode is the opposite of Aperture Priority. You’ll choose the shutter speed, and the camera will set the appropriate aperture, to give you the proper exposure. Remember, you’ll also need to set the ISO to ensure your exposure is correct, or set AUTO ISO so the camera can do it for you.

    Shutter-Priority-Panning

    Use of shutter priority allows you to select the shutter speed for panning shots like this one.

    Shutter priority is useful when you know you want to use a certain shutter speed to capture motion in a specific way. For instance, if you are photographing sports, you know you want a faster shutter speed to freeze the action. You’ll likely set a shutter speed of 1/500th (or faster) to ensure you’re doing that, and let the camera set the aperture for the appropriate exposure. For more information on both Aperture Priority and Shutter Priority modes, see Getting off Auto – Manual, Aperture and Shutter Priority modes explained.

    Manual Mode

    Universally indicated by an M on your mode dial, in Manual Mode you are truly flying solo. You are responsible for setting your aperture, shutter speed, and the ISO, to achieve the proper exposure. This gives you the ultimate freedom in creating images, as all camera settings are available for you to set, and change as you see fit. You’ll want to keep an eye on your camera’s meter to be sure you aren’t over or underexposing the image. How to Learn Your Camera’s Light Meter and Master Manual Mode is a great primer if you’re ready to take the plunge and learn to shoot manually.

    If you’re still not sure where to start, have a look at A Beginner’s Guide to Choosing Shooting Mode for further clarification.

    googletag.cmd.push(function() {
    tablet_slots.push( googletag.defineSlot( “/1005424/_dPSv4_tab-all-article-bottom_(300×250)”, [300, 250], “pb-ad-78623” ).addService( googletag.pubads() ) ); } );

    googletag.cmd.push(function() {
    mobile_slots.push( googletag.defineSlot( “/1005424/_dPSv4_mob-all-article-bottom_(300×250)”, [300, 250], “pb-ad-78158” ).addService( googletag.pubads() ) ); } );

    The post Camera Modes Explained for Newbies by Rick Berk appeared first on Digital Photography School.


    Digital Photography School

  • A Beginner’s Guide to Doing Black and White Photography

    If you’ve never tried black and white photography before, you may be wondering what the appeal is. After all, isn’t it a little like black and white television or silent movies – an anachronism in our modern, high-tech age?

    Black and white photography

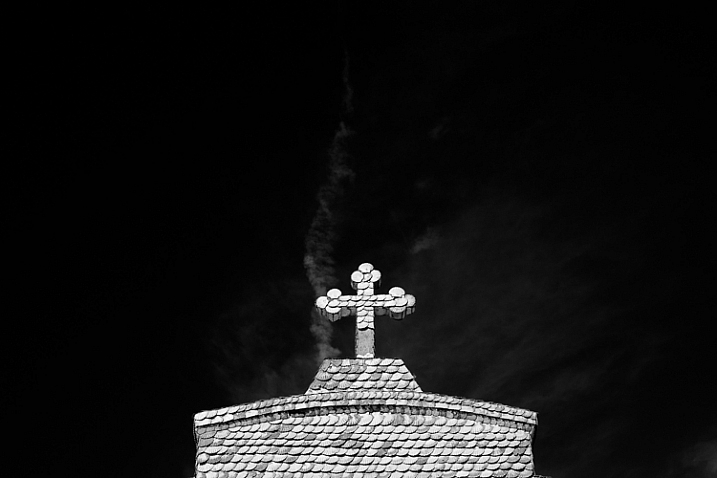
    The answer is no, definitely not. In the photography world, black and white is considered an art form. Some would even say only the best photographers work in monochrome. It’s a medium with a rich history, (look at the work of Ansel Adams, Edward Weston or Henri Cartier-Bresson for examples) and a bright future.

    Just as importantly, working in black and white can help you become a better photographer. How? It’s all to do with composition.

    Colour is very powerful, and tends to dominate the photo so much that it’s difficult to see other elements like tonal contrast, texture, shape, form and quality of light. Experienced photographers instinctively see these things, regardless of whether they work predominantly in colour or black and white. But if you’re just starting out, you may need some assistance to do so, and working in black and white photography will help you.

    Black and white photography

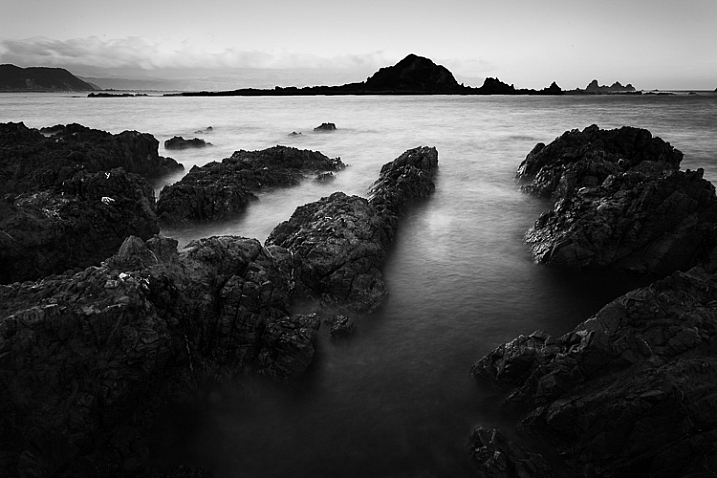
    Black and white emphasizes the textures of the rocks and sea in this landscape photo.

    Naturally, there are certain subjects that tend to work better than others in black and white; two in particular are landscapes and portraits. If this is your first time shooting in black and white, then these are great subjects to try out.

    Black and white photography

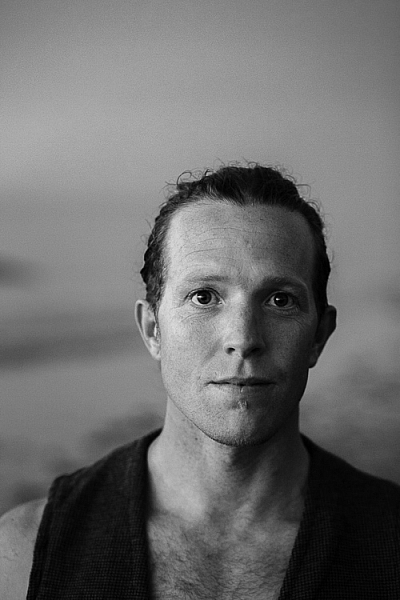
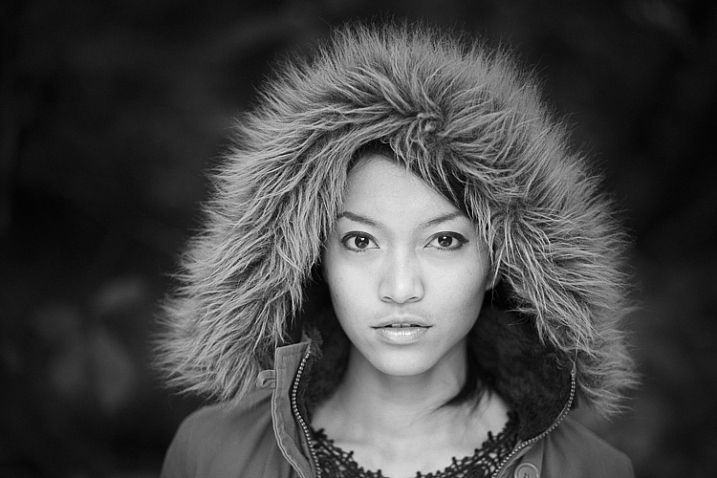
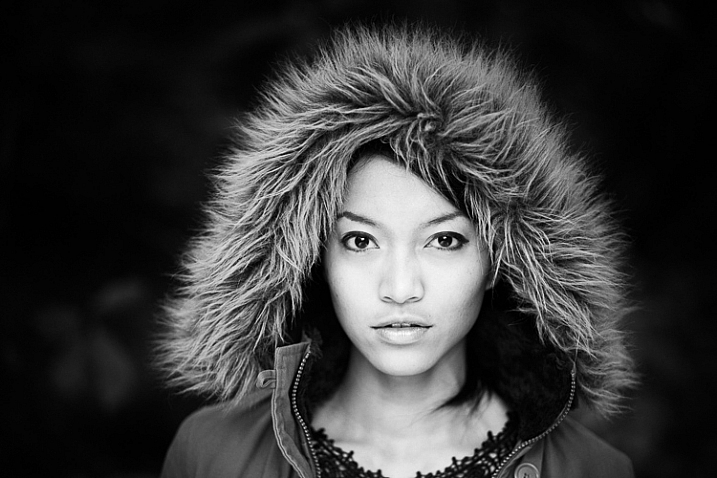
    Black and white portraits emphasize expression and quality of light.

    Black and white on your camera

    Before digital photography the only way to work in black and white was to use black and white film. Thankfully, now it’s much easier to work in black and white, just by switching your camera to Monochrome Mode (check your camera’s manual if you are unsure how to do so, look for Picture Styles settings).

    Cameras with electronic viewfinders automatically display the image in black and white, helping you see how the image will look, before you press the shutter. If you have a digital SLR you will get the same effect in Live View. This may be useful if you are working with your camera on a tripod (for instance, taking a landscape photo).

    Usually at this point I advise you to use the Raw format. In the long run it’s easier than using JPEG, and gives you better image quality. But I appreciate that if you’re new to photography you may still be working exclusively in JPEG. The rest of this article works on this basis.

    Working in Monochrome Mode

    Once in monochrome mode you will see some extra options. They help you set your camera up to produce the best results. Again, check your manual if you are not sure where to find them.

    Colour filters

    The colour filter settings are left over from the days of film photography. Photographers would buy coloured filters, and use them to alter the tones in black and white photos. For example, if your scene includes a blue sky, then using a yellow filter will make the sky a little darker, an orange filter makes it even darker, and a red filter darker still.

    Black and white photography

    This scene works quite well in black and white, but it’s not nearly as dramatic as it could be.

    Black and white photography

    Applying the Red filter setting makes the blue sky go much darker, creating a much more dramatic version of the same scene.

    There is also a place for green filters, which can bring out more detail in green subjects like leafy forests. Those four coloured filters (red, orange, yellow and green) have made their way onto most digital cameras as black and white settings.

    Contrast

    If you take a photo in flat light (for example, a portrait of somebody standing in the shade) the photo may look flat (two dimensional). So, you need to compensate by increasing the contrast. You can either do this in Photoshop or Lightroom after the photo has been taken, or you can do it in-camera with the contrast setting.

    Black and white photography

    The model was standing in the shade when I took this photo. The light lacks contrast, and the black and white photo is flat.

    Black and white photography

    Increasing contrast creates a much stronger image.

    Cropping and the square format

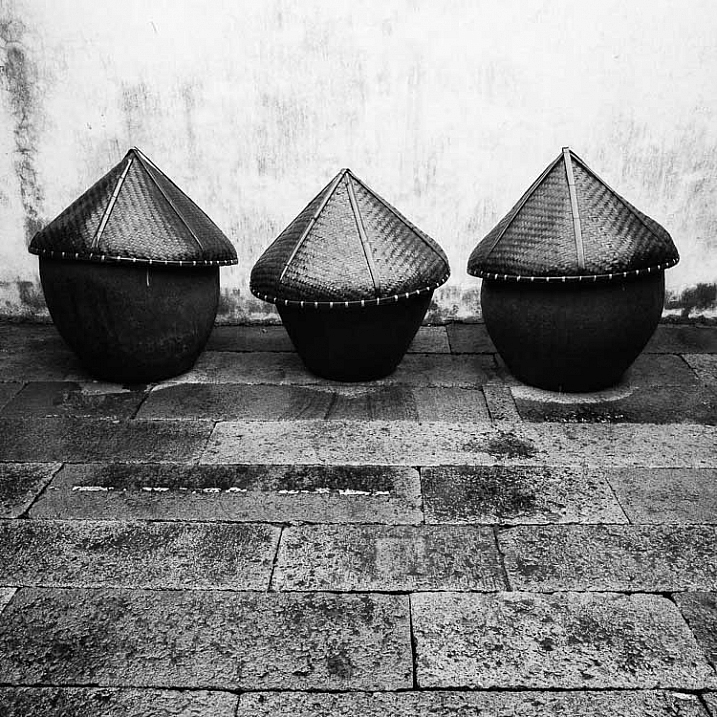
    Most modern cameras let you change the aspect ratio. The reasons why you might want to do that are a little complex, but the main one is that it lets you shoot in the square format, something you may already be used to if you use an app like Instagram on your smartphone. If your camera has an electronic viewfinder, it will display a square image for you, making composition much easier.

    Black and white photography

    Cropping to the square format emphasizes the shapes of the three pots.

    Toning

    Finally, you may have the option to tone your images. To be honest, unless your camera lets you apply toning affects subtly, I wouldn’t bother with these, as the effect is usually too strong.

    Have fun!

    Black and white is a beautiful medium to work in, one which you will appreciate the more you practice. In the meantime – have fun and enjoy yourself. You are following a path trodden by some of the most famous names in photography. And of course, if you have any questions about working in black and white, please let us know in the comments.


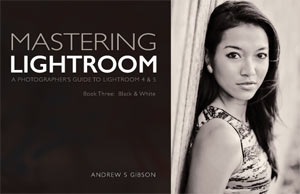
    Masterlng Lightroom: Book Three – Black & White by Andrew S Gibson

    Mastering Lightroom: Book Three – Black & White

    My ebook Mastering Lightroom: Book Three – Black & White goes into the topic of black and white in depth. It explains everything you need to know to make dramatic and beautiful monochrome conversions in Lightroom, including how to use the most popular black and white plug-ins. Click the link to visit my website and learn more.

    googletag.cmd.push(function() {
    tablet_slots.push( googletag.defineSlot( “/1005424/_dPSv4_tab-all-article-bottom_(300×250)”, [300, 250], “pb-ad-78623” ).addService( googletag.pubads() ) ); } );

    googletag.cmd.push(function() {
    mobile_slots.push( googletag.defineSlot( “/1005424/_dPSv4_mob-all-article-bottom_(300×250)”, [300, 250], “pb-ad-78158” ).addService( googletag.pubads() ) ); } );

    The post A Beginner’s Guide to Doing Black and White Photography by Andrew S. Gibson appeared first on Digital Photography School.


    Digital Photography School
  • How to be a Better Photographer: Camera User Manual University

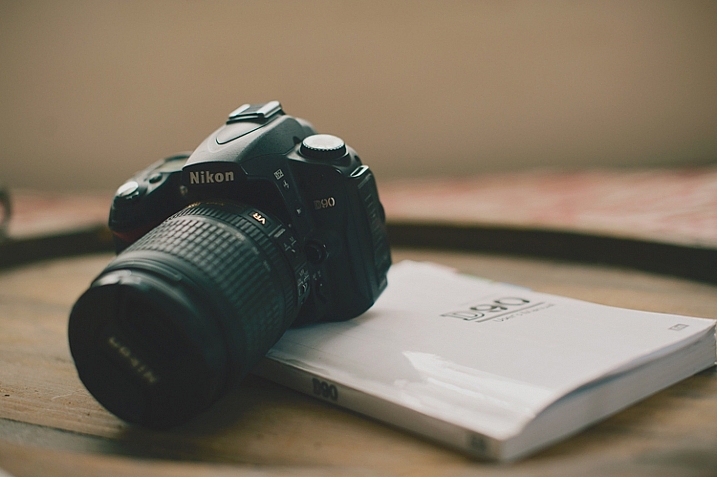
    dPSmanual

    Let me guess; you got a brand new camera, you don’t know how to use it, and you have no idea where to start – about right? Let me introduce you to one of the best ways to get to know your camera inside and out, backward and forward. It’s included with your camera, so there is no extra cost! It’s at your fingertips 24 hours a day. It’s patient, and never gets frustrated if you ask it the same questions over and over again. Welcome to:

    Camera User Manual University!

    dPScamera

    For many of us, getting a brand new camera is beyond exciting. We start trying to use it right away, throwing the manual back in the box, forgotten forever. The problem is, we soon run into frustrations and questions, and end up just putting the camera aside, or searching and asking for the answers one at a time, learning slowly and with difficulty. Or maybe we have even had our camera for ages, and just barely discovered something amazing that it can do.

    If I can convince you to actually USE that camera manual, you will start out with much more knowledge than the average camera owner, and you will discover lots of cool stuff that your camera can do, that your seasoned photographer friends may not even know!

    I am going to share my first camera manual and how I made it useful for me. These tips might help you transform your boring manual, into something that can actually help you become a better photographer.

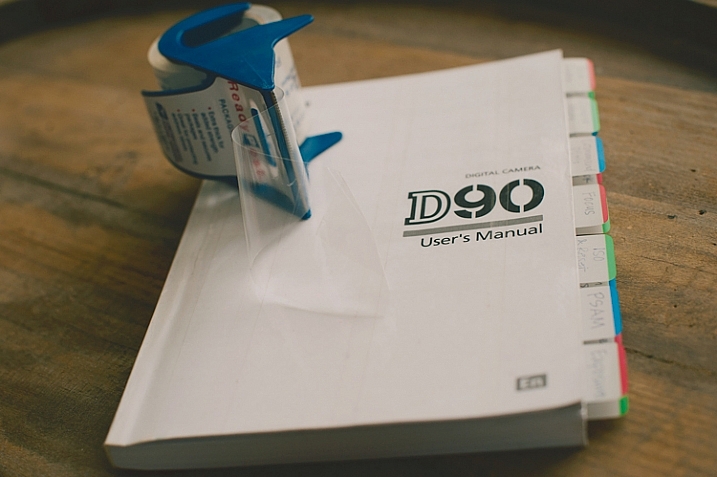
    Protect Your Manual

    dPSprotect

    The covers on camera manuals are usually very flimsy, and easily torn or bent. The first thing to do is laminate your cover, so it’s more durable and stays nicer. I did this by simply covering the front and back covers with packaging tape. I made the pieces of tape slightly bigger than the book, and folded them under so the edges were protected also. Take your time with this, and make sure you use a clean surface to avoid bubbles and dirt stuck underneath the tape.

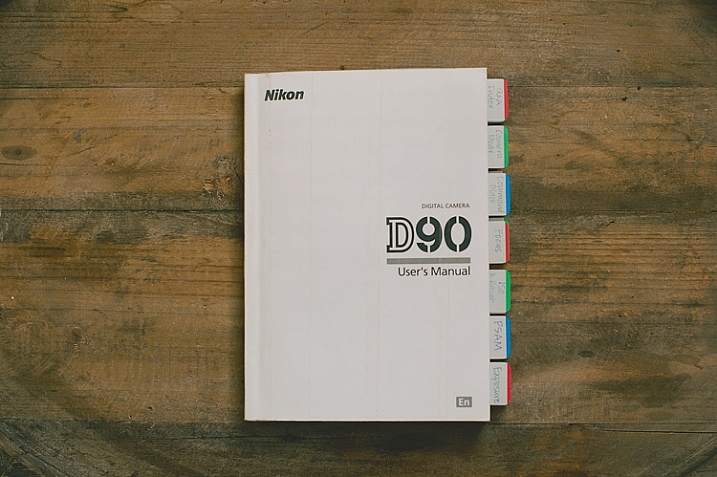
    Add Divider Tabs

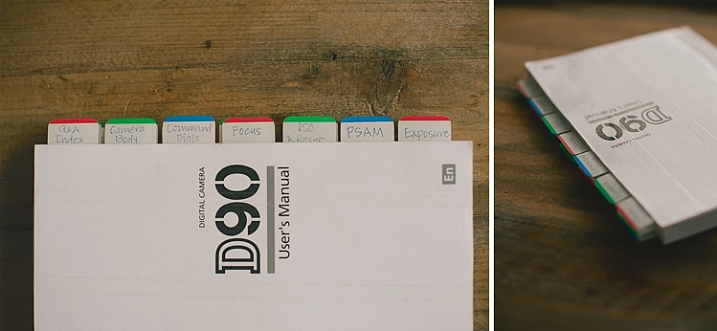
    dPStabs

    I went through the book and labeled and divided each section, so I could find them at a glance. Not only does this make finding things easier later on, but labelling the tabs and sticking them in each section, gets you familiar with the manual even before you start digging in deeper. You will know what your manual has to offer, and what kind of things you are going to be learning very soon.

    I used removable tabs that I bought from an office supply store. They have a slight plastic feel to them, and are very sturdy. I like using removable ones, because you can move them later if you don’t need one of the labels in there.

    Start at the Beginning

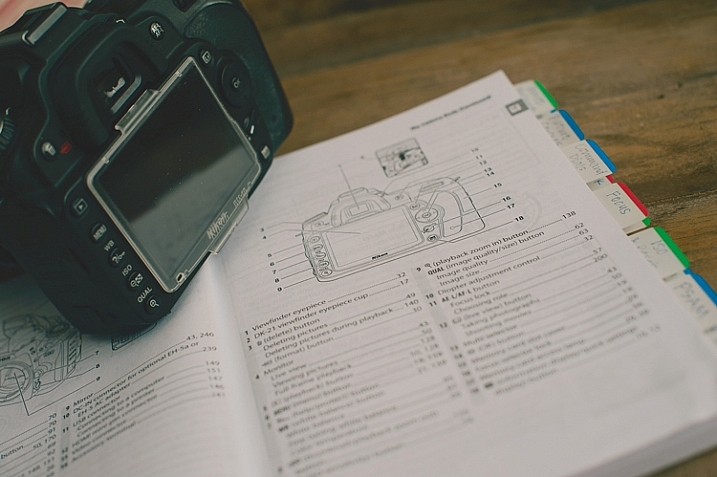
    dPSpages

    With your camera in your hands, go through the manual from the very beginning. Look at the diagrams, and find each item on your camera body. Even if you don’t understand what something is yet, find it on your camera. Later, as you read more detail, everything will start to come together. Read every page, even if it doesn’t make sense at first. Getting a nice camera is a big investment, so wouldn’t you want to know what it can do?

    Camera manuals usually have very basic instructions near the beginning of the manual to get you shooting, almost right out of the box. Feel free to read that part, and begin using your camera right away, but don’t stop there! As you work your way through the manual, you will discover the reason you wanted a DSLR in the first place.

    Try Everything

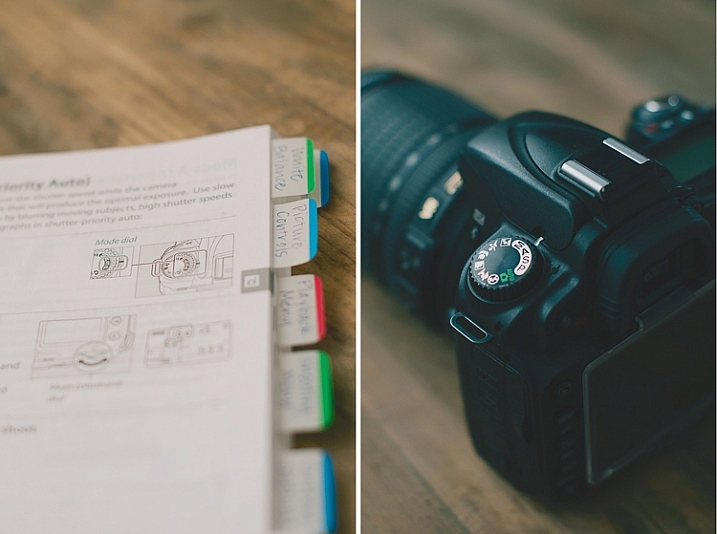
    dPSdial

    As you read and find each dial, button, and menu item on your own camera, give everything a try. If the manual is talking about different shooting modes, dial your camera in to each one, follow the instructions, and try a few test shots. Reading about things is good, but reading and then getting hands-on experience is infinitely better. You will understand what the manual is talking about with more clarity if you try things out for yourself.

    Keep in mind that not everything will make sense the first time through, that’s okay. After you’ve practiced awhile, try going back through the manual page by page again. You’ll find that much of what confused you initially, has now become clear.

    Once you’ve tried something, you may realize that it isn’t a feature that you will ever use. If that’s the case, just move on, and know that you at least tried it. You may end up wanting to use that feature in the future, and now you know that it exists.

    Underline the Key Words

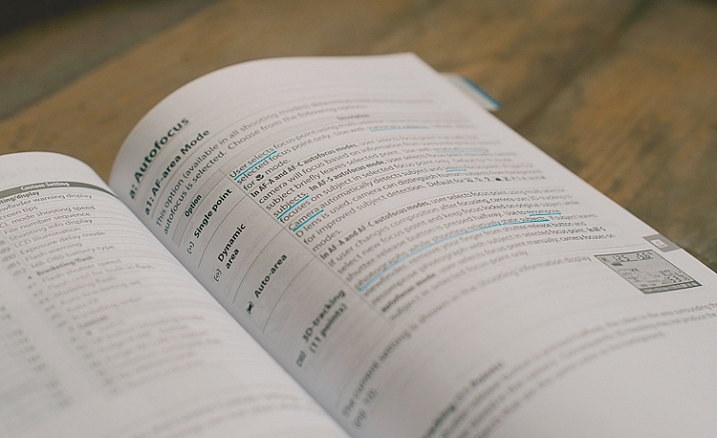
    dPSmark

    As you are reading through and learning, have a pen handy. Underline (or highlight if that’s your thing) key words that will help you focus on what is most important. Sometimes manuals can be wordy, and hard to understand. If you can zone in on the most important words, it will become more clear. Later, when you are trying to find something, those underlined words will pop out and make it easier to find.

    Take notes in the margins if you try something, love it, and know that you will want to remember that in the future. Add an extra tab or sticky note there, or put a star next to it. It’s hard to remember everything you read after one read-through, but if you can quickly go back to your starred items and practice those often, you’ll be well on your way to mastering your camera.

    dPSmanual

    All of this might seem a little obsessive, and maybe it is for some. However, I have taught many photography classes, and had many one-on-one mentoring sessions with new photographers, and almost every question they ask me about their camera can be found in the manual. Some people learn better from a live teacher, but the great thing about the manual is that you can refer back to it as many times as you need to, and you don’t have to pay anything extra to learn.

    Have you attended Camera Manual University? Do you have any tips for making your camera user manual easier to use? I’d love to hear them in the comments.

    googletag.cmd.push(function() {
    tablet_slots.push( googletag.defineSlot( “/1005424/_dPSv4_tab-all-article-bottom_(300×250)”, [300, 250], “pb-ad-78623” ).addService( googletag.pubads() ) ); } );

    googletag.cmd.push(function() {
    mobile_slots.push( googletag.defineSlot( “/1005424/_dPSv4_mob-all-article-bottom_(300×250)”, [300, 250], “pb-ad-78158” ).addService( googletag.pubads() ) ); } );

    The post How to be a Better Photographer: Camera User Manual University by Melinda Smith appeared first on Digital Photography School.


    Digital Photography School