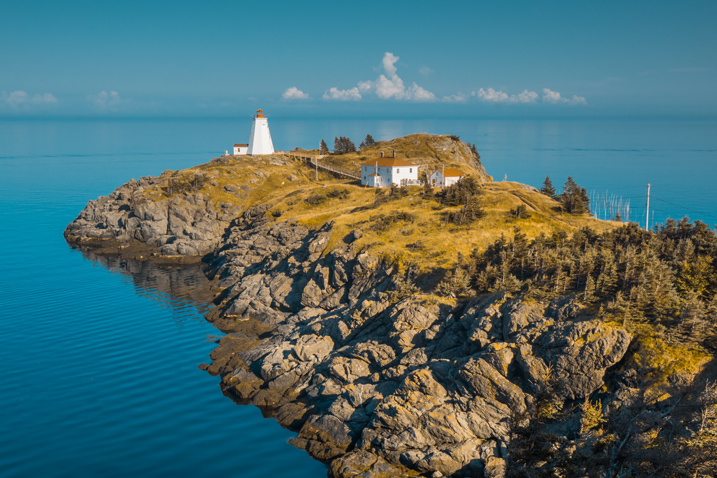
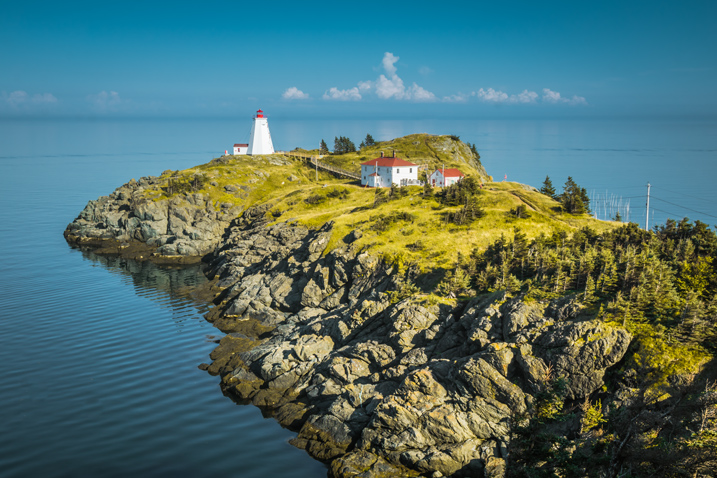
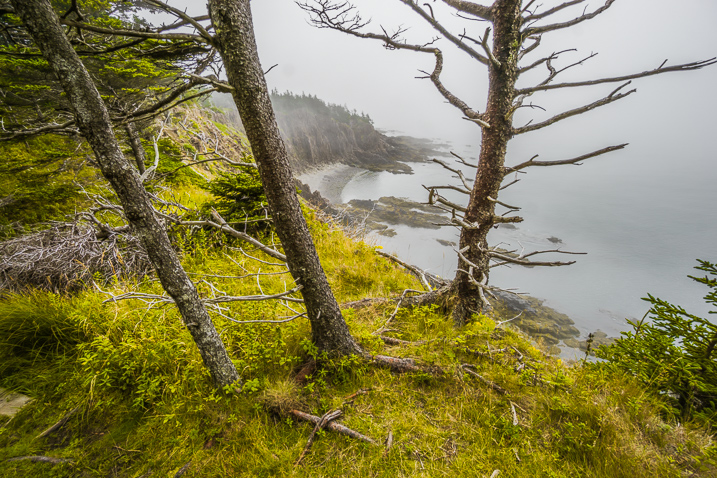
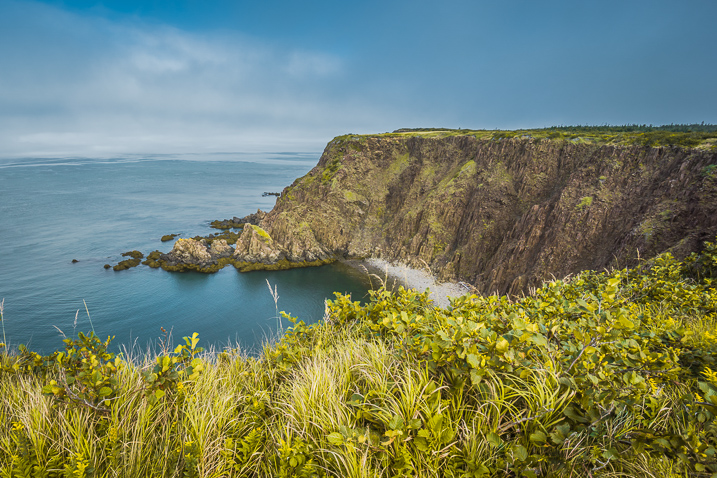
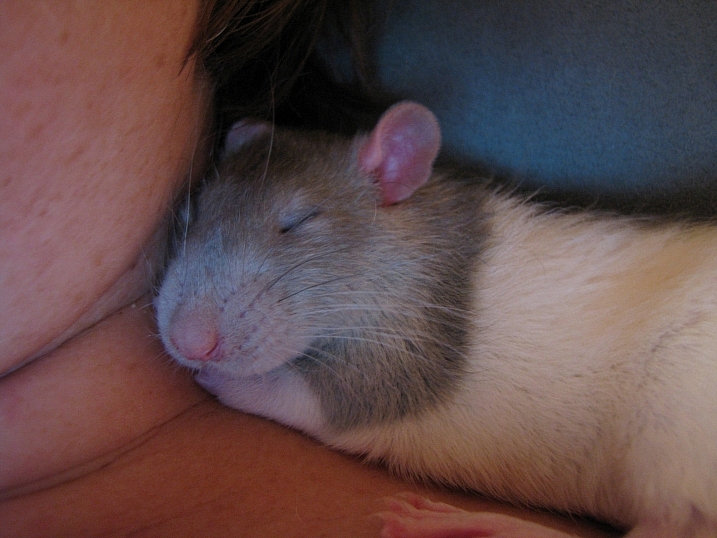
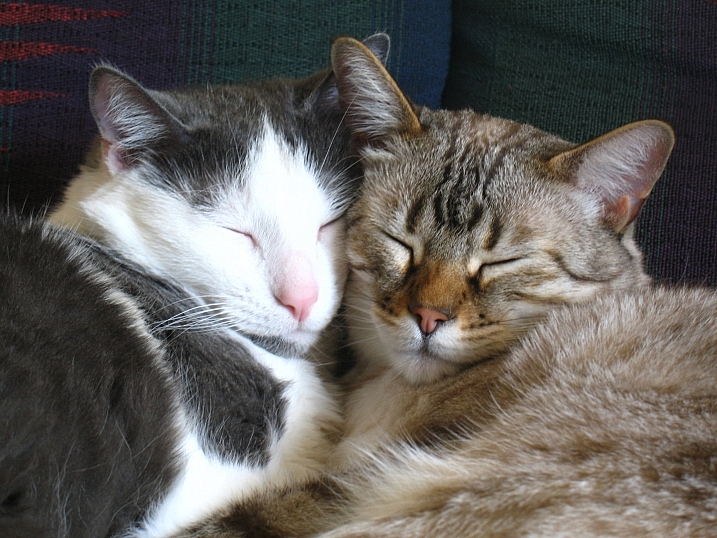
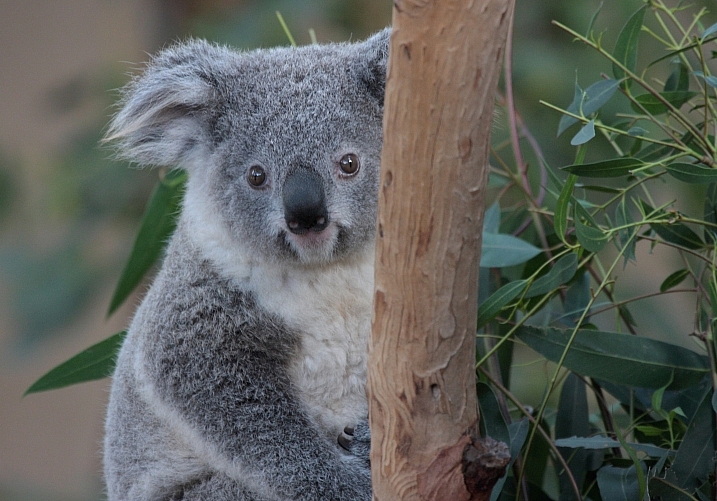
Category: Photography

  • Photo Editing Workflow for Travel Photography

    Get Viktor’s Lightroom Rapid Editing System for Travel Photography Course 50% off now at SnapnDeals for a limited time only – February 9th-23rd, 2016.

    A few years ago, just as I returned with 5,000 brand new photos from a driving trip to California, Utah and Nevada, I realized that I needed a completely new editing workflow. Two months later, I was not even close to being done with editing.
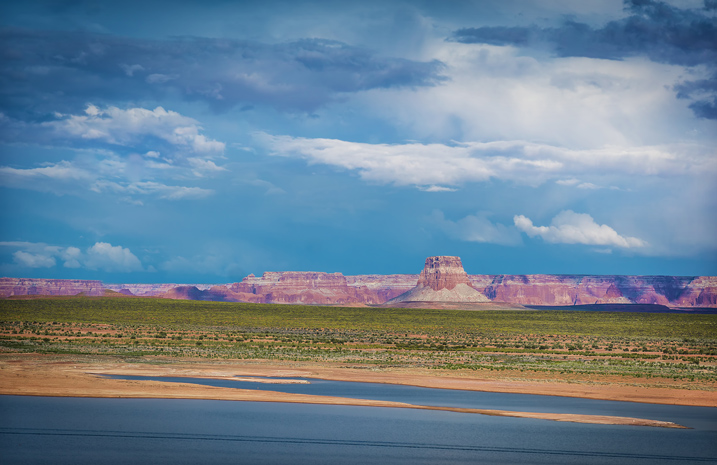
    Photo Editing Workflow for Travel Photography Image 01

    I spent the following year or so testing different approaches and systems, with the main goal to streamline, simplify, and speed up the entire process – from the moment the picture is taken, until it is published and safely backed up to the cloud.

    After implementing my new workflow, using it for over a year and tweaking it along the way, I can now process and edit thousands of photos in a matter of hours. I would love to share my new workflow with you.

    On the Road

    The biggest change in my editing workflow happened when I practically stopped editing photos while traveling. Instead, I concentrated only on shooting, rather than wasting time on anything else.
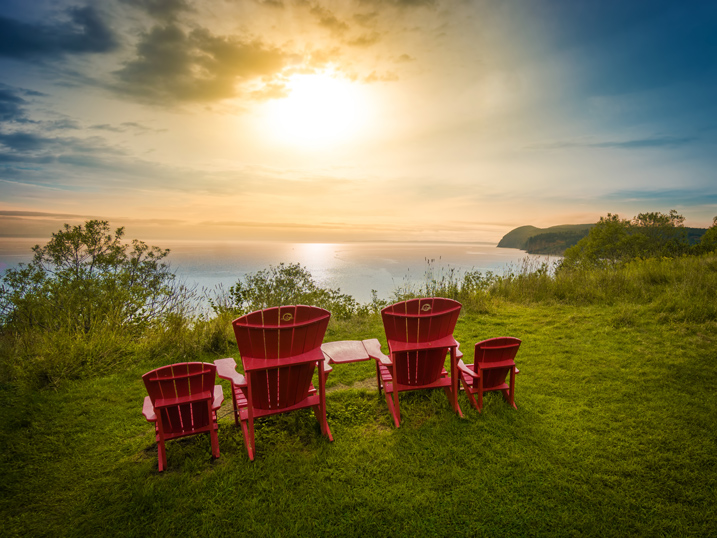
    Photo Editing Workflow for Travel Photography Image 02

    By the end of each day on the road, I import all new photos to a temporary Lightroom catalog, and during the import, I select the option to generate Smart Previews. This allows me to have access to all my photos through Lightroom Mobile on my tablet. I also rename all the images using my renaming template.
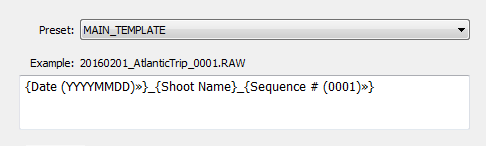
    Photo Editing Workflow for Travel Photography Image 03

    After renaming, my photos then have the following naming structure:

    • 20160201_AtlanticTrip_0001.RAW
    • 20160201_AtlanticTrip_0002.RAW
    • 20160201_AtlanticTrip_0003.RAW

    During initial import, I also apply top level tagging based on the location, or type of photos. For example, I might apply very generic tags like “Canada” and “New Brunswick.”

    But, even before I import the photos to Lightroom and generate the Smart Previews, I always have another option to access my images. Since switching to mirrorless, I can now connect to my camera using my tablet or smartphone at any time, grab a few images for a quick edit in Snapseed, and post them to social media. As I mentioned before, my editing workflow is minimal on the road.

    At Home

    The real processing work starts as soon I am home. Sometimes, however, it can start even sooner. If it is a long flight home, I might cull some photos on the plane using Lightroom Mobile, with the main purpose simply to refresh my memories of the trip and make notes.

    Import

    At home, I connect my master travel external hard drive to my desktop computer, and use the Lightroom option “Import from Another Catalog.” I then bring all the new photos to my main catalog and generate full-size previews for all of them. Because it typically takes a while to import thousands of RAW files and generate full-size previews, I often start the process before going to bed, so that when I wake up in the morning everything is ready.

    Culling

    Culling is the process of selecting the best photos for editing, and rejecting the bad ones. For a long time, I struggled with this step, as it was always time consuming, and quite often I would get distracted with an interesting image and start editing before finishing my selection.

    Lightroom has multiple organizational features for culling that can, to be honest, be overwhelming at times. Features include: Flagging, Starring, Color Tagging, Collections, Smart Collections, Quick Collection. In the past, I tried to use all of them to design an elaborate system that was impossible to sustain for very long. Each time I failed with one system, I would come up with an even more complex scheme. Eventually, I recognized that it was time to simplify the process.

    The inspiration for my new culling strategy was from the book, The ONE Thing, by Gary Keller. It states that in order to be 100% efficient you should concentrate on only one thing at a time. In other words, multitasking is evil. Inspired by the book, my process soon changed. My first goal, after importing new photos to Lightroom, is now to remove all the bad shots, the ones that can never be used (out of focus photos, for example). I quickly go through all my photos and use the keyboard shortcut “X” to flag all rejected shots. The process goes very fast even if I have thousands of photos because I concentrate on only one task.

    After I finish marking the photos, I immediately delete the rejected files so they do not go to my backup system.
    The next step is my favorite. I go through the photos again, and with the help of the keyboard shortcut “P” (P is for PICKED), I flag all the photos that have the potential to be processed and published (keepers). Once again, I only concentrate on a single task as I am not trying to grade picked photos or set star value. This approach allows me to identify the keepers at an incredible and efficient speed.

    The next step is to make the keepers pretty.

    Rapid Editing

    The development of a new Lightroom editing approach was triggered by the realization that 80-90% of the edits I perform in Lightroom are identical for every edited image, and only 10-20% contributes to the uniqueness of any given photograph. The rationale was to automate the 80-90% of the editing process to save time on repetitive tasks.

    In order to automate the editing, I created a two-level preset based system, one that I call Lightroom Rapid Editing. Lightroom Rapid Editing allows me to overcome the limitation of the presets, such as when any given preset produces a very different result depending on the level of exposure, lighting conditions, shadows and the dynamic range of the scene. With this two-level approach, I am able to compensate for various lighting conditions without touching the main Lightroom editing tool.

    Level 1 – Style Presets. The presets that define the “LOOK” and style of the photograph. For example: cool or warm, cross processed or natural, contrasted or soft.
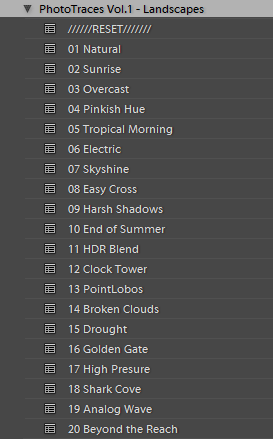
    Photo Editing Workflow for Travel Photography Image 04

    Level 2 – Adjustment Presets. The presets that allow fine-tuning of a photo without altering the style, and without the use of Lightroom editing tools. I named them the TOOLKIT.
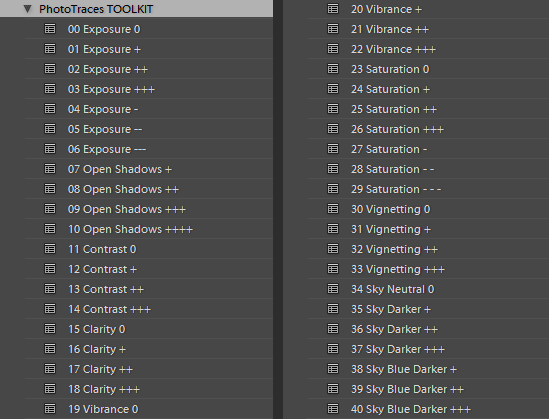
    Photo Editing Workflow for Travel Photography Image 05

    Here is a real life scenario

    When I returned from a driving trip to Atlantic Canada, I brought back over a thousand new photos. After selecting around 10 keepers, I wanted to edit them using a similar style, and then publish them as the Atlantic Series on my travel photography blog. I started with my favorite photo from the selection.
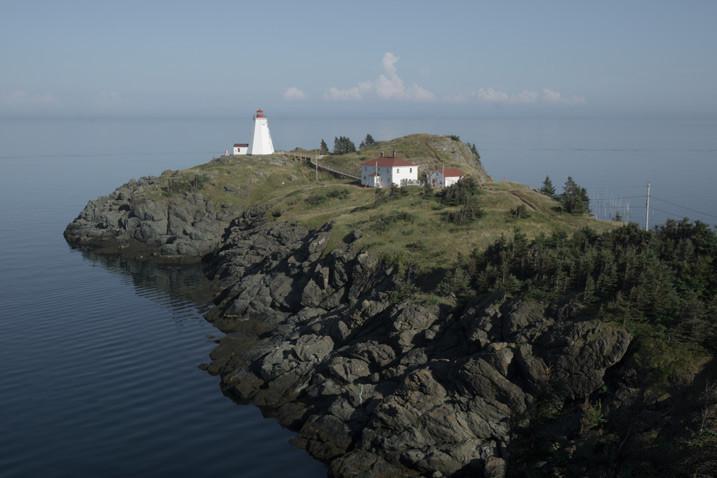
    Photo Editing Workflow for Travel Photography Image 06

    I began with Level 1 of Rapid Editing by applying the NATURAL style preset to the selected image (above).
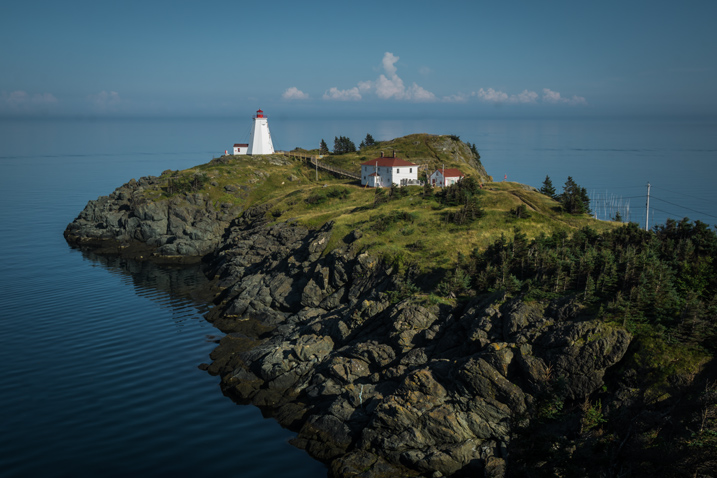
    Photo Editing Workflow for Travel Photography Image 07
    Natural style preset applied.

    Even though I liked the style, the image did not look good at all, because it was too dark, with deep shadows in the background. This is when the second level of editing came into play.

    From the TOOLKIT adjustment presets collection, I applied the following presets:

    • 01.Exposure +
    • 09.Open Shadow +++
    • 16.Clarity +
    • 20. Vibrance ++

    Below is the final result. It took me five clicks to go from the original unprocessed RAW image to the final edit.
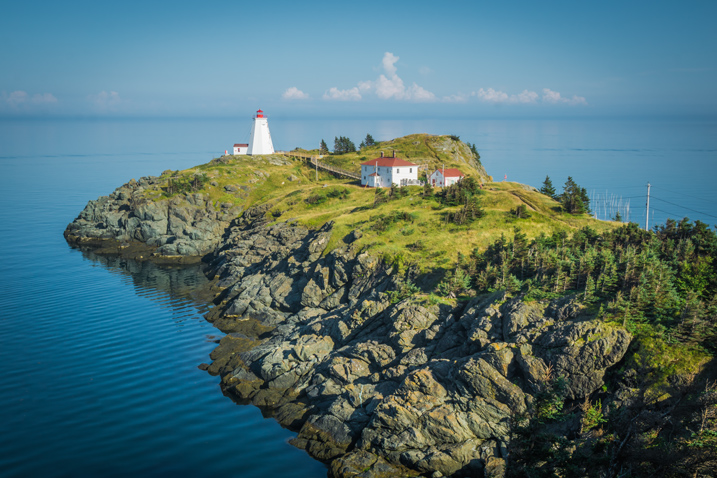
    Photo Editing Workflow for Travel Photography Image 08

    The next step was to come up with a more creative style for this particular photograph. I used the two-level Lightroom Rapid Editing process to produce three more creative versions.
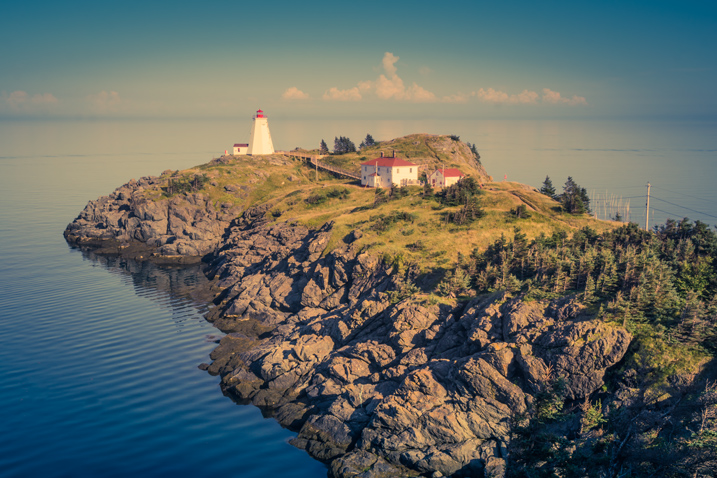
    Photo Editing Workflow for Travel Photography Image 09
    Preset: Broken Clouds

    Photo Editing Workflow for Travel Photography Image 10
    Preset: Drought

    Photo Editing Workflow for Travel Photography Image 11
    Preset: Point Lobos

    During the next step, I selected the edited version I liked the best. In this particular case, I chose the image with the Point Lobos preset effect. I then used the SYNC SETTINGS functionality of Lightroom, to synchronize the editing settings with the rest of the flagged photos (the other nine keepers).

    In the last step, I went through the photos one more time, using only the TOOLKIT, and focused on each photo individually. At this stage, I mostly adjusted the Exposure and Open Shadow to compensate for different lighting conditions and exposure imperfections (underexposure and overexposure). This process typically does not take long – an average of 10-15 seconds per photo.
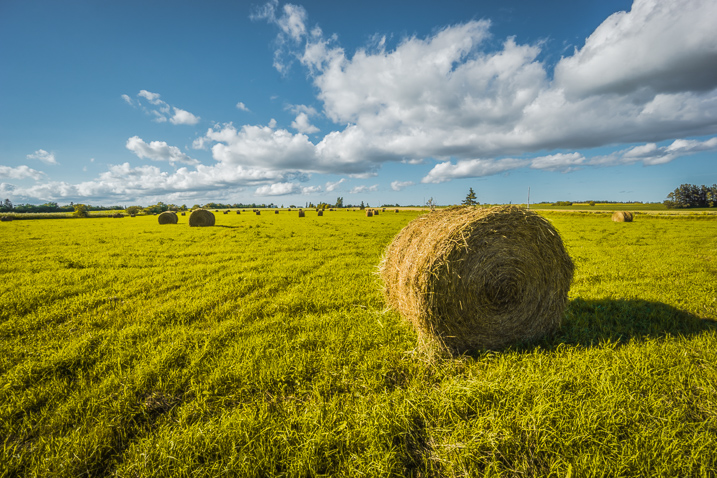
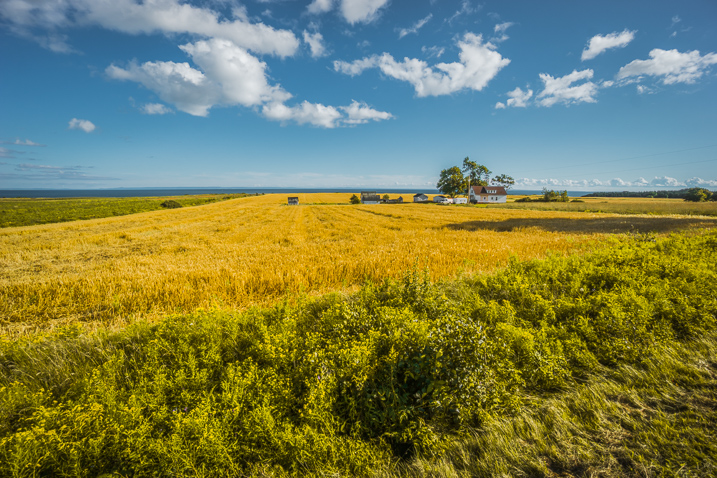
    Photo Editing Workflow for Travel Photography Image 12

    Photo Editing Workflow for Travel Photography Image 13

    Photo Editing Workflow for Travel Photography Image 14

    Photo Editing Workflow for Travel Photography Image 15

    Photo Editing Workflow for Travel Photography Image 16

    Photo Editing Workflow for Travel Photography Image 17

    Photo Editing Workflow for Travel Photography Image 18

    Photo Editing Workflow for Travel Photography Image 19

    Photo Editing Workflow for Travel Photography Image 20

    At this point, I was finished with Rapid Editing. I managed to complete 80-90% of the editing process without touching any of the Lightroom editing tools. As you can see, Lightroom Rapid Editing allows me to process a high volume of photos in a relatively short amount of time, while also giving the photos a similar look and feel, that makes the set distinguished and unique.

    After this two-level editing process, it was then time to perform the last 10-20% of editing that cannot be automated.
    Depending on the image, I might open it in Photoshop for selective editing. In most cases, I clean the images by removing distracting elements from the composition (electric wires, debris). Another option I often use is Lightroom Adjustment Brushes for selective editing.

    Publishing

    The very last step of my workflow is publishing. I use the plugin functionality of Lightroom to synchronize my newly created photos with my cloud portfolio on SmugMug. With SmugMug cloud service, I have access to all my photos at full resolution, and 100% quality anytime and anywhere.

    One of my favorite features of SmugMug is the ability to create custom sized images on the fly by manually changing an image URL, without using any editing tools.

    Conclusion

    What I learned after designing my photo editing workflow is that there is no perfect solution for travel photography that fits every photographer. Any system we put in place is in a constant state of fluctuation, and all we can do is keep adjusting it based on the type of photography and our individual habits and routines.

    Do you have a workflow you’d like to share with us? Please do so in the comments section below.


    If you found this helpful, get Viktor’s Lightroom Rapid Editing System for Travel Photography Course 50% off now at SnapnDeals for a limited time only – February 9th-23rd, 2016.

    googletag.cmd.push(function() {
    tablet_slots.push( googletag.defineSlot( “/1005424/_dPSv4_tab-all-article-bottom_(300×250)”, [300, 250], “pb-ad-78623” ).addService( googletag.pubads() ) ); } );

    googletag.cmd.push(function() {
    mobile_slots.push( googletag.defineSlot( “/1005424/_dPSv4_mob-all-article-bottom_(300×250)”, [300, 250], “pb-ad-78158” ).addService( googletag.pubads() ) ); } );

    The post Photo Editing Workflow for Travel Photography by Viktor Elizarov appeared first on Digital Photography School.
    Digital Photography School

  • Review: Think Tank Turnstyle Sling Bag

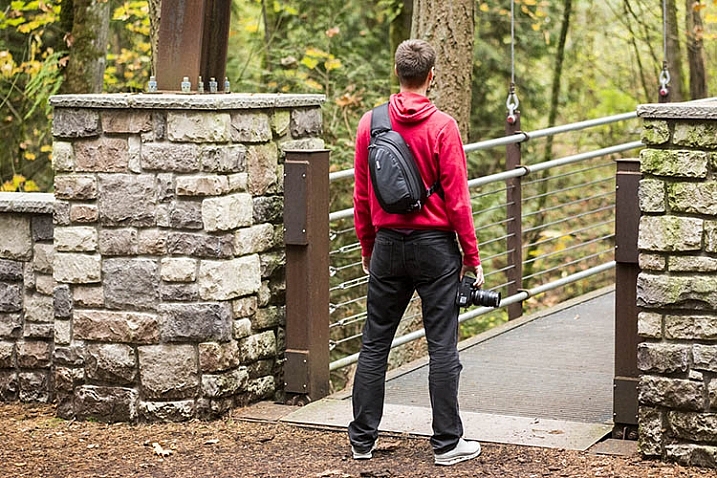
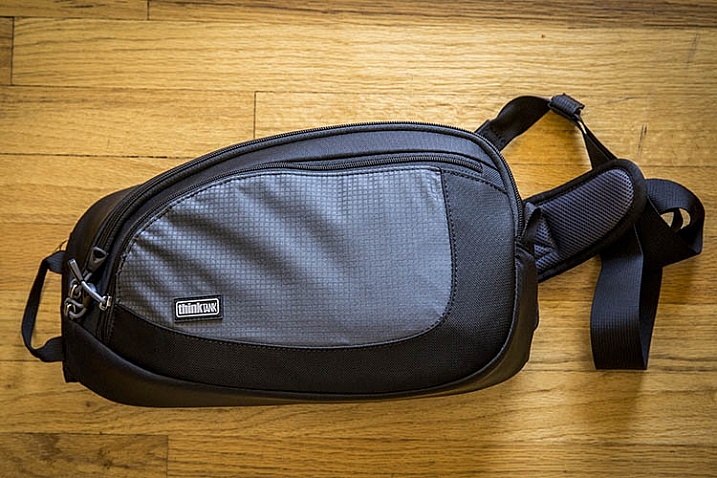
    From messenger bags to suitcases, camera bags today come in just about every shape and form. After spending years tinkering mainly with backpacks and belt packs, I decided to try out a relatively new type of camera bag: the Think Tank TurnStyle sling bag. With its unique body-conforming design, and the rugged durability that comes with all Think Tank products, the TurnStyle has quickly become my new favorite camera bag. Here’s why:

    ThinkTank TurnStyle Sling Bag Review

    Think Tank TurnStyle Sling Bag

    First off, it’s important to know that the TurnStyle bag comes in two colors (charcoal or slate blue) and three sizes. TurnStyle 5 is the smallest, meant to haul compact mirrorless camera systems, while TurnStyle 20 is the largest, capable of carrying a standard DSLR with a 70-200mm f/2.8 attached, plus another lens. Right in the middle of these two bags is the one I opted for: the TurnStyle 10, which could purportedly hold a standard DSLR with a 24-70mm f/2.8 attached. This is where I had a bit of a gripe with the bag off the bat.

    ThinkTank TurnStyle Sling Bag Review

    What Fits in the TurnStyle 10

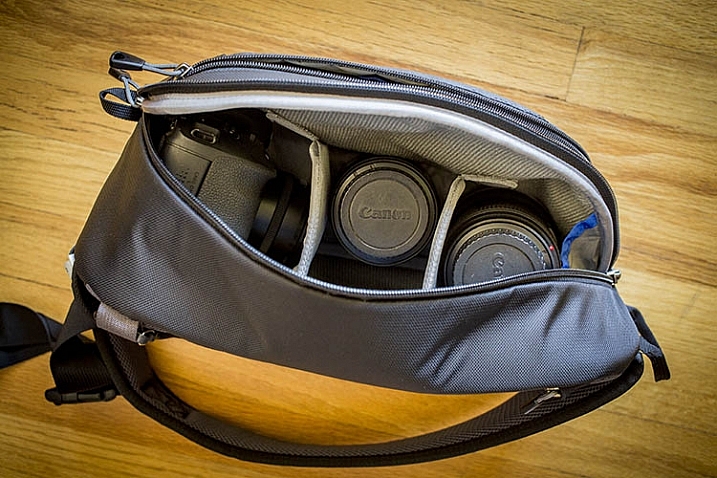
    While the TurnStyle 10 is definitely a roomy bag, it couldn’t exactly hold my Canon 5D Mark III with a 24-70mm f/2.8 attached. The camera with lens does fit into the bag, but it won’t even come close to zipping up. (Note: I figured out I can make it fit if I take out all the dividers).

    What does fit, albeit on the snug side, is my Canon 6D with the 24-70mm f/2.8 lens attached; in this setup, there are two more lens compartments open that can hold small or medium-sized lenses or a Canon Speedlite. In the above photo, the configuration shows a Canon 6D with 40mm f/2.8 pancake lens attached, a Canon 100mm f/2.8 macro lens, and a 24-70mm f/2.8 lens.

    What definitely will not fit in this bag is a 70-200mm f/2.8 lens, unless it’s the only thing the bag is carrying. This makes the TurnStyle 10 a perfect travel photography camera bag, assuming you’re carrying a smaller DSLR body, and relatively few accessories. If you intend to carry a heavy-duty DSLR kit, the TurnStyle 20 will be a more accommodating size.

    ThinkTank TurnStyle Sling Bag Review

    Best Features

    Body-Conforming Design

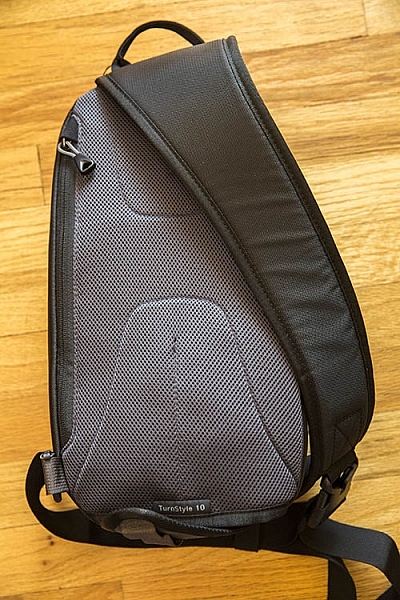
    By far the best part of the TurnStyle bag series is its body-conforming design. Initially, the idea of the bag only having one strap may make it seem like you’ll end up carrying too much weight on one side of your body, but that is far from the case. The thickly padded single shoulder strap does indeed contour your body nicely, making even the heaviest gear bag feel relatively lightweight. This overall design makes the TurnStyle bag by far the most ergonomic camera bag I’ve ever used.

    Suzi Pratt_Turnstyle 04

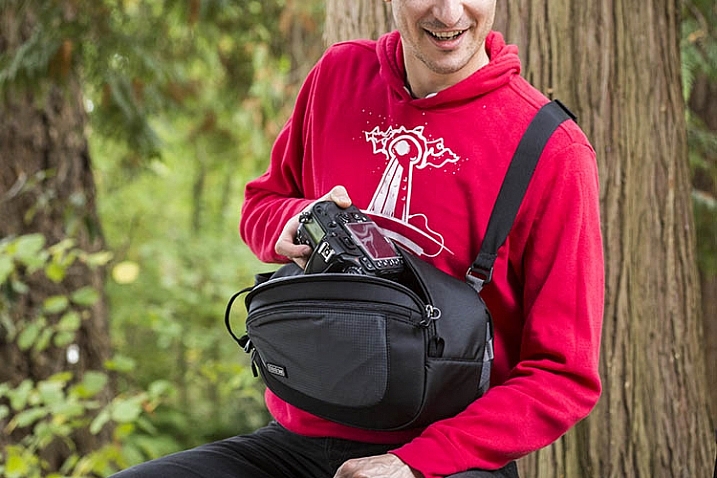
    Converts into a Belt Pack

    Another positive design feature is the ability to easily rotate the bag from your back to your chest, for quick access to your gear without having to take the bag off. You could even adjust the strap’s length, and turn the bag into a belt pack for better accessibility.

    Made of Quality Materials

    Similar to all other Think Tank products, the exterior components of the TurnStyle are highly durable and visually appealing. The bag’s exterior is made of rip-stop polyester with a water-repellant coating, and all zippers are abrasion-resistant. That is the say, this bag holds up even when you expose it to the elements, making it perfect for taking on your next photo safari vacation.

    ThinkTank TurnStyle Sling Bag Review

    Many Dedicated Pockets

    The TurnStyle’s main compartment for holding your camera gear, comes with removable foam dividers so that you can customize the interior padding, based on what you’re carrying. There is also has a padded back pocket for holding a tablet or paperwork, and a larger zippered pocket on the front of the bag for holding essentials such as your wallet, cell phone, memory cards, etc. Finally, there is the signature component that accompanies all Think Tank bags: a dedicated rain cover that shields your bag from the elements.

    Over to You

    So is the Think Tank TurnStyle bag right for you? Honestly, it comes down to how much gear you want to carry with you. While you could combine this bag with a waist pack or shoulder bag to hold more gear, you experience the full benefits of the TurnStyle bag when carrying minimal gear. In this sense, it’s best suited for travel or street photographers, shooting with mirrorless or smaller DSLR cameras. If you plan to carry a longer telephoto lens, you’re probably better off with either the larger TurnStyle bag, or a different style altogether.

    Have you tried out a sling-style camera bag? What were your thoughts on it? Do you have another favorite bag? Please share in the comments below.

    googletag.cmd.push(function() {
    tablet_slots.push( googletag.defineSlot( “/1005424/_dPSv4_tab-all-article-bottom_(300×250)”, [300, 250], “pb-ad-78623” ).addService( googletag.pubads() ) ); } );

    googletag.cmd.push(function() {
    mobile_slots.push( googletag.defineSlot( “/1005424/_dPSv4_mob-all-article-bottom_(300×250)”, [300, 250], “pb-ad-78158” ).addService( googletag.pubads() ) ); } );

    The post Review: Think Tank Turnstyle Sling Bag by Suzi Pratt appeared first on Digital Photography School.

    Digital Photography School

  • Find Love Through Your Lens: 3 Ideas for a Valentine Photo Shoot

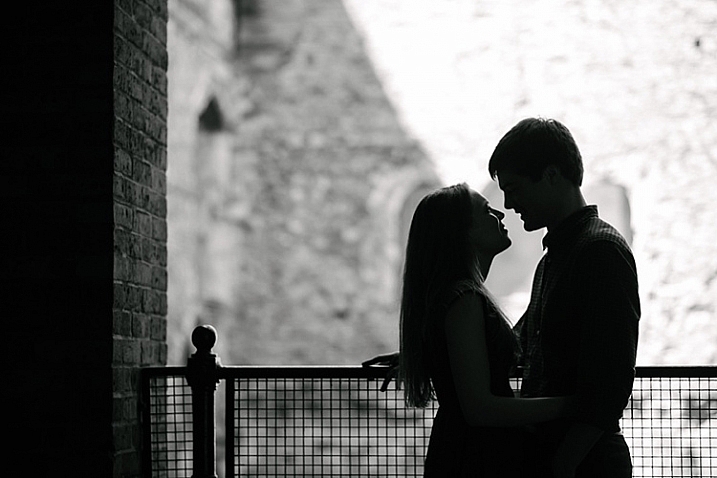
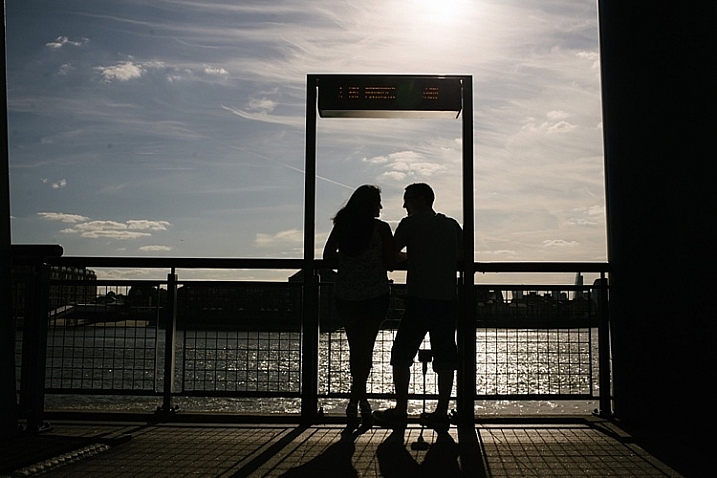
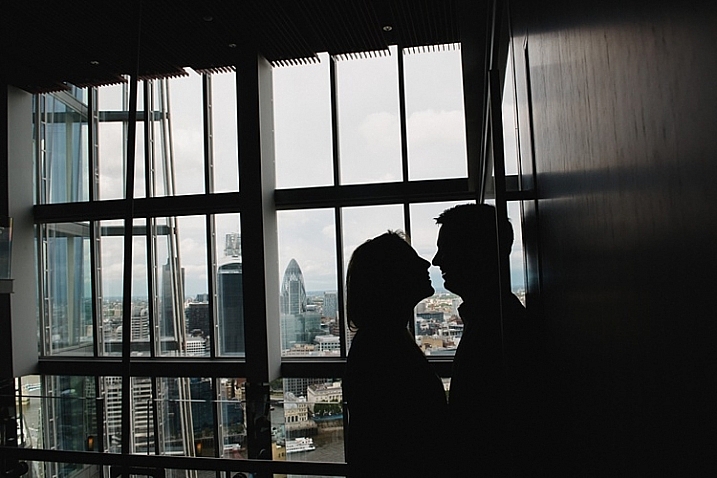
    Editor’s note: Valentine’s Day is a good opportunity for aspiring portrait photographers to practice love story and romantic / family photo shoots. Below you can find three practical tips and ideas for a Valentine photo shoot from our regular writer, a portrait photographer, Barbara Stitzer. *** Ahhh, Love. It can be giddy, maddening, complacent, jealous, warm and gooey, and downright Continue Reading

    The post Find Love Through Your Lens: 3 Ideas for a Valentine Photo Shoot appeared first on Photodoto.


    Photodoto

  • Quick Overview of How to do Macro Photography

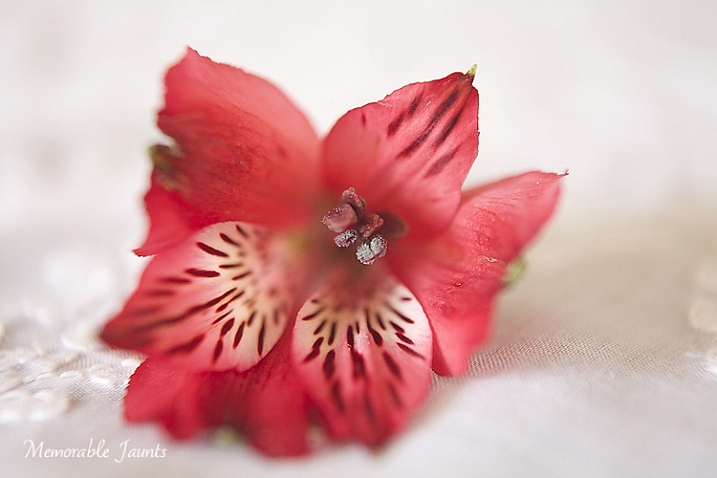
    In the photography domain, macro photography is defined as the art of magnification of subjects. It is a very interesting form of photography, which seems to have an application in almost every genre.

    Memorable Jaunts Macro Photography Article for DPS 05

    For wedding photographers, it’s a great way to highlight wedding details like rings, the invitation suite, certain aspects of the bridal bouquets, and boutonnières. For nature photographers, it is a great way to get up close and personal with many interesting subjects like bugs, insects, and small animals. For food photographers, a macro lens is one of the ultimate tools to highlight their craft because it’s such a great way to emphasize textures, patterns, and details. Even portrait photographers are known to favor the long focal length macro lens, as it gives them the flexibility of getting close details of their subjects, without invading a client’s personal space, especially when dealing with camera-shy children and adults.

    Gear choice

    There are several options in the marketplace in terms of gear choices for the macro photographer. Extension tubes, macro (or close-up) filters, as well as specific macro lenses are available for every budget. Based on the macro lens used, you can achieve magnification anywhere from around half to four or five times life-size, of the object being photographed.

    Memorable Jaunts Macro Photography Article for DPS

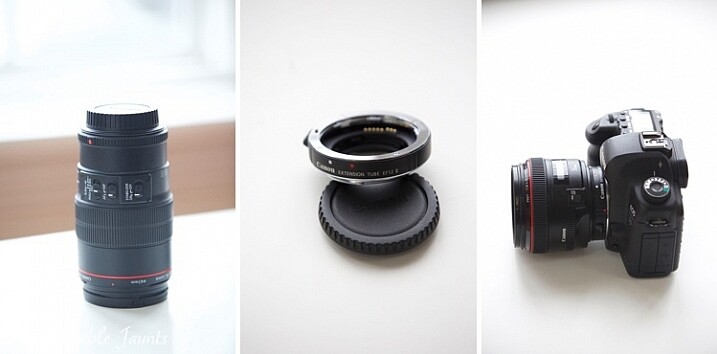
    Left image: 100mm f/2.8L IS Macro Lens
    Middle: Canon 12mm Extension Tube
    Right: Canon 5D MkII with 50mm lens and extension tube attached

    1. Speciality Lens – Macro lenses come in various focal lengths. Short macros are typically lenses in the 30-50mm range. Standard macro lenses are in the 60-105mm focal length range, and tele-macro lenses are in the 150mm-200mm range. These macro lenses tend to perform better than extension tubes and macro filters, since they are build specifically for close-up photography. They work great at short focal lengths as well as longer ones. The main disadvantage with these lenses tends to be the price point. Most of the dedicated macro lenses are upwards of $ 500 (or more) and that can be a limiting factor for someone just getting into macro photography.
    2. Extension tubes are hollow tubes that fit between your lens and your camera mount. They don’t have any glass elements within them, they simply move the actual lens further from the camera, and the front element of the lens closer to the subject, thus offering a certain amount of magnification to the subject. Extension tubes tend to be less expensive than traditional macro lenses and can be mounted on any lens. But they tend to work best with shorter focal lengths. The main disadvantage with extension tubes is that your lens looses the ability to focus on distant objects, since it works only on close-up magnifications. There is also some light loss, which can be compensated by increasing the ISO or by using a slower shutter speed. The camera sensor is also exposed to dust, and the external elements, every time you remove or add the extension tube to the front of your lens.
    3. Macro filters are similar to other types of filters that attach to the front of your lens. They come in different sizes, and different magnification ratios, so if you want to use them on various lenses, then you will need to invest in a variety of filters. They tend to be relatively inexpensive, and can be stacked one on top of one another, in order to get a variety of magnification factors for your subjects. Macro filters also tend to lose light, especially when used as a multiple stack. Hence these cannot be used very effectively with wide apertures. They work best when apertures are stopped down (higher f-stop number).

    My initial choice for macro photography was the Canon extension tube EF12 II. As a wedding photographer, I wanted something small and inexpensive for photographing details and ring shots. Since then I have migrated to the Canon 100mm f/2.8 L-series macro lens, and find myself reaching for this beautiful lens more often than not. I have used it for portraits, food photos, as well as still life details.

    Technical tips

    The key thing to note in macro photography, is that depth of field (DOF) depends primarily on two factors: aperture value and magnification. For any given aperture value, the higher the magnification ratio, the smaller the DOF will be, hence the DOF tends to be very shallow for macro photography (higher f-stop).

    Memorable Jaunts Macro Photography Article for DPS 04

    Both images were shot at f6.3 – the one on the left is using the 50mm with extension tube, right image is with 100mm macro lens

    Memorable Jaunts Macro Photography Article for DPS 02

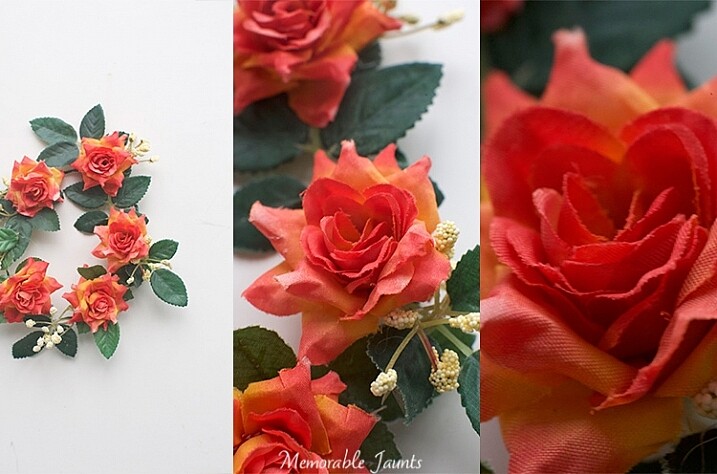
    The left image is a pull back using a 50mm lens
    Middle is using the 50mm + extension tube
    Right is using the 100mm macro lens (all other settings are fairly standard across all three images)

    From an application perspective, focus on the main point of the subject that you want to target. If your camera supports live view, use it to zoom-in and ensure that the image is sharp. Set the aperture around f/11 (feel free to experiment to find the optimal setting for your lens, filter, extension tube combination). If you want a greater depth of field (more of the subject is in focus) use a smaller aperture like f/16 or f/22.

    Another thing to note is that when photographing objects that tend to move suddenly, like bugs and insects, a higher shutter speed is advantageous to stop motion and freeze the subject. As a rule of thumb try not to drop below 1/400th or 1/500th shutter speed.

    Memorable Jaunts Macro Photography Article for DPS 07

    One of the most popular uses of macro lenses is in food photography. Left image using 50mm with extension tube, right image using 100mm macro lens. Both have shallow depth of field because I wanted to blur out the food in the background.

    Mirror lock-up

    Most DSLR cameras have a mirror inside, which allows you see the image in the viewfinder. The mirror flips out of the way when you press the shutter button, and this action itself can introduce camera shake, and cause your image to be blurry. You can reduce the chances of blurry images by turning “ON” the mirror lockup function (look for it in your camera’s manual). On most cameras that means you will press the shutter button once and it will flip up the mirror, pressing it again takes the exposure. If you have a mirrorless camera then this does not apply to you.

    Diffraction

    In Photography, diffraction is the bending of light as it passes by the small sharp edged blades, which form the aperture opening. The light gets squeezed together, or blends together. Diffraction is worse with smaller aperture settings like f/16 to f/22. This causes the image to be less sharp, especially at the edges, even more so in macro photography when you are often shooting at smaller apertures. You can avoid diffraction by not dropping below f/16, or by using selective focus over multiple images, and stacking (focus stacking) them together in post-production to get an overall sharp image.

    Practical Applications

    Contrary to popular belief, macro photography is not restrictive to images of bugs, leaves, flowers and food. They can be an effective tool to highlight any form of detail, texture and pattern. Specific macro lenses also double up as great portrait lenses, extending their use beyond just macro photography.

    Memorable Jaunts Macro Photography Article for DPS 06

    Memorable Jaunts Macro Photography Article for DPS 03

    Left image is pull back of the ring
    Middle is with 50mm + extension tube
    Right is 100mm macro. F-stop was around f/9 and shutter speed was around 1/50 (I was loosing light very fast and had my ISO up to 2500).

    So the next time you want a little boost of creativity, use macro photography to get a fresh, up close perspective on things!

    googletag.cmd.push(function() {
    tablet_slots.push( googletag.defineSlot( “/1005424/_dPSv4_tab-all-article-bottom_(300×250)”, [300, 250], “pb-ad-78623” ).addService( googletag.pubads() ) ); } );

    googletag.cmd.push(function() {
    mobile_slots.push( googletag.defineSlot( “/1005424/_dPSv4_mob-all-article-bottom_(300×250)”, [300, 250], “pb-ad-78158” ).addService( googletag.pubads() ) ); } );

    The post Quick Overview of How to do Macro Photography by Karthika Gupta appeared first on Digital Photography School.

    Digital Photography School

  • 5 Creative Ideas to Improve and Inspire Your Photography

    If you are a photographer who takes pictures day in and day out, perhaps because it is your livelihood or you are a keen hobbyist, there are times when you may want to digress from the day to day, and do something new on your day off. You can do this purely for the fun of it, or to set yourself some new learning challenges. This is a good practice to implement regularly because it pushes you to think outside the box, hone your skills, enlarge your vision, and challenge your creativity.

    Here are some creative ideas on what you can do to take a break or depart from the usual, even just for a day.

    layering-creative-photography-tip-01

    1 – Vertical only please

    These vertical images below were taken from a beach summer holiday when I decided to do this particular photography challenge, purely as a fun visual exercise in composition. All I had was a D700, a 35mm f/1.4 lens, and a few meters of beach.

    vertical-photography-tip-01

    Photographing solely in the vertical orientation can be quite tricky. Your view and vision are more constrained. If you are photographing a landscape scene for instance, with the vertical orientation you are limited to pretty much the sky or the earth.

    vertical-photography-tip-02

    vertical-photography-tip-03

    Things that you are always used to seeing in a landscape (horizontal) format will look different, and therefore you will begin to see with a fresh eye. This forces you to look for more intriguing views and items to photograph, as well as to compose in such a way that the photograph is still interesting, despite the limited width.  You could be confronted with some quite unnerving compositions which make the picture more striking, or at the very least elicit an unusual or unexpected reaction.

    vertical-photography-tip-04

    vertical-photography-tip-05

    2 – No eyes allowed

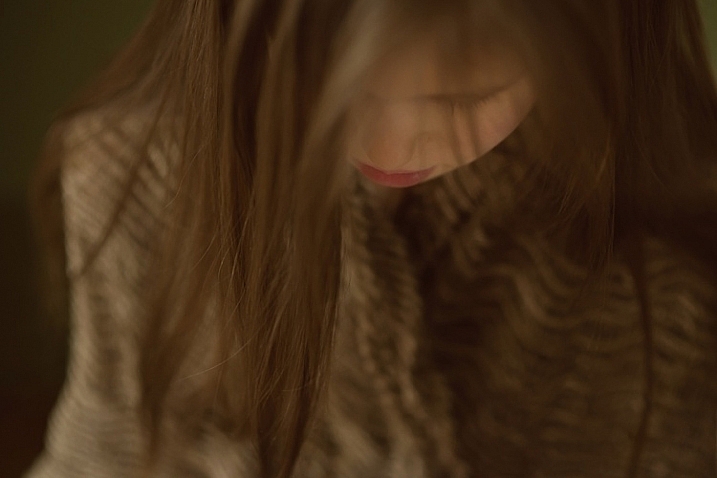
    It is said that the eyes are the window to the soul. This challenge is to try and capture a someone’s personality, without photographing their entire face. There are many more things to a person than just a face. For this challenge focus on anything but the eyes, and see how much of the person’s personality you can capture.  You can focus on physical aspects, clothes, or objects that the person loves.

    personality-photography-tip-01

    personality-photography-tip-03

    Some people have developed icons of themselves: things they are known and recognized for. For example, someone who always wears sunglasses on their head, or a person who only wears striped socks, or someone’s tattoo or jewellery style. Find something distinctive about the person. You can also focus on actions. Perhaps the person is adventurous or has a fun-loving, bigger-than-life personality.

    persosnality-photography-tip-08

    You may want to ask them to do something they love, or hold something that reflects their persona, and find a way of capturing that without photographing the face. Focus on the running motion of their feet, or waving hands, or a big smile cropped in an interesting composition. Color could be another thing. Ask the person to wear their favorite color and find a location that has the same tones.

    persosnality-photography-tip-09

    You can also set something up that reflects the quirkiness of the person, or choose a location that does the same. A country-loving person might be walking in muddy boots, on a long road that seemingly leads to nowhere. Give it some thought with a person in mind, and you may be surprised how many ideas you can come up with that will potentially truly capture their personality.

    personality-photography-tip-07

    3 – Through a glass, darkly…

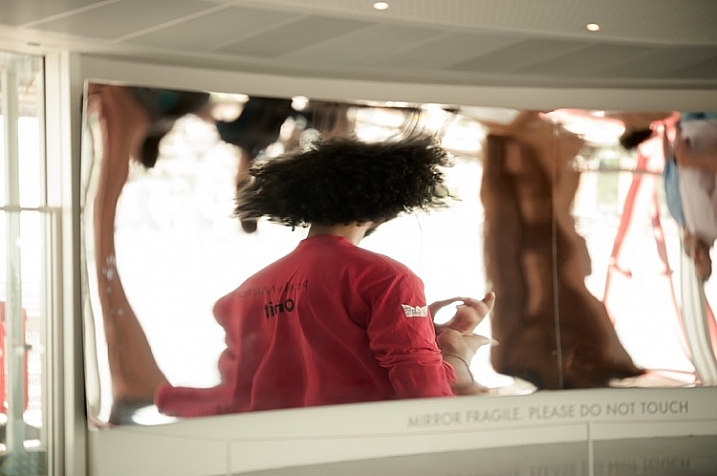
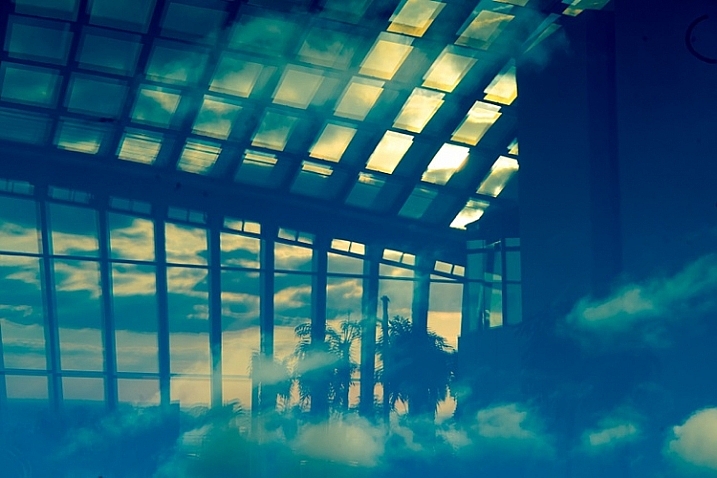
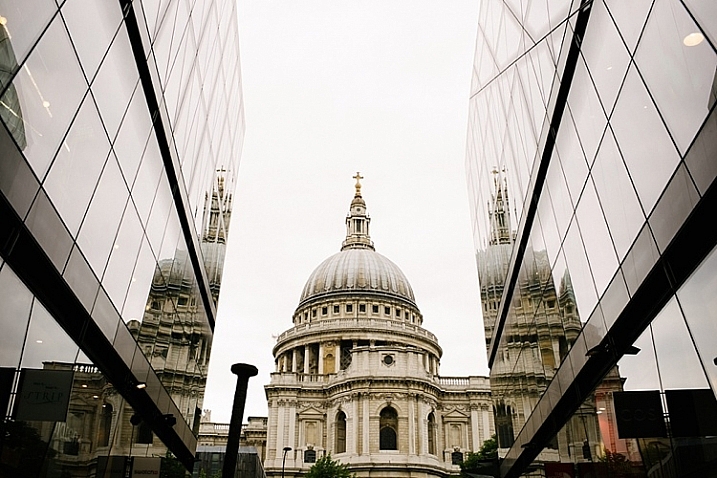
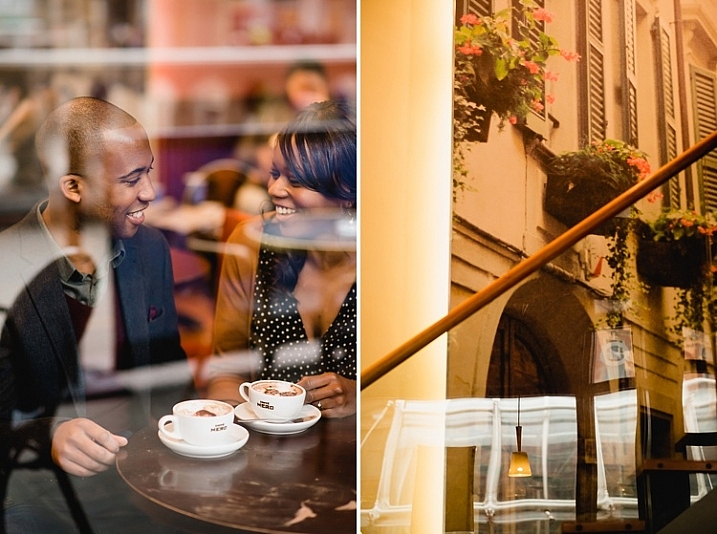
    Consider utilizing reflection to make your images more enthralling and thought-provoking. You can impose a rule that you can only photograph a reflection and never the person or the object, or you can use both subject and reflection for a refreshing take on an image, making them more captivating.

    reflection-photography-tip-01

    reflection-photography-tip-01

    reflection-photography-tip-02

    Some reflector ideas include: mirrors and shiny reflective objects, water, reflective glass or plastics, windows – even clear windows can have reflections. Raindrops can be great reflectors although you may have to pull out your macro lens to capture the reflection. Photographing reflections can open up a whole new world, such as seeing and capturing surreal or abstract images with the blending of forms and colors, as well as igniting your imagination, and filling you with a new sense of wonder.

    relfection-photography-tip-04

    relfection-photography-tip-04

    relfection-photography-tip-06

    4 – Black is the new hue

    Silhouettes are fun to photograph, and not that difficult to execute. But the bigger challenge is to find a striking silhouette concept. The main thing to remember is to find good contrast – a very bright background, preferably bigger than the subject, and put the subject in front of the light area. Expose for the bright background so that your subject is so severely underexposed that they look very dark or black.  Here is a really good article with a simple step-by-step guide on how to take stunning silhouettes.

    silhouette-photography-tip-01

    silhouette-photography-tip-02

    silhouette-photography-tip-03

    5 – Layering

    Layering is a really subtle, but extremely effective, photographer’s trick to convey depth, mystery, and mood in a photograph.  It is especially useful if you are a photojournalistic or documentary photographer, as it makes the viewer feel that they are looking through someone else’s lens, and are present in the moment but inconspicuous, much like a fly on the wall.

    layering-photography-tip-01

    layering-photography-tip-02

    There are three basic things to remember when composing a photograph with layering in mind: foreground, middle ground and background.  Most of the photographs we see often have two layers – the subject and the background.  Incorporating a foreground in your composition not only adds three-dimensionality to your photograph but also makes it more visually compelling.

    layering-photography-tip-03

    Choosing the right foregrounds can be used to frame your subject – as a leading line to direct attention to your subject, therefore making your image more dynamic, or as a tool for emphasis and composition amongst many others. There are times when finding an obvious foreground is next to impossible. One solution is to physically hold an object, such as a leaf or paper, in front of your lens just enough to be in the frame, but not to obscure the subject.

    layering-photography-tip-04

    layering-photography-tip-04

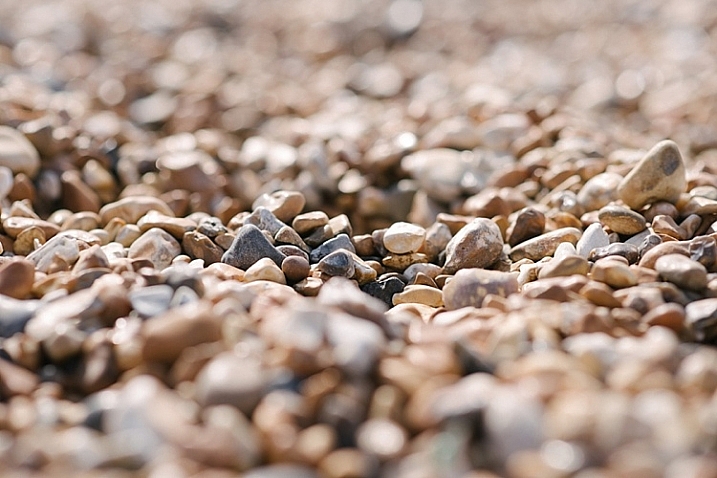
    You can also layer by simply using your lens and the effect of a very wide aperture such as f/1.4. By employing your lens’s ability to blur the foreground, while keeping the middle ground in sharp focus, and then blur the background again, can make an otherwise dull image enchanting. Even something as simple as a patch of stones or sand can look layered using this technique.

    layering-photography-tip-06

    I hope you will enjoy doing these creative challenges. Do you have other creative photography ideas to share? Please do so in the comments below.

    googletag.cmd.push(function() {
    tablet_slots.push( googletag.defineSlot( “/1005424/_dPSv4_tab-all-article-bottom_(300×250)”, [300, 250], “pb-ad-78623” ).addService( googletag.pubads() ) ); } );

    googletag.cmd.push(function() {
    mobile_slots.push( googletag.defineSlot( “/1005424/_dPSv4_mob-all-article-bottom_(300×250)”, [300, 250], “pb-ad-78158” ).addService( googletag.pubads() ) ); } );

    The post 5 Creative Ideas to Improve and Inspire Your Photography by Lily Sawyer appeared first on Digital Photography School.

    Digital Photography School

  • List of Resources for Making a Photography Website

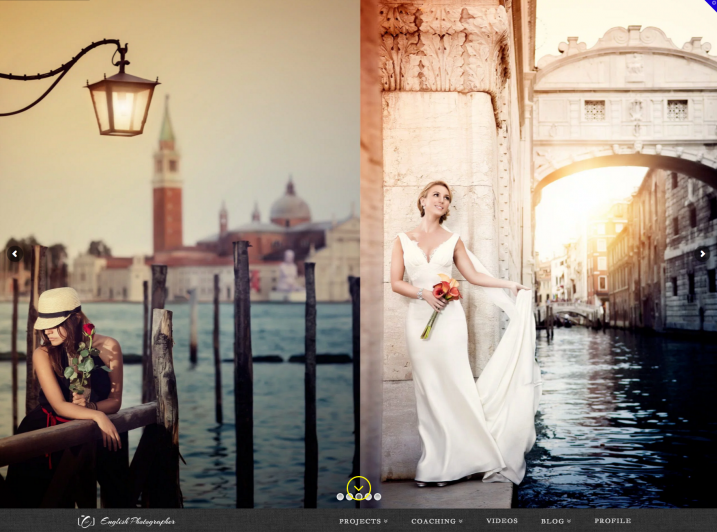
    I’ve just made a new photography website for my fashion, portrait, and event photography. This meant researching the different options currently available (as of December 2015) for creating photography websites. So whether you’ve just gotten your first camera, or are a seasoned pro looking to update your photography website, here are some options to consider.

    I’ll make some recommendations about specific companies that I’ve used. Most articles would make money on these through affiliate links; but there are no affiliate links here (I get no benefit recommending them), these are just companies that I’ve been happy with.

    Editor’s note: none these companies have not been researched or checked by dPS, and are solely the recommendations of the author. As with any purchase please do your own due diligence, read online reviews, and do trial periods where possible, before choosing your web suppliers. dPS is not responsible for any issues that may arise if you follow these suggestions.

    make-photography-website8727-2

    Why make a photography website?

    Now that the majority of photos aren’t printed, sometimes they can get lost in your hard drives and forgotten. Sharing the pictures you make with family and friends is much easier when your photos are online. Depending on the photography website you use, you can also get useful feedback on your pictures, or even sell them to buyers around the world. Now is also the best time to start getting followers, if you haven’t already done so.

    As well as sharing, developing, and selling your photography online, having a photography website helps encourage you, and gives you a sense of accountability so you keep practicing. Old photos are also one of the most valuable things we own, professional or amateur, and photo albums are often what most people would choose to save in a fire. Keeping your memories online not only shows you how your photography has improved, but also keeps them safe in the cloud. When my Western Digital hard drive arbitrarily malfunctioned and lost all of my photos, I was thankful to have uploaded my favourite ones online.

    Make a photography website for free

    Alan O'Rourke

    By Alan O’Rourke

    There are several excellent free options to get your photography online.

    • Flickr – Like a resurrected giant, Flickr offers a huge 1 TB of complimentary storage and has a thriving community.
    • Facebook – A humble Facebook page (not your personal profile but a business page) for your pictures is an ideal way to start to gain a following.
    • Google Plus – Less popular lately, but better quality, and good if you want to be found online by the Google search engine.
    • Instagram– Even if this isn’t your main site, it’s very useful to have as a photographer.
    • Tumblr – A clean, free way to create a blog and feature your most recent photography.
    • 500px – A relative newcomer, the 500px design is clean and contemporary; their free option is fine.
    • Behance – A professional space for your best photos that looks more prestigious.

    Make a photography website

    As well as the free options, you might like to make a photography website that you have more control over. Personally after much research I opted for a self-hosted WordPress site using a pre-designed theme that I customized. To do so you will need;

    A Domain name

    The domain name is your address on the internet. For example: http://digital-photography-school.com is the domain name, or URL for dPS. I get my domain names from www.Internet.bs or www.NameCheap.com.

    Hosting

    This is your real estate on the internet. You need a place to park your site, that is called hosting. Your host online is where all the files for your site will be stored (hosted).

    I use www.LiquiLayer.com (really excellent, personal support) and www.HostDeal.com. I’ve heard good things about www.HostGator.com, www.DreamHost.com and www.HostWinds.com, but haven’t used any of those personally.

    make-photography-website_1413

    Content Management System

    This simplifies building your website tremendously. I use WordPress and highly recommend it. Most web hosts will give you options to install it very easily.

    WordPress Theme

    This provides a structure for your website. There are both free and paid options available, which allow you to make a great looking site faster. Here are my favourites:

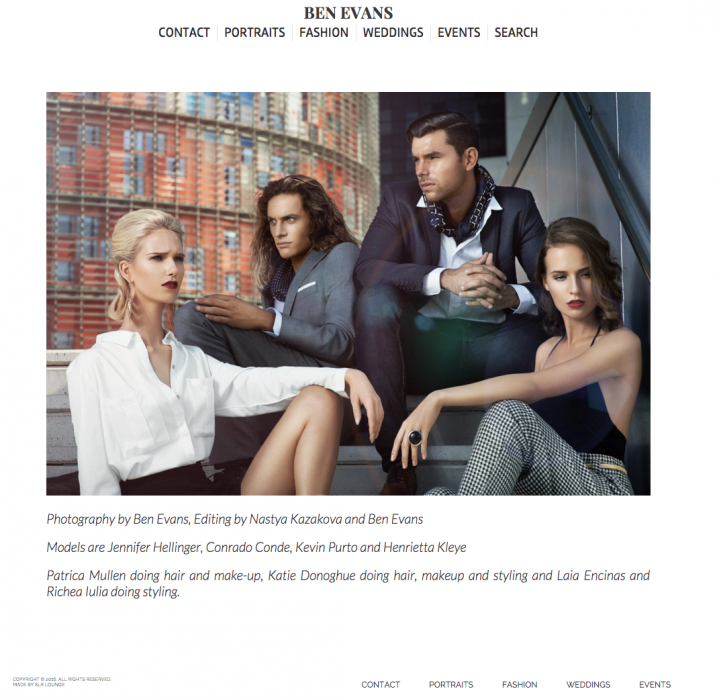
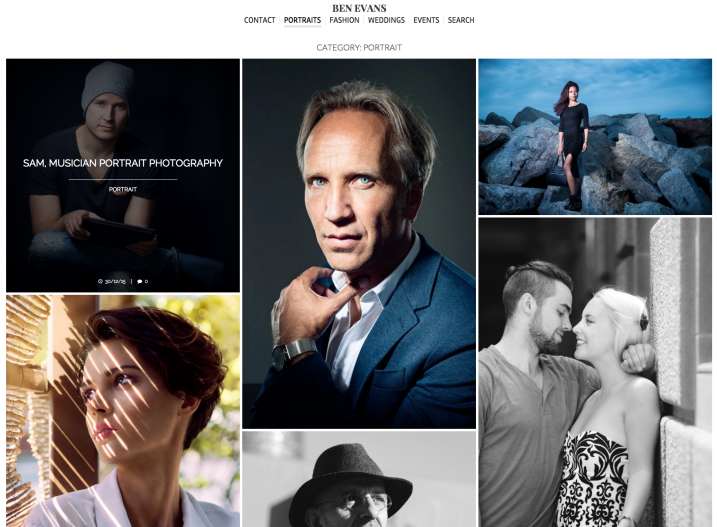
    SLR Lounge’s WordPress Theme – I recently discovered this free WordPress photography theme and used it to build my latest website. It has a clean, simple style and creating the site took a few days.

    Screen Shot 2016-01-30 at 1.16.20 PM

    Home page of my new site

    Screen Shot 2016-01-30 at 1.17.21 PM

    Portrait page

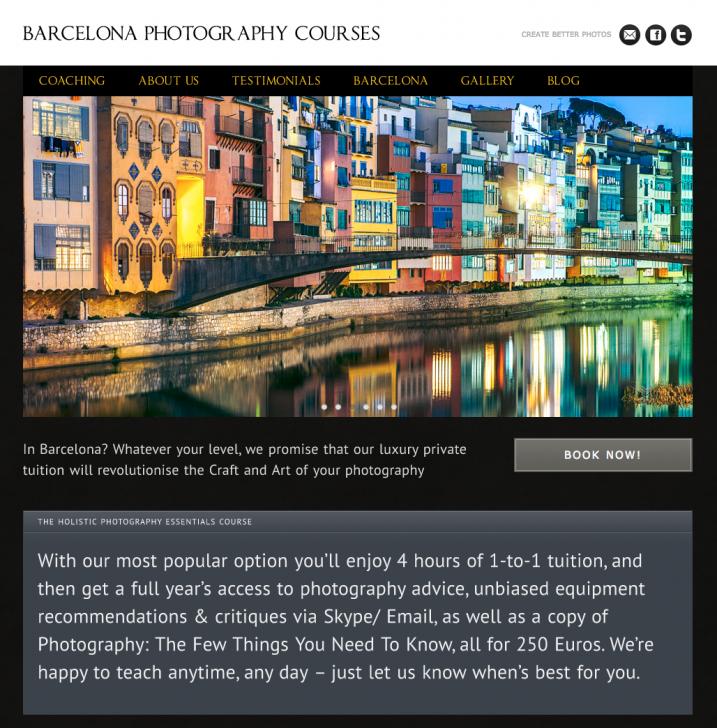
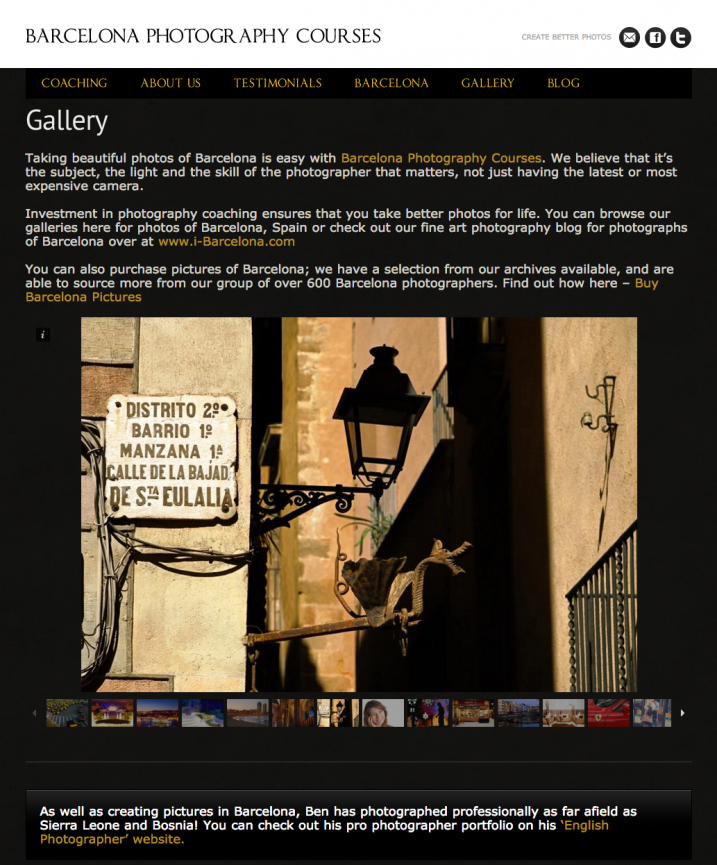
    MySiteMyWay’s InFocus Theme – (Paid theme) I’ve used MySiteMyWay’s themes for several websites. As well as the design, I’ve been incredibly happy with the ongoing support, which has saved me a huge amount of time, and allowed me to do things I wouldn’t otherwise have been able to do.

    Screen Shot 2016-01-30 at 1.22.01 PM

    Home page

    Screen Shot 2016-01-30 at 1.22.31 PM

    Gallery page

    The X Theme – (Paid option) It’s a silly name, but this Premium WordPress theme looks good, and they have done very well with updating it. There is a lot of features available here for more advanced internet users and web designers.

    Screen Shot 2016-01-30 at 1.28.18 PM

    Themeforest – (Free and paid options) Themeforest is the marketplace for WordPress themes online. Because they are constantly being released and updated, and because creating a website can be quite a personal choice, it is worth having a look here to see which themes are currently rated highly.

    Designers

    It can be helpful to hire a designer/ coder to help you with creating your photography website.

    • Fiverr – This is my go-to site for getting help with websites and so on. It’s cheap, fast, and so far I’ve been very happy with the results.
    • Elance – More professional than Fiverr; expect to pay more as well.

    Pay monthly for a photography website

    If designing a site isn’t for you, there are quite a few companies that can help. I don’t use these options personally because I like being able to move my website to another hosting provider if I want, or archive a site and bring it back later.

    • Smugmug – An established player that will allow you to show, share and sell your photos.
    • SquareSpace – The choice of many top professionals, although caveat emptor, several are sponsored. It’s quite pricey, but the designs it offers for photographers really look incredible, and it’s the easiest way to get a good looking photography website online quickly and easily.

    Some bonus photography related companies

    While we’re on the subject, here are a few companies that are very useful for photographers.

    • WeTransfer – Ideal for sending large files or even whole photoshoots. Their free option is excellent, and the paid version is great for photographers who want more options.
    • Dropbox – Very well integrated, and a great way to back up your photos online.
    • Google Drive – Again, an excellent option to save and send photos.
    • PicSurge.com – I use this a lot. It’s a well-designed site that allows you to show photos in good looking galleries that remain live for years. It lets you password-protect your images, and allows clients/family/friends to download files individually or collectively – and it’s free!

    Conclusion

    So those are some of the main options to consider if you want to make a photography website in 2016, and some reasons why you might want to consider doing so if you haven’t already. Hopefully this has been useful – please feel free to share your own websites in the comments below!


    Editor’s note: please see this page for website resources, personally recommended by dPS founder and chief, Darren Rowse, over on his other site dedicated to blogging – ProBlogger. If you’re really interested in blogging you may wish to sign up there to get free weekly blogging tips.

    googletag.cmd.push(function() {
    tablet_slots.push( googletag.defineSlot( “/1005424/_dPSv4_tab-all-article-bottom_(300×250)”, [300, 250], “pb-ad-78623” ).addService( googletag.pubads() ) ); } );

    googletag.cmd.push(function() {
    mobile_slots.push( googletag.defineSlot( “/1005424/_dPSv4_mob-all-article-bottom_(300×250)”, [300, 250], “pb-ad-78158” ).addService( googletag.pubads() ) ); } );

    The post List of Resources for Making a Photography Website by Ben Evans appeared first on Digital Photography School.

    Digital Photography School

  • How to Add a Texture Overlay to Your Images for a Stunning Effect

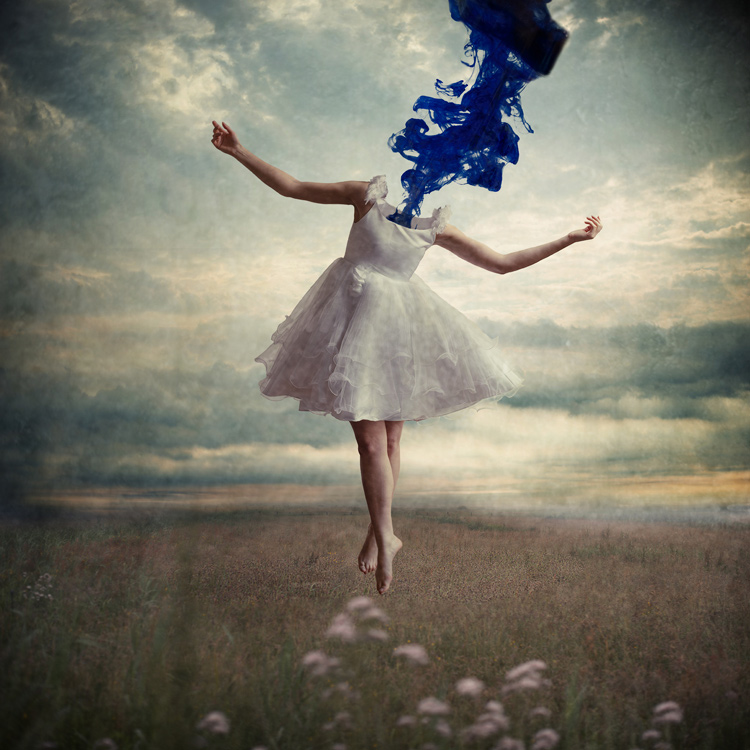
    Adding a texture overlay to your images is an amazing creative tool. It adds another dimension of depth in the image; it makes it dreamy and adds a painting flavor. It also creates a timeless feeling, especially useful when you want to give a vintage look to your pictures.

    You will really love this effect, it can be used in your personal work, and also sometimes in your commissioned work when you have some creative freedom over the result.

    Adding a texture overlay is very easy. In this article I will explain how to create your own textures, then how to edit them to have infinite creative possibilities.

    05 texture 100 percent

    First – shoot your own textures

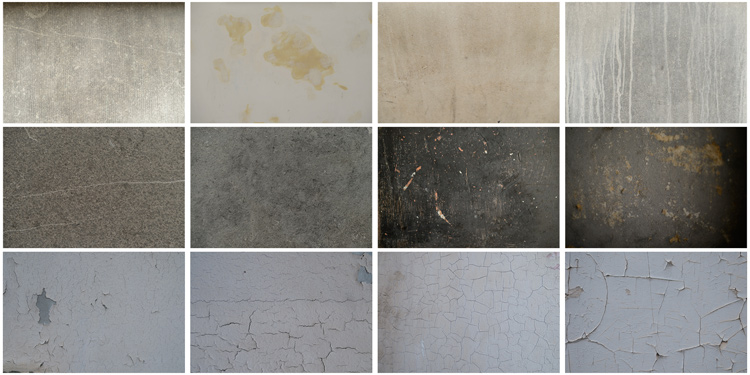
    You can find many free textures online, for example on Deviant Art, or on any stock photo website. This is east, and sometimes helpful, although you can have copyright issues. The textures you will find online for free, are not always at high resolution. You will mainly find small files, not always the best to work with. But, I must say that so far I have never had any issues regarding textures size, even when printing my work in large format.

    Shooting your own textures can be very fun, and a great creative exercise. Okay sometimes you will feel weird because people will not understand what you are shooting down on the pavement, nor they will see the point in photographing an old and dirty rain gutter. But it is well worth it.

    It is very easy to find great textures around you and build you own texture stock. You only have to take a walk with your camera to find textures. Look for some old painting on the walls, wood on the doors, or any bench in the street. You can also find metal objects with great texture and colors. You are looking for whatever has scratches, and can add an organic and natural feeling to your work. You can use stones, such as marble or granite, but also canvas or any other fabric with a nice texture as well.

    01 textures

    When shooting your texture, pay attention to your exposure compensation, as you want to have a contrasty, image to get more difference between the darks and lights. Also, you want to make sure everything is more or less sharp, so pay attention to your focus, depth of field, and angle from which you are shooting. This way the texture will be more homogeneous on your final image (and as you will see later in this same article you can adjust the texture in many ways).

    To help you start your own textures library, you can find a link to download some textures you can use for free at the bottom of this article. I found many good textures for free online, so it is my way to pay forward this kind of generosity I found among photographers.

    You can create your own textures at home

    In Brussels it is freezing cold and rainy during the winter, so maybe you are the same as me, you do not want to go outside.

    03 blue tale 01 no texture

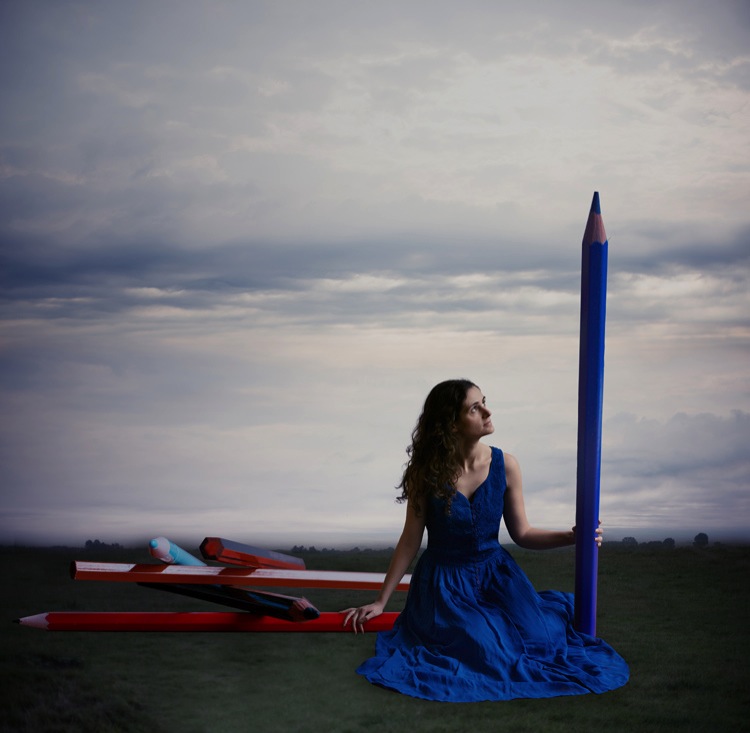
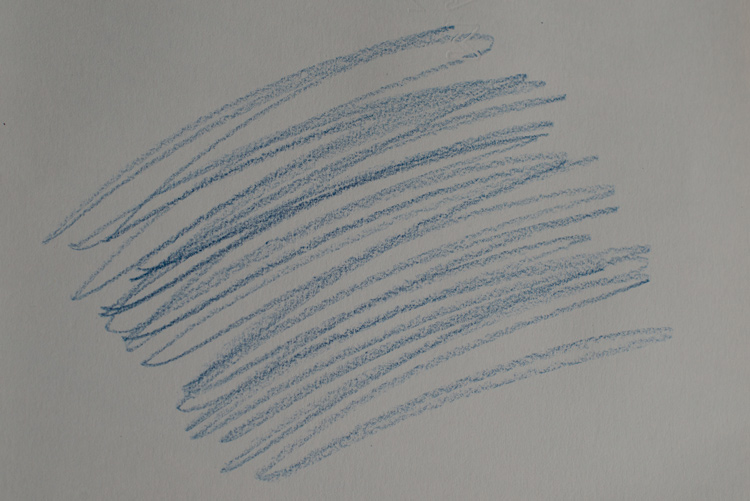
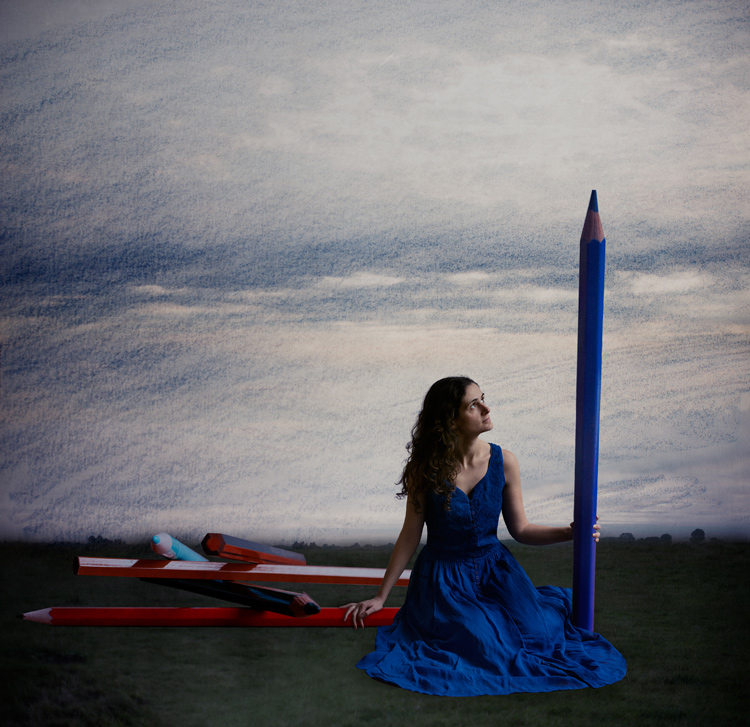
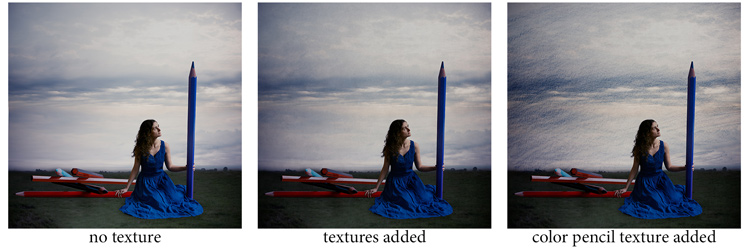
    When you look for a specific effect you can make your own specific textures. For example, in the picture A Blue Tale (above) I wanted to play with a pencil color effect. Therefore I created the following texture to be added to the clouds.

    I simply colored a piece of paper with a blue pencil crayong to have those lines and a texture effect. In this case, the preparation of the texture is fully part of the creative process, to put all those details together to create the image.

    02 color pencil texture

    03 blue tale 03 color pencil texture added

    03 blue tale textures

    You can also play with paper, painting, burn some paper (although I recommend being very careful).

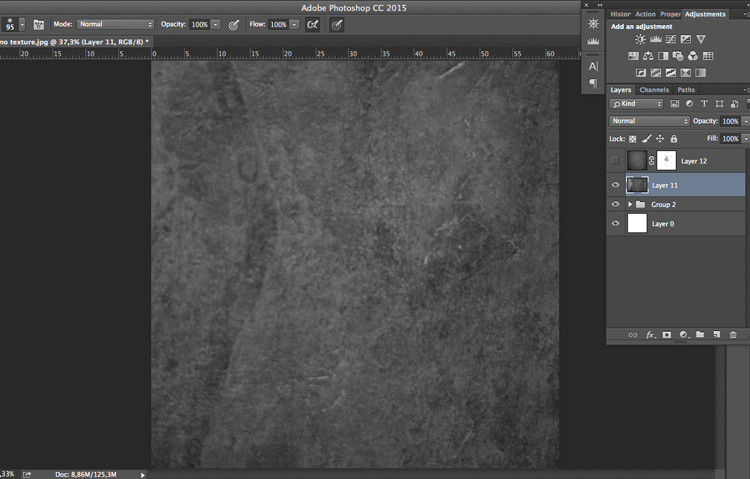
    Now that you have your textures ready to be used, let’s open them in Photoshop. You can also use the ones that I shot for you down my street. To add a texture you can simply grab your moving tool and drag and drop it on your picture – or by doing copy/paste on your image.

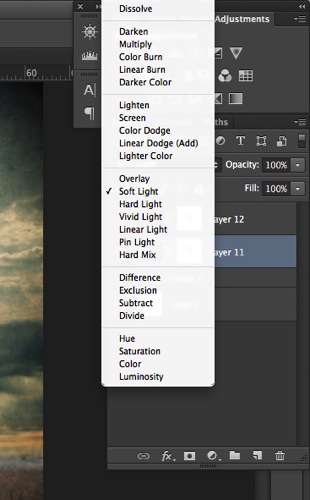
    Play with the Blend Modes

    You can change the Blend Mode to change the look. When you add a texture to your image it will first look as follows, you see only the image of the texture on top of your image.

    04 texture normal 100 percent

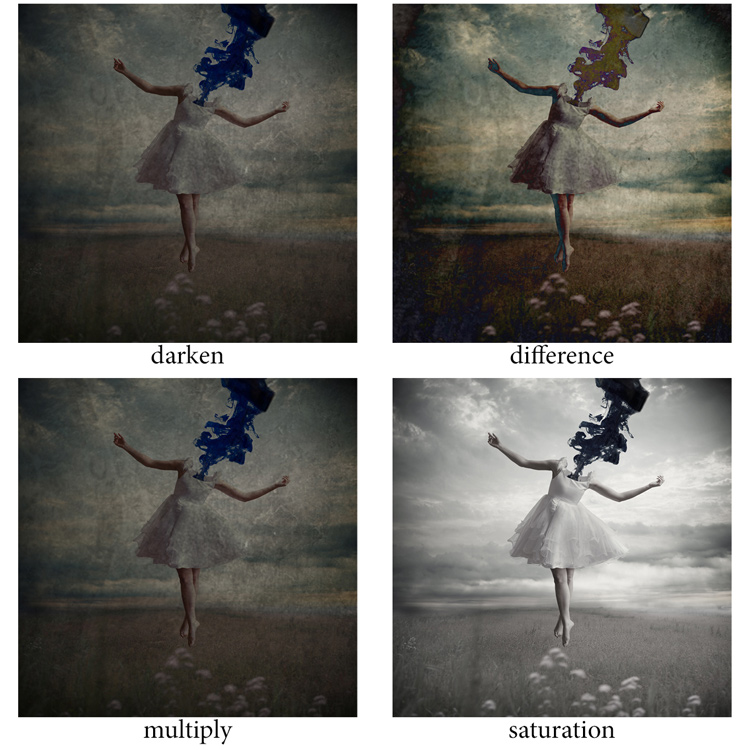
    Play around with all the options Photoshop offers. Some texture/image combinations it will look weird, and others will look amazing.

    Select your texture and hold down the Shift button, and + or –, to change quickly Blend Modes to go through them one by one, and test on your image. It allows you to see what every single Blend Mode will do to your texture – great way to quickly learn which one you like best.

    • The darkening group will help you to get rid of all light tones.
    • The lightening group will allow you to get rid of your darks.

    04 Blend Modes panel

    Most of the time, I choose the Soft Light Blend Mode – but you can choose any option, depending on your taste and the sought-after effect.

    04 Blend Modes

    Modify your texture

    Move and resize the texture layer. Grab your Move Tool to place the texture as you wish on the image. Use Cmd/Ctrl+T to activate the Free Transform Tool and resize the texture layer, or flip it, to adjust it to the underlying picture.

    You can add a Levels Adjustment with Cmd/Ctrl+L, to add some more detail contrast in your texture. You can also adjust the color. Usually I add the color in my image and prefer a desaturated texture. Hit Cmd/Ctrl+U to play with its color – if you want to desaturate it or change the color tones.

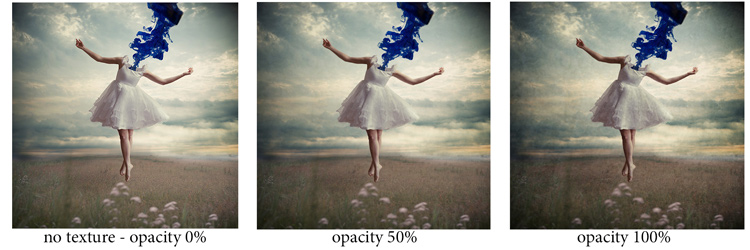
    Play with the layer opacity

    Turn down the opacity to see what best suits the chosen texture and image, in this case we’ll turn it down to 82%. Once you have found the right opacity you can always go back and change it whenever you want.

    05 opacity

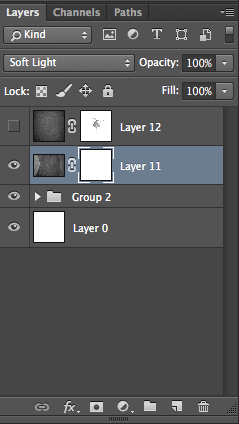
    Add a layer mask on the texture layer

    Applying texture over the whole image is great to give an artistic feel when the person is far away or it’s applied on a landscape. But, usually you want to avoid strong texture on your main character, especially if it is a close-up portrait, so you will want to soften the texture, or to erase it completely on areas such as the skin and eyes.

    06 add layer mask

    Add a layer mask on the texture layer and paint in black, playing with your brush opacity, size, and hardness to erase the texture where you want. Paint white your layer mask with a very soft edge brush, and low opacity, to bring back some texture on the subject edges to blend it with the background.

    05 texture 100 percent

    Add some more textures

    You can lower the opacity of your textures and add as many of them as you whish to get the visual affect you want. If you want to see the full edit of this picture you can have a look at my speed editing video below:

    I hope you will now want to add texture overlays to some of your work, or at least give it a try. It’s a great technical and creative exercise.

    You can start with the free textures I prepared for you (click here to download them), and with some time start to shoot your own. Feel free to share the results or your technique in the comments below.

    Editor’s note: if you have questions or issues downloading the textures, please contact Amelie on her site as they are not being hosted here on dPS so we cannot sort that for you. Thank you.

    googletag.cmd.push(function() {
    tablet_slots.push( googletag.defineSlot( “/1005424/_dPSv4_tab-all-article-bottom_(300×250)”, [300, 250], “pb-ad-78623” ).addService( googletag.pubads() ) ); } );

    googletag.cmd.push(function() {
    mobile_slots.push( googletag.defineSlot( “/1005424/_dPSv4_mob-all-article-bottom_(300×250)”, [300, 250], “pb-ad-78158” ).addService( googletag.pubads() ) ); } );

    The post How to Add a Texture Overlay to Your Images for a Stunning Effect by Amélie Berton appeared first on Digital Photography School.


    Digital Photography School

  • 4 Steps to Creating Images With More Meaningful Composition

    If you wonder what composition really means, it is basically what elements you choose to put in a photograph, and where you decide to place them in the frame.

    Vickie-Lewis-MtHood

    When composing a photograph you need to consider several things:

    1. What is the story you are trying to tell? In other words, what do you want the viewer to see or feel when they look at your photograph?
    2. What’s your center of interest or focal point?
    3. What elements will most support that story?
    4. How can you maximize those elements?

    Let’s consider each of those points individually.

    1- What is the story you are trying to tell?

    In other words, what do you want your viewer to know or experience when they see the photograph?

    Some ideas if you are photographing your children:

    • You might want the viewers to see how cute they are.
    • You might want the viewers to see how smart they are.
    • You might want the viewers to see how much they love their sibling or new puppy.

    Each of those ideas will impact how you choose to compose the picture. In the first example, you might choose to dress your daughter with a pink bow and sit her on her princess bed. If you want to show how smart your child is, you may decide to photograph them winning a spelling bee, or playing with test tubes. Of course, if the story is the new relationship with their puppy, you want to capture that moment of them hugging the puppy, or the puppy licking their face.

    Lake-Vickie-Lewis-Photography-for-dps

    Here’s another example shooting landscapes. Let’s say you want to take a photograph of a beautiful lake in a park, in the middle of a city. What’s the story you want to tell? What’s the experience you want your reader to have when they see your photo?

    Here are some ideas:

    • You can isolate the lake and shoot it in such a way that it looks as though it is in the middle of nowhere.
    • You could shoot the lake with the cityscape in the background to show it as a haven in the middle of a grimy city.
    • You could show the restful, or quiet feeling, of the lake by just focusing on an empty park bench, or the reflection of a tree in the water.

    grass by edge of lake Vickie Lewis Photography for dps

    In every situation, there are many different stories and compositions. Knowing what the story is, and what you want to say, is the first step in composing a photograph. You can start to see how your intention with the photograph becomes important in composing a photograph.

    2 – Choosing a focal point

    With that in mind, the next step you want to think about is what is your center of interest or focal point? In other words, what is the one element you want your viewer to see first? What ONE element do you want to stand out?

    If you are photographing your children, that’s pretty simple, you want your child to stand out. We’ll talk about some strategies to do that in a minute, but first let’s look at our other examples.

    If you see a lake that you are drawn to, first ask yourself the story, then ask yourself what one element can be the subject? Is it a tree or rock in the lake? Is it a house on the lake? Is it the moon rising above the lake? Is it the grass growing on the edge of the lake?

    Drop-by-Vickie-Lewis

    3 – What elements support the story?

    As you view the scene, ask yourself, “What elements support the story I’m telling?” As you look through the viewfinder, move your eye around the outside frame of the photo, then look inside that frame and ask yourself if there is anything in the photo that doesn’t belong there.

    For example when you are taking a photograph of your child, you ask yourself if you need the dining room table in the background? Do you need your car in the background? What’s important? What elements add to the subject and which distract?

    4 – How can you maximize those elements?

    In the next section, we’ll look at examples and talk about ways you can clean up your photographs in two simple ways.

    1 Lighthouse snapshopt Vickie Lewis Photography for dps

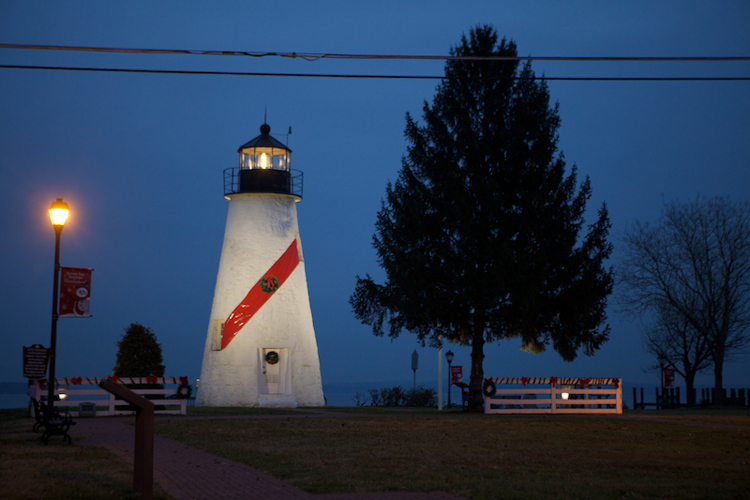
    Above is a photo of a lighthouse. It’s a very pretty scene, but it’s filled with elements that don’t really help the composition. There are elements, including a wire overhead and an information stand in the front, that don’t add anything to the feel of the place.

    2 Lighthouse Vickie Lewis Photography for dps

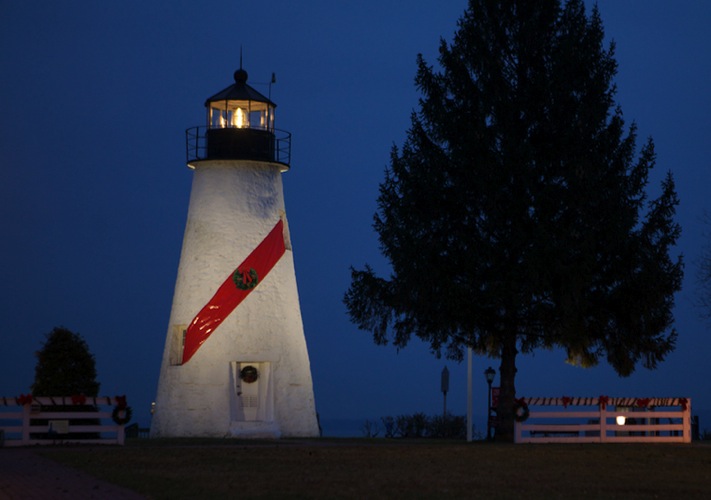
    This is better. The first shot was taken with a wider angle lens. In this shot, I took a few steps to the right, and zoomed in a little bit. Zooming in not only eliminates some of the foreground, it changes the perspective. Can you see how the image feels more compressed? Also, the wires were not magically Photoshopped out of the picture, I chose to eliminate the top of the tree from the frame.

    3 Lighthouse Vickie Lewis Photography for dps

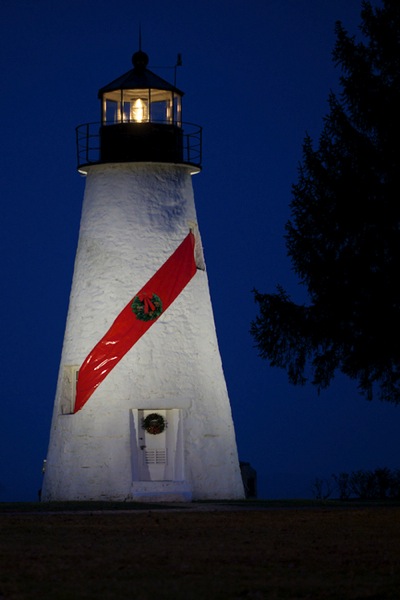
    Here’s yet another different perspective. For the shot above, I used an even longer lens, and moved more to the right. The most important element to me, the story, is the lighthouse. The dark tree nicely frames it, and adds perspective. This photo, compared to the first, is much cleaner.

    Now, I could have chosen to get closer with the wide angle lens, but the light house would start to lean, and it would have emphasized the power lines.

    Different angles can also help clean up backgrounds, so you ask yourself:

    • Would taking a step or two in a different direction get rid of some distractions?
    • Would getting a little bit higher or lower help the composition?
    • Would changing the focal length help with the composition?

    1 Foggy Shack vickie lewis for dps

    2 Foggy Shack Vickie Lewis for dps

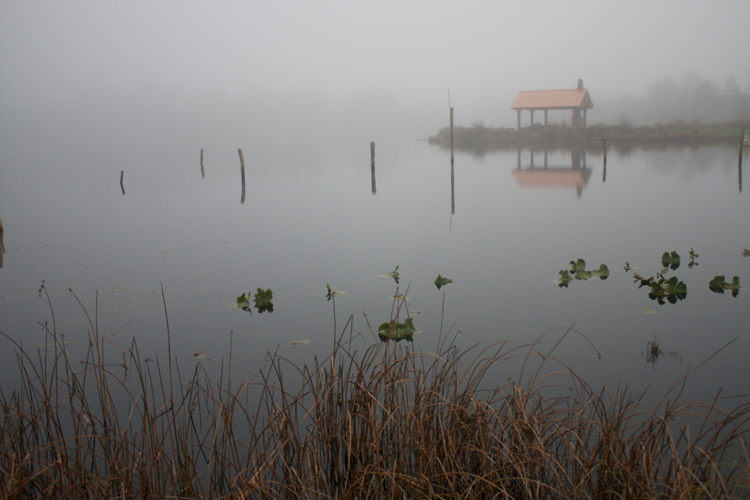
    Here’s a great scene of a foggy shack on a lake. It’s next to a very busy highway, so I chose an angle from which you can’t see any cars. In the first example, the emphasis is on the grass. I used a wider lens and looked for a patch of grass for the foreground that made a nice pattern. The grass leads the viewer into the photograph. The shack seems further away.

    In the second image, I chose to focus just on the reflection and the quietness of the scene. I found an angle from which I could shoot with no grass. My focus changed, the feeling also changed. Which one do you like better?

    1 Nehalem River Vickie Lewis for dps

    Here’s a beautiful scene with lots of potential. But your eye really has no place to go. There isn’t a strong sense of interest. The story is one of serenity and a great place to go fishing.

    2 Nehalem River Vickie Lewis for dps

    To improve the composition, I waited until some fishermen popped into the right place. In the second photo, can you see how your eye has a place to go? It’s immediately drawn to the fishermen in the red boat.

    You can greatly dramatically improve the composition in your photographs by framing a photo and waiting for the right elements to come together.

    So now, moving forward with your photography, you have some great ideas to work with:

    • Consider what story you are telling with your photographs.
    • Make sure you have a center of interest.
    • Decide what elements support the story.
    • Maximize the elements by changing position and focal length.

    googletag.cmd.push(function() {
    tablet_slots.push( googletag.defineSlot( “/1005424/_dPSv4_tab-all-article-bottom_(300×250)”, [300, 250], “pb-ad-78623” ).addService( googletag.pubads() ) ); } );

    googletag.cmd.push(function() {
    mobile_slots.push( googletag.defineSlot( “/1005424/_dPSv4_mob-all-article-bottom_(300×250)”, [300, 250], “pb-ad-78158” ).addService( googletag.pubads() ) ); } );

    The post 4 Steps to Creating Images With More Meaningful Composition by Vickie Lewis appeared first on Digital Photography School.

    Digital Photography School

  • Weekly Photography Challenge – Warm Fuzzies

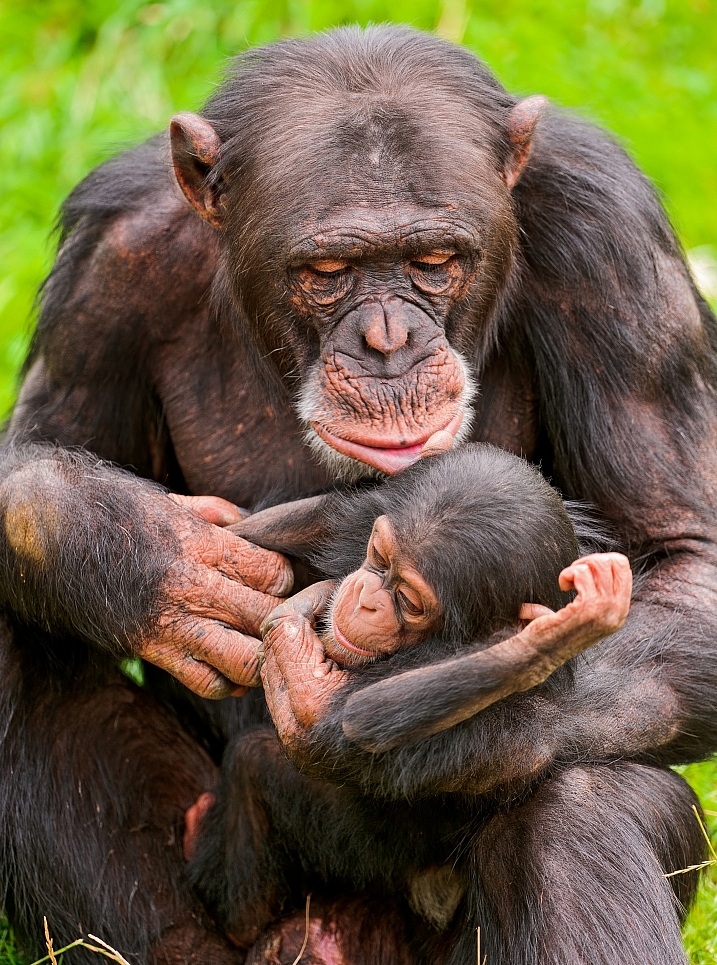
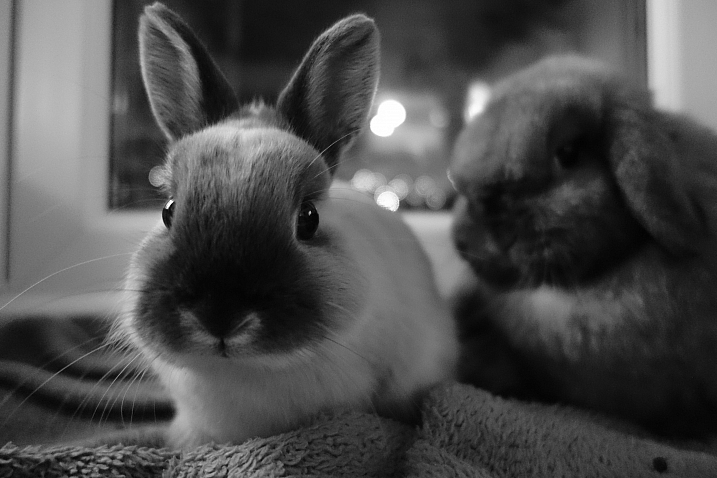
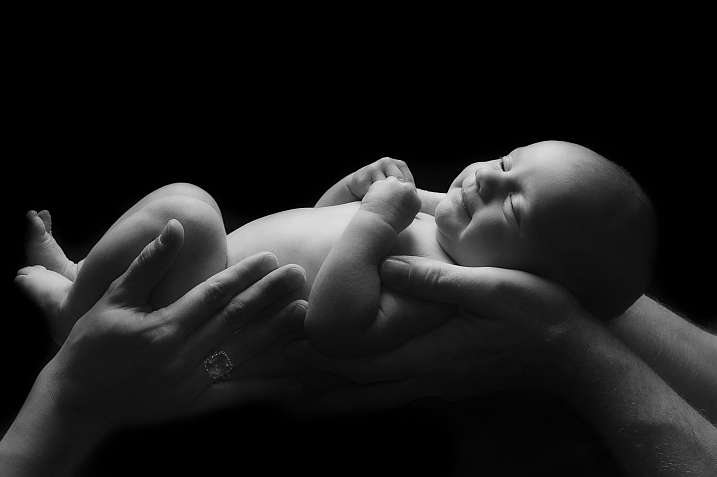
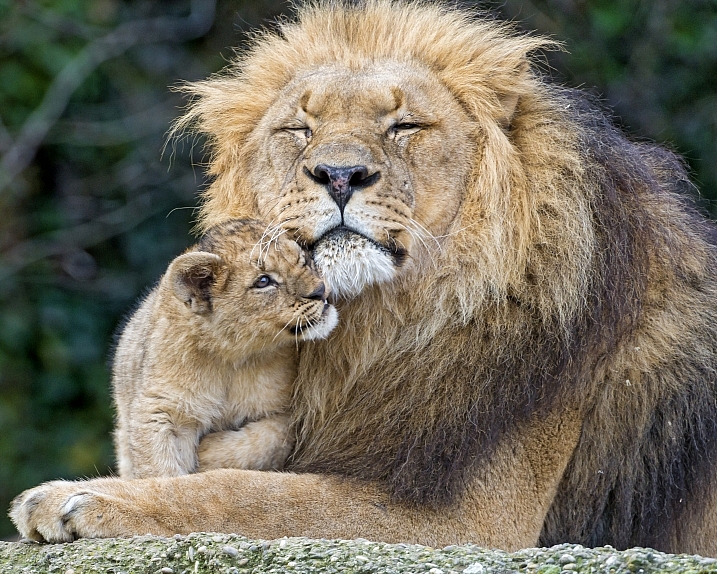
    Earlier today I shared a collection of images that represent cuddly.

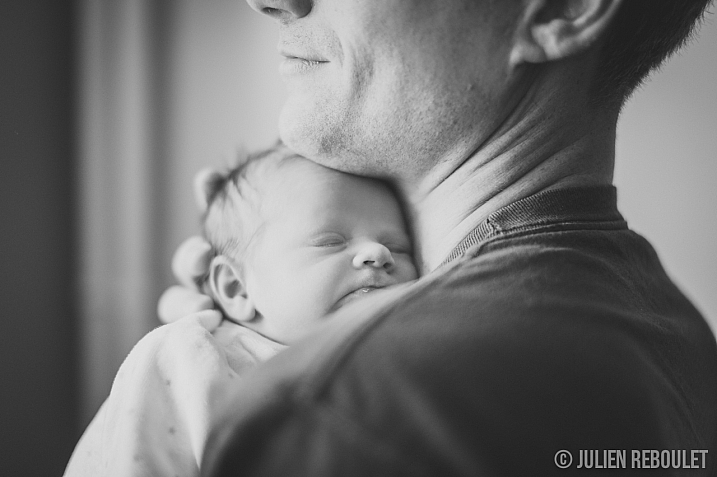
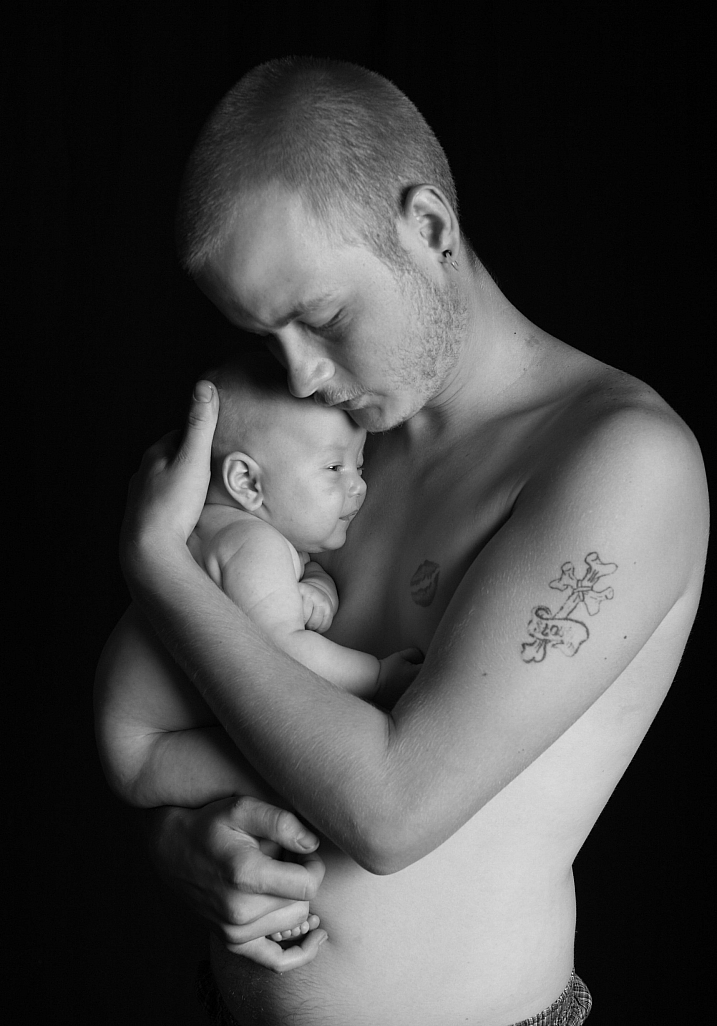
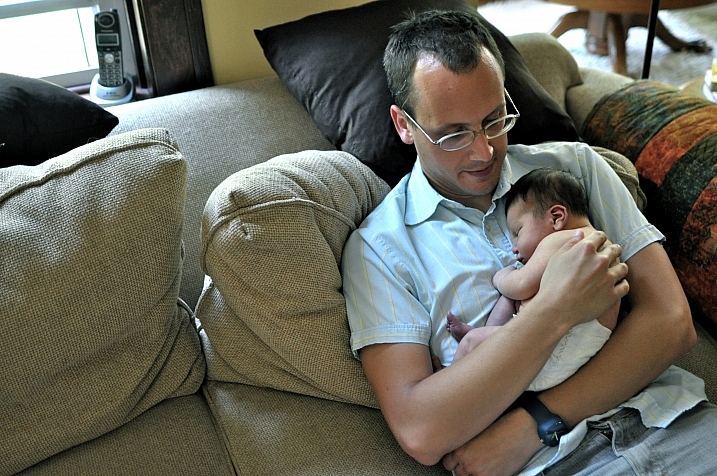
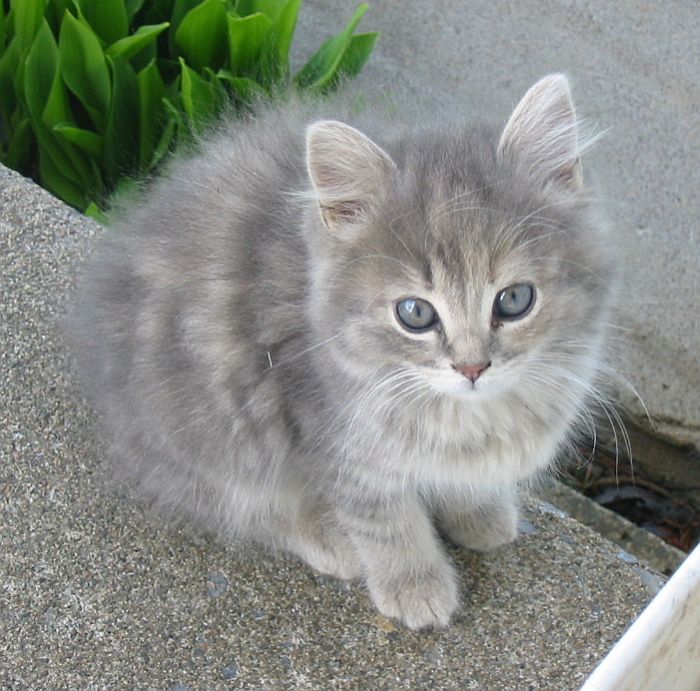
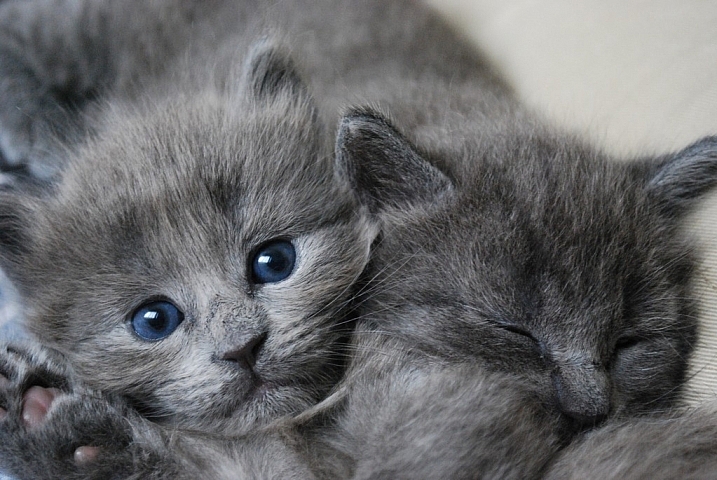
    A good hug, a snuggly puppy or kitten, a father with his newborn son – all things that give us warm fuzzies inside.

    Wei-Hang Chua

    By Wei-Hang Chua

    Weekly photography challenge – warm fuzzies

    So your challenge this week is, you guessed it, photograph something that either is warm and fuzzy, or gives you that feeling. So that could be many different things:

    • Your bedroom slippers
    • A favorite sweater
    • A pet
    • Parent and baby
    • Kids hugging
    • Someone doing a good deed

    You get the idea.

    Etolane

    By Etolane

    Gloson Teh

    By Gloson Teh

    Richard Walker

    By Richard Walker

    Thomas Hawk

    By Thomas Hawk

    Bunches And Bits {Karina}

    By Bunches and Bits {Karina}

    Phil Dolby

    By Phil Dolby

    Kate

    By Kate

    Flickpicpete (Thanks For 1 Million  Views)

    By Flickpicpete (Thanks for 1 million+ views)

    Share your images below:

    Simply upload your shot into the comment field (look for the little camera icon in the Disqus comments section) and they’ll get embedded for us all to see or if you’d prefer upload them to your favourite photo sharing site and leave the link to them. Show me your best images in this week’s challenge. Sometimes it takes a while for an image to appear so be patient and try not to post the same image twice.

    googletag.cmd.push(function() {
    tablet_slots.push( googletag.defineSlot( “/1005424/_dPSv4_tab-all-article-bottom_(300×250)”, [300, 250], “pb-ad-78623” ).addService( googletag.pubads() ) ); } );

    googletag.cmd.push(function() {
    mobile_slots.push( googletag.defineSlot( “/1005424/_dPSv4_mob-all-article-bottom_(300×250)”, [300, 250], “pb-ad-78158” ).addService( googletag.pubads() ) ); } );

    The post Weekly Photography Challenge – Warm Fuzzies by Darlene Hildebrandt appeared first on Digital Photography School.


    Digital Photography School

  • 24 Cuddly Images That Make You Say Awww

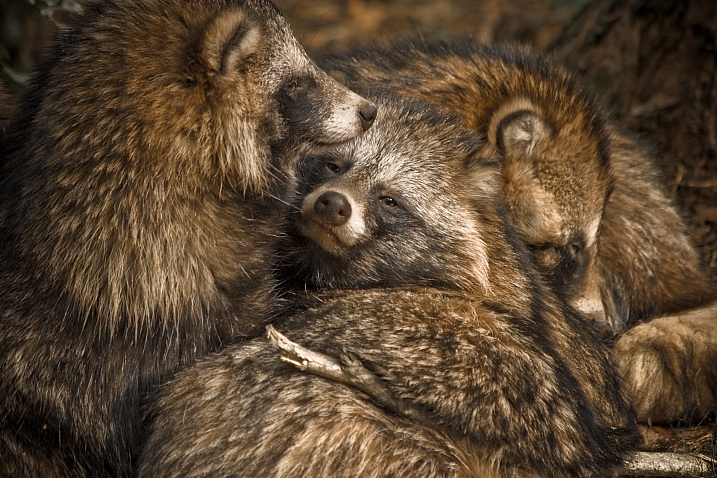
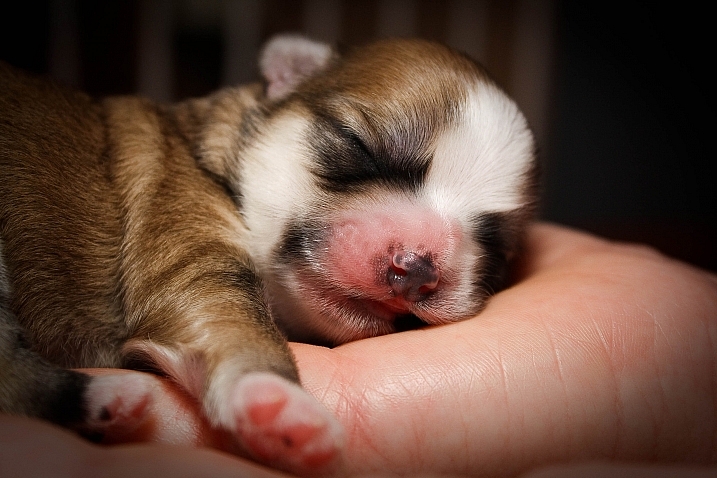
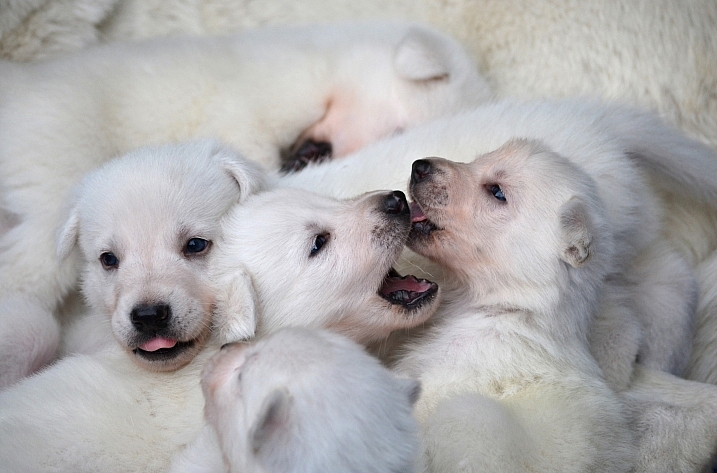
    Who doesn’t love a good warm and fuzzy image? All things fuzzy and cuddly that make the heart thump and make us feel good.

    These photographers captured the essence of cuddly with their images:

    Marji Beach

    By Marji Beach

    Scott Wills

    By Scott Wills

    Jürgen Schiller García

    By Jürgen Schiller García

    Julien REBOULET

    By Julien REBOULET

    Jonathan Kriz

    By Jonathan Kriz

    Wsilver

    By wsilver

    Jan Truter

    By Jan Truter

    Tambako The Jaguar

    By Tambako The Jaguar

    Snugg LePup

    By Snugg LePup

    Mark Philpott

    By Mark Philpott

    Chris Fifield-Smith

    By Chris Fifield-Smith

    Barry Rayburn

    By Barry Rayburn

    Fivehanks

    By fivehanks

    Tambako The Jaguar

    By Tambako The Jaguar

    Ray Dumas

    By Ray Dumas

    Sandor Weisz

    By Sandor Weisz

    Franziska Geiser

    By Franziska Geiser

    Lou Bueno

    By Lou Bueno

    Kathleen

    By Kathleen & Ryan Rush

    Björn Láczay

    By Björn Láczay

    Rachel

    By Rachel

    Luke Jones

    By Luke Jones

    FancyLady

    By FancyLady

    Nathan Rupert

    By Nathan Rupert

    googletag.cmd.push(function() {
    tablet_slots.push( googletag.defineSlot( “/1005424/_dPSv4_tab-all-article-bottom_(300×250)”, [300, 250], “pb-ad-78623” ).addService( googletag.pubads() ) ); } );

    googletag.cmd.push(function() {
    mobile_slots.push( googletag.defineSlot( “/1005424/_dPSv4_mob-all-article-bottom_(300×250)”, [300, 250], “pb-ad-78158” ).addService( googletag.pubads() ) ); } );

    The post 24 Cuddly Images That Make You Say Awww by Darlene Hildebrandt appeared first on Digital Photography School.

    Digital Photography School