Category: Photography

  • Why is Monitor Calibration Important and How to do it

    Why you need to calibrate your monitor

    If there one thing that’s certain about photos on the internet, it’s that nobody is seeing exactly the same thing as you. In general, most screens are too bright, and have whatever default color the monitor happens to ship with. Some are great, others not so much. As the monitor gets older, these colors change too. It’s more of an issue with older bulb light monitors, and less so with LED, but still these colors change over time.

    There’s also the matter of print matching. If you’ve ever printed (you’re missing out if you haven’t), and been dissatisfied with the print, it could be that your screen is fooling you when you’re editing.

    There is a way to get your screen to a known standard, and doing this means that you know you have good representative color and brightness on your screen, and that you’ve made a step toward better prints. This is screen or monitor calibration.

    Calibrating your screen 01

    What is monitor calibration?

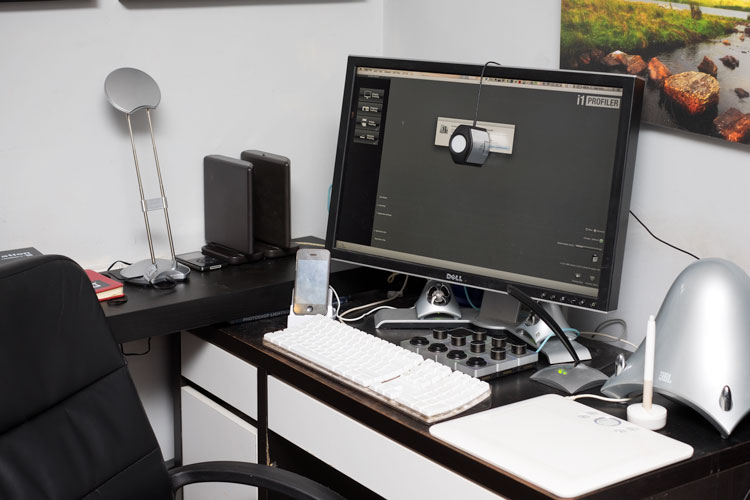
    To calibrate your screen, you need a puck-like device that sits on your screen, and measures the color being displayed. This is called a spectrophotometer. It’s just a name for what it does: photo = light, spectro = from spectrum meaning a range of colors, and meter = to measure. So it measures the light color. Don’t worry, you don’t need to buy one of these specifically, and match software to it, they come as kits, with the required software bundled with it.

    What do you need to do it?

    Some examples of the screen calibration kits include the X-Rite i1 Display Pro (which is what I have), the Spyder Pro, and the Color Munki. The process for each is similar and pretty straightforward. First you install the software, and run it. Next you attach the device. Initially you have to decide the settings, but the correct ones are usually suggested. Usually these are 120cd/m2 or less in brightness, D65 or Native for Illuminant and 2.2 for Gamma. At the start you may need to set the monitor brightness and contrast via the monitors own menu. Finally you just let the software run and it will create a profile automatically at the end. One thing that’s critical is that you need to have your monitor on for a while before starting the calibration. It takes up to 30 minutes for the monitor to settle.

    How do you do monitor calibration?

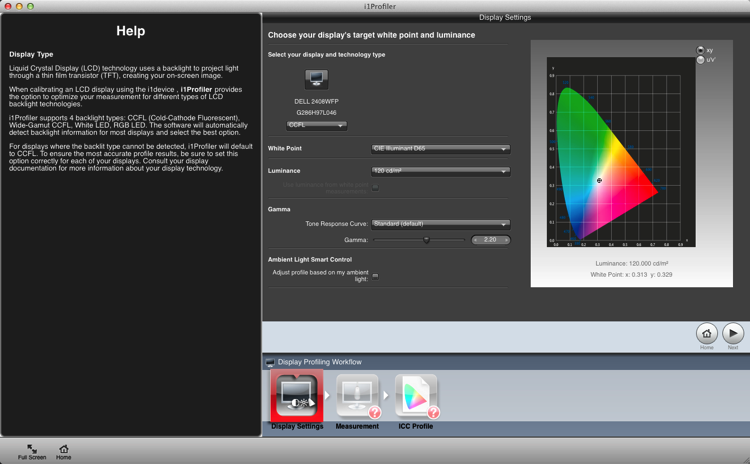
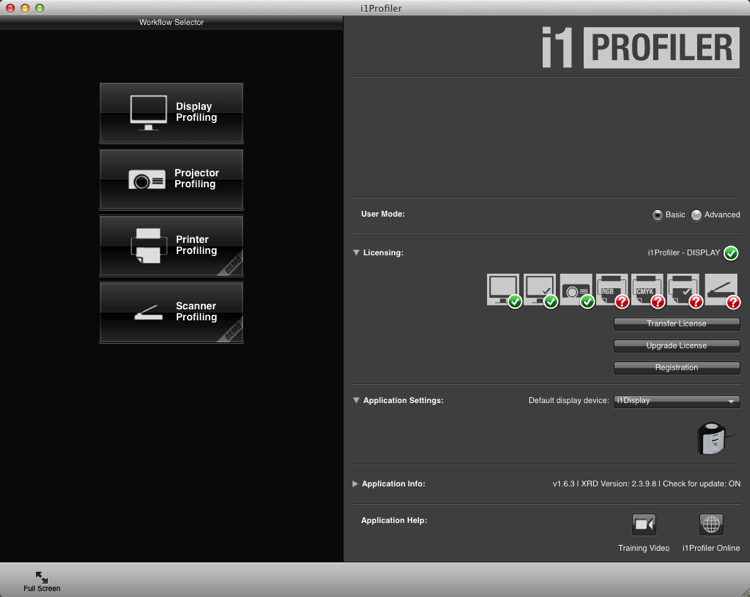
    Let’s look at this using the software supplied with the i1DisplayPro, i1 Profiler. Here’s the screen you see at the start (after registering the product).

    Calibrating your screen 02

    Click on Display Profiling to begin. The software detects your screen type automatically and applies recommended defaults for the screen. Press Next (below).

    Calibrating your screen 03

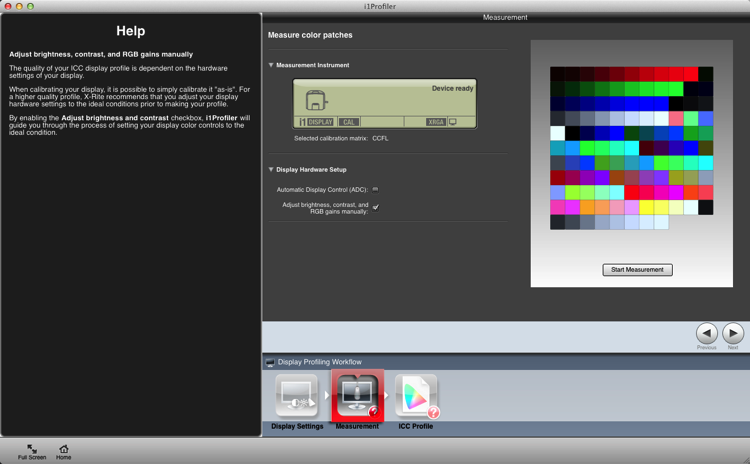
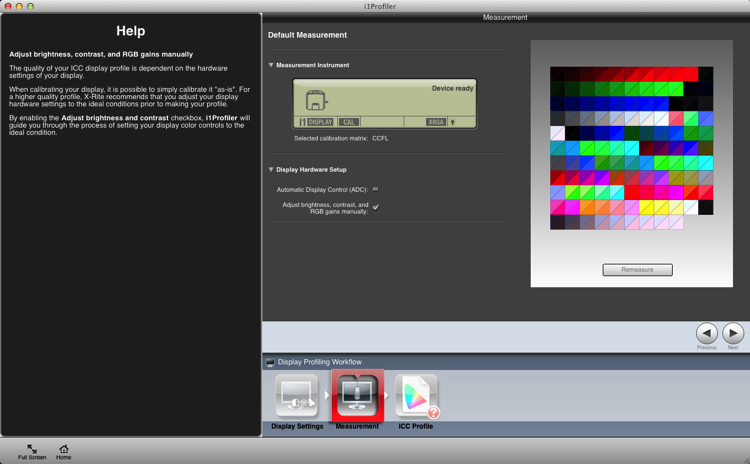
    You’re on to the Measurement screen now (below). Choose the manual option for the screen brightness and contrast. The color tiles you see on the right are the colors that will flash on the screen as the calibration runs. Click the Next button to begin.

    Calibrating your screen 04

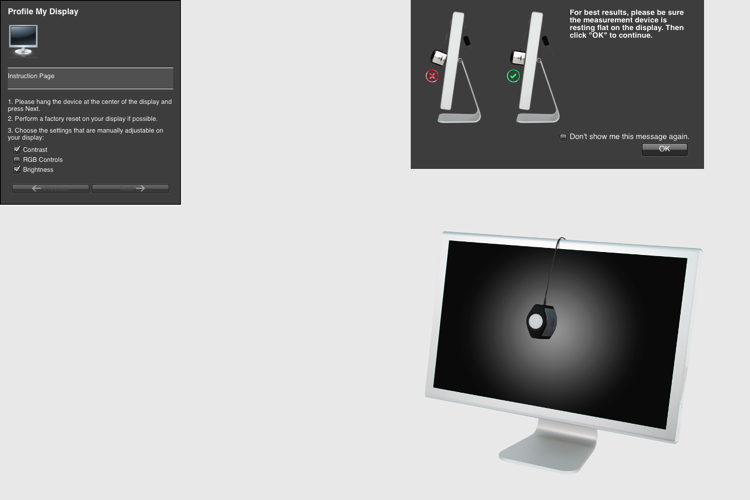
    The next figure below, is a cropped version of the screen you will see. Place the device on the screen as instructed. Press ‘Ok’ to continue.

    Calibrating your screen puck position

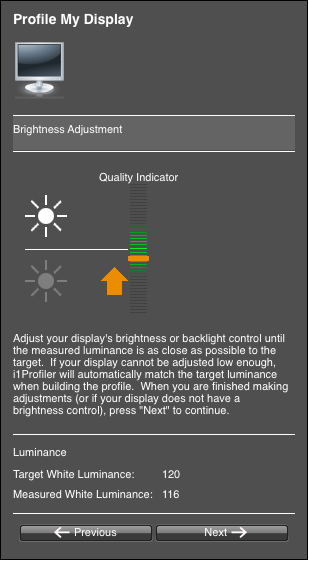
    Use the controls on you monitor to get the correct brightness settings (see below) for the profile. Click Next when it’s correct. The screen will cycle through the series of colors seen as tiles back further. As each tile displays, the entire screen changes to that color. This takes about two minutes.

    Calibrating your screen 06

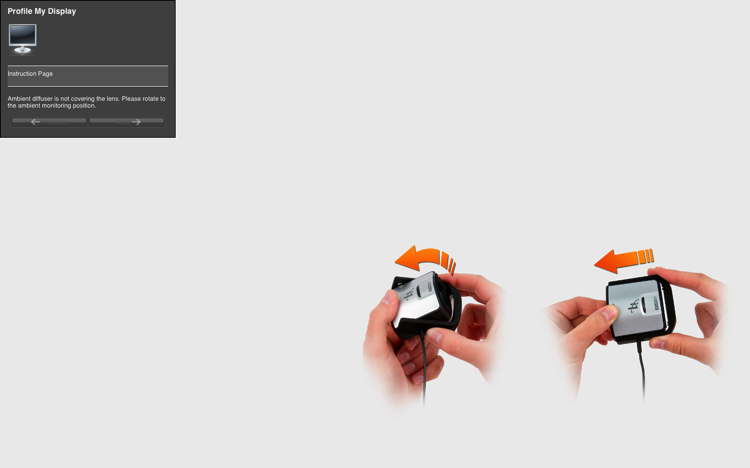
    Take the device off and set it for ambient light, even if you don’t use this function.

    Calibrating your screen 07

    The tiles now show a before and after view of the color changes from the profile. Click next.

    Calibrating your screen 08

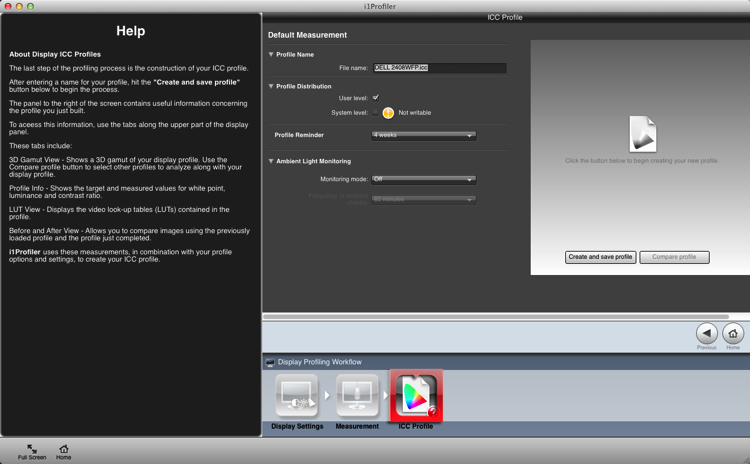
    Click Create and Save Profile to make a new monitor profile.

    Calibrating your screen 09

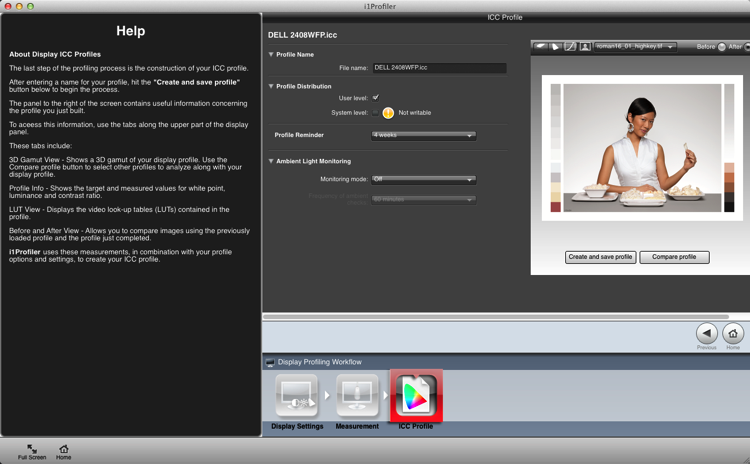
    Once the profile is made, you can do a comparison using the test charts in the screen.

    Calibrating your screen 10

    Summary and questions

    That’s it. You’re done. Lightroom, Photoshop and color managed browsers like Safari will use this profile when you view images, allowing you to edit and process images with the best color rendition. Ideally you should do this calibration no less than once a month for best color. You’ve also taken your first steps into color management without knowing it; probably the most important.

    Do you have any questions about this process? Have you tried it? Had any difficulties? If you use a similar device which one, and have you had good success with it? Please share in the comments below.

    googletag.cmd.push(function() {
    tablet_slots.push( googletag.defineSlot( “/1005424/_dPSv4_tab-all-article-bottom_(300×250)”, [300, 250], “pb-ad-78623” ).addService( googletag.pubads() ) ); } );

    googletag.cmd.push(function() {
    mobile_slots.push( googletag.defineSlot( “/1005424/_dPSv4_mob-all-article-bottom_(300×250)”, [300, 250], “pb-ad-78158” ).addService( googletag.pubads() ) ); } );

    The post Why is Monitor Calibration Important and How to do it by Sean McCormack appeared first on Digital Photography School.


    Digital Photography School

  • Weekly Photography Challenge – Time

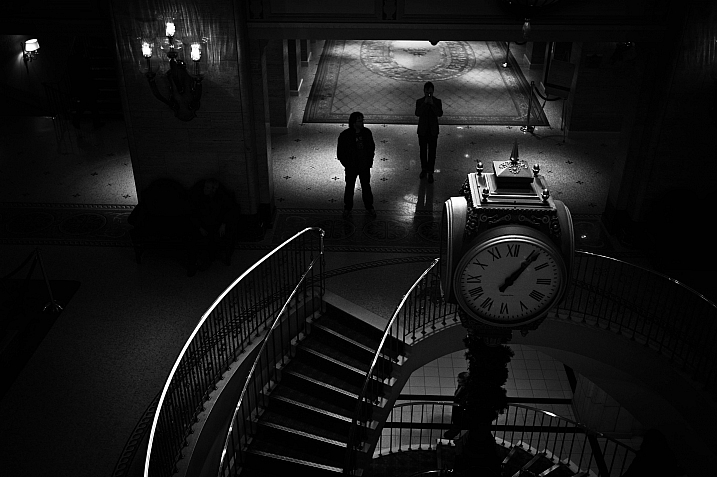
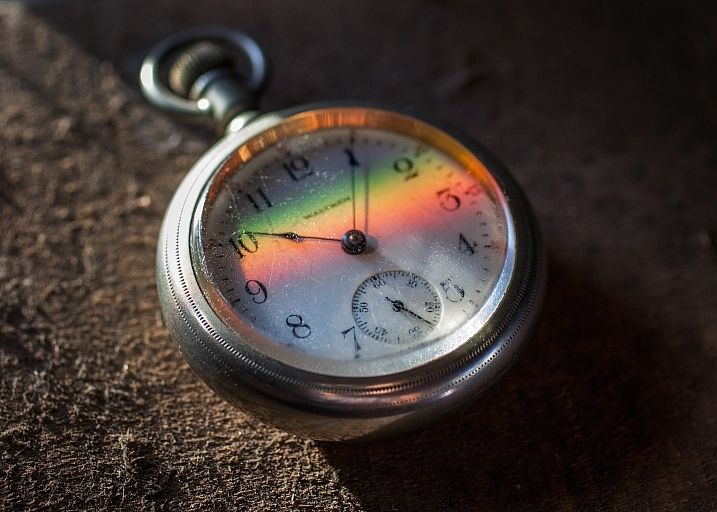
    Time – it just keeps on ticking and there’s nothing we can do about it.

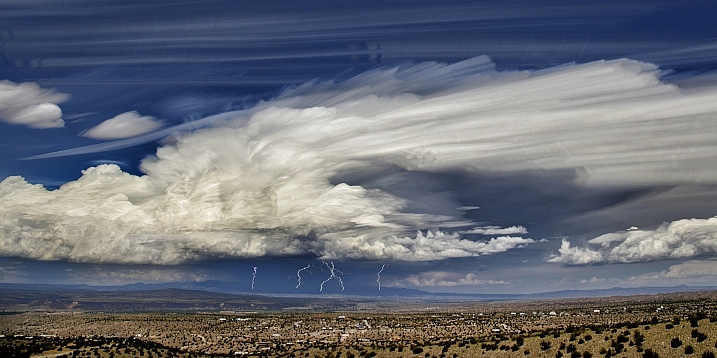
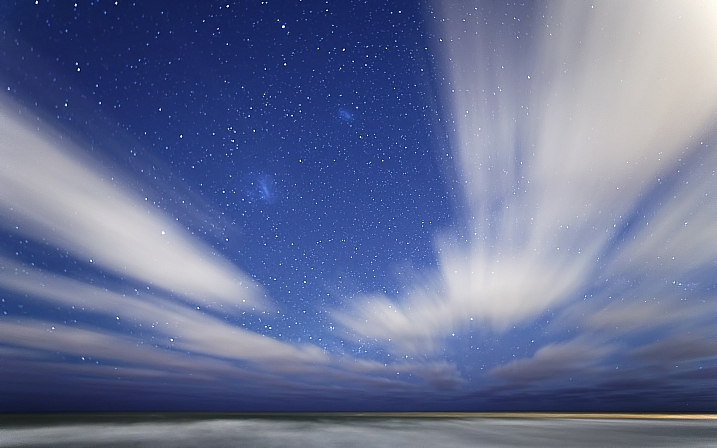
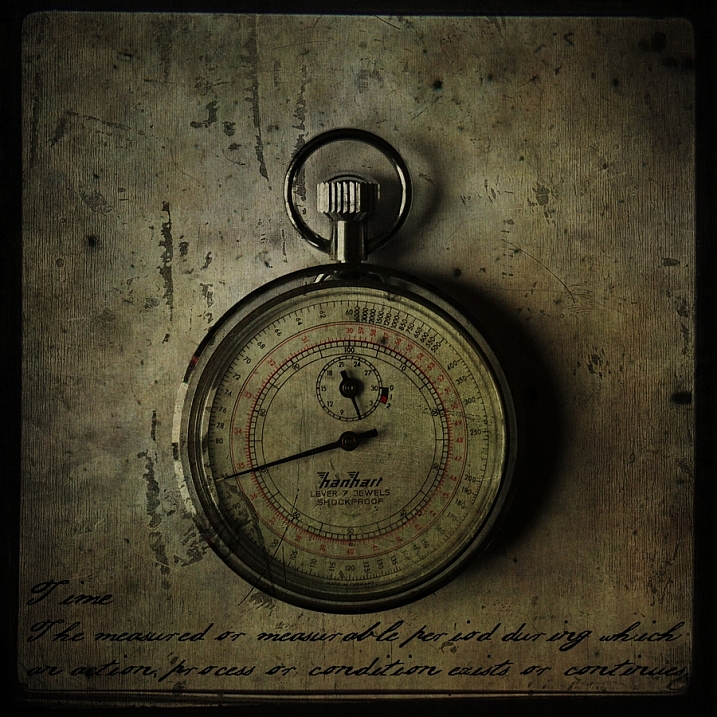
    Except maybe try and capture the concept of time in an image – like these images I shared earlier.

    Niko Knigge

    By Niko Knigge

    The hands of time can be taken quite literally, as in the image above – or more figuratively such as the images below:

    ?? ?????

    By ?? ?????

    Jason Mrachina

    By Jason Mrachina

    Basheer Tome

    By Basheer Tome

    Weekly Photography Challenge – Time

    As always we have a weekly challenge and this week it all about time. Finding time, time warp, hands of time – however you want to interpret it is up to you. Take it literally and photograph a time piece like an interesting watch or clock, or perhaps a sundial like above. Or get more out there and think about time as in long exposures, star trails, car light trails, a moment frozen in time, etc.

    Corie Howell

    By Corie Howell

    Tom Roeleveld

    By Tom Roeleveld

    Luc Mercelis

    By Luc Mercelis

    ?ethan

    By ?ethan

    KHAIRIL FAIZI

    By KHAIRIL FAIZI

    Share your images below:

    Simply upload your shot into the comment field (look for the little camera icon in the Disqus comments section) and they’ll get embedded for us all to see or if you’d prefer upload them to your favourite photo sharing site and leave the link to them. Show me your best images in this week’s challenge. Sometimes it takes a while for an image to appear so be patient and try not to post the same image twice.

    googletag.cmd.push(function() {
    tablet_slots.push( googletag.defineSlot( “/1005424/_dPSv4_tab-all-article-bottom_(300×250)”, [300, 250], “pb-ad-78623” ).addService( googletag.pubads() ) ); } );

    googletag.cmd.push(function() {
    mobile_slots.push( googletag.defineSlot( “/1005424/_dPSv4_mob-all-article-bottom_(300×250)”, [300, 250], “pb-ad-78158” ).addService( googletag.pubads() ) ); } );

    The post Weekly Photography Challenge – Time by Darlene Hildebrandt appeared first on Digital Photography School.


    Digital Photography School

  • Review : WD MyCloud Mirror Personal Cloud Storage

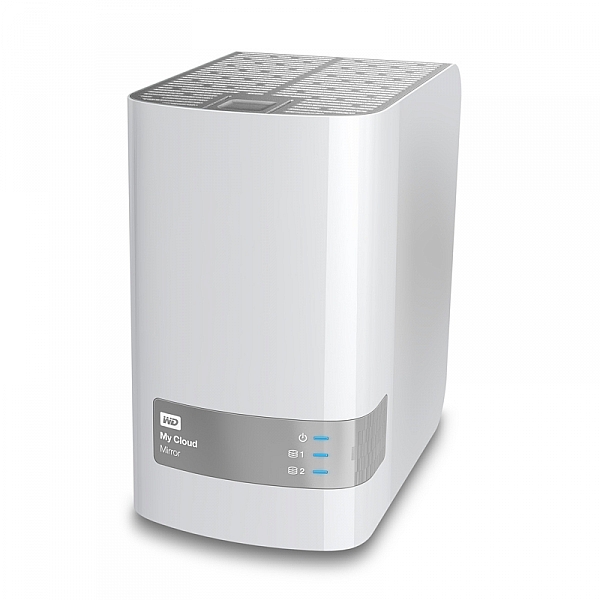
    Some would argue that, these days, it’s just as important to backup our mobile (camera) devices for the very reason we backup our regular digital photographs. Here’s my take on doing just that with my review of the My Cloud Mirror.

    wdfMyCloud_Mirror (1)

    MyCloud Mirror Personal Cloud Storage on Amazon

    Even though I have my camera with me most of the time, I still have my iPhone (or your Android or Windows thing or heck, even your Blackberry) with me about 99.8% of the time. That’s maybe more than most people as my 9 to 5 is social media and photography, so I tend to have the phone near, and as a result, I take a lot of photographs with the thing.

    It’s the iPhone 6 Plus, it has a half decent camera and as a result I take a lot of photos, videos, time lapse sequences, slow motion videos, etc. The bottom line is, I use it to create a LOT of content, and I know a lot of you guys do too. The theme with my other storage and backup related articles here on dPS has been “don’t lose stuff when you don’t need to!” and really, the same goes for your phone. You use it to create memories, even if you can’t print those memories out at A1 size (23.4 x 33.1″), they are still moments that you might like to remember. (Or they’re just photographs of every coffee you’ve ever had and really, you should just stop that!*)

    wdfMyCloud_Mirror

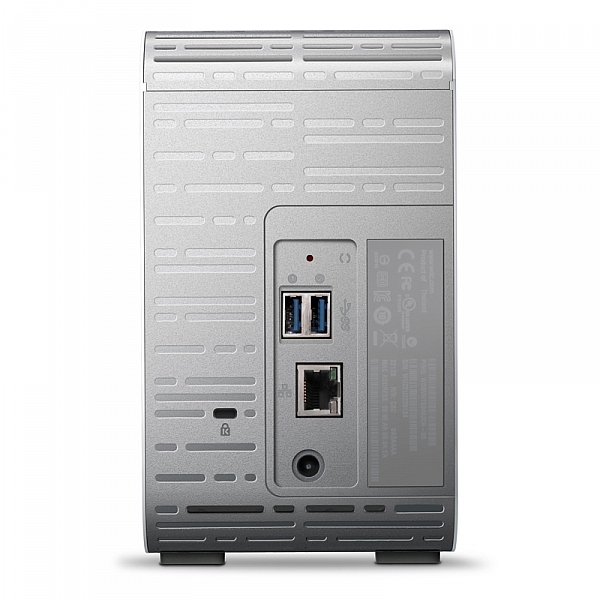
    As ever, without slapping down a whole page of technical jargon that you really don’t understand, I shall explain the WD MyCloud Mirror in the easiest way I can. You unbox it, plug it into power and to your network, (Cat5 cable between your MyCloud and your internet modem / router) follow the configuration instructions, and within minutes (unless you really are very very bad at things with buttons and knobs) you will have a storage drive that is both connected to your computer on your home network / wireless, and you will have a storage “cloud” that is available to you on your phone (apps available in Google Play and iTunes app store) and via any internet connected browser.

    Maybe the skeptic in you is saying, “but I still have to remember to actually backup my phone!” Actually, and you knew I’d say that, it does it automatically (make sure your app settings are right) so you can shoot on your phone, and have your photos automatically transferred to your MyCloud Mirror (you control if it does it all the time or only when you’re connected via Wifi to avoid crazy mobile data bills).

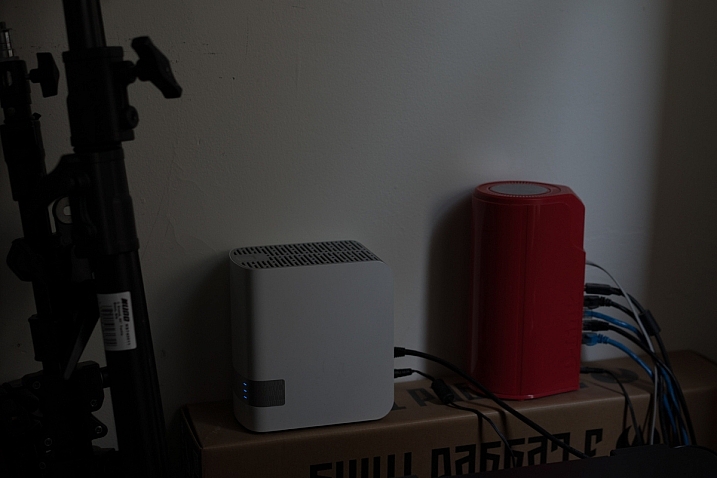
    Simon_Pollock_WD_MyCloud_Review

    My ultimate test of the WD MyCloud Mirror was on a recent trip to Fiji for a photography workshop. I was using a Fijian sim card in my iPhone and had wifi at random hours of the day. I set the MyCloud app to upload my iPhone content when on Wifi, and that’s exactly what it did – seamlessly! My wife could navigate to a website back in Melbourne and see what I’d photographed on my phone, and show my boys where I was – it was great. Now, you can do that using a camera, card reader, and a laptop with wifi (or a hundred other ways) but for those moments that I simply whipped out my phone and snapped a memory, they were preserved and immediately available for others to see (or to not see, depending on your security settings, obviously).

    Some specs for you to wrap your head around

    • Keep your content in one, double-safe place
    • Get abundant, dual-drive storage with access from anywhere
    • Save everything with twice the protection using Mirror Mode (RAID 1-default)
    • Easily transfer to and from Dropbox™ and other cloud accounts

    You can use the MyCloud Mirror with the following

    • Windows® 8.1 or earlier, Windows 7, Windows Vista® or Windows XP (32 bit) SP 3 operating systems
    • Mac® OS® X Mavericks, Mountain Lion™, Lion™ or Snow Leopard® operating systems
    • DLNA®/UPnP® devices for streaming
    • Router with Internet connection

    Supported browsers:

    • Internet Explorer® 8 or higher
    • Safari® 6 or higher
    • Firefox® 21 or higher
    • Google Chrome™ 27 or later on supported Windows and Mac OS platforms

    What’s that about a mirror?

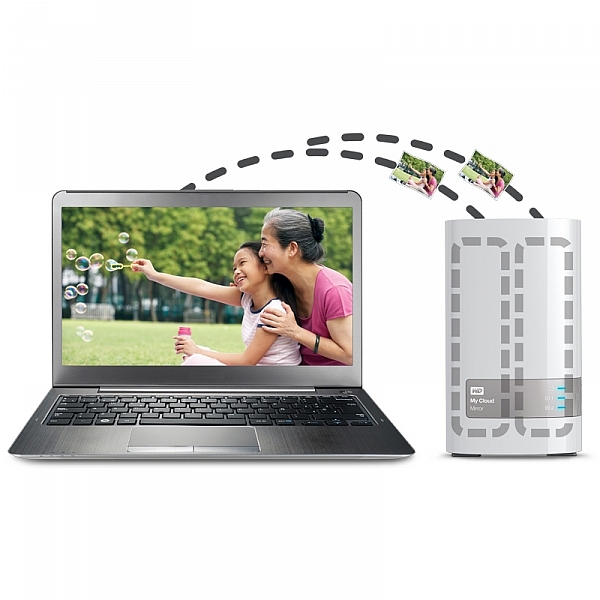
    You may also have picked up on the word mirror in the name of the MyCloud, it does indeed have two disks in it and it mirrors your data. While you’re backing it up from your phone, you’re also making a redundant copy of it onto the second drive, so if disk number #1 should fail, disk #2 will still have all of your duck-faced selfies (be honest, who doesn’t love a duck-faced selfie). Here’s a picture of that happening, just perchance I’ve confused you with my techno-babble.

    wdfMyCloud_Mirror (3)

    In summary, I totally love the WD MyCloud Mirror (I have the 4/2 (mirrored) TB version). I can’t recommend it enough for those of you that are half serious about your phone photography, or even just half serious about storage and content access while you’re anywhere with an internet connection.

    The WD MyCloud Mirror has been online for three months to test its reliability. It’s been online, and available all of that time, without a hiccup. I was sent the unit for test and review purposes, and will always give an unbiased opinion of a product. I award the MyCloud Mirror Five stars for simplicity in setup and usage, as well as (three months) constant reliability.

    *there’s a good chance that sentence was about, and directed at me :) 

    googletag.cmd.push(function() {
    tablet_slots.push( googletag.defineSlot( “/1005424/_dPSv4_tab-all-article-bottom_(300×250)”, [300, 250], “pb-ad-78623” ).addService( googletag.pubads() ) ); } );

    googletag.cmd.push(function() {
    mobile_slots.push( googletag.defineSlot( “/1005424/_dPSv4_mob-all-article-bottom_(300×250)”, [300, 250], “pb-ad-78158” ).addService( googletag.pubads() ) ); } );

    The post Review : WD MyCloud Mirror Personal Cloud Storage by Sime appeared first on Digital Photography School.


    Digital Photography School

  • 4 Tips for More Dramatic Beach Photos

    For some of us, the beach is a way of life. Whether it’s barefoot strolls at sunset, surfing in the big waves, or simply relaxing in the sun, the beach can be a magical place that is food for the soul.

    Capturing it in a photograph though, can be a completely different story!

    Suddenly you notice things that weren’t so apparent before you took your camera out: super bright harsh light, and photos that look boring and that don’t convey the feelings you experienced when you were at the beach.

    Bandon Beach, Oregon by Anne McKinnell

    These tips will help you make the most of your time photographing at the beach, and ensure you come home with photos that are just as dramatic and memorable as your fun day in the sun.

    1. Photograph during the Golden Hour

    The middle of the afternoon, when the sun is high in the sky and the light is bright, is a great time for swimming and sunbathing, but not such a great time for photography. Just like other types of landscape photography, beach photography is all about the quality of the light.

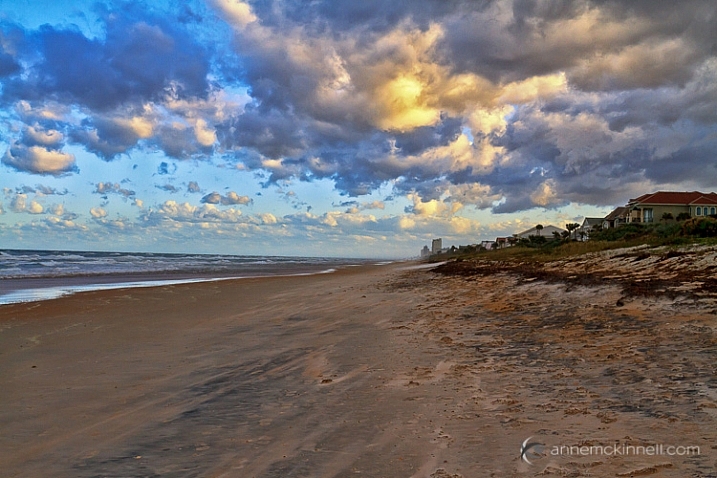
    At the edges of day, when the sun is low in the sky, you’ll find more gentle golden light that will make your photos glow. Sometimes you can photograph during the day too, but only when there are big puffy clouds in the sky that diffuse the light and create drama. If you have a big bright blue sky, it’s better to enjoy the afternoon swimming and visiting with friends, and save the photography for later.

    Ormond Beach, Florida by Anne McKinnell

    2. Use a Graduated Neutral Density Filter

    Even at the edges of the day, the sky is usually quite a bit brighter than the sand or rocks in the foreground of frame, which makes it difficult for your camera to get a good exposure, without blowing out the highlights and creating dark shadows.

    Try to even out the exposure by using a graduated neutral density filter which is kind of like sunglasses for your camera. It’s a piece of plastic or glass that is dark on the top, and light on the bottom, and you use it to darken the just the sky portion of your image.

    3. Use foreground elements to create an interesting composition

    The beach always looks inviting when we’re just about to step onto the soft sand with our bare feet. But when you photograph it just as you see it, it can end up looking boring.

    Try using a foreground element in your composition to add interest to the scene. Is there something unique about your particular beach? Perhaps it has colourful rocks, big boulders, driftwood, or seashells. Try incorporating the unique element into the foreground of your image, to make your photograph more interesting.

    Rebecca Spit, British Columbia by Anne McKinnell

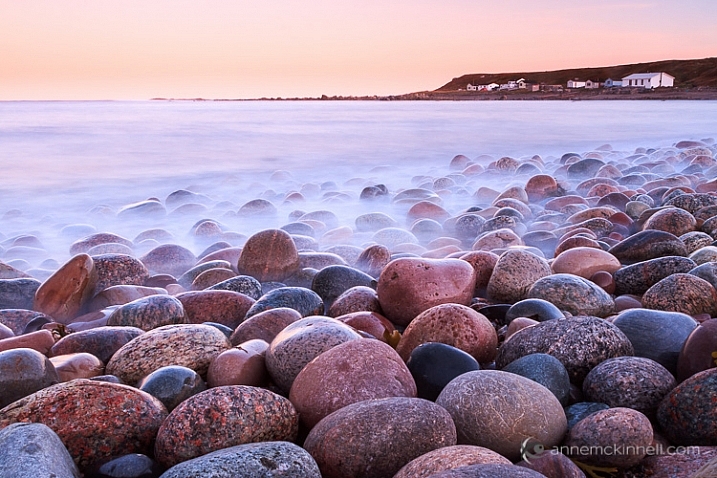
    You can also use a low angle and get really close to your unique element to emphasize it. If you have big colourful rocks, getting down low, and angling your camera upwards, will make them seem even larger. Whereas if you photograph them from eye level they may not look nearly as dramatic as you remember them being.

    Gros Morne National Park, Newfoundland by Anne McKinnell

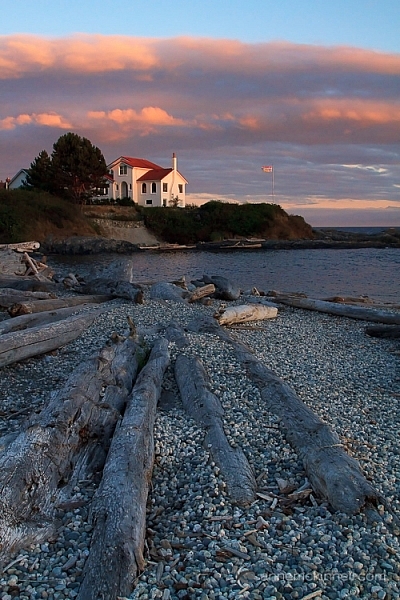
    Look around and see what you can use for leading lines that will guide the eye out to the sunset, or towards an important feature in the frame, like sea stacks, or a house in the distance.

    Ross Bay, British Columbia by Anne McKinnell

    4. Sunbursts and silhouettes

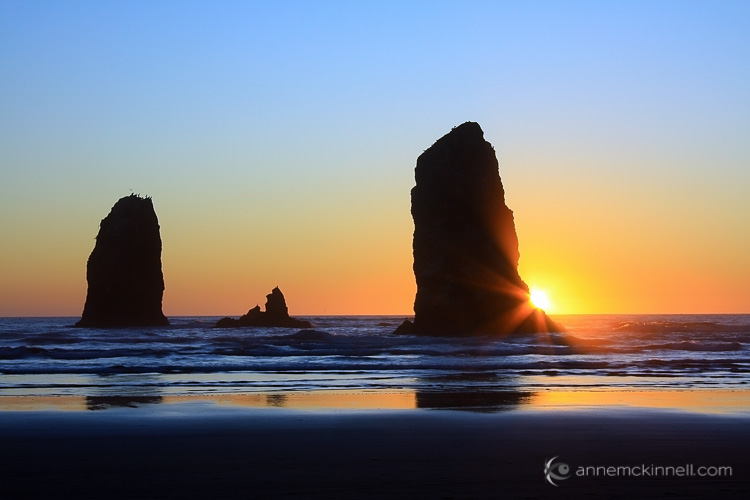
    Try some new techniques to create dramatic images. If you are looking towards the sun, you can create a sunburst by including the sun in your frame and using a small aperture like f/22. It also helps if you can partially hide the sun behind an object.

    If you have an interesting foreground element with a strong shape, use it to create a silhouette. To do this, use spot metering and expose for the sky, allowing your foreground element to go completely black.

    You can even do the silhouette and sunburst together for even more drama!

    Canon Beach, Oregon by Anne McKinnell

    Next time you go to the beach remember these tips to help you come home with photos that are just as much fun as you had playing in the surf.

    Do you have any other beach photography tips, or some favorite beach photos? Please share in the comments below.

    googletag.cmd.push(function() {
    tablet_slots.push( googletag.defineSlot( “/1005424/_dPSv4_tab-all-article-bottom_(300×250)”, [300, 250], “pb-ad-78623” ).addService( googletag.pubads() ) ); } );

    googletag.cmd.push(function() {
    mobile_slots.push( googletag.defineSlot( “/1005424/_dPSv4_mob-all-article-bottom_(300×250)”, [300, 250], “pb-ad-78158” ).addService( googletag.pubads() ) ); } );

    The post 4 Tips for More Dramatic Beach Photos by Anne McKinnell appeared first on Digital Photography School.


    Digital Photography School

  • 27 Interpretive Images that Represent Time

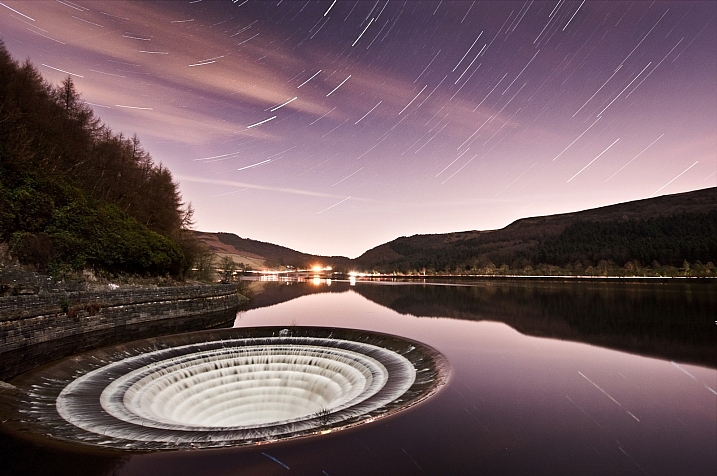
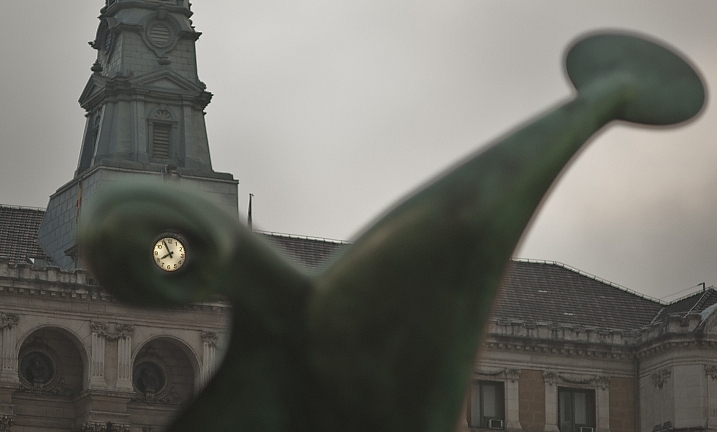
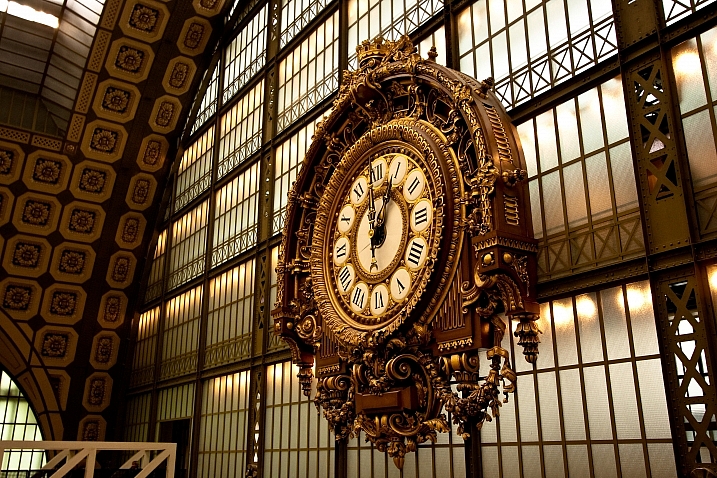
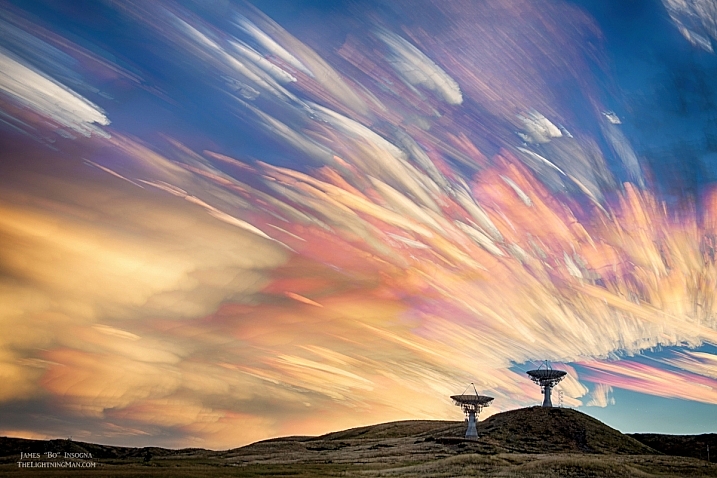
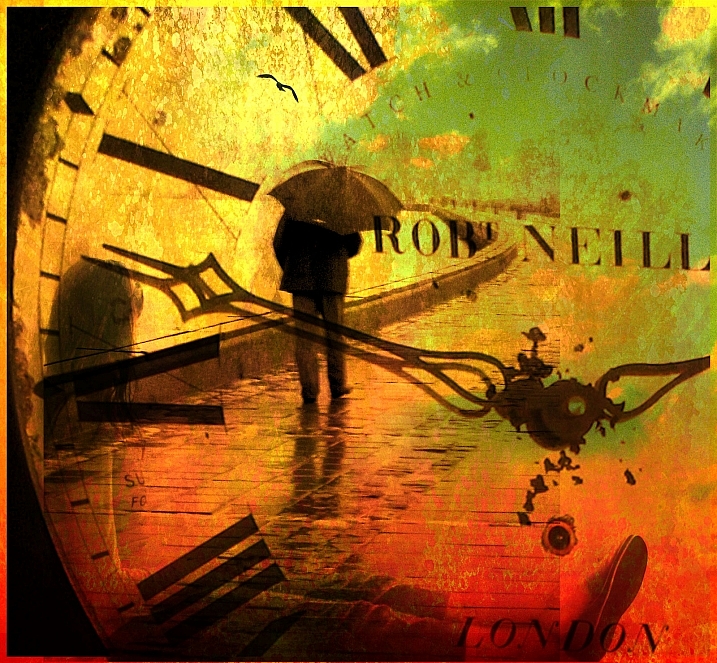
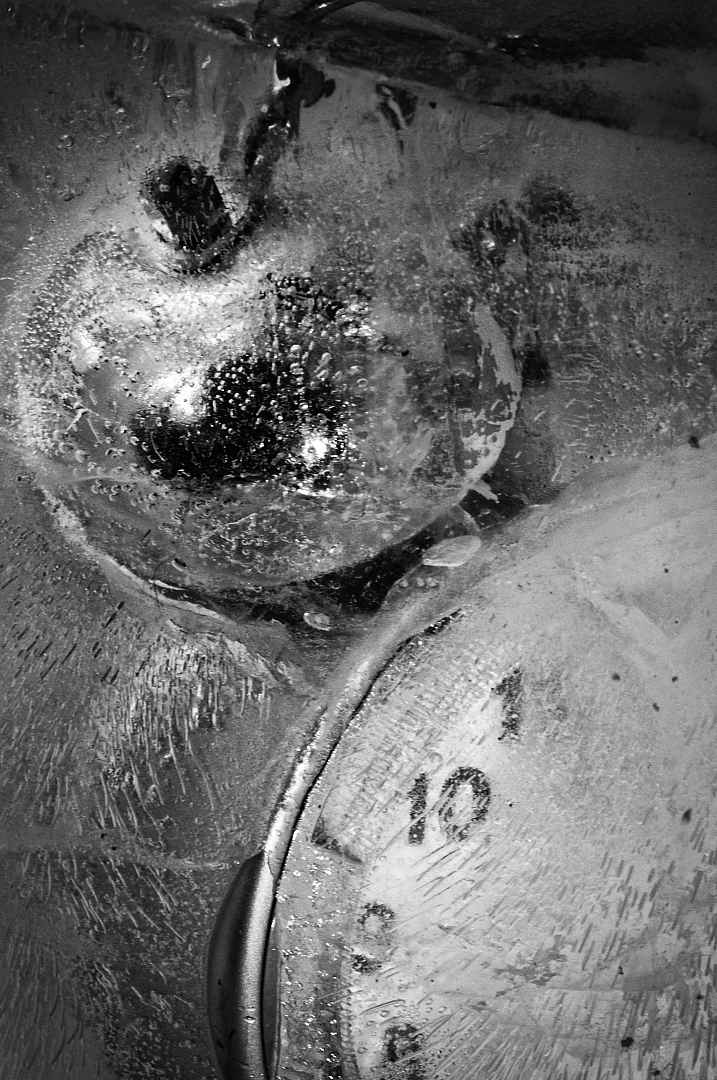
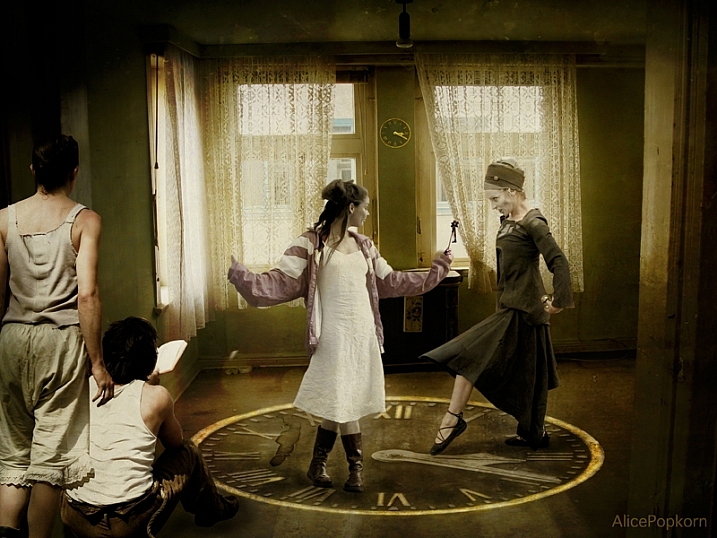
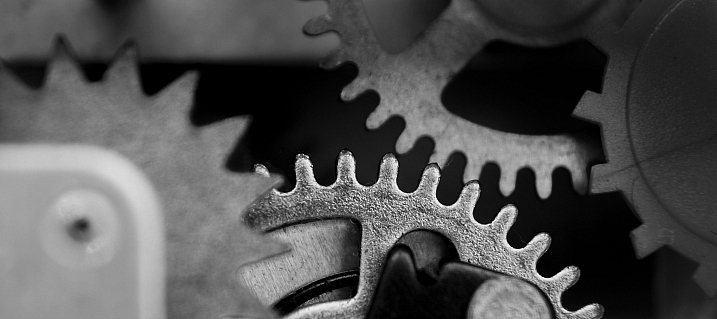
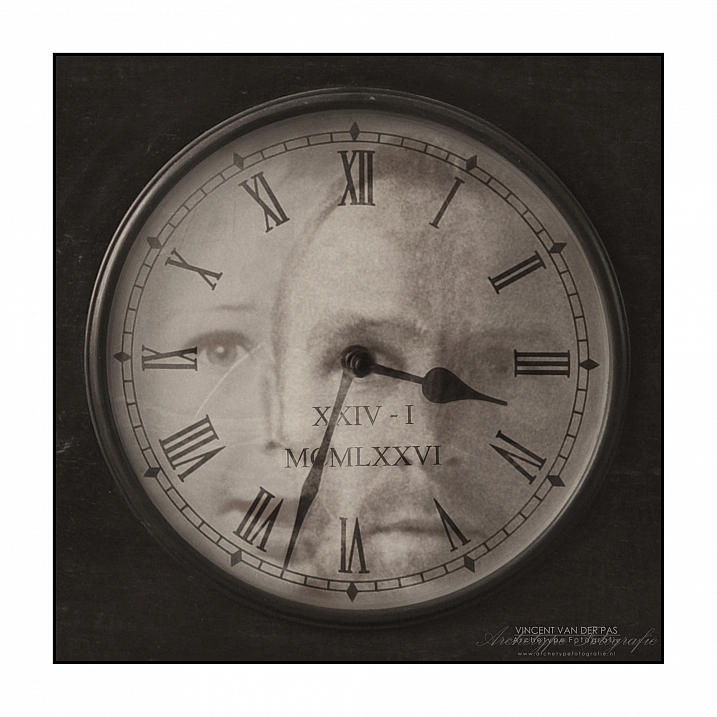
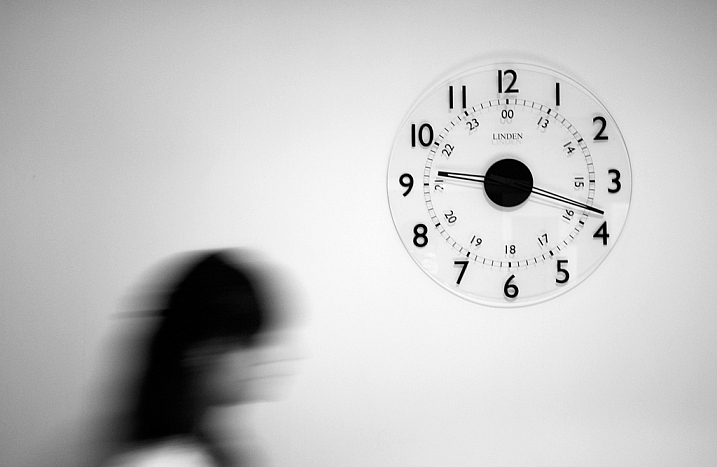
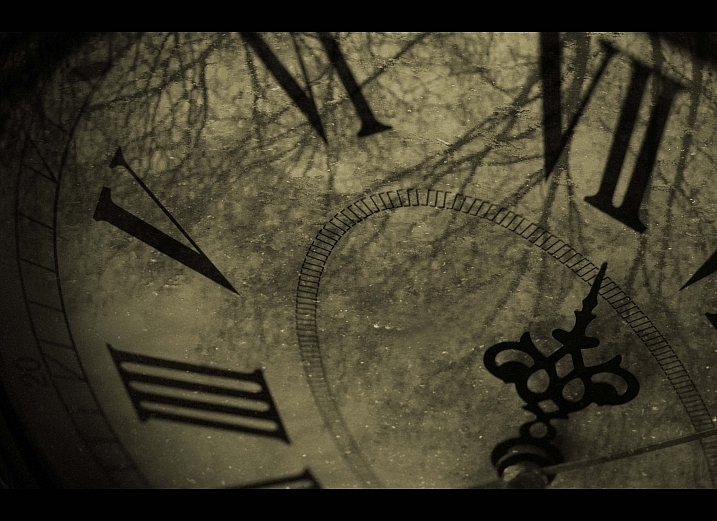
    Okay technically this is 26 images and one really cool time lapse video that represent things related to time. Some are actual clocks or time pieces, yet others are more interpretive, mystical – such as long exposure photography, light trails and stars.

    See where these photographers went – around the clock.

    Christian Schirrmacher

    By Christian Schirrmacher

    Arne Bornheim

    By Arne Bornheim

    Paul Gravestock

    By Paul Gravestock

    Sacha Fernandez

    By Sacha Fernandez

    Vaidotas Mišeikis

    By Vaidotas Mišeikis

    Julen Landa

    By Julen Landa

    Robert Couse-Baker

    By Robert Couse-Baker

    Eddi Van W.

    By Eddi van W.

    Elvin

    By Elvin

    Bo Insogna, TheLightningMan.com

    By Bo Insogna, TheLightningMan.com

    Paolobarzman

    By paolobarzman

    John Fowler

    By John Fowler

    Luis Argerich

    By Luis Argerich

    Kat...

    By Kat…

    Philip Edmondson

    By Philip Edmondson

    Mikael Tigerström

    By Mikael Tigerström

    Alice Popkorn

    By Alice Popkorn

    Charlie Wales

    By Charlie Wales

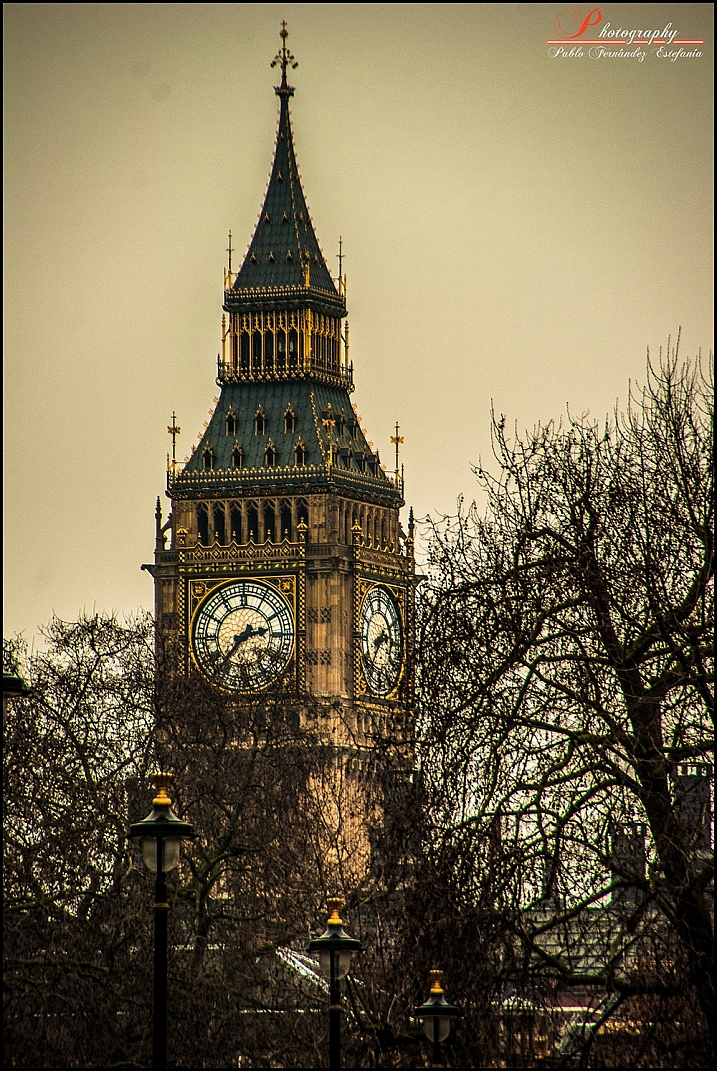
    Pablo Fernández

    By Pablo Fernández

    Vincent_AF

    By Vincent_AF

    Tekke

    By Tekke

    Stefanos Papachristou

    By stefanos papachristou

    Atilla Kefeli

    By Atilla Kefeli

    Ian Sane

    By Ian Sane

    Joe Penniston

    By Joe Penniston

    Michael Shaheen

    By Michael Shaheen

    googletag.cmd.push(function() {
    tablet_slots.push( googletag.defineSlot( “/1005424/_dPSv4_tab-all-article-bottom_(300×250)”, [300, 250], “pb-ad-78623” ).addService( googletag.pubads() ) ); } );

    googletag.cmd.push(function() {
    mobile_slots.push( googletag.defineSlot( “/1005424/_dPSv4_mob-all-article-bottom_(300×250)”, [300, 250], “pb-ad-78158” ).addService( googletag.pubads() ) ); } );

    The post 27 Interpretive Images that Represent Time by Darlene Hildebrandt appeared first on Digital Photography School.


    Digital Photography School

  • How to Create Awesome Portrait Lighting with a Paper Bag an Elastic Band and a Chocolate Donut

    Paperbag main 717

    I photographed Luke Deslandes with a homemade modifier and a lighting kit that can be created for less than $ 200

    One of my favourite TV series from the 90s was MacGyver, an action-adventure series about a US government secret agent with a fabulous mullet, who improvised and built complicated devices from household objects such as rubber bands, paper clips, pens and a Swiss Army knife.

    The show was so incredibly popular that the term MacGyver made its way into the dictionary:

    MacGyver (v): To make or repair (an object) in an improvised or inventive way, making use of whatever items are at hand:

    • He MacGyvered a makeshift jack with a log.
    • He has a shock of short red hair and a pair of rectangular-framed glasses, MacGyvered with duct tape.

    The other week I was caught short on a night shoot because I’d misplaced my small softbox modifier, and needed to come up with a way to soften and control the from my speedlight to create portrait lighting.

    I searched my entire kit and car, found nothing useful, then I asked myself, “What would Macgyver do?”. I rummaged through my bag and found a chocolate donut (Nutella filled, so good!) in a white paper bag, and a hair elastic which would be perfect substitutes for the softbox I’d forgotten to bring to the shoot.

    The really cool thing about lighting is that the basic principles will work with any kind of light, regardless of budget, or the type of modifier used. So whether you’re working with a $ 150 lighting kit (similar to the one I used for these images) a $ 1,500 hit, or $ 15,000 one, the light will still react in the same way.
    light-modifers

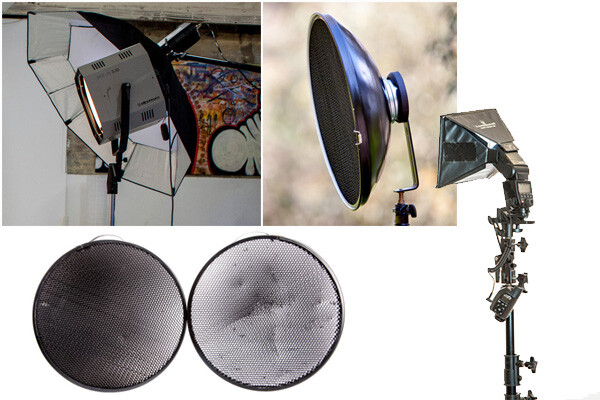
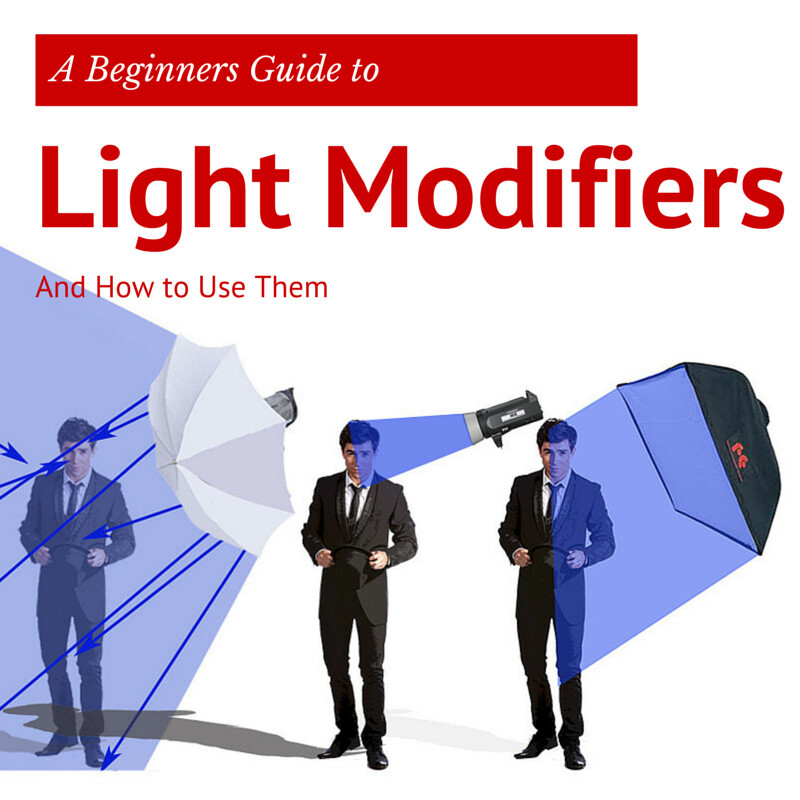
    One of the best lessons I learned from working with film and television crews is that ordinary household objects can be used to shape and train light. I’ve seen soft light created using sheets of Perspex, calico, and even shower curtains. A light modifier is basically designed to do two things:

    1. It controls the shape of the flash
    2. It controls the quality of light coming from the flash
    Light Shapers SQ copy

    Some modifiers, like umbrellas, will spread the light over a large area and soften the quality of the light. Other modifiers like grid spots contain the light to a very small area and create a hard quality of light (click image above to read more).

    The main differences between the high-end options, and MacGyvered lighting are: light quality, consistency, and build. A light modifier that has been cobbled together using found objects is not going to look pretty, and you may attract some odd looks from passers by. On a positive note, I believe a MacGyvered light modifier is a perfect way to get your head around how lighting works, and to vary your lighting styles without having to empty your bank account.

    This is how I created my mini softbox using a paper bag, an elastic band, and a chocolate donut.

    The Gear
    Boom 750
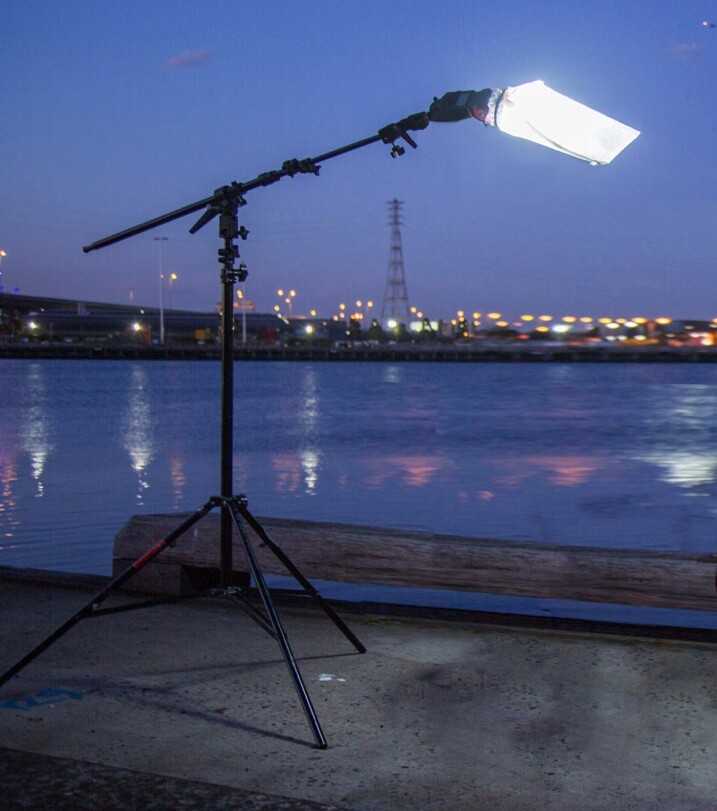
    Booms are an awesome way to add light above your model, as they allow the freedom to work without stands getting in the way of your shot. Using a boom is also the best way to position the light exactly where you want it.

    I’ve created this lightweight location boom by using a mini-boom arm on an umbrella bracket, attached to a light stand. Always remember to use a weight on the light stand, to avoid it tipping over in high winds. You can buy a sandbag, or MacGyver your own using two-litre drink bottles filled with water in a canvas bag.

    A cheaper alternative to the boom is to use a light pole, and to ask a friend to hold it for you. If you are new to working with off-camera flash, I suggest you read one of my previous blog posts: A Beginner’s Guide to Working With Flash Off-Camera.It will walk you through the step-by-step technique of shooting with off-camera flash .

    • A Yongnuo YN-560II speedlight – under $ 80
    • Yongnuo RF-603N flash triggers $ 30
    • CowboyStudio umbrella mount bracket with swivel tilt bracket $ 16
    • LumoPro LP605 compact 7 foot stand with ground spikes $ 45
    • Sandbag $ 7
    • LumoPro mini-boom/reflector arm $ 40
    • Tripod
    • Nutella donut in a white paper bag – you can use plain donut but they are not as good! <$ 1
    • One Hair elastic <$ 1
    • Canon 5DMK111 (use your own camera)
    • Canon 24-105mm L series (use the lenses you have already)

    The Way

    Paperbag 2 717

    Carefully remove the donut from the bag, being careful not to get any Nutella smeared on the bag. Divide the donut into two equal portions. Offer one half to your model and eat the other half. If you can’t find Nutella donuts in your neck of the woods, you can substitute with any other pastry served in a white paper bag.

    If you prefer a cleaner style of shooting, just ask for an extra bag when you buy your donut. You can also skip this part altogether, but it’s not as much fun, and just find a white paper bag similar to the one I’m using (see below). They vary in size and thickness so look for bags that are free of any advertising.
    Paperbag 3 717

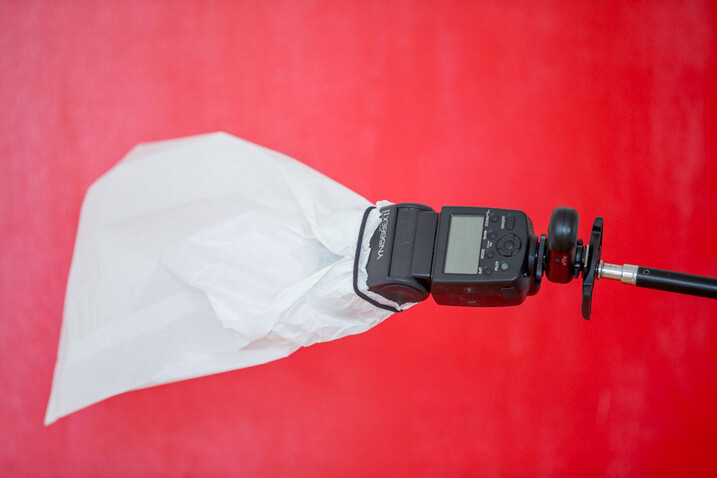
    Place the bag over the flash and secure using the hair elastic. Electrical tape will also work, but it tends to leave a sticky residue on the flash.
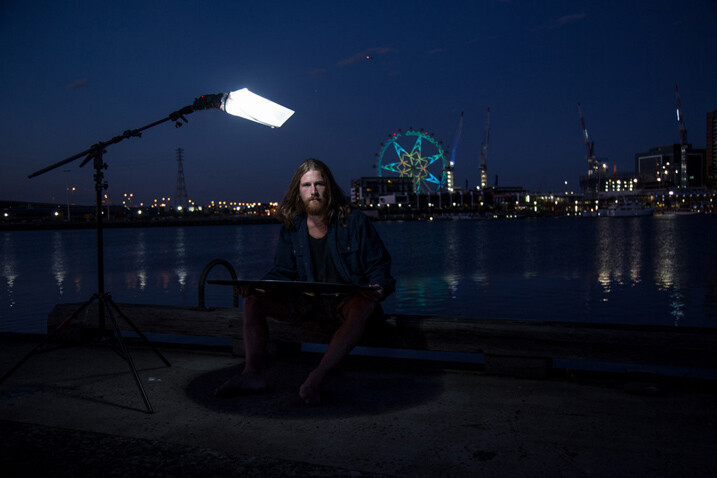
    Paperbag 4 717

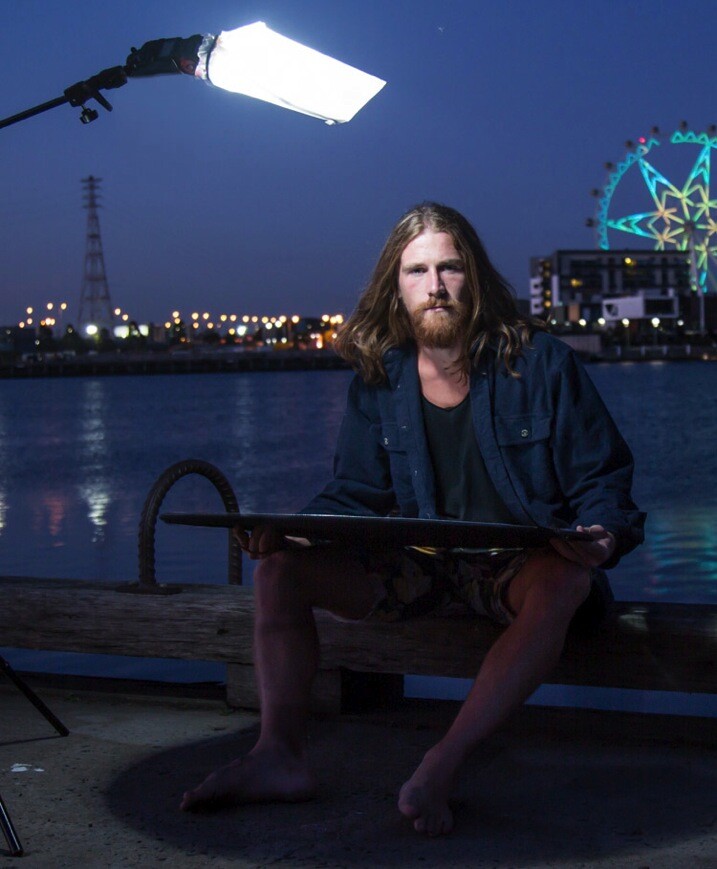
    Position the light directly above, and slightly to one side, your model’s head. This lighting style is called loop lighting. I think it’s a flattering style because it leaves the face in partial shadow, and creates the illusion that the face is slimmer.

    It’s called loop lighting because of the loop-shaped shadow the nose casts on the side of the model’s face. How prominent the shadow is, depends on how much fill light is used. I use this style of lighting for 80% of my studio and location shoots, as I believe it is one of the most natural-looking lighting techniques.
    Paperbag 5

    Adding Fill Light

    Using one light from overhead looks great, and adds definition to the model’s bone structure. As I prefer a softer lighting style, I’ve also added a white reflector to my shot.

    I placed the reflector on Luke’s (my model) lap because I was shooting very tight headshots. If I were shooting a ¾ or full-length portrait, I would position the reflector on the ground, just out of the shot. The reflector fills in the shadows caused by the flash overhead. You can modify the amount of fill light by how close you place the reflector in relation to your light source. The closer the reflector is to the light, the more evenly lit your portrait will look. If you prefer more contrast or mood to your lighting, move the reflector further away from the light or don’t use one at all.
    Paperbag_6-717

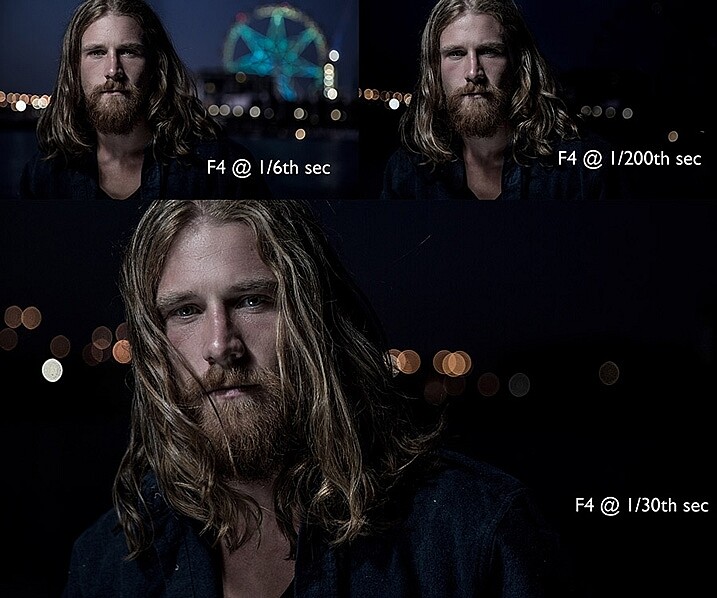
    Changing the shutter speed controls how much ambient light there is in the image. To create a brighter background, I selected a shutter speed of 1/6th second. Shooting at 1/200th of a second removes most of the ambient light and creates a moodier image. I wanted to create the goldilocks effect, not too heavy, and not too light, but just right.

    The Final Image

    Paperbag final 717

    Here are a few more awesome Macgyver lighting hacks that my podcast listeners have shared with me.

    Ping pong balls and empty toilet rolls
    Brett Ferguson 01

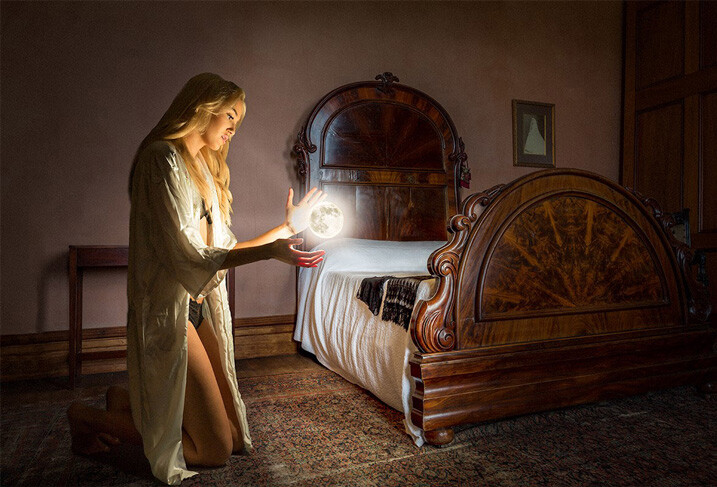
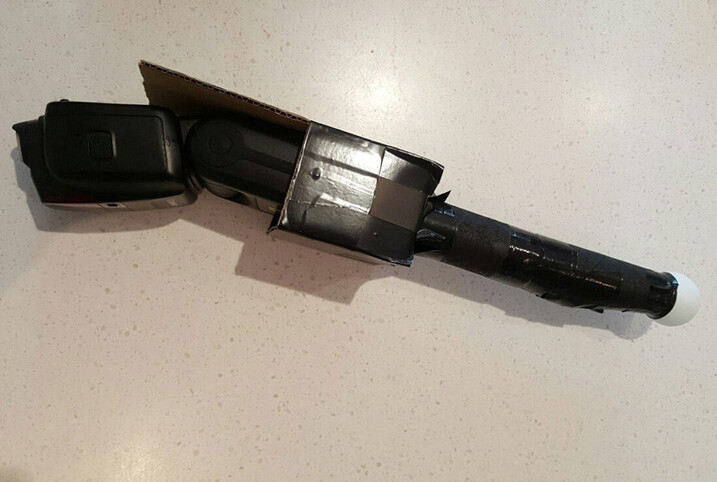
    This gorgeous image by Brett Ferguson was created with a light modifier Macgyvered together with a ping pong ball and empty toilet rolls.
    Brett Ferguson 02

    Hey Gina Milicia, here is a Macgyver light modifier for you. I needed a spot light source to light the model in a convincing way. It was really important to have a soft glow, and realistic shadows, to emulate what the moon would look like. I used a ping pong ball at the end of two empty toilet rolls and then rigged some cardboard to hold the flash. The flash head fits in nicely, and the centre of the toilet rolls are white, allowing it light up to the ball. This image (edited) was shot at 47mm on a 24-70mm f2.8L II lens on a Canon 5D3 at 1/80th, f/3.5 and ISO 500.

    You can see a larger version of the finished image at www.brettferguson.com.au.

    The Pringles gridspot
    GlennDube 717

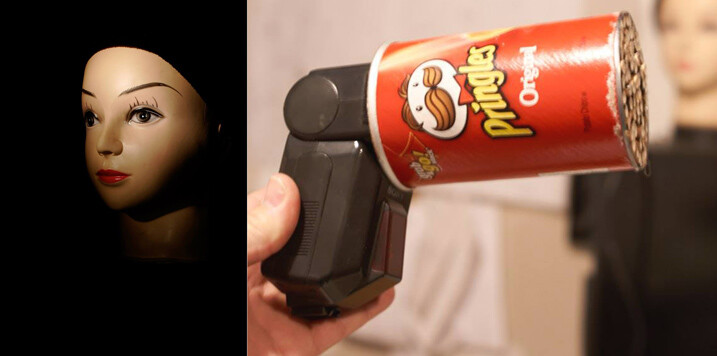
    Photographer Glen Dube has Macgyvered this brilliant grid spot using a Pringles container and straws.

    This is basically just a Pringles can, with the bottom cut out and replaced by straws, hot glued in place. But I found coloured straws tainted the light, luckily my wife found some paper straws that have a nice bright white inside. The end of the can you get the chips out slides right over all the flashes I have, except this really old Vivitar that has the zoom function on the outside. Pringles has been helpful in providing a variety of lengths of cans for us.

    The length (and diameter) of the straws determines the size of the spot and there are even online calculators. I found the flashes zoom function has little effect but the calculators are accurate for determining the spot sizes. The paper straws let you have a sharper fall off (as the plastic straws are translucent and spill light outside the circle). I used 60mm straws, which at 1 meter (3′) gives me a 180MM (7.1″) diameter spot that gets wider the farther away the light is from the subject.

    Pop-up flash modifier
    Andrej Valko 717

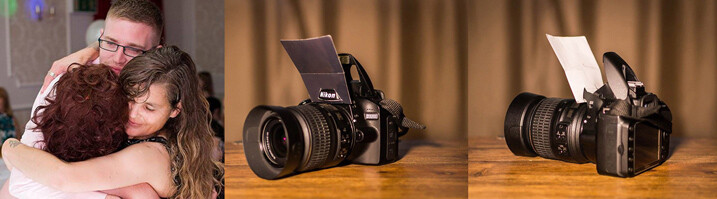
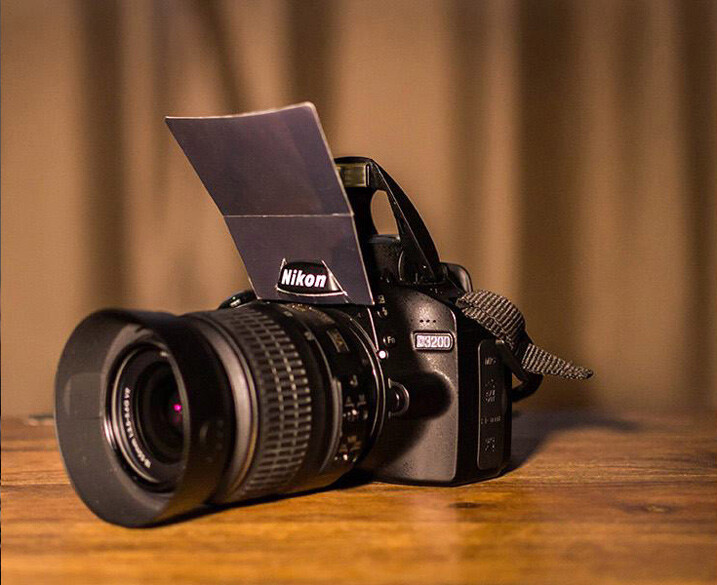
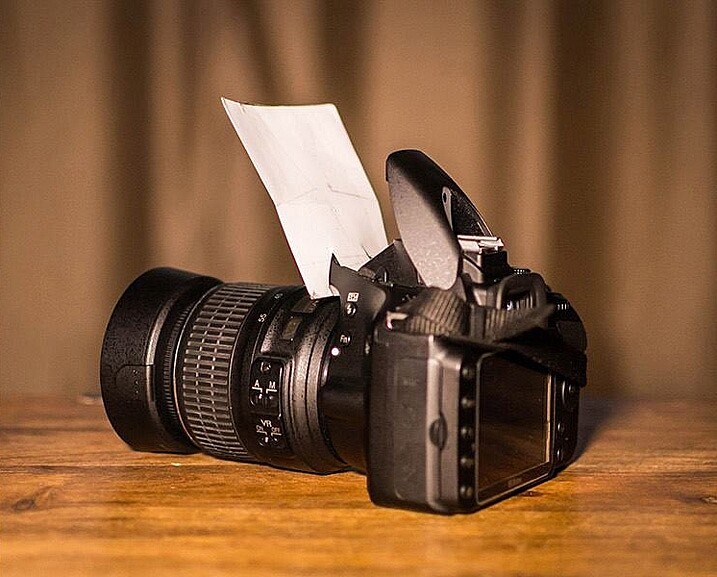
    Photographer Andrej Valko created this really simple portable pop-up flash modifier using cardboard.

    I saw this idea a couple of years ago – a bounce card for the on-camera flash. I thought: how hard can it be to make one. So I did – I printed black on one side of heavy photo-paper so it didn’t look conspicuous from the front. It was white on the other side to bounce light. I taped it with clear tape so it reflected light more efficiently (it also made it a bit more durable), and I cut it to suit my camera.
    Andrej Valko 2

    Andrej-Valko-3

    It was easy to mount (it just slid in), easy to carry (in a back pocket just like a business card) and it bounced light off the walls and ceiling, as well as off my face! And I, the crazy photographer, shot a wedding reception with just the bounce card! (I didn’t have a single flash unit at the time.) I still cannot believe I actually used this to shoot a wedding.

    The drawer liner modifier
    MikeHickman 2 717

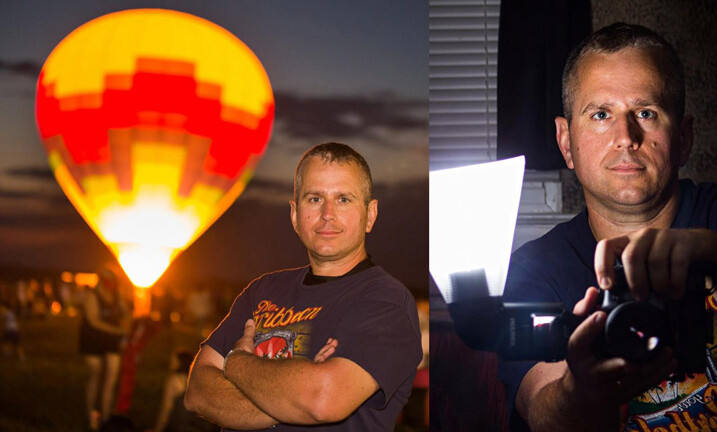
    Photographer Mike Hickman created this modifier using a translucent drawer liner.

    My “ugly” modifier created from translucent drawer liner which I have used almost exclusively during events, including weddings. The idea came from here.

    Cost is about $ 10 for a full liner made by Contact, and attached with Velcro strips for about an additional $ 6. Makes three or four, depending on size. Also, folds up to stick in your pocket when changing locations and I have two in my camera bag at all times. Can’t do that with too many other modifiers!

    There are so many awesome ways to MacGyver light modifiers. Do you have one you are particularly proud of? I’d love to see it. Please share your ideas in the comments below.


    fastflash_bookIf you want to learn more about using flash for creating portraits, pick up Gina’s brand new dPS ebook: Fast Flash for Portrait Perfection. Now on sale for an introductory price for a limited time only.

    googletag.cmd.push(function() {
    tablet_slots.push( googletag.defineSlot( “/1005424/_dPSv4_tab-all-article-bottom_(300×250)”, [300, 250], “pb-ad-78623” ).addService( googletag.pubads() ) ); } );

    googletag.cmd.push(function() {
    mobile_slots.push( googletag.defineSlot( “/1005424/_dPSv4_mob-all-article-bottom_(300×250)”, [300, 250], “pb-ad-78158” ).addService( googletag.pubads() ) ); } );

    The post How to Create Awesome Portrait Lighting with a Paper Bag an Elastic Band and a Chocolate Donut by Gina Milicia appeared first on Digital Photography School.


    Digital Photography School
  • 40+ Free & Premium Lightroom Presets You Shouldn’t Miss

    Presets can be a Lightroom user’s best friend. When you are editing hundreds or thousands of photos any time you can save in post processing is extremely valuable. Making use of presets is one of the best ways to streamline your workflow and save time in the editing process. You can either create your own presets, download free presets, or Continue Reading

    The post 40+ Free & Premium Lightroom Presets You Shouldn’t Miss appeared first on Photodoto.


    Photodoto

  • Understanding Normal and Cross-Type Focusing Points

    Look through the viewfinder of any DSLR camera and you will see several dots, or squares, that represent individual points at which the camera is capable of focusing. The purpose of these focusing points may seem fairly obvious, but not all of them are created equal. When you press the shutter button (or back button) halfway, some of these points will light up, indicating that everything at that specific spot is crystal clear and your photo will be nice and sharp.

    However, the speed at which your camera can focus on one of the points, as well as how accurate the focus will be, depends greatly on whether the individual focusing point is a single or cross-type. Understanding the differences in how they operate can help you decide which ones to use to take better photos.

    cross-type-focus-sensors-joy-of-the-waters

    Most DSLR cameras use what’s called a phase-detection focusing system – whereas most mirrorless cameras, point-and-shoots, and mobile phones use a separate system called contrast-detect. In a DSLR, most of the light coming through the lens is reflected upwards by the mirror, to the optical viewfinder, which lets you see precisely what the camera lens sees.

    However, a tiny bit of light is also sent downward to a series of sensors that are capable of figuring out whether the image is in focus. The science behind this involves splitting the incoming light, and comparing two beams, to essentially see if they match up. If not, an electronic signal is sent to the focusing motor, to adjust the lens until the image is in focus. All this happens in a fraction of a second, but these fractions matter in photography, and can often be the difference between a tack-sharp image and a blurry shot.

    I used my camera's cross-type focusing points to make sure this picture of a holstein cow was tack sharp.

    I used my camera’s cross-type focusing points to make sure this picture of a holstein cow was properly focused.

    The problem with traditional phase-detecting systems is they get a bit stumped if there are a lot of vertical lines in the spot where they are trying to focus. To see how this works for yourself, print a sheet of paper on your computer, with nothing but vertical lines. Tape it to a wall, and try to focus on it with your camera. If you are using one of the focusing points on the outside edge of your camera’s viewfinder, your lens will likely spend a few seconds hunting for focus but will probably never find it. However if you turn the paper sideways and try again your camera will likely get things focused fairly easily. This is because when light is sent to the phase-detection sensors in your camera, the sensors don’t have enough information to determine focus, if all it sees is vertical lines.

    While most of the time when you are out taking pictures, you are probably not shooting images of vertically-lined paper, this example does illustrate how your camera’s autofocus can get slowed down, and become unreliable under certain conditions. Ironically, in this test, your camera will find focus much better if you use the live view function. That employs a contrast-detection focusing method which is also used in most mirrorless cameras, and while it is a bit slower, can have some advantages over traditional phase-detect systems.

    Test your camera's focus sensors with nothing but a lined piece of paper.

    Test your camera’s focus sensors with nothing but a lined piece of paper.

    To address this issue, most camera manufacturers have implemented cross-type focusing sensors that work fine when focusing on images with horizontal and vertical patterns. On high-end models (like the Nikon D5 or Canon 5D Mark III) there are several clusters of cross-type focusing sensors, but lower-end models (like the Nikon D3200 and Canon Rebel T3i) usually have just one, right in the center. This means that the center autofocus point will likely be significantly faster, and more reliable, than the points on the edge. You can see the results yourself by repeating the test from earlier with the center focus point, instead of one on the perimeter of your viewfinder.

    Using your camera's cross-type sensors can help ensure your pictures are perfectly focused.

    Using your camera’s cross-type sensors can help ensure your pictures are perfectly focused.

    The real-world implications of this are quite significant, and may very well change how you approach your photography. Many people use an automatic setting that allows their camera to look at all the available focus points, and determine which one should be used to set the focus. But, if you know that the the cross-type points will give you consistently better results, you might try using them more often.

    This is especially useful with sports and fast action, but other types of photography situations can benefit from utilizing cross-type points also. Portrait, family, and wedding photographers often utilize the focus-and-recompose method to nail focus with a cross-type sensor, then shift their camera’s field of view to get precisely the composition they want. If you shoot landscapes you might not need speedy autofocus, but using your camera’s cross-type sensors may help your focus be more accurate.

    Of course all this doesn’t mean that the normal focusing sensors on your camera are worthless, just that knowing which ones are cross-type can often give you an advantage you might not have otherwise had.

    My Nikon D750 has 15 cross-type sensors all in the middle. To get this shot I used a cross-type sensor to nail focus and then recomposed by slightly shifting my camera to the right.

    My Nikon D750 has 15 cross-type sensors, all in the middle. To get this shot I used a cross-type sensor to nail focus, and then recomposed by slightly shifting my camera to the right.

    One other point worth noting is that mirrorless cameras use phase-detection focusing more than they used to, and some are implementing cross-type sensors too. Just because this technology started with DSLRs does not mean it will be forever limited to these types of cameras, and as manufacturers continue to innovate we will likely see more, and better, focusing options in the years ahead.

    To help you figure out how many cross-type focusing points your camera has, you can do a little searching online, or look at the list below. I have compiled some data based on the more popular camera models for you:

    Canon

    • 70D, T6/T6i: 19 points, all cross-type
    • 60D, T5/T5i, T4/T4i: 9 points, all cross-type
    • T3/T3i, T2/T2i: 9 points, 1 center cross-type
    • 6D: 11 points, 1 center cross-type
    • 7D: 19 points, all cross-type
    • 7D Mark II: 65 points, all cross-type
    • 5DSR, 5D Mark III: 61 points, 41 cross-type in 3 columns (middle, left, and right-side)

    Nikon

    • D3300, D3200, D3100: 11 points, 1 center cross-type
    • D600, D610, D7000, D5500, D5300, D5200: 39 points, 9 cross-type (clustered in center)
    • D750, D810, D7100, D7200: 51 points, 15 cross-type (three center columns)

    Sony

    • a6000: 179 points, 15 cross-type
    • a77II: 79 points, 15 cross-type
    • a77: 19 points, 11 cross-type
    • a7II: 117 points phase detection, PLUS 25 cross-type points
    • a7R II: 35mm full frame: 399 points (phase-detection AF) APS-C: 357 points (phase-detection AF) / 25 points (contrast-detection AF)

    Pentax

    • K-5: 11 points, 9 cross-type
    • K-3: 27 points, 25 cross-type

    Have you ever tried using cross-type focusing points? What have your results been like, and what other tips and tricks do you have for other dPS readers? Leave your thoughts in the comments section below.

    googletag.cmd.push(function() {
    tablet_slots.push( googletag.defineSlot( “/1005424/_dPSv4_tab-all-article-bottom_(300×250)”, [300, 250], “pb-ad-78623” ).addService( googletag.pubads() ) ); } );

    googletag.cmd.push(function() {
    mobile_slots.push( googletag.defineSlot( “/1005424/_dPSv4_mob-all-article-bottom_(300×250)”, [300, 250], “pb-ad-78158” ).addService( googletag.pubads() ) ); } );

    The post Understanding Normal and Cross-Type Focusing Points by Simon Ringsmuth appeared first on Digital Photography School.


    Digital Photography School

  • How to Take Care of Your Camera in Cold Weather

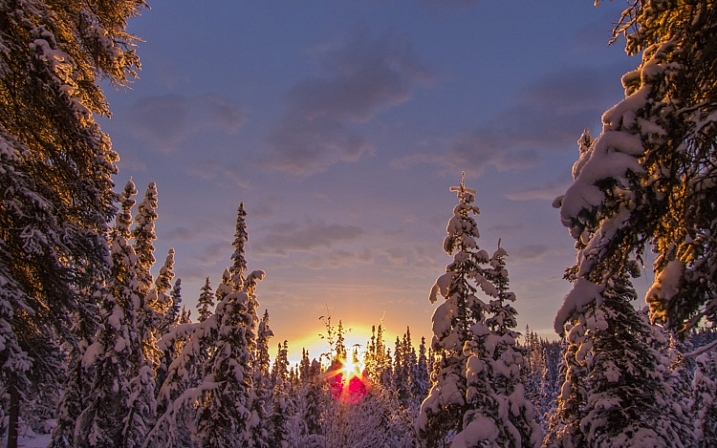
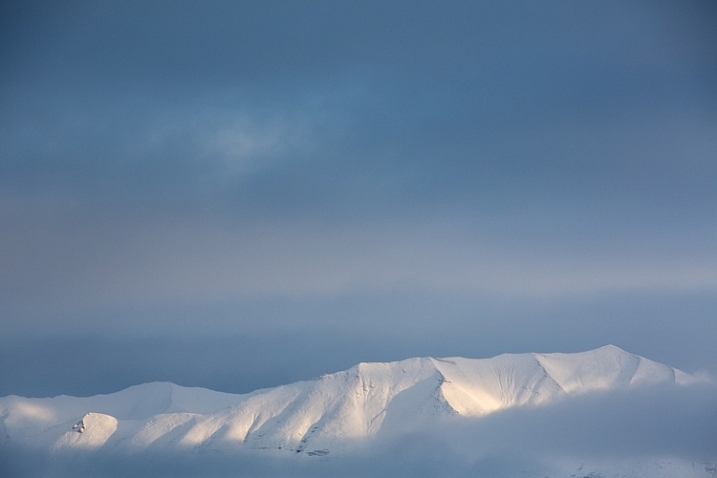
    Mid-day, mid-winter, Alaska light. It just doesn't get any better.

    Where I live, it gets cold. Not your “Brrr, I need to put on a sweater” kind of cold, but genuine, bone-chilling, spit-freezes-before-it hits-the-ground, kind of cold. Here in Fairbanks, Alaska, winter temperatures regularly drop far into the negatives, and yearly we suffer through snaps that send the mercury plummeting to -40F (-40C).

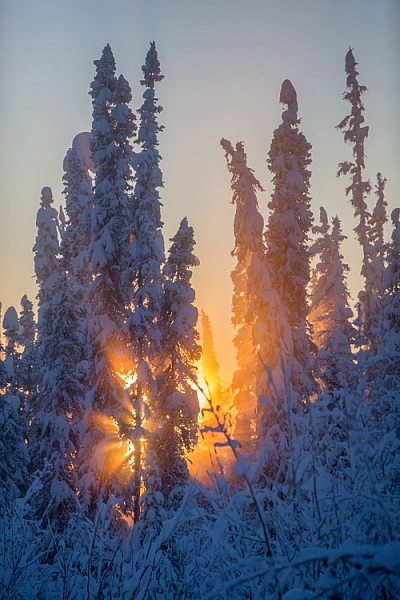
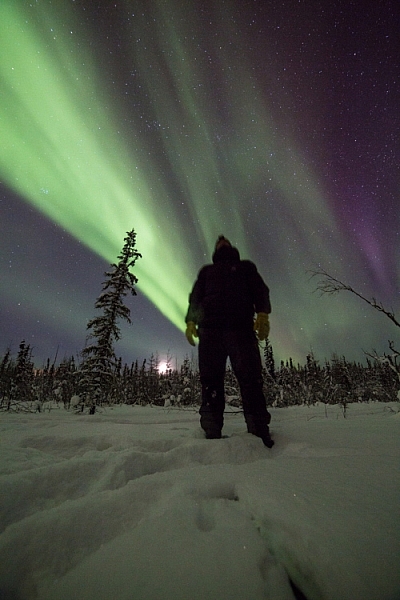
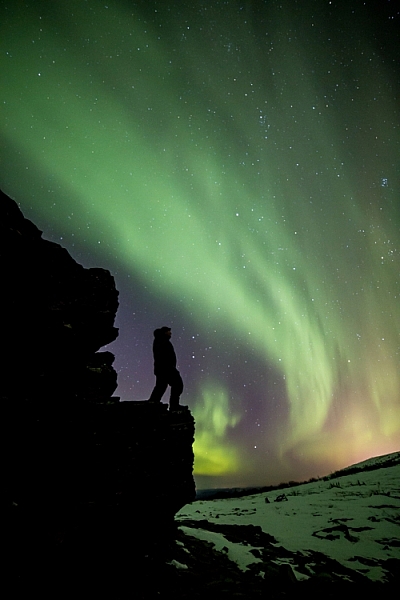
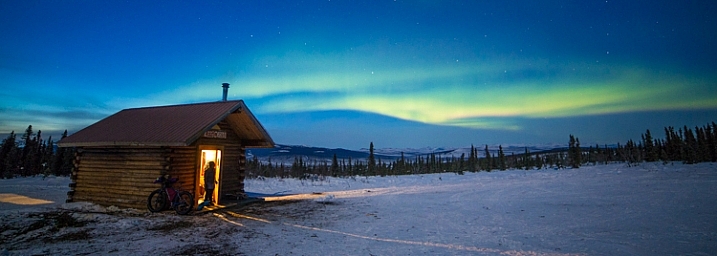
    You’d think that in such conditions I wouldn’t want to step outside, let alone take photos, but you’d be wrong. Winter light, what few hours there is of it, is absolutely beautiful. That sweet, crisp glow can pull me from the deepest funk, and lure me out with a camera in hand. During many long winter nights, the aurora borealis dances overhead, and that too can draw me from my cozy cabin, into the snowy forest to make images. On the days I made the two images below, it was seriously cold, but that light, yep, that light will get me outside.

    Low winter sun, and frosted birches near Fairbanks, Alaska. AK-FAI-Winter-sun-112172-17

    To venture out in those temperatures, you’ve got to be prepared. You need the right clothes to stay warm, and you’ve got to make sure your camera equipment is ready too.

    Forget about fashion

    To shot the aurora during mid-winter in Alaska you need to dress warm!

    To shot the aurora during mid-winter in Alaska, you need to dress warm!

    You’ve got to dress right. It doesn’t matter what the light is doing, if you get frost-bite on your fingers, and can’t operate the camera. When dressed in my winter-photo clothing, I feel a bit like an onion, wrapped in layer upon layer. From inside to outside my system goes like this: long underwear, fleece or wool sweater and pants, down or synthetic vest, 800 fill down jacket with hood, windproof Thinsulate pants, two pairs of thick wool socks topped by expedition quality winter boots, a musher’s style hat complete with ear flaps, a balaclava or face mask, and thin nimble gloves with a pair of expedition overmitts dangling from wrist straps. Last, I’ll often throw a couple of chemical hand-warmers into my jacket pockets. When temperatures drop to -40F, it’s best not to mess around.

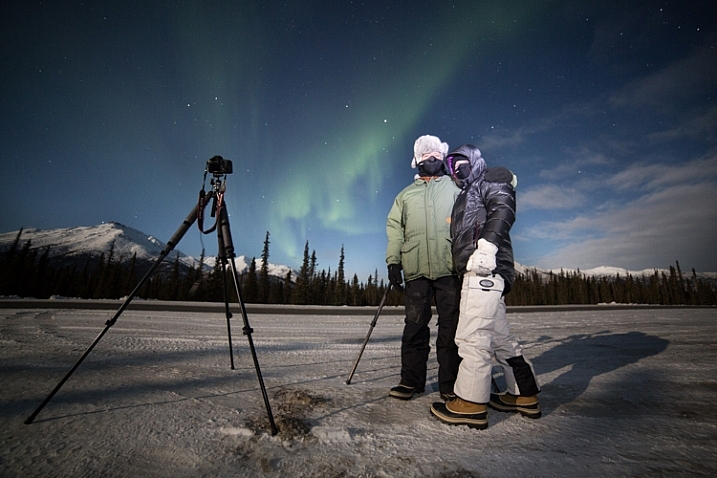
    Two of my clients on an aurora photography tour, dressed for the weather.

    Two of my clients on an aurora photography tour, properly dressed for the weather.

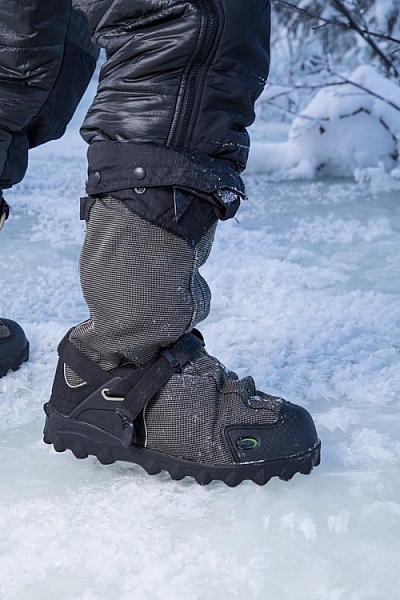
    The author's well-worn NEOS overboots.

    The author’s well-worn NEOS insulated overboots.

    Stay Charged

    The fluctuations of electricity mean that a cold battery cannot kick out the same amount of electricity as a warm battery. This means that on a brutally cold day, your camera or flash batteries will last only a small fraction of the time they normally would at room temperature. It’s a problem easily solved by carrying a spare battery or two.

    A backup battery will let you swap out the cold, dead one in your camera, but there is a hitch: the spares should not be kept in your camera bag, but in an inside jacket pocket. That way they are warm when they go into the camera. When the dead battery warms back up in your pocket (with the help of the aforementioned chemical hand warmers) it will be ready to use for a while again. I find I can shoot at extremely cold temperatures for the better part of day by cycling two batteries back and forth from my pocket to my camera. Though this will vary a lot, depending on how power-hungry your camera is.

    AK-FAI-Aurora-111154-35.jpg

    Avoiding Bad Breath

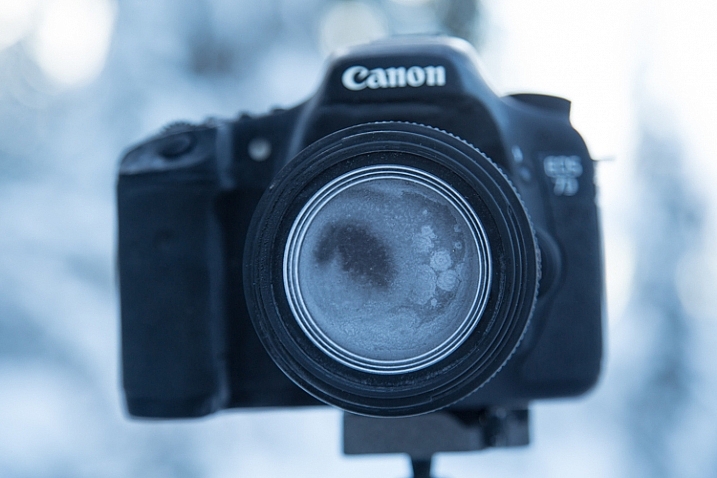
    The cold comes with other risks, one in particular, can ruin your day of photography, and that is – watch your breath. I mean it. A mistimed, warm, humid, breath will condense on your lens, resulting in a layer of milky frost on the glass. It doesn’t matter how much money you spend on your lenses, no amount of sharpness will make up for that kind of damage. Wiping at it, usually just smudges it more, and defrosting it inside (see below), can take hours. Watch where you breathe, if you turn your camera around to check lens settings, don’t exhale. I also usually wear a neck gaiter or balaclava that I pull up over my mouth and nose. So with your mouth covered, your breath is directed up, where it frosts on your eyelashes instead of your camera.

    This is what happens if you accidentally breathe on your lens during a cold weather shoot.

    This is what happens if you accidentally breathe on your lens during a cold weather shoot.

    Lens Caps Exist for a Reason

    Breath is the usual culprit of fogged lenses, but when shooting at night, there is always the chance that natural frost will form. To avoid this, use your lens cap when you aren’t shooting. If you are walking from one location to another, taking a break, or searching for a new composition, put the cap back on your lens. When I’m out shooting the aurora at night, my cap is on my lens, even if I’m just walking a short distance to a new shooting location.

    AK-Interior-Whites-103193-8

    Back Indoors

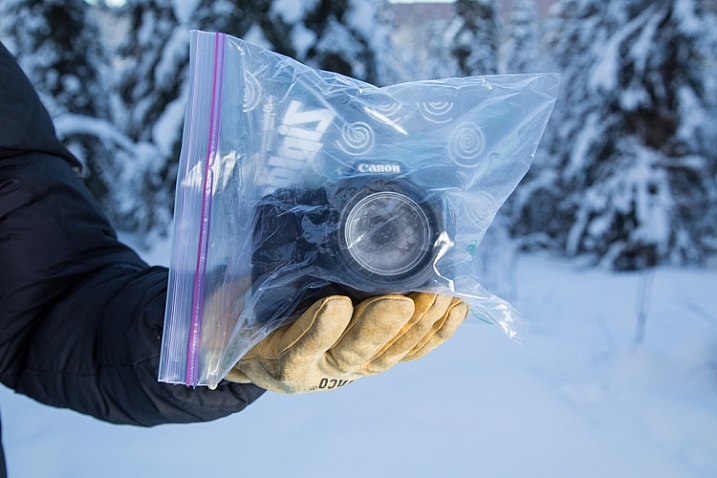
    Last, and perhaps most importantly, is the return indoors. You know how on a hot day, your cold beer glass gathers condensation? Ever watched how those drips can form and run down the bottle, pooling in a messy ring on the hard-wood table? Imagine that happening to your camera gear. It can, and it will. When you step back indoors to take a break, warm up, or finish up for the day, place your camera and lenses into an airtight bag.

    A properly bagged and sealed camera, ready to be taken back indoors after a cold outdoor shoot.

    A properly bagged and sealed camera, ready to be taken back indoors after a cold outdoor shoot.

    Ziplocks are good, but I favor light-weight roll-top dry bags like those used by boaters to keep their gear dry. These are tough, reusable, and work like a charm. Once sealed up tight in a ziplock or dry bag, condensation can’t form on your gear. Just let your camera warm up to room temperature before you pull it out.

    AK-NoatakPreserve-KellyRiver-1083-491

    The cold scares a lot of photographers, and make no mistake, a frigid, mid-winter Alaskan night is nothing to mess around with. But with a few precautions – warm clothes, spare batteries, avoiding frost, and protecting against condensation – you can take advantage of the stellar beauty of crisp, clear, days and nights like this one.

    googletag.cmd.push(function() {
    tablet_slots.push( googletag.defineSlot( “/1005424/_dPSv4_tab-all-article-bottom_(300×250)”, [300, 250], “pb-ad-78623” ).addService( googletag.pubads() ) ); } );

    googletag.cmd.push(function() {
    mobile_slots.push( googletag.defineSlot( “/1005424/_dPSv4_mob-all-article-bottom_(300×250)”, [300, 250], “pb-ad-78158” ).addService( googletag.pubads() ) ); } );

    The post How to Take Care of Your Camera in Cold Weather by David Shaw appeared first on Digital Photography School.


    Digital Photography School
  • How to Use the X-Rite ColorChecker Passport to Obtain Perfect Color

    There are two ways you can approach color reproduction in photography. The first is to try and reproduce the colors of the subject as accurately as you can. If you take a photo of someone wearing a red sweater, then you want the photo of that sweater to have exactly the same shade of red as the real thing. The other way is to produce colors that are pleasing to the eye, rather than accurate.

    The key point to understand here is that your camera isn’t designed to produce accurate colors, it is biased towards the second approach. The reason behind this is probably quite simple. Camera manufacturers want you to be happy with the photos that your camera produces, and that means tweaking colors so that they look more attractive.

    ColorChecker Passport & Lightroom

    The way your camera records color is determined by the color and white balance settings selected when you take the photo. This is especially true for JPEG files – if you use the Raw format you have the freedom to change those color settings when you process the file.

    Each manufacturer has a different name for the setting used to control color. Canon calls it Picture Styles, Nikon – Picture Control, Sony – Creative Style, Pentax – Custom Image, Olympus – Picture Mode and Fujifilm – Film Simulation.
    Let’s look at Canon’s Picture Styles as an example (I’m familiar with these as a long time Canon user). Their neutral and faithful Picture Styles are designed to give reasonably accurate colors, but the others aren’t. Portrait is designed to give good skin tones, landscape for strong greens and blues, and standard to make good reds. You will not achieve accurate color with the portrait, landscape or standard Picture Styles, but you may well end up with pleasing colors.
    But what if you simply want accurate color? There are a number of reasons why you might want to do this.

    • When photographing something that needs to be recorded accurately, such as product shots for a commercial client.
    • When photographing flowers, where it is very difficult to tell if the colors are accurate.
    • To make sure that photos taken with two different cameras match as closely as possible.
    • To simply start with a photo that has accurate colors as the first step in post-processing, so you can decide in which direction to go, from a neutral starting point.

    The X-Rite ColorChecker Passport

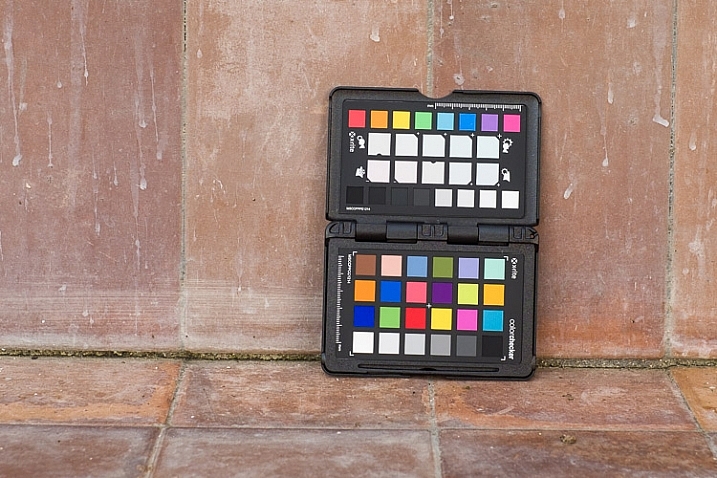
    The truth is that if you want accurate color, then for the reasons mentioned above, you can’t rely on your camera’s settings – you need some outside assistance. That’s where the X-Rite ColorChecker Passport comes in. This relatively inexpensive device is simple to use, and just as importantly from the point of view of a Lightroom user, integrates neatly with Lightroom.

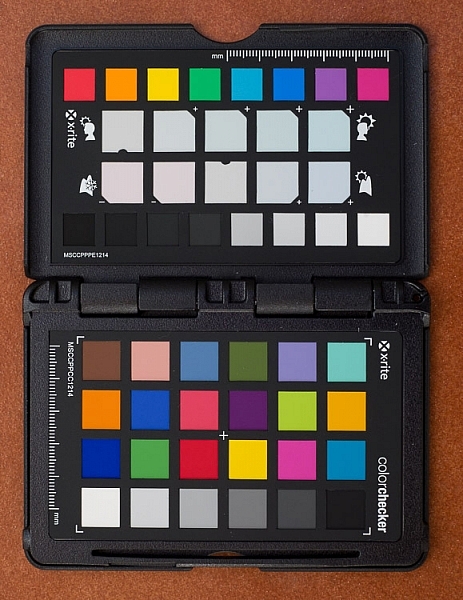
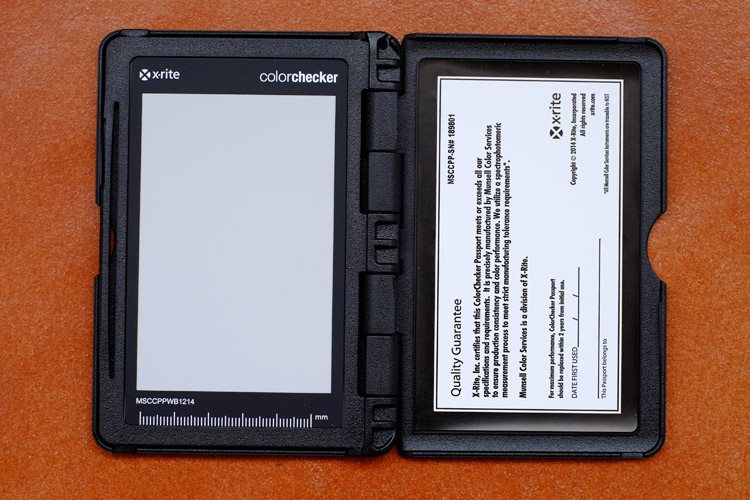
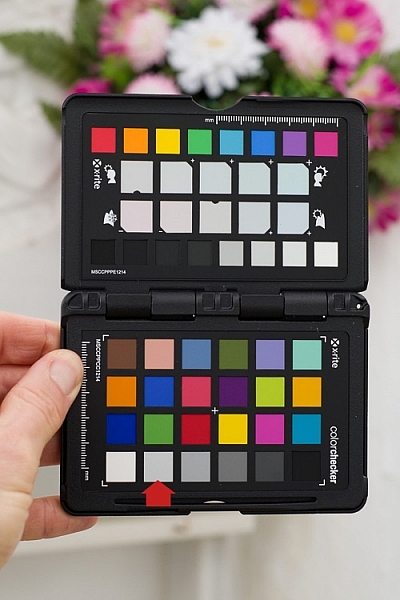
    The X-Rite ColorChecker Passport itself is made of grey plastic, and opens up to display the color patches shown here.

    ColorChecker Passport & Lightroom

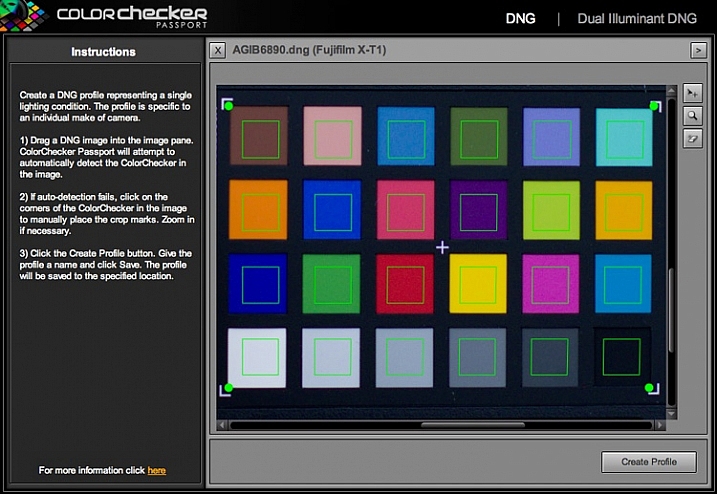
    The ColorChecker Passport is easy to use. Simply take a photo of the Passport in daylight (using the Raw format), convert it to DNG (use the Export option in Lightroom to do so) and drag the DNG file to the ColorChecker Passport software.

    ColorChecker Passport & Lightroom

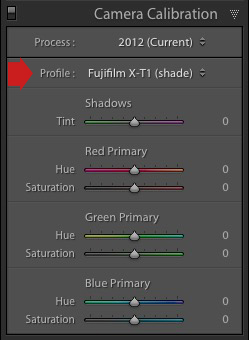
    The software creates a profile, calibrated for your camera, and stores it along with the other profiles found in Lightroom’s Camera Calibration panel. You’ll need to restart Lightroom to see it, but once you have done so, you can apply that profile to any photo taken in daylight with that camera. The profile is also available in Photoshop’s ACR if you need it.

    Note: The software also installs a Lightroom plug-in that you can use to create the profile by selecting the photo containing the ColorChecker Passport, going to File > Export and selecting the ColorChecker Passport preset.

    ColorChecker Passport & Lightroom

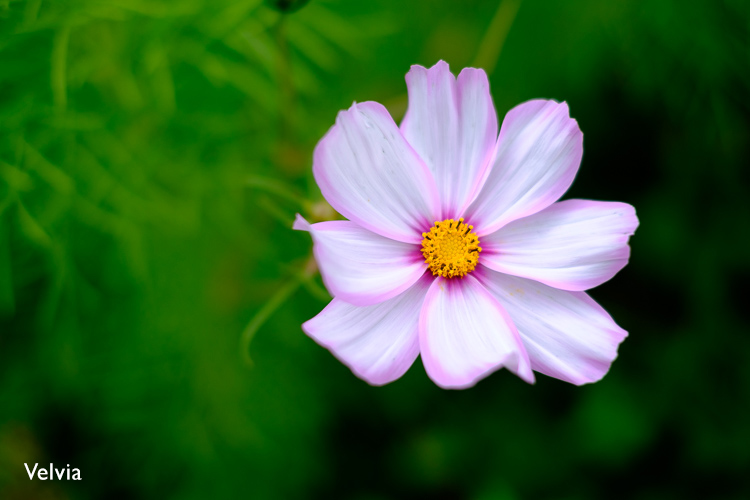
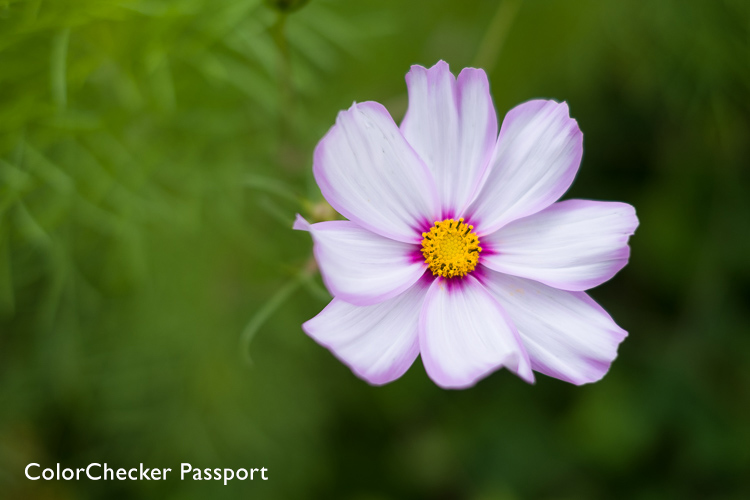
    The next two photos show the difference that using the calibrated profile can make. Both were created from the same Raw file. The first uses the Velvia camera profile specific to Fujifilm cameras. The second uses the Camera profile that I created using the ColorChecker Passport. This photo has the most accurate color, although it may not be as pleasing to the eye as the first, which uses a profile designed to make the photo look good.

    ColorChecker Passport & Lightroom

    ColorChecker Passport & Lightroom

    Dual Illuminant Profile

    You can also create a different type of profile called a Dual Illuminant Profile. To do so, you need two photos of the ColorChecker Passport taken with the same camera at the same ISO setting, but under different light sources. One should be daylight, and the best light source for the second one is probably tungsten. A Dual Illuminant Profile is more accurate as it takes into account the way sensors record light differently, under different light sources.

    Using the ColorChecker Passport for White Balance

    The final part of the color accuracy equation is white balance. You really shouldn’t rely on your camera’s auto white balance setting, as it can be misled by scenes that have more than average amounts of colors like red or blue in them.

    The ColorChecker Passport is small enough to carry around with you just about everywhere. That means you can use it on location, to record colors accurately, and set white balance. The Passport also has another panel that you can use to take a white balance reading, and create a custom white balance setting on location.

    ColorChecker Passport & Lightroom

    Alternatively, you can take a photo of the Passport’s color swatches in the same light as the subject, and use it to create a new profile. Then, in Lightroom’s Develop module, you can use the White Balance Selector to click on the 18% grey swatch second from left on the bottom row (indicated below). This method ensures both accurate color (from the profile) and accurate white balance (from the 18% grey swatch).

    ColorChecker Passport & Lightroom

    Have you use a Coler Checker before? Please share your experiences and comments below.


    The Mastering Lightroom CollectionMastering Lightroom ebook bundle

    My Mastering Lightroom ebooks are a complete guide to using Lightroom’s Library and Develop modules. Written for Lightroom 4, 5, 6 and CC  they  show you how to import and organise your images, use Collections, creatively edit your photos and how to work in black and white. Grab this book on sale now at 40% off over at Snapndeals, for a limited time only.

    googletag.cmd.push(function() {
    tablet_slots.push( googletag.defineSlot( “/1005424/_dPSv4_tab-all-article-bottom_(300×250)”, [300, 250], “pb-ad-78623” ).addService( googletag.pubads() ) ); } );

    googletag.cmd.push(function() {
    mobile_slots.push( googletag.defineSlot( “/1005424/_dPSv4_mob-all-article-bottom_(300×250)”, [300, 250], “pb-ad-78158” ).addService( googletag.pubads() ) ); } );

    The post How to Use the X-Rite ColorChecker Passport to Obtain Perfect Color by Andrew S. Gibson appeared first on Digital Photography School.


    Digital Photography School