Category: Photography

  • Travel Photography Simplified: 4 Changes that Made me a Better Photographer

    Get Viktor’s Lightroom Rapid Editing System for Travel Photography Course 50% off now at SnapnDeals for a limited time only – February 9th-23rd, 2016.

    When I look back and analyze how my photography has changed over time, I see that the last couple of years were the most eventful in regards to the evolution of my photography. I see that rapid advances in technology, in combination with my attempts to simplify various aspects of my photography, gradually changed my entire workflow.
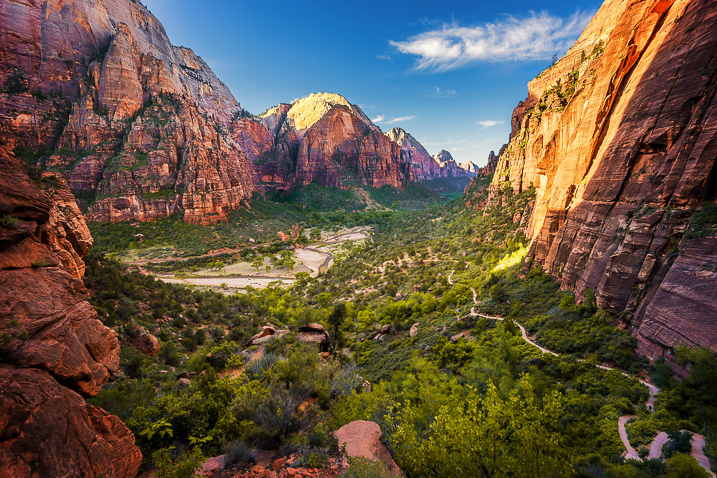
    Images Travel Photography Simplified 01

    If I had to identify the key moments that triggered the rest of the changes, my switch from DSLR to a mirrorless system would be at the very top of the list.

    1. Mirrorless Setup

    Depending on the type of photography, the switch to a mirrorless system affects photographers differently. As a travel photographer, the effect of the change was huge for me, and even though the learning curve was steep, it was liberating from the very beginning.

    The compactness of mirrorless systems was the most obvious factor for the switch. Here is the breakdown of my camera, plus lenses setup:

    • Sony A6000 (344g, 12oz)
    • Sony 10-18mm (220g, 8oz)
    • Sony 16-70mm (308g, 11oz)
    • Total: 874g (31oz)

    It’s hard to believe that a high-quality, wide angle zoom lens (10-18mm) can weigh only 220g (8oz). The full set, including the camera and two lenses that cover 90-95% of my needs, weighs less than 900g (32oz). I call it freedom.
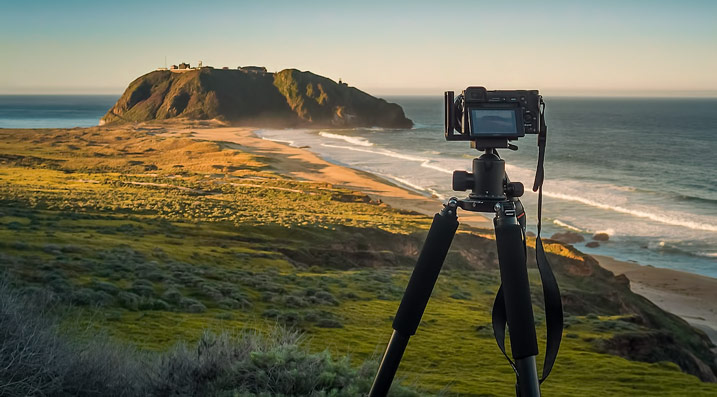
    Images Travel Photography Simplified 02

    From a practical standpoint, it actually means that I can pack the entire setup into a carry-on when traveling by plane. It also means that I do not have to think about what equipment to bring when packing for a demanding hike. Instead, I bring everything with me.

    The other two factors of my switch that impacted my photography were the amazing dynamic range of the Sony sensor and its EVF (Electronic Viewfinder). The extended dynamic range of the sensor allows me to reduce the number of brackets I have to take, to cover the entire dynamic range of the scene. Also, it saves me time editing, since I do not have to use HDR, and Image Blending techniques, as often as before.

    The Electronic Viewfinder also allows me to more accurately assess the scene before taking the shot and, as a result, reduces the number of unsuccessful shots.
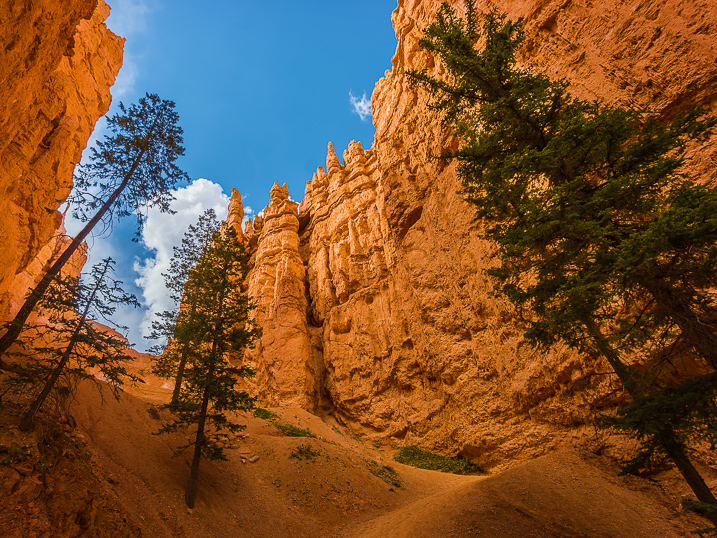
    Images Travel Photography Simplified 03

    2. Changing Travel Routine

    I did not expect that one small change to my travel routine would impact my photography so much. So what was the change? I simply stopped editing photos while traveling. Instead, I began concentrating all my efforts on finding interesting locations and capturing them – nothing else. This new focus makes my trips more enjoyable, reduces stress, and improves my photography in general.

    Before, I always loaded all of the new photos at the end of the day to Lightroom using my laptop. While checking the day’s results, I would often start culling and editing.

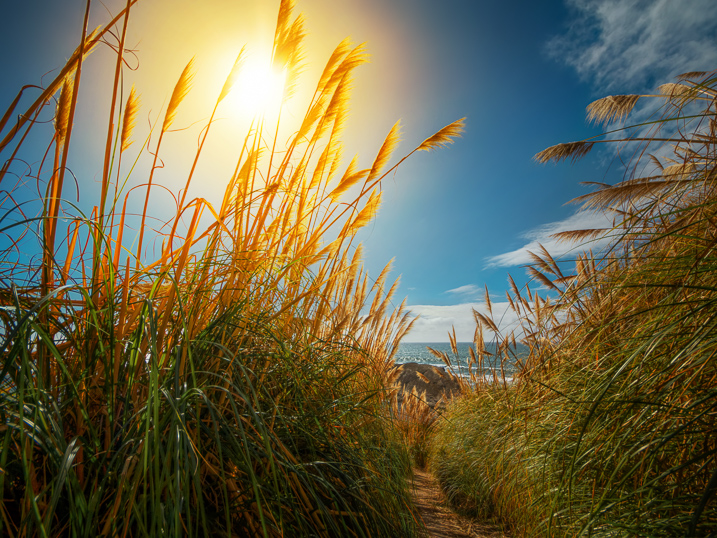
    Now, when I want to check if a shot is successful, I can do it while shooting, simply by wirelessly connecting my camera with my tablet. And, if it is absolutely necessary to post a couple of new photos to social media, I can edit them in seconds using Snapseed on my tablet, then easily post them online.
    Images Travel Photography Simplified 04

    3. Simplified Backup System

    Keeping photos safe while traveling is a big issue for any photographer. Up until recently, there was no reliable enough solution for a photographer, like myself, to go on an extended photography trip without bringing a laptop. For years, a laptop was the center of my backup strategy while traveling, which only added unnecessary bulk to my setup.

    Finally, I think this is starting to change. For the last few months I’ve been testing a laptop-less travel approach, and I am confident that a new setup this year will completely replace my outdated backup system.

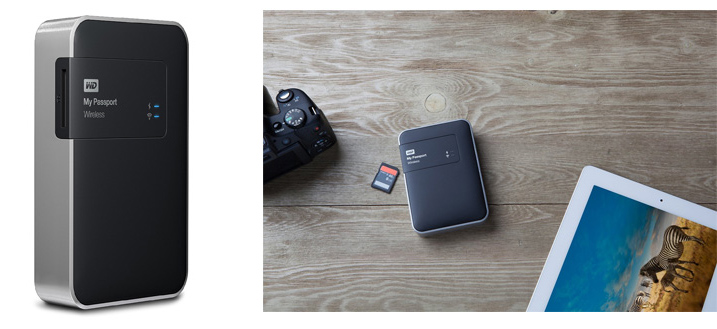
    This new workflow is possible because of a device that was recently released: WD My Passport Wireless. The device has a variety of interesting features, but the most important one, from a photography standpoint, is the SD Memory Card Reader. When you insert a memory card into the reader, it automatically backs up all the contents of the card to the drive. Plus, it supports incremental backups, which means that it backs up only new files rather than those previously transferred.
    Images Travel Photography Simplified 05

    Photo courtesy Western Digital

    This device makes it possible to travel without a computer. Also, it minimizes the risk of losing images due to memory card failure. Now, I incrementally backup my new images multiple times throughout the day, and by the end of the day back at the hotel, I already have all of my new images on two devices.

    Another feature of the WD My Drive Wireless that excites me as a photographer, is its ability to connect to the drive with a mobile app and grab any photos (JPEGs only) for editing.
    Images Travel Photography Simplified 06

    4. Rapid Editing

    Lightroom is my primary photography editing tool. At some point, I realized that 80% of my editing steps were identical for every photo. This meant that only 20% of my efforts were spent on what really mattered: making every photo unique. I also recognized that if I could automate the 80%, then I could drastically reduce the time I spend in front of the computer.

    The obvious choice for editing automation was Lightroom’s preset functionality. The presets allow users to record their editing steps in Lightroom for later use.

    The main obstacle in developing and implementing a new system was Lightroom’s presets limitations. You have probably already noticed that it is rare when you apply one of the presets to a photo that are happy with the final results. You still have to dive deeper into the Lightroom editing tools to compensate for the level of exposure, lighting conditions, shadows, and the dynamic range of the scene.

    I solved this problem by introducing a two-level editing system which I call Lightroom Rapid Editing. I separated my Lightroom presets into two categories:

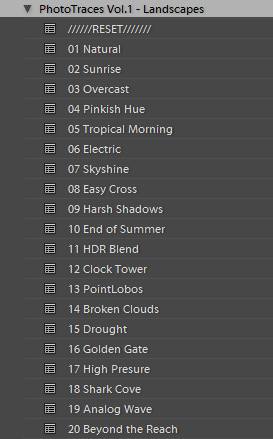
    Style Presets: The presets that establish the artistic style and reflect our creative vision. For example, a dreamy, warm look or an aggressive and contrasted style, soft black & white or a vibrant cross processed treatment.
    Images Travel Photography Simplified 07

    Adjustment Presets: The presets that do affect the style of the photograph but help us to fine-tune the following parameters: exposure, shadow recovery, contrast, clarity, vignetting. I called the collection of the adjustment presets the TOOLKIT.
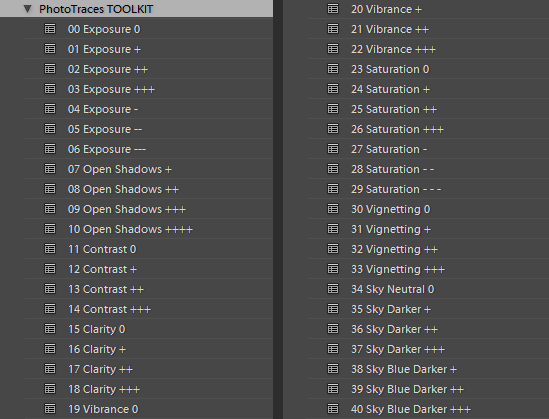
    Images Travel Photography Simplified 08

    This is how my workflow looked after I implemented the two level preset system:

    First, I applied one of the Style Presets. Then, I used the Adjustment Presets from the TOOLKIT to fine tune the image. Simple, effective, and automated. The Lightroom Rapid Editing System reduced my editing time by more than half and made my photography more consistent.

    Here is a quick demonstration:

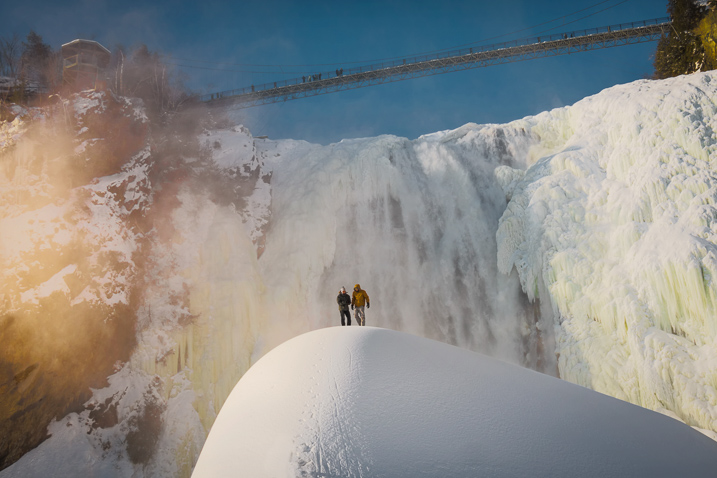
    For the demonstration, I selected a photo of Niagara Falls (American and Bridal Veil Falls). The scene was somewhat challenging as the water of the falls, was much brighter than the rest of the scene. I intentionally set exposure for the brightest areas, making sure I preserved enough details in the water. It resulted in an underexposed capture, making it more challenging to edit.
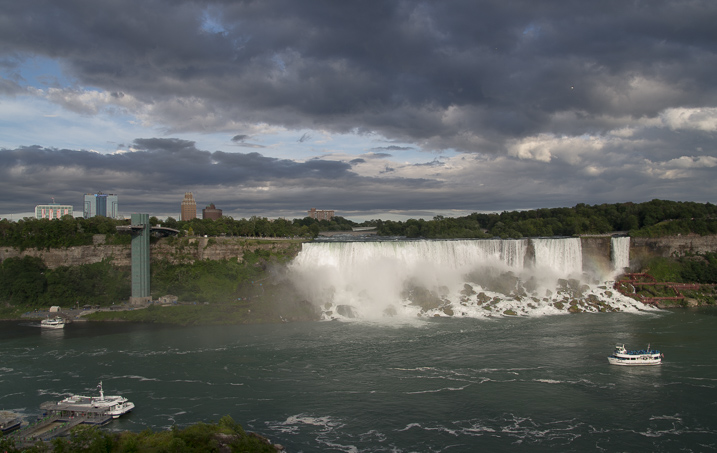
    Images Travel Photography Simplified 09

    First, I applied one of my favorite presets from the Landscape Collection – Natural. Second, I used the following TOOLKIT adjustments (Adjustment Presets):

    • 01 Exposure +
    • 08 Open Shadows ++
    • 17 Clarity ++
    • 31 Vignetting +

    Here is the result. It took me five clicks, and no more than two minutes to complete the editing. To record my editing steps for future reference and easy sharing, I used Lightroom Rapid Editing Formula: Natural (02, 08, 17, 31).
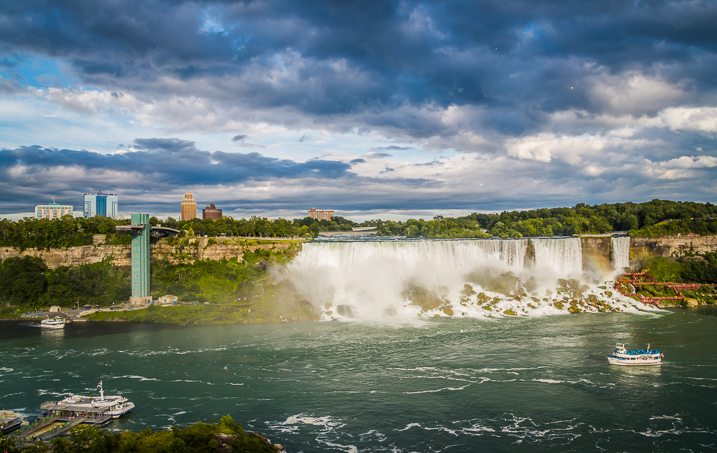
    Images Travel Photography Simplified 10

    Read a more detailed explanation of my travel photography workflow here: Photo Editing Workflow for Travel Photography

    Conclusion

    I believe that simplification is the key factor in mastering any complex process. If you reject unnecessary complexity by drastically simplifying it, you can invest more time and effort into what really matters. The changes I listed above did not happen overnight but they were always driven by the desire to simplify my photography.

    How have you simplified your photography? Share with us in the comments below.


    If you found this helpful, get Viktor’s Lightroom Rapid Editing System for Travel Photography Course 50% off now at SnapnDeals for a limited time only – February 9th-23rd, 2016.

    googletag.cmd.push(function() {
    tablet_slots.push( googletag.defineSlot( “/1005424/_dPSv4_tab-all-article-bottom_(300×250)”, [300, 250], “pb-ad-78623” ).addService( googletag.pubads() ) ); } );

    googletag.cmd.push(function() {
    mobile_slots.push( googletag.defineSlot( “/1005424/_dPSv4_mob-all-article-bottom_(300×250)”, [300, 250], “pb-ad-78158” ).addService( googletag.pubads() ) ); } );

    The post Travel Photography Simplified: 4 Changes that Made me a Better Photographer by Viktor Elizarov appeared first on Digital Photography School.
    Digital Photography School

  • Intentional Blur- How to Create it and Why it’s Awesome

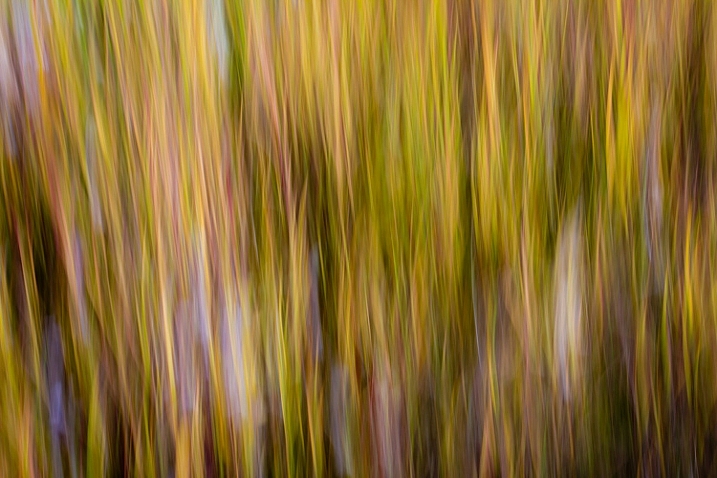
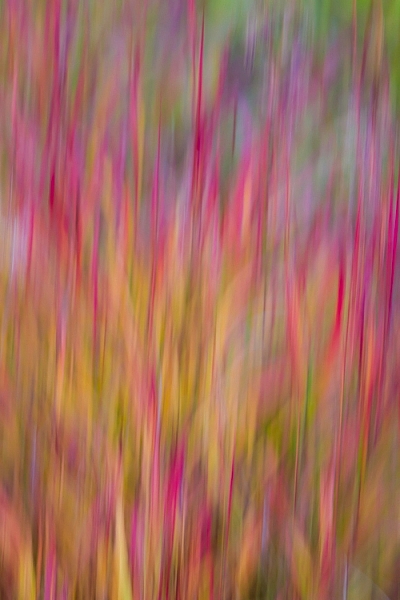
    An abstract blur of cotton grass, Fairbanks, Alaska, in autumn.

    Open up any photography magazine or website, and I promise there will be at least one article, and a half dozen ads, discussing image sharpness and how to get it through technique or gear. Don’t get me wrong, sharpness is great. When I’m shooting a classic landscape or portrait, if the image is a hair out of focus, it goes in the trash. But, at times, blur is exactly what you want, and occasionally, it’s exactly what your sharpness-obsessed brain needs. All you need, is a camera that allows you to manually control shutter speed.

    Abstract Panning Blur

    Creating abstract blurs is a chance to explore color, and pattern, and forget about the nit-picky details of composition. Frankly, it’s a fun way to screw around with your camera, and the results can be very cool.

    An abstract blur of Fireweed, Fairbanks, Alaska, in autumn.

    I made the above image in the small wetland below my home in Alaska. In the autumn, the fireweed fades from green, to orange and red, and these plants erupted from the background. Photographically, I didn’t care about the fireweed itself, I wanted to create an image with the feeling of an explosion. After a moment of pondering, I decided a blur might do the trick. I set the camera shutter to 1/10th second, and panned the camera parallel to the direction of the stems (up and down).

    The process is simple, but can feel strange. The camera must be in motion for the entire length of the exposure (usually longer than 1/15th of a second). If you pause, start too soon, or end too early, then elements of the image will retain detail, and the clean washes of color will become confused.

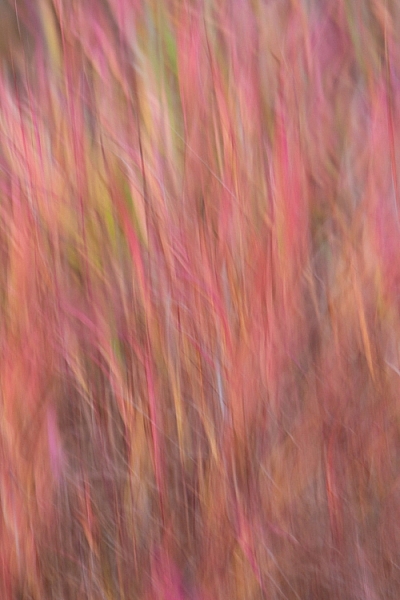
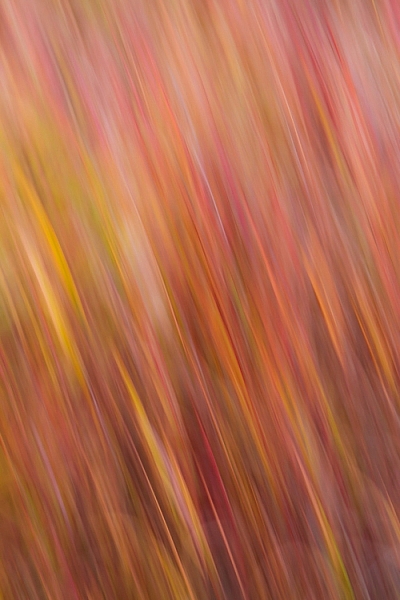
    Below are a couple of examples using a patch of autumn foliage. In the first (below left), I moved the camera slowly, while the second (below right) is a quicker motion:

    AK-FAI-autumn-blur-abstract-11 An abstract blur of Fireweed, Fairbanks, Alaska, in autumn.

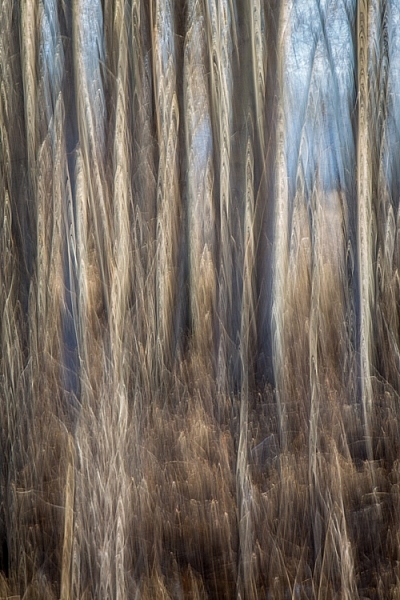
    Linear patterns, like the fireweed stems I noted above, or trunks of trees, make great subjects for this kind of image. Below are two interpretations of a forest. The first of these images was made during the blue hour of a snowy winter morning, the second is a very fast vertical pan of cottonwoods, on a bright spring day.

    AK-FAI-winter-abstract-6
    AK-FAI-CreamersField-abstract-104284-25

    You can also experiment with jiggling the camera as I did in the image below. The results can be very painting-like, and are quite unlike any other type of image I know how to create.

    AK-FAI-CreamersField-abstract-104284-33
    Zoom Blurs

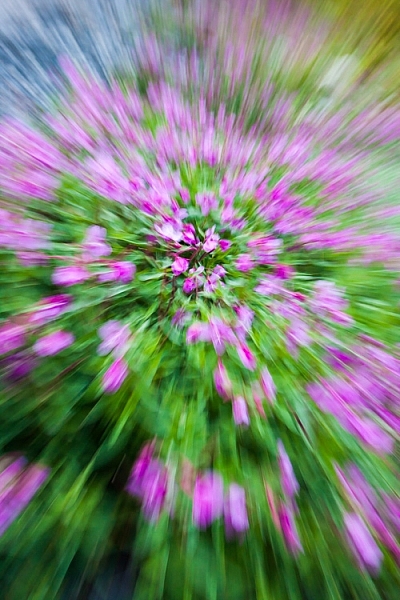
    A zoom blur, as is obvious from the name, requires a zoom lens to execute. The result is an image that appears to blur outward, from a comparatively sharp center point. Often, it gives the impression of forward motion, or viewing the subject down a long tunnel of color and pattern. Bright subjects, like flowers, often work well. When done properly, this technique yields an image that is a celebration of color.

    AK-Girdwood-fireweed-abstract-3

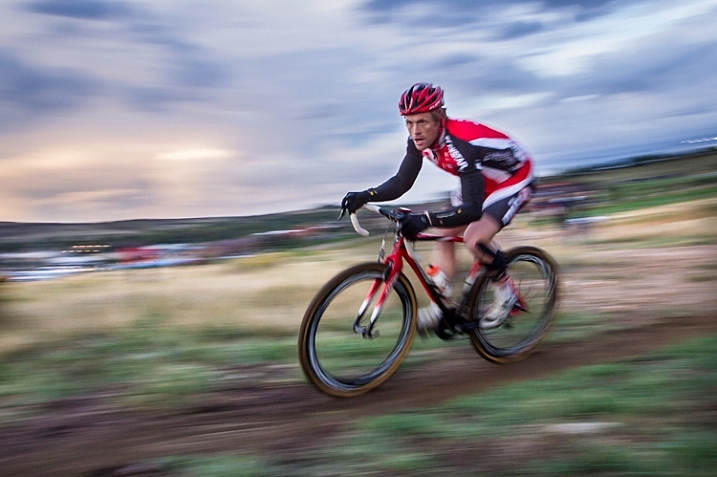
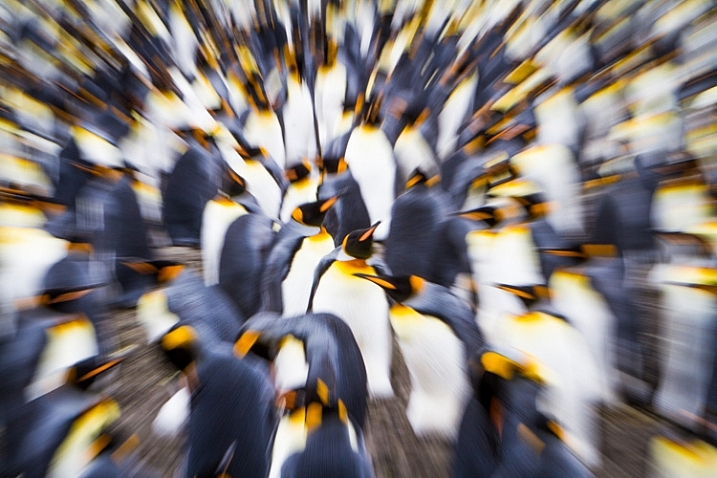
    Just as you need the camera in constant motion to create an effective panning blur, you’ll need to make sure the zoom is activated throughout the exposure. Try 1/10th second as a starting point. I’ve experimented with this technique in a variety of situations, even on a colony of King Penguins (below), where I think the technique emphasizes the chaos and noise of the tightly packed birds. It can also be effective for portraying motion, as I did in the image of the mountain biker (second image below). For this image I used a small zooming motion, instead of a dramatic pull back, as the cyclist approached me.

    SGeorgia-9Jan10-SalisburyPlains-53
    AK-FAI-GoldstreamSports-Sep13-121

    Subject Blur

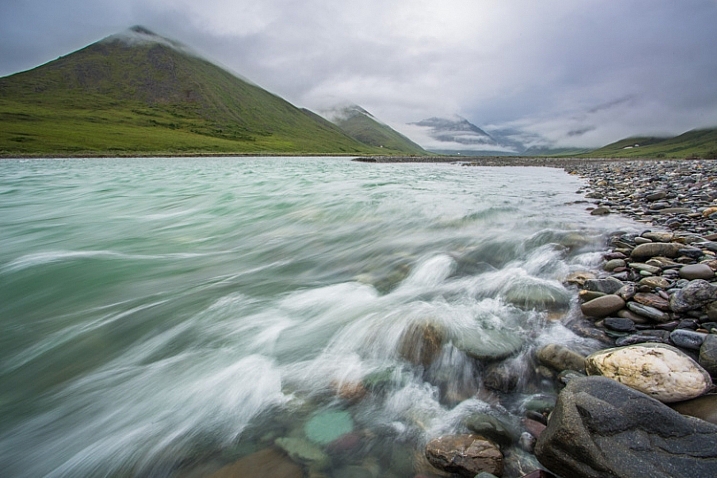
    In the techniques I described above, either the camera, the lens, or both must be in motion, but blurs can also be effective when it’s the subject that’s moving. Most landscape photographers will already be familiar with the technique of blurring moving water through the use of a slow shutter speed. This technique requires a tripod to be effective, and composition, unlike in abstract blurs, now plays an important role.

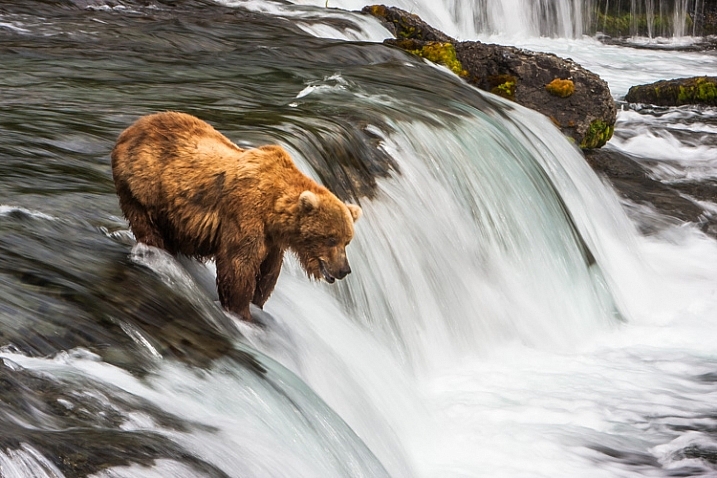
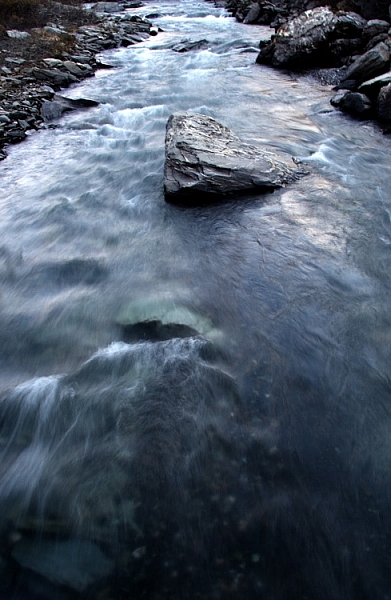
    Your shutter speed will dictate how the blur appears in your final image. Slowly moving subjects like rippling waves, may require several seconds to blur, while a fast tumbling creek or waterfall may only need 1/15th second. Experiment, and see what you get. In the two images below, the bear and waterfall required only 1/15 second to blur, while the slower moving creek required nearly a half second.

    A Brown Bear fishes for salmon at Brooks Falls in Katmai National Park, AK, USA.

    AK-Denpark-Savageriver-01

    1/8th second at f16

    1/8th second at f16

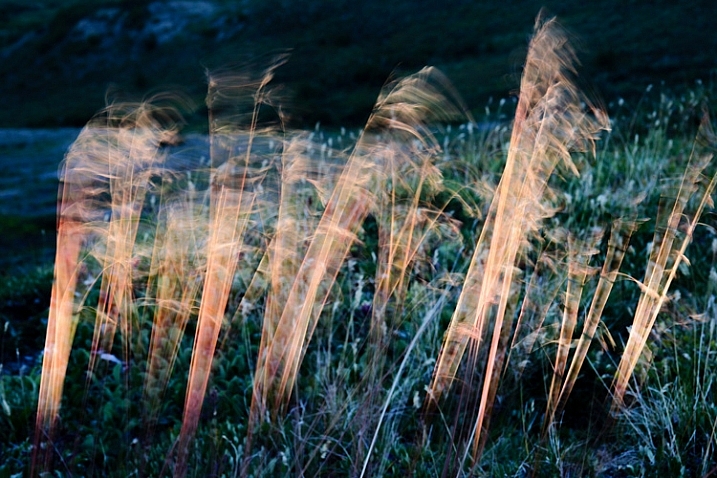
    Water is the obvious subject for this kind of photography, but don’t limit yourself. Several years ago, I was hiking atop a ridge in the Alaska Range. It was mid-summer, a few minutes before midnight, and the sun was just setting behind the mountains. It was windy, and tufts of golden tundra grass were waving rapidly back and forth in the breeze. I knew that when the last light of day departed, those tufts of grass would be lit up, and all the rest of the world would be shadowed. Quickly, I set up: tripod placed low, long shutter speed (1/4 second), and waited. Sure enough, for just a moment, the only thing lit by the sun was the blowing grass stems:

    Blowing tundra grass lit by evening sun, Alaska.

    Action Blurs

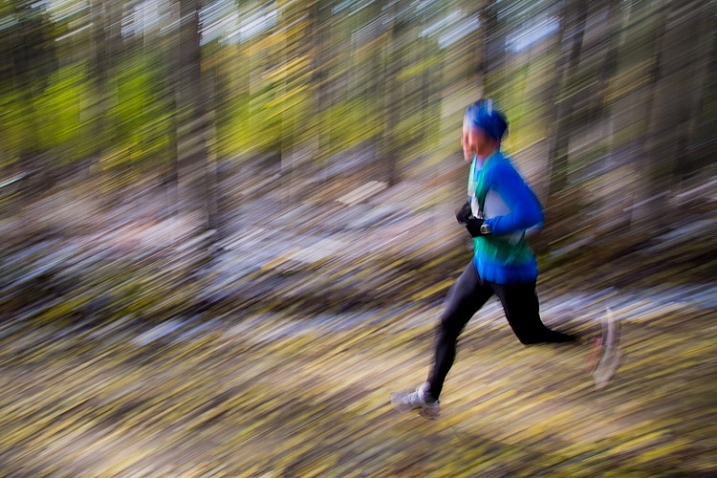
    This last technique is frequently used to give the impression of movement and speed, and is often used in sports and wildlife photography. There are two flavors of action blurs. The first is when the camera is panned to track a moving subject. This results in an image with a sharp, or semi-sharp subject, and blurred background like the image below.

    AK-FAI-Equinox-marathon-109203-3

    The second is when the camera is still, and the subject is in motion. The outcome is a blurred subject, with a sharp background. Both result in an image that clearly tells the story of motion.

    AK-FAI-GoldstreamSports-Sep13-128

    Results using this technique are hard to predict. The combination of long shutter speeds, and moving cameras and subjects, can result in many failed images. But when it works, the results can be awesome.

    CO-Golden-Cyclocross-26Sep2012-87

    Rapidly moving subjects may require only 1/60th of second (or faster) to provide blurred motion, but slow subjects may need substantially longer shutter speeds. It’s a game of trial and error. Running and cycling races, or other sporting events, are great places to practice the technique, as you can shoot again and again while experimenting with different shutter speeds. Once you’ve mastered the method, you can break it out on higher stakes subjects like fast moving wildlife, where you may only get one opportunity to get the shot.

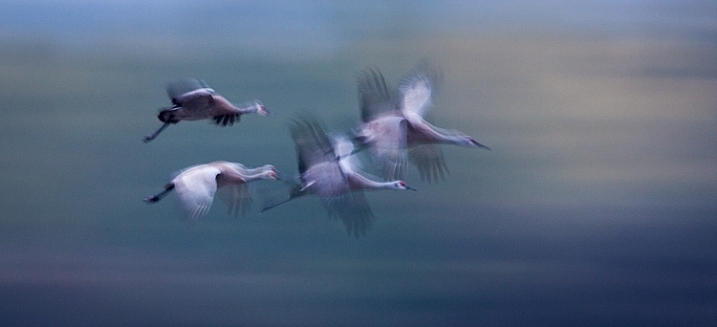
    AK-FAI-CreamersField-Migration-Aug2009-54

    Go out and experiment. Blurs, be they abstract, impressionist, or realistic, can be great fun to play with. For me, it’s a fallback technique when I need to jumpstart my creativity.

    Have you tried making blurs? I’d love to see what you get. Feel free to post them in the comments below.

    googletag.cmd.push(function() {
    tablet_slots.push( googletag.defineSlot( “/1005424/_dPSv4_tab-all-article-bottom_(300×250)”, [300, 250], “pb-ad-78623” ).addService( googletag.pubads() ) ); } );

    googletag.cmd.push(function() {
    mobile_slots.push( googletag.defineSlot( “/1005424/_dPSv4_mob-all-article-bottom_(300×250)”, [300, 250], “pb-ad-78158” ).addService( googletag.pubads() ) ); } );

    The post Intentional Blur- How to Create it and Why it’s Awesome by David Shaw appeared first on Digital Photography School.

    Digital Photography School

  • Designing the Perfect Camera – What Features are on Your Wish List?

    The perfect camera doesn’t exist, but if I were a camera designer, I know exactly what sort of camera I would make for myself, and how I’d improve on the one that I’ve already got. I’m not asking for the impossible either – all these ideas could be implemented using current technology. Really, what I would do is take the camera I already own – the Fujifilm X-T1 – and add the best bits from other cameras, to make a kind of super-camera, or at least one that is better tailored to my own needs.

    1 – Sensor size

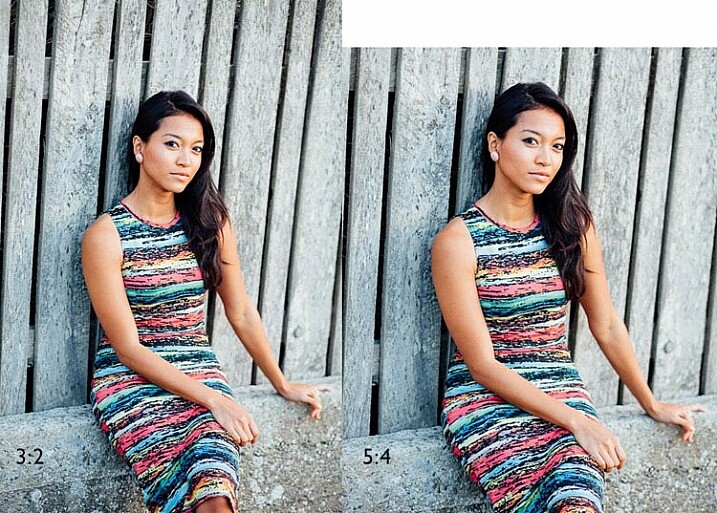
    Let’s start with the sensor. The X-T1’s sensor uses the same 3:2 aspect ratio as other APS-C and medium format cameras. This often works well when taking photos in the landscape orientation. But it doesn’t work nearly so well when taking photos in the portrait orientation (with the camera turned on its side).

    Aspect ratio

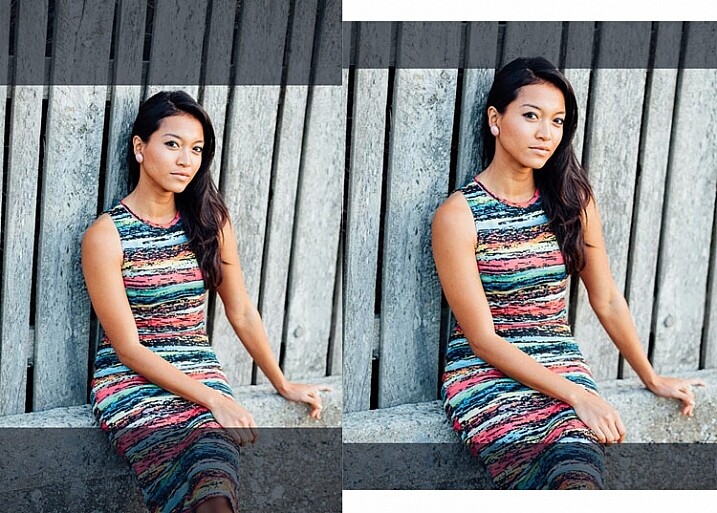
    The portrait on the left has an aspect ratio of 2:3 (width always comes first), the same as the sensor on the X-T1. The portrait on the right shows how it would look if the sensor had a 4:5 aspect ratio. The area is the same, but the width and height are different.

    It’s surprisingly hard to create a good composition that utilizes all the space in the frame well, especially for landscapes and portraits. It’s much easier with a shorter rectangle, such as those found in large format cameras (aspect ratio 5:4), some medium format film cameras (7:6) and Micro four-thirds cameras (4:3).

    For example, check out the landscapes of Joe Cornish. He uses a large format camera for a lot of his work, and he uses the portrait orientation a lot. It works really well with the short rectangle.


    My proposal is this. Ditch the 3:2 aspect ratio sensor and place it with one that uses the 5:4 aspect ratio. But keep the area of the sensor – don’t make it bigger or smaller. This would give you several benefits:

    • It’s easy to compose images within the 5:4 aspect ratio.
    • If you crop to a square (as I often do because I love the square format) you use more of the sensor than when you crop the current APS-C sensor.
    • You get a slight improvement in image quality, especially at wide apertures, because you are using the centre part of the lens to create the image.
    Aspect ratio

    The above two photos, cropped to a square. The dark grey area shows the unused part of the sensor. You lose less information captured from the 5:4 sensor than you do from the 3:2 one.

    What I don’t want to see, is a full-frame camera introduced into the Fujifilm range. The problem with having two sensor sizes in the same range, is that it greatly complicates the process of making, and buying lenses. It’s far better, as Fujifilm has done so far, to use a single sensor size throughout the range (in my opinion).

    2 – In-Camera Image Stabilization

    I think this is a fantastic idea, and I’d like to see it in Fujifilm cameras. The advantage of having Image Stabilization in the camera is that you can use it with any lens. That includes wide-angles, which you can then potentially hand-hold at shutter speeds like 1/4 or 1/8 second, giving all sorts of interesting creative possibilities when it comes to recording movement. Sony and Olympus have got this one right.

    Fast shutter speed

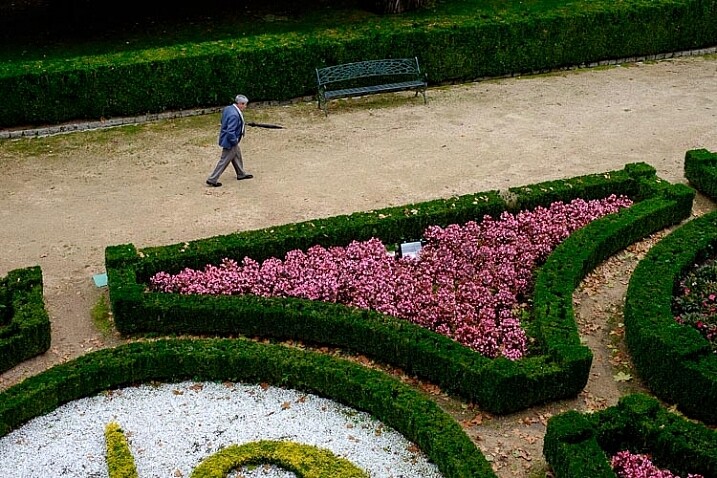
    I took this photo with a 35mm lens at 1/180 second to freeze movement. This lens doesn’t have Image Stabilization, but if it were built into my camera, I could try taking the photo at a shutter speed as slow as 1/15 or 1/8 second. The man would be a blur, creating a different image entirely. Image Stabilization lets you try this with a hand-held camera, so you don’t have to use a tripod.

    3 – Quick control dial

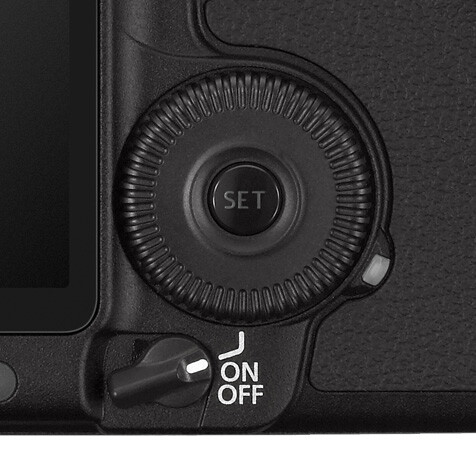
    Mid-range and high-end Canon cameras have a quick control dial – a thumbwheel on the back of the camera, that you can move while looking through the viewfinder. The big advantage of the quick control dial is that you can adjust exposure compensation without removing your eye from the viewfinder.

    Quick control dial

    The quick control dial on the EOS 5D Mark II. Its position means that it’s easy to move with your thumb, while looking through the viewfinder.

    The X-T1 can already display a histogram in the viewfinder. With a quick control dial you can adjust exposure compensation (when in an automatic mode like aperture priority, shutter priority or program) as you go, to get the histogram where you want it. All guesswork regarding exposure is gone. The current exposure compensation dial is too hard to move while looking through the viewfinder, and reduces the usability of the camera.

    The joystick added to the X-Pro 2 for quick movement through the autofocus points would also be a welcome addition.

    4 – Dual card slots

    Probably coming in the XT-2, but essential for backing up photos. Good quality memory cards are virtually indestructible. If your camera saves a copy of each photo on two different cards this makes backing up photos much easier, especially while travelling.

    So Fujifilm, if you’re listening, I know I’m only one user among many, but I’d love it if you could give some consideration to these ideas. Especially the one about sensor size, which I think could revolutionize the way we use cameras.

    Your turn

    If I could add just one feature to my X-T1 it would be the 5:4 aspect ratio sensor. So here’s a question for you – if you could add just one feature to your camera, which would it be and why? I’m looking forward to reading your answers, this should be interesting.


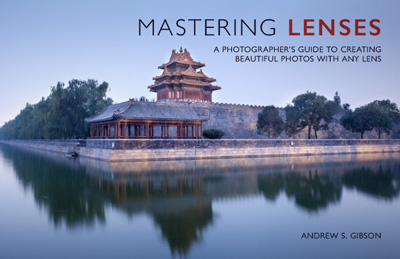
    Mastering Lenses photography ebookMastering Lenses

    My new ebook Mastering Lenses: A Photographer’s Guide to Creating Beautiful Photos With Any Lens shows you how to get the best from the lenses you own already. A comprehensive guide to exploring the creative potential potential of wide-angle, normal and telephoto lenses, it’s also the ultimate buying guide for readers thinking about purchasing a new lens for their camera. Please click the link to learn more or buy.


    googletag.cmd.push(function() {
    tablet_slots.push( googletag.defineSlot( “/1005424/_dPSv4_tab-all-article-bottom_(300×250)”, [300, 250], “pb-ad-78623” ).addService( googletag.pubads() ) ); } );

    googletag.cmd.push(function() {
    mobile_slots.push( googletag.defineSlot( “/1005424/_dPSv4_mob-all-article-bottom_(300×250)”, [300, 250], “pb-ad-78158” ).addService( googletag.pubads() ) ); } );

    The post Designing the Perfect Camera – What Features are on Your Wish List? by Andrew S. Gibson appeared first on Digital Photography School.


    Digital Photography School

  • Nikon D5 and D500 Review: Exceptional Image and Video Quality

    Professional photographers and shutterbugs alike were excited when Nikon Corporation launched in January 2016 the Nikon D5 (the most advanced professional DSLR to date), as well as the Nikon D500 (which replaced the D300S, Nikon’s previous DX-format flagship DSLR). Let’s take a deeper look at each of the new Nikon cameras. Nikon D5: Setting New Benchmarks for Speed, Accuracy, and Continue Reading

    The post Nikon D5 and D500 Review: Exceptional Image and Video Quality appeared first on Photodoto.


    Photodoto

  • 6 Moments of Childhood to Capture Beyond the Obvious

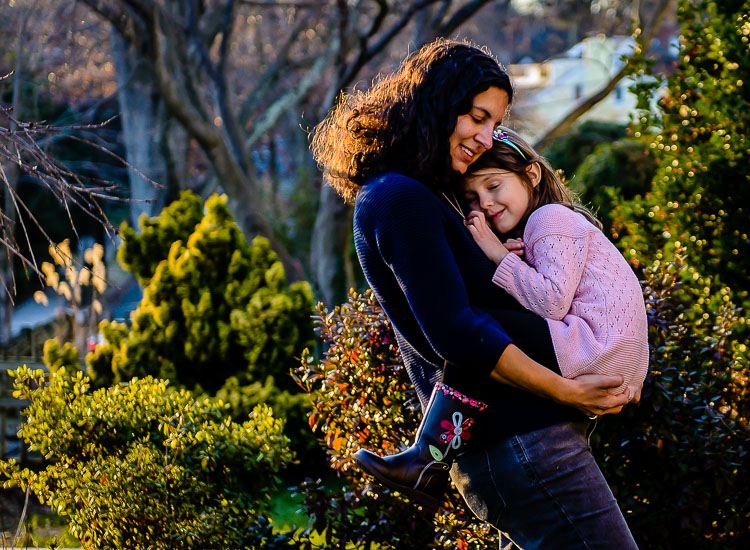
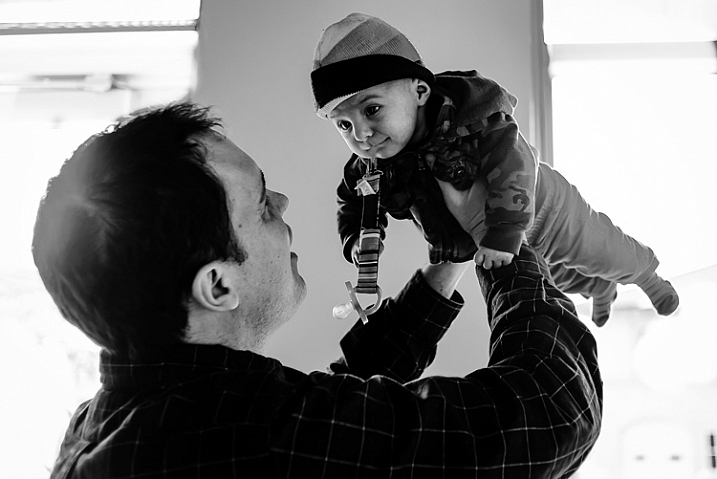
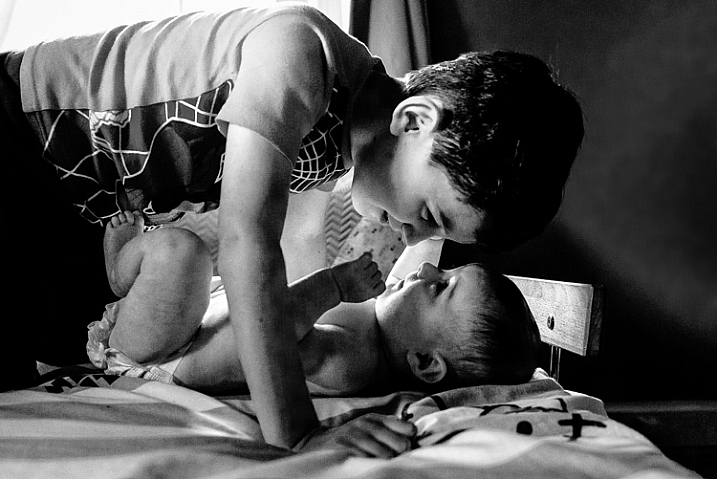
    If you are a parent, you probably pull out your camera to take photos of the big moments in your child’s life. You have almost certainly captured her first taste of solid food, his first steps, and her first day of school. You probably also have a handful of photos from family vacations, and you may even have an annual portrait for the end-of-year holiday card.

    dps-3

    But, looking back, you are likely to find that these photos don’t tell you much about what life was like for you, and your child, during his early years. To help you capture the smaller, but special, moments of your little one’s childhood, be sure to take photos of these essential parts.

    1) Your Child’s Friends

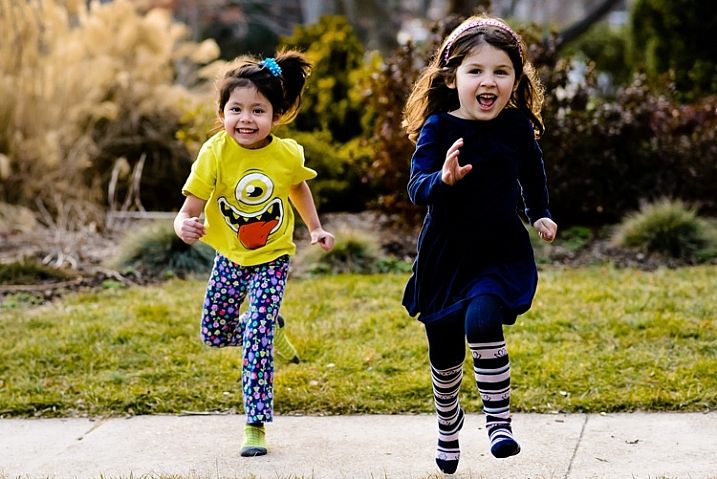
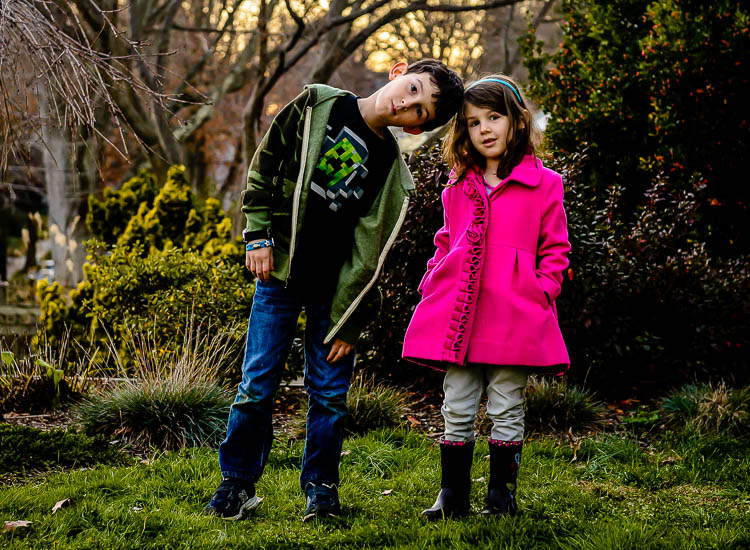
    Your child will always hold a special place in his heart for his childhood friends. While it is tempting to always get shots of your child alone, you and your child will appreciate having photos of him with his friends to look back on through the years, especially if you, or a special friend, may one day move away. To make these photos even more meaningful, get a shot of the kids engaging in a favorite activity together – whether it’s playing board games, dolls, or soccer.

    dps-2-750

    Dps 8

    2) The Fits

    One look through your Facebook or Instagram feed, and you might think that all of your friends’ kids are happy, all the time. While your friends may work hard to make their little ones seem perfect, the reality is that disappointment is a big part of childhood. Don’t overlook taking pictures of your kids when they are in the midst of a temper tantrum, or when they are doing their Oscar-worthy performance to try to convince you to give them an extra 10 minutes of screen time.

    Dps 7

    dps-7-750

    3) Bedtime

    Bedtime happens every night, and by the time it rolls around you are probably just ready to get the kids to bed, and aren’t thinking about taking photos. But, there are lots of great memories being made at the end of the day. Your kids probably look adorable in their jammies, and brushing their teeth. If you read books before bed, getting photos of your child flipping through her favorites, while snuggled under the covers, will bring back memories of the books she loved the most, years later. On the nights you take out your camera, be sure to get at least one shot of your sleeping angel.

    dps-1-750

    4) Their Little Quirks

    Although they may not seem like picture-perfect moments, capturing the little mannerisms that your child makes as he grows up, will be precious to you when he’s older. Did your baby start putting his hands on his head when he’s upset? Does your toddler cross her arms to show she’s angry? Has your pre-schooler started covering her mouth with both hands when she’s excited? Whether these mannerisms are fleeting, or stay with your child for life, you will appreciate having photos of his little quirks when he’s older.

    dps-4-750

    dps-8-750

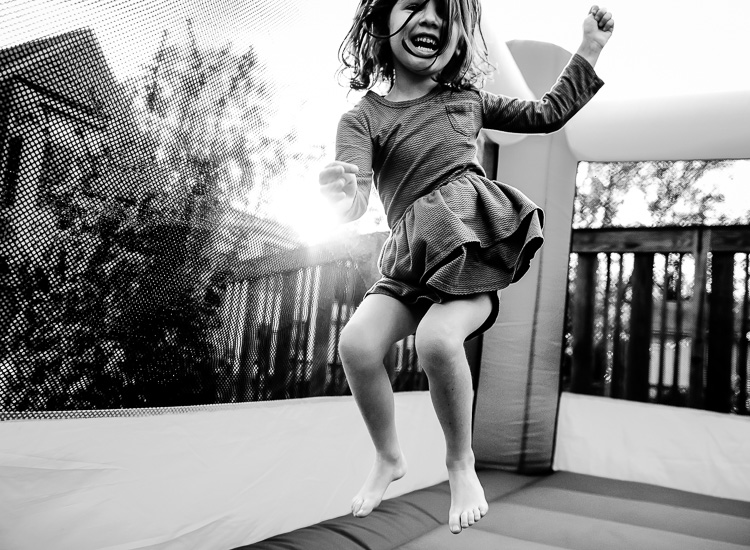
    5) Playtime

    Your child sitting on the floor playing with blocks, or on lounging on the sofa with his tablet, may not seem noteworthy now, but in a few years her interests will change. Having photos of your child at play, will bring back precious memories of what your child was like back then, and will help him remember specific toys and games he liked to play during that time.

    Dps 6

    Dps 2

    6) You and Your Child

    There is probably no people more important to your child, than his Mom and Dad. If you are the one picking up the camera, you are probably not in a lot of pictures. Your child will want to remember what you looked like when they were little, and will treasure photos of you and him doing activities together, even if it’s as simple as playing a game or baking cookies. Find a way to get into some photos with your child, whether it’s by using a tripod and remote, handing the camera to a friend, or hiring a professional photographer.

    Dps 9

    dps-3-750

    dps-5-750

    Do you have any other moments in your child’s life that you feel are important to capture in photos? Please share in the comments below your thoughts and your images.

    googletag.cmd.push(function() {
    tablet_slots.push( googletag.defineSlot( “/1005424/_dPSv4_tab-all-article-bottom_(300×250)”, [300, 250], “pb-ad-78623” ).addService( googletag.pubads() ) ); } );

    googletag.cmd.push(function() {
    mobile_slots.push( googletag.defineSlot( “/1005424/_dPSv4_mob-all-article-bottom_(300×250)”, [300, 250], “pb-ad-78158” ).addService( googletag.pubads() ) ); } );

    The post 6 Moments of Childhood to Capture Beyond the Obvious by Jamie Davis Smith appeared first on Digital Photography School.


    Digital Photography School

  • Tips for Removing Digital Noise in Lightroom

    One of the most significant advantages that modern cameras have over their film-based counterparts of days gone, by is their ability to change how sensitive they are to light with the touch of a button.

    Back in the days of film you had to decide ahead of time whether you wanted to shoot at ISO (then called ASA) 100, 200, 400, or in extreme cases, 800. If you were going to take pictures outdoors, a roll of 24 or 36 exposure, 100 or 200 film would work fine, but woe betide the unsuspecting photographer who wandered inside a dimly-lit building with that same film still in his or her camera. To change sensitivity, and shoot in the new lighting conditions, you had to shoot the rest of the pictures on a given roll of film, remove it from your camera, and hope you brought some ASA 400 or 800 film with you.

    Nowadays you just spin a dial on your camera to instantly switch between ISO values like 100 or 200, that work great in broad daylight, to ultra-high values like 6400 or 12,800, that would be positively unthinkable with film. It’s not all sunshine and roses though as one of the biggest issues with high ISO values is that of digital noise. Even the newest cameras produce pictures with noise and grain when shooting at high ISO values, but thankfully Lightroom can help mitigate some of the effects of this noise.

    Shot at ISO 5000, the original image was too noisy for practical use. Lightroom enabled me to clean things up significantly.

    Shot at ISO 5000, the original image was too noisy for practical use. Lightroom enabled me to clean things up significantly.

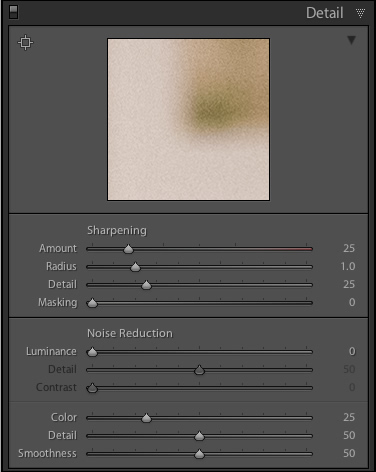
    To get started with the noise reduction options click on the Develop module, then find the Detail panel on the right side. Note: this process works best if you shoot in RAW, not JPG.

    You will find several options that can seem a bit confusing and overwhelming at first. You can experiment all you want, by just moving the sliders around to see what effects they have on your pictures, but it also helps to examine each one individually, to know precisely what they do. You will also see the Sharpening options, which are related to noise reduction, but I’m not going to focus on them specifically just yet. Before you look at the sliders themselves in the noise reduction area, it’s important to understand the two types of noise that are produced when taking a picture, Luminance and Chroma.

    lightroom-noise-reduction-develop-panel

    Luminance noise

    This kind of noise affects the brightness, but not the color, of individual pixels. If you had a picture of a dark grey piece of paper with a great deal of luminance noise it would appear similar to old-school television static with lots of light and dark fuzz.

    Chroma noise

    This shows up as oddly-colored pixels, scattered throughout an image, almost like someone has tossed a handful of red, blue, and green grains of sand at it. Lightroom calls this “Color” noise, but it’s just another term for Chroma noise.

    Both types of noise are byproducts of how digital image sensors capture data, and while they can be corrected somewhat in Lightroom and other post-processing software, it’s almost impossible to completely remove noise from a picture while still ending up with a usable image. Lightroom does give you some tools to get your digital noise under control, and if you know what you’re doing you can get some fairly decent results. Using separate controls for luminance and chroma noise, in combination with some sharpening adjustments, can help you salvage what you may think is a useless picture. As an example, here’s a picture that I took at ISO 6400, without any noise reduction applied.

    35mm, f/5.6, 1/60 second, ISO 6400

    35mm, f/5.6, 1/60 second, ISO 6400

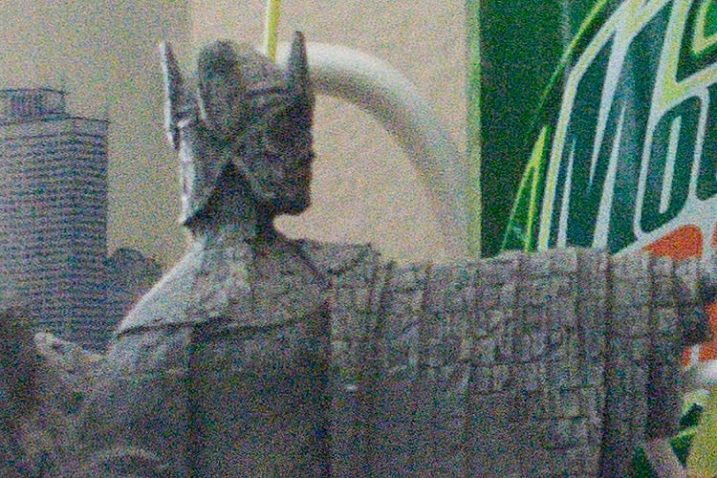
    Not bad, right? If this is what ISO 6400 looks like, you might as well shoot like this all day long! Well, before you go and spin your ISO dial all the way up to Ludicrous Mode, you might want to take a look at the same 24-megapixel image zoomed in to 100%.

    lightroom-noise-reduction-scene-no-noise-reduction-100-percent

    Ow, my eyes! The noise, it hurts! Not only is the picture full of color blotches, but shooting at ISO 6400 has resulted in an image that is far less sharp than it could be at a lower ISO. A great deal of color noise is evident on the torso of the figure, as well as the slanted lines on the left side, and you can see lots of luminance noise in the green letters on the right side too.

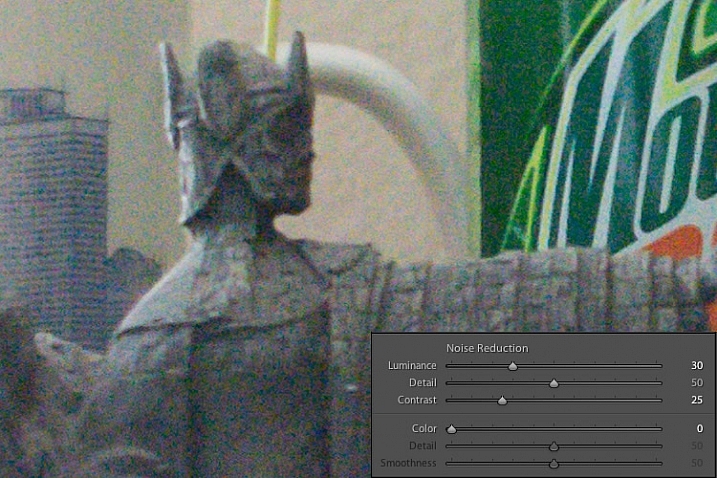
    This noise is not always visible when you shrink  your files down to share online, but if I were to print this picture it would look like my cat threw up on the paper. Lightroom can help us fix things, and a good place to start, in this case, is with the luminance slider at a value of 30.

    lightroom-noise-reduction-scene-luma-noise-reduction-100-percent

    Much of the black and white static has been removed, but there are still splotchy patches of color scattered throughout the image, which can dealt with using the color slider next. Before you start thinking that this is a magical cure-all for your noisy images, take a closer look at the picture. Much of the details have been lost, or blurred, such as the lines on the side, and the patchwork of the figure’s tunic.

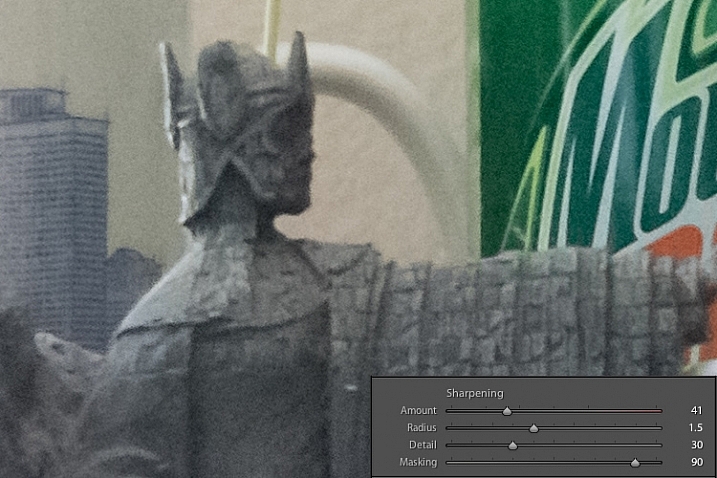
    You can mitigate these effects somewhat by using the detail and contrast sliders, but again the results are not going to be ideal. Detail acts as sort of a threshold control, allowing you to tell Lightroom what should be treated as noise and what should be left in. I usually leave this slider at 50 but you can experiment with it to get the results you need. The contrast slider helps bring back some of the edges that have gotten blurry, thanks to the noise reduction algorithm, and even though I have set it to 25 in this example, you can clearly see that much of the edge contrast is not as good as the noisy original. Move this slider too far though, and your photo will start looking fake and artificial, so you’ll have to find a good balance depending on your needs.

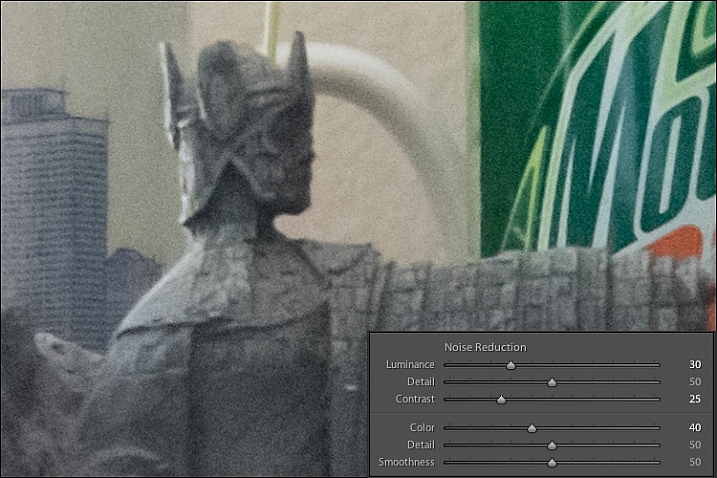
    To continue with the noise reduction, the color slider can be used to get rid of the weird splotches of red, green, and blue, but again you are going to see some tradeoffs.

    lightroom-noise-reduction-scene-chroma-noise-reduction-100-percent

    The results look fine at first, and you may notice that Lightroom automatically applies some degree of Color noise reduction (value 25) to every photo by default. This is because low-grade Color noise reduction is almost always good to have, and generally won’t result in too many tradeoffs for the image as a whole. In this case I used a value of 40, to show the effects a bit more. Even though the result is decent, you might notice something else that’s missing, if you look at the soda bottle label on the right-hand side. Compare it to the original picture and you will see that along with removing some of the color noise Lightroom has actually removed some color from the whole photo.

    The Detail slider slider, similar to its counterpart in Luminance noise reduction, acts as somewhat of a threshold so you can tell Lightroom what is, and is not, noise to remove. The Smoothness slider is a fairly recent addition to Lightroom, and can be used to control what’s known as “low-frequency” color noise. Basically, slide it to the right to remove larger splotches of noise or to the left to keep these more intact.

    Every time you use Lightroom’s noise reduction tools you will deal with tradeoffs, and one of the most significant of these is the overall sharpness of the image. Photos with more noise reduction will almost always be softer, particularly where there are sharp contrasting edges, and you can bring a bit of this back by using the sharpening tools.

    Here’s yet another 100% crop of the image above with the same noise reduction employed in the previous image, but with added sharpening.

    lightroom-noise-reduction-scene-sharpened-100-percent

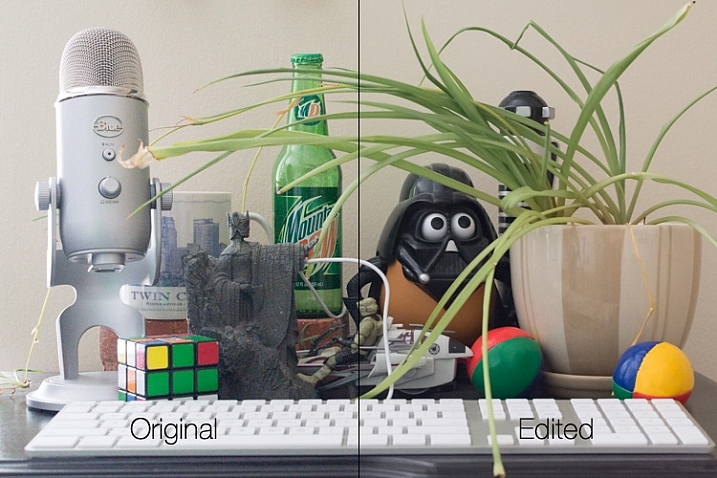
    After a bit of sharpening, the detail in the lines on the left side has returned, and so has the texture of the tunic, but the lower-left corner is still a muddy mess of grey, whereas in the original noisy picture it was more defined. Here’s both the original and edited image side-by-side which might help you get a macro view of how these noise reduction and sharpening tools can affect a picture.

    lightroom-noise-reduction-scene-both

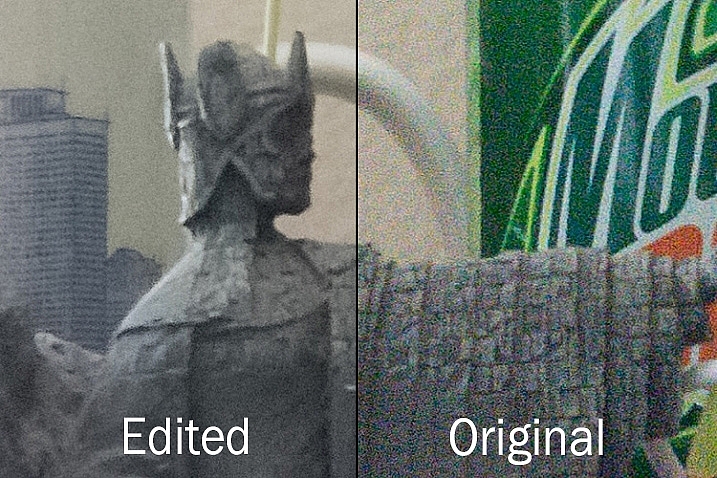
    At first glance you might not notice too many differences, but one of the most glaring problems with the edited picture is the complete lack of texture on the wall behind the scene, as well as a smoothness to the plant that is almost unnatural. Here’s a side-by-side zoomed in to 100%.

    lightroom-noise-reduction-scene-no-noise-reduction-100-percent-before-after

    Is it worth these tradeoffs to get a photo with less noise? That question can only be answered by you, but one rule of thumb I like to follow, is that a noisy image can be corrected and edited in postproduction, albeit somewhat imperfectly. A blurry image cannot be fixed.

    So, if there is a situation in which I find myself having to choose between a faster shutter speed and higher ISO (i.e. more noise), or a slower shutter speed and lower ISO (i.e. less noise) I’ll usually err on the side of noise, if the slower shutter speed would result in an image that is too blurry.

    I also make liberal use of my camera’s auto-ISO feature, which allows me to set a minimum shutter speed and a maximum ISO value. That way I can concentrate on adjusting the aperture to get the composition I want, and always know that my pictures will be free of blur, even if does mean there will be a bit of noise I have to clean up in Lightroom.

    The light here was quite dim which required a high ISO value. I didn't mind a slightly noisy image that was sharp and in focus, because I was able to get rid of most of the noise in Lightroom.

    The light here was quite dim, which required a high ISO value. I didn’t mind a slightly noisy image that was sharp and in focus, because I was able to get rid of most of the noise in Lightroom.

    One final note worth mentioning is you can also use Lightroom’s local adjustments like the Radial Filter, Graduated Filter, and Adjustment Brush to apply noise reduction in specific areas of an image only. However, this is a bit limited, in that these adjustments only perform luminance noise reduction, so you might still be left with some ugly colored spots, that can only be removed using the global adjustments in the detail panel of the develop module.

    What are some of your favorite tips and tricks for removing noise? I’d be interested to hear any thoughts you have in the comments section below.

    googletag.cmd.push(function() {
    tablet_slots.push( googletag.defineSlot( “/1005424/_dPSv4_tab-all-article-bottom_(300×250)”, [300, 250], “pb-ad-78623” ).addService( googletag.pubads() ) ); } );

    googletag.cmd.push(function() {
    mobile_slots.push( googletag.defineSlot( “/1005424/_dPSv4_mob-all-article-bottom_(300×250)”, [300, 250], “pb-ad-78158” ).addService( googletag.pubads() ) ); } );

    The post Tips for Removing Digital Noise in Lightroom by Simon Ringsmuth appeared first on Digital Photography School.

    Digital Photography School

  • 5 Must-Have Lenses for Wedding Photographers and Why

    Have you ever wondered which lenses are in a wedding photographer’s bag? There is a plethora of choice when it comes to lenses, and lens companies come up with new products all the time. Many photographers are attracted to these bright and shiny things and end up with a mammoth collection of lenses, many of which hardly see the light of day. If you have to pare back to the absolute necessities, and are allowed five lenses in your wedding photography bag, these are the ones that I would recommend. I have been a professional wedding photographer for seven years now, and deciding on these five took some time, and serious consideration over the course of my career.

    They are:

    1. The 70-200mm f/2.8
    2. The 24-70mm f/2.8
    3. The 85mm prime
    4. The 35mm prime
    5. A macro lens (105mm or 60mm for Nikon, 100mm or 60mm for Canon)

    Let’s look at each individually to see why.

    5-must-have-lenses-wedding-photographer_0001

    #1 – 70-200mm f/2.8

    It’s big, bulky and heavy but I wouldn’t do a wedding without this lens. The 70-200 f/2.8 is my workhorse when it comes to weddings. It is a versatile lens that gives you amazing sharpness at all focal lengths. The bokeh is beautiful, especially at 200mm, even with a stopped down aperture due to the compression caused by the long focal length.

    This lens makes a wedding photographer invisible. You don’t have to be so close to people’s faces; you can capture candid expressions and serendipitous moments from a fair distance away. This lens is especially useful during the ceremony, where you would rather be far away and out of sight, or hidden behind a wall or door. It allows you to capture the exchange of rings, vows, and kiss discreetly.

    5-must-have-lenses-wedding-photographer

    If you require a longer zoom while being at the same fair distance, you can choose to photograph in DX mode (if you shoot full frame and your camera offers this option) on your camera, and the lens will give you 1.5x distance more, making 200mm into a neat 300mm zoom. If you do this, make sure that you have enough pixels for the crop, in case you feel the need to straighten or change your composition in post-processing.

    For example, of you are shooting with a 12MP camera such as the old Nikon D700 on FX mode, when you convert to DX mode the camera becomes a 5MP camera, which is below the minimum amount of pixels you can have – 6MP – to be able to enlarge prints to a decent size. If you have to crop in post-processing, this will not give you enough pixels to be able to safely do so without compromising print output sizes.

    5-must-have-lenses-wedding-photographer

    However, if you are photographing with a Nikon D810 in DX mode, your image goes from 36MP to 15.3MP but still leaves you enough wiggle room for minimal, and sensible cropping if necessary. If you use this functionality, don’t forget that when photographing in DX mode on a full frame camera, or when using a DX lens, the camera only uses the center of the sensor. So if you forget to compose accordingly in camera, you will get a nasty surprise after you have taken the image: cut off heads and limbs, and badly cropped compositions are some examples. When using DX lenses, the rest of the unused sensor area is blacked out but when using FX lenses in DX mode, this is not the default and you would still see the entire full-frame sensor if you don’t change your settings.

    5-must-have-lenses-wedding-photographer

    The 70-200mm is an excellent focal length for flattering portraits. When photographing at 200mm, I typically stop down to around f/4 or f/5.6 at a shutter speed of 1/200-1/400th, and the sharpness of the image is stunning against a creamy bokeh background. This lens also has a built-in lens collar you can use to steady it when hand holding, or attaching it to a tripod stand. Without a tripod, you can steady yourself as much as possible by leaning against something immovable like a wall, or on a stable surface such as a table, or keeping your arms pinned against something sturdy to reduce camera shake, especially when using this lens for portrait work at the longer end of the focal length.

    5-must-have-lenses-wedding-photographer

    5-must-have-lenses-wedding-photographer_0033

    You can now get a f/4 version of this zoom lens (for Nikon, Canon has always had one) at a vastly cheaper price compared to the f/2.8. I personally do not have the f/4 version but if you’re on a budget, and you don’t mind not having the option to photograph at a wider aperture, then I see no reason why you should not get the f/4. It is lighter and smaller, understandably so because it has less glass elements compared to its more expensive counterpart, and may not only suit the budget better, but also lessens the bulk you have to carry at a wedding.

    5-must-have-lenses-wedding-photographer

    5-must-have-lenses-wedding-photographer

    #2 – 24-70mm f/2.8

    The 24-70mm f/2.8 offers the focal length versatility needed when you are photographing on the go, which is what wedding photographers need for most of the day. You can use this lens to capture wider location scenes, candid photos of people, guests arriving, people milling and chatting while waiting for the ceremony to start or during the wedding breakfast, some decorations and details, the first dance, and the leaving photos, to cite just a few.

    5-must-have-lenses-wedding-photographer

    5-must-have-lenses-wedding-photographer

    I use this lens for photos that do not require close portrait work, although it can definitely be used as one. The 50-70mm range will yield pleasing results, like the image directly below. However, my preference is to use prime lenses for portraits. The 24-70mm lens sees a whole lot of action during the wedding day, and is definitely my other workhorse for capturing people, wider shots, and behind-the-scenes.

    5-must-have-lenses-wedding-photographer

    5-must-have-lenses-wedding-photographer

    Many photographers include a much wider lens for location photographs such as the 14-24mm f/2.8. While I would love to add this lens to my arsenal, this is not an absolute necessity, in my opinion. With the 24-70mm, you can photograph location scenes wide enough – but should you need to capture a wider scene, you could photograph a few images and stitch them together in Photoshop as a panorama. This is easy enough to do by making sure the exposure setting for the series of shots are the same, and you stand on a fixed point, inching your way across the panorama. You can do the same for a photograph of all the guests too. These would be the only times I would need an ultra wide angle lens for a wedding, hence I cannot just yet justify adding it to the list of must-haves.

    5-must-have-lenses-wedding-photographer

    5-must-have-lenses-wedding-photographer

    #3 – 85mm prime

    This is my all-time favorite lens, and the one I use for portraits of the bride and groom, bridesmaids and groomsmen, individual guests or small groups, and the list goes on. As a fixed lens, this requires more work on your part – you have to zoom in and out with your feet. But, the extra effort is worth it – the portraits are cleaner, the backgrounds are creamier, and it is a fabulous lens in very low light conditions.

    5-must-have-lenses-wedding-photographer

    The best thing I love about this lens is that it is tack sharp from the sweet spot on. Accurate, light sensitive, great results on skin, this is my go-to lens, and it never leaves my bag. Being a prime lens, the 85mm is fast, small, and extremely reliable.

    5-must-have-lenses-wedding-photographer

    I have photographed an entire wedding of a relative (as a guest) using only this lens. I was asked on the day if I could cover the wedding and I agreed, with only the D700 and 85mm combination in hand, which I carry with me most times for personal snapshots, and photos of my family. The photos from that wedding are published in one of the UK’s top wedding blogs: proof that you can photograph a wedding with what you have, given that you know your gear well enough.

    5-must-have-lenses-wedding-photographer

    The 85mm for Nikon comes in either an f/1.8 ($ 479 USD) or f/1.4 version ($ 1595 USD), with a huge price difference between the two, due to the glass elements and optics (Canon also has an f/1.2 available, it’s $ 1999 USD). However, many photographers are divided between which lens is better. I have the f/1.8, and it has always performed marvellously for me. The f/1.4 has been on my lens list forever, and while I could buy it as the 85mm is on my necessity list, I have held off given that I have never felt the need to upgrade.

    5-must-have-lenses-wedding-photographer

    #4 – 35mm

    One of my early serious lens investments was this amazing 35mm f/1.4. If there is a lens I can always rely on, it’s this one. This is an ultra versatile lens that you can use to photograph the bride getting ready – the time when wedding photographers are usually under pressure to capture everything from location, the myriad of accessories, details, candid shots, the dress, the natural interactions between the bride and her loved ones, and group portraits – in a very short amount of time and more often than not, in small spaces like cramped hotel rooms. It is also perfect for photographing wider scenes, and you get images without the exaggerated distortions that you get with the 24mm.

    5-must-have-lenses-wedding-photographer

    5-must-have-lenses-wedding-photographer

    This lens is super fast and sharp, and has yet to fail me. With this lens you can get close, with 0.3m (11.7″) minimum focusing distance – very handy when you are in in a crowded space. As if that weren’t enough, this lens opens up to f/1.4 which can let you photograph in extremely low light, especially if you are so pressed for time and space to use off-camera flashes. Even though the 35mm focal length is already covered by the 24-70mm, the difference between f/1.4 and f/2.8, in its ability to allow more light in (two more stops of 4x the light), cannot be underestimated.

    5-must-have-lenses-wedding-photographer

    5-must-have-lenses-wedding-photographer

    The 35mm also comes in f/1.8, a DX lens you can purchase inexpensively (under $ 200). You may wonder why the astronomical difference in price compared to the professional f/1.4 counterpart. First of all, you cannot use the DX lens on a full frame camera without losing pixels, and without the 35mm focal lens becoming a 52.5mm, which can be very limiting in tight spaces. Secondly, the 35mm view is close enough to what the eye naturally sees which people say is around 40mm in loose terms, and I like that view. As a wedding photographer, it allows you to capture images that gives the viewer the impression that they could have been there, seeing the same view themselves. This is an important element in any wedding photography, specifically that with a documentary style, in my opinion.

    5-must-have-lenses-wedding-photographer

    If you ever get to physically hold each lens in your hands at the same time, the enormous price difference won’t even be in question. The f/1.4 is considerably heavier, and much bigger than the pocket-sized f/1.8. But, don’t be fooled by appearances. The f/1.8 is also an outstanding lens with exceptional performance in its own right, and for crop sensor cameras may be more than sufficient, and is most definitely easy on the budget.
    5-must-have-lenses-wedding-photographer

    5-must-have-lenses-wedding-photographer

    If you already have the 50mm and your budget is constrained, then the 50mm could replace 35mm on this list. It is also an incredible lens. Although the 50mm doesn’t give you as much room to maneuver in smaller spaces as the 35mm, the bokeh on the 50mm is stunning and it’s impressively sharp too, which is one of the top benefits of prime lenses. Like the 35mm, the 50mm is also available in f/1.8, f/1.4, and for Canon f/1.2.  The price difference is meagre between the f/1.8 and the f/1.4, then it jumps up to a whopping figure with the f/1.2.

    5-must-have-lenses-wedding-photographer

    5-must-have-lenses-wedding-photographer

    #5 – 105mm (100mm) or 60mm macro lens

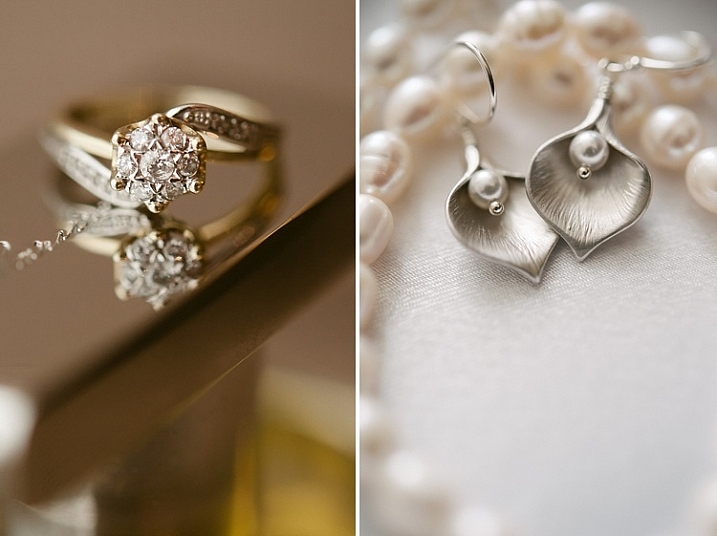
    A macro lens is a must for you as wedding photographer, if you want to capture amazing images of rings in close detail. You can also use this lens for photographing jewellery and other accessories when the bride is getting ready. If the bride’s dress is adorned with jewels, the macro lens would also be ideal to photograph the details. In addition, macro lenses are also great to use for portraits if you do not require an aperture wider than f/2.8. This makes it a versatile lens to carry around, especially the 60mm which looks and feels minuscule compared to the 105mm (100mm for Canon). Both lenses can also stop down to f/32, which is handy, especially when photographing location landscapes in extremely bright sunlight.

    5-must-have-lenses-wedding-photographer

    5-must-have-lenses-wedding-photographer

    Some photographers use the 105mm as a close substitute for the 70-200mm, if the latter is just too out of reach.  You can use the 105mm in DX mode which gives you 157.5mm, long enough to enable you to still be very inconspicuous at a wedding. It is also smaller and lighter, and opens up to f/2.8, as well as doubles up as a macro lens.

    5-must-have-lenses-wedding-photographer

    5-must-have-lenses-wedding-photographer

    Do you have other must-have lenses in your wedding camera bag? Please share them here below.

    googletag.cmd.push(function() {
    tablet_slots.push( googletag.defineSlot( “/1005424/_dPSv4_tab-all-article-bottom_(300×250)”, [300, 250], “pb-ad-78623” ).addService( googletag.pubads() ) ); } );

    googletag.cmd.push(function() {
    mobile_slots.push( googletag.defineSlot( “/1005424/_dPSv4_mob-all-article-bottom_(300×250)”, [300, 250], “pb-ad-78158” ).addService( googletag.pubads() ) ); } );

    The post 5 Must-Have Lenses for Wedding Photographers and Why by Lily Sawyer appeared first on Digital Photography School.

    Digital Photography School

  • Beginner Tip: How to Use the Canon Quick Menu to Change Cacmera Settings

    canon-quick-menu-3

    When it comes to beginner photographers, one of the first major goals is often to get off Auto. Doing so really is an important step to using your camera to the best of its capabilities. However, the concern that I hear most often from beginners in terms of stepping away from auto mode, is that it takes so long to get their shutter speed, aperture, ISO, white balance, and focal points set, that sometimes they’ve missed the shot that they were hoping for completely. I understand how frustrating that dynamic can be, and I have one Canon tip to share that may make life a little simpler if you’re just starting out.

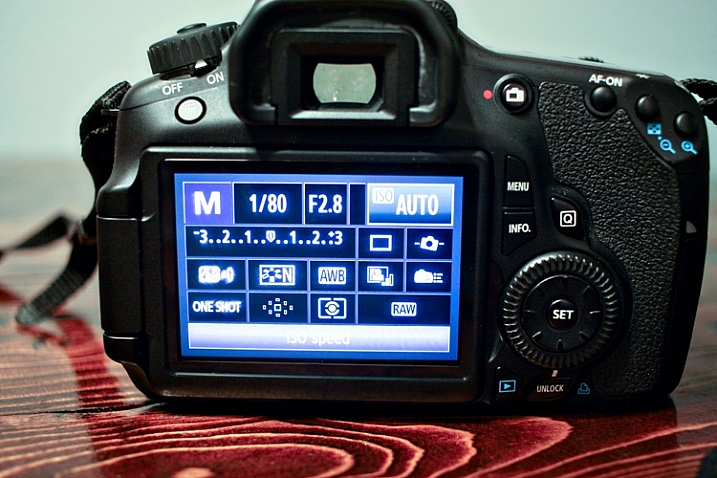
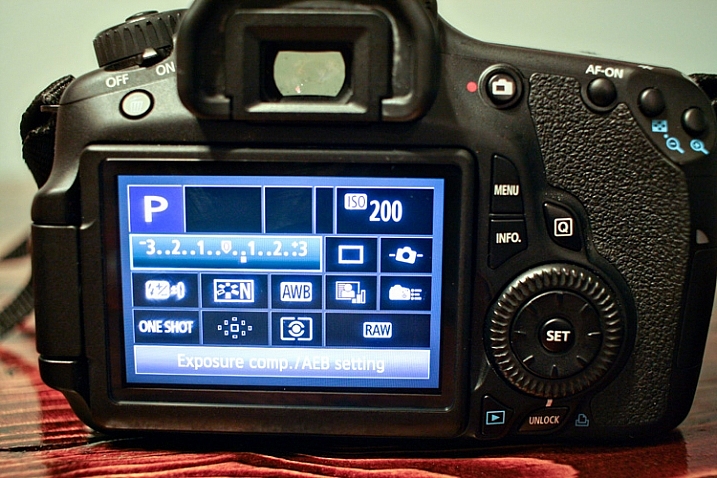
    Canon EOS cameras have a feature called the EOS Quick Menu. For the vast majority of EOS cameras, you’ll access the Quick Menu or Control Screen by pressing the button on the back of the camera with the letter Q. For a few older EOS cameras, you’ll have to push the button in the center of the multi-controller (that’s the big wheel on the back of your camera to the right of the screen). Once you hit that button, a very handy screen pops up that looks something like this:

    canon-quick-menu-1

    Now, you’ve got many of the most commonly changed settings right at your fingertips. You can change shutter speed, aperture, ISO, metering mode, focal point, file type, and several other features, right from the Quick Menu, without having to scroll through several different menus or adjust settings located in several different places on your camera body. You just use the multi-controller to navigate to the setting that you’d like to change, and then press the SET button to access that setting.

    It’s worth noting that your available options will change somewhat depending on which camera mode you’re in. In the above image, the camera is set to manual mode and thus there are high number of settings available to be changed.

    canon-quick-menu-2

    If you switch the camera to Program mode, the option to change shutter speed and aperture vanishes, as those are set automatically by the camera. You still have access to other controls like ISO, file type, metering, and exposure compensation through the Quick Menu in this mode.

    canon-quick-menu-4

    Of course, all of these features can also be accessible via the buttons/dials on the top and side of your camera, or in the standard menu screens. I do think it’s important to learn how to change your settings in those traditional ways, as the Quick Menu may not always be the most effective, or efficient, way to change a particular setting depending on the circumstances. The more you know about your camera, the better you’ll be able to utilize all of its features! That said, it’s never a bad thing to know how to accomplish the same task in more than one way, and the Canon Quick Menu can be a huge help when you’re trying to make changes to your settings in a short amount of time. In my opinion, both shorthand and longhand have their time and place!

    If you’re a Canon EOS user, have you found the Quick Menu to be a helpful tool? Are there some settings you still prefer to access and change in other ways? Do you shoot Nikon or another brand of camera – and does it have something similar? Please share in the comments below.

    googletag.cmd.push(function() {
    tablet_slots.push( googletag.defineSlot( “/1005424/_dPSv4_tab-all-article-bottom_(300×250)”, [300, 250], “pb-ad-78623” ).addService( googletag.pubads() ) ); } );

    googletag.cmd.push(function() {
    mobile_slots.push( googletag.defineSlot( “/1005424/_dPSv4_mob-all-article-bottom_(300×250)”, [300, 250], “pb-ad-78158” ).addService( googletag.pubads() ) ); } );

    The post Beginner Tip: How to Use the Canon Quick Menu to Change Cacmera Settings by Meredith Clark appeared first on Digital Photography School.

    Digital Photography School

  • How to Use Exposure Compensation to Take Control of Your Exposure

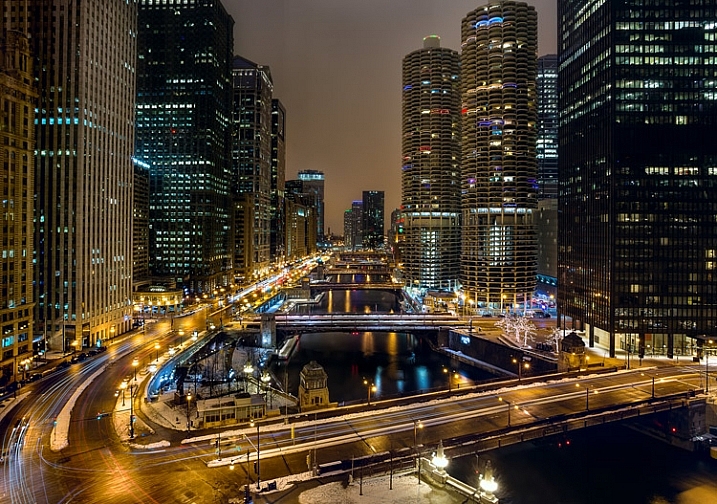
    Chicago-River-2016-01-02You don’t have to shoot in Manual mode to take complete control over the exposure process.

    When you use shooting modes other than Manual, the camera will set at least one of the three exposure controls (shutter speed, aperture, and/or ISO) for you. However, your camera provides you with an override called exposure compensation. It gives you the ability to change the camera’s exposure values from something other than what the camera automatically sets for you. In this article, I will show you how to use it to get the exposure you want every time.

    When should you use Exposure Compensation?

    First, let’s back up and talk about when you might want to use exposure compensation. You may wonder why you’d want to change anything, if your camera is already determining the proper exposure level.

    The first reason is that your camera’s meter can be fooled by some of the conditions you face. The meter operates by looking at the tones in its view, then averaging them out. Basically, the manufacturers have determined that most scenes will average out to a middle grey tone, often referred to as 18% grey. Therefore, if the tones in your frame are darker than this middle grey tone, the meter will show that there is not enough light for a proper exposure, and therefore the meter thinks your picture will be underexposed. Conversely, if the tones in your frame are lighter than middle grey, the meter will show that there is too much light for a proper exposure and it thinks your photo will be overexposed. A lot of the time the camera meter is right, but sometimes it is not.

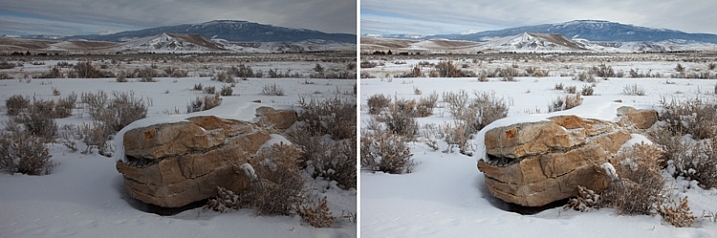
    Some situations are supposed to be brighter than middle grey. A classic example is a photograph taken of a snowy scene. Your camera’s meter will assume that all that white snowy scene should be grey, and will therefore choose exposure settings that underexpose the image. Obviously you don’t want that. Here is an example, the picture to the left was taken strictly by the camera’s meter, and the picture to the right overexposed by one stop according to the camera’s meter:

    A snowy scene frequently confuses your camera's meter. To the left is a shot taken at normal exposure. To the right is one taken after adding in a stop of exposure compensation (overexposure).

    A snowy scene frequently confuses your camera’s meter. To the left, is a shot taken at normal exposure. To the right, is one taken after adding in a stop of exposure compensation (overexposure).

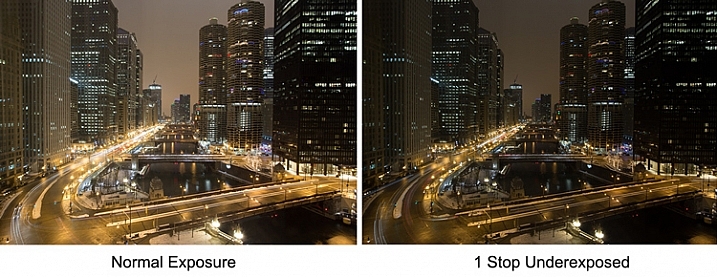
    Another example is night photography, where the darkness of the scene should result in dark tones in your picture. The camera’s meter won’t recognize this though, and will tell you to brighten up the picture. Using exposure compensation will allow you to take control, and set a proper exposure.

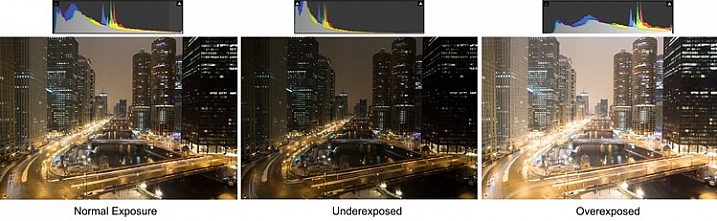
    As an example, check out the pictures below. In the picture on the left, taken at normal exposure as per the camera’s meter, it brightened the night scene and it looks a little washed out. To the right is an underexposed (according to the meter) image that more closely resembles the actual conditions of the scene.

    Night-Comp

    The camera’s meter (and even the histogram) tells you that the normal exposure is correct (see below). But the reason the camera thinks the normal exposure is correct, is that it that the average of the tones closely approximates middle grey. However, the underexposed image actually more closely captures the reality of the situation.

    Histogram-Comp

    Another reason you may want to use exposure compensation is that you simply don’t like the “correct” exposure. You may want to darken the scene to add some mood or drama, or you may want to brighten things up. Photography is ultimately an artistic endeavor, and is highly subjective, so exposure compensation gives you a tool to put that to work.

    Finally, if you subscribe to the theory that you should expose to the right, exposure compensation will allow you to do so in camera modes other than Manual. If you are unfamiliar with this concept, expose to the right means that you slightly overexpose your images so that most of the tones appear on the right side of the histogram (without clipping anything). You later reduce the tones in post-processing and this can sometimes result in slightly better image quality. The overexposure happens by using exposure compensation.

    How Exposure Compensation Works

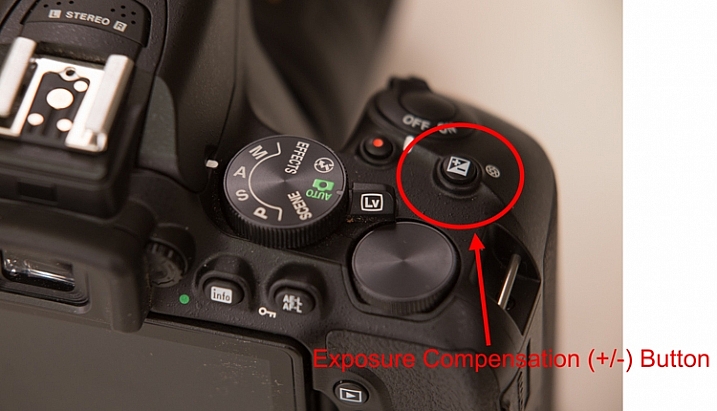
    Now that you know what exposure compensation is, how do you use it? In most cases, your camera will have a little button with a +/- on it. That is the button you press to change the exposure compensation. While pressing that button, turn the main dial of your camera right or left (by main dial, I am referring to the dial on the top right of your camera, usually next to the shutter release button). That will change the exposure compensation. Turning the dial one way will reduce the exposure, and the other way increases it. Each click of the dial will usually change exposure settings by 1/3 of a stop.

    PlusMinusButton

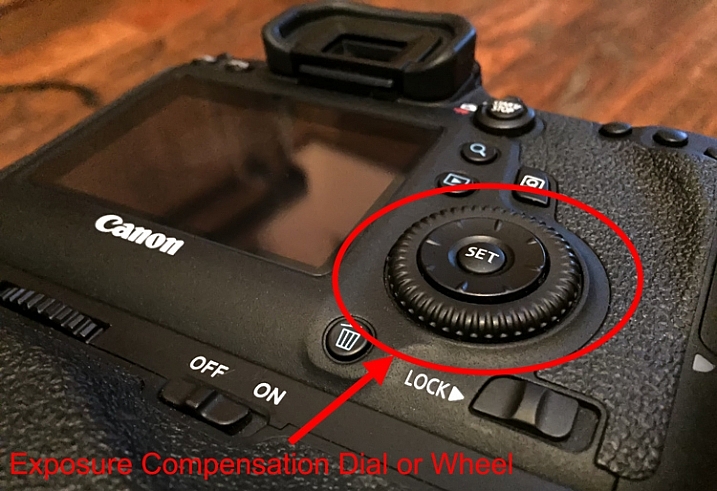
    If you have a higher-end DSLR, then your camera will have a second dial or wheel on the back of the camera. Those cameras will usually not have the +/- button, but that second dial will be used to change the exposure compensation settings. The advantage is that you can just turn that dial with your right thumb without needing to press any buttons.

    Wheel

    Exposure Compensation in Different Camera Modes

    So what does exposure compensation actually do? You know that it changes the exposure, but how does it do so? By changing the aperture? Or the shutter speed? Or both?

    The answer is that it depends on what mode you have your camera in. I will explain what is going on for each of the camera modes:

    • Aperture Priority Mode – In Aperture Priority mode, exposure compensation changes the shutter speed. Remember that in this mode, you set the aperture and the camera sets a corresponding shutter speed. If you change the Aperture, your camera just sets another corresponding shutter speed, and there is no change in the exposure level. Exposure compensation gives you the ability to change the shutter speed (and the overall exposure value) while staying at the same aperture you originally set.
    • Shutter Priority – In Shutter Priority mode, exposure compensation changes the size of your aperture. It is basically the reverse of Aperture Priority mode. You set a shutter speed, and the camera sets a corresponding aperture. Exposure compensation therefore changes the exposure by allowing you to change that aperture size.
    • Program – In Program mode (P on your mode dial), exposure compensation changes the shutter speed. At least that’s what happened on the cameras I tested. It is possible that yours works differently, or that you can change it in the menu. As with so many things, this is a good excuse to pull out your camera’s user manual and go through it.

    What about Manual and Automatic modes? These don’t have exposure compensation. In Manual mode, the camera does not set an exposure value for you in the first place, you set everything yourself. Whenever you change the aperture or the shutter speed, you are changing the exposure value. In Automatic mode, there is no exposure compensation because you have no control over exposure – the camera does everything for you. That is one of the reasons why you should never use this mode.

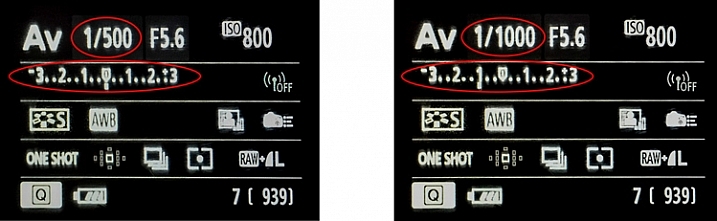
    Exposure-Compensation

    Here we see the back of the camera before and after applying one stop of exposure compensation. In the example to the left, the camera shows a normal exposure with a shutter speed of 1/500 of a second. In the example to the right, the shutter speed is reduced by 1 stop to 1/1000 of a second, and the meter reading reflects that.

    Exposure Bracketing

    While talking about exposure compensation, there is a related topic that you might find useful as well. It is Auto Exposure Bracketing (AEB, or just bracketing). It is where you set your camera to take multiple pictures in a row with the first at normal exposure, the next one(s) underexposed, and the final one(s) overexposed (if you have Canon it may look more like this:  underexposed>normal>overexposed, you can also change the order on a Nikon if you go to your menu settings).

    When you enable the feature in your camera’s menu, you set the amount of under and overexposure. The camera will take three to five pictures in rapid succession (depending on your camera, if you shoot Canon you have to also set your drive mode to high speed burst). In a way, this accomplishes the same thing as exposure compensation, because you are dialling in a certain amount of underexposure or overexposure.

    Bracket

    Why would you want to do this? Several reasons. Usually it comes into play when there is a wide divergence of tones in the image. Using a little blending later, you can use the brightest tones from the underexposed image and the darkest tones from the overexposed image. In addition, if you are ever going to use any high dynamic range processing on your images, you should have multiple images to work with. Finally, you might just think of it as “exposure insurance” for important shots to make sure that you have nailed the exposure.

    Conclusion

    We all want to be able to take complete control over the exposure process, but not all of us want to work in Manual mode. When you work in a mode like Aperture Priority mode, the camera offers you a lot of benefits – speed being the main one. By adding exposure compensation to your process, you can get the speed of other modes, along with the control of manual.

    If you haven’t used exposure compensation before, give it a try. If you are familiar with it, chime in below with your own tips and experiences.

    googletag.cmd.push(function() {
    tablet_slots.push( googletag.defineSlot( “/1005424/_dPSv4_tab-all-article-bottom_(300×250)”, [300, 250], “pb-ad-78623” ).addService( googletag.pubads() ) ); } );

    googletag.cmd.push(function() {
    mobile_slots.push( googletag.defineSlot( “/1005424/_dPSv4_mob-all-article-bottom_(300×250)”, [300, 250], “pb-ad-78158” ).addService( googletag.pubads() ) ); } );

    The post How to Use Exposure Compensation to Take Control of Your Exposure by Jim Hamel appeared first on Digital Photography School.


    Digital Photography School

  • Win a Pro-Level Portfolio Website CMS for FREE

    In this giveaway you can win one of 5 great prizes provided by our friends at MotoCMS. Whether you’re professionally into photography or you just plan to start making money out of your photos, you probably know by now that a good website managing software is a gold find for your business. Something that would have a lot of design Continue Reading
    The post Win a Pro-Level Portfolio Website CMS for FREE appeared first on Photodoto.


    Photodoto