Category: Photography

  • 8 Tips to Improve Your Photography by Creating Instead of Taking Photos

    If you’re like most photographers you use your camera to capture a moment; you see an interesting subject, so you photograph it to the best of your ability. But a worthwhile experiment is to try staging a photo. Rather than waiting for all the elements to perfectly arrange themselves, take control and create the moment yourself.

    It’s an important lesson in thinking about the story and composition, and it’ll improve your photography in no time. I spent three years photographing everything in sight, but it was only after taking control of my images that I was able to turn my hobby into a profession.
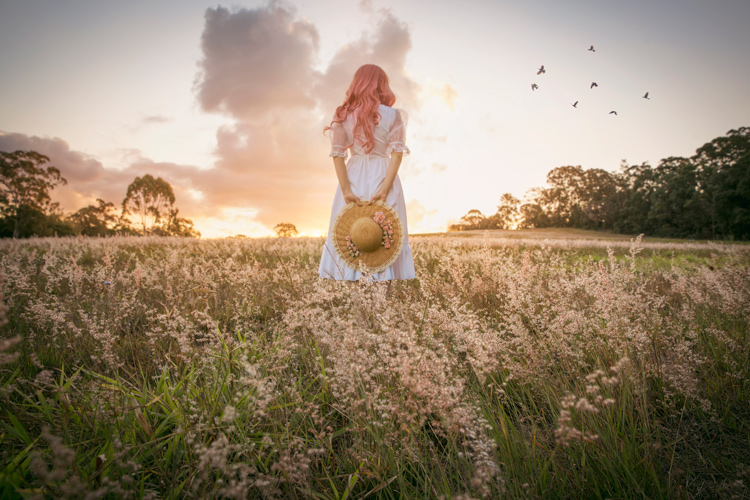
    Field of Dreams

    Creating a photo can be as simple, or elaborate, as you wish. If you’re interested in street photography, this could involve asking an interesting stranger to pose in a particular place or way. For macro photography, setting up a backdrop behind a pretty flower can make the subject more dynamic. For portraits it could be a photo of your child dressed in their favourite costume, acting out a scene in your backyard. As long as you have actively directed the subject in some way.

    Elements to consider are:

    1. Story
    2. Subject
    3. Setting and location, era, time of day
    4. Props
    5. Wardrobe
    6. Pose
    7. Lighting
    8. Framing / Composition and angle, lens used

    Let’s break these down one by one.

    #1 – Story

    What’s happening in your photo? What’s your subject or character doing? A story isn’t always necessary, but having answers to these questions certainly helps make it more engaging, and gives you an idea of what extra elements can help enrich the story.

    In “Return of the Sword” (below) I was playing with the idea of King Arthur’s Excalibur, and I wanted my character’s reflection to look as if it were offering her the sword. To be able to tell this story I needed to have the right prop, costume, and location, to help the viewer understand what was happening, and associate it with the original story.
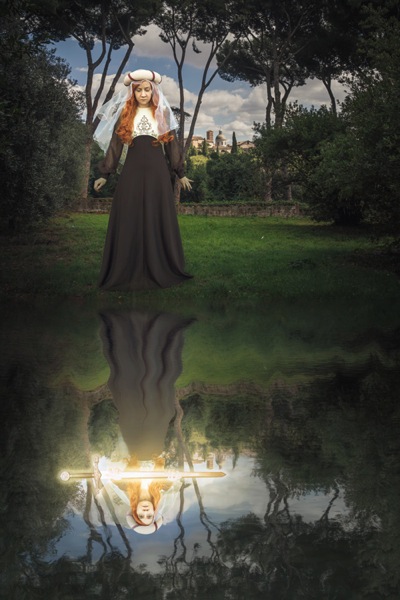
    Return of the Sword

    #2 – Subject

    Who is your character? What physical attributes do they need to have? If you have a willing family member or friend on hand, that’s great! Otherwise you can recruit models through places like ModelMayhem. However, your subject needn’t be a person, an object or an animal are fine too.

    I shoot self-portraits, primarily because it’s convenient, but I’m certainly no classic beauty, so I try to disguise my face as much as possible. In “Red Runs” below, I wanted to show Red Riding Hood running through a forest, followed by a wolf, so my character needed a red cape and blonde hair. This was easily achieved with the help of a blonde wig and my dog, Koda.
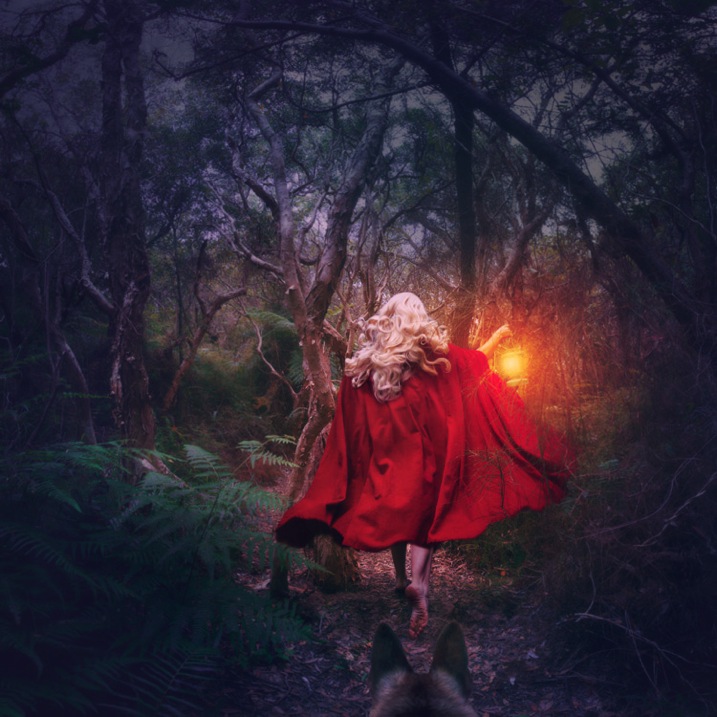
    Red Runs

    #3 – Setting

    Where and when is your story taking place? To find interesting locations, assess your local area for unique landmarks. Use Google Maps to discover what’s nearby, then use your car and your feet to explore further. If your goal is to photograph an interesting insect, your where might be in front of some black cardboard to cut out the background clutter, and your when might be early morning when the light is soft and appealing.

    In “Siren’s Sorrow” below, I used an impressive local relic, the Gayundah Shipwreck, to tell the story of a regretful mermaid. I shot at sunset to add interest to the sky, and I wanted the time period to be non-specific, so I was sure not to include any objects in the shot, that would anchor it in time. There were many walkers passing by, and an active construction site overlooking the area, but you’d be surprised how quickly you stop being self-conscious when you start doing self-portraits.
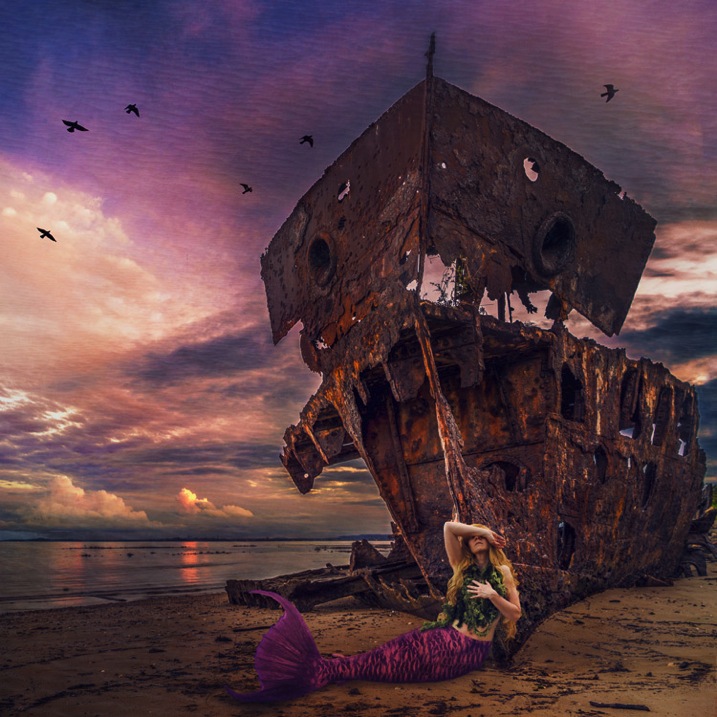
    Siren s Sorrow

    #4 – Props

    Having your subject interact with something will make your shot more interesting and further your story. You can buy props from cheap used clothing shops, eBay, or just use things you have lying around the house. If you’re going for something simple, spraying water on a flower adds interest, as does adding people to a landscape.

    In “The Blue Girl” I wanted to tell the story of a girl who had cried for so long, that she filled a room with tears, and turned it into an ocean. I placed polyfill behind her head for the clouds, and added birds and a friend’s model ship, to give interest to the scene.
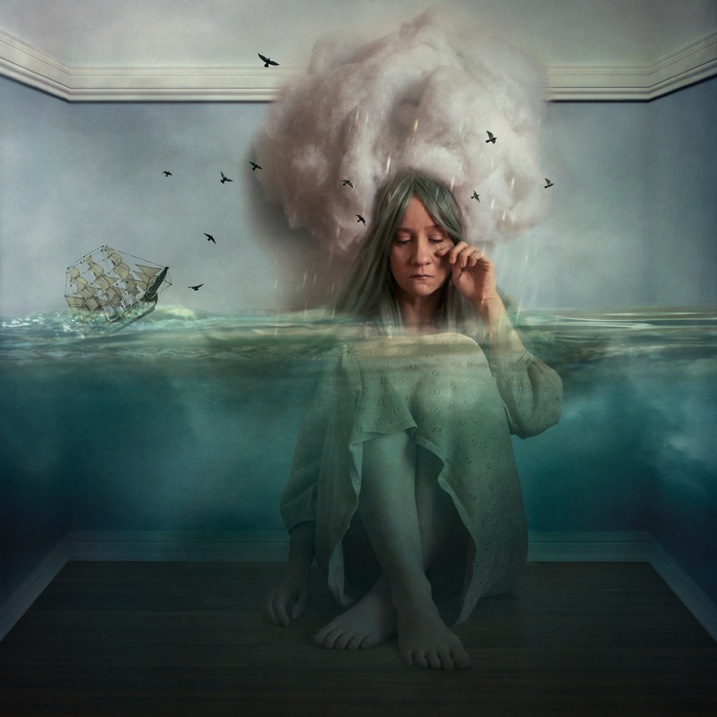
    The Blue Girl

    #5 – Wardrobe

    What would your character be wearing? I have a rack full of costumes, specifically to be used in photoshoots, that I’ve bought from eBay and op shops, but you needn’t get this involved. My main considerations are usually whether the outfit suits the story, and if its colour will contrast with the surroundings, to make it stand out. If my face will be seen, I generally wear basic make-up I’ve applied myself.

    In “Dance of the Jacarandas” I used a $ 30 wig from eBay, and a $ 5 dress I bought at a local theatre’s costume sale. The dress was the perfect colour and shape, to make my character look like a Jacaranda flower.
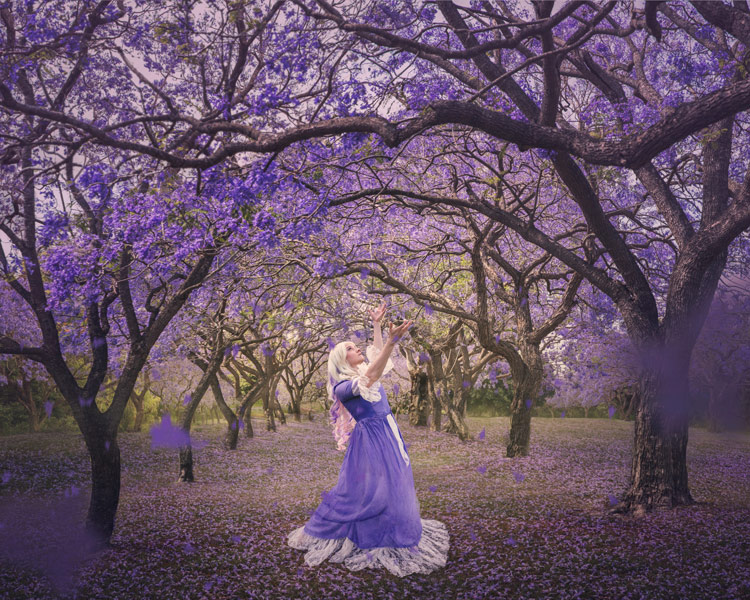
    Dance of the Jacarandas

    #6 – Pose

    What would your character naturally be doing in their story? Are they powerful or submissive? I tend to shoot the main pose, and then do a few variations so I have options to work with.

    In “I Tried to Drown My Sorrows”, I wanted to show a girl who looked like she’d fallen into a glass. The pose had to be compact to fit in the glass, yet rigid to show the shock of the fall. I did this by jumping around in my backyard, then flipping the image upside down so I was falling instead of jumping. The movement caused by jumping makes the pose more dynamic and my hair look like it’s floating.
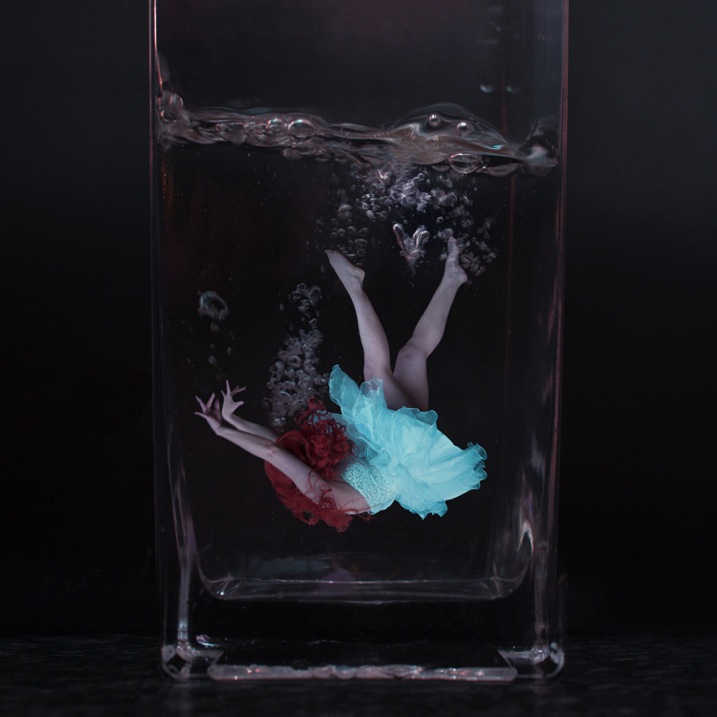
    I Tried to Drown My Sorrows

    #7 – Lighting

    Lighting can be tricky, and expensive, so it’s always best to start out with natural light, positioning your subject so the light sculpts their features. Shoot early, or late in the day, and aim for overcast or cloudy days to avoid harsh shadows (unless that’s what you want). You can start experimenting cheaply with lamps and candles.

    I usually like to work with natural, overcast lighting, because it makes compositing easier. But, in “Self-Destruct” I wanted the character to look as if she were burning the world down, so I shot as the sun was rising which would make the landscape a warm orange.
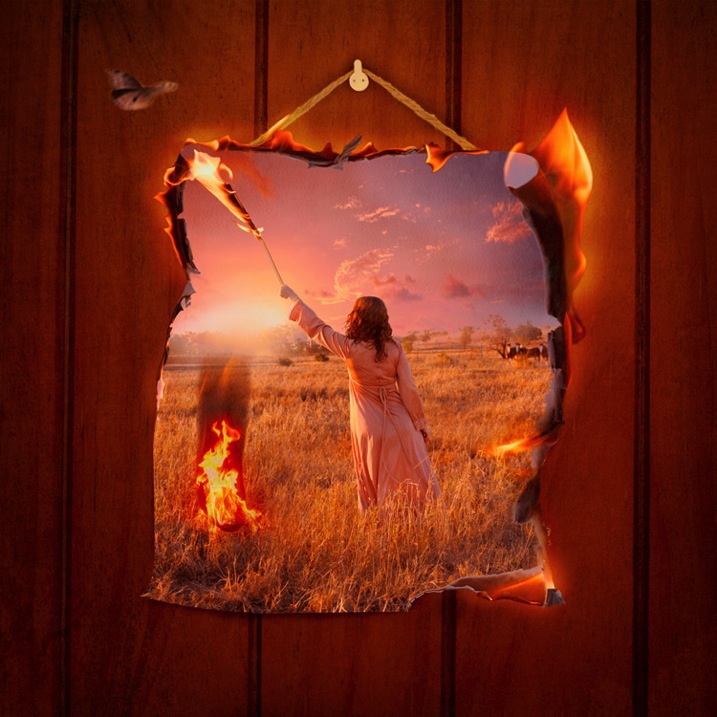
    Self Destruct

    #8 – Framing

    Do you want a wide shot to see the location, or a tight shot to really focus on your subject? Do you want to shoot from low down to make them look powerful, high up to make them look submissive, or straight on to let the image alone tell the story? Do you want the whole scene in sharp focus, or do you want the background to be blurry?

    I shot the three elements (sky, character, flowers) of “Time Flies” straight on, so they were easy to composite together. I cropped the image so the girl filled the frame, but removed her face to add mystery to the image. The loosely pointed hand directs the eye around the scene.
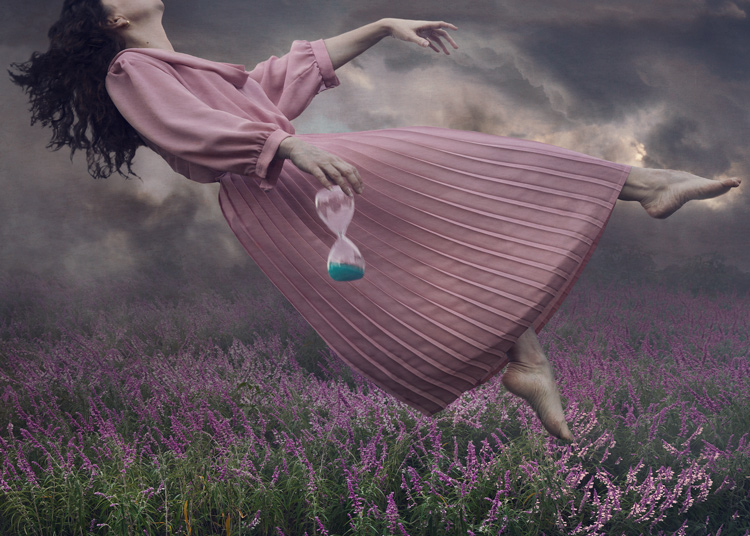
    Time Flies

    Summary

    When planning your image, try sketching out your idea beforehand, as this helps you visualize what it will look like, and if any extra elements are needed to strengthen your story. My images often take on a life of their own, different from my original concept, so don’t get too disheartened if your shoot doesn’t work out. You’ll still have learned a ton of things from the experience that you can use next time.

    Naturally your concepts don’t need to be as involved, or as heavily Photoshopped as mine, but I’m certain you’ll find the process of creating something from your imagination incredibly fun and rewarding. I’d love to see the results of your own staged shoots, please share in the comments below.
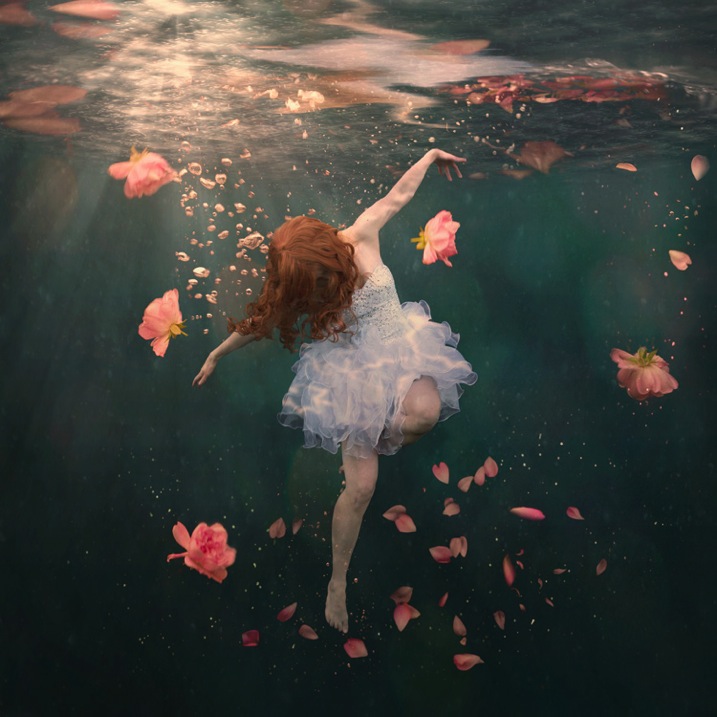
    Rosewater

    googletag.cmd.push(function() {
    tablet_slots.push( googletag.defineSlot( “/1005424/_dPSv4_tab-all-article-bottom_(300×250)”, [300, 250], “pb-ad-78623” ).addService( googletag.pubads() ) ); } );

    googletag.cmd.push(function() {
    mobile_slots.push( googletag.defineSlot( “/1005424/_dPSv4_mob-all-article-bottom_(300×250)”, [300, 250], “pb-ad-78158” ).addService( googletag.pubads() ) ); } );

    The post 8 Tips to Improve Your Photography by Creating Instead of Taking Photos by Hayley Roberts appeared first on Digital Photography School.
    Digital Photography School

  • Winter Kayaking on the Lower St Vrain Creek

    February 11, 2016. I did some scouting and a little bit of paddling on the lover St Vrain Creek. First, I checked some potential launching spots, i.e., bridges, below I-25 highway. Then, I ended up paddling upstream from the county […]
    paddling with a camera

  • 3 Easy Steps to Photograph Glassware with Minimal Gear

    Photographing glass objects is always a complicated task because of the reflective surface, and at the same time translucent nature, of this material. The catalogue images with great glassware perfectly illuminated, are usually done with complicated setups, in studios that allow the control of reflections, and lighting equipment with accessories that are not accessible to most photographers.

    In this article I will show you how photograph a glass on both white and black backgrounds, with minimal equipment, and a fairly simple lighting setup.

    01

    The techniques used here are known as black-line and white-line lighting, and are defined by the way light is shown at the edges of the glass, in contrast to the color of the background. This is usually done with a light placed behind and above the object, with softboxes or diffusion panels to create the transparency in the glass, black and white cardboard to create the edges, and black and white acrylic panels to create the bottom reflection.

    Equipment needed

    Well, you may not have a studio and lighting equipment with accessories available, but it doesn’t mean you can’t give this kind of photography a try. Here is what you will need:

    02

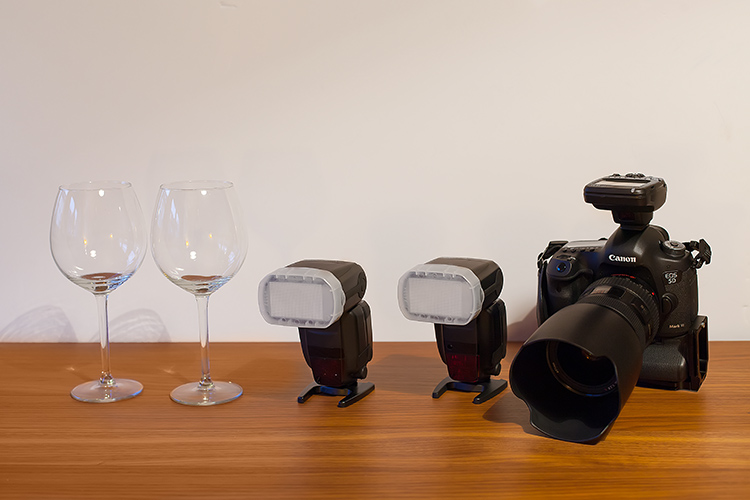
    Besides the camera body and the lenses of your choice, you will need two flashes with diffusers, a trigger to fire them, some white cardboard, and two identical glasses (you will see why you need two of them later).

    Step one: Clean the glasses

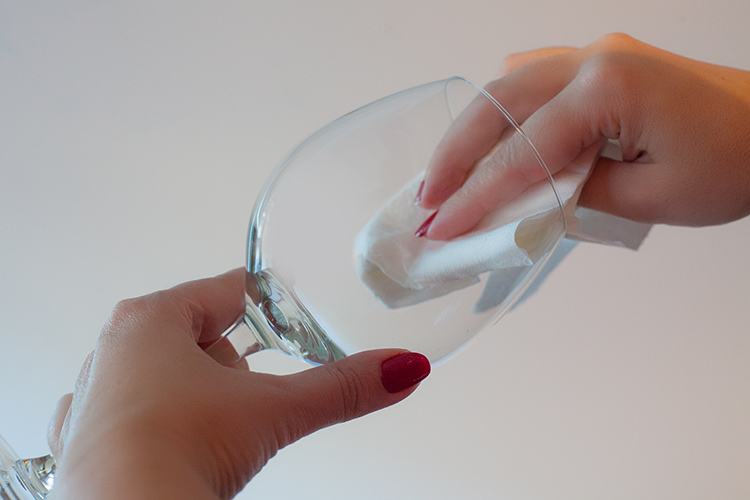
    The first step, and a really important one may I add, is to clean the glasses really well, as any dirt in the glass will be visible in the image. Toilet paper and glass cleaning fluid are a good choice to get rid of spots or smudges, and a compressed air can be a good choice to get rid of dust specks.

    03

    Step two: Prepare your set

    In these images, instead of an acrylic panel to create a reflection effect, I decided to use an old school technique to simulate the same effect – with the use of another glass turned upside down, under the main photographed glass. I use this technique a lot, as it allows me to have a pure white or black background, without a horizon line created by the base that holds the object, which can give ghost reflections sometimes, and is hard to keep clean due to electrostatic.

    Step three: set up your lights

    Even though camera flashes (speedlights) are very low power compared to studio units, they have more than enough power for this kind of setup, and are an accessible and simple solution.

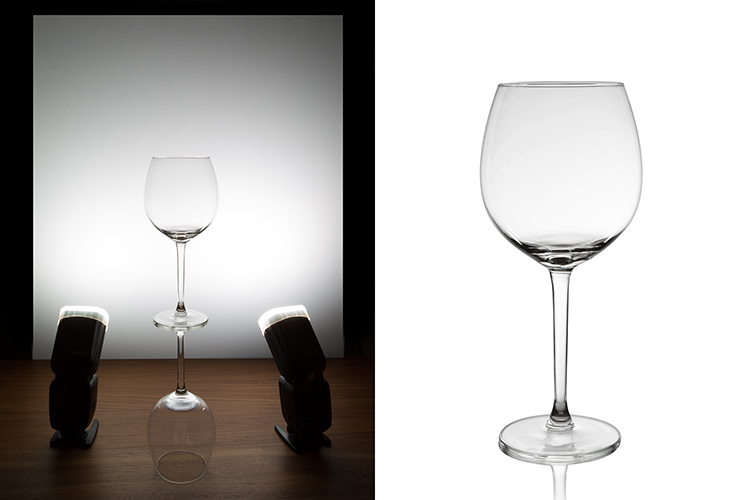
    You will need to use the white cardboard as the background, and one flash with a diffuser on each side of the glas, illuminating the background evenly. This simulates the use of a softbox as backlight in a really simple way.
    Here is the behind the scenes image showing the setup:

    04

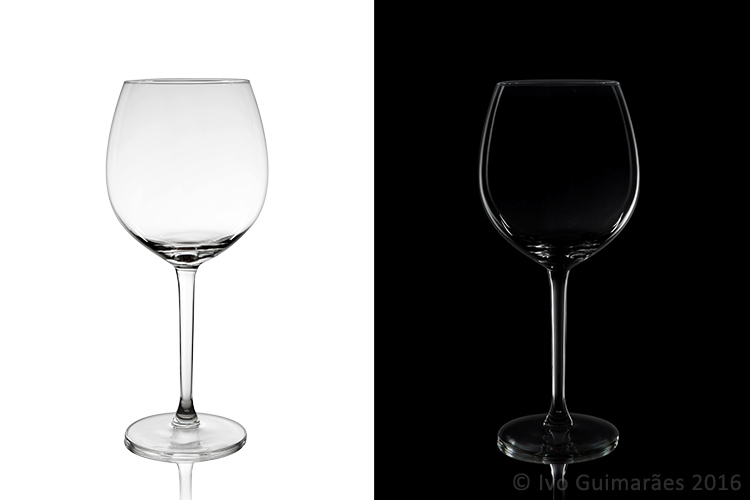
    Voila, here is a perfect white background glassware image. It’s amazing what you can get straight out of the camera with such a simple setup. The camera settings used were: f/22, 1/200th (flash sync speed), ISO 50. Both flashes were on 1/2 power with a 50mm zoom setting.

    It is important to have a large depth of field to get well-defined glass edges (including the back side of the glass), and to use the highest sync speed for your flash/camera combination to avoid the ambient light making a reflection and changing the color temperature of the image.

    Bonus step: Black background setup

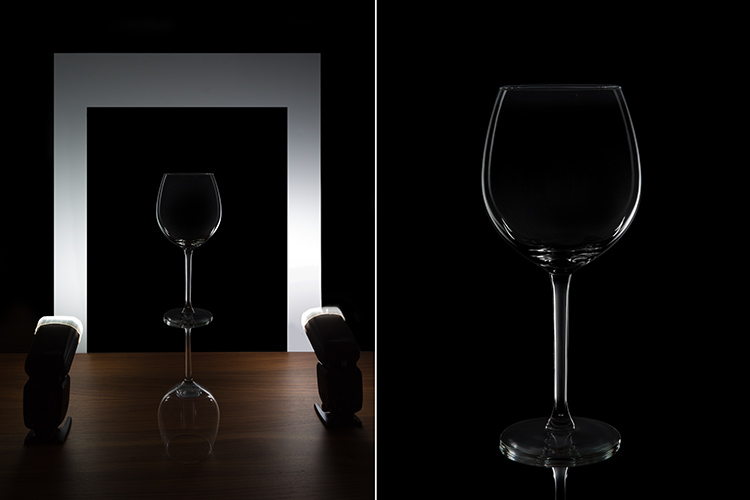
    The black background image might seem a lot more complicated, but actually it’s as simple as cutting a hole in your white cardboard, that will function as an open window for the black background. Here is the behind the scenes image for that setup:

    05

    Here is the black background glass image.

    The camera and flash settings are the same, but the white cardboard acts as a reflector, defining the white line around the glass. Just be sure not to have anything behind the cardboard or use some black velvet as the background, which doesn’t reflect light and guarantees you a pure black.

    So, there you go, a simple, yet highly effective technique to produce amazing glassware images with white or black background, and bottom reflection effect – without a studio, fancy lighting equipment, or a ton of accessories.

    Give it a try, I’m sure you’ll get great results! Please share your images in the comments area below.

    googletag.cmd.push(function() {
    tablet_slots.push( googletag.defineSlot( “/1005424/_dPSv4_tab-all-article-bottom_(300×250)”, [300, 250], “pb-ad-78623” ).addService( googletag.pubads() ) ); } );

    googletag.cmd.push(function() {
    mobile_slots.push( googletag.defineSlot( “/1005424/_dPSv4_mob-all-article-bottom_(300×250)”, [300, 250], “pb-ad-78158” ).addService( googletag.pubads() ) ); } );

    The post 3 Easy Steps to Photograph Glassware with Minimal Gear by Ivo Guimaraes appeared first on Digital Photography School.

    Digital Photography School

  • 4 Quick Ways to Add a Vignette to Your Images in Post-Processing

    What is a vignette?

    way-to-add-vignette-tutorial
    The word vignette comes from the root word vine, which originally was taken to mean a decorative border on a page. In photography, this translates to a border around the edge of the image. This border is caused by a reduction of light from the center of the image, or a light fall-off. Light fall-off can be due to a variety of reasons: the amount of light hitting the sensor, the type of lens used, or an intentional addition in post-production. This article will focus on the latter.

    In adding vignettes in post-processing, you have two choices: darker or lighter, and soft-gradual or hard-edge.

    Why add a vignette?

    way-to-add-vignette-tutorial

    The addition of a vignette in post-processing comes down to your personal taste. It would also largely depend on your photography style, and the type of image you are editing. Generally speaking, high-key images do not need a dark vignette. If you want to add a vignette to bright images, most often a lighter one looks better, but I would still be very careful about adding one.

    A vignette helps draw the viewer’s eye to the center of the image. This is particularly useful if the image has plenty of clutter, or distracting elements around the edges. Similarly, if the edges are pretty bare which makes the image look flat, a vignette adds an illusion of foreground, or another layer to the image, giving it more depth.

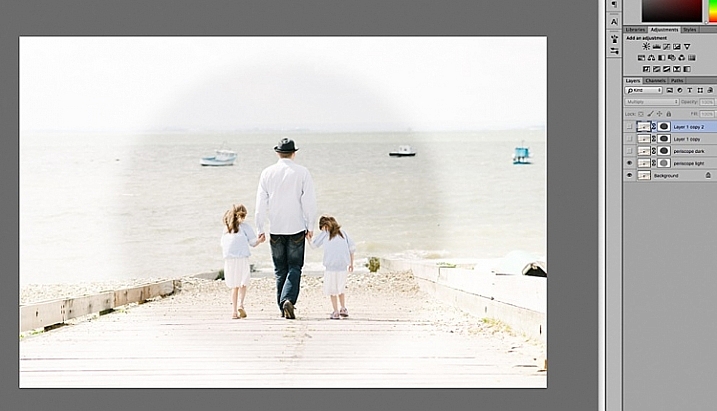
    Be gentle and sparing when adding a vignette, it can enhance or ruin an image. What works often, and best, is a gradual and very subtle vignette, especially for portraits. More exaggerated vignetting may be required on some artistic images – the choice is yours. If you want to add a spotlight effect to an image, then adding vignettes can be essential. A hard-edged vignette, if done unintentionally, makes your image look like a view through a periscope and can burn your image, like a moth to a flame.

    Here are four quick ways to add a vignette

    In Adobe Camera Raw

    The quickest and easiest way to add a gradual and gentle vignette in your image is via Adobe Camera Raw (this works in both Photoshop and Lightroom).  My previous article on batch editing with Bridge and Adobe Camera Raw explains how you can open your file in Camera Raw and make your initial edits.

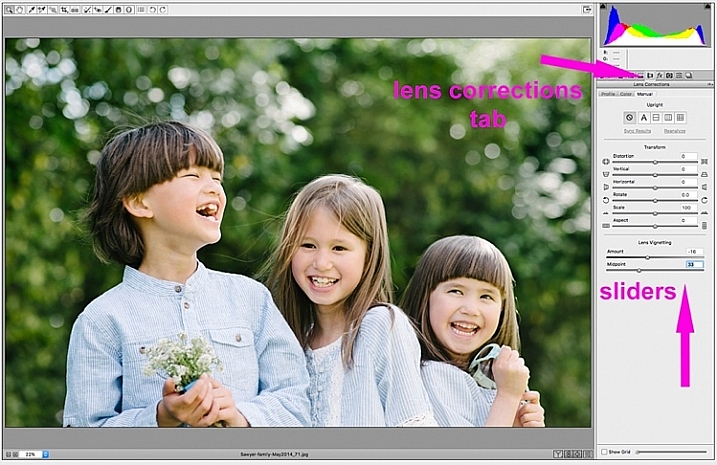
    1. Using the lens correction tab

    On the image below, you will see the lens vignetting slider under the lens correction tab. Move the sliders along to add, and remove vignettes to your image, according to taste.

    way-to-add-vignette-tutorial

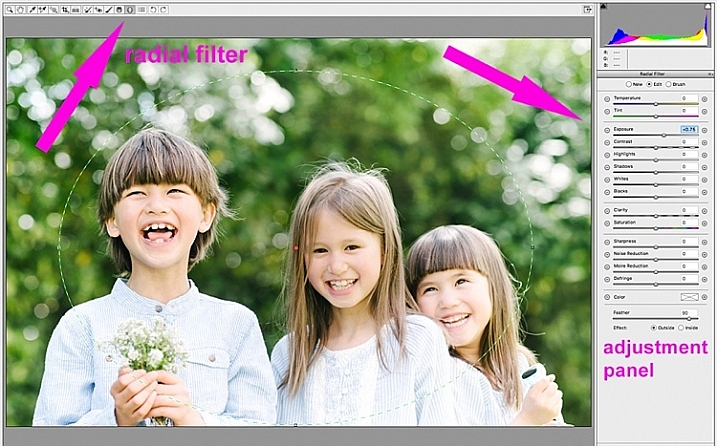
    2. Using the radial filter tool

    You can also add a dark or light vignette using the radial filter tool. On the adjustments panel, you need to specify where you want the vignette added – whether inside or outside the radius, then adjust the exposure to lighten or darken the vignette (with this method you can even add blur, lower highlight, or change the color of it if you like – anything on the sliders). This is a really handy feature in ACR because it acts like a layer mask, although you can’t easily do fine tuning with this tool like you can in Photoshop.

    way-to-add-vignette-tutorial

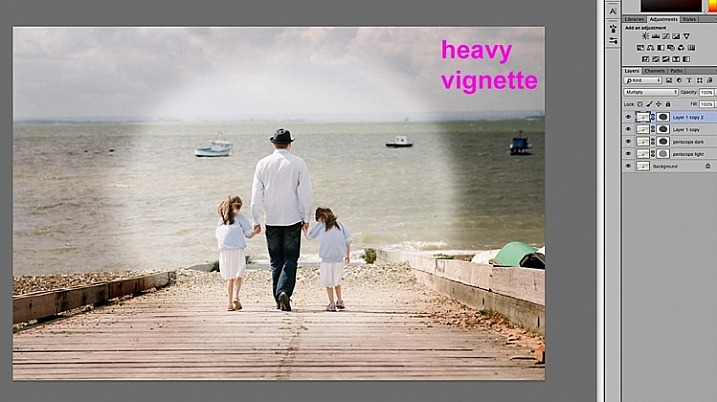
    Below is an image with a pretty dark and heavy vignette. In my opinion it’s too much, and takes away from the image, rather than enhancing it.

    way-to-add-vignette-tutorial

    Below is the same image with a bright vignette; this doesn’t look right to me at all.

    way-to-add-vignette-tutorial

    On this version below, I think the vignetting is just right, as it enhances the natural look of the photograph, which was my aim.

    way-to-add-vignette-tutorial

    In Adobe Photoshop

    If you skip Adobe Camera Raw and open your file in Photoshop, there many ways to add a vignette. Below are the two quickest ways I have found. Before attempting to add a vignette in Photoshop, in order to perform non-destructive edits to your images, I recommend you learn to use layers and masks.

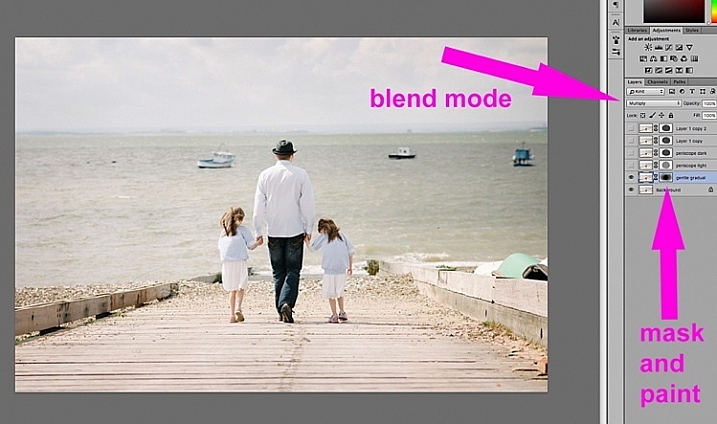
    1. Using blend modes

    The first quick way  of adding vignettes in Photoshop that I found is by duplicating the background layer using CMD/CNTRL + J. You need to make all your adjustments on the layers above your background layer, in this case the duplicated layer, so that your original file is safe and untouched.

    way-to-add-vignette-tutorial

    With your duplicate layer selected, change the mode to darken or multiply to add a dark vignette, or to screen or lighten to add a light vignette. Now add a layer mask to the duplicate layer. If you choose to paint the vignette on, make sure the mask is blacked out. Select a big soft brush, using the brush tool set to a very low opacity, and paint with white on the vignette around the edges.

    Alternatively, you can choose to remove the vignette instead of painting it on, which in this case would be my preference. With your duplicate layer superimposed on the background layer, add a white layer mask. Choose a big soft brush set to a higher opacity and start painting the layer mask black, starting from the middle and ever so gently radiating outwards until all the vignette is removed from the center, and only a touch on the edges is left. Adjust the opacity of the layer to suit your taste.

    Below are two examples of exaggerated vignetting added in Photoshop using this method.

    way-to-add-vignette-tutorial

    way-to-add-vignette-tutorial

    Manually painting, or removing the vignette by hand, gives you flexibility as to where to apply the vignette, how far in, and to what degree, depending on what’s required for each image.

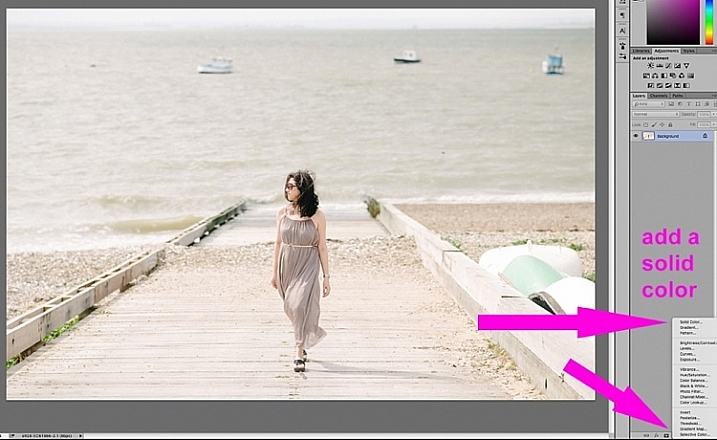
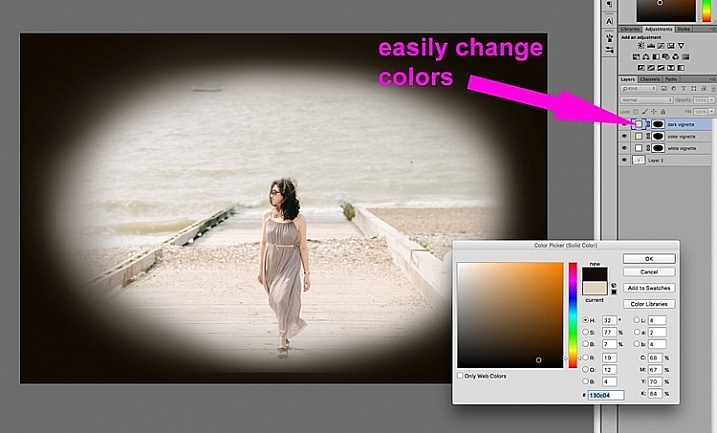
    2. Using a solid color layer

    Another quick way is to add a solid color. This method allows you to be more experimental, as it’s very easy to change the colors with a click of the eyedropper tool.

    way-to-add-vignette-tutorial

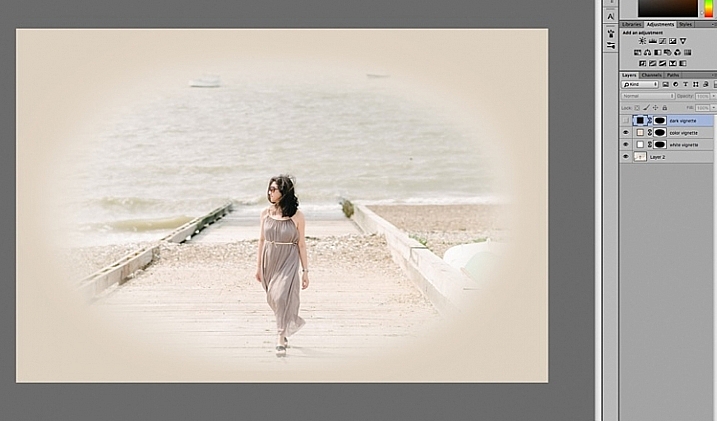
    The solid color will sit on top of your image, so all you will see is a flat rectangular block of color. You need to add a layer mask, and start removing some of the color beginning at the center and radiating outwards. Again, use a soft large black brush to remove the color. If you do this kind of vignetting, as in the two images below, it has to be intentional as these do not give you a natural look to the images at all. They may work for a scrapbook, or other specific purposes, but this is not the look I would give to my clients.

    way-to-add-vignette-tutorial

    On the image below, the vignette was added using the same solid color method as above. You can then play around with the blend modes to see what looks best.

    biege - color-burn

    This was done using the same solid color as above but Color Burn Blend Mode.

    way-to-add-vignette-tutorial

    This one is done with a black solid color added, masked, and Overlay Blend Mode with the layer at 80% opacity.

    This one is done with a black solid color added, masked, and Overlay Blend Mode with the layer at 80% opacity.

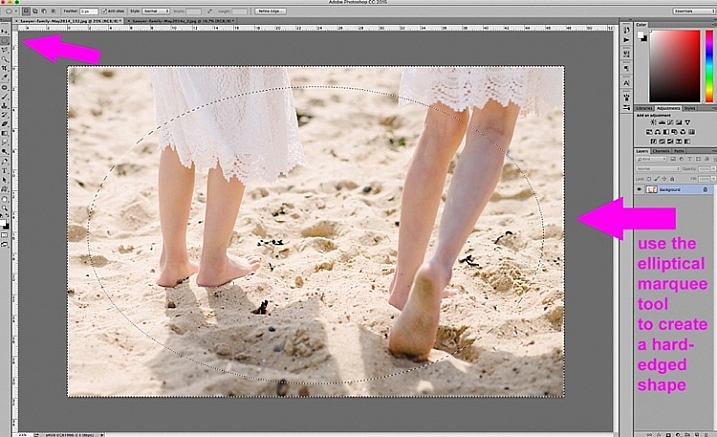
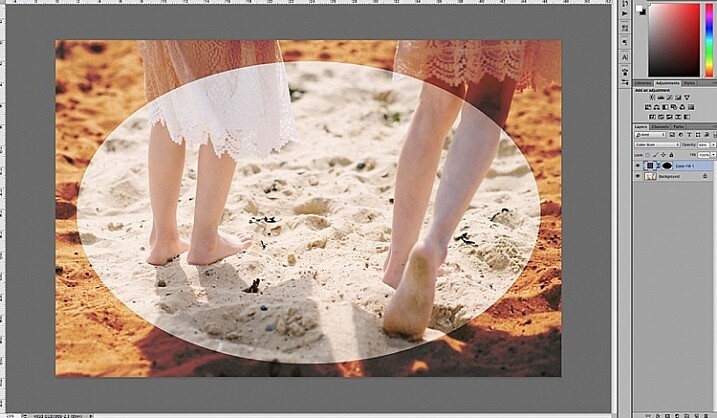
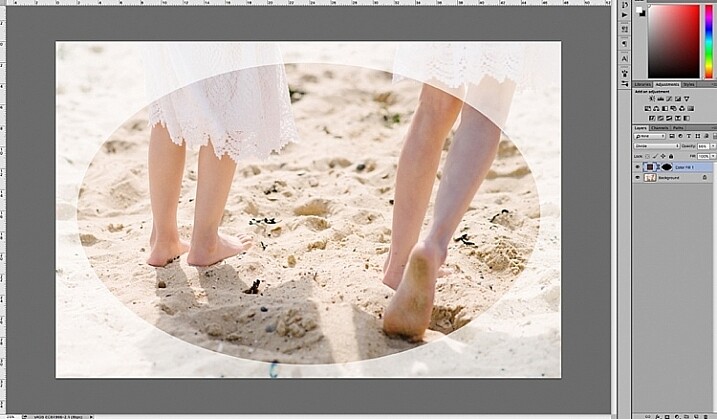
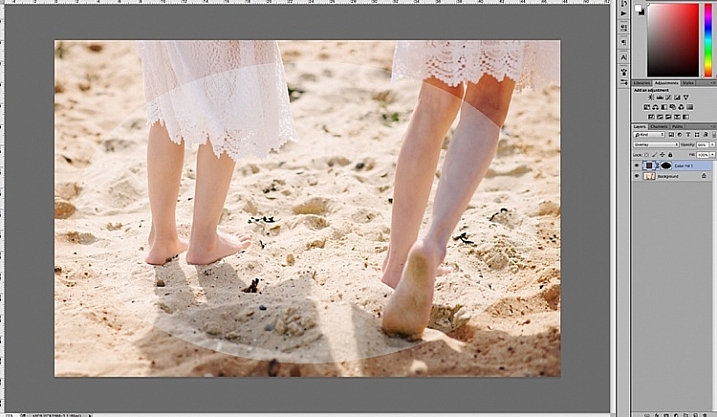
    You can also make shapes as vignettes, using the marquee tool.  The elliptical marquee tool was used for the image below, creating a hard-edged vignette. Make your shape by dragging this tool on your image, and you will see marching ants around the shape you have just created. You must immediately invert it using CMD/CNTRL + shift + I so the outside of the shape will be selected and would now be the area surrounded by the marching ants (as below).

    elliptical marquee

    Click on the solid color icon and select a color. A new layer with your shape filled with the solid color will automatically be created. Select this layer and play around the the blend modes and the layer opacity. You will see below what the Divide, Color Burn and Overlay modes look like.

    Color Burn Blend Mode

    Color Burn Blend Mode

    Divide Blend Mode

    Divide Blend Mode

    Overlay Blend Mode

    Overlay Blend Mode

    You will want to feather the mask on your color layer, or blend the edges manually using the brush tool so that you do not see the edge of the vignette so well-defined. I’ve left it like this for demonstration purposes so you can see what the vignette layer is doing.

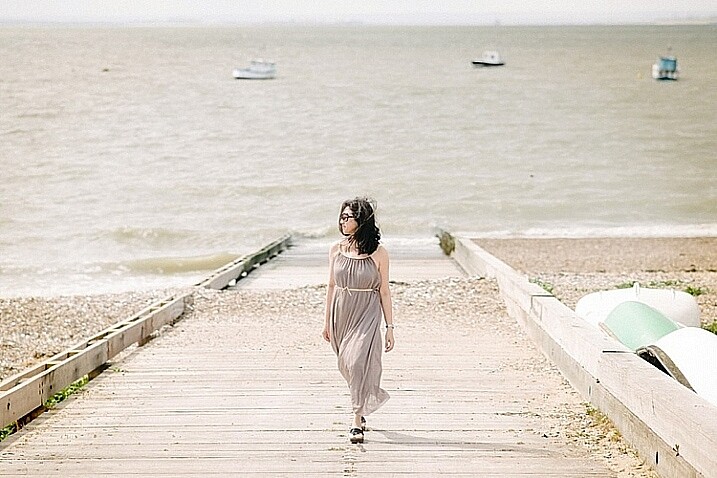
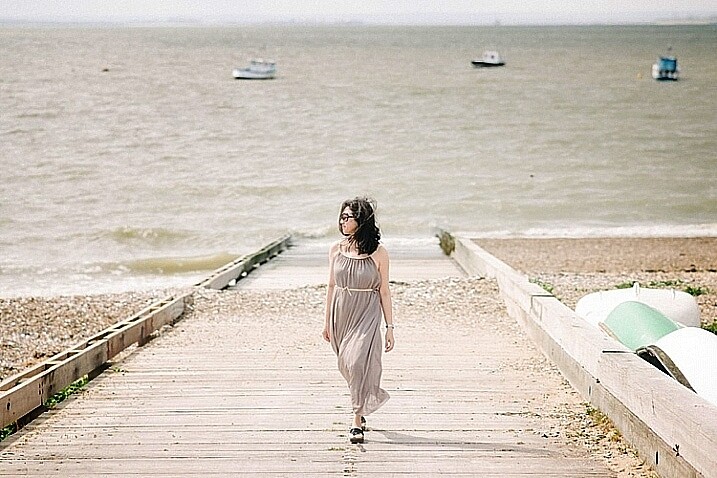
    Below is the final image with only a hint of vignette on the edges, just to take the edge off the brightness of the scene.

    way-to-add-vignette-tutorial

    I hope this tutorial has given you some new ideas on how to enhance your images using vignettes. Do you have other quick ways of adding vignettes to your images? Share them here.

    googletag.cmd.push(function() {
    tablet_slots.push( googletag.defineSlot( “/1005424/_dPSv4_tab-all-article-bottom_(300×250)”, [300, 250], “pb-ad-78623” ).addService( googletag.pubads() ) ); } );

    googletag.cmd.push(function() {
    mobile_slots.push( googletag.defineSlot( “/1005424/_dPSv4_mob-all-article-bottom_(300×250)”, [300, 250], “pb-ad-78158” ).addService( googletag.pubads() ) ); } );

    The post 4 Quick Ways to Add a Vignette to Your Images in Post-Processing by Lily Sawyer appeared first on Digital Photography School.

    Digital Photography School

  • Review of the Vü Professional Filter System

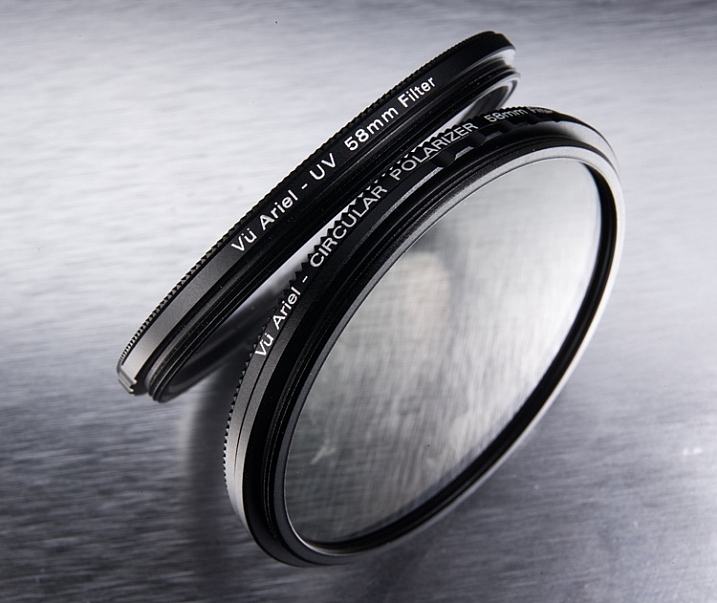
    Filters are wonderful little tools that help modify the light coming through your camera lenses, and alter what is recorded onto the sensor or film, whichever the case may be. Different filter types exist for varying purposes; polarizing filters deepen sky color and remove glare and reflections from shiny surfaces, a UV filter screens out ultraviolet light and adds a protective surface over the camera lens, while a graduated neutral density (GND) filter allows you to expose a foreground properly while avoiding a bright, blown-out sky.

    The Vü filter system represents the higher-tier of camera accessories in this segment of hardware, and I was fortunate enough to have a couple of weeks using them.

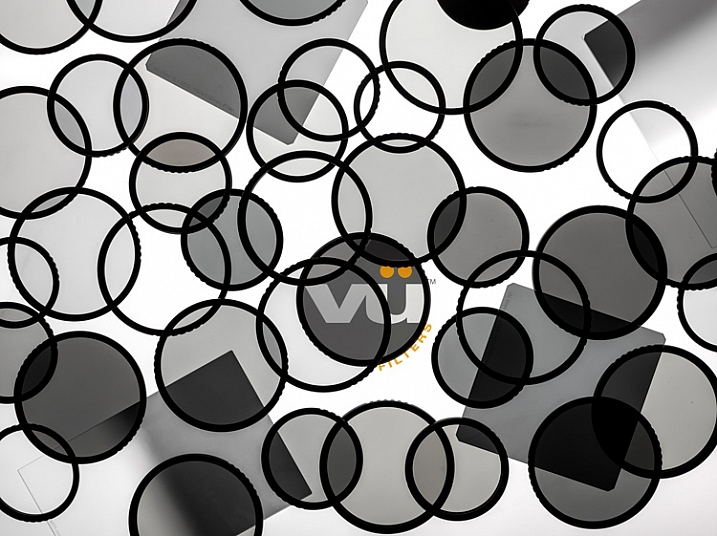
    VU_Layout_wLogo

    Image courtesy of Vü Filters

    Upon opening the complete set of the company’s filters, the first thing I noticed was the quality and attractiveness of the packaging. All of the boxes were constructed of very sturdy material, clearly marked, and conveyed a great sense of style.

    The set I received consisted of several filters and accessories, including a filter holder, drop-in filters, and lens adapters for the lenses I specified when ordering (in this case, a Canon EF-S 50mm f/1.8, and Canon EF-S 24mm f/2.8 STM). As my time was limited, I restricted my use to the screw-on Circular polarizing Filter ($ 59-126 depending on filter size)), the 10-stop Neutral Density (ND) Filter ($ 144) and Drop-in Filter Holder ($ 150).

    If you’re looking for a quick, overall thought on the system, it’s generally good. The filters are high-quality and are very well constructed.

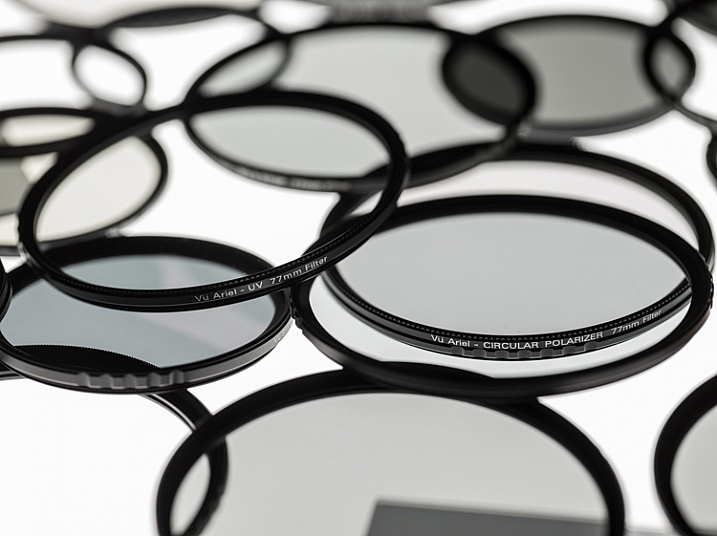
    Circular Polarizing Filter

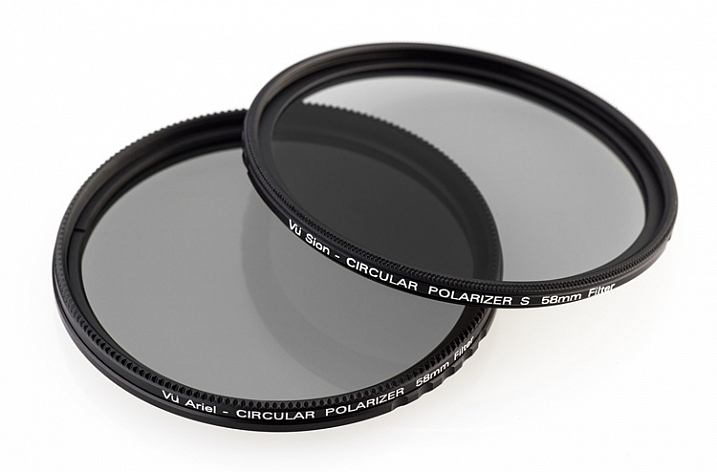
    Vu_CPOL_Group_Left

    Image Courtesy of Vü Filters

    The circular polarizing filter did just what I expected. It darkened the desired areas in my photo, removed any extra shininess from the image, and generally smoothed the photo over, giving it a look that is hard to discern or describe, but which definitely exists.

    The circular polarizer tends to smooth out rough points, darkens skies, and removes some of the reflective properties of shiny surfaces.

    The circular polarizer tends to smooth out rough points, darkens skies, and removes some of the reflective properties of shiny surfaces.

    Using this filter was the easiest, as it only required I that connect it to the step-down adapter for my particular lens size, and then screw that assembly onto the lens itself.

    Ariel_Lens_01

    Image courtesy of Vü Filters

    As with all polarizing filters, this one works best when light is coming from the right angle, in this case, about 45 degrees. Using it when light is directly in front of, or behind you, won’t yield much or any of an effect on your image.

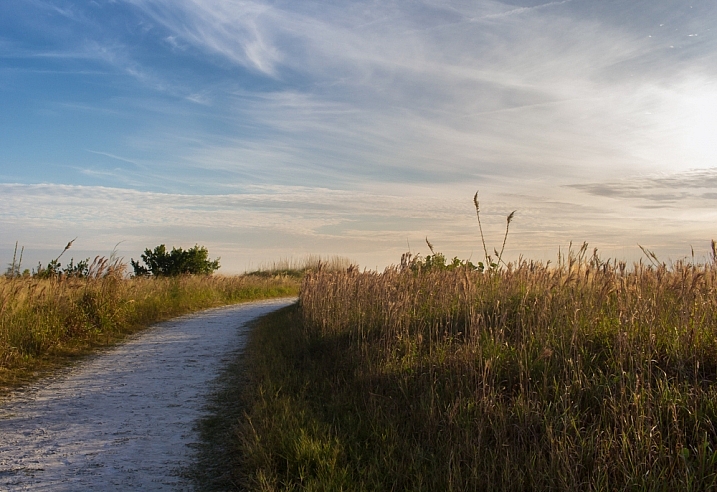
    Again, the polarizer helped darken this sky a bit more to where I wanted it to be.

    Again, the polarizer helped darken this sky a bit more, to where I wanted it.

    10-Stop Neutral Density Filter

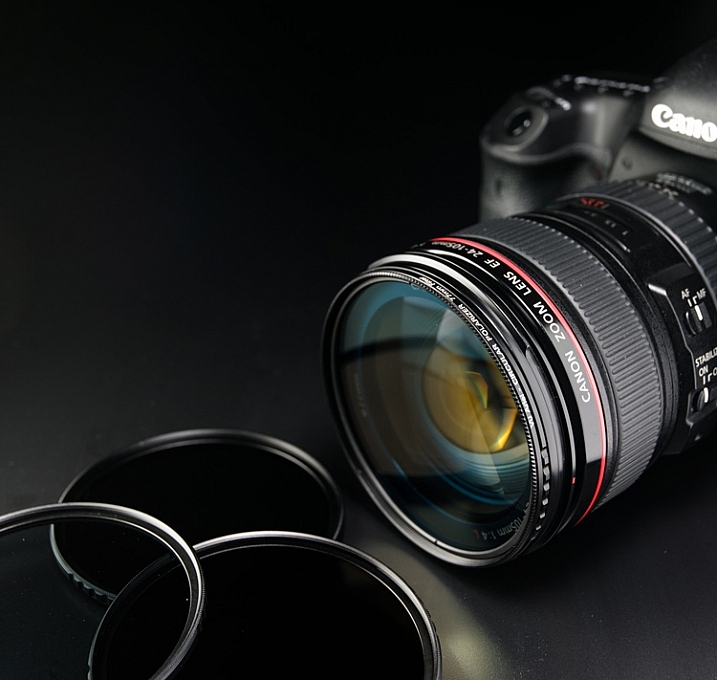
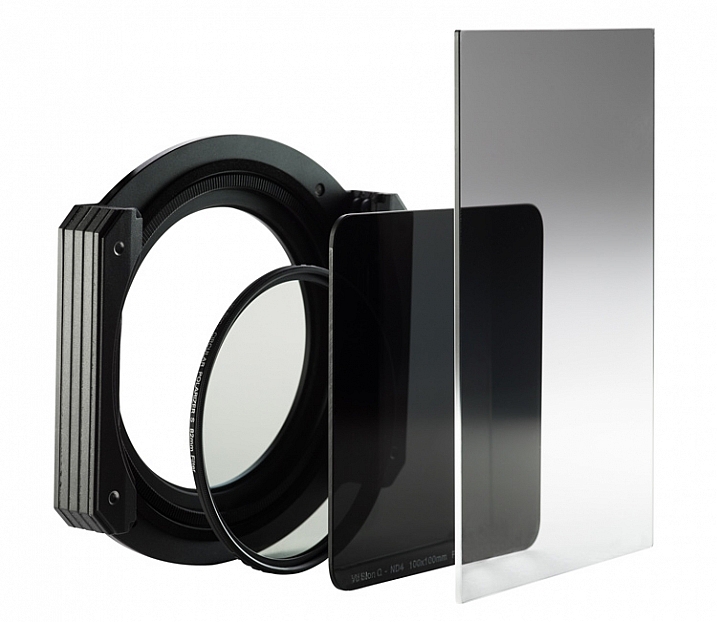
    VFH100_CanonFront_CPOL_NDGrad

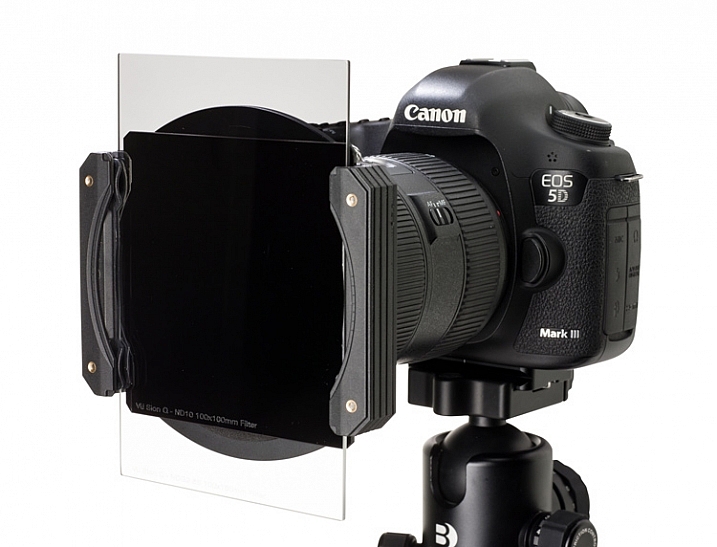
    Image courtesy of Vü Filters showing the filter holder, 10-stop ND, and Graduated drop-in filters mounted on a Canon lens.

    I was most excited to try the 10-stop neutral density filter. The purpose of this filter is to reduce the amount of light coming through the lens. As you might imagine, this particular filter reduces that amount by 10 stops of light, which is quite a bit. The beauty of it, is that you can use a much slower shutter speed in daylight, and capture long exposure images when it would normally be impossible.

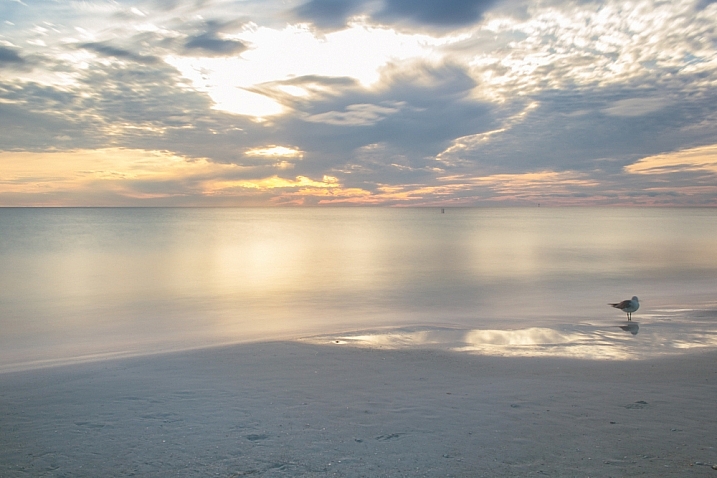
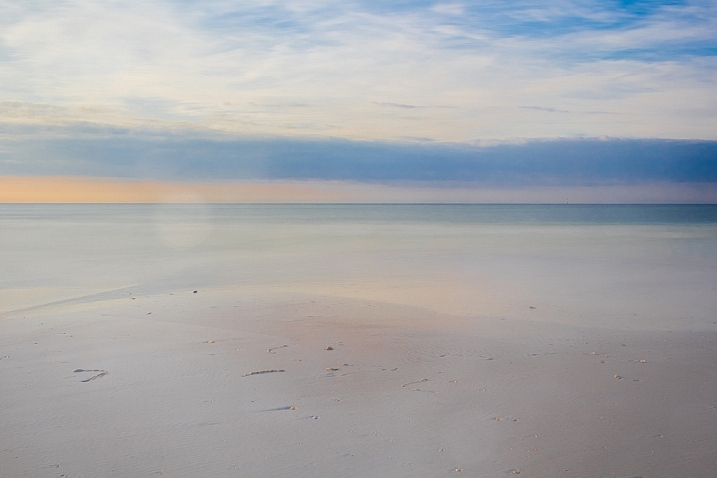
    I tried this myself using the Vü 10-stop ND filter, and was extremely happy with the results. I was able to capture the ebb and flow of the ocean waters at our nearby beach, well after the sun had risen. With the filter, 25 and 30 second exposures were possible, which produced shots that I would never have thought possible.

    The 10-stop neutral density filter allows you to take long-exposure shots when there is plenty of light available.

    The 10-stop neutral density filter allows you to take long exposure shots when there is still plenty of light available.

    The Vü ND filter fortunately does not suffer from common ailments of other dark, lower quality filters, such as color shifting near the corners of the lens. Tones remain faithful and consistent across the entire image.

    To me, that’s the grand measure of the usefulness of this system; shots that would have been impossible, or extremely difficult to create, can now be accomplished using these types of accessories. As a photographer, it opens up a multitude of ideas and situation I can now explore.

    Drawbacks of the system

    Of course, everything can’t be roses, and I did have a couple of complaints about the Vü system.

    First and foremost, as wonderfully performing and artfully constructed as the system is, I’m afraid that some novices may get a bit lost figuring out how to use them, creating a barrier to entry that could easily be avoided.

    The boxes of filters, and bags of adapters, come devoid of any instructions, inside or out. An advanced user that has experience with different filter systems will figure it out rather quickly, but someone who lacks this experience will likely fuddle around until they eventually understand how everything fits together.

    VFH150_Parts Vu_FilterHolder_Group_02

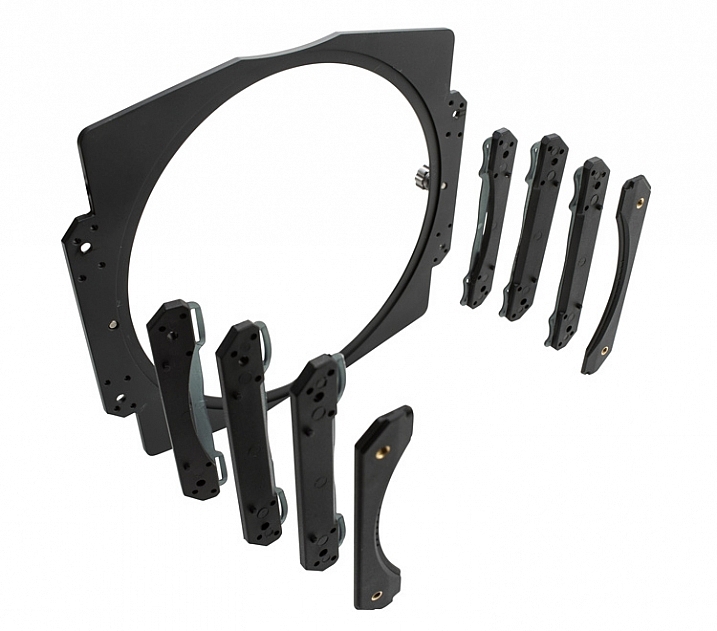
    As an example, attaching the 10-stop ND filter to my camera’s lens (a Canon 60D with the Canon EF-S 24mm 2.8 STM) was a bit of a chore. The large metal filter holder was required, since this particular filter is the drop-in type, meaning the filter is a large square piece of thick glass. The filter slides vertically into the holder attachment, which is then attached to the lens via an adapter ring, suited for your lens’s filter size.

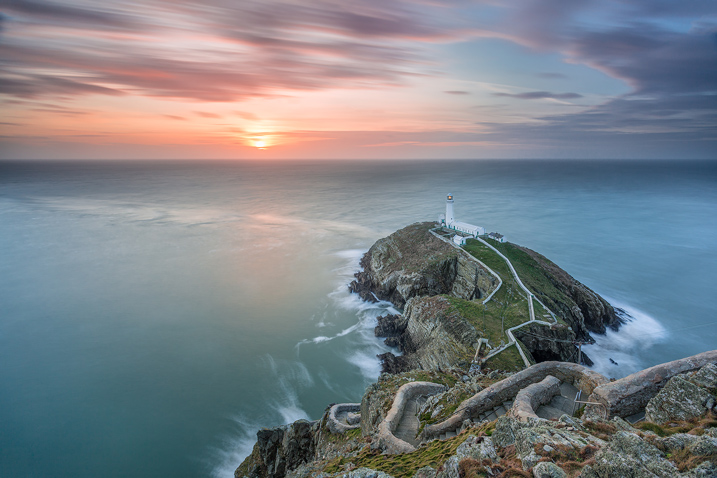
    Another example of long-exposures at daytime with the neutral density filter.

    Another example of long-exposures at daytime with the neutral density filter.

    It took several tries to get this right, and in the end was no small feat. I wasn’t positive after I was done that I had attached it correctly, but it functioned without any issues, so I’m assuming I did. A simple set of instructions for each piece would negate this problem altogether in my opinion.

    The Vü website gives details and information about the products themselves, but I couldn’t find a support section where a user could quickly fetch instructions.

    VFH100_FilterGroup

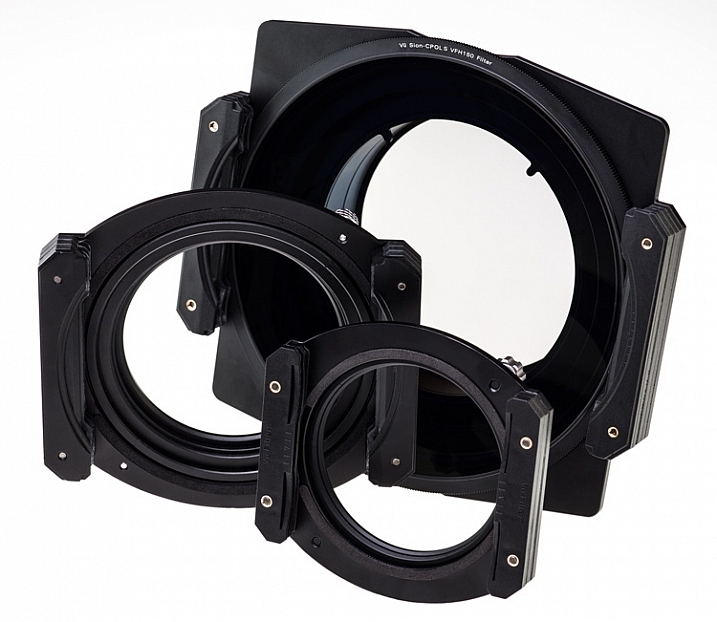
    Once you figure out how to attach the product to your camera, and put them together, the filters and holder feel very solid and well constructed. Several sizes of adapter rings are available, to ensure the filters will fit almost any lens, and additional accessories for the system are also available. The holder, as I mentioned before, is large and a bit unwieldy, and using it without a tripod would be difficult.

    My contact at the company was very helpful and knowledgable, and made sure everything got to me as quickly as possible.

    Editor’s note: the video below was provided by the supplier when we discussed this issue with them. This should help solve the problem.

    Summary

    At the end of the day, regardless of any assembly difficulties I might have experienced, I found the filters very attractive from several standpoints. The filters were obviously made with the serious photographer in mind, and didn’t skimp on materials, strength, or quality.

    VU_TableTop_06 Ariel_Hero_f32

    Pricing is, in my opinion, below what you would expect for this level of craftsmanship. Ordering their whole line would be expensive, but picking and choosing individual filters within the system, would prove affordable for most photographers.

    Most importantly, the filters themselves work fabulously, and produce very good images. Some in the industry still consider filters to be a degradation to image quality, but after seeing the images these filters can produce, I slide off the fence into the more positive side of the field, and would use these accessories in all of my work.

    Have you given Vü filters a try? Sound off below and tell us your experience!

    Learn more about Vü filters, including the full product line, and you can purchase them online at Amazon.

    googletag.cmd.push(function() {
    tablet_slots.push( googletag.defineSlot( “/1005424/_dPSv4_tab-all-article-bottom_(300×250)”, [300, 250], “pb-ad-78623” ).addService( googletag.pubads() ) ); } );

    googletag.cmd.push(function() {
    mobile_slots.push( googletag.defineSlot( “/1005424/_dPSv4_mob-all-article-bottom_(300×250)”, [300, 250], “pb-ad-78158” ).addService( googletag.pubads() ) ); } );

    The post Review of the Vü Professional Filter System by Tim Gilbreath appeared first on Digital Photography School.

    Digital Photography School

  • PhotoPills: The Photographer’s Swiss Army Knife

    It’s 6pm, it’s cold, and the sun is on its way to set. The tripod is placed, the composition is done – now I just have to wait for the big show that Mother Nature puts on every day to happen again. The sky is threatening, but with a little luck, the sun will pierce the clouds to pass above the lighthouse in front of me.

    Image 1

    If I think about the first time I went out with the tripod on my shoulder, it makes me smile. I knew more or less where to go, I had no idea of the exact time at which the sun would set, nor where. Failure was inevitable!

    Years have passed since then, and many things have changed. But the biggest and decisive one is in my hands right now: PhotoPills – photo planning app.

    What is PhotoPills?

    PhotoPills is like having a Swiss Army Knife for all photography matters in your pocket, at your service. Whether you’re a seasoned photographer, or someone who’s barely touched a camera, PhotoPills has you covered. You have a question, you get the answer.

    Image 2

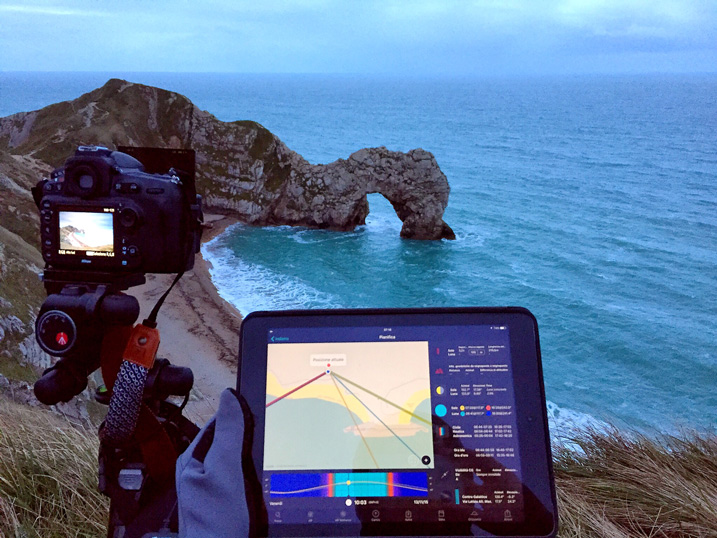
    Using PhotoPills at Durdle Door (UK)

    Beginners will love it. I see it in every single workshop I run. There, in the field, before deciding the frame and the shooting spot, people enjoy using the Augmented Reality views, to easily track the position and the path of the Sun, the Moon, and the Milky Way. It’s the simplest way to understand what’s going to happen next.

    On the other hand, on a more advanced level, being able to plan your shots directly on a map, even the Milky Way shots, saves a ton of time. PhotoPills’ Planner is so well designed, that you can quickly figure out the perfect shooting spot, date, and time for any scene you imagine.

    Image 3

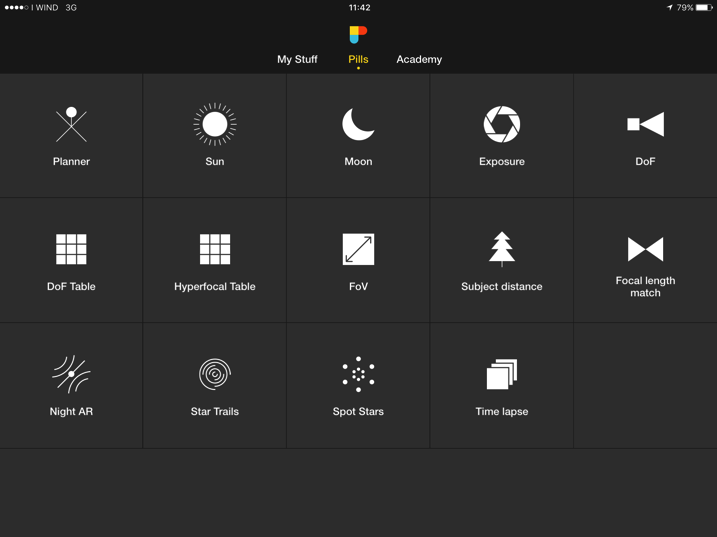
    PhotoPills screen menu

    Everything starts from a clean and user friendly interface.

    You can choose between three menus, simply through a swipe to the right or left at the top of the interface. After choosing your camera, the map type, and other settings in “My Stuff” menu, you can enter the main section called “Pills” where you have the access to all the available modules.

    The possibilities are almost endless, and in this article, I’ll do my best to describe some of the things you can do with this app. Are you ready?

    Widgets

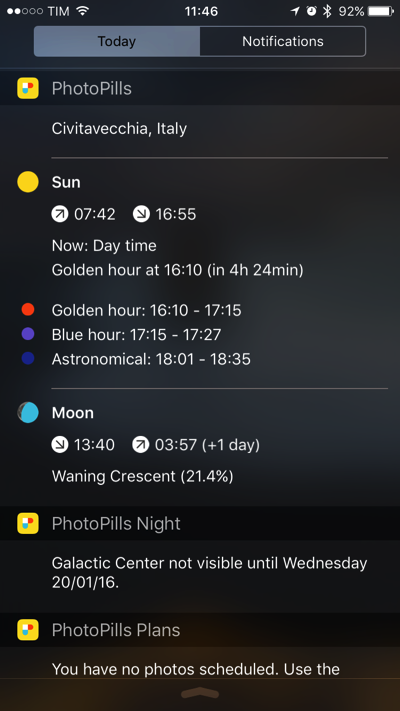
    Imagine that you’re going to bed (at home, or anywhere in the world) and want to know at what time the sun will rise tomorrow, when the golden hour starts, or when the Moon will rise, or what about the the galactic center visibility times?

    The first thing that I love in this App, is that all you have to do is to pull down from the top of the screen and enable the three PhotoPills widgets in the notification center. If you do so, you’ll have all the key light, sun, moon and Milky Way information in just one swipe. Also, you’ll have access to the five upcoming photo plans you’ve saved using the Planner.

    Image 4

    I love using the widgets when I’m traveling, since it’s so easy to have everything I need on one single screen. A cool feature is that it works offline too. As it happens with the Augmented Reality views, PhotoPills doesn’t need an internet connection to give you all the key data you need.

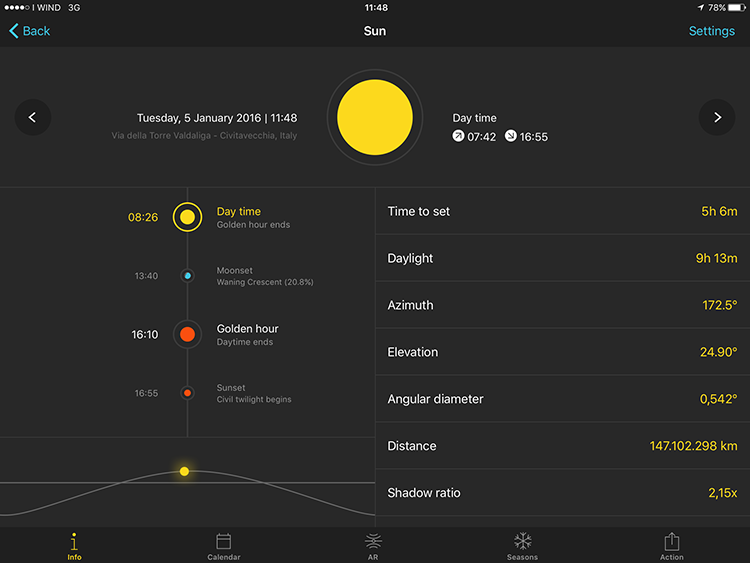
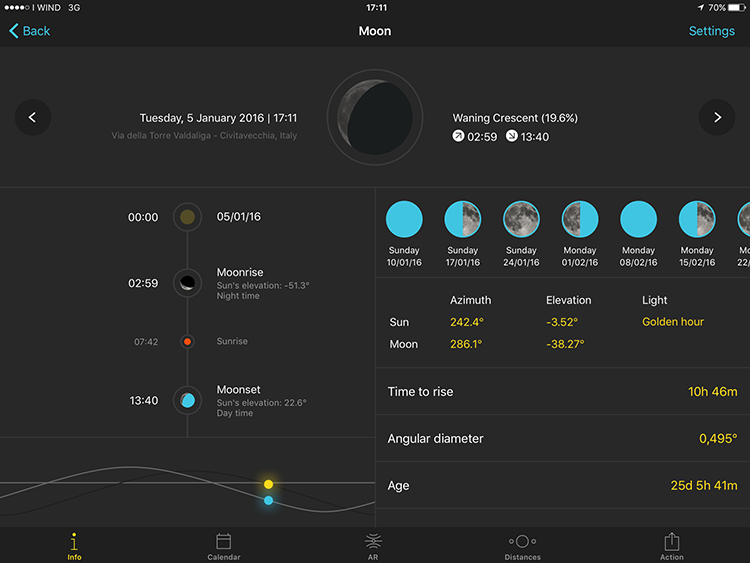
    But that is not all, in the case you want to have all this information (and much more) for a different location or date, just use the new Sun and Moon Pills. So easy, and so nice to have everything together. I really hope that an Apple Watch version will be implemented soon too.

    Image 5A

    Sun Pill

    Image 5B

    Moon Pill

    Augmented Reality

    In a landscape image, composition is more than fundamental. How many times have you arrived at your shooting location, and wondered where the sun would set? For me, every time – but before using PhotoPills, I was never able to have a precise answer.

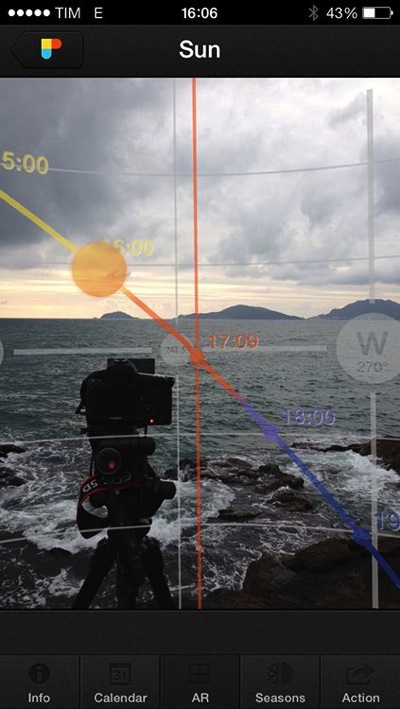
    The Augmented Reality (AR) module included in the App, makes things so easy. Just point your phone at a subject, and use the AR tools available within the Sun, Moon and Night AR pills to see where the Sun, the Moon or the Milky Way will be in the image.

    Image 6

    Sun AR in action

    Besides, and this is particularly clever, you can change the time to see how everything evolves, just by scrolling on the screen with your finger.

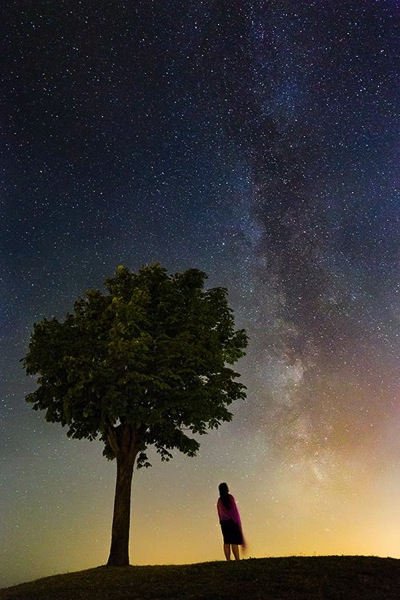
    The application is also useful for all the star hunters out there – with the Night AR view it is easy to plan star trails shots. For example, if you’re planning to shoot a circumpolar, the Night AR view will also help you locate the North Star (Polaris). And, if you live in the southern hemisphere, PhotoPills will give you the position of the south celestial pole, right where you need to frame.

    Image 7 1

    A Milky Way shot planned using Night Augmented Reality

    Planner

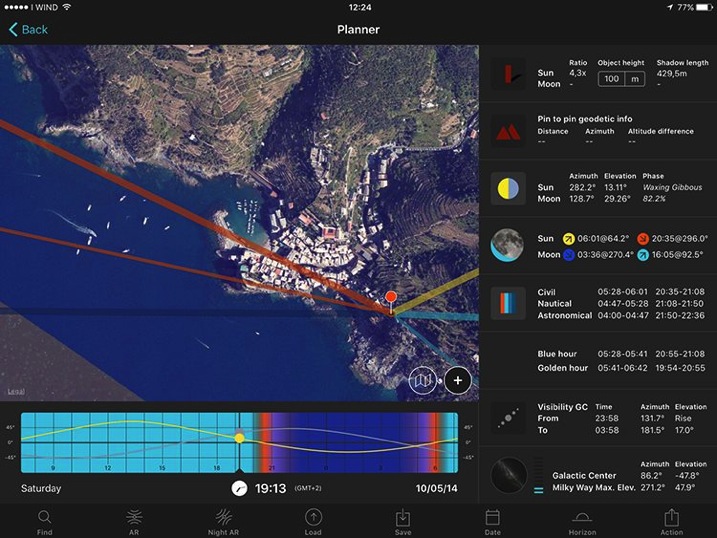
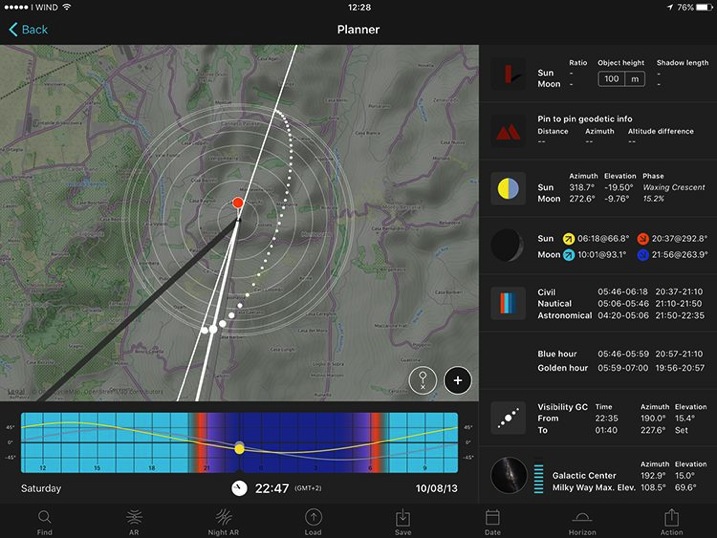
    If the Augmented Reality tools are my students’ favorites, I simply love the Planner. I use it to plan every shoot.

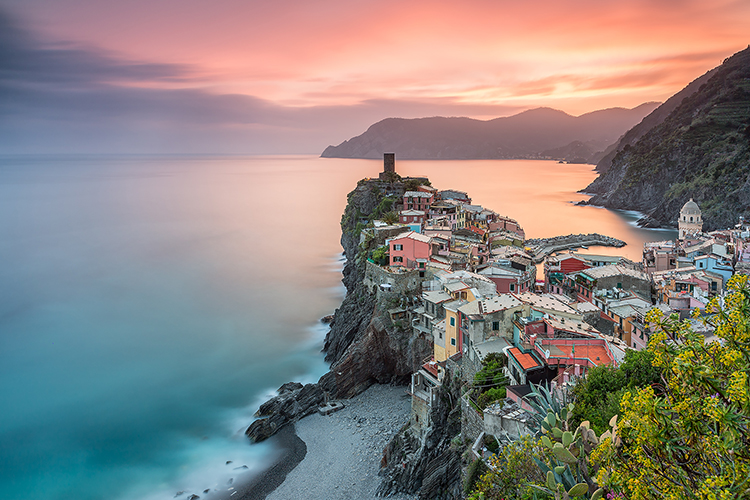
    Image 8

    No matter if it’s a sunset in Vernazza (above), a moonrise in Iceland, or the Milky Way in Yosemite National park, the PhotoPills Planner helps me find the right time, for the alignments I’m looking to happen. It’s my imagination’s best ally.

    Image 9A

    Planning Pill for Vernazza shot above

    Image 9B

    Planning Pill for Milky Way shot above

    A lovely feature, is that once I’ve figure out the shooting spot and shooting time, I can save the plan in my To-Do list of planned photos. Then, every time I have an idea, I plan it and save it in my list. This way, I make sure not to miss any of my favourite shots.

    Location Scouting

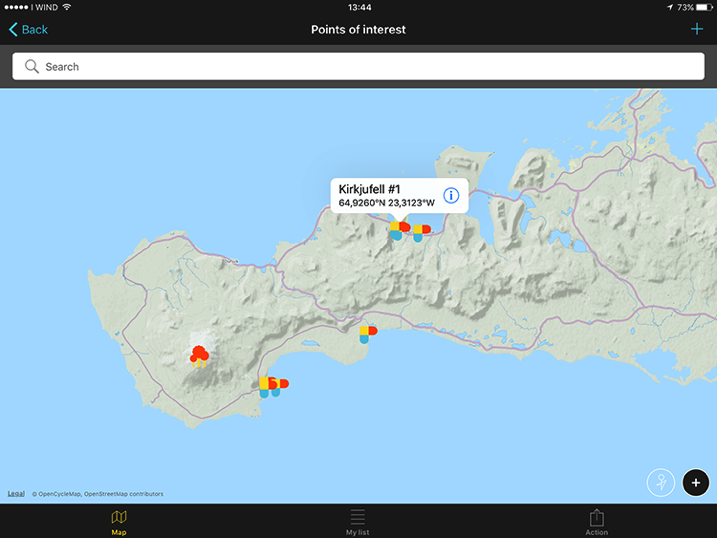
    We’re all exploring new locations all the time, looking for new possibilities, and to be able to store the most valuable places in our own database is just a must. So, every time I find a place I’d like to remember and study for a possible shot, I use PhotoPills to save it as a Point of Interest.

    Another useful feature is that I can upload to PhotoPills all my .kmz files, so I can bring with me all the plans already made with Google Earth!

    Image 10

    Point of Interest visualized on map

    Calculations

    Knowing the shooting time and spot is obviously the first step, but you also need to make many more decisions before pressing the shutter – this is where PhotoPills is brilliant.

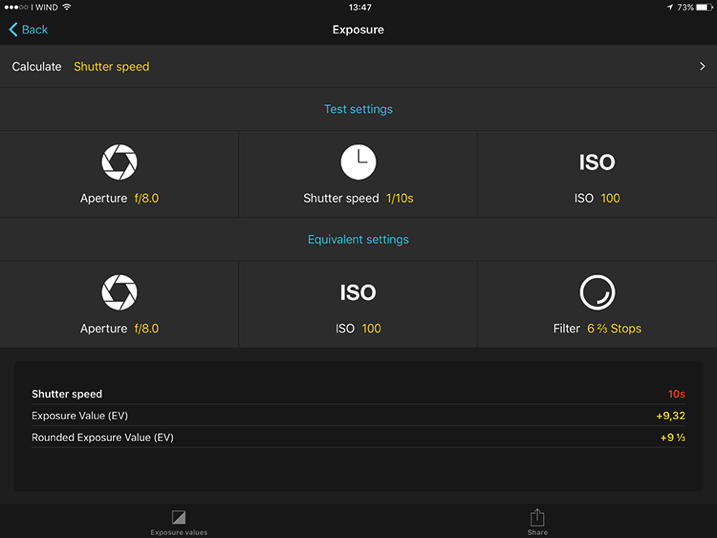
    These are just four of the numerous calculators I use to figure out the settings I need:

    Image 11A

    Long Exposure calculator

    Long Exposure calculator: You already know, my favorite one! With this module I’m able to calculate the exact exposure time when using ND and GND filters. By the way, PhotoPills has the only Long Exposure calculator that allows you to convert the shutter speed for non-standard f-stop reductions.

    Spot Stars calculator: When shooting the Milky Way, it helps determine the maximum exposure time that allows me to capture the stars as big bright spots. The longer the exposure time, the more light is collected by the camera sensor, and the brighter the stars will appear in the image. If I go beyond this exposure time, stars will begin to appear as trails in the image, which is something I want to avoid at all costs.

    Time lapse calculator: If you’re doing time lapse photography, this calculator will save you lots of time. Just set the frames per second (24fps), the duration of the event you’re shooting (example 6 hours), the desired clip length (30 seconds) and the image size (4Mb) to get the shooting interval (30 seconds), the number of photos (720) and the total memory usage of the SD card (2.81Gb). I used to need 15 minutes to figure out all those numbers, before I started using PhotoPills.

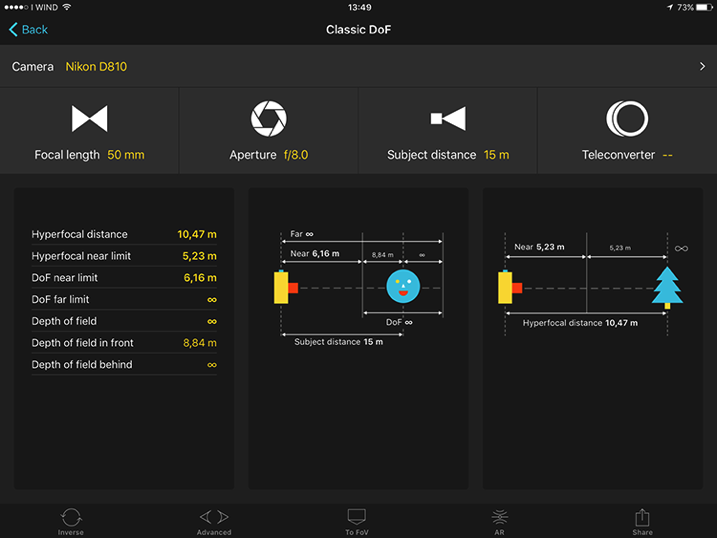
    Depth of Field calculator: I use it to calculate the distance where to focus, to maximize depth of field (hyper focal distance). This becomes very useful in my night shots, since I want everything in focus, from the foreground to the stars. I simply calculate the hyperfocal distance and then I make sure to focus my lens at a slightly longer distance. This assures me that I’ll have the stars in sharp focus.

    Image 12

    DoF Calculator

    Conclusions

    PhotoPills is definitely a must have for (but not only) landscape photographers. The features are many and well-maintained, and the difficulties that you can encounter at the beginning, can quickly be overcome thanks to the Academy (a virtual university of PhotoPills where you can follow video tutorials, and read insights on each function of the application to really turn our ideas into real images).

    The price of $ 9.99 in the App Store is higher than average, but is ridiculous compared to the large amount of features and practical uses, as PhotoPills replaces much of the paid, and free apps, in one go.

    It must be mentioned that PhotoPills is currently available only for iPhone and iPad, but the Android version has been announced to launch in 2016.

    After many months of use, now I cannot imagine a photographic adventure without this application. Once you fall into the Imagine-Plan-Shoot creative loop, you won’t be able to stop pushing your imagination, and this will lead you to discover a new world of possibilities.

    Definitely, give it a try!

    Pros:

    • Clean and friendly user interface
    • Many different tools in a single application
    • Cached maps for offline use
    • Possibility to import POI from .kmz files
    • Localized languages
    • Tons of tutorials

    To be considered:

    • Android version still in development (release expected in 2016)

    Do you use PhotoPills or another photography planning app? Please share your experiences and tips in the comments below.

    googletag.cmd.push(function() {
    tablet_slots.push( googletag.defineSlot( “/1005424/_dPSv4_tab-all-article-bottom_(300×250)”, [300, 250], “pb-ad-78623” ).addService( googletag.pubads() ) ); } );

    googletag.cmd.push(function() {
    mobile_slots.push( googletag.defineSlot( “/1005424/_dPSv4_mob-all-article-bottom_(300×250)”, [300, 250], “pb-ad-78158” ).addService( googletag.pubads() ) ); } );

    The post PhotoPills: The Photographer’s Swiss Army Knife by Francesco Gola appeared first on Digital Photography School.

    Digital Photography School

  • Weekly Photography Challenge – The Dinner Table

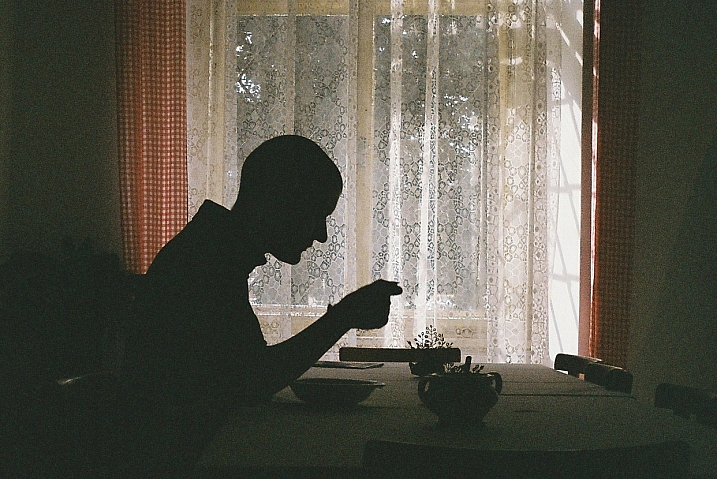
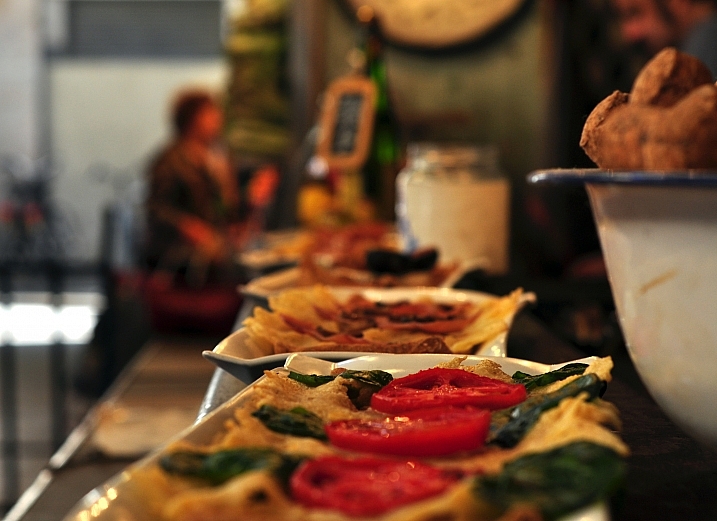
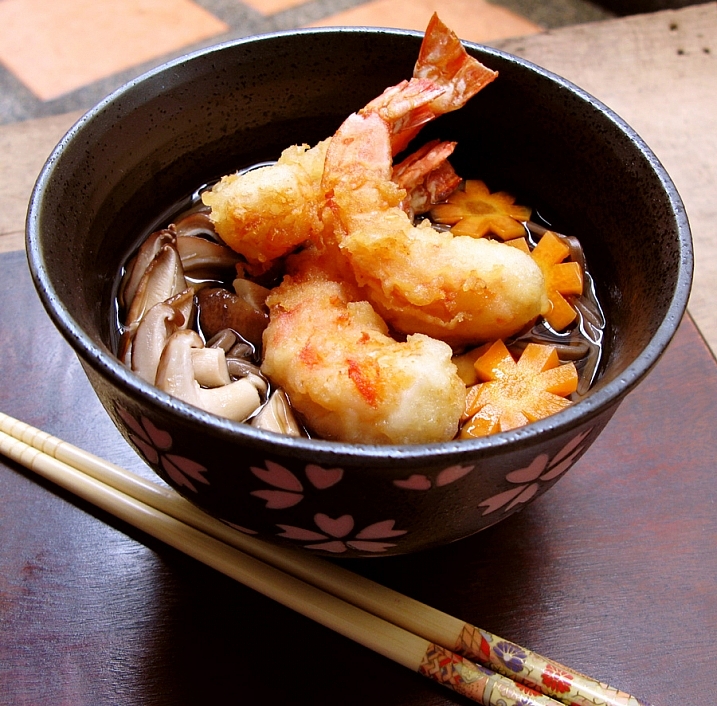
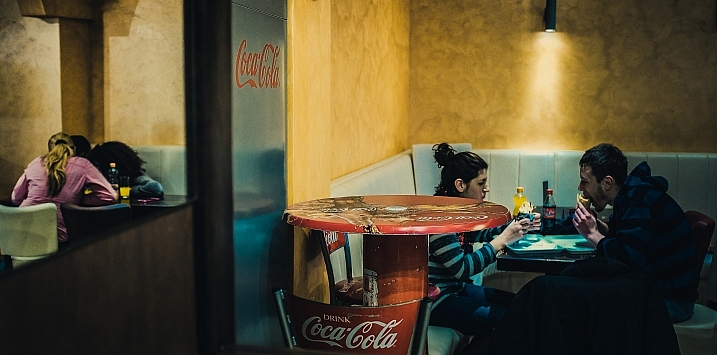
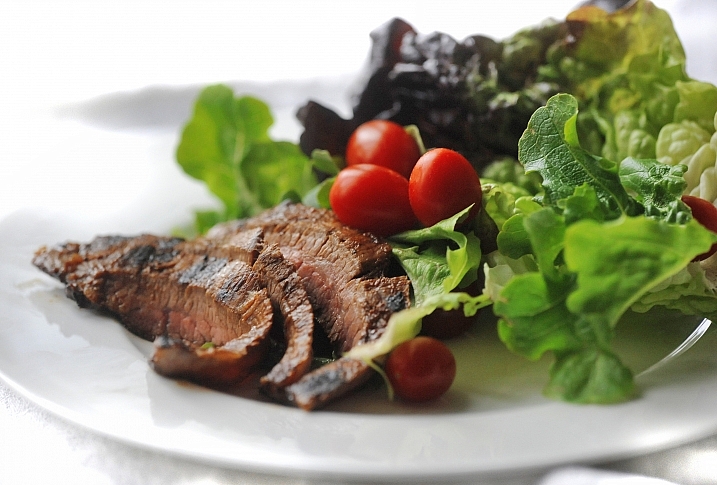
    Photos of food, when done well, serve to make the viewer hungry or at the very least make the food in the photo look appetizing. Often food is photographed right at the table.

    Stéphanie Kilgast

    By Stéphanie Kilgast

    Laura Thorne

    By Laura Thorne

    Weekly Photography Challenge – The Dinner Table

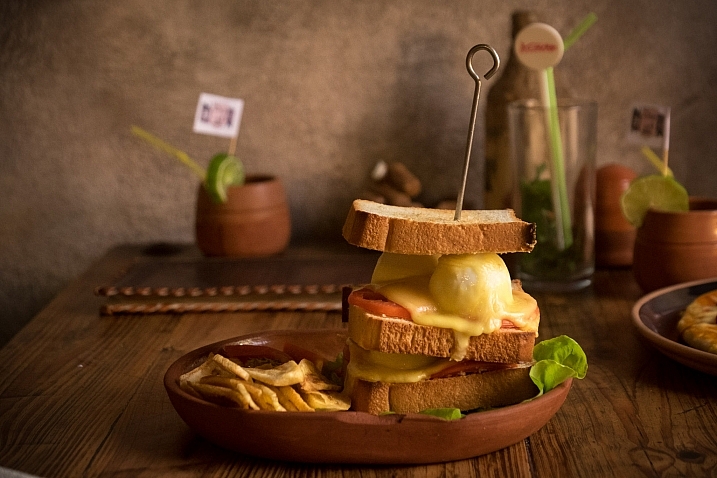
    Your goal for the photography challenge this week is to photograph some food. It could be your meal, or like this image of mine I shared previously, someone else’s that looked appealing.

    This is actually my photo taken of someone else's sandwich in Trinidad, Cuba. It just looked so amazing!

    This is actually my photo taken of someone else’s sandwich in Trinidad, Cuba. It just looked so amazing!

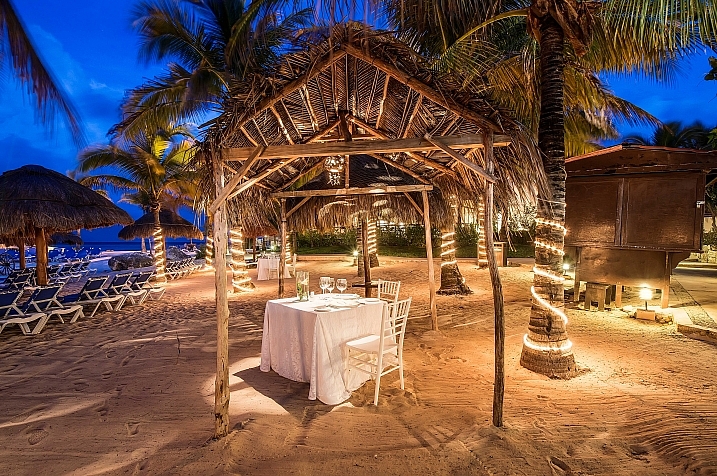
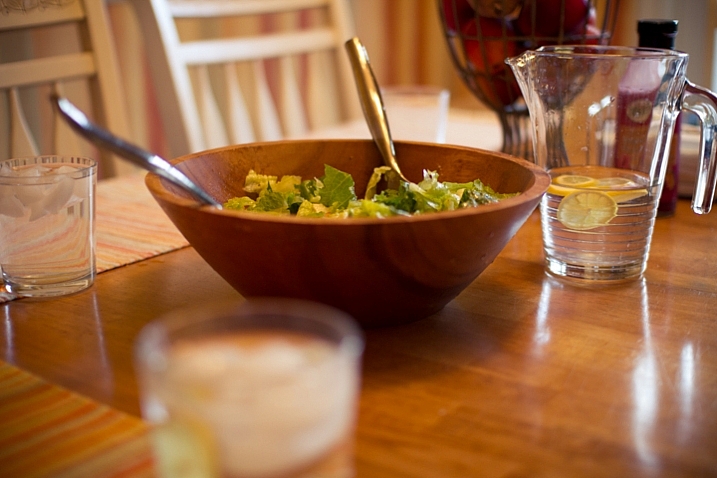
    Interpret the theme – the dinner table – however you want. It could be even just the table and place setting, maybe a candle or two, or an entire spread of food. Include people eating and enjoying the food, or for scale and perspective. Get close up on one item, or shoot the whole plate. The choice is yours.

    Gwaar

    By gwaar

    Dan Foy

    By Dan Foy

    Robert S. Donovan

    By Robert S. Donovan

    Scott  Norris

    By Scott Norris

    Stacy Spensley

    By Stacy Spensley

    Ari Helminen

    By Ari Helminen

    Equipe Integrada

    By Equipe Integrada

    Share your images below:

    Simply upload your shot into the comment field (look for the little camera icon in the Disqus comments section) and they’ll get embedded for us all to see or if you’d prefer upload them to your favourite photo sharing site and leave the link to them. Show me your best images in this week’s challenge. Sometimes it takes a while for an image to appear so be patient and try not to post the same image twice.

    googletag.cmd.push(function() {
    tablet_slots.push( googletag.defineSlot( “/1005424/_dPSv4_tab-all-article-bottom_(300×250)”, [300, 250], “pb-ad-78623” ).addService( googletag.pubads() ) ); } );

    googletag.cmd.push(function() {
    mobile_slots.push( googletag.defineSlot( “/1005424/_dPSv4_mob-all-article-bottom_(300×250)”, [300, 250], “pb-ad-78158” ).addService( googletag.pubads() ) ); } );

    The post Weekly Photography Challenge – The Dinner Table by Darlene Hildebrandt appeared first on Digital Photography School.

    Digital Photography School

  • 11 Premium & Free Resources for Photographers (Bundles, eBooks, Courses)

    How do I start my own photography business? How can I improve my shooting skills? What do I need to edit images faster? There’s no lack of information to answer these and other questions photographers may face. But then again, choosing the right eBook, email course, or Lightroom preset collection from an overwhelming amount of available resources may be quite Continue Reading

    The post 11 Premium & Free Resources for Photographers (Bundles, eBooks, Courses) appeared first on Photodoto.


    Photodoto

  • 26 Images with a Hunger for a Good Meal – Photos at the Dinner Table

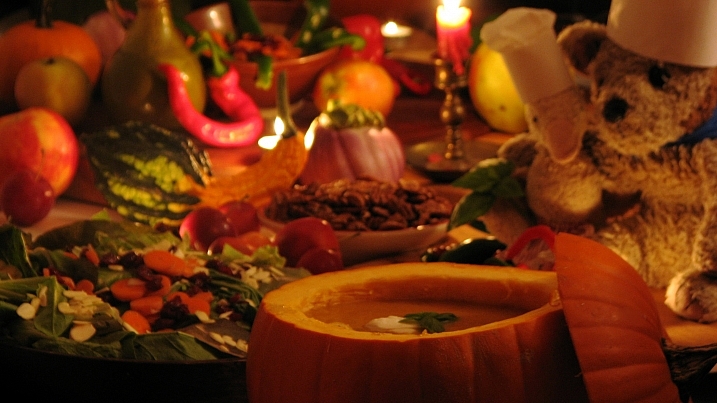
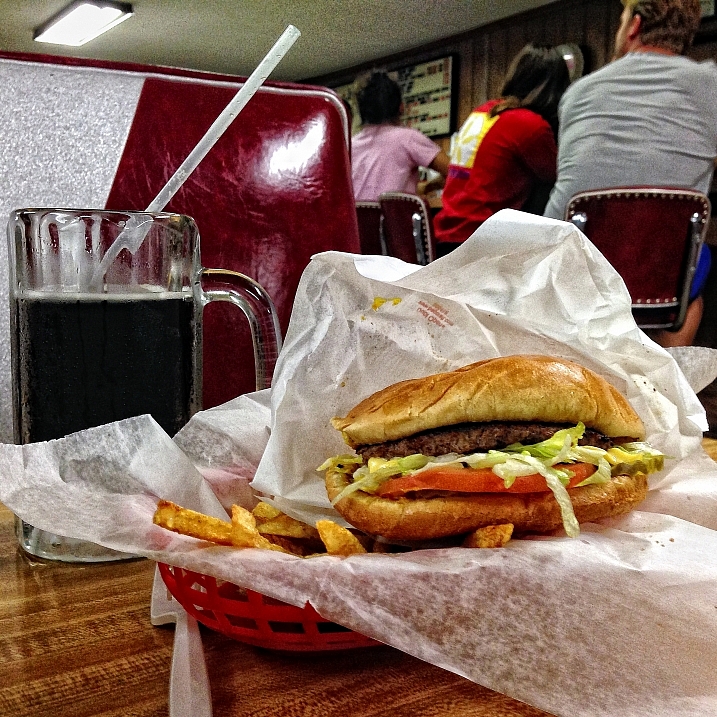
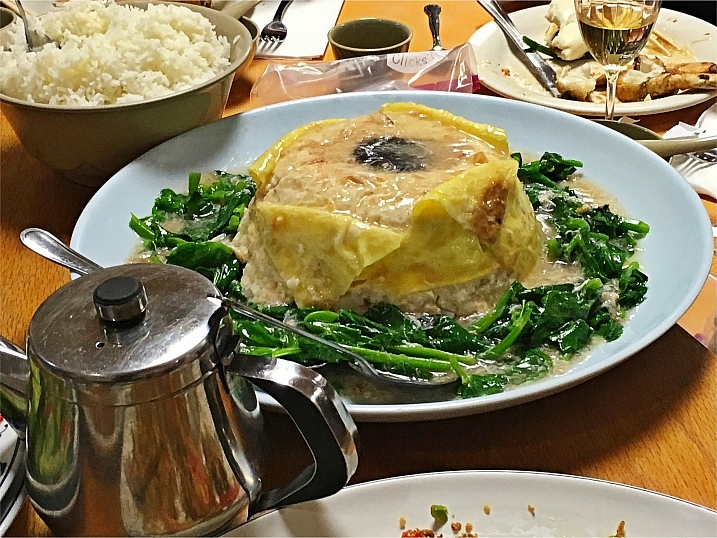
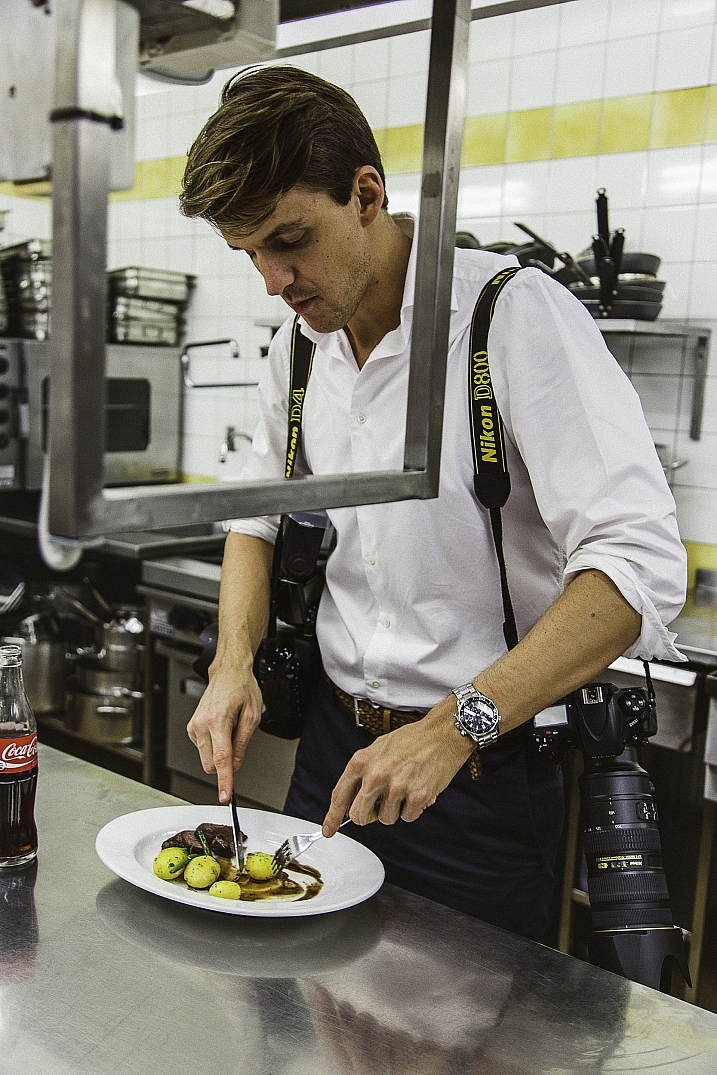
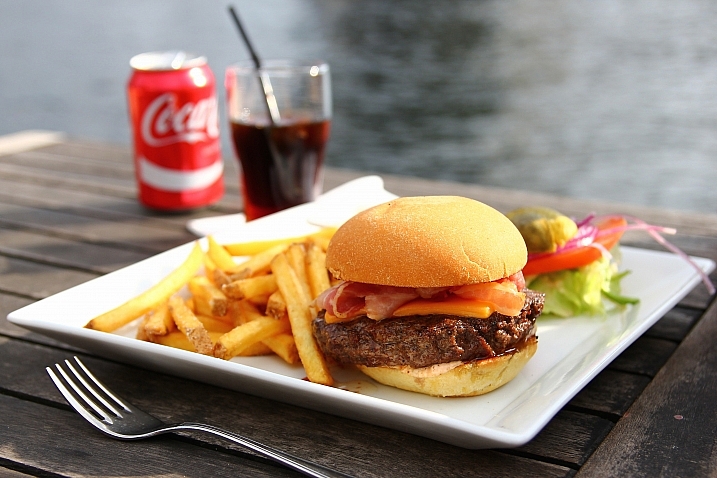
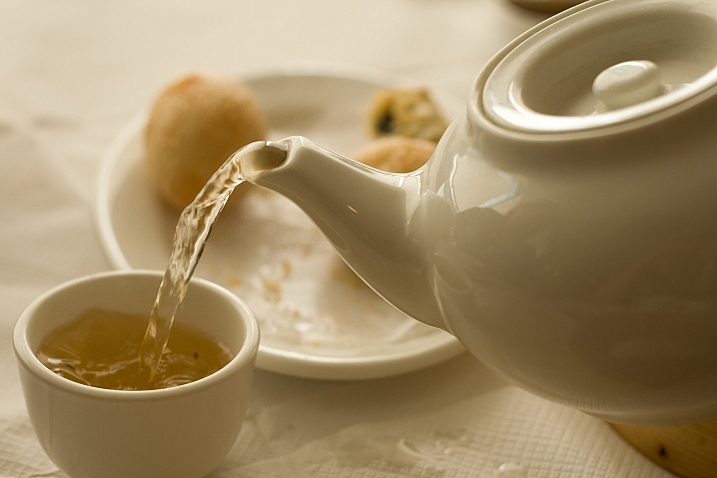
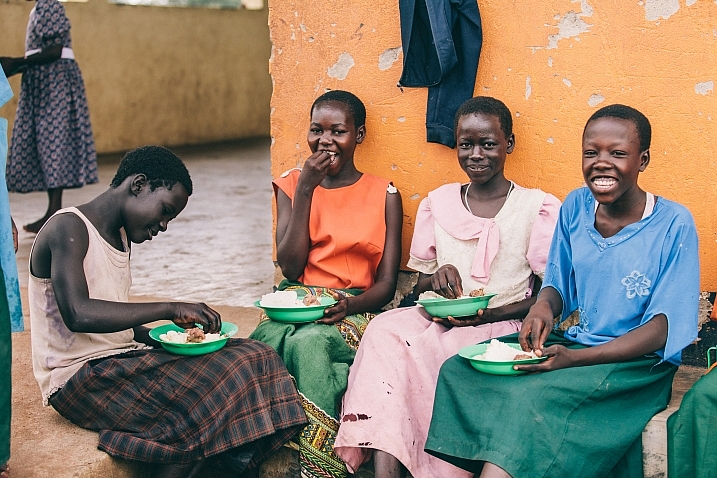
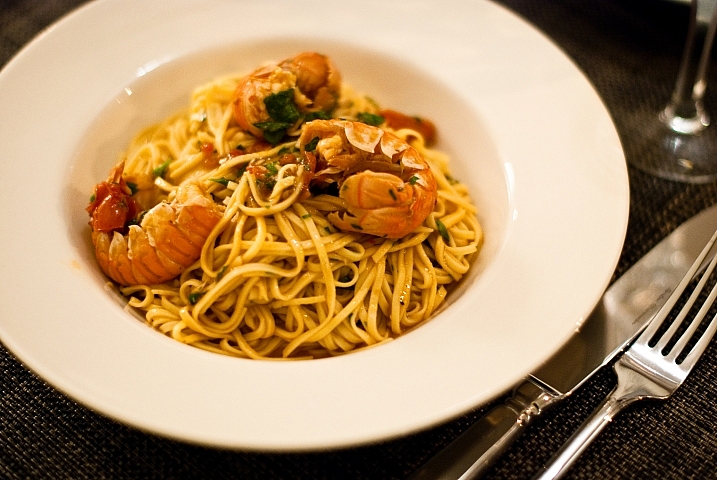
    Whether it be a fancy feast at a special occasion, a romantically set table for two, or burger and fries on a plate – the following images satisfy a hunger for not only a good meal, but some great photos at, and around the dinner table.

    Are you one to photograph your food in restaurants? Entire Instagram accounts are made up of such images. Note: remember to follow dPS over on Instagram! Even if you aren’t prone to that kind of photography, let’s see if these photos at the dinner table can inspire you, and/or make you hungry too!

    This is actually my photo taken of someone else's sandwich in Trinidad, Cuba. It just looked so amazing!

    This is actually my photo taken of someone else’s sandwich in Trinidad, Cuba. It just looked so amazing I had to photograph it!

    Radiowood

    By radiowood

    Antonin Rémond

    By Antonin Rémond

    Snugg LePup

    By Snugg LePup

    Dave Hensley

    By Dave Hensley

    Ron Frazier

    By Ron Frazier

    The Hamster Factor

    By The Hamster Factor

    JAPANKURU

    By JAPANKURU

    Ames Lai

    By Ames Lai

    Jitter Buffer

    By Jitter Buffer

    Shawn Harquail

    By Shawn Harquail

    Laura Thorne

    By Laura Thorne

    Marketa

    By Marketa

    Adam Wyles

    By Adam Wyles

    Mark Manguerra

    By Mark Manguerra

    Zlatko Vickovic

    By Zlatko Vickovic

    Tobias Lindman

    By Tobias Lindman

    Gunilla G

    By Gunilla G

    Kai Chan Vong

    By Kai Chan Vong

    Brian Wolfe

    By Brian Wolfe

    Foodswings

    By foodswings

    Brook Ward

    By Brook Ward

    Elias Quezada

    By elias quezada

    Stijn Nieuwendijk

    By Stijn Nieuwendijk

    Georgie Pauwels

    By Georgie Pauwels

    Renaud Camus

    By Renaud Camus

    googletag.cmd.push(function() {
    tablet_slots.push( googletag.defineSlot( “/1005424/_dPSv4_tab-all-article-bottom_(300×250)”, [300, 250], “pb-ad-78623” ).addService( googletag.pubads() ) ); } );

    googletag.cmd.push(function() {
    mobile_slots.push( googletag.defineSlot( “/1005424/_dPSv4_mob-all-article-bottom_(300×250)”, [300, 250], “pb-ad-78158” ).addService( googletag.pubads() ) ); } );

    The post 26 Images with a Hunger for a Good Meal – Photos at the Dinner Table by Darlene Hildebrandt appeared first on Digital Photography School.

    Digital Photography School

  • Watch This: The Secret(s) to Alexis Cuarezma’s Success

    Up for a quick shot of knowledge, with an order of motivation on the side?

    Take a few minutes to watch this interview with photographer Alexis Cuarezma, a sports portrait specialist based in San Francisco and LA.

    The short version? Be like water finding downhill. But the video is full of good tips, strong work and solid dose of BTS pics to satisfy your jones for lighting.Read more »
    Strobist