Category: Photography

  • The Not So Decisive Moment – How to Increase Your Chances of Getting the Best Shot

    To a certain extent Henri Cartier-Bresson has a lot to answer for. Yes, he’s certainly one of the photography greats, and his work has inspired countless photographers, but his book “ The Decisive Moment ” and the meaning of its title, is frequently misunderstood by many, and has created a whole raft of confusion.

    Many photographers have made the assumption that Cartier-Bresson was referring to a sort of magic moment, where the photographer manages to instinctively see a perfectly formed image in a fraction of a second, bring the camera up to their eye, and take the image in its perfect form, before moving on. Interestingly, the French version of the book is called “Images on the Run”, which seems to almost suggest the opposite. This couldn’t be further from the truth, and a study of his contact sheets tells a rather different story.
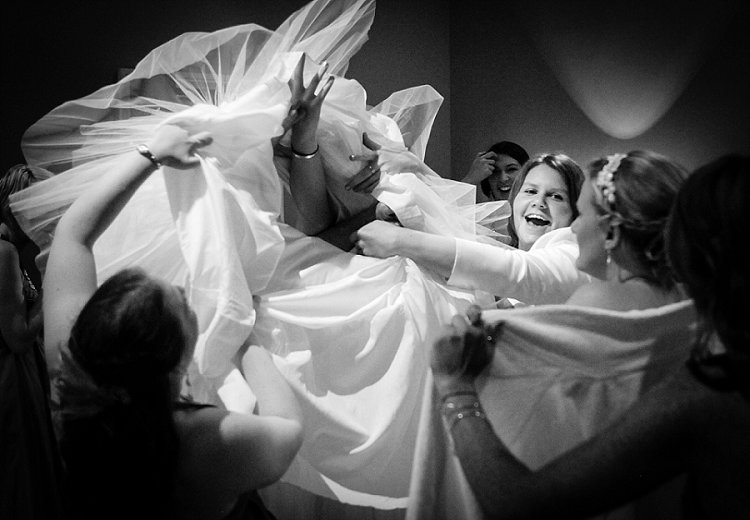
    001

    I’ve been photographing weddings professionally in a photo journalistic style, for well over 10 years. When I started out, I too thought that capturing these types of images was simply about looking and reacting. However, I soon learned that by taking control and being proactive, rather than reactive, I could significantly increase my chances of getting the shot.

    There really isn’t a magic formula, and is possible to stack the odds in your favour, to greatly improve your chances of getting the image. Sometimes it really is luck and good reactions, but more often than not, the techniques outlined below will produce more consistent and predictable results.

    Set up your camera

    On a very practical level, it’s vital that you have the right camera, and that it’s set up correctly. It must be quick, with virtually no shutter lag at all. You’ll also need to get used to timing your shutter actuations. This can be done with practice, by repeatedly photographing moving objects, such as passing cars or bikes, until you’ve completely gotten the feel of the timing, and speed of the shutter release. This is vital, as the coordination between your eye, the shutter release, and the camera needs to be instinctive, to achieve the split second timing that’s needed.

    You might find that shooting with a prime lens is faster as well. Using a zoom will inevitably waste precious seconds zooming in and out, it’s often quicker to just move. You might also find that the focus on a prime lenses is a bit quicker, and that you compose better with a prime attached to the camera, rather than a zoom.
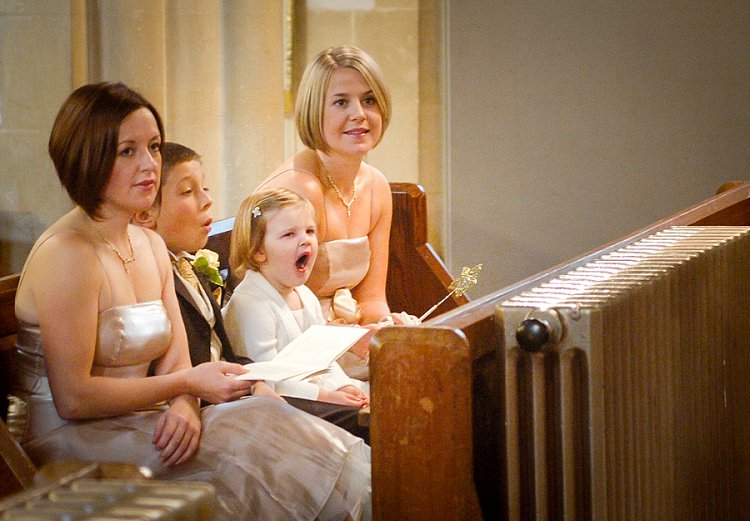
    002

    As far as camera settings are concerned, again, it’s all about anticipation. Set up the camera, wait, and shoot. Often this will mean using a number of auto controls – have a go at using auto ISO, auto white balance (to be corrected from the RAW files in Lightroom) and generally shoot in aperture priority mode. For this type of photography, the moment is far more important than your choice of depth of field, and even having the camera on full programme mode is okay. It’s all about emotion and expression, timing and anticipation, and the fewer distractions you have to achieve this goal, the better. If you are a manual shooter, then setting the exposure in advance is critical.

    Finally, it’s also worth mentioning, that having a camera that writes to the memory card reasonably quickly, is important too. You’ll likely need to fire off several shots relatively rapidly, and waiting for the camera to write the card is a pain. Often buying faster, high quality cards is the answer, maybe changing the camera to record slightly smaller jpegs might work – again the priority is timing, speed, and anticipation for this type of photography. If you need to sacrifice using massive file sizes, to gain the speed you need, then so be it.
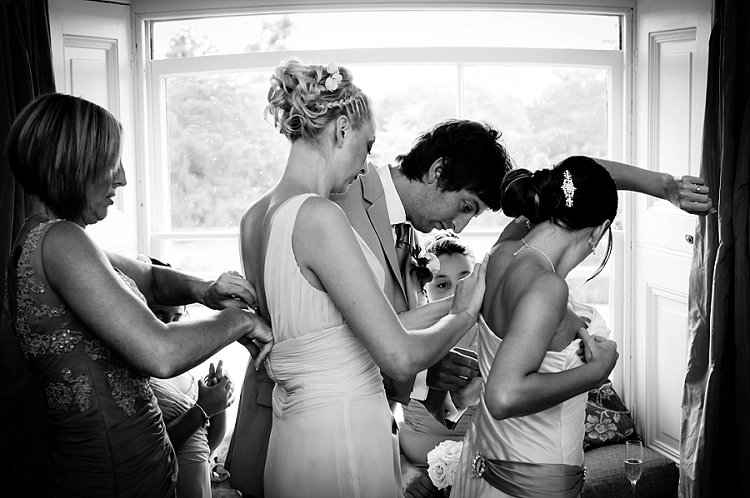
    003

    Pre-planning and envisioning

    Think about where the type of pictures you want are likely to happen. It’s hopeless to randomly go out looking for photographs, you really have to put yourself in the best situation, at the best time, to increase your chances of getting the pictures you’re after. If you are a street photographer for example, then you’ll probably want to head out in the middle of the day, maybe on a weekend, when the streets are more likely to be filled with people. There will be many more interactions, and your chances of success are higher. It all begins with deciding exactly what type of pictures you want, and where the most likely place are that you will get them.

    Once you are in place, also pre-visualizing the types of shots you want, will give you focus and purpose. If you’re photographing at an outdoor market for example, how about setting yourself the task of photographing human connections, maybe as people are chatting, handing over money or goods, etc? Or how about looking for interesting juxtapositions between shop window displays, and people standing or passing in front of them? This may all sound rather prescriptive but, by setting yourself some parameters, you’ll get your creative juices going, focus your attention, and increase your chances of success. There’s nothing worse than not knowing what you want, randomly taking pictures, waiting for something to happen.
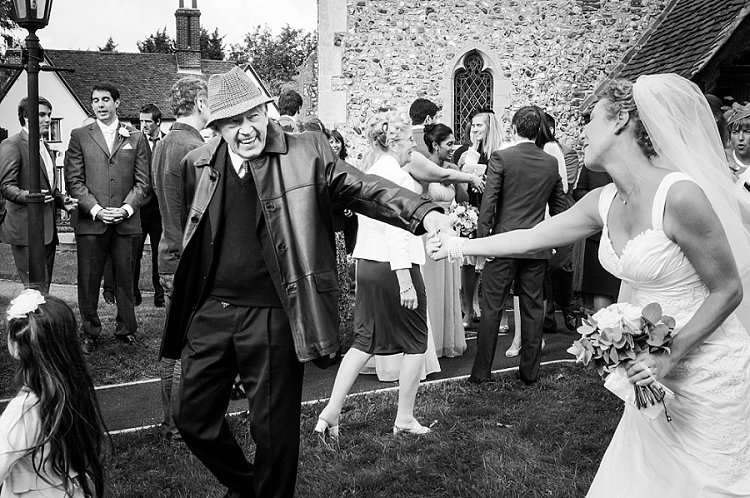
    004

    Set the scene

    It’s important to look for the elements in the image that you can actually control. For example, finding some nice light, a great background, or a place where an image will work well compositionally. Having set the stage, it’s then simply a case of waiting for something to happen on the stage, to complete the picture. This is so much better than looking for something to happen in hunting mode, where you are trying to react to things all over, and have no control over any of the photographic elements. The chances of getting a strong image with the former method, are significantly higher. It might take longer, and you may shoot fewer frames, but the overall quality of the end result will be better.

    Work at the image

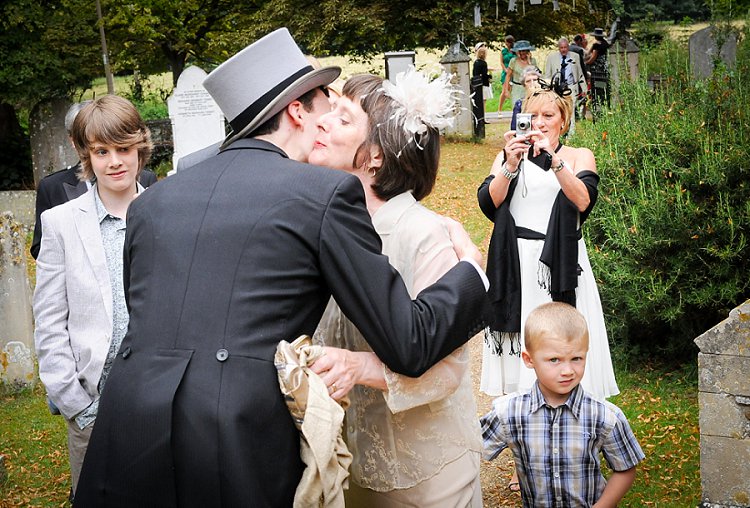
    Looking at his contact sheets, Cartier-Bresson always took several exposures of the same scene or moment. He very rarely got the shot in one take, and it’s a great relief to realize that he worked the scene. This means that you need to take a number of frames, in fairly quick succession – not on continuous (burst) shooting mode, but close enough together to record subtly different expressions, juxtapositions of people in the frame, and changes of angle and composition. You should aim to keep moving – try the shot a little to the left, then the right, maybe a step forward or back, or a little higher or lower. Photography should keep you fit, and you should always be moving. You can then go through the different frames once they are downloaded, and select the strongest image.
    005

    Being unobtrusive and body language

    Generally people will be aware that you’re taking pictures. I don’t think that it’s a particularly good approach to stalk your subject from behind a huge 400mm lens, it’s much better to use something smaller and less intrusive, to be closer to the subject and more involved in what’s going on. You can even interact with people as you’re taking pictures, which makes you much less threatening, and consequently people will behave in a much more natural and relaxed way in front of you and your camera.

    Being non-threatening can be as simple as smiling, looking relaxed, keeping your body language open and friendly, and just being respectful of people’s personal space. Yes, you’re an observer, but you have to observe from a position of being emotionally and physically involved. You’ll gain much more acceptance from your subjects, and the pictures will be more authentic and natural. That’s not to say that your presence should influence the scene in any way, it’s just that you have to be accepted, to be able to photograph people behaving naturally. If your subjects insist on fake posing, and smiling for the camera, you need to work harder.

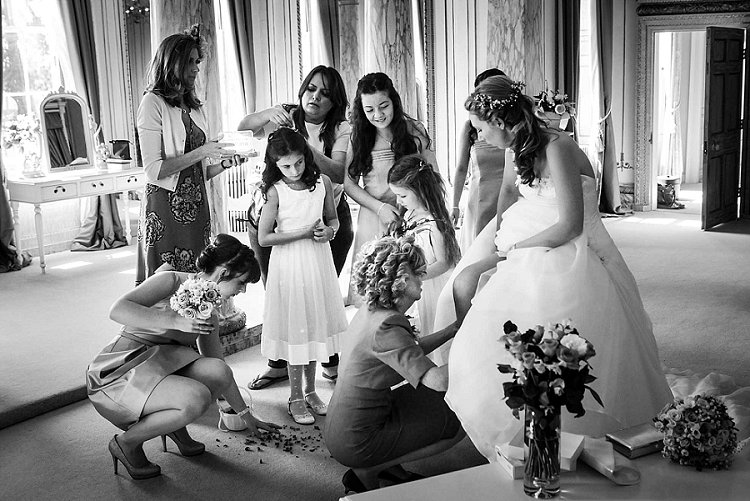
    A great way of making this work is to move in and out of the scene really quickly – essentially this means waiting for a scene to unfold a little distance from you. As the moment is about to happen, walk towards the scene, camera ready to go. Very quickly, shoot as you are close to the action, then continue to walk out of the scene. If you combine this with unobtrusive body language, you can remain essentially invisible.
    006

    Eye contact

    Human eye contact is a powerful communication which you can use to your advantage. I think that people can almost sense when they are being watched, and avoiding eye contact (in a non-threatening way) can be a powerful technique. If you want to photograph a group of people, it’s amazing how close you can get to them, if you seem to be diverting your attention to something else. It’s then often possible to get the shot without disturbing them, as they feel as though your interest is elsewhere. We also naturally have an inclination to look at our subject as we take the camera down from our eye, so try to avoid doing that. You’ll be much less intrusive and conspicuous to your subject, particularly if you seem to be focussing your attention on some other subject away from them.

    Insert Image 007 MISSING??

    Anticipation

    This means simply imagining what could happen next, you need to become an expert in human behaviour, and be ready for what you think is about to happen. Often, with a bit of practice, you’ll be right, and you’ll have prepared yourself to get the shot.

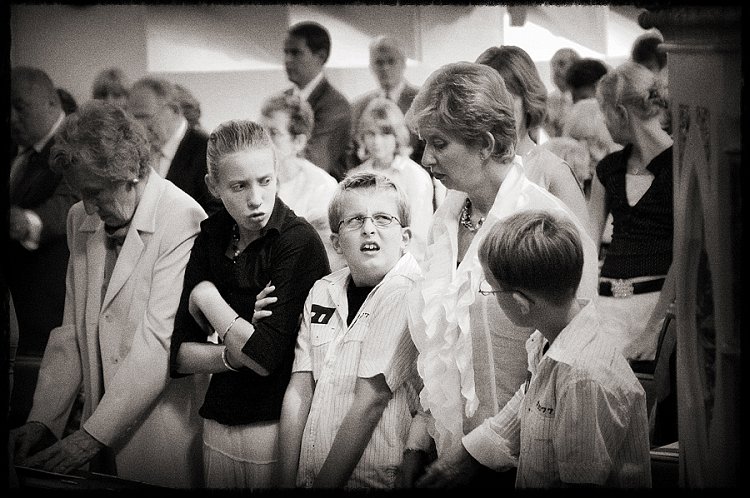
    As an example, part of my job as a wedding photographer, is to take pictures of people laughing and enjoying themselves. Good expressions are vital, and getting the timing right is the key. I listen for people telling an amusing tale, that will inevitably end in laughter. It’s no good waiting until they are laughing to bring the camera to my eye and take the shot – I need to be ready beforehand, and choose my moment. It’s also worth saying that often there will be laughter at the original joke, then someone will but in with secondary after joke, creating even more hilarity, which often makes an even better image than the first one – so be patient and wait.

    The same principal can be applied to all sorts of situations – imagine what is going to happen next, prepare for it, and photograph it, if and when it happens. Often something else will happen, so you also need to be prepared to be flexible. Make sure that when you get what you were expecting, that something else even better doesn’t happen and you miss it.
    008

    No chimping

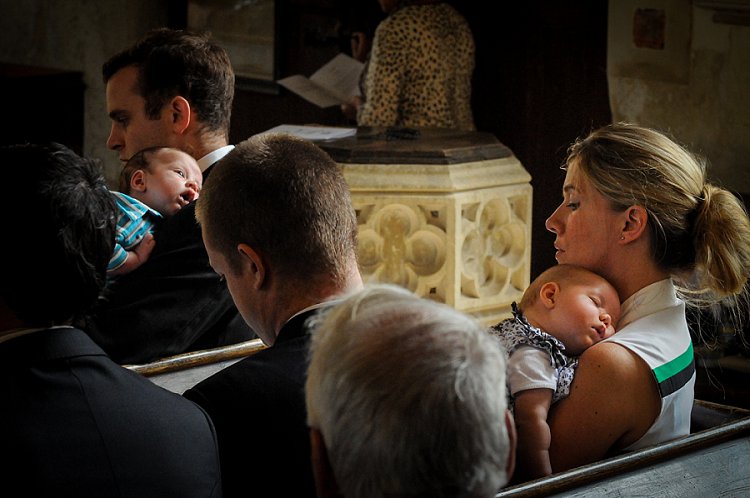
    The moment is often after when you think it’s going to be – just as you are checking your screen. This is what I call the chimping effect. Many, many times I’ve taken an image, had a quick look down at the screen on the back of the camera, only to realize that I have just missed something better. Don’t look at the screen. Keep your camera ready, and always wait – even if you think you’ve got the shot.

    Similarly, you will often miss great shots, just at the point when you are tired and have given up. You need to keep going and going – I know that the longer I shoot, the more high quality images I will get. I also know that by having a complete break for five minutes or so every hour, I am able to keep quick and alert for longer. However it’s weird the number of times that I have just given up on a scene, that something suddenly interesting happens.
    009

    When it looks like there’s nothing to photograph – think again

    Very rarely is there not a photograph to be taken somewhere – it comes down to the photographer’s skill in making images. This is particularly hard with transient, and moving subjects like people. But, people do constantly interact, do things, and move around. It might be that you can’t get the exact image you have in mind, but try to think more laterally, and look for something completely different. In a situation like this it becomes a case of mind over matter, work at keeping your creative thinking fresh and flexible, and you will find an image somewhere.

    Practically speaking, changing lenses, moving position, or trying a new technique can spark some creative thought. However, very often it’s just a case of looking and waiting… then looking and waiting some more. There are always images to be had, often they are small fleeting moments, but they are always there.
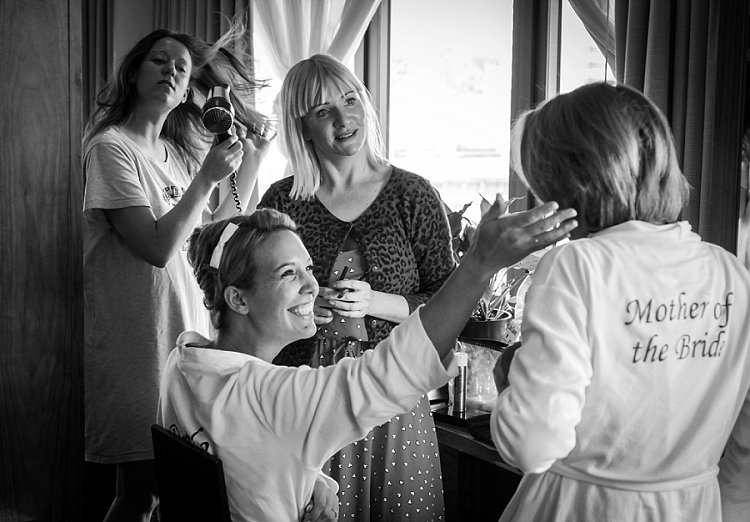
    010

    It’s behind you

    This isn’t a joke. Weirdly, and frequently, I’ll be looking for an image in front of me, not having much luck, then realize that I should have been looking the other way. Often just turning right around, will present a completely new range of photographic possibilities. Sometimes the picture really is just behind you – you only need to turn around and look.

    Primary and secondary subjects making the moment

    Try to make a photograph by adding another element in the frame, i.e. having a primary and secondary subject. It could be that both subjects make an okay picture on their own, but if they are combined into one image, they become much stronger. If the image explores a relationship between the two subjects it’s even better. Maybe one offers a commentary on the other, or there is an echoing of shape or gesture.
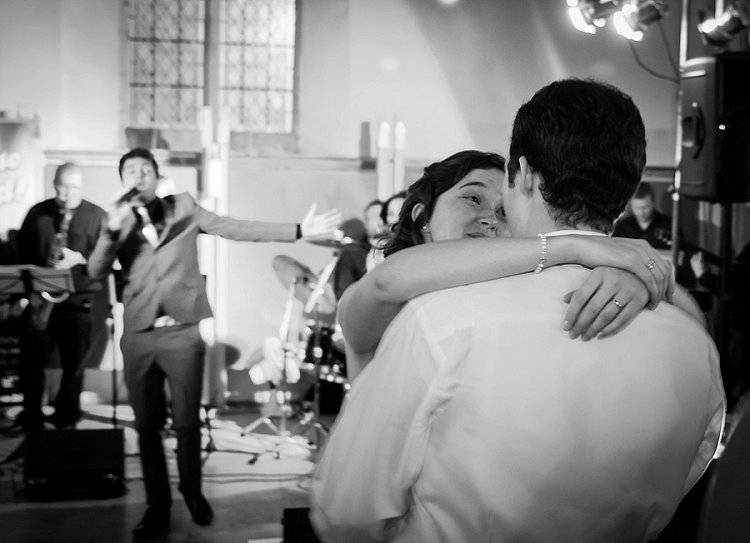
    011

    Waiting, waiting and waiting

    I’ve mentioned being patient several times, and the amount of time spent looking and waiting for success in this type of photography is phenomenal. Never give up – just wait, poised for action. Linger a little longer, just outside your comfort zone you might well find that there are a number of great images to be had.

    As with anything, practice is the one thing that will really make a difference, and this can be both photographic practice, as well as observational practice. Try to develop skills in reading people, anticipating moments in your everyday life, and practice your observational skills. Combine this with the other techniques above, and you will soon find that you are able to make some of these seemingly magic moment images happen. You will have become proactive in your photography, rather than reactive, and your success rate will be considerably higher.

    You Decide

    So I urge you to give these tips a try, and see if you can come away with better candid images. Please share your thoughts and experiences in the comments below.


    googletag.cmd.push(function() {
    tablet_slots.push( googletag.defineSlot( “/1005424/_dPSv4_tab-all-article-bottom_(300×250)”, [300, 250], “pb-ad-78623” ).addService( googletag.pubads() ) ); } );

    googletag.cmd.push(function() {
    mobile_slots.push( googletag.defineSlot( “/1005424/_dPSv4_mob-all-article-bottom_(300×250)”, [300, 250], “pb-ad-78158” ).addService( googletag.pubads() ) ); } );

    The post The Not So Decisive Moment – How to Increase Your Chances of Getting the Best Shot by Andrew Hind appeared first on Digital Photography School.
    Digital Photography School

  • Understanding the HSL Panel in Lightroom for Beginners

    Understanding the HSLPanel for Beginners

    There are many things involved in post-processing an image, that might seem a little bit daunting at first. That doesn’t mean that they are difficult to learn, or hard to understand. The HSL panel in Adobe Lightroom (or similar editing software that uses Adobe Camera Raw), tends to bring about feelings of anxiety, when it comes to making sense of all those sliders. Some photographers choose to pretend it doesn’t even exist, just because it looks a little complicated. Nothing could be further from the truth!

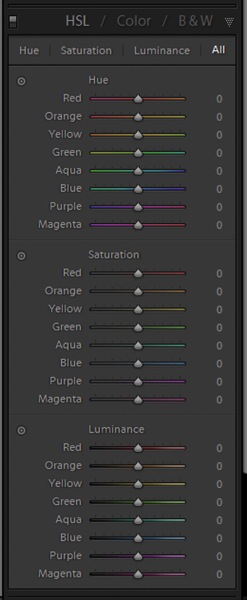
    Simply put, those three little letters stand for Hue-Saturation-Luminance. What makes the HSL panel so powerful, is that it allows you to control different colors independently. HSL adjustments will enable you to brighten, or emphasize specific saturations, and control the hue of only certain colors. Like working with black and white? Then you should definitely make use of the HSL panel, and take your black and white conversions to a whole new level. Let’s get started!

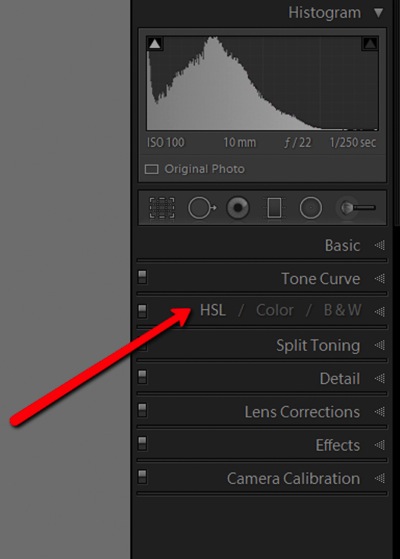
    HSL Dropdown

    We’ve already talked about what the letter HSL stand for, so now let’s break it down, so that you will really understand how each one affects your image.

    H – What is hue?

    Admittedly, trying to discern the functional difference between the words hue and color, can form a little bit of a gray area (haha color humor). But generally, we think of hue in terms of the shade of a color on a gradient and is dependant on the wavelength of the light reflected. Don’t worry, that’s about as scientific as we will get.

    Let’s say that I see a flower out in a field. The flower has beautiful yellow petals. What shade of yellow are the petals? Are they actually yellow, or are they maybe a dark yellow with a little bit of orange? Maybe a brighter, more greenish yellow? This subtle gradient of color is what we might describe as hue, and it varies infinitely across the color wheel. Controlling the hue of the colors in your image is a great way to bring realism to your photo, or even depart from it using psychedelic alternatives to the actual colors within the scene.

    S – What is saturation?

    Saturation is much simpler to comprehend. When we talk about saturation, we are referring to the intensity of a color. Saturation can play a central role in controlling the mood of a photograph. Highly saturated colors generally convey brighter emotions, whereas muted, desaturated color can lend a sense of brooding or sadness. What the HSL panel allows you to do is control the saturation of only the colors you choose, which will really expand your creative range.

    L – What is luminance?

    This may very well be the most easy part about HSL to understand, and requires the least amount of explaining. Luminance is simply the reflective brightness of colors. It is extremely useful when there are certain colors within the image that you feel should be either darker, or brighter. This comes in handy, especially when working with black and white images (converted from color), but more on that in just a moment.

    There are a couple of ways to configure the HSL panel, but I prefer to leave each adjustment section open while I work. True, it takes up a fair amount of space in the develop module, but it also let’s me make quick adjustments as I go without switching back and forth between the dedicated hue, saturation, and luminance panels.

    HSL All

    Adjusting specific saturations

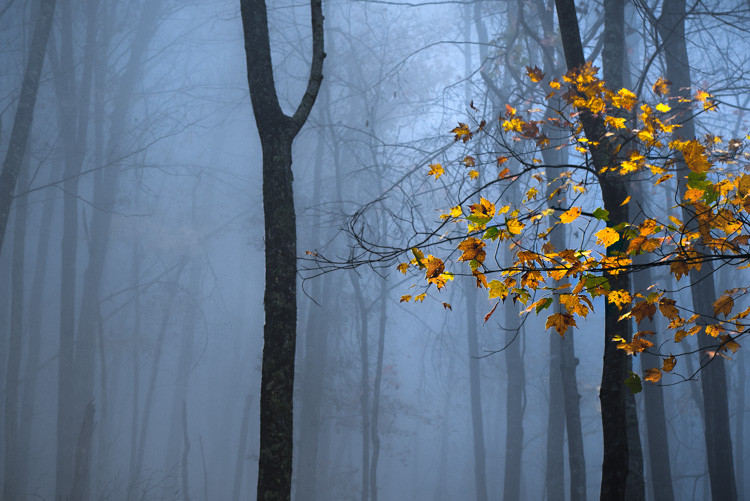
    Let’s say you have an image that you want to bring out only certain colors. You can do this by using the saturation slider. An easy way to select the color you want to adjust, is by using the color picker. It eliminates the guesswork of deciding what color is actually which. In this case I want to increase the saturation, brightness, and hue of the leaves, without affecting the blues of the background.

    Original Image

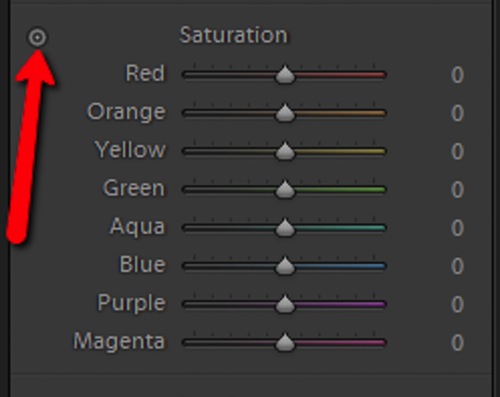
    Find the saturation section of the HSL panel, and select the picker tool (see red arrow below to locate it).

    Color Picker

    Hover over the color you want to saturate or desaturate. Notice that this will subtly highlight the corresponding color values in the saturation section of the HSL panel. Then simply click and hold while you drag up or down.

    Saturation Image

    The change here is barely perceptible for the time being, but after some more adjustments, it will be obvious.

    Adjusting specific luminance

    Next, we will make the leaves a little bit brighter, so that they stand out from the blue background even more. They mainly consist of oranges and yellows. Go to the luminance section, and again select the color picker tool. This time it will control the brightness of the selected color.

    Click and drag (up to lighten, down to darken).

    Luminance Image

    Adjusting specific hues

    I like saving the hue adjustments for last, because it’s easier (for me at least) to decide the final color tone, after it has reached the desired brightness and saturation. For this picture, I want to make the leaves more orange than yellow in hue. As above, locate the hue adjustment section and the color picker and then…you guessed it, click and drag.

    Hue Image

    After you finish, make sure to go back and perform any fine tuning using the sliders, in order to get everything just right.

    Original Image

    Before adjustments

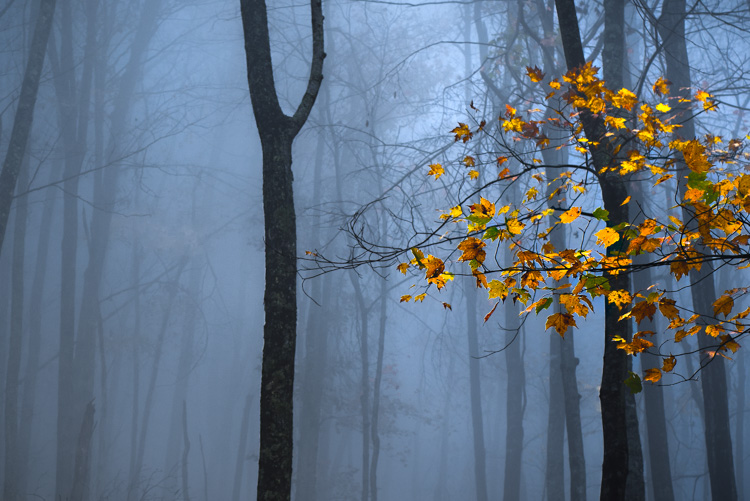
    Final Image

    After – final image

    HSL with Black and White

    When it comes to black and white, the HSL panel can work wonders. Of course, seeing as the image is black and white, there won’t be any effect on the hue or saturation of the colors. Rather, Lightroom gives you a completely different set of controls, which is virtually a stand-alone luminance adjustment panel.

    BW Panel

    Even though you are working with a monochromatic image, the color information is still stored, so the program knows what color was there, before the conversion to black and white. Keep in mind, this does not apply to images shot in non-RAW format (like JPG) using your camera’s black and white setting, or images which you previously converted to grayscale in Photoshop. Doing so removes all the color information from the image file, making the option for working with individual color luminance in Lightroom unavailable.

    By being able to selectively adjust the brightness of each color, you will now be possible to adjust the luminance of your black and whites very creatively. This way, you can really control the contrast and mood of your image much better and easier. Adjusting the luminance of certain colors, within a converted black and white image, can drastically change the way the photo appears to the viewer. Here is color image after being converted to black and white.

    Black and White

    Here you see the same image, after some selective adjustments in the black and white section of the HSL panel.

    HSL Black and White 2

    Working with the HSL panel may look overwhelming, but once you understand how each adjustment affects your photo, it becomes a lot less scary. By being able to adjust the hue, saturation, and luminance of colors, independently of one another, will allow to take a huge amount of creative control over your post-processing. Don’t be reluctant to experiment with HSL and have fun with your photography!

    Have you used the HSL panel before? What other tips or tricks to you have for using it? Please share in the comments below.

    googletag.cmd.push(function() {
    tablet_slots.push( googletag.defineSlot( “/1005424/_dPSv4_tab-all-article-bottom_(300×250)”, [300, 250], “pb-ad-78623” ).addService( googletag.pubads() ) ); } );

    googletag.cmd.push(function() {
    mobile_slots.push( googletag.defineSlot( “/1005424/_dPSv4_mob-all-article-bottom_(300×250)”, [300, 250], “pb-ad-78158” ).addService( googletag.pubads() ) ); } );

    The post Understanding the HSL Panel in Lightroom for Beginners by Adeel Gondal appeared first on Digital Photography School.

    Digital Photography School

  • My New Favorite Lens: The Fujinon 35mm F1.4 R

    Before I switched to Fujifilm I was a Canon EOS user. My favorite camera was the EOS 5D Mark II and my favorite lens the 85mm f/1.8. I liked that lens because it was ideal for portraits, and for close-ups revealing details.

    When I switched to Fujifilm I expected the Fujinon 56mm f/1.2 lens, the closest equivalent (on an APS-C crop sensor camera) to the 85mm, to become my new favorite. It’s a great lens, especially for portraiture. But, to my surprise, the humble 35mm f/1.4 lens, bundled with the X-Pro 1, has become my new favorite.

    Favorite lens 35mm Fujinon f1.4

    At first I was a little puzzled as to why. With Canon I owned a 50mm lens, and while I tried to use it in practice, it didn’t get used much. It was more of an experimental lens – I used it with extension tubes, and reversed for experimental close-up and macro photography. Occasionally I used it while out shooting, but always ended up preferring either the 85mm (short telephoto) or a wide-angle.

    So what happened with the 35mm f/1.4 lens (which has the same angle-of-view, and is a normal lens for an APS-C camera)? I think, a number of things happened.

    • The 35mm suits the X-T1, the camera I use most of the time, very well. The camera feels well balanced, and is light enough to carry around all day.
    • This camera and lens combination is ideal for taking candid photos of people, without being too far away (losing the sense of intimacy and closeness) or having to get too close to fill the frame (where I would be getting close enough to bother people). People may notice me with it, but they don’t seem to be worried by it.
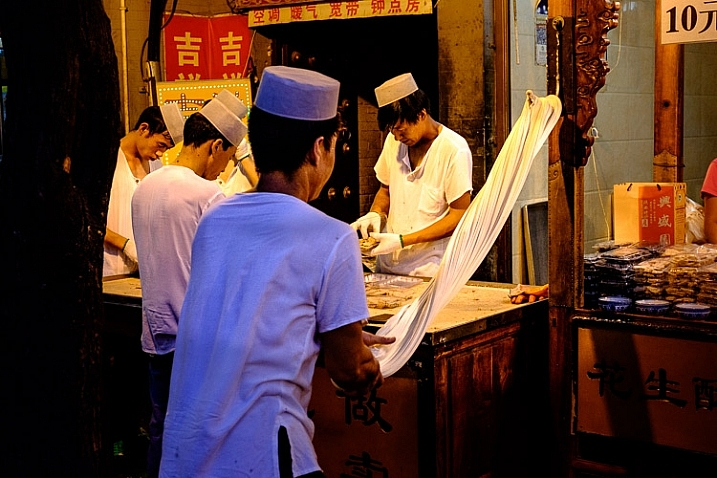
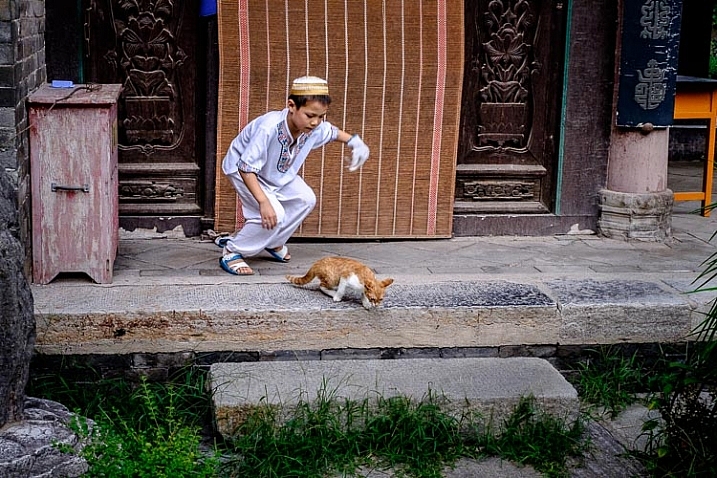
    • It’s an ideal focal length for environmental portraiture. I used it the 35mm lens a lot during a recent trip to China, where I had a lot of fun photographing people. It allows me to capture a scene with people in it, without revealing too much (always a danger with wide-angle lenses) or too little (as can happen with short telephotos).

    These two photos are great examples.

    Favorite lens 35mm Fujinon f1.4

    Favorite lens 35mm Fujinon f1.4

    Another thing I like about the 35mm lens, is that it focuses quite close to the subject, allowing me to move in close for detail shots without having to use a close-up lens or extension rings. The 85mm lens that I used with my Canon camera didn’t focus quite so closely, and I had to use a 500D close-up lens (filter) with it for close-up photography. Here’s an example.

    Favorite lens 35mm Fujinon f1.4

    One of the benefits of a mirrorless camera system, with an APS-C sensor, is that the lenses are smaller and lighter than those made for camera systems with full-frame models. The 35mm lens is small (it’s only 55 mm long) and light (it only weighs 187 grams, 6.5 ounces). Compare those dimensions to a 35mm f/1.4 lens made for a full-frame camera and you’ll see what I mean (Canon’s 35mm f/1.4 is 20.46 oz., or 580 grams).

    That wide aperture comes in very useful when shooting in low light, or if you want to use a wide aperture for creative effect. This lens gives me the best of two worlds – small size and wide aperture. This photo, taken at f/1.4, ISO 6400, shows how useful a wide aperture is in low light.

    Favorite lens 35mm Fujinon f1.4

    Another benefit of this lens is that I can take photos that aren’t affected by converging verticals. With wide-angles, even moderate ones, any slight tilt of the camera results in converging verticals. Vertical lines are crooked rather than straight. It’s not necessarily a bad thing, but sometimes I prefer the straightness and order, imposed by the 35mm lens. This candid photo shows the point – with a 35mm lens it was easy to frame the photo and make sure the pillar (and the other verticals) were straight.

    Favorite lens 35mm Fujinon f1.4

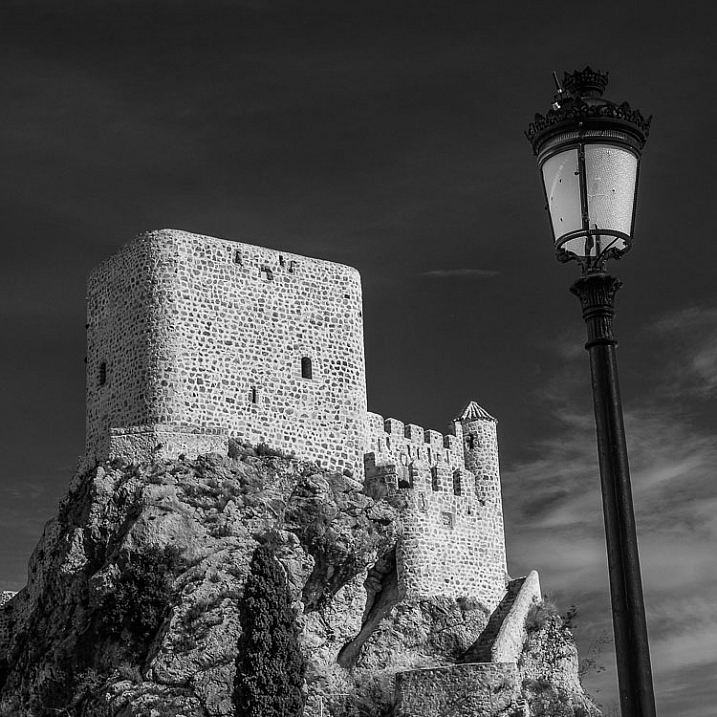
    The focal length also works very well when I shoot in the square format. There is something a little magical about the results, and I have been using it a lot for that lately. Here is a photo I took recently in Spain.

    Favorite lens 35mm Fujinon f1.4

    Your turn

    Have you used the Fujinon 35mm f/1.4 lens? Or indeed any other normal or standard lens? Let us know what you like, or dislike, about these lenses in the comments. It will be interesting to hear what you think.


    Mastering Lenses photography ebookMastering Lenses

    My new ebook Mastering Lenses: A Photographer’s Guide to Creating Beautiful Photos With Any Lens shows you how to get the best from the lenses you own already. A comprehensive guide to exploring the creative potential potential of wide-angle, normal and telephoto lenses, it’s also the ultimate buying guide for readers thinking about purchasing a new lens for their camera. Please click the link to learn more or buy.

    googletag.cmd.push(function() {
    tablet_slots.push( googletag.defineSlot( “/1005424/_dPSv4_tab-all-article-bottom_(300×250)”, [300, 250], “pb-ad-78623” ).addService( googletag.pubads() ) ); } );

    googletag.cmd.push(function() {
    mobile_slots.push( googletag.defineSlot( “/1005424/_dPSv4_mob-all-article-bottom_(300×250)”, [300, 250], “pb-ad-78158” ).addService( googletag.pubads() ) ); } );

    The post My New Favorite Lens: The Fujinon 35mm F1.4 R by Andrew S. Gibson appeared first on Digital Photography School.

    Digital Photography School

  • A Journey From Novice to Natural Light Portrait Photographer

    I’m here to share my photography journey that started few years ago as a novice, to where I stand today. As am amateur or hobby photographer, you may relate.

    The journey from novice to advanced photographer

    About two years ago, I bought an entry level DSLR, to use it as an expensive point and shoot camera. The camera decided the fate of most of my pictures. On innumerable occasions, the pictures were blurry, under or overexposed, and were of poor quality.

    The urge to work on my photography skills blossomed, when I was blessed with a little girl. An utmost desire to take only the best pictures of my angel, had taken roots in me. As you may also do, I started searching the internet fervently, for ways to capture the best shots.

    Dps fb ca viks photogrphy

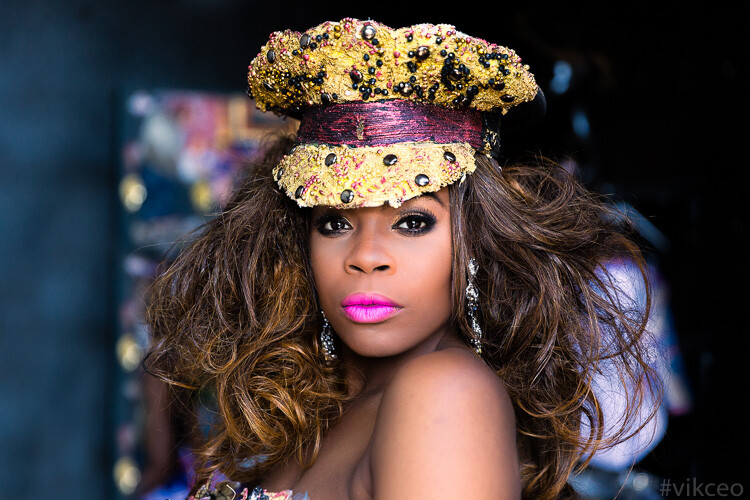
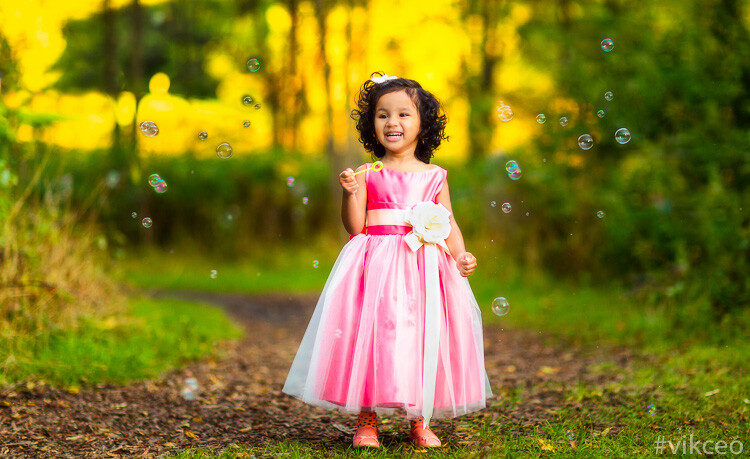
    This is the kind of natural light photography I do now, but that’s not where I started. Read on to find out how I got here, and you can too.

    I realized, other than going through basic photography tutorials on YouTube, the thing that helped me the most was Flickr’s discussion groups. It has large community of knowledgeable professionals, and semi-professionals, who love to take a look at your picture and provide valuable feedback. Positive suggestions and encouragement I received on the forums, helped me to experiment further, and escape out of automatic mode. If you are in the same mode as I was two years ago, I strongly recommend getting feedback for your photos, through the online forums.

    Moving out of auto mode and kit lens limitations

    The very first step towards improvement for me, was shifting to Aperture Priority (Av/A) mode. Initially, pictures were blurry even in Av mode, but I could see that inside my home, my kit lens at f/4.5, ISO 6400, was still unable to shoot faster than 1/30th of a second. Such a slow shutter speed caused the motion blur. Shooting outdoors normally helped me to avoid blurry pictures, but I was not sure why my images didn’t have a blurry background like I saw online. Eventually, I understood the limitations of my kit lens, in not being able to shoot at a larger f-stop, to achieve shallower depth of field.

    500px Photo ID: 53404702 -

    This image is very noisy, focus is on her dress rather eyes/face, the out of focus raised hand actually distracts the viewer a lot.

    One thing I would realize after many months of shooting, is that the exposure triangle (aperture, shutter speed and ISO) is easy to comprehend theoretically, but really hard to apply in the field. I went out for a shoot almost every day, and started experimenting with aperture and shutter speed to get a more desired shot. On returning home, I always got an impression I should have used a different aperture or shutter speed for a better shot. The ability to learn through your mistakes is a major milestone in your journey.

    Branching out

    Once you are bit confident in your understanding of the basics, you start enjoying it – which is what I experienced. I started devoting time to reading topics such as composition, photography tips, and subscribed to sites like Digital Photography School. Another thing that helped me a lot, was connecting to local events and activity pages via Facebook. I started showing up at many local events and offering free photography to the organizers.

    The experience of shooting events was quite chaotic and challenging, especially when there were far more people posing in front of the camera, and many arbitrary things happening – kids running around, or folks dancing to tunes of the festivities. Every such shoot gave me lot more insight into concepts of understanding concepts like plane of focus, controlling focus points, exposure compensation, tips to hand hold the camera firmly, etc.

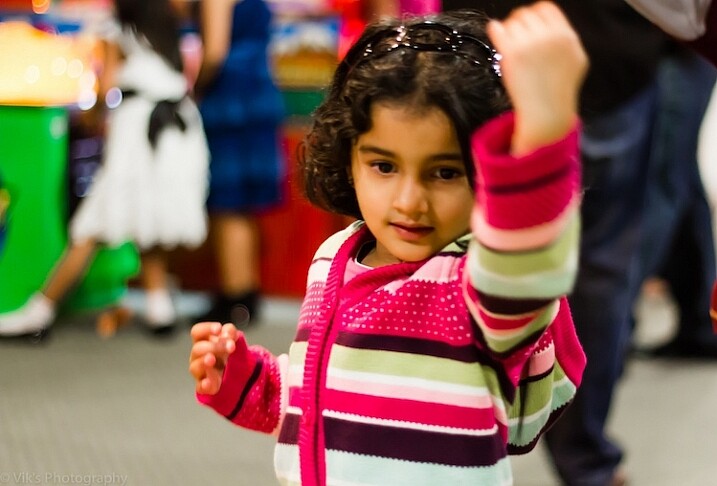
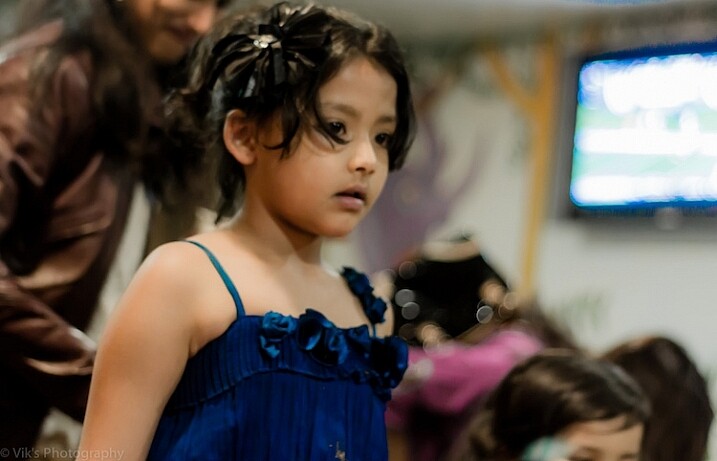
    One of my early event photos. The face and overall image is poorly lit and the face looks orange. Overall image is noisy and the eyes are not in focus. The person behind her is very distracting.

    One of my early event photos. The face and overall image is poorly lit, and the face looks orange. Overall, the image is noisy, and the eyes are not in focus. The person behind her is very distracting.

    Upgrading gear

    It’s very easy to get overwhelmed when reading about, or watching, the type of gear that pros are using in the field. My advice would be to start with minimum possible gear, and upgrade only when you clearly understand the limitations of your existing gear. Be it body, lens, tripod, or anything. After understanding that I couldn’t shoot with very low noise in ambient light during evenings, or achieve huge shallow DOF with my canon T3i and a kit lens, I moved up to a 6D after few months, and bought a prime lens. Though I love to shoot 100% natural light, I added a flash to my gearbox as well, to use as a fill light in some situations.

    Here are few things I learned so far, that you can also apply in your photography. Then I will move on to what kind of work I produce these days, and some explanation about how the results are achieved.

    Understand the basics:

    Read a lot about aperture, shutter speed, ISO, and other beginner tutorials. Apply them as much as you can. These concepts are simple but take a lot of hands-on practice to start making some sense.

    Very noisy, Focus is on the shoulder, a very bright area in the background is a huge distraction, very messy environment.

    Very noisy, Focus is on the shoulder, a very bright area in the background is a huge distraction, very messy environment.

    Participate:

    Do share your everyday shots and learning, to online discussion groups and forums, without worrying about the quality of your work. Google knows a lot. Give it a try by typing the question the way you would ask someone in person. Once you get some clue, make sure to try it out, to experiment and confirm your understanding. As I said earlier, do volunteer photography for local charity or non profit, etc., as that is a sure way to learn, and it is much more fun.

    Avoid GAS (Gear Acquisition Syndrome):

    Avoid the mindset that you cannot do good photography without expensive gear. In the beginning, your cheapest camera is enough to get you started. Photography is not 100% driven by expensive gear. There are way many areas to catch up like composition, understanding of light, angle of shooting, etc. Learn the basics and how to use the gear you have first.

    Shoot, shoot and shoot:

    There is no shortcut to get good at photography. You have to keep shooting to learn, and learn more to confirm your understanding and get better.

    Understand Light:

    Taken in the middle of the day when sun was overhead with caring about harsh shadows. From composition point of view the image has a very busy background and viewer will be completely distracted at other elements of the image.

    Taken in the middle of the day, without caring about harsh shadows when sun was overhead. From a composition point of view, the image has a very busy background and viewer will be completely distracted by other elements of the image.

    It doesn’t matter what genre of photography you shoot; you need a firm understanding of light. This is a key ingredient for a good picture. So, read about the direction and quality of light, and how it affects the shape, size, shadows, and contour of objects it falls upon.

    Master your camera:

    This tip is especially important if you aim to shoot events, happening at fast pace like kids photography, birds, action, sports, etc. You will really miss opportunities if you are unable to change settings quickly on the fly, without looking at the controls.

    Go Manual:

    This needs to be your ultimate destination in terms of shooting modes. It’s true that 80% or more time you may be happy with Av mode, but ideally you should have no hesitation in switching to the manual mode in a blink.

    Depth of Field:

    Technically, in simple terms, aperture controls the depth of field. However, this is the area that took me the longest time to get a good grip on. It’s very hard to stop the desire to shoot at f/1.2, if you own a lens capable of that. However, lenses are not the sharpest at so small f-numbers, plus the depth of field is so thin, that it could be unusable if you are not at the right distance from the subject.

    Though there is a nice catch light but looking at the distance it has been shot the f stop should have been chosen higher. The face is not completely in focus and the image does not appeal the viewer. The subject should have been moved a bit to get rid of uneven shadows.

    Though there is a nice catch light, but looking closer, it has been shot with an f-stop that should have been higher. The face is not completely in focus, and the image does not appeal the viewer. The subject should have been moved a bit, to get rid of uneven shadows on his face.

    Positioning the Subject:

    Another key point I have seen even very mature photographers lacking, is realizing the importance of where you should ask the subject to stand. Key mistakes are: placing subject in front of a very busy background, having undesired points of interest in the frame, a brighter large light source behind the subject, etc.

    I hope you find the above tips useful. In the final part, I would like to show some images, and a bit about my thoughts on post-processing. All the below images have been published in one or the other magazine.

    Dps fb ca viks photogrphy 5

    85mm, f/1.6, 1/1600, ISO 800

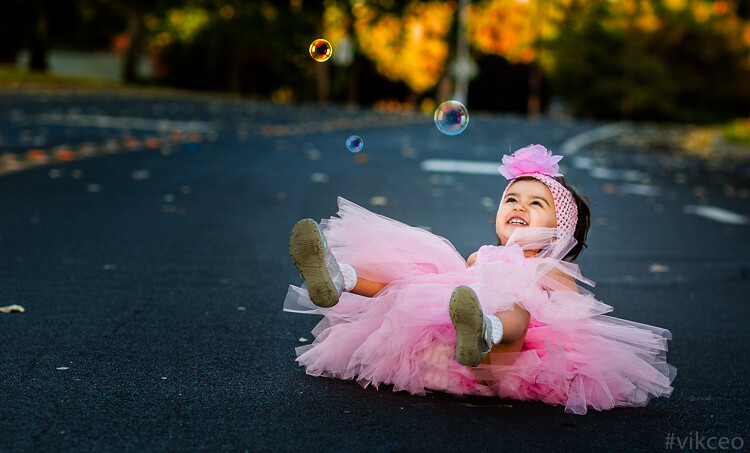
    Location: Milwaukee, WI. This was taken at golden hour, with the sun facing the subject. The trees with some fall colors, are very far behind her.

    Dps fb ca viks photogrphy 3

    85mm, f/3.2, 1/400, ISO 400

    Location: Redwood Shores, CA. This was taken at golden hour with sun facing her. The intensity of the light was low, as only partial light was passing through the tree. It was shot from above at about a 45-degree angle.

    Dps fb ca viks photogrphy

    70mm, f/2.8, 1/320, ISO 800

    Location: Los Angeles, CA. This was taken in the middle of the day, in an apartment, where model was facing window light.

    Dps fb ca viks photogrphy 6

    135mm, f/2.8, 1/400, ISO 400

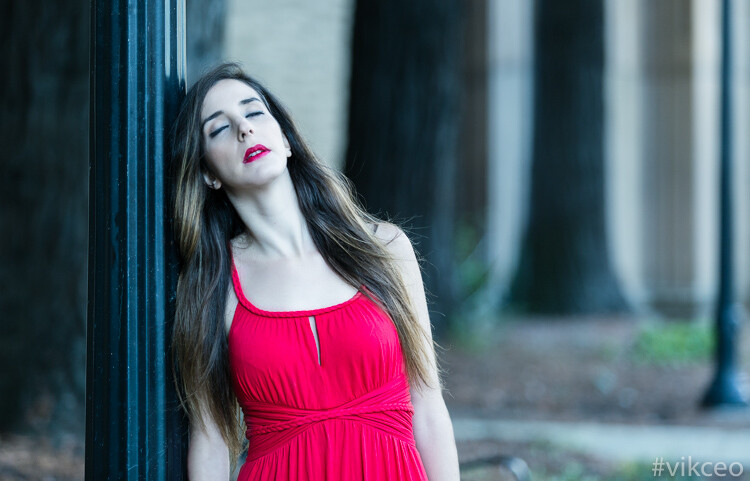
    Location: Palace of fine arts, CA. Taken in the middle of the day, where plenty of ambient light was available. Behind the subject is a little darker area, due to trees and pillars. I positioned her at a spot where light was just right to avoid on her face which were too dark.

    Dps fb ca viks photogrphy 484

    85mm, f/1.8, 1/6400, ISO 100

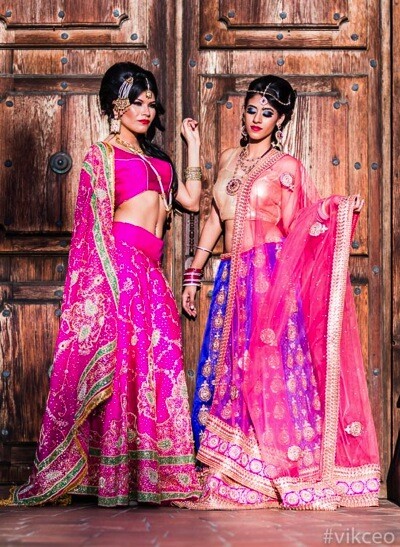
    Location: Fremont, CA. Again taken during golden hour, with a bit of shade from the door structure.

    Dps fb ca viks photogrphy 4

    85mm, f/2.8, 1/2000, ISO 800

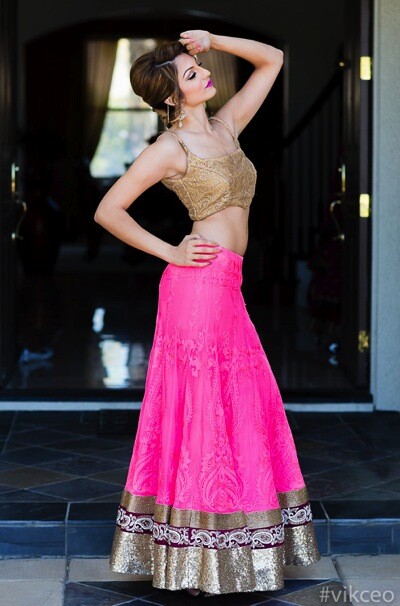
    Location: San Jose, CA. Taken in the middle of the day, using the shade from the ceiling above the model, and avoiding sunlight falling directly her.

    Importance of Post-Production:

    As a beginner you will surely hear or read a lot something similar to these statements, “I love straight out of camera pictures” or “I hate editing pictures”. However, I have found that you can delay getting into the post-processing of images, but cannot avoid it.

    The extent you go to post-processing an image, is totally a different debate. Some do it to enhance the existing elements of an image, and others do it to make it into a totally different image. I am in the first category, and spend time doing things that improves the overall image appeal.

    For beginners, I would advise that you stay away from it until you are comfortable with your gear and the basic concepts of photography. Always aim to get the image right in the camera.

    The first step for post-processing, you can start with Adobe Lightroom, which is a great piece of software to enhance your images. Spend time in achieving mastery with Lightroom, and, once you understand its limitations, then start exploring Adobe Photoshop on a need only basis. In my typical workflow, all the images go through Lightroom, then for some final touches in Photoshop.

    Your journey

    So where are you in your photography journey? Did you just pick up a camera and can relate to my early experiences? Have you been practicing for a while? What is your experience, please share in the comments below.

    Author Bio

    Vik (Vivek) Kumar is a photographer and a software engineer. Hi started his photography a couple of years ago as an amateur landscape photographer. The hobby became serious portrait photography fun. His images are used by reputed hotel brands like Hyatt. He has been published numerous times in various fashion magazines like ICON, PUMP, Surreal Beauty Magazine, etc. See more of his work on his website or on his Instagram profile. His landscape photography work can be explored on 500px.

    googletag.cmd.push(function() {
    tablet_slots.push( googletag.defineSlot( “/1005424/_dPSv4_tab-all-article-bottom_(300×250)”, [300, 250], “pb-ad-78623” ).addService( googletag.pubads() ) ); } );

    googletag.cmd.push(function() {
    mobile_slots.push( googletag.defineSlot( “/1005424/_dPSv4_mob-all-article-bottom_(300×250)”, [300, 250], “pb-ad-78158” ).addService( googletag.pubads() ) ); } );

    The post A Journey From Novice to Natural Light Portrait Photographer by Vik Kumar appeared first on Digital Photography School.

    Digital Photography School

  • 3 Tips to Maximize Your Road Trip Photos

    Road-Trip-Photo-Tip-Wide-Angle-06

    Road trips have been hailed as one of the greatest pastimes ever, and something that everyone should do at least once in their lifetime. It is a great way to experience a lot in a short span of time, and as a photographer, there will be many opportunities and moments awaiting your perspective. Sometimes preserving your creative spin in the midst of all the new discoveries, can become sensory overload and feel overwhelming.

    Here are three tips that can help you make better photographs on your journey and maximize your road trip.

    Road-Trip-Photo-Tip-Wide-Angle-03

    1. Plan, plan … plan?

    Most successful photo sessions involve a level of planning, this is no different for road trips. The plan does not have to be detailed, it can start out with some basics, such as final destination and must-see places/events, then you determine what should happen daily. Research your routes, note interesting things along the way, and make a priority list. Keep in mind that when traveling you are subject to the unforeseen, such as inclement weather, or places inaccessible for one reason or another, so be ready to switch to Plan B.

    Road-Trip-Photo-Tip-Wide-Angle

    As a light chaser, planning should include knowing when the most flattering light will hit your must-see locations or subjects (e.g. sunrise or sunset), and getting there on time. Thankfully there are now many smartphone apps that will help you plan for the golden hours, work out directions, as well as drive times (and distance) between destinations.

    Road-Trip-Photo-Tip-Wide-Angle-01

    The last part of planning is building flexibility into your days. Sometimes even the best laid plans end up with hiccups and delays, and you still need to make the most of it. The main objective of any road trip is to have fun, so build in a little flexibility, and who knows, you could find something worth exploring, or maybe you will be forced to get creative when you least expect it.

    Road-Trip-Photo-Tip-Wide-Angle-05

    2. Gearing up

    So with your destination(s) planned, it’s time to figure out what gear you need. The last thing you want to do is lug around everything you own, in fact, quite the opposite – you will want to travel light. This is why knowing your destination is key to packing. Will you be driving through amazing scenery? If yes, then you may want to pack a wide-angle lens. If wildlife is your focus, you may decide on a telephoto zoom, which is also great for capturing portraits of people in their natural environment, without being too obtrusive.

    Note: Good advice, when it comes to portraits, asking permission is a nice approach.

    Road-Trip-Photo-Tip-Zoom-03

    Road-Trip-Photo-Tip-Zoom-01

    It all depends on what your end game is, and what lens (or two) you will be using the most. There will always be regrets over what you left behind, such as that one photo that would have been awesome if you had packed a fish-eye or macro lens – but think about the extra weight, and whether of not it’s justified for the duration of the trip.

    Road-Trip-Photo-Tip-Wide-Angle-04

    If you really want to travel light, a mid-range zoom is a great compromise and a good broad spectrum lens to have during your journey, so research your surroundings and decide if this could work for you. A tripod is a safe bet if you plan to do any night photography, but use the same rule and take it only if you need it.

    Road-Trip-Photo-Tip-Night

    3. Road trip story

    When you shoot with a story in mind, it can make your photos take on a life of their own. Are you documenting something specific along the way, such as small towns or diners, breath-taking landscapes, or the road itself?

    Road-Trip-Photo-Tip-Zoom-02

    There are many different ways to tell a story, and your objective and style will dictate the way you tell yours. If your destination includes places that are prone to lots of tourists – decide how this fits into your vision. Do you make them a part of the photo (i.e. use their presence for a sense of scale) or would you prefer the location desolate (which probably means rising early to beat the rush). What story are you trying to tell?

    Road-Trip-Photo-Tip-Wide-Angle-02

    Road-Trip-Photo-Tip-National-Park

    Conclusion

    Road trips are fun, and are a great way to make memories with hundreds of photo opportunities. Planning goes a long way, and will help you determine which gear to travel with, and what photos will make up your story line. So whether you are journeying to a National Park or just venturing out to a new place – a journey that spans two weeks or just two hours – know before you go, have lots of fun, and make awesome photo memories.

    What other important tips would you add for fellow photography road trippers?

    googletag.cmd.push(function() {
    tablet_slots.push( googletag.defineSlot( “/1005424/_dPSv4_tab-all-article-bottom_(300×250)”, [300, 250], “pb-ad-78623” ).addService( googletag.pubads() ) ); } );

    googletag.cmd.push(function() {
    mobile_slots.push( googletag.defineSlot( “/1005424/_dPSv4_mob-all-article-bottom_(300×250)”, [300, 250], “pb-ad-78158” ).addService( googletag.pubads() ) ); } );

    The post 3 Tips to Maximize Your Road Trip Photos by Nisha Ramroop appeared first on Digital Photography School.

    Digital Photography School

  • Tips to Help You Start a Successful Photo Blog

    As you learn more about using your camera, and start taking beautiful pictures, you might also want a way to share them with the rest of the world. There are many social networking platforms that are ideal for this sort of thing like: Instagram, Flickr, Google Photos, Tumblr, and Facebook, along with hundreds more.

    However, one of the most popular, and effective ways, to share your pictures is a simple, humble, tried-and-true blog. Even though blogs are sort of like grandpas in our modern internet age, there’s a reason they have stuck around for more than two decades: they’re intuitive, easy to set up, and they allow you to have full control over your content. Many photographers enjoy using blogs because of their flexibility and customizability, and if you want to spent a bit of money for a dedicated blog platform like Squarespace, or a self-hosted WordPress installation, you can get even more creative.

    If you are thinking about pursuing this route there there are some things you need to consider before setting up your own photo blog.

    There are many sites that let you build photo blogs, several of which do it for free.

    There are many sites that let you build photo blogs, several of which are free.

    Know why you are doing a blog

    This first point seems kind of obvious, but a lot of photographers find their blogs stalling out, and gathering dust after a few months, because they did not define their purpose for doing the blog when they first began. Many people start blogs because they just want to share random pictures, but if you want a viable long-term blogging solution, you’re going to need something more.

    Are you starting a photo blog to get your name out there, and generate sales leads (potential customers)? Do you want to make a mark in your community? Do you want to simply post photos you think are interesting? Whatever your reason for doing a photo blog, it’s important to make sure you at least have one, in the first place. If you have never done a photo blog, then it’s likely you are doing it for personal reasons, such as trying to learn and grow as a photographer. That is an outstanding goal, and one that has helped many other bloggers, become much better at photography as well.

    Once you know precisely why you are doing your blog, it will serve as a guide for everything you post. Brandon Stanton started the well-known Humans of New York blog with a specific purpose: to photograph 10,000 people living in New York City. This helped him have a sense of purpose and direction when taking and posting photos, and doing the same thing can greatly benefit you as well. If you cannot explicitly state why you are doing a blog, it is much more likely to gather virtual dust after a short time, and any readers you do manage to pick up, will possibly stop investing their time in it as well.

    One of the first pictures I ever posted to my blog. It's not even an interesting photo but I was just starting out and can look back on this to see how much I have learned since then.

    One of the first pictures I ever posted to my blog. It’s not even an interesting photo, but I was just starting out, and can look back on this to see how much I have learned since then.

    In 2008 the web analytics firm Technorati found that roughly 95% of the blogs it tracked, went more than 120 days without being updated. When your blog goes four months without anything new, it is more than likely a failure. So how can you keep your blog not only surviving, but thriving past 120 days, and well beyond? Here are few more tips that might help:

    Clearly articulate the purpose of your photo blog to your viewers

    Attention spans are short, and people today have a never-ending stream of tweets, news clips, soundbites, app updates, and cat videos coming their way, almost every waking moment. So,how on earth can you make your blog stand out, and get noticed amid all the other sites, apps, and feeds that people check on a daily basis?

    New readers should be able to tell within five seconds, what your blog is about. The best option is to have a specific niche that your photo blog serves (e.g. wildlife, surfers, snowflakes, street pictures, etc.). But, even if it’s just pictures you like taking for no particular reason, you should at least make that clear to your readers upfront. You’re basically setting expectations right from the outset, and giving your audience a clear sense of what they will get out of reading your photo blog. Some people do this by having a descriptive name for their blogs, a brief tagline, or a set of pictures that instantly conveys a sense of purpose (e.g. flowers, cattle, cars, sunsets, etc.). Whatever the purpose of your photo blog is, if your readers can’t figure it out, they’re going to quickly move elsewhere.

    My blog is specifically for photos I take with my 50mm lens, and I make that clear to my readers immediately when they visit the site. If you don't let your readers know what your blog is about they will probably not stick around very long.

    My blog is specifically for photos I take with my 50mm lens, and I make that clear to my readers immediately when they visit the site. If you don’t let your readers know what your blog is about, they will probably not stick around very long.

    Post new content regularly

    Not every blog that is updated regularly is going to be a success, but every successful blog is updated regularly. I have seen too many photographers start blogs that are updated daily, then weekly, and before long, the rate at which new pictures are posted slows to a trickle. Soon it’s a photo every couple weeks, then one a month, and then a written apology by the blogger about how he or she has just been so busy lately, but they promise to start posting more photos soon. More often than not, soon becomes later, then later becomes never, and a once-promising photo blog becomes another statistic of failure rates.

    The best way to combat this problem, is to not post pictures whenever you feel like it, but instead post them on a regular and predictable basis. This gives your readers something to expect, and also imparts upon you, the blogger, a sense of accountability, which helps keep your camera in your hands and out of your closet. My photo blog is titled “Weekly Fifty”, and because it requires me to post a picture every single week, I almost always carry my camera with me, and am constantly looking for photo opportunities. In almost three years I have never failed to post a photo each Wednesday morning, which has helped me build a nice following, with regular commenters as well.

    A few years ago I ran out of ideas for pictures to post, but I knew I had to stick with my weekly schedule so I made this image that turned out to be one of my more popular photos.

    A few years ago I ran out of ideas for pictures to post, but I knew I had to stick with my weekly schedule. So, I made this image, that turned out to be one of my more popular photos.

    One trick I like to recommend for photo bloggers, is to schedule your posts in advance. This doesn’t work well for blogs about news or current events, but as a photo bloggers you do not have to be timely in the same manner. I currently have complete posts (each with a photo, written explanatory text, and an accompanying 4-minute audio commentary) scheduled for the next six weeks. I use WordPress, which allows me to schedule posts in advance, so each of these six posts will be automatically published on subsequent Wednesdays at 1:00 a.m. This gives me a bit of padding, if I ever find myself in a position with lots of things going on in my life, and my readers know that they will get a new picture each week, no matter what.

    Of course the catch here, is that I can’t merely sit on my laurels in the meantime. I have to keep taking pictures, and producing new blog posts, so that six weeks from now I don’t run out of material. This type of accountability is enormously helpful for photo bloggers, and if you’re not sure where to start, I always recommend doing one picture each week. If that’s too much you can lower it, and if it’s not often enough you can increase it, but I have found that a weekly schedule is a sweet spot that gives you enough time to take pictures, and doesn’t overload your readers with so much new content that they start ignoring it.

    Engage with your audience

    Building a loyal audience is the holy grail of almost every blogger, but it’s not easy to do. Your readers have many obligations, alerts, people demanding their time, and often it’s difficult enough just to get them to visit your blog in the first place, much less comment on a photo, or offer some kind of reaction to it. Early in the life of your blog, visitors will usually not be invested in your pictures enough to leave comments. But, as you start to build traffic, and readership over time, you will likely have a few people who start to offer feedback on your images.

    When you do get commenters it’s essential that you interact with them, in order to build a sense of community, respect, and mutual sharing. If someone likes one of your pictures, say “Thank you” and ask if you can see some of their photos too. If someone offers a bit of constructive criticism on a picture, try re-taking a similar photo using their suggestions. You can offer a Call to Action by posting a photo, and encouraging your readers to take, and share similar photos in the comments section. This type of audience engagement benefits all parties; by giving you even more reasons to continue your blog, giving your readers a reason to keep coming back, and giving new readers a sense that your photos are interesting and worthy of comments.

    I ran my blog for almost a year and a half before getting any regular commenters. Now I get about 40 comments each month, a number with which I am very happy.

    This chart shows my comment statistics for calendar year 2015. I ran my blog for almost a year and a half before getting any regular commenters, and now I get about 40 comments each month. It’s not huge, but it’s a number with which I am very happy.

    If your blog grows to mammoth proportions, and you start getting hundreds of comments on each picture, it might not be reasonable to reply to every single one, but until that happens you need to take care to give each commenter a personal response. If people are taking time out of their day to leave comments on your pictures, knowing that you personally read and responded, will make them want to keep visiting your blog, and engaging with you as well as other readers.

    On my blog I have a few loyal readers who comment on every single picture, and it’s well worth a few minutes of my time each week to respond to the things they write. This helps make my commenters feel valued, and builds a sense of community that would not exist otherwise.

    Push content to your readers

    People rarely go out of their way to visit a blog, so instead you need to find a way to push your new pictures to them. One of the most effective ways of doing this is to ask your readers to sign up for email updates, but you can also use social networks to get the word out about each new post.

    Every Wednesday my email subscribers get that week’s photo in their email inbox, but I also publish a link to my blog on Facebook and Twitter, and put that week’s image in my Instagram feed as well. (With the last option people are not directed to my blog, but I still get to engage with them about my pictures.) If you would like to ultimately generate revenue from your blog you might want to focus on ways of pushing content to your readers that, as often as possible, will bring them directly to your site and not to somewhere else that also has your photos.

    I woke up the morning this photo was published and found two comments had already been posted at about 2am. This type of engagement is possible because these people subscribed to email updates. If you don't have a way of pushing content to your readers you will likely not get the same level of engagement as you would otherwise.

    I woke up the morning this photo was published and found two comments had already been posted at about 2am. This type of engagement is possible because these people subscribed to email updates. If you don’t have a way of pushing content to your readers you will likely not get the same level of engagement as you would otherwise.

    Define your success criteria

    I teach a Project Management class at Oklahoma State University. One concept we talk about often is how to tell if a project is successful, and the same holds true for your photo blog. At what point will you know that your blog has succeeded in meeting your goals? Will you be happy if you have two comments, and 10 social media shares for each picture you post? Are you looking for a way to generate a specific amount of revenue from your blog? Or is your success criteria more esoteric, such as using your blog for a sense of personal growth and development?

    Having a set of clearly-defined success criteria is not necessarily essential for a blog, but it will give you something to shoot for, and a way of knowing whether you have gotten there or not. Whatever your success criteria is, take care to not compare it to anyone else’s. For example one of your photos might get five comments and 10 social media shares, but then you talk to a friend who just had five thousand visitors to his blog. Whose blog is more successful? The answer is…they both are.

    Success depends entirely on how you define it, and thankfully the internet is big enough for millions of photo blogs to coexist. Congratulate your friend, and ask to see the photo that was so popular. Don’t make your blog’s success a competition, because and as long as you are happy with how things are going, then that’s the only thing that matters.

    This photo had a great deal of personal meaning to me, but it generated very little traffic and almost no comments. If my success criteria is only quantifiable through numbers I would have been let down, but instead taking this photo forced me out of my comfort zone and made me try something new. Because of that I considered this one of my better photos even though raw numbers might say otherwise.

    This photo had a great deal of personal meaning to me, but it generated very little traffic, and almost no comments. If my success criteria was only quantifiable through numbers I would have been let down, but instead the sheer act of taking this photo, forced me out of my comfort zone, and made me try something new. Because of that I considered this one of my better images, even though raw numbers might say otherwise.

    Ignore the numbers

    Visitor statistics can be so exciting, but they can also lead you down the path to the blogging dark side. It can be fun to log in to your account dashboard, and see that a recent picture generated 200 visitors, but those numbers don’t mean anything, if they don’t translate to reader engagement. Imagine building a store and getting hundreds of people to come see your wares, but having every one of them leave without making a purchase. Not only would your store be a failure, but you would quite likely be disappointed on a deeply personal level.

    As a photo blogger you need to strive for quality over quantity, and look for ways to build a loyal following, not just try to increase raw visitor statistics. You might get a nice feeling seeing one of your photos get hundreds or thousands of views, but what happens when a different (or far better) picture you post gets only a couple dozen views? Visitor traffic is a fickle mistress, and if you pin your blogging hopes and dreams on simply making the numbers go up, you could very well be setting yourself up for a painful failure.

    February 2015 was a big month for my blog, but the numbers have gone down dramatically ever since. Since my success criteria is not measured in raw numbers this drop in traffic makes no difference to me, but if numbers are your goal then you could very well end up chasing a white whale that can never be captured.

    February 2015 was a big month for my blog, but the numbers have gone down dramatically ever since. Since my success criteria is not measured in raw numbers this drop in traffic makes no difference to me, but if numbers are your goal then you could very well end up chasing a white whale that can never be captured.

    I used to run a movie and TV review website, and wrote an article about the now-defunct show, “Man versus Food” on The Travel Channel. Somehow the host of the show found out about the article, tweeted it to his followers, and that single article generated more traffic than anything else we had ever posted. The problem was that those visitors did not stick around, and within a few weeks we were back to the same relatively low numbers we always had. At the time I figured blogging success meant getting sky-high traffic numbers, and when those numbers did not pan out I thought we had failed.

    When I started my Weekly Fifty photo blog, I took an entirely different route and tried hard to ignore numbers about visitor statistics, and have been much happier as a result. I do my blog because it helps me learn and grow as a photographer, and I get a great deal of personal satisfaction out of it. I appreciate the continual challenge it offers. In short, I’m a happy and successful small-time photo blogger, because I don’t let numbers and statistics define what success means to me.

    This is by far the worst photo I have ever posted on my blog, and it's almost painful to look at it now. But early on in my blog I had no idea what I was doing, and it was only through taking lots of bad pictures that I learned how to make a good image. Even though this picture is kind of embarrassing, it served a valuable purpose both on my blog and for me as a photographer.

    This is by far the worst photo I have ever posted on my blog and it’s almost painful to look at it now. But early on in my blog, I had no idea what I was doing, and it was only through taking lots of bad pictures that I learned how to make a good image. Though this picture is kind of embarrassing, it served a valuable purpose both on my blog, and for me as a photographer.

    Do you have a photo blog, or are you thinking about starting one? I’d love to hear any tips you would like to share, and will try to answer any questions you might have as well. Leave your thoughts in the comments section below and I’ll do my best to engage with you, the dPS readers, so you feel valued and keep coming back to our site. :)

    googletag.cmd.push(function() {
    tablet_slots.push( googletag.defineSlot( “/1005424/_dPSv4_tab-all-article-bottom_(300×250)”, [300, 250], “pb-ad-78623” ).addService( googletag.pubads() ) ); } );

    googletag.cmd.push(function() {
    mobile_slots.push( googletag.defineSlot( “/1005424/_dPSv4_mob-all-article-bottom_(300×250)”, [300, 250], “pb-ad-78158” ).addService( googletag.pubads() ) ); } );

    The post Tips to Help You Start a Successful Photo Blog by Simon Ringsmuth appeared first on Digital Photography School.

    Digital Photography School

  • 2 Quick Ways to Add a Sunflare in Photoshop

    Sunflares can make an otherwise dull image, look pretty dramatic. It’s very tricky to get good images of a sunflare in-camera, especially when using natural light only, as the contrast between the light and dark parts of the image is often too great that no amount of Active-D lighting can fix. Thankfully, we have Photoshop and many special effects like sunflares can be magically created, added, or enhanced, using this software’s mind-blowing functionality.

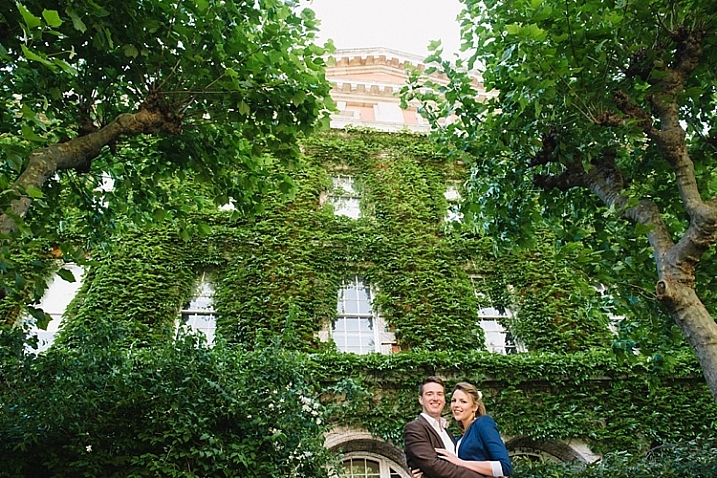
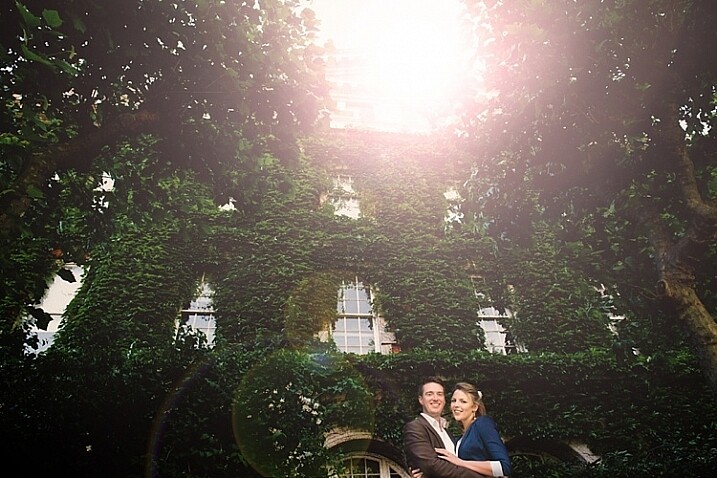
    special-effects-sunflare-photoshop-tutorial

    Why add a sunflare?

    Special effects, such as a sunflare, ultimately boil down to the photographer’s personal taste. Here are a few reasons why sunflares may be added in post-processing.

    • To exaggerate the sun’s rays.
    • To enhance contrast and inject drama.
    • To hide unwanted clutter.
    • To achieve artistic effects, for example if you are aiming for a dreamy and romantic effect, or soft and hazy ambience, such as the image above right.

    When not to add a sunflare?

    When you discover the magic of Photoshop, you can easily get carried away by the excitement of adding special effects, and there’s the danger that you add it on all your images, even when completely out of context, out of place, or totally unnecessary. I suggest avoiding sunflares when:

    • There is no sun at all or any large light source, in the shot.
    • When it makes the image look completely fake, when you really mean for it to look natural.

    How to add flare in Photoshop

    As is the usual case in Photoshop, there are always several methods to do something. This tutorial focuses on two ways of adding a sunflare.

    special-effects-sunflare-photoshop-tutorial (1)

    1. Method one: Using the LensFlare filter

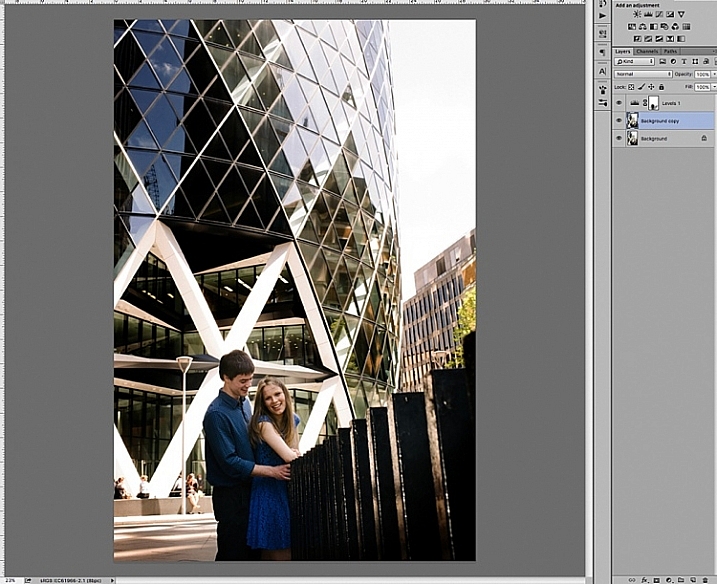
    Adding a bright sunflare to the image above won’t make much difference to an already washed out sky and part of the building. First of all you would need to create contrast by darkening the image. Copy the image on a new layer using CMD/CNTRL + J, and darken it using a Levels adjustment layer.

    special-effects-sunflare-photoshop-tutorial (12)

    Merge the background copy layer with the levels layer, by selecting both layers and typing CMD/CNTRL + E to merge them. Now you have a new darkened layer. Make another copy of the new darkened layer, then work on this new layer with the sunflare.

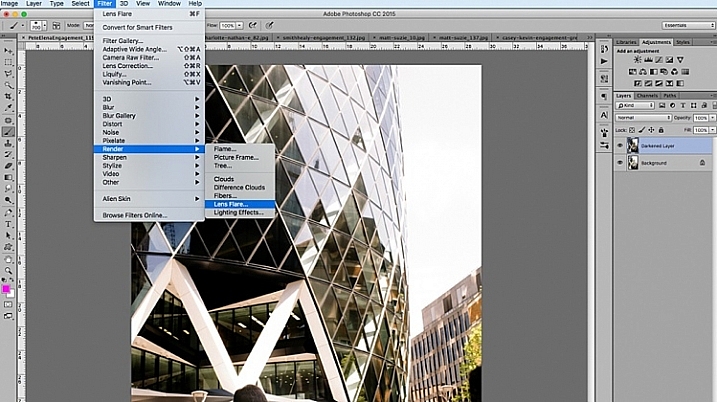
    When you add sunflare, it is automatically added on the layer as part of the image, and not on a new layer by itself. So to be safe, keep a copy of the darkened layer which you don’t touch. Always work on the new copy with the sunflare, so in case you make mistakes or need to reposition your sunflare, then you won’t need make a darkened layer all over again. You can just delete the layer you are working on, and duplicate your untouched dark layer, to start adding a new sunflare.

    In Photoshop, bring up the Lens Flare from the top menu bar using the Filter>Render>LensFlare drop down menu.

    special-effects-sunflare-photoshop-tutorial (1)

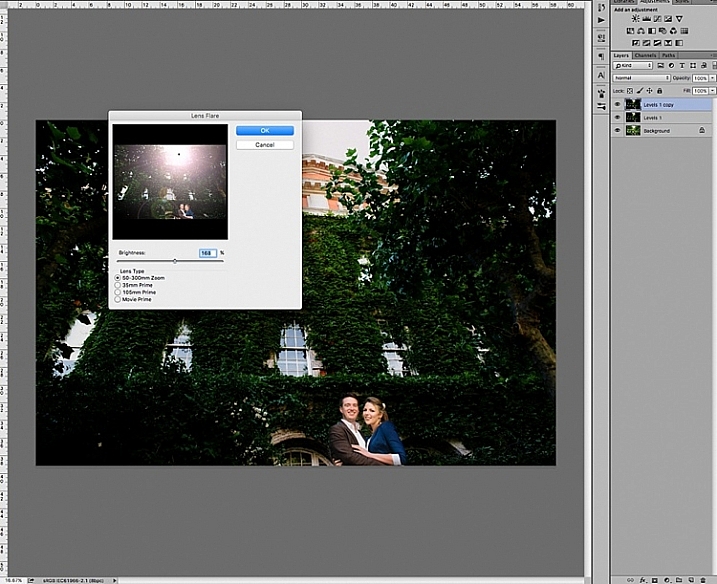
    You can experiment which type of lens flare you want to add, by clicking the circles next to the type of sunflare option, and adjusting the brightness intensity by moving the slider. Click OK when you’re happy with your choice, and the sunflare will be superimposed on your image on the same layer.

    special-effects-sunflare-photoshop-tutorial (8)

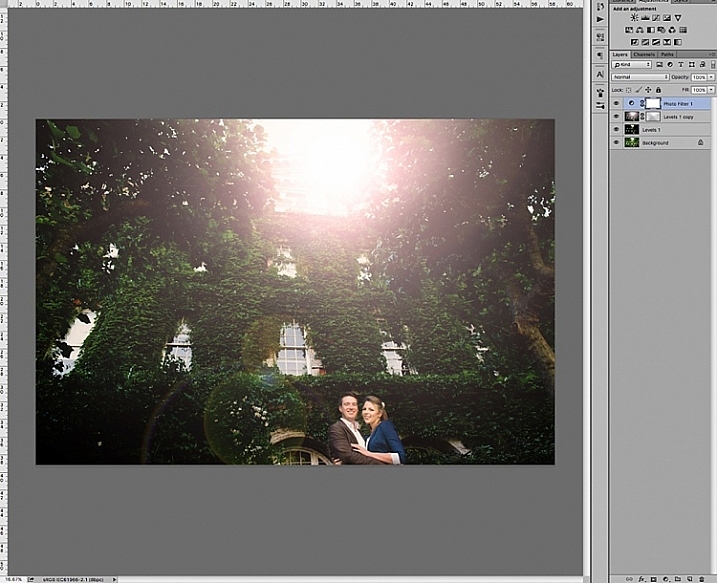
    Once the sunflare is applied to the image, add a layer mask, and using a soft black brush, remove some of the sunflare from areas you want to protect such as faces (make sure to paint on the mask, not on the layer).

    special-effects-sunflare-photoshop-tutorial (9)

    special-effects-sunflare-photoshop-tutorial (14)

    To finish, I added a photo filter on top, to warm up the image. Below is the image before and after the sunflare has been added. It is always a good practice to save the image with sunflare as a new JPG file, and always save your Photoshop file (PSD) with all the layers in tact, in case you need to revisit it again in the future.

    special-effects-sunflare-photoshop-tutorial (3)

    special-effects-sunflare-photoshop-tutorial (2)
    2. Method two: Using overlays

    The built-in sunflares in Photoshop have very limited choices, as you have seen above. There are far more interesting sunflares of all shapes and colours available, in the form of overlays.

    Below is an example of an image with a faint sunflare added in Photoshop, using one of the built-in choices above. I don’t think this is dramatic enough. In this example, I am exaggerating the sunflare by adding a sunflare overlay.

    special-effects-sunflare-photoshop-tutorial (5)

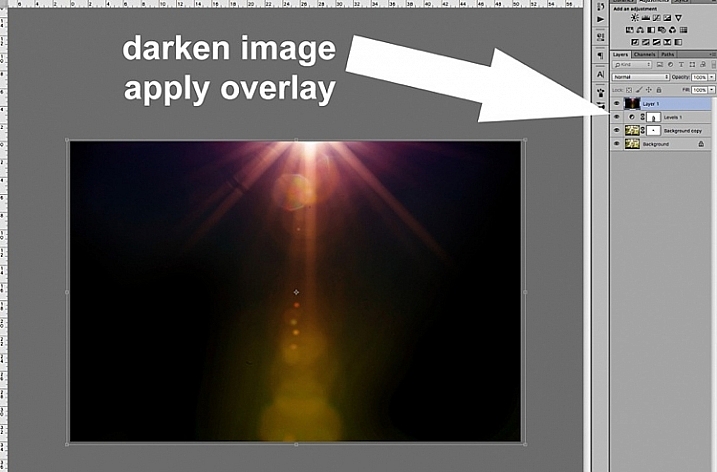
    First darken the image with Levels, as in the first method above, using a layer mask to protect areas you don’t want to be darkened. Then apply the overlay on the entire image, as shown below.

    special-effects-sunflare-photoshop-tutorial (11)

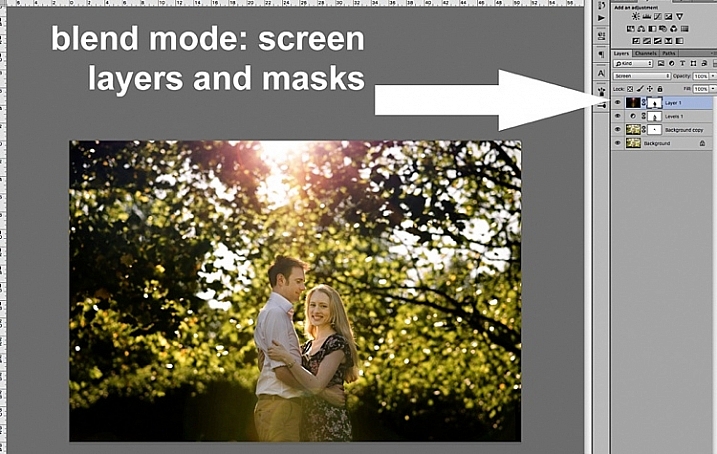
    Change the layer blend mode to Screen, which makes all the dark areas of the overlay disappear, and you will only be left with the light areas superimposed on your image.

    special-effects-sunflare-photoshop-tutorial (10)

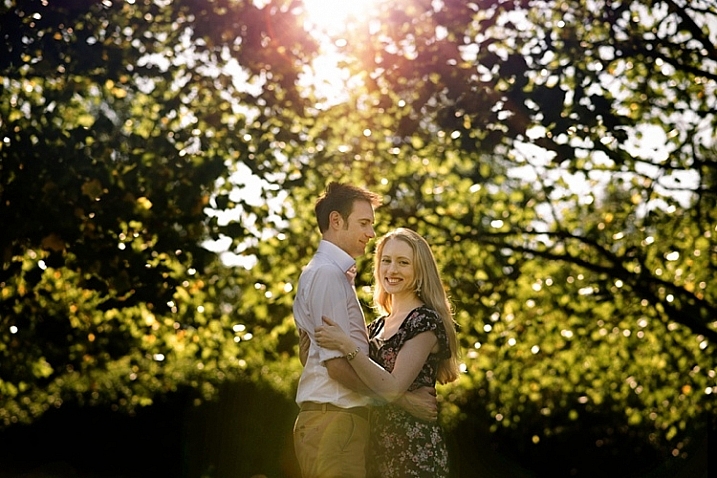
    Below is the final JPG image with the new sunflare overlay, with the whole image darkened for more contrast.

    special-effects-sunflare-photoshop-tutorial (4)

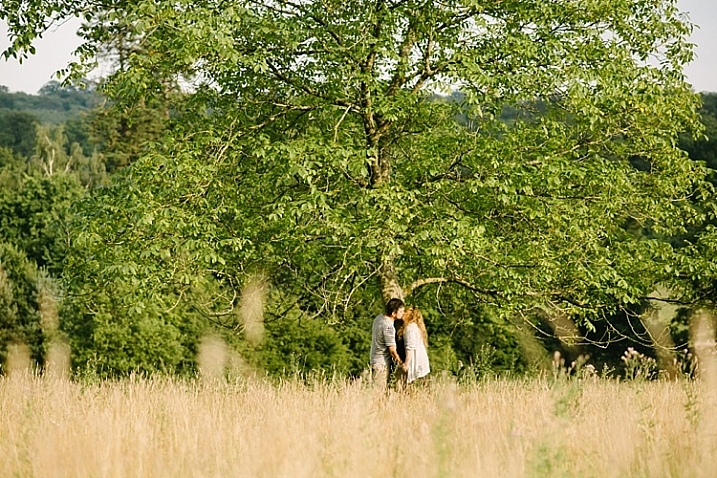
    Below is another image about to be treated with a sunflare overlay, but this time way more exaggerated than the example above.

    special-effects-sunflare-photoshop-tutorial (7)

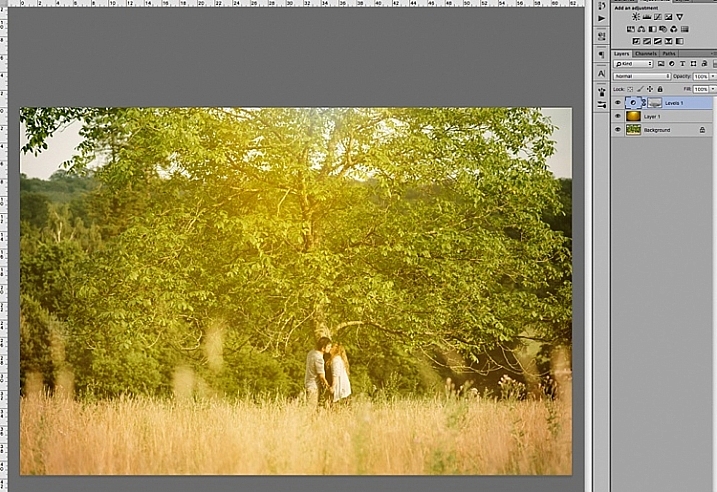
    The overlay is so strong, as you can see on Layer 1 below, I have applied a levels layer to brighten it a little, and a layer mask to gradually remove some of the overlay from areas I wanted to protect.

    special-effects-sunflare-photoshop-tutorial (7)

    Below is the final image with an exaggerated sunflare overlay, that looks like it has been photographed through a warm filter over the lens.

    special-effects-sunflare-photoshop-tutorial (7)

    A few things to note when applying special effects

    • Be subtle and experiment with the opacity to achieve the desired effect.
    • Darken surrounding areas to emphasize flare, especially on a very bright image.
    • Mask off special effects from faces, and areas that clearly do not need it. The built-in sunflares in Photoshop have circular flares that appear too perfect and hard-edged. You can always mask some of this away to take the edge off, and soften the flare effect.

    I hope you have enjoyed this little tutorial in adding a sunflare special effect in Photoshop. Do you have other tips and ways to add sunflares in post-processing? Please share them in the comments below.

    googletag.cmd.push(function() {
    tablet_slots.push( googletag.defineSlot( “/1005424/_dPSv4_tab-all-article-bottom_(300×250)”, [300, 250], “pb-ad-78623” ).addService( googletag.pubads() ) ); } );

    googletag.cmd.push(function() {
    mobile_slots.push( googletag.defineSlot( “/1005424/_dPSv4_mob-all-article-bottom_(300×250)”, [300, 250], “pb-ad-78158” ).addService( googletag.pubads() ) ); } );

    The post 2 Quick Ways to Add a Sunflare in Photoshop by Lily Sawyer appeared first on Digital Photography School.

    Digital Photography School

  • 7 Tips for Better Adventure Photography

    Adventure photography has continuously become more and more popular for outdoor photographers, thanks to new technology in cameras, and the outlets of social media platforms like Instagram, that are very photography-friendly. You may have seen some posts that are routinely labeled as “epic” and want to know how to create the same awe-inspiring feeling in your own photographs.

    The good news is you can! But, just like in other fields of photography, composition is extremely important when you want to start dabbling in epic scenes. Let’s look at some tips to help you start shooting better adventure photography.

    1- Always have your camera on

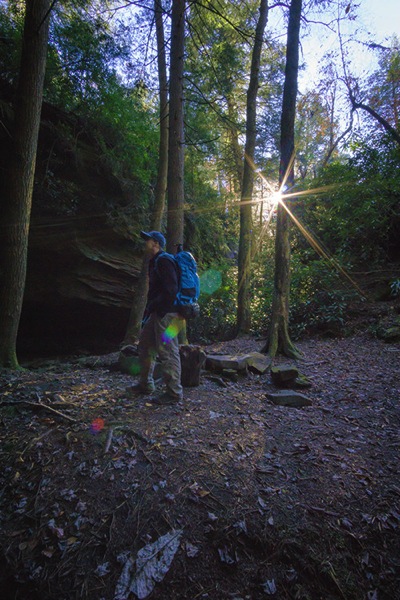
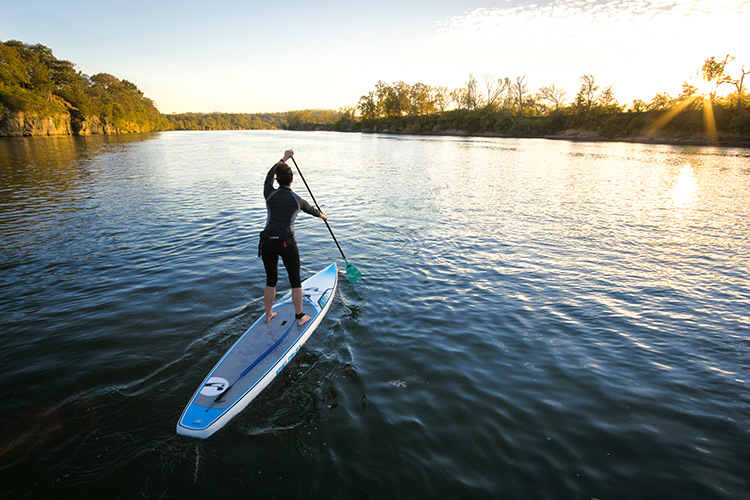
    PHOTO 1

    Like a lot of photographers, you may suffer from battery anxiety, the fear that your battery is going to die and you’ll miss that one shot you’ve been waiting for your entire life. Well, when you constantly have your camera turned off, you’re probably going to miss more amazing split second shots, than if your battery died. That’s why you should always leave your camera on when you’re out shooting adventure photography.

    Are you out hiking with your friends? Leave the camera on. What about spelunking in some caves? Leave the camera on. What if you’re zip-lining through a jungle canopy? First, leave your camera on, and then hold on to your camera tightly.

    You won’t have to worry about battery anxiety if you properly pack, including extra batteries to take with you. Simply leave your camera on, never put your lens cap on, use a lens hood to protect the lens, and take a micro-fibre cloth to clean the lens. Your fear of the battery going dead should never stand between you, and freezing an adventurous moment in time.

    2 – Put yourself in the frame

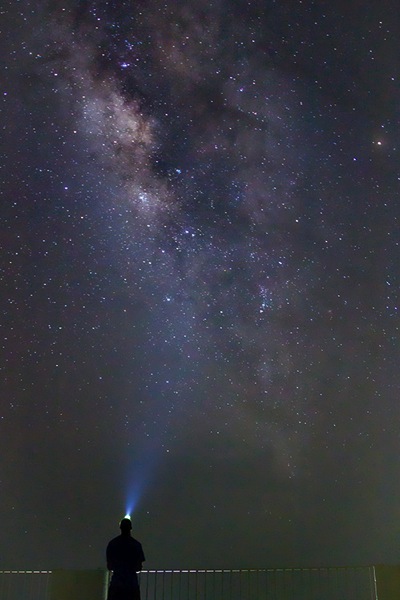
    Adventure photography features people living their lives to the fullest, by placing them in amazing landscape scenes. But, what if you aren’t in nature with anyone else? I’m sure you’ve faced that dilemma before. Well, instead of feeling like all is lost, think outside the box and put yourself into the frame.

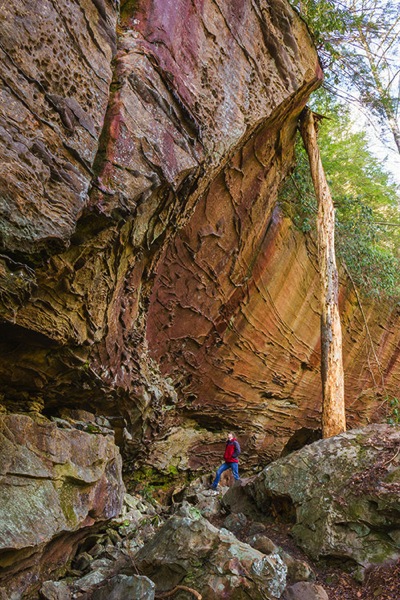
    PHOTO 2

    It may feel a bit strange at first to feature yourself in a photograph, but sometimes you have to do what you have to do,in order to get the shot! If you’ve never done this before, all you have to do is mount your camera on a tripod, and set it to the 10-second delayed timer. Once you press the shutter and the timer starts, get into position, and wait for the camera to do its thing.

    You might want to also set your camera to take a series of shots once the ten second timer is complete, to be sure you get a suitable photograph. Many cameras have the option to use the timer, or one with continuous shots. Sometimes you might not get in place fast enough, but using a multiple shot sequence will allow you to have a couple more frames to get into position.

    3 – Subject placement in adventure photography

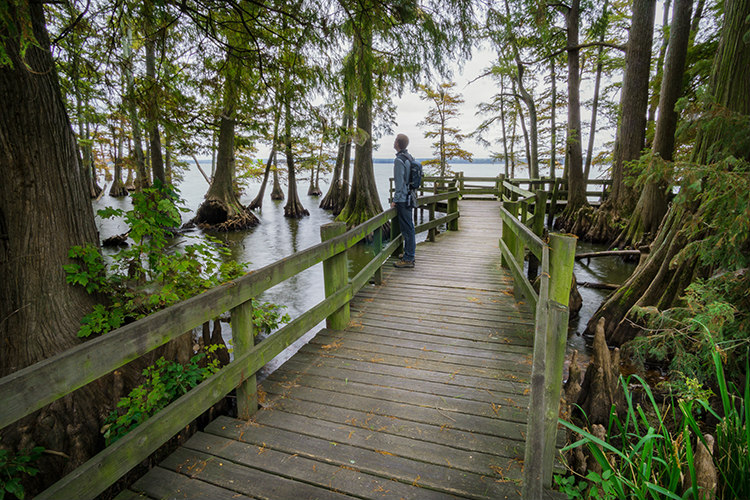
    Subject placement is extremely important in adventure photography. You want to feature your subject (the person out adventuring) in the landscape, without any distractions or limitations. Anyone viewing your adventure photograph should never be confused about where the subject is, or what they are doing.

    It doesn’t matter whether your subject is close to the camera, or way off in the distance. What matters is their placement in space. So, when you’re inspecting a landscape, and trying to decide where to place your subject, always look for a solid color or a negative space to place them.

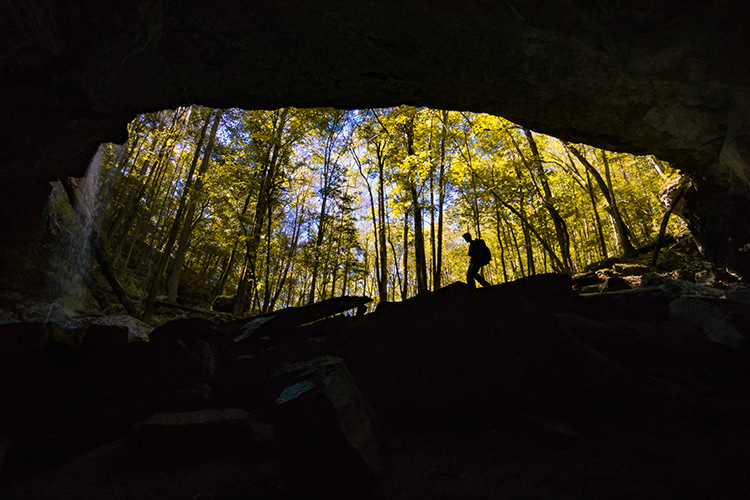
    PHOTO 3

    The people in the landscape will stand out against a solid color and negative space, to allow your audience to locate the subject immediately. The last thing you want when you show a photo, is someone trying to find your subject because they are right on the horizon line, or lost in a pattern of shadows.

    Not only will placing your subject in negative space clearly reveal where and what your subject is, but it will also eliminate any boring spaces in the photograph’s composition.

    4 – Choose a better perspective

    Perspective, or point of view, in photography ia always important when you’re trying to show a scene more creatively. Think about it; everyone walks around all day seeing everything at eye level. So, if you want to show something differently, shoot a perspective that isn’t at eye level.

    Getting lower to the ground gives your subject in adventure photography a larger than life feel. This is usually shot with a wide angle lens, to fit a low perspective foreground, and the landscape into one photograph. Low perspectives show the importance of a person or activity, more than the landscape surrounding them.

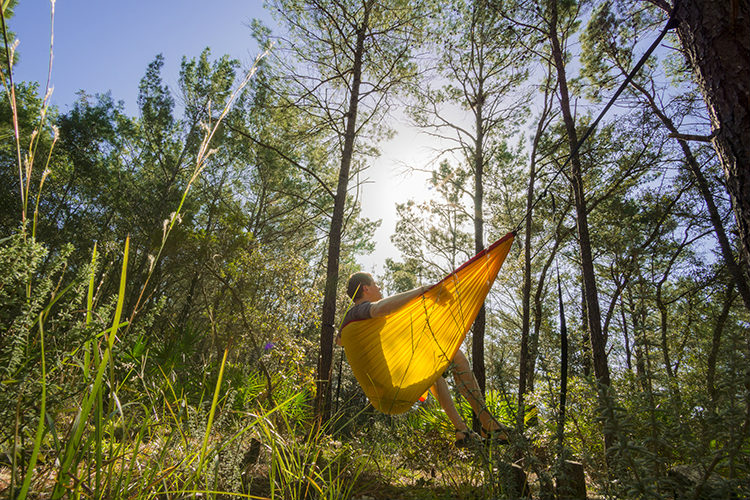
    PHOTO 4

    Higher perspectives feature the landscape more than the subject, making the natural elements of the frame seem larger than they actually are in reality. These points of view are usually used to look down on your subject, while allowing you to show more of a landscape as well.

    5 – Show scale

    Do you remember doing science projects in school where you’d have to collect photo evidence of your specimen, by placing a pencil or coin next to it to show its size? Well, that’s called scale. You use an object of a well-known size next to your find, to give your audience an idea of the actual size of the specimen shown.

    You can actually do the exact same thing in adventure photography. Everyone knows the average size of a human. However, when you show a photograph of just a cliff, it’s difficult for someone to get a really good idea of how large the cliff actually is.

    The solution is to incorporate a well-known average size (in adventure photography that would be a person) into the frame, so your audience is able to get a much better idea of how large and grand the landscape actually is. This is a tremendous composition technique to use whenever you feel absolutely dwarfed in nature.

    PHOTO 5

    6 – Think about using silhouettes

    Silhouettes are another great technique that you can use in adventure photography. Whenever you’re stuck in a bad lighting situation, one that has too much dynamic range to be able to capture both your subject and the landscape in good light, go directly for the silhouette shot.

    To use silhouettes effectively in adventure photography, place your subject on a solid line within the scene. This could be either a horizontal or a vertical line. For example, you could place your subject on a hiking trail, or on a vertical wall, while rock climbing. Next, compliment your subject by placing an interesting background behind them, such as a forest or sunset.

    The key to an effective complementary background is to create a composition that features your subject first. This goes back to what you learned on subject placement in adventure photography. Never overpower the subject of the photograph by hiding them in a complementary background.

    PHOTO 6

    7 – Make your audience jealous

    Lastly, make your audience jealous with your adventure photography. Compose an adventure photograph in a way that makes people want to go where you went, and do what you did. The overall goal of adventure photography is to get people outside, exploring new places.

    Let your audience live vicariously through your photography. When you’re able to do that, you’ve definitely stepped up your adventure photography game.

    PHOTO 7

    So, by all means, get out and document your adventures!

    Do you have any other adventure photography tips to share? Or perhaps some of your favorite adventure photography images? Please do so in the comments below.

    googletag.cmd.push(function() {
    tablet_slots.push( googletag.defineSlot( “/1005424/_dPSv4_tab-all-article-bottom_(300×250)”, [300, 250], “pb-ad-78623” ).addService( googletag.pubads() ) ); } );

    googletag.cmd.push(function() {
    mobile_slots.push( googletag.defineSlot( “/1005424/_dPSv4_mob-all-article-bottom_(300×250)”, [300, 250], “pb-ad-78158” ).addService( googletag.pubads() ) ); } );

    The post 7 Tips for Better Adventure Photography by David Johnston appeared first on Digital Photography School.

    Digital Photography School

  • 10 Ways to Use a 5-in-1 Reflector

    ten-ways-to-use-reflectors-1803

    In photography books, magazines, and websites, references to reflectors are often and many. They’re a quintessential tool for modifying light in just about every genre, and they’re an indispensable part of many photographers’ toolkits.

    If you’re new to the idea of using reflectors, or new to photography in general, the problem with reflectors is that, although they seem self-explanatory in use, their effects can often be too subtle to be noticed if you lack experience using them. To combat this, and make the learning process easier, this article will give you examples of 10 common uses for a 5-in-1 reflector. It will also show you what the reflector is doing in each instance, as well as provide diagrams for you to repeat the exercise in your own time.

    The best way to take full advantage of the information in this article, is to duplicate all of the following setups, using your own equipment and subjects. Once you understand the basics outlined here, you can start experimenting, and altering variables, to see how small changes can affect your images.

    What is a 5-in-1 reflector?

    5in1reflector


    A 5-in-1 reflector is a nifty gadget that incorporates several different types of reflector, into one portable and easy to use package. These include white, silver, gold, black reflectors (or flag), and a diffusion panel.

    05-westcott-photo-basics-reflectorThe way they are put together is that the four reflector sides are sewn into a sort of pouch, that fits around the diffusion panel; making a change to a different color as simple as unzipping it, removing the diffusion panel, turning the pouch inside out, and replacing it over the diffusion panel.

    Clarifications

    This article focuses on practical uses for 5-in-1 reflectors, but to use and understand them most effectively there a couple things to keep in mind.

    Quality of light

    When referring to the quality of light, this term has nothing to do with whether light is good or bad. The word quality refers to the physical properties, traits, or characteristics of the light. These properties include the softness or hardness, the shape, the color, and the intensity of the light.

    A little confusing, I know, but it’s just one of the many quirks of the English language. If it helps, try to remember there is no such thing as good or bad light; only light more suitable for a different subject.

    Softness, hardness and intensity

    In terms of reflectors, it is important to understand how they modify your light.

    Softness and hardness are affected by the apparent size of your light source. If you move your reflector closer to your subject, you get softer light. If you take it further back, you get harder light. The same applies to different sized reflectors. A larger reflector, at the same distance from the subject as a smaller one, will produce softer light, while the smaller one (in the same position) will produce harder light. However, if you put the larger one farther away from the subject, and the smaller one closer – they may become equal.

    When swapping between the colors on your 5-in-1 reflector, from white to silver for example, the properties of the light you are altering are the color and the intensity. Providing that the reflector hasn’t moved, a silver and a white reflector will give the same softness/hardness of light. However, a silver reflector will reflect more light than a white one, thereby providing more intensity. Because of this, anytime you change out your reflectors, you will also need to alter your exposure settings.

    Additionally, using a different colored reflector will change the color of the light and you may need to alter your white balance settings. The exception to this is when using a gold reflector which is often done to intentionally add a color cast to the image.

    Exercises

    Exercise One – white/silver on the side

    ten-ways-to-use-reflectors-diagramA

    This first example may be the most common way to use a reflector. The light is illuminating the subject from camera left. This is causing dark shadows on the subject’s face at camera right. While these shadows can often be pleasing and acceptable, at other times you may choose to fill them in with additional light. This is where the reflector comes into play.

    To do this, place your reflector, either silver or white, to the side and close to your subject, facing the light. This will fill in the shadows, brightening up the frame.

    Note: You can also vary the intensity of the light reflected by moving the reflector toward, or away from the subject. Move it closer to brighten the shadows more, move it away to have less fill-light and darken the shadows.

    ten-ways-to-use-reflectors-A

    Left: without reflector. Right: with reflector

    Exercise Two – white/silver from below

    ten-ways-to-use-reflectors-diagramB

    This setup is also very common, and is a slight variation on exercise one above. Here, the reflector is placed underneath your subject, and is filling in shadows from below.

    ten-ways-to-use-reflectors-B

    Left: no reflector. Right: with reflector.

    Note: be very careful doing this on a subject that is heavy-set or has a double chin, as it will highlight that and make it stand out more – not overly flattering for them. You could also light up the nostrils so be conscious of that as well.

    Exercise Three – white/silver bend it

    You can also take advantage of a 5-in-1 reflectors lack of rigidity, by shaping it. This will allow you to mould your light, to fill in shadows that may not have been affected by a flat reflector. To do this, simply hold two opposite sides of your reflector and bend it inwards, thus creating a curved surface that will fill in shadows that a flat surface could not reach.

    ten-ways-to-use-reflectors-diagramG

    ten-ways-to-use-reflectors-1817

    ten-ways-to-use-reflectors-G

    Left: no reflector. Right: reflector in place bent to fit.

    Exercise Four – white/silver

    In this example, the light source is coming from behind the subject. The reflector is used parallel to the light source in order to bring detail into the heavy shadows caused by the backlighting technique. While it is possible to use this technique for portraits, it can be tricky. However, it comes into its own in food photography and other still life situations.

    ten-ways-to-use-reflectors-diagramC

    ten-ways-to-use-reflectors-C

    Left: no reflector with strong backlight. Right: with reflector.

    Exercise Five – white/silver

    If your light source is small, and the light is too hard for the effect you are trying to achieve, 5-in-1 reflectors offer a few options to help you soften the light.

    Here, instead of lighting your subject directly with the light source, bounce the light off of the reflector. Doing this effectively increases the size of your light source, thereby softening it. You will lose some of the intensity of the light doing this, and you will need to meter for the reflected light, rather than the output from your flash.

    ten-ways-to-use-reflectors-diagramJ

    ten-ways-to-use-reflectors-J

    Left: direct, small light source. Right: light bounced off white reflector.

    Diffusion

    Exercise Six – diffusion panel

    Another way to soften hard light with a 5-in-1 reflector, is to use the diffusion panel. Simply place the diffusion panel somewhere between your light source and subject, making sure that all of the light is hitting the reflector. Diffusion panels do come with an inherent loss of light. Many are designed to cut down two stops of light, but this will depend on your exact reflector. As such, you will want to calculate your exposure with the diffusion panel in place, before taking any images.

    Where this technique really comes into its own, is that you can move the diffusion panel anywhere between your light source and the subject, without altering your exposure. This allows you to manipulate the shape and quality of your light in moments, without having to further alter your settings.

    ten-ways-to-use-reflectors-diagramI

    ten-ways-to-use-reflectors-I

    Left no diffusion, small hard light source. Right with diffusion panel in place, softens the light.

    Black reflector

    Exercise Seven – black reflector or flag

    For the first use of your flag, use it as you would a white or silver reflector, as in example one above. Doing this with the black side of your reflector will help to deepen, and intensify the shadows on your subject. This technique isn’t as common as the others, but it can be used to great creative effect.

    ten-ways-to-use-reflectors-diagramE


    ten-ways-to-use-reflectors-E-700

    The difference is subtle but look at the shadows.


    Exercise Eight – black reflector or flag

    Instead of reflecting light, you can also use your flag to block, and shape the light in your scene. With the black side of the reflector facing your subject, hold it so that it obscures a large portion of your light source. This technique can be use in lieu of time consuming modifier changes, and can allow for some dramatic lighting effects without a great deal of equipment.

    ten-ways-to-use-reflectors-diagramF

    ten-ways-to-use-reflectors-F

    Left: before. Right: after.

    Exercise Nine – black reflector or flag

    ten-ways-to-use-reflectors-diagramD

    Another use for your flag is to use it as a background. You probably won’t do this very often, as it isn’t an ideal solution in most cases, but in a pinch you can get rid of messy backgrounds with ease.

    ten-ways-to-use-reflectors-D

    Gold reflector

    Exercise Ten – gold

    To be honest, you will probably never want to use a gold reflector. The effect, and the color cast they provide are often far too intense for most purposes. However, with judicious care, they can be used to provide a warm colored rim light. Here, the reflector is placed behind the subject and is reflecting light back onto her hair.

    ten-ways-to-use-reflectors-diagramH

    ten-ways-to-use-reflectors-H

    Left: before. Right: after. Notice the warm tone added to her hair, it’s very subtle.

    Just the beginning

    These 10 examples barely scratch the surface of what can be accomplished with a 5-in-1 reflector. However, by going through these exercises a number of times, with a variety of subjects, you will quickly begin to notice how reflectors modify light in a given situation. From there you will be able to employ them effectively in your photography. Do you have any other uses or tips for using one? Please share in the comments below.

    googletag.cmd.push(function() {
    tablet_slots.push( googletag.defineSlot( “/1005424/_dPSv4_tab-all-article-bottom_(300×250)”, [300, 250], “pb-ad-78623” ).addService( googletag.pubads() ) ); } );

    googletag.cmd.push(function() {
    mobile_slots.push( googletag.defineSlot( “/1005424/_dPSv4_mob-all-article-bottom_(300×250)”, [300, 250], “pb-ad-78158” ).addService( googletag.pubads() ) ); } );

    The post 10 Ways to Use a 5-in-1 Reflector by John McIntire appeared first on Digital Photography School.
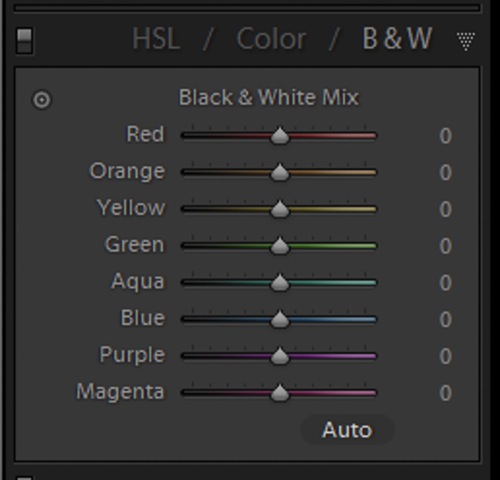

    Digital Photography School

  • Winners of the Portfolio Website CMS Giveaway
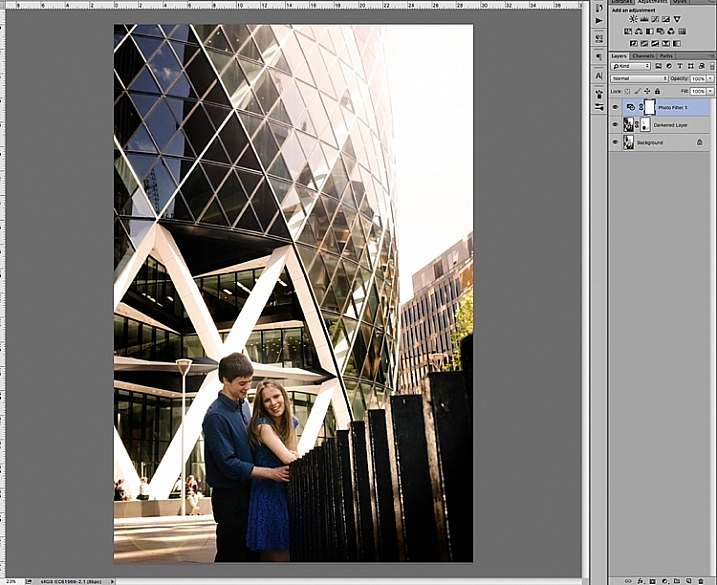
    A big thank you to all entrants of our recent portfolio website CMS giveaway. We were excited to see such a great response, you rock guys! We won’t drag things out any longer. Drumroll please… And the lucky winners of the MotoCMS giveaway are: 1st Place Winner – Wayne Johnson Prize: Full License for MotoCMS 3.0 “I’m Wayne a portrait Continue Reading

    The post Winners of the Portfolio Website CMS Giveaway appeared first on Photodoto.


    Photodoto