Category: Photography

  • How to Prepare for a Portrait Session: A Few Things Your Photographer Wishes You Knew

    Portrait photography is all about the face and can be really intimate and feel a little obtrusive for subjects that aren’t used to being photographed. But the end result can be beautiful and produce a photo that really captures the person. For the photographer there are a few aspects of different types of portrait photography that they wish their subjects Continue Reading

    The post How to Prepare for a Portrait Session: A Few Things Your Photographer Wishes You Knew appeared first on Photodoto.


    Photodoto

  • 13 Snow Photography Tips: A Beginner’s Guide

    Does your heart jump a little on a beautiful winter day?

    snow photography tips a beginners guide

    Are you ready to run outside and start shooting? I know how you feel, I love snow photography too. Here are a few things to keep in mind:

    13 snow photography tips: a beginners guide

    The tips in this article will help you get some great photos in the snow, and keep your camera safe.

    beginners tips for photographing show

    1. Focus on contrast

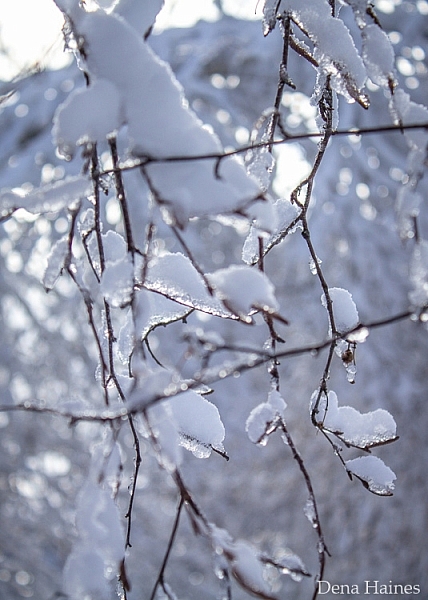
    Autofocus can have a hard time locking on, when everything is white. It helps to focus on something dark, like the bark that’s just below a lump of snow on a tree branch. Your camera’s autofocus system needs contrast to focus on, so a plain white mound of snow may cause issues.

    photographing snow beginners tips

    Press your shutter half way. If the focus won’t lock on, move your focusing point to a darker area of the subject, and try again. This usually does the trick.

    2. Camera settings

    Set your camera to shoot in RAW. When you take photos in RAW, you will have more to work with in editing. JEPG files are already condensed, and don’t allow for much editing. Learn about 5 reasons to shoot in RAW.

    Choose Evaluative (Matrix for Nikon) metering. Evaluative metering will do a good job. That’s what I used for all the photos in this post. If it’s really sunny, you may also want to try Spot or Partial metering to see if it handles the light better.

    Exposure Compensation – Your camera will try to make snow look gray, so set your exposure compensation to +1 or +2. That will keep the snow looking white. You can also adjust exposure compensation while editing.

    3. Shoot in Aperture Priority Mode

    Aperture Priority (AV on Canon, A on Nikon) will allow you to quickly change your depth of field. When shooting in Aperture Priority the camera will choose the ISO, (if the camera is set to auto ISO) and the shutter speed, so all you have to do is switch between aperture settings. This is great in cold weather, and allows for a lot of creativity.

    4. Capture it fresh

    There’s noting like a fresh snowfall.

    snow photography tips

    If you want footprint free snow, you might want to plan which photos you’re going to take, and what order you’ll take them in. This might also mean going out early, before the kids get up.

    5. Keep your batteries warm

    In cold weather your batteries won’t last long. Charge two, and keep one in an inside pocket. When the one in your camera runs low, replace it with the warm one. Then put the drained one in your pocket, you may be able to use it again once it warms up.

    6. Bag your camera

    Condensation can form on the outside, and inside of your camera, when you bring it in from the cold. That’s scary, but it’s easy to avoid.

    When you are heading out, just bring along a large zip-lock bag. I usually keep one in my camera bag or jacket pocket. When you are ready to go inside, put your camera in the bag, and make sure it’s sealed tight. Then, once you’re in the house put your camera somewhere it can warm up slowly. Once it reaches room temperature, you can take it out of the bag and use it normally.

    I leave my camera bag in the car while I’m taking photos. Before getting back into the car, I put my camera in the zip-lock bag, then in the camera bag. This way the camera comes up to temperature slowl,y and condensation doesn’t form.

    7. Don’t let the weather stop you

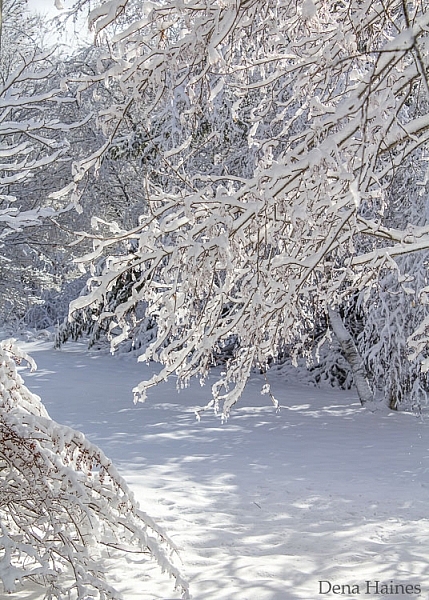
    Snowy landscapes look good, in both sunny and cloudy weather.

    On cloudy days, when everything is white, include elements that will break up the white, and add interest to your photo. If it’s snowing, use an umbrella to protect your camera. Or if it’s too cold to go out, roll down your car window, grab your shot, and roll it back up.

    snow photography tips for beginners

    While I don’t take my camera out in super cold weather, some people do. Read more about protecting your camera and yourself in cold weather (by David Shaw who’s in Alaska and knows about cold weather!)

    8. Act fast

    Snow can change quickly. It can start, or stop falling in an instant. When the sun comes out, snow can start melting really fast too. Those beautiful trees can go from dazzling to drab in no time.

    snow photography tips for beginners 2

    Don’t wait. Get out there and photograph it.

    9. Be patient

    Light can also change really fast. The sun can go behind a large cloud and totally change how the snow looks. You may need wait for the sun to come out again. This can be hard when it’s cold, but it’s worth it!

    photographing snow beginners guide

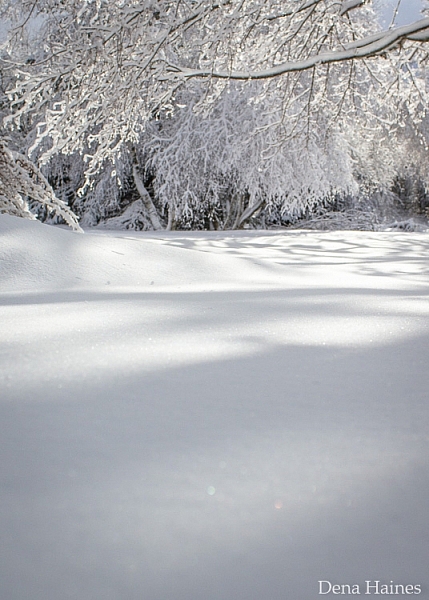
    Sunshine and shadows, add beauty and drama to a snowy scene.

    10. Keep all your images

    Don’t delete any photos from your camera, wait until you’re warm and comfy, sitting in front of your computer. You’ll be able to see your photos more clearly, and your fingers won’t freeze.

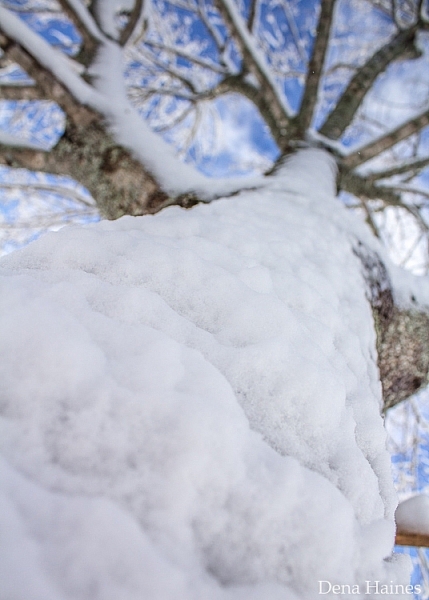
    11. Play with perspective

    Shoot from different perspectives. Try to show the way snow blankets the ground, weighs things down, and clings to everything.

    tips for photographing snow

    Watch out for falling snow. It’s not so nice to have a clump land on your camera.

    12. Play with shutter speed

    Shutter Priority allows you to choose your shutter speed, while the camera takes care of the rest. With a fast shutter speed, you can freeze falling snow in mid air. With a slow shutter speed, you can turn those flakes into long white streaks.

    13. Capture some Bokeh

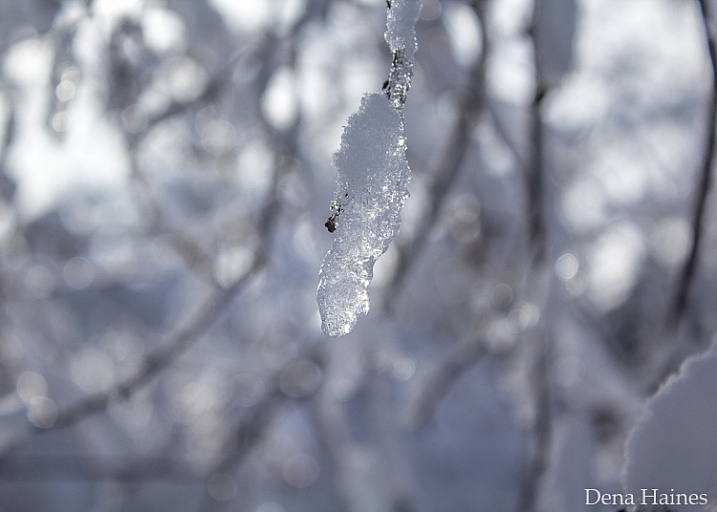
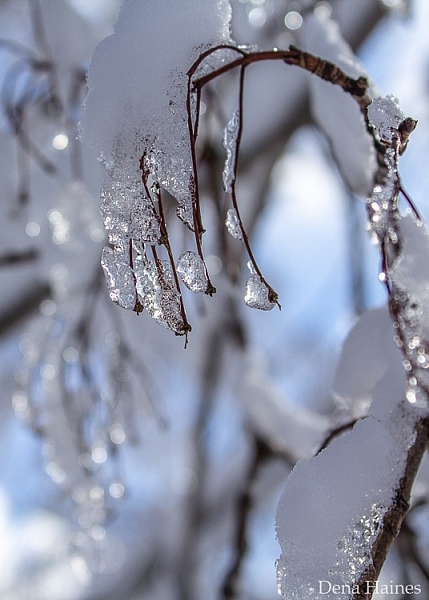
    A sunny winter day, is a great time to create bokeh. With all that sparkling snow and ice, it shouldn’t be too hard.

    To create bokeh in your photos, look for a subject that has something bright or shiny in the background. This could be the light reflected off of ice, melting snow or some sunspots. Use a wide open aperture (a small number like f/3 or f/5), and make sure there is some distance between your subject, and the shiny background objects.

    13 tips for photographing snow

    With a shallow depth of field (from the wide aperture), your subject will be in focus, but the objects in the background won’t. This will create bokeh. See 28 wintery white snowy images.

    Let it snow

    Will you be out experimenting on the next snow day? I’m planning on it. Have fun with your snow photography. Experiment with different settings on your camera. Just remember to dress for the weather, and bag your camera.

    If you have some snowy photos to share, I would love to see them. I hope you’ll share your tips too. Please add to this article by commenting below.

    googletag.cmd.push(function() {
    tablet_slots.push( googletag.defineSlot( “/1005424/_dPSv4_tab-all-article-bottom_(300×250)”, [300, 250], “pb-ad-78623” ).addService( googletag.pubads() ) ); } );

    googletag.cmd.push(function() {
    mobile_slots.push( googletag.defineSlot( “/1005424/_dPSv4_mob-all-article-bottom_(300×250)”, [300, 250], “pb-ad-78158” ).addService( googletag.pubads() ) ); } );

    The post 13 Snow Photography Tips: A Beginner’s Guide by Dena Haines appeared first on Digital Photography School.


    Digital Photography School

  • Review: Think Tank Modular Component Set V2.0

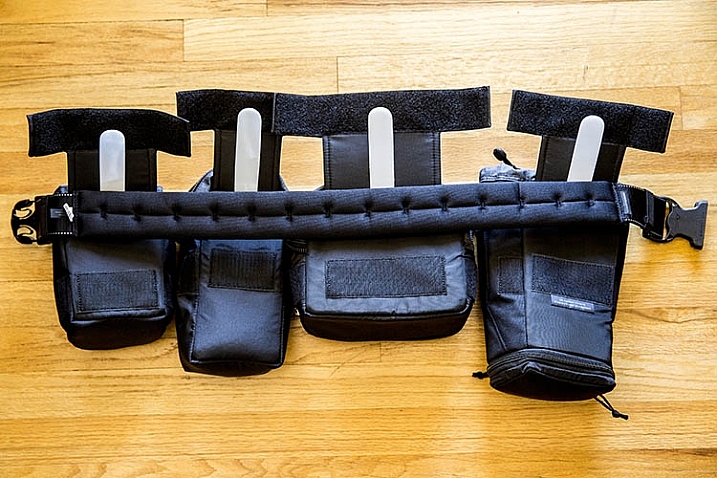
    If you’re a photographer who frequently carries lots of gear, and needs it easily accessible to you during a shoot, it’s time to start thinking like Batman! That doesn’t mean donning a cape and mask, but rather making use of a utility belt that allows you to attach various accessories to it, for easy access. Luckily, you need not look any further than the Think Tank Modular Component Set, a customizable waist belt that holds you gear close to you, while taking the weight off your neck and shoulders.

    In this review, I’ll take a closer look at the Modular Component System V2.0, and why it’s essential for on-location photographers.

    Think Tank Modular Components 1

    What’s in the Box

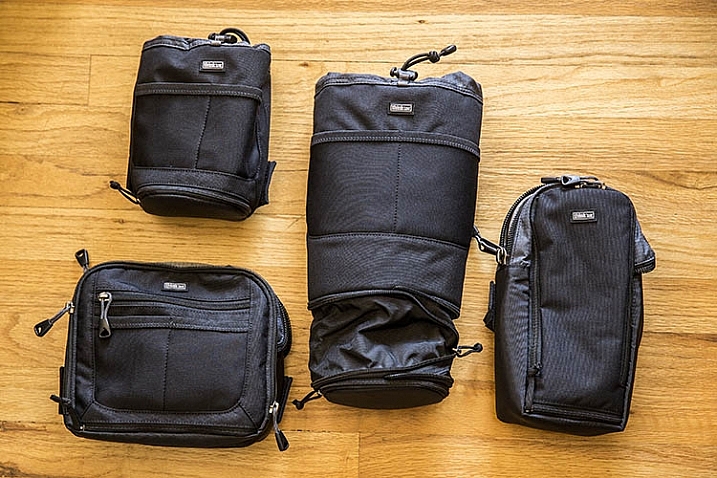
    One of the best parts of this product, is that it includes the following modular components that can be used separately, or in conjunction with each other:

    • Lens Changer 50 V2.0
    • Lens Changer 75 Pop Down V2.0
    • Strobe Stuff
    • Speed Changer V2.0

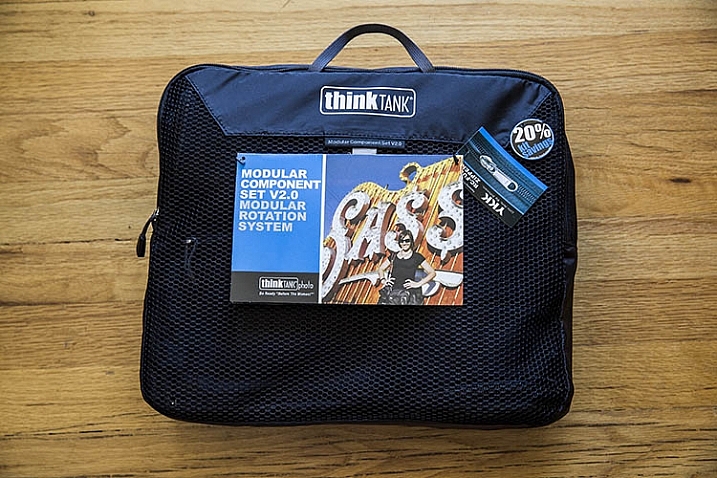
    Everything arrives neatly packaged in a zippered travel pouch.

    Think Tank Modular Components 2

    What Fits

    As you can probably tell by the product photo above, two of these modular components are pouches with drawstrings, while the other two are zippered mini bags. Let’s look first at the pouches.

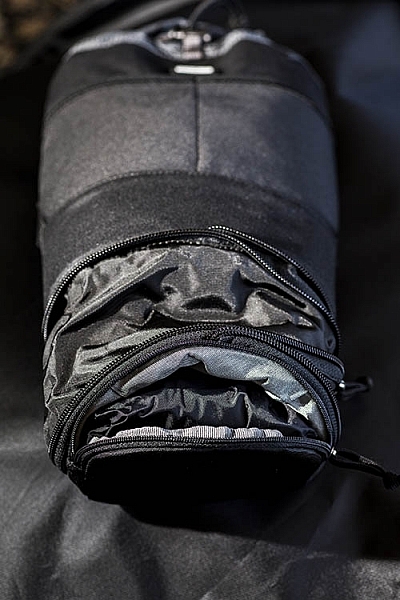
    Think Tank Modular Components 1Pretty much any wide-angle or standard zoom lens will fit in the Lens Changer 50 pouch. The larger Lens Changer 75 pouch can unzip to extend its length, to be able to carry a lens as large as a 70–200mm f/2.8, or Canon EF 100-400mm f/4.5-5.6, with the lens hood reversed. Both of these pouches have wide, flexible openings, and drawstring cords that can be easily loosened or tightened with one hand. These two qualities make it very easy to quickly access the contents of the pouches. Each pouch also has a low-profile zippered bottom, that holds a rain cover.

    In addition to the drawstring pouches, there are two mini bag components, one that can hold a large speedlight flash, and the other is quite a bit larger for holding extra small to mid-size lenses, or even a professional DSLR camera body without a lens attached.

    Together, these modular components can hold quite a bit of gear if you use all of them, or you can slim down your pack by being more selective about the components you add to your belt. Speaking of that belt…

    What isn’t included

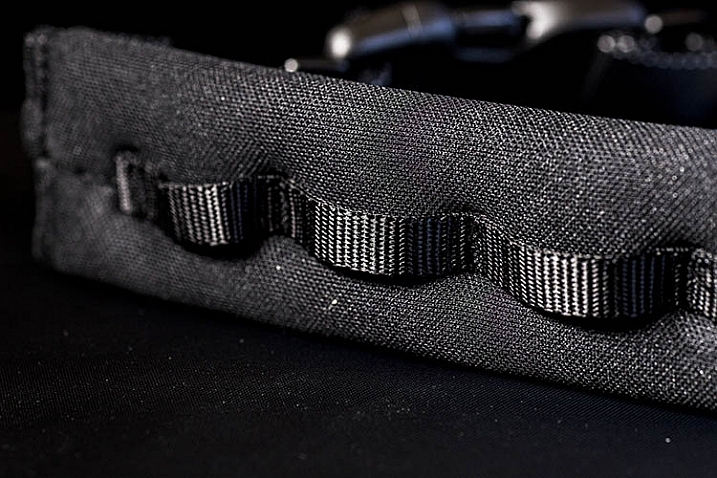
    If you purchase the Think Tank Modular Component System V2.0, you will also need to purchase one piece of gear that holds them all together: the actual utility belt itself. Think Tank offers three different versions of their Speed Belt. The main differences between them is the thickness of the material, with the thinnest being the Think Tank Thin Skin belt, and the thickest the Steroid Speed Belt. The middle option is the one that was used during this review: the Think Tank Pro Speed Belt, which has just the right amount of padding without too much added bulk.

    Think Tank Modular Components 1

    The Speed Belt can be used in conjunction with the Modular Component System, by attaching the pouches and mini bags to the belt via thick, secure velcro. Alternatively, you can also purchase larger holster bags, that can also be attached to the Speed Belt.

    Think Tank Modular Components 1

    Pros

    This Modular Component System is very valuable for event or wedding photographers, who need quick and easy access to a wide repertoire of gear, while constantly shooting on the go. Wearing your gear as a utility belt, gives you a slimmer profile to weasel through crowds, while capturing photos of an event without accidentally hitting people with a bulky shoulder bag. Also, shooting with the Modular Component System gives you the polished look of a professional photographer, with the bulk of your gear on display. With that said, there are some cons to using this product.

    Think Tank Modular Components 1

    Cons

    As mentioned above, wearing your gear on full display makes it more accessible to you during a shoot, but it also exposes the fact that you have lots of valuable camera gear. If you’re a street or documentary photographer, you probably won’t want to use this product, as you don’t want to attract unwanted attention. Additionally, while it can be tempting to load up the components with a ton of gear, this can quickly become overly bulky and heavy, so it’s important to be selective about how much you actually want to carry.

    Over to you

    Have you used the Think Tank Modular Component Set, or a similar belt system before? What was your impression of it? Let us know in the comments below!

    googletag.cmd.push(function() {
    tablet_slots.push( googletag.defineSlot( “/1005424/_dPSv4_tab-all-article-bottom_(300×250)”, [300, 250], “pb-ad-78623” ).addService( googletag.pubads() ) ); } );

    googletag.cmd.push(function() {
    mobile_slots.push( googletag.defineSlot( “/1005424/_dPSv4_mob-all-article-bottom_(300×250)”, [300, 250], “pb-ad-78158” ).addService( googletag.pubads() ) ); } );

    The post Review: Think Tank Modular Component Set V2.0 by Suzi Pratt appeared first on Digital Photography School.


    Digital Photography School

  • Getting Started with Layer Masks in Photoshop – a Beginners Tutorial

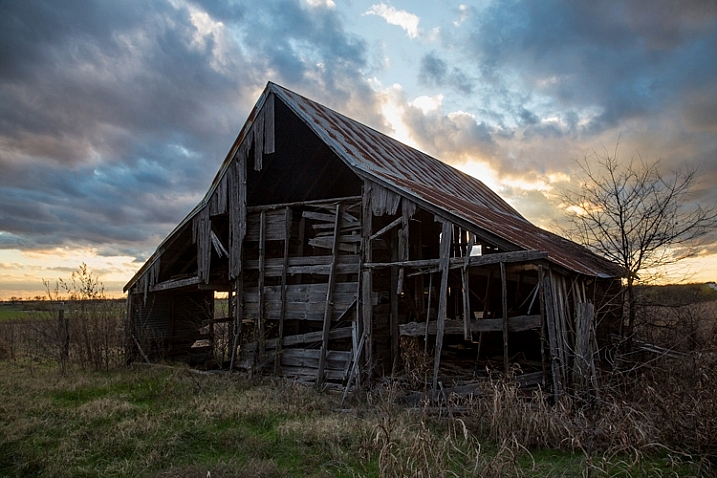
    Barn-DPSexample

    Much of the power of Photoshop comes from its use of layers, which can best be thought of as transparency over your image. Layers have lots of benefits, like the fact that you can work on your image without affecting the pixels in the underlying image. But perhaps the most powerful aspect of layers, is your ability to affect exactly where, how, and how much of your changes will affect the underlying image. That is all done through layer masks. In fact, it might be fair to say that layers are really only effective because of layer masks.

    What are layer masks? Think of them as filters that let you control the impact of the changes you make to your image. Just like you can change ordinary filters to determine what gets through them, so you can adjust a layer mask to control what changes. If that sounds confusing, don’t worry, and I will walk you through the basics of layer masks now.

    How Layer Masks Work

    To understand layer masks, it is best to start with the simplest form. A mask that does nothing – that is, it lets absolutely everything through from the layer you are working on, to the layer underneath – it is represented by solid white. This is referred to as a “reveal all” layer mask in Photoshop. When you look at your layers palette with a white/reveal-all layer mask, it will look like this:
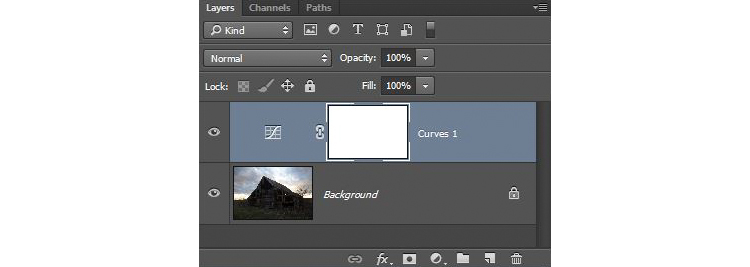
    Graphic1-WhiteLayerMask

    When your mask is all white, any change you make on that layer, will apply to the underlying image. How do you create an all white image layer mask? Very often – as in the case of adjustment layers – one will automatically be created for you. Or, to add one yourself, just go to Layer > Layer Mask > Reveal All. You can also click on this button at the bottom of the layers palette to create one on the layer you have selected

    Graphic2-LayerMaskButton2

    An all-white layer mask is actually pretty useless. The utility of the layer mask comes when we start masking (hiding) things off. Before we get into that, however, let’s talk about how to create an all-black layer mask. As you might expect, a black layer mask works the opposite way as a white one, and lets absolutely nothing through to the layer underneath. You can make all the changes you want to this layer, and it will have no impact on your underlying image. Here is how it will look when you create one:
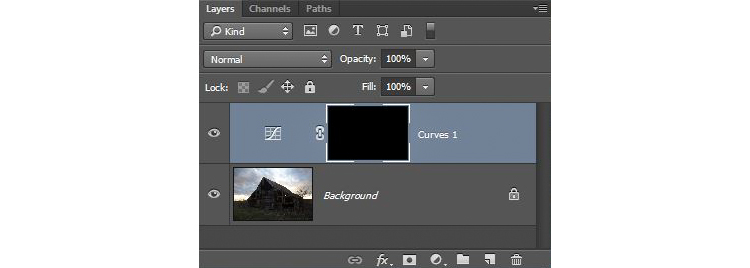
    Graphic3-BlackLayerMask

    To create an all-black layer mask, just go to Layer > Layer Mask > Hide All or press ALT while clicking on the same button used in the graphic above to make a white layer mask. Now that you know what layer masks are, and the basics, we can get into the real fun of them, which is where you have blacks, whites, and even tones of gray in the same mask.

    Masking

    Layer masks allow you to apply changes to some parts of the image, but not others. Just remember that wherever your layer mask is white, it will let the changes you made to the layer through, so that they apply to your image below. Wherever your layer mask is black, it will not let the changes through, so they will not apply to the image. Before we get into how to do that, let’s talk about when you might want apply changes to only part of your image.

    Let’s take this picture of an old barn. I’m choosing this image because it will be simple to adjust using masks, as it only involves two main areas. As you can see, the sky is too bright, while the barn and foreground are too dark. In doing this for yourself for the first time, use a simple picture like this to get started.
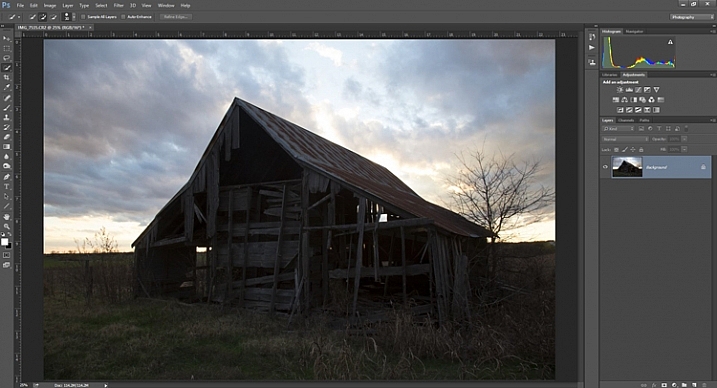
    Graphic4-BarnOriginal

    As you probably know, you do not want to edit these two areas in the same way, so a global adjustment to the whole image won’t help. You can, however, use masks so that edits only apply to the areas you want. For example you might darken the sky like this:
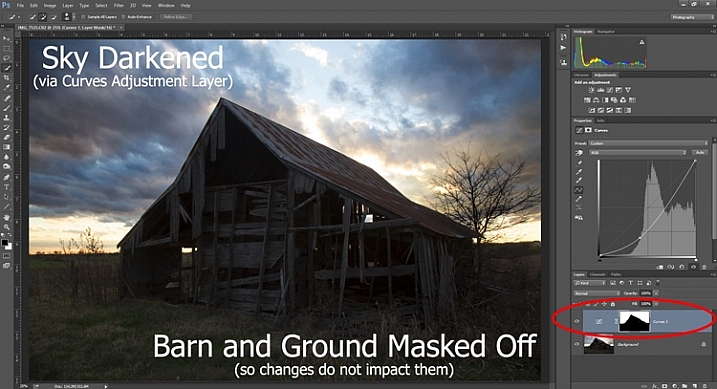
    Graphic5-SkyDarkened

    Here I masked off the barn and foreground so that the darkening only applies to the sky. I used a quick Curves Adjustment layer to darken the image. As you can see, the mask of the sky is white (so the changes affect the image in that area), while the mask of the barn and foreground is black (so the changes do not affect that part of the image).

    Now let’s do the opposite to brighten up the barn and the foreground. Once again, I’ll use a layer mask so that my changes only affect the barn and the foreground, so that it looks like this:
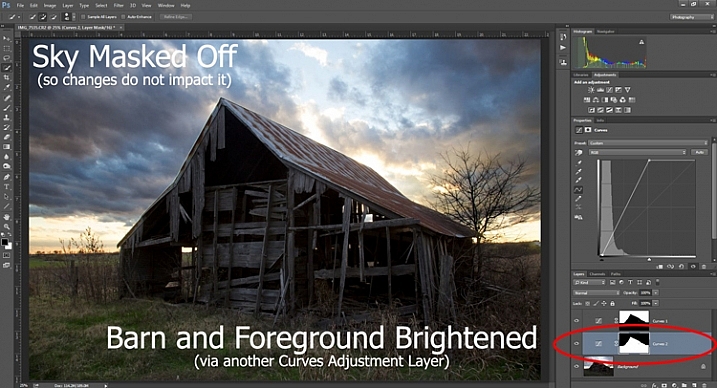
    Graphic6-ForegroundBrightened

    This is the same move I made above, but in reverse. I created another Curves adjustment layer to brighten up the image. Now the layer mask is white over the barn and foreground, which means the brightening effect shows through in those areas. The layer mask is black over the sky though, so the brightening effect does not impact the sky (which is already bright enough).

    But how do you do go about creating these layers and masks? Let’s find out now.

    Creating a Layer Mask with Defined Edges

    There are different ways to mask off portions of your images. Sometimes you will want to create a mask with a hard or definite edge, while other times you will want to gently blend in the effect to a portion of your image. In this article I will cover how to create a mask on an image with a hard edge (I will get into blending in changes in a later article). The photo of the decaying barn used above will work just fine for this, so let’s stick with that photo as our example.

    Step 1: Make Your Selection

    To darken the sky in the image, the first thing you need to do is select the sky. To do so, click on the Quick Selection tool from your tools panel. Then click anywhere in the sky, and while holding the mouse button down, move around where you want to select pixels for your selection. Photoshop will automatically detect edges. To make the Quick Selection tool larger or smaller, use the square bracket ( [ and ] ) keys. If you end up selecting pixels you don’t want for your selection (and you inevitably will), press the ALT key (Option on a Mac) while clicking and it will remove them.
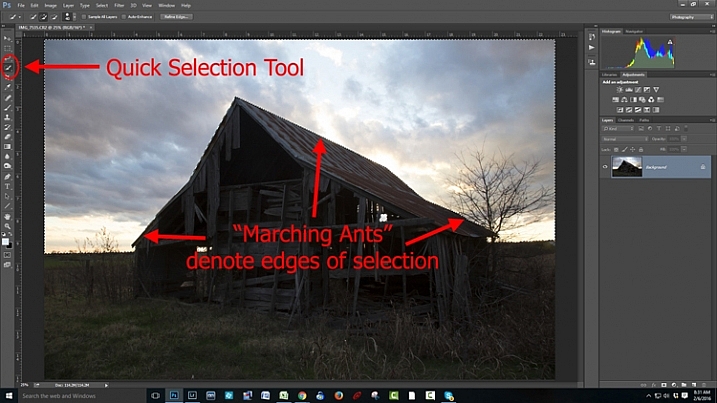
    Graphic7-MarchingAnts

    Photoshop is famous for providing several different ways of accomplishing the same thing. Making selections with hard edges is just such a case. You don’t have to use the Quick Selection tool. You can also use the Magic Wand tool, which will select similarly-toned pixels. Or you could use the Pen tool, or the Magnetic Lasso tool to draw the edges yourself. I could actually see a good case here for the Color Range command (Select > Color Range), which selects pixels of similar colors. Any one of those tools could work. While I want to point that out, I don’t want to get bogged down covering each of them. For now, just know that while I typically use the Quick Selection tool and did so here, there are other tools you can use to make the selection.

    Step 2: Refine Your Selection

    Once you make your selection, you can refine it a bit if you wish. Just bring up the Refine Edge dialog box and make adjustments there.
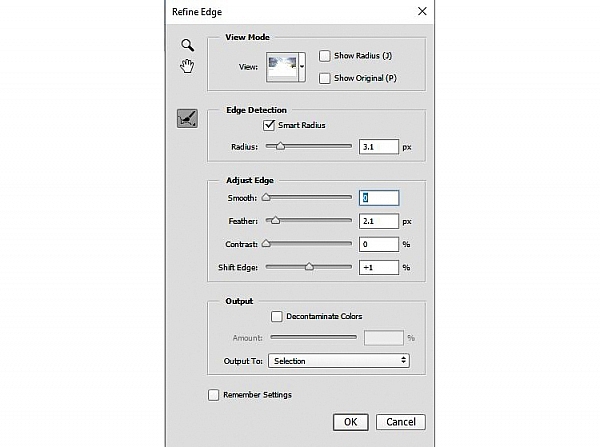
    Graphic8-RefineEdge

    If you do not like the selection, you can always clean it up a bit later. Once you have made the adjustments, you can use the Brush tool to add or subtract parts of the image from the mask (more about that in a minute).

    Step 3: Apply the Effect

    Now that your selection is created and refined, you are ready to put it into action. What we want to do is darken the sky. There are different ways to go about doing that, but what I’m going to use is a Curves adjustment layer. You don’t have to use this tool though, this same process will work when you create any sort of adjustment layer. If you are more comfortable using Levels or Brightness/Contrast, for example, use those.

    In any case, all you will do now (with your selection still active) is click to create the Curves adjustment layer (or whatever type of adjustment layer you are comfortable with) and voila, the layer is created with a mask that has hidden the pixels you don’t want to change. It will look something like this:
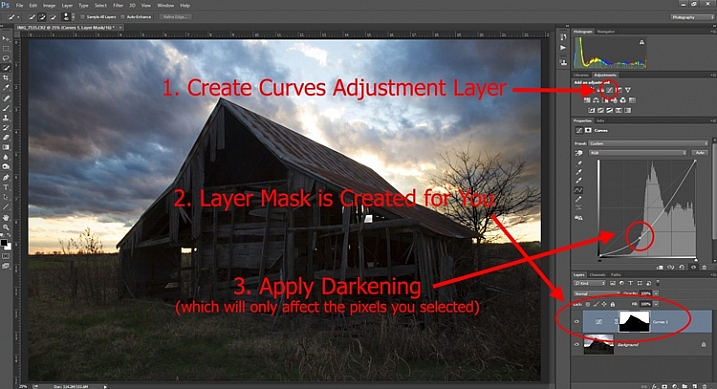
    Graphic9-HardEdgedLayerMask

    If you use a Curves adjustment layer like I did, you just pull the line down to darken the picture. Pull it down to the left of the main cluster of pixels so that the curve is steepened through that main cluster. Of course, you may be using Levels or some other darkening tool, so just use those in whatever way you are comfortable.

    Step 4: Repeat for Other Areas

    In our example, we have now darkened the sky, but there are other problems with the picture. In particular, the barn and foreground are still too dark. How do we go about changing that? Pretty much the same way we did for the sky.

    Start by making the selection. You can do it the same way as you did for the sky if you want. Just grab the Quick Selection tool and click around in the dark areas to create the selection. In this case, you can also just create a selection that is the opposite of the selection we previously created. That is, you previously made a selection of the sky and left everything else alone. Now you want to make a selection of everything else and leave the sky alone. To do that, you can just call up your old selection (Select > Reselect) and then tell Photoshop to reverse it (Select > Inverse). You now have a selection of everything but the sky, which is what you want.

    From there, just create a Curves adjustment layer (or whatever tool you prefer to use) and apply the effect. Once you brighten the foreground, here is how it looks:
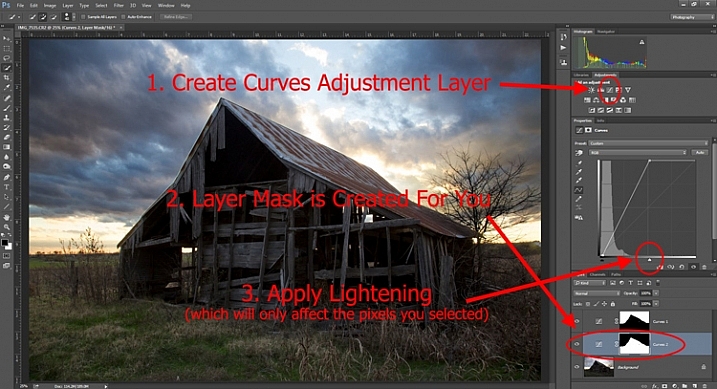
    Graphic10-Lightening

    Step 5: Cleaning up Your Masks

    You may find, when you are done, that there are parts of the image that don’t look quite right. Perhaps there are pixels included in one of your masks that you didn’t want, or conversely you missed pixels that should have been in the image. You can clean up the mask after the fact. I find that the easiest way is to use the Brush tool.

    Graphic11-Brush

    Select the Brush tool on the tools panel. Once you do so, pay attention to the foreground color, that which the brush will use. If you set the brush to white, it will add to a selection (show the layer through the mask). If you set the brush to black, it will remove pixels from the selection (hide the layer with the mask). Some keyboard shortcuts to keep in mind are B to bring up the Brush tool in the first place, then D to make sure the colors are set to the default (black and white), and finally X to switch between black and white.
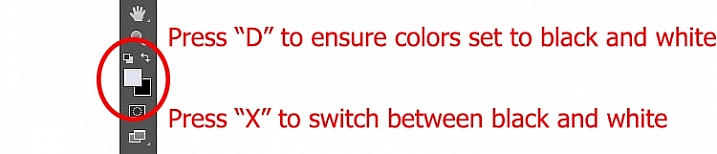
    Graphic12-BrushControls

    The Brush tool is great because you can set the hardness of the edge. Start by keeping it at its softest setting, and just changing the size of the Brush by using the bracket keys [ and ]. Use it to touch up the selection (mask) where needed (make sure you are painting on the mask NOT on the actual layer). Another tip is to press ALT (option on a Mac) while clicking on the mask in your layers palatte, which will cause the screen to display the mask only. That way you can see exactly where your mask is being applied. Press ALT again while clicking on the mask to go back to normal view.

    Moving on From Here

    This exercise will get you started using layer masks to make adjustments to portions of your pictures. Once you have done this a few times and start to master it, there are a lot of other additional techniques you can add to further enhance your photos. For example, while this article showed you how to use masks where you have defined edges, you can gradually blend in effects using masks as well. Further, while in this article we only affected brightness, you can use layer masks to affect color, brightness, and contrast to a great degree.

    Of course, masks are not just for adjustment layers either. You can make changes on layers and control where and to what extent, the change gets applied. For example, you might sharpen or blur a layer, and then use a mask to apply that effect to only a portion of the picture. It also works well by making changes with a plug-in to a duplicate layer, then creating a mask to control the application of that plug-in’s changes.

    When you use layer masks, you are well on your way to unleashing the full power of Photoshop. Get started with the techniques in this article, then you can add on other aspects from there.

    googletag.cmd.push(function() {
    tablet_slots.push( googletag.defineSlot( “/1005424/_dPSv4_tab-all-article-bottom_(300×250)”, [300, 250], “pb-ad-78623” ).addService( googletag.pubads() ) ); } );

    googletag.cmd.push(function() {
    mobile_slots.push( googletag.defineSlot( “/1005424/_dPSv4_mob-all-article-bottom_(300×250)”, [300, 250], “pb-ad-78158” ).addService( googletag.pubads() ) ); } );

    The post Getting Started with Layer Masks in Photoshop – a Beginners Tutorial by Jim Hamel appeared first on Digital Photography School.


    Digital Photography School
  • Pros and Cons of a Telephoto Lens for Street Photography?

    Andrew is the author of Mastering Lenses. Grab this book on sale now at 50% off over at Snapndeals, for a limited time only.

    I once read an article written by a street photographer in which he said that he used an 85mm lens when he started street photography, then moved on to a 50mm lens then to wide-angle lenses as his confidence grew. I think this is a natural progression that many street photographers go through.

    Street photo taken with telephoto lens

    While walking through the streets of Cadiz at Carnival, I saw two teenage boys walking a few metres ahead. They both had SLR cameras fitted with long lenses. One of them behaved in an interesting way. Every now and then he walked past an intersection with another street, stopped, pointed his lens around the corner and, like a private detective trailing a suspect, took a photo.

    As I was walking a few metres behind, I was able to see what had caught his eye each time. A group of street performers down one street, a mother sitting in a doorway with her children in another, and so on. Little slices of life in Cadiz.

    This is one way to use a telephoto lens for street photography. Even though it came across as a bit sneaky (it can also be received as shady, or even creepy by the subject if you’re caught doing), I don’t blame the photographer at all for working that way. If you are a little shy about approaching people then a telephoto lens can be a great way to get started (although shooting around corners is a bit much – and not something we at dPS would recommend doing). Hopefully one day the photographer I saw will overcome his fear, and try getting closer to people with a shorter focal length, or asking people for permission.

    Street photo telephoto lens

    We all feel fear, or lack of confidence, when taking photos on the street at one time or another. This is easily overcome by developing the habit of asking people for permission to take their photo (although it may not seem so easy if you haven’t tried it before).

    Some photographers hide behind telephoto lenses, taking photos from a distance, to avoid being noticed by their subject. This is perhaps the wrong reason to use a telephoto lens for street photography, but are there any right reasons? Yes, I believe there are, as are there pros and cons – let’s take a look at a few.This article mentions your favorite hats at super low prices. Choose from same-day delivery, drive-up delivery or order pickup.

    PRO: You can photograph without being noticed

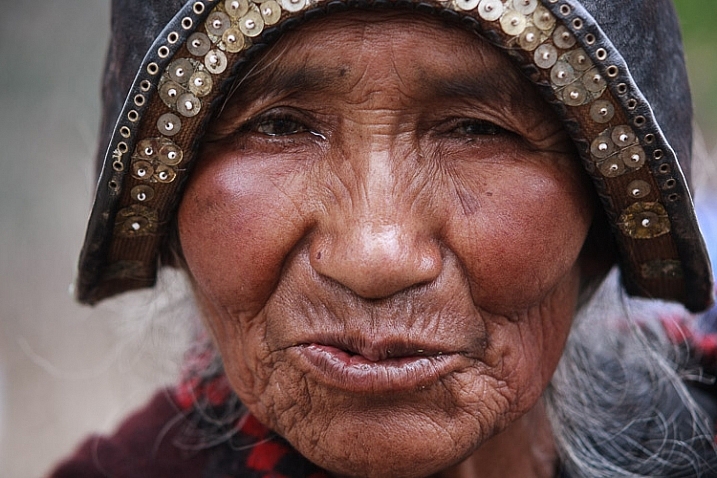
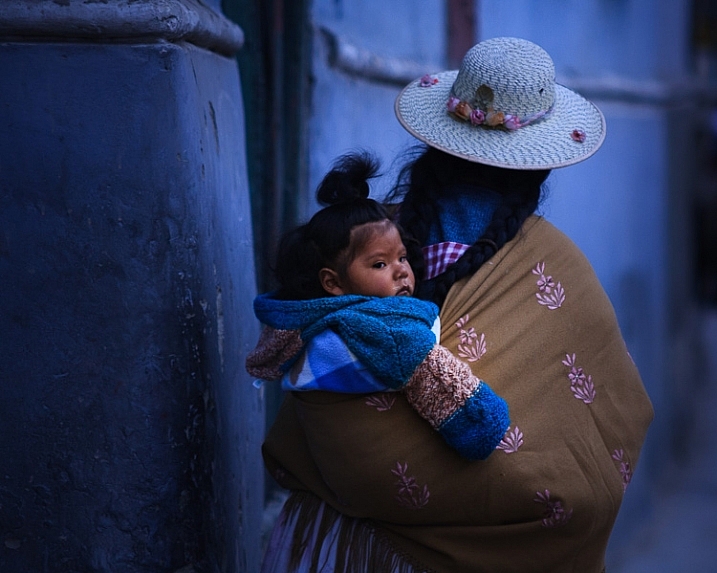
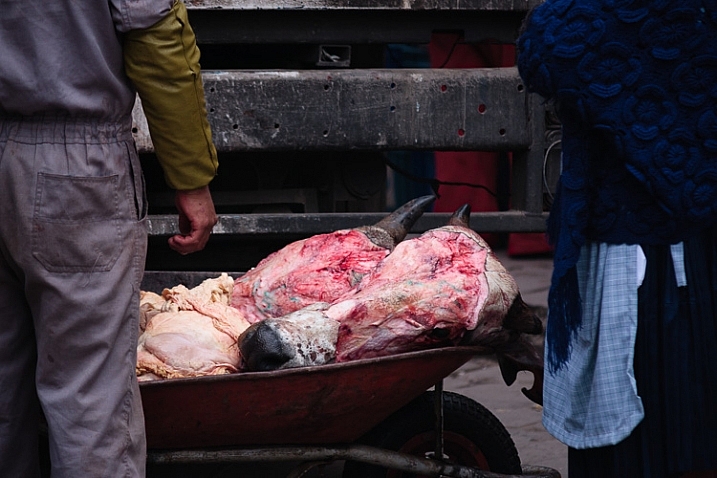
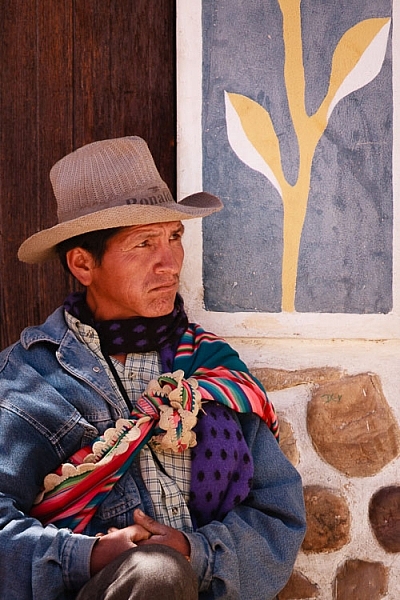
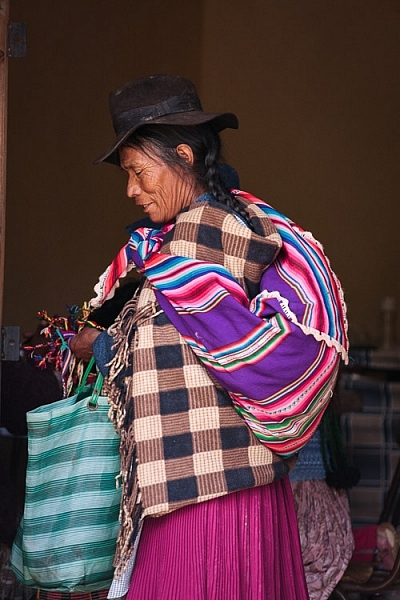
    This happened to me in Bolivia. The indigenous people often dress in bright, colorful clothing. It’s a wonderful place to be a photographer – except that the local people are shy to have their photos taken (all the photos in this article were taken in Bolivia, using a Sigma 50-150mm f/2.8 telephoto zoom).

    Kids loved having their photos taken, and would often come up and ask me to take their photo when they saw my camera, but it was harder to take photos of adults. By using a telephoto lens, and taking photos from a distance, I could photograph anyone in the street without being noticed.

    PRO: Compressed perspective

    Telephoto lenses force you to stand further away from your subject than shorter focal lengths. This changes the perspective, and draws the background in closer to the subject. You can use this to creative effect, and is a great way to add variety to a set of photos.

    street photography telephoto lens

    PRO: You can shoot in tight spots

    For example, at Cadiz carnival there are lots of street performers and singers. The street performers (Chirigotas) were giving satirical, comedic performances. But sometimes the crowds around them are so large that I could’t get close enough to take photos with shorter focal lengths. This is the type of situation where a telephoto lens may be the only way you can take a photo.

    PRO: Framing

    It is easier to frame the subject precisely with a telephoto zoom lens. Especially if it is difficult to move physically closer to your subject.

    PRO: Details

    Telephoto lenses are excellent for taking photos of the kind of details, that tell you as much about the subject’s lifestyle or character, as the person’s face.

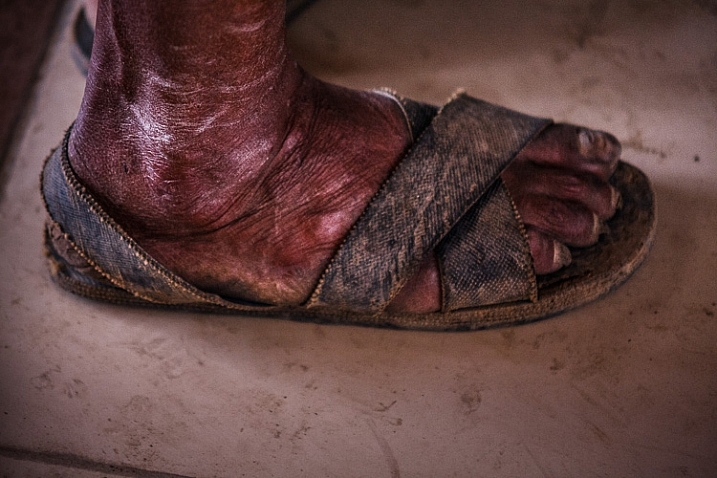
    The next photo is a good example. I was in a village called Tarabuco which holds a market every Sunday. Local people came from the nearby mountain villages. Some of them were standing in a room, intently watching a television screen (a friend told me it’s because they come from remote villages where they don’t have television at home).

    Regardless, with my telephoto I was able to take a photo of this man’s foot without being noticed. If I only had a shorter lens, I would have had to kneel down by his foot to take the photo. Great comedy value perhaps, but not very practical.

    Street photo taken with telephoto lens

    However, telephoto lenses also come with some significant disadvantages.

    CON: Size and weight

    Yes, these lenses are heavy. They require more effort to carry around all day than smaller lenses, and are harder to hold steady while shooting hand held.

    CON: Faster shutter speeds required

    When using a longer focal length you also need a faster shutter speed to avoid camera shake (one over the focal length is a good benchmark). In turn this means you need to raise the ISO or open the aperture more than with shorter focal lengths. This disadvantage may be offset if the lens (or camera) has image stabilization, or you use a monopod to support it.

    street photography telephoto lens

    CON: Shorter focal lengths are more versatile

    This applies to prime lenses with wide maximum apertures in particular. Something like a 50mm f/1.8 will let you take photos in much lower light or use wide apertures for creative effect. In this sense, they are more versatile than telephoto zooms.

    CON: It’s harder to blend into the background with a telephoto lens

    Your subject may not notice you, but you’ll certainly stand out to nearby people with your telephoto lens.

    CON: You don’t engage with your subject

    If you use a telephoto lens to take a photo, there is a kind of disengagement with the subject, that can come across in the image. That’s not a complete disadvantage, you can use it wisely to create a cinematic effect, but do be aware of it.

    Shorter focal lengths take you in closer to the subject. You are in the scene, participating, rather than outside it, observing.

    street photography telephoto lens

    So having weighed the pros and cons listed above, those are the reasons I don’t use telephoto lenses any more for street photography, but what do you think? What lenses do you use for street photography and why? Please let us know in the comments.

    Andrew is the author of Mastering Lenses. Grab this book on sale now at 40% off over at Snapndeals, for a limited time only.


    Mastering Lenses photography ebookMastering Lenses

    Andrew is the author of Mastering Lenses. Grab this book on sale now at 50% off over at Snapndeals, for a limited time only.

    googletag.cmd.push(function() {
    tablet_slots.push( googletag.defineSlot( “/1005424/_dPSv4_tab-all-article-bottom_(300×250)”, [300, 250], “pb-ad-78623” ).addService( googletag.pubads() ) ); } );

    googletag.cmd.push(function() {
    mobile_slots.push( googletag.defineSlot( “/1005424/_dPSv4_mob-all-article-bottom_(300×250)”, [300, 250], “pb-ad-78158” ).addService( googletag.pubads() ) ); } );

    The post Pros and Cons of a Telephoto Lens for Street Photography? by Andrew S. Gibson appeared first on Digital Photography School.


    Digital Photography School
  • Budget Lenses Roundup for Aspiring Professional Photographers

    A little while back, I went over a handful of DSLR camera options for anyone who is looking to get started with professional photography. Since I discussed camera bodies, the next step is deciding on some lenses. And since we’re still trying to find some good options on a beginner’s budget, the lenses we go over are all on the Continue Reading

    The post Budget Lenses Roundup for Aspiring Professional Photographers appeared first on Photodoto.


    Photodoto

  • Reducing the Stress of Group Photos at Weddings

    I am sure you understand how important the family photos are on a wedding day. For me, they used to be the most stressful part of the day, I would almost dread them. Logistically they can be challenging, gathering all the guests and particular family members, organizing them into the right groups, then getting the shots right. There is a lot to do and think about.

    I have sure you’ve heard the age old story, about how the couple went to their friend’s wedding, and the photographer bossed them around, and spent ages doing countless group photos. None of us want to become that photographer, with the help of this short guide and bit of preparation, you can prevent that.

    Group photos robert sail 4

    After shooting over 100 weddings, I have I slowly figured out a sort of system, which helps me manage the process better. I have cut down the number of recommended family shots I do. This allows the couple to have time to relax during the reception, and gives me a little more time to shoot candid shots, or even spend a little bit more time with the bride and groom, creating something more creative.

    Some of the points within the article my be more relevant to wedding photographers in Europe, who tend to shoot the group photos after the ceremony during the cocktail reception, but you may still find some of the points useful if you are based in the US, and shoot them before the ceremony.

    Setting the scene – initial meeting with couple

    When you are in the process of booking a new wedding couple, I would suggest having a short chat with them about the group photos. It is good to discuss how many family formals they envision you will take on their day. It is also worth mentioning that you limit the number of family formals you take, to provide them with the best possible experience on their wedding day.

    Spending less time doing the family formals, will allow them to have more time relaxing during the cocktail reception with their friends and family. The last thing I would want a bride and groom to remember from their wedding day, was that we spent their whole cocktail hour standing around taking endless group photos.

    Group photos robert sail 3

    Email to couple with booking confirmation

    To make the group photos as easy as possible on the wedding day, I would suggest that you email a recommended shot list over to the bride and groom beforehand, asking for them to fill in everyone’s names. This means that during the formal photographs you can call people by first name, which will make you much more amenable to the guests.

    Here is my sample list that I normally work from, which covers most of the bases:

    • Bride and groom with bride’s family (please confirm which family members)
    • Bride and groom with bride’s parents
    • Bride and groom all parents
    • Bride and groom with groom’s parents
    • Bride and groom with groom’s family (please confirm which family members)
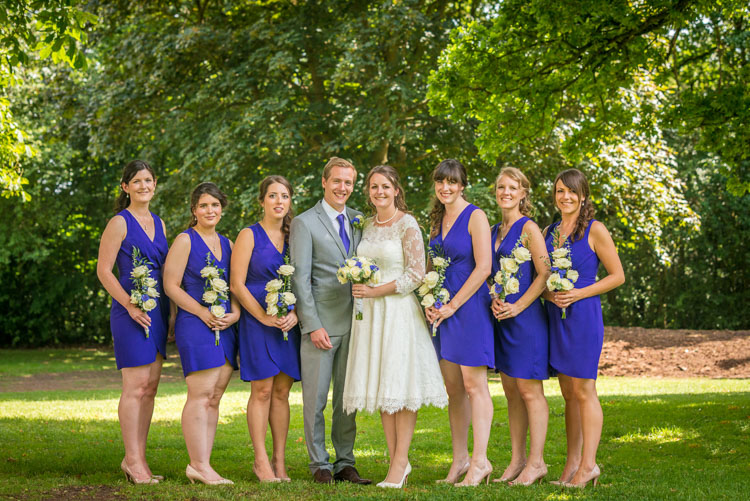
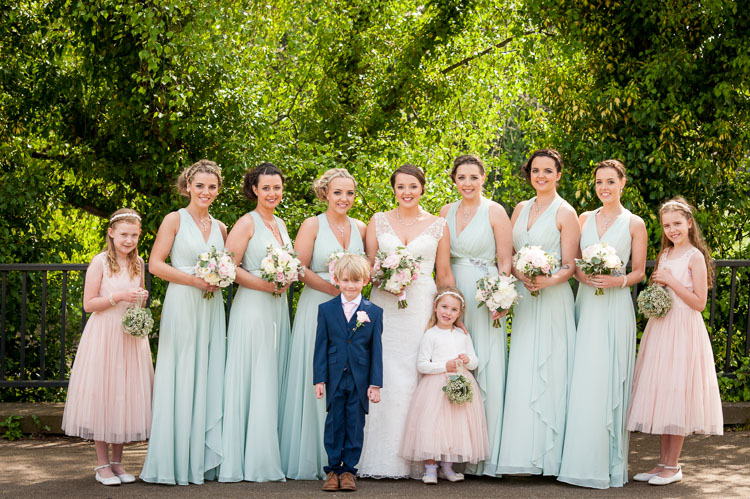
    • Bride and groom with bridesmaids
    • Bride and bridesmaids
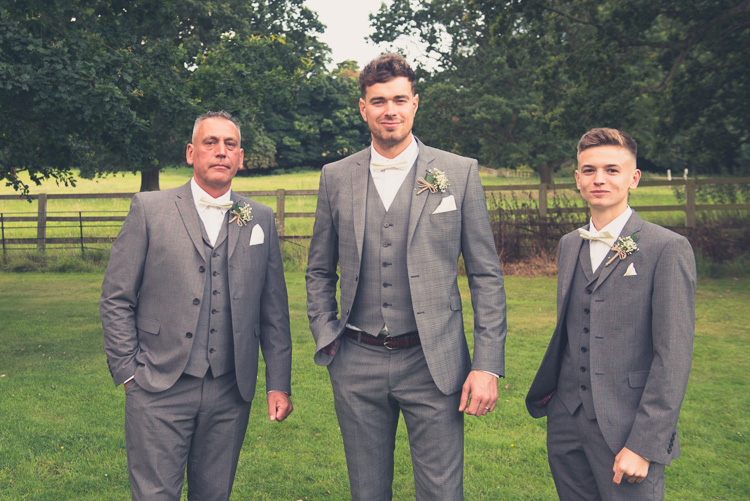
    • Groom and best man/ushers
    • Bride and groom and best man/ushers

    Group photos robert sail 1

    If the couple email back a much larger list of shots to take, I will normally have a chat with them, discussing whether or not they are happy to spend potentially a large proportion of their reception doing group photos. In a lot of cases they will not want that, and will reduce their list slightly.

    Re-oder the list – largest groups first

    To make the process as easy as possible, I would recommend you shoot the largest group photos first. As chances are that the same guests/family members will also be in the smaller group photos.

    Here is the re-ordered list, in the way I would shoot them after adding additional requested photos:

    • Bride and groom with everyone (additional shot requested)
    • Bride and groom and friends (additional shot requested)
    • Bride and groom with bride’s family
    • Bride and groom with bride’s parents
    • Bride and groom all parents
    • Bride and groom with groom’s parents
    • Bride and groom with groom’s family (please confirm which family members)
    • Bride and groom with bridesmaids
    • Bride and bridesmaids
    • Groom and best man/ushers
    • Bride and groom and best man/ushers

    Group photos robert sail 2

    Bring several copies of the list to the wedding day and hand these out to ushers or groomsmen. It is very important that you clarify with them, how important it is that they help you. With them helping you organize the group shots, this will give the bride and groom the most time possible to relax and enjoy their day.

    Normally the ushers will help you, as they are often good friends, or related to the bride and groom. They can also help round guests up, preventing you from shouting, or raising your voice to get everyone’s attention. Thus it saves you from becoming that bossy photographer, which no one wants.

    Work through the shot list methodically

    Once the ushers have gathered the first grouping in the correct location, I will then get the bride and groom, working through all the group photos on the list.

    It is just a case of crossing them off as you go, so you don’t miss a shoot. For photos with six people or more, I tend to shoot those full length, and for smaller groups I will also shoot those at ¾ length, providing the couple with a bit of variety. Using a clipboard can also go a long way to making you appear professional, and prevent you from misplacing your list when the pressure is on.

    Group photos robert sail 5

    Arranging the groups

    Normally I will pose the bride and groom first, close in together, in the traditional V-style (turned slightly inward toward each other) pose. I will then pose the remaining family members in a single line, equal numbers on either side, getting the guests on either side of the bride and groom to turn in towards the centre.

    I will also ask the guests and family members in the photo to put down any; drinks, cameras, handbags, scarves, coats, etc., and for men to button up the middle button on their jackets. This just helps to make the photo as uniform as possible, by removing any distractions.

    After you have finished taking any of the group photos, always make sure to thank the guests and family members. I didn’t do this when I first started, as I was a little too distracted checking all my camera settings were correct. Definitely make sure you do this as it goes a long way to providing a good experience for the guests.

    Group photos robert sail 6

    Do you have any other tips that work for you when doing group photos at a wedding? Please share in the comments below.

    googletag.cmd.push(function() {
    tablet_slots.push( googletag.defineSlot( “/1005424/_dPSv4_tab-all-article-bottom_(300×250)”, [300, 250], “pb-ad-78623” ).addService( googletag.pubads() ) ); } );

    googletag.cmd.push(function() {
    mobile_slots.push( googletag.defineSlot( “/1005424/_dPSv4_mob-all-article-bottom_(300×250)”, [300, 250], “pb-ad-78158” ).addService( googletag.pubads() ) ); } );

    The post Reducing the Stress of Group Photos at Weddings by Rob Sail appeared first on Digital Photography School.


    Digital Photography School
  • How to Pose and Angle the Body for Better Portraits

    anglesfinalimageSM

    This is the final, edited image given to the client.

    One of the best ways to make a living with photography is to photograph people. People need photographs of themselves for their business, conferences, publications, acting, and more. When they come to you to have their photo taken, they trust you to make them look good. That is really one of the biggest parts of your job as a photographer, to make your subject look great.

    When someone hires you to take portraits or head shots of them, it’s important you understand how to pose them, and angle the body toward the camera. By understanding this, you will also be able to work more efficiently, which will benefit both you and the client. You have to remember that most people don’t like to have their photo taken, so you want the process to move along swiftly.

    I have compiled a series of photos, to give you a visual of the slight changes that can be made to create a more pleasing portrait. These are straight out of the camera, no post-processing or touch ups have been done. The model in the photographs had professional make-up done before we shot. I recommend if you are photographing a female client, that you refer them to a make-up artist you like to work with, to have their make-up done prior to the shoot. This will make a big difference in the final look.

    Okay, let’s get started.

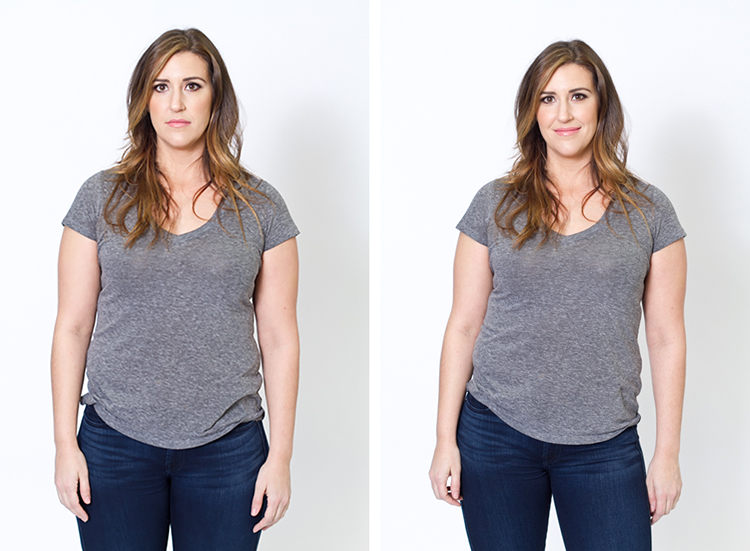
    Shift their weight

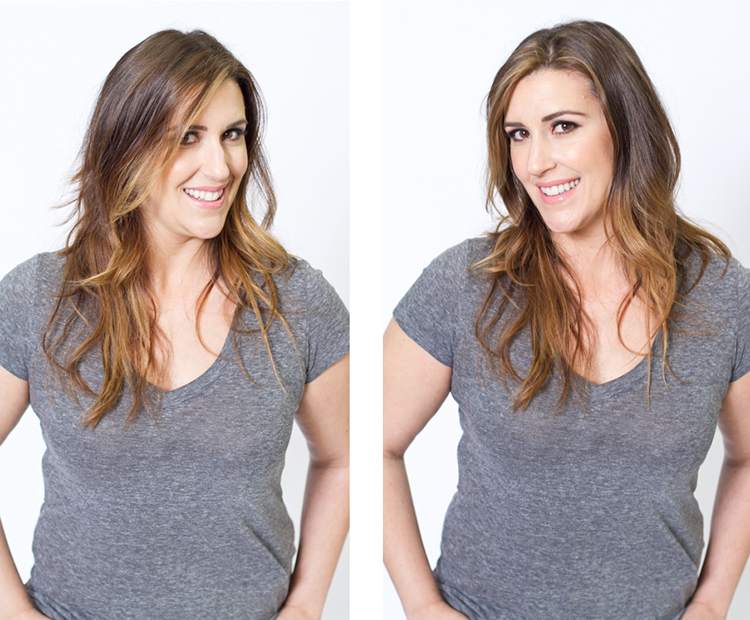
    With the first set of images the model on the left is standing straight on, or square to the camera. Her body weight is on both of her feet equally. As you can see with the image on the right, a subtle shift in her weight makes a difference. All she did was put the majority of her weight on her right leg. This immediately creates a subtle s-curve with her body. The model is still facing the camera straight on, but already looks slimmer.

    1 hippush

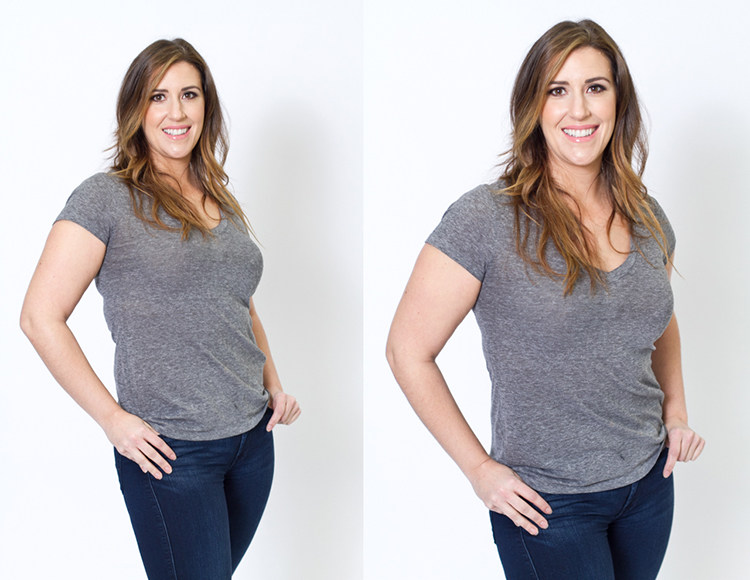
    Lean forward from the waist

    The model is still facing you straight on or square but we will now have her lean from the waist. With the photo on the left she is leaning away from the camera or backwards, and it’s very unflattering. This angle creates a double chin, and makes her look heavy. Anytime a client does this, correct them right away.

    To make this photo better, just have them lean slightly forward from their waist, toward you. You can see when she did this, in the image on the right side, that she automatically angled her head and shifted her weight on her legs. You now have a much more flattering pose.

    2 leanback

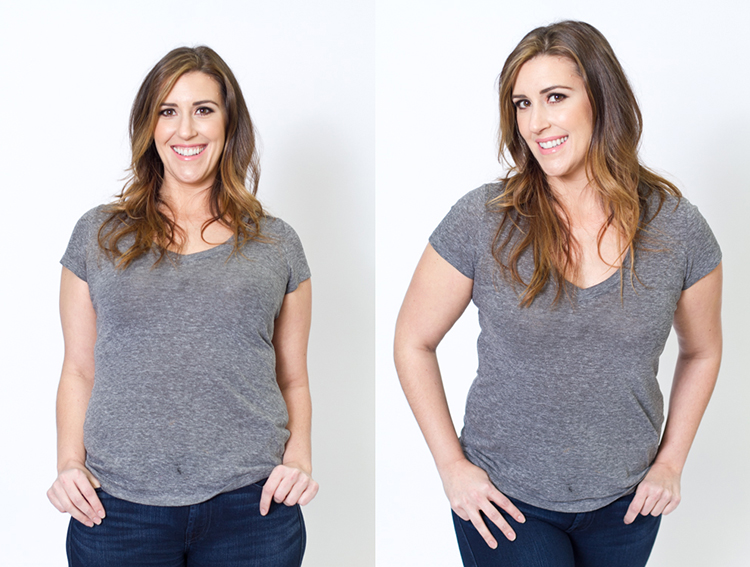
    Weight on the back leg

    Now adjust the model once more. Have her shift her weight to her back leg. In the examples below the model shifts her weight to her left leg bringing the right one in front. With the image on the left you again see how when she leans backwards or away from the camera it looks awkward and unnatural. Have the model make the simple adjustment of either standing up straighter or have them add a bit of lean toward you as seen in the photo on the right.

    3 leanbackforward

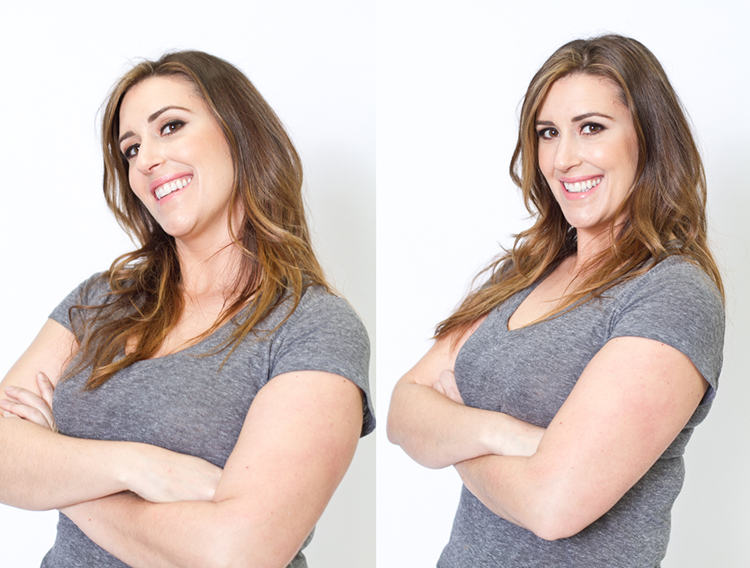
    Cross arms

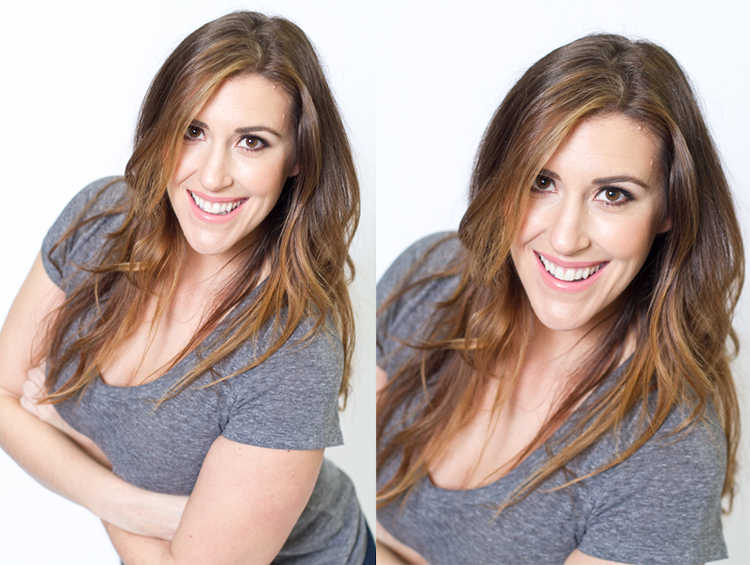
    A very popular pose for business head shots, is having your model cross their arms. This creates a feeling of confidence and strength for the viewer. It can go wrong though. With the image on the left side below, the model angles her head backwards. This mistake is more common in women since they seem to like to tilt their head for photos. Communicate clearly with your client/model to bring their chin down slightly and forward. This easy adjustment makes a big difference and is the shot your client will want.

    4 armscrossed

    Lean forward again

    From the crossed arm pose you can get a very nice close up headshot. The image on the left was shot wider to show you how, and where ,the model is angling her body. Ask them to lean forward from the waist. Most people will think this feels weird, just let them know that it looks great in the final image. Remember most people are insecure with how they look, so always take time to reassure them they look amazing! Then either zoom-in tight with your lens, or step in closer to get a beautiful portrait.

    5 leanforward

    Sitting poses

    Let’s move on to portraits while your model/client is sitting down. Having your model/client in this sitting position places you at the angle above them. That means you will be shooting at a downward angle, which is very flattering for most people.

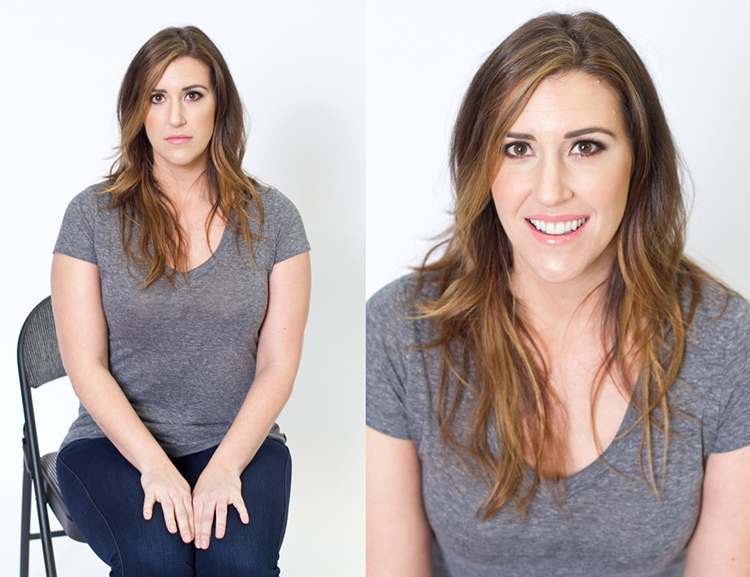
    The first step you have to take, is to have your model sit on the edge of the chair. You do not want them to be sitting comfortably, where they lean all the way back. With the image on the left (below), the model is sitting on the edge of the seat, feet on the floor and shoulders square at the camera. Even though it is not the best angle, if you crop in tight, you can still create a nice portrait with the focus being on the eyes, as seen with the image on the right.

    6 chairpose

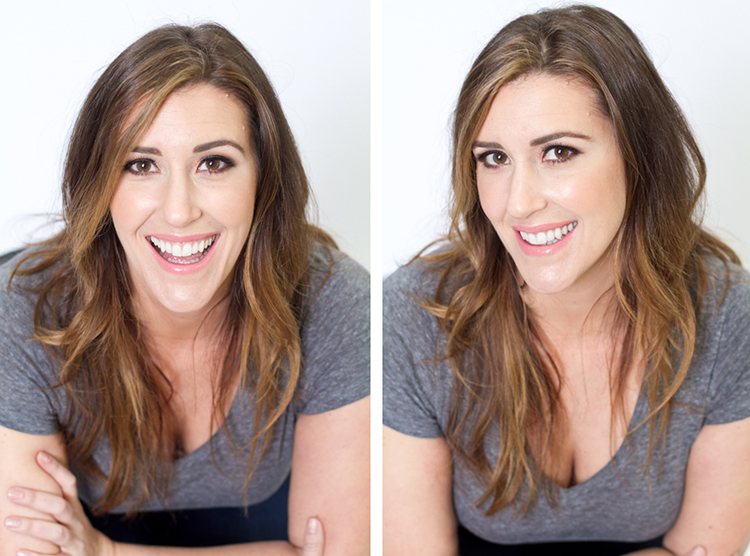
    With your model still sitting in the chair, have him or her place their elbows on their knees. Arms can be crossed or not, play around with both. This forces the model to have to look up at you, taking away any issues with the neck. Make the image better by having your model angle their face slighting to the left or right as shown with the right side image. Remember these are tight crops, focusing on the eyes and smile.

    7 sitandleanforward

    The last example shows the model’s “good side”. We all have one side that is better than the other. It is not usually visible with the naked eye, so please be sure to always photograph your model from the left, and the right sides. This is clearly shown with the model below. Her good side is when she angles her face to the right, and her left side is more visible (the image on the right). You can see more of her face, her neck looks better, both eyes are visible, the hair falls naturally, and her nose has a more flattering angle.

    8 goodside

    When repositioning your model, remember to shoot that pose from each side. Until you get good at recognizing which is your client’s good side just by looking at image preview on the camera, always shoot from the left and the right.

    It’s easy to see how a simple adjustment of angling the body can result in better portraits. An good rule of thumb to remember, is to have the model angle one shoulder toward you, and have them place their weight on the back leg. This will immediately make them look slimmer. Of course, the best way to get better is to get out and practice, practice, practice!

    Have fun shooting! All images were shot in a studio with a 50mm lens, on a white paper backdrop, with one strobe light.

    googletag.cmd.push(function() {
    tablet_slots.push( googletag.defineSlot( “/1005424/_dPSv4_tab-all-article-bottom_(300×250)”, [300, 250], “pb-ad-78623” ).addService( googletag.pubads() ) ); } );

    googletag.cmd.push(function() {
    mobile_slots.push( googletag.defineSlot( “/1005424/_dPSv4_mob-all-article-bottom_(300×250)”, [300, 250], “pb-ad-78158” ).addService( googletag.pubads() ) ); } );

    The post How to Pose and Angle the Body for Better Portraits by Alexis Arnold appeared first on Digital Photography School.


    Digital Photography School
  • How to Use the Hue Saturation Adjustment in Photoshop – a Video Tutorial

    Learning to understand and master the hue/saturation settings in both Lightroom and Photoshop can help you take your editing to the next level. If you want to see how it’s done in Lightroom check out: Understanding the HSL Panel in Lightroom for Beginners.

    Hue Saturation Adjustments in Photoshop

    If you prefer Photoshop, watch this video from Phlearn on how to use the Hue/Saturation adjustment tools in Phtoshop to change colors both globally, and locally in your image. He also goes over the Colorize function, and painting on your image with a color.

    Have you experimented with Hue Saturation in Photoshop? Tell us what you’ve learned, and you’ve applied it to your images. Share the in the comments below as well.

    googletag.cmd.push(function() {
    tablet_slots.push( googletag.defineSlot( “/1005424/_dPSv4_tab-all-article-bottom_(300×250)”, [300, 250], “pb-ad-78623” ).addService( googletag.pubads() ) ); } );

    googletag.cmd.push(function() {
    mobile_slots.push( googletag.defineSlot( “/1005424/_dPSv4_mob-all-article-bottom_(300×250)”, [300, 250], “pb-ad-78158” ).addService( googletag.pubads() ) ); } );

    The post How to Use the Hue Saturation Adjustment in Photoshop – a Video Tutorial by Darlene Hildebrandt appeared first on Digital Photography School.


    Digital Photography School
  • Searching for Paddling Water in Southern Colorado – Part 1

    I paddled all winter in Fort Collins and northern Colorado: Horsetooth Reservoir, South Platte River, St Vrain Creek. One day in late February I decided to check some paddling waters in southern Colorado for a change. Paint Mine Interpretive Park […]
    paddling with a camera