Category: Photography

  • How to Use Leading Lines Effectively in Landscape Photography

    Leading lines composition technique is the easiest to understand and apply in landscape photography.

    In fact, we compose some photographs using leading lines unknowingly! You may have done that too, it comes to us naturally. Let me show you, using an example.

    Imagine you are driving through a forest, and you see beautiful line of trees on either side of the road. The autumn leaves are so breathtakingly colorful, that you couldn’t help but pull your car to a side. You want to capture that beautiful moment in your camera. Now…how would you photograph it?

    Would you stand parallel to the road and just take trees on one side of the road, or would you consider taking a photograph standing right in the middle of the road, with trees on either side?
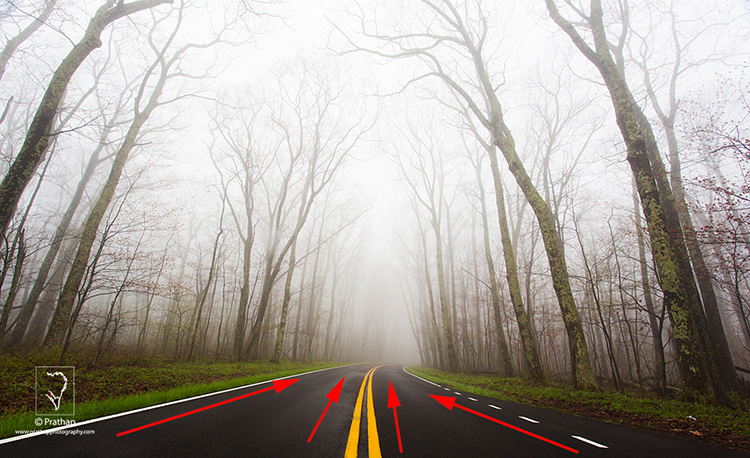
    01 Leading Lines Composition Techniques Landscape Photography by Prathap Skyline Drive

    Invariably, you would likely consider the latter approach. Right? Of course, you don’t want to stand in the middle of a busy road, just be careful when you do it. Don’t hang me for this idea.

    When you photograph the road running from the bottom, to the center of the image, you are using the leading lines composition technique, and the road serves as the line.

    Leading Lines

    Simply put, a leading line is a one that leads you from one point to another in your image. Our eyes naturally follow the line unconsciously.

    Check it out now. Your eye will invariably follow the line from left to right (or right to left). Look at the examples below. Your eye connects the dot subconsciously. You make a line, a triangle, and a square! That’s the power of the line.

    This very nature of ours is exploited in photography, by composing an image using leading lines. By using this technique, you can force the viewer to follow the line, taking them on a visual journey. The journey becomes more interesting when you have some high drama surrounding the line.
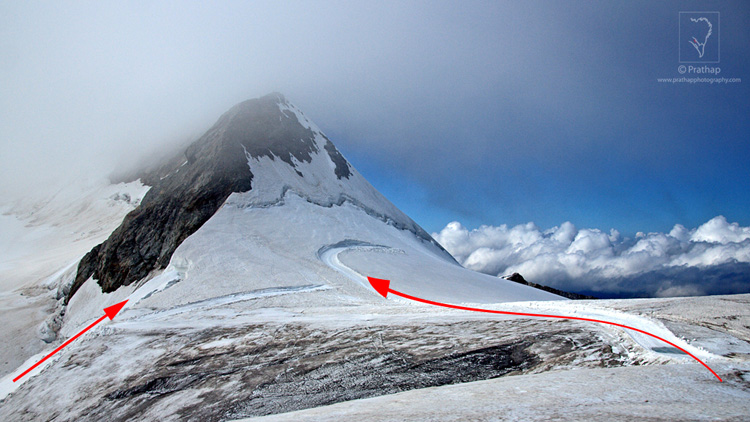
    08 Leading Lines Composition Techniques Landscape Photography by Prathap Swiss Alps

    It is one of the simplest, and most powerful composition techniques used in the landscape photography. Landscape photographers always look for leading lines in nature, to create a sense of depth in the image, and also to lead the viewer to the main subject of interest.

    The idea is to lead the viewer into the scene with the help of literal, or imaginary/implied lines, in the scene. The photograph becomes much more interesting when this line leads the viewer to the main subject of interest, or an anchor point.

    Some of the important aspects of using leading lines in composition are:

    • Leads the viewer into the photograph.
    • Leads the viewer from one point to another.
    • Leads the viewer to the main subject of interest.
    • Creates the illusion of depth, that is much needed in landscape photographs.

    You can make most the compelling landscape photographs, by combining leading line composition technique, with the Rule of Thirds. Below is one such example where I have used leading lines to guide the viewer from the foreground, all the way to the background. Also, I have placed the horizon on the upper third of the frame, following the Rule of Thirds, and creating a dynamic landscape photograph.
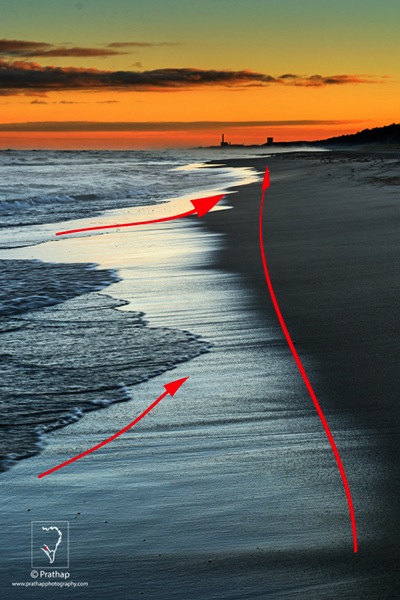
    02 Leading Lines Composition Techniques Landscape Photography by Prathap Indiana Dunes State Park Beach

    The beauty of nature is that there are plenty of elements in nature which can be used as leading lines:

    • Roads
    • Railway tracks
    • Boardwalks
    • Pathways
    • Waterfalls
    • Streams
    • Shorelines
    • Series of trees, poles, etc.
    • Fencing
    • Pebbles or rocks on the shoreline

    The list can go on. It’s amazingly simple to use leading lines in your landscape photographs, you just have to look around.

    Types of Leading Lines

    Leading lines can be straight or curved, and straight lines can also be horizontal, vertical, or diagonal.

    A horizontal line induces a feeling of calmness, whereas a vertical line represents strength.
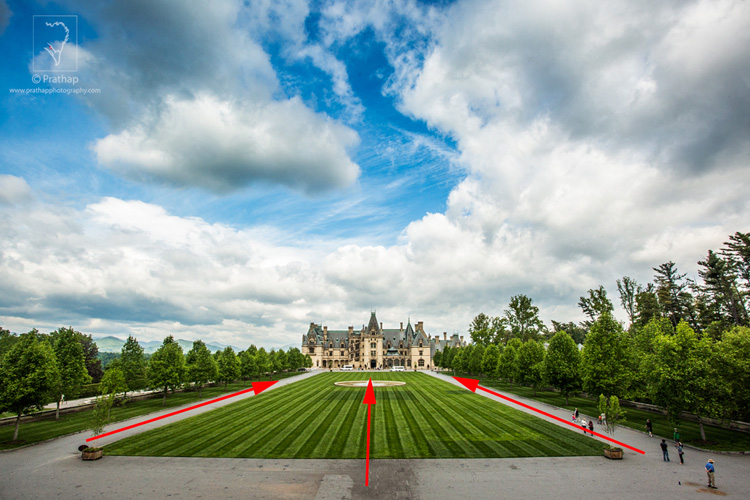
    03 Leading Lines Composition Techniques Landscape Photography by Prathap Biltmore Estate

    Diagonal lines can be very interesting as they represent energy. If used properly, diagonal lines can make a dull image look more compelling.
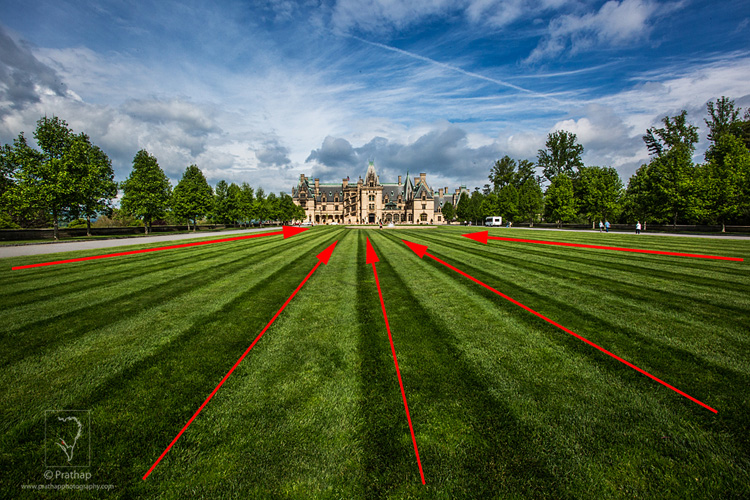
    04 Leading Lines Composition Techniques Landscape Photography by Prathap Biltmore Estate Closeup

    A curved line makes it for an interesting composition, as it spirals around the frame asking for more attention. The viewer will eventually scan more parts of the image.
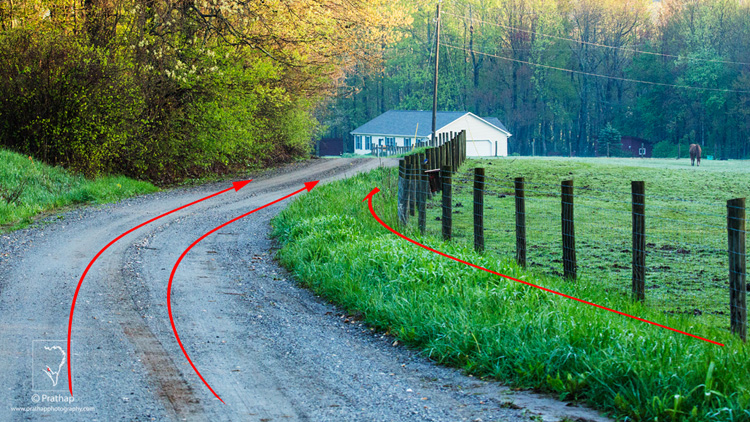
    05 Leading Lines Composition Techniques Landscape Photography by Prathap Blue ridge Parkway Countryside

    An s-curve is predominantly preferred by many landscape photographers, for its ability to connect many parts of the image. It gives a soothing feeling in the viewer.
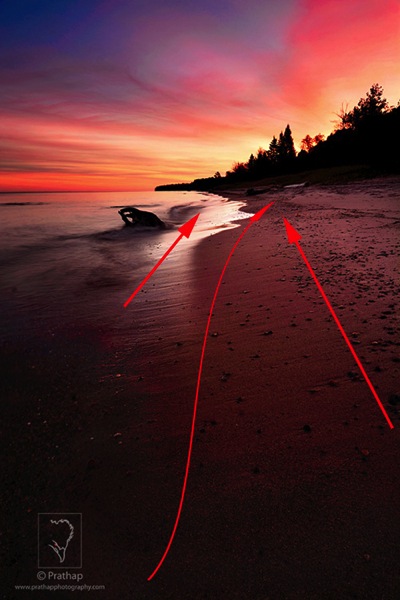
    06 Leading Lines Composition Techniques Landscape Photography by Prathap Beautiful Sunrise in Lake Superior

    A tighter curve, however, might induce sense of danger.
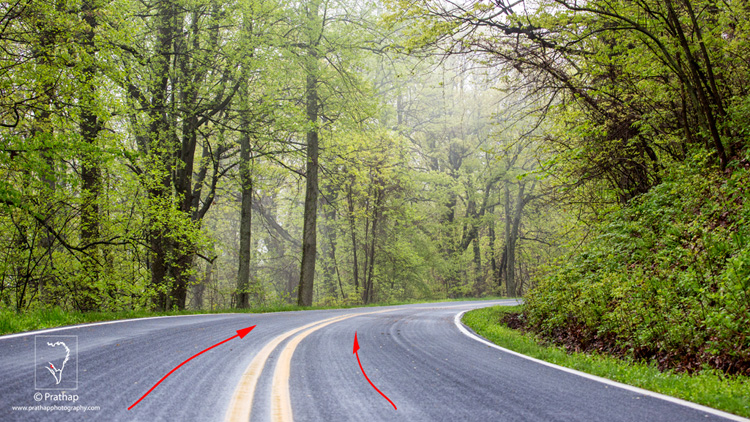
    07 Leading Lines Composition Techniques Landscape Photography by Prathap Blue ridge Parkway

    The most important point is to use the leading lines to direct the viewer into the scene. It wouldn’t make much sense, or be effective, if it leads the viewer out of the scene.

    Conclusion

    Leading line photographic composition is the most powerful natural technique a landscape photographer can use to lead the viewer into the photograph. When combined with the Rule of Thirds, you can make some compelling photographs.

    It is by far the easiest method to create a 3-dimensional effect, in a 2-dimensional photograph. Landscape photographers use this very effectively to force the viewer to scan the photograph from foreground to background.

    “Lead the viewer in to the scene, not out of the scene.”

    Embrace it now, and see how it transforms your landscape photographs into something more realistic and interesting. Think photography! Think Simple!

    How do you use leading lines in your photography? Please share in the comments below.

    googletag.cmd.push(function() {
    tablet_slots.push( googletag.defineSlot( “/1005424/_dPSv4_tab-all-article-bottom_(300×250)”, [300, 250], “pb-ad-78623” ).addService( googletag.pubads() ) ); } );

    googletag.cmd.push(function() {
    mobile_slots.push( googletag.defineSlot( “/1005424/_dPSv4_mob-all-article-bottom_(300×250)”, [300, 250], “pb-ad-78158” ).addService( googletag.pubads() ) ); } );

    The post How to Use Leading Lines Effectively in Landscape Photography by Prathap DK appeared first on Digital Photography School.

    Digital Photography School

  • How to Educate Your Clients to Make Them Comfortable and Get Stellar Shots

    We’ll never forget the look on one of our earliest client’s faces when she arrived at her photoshoot. She stepped out of her car and saw our smiling faces waiting, cameras in hand, ready to take her photo. Abject terror is an understatement. We spent half of the shoot calming her down, soothing her nerves, and making her feel right at home with the camera. Meaning we had half has much time to get the stellar images we were being paid to get.

    Her deer-in-the-headlights expression has stuck with us as a constant reminder, that no matter how comfortable we are as photogs BEHIND the camera, most of our subjects in FRONT of the lens are not used to being there. We think of her every time a new client books with us, because the fault was entirely ours for not properly educating her before her shoot.

    client-education

    An educated client is a confident one. The onus is on you as the photographer to over-educate the client before their shoot: it doesn’t just create happier, more comfortable photo subjects, it helps you create the images you’re both dreaming of. Our goal is to always become stronger in educating our client at each stage of their shoot. We divide client interaction into four distinct categories, each with its own ideal outcome:

    #1 Pre-client phase

    This phase is when a future client knows about you, but isn’t necessarily in the market to hire you right away. This is the time to develop an indirect relationship with them, and begin the education process before they ever hit send on your contact page.

    Your brand is spread out across multiple locations: everything from Instagram, to your interactions with guests at weddings, is announcing who you are, and what you’re about. One of our biggest goals with clients, is for them to be confident that they can trust us to be really solid humans. Being a genuinely good person, is an increasingly valuable commodity in this complex world of endless information. So, when we first started out, we set the simple plan of introducing ourselves to future clients, with every piece of media we created, no matter how subtle.

    client-education-2

    We knew we had zeroed in on our voice when we began getting email after email saying things like, “I feel like I know you so well already!” or, “We’ve never met, but I just think you’d be so fun to have at our wedding.” BINGO, this was our goal!

    Creating a client who trusts you, begins way before you think it does. It doesn’t only hinge on email conversations, or some copy on your website. People research: your personality, brand, likes and dislikes, are attached to every piece of information you put out there, whether it’s a Facebook post or an interaction with a wedding guest.

    If you mention something in a blog post that you absolutely love shooting, whether it’s a location, style, or piece of inspiration, people hear that. We casually mentioned that we love having dogs come with on engagement shoots, and suddenly our next three bookings all brought their pups, as we jaunted around town taking their photo.

    client-education-5

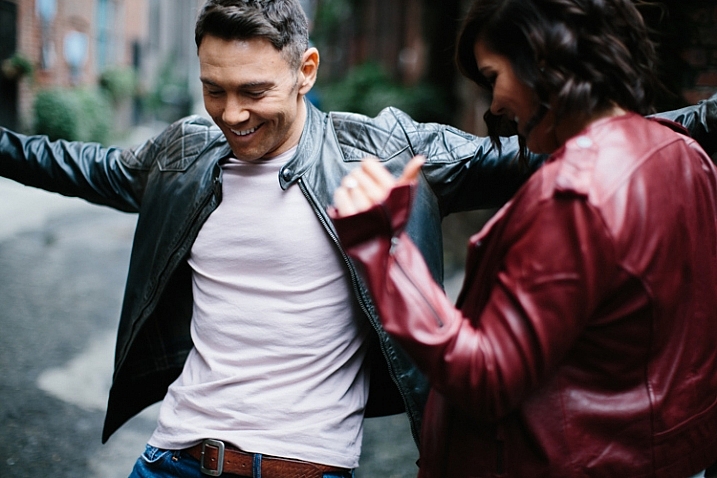
    This also works in reverse—without getting negative, if there’s something you despise during shoots (for example, we cannot abide jumping shots or fake smiles directly at the camera), talk about the opposite so people subconsciously gravitate away from it. Keep your brand consistent and true to yourself, and your future clients will begin developing trust in you, and understand what you’re all about before they ever contact you.

    Education Goal: Let the world get to know your personality and trustworthiness, and in the process, subtly educate people on what you want.

    #3 New client, pre-shoot phase

    Woohoo! You’ve got a new client who just booked a shoot, and now they’re sitting around twiddling their thumbs while they wait for the shoot date. What are you going to do with them in the interim?

    client-education-3

    This time frame is solid gold, if you use it well. We realized early on that we could save ourselves a ton of time, and repetitive emails, if we just listened a little more closely to what clients were asking us, and beat them to the punch. The most common questions we get before a shoot are:

    • What should I wear?
    • Where should we go?
    • Do you even KNOW how stupid I look in photos? Wait, this isn’t a question, really. I’m telling you I’m the most awkward human on the planet.

    Since we can confidently predict that a client will email us with those questions (and a few more that are more or less consistent depending on the shoot style), we head them off at the pass, and send out a handy little info packet as soon as they put the deposit down on the shoot. In this fun little PDF, we cover clothing options (including How to Put Together an Outfit 101, How to Coordinate with your Lovah, and so on), recommend locations in their area (or lead them to come up with their own ideas by suggesting types of locations that you prefer shooting in), and tell them in no uncertain terms that even Naomi Campbell thinks she’s awkward (probably not a true fact) and that we have our tried and true methods of making anyone look good. At this point, an educated client is a confident client, and confidence is the #1 thing you want when they walk in the door to the shoot.

    dpsclienteducpation 1

    Education Goal: Have the client prance into the shoot feeling like they brought the right clothes, look bomb as can be, are in capable hands, and won’t seem like a nob on camera.

    #3 Current client – shoot day phase

    The day has finally arrived, the batteries are charged, the lights are on, the client is taking their first foray into being a model. What’s the best part about being the photographer? You are the one in full control of the mood, atmosphere, and pace of the shoot. Ah, the sweet smell of owning your territory. There’s nothing better, or more important on a shoot.

    Okay, so you’re also at the mercy of the person in front of your lens, but the goal for the shoot is to create an ongoing verbal education, so your client is equipped to work with you in creating images together. Every photographer is a unique snowflake, and you’ll have their own methods and style for how you arrange and conduct yourself during a shoot. But the only way to tackle this, is to keep it real by continuing the extension of your brand, that you’ve been putting out there all along.

    client education (3 of 1)

    Our personal strategy, honed through shooting each other through long stints of travel (and never wanting a client to look like a deer in the headlights again), is to talk a ton. Keeping the atmosphere light is what suits us best and makes our clients happiest, but that’s not necessarily the best fit for all photographers. We just watched a documentary on Richard Avedon and couldn’t stop laughing because he was SO DARN SERIOUS all the time—talking about dead dogs, and the end of life with his clients, and otherwise basically being silent! His whole methodology gave us cold sweats, but it was completely true to who he was, and more importantly, obviously produced master-level work. We have complete and utter respect for him, because he practiced his craft in the precise manner that got him the results he was looking for, and was truest to his own brand (even if he wouldn’t have described it as such). Be the same way: cultivate your own methods of shooting and own them.

    Education Goal: Make the person in front of the camera think like Beyonce. Or a dead dog, depending on what kind of shot you’re going for.

    #4 Archived client – post-shoot phase

    client-education-4

    The shoot is over… now what?

    Post-shoot is the time when it’s easiest to drop-off in terms of client education. The normal routine is to send the images their way, drop them a little thank you note, and move on with your life. But this is such a great time to step your game up, and help yourself out in the process!

    Depending on how you deliver images, sending along a detailed explanation of next steps is a lovely last touch. Explain to your clients how to download, share, and order prints—the things that seem so simple to us, when we deal with them all day long, are surprisingly complex for the first-time print orderer or mother-in-law trying to download a set. We strictly use an online gallery for deliveries, but many photographers are still sticking with a thumb drive or other physical delivery systems. Whatever you choose, make it user friendly and simple, and explain it in detail!

    client-education-6

    At this point, your client is riding the high of seeing their own images come to life, after so much thought and effort went into them. May we humbly suggest taking advantage of this energy by asking for what you want! In most cases, we are thrilled if a client is happy and recommends us to their friends. At some point, we realized, “Why are we just sitting around hoping that will happen? Why don’t we ask them for help with referrals?”

    The key here is to provide excellent service throughout the customer experience, and help educate them towards an experience that benefits not only them, but your business in the long term. Be specific about what you’d like them to do; ask them to like your Facebook page, follow you on Instagram, or tell their friends about their experience with you. This isn’t opportunistic or tacky when it’s done right, and most importantly, when you’ve gone above and beyond in customer service, most people are MORE than happy to pass your name along!

    Lastly, sending a thank you note or gift, depending on the client, is a classy little touch that we absolutely adore doing. We look forward to the end of each wedding season, when we sit on our living room floor surrounded by individually-chosen prints and gift boxes and handwritten notes to each of our couples and send a bunch of love out into the world.

    dpsclienteducpation 2

    Education Goal: deliver an excellent product and encourage the client to rave about you to their friends.

    At the end of the day, the relationships we create through photography never fail to blow us away with their depth and compassion, and educating a client throughout their experience with us makes all the difference. This is a work in progress, and we’re always looking for ways to improve our game, so we’d love to hear your strategies in the comments.

    googletag.cmd.push(function() {
    tablet_slots.push( googletag.defineSlot( “/1005424/_dPSv4_tab-all-article-bottom_(300×250)”, [300, 250], “pb-ad-78623” ).addService( googletag.pubads() ) ); } );

    googletag.cmd.push(function() {
    mobile_slots.push( googletag.defineSlot( “/1005424/_dPSv4_mob-all-article-bottom_(300×250)”, [300, 250], “pb-ad-78158” ).addService( googletag.pubads() ) ); } );

    The post How to Educate Your Clients to Make Them Comfortable and Get Stellar Shots by Tim Sullivan appeared first on Digital Photography School.

    Digital Photography School

  • 2 Video Tips for Using the Print Module in Lightroom

    Julianne Kost is the premiere Adobe instructor who teaches us about both Lightroom and Photoshop. In these two videos she gives us tips for printing from Lightroom.

    In this first one learn some general tips using the Print Module inside Lightroom:

    The second video below is a handy tip on how to print multiple images directly to a JPG, using a the Print Module again but this time saving a file, not making a print. This is really good to know if you want to make images to share on social media, your blog or website, etc.

    If you want more printing tips check out these dPS articles:

    • Image Size and Resolution Explained for Print and Onscreen
    • Two Useful Lightroom Print Module Custom Layouts
    • How to Create a 2015 Calendar in the Lightroom Print Module (you can figure out how to make one for 2016 too!)
    • Next Steps to Getting Started in the Lightroom Develop Module

    googletag.cmd.push(function() {
    tablet_slots.push( googletag.defineSlot( “/1005424/_dPSv4_tab-all-article-bottom_(300×250)”, [300, 250], “pb-ad-78623” ).addService( googletag.pubads() ) ); } );

    googletag.cmd.push(function() {
    mobile_slots.push( googletag.defineSlot( “/1005424/_dPSv4_mob-all-article-bottom_(300×250)”, [300, 250], “pb-ad-78158” ).addService( googletag.pubads() ) ); } );

    The post 2 Video Tips for Using the Print Module in Lightroom by Darlene Hildebrandt appeared first on Digital Photography School.

    Digital Photography School

  • The Importance of an Anchor – Why Foreground Matters

    Most everyone is familiar with the concept of an anchor in the nautical sense. The anchor keeps the vessel from drifting away, due to current or wind. It fixes the vessel to a certain position. While this is easily understood, fewer people are aware of the need for a similar concept in photography.

    I enjoy using wide angle lenses for landscape photography, but I also recognize that a wider focal length brings additional compositional challenges. While a wide focal length can produce visually exciting images, it can also produce really boring, empty feeling images. The nature of wide angle lenses is that they create the feeling of space, of distance. That distance can really disconnect the viewer from your subject, if you are not careful. When using a wide focal length, it becomes incredibly important to anchor your image with a strong foreground.

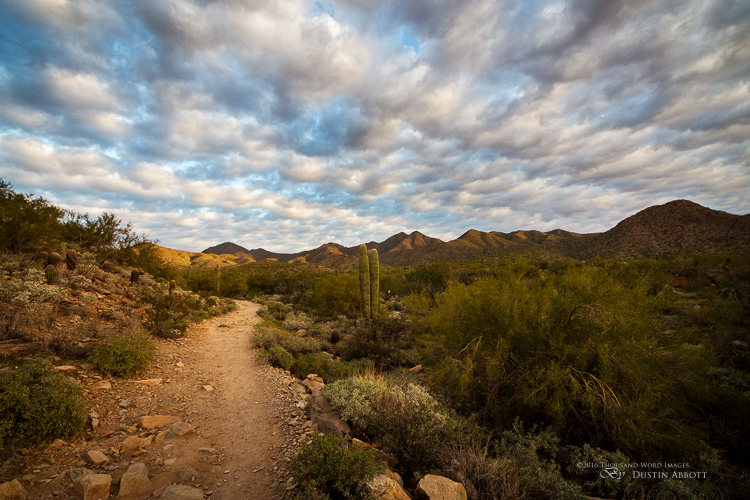
    Trailhead

    The trailhead in the foreground of this image, leads you into the grander scene.

    The nature of a wide angle means that it distorts the perspective of the objects, closest to the camera. There is a feeling of distance from your background, so the eye needs something closer to engage it, before moving on to the grander scene beyond. I’m sure you’ve seen visually stunning images of famous mountain ranges, sunsets, waterfalls, or wild natural scenes. I’m willing to be that your favorites all feature a small scale object in the foreground. Patterns in the ice or snow, wildflowers, rocks, or fallen autumn leaves. These serve as the visual anchors of the scene. Without them the image becomes much more boring, and far less grand.

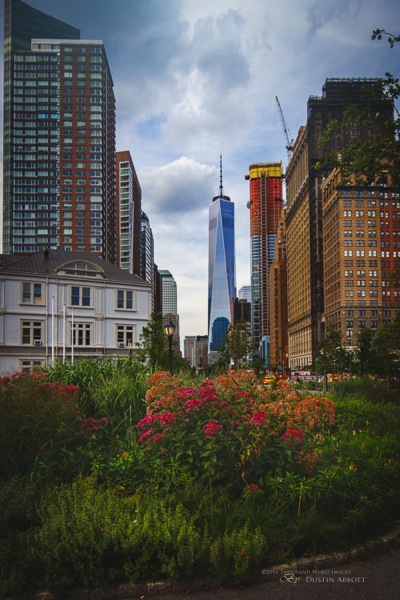
    There are many beautiful places on our planet, but photography, much like everything else, is very trendy. It is rare that you have an opportunity to capture something that has never been photographed before. The challenge then, is to find a way to set your work apart from the crowd. Anchoring your image through something unique is one of the key ways to accomplish this. Take for example, the new One World Trade Center in New York City. It has an incredible amount of emotional capital invested in it, because of the events of September 11th, 2001. So, it’s been photographed hundreds of thousands of times already since its completion. I wanted something different, and I saw the opportunity while in Battery Park further up Manhattan Island. Green space is at a premium in the big city, so when I saw an opportunity to shoot the tower, with the anchor of some flowers in the park in the foreground, I jumped on it, and am happy to have a different perspective on a familiar sight (image below).

    The City

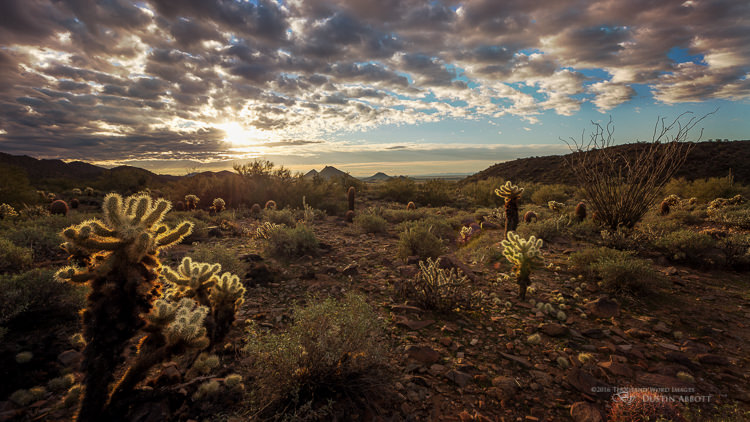
    The sunrises and sunsets of Arizona, in the American Southwest, are breathtaking, but can be challenge to capture because of the scale of the wide open spaces. This particular morning brought a gorgeous sunrise with a great, nuanced sky. I composed with a 15mm lens that could capture a lot of the context, but to keep it visually interesting I got about as close as I could to a clump of cholla cacti, that was catching the directional morning light. That grabs your attention first, and as your eyes move on through the scene, you have a great sense of depth of the wide open space because you are already visually anchored to the scene.

    Cholla

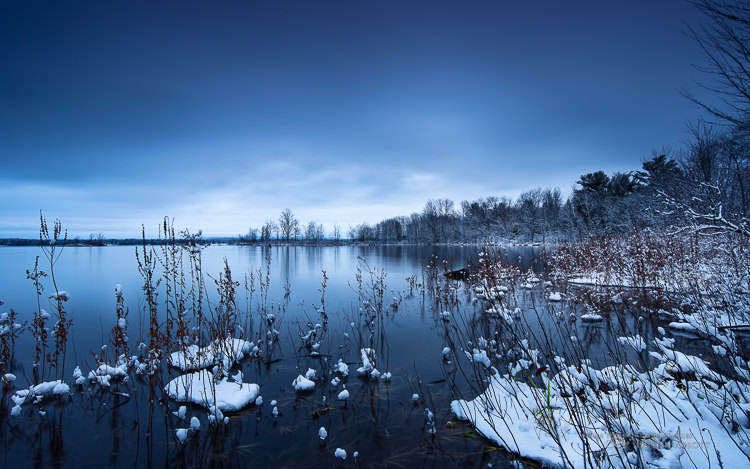
    Here’s another example from Ontario, Canada. This was the first snow of the winter, and the rivers and lakes were still not frozen. I shot a long exposure, that has a lot of subtleties in the sky and vibrant blue, wintry tones. But it’s made special by the patches of snow, caught amongst the plants, on the water’s edge in the foreground. These anchor the image, and give depth to it, along with providing some bright points in an otherwise dark scene.

    Snow

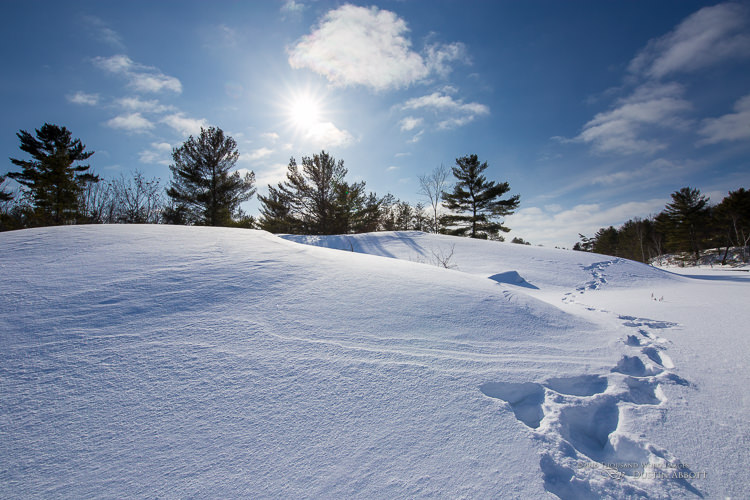
    Your anchor can also help to lead you into the scene. In this snowy scene on a cold, clear, winter day, the footprints featured in the foreground help lead your eye through the scene below.

    Snow Footprints

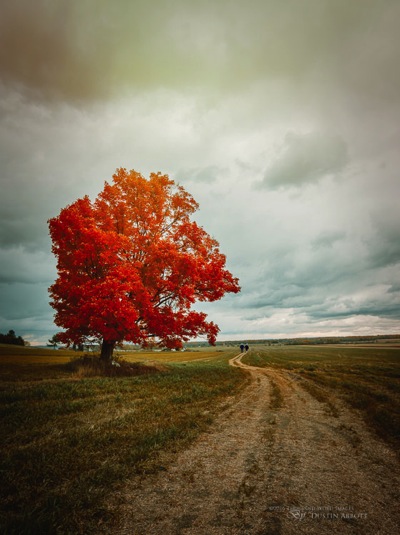
    Finally, the path that anchors this beautiful autumn image, eventually leads you to the elderly couple walking hand in hand. The name of this image is “Seasons of Life”, and the use of the anchor to lead the eye through the scene has helped me tell a story, and provide some emotional resonance.

    Path

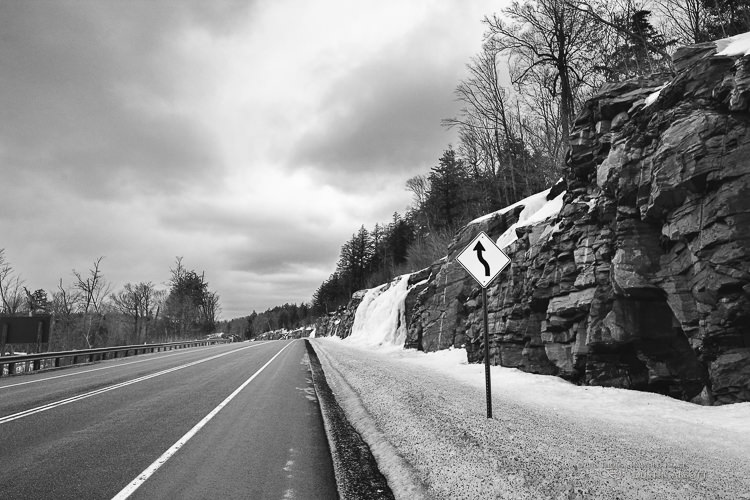
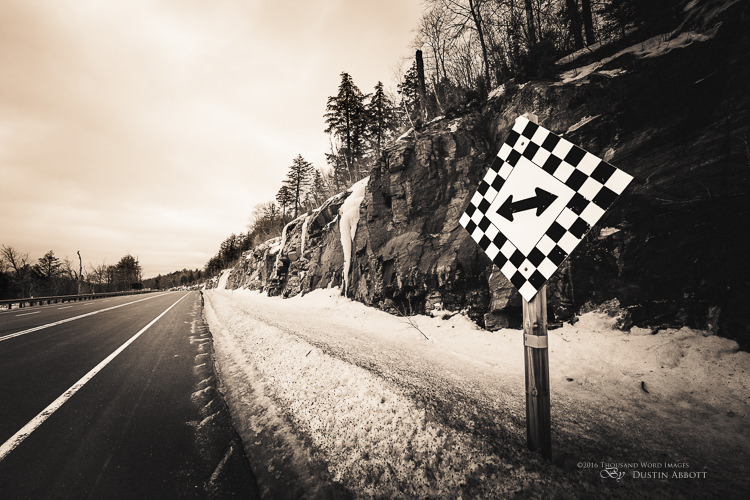
    Another purpose of the anchor is to make a scene more visually engaging. Use the wide angle distortion to your advantage. I was driving through Ontario, Canada’s famous Algonquin Provincial Park, and noted the cool frozen cascades along the road. I wanted to include a road sign for more visual interest. Note how this first image, while not distorted, is not particularly interesting.

    Less Interesting

    In this second image, however, I got close enough to this sign that the wide angle lens I was using, distorted it. Distortion sounds bad, but the end result here is a more visually interesting image, where the sign helps point the eye into the scene, where you can see the frozen cascades along the road.

    Sign

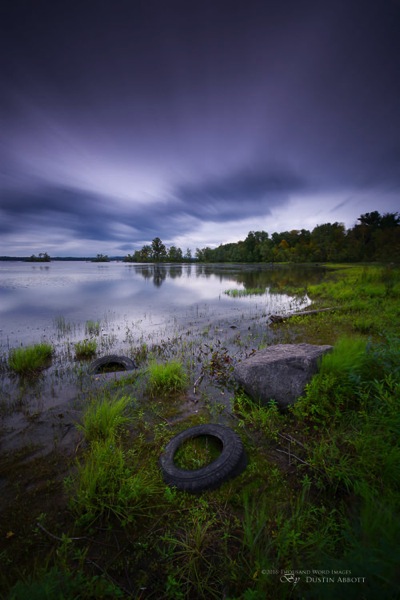
    You can also use this to tell your story. I shot a visually lush scene, but wanted my anchor to tell the story of people “Dumping in Paradise”. By getting close to the old tire it becomes unnaturally prominent, but by shooting it with a wide angle lens I’m also able to give the larger context in one shot. I’ve suddenly got an image with a cause attached to it, because of the anchor. Shooting a closer shot of the tire stuck in mud wouldn’t have had the same visual impact.

    Dumping in Paradise

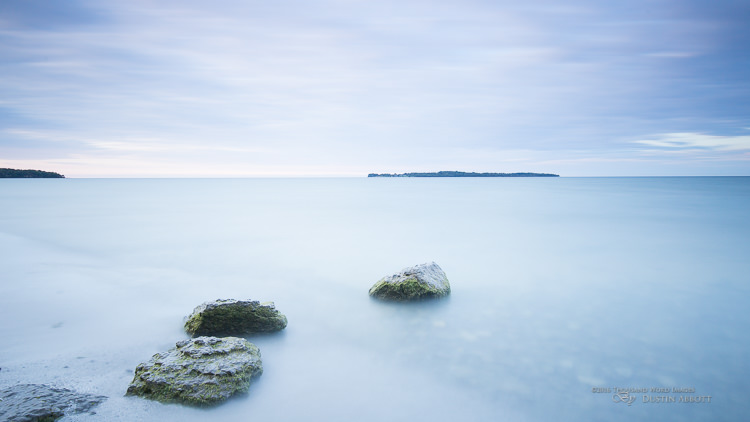
    One final way that an anchor is important, is to prevent a scene from feeling empty. The way that long exposures blur water is very cool, of course, but this image would have felt very empty with nothing but blurred water. It would have lacked any true feature. But the foreground rocks that I’ve included in the composition, give the eye something to look at, and that in turn causes the brain to appreciate the image more as a whole. The rocks also point you toward the island in the distance, creating some tension between the little rocks in the foreground, and the big rock beyond.

    Zen

    These are but a few examples to help you understand the relationship between the foreground and background of an image. The foreground is your anchor, and without that anchor there is a good chance the image is going to, well, drift. A good anchor will help build strong, visually appealing images that will help to set your work apart – and isn’t that what we are all looking for?

    Do you use anchors in your wide angle landscape photography? Share your ideas in the comments below.

    googletag.cmd.push(function() {
    tablet_slots.push( googletag.defineSlot( “/1005424/_dPSv4_tab-all-article-bottom_(300×250)”, [300, 250], “pb-ad-78623” ).addService( googletag.pubads() ) ); } );

    googletag.cmd.push(function() {
    mobile_slots.push( googletag.defineSlot( “/1005424/_dPSv4_mob-all-article-bottom_(300×250)”, [300, 250], “pb-ad-78158” ).addService( googletag.pubads() ) ); } );

    The post The Importance of an Anchor – Why Foreground Matters by Dustin Abbott appeared first on Digital Photography School.

    Digital Photography School

  • Wide Angle Versus Telephoto Lenses for Beautiful Landscape Photography

    WILLCK 1 SNEFFELS

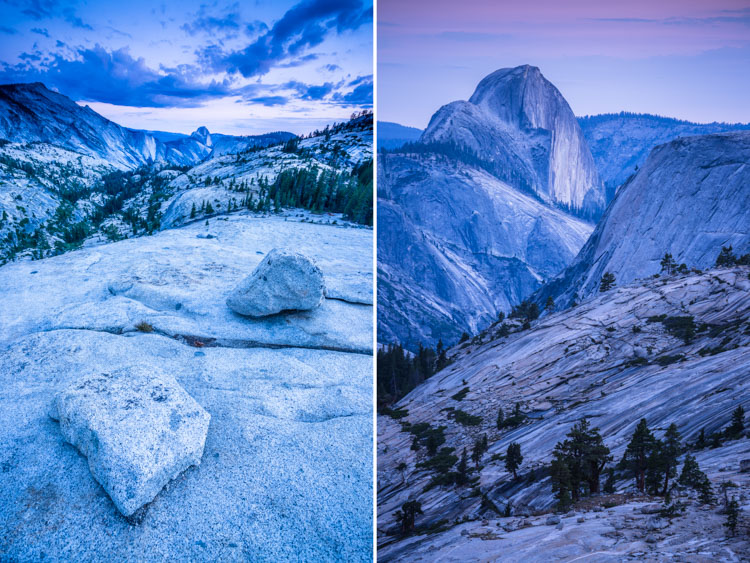
    An easy assumption to make, when shooting landscapes, is use a wide angle lens. After all, most landscape photographers favor wide angle lenses for a reason, they naturally give you the widest view and allow you to get the full landscape into the frame, from the foreground to the horizon. They have the widest depth of field, so you get the whole landscape in focus too. Their distortion enlarges objects in the foreground, letting you show off close-up details. The same distortion also emphasizes leading lines, enhancing your composition, and giving your image a more dynamic feel. But when you default to wide angle, you miss many hidden opportunities offered by telephoto lenses.

    Field of View: The Whole and its Parts

    This is the most basic difference between the two lens types: wide lenses give you a wide view, telephoto lenses give you a narrow view. And while landscapes look great in their entirety, it’s a good habit to take a moment and look for details. These are beautiful elements of the landscape that might get shrunken, or ignored in the expanse of a wide-angle image. This is where your telephoto lens comes in. Its narrow field of view is perfect for trimming off the extra elements, and focusing right on small, beautiful scenes like the curve of a mountain, a reflection in a far-off pond, or the silhouette of a tree.

    WILLCK 2 YOSEMITE

    In the two images above, you can see this in action. They were both taken from Olmstead point in Yosemite National Park, one with a wide angle lens and the other with a telephoto. In the first image, the wide angle shows off the total landscape. It includes both sides of the valley, the up-close textures of the rocks and the far off peak of Half Dome. In the second image, the telephoto lens brings the eye right up to the mountains, showing off their shapes and the details of the geology.

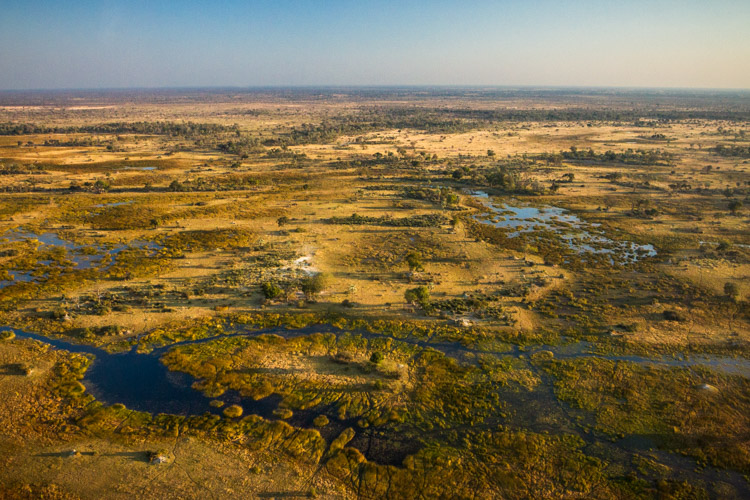
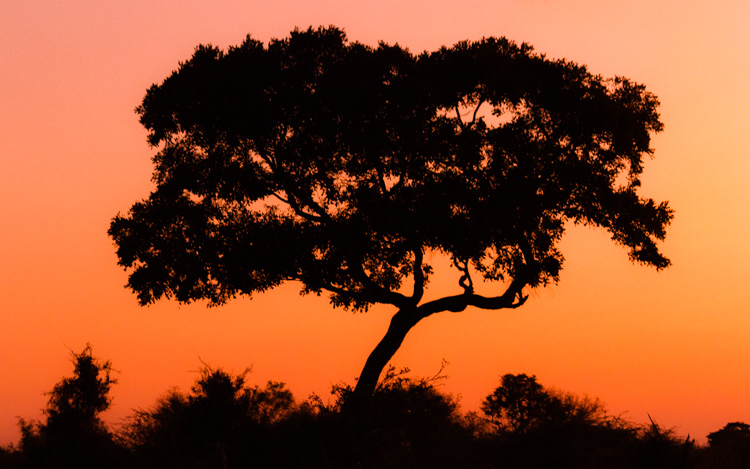
    Another pair of images (below), shows this effect even more dramatically. The first image is not just wide-angle, but an aerial shot as well, taken from a small airplane over the Okavango Delta in Botswana. From this vantage point all of the individual elements of the landscape become incredibly small, and your eyes pay more attention to their arrangement than their individual shapes. In the second image, also from the Okavango area, but this time on the ground, a telephoto lens is used to draw attention to the beautiful curves of a single Acacia tree.

    WILLCK 3 OKAVANGO wide

    WILLCK 4 OKAVANGO tele

    Depth of Field: Focusing the Eye

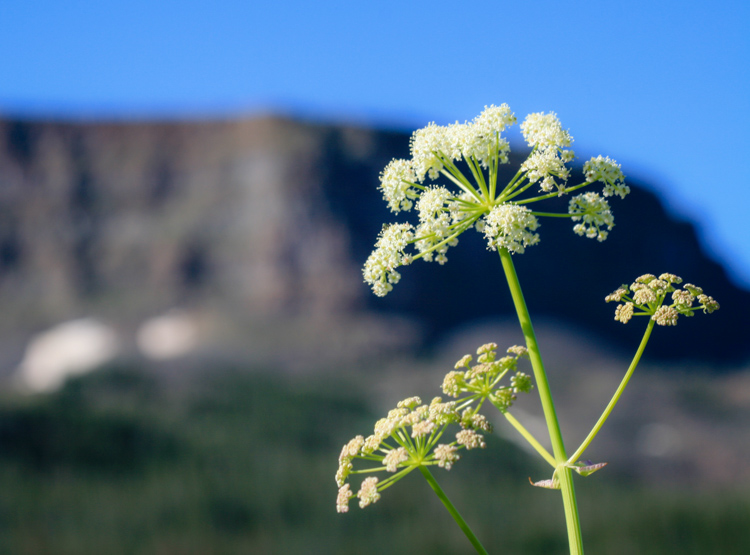
    The second major difference between wide angle and telephoto lenses is the innate size of their depth of field. Put succinctly, the higher the focal length, the narrower the area of focus. In practice, this means that when shooting wide, it’s much easier for you to get everything in focus, from the grass at your feet to the ridge on the horizon. This is especially true when you’re trying to use your lens’s sharpest apertures (the so-called sweet spot). However, a narrower depth of field is much better for isolating your subject from the background, and this is where your telephoto lens comes into play. Try shooting a close-up detail at a low aperture, using the landscape as a nice creamy bokeh backdrop.

    WILLCK 5 FLATTOPS

    WILLCK 6 DENVER

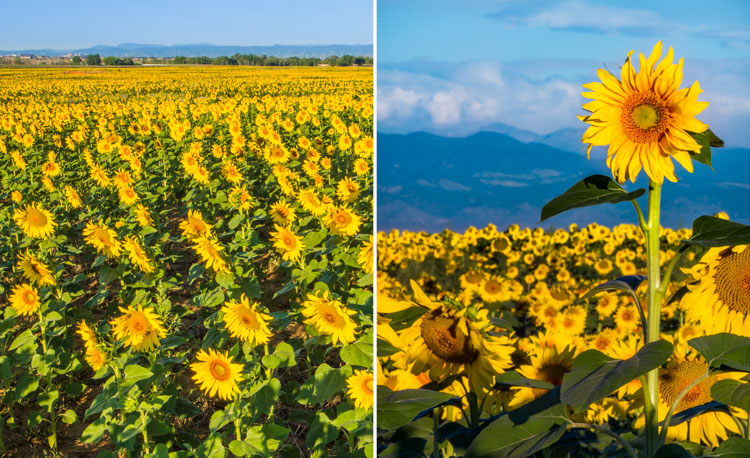
    The two images above are perfect examples of this effect. In the first image, the wide angle lens brings the whole landscape into focus, from the close-up sunflowers to the far-off mountains. In the second image, shooting with a telephoto blurs out the flowers and mountains in the background, turning them into a nice soft background for main sunflower.

    Depth Compression: Playing with Size

    It’s no secret that wide angle lenses expand the sense of depth in an image, by enlarging elements in the foreground and shrinking those in the back. This is great for creating images that make you feel like you could step right into the frame. On the flip-side, you run the risk of making towering, awesome mountains in the distance look like puny hills. Telephoto lenses, on the other hand, compress depth, causing objects near and far to appear more similar in size. A compressed sense of depth is great for abstracting a scene, and bringing out its graphical qualities. Colorful forest canopies, layered mountain ridges, and curving sand dunes, are all great subjects for this kind of shooting.

    WILLCK 7 MICA

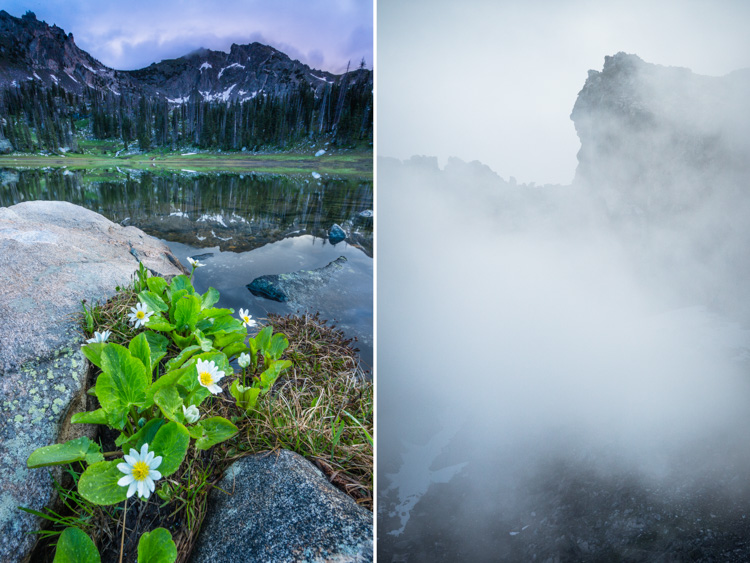
    In the first of this pair above, notice how the wide angle lens exaggerates the size of the flowers in the foreground at the expense of the mountains in the background. The mountains are so tall that they’re shrouded in clouds, but the lens keeps them from looking quite as grand. But pull out a telephoto lens and you can zoom straight in on the mountain, showing off the contrast between the rugged outline of the peak and the soft wispy form of the cloud.

    WILLCK 8 BIGBEND wide

    WILLCK 9 BIGBEND tele

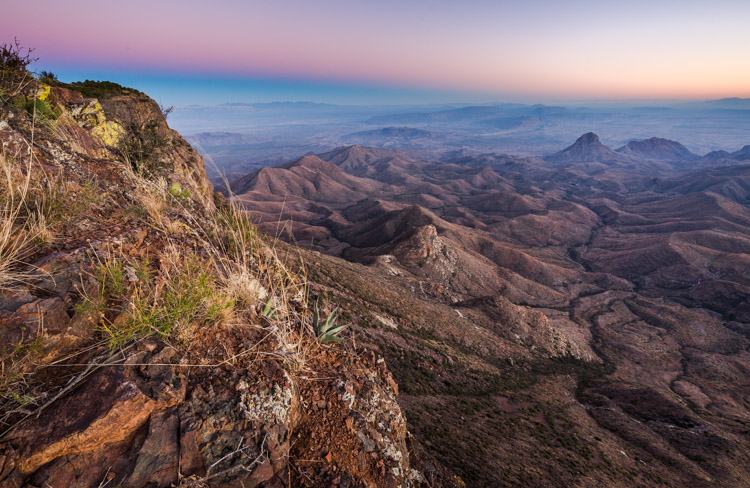
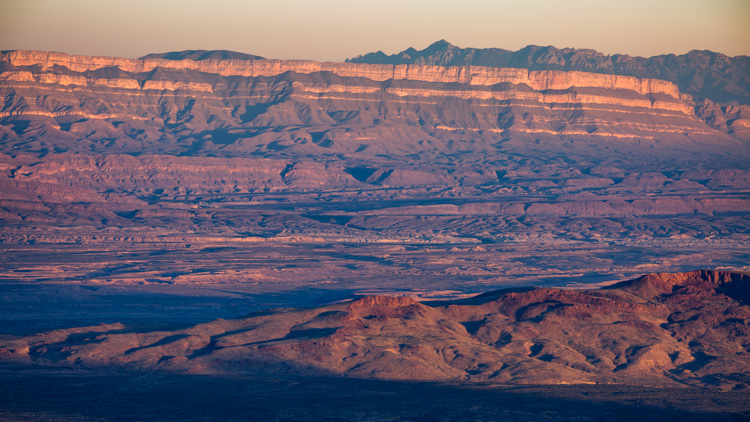
    Here are two more images, both taken at the same location in Big Bend National Park, that show off this effect. In the first image, you can see that the wide angle lens increases the size of the plants and rocks in the foreground, while shrinking the large desert mountains in the background. In the second image, a telephoto lens flattens out the depth of the many desert ridges, calling attention to their graphic patterns and outlines.

    Summary: Space Versus Object

    Have a hard time remembering all these details? Here’s an easy way to summarize it with a simple idea:

    Wide angle lenses show off space, telephotos show off objects.

    The wide angle lens’s big field of view, ease of uniform focus, and depth-distorting abilities, are great at showing off big, expansive landscapes. However, they take focus away from individual elements within the landscape in favor of showing the whole. Telephoto lenses are naturally the opposite: they’re great at showing off the size, shape, and intricacy, of detail of individual elements within the landscape. But their narrow field of view, small depth of field, and depth-compressing qualities make it hard to capture the landscape as a whole.

    WILLCK 10 WILLOW wide

    You can analyze this pair of images to see exactly how all of these techniques work together. Starting with the photo above, you can see how the wide angle lens fits the whole landscape into the frame, from close-up rocks, to far off peaks and sky. Because of the lens’s large depth of field, the whole landscape is in acceptable focus as well. The lens’s depth distortion is readily apparent as well: the foreground rocks look very large, creating a pleasing sense of depth, and emphasizing the leading lines that draw the eye from the edges of the frame to the center. Overall, you get a very good sense of the space and the expansiveness of the valley.

    WILLCK 11 WILLOW tele

    This image was taken in the same place, but the use of a telephoto lens captures it in a very different way. The photo brings out a single element of the landscape – look closely and you can see this peak in the previous image on the top right – and allows the viewer to appreciate its subtle details. Because of the telephoto lens’s narrow depth of field, the sky is slightly out of focus while leaving the details of the peak itself perfectly sharp. And most of all, the compressed sense of depth flattens the image, showing off the rocky mass of the mountain, and calling attention to the beautiful curve of the ridge line. Overall, you get a great sense of the mountain as a solid object, rather than a bounded space.

    When to shoot what?

    The best way to know which lens to use is to get out there, look, and think. What part of the landscape are you most drawn to? Does the landscape’s expansiveness give it its character? Are there stunning details surrounded by less photogenic elements? Are you shooting spaces or objects?

    WILLCK 12 ZODIAC

    That said, my personal strategy is to just shoot both, because almost any landscape has enough beauty that just one type of lens isn’t enough to get to all of it.

    What is your approach to landscape photography? Do you use a wide or telephoto more often? Please share your thoughts and landscape images in the comments below.

    googletag.cmd.push(function() {
    tablet_slots.push( googletag.defineSlot( “/1005424/_dPSv4_tab-all-article-bottom_(300×250)”, [300, 250], “pb-ad-78623” ).addService( googletag.pubads() ) ); } );

    googletag.cmd.push(function() {
    mobile_slots.push( googletag.defineSlot( “/1005424/_dPSv4_mob-all-article-bottom_(300×250)”, [300, 250], “pb-ad-78158” ).addService( googletag.pubads() ) ); } );

    The post Wide Angle Versus Telephoto Lenses for Beautiful Landscape Photography by Will Crites-Krumm appeared first on Digital Photography School.

    Digital Photography School

  • Weekly Photography Challenge – Round and Round

    Each week here on dPS we give you a new challenge, something to sink your teeth into and go out and photograph. Last week it was Modes of Transportation and I see many of you have participated in that one.

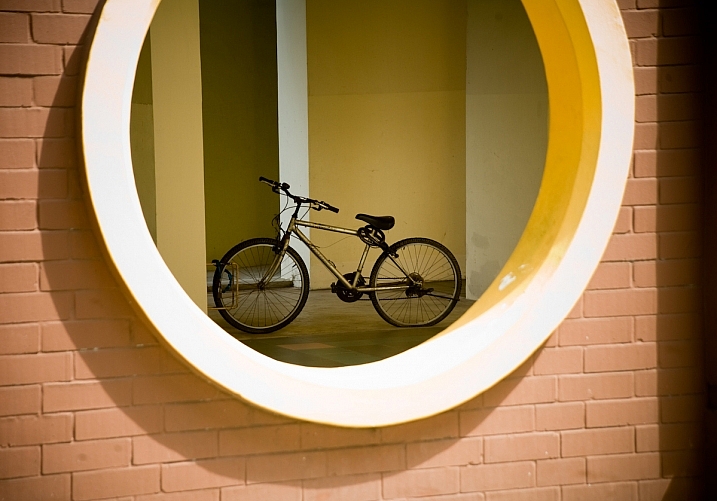
    If you’re following along, this week we have a new one, and I shared some examples to wet your appetite already for shooting circles.

    Lotus Carroll

    By Lotus Carroll

    Weekly Photography Challenge – Round and Round

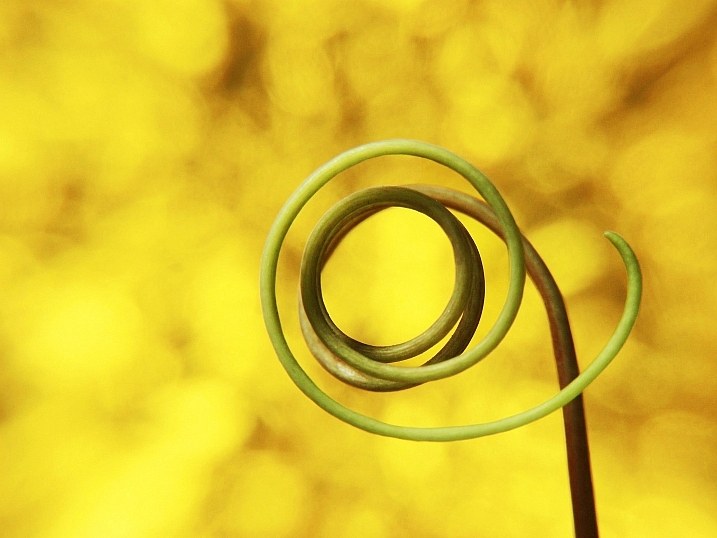
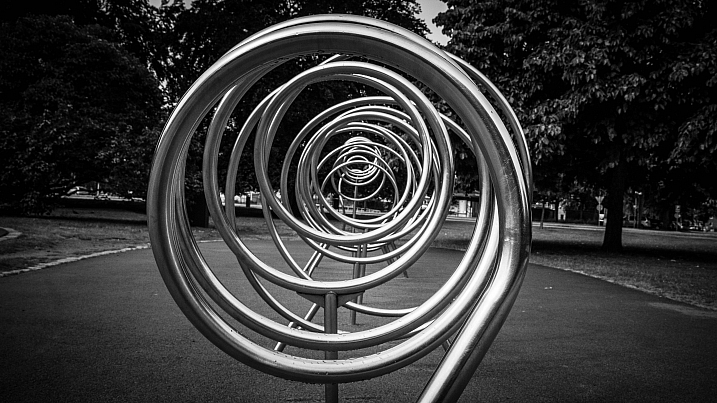
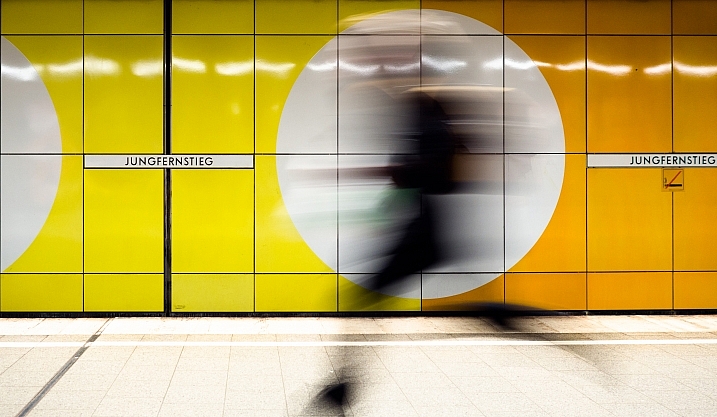
    Circles come in many forms, both natural and man-made. Look for them everywhere. Also think outside the box and photograph partial circles, curves, orbs, balls, and spirals. If you need some tips, read for inspiration:

    • How to Capture Beauty in Ugly and Mundane Subjects
    • Composing with Curves
    • How to Build an LED Light and Make an Orb
    • Playing With Fire: Steel Wool Spinning in the Landscape
    • How to Make a Little Planet Using Photoshop
    Kenneth Lu

    By Kenneth Lu

    Frahman Photography

    By Frahman Photography

    ~ Lzee ~

    By ~ lzee ~

    Antti T. Nissinen

    By Antti T. Nissinen

    R'lyeh Imaging

    By R’lyeh Imaging

    Jack.chih

    By jack.chih

    Share your images below:

    Simply upload your shot into the comment field (look for the little camera icon in the Disqus comments section) and they’ll get embedded for us all to see or if you’d prefer upload them to your favourite photo sharing site and leave the link to them. Show me your best images in this week’s challenge. Sometimes it takes a while for an image to appear so be patient and try not to post the same image twice.

    Alex

    By Alex

    Commander, U.S. Naval Forces Europe-Africa/U.S. 6th Fleet

    By Commander, U.S. Naval Forces Europe-Africa/U.S. 6th Fleet

    Ian Muttoo

    By Ian Muttoo

    Papieren Geluk

    By Papieren Geluk

    Lucapost

    By lucapost

    googletag.cmd.push(function() {
    tablet_slots.push( googletag.defineSlot( “/1005424/_dPSv4_tab-all-article-bottom_(300×250)”, [300, 250], “pb-ad-78623” ).addService( googletag.pubads() ) ); } );

    googletag.cmd.push(function() {
    mobile_slots.push( googletag.defineSlot( “/1005424/_dPSv4_mob-all-article-bottom_(300×250)”, [300, 250], “pb-ad-78158” ).addService( googletag.pubads() ) ); } );

    The post Weekly Photography Challenge – Round and Round by Darlene Hildebrandt appeared first on Digital Photography School.

    Digital Photography School

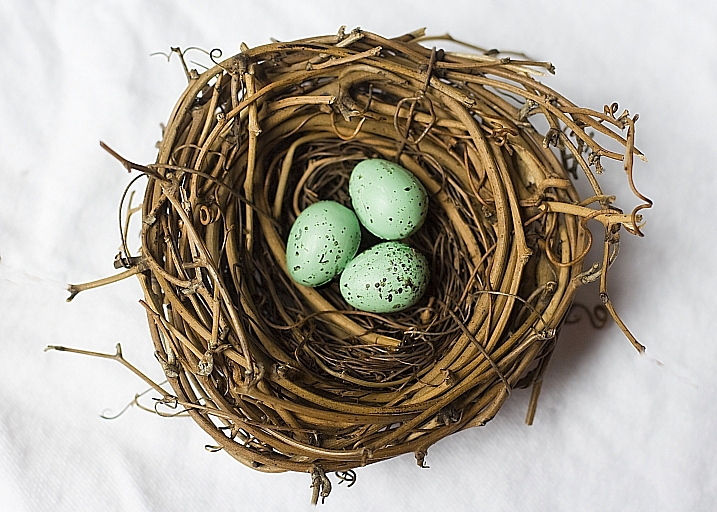
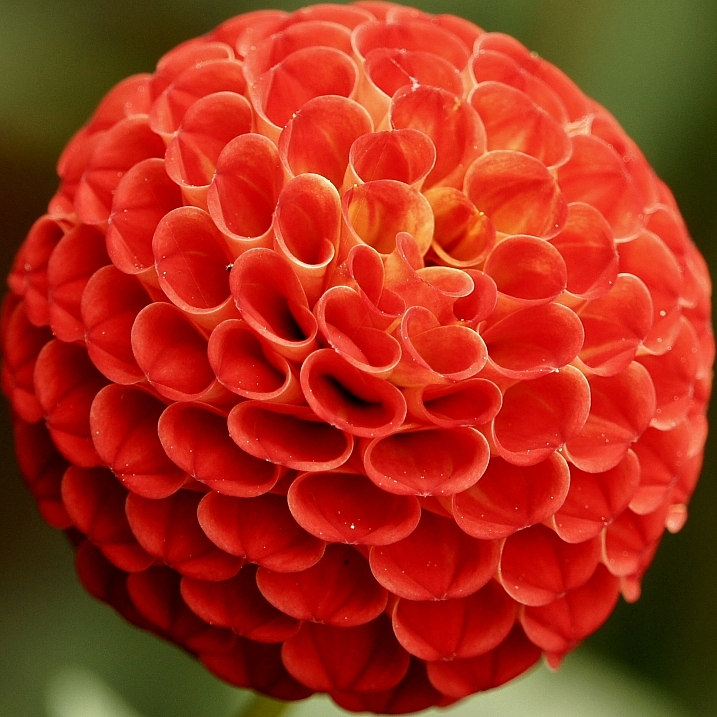
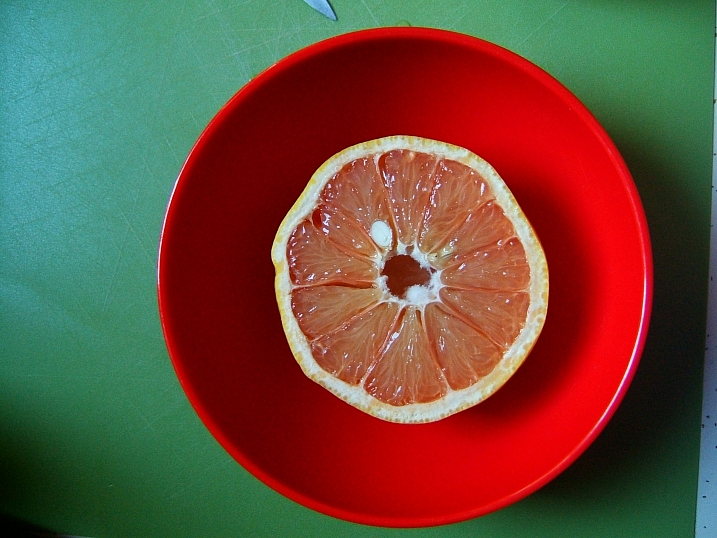
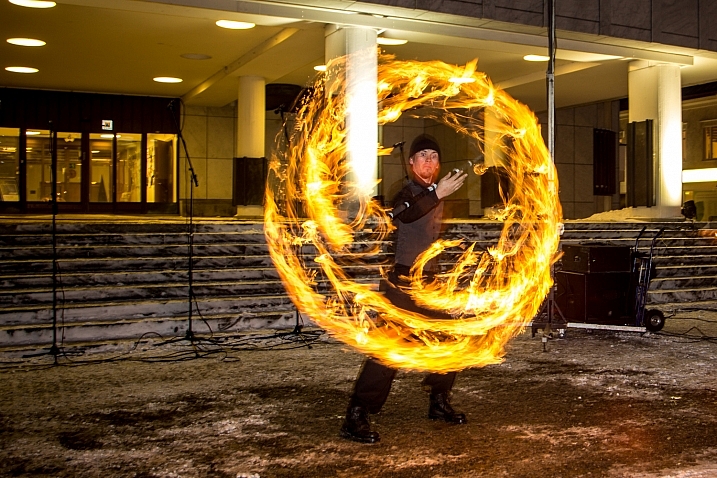
  • 23 Ellipical Photos that Come Full Circle

    Shapes are a something that occur naturally in the world, and we reproduce in man-made objects. Squares, triangles, rectangles, and circles.

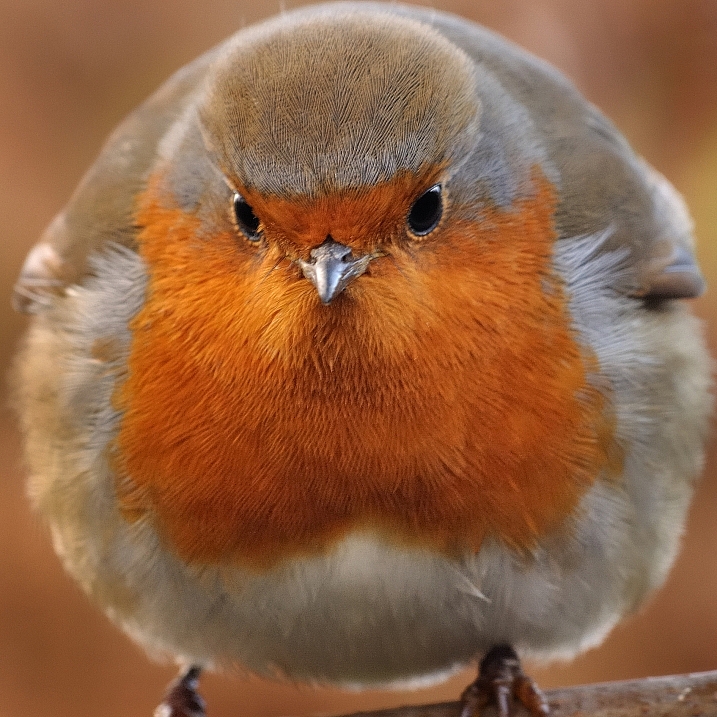
    In this image set let’s look at the never ending shape – the circle. Curves lines are feminine in nature, they have no beginning and no end. Here are 23 images showing the circle:

    Darlene Hildebrandt

    By Darlene Hildebrandt

    Stardex

    By stardex

    Kirsten Pauli

    By Kirsten Pauli

    Sea Turtle

    By sea turtle

    Tracy Ducasse

    By tracy ducasse

    Macaron*macaron(Est Bleu2007)

    By macaron*macaron(Est Bleu2007)

    Joakim Berndes

    By Joakim Berndes

    TheGiantVermin

    By TheGiantVermin

    Tanakawho

    By tanakawho

    Andrew

    By Andrew

    Susanne Nilsson

    By Susanne Nilsson

    Mette1977

    By Mette1977

    Jeff_golden

    By jeff_golden

    Daniel Novta

    By Daniel Novta

    Benh LIEU SONG

    By Benh LIEU SONG

    Howard Ignatius

    By Howard Ignatius

    Sam Ili?

    By Sam Ili?

    Kkmarais

    By kkmarais

    David Goehring

    By David Goehring

    Anh Dinh

    By Anh Dinh

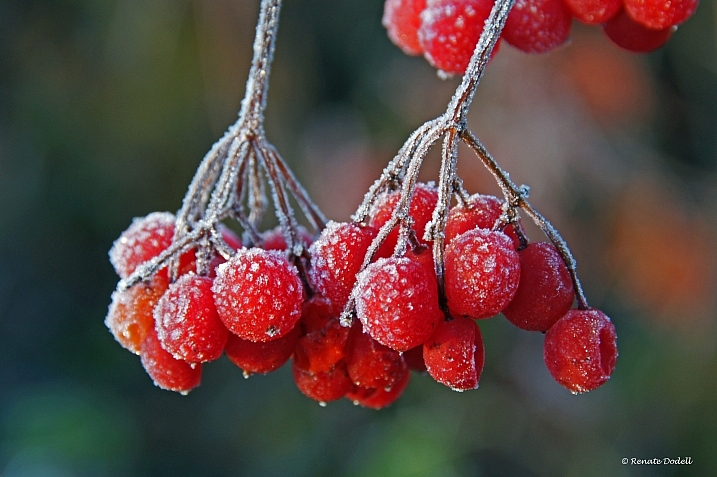
    Renate Dodell

    By Renate Dodell

    Nicholas Erwin

    By Nicholas Erwin

    FabQuote.co

    By fabQuote.co

    googletag.cmd.push(function() {
    tablet_slots.push( googletag.defineSlot( “/1005424/_dPSv4_tab-all-article-bottom_(300×250)”, [300, 250], “pb-ad-78623” ).addService( googletag.pubads() ) ); } );

    googletag.cmd.push(function() {
    mobile_slots.push( googletag.defineSlot( “/1005424/_dPSv4_mob-all-article-bottom_(300×250)”, [300, 250], “pb-ad-78158” ).addService( googletag.pubads() ) ); } );

    The post 23 Ellipical Photos that Come Full Circle by Darlene Hildebrandt appeared first on Digital Photography School.

    Digital Photography School

  • Like Fine Wine – Creativity Gets Better With Age

    As a culture we are constantly encouraged to believe that youth is a magical time – that everything is at our fingertips, easily captured, and that age will only bring a withering of possibilities and opportunities.

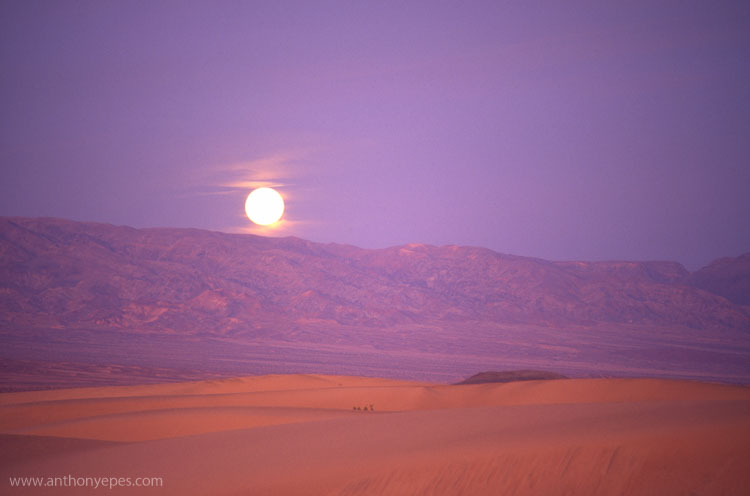
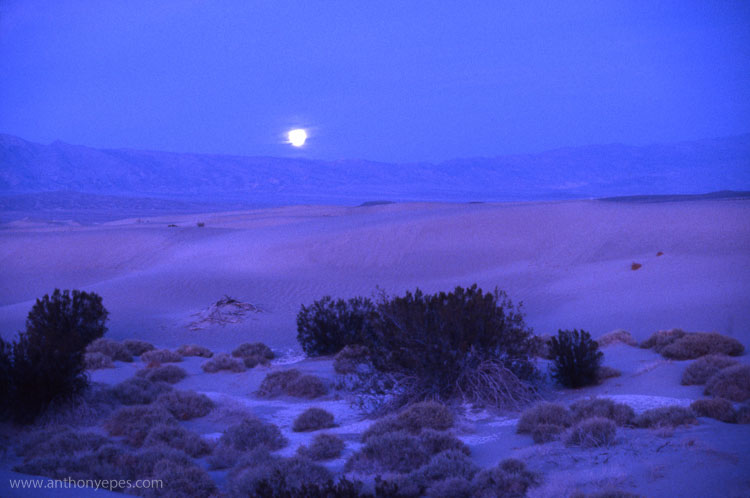
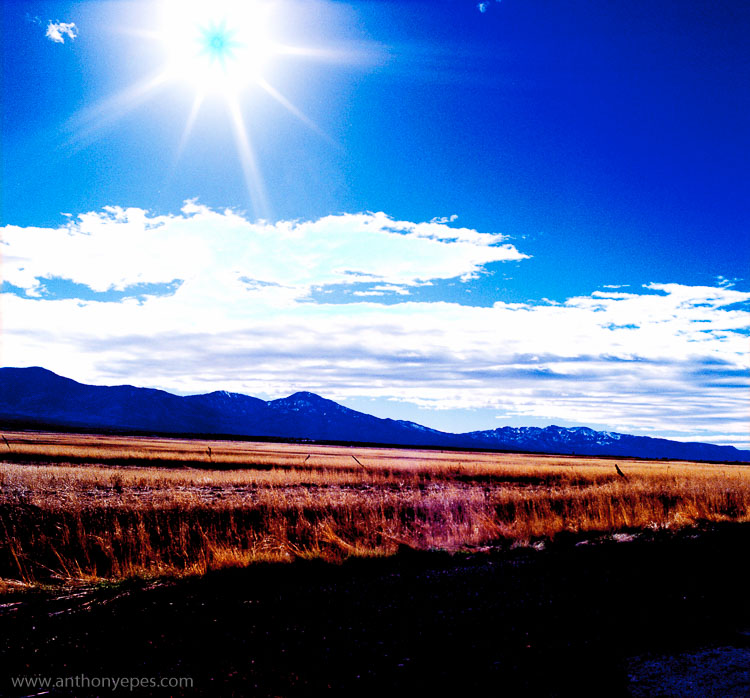
    DPS creativityAnthonyEpes01

    “Aging seems to be the only available way to live a long time.” – composer, Daniel-Francois-Esprit Auber

    Creativity is a huge victim of this idea – that aging destroys it rather, than helping us to flourish. Well, I don’t believe that at all. Creativity can wither with age – but it doesn’t have to. What about our huge amount of experience that we gather throughout life? Isn’t that pretty useful for creating?

    Here are some ideas on the benefits of keeping creative with your photography as you age, and why you can get more creative, not less, as you get older.

    Very few of us can tap the creative genius at a young age

    When you are taking photos and being creative, you want to aim to access that wild creative place deep inside you, where pure inspiration flows. Some people call it the creative flow state. For some it’s a zone, but it could be thought of as a well of inspiration. But, that can be a hard place to get to – you’re encouraged in so many ways in life to prioritize your practical skills (getting a job, buying a house, raising children, etc.) over your creative skills. Some people can access their inspirational, creative space when they are young, but for many it takes years. But what’s great about that, is that it’s only a question of getting there, not whether or not you have it.

    “Every day we slaughter our finest impulses. That is why we get a heartache when we read those lines written by the hand of a master and recognize them as our own, as the tender shoots which we stifled because we lacked the faith to believe in our own powers, our own criterion of truth and beauty. Every man, when he gets quiet, when he becomes desperately honest with himself, is capable of uttering profound truths. We all derive from the same source. there is no mystery about the origin of things. We are all part of creation, all kings, all poets, all musicians; we have only to open up, only to discover what is already there.” – author, Henry Miller

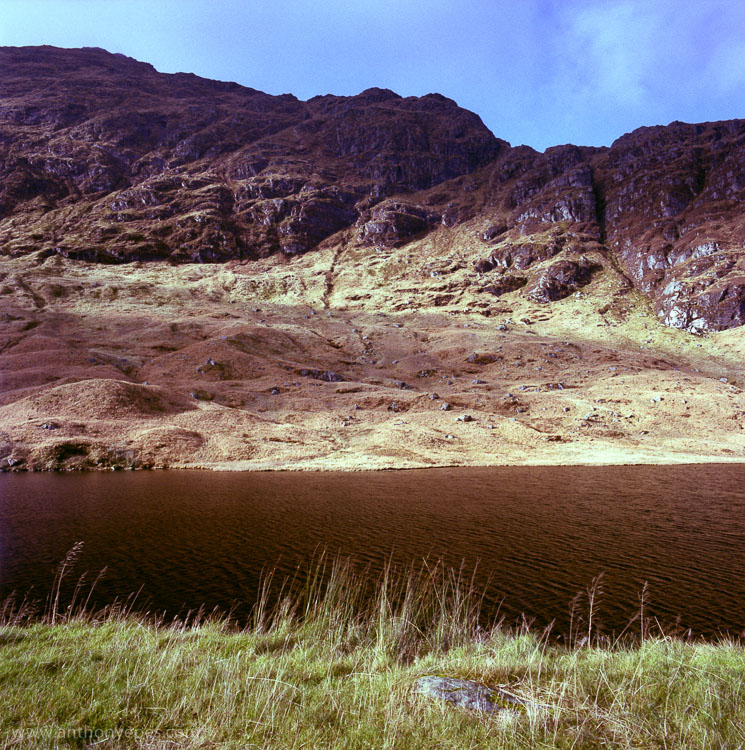
    DPS creativityAnthonyEpes02

    I don’t remember my youth being a place of unfettered, wild creativity. I was a pretty good photographer, but I wasn’t one of those types of artists who excelled in their twenties (think Rankin, Bob Marley, or JD Salinger). So unless you’re one of those young creative geniuses, I reckon that you could be on the same path as me – my creativity is building, and improving over the years.

    Let it give you permission for freedom

    But becoming more creative as you age isn’t a given, it’s a choice. As a culture we are more likely to give into the idea that we can’t be as creative with age, as when we were young.

    “No, that is a great fallacy; the wisdom of old men. They do not grow wise. They grow careful.” – author, Ernest Hemingway.

    But it doesn’t have to be that way. You can use what you’ve learned, and seen throughout life to make you more cautious, or you can allow it to give you permission to ignore your fears, ignore what others tell you about aging, and just choose freedom.

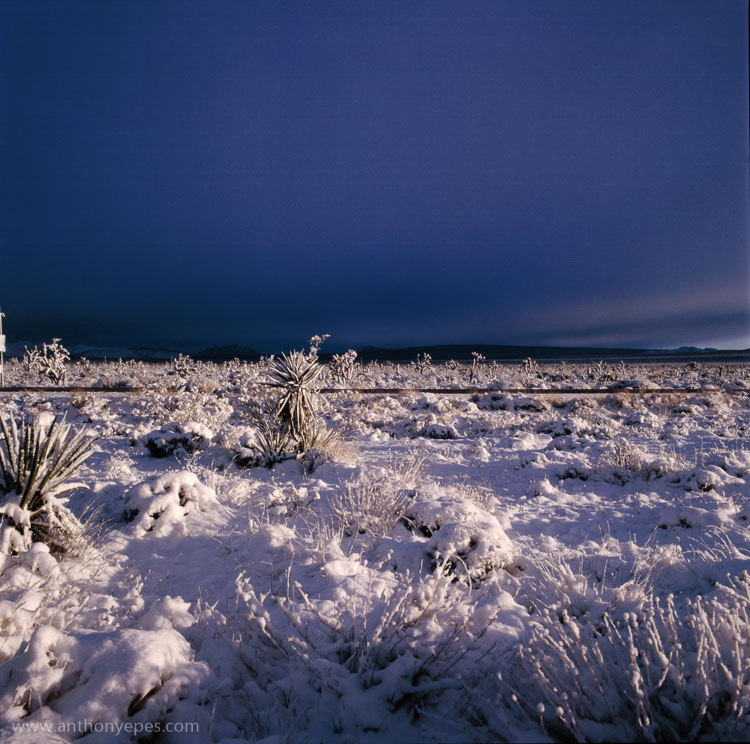
    DPS creativityAnthonyEpes03

    You are not who you think you are (unless you want to be)

    Our brains are amazing at creating stability and continuity, so that we can live day-to-day, almost on auto-pilot. Neuroscientists now say that 95% of who you are (habits, behaviours, beliefs) is set by the age of 35. And 70% of the thoughts you will have today, you also had yesterday! So if you aren’t in the habit of being creative, it might seem a little hopeless.

    But – and this is an awesome but – neuroscientists are now also saying that we can change our brains any time we like. So even if you haven’t lived a creative life, and are only turning to it at 40, 60 or 85 – you can quite easily change your brain’s habits. Becoming super creative is completely possible at any age. You don’t have to be stuck in the same place, doing the same things, and being the same way forever.

    Creativity keeps your mind young

    “There is a fountain of youth: it is your mind, your talents, the creativity you bring to your life and the lives of people you love. When you learn to tap this source, you will truly have defeated age.” – actress, Sophia Loren

    Some kind of creative thinking, is an amazing way to keep your mind young. Because as Edward de Bono says, in order to be creative you have to use your mind in a different way than before. Anything you do that is new to your brain, creates new neural pathways, and engages those dusty grey parts that maybe you hadn’t used before.

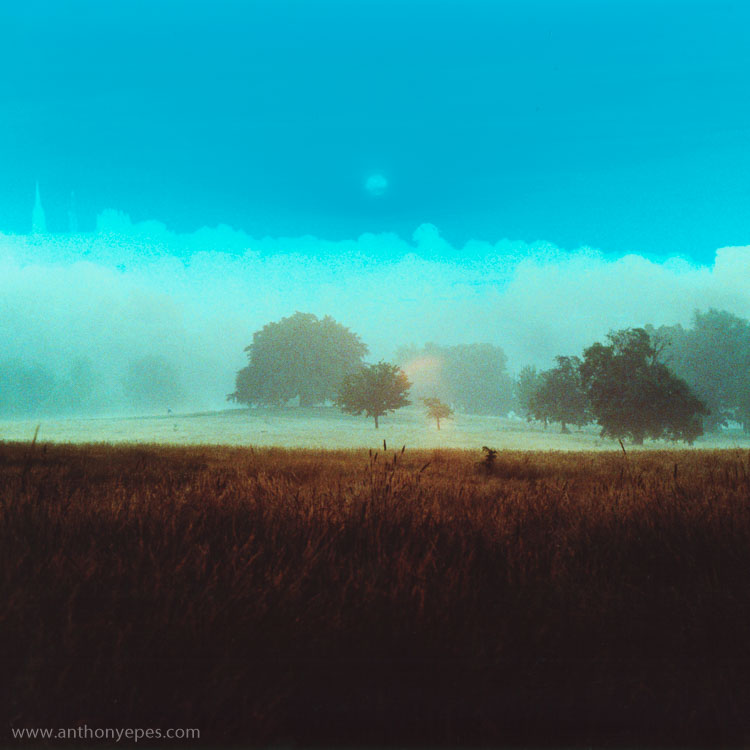
    DPS creativityAnthonyEpes04

    Photography is about communicating feelings and experiences

    “Photography for me is not looking, it’s feeling. If you can’t feel what you’re looking at, then you’re never going to get others to feel anything when they look at your pictures.” – photojournalist, Don McCullin

    What more do we have as humans as we age, than experiences, and a rich storehouse of memories and feelings? Let’s draw from that to inject our photos with more meaning and feeling. Let’s use that experience to connect with our subjects, to go deeper into the myriad of experiences happening all around us every day.

    “Photography is a way of feeling, of touching, of loving. What you have caught on film is captured forever… it remembers little things, long after you have forgotten everything.” – photographer, Aaron Siskind

    Unshackled from expectation – “The man who views the world at 50, the same as he did at 20, has wasted 30 years of his life.” – boxer, Muhammad Ali

    I love that now I am in my forties, I care a lot less about what other people expect of me, and my photography. I can go on my own way, and do the things that really inspire me. And you know what, the more inspired I am, the better my photography turns out – so that’s a double win!

    DPS creativityAnthonyEpes05

    Age can bring freedom from expectation. Many people mind less about what people think as they get older. Use that. Create not for some specific goal, but just for the sheer joy of it, the wonder of discovering new subjects, the beauty of light, the amazing feeling of walking not to get somewhere, but to just see new things.

    “We move what we’re learning from our heads to our hearts through our hands. We are born makers, and creativity is the ultimate act of integration – it is how we fold our experiences into our being.” – professor, PhD, author, Brené Brown

    Taking photos energizes your mind

    Creativity is an amazingly powerful way to smash through lethargy, and that beautiful French word, ennui (a feeling of listlessness and dissatisfaction arising from a lack of occupation or excitement). Maybe your job is boring, maybe your life is a lot of endless tasks that make you feel a bit sludgy, maybe you’ve retired and are thinking – now what?! Well, what better way to greet lethargy, than to meet it with the scintillating excitement of creating something. We are all born to be creative, it’s in our bones, the very fabric of our being. Maybe we hide it under deep layers of other stuff – but it’s still there, burning like a small ember of inspiration.

    DPS creativityAnthonyEpes06

    Creativity is a journey, not a destination

    Creativity is a liberating experience. It will help you discover new parts of yourself, but also help you see the world in a new and refreshing way. Let it liberate you. Let it fill your life with awe at the beauty, craziness, and amazingness of what lies around us in this world.

    You are never too old, too set in your ways, too full of habit to embrace the creative journey. Photography has brought amazing, interesting, challenging and awe-inspiring experiences into my life, which make me feel good to be alive.

    “Putting things off is the biggest waste of life: it snatches away each day as it comes, and denies us the present by promising the future.” – Seneca

    Whatever you do, don’t let age stop you.

    Carpe diem! Because if not now, then when?


    googletag.cmd.push(function() {
    tablet_slots.push( googletag.defineSlot( “/1005424/_dPSv4_tab-all-article-bottom_(300×250)”, [300, 250], “pb-ad-78623” ).addService( googletag.pubads() ) ); } );

    googletag.cmd.push(function() {
    mobile_slots.push( googletag.defineSlot( “/1005424/_dPSv4_mob-all-article-bottom_(300×250)”, [300, 250], “pb-ad-78158” ).addService( googletag.pubads() ) ); } );

    The post Like Fine Wine – Creativity Gets Better With Age by Anthony Epes appeared first on Digital Photography School.

    Digital Photography School

  • How to Make Colors Pop in Your Portraits – Without Using Photoshop

    Complementary Colors 2_1

    There are a lot of really great tools to use in Photoshop, or Lightroom, to get the colors in your photos to pop, creating a more vibrant portrait. But, did you know that you can create color popping portraits, before you even open them for post-processing? It’s true!

    By incorporating some of the simple things below ,before you take a photo, the color in your portraits will really stand out, and help you create eye catching photographs.

    Make sure your background colors complement the subject

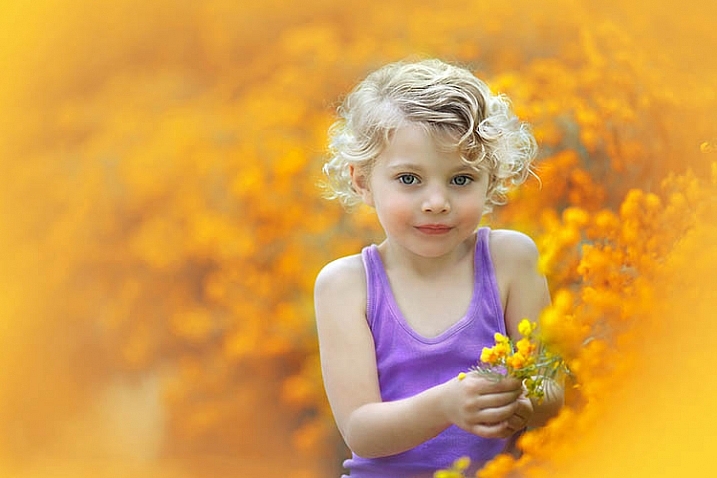
    Understanding what colors complement each other, will really help the colors in your portraits pop. Complementary colors are red and green, orange and blue, and purple and yellow. Using combinations of these colors with your subject and background, will help create a flattering portrait.

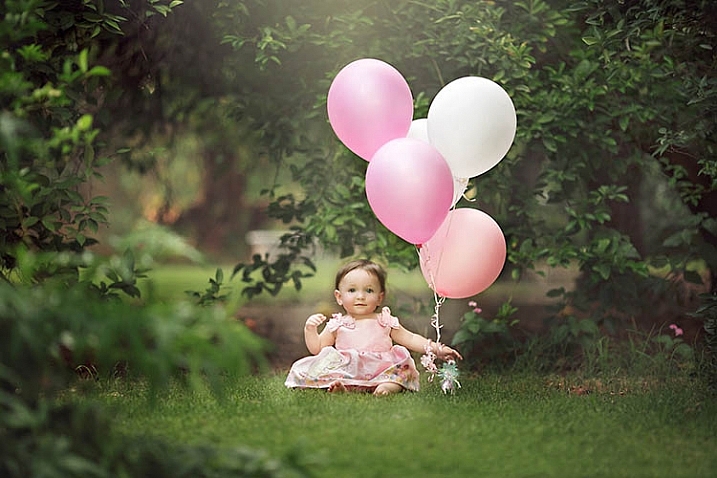
    It’s important to know the colors of the location where you are going to be shooting. If you know you’ll be at a location filled with yellow wildflowers, have your subject wear purple shades. If your background is lush green grass, with green trees all around, your subject will look best in pinks or reds. Know the area you will be shooting, and have your subject wear the color that complements that background. A complementary color palette will make your photo stand out!

    Example images of complementary color schemes below, and top.

    Complementary Colors_1

    Use a neutral background

    If your subject is wearing really colorful clothing, there is an easy way to make that color really stand out. A trick to get your subjects to really pop is to take a closer look at your background. Find an area that is plain, with neutral tones. Colorful, busy backgrounds can be fun, but they can also make a photo too cluttered, and draw the eye away from the subject, especially if they are also wearing bright clothing.

    Neutral Background_1

    Too much color throughout the photo won’t cause anything to pop out at you. Backgrounds that are more neutral will cause the eye to look directly at the subject, and the colorful clothing or accessories they are wearing. Look for a duller background such as: a dirt path, a mountain, stones, or anything that has a more earthy tone.

    Neutral background 2_1

    Use a colorful background

    You can still make the colors really pop out in your portraits, even if the subject is not wearing colorful clothes. If they are wearing white, black, or neutral colors, find an area in your environment with rich color. Look around for flowers, or brightly colored walls to place them near. With your neutral subject next to bright color, the colors will jump out.

    Colorful background_1

    Eliminate anything distracting

    Finally, before you press the shutter, make sure that there are no distracting objects in the background, that will pull the eye away from the subject. Are there other people in the distant background? Trash on the ground? Different colored cars in a nearby parking lot? If you can see them through your camera, you will see these distracting things in your final picture.

    Recompose your subject so you don’t see those people in the distance. Pick up any trash that might be on the ground near the subject. Eliminating anything that will distract from the subject, will make the subject, and the colors they are wearing, pop even more.

    Colorful background 2_1

    If you have used some of these tips to plan your portrait, the colors should look pretty nice without doing any extra work in Photoshop or Lightroom. If you’d like, you can use those programs to enhance the color even more. Levels, hue/saturation or selective color are some fantastic tools for creating brighter and bolder colors in Photoshop. Play around with the different tools and see if you can get your portrait bright and colorful.

    Please share your portraits and any questions or tips you may have on this topic, in the comments below.

    googletag.cmd.push(function() {
    tablet_slots.push( googletag.defineSlot( “/1005424/_dPSv4_tab-all-article-bottom_(300×250)”, [300, 250], “pb-ad-78623” ).addService( googletag.pubads() ) ); } );

    googletag.cmd.push(function() {
    mobile_slots.push( googletag.defineSlot( “/1005424/_dPSv4_mob-all-article-bottom_(300×250)”, [300, 250], “pb-ad-78158” ).addService( googletag.pubads() ) ); } );

    The post How to Make Colors Pop in Your Portraits – Without Using Photoshop by Emily Supiot appeared first on Digital Photography School.

    Digital Photography School

  • Why Asking What Camera Settings Were Used is Not as Helpful as You Think

    When you view an image that you love, do you find yourself asking, “What camera settings did the photographer use?” This is a common question, that overlooks other important aspects which would have helped to create that image, such as the lighting conditions, and any post-processing techniques involved. As you become more experienced, and progress in your journey as a photographer, you may begin to realize that the things you originally obsessed over, may not be as important as you once thought.

    Fig 4

    For this image I used a shutter speed of 1/5th, as this would blur out the background quite nicely, as I panned with the rider to make him pop out more. This meant I had to increase my aperture to f/10, and could also decrease my ISO to ISO 320, too. © Daniel Smith / Getty Images.

    A topic that many photographers are caught up in, is knowing which camera settings were used; more specifically, aperture, shutter speed and ISO. Any photographer will tell you that these three elements of exposure are very important in creating the desired image. If you use the wrong combination of these in any given environment, you could very well end up with undesired results. Keeping that in mind, it is completely understandable why new photographers obsess over knowing exactly which camera settings were used.

    In theory, this should help you to recreate that particular image, right? Unfortunately this may not be the case. Images are created from much more than just the correct combination of aperture, shutter speed and ISO. These three fundamentals do more than just control the exposure; they also give us a creative language to use in our images.

    Fig 2

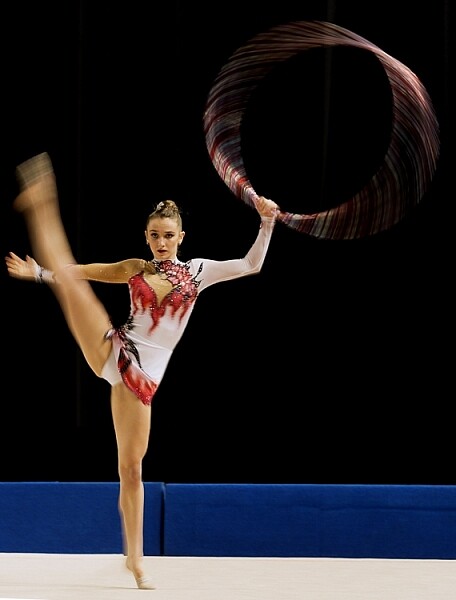
    In this image, I wanted to show some motion in the gymnast’s movements, rather than taking another frozen frame. To do this I lowered my shutter speed from 1/1000th to 1/15th. This reduction meant I could also lower my ISO from ISO 3200 to ISO 500 and increase my aperture to f/7.1.

    But before diving into this further, let’s explore the two different perspectives of this question; firstly from the point of view of a beginner, who would hope to replicate this imagine. They may assume that by knowing the exact camera settings, and dialling them into the camera, that they will somehow magically achieve the same result. Looking at this from an experienced photographer’s perspective, they may ask this question but with a different scope in mind. It may be when they are perplexed as to the techniques behind a particular image, or in relation to a very specific genre in photography, such as astrophotography, where knowing the settings may help provide a breakthrough.

    So why is the question unhelpful?

    This question will not always equip you with the knowledge you need, to recreate that image, or with your endeavours of becoming a more successful photographer. There is a lot more to creating an image than just the camera settings. By focussing on camera settings alone, you are missing out on a lot more information as to why those settings were used.

    Settings are only a small part of what makes up that image. Lighting conditions, post-processing and the outcome the photographer wants to achieve, are just some of the factors that will dictate what settings the photographer uses. It’s akin to having the correct ingredients for a cake, but not knowing the method behind making it, or the reasons behind that method. Relying on camera settings alone does not tell you anything about the environment the image was taken in, nor does it give you an indication of what the lighting conditions were like.

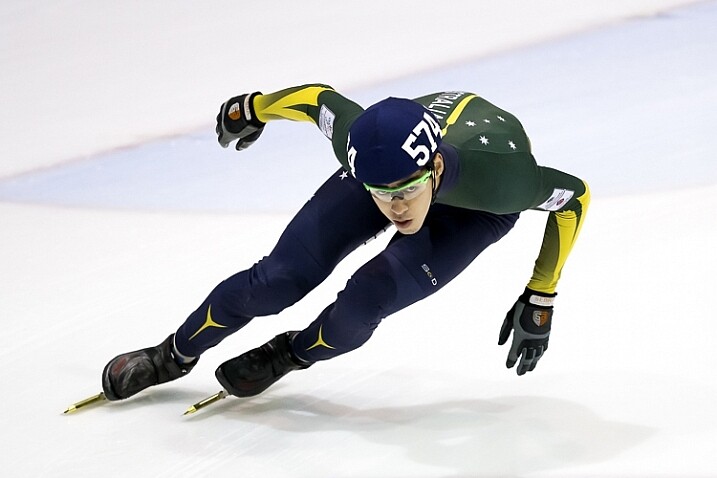
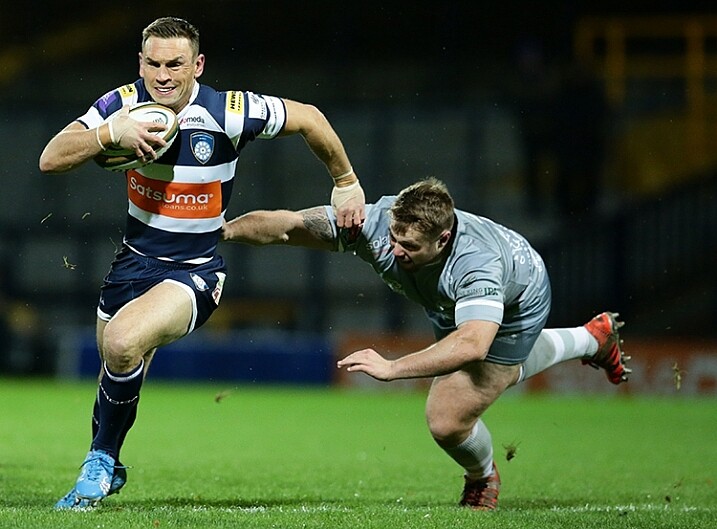
    To freeze the action here I used a shutter speed of 1/1000sec. To keep my ISO as low as possible, but still have a little more depth of field than what /2.8 would offer, I used an aperture of f/3.5. I then set my ISO to ISO 3200 to give me the correct exposure. Being indoors, the ISO is a little higher. © Daniel Smith / Getty Images.

    To freeze the action here I used a shutter speed of 1/1000th. To keep my ISO as low as possible, but still have a little more depth of field than what f/2.8 would offer, I used an aperture of f/3.5. I then set my ISO to 3200 to give me the correct exposure. Being indoors, with low light conditions, the ISO is a little higher. © Daniel Smith / Getty Images.

    Deciding what camera settings to use is a result of knowing how you want the image to look. For the above image, if I told you that I used a shutter speed of 1/1000, aperture f/3.5 and ISO 3200, and you were to go out and dial in the same settings, it would be highly unlikely that you will get the same result. Why? Because the chances of the lighting in your environment, compared to where this image was taken, being the same is highly unlikely.

    The reason I chose these particular settings was simple; I needed a fast shutter speed to freeze the action, so I used 1/1000th of a second. I also wanted to use a wider aperture that would allow me to isolate the subject more. A bi-product of this, is that it allows me to maintain a fast shutter speed, but also helps me use a lower ISO. I then use whatever ISO needed to create the correct exposure – in this case it was ISO 3200. The settings you that you require could be 1/2000th, f/4 and ISO 800. The exposure may come out the same, but the settings used are different, and tailored to the specific lighting conditions.

    1/160, f/2.8 ISO 100 © Daniel Smith / Getty Images.

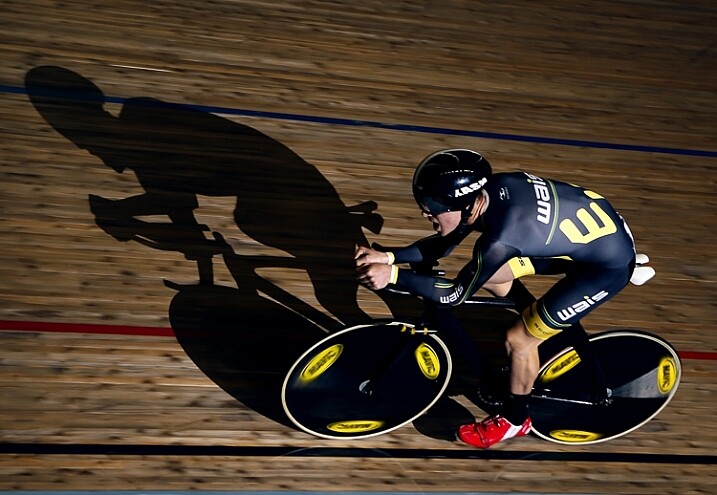
    1/160th, f/2.8 ISO 100 © Daniel Smith / Getty Images.

    Consider the image above. If you ask me what the camera settings for this image were, I will gladly tell you that this was shot at 1/160th, f/2.8 and ISO 100. But what this doesn’t tell you is that I had a speedlight on the ground, off to camera right, at full power. The majority of the light in this image is coming from the flash, with very little ambient (available light) influencing this image at all. Knowing just the settings will not help you to understand how this image was made. There is more to the image than just the camera settings.

    The camera settings here are geared more toward the speedlight, as it is quite a distance from the rider. The slower shutter speed is just below sync-speed, which allows for more power of the flash to affect the image (high-speed sync decreases the flash output range) and it also adds a slight blur to the wheels, which gives a nice sense of speed to the image. I used f/2.8 again to aid in the power of the flash, because my ISO was low to reduce the amount of ambient light. The flash is also freezing the majority of the action here.

    Knowing why those settings were used, is far more important than just knowing the settings by themselves. It’s knowing the why, that will help you in your journey as a photographer. As the saying goes, “Give a man a fish and you feed him for a day; teach a man to fish and you feed him for a lifetime.” The same principle is at work in photography. Even if I was with you, and told you the settings to use, what will you do when you are alone? You need to understand why those settings have been used.

    Reading an image

    When looking at an image, understanding what and why you like it, will be of great benefit to you. This is something that you will develop more and more, as you mature as a photographer. Just a hint, it’s not the camera settings that made an image great. It could be the location, the lighting (time of day is very important), composition, perspective, focal length, any editing techniques used, etc., that all worked together to make the final piece. Each one of these is no more or less important than the next, and they all need to be considered.

    For me, moving from obsessing over camera settings, to these other factors that influence a photo, was somewhat of an epiphany for me, and made me realize that photography may not be as simple as I once thought it was!

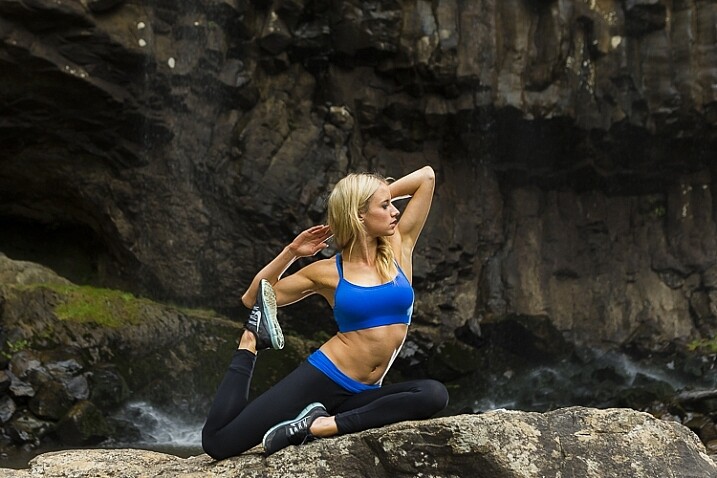
    With this image, I used 1/160sec, f/4 and ISO 400. I also have two flashes fired remotely; one camera-right just behind the model giving the rim light on her front side and arms etc. I also have my key light placed at camera left and at ~ 45-degree angle facing the model. Both lights are un-modified (bare-head, or bare-bulb).

    With this image, I used 1/160th, f/4 and ISO 400. I also have two flashes fired remotely; one camera-right just behind the model, creatng the rim light on her front side and arms. I also have my key light placed at camera left and at approximately a 45-degree angle, facing the model. Both lights are un-modified (bare-head, or bare-bulb).

    As you advance in photography, you will slowly develop a skill that is often referred to as reading an image. This is were you look at an image, and begin to work out how it was created.

    For instance you will be able to have a rough idea of the position of the camera, any lighting setups that were used, etc. This is something that you will build upon as you become more experienced. Unfortunately, this is where the magic of photography seems to end. At first, you are in awe of what you captured, when you didn’t quite know how you got it; it all seemed to work like magic. But as you begin to read images, and dissect how they were crafted, that magic can seemingly disappear.

    Here I used 1/1000sec to freeze the action, f/3.5 to give less depth of field and ISO 6400 to fill in the exposure gap. The ISO is quite high as this is at a night game. © Daniel Smith / Getty Images.

    Here I used 1/1000th to freeze the action, f/3.5 to give less depth of field, and ISO 6400 to fill in the exposure gap. The ISO is quite high as this was a night game. © Daniel Smith / Getty Images.

    But before you being to to read photos, you must first be very comfortable with not only the three exposure elements (aperture, shutter speed and ISO), but also how they visually affect images. Once you fully understand each element, you will be able to look at an image and say, “They’ve used a fast shutter speed for this” or, “The aperture used was very wide”.

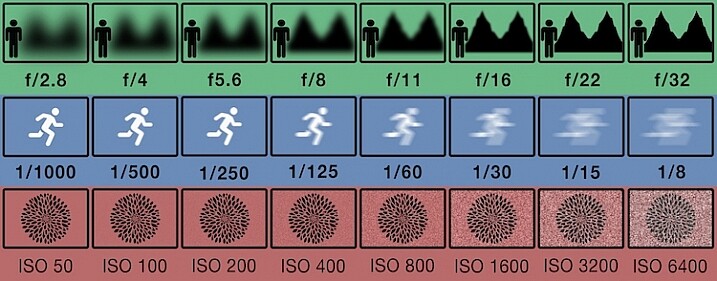
    You may not be able to determine the exact camera settings, but you will be able to put yourself in a much better starting point than when you first begun, when you had no idea where to begin! This illustration gives a very quick visual representation of how shutter speed, aperture and ISO affect the look of an image.

    This illustration gives a visual guide to how aperture, shutter speed, and ISO affect an image. *this is just an illustration and does not necessarily give exact representation for each.

    This illustration gives a visual guide to how aperture, shutter speed, and ISO affect an image. *Note: this is just an illustration and does not necessarily give exact representation for each.

    Conclusion

    So you now know why asking, “What camera setting did you use?” is not the most helpful. But rather than leave you there, let’s look at some alternative questions you can ask, while you develop your image reading skills, and get some education under your belt:

    • How did you create this image?
    • What post-processing methods did you use?
    • How did you achieve (whatever part you are most intrigued about)?
    • What camera/lens combination did you use?
    • Why did you use that specific camera/lens combination?
    • Why did you use those particular settings?
    • What was the lighting like?

    Now you are armed with some alternative questions to ask that will give you a better insight to how it was made, when you see an image you like.

    With this in mind, what questions would you ask about this image? Would you still ask for the camera settings, or how this image was created?

    Fig 9

    googletag.cmd.push(function() {
    tablet_slots.push( googletag.defineSlot( “/1005424/_dPSv4_tab-all-article-bottom_(300×250)”, [300, 250], “pb-ad-78623” ).addService( googletag.pubads() ) ); } );

    googletag.cmd.push(function() {
    mobile_slots.push( googletag.defineSlot( “/1005424/_dPSv4_mob-all-article-bottom_(300×250)”, [300, 250], “pb-ad-78158” ).addService( googletag.pubads() ) ); } );

    The post Why Asking What Camera Settings Were Used is Not as Helpful as You Think by Daniel appeared first on Digital Photography School.

    Digital Photography School