Category: Photography

  • A Beginner’s Guide to Focus Stacking

    Other than for special effect, photographers generally do not want out-of-focus images. But sometimes, regardless of which camera settings are used, not every detail of an image can be captured tack sharp. Depth of field (DOF) can be so shallow, that interesting aspects of the photos are without sharpness. Setting to a smaller aperture may be used to increase DOF, but moving the aperture farther from a lens’s sweet spot introduces lens diffraction into the image, again resulting in some fuzziness. Also, if stopping down the camera’s aperture, shutter speed will need to be increased and blurry images may result. Increasing ISO to help with the exposure will introduce digital noise to the image.

    So, how do you shoot with the best aperture and shutter speed combination, and get sharp images from front to back of an image? A technique that can help resolve this problem is called focus stacking. Here’s some helpful info about this technique.
    13 image Focus Stack

    13 image focus stack

    What You Need

    • A tripod.
    • A DSLR camera, capable of shooting in manual mode. It is possible to use a point and shoot camera, but it must have manual mode and manual focus capabilities.
    • Depth of Field iPhone app (helpful but not required).
    • Photoshop or another focus stacking software.

    How to Shoot for Focus Stacking

    Focus stacking is similar in principle to HDR. However, with focus stacking, images are captured with different focus points, and later combined in Photoshop, to create an image with more DOF than would be possible with a single exposure. Landscape and macro photography are two genres of photography that benefit most from using this procedure. Be warned – calm winds and reasonably stationary objects are a must!

    Before beginning to shoot, it is always helpful to know a lens’s sweet spot, defined as the aperture that the lens produces its sharpest image. (It is usually found about two to three stops from wide open.) Experiment until this important setting is determined.
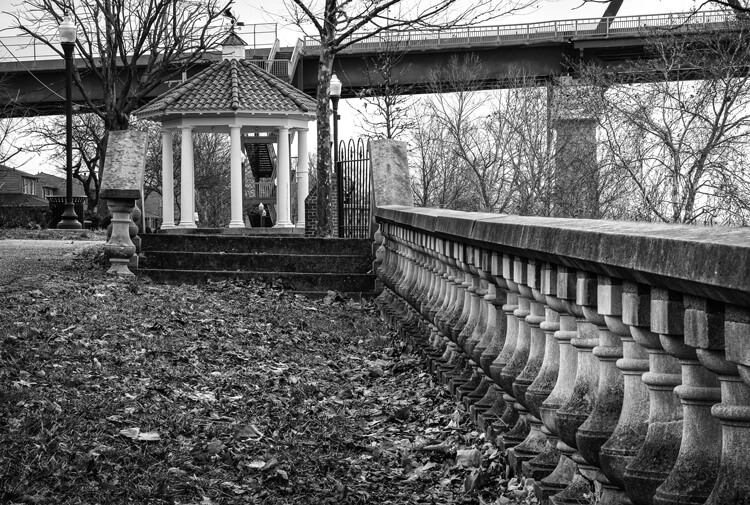
    6 image Focus Stack

    Landscape

    There are two basic scenarios when shooting landscapes, that may benefit from focus stacking. The first is when the subject is a close foreground object, with an interesting background, both desirable aspects to be in sharp focus. The second, is when using a telephoto lens (which typically has a shallow depth of field) and the subject covers multiple distances, that may be brought into sharper focus. (FYI: If shooting a landscape with a wide angle lens, the DOF may be adequate enough to capture a sharp image that has no benefit in being processed by focus stacking.)

    Tip: Here is a little trick to find out if focus stacking will benefit an image when photographing a scene or subject. After composing the image, set the focus point about one third into the image. Then, using Live View, enlarge the image and check to see if the foreground and background are sharp or blurry. If either or neither are in focus as sharply as desired, the image could benefit from focus stacking.

    Steps for Shooting Landscapes for Focus Stacking

    1. Place the camera on a sturdy tripod – a must!
    2. Frame the subject and compose the shot.
    3. Determine exposure for the scene, and set the camera to manual mode, to ensure that the exposure is constant for every image.
    4. Set the camera to Live View and aim the focus point on the nearest object desired to be in focus. Use the camera’s zoom (+ button, not zoom on the lens) to preview the focus through Live View. Then switch to manual focus and use the focus ring to fine tune for sharpness if necessary.
    5. Take the first exposure.
    6. Without moving the camera or adjusting any settings, move the focus point to an object mid-way in the image and refocus.
    7. Take the second exposure.
    8. Again, without changing anything, refocus on an object at the farthest point of the intended image.
    9. Take the third exposure.
      To capture landscapes, three images are generally all that is necessary to create sharp focus stacking images, but it’s completely fine to take extra images to make sure that the entire scenee is covered. A rule of thumb would be to add more images for longer focal lengths. Be aware that extra images will take longer to process in post-production. If available, check the DOF with a Smartphone app, in order to figure out how many images will be necessary, to get every aspect of the photo in focus.
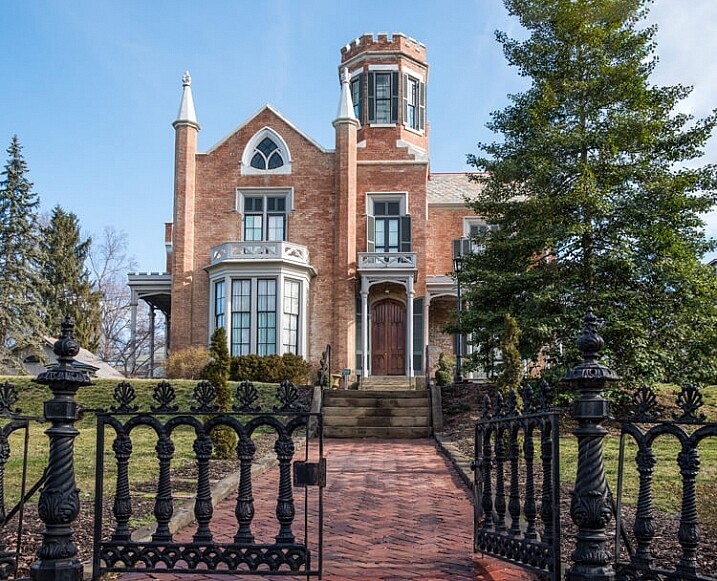
    Using three images focus stacking. The first image was focused on the fence, the second was focused mid-way into the image, and the third was focused on the front of the house.

    The first image was focused on the fence, the second was focused mid-way into the image, and the third was focused on the front of the house.

    Macro Photography

    Macro photography can benefit from focus stacking more than any other type of photography, because a macro lens has an extremely shallow depth of field.

    1. Place the camera on a sturdy tripod – a must!
    2. Frame the subject and compose the shot.
    3. Determine the exposure for the subject, and set the camera to manual mode to ensure that the exposure remains constant for each and every image.
    4. Set the camera to Live View and aim the focus point on the nearest object desired to be in focus. Use the camera’s zoom (+ button, not zoom on the lens) to preview the focus through Live View. Then switch to manual focus and use the focus ring to fine tune for sharpness if necessary.
    5. Take the first exposure.
    6. Without moving the camera or adjusting any settings, move the focus point to a distance slightly farther away from the lens. Remember that DOF in macro will be measured in fractions of an inch, instead of feet, as in landscape photography.
    7. Repeat step 6 as many times as needed to cover every aspect of the subject’s DOF. This could range from as few as six images to 30+ images. Make sure the entire subject is covered or the results may be unusable. If available, check the DOF with the iPhone app (www.setmycamera.com), in order to figure out how many images will be necessary to get every aspect of the photo in focus.
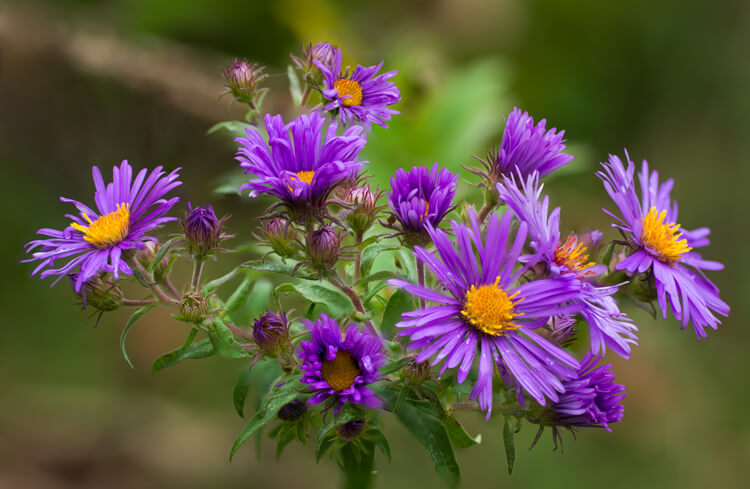
    By focus stacking the flowers only and leaving the background out of focus makes the flowers stand out in the final image.

    Focus stacking the flowers only makes the flowers stand out from the background.
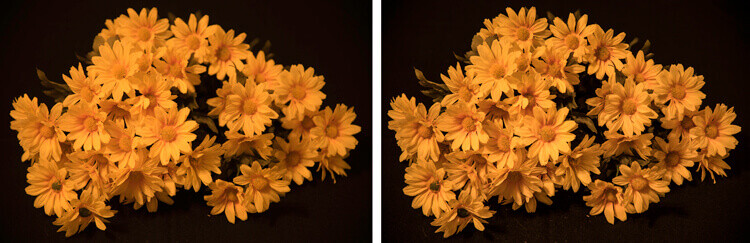
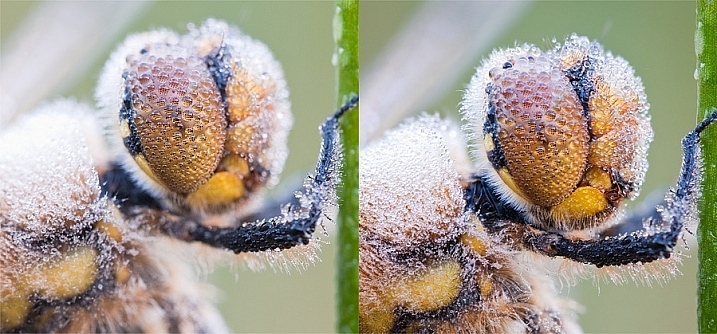
    Image on right is a single image capture at 85mm focal length. Image on right is a 12 image focus stacked image. Each image had a DOF of less than one inch.

    The image on right is a single image capture at 85mm focal length. The image on right is a 12 image focus stack. Each image had a DOF of less than one inch. Note the additional detail in the image on the right, compared to the single image.

    Tip: As often used when capturing HDR images, take a shot with your hand in front of the camera before and after each series of images. When working with the images later, this will make it easier to tell where each series starts and ends.

    Use you hand to mark the beginning of each series of images, this will make processing you images much easier.

    Use your hand to mark the beginning of each series of images. This will make processing your images easier.

    Processing the Final Images

    Processing the files to accomplish the final image may seem like the most difficult part of creating a focus stacked image, but it’s really very simple to do in Photoshop. Here’s how:

    1. Open Photoshop
    2. Get each image on a separate layer: Under File, choose Scripts and Load files into stack. Click Browse and select all the images.
    3. Check the box for Attempts to Automatically Align Source Images.
    4. Click OK and each of the images will open into a new layer in Photoshop.
    5. Open the Layer palette and select All Layers.
    6. Under Edit, select Auto-Blend Layers.
    7. Check the box for Stack Images and Seamless Tones and Colors. Optionally, select Content Aware Fill Transparent Areas, which will fill any transparent areas generated by aligning images in step 3. (Be aware this will increase processing time. Generally, I do not choose this option; rather, I just crop the image slightly later, if necessary.)
    8. Click OK
    9. Flatten the image by selecting Layer/Flatten image and save.
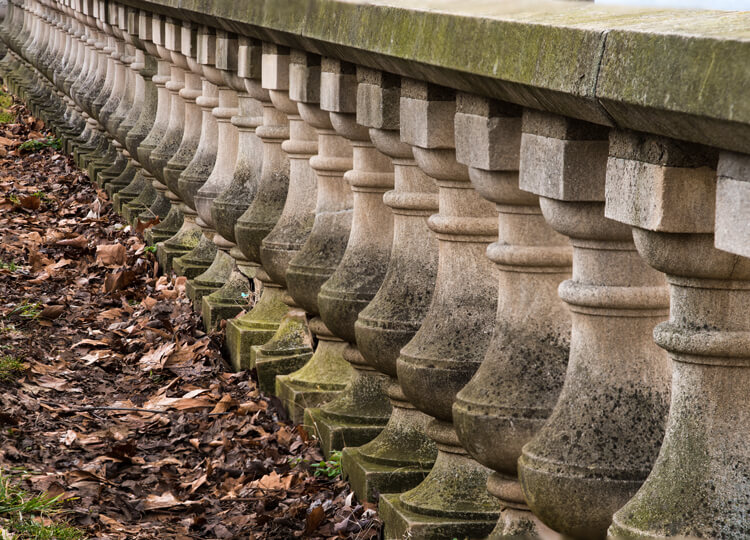
    Focus-stacking-1

    Note: If you are using a Lightroom and Photoshop workflow, after importing your images into Lightroom, instead of following steps 2 through 5, you can simply add all your images into Photoshop layers by selecting all your images, then go to Photo/Edit in/Open as Layer In Photoshop. This will open all the selected images as layers. You will then have to Align your images by selecting all the layers in the layer palette, then go to Edit/Auto Align Layers. Then continue at step 6 above.

    Summary

    It is nearly every photographer’s intention to capture the sharpest images possible, and focus stacking can be another tool to help you achieve this goal. The trick to this whole process is to take enough focused images, to create a final photo that is in focus from foreground to background. The results can be amazing once you get the hang of it! Give it a try and post your results and any questions you have here.

    googletag.cmd.push(function() {
    tablet_slots.push( googletag.defineSlot( “/1005424/_dPSv4_tab-all-article-bottom_(300×250)”, [300, 250], “pb-ad-78623” ).addService( googletag.pubads() ) ); } );

    googletag.cmd.push(function() {
    mobile_slots.push( googletag.defineSlot( “/1005424/_dPSv4_mob-all-article-bottom_(300×250)”, [300, 250], “pb-ad-78158” ).addService( googletag.pubads() ) ); } );

    The post A Beginner’s Guide to Focus Stacking by Bruce Wunderlich appeared first on Digital Photography School.

    Digital Photography School

  • On Assignment: Leaf and a Dish

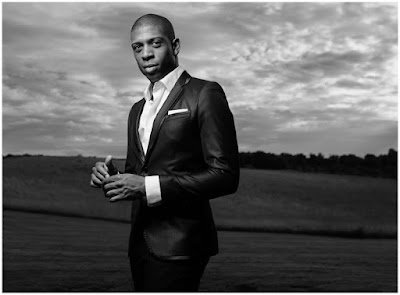
    As photographers, we often have to do outdoor portraits. And if we are lighting, that means hauling a lot of gear, fighting a lot of sun and dealing with the wind. But lately I've been working to pare the gear pack down to something that is reasonable in terms of cost, size and weight.

    The photo above is a good example of what can be done with a minimal amount of well-chosen gear. With a little advance thought, you can overpower the sun, have good mobility and not have to worry about the wind.

    Read more »
    Strobist

  • Beginner’s Guide to Water Droplet Photography

    Have you ever looked at those great water droplet or splash images and found yourself scratching your head wondering how did they do that?

    10

    Well, those great images are usually done in studios, with electronically programmable eyedroppers, and motion triggers that fire the camera at an exact split second, allowing the photographer to freeze motion on that exact perfect moment. All that specialized gear makes all this process controllable, but if you own a camera and an external flash, you can also give this type of photography a try.

    Water drops are an interesting subject to photograph, as it gives you the opportunity to explore techniques you wouldn’t normally do, and will probably give you some great images to add to your portfolio.

    In this article, I will give you some interesting tips on how to get started with water droplet photography, with just some basic equipment.

    Gear

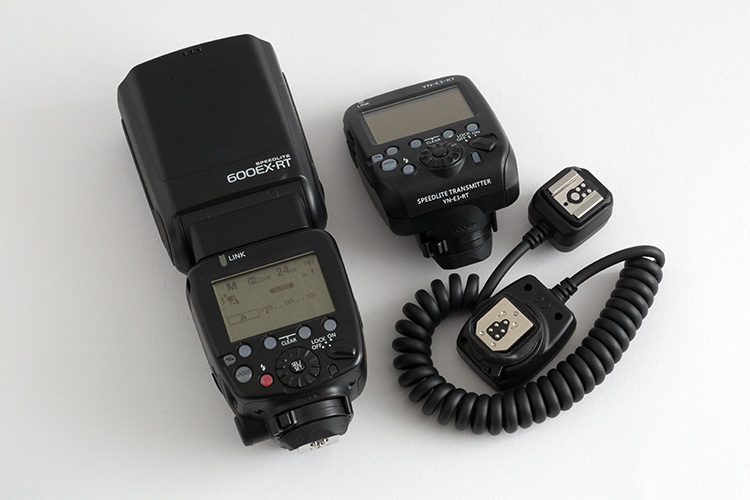
    Besides your camera and lenses of choice, you will need an off-camera flash, and a wireless trigger or dedicated extension cable.

    01

    Even though you can get great images without it, flashes with the high-speed sync (HSS) function will allow you to use shutter speeds above 1/250th, and freeze the motion much better.

    02

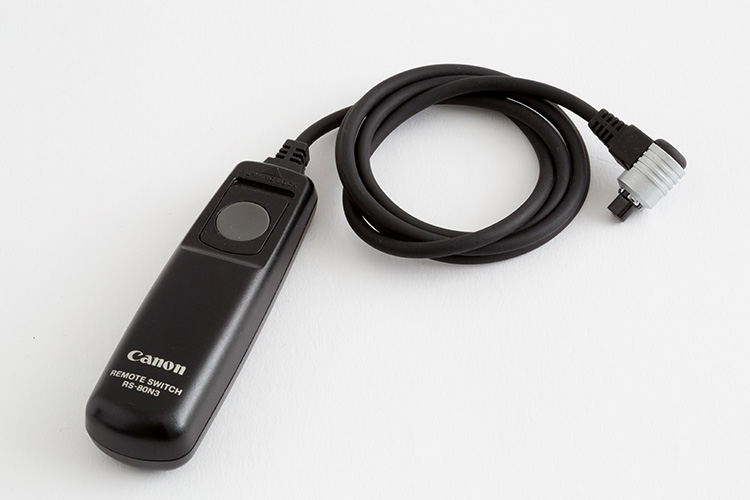
    A shutter cable release is also a good accessory to use, as it will allows you to fire your camera without touching it.

    03

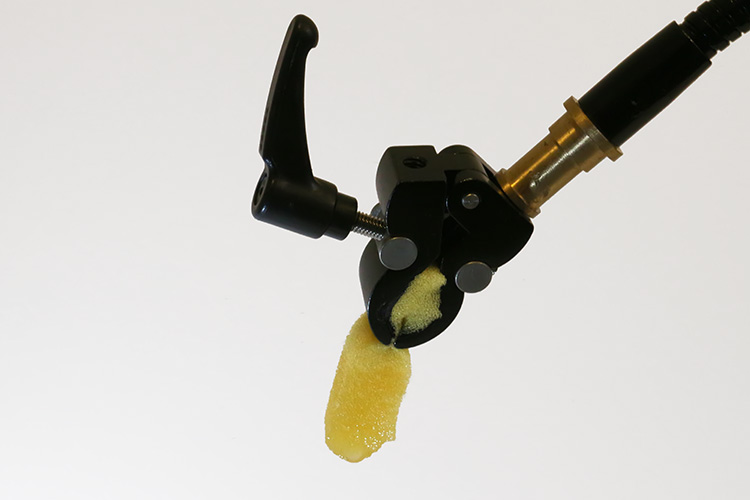
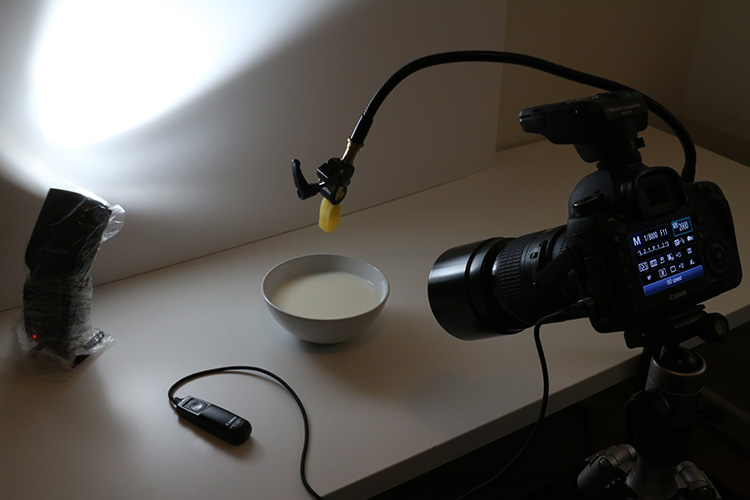
    Finally you will need an eyedropper, or a wet sponge, with a system to hold it in place above a container with water. Usually I prefer to use a sponge, as it can produce bigger drop. I use a nano clamp and a gooseneck, attached to a tripod, to hold things in place.

    Here is the complete setup:

    04

    Safety

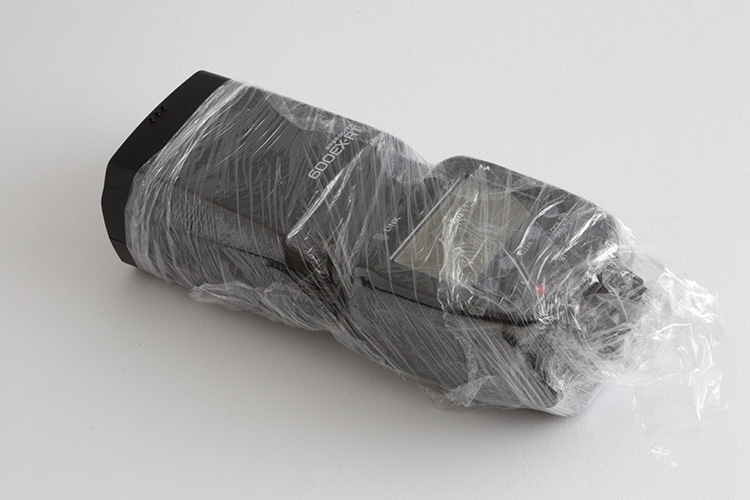
    Electronics and water don’t get along very well, so will need to be extra careful when doing this type of photography. Safety first, so a good piece of advice, is to protect your equipment with cellophane wrap, so any accidental water spillage won’t damage it.

    05

    Lighting

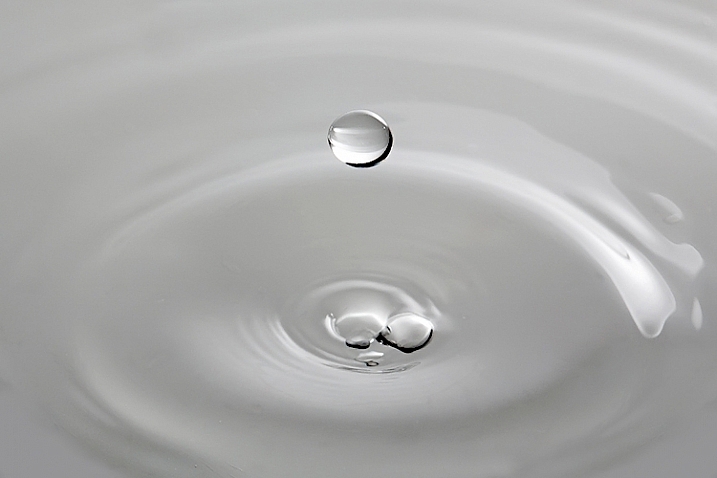
    The first step is to keep in mind, that water is a specular surface, so you should not light the water but rather what the water reflects. Here I’m using white cardboard to bounce the light that reflects on the water surface.

    06

    Exposure: ISO 2000, 1/8000, f/11

    The f/11 aperture allows me to have some depth of field, and the 1/8000 shutter speed, together with the flash at full power on HSS mode, allows me to freeze the action.

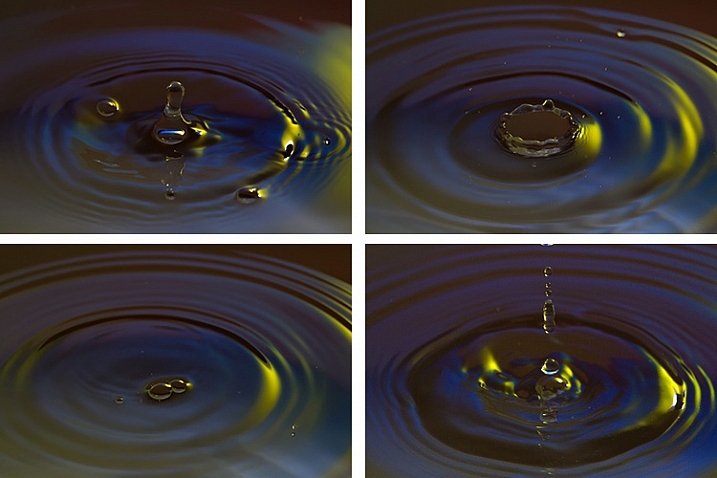
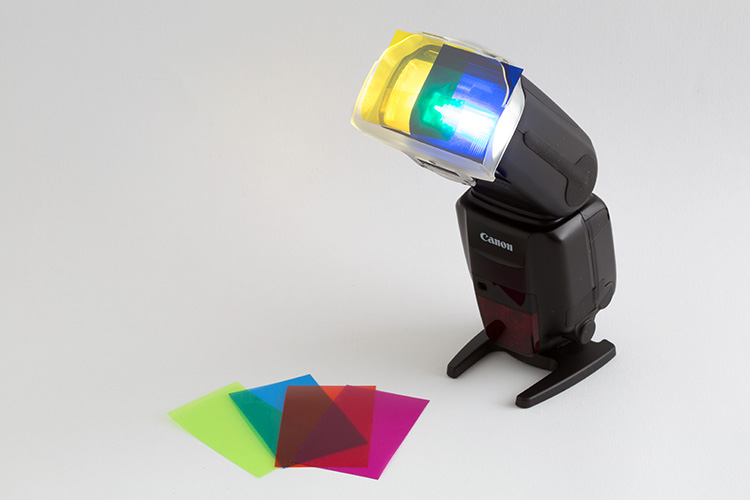
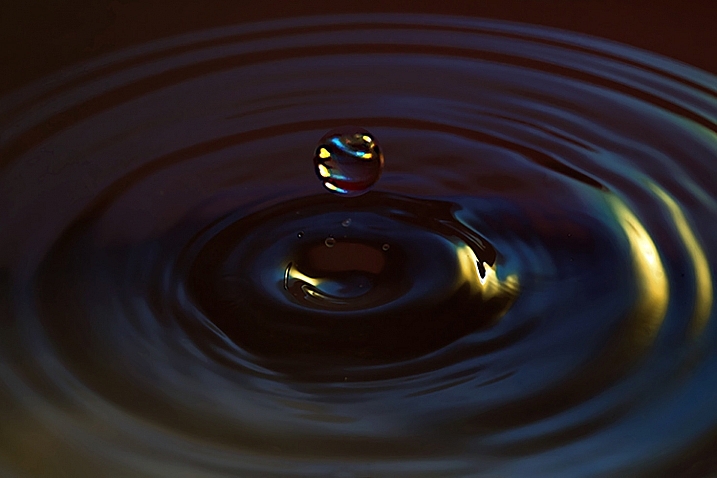
    You can get a lot of different effects with slower shutter speeds and different apertures. This is a plain simple image, but you can get creative in a lot of ways here. One thing I use a lot is colored gels in front of the flash, to create some dynamics in the image.

    07

    Here I am mixing yellow and blue gels to create this colorful image.

    08

    Timing

    The perfect timing to press the shutter release is something really hard to accomplish, as it’s humanly impossible to be that accurate. But, with some practice, and a little bit of luck, you will end up some great shots. To be honest, the random nature of the results is something that I really enjoy.

    Here is a sequence of images that didn’t work as good as the last one.

    09

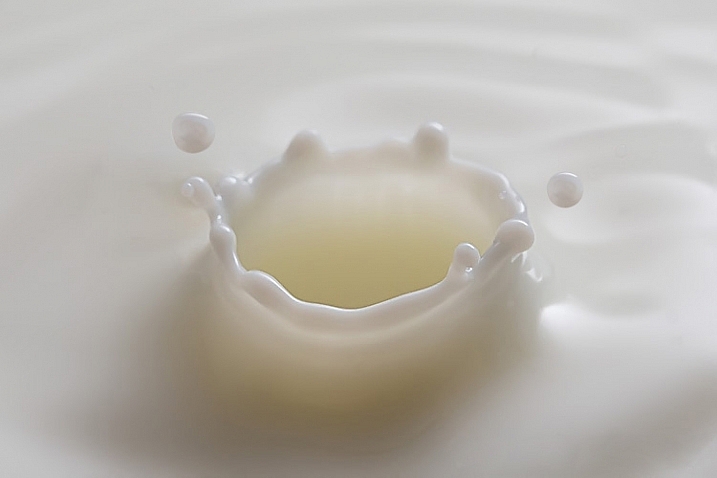
    Once you get the hang of it, you can experiment with food colorants and different liquids. Milk is a good choice, as it gives you drops with more consistency, and therefore best splashes.

    10

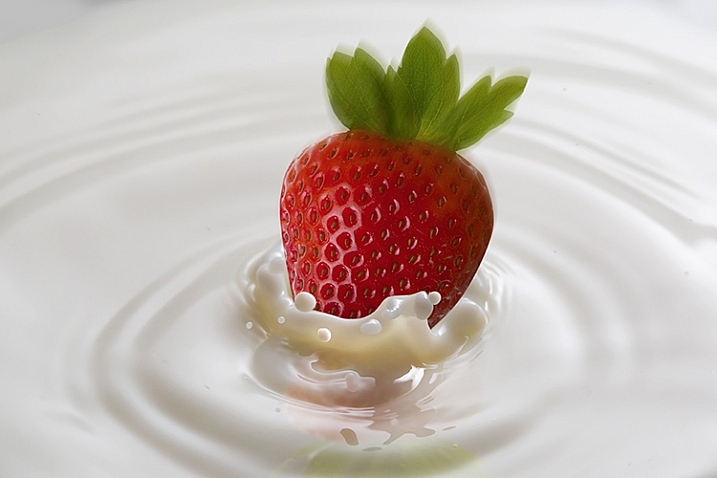
    You are only limited by your imagination here. With some basic Photoshop skills, you can take your images to the next level with some photo composites, like this image I created for a strawberry yogurt advertisement campaign.

    11

    So, there are some basic techniques to produce great water droplet images, without specialized equipment or motion triggers. Give it a try, I’m sure you’ll get great results!

    This week on dPS we are featuring articles on special effects. Check out the others that have already been published here:

    • How to Photograph the Full Band of the Milky Way
    • Fire Spinning with Steel Wool – A Special Effects Tutorial
    • Special Effect – How to Create Multiple Flash Exposures in a Single Frame
    • Stacking Light Trails for Night Photography Special Effects
    • 26 Unique Special Effects Photos to Spark Your Creativity
    • Weekly Photography Challenge – Special Effects
    • Tips for Shooting Through Objects to Create a Special Effect
    • How to Add Vintage Frame Overlays Using Alien Skin Exposure X
    • 8 Steps to Great Long Exposure Landscape Photography
    • How to Create In-Camera Double Exposures

    googletag.cmd.push(function() {
    tablet_slots.push( googletag.defineSlot( “/1005424/_dPSv4_tab-all-article-bottom_(300×250)”, [300, 250], “pb-ad-78623” ).addService( googletag.pubads() ) ); } );

    googletag.cmd.push(function() {
    mobile_slots.push( googletag.defineSlot( “/1005424/_dPSv4_mob-all-article-bottom_(300×250)”, [300, 250], “pb-ad-78158” ).addService( googletag.pubads() ) ); } );

    The post Beginner’s Guide to Water Droplet Photography by Ivo Guimaraes appeared first on Digital Photography School.

    Digital Photography School

  • How to Create In-Camera Double Exposures

    It was yet another snowy day in New York, so I headed to the Arboretum to work on macro photography. Tripod slung over one shoulder, with my Olympus mirrorless gear in tow, I approached the door only to be stopped in my tracks. “No tripods” she said, pointing to the sign.

    I’ve been here plenty of times with a tripod, but on holidays and weekends the rules change. Since it was President’s Day, the ban was in place. I put the tripod back in the car and decided to use the limitation as opportunity. Instead of close up studies, my plan changed to in-camera double exposures.

    This is a feature that I loved with my old film camera (Canon Elan 7). While my switch to digital was a revelation, the lack of double exposure capability was a huge let down. It was only recently that camera manufacturers started including it again. Not only has it been added to most current bodies, but the functionality has been further enhanced. Some may consider it cheating, but I look at the updates as an opportunity to be even more creative.

    When you take your first shot, you can see an imprint of it in the viewfinder, while looking for shot number two. This makes it possible to line things up carefully, instead of leaving it to chance. It takes a little time to get used to it, sort of the way the depth of field preview button is a bit odd at first. After some practice however, you start to realize the incredible potential of this feature. Scenes that were once ordinary, become a treasure trove of artistic possibility.

    In addition to the standard double exposure mode, the Olympus E-M1 has an overlay feature that lets you choose a RAW file from your SD card as shot number one. You then shoot as many frames as you like, to find the perfect image for shot number two. I found this to provide even greater control over the final image. I’m not sure what other manufacturers offer this feature, so be sure to check your manual. With this setting turned on, I set out to create some interesting images.

    Ultimately I was looking for texture in shot one, as it would be complementary to the subject in shot number two. The possible outcomes are limitless, with every shot being completely unique. Rather than simply shooting a static flower, it’s possible to create a special piece of art. Today, as more people have cameras than ever before, the ability to make a shot has become even more important. This is not something you can do with a phone camera.

    You may be wondering why I wouldn’t just do this in post-production by layering two shots in the computer. First, it wouldn’t be nearly as fun – I enjoy working with my camera more than pushing pixels around in Photoshop.

    Next, there is something serendipitous about doing it in the field. You work harder, and really tune in to all the possibilities around you. A textured brick becomes more than a wall, but a perfect layer of texture. A crack in the pavement is not merely an imperfection in the floor, but a possible part of an exciting composition. By working deliberately like this, you have no choice but to slow down, and really exercise your vision. You pay attention to the smallest details, focusing on things that most people would walk right past. Isn’t that what creating art is all about?

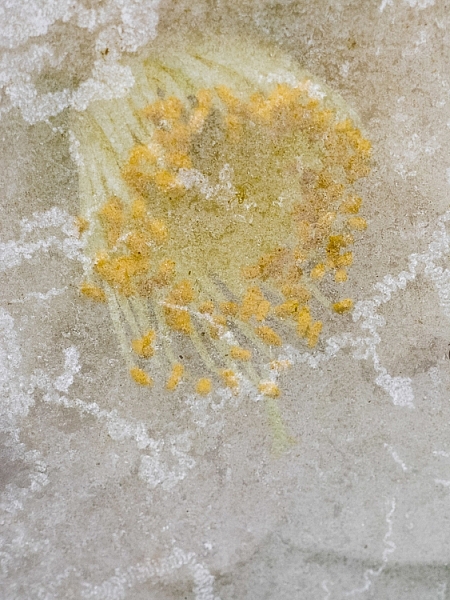
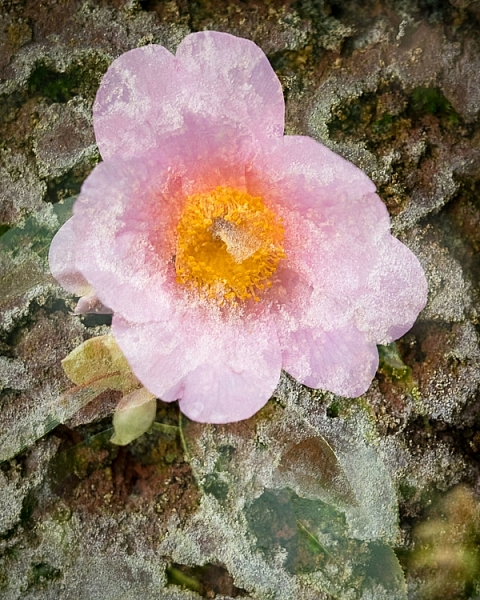
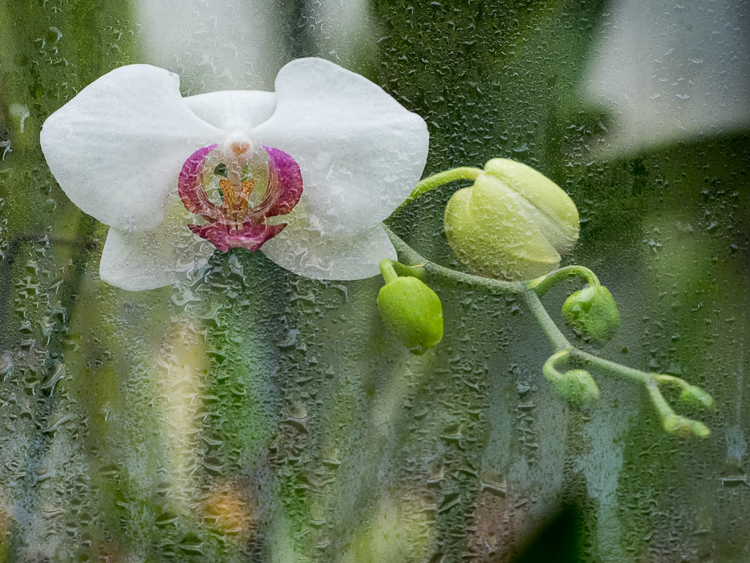
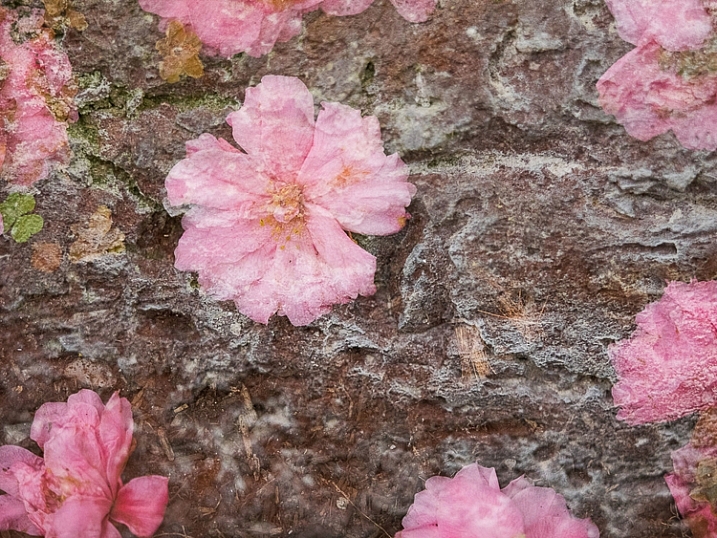
    Will there be shots that don’t work? Absolutely! To create these six images I took 200 photos, over two hours. I don’t regret a single moment of this experience however. Each one is a unique work of art that can never be reproduced. Still, you must be patient, and set aside a good amount of time to do this. If you are rushing through, you’ll miss potentially great opportunities.

    With winter upon us (spring coming soon in some areas of the Northern Hemisphere), and outdoor expeditions limited, now is the perfect time to explore this form of photography. You just may create something spectacular. The only way to find out is to give it a try.

    Have you tried in-camera double exposures before? Please share your results and questions in the comments below. If your camera has a cool double exposure feature – please tell us about it.

    This week on dPS we are featuring articles on special effects. Check out the others that have already been published here:

    • How to Photograph the Full Band of the Milky Way
    • Fire Spinning with Steel Wool – A Special Effects Tutorial
    • Special Effect – How to Create Multiple Flash Exposures in a Single Frame
    • Stacking Light Trails for Night Photography Special Effects
    • 26 Unique Special Effects Photos to Spark Your Creativity
    • Weekly Photography Challenge – Special Effects
    • Tips for Shooting Through Objects to Create a Special Effect
    • How to Add Vintage Frame Overlays Using Alien Skin Exposure X
    • 8 Steps to Great Long Exposure Landscape Photography

    googletag.cmd.push(function() {
    tablet_slots.push( googletag.defineSlot( “/1005424/_dPSv4_tab-all-article-bottom_(300×250)”, [300, 250], “pb-ad-78623” ).addService( googletag.pubads() ) ); } );

    googletag.cmd.push(function() {
    mobile_slots.push( googletag.defineSlot( “/1005424/_dPSv4_mob-all-article-bottom_(300×250)”, [300, 250], “pb-ad-78158” ).addService( googletag.pubads() ) ); } );

    The post How to Create In-Camera Double Exposures by Chris Corradino appeared first on Digital Photography School.

    Digital Photography School

  • How to Build the Best On-Location Photography Lighting Kit

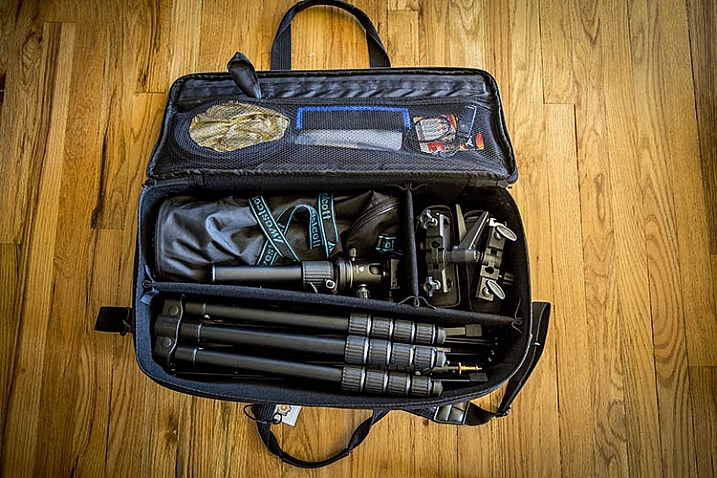
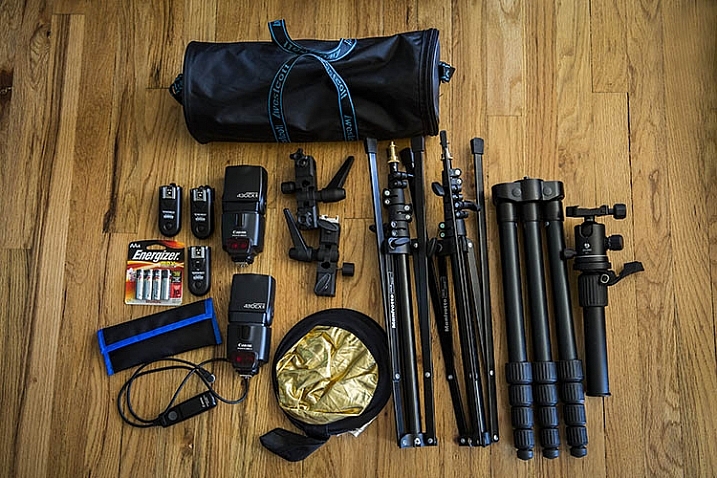
    Digging around the Internet, there are tons of resources available for constructing the perfect studio lighting setup for photographers, but very little is written about the best travel photography lighting kits. As a result, this article is an entirely DIY approach, comprised of lots of sleuthing and trial and error, to create the ideal lighting kit, that’s compact and easy to travel with. Let’s start with the essentials: the lighting gear!

    photography lighting equipment

    Best Travel Photography Lights

    Compared to studio lights, you really can’t go wrong with speedlights when you’re looking for portability. As a Canon shooter, this means having a Canon 580EXII as my main light, and two Canon 430 EXII Speedlites as my secondary lights. A possible lightweight and travel-friendly alternate light source is the Westcott Ice Light, which offers continuous LED lighting, although in general it doesn’t quite have the oomph and output that speedlights do.

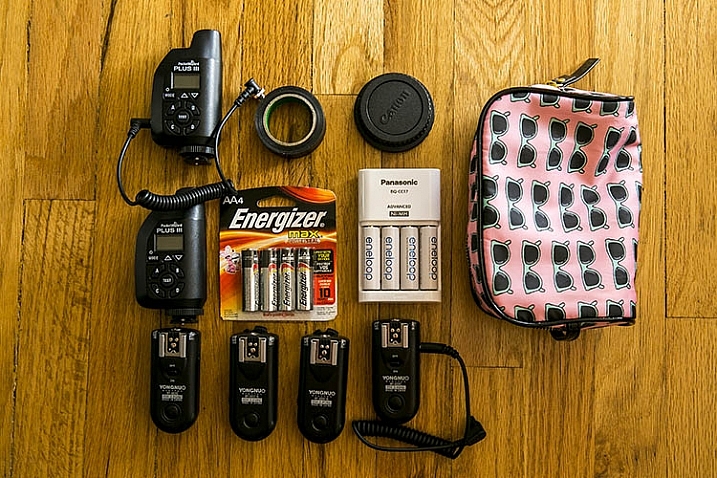
    All flashes are powered by Panasonic Eneloop AA batteries, which have been a huge money-saver, thanks to the fact that they are rechargeable, and have all been extremely reliable to date. To sync all three speedlights, I have PocketWizards that I always carry as backups, but primarily rely on Yongnuo RF-603CII-C1 remote flash triggers for two reasons:

    1. They’re small and low-profile
    2. They’re incredibly cheap and affordable

    Amazingly, the Yongnuos are also very reliable, and haven’t once failed in two years of constant usage.

    Compact Light Stands

    photography lighting equipment

    Next on the list are light stands in the form of Manfrotto 5001B Nano stands. Weighing in at just 2.2 pounds (1kg) each, these light stands fold down to a mere 19 inches (48cm), while still having a maximum height of 74.4 inches (1.9m). They aren’t the most stable or sturdy light stands out there, but they travel extremely well, and work just fine for simple speedlight setups. Two light stands gets their own umbrella adapter and accompanying umbrella, while one lucky stand is adorned with a Westcott Rapid Box lighting modifier.

    Lighting Gear Extras

    As with most photo shoots, you never quite know what extra accessories you might need when on location, so my lighting kit varies from shoot to shoot. Some common extras include a a Benro Travel Flat Tripod, Canon shutter release cable, mini gold/silver reflector, speedlight color gels, gaffer’s tape, spare batteries, and camera body and lens rear caps, in case of drops and spills (sad to say these have come in handy more than once).

    Bonus tip: I recommend using a lightweight zippered women’s cosmetic bag to hold, and organize, your smaller items such as remote triggers, batteries, front and rear caps, etc. This is the easiest way to keep those items contained in one spot for easy access, with less chance of losing them while at a shoot.

    photography lighting equipment

    Lighting Gear Bags

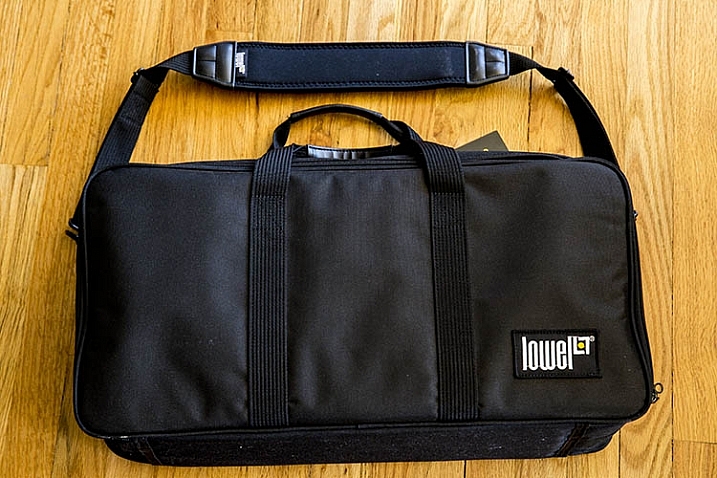
    After a huge laundry list of items, you’re probably now wondering how to carry all of this stuff. Finding the perfect lighting gear bag was by far the most challenging part of assembling this DIY kit. But after lots of hunting, I found the best solution to be a Lowel Litebag, which come in a range of sizes.

    With a thick and sturdy vinyl exterior and soft interior, this zippered bag has padded partitions that can be removed, or modified to suit a variety of needs. It has an adjustable, nicely padded shoulder strap and handles, making it easy to carry, even when heavy with equipment inside. It isn’t sufficiently padded to take a solid beating, but it will definitely protect your gear to a reasonable extent, without the added bulk and weight. Unfortunately, this bag isn’t the easiest to find, but it is incredibly solid, and holds all of the gear I mentioned above, with room for more!

    photography lighting equipment

    In Conclusion

    As a traveling, or on-location photographer, it’s important to have a go-to travel photography lighting kit that is compact and flexible, while still keeping your gear safe from harm. If you’re searching for a flexible lighting kit, try out the above recommendations, and let me know what you think the comments below! Also, if you have another travel lighting kit setup, I’d love to hear about your own suggestions and modifications.

    amzn_assoc_placement = “adunit0”;
    amzn_assoc_enable_interest_ads = “true”;
    amzn_assoc_tracking_id = “dpsgeneral-20”;
    amzn_assoc_ad_mode = “auto”;
    amzn_assoc_ad_type = “smart”;
    amzn_assoc_marketplace = “amazon”;
    amzn_assoc_region = “US”;
    amzn_assoc_linkid = “6710d26f550e9793f41475ee806fee9e”;
    amzn_assoc_emphasize_categories = “13900861”;
    amzn_assoc_fallback_mode = {“type”:”search”,”value”:”digital cameras”};
    amzn_assoc_default_category = “Photo”;

    googletag.cmd.push(function() {
    tablet_slots.push( googletag.defineSlot( “/1005424/_dPSv4_tab-all-article-bottom_(300×250)”, [300, 250], “pb-ad-78623” ).addService( googletag.pubads() ) ); } );

    googletag.cmd.push(function() {
    mobile_slots.push( googletag.defineSlot( “/1005424/_dPSv4_mob-all-article-bottom_(300×250)”, [300, 250], “pb-ad-78158” ).addService( googletag.pubads() ) ); } );

    The post How to Build the Best On-Location Photography Lighting Kit by Suzi Pratt appeared first on Digital Photography School.

    Digital Photography School

  • 8 Steps to Great Long Exposure Landscape Photography

    longexposure_landscape2

    In this article I will outline eight steps, that will help visualize what you’ll need to capture beautiful, well-planned, and unique images that you’ll be happy with.

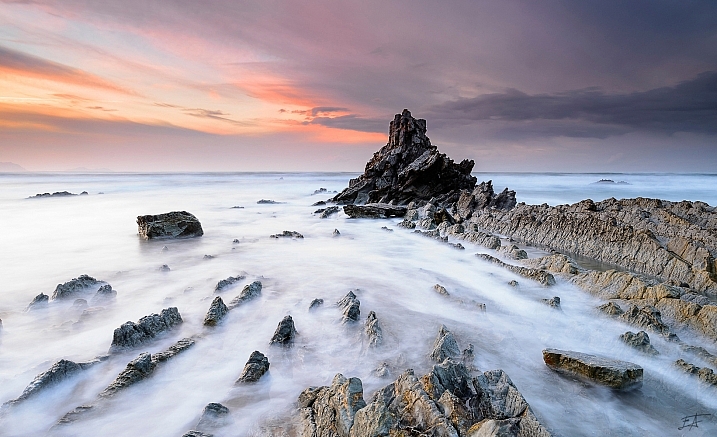
    Long exposures are the true artworks of photography; a normally static and bland scene can become a dynamic masterpiece when the shutter is left open, and the capturing of movement occurs. Surf on a beach becomes a swirling, cloud-like mass, and grasses flowing in the wind become a single, beautiful entity. This is a situation where what you see, and what you end up with, are usually two very different things, and the results are often breathtaking.

    But capturing that beauty can be challenging. So what do you need to focus on to make a long-exposure landscape shot work? Let’s explore that a bit more.

    David McAughtry

    By David McAughtry

    1. Choose your location wisely

    Before you even shoot your landscape, you’ll need to decide what type of shot you’ll tackle, and what environment you’d like to shoot in – whether it be a grassy plain, a seascape, or a busy highway.

    Long exposure photography is about capturing, and translating movement within a frame. Spend some time deciding what you’re trying to capture, and what movement you want to accentuate. Rolling waves? Swaying grass? Flowing clouds?

    Take a moment to envision what your scene will look like, and what parts of it will be stationary, and which parts will be fluid.

    Aaron

    By Aaron

    2. Be patient and wait for the right time

    Long exposures, at their very basic premise, require one of two things to work properly. Either very dim light situations such as the golden hour time periods, very early, or very late in the day – OR modifiers added to the camera to diminish the light that is coming in through the lens.

    The reason you need one of these is because leaving the shutter open for longer periods of time, monopolizes one corner of the exposure triangle. When a normal amount of light strikes the camera’s sensor for an extended period of time, you’re guaranteed an overexposure. Therefore, you’ll need to change one of the variables to reduce that amount of light.

    longexposure_landscape

    The solution? Plan your shoot for very early in the morning, and very late in the evening. The darker it is outside, the longer you’ll be able to leave your shutter open, and therefore the more motion you’ll be able to capture in your image.

    If you’re unable to shoot at those times, you’ll need to invest in a neutral density filter, preferably one with the ability to reduce the amount of light coming in to your lens by 10 stops, or more. These filters also add an extra layer of uniqueness to your images, because they allow you to shoot these long exposures at times of the day you normally don’t expect to see them.

    3. Select the perfect lens

    Of course, there are no hard and fast rules about which lens you’ll need to use, but traditionally, landscapes are captured with wide-angle lenses, to broaden the view and translate a sense of expansiveness.

    Can you capture a landscape with a standard 50mm lens? Of course you can! But to maximize the open feel of a scene, consider using something wider. Keep in mind that the more you capture within the frame, the more movement it will contain.

    070515_

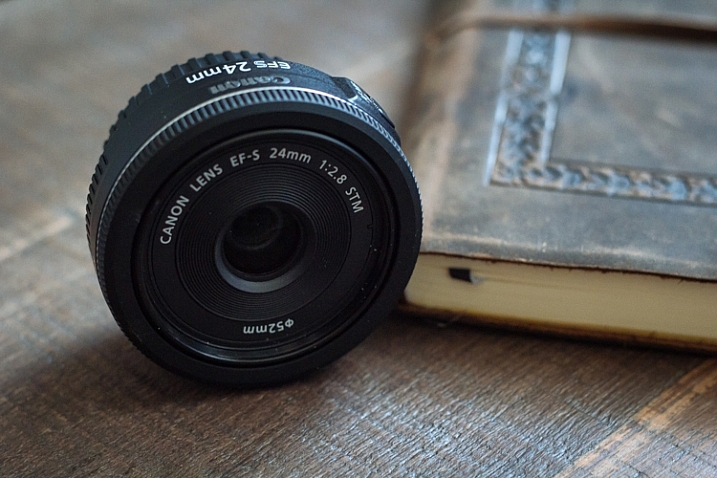
    I personally use a 24mm f/2.8 pancake lens for most of my landscape shots. While it’s not as wide as what some people use, I find it gives me a good middle ground, with a wide focal length, and very little of the distortion traditionally associated with super-wide glass.

    4. Bring the proper equipment

    While we’re speaking about the planning phase of your shoot, it’s a perfect time to consider what gear you’ll need to pull off a long exposure landscape. As it happens, it’s the same equipment you’d need for any other long exposure shot.

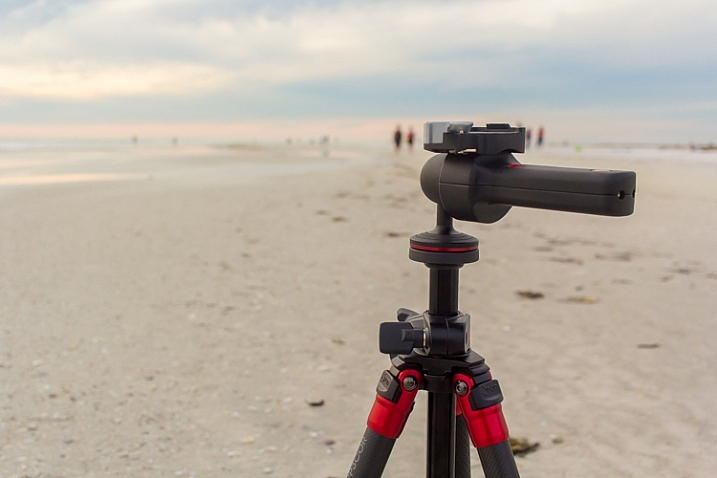
    A tripod is a invaluable piece of gear for any landscape photographer, and for a long exposure, it’s an absolute requirement. Exposures of several seconds, which are required to produce movement within the image, need a stable base for the camera. The slightest amount of movement can cause blurriness, and that is amplified with longer and longer shutter times. Invest in a good, sturdy tripod, and ensure nothing will blow or bump into the unit while in operation.

    013016_

    Another essential accessory for this situation is a remote shutter release. There’s really no excuse for any landscape photographer to not have one, as they can be found for your camera model for $ 10, or so. These releases connect to your camera, and allow you to activate the shutter without ever touching the camera body itself. This keeps the vibration during the shutter click to an absolute minimum.

    5. Use the correct camera settings

    Since you’re using longer exposure times to pull off this type of shot, you’ll need to make adjustments to other parts of the exposure triangle. Generally, this means you need to stop your aperture down as far as you can, while maintaining sharpness, and reducing your ISO to the lowest setting. These two settings will allow you to bump your exposure time up, to long enough to capture movement in your image.

    Fortunately this also gives you some bonus advantages; a lower ISO (such as 100), will keep the noise and artifacts in your shot to a minimum, giving you the best possible image quality. In addition, lenses tend to be sharper in the middle aperture ranges. Using apertures such as f/8, f/11 or f/16 will give you a nice, deep depth of field throughout the picture, while also taking a sharper, clearer photo than what you’d generally get with an extreme aperture of f/22 (due to diffraction).

    022916_

    As always, shoot in RAW. This will capture as much data as possible, and allow you to make non-destructive edits to the file later. Shooting in RAW format also negates the need to fiddle with white balance while shooting, since that can be adjusted in post-production.

    If you do set white balance at the time of the shot, it’s usually a good idea to select the Daylight preset, or a custom white balance setting of your own, that counterbalances the extreme warmth encountered at sunset, and vice-versa for a shot at sunrise, which is a cooler time of the day, color temperature-wise.

    6. Focus on your composition

    Ekaitz Arbigano

    By Ekaitz Arbigano

    When you have your equipment and settings where they need to be, it’s time to take a moment to compose your shot. What are you capturing? The movement of a body of water like the surf from the ocean? Adjust your composition to allow for more of the water to be in the composition, instead of the sky. Are you trying to focus on the movement of clouds across the sky? Then give that part of the scene more attention within your frame to accentuate it.

    7. Envision and anticipate movement

    Shooting a moving scene, and attempting to capture that movement involve a bit of foresight, not unlike a marksman leading his target, by visualizing where the target will be when the shot gets there.

    longexposure_landscape3

    How far will the clouds move in the duration of the exposure? In which direction? Plotting this out before you click the shutter will improve your final image.

    For example, capturing the ebb and flow of surf pounding a beach, requires knowing where the surf-line will end, and begin to recede back into the ocean, to properly compose it. Watching the movement of the subject you’re shooting, will help anticipate where it will appear in the final image. It’s always pays to plan ahead!

    8. Enhance beauty in post-production

    Finally, (and yes, this can be a touchy subject), learn to excel with the post-production process. A long-exposure image will already by eye-catching just by its inherent properties, but it’s important to take time during editing to enhance the beauty you’ve already captured in camera.

    This shot initially had a cooler white balance, due to being shot in the morning, as opposed to during sunset.

    This shot initially had a cooler white balance, due to being shot in the morning, as opposed to during sunset.

    Since you’ll be shooting early or late in the day, tones will most likely already be dramatic, but may require some light boosting of the colors, or dodging and burning in Photoshop to add a bit more.

    Since you shot at a low ISO to begin with, you likely won’t have to deal with noise reduction. After your exposure and tones have been taken care of, a little sharpening is all that stands between you and the final image.

    Aaron

    By Aaron

    So that’s it folks, the eight steps to get you started on the path to taking great long exposure landscape shots. What other tricks of the trade do you use to get the perfect capture? Sound off in the comments below, and as usual, let your voice be heard.

    This week on dPS we are featuring articles on special effects. Check out the others that have already been published here:

    • How to Photograph the Full Band of the Milky Way
    • Fire Spinning with Steel Wool – A Special Effects Tutorial
    • Special Effect – How to Create Multiple Flash Exposures in a Single Frame
    • Stacking Light Trails for Night Photography Special Effects
    • 26 Unique Special Effects Photos to Spark Your Creativity
    • Weekly Photography Challenge – Special Effects
    • Tips for Shooting Through Objects to Create a Special Effect
    • How to Add Vintage Frame Overlays Using Alien Skin Exposure X

    googletag.cmd.push(function() {
    tablet_slots.push( googletag.defineSlot( “/1005424/_dPSv4_tab-all-article-bottom_(300×250)”, [300, 250], “pb-ad-78623” ).addService( googletag.pubads() ) ); } );

    googletag.cmd.push(function() {
    mobile_slots.push( googletag.defineSlot( “/1005424/_dPSv4_mob-all-article-bottom_(300×250)”, [300, 250], “pb-ad-78158” ).addService( googletag.pubads() ) ); } );

    The post 8 Steps to Great Long Exposure Landscape Photography by Tim Gilbreath appeared first on Digital Photography School.

    Digital Photography School

  • How to Add Vintage Frame Overlays Using Alien Skin Exposure X

    Here is a quick and snazzy tip on adding some cool retro and vintage frame overlays to your photographs, including polaroids and borders, using Alien Skin Exposure X. It’s easy as pie, and takes seconds! Unlike Photoshop, adding frames in Exposure X does not require masking, or the use of layers.

    adding-vintage-frames-tutorial-alien-skin-exposure_0007

    But first… why add frames?

    1. You may be going for a certain look and want your images to stand out.
    2. You may want to use your images in scrapbooks and blogs that have  a specific theme.
    3. You might just be feeling super creative and want to do something different.

    Whatever your reason, it’s a fun experiment, and of course, highly dependent on your taste.

    Here’s how to add a frame

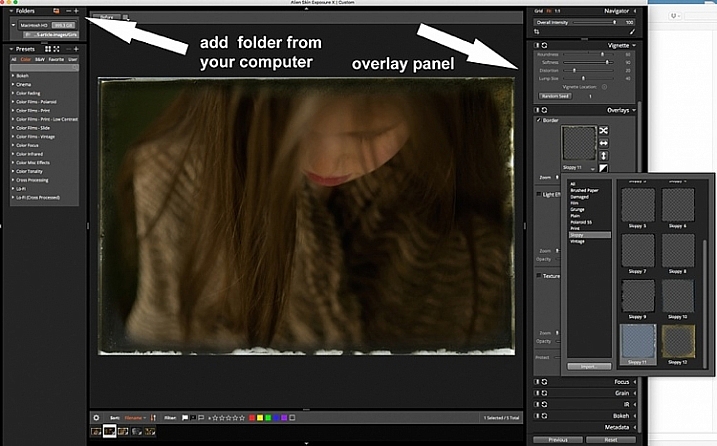
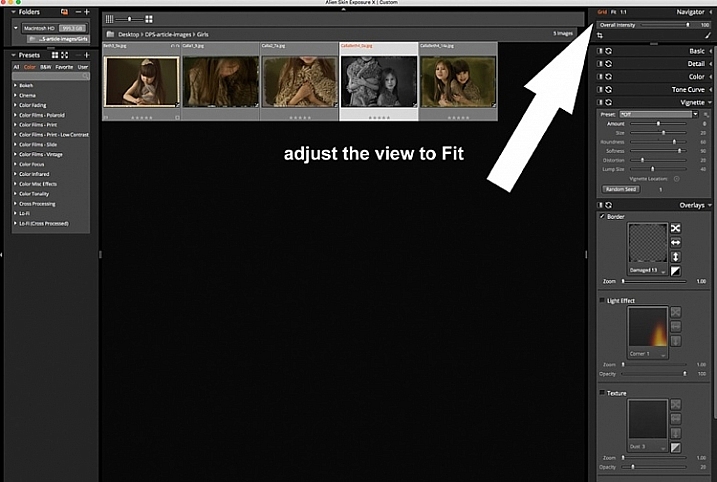
    Open Alien Skin Exposure X (the latest version is 10, but previous versions work just the same). Click the + icon on the top left corner of the window to add folders from your computer. Choose the folder you want to add, and double click. You may notice that when you open the folder, your images will be initially displayed as a Grid as shown on the second photo below.

    adding-vintage-frames-tutorial-alien-skin-exposure_0000

    adding-vintage-frames-tutorial-alien-skin-exposure_0008

    Click Fit on the upper right corner of the window and you will see (as shown on the first photo) that your chosen image is enlarged, but you can still see the rest of the set, in the thumbnails just below. Once you have your image, look on the right panel, and bring up the Overlays option by clicking on the arrow. Tick the border, then click on the box showing the overlay and a pop up window, giving you a variety of overlay options, comes up. You can scroll through these options to find the overlay you want to use.

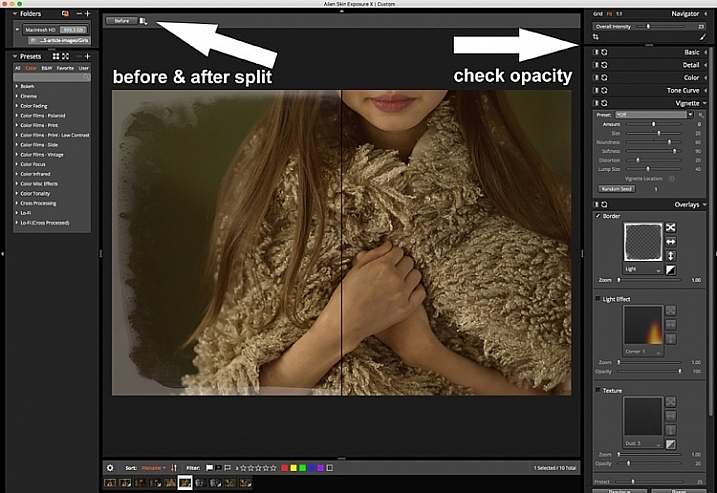
    You can work on each photo individually or select all using Cmd/Ctrl + A, and your chosen settings will be applied to all the images. TypeCmd/Ctrl + D to deselect, and click on one photo to work on it individually. Don’t forget to use the Overall Intensity slider on the top right corner of the window, it works like the opacity slider in Photoshop. You also have a selection of view options that allow you to see the various before and after splits, as shown on the image below. In this case, the left half of the photo has the overlay and the right half shows the original. This is helpful in gauging the intensity of the overlay applied, and its effect on the original image.

    adding-vintage-frames-tutorial-alien-skin-exposure_0001

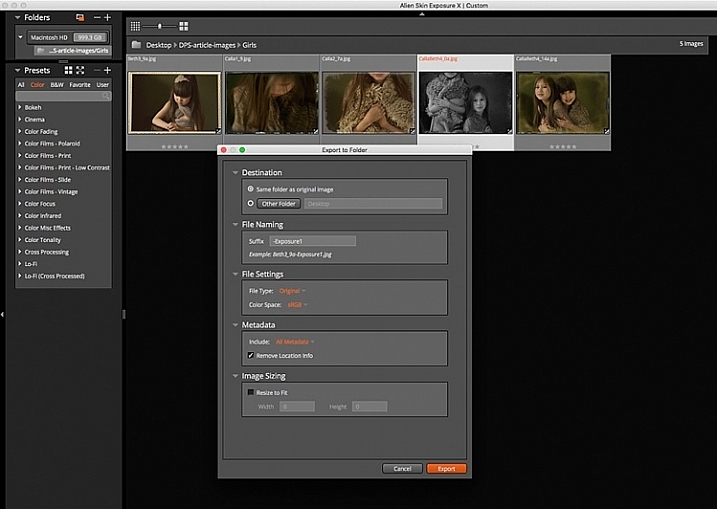
    After you have applied your frames on each image, you now need to export them. Select all the images using Cmd/Ctrl + A, then either go to the Exposure bar File menu and select Export, or simply typeCmd/Ctrl + E, and you can export your new images to a folder you designate. I suggest that you keep the suggested file suffix, or change it to something of your choice, so you know these are the new files with the Exposure edits, should you want to keep them in the same folder. You will still have your original images in tact and untouched, in case you want to revisit them later.

    adding-vintage-frames-tutorial-alien-skin-exposure_0002

    Here are the images that I used in this tutorial, with the added frames using Alien Skin Exposure X.

    adding-vintage-frames-tutorial-alien-skin-exposure_0006

    adding-vintage-frames-tutorial-alien-skin-exposure_0005

    adding-vintage-frames-tutorial-alien-skin-exposure_0002

    adding-vintage-frames-tutorial-alien-skin-exposure_0004

    I hope you enjoyed this quick tip. Have fun experimenting with frames as well as other special effects. Do share any other quick tips on adding vintage frames in the comments below.

    This week on dPS we are featuring articles on special effects. Check out the others that have already been published here:

    • How to Photograph the Full Band of the Milky Way
    • Fire Spinning with Steel Wool – A Special Effects Tutorial
    • Special Effect – How to Create Multiple Flash Exposures in a Single Frame
    • Stacking Light Trails for Night Photography Special Effects
    • 26 Unique Special Effects Photos to Spark Your Creativity
    • Weekly Photography Challenge – Special Effects
    • Tips for Shooting Through Objects to Create a Special Effect

    googletag.cmd.push(function() {
    tablet_slots.push( googletag.defineSlot( “/1005424/_dPSv4_tab-all-article-bottom_(300×250)”, [300, 250], “pb-ad-78623” ).addService( googletag.pubads() ) ); } );

    googletag.cmd.push(function() {
    mobile_slots.push( googletag.defineSlot( “/1005424/_dPSv4_mob-all-article-bottom_(300×250)”, [300, 250], “pb-ad-78158” ).addService( googletag.pubads() ) ); } );

    The post How to Add Vintage Frame Overlays Using Alien Skin Exposure X by Lily Sawyer appeared first on Digital Photography School.

    Digital Photography School

  • Writer’s Favorite Lens – the Canon 400mm f/2.8

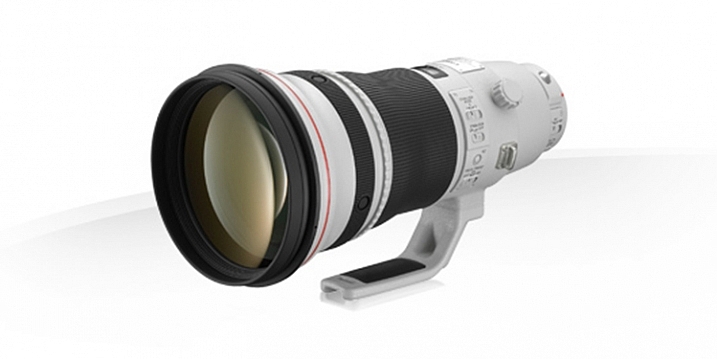
    Being a sports photographer, covering things ranging from soccer (football) and rugby, to horse racing, I often have the Canon 400mm f/2.8L IS II USM on one of my camera bodies. It’s this lens’ focal length and fast aperture that is most helpful. I love this lens for its image quality and performance, but also its versatility.

    Fig 12

    Image courtesy of Canon.

    So let’s have a look at the specs of this lens:

    • Focal length: 400mm (560mm APS-C approximate)
    • Maximum aperture: f/2.8
    • Maximum diameter x length: 163mm x 343mm (6.41 x 13.50″)
    • Weight: 3.85 kg (8.48 lbs)
    • Image stabilized? Yes, four stops
    • Minimum focusing distance: 2.7m (8.85′)
    • Weather sealed: Yes

    PROS

    Ideal Sports Lens

    The 400mm focal length of this lens is ideal for many field based sports such as soccer (football) and rugby as it’s not too long, such as a 500mm for example, but at the same time it’s gives more pull than a 300mm. Its fast f/2.8 aperture is very handy when photographing in low-light situations, such as at night matches where the light is often quite low, as it allows me to use a lower ISO and still be able to maintain a shutter speed that is fast enough to freeze the action. This maximum aperture is also ideal to nicely isolate the subject from a busy background and make them pop more. Although I don’t always shoot at f/2.8 (generally hovering around f/3.5-f/4) having the ability to use f/2.8 is quite handy.

    As far as focussing speed goes, this lens is blazingly quick and spot-on accurate, especially when coupled to a 1D X, for example. It easily locks on to a subject without any search or lag whatsoever.

    In the following images, the 400mm focal length has been fantastic at pulling the subject in closer than what a 70-200 or 300mm for example, would be able to offer. These images have still been cropped, but not as much as would be needed if I had used a shorter focal length.

    © Daniel Smith / Getty Images.

    © Daniel Smith / Getty Images.

    © Daniel Smith / Getty Images.

    © Daniel Smith / Getty Images.

    Versatility

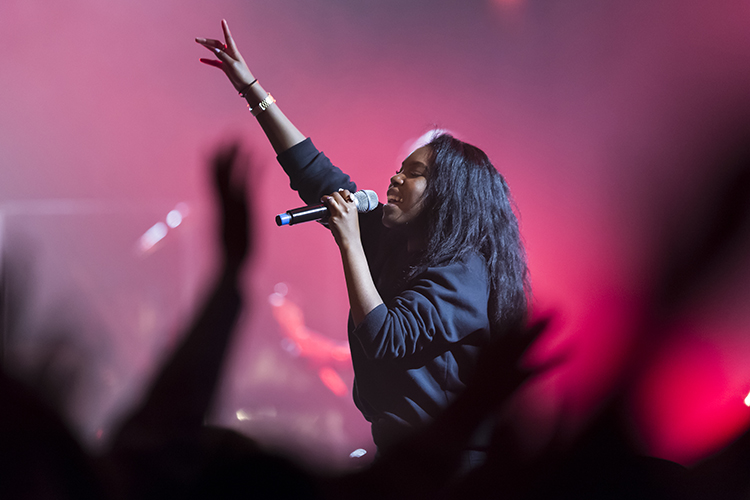
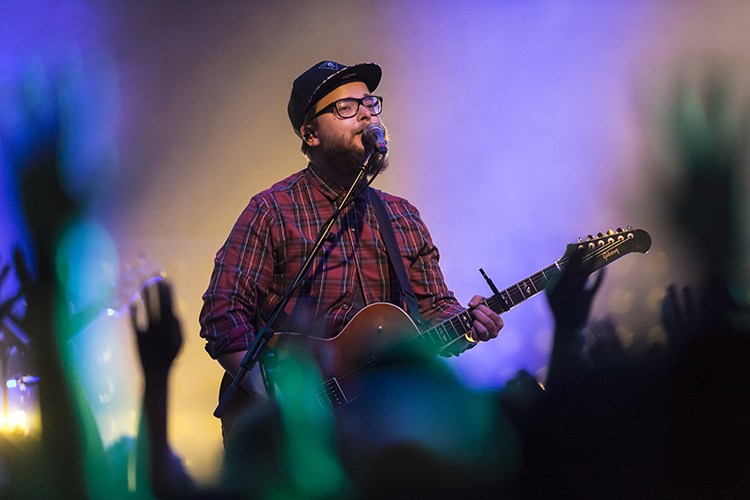
    Being quite heavy and long, with no zoom, you may think that this lens would only be suited to use on the sidelines of a sports field, attached to a monopod. However, this lens is much more versatile than that. Being the series two version of this lens, it is significantly lighter than its predecessor. This reduction in weight means that I am now able to use this lens hand-held (if I’m using it for extended period of time, I do use a monopod; it’s not that light!) which opens up more options. For example, I have photographed live concerts with this lens; a lens that is rarely used because of its long focal length. But it’s this focal length, coupled with an f/2.8 aperture, that I love. Photographing through the crowd is fantastic, as I am able to create abstract shapes through the silhouettes created by the audience, and use them to frame my subject.

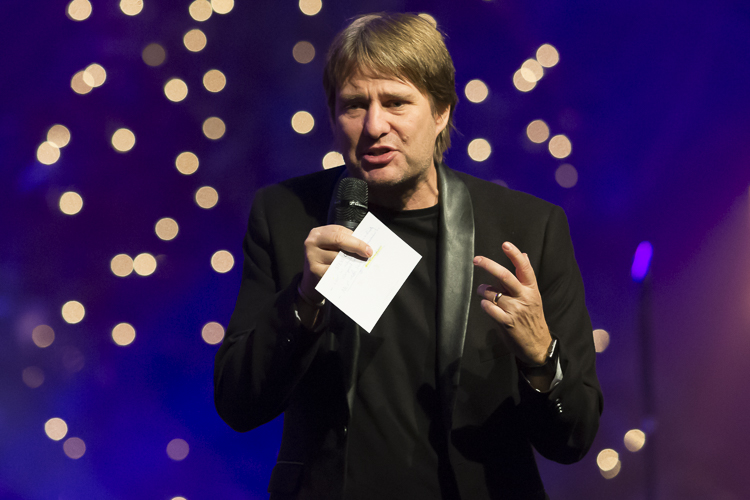
    The longer focal length can also be great when covering conferences, as I am able to photograph further back. This is especially helpful if the speakers are on a stage, as standing further back will reduce the angle in which you look up, and enable you to reduce the distortion that looking up can cause.

    Fig 3

    This was taken from further back. The speaker was on a stage. By standing back I was able to photograph the speaker and be closer to his level. The aperture also provided some great bokeh with the lights in the background.

    Fig 1

    400mm, 1/500sec, f/3.2 ISO 6400. The singer raising her hand is made stronger by the abstract hand being raised by the fans.

    Fig 2

    400mm, 1/500sec, f/3.5 ISO 6400. Shooting through the fans with their hands in the air adds some great foreground interest to this image.

    In addition, its fast f/2.8 aperture lends itself to use with teleconverters if extra reach is needed. When adding one, you multiply the aperture and focal length by the strength of the teleconverter; so if you are using a 2x, it would make this lens an 800mm f/5.6. And because its image quality is so good, the degradation to image quality when using converters isn’t really noticeable with this lens. Its AF also does not really take much of a hit, either. So for the price of a couple of teleconverters, I potentially have three lenses in one:

    • A 400mm f/2.8 as it is
    • A 560 f/4 with a 1.4x teleconverter
    • a 800 f/5.6 with a 2x teleconverter

    CONS

    Cost

    This lens is not the cheapest lens on the market; Amazon has it listed at $ 9,999 USD, so this lens is definitely not something many photographers would consider purchasing.

    An alternative to this would be the Canon 400mm f/5.6L USM which sells for a much more affordable $ 1,199 USD. The biggest drawback with that lens, however, is its maximum aperture of f/5.6, which would not be very useful in low-light situations, where a wider aperture is much more beneficial.

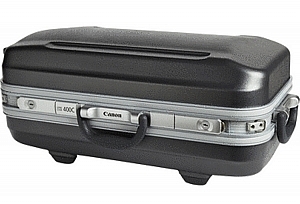
    Image courtesy of Canon.

    Image courtesy of Canon.

    Size

    This isn’t the smallest lens either, and you will generally be very noticeable with it. Using this as a street photography lens would not be ideal, and would make you quite a target! You will also need quite a large bag to carry this in, although it does come with its own hard-case as seen here.

    Weight

    Even though this is the series two, and much lighter that its predecessor, at nearly 4kg (almost 8.5 pounds) this is definitely not a light lens! You will need a monopod with this lens if you intend to use if for long periods of time. Transporting it also requires quite a large bag; a roller bag being ideal as you don’t have to carry it. I transport all of my equipment in the one bag generally – a ThinkTank Photo Airport Security V2.0 roller bag. This makes carrying not only this lens, but all of my equipment much easier, and saves injuring my back.

    ALTERNATIVES

    This lens is not for everyone, primarily because of its high cost. If you would love to have one of these in your kit but don’t have the finances available, going second hand is an option. A used 400mm f/2.8L IS USM (non-Series II) is still a fantastic lens and can be found relatively (compared to the new version) cheaply at around $ 4,000-$ 5,000 USD.

    If that’s still pushing the financial friendship a little consider these:

    • Canon 100-400mm f/4.5-5.6L IS II USM at $ 2,099 USD (or the original for $ 1389)
    • Canon 400mm f/5.6L USM at $ 1,149 USD
    • Or the many offerings from Sigma, Tamron and Tokina which have the 400mm focal length covered

    CONCLUSION

    While this is the heaviest lens it my kit, the image quality and performance from it is unmatched, and definitely make it worthwhile carting around. With a little practice using a prime super-telephoto, you can create some striking images that you just cannot achieve with shorter focal lengths. The large aperture and the bokeh it produces at 400mm is dreamy, too!

    I really enjoy using this lens in areas that it typically would not be used. It doesn’t always work in those situations, but is a lot of fun nonetheless. Do you have a long telephoto lens? What do you shoot with it? Please share your thoughts in the comments below.

    amzn_assoc_placement = “adunit0”;
    amzn_assoc_enable_interest_ads = “true”;
    amzn_assoc_tracking_id = “dpsgeneral-20”;
    amzn_assoc_ad_mode = “auto”;
    amzn_assoc_ad_type = “smart”;
    amzn_assoc_marketplace = “amazon”;
    amzn_assoc_region = “US”;
    amzn_assoc_linkid = “59b2c6e145b8854217845ac445c9a2b8”;
    amzn_assoc_emphasize_categories = “13900861”;
    amzn_assoc_fallback_mode = {“type”:”search”,”value”:”Digital Cameras”};
    amzn_assoc_default_category = “Photo”;

    googletag.cmd.push(function() {
    tablet_slots.push( googletag.defineSlot( “/1005424/_dPSv4_tab-all-article-bottom_(300×250)”, [300, 250], “pb-ad-78623” ).addService( googletag.pubads() ) ); } );

    googletag.cmd.push(function() {
    mobile_slots.push( googletag.defineSlot( “/1005424/_dPSv4_mob-all-article-bottom_(300×250)”, [300, 250], “pb-ad-78158” ).addService( googletag.pubads() ) ); } );

    The post Writer’s Favorite Lens – the Canon 400mm f/2.8 by Daniel Smith appeared first on Digital Photography School.

    Digital Photography School

  • Tips for Shooting Through Objects to Create a Special Effect

    Photography is as much a study of the creative, as it is a study of the technical. Often, knowing all the technical ins and outs of your camera, still does not guarantee a stellar image – an image that evokes emotion, one that makes you stop in your tracks and take a second look. Such images are created by thinking outside the box, by experimenting with new techniques and ideas that may seem crazy, ridiculous, or even somewhat unbelievable! Lucky for us, we photographers are known to be a little bit crazy, so trying new and innovative techniques should not surprise us too much.

    One such really cool and innovative technique, to add a little bit of creativity and flare in our imagery, is shooting through objects. This technique is, quite literally, to have a small object between the front of the lens and your subject. This is often used to frame the subject, in order to draw attention to it/them, soften the edges of the image, or add a cool color special effect, to an otherwise ordinary image.

    Memorable Jaunts DPS Article Shooting through objects for special effects 01

    The whole idea of shooting through objects, is to have an out of focus foreground and be able to shoot through it, but at the same time keep the subject sharp. This effect is best achieved by placing the object close to the lens, either by hand holding it, or by resting it against the lens. Placing the foreground object further away from the actual subject and closer to the front of your lens, makes it easier to blur.

    Although any lens will work, the shorter your lens focal length the closer the foreground object will need to be to the front of the lens, making it much easier to hand hold. If the object you are shooting through is large, it is easy to miss the focus on the actual subject. In these situations, it is best to focus on the subject, lock focus by switching to manual focus (MF/AF toggle buttons are located on the lens body in most cases or using back button focus) and then bringing the foreground object close to the lens for the blur effect. Sometimes it is possible to use the out of focus foreground to hide distracting things in the background.

    Memorable Jaunts DPS Article Shooting through objects for special effects 06

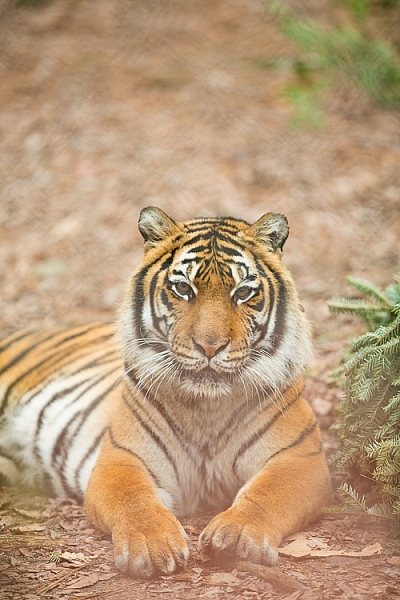
    In the above image, this tiger in North Carolina’s Tiger Rescue facility, was holding a perfect pose and staring dead straight at me. Thankfully, I had a fence between me and the tiger (I am sure he was viewing me as a tasty snack!) and I loved the blur shapes seen in the top of the frame. I also handheld a piece of candy wrapper towards the bottom of the lens to give a little pink tint to the bottom of the image. The only post-processing done here, was to bring up the blacks and add a little contrast to the image.

    The shoot-through technique works especially well with leaves, flowers, and even small pieces of glass. The possibilities are quite endless when it comes to finding things to shoot through. If you are feeling uninspired, sometimes bringing something as simple as a small strip of fabric, or a piece of clear plastic, can completely change the outcome of your final photograph. Look around your photography location and you are bound to find something to shoot through. Even if you often shoot in the same location, you may find something new each time. Flowers bloom at different times of year, leaves change color, and sometimes even dry twigs add an element of interest.

    Memorable Jaunts DPS Article Shooting through objects for special effects-SidebySide01

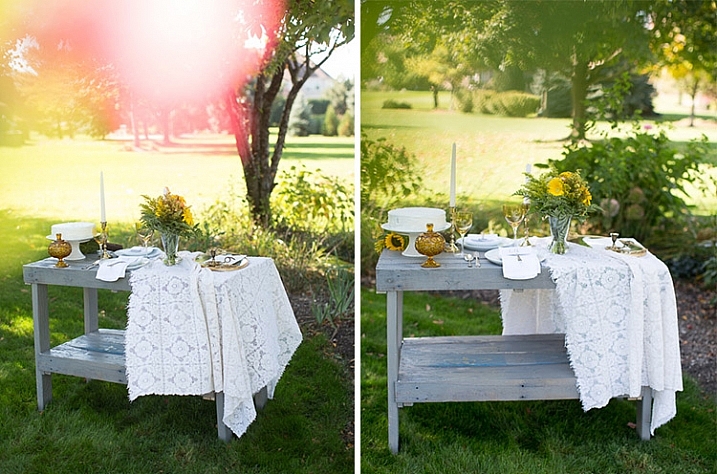
    Always use these effects to taste. In the side-by-side above, I initially used a pink flower to see if I could get a cool, light leak effect in the frame. But somehow that did not appeal to me. So in the next frame, I took a leaf and held it up to the top of the lens. I loved this effect, as if I was shooting through the bushes but still retaining the details in the bottom half of the image.

    Memorable Jaunts DPS Article Shooting through objects for special effects-SidebySide02

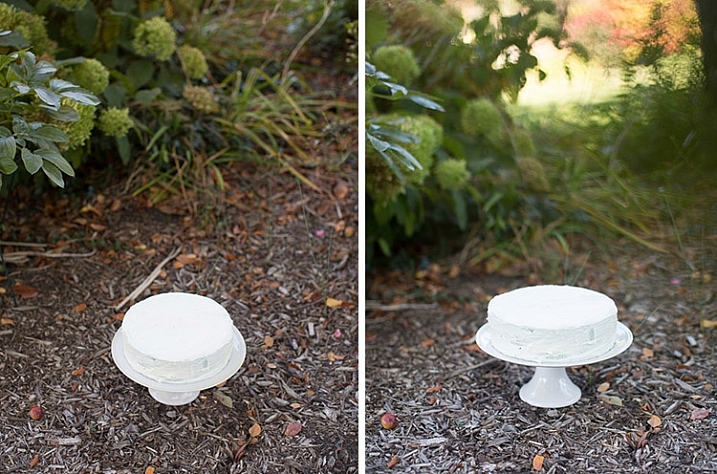
    In the images of cakes above, the first is a standard, run-of-the-mill, top shot of the cake. But when I changed my angle and used a leaf to shoot through, I loved the blur effect it produced at the top of the frame.

    Shooting through objects adds an element of interest to photographs. When you use colored pieces of glass or flowers, you get an effect similar to a light leak (from film days). Some photographs also appear to have been processed with unique filters, except all these effects are straight out of the camera (SOOC), not added during post-processing. When you use clear glass, plastic bags, or even sheer fabric, photographs appear to have additional texture and depth.

    Memorable Jaunts DPS Article Shooting through objects for special effects-SidebySide03

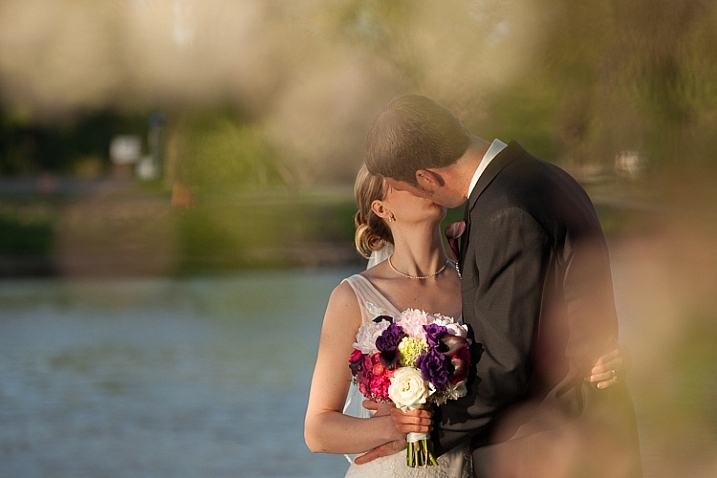
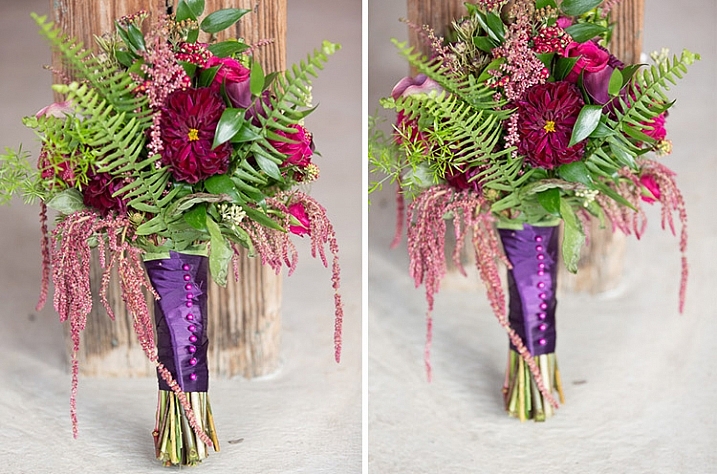
    The bridal bouquet on the left is a straight shot. The one on the right has a clear piece of plastic (it was used to cover the cake topper) – I held it to the bottom on the lens to add a little texture and interest.

    Memorable Jaunts DPS Article Shooting through objects for special effects 05

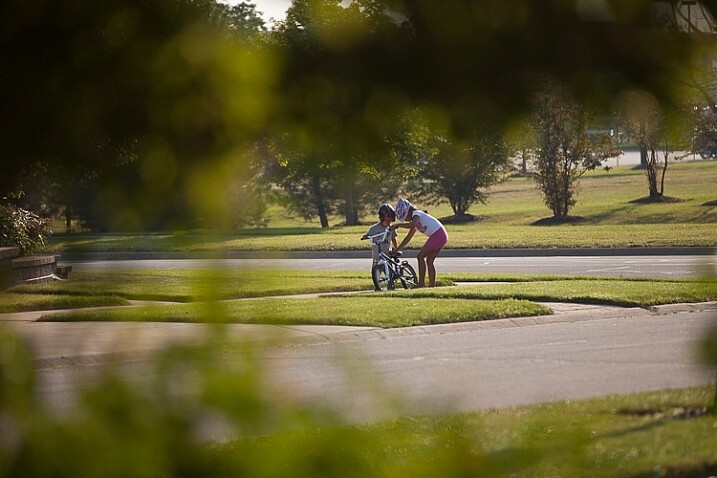
    I love this image of my kids – my daughter is teaching my son to ride his bike. By shooting through the bushes, I caught them unawares, as well as used the bushes to frame the subject (in this case my kids!).

    Memorable Jaunts DPS Article Shooting through objects for special effects 03

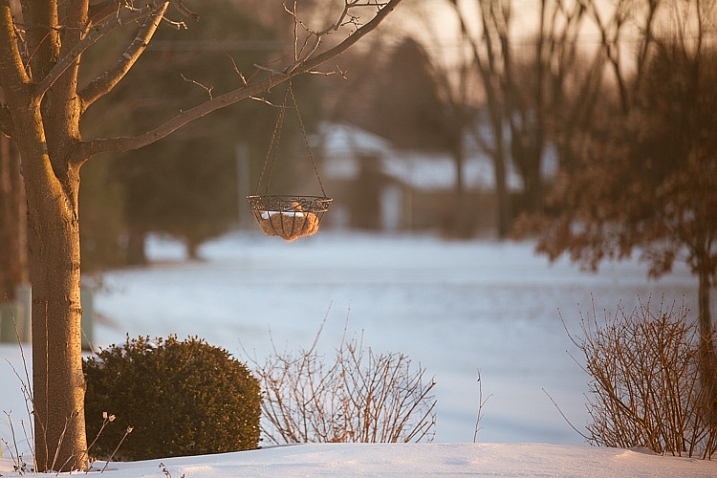
    The sun was setting in my backyard, and to exaggerate its warmth, I added an orange piece of plastic (my flash gel cover). No post-processing needed!

    While this is not a technique that should be used on every photograph, there are so many options for framing, introducing texture, and adding interest when you add an unexpected element into your photographs. Use this tool when you want to break free from the mundane and the ordinary, you might be pleasantly surprised with the results!

    This week on dPS we are featuring articles on special effects. Check out the others that have already been published here:

    • How to Photograph the Full Band of the Milky Way
    • Fire Spinning with Steel Wool – A Special Effects Tutorial
    • Special Effect – How to Create Multiple Flash Exposures in a Single Frame
    • Stacking Light Trails for Night Photography Special Effects
    • 26 Unique Special Effects Photos to Spark Your Creativity
    • Weekly Photography Challenge – Special Effects

    googletag.cmd.push(function() {
    tablet_slots.push( googletag.defineSlot( “/1005424/_dPSv4_tab-all-article-bottom_(300×250)”, [300, 250], “pb-ad-78623” ).addService( googletag.pubads() ) ); } );

    googletag.cmd.push(function() {
    mobile_slots.push( googletag.defineSlot( “/1005424/_dPSv4_mob-all-article-bottom_(300×250)”, [300, 250], “pb-ad-78158” ).addService( googletag.pubads() ) ); } );

    The post Tips for Shooting Through Objects to Create a Special Effect by Karthika Gupta appeared first on Digital Photography School.

    Digital Photography School

  • 26 Unique Special Effects Photos to Spark Your Creativity

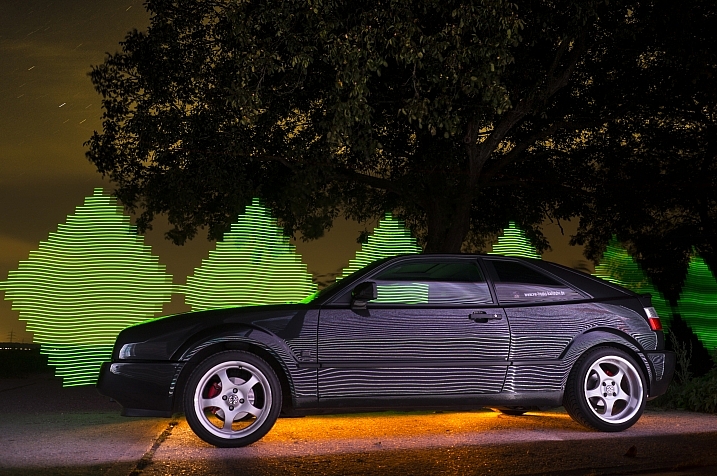
    This week on dPS we are all about special effects. Check out the others that have already been published here:

    • How to Photograph the Full Band of the Milky Way
    • Fire Spinning with Steel Wool – A Special Effects Tutorial
    • Special Effect – How to Create Multiple Flash Exposures in a Single Frame
    • Stacking Light Trails for Night Photography Special Effects

    Now it’s time to look at some special effects images:

    I Am Dabe

    By i am dabe

    Redfishingboat (Mick O)

    By Redfishingboat (Mick O)

    Mike Boening Photography

    By Mike Boening Photography

    Neil Howard

    By Neil Howard

    Terry Lawson

    By Terry Lawson

    Louish Pixel

    By Louish Pixel

    Taichiro Ueki

    By Taichiro Ueki

    Thierry Marysael

    By Thierry Marysael

    John Watson

    By John Watson

    Nick Kenrick

    By Nick Kenrick

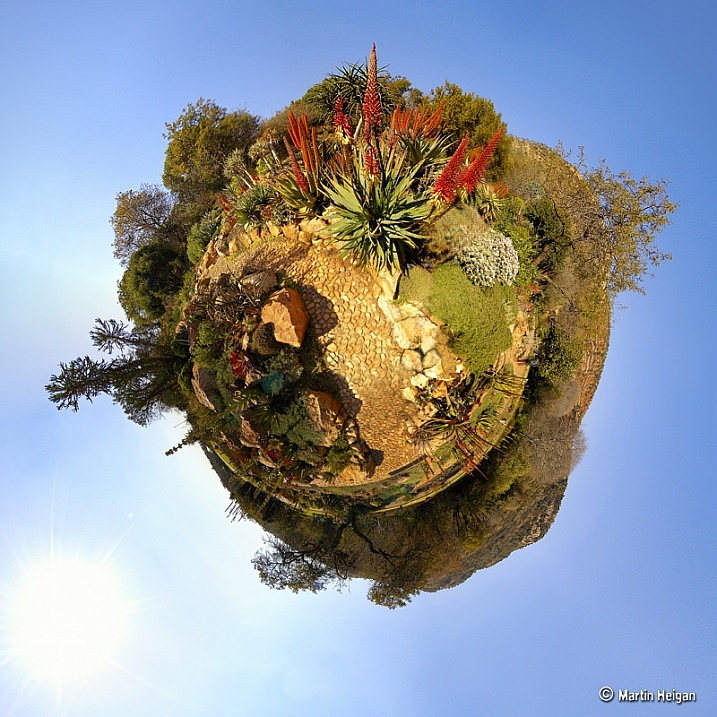
    Martin Heigan

    By Martin Heigan

    Mibby23

    By Mibby23

    Mickaël

    By Mickaël

    Inefekt69

    By inefekt69

    Knowsphotos

    By Knowsphotos

    Disco's Place

    By Disco’s Place

    Dennis Crabtree

    By Dennis Crabtree

    Wayne Stadler

    By Wayne Stadler

    Liz West

    By liz west

    TJ Gehling

    By TJ Gehling

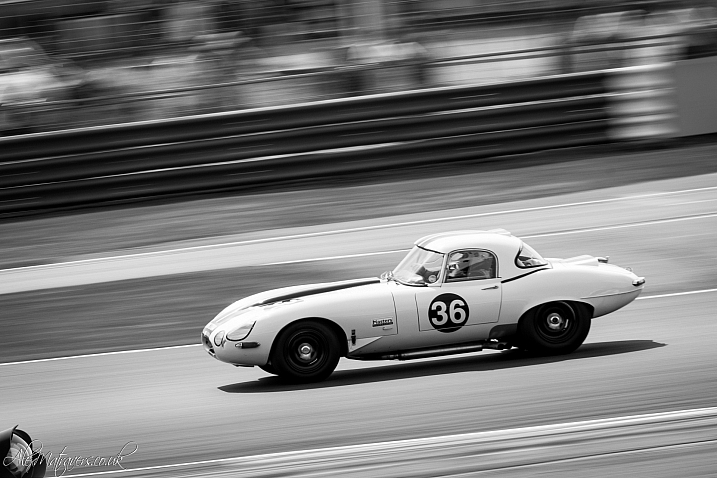
    Alex Matravers

    By Alex Matravers

    Howard Ignatius

    By Howard Ignatius

    David Bokeh

    By David Bokeh

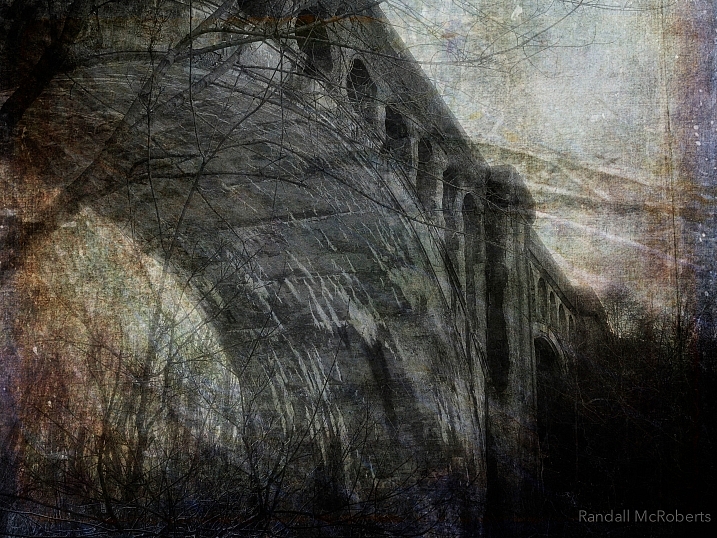
    Randy McRoberts

    By Randy McRoberts

    Manuel Paul

    By Manuel Paul

    Alex Matravers

    By Alex Matravers

    googletag.cmd.push(function() {
    tablet_slots.push( googletag.defineSlot( “/1005424/_dPSv4_tab-all-article-bottom_(300×250)”, [300, 250], “pb-ad-78623” ).addService( googletag.pubads() ) ); } );

    googletag.cmd.push(function() {
    mobile_slots.push( googletag.defineSlot( “/1005424/_dPSv4_mob-all-article-bottom_(300×250)”, [300, 250], “pb-ad-78158” ).addService( googletag.pubads() ) ); } );

    The post 26 Unique Special Effects Photos to Spark Your Creativity by Darlene Hildebrandt appeared first on Digital Photography School.

    Digital Photography School