Category: Photography

  • The 3Pod P3COR Tripod and SH-PG Ball Head Review

    In one of my previous articles, while reviewing the Nitz Strap heavy-duty camera strap, I mentioned that straps fall into the category of accessories most of us photographers hate to spend money on. We know that we need them, and we know that we usually get what we pay for, but our minds don’t connect the piece of hardware that doesn’t technically take the image we’re capturing, and the image itself.

    Tripods seem to fall in that category as well. We know that a sturdier tripod can lead to a sharper, clearer image, yet we cringe at the thought of dropping $ 200, or more, on one. My first tripod was a wobbly Velbon50 that I picked up for $ 10 at a local garage sale. It helped me along through my first landscape images, but I didn’t actually think about the fact that my images could suffer from using unsturdy equipment.
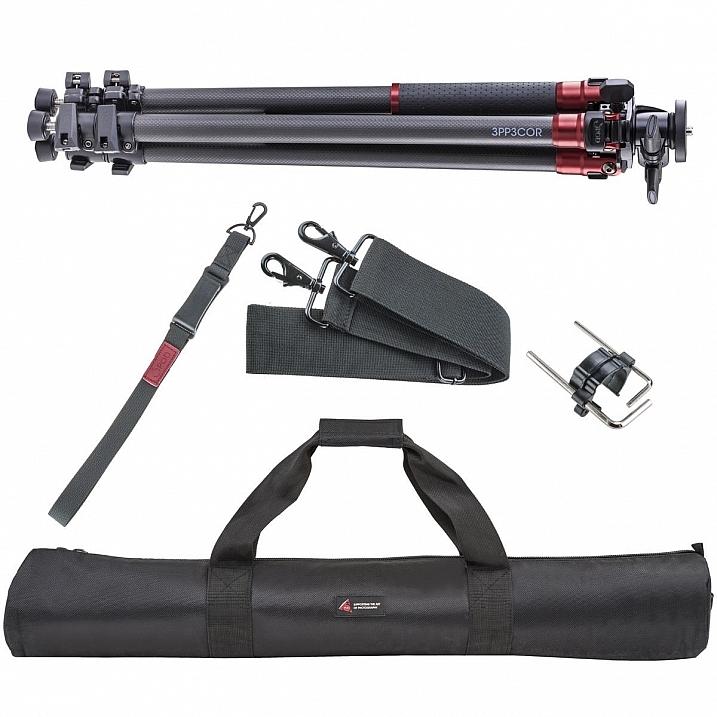
    3pp3cor_12

    Image courtesy Adorama and 3Pod

    Of course, the images from less sturdy tripods can be perfectly acceptable, and you can make the argument that there are some excellent tripod setups to be had for $ 100 or less. But, once you’ve used a beast of a piece of hardware, such as the 3Pod Orbit 3 Carbon Fiber setup I’ll be discussing here (see photo above), it’s really hard to go back, and makes you wonder why you didn’t buy something this solid in the first place.

    When I received my tripod (Orbit 3 Section Carbon Fiber, P3COR) and head (Pistol Grip Ballhead, SH-PG) from 3Pod, the first thing I noticed was the heft. Pulling the tripod itself out of the box, I got the feeling I was handling a piece of military equipment – tough and rugged.
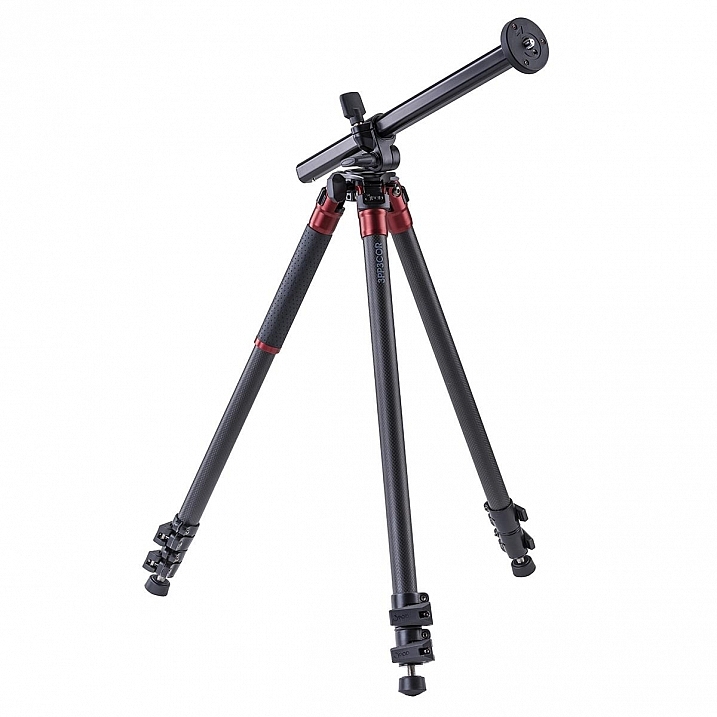
    3pp3cor

    Image courtesy Adorama and 3Pod

    The tripod weighs in at 4.25 lbs. (1.9kg), while the head was a considerable 1.85 lbs. (0.84kg) so it’s clear from the beginning, this isn’t a nimble photographer’s setup. The P3COR is meant to be an absolute oak, to mount heavy camera and lens combinations on top of, without so much as a wobble. Carbon fiber is the material choice (lighter and sturdy, but more costly) for this tripod, as opposed to the usual aluminum setup.
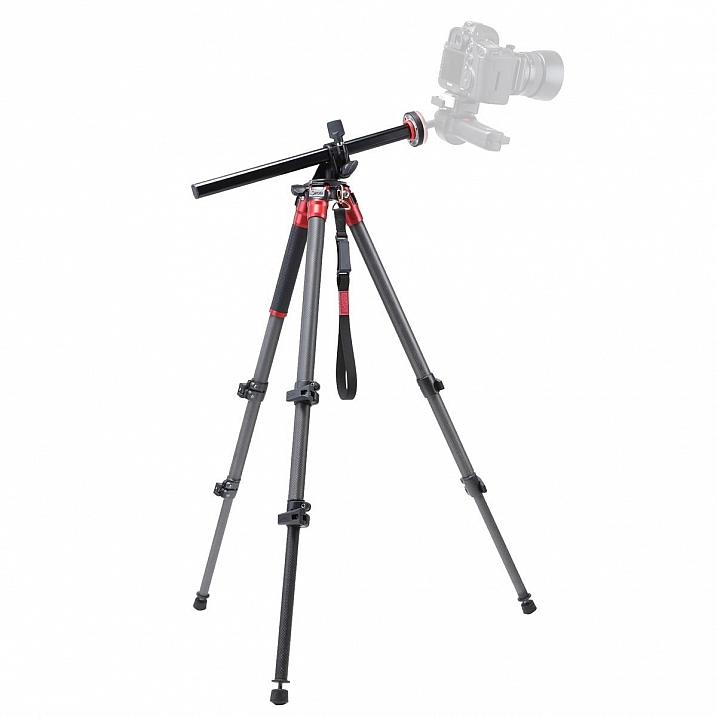
    3pp3cor_2 3pp3cor_4

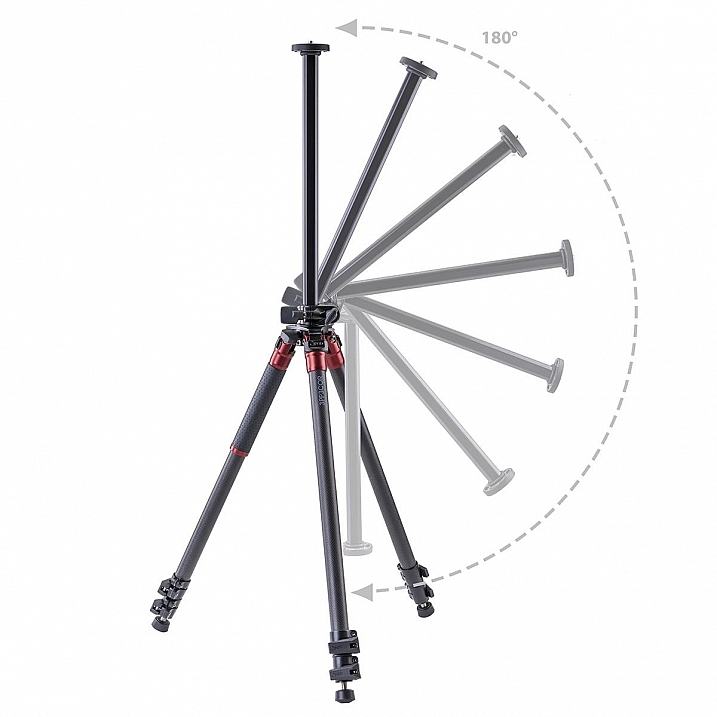
    The tripod features the Orbit Overhead Shot System, which means the vertically-adjustable center column, and its accompanying standard direct-mount plate, can be pivoted at almost any angle (see photos above, images courtesy Adorama and 3Pod), allowing for some interesting composition possibilities.
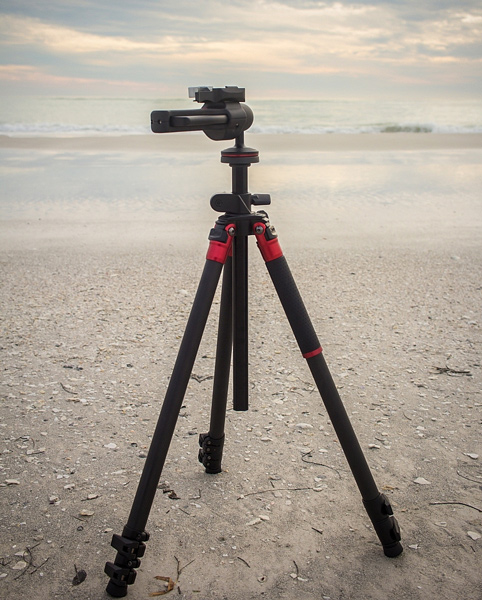
    013016__myshot-600

    The three carbon fiber legs are rated to hold 18 lbs. (8.16kg), and the unit can be extended to a maximum usable height of just over 69 inches (1.75m), while collapsing to a very manageable 28.5 inches (0.72m). The legs use a standard flip lock, for raising and lowering, and they work very well. The locks aren’t too simple to disengage, but don’t take a ton of strength either, making them easy to manage while giving you peace of mind.

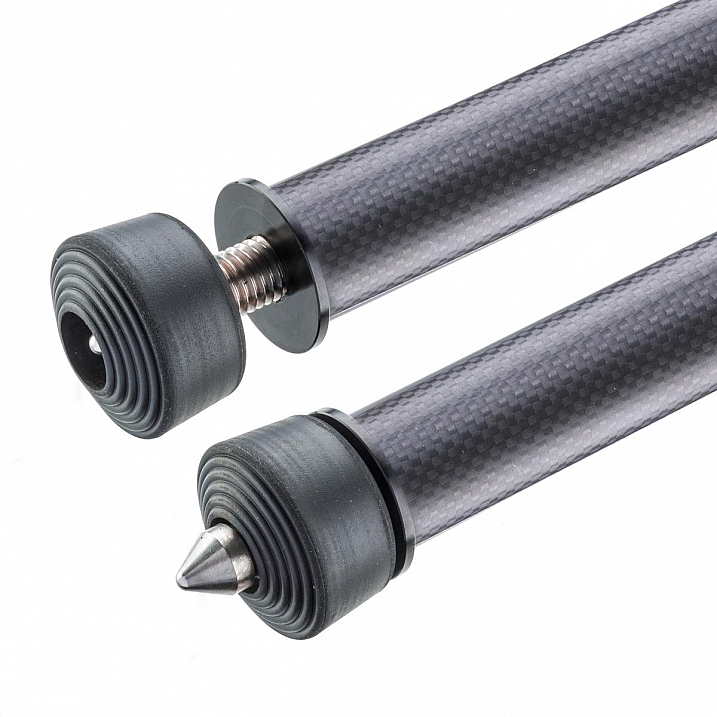
    The screw mount itself is reversible from 3/8″ to a 1/4″  variety, by flipping the mount block upside down. I found the mount easy to remove and lock, and my Canon 60D felt very sturdy when locked into the mount. Coverable foot spikes allow you to ensure stability in any situation, from dirt, rocks and sand, to smooth indoor floors, without worrying about damaging any sensitive surfaces.
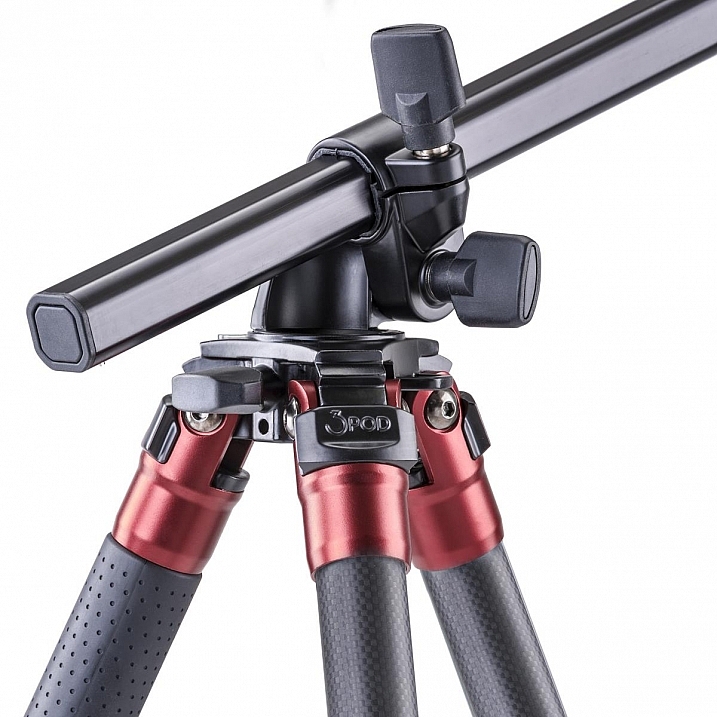
    3pp3cor_6

    Attractive appearance (Image courtesy Adorama and 3Pod)

    With appearances having absolutely no impact on the functionality of a tripod, it must be said that this particular 3Pod model is beautiful, with metallic red color accents, against dark carbon fiber pieces. An attention-getter at the local beach, let me tell you!
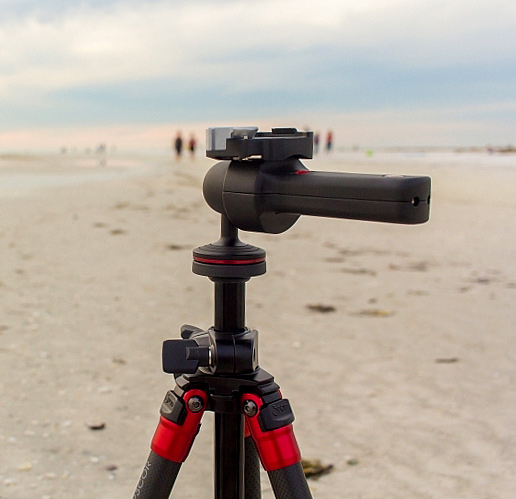
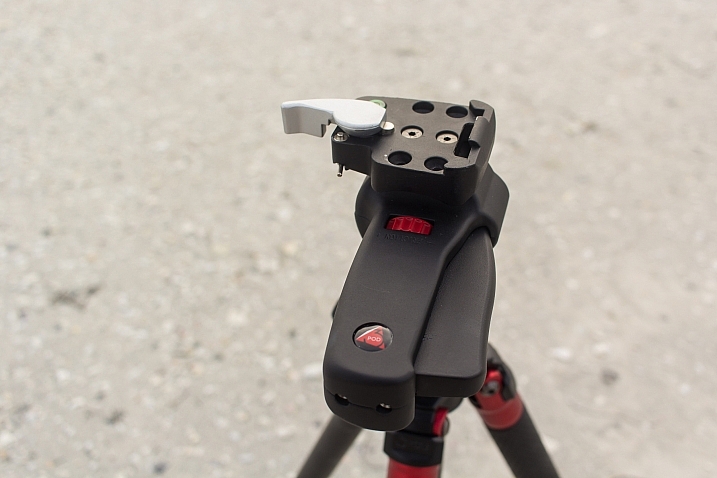
    013016__myshot-3-cropped

    013016__myshot-4

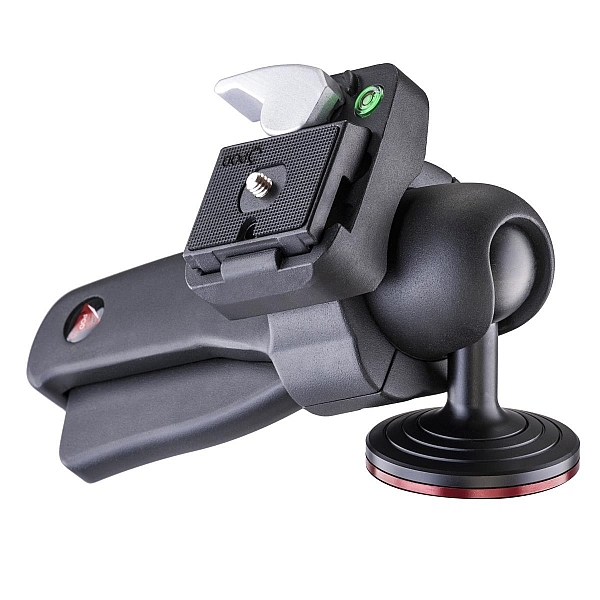
    This was my first experience with a pistol-grip type tripod head, and let’s just say I’m sold on the concept. The 3Pod SH-PG is a delight to use. No more hassling with various screws on various planes of movement to get the perfect horizontal and vertical positions; simply squeeze the trigger on this unit, adjust to the desired angle, and release. The position is set in stone, and you’re free to concentrate on your primary focus, taking a great picture.

    The advantage of this setup, is the ability to compose your image with one hand, freeing up the other to operate the camera itself. The mount is situated directly on the ball, and can be moved to allow for several configurations, including left-handed, right-handed, and traditional joystick orientation (see example photos below). A thumb-operated dial on the grip allows for modifying tension within the handle; lighter camera setups can use less tension, for more precise adjustments.
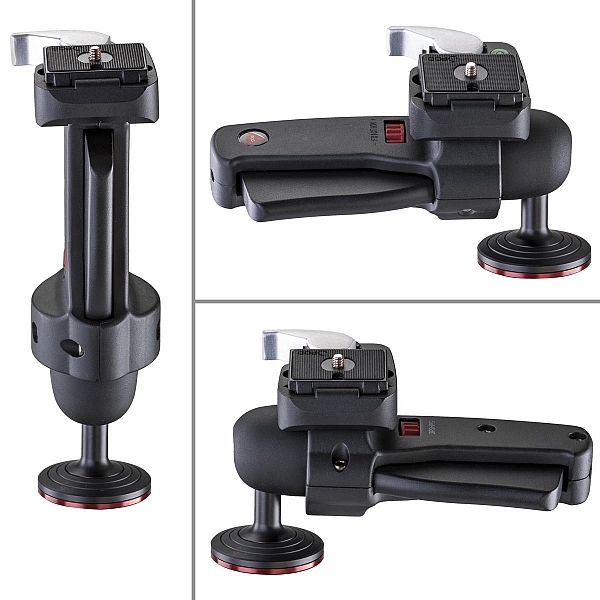
    3pshpg_11

    Image courtesy Adorama and 3Pod

    3pshpg_04

    Image courtesy Adorama and 3Pod

    The rotation of the ball head is a full 360 degrees, with -20 to 90 degrees of tilt. The head features the expected quick-release plate, and a bubble level, separate from the tripod body. The head itself weighs in at 1.85 lbs. (0.84kg), and supports up to 11 pounds (4.99kg) of camera body and lenses, although it feels as if it would support more weight.

    I tested the head and tripod legs at a couple of different locations, as well as indoors. I was pleased at how well the unit gripped all surfaces. The legs predictably sank and settled perfectly into beach sand, as well as a grassier area just inland. I place the tripod in a rather sandy/muddy situation as well, and again, found the support for my camera to be very sturdy. Finally, covering the adjustable leg spikes allowed me to use the tripod indoors in a carpeted area, with no worry of damage to the fibres.
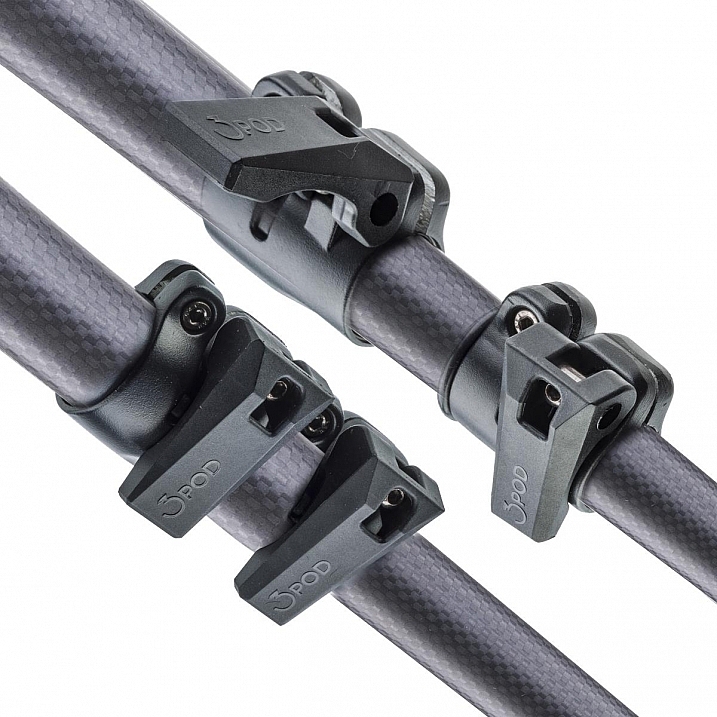
    3pp3cor_10

    Carbon fiber legs with flip lock mechanisms (Image courtesy Adorama and 3Pod)

    3pp3cor_11

    Spikes and covers on the legs (Image courtesy Adorama and 3Pod)

    I was met with the usual high winds on the beachfront, and found I was able to capture standard shots, as well as long exposures without any issue. Images were crisp and clear. As solid and hefty as the unit is, I was able to collapse it down to its smallest size, and carry it over my shoulder with my 60D still attached, for the long walk back to the parking lot, fairly easily.

    This particular setup will set you back $ 249.95 USD for the tripod and $ 39.95 USD for the pistol-grip head. Many photographers won’t scoff at a $ 300 USD entry price for a very solid piece of hardware, but some beginners/enthusiasts may not feel such a price is doable for their first tripod. As we discussed in the beginning of this article, some accessories have qualities that reflect their price point, and we see that here with 3Pod’s offerings.
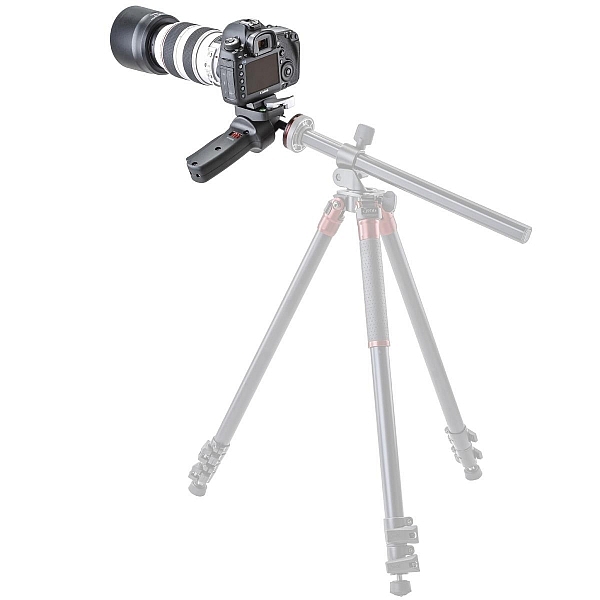
    3pshpg_1

    Image courtesy Adorama and 3Pod

    At the end of my review period, I boxed up the 3Pod with a bit of a heavy heart, as I had no desire to send it back. For me as a photographer with a focus on landscape and nature, the Orbit 3 and pistol grip head are the perfect combination, and I can see how owning this particular setup will make my photography immensely easier, and therefore more enjoyable and satisfying. Which means one thing – I’ve got a new spot in my budget for a purchase this year.

    Have you used 3Pod tripods and heads before? What has your experience been? Sound off below and let us know how these quality pieces of hardware have helped your photography.

    Editor’s note: these products were loaned to our author by Adorama at no cost, but in no way influence Tim’s review and opinion of this tripod and head combination.

    googletag.cmd.push(function() {
    tablet_slots.push( googletag.defineSlot( “/1005424/_dPSv4_tab-all-article-bottom_(300×250)”, [300, 250], “pb-ad-78623” ).addService( googletag.pubads() ) ); } );

    googletag.cmd.push(function() {
    mobile_slots.push( googletag.defineSlot( “/1005424/_dPSv4_mob-all-article-bottom_(300×250)”, [300, 250], “pb-ad-78158” ).addService( googletag.pubads() ) ); } );

    The post The 3Pod P3COR Tripod and SH-PG Ball Head Review by Tim Gilbreath appeared first on Digital Photography School.

    Digital Photography School

  • How to Find a Great Sunset Photography Location

    We all know that one essential ingredient to a great photograph is beautiful light, and that some of the best light happens during sunset. But what truly makes a great sunset photography location?

    Acacia tree or umbrella thorn in Serengeti National Park, Tanzania.

    Acacia tree or umbrella thorn in Serengeti National Park, Tanzania.

    In my experience, the best locations are ones where you can find two different compositions, that will work under different lighting situations, to double your chances of making a spectacular sunset image.

    To understand what I’m getting at, first think about the direction of light. As the sun descends in the sky and approaches the horizon, the last of the sun’s rays have a wonderful warm hue, that can light up the tips of mountains, and cast a golden glow on the land in the direction opposite the sun. Then there’s usually a lull for a few minutes when nothing much happens, giving you a chance to change position to face the sun. When the sun falls below the horizon, you’ll have an opportunity to make backlit or silhouette photos.

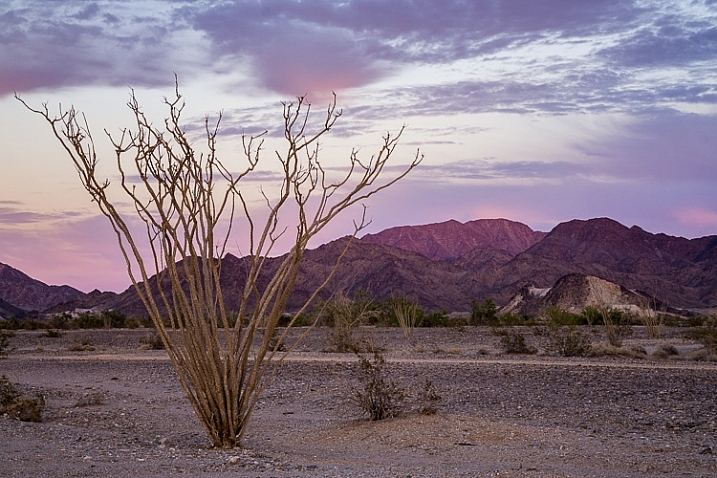
    Salton Sea Moments

    Finding Your Location

    It’s best not to leave location scouting for the last minute, or you won’t have enough time to find a spot with two good compositions, in both directions. Scouting a location is a good activity for mid-afternoon, when you’re probably not going to be photographing anyway, due to the harsh light. Leave your gear at home, or only take minimal equipment to record the scene, so you don’t have a heavy load and you can move quickly and easily.

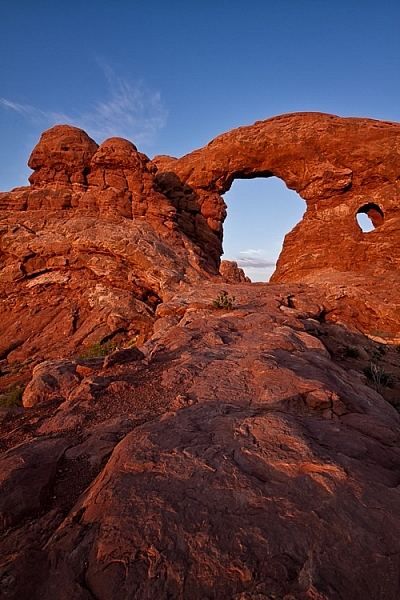
    Arches National Park, Utah

    Arches National Park, Utah

    Before you go scouting, don’t forget to find out the exact direction where the sun will set. This is easy to find with a quick internet search and a compass, or using an app on your phone or tablet.

    When you are scouting, what you’re looking for is a good composition for both a front-lit scene and a backlit scene. They don’t necessarily have to be at the exact same spot, but it should take you no more than a few minutes to walk between them.

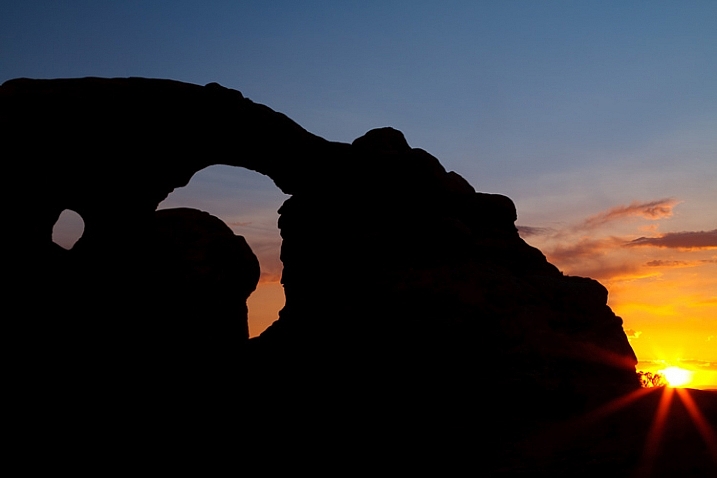
    Sunset at Arches National Park, Utah.

    Sunset at Arches National Park, Utah.

    Composition Tips for Front-lit Scenes

    For your front-lit scene, you are going to have nice golden light throughout the landscape, and if there are any mountains in your frame, they will have dramatic bright light on the top. What I usually look for in this kind of a scene is depth, by using foreground elements to emphasize the distance between foreground and background.

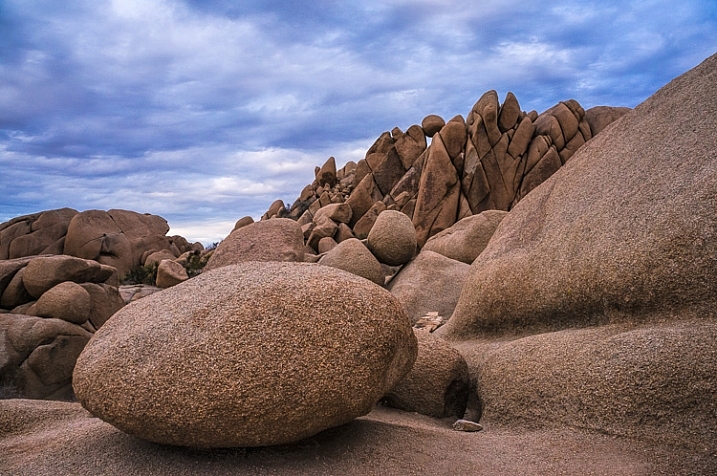
    Jumbo Rocks

    Try to find some leading lines that will guide the viewer’s eye through the image, and ideally lead to something in the background. Or, find other interesting features, such a plant or colourful rocks, to place in the foreground of the scene.

    Composition Tips for Backlit Scenes

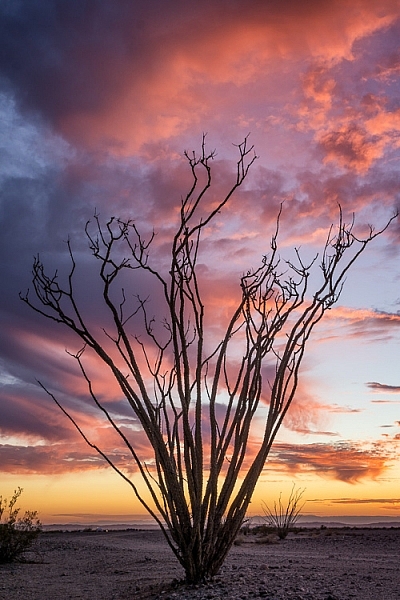
    Once those final rays have disappeared from your front-lit scene, you’re ready to change positions and get ready for the backlight. In a backlit scene, everything on the ground is going to be in shadow, so you no longer need to worry about depth – it’s all going to be black anyway. So now what you are looking for is something with a great shape, to make an interesting silhouette against the colourful sky. This can be jagged mountains, sea stacks on the ocean, a cactus, or anything else that has a really strong shape. Don’t pick anything that is going to just look like a vague blob of darkness.

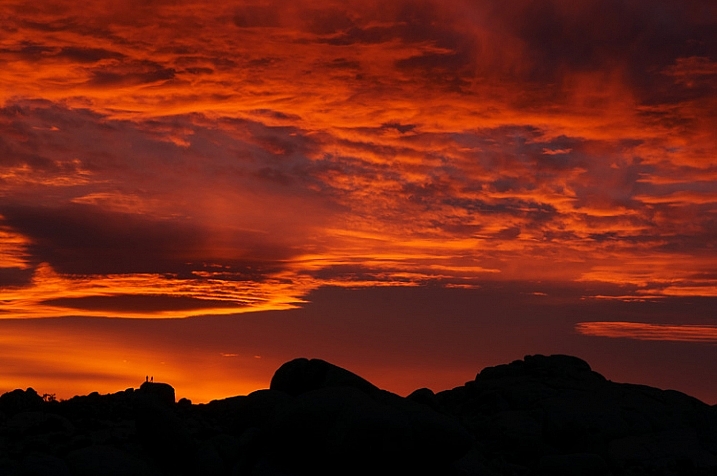
    Sunset at Joshua Tree National Park, California

    Sunset at Joshua Tree National Park, California

    In the Field

    Keep these composition ideas in mind when you scout your location, and if you need to, mark your chosen spots with a GPS while you are scouting, to make it easier to find your location when you return to the scene for sunset.

    Go early! If there are any clouds on the horizon where the sun will set, the last rays for your front-lit scene will come sooner than expected.

    Boondocking spot off Ogilby Road near Yuma, Arizona.

    Ogilby Road near Yuma, Arizona.

    Exposure for Front-lit Scenes

    As the sun descends in the sky and approaches the horizon, your scene will have a more even exposure than it would have earlier in the day. But you still may want to use a graduated neutral density filter, to even out the exposure between the brighter sky and the darker land.

    Exposure for Backlit Scenes

    When exposing for a backlit scene, it’s important not to use an exposure setting that takes the whole frame into account, like matrix or evaluative metering. Instead use spot metering, and meter on a sky portion of your image, which will capture the dramatic colours in the sky, while allowing your subject in the foreground (the one with the great shape) to become a silhouette.

    Ogilby

    Conclusion

    You can only plan so much when it comes to sunset photography, the rest is up to mother nature. You can only guess what is going to happen with the clouds and the light. When you get there, you may only have clouds for your front-lit scene and not the backlit one. But at least if you plan out two different shots, you’ll double your chances of coming home with a stunning sunset photo.

    googletag.cmd.push(function() {
    tablet_slots.push( googletag.defineSlot( “/1005424/_dPSv4_tab-all-article-bottom_(300×250)”, [300, 250], “pb-ad-78623” ).addService( googletag.pubads() ) ); } );

    googletag.cmd.push(function() {
    mobile_slots.push( googletag.defineSlot( “/1005424/_dPSv4_mob-all-article-bottom_(300×250)”, [300, 250], “pb-ad-78158” ).addService( googletag.pubads() ) ); } );

    The post How to Find a Great Sunset Photography Location by Anne McKinnell appeared first on Digital Photography School.

    Digital Photography School

  • Weekly Photography Challenge – Modes of Transportation

    Rishi Bandopadhay

    By Rishi Bandopadhay

    We humans have many ways of getting ourselves from point A to point B, methods of transportation, or vehicles, such as:

    • Planes
    • Trains
    • Car/automobiles
    • Bus
    • Bicycle
    • Motorcycle
    • Boat
    • Scooter
    • Sailboat
    • Cruise ship
    • Skateboard
    • Rollerblades
    • Etc. and the list can go on and on . . .
    Joan Campderrós-i-Canas

    By Joan Campderrós-i-Canas

    Sese_87

    By sese_87

    Weekly Photography Challenge – Modes of Transportation

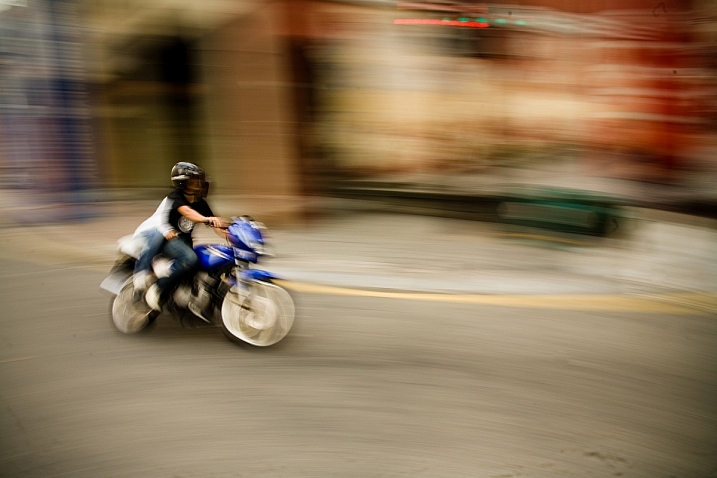
    That leaves it pretty wide opened for you this week. You could shoot traffic on a busy street, try some panning, freeze or stop the motion by choosing the appropriate shutter speed, take a bus or train and shoot from inside, just for a few ideas.

    Ben Salter

    By Ben Salter

    Harald Kobler

    By Harald Kobler

    Bob Jagendorf

    By Bob Jagendorf

    Joiseyshowaa

    By joiseyshowaa

    Share your images below:

    Simply upload your shot into the comment field (look for the little camera icon in the Disqus comments section) and they’ll get embedded for us all to see or if you’d prefer upload them to your favourite photo sharing site and leave the link to them. Show me your best images in this week’s challenge. Sometimes it takes a while for an image to appear so be patient and try not to post the same image twice.

    googletag.cmd.push(function() {
    tablet_slots.push( googletag.defineSlot( “/1005424/_dPSv4_tab-all-article-bottom_(300×250)”, [300, 250], “pb-ad-78623” ).addService( googletag.pubads() ) ); } );

    googletag.cmd.push(function() {
    mobile_slots.push( googletag.defineSlot( “/1005424/_dPSv4_mob-all-article-bottom_(300×250)”, [300, 250], “pb-ad-78158” ).addService( googletag.pubads() ) ); } );

    The post Weekly Photography Challenge – Modes of Transportation by Darlene Hildebrandt appeared first on Digital Photography School.

    Digital Photography School

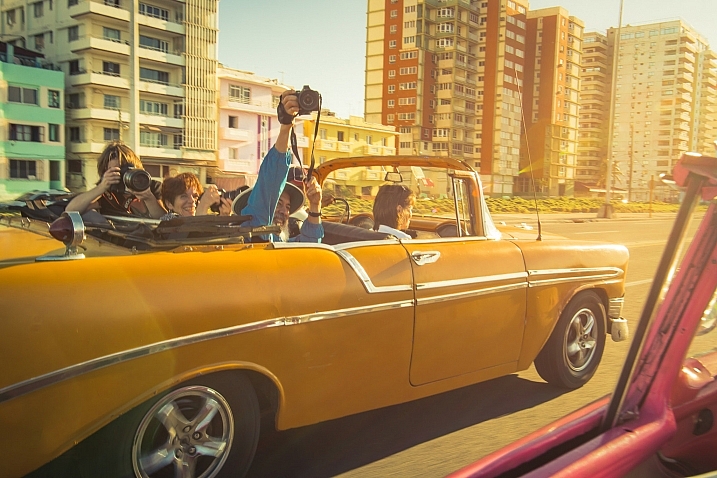
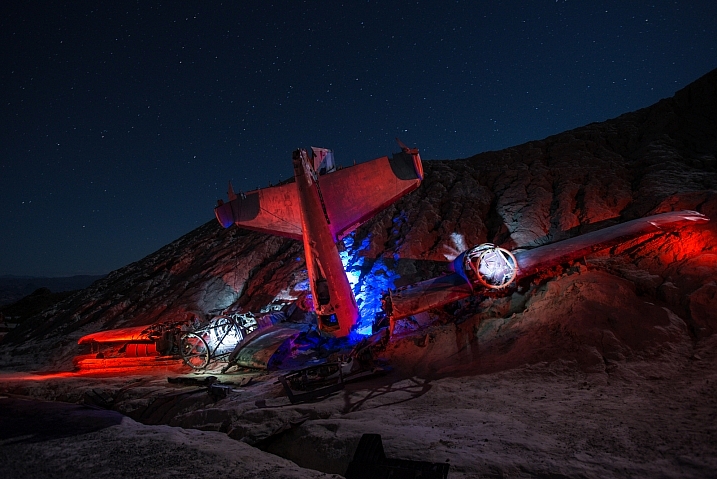
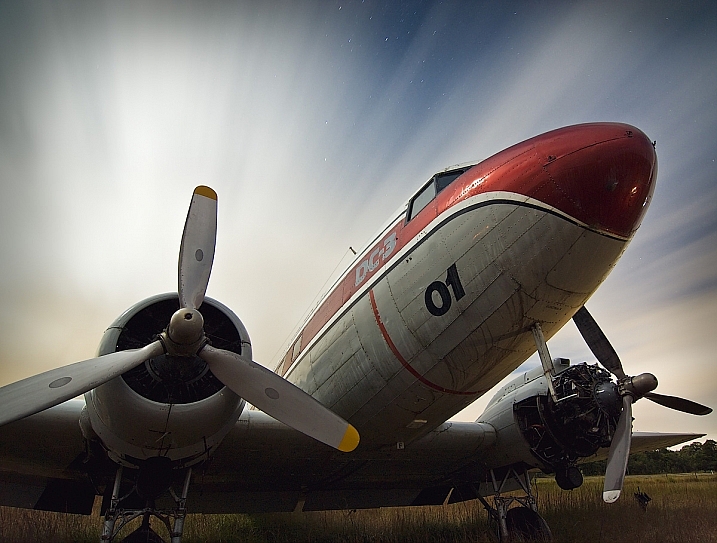
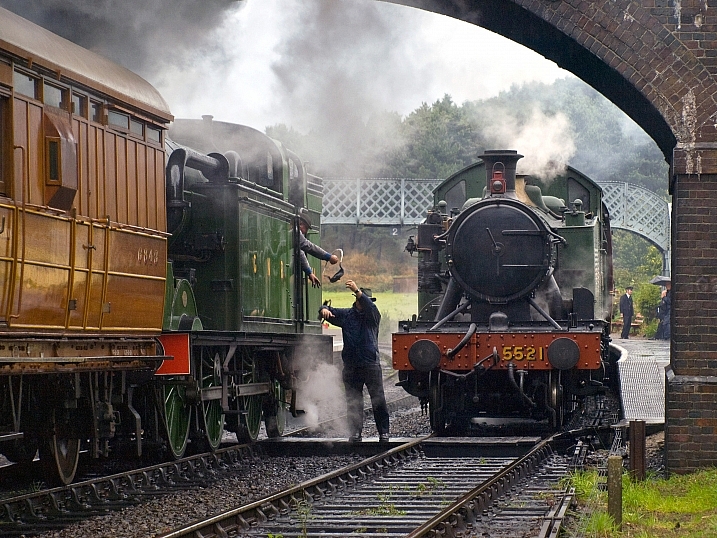
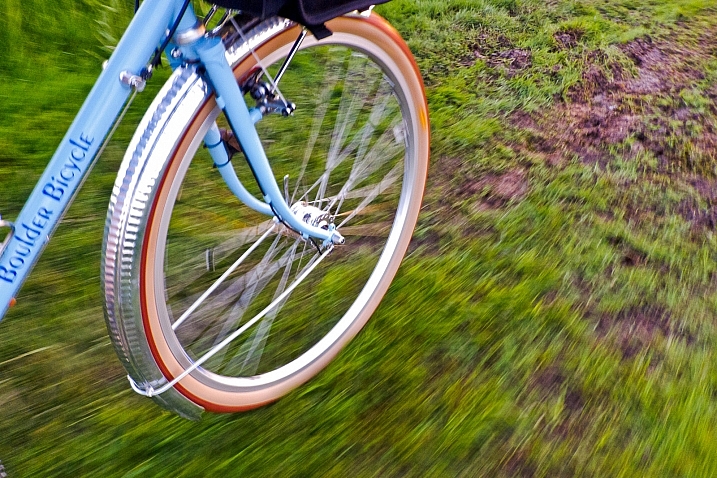
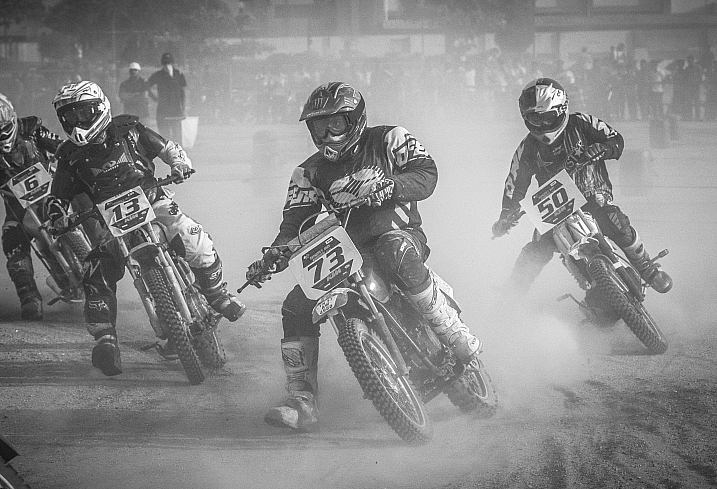
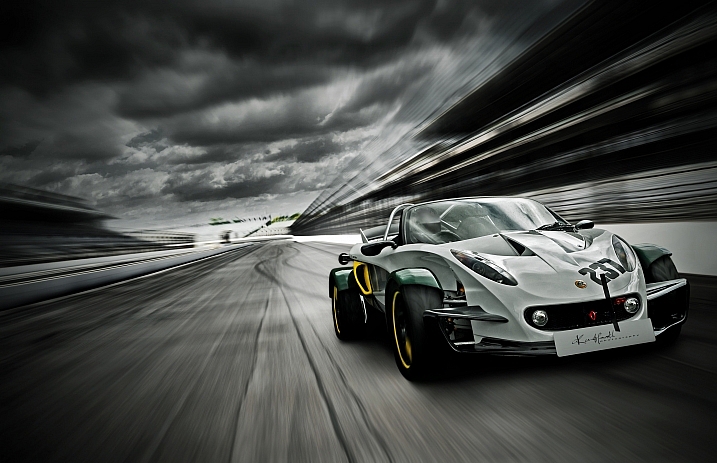
  • Modes of Transportation – 28 Images of Planes, Trains, and Automobiles

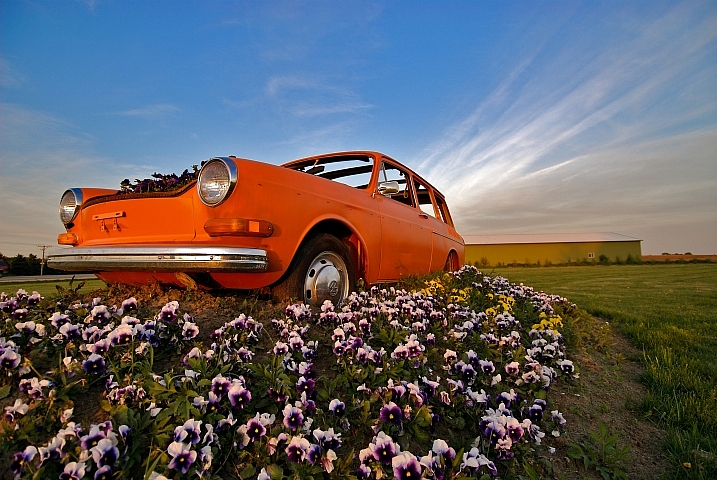
    We photographers tend to have a fascination with a few different subjects including old cars and bicycles.

    But what other modes of transport are there that we love to shoot? How many can you see here, and how have these photographers captured their essence, done them justice?

    These first few images are mine:

    Darlene Hildebrandt

    By Darlene Hildebrandt

    Darlene Hildebrandt

    By Darlene Hildebrandt

    Darlene Hildebrandt

    By Darlene Hildebrandt

    Darlene Hildebrandt

    By Darlene Hildebrandt

    Darlene Hildebrandt

    By Darlene Hildebrandt

    Darlene Hildebrandt

    By Darlene Hildebrandt

    These are by other photographers:

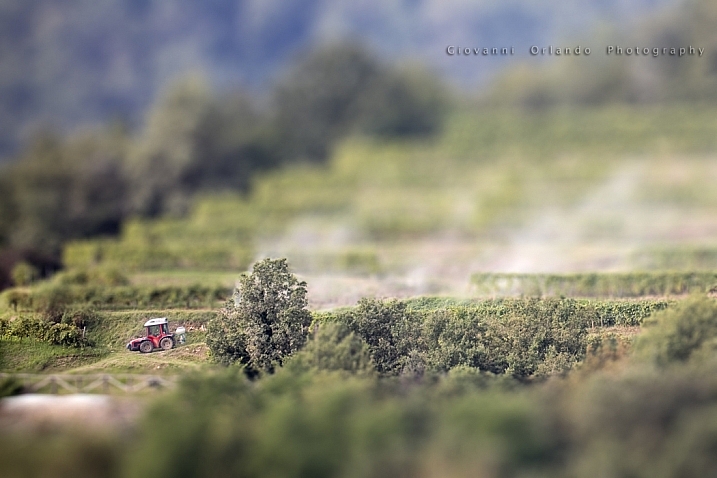
    Giovanni Orlando

    By Giovanni Orlando

    Howard Ignatius

    By Howard Ignatius

    Brent Pearson

    By Brent Pearson

    Timothy Neesam

    By Timothy Neesam

    Staffan Scherz

    By Staffan Scherz

    Garrett

    By Garrett

    Jimmy Brown

    By jimmy brown

    Peter Miller

    By Peter Miller

    Gerry Balding

    By Gerry Balding

    Patrick Franzis

    By Patrick Franzis

    Justin

    By Justin

    Konstantinos B

    By Konstantinos B

    Amanda Tipton

    By amanda tipton

    Davide D'Amico

    By Davide D’Amico

    Patrick Franzis

    By Patrick Franzis

    Jimmy Brown

    By jimmy brown

    Michael Kooiman

    By michael kooiman

    Ryan Desiderio

    By Ryan Desiderio

    WickedVT

    By WickedVT

    Madhan R

    By madhan r

    Kev Haworth Photography

    By Kev Haworth Photography

    Dennis Jarvis

    By Dennis Jarvis

    Caden Crawford

    By Caden Crawford

    googletag.cmd.push(function() {
    tablet_slots.push( googletag.defineSlot( “/1005424/_dPSv4_tab-all-article-bottom_(300×250)”, [300, 250], “pb-ad-78623” ).addService( googletag.pubads() ) ); } );

    googletag.cmd.push(function() {
    mobile_slots.push( googletag.defineSlot( “/1005424/_dPSv4_mob-all-article-bottom_(300×250)”, [300, 250], “pb-ad-78158” ).addService( googletag.pubads() ) ); } );

    The post Modes of Transportation – 28 Images of Planes, Trains, and Automobiles by Darlene Hildebrandt appeared first on Digital Photography School.

    Digital Photography School

  • 3 Secrets to Getting Amazing Toddler and Newborn Photos

    Newborn sibling ct heather kelly photography 001

    You are so excited about an upcoming newborn session. You can’t wait to cuddle the new baby, as you soothe them to sleep and pose them. Then you find out that the parents want to include their toddler, or even worse, toddlers! Now the excitement has changed to anxiety about throwing a toddler into the mix. Toddlers can be unpredictable, difficult to bribe, and sometimes want nothing to do with the new little person in their life.

    Take a deep breath and remain calm. You can do this! Here are my three secrets to getting amazing toddler and newborn photos:

    1. Friend the older sibling

    Newborn sibling ct heather kelly photography 002

    What are their interests?

    Remember that just a couple weeks ago, they were front and center in their parents’ lives. There have been a lot of changes, and most likely a little less attention for them.

    Talk with the parents to find out about big sister. What does she like? Does she have any favorite songs or shows? What is her favorite treat? Talk with mom and dad beforehand, and see if they are okay with a little reward. Make big sister the center of attention when you arrive. Get down on her level, tell her about yourself, and ask her questions. Have her introduce you to her new baby sister. You want big sister to trust and like you.

    Siblings make great helpers

    Toddlers are so curious, and love to help. Show them some of the hats or headbands you brought for their little sibling. Ask them to pick out their favorites. Once they are comfortable with you, it will be a lot easier to get them to listen, when you want to take a picture with their new baby sister.

    After you are done setting up, ask them to help you test out the light. If you can get them to lie down, the battle is half over. Tip: have baby all wrapped up and ready to go, before you have big sister help by being a light tester.

    Newborn sibling ct heather kelly photography 003

    Newborn sibling ct heather kelly photography 004

    newborn-sibling-ct-heather-kelly-photography-005

    2. Let the toddler rule the session

    Choices

    Now that you and big brother are friends, give him some choices. He needs to know that he is in charge. Forcing him to do something he doesn’t want to do, can backfire.

    Some choices could be:

    • Do you want to lay down on this cream rug or this blue rug?
    • Would you like your baby brother on this side or that side?
    • Would you like to kiss your brother or look at the camera?
    • Do you want the red truck or the blue car as your prize?

    Choices make big brother feel in control. If he doesn’t want to cooperate in the beginning, that’s okay. You can try again later.

    Do you want to take the picture now or come back in 5 minutes?

    Let him take a break and then you can try again in a little bit. Use this break to get some images of baby alone. After big brother has had a break, you can give it another try. Sometimes multiple breaks are needed.

    newborn-sibling-ct-heather-kelly-photography-007

    Expectations

    Tell big brother what to expect, and how long it’s going to take. Children have a much easier time if they know what to expect, and that there is an end time. You want to tell them what they’re going to do, how many pictures you’re going to take, and what happens after (the reward!).

    “We are going to take a picture of you and your baby brother for mommy and daddy. It won’t take long. I will take five photos, then we’ll be done and you can pick out your prize! I’m going to start counting. 1 – 2 – 3 …”

    Counting works great as even young toddlers can understand counting to three or five. You can take multiple photos while you draw out one number so you’ll end up with a lot more than five. With squirmy toddlers, multiple images are definitely needed. Once you hit the number, they are done.

    If you don’t think you got a useable image give them a choice of counting again or taking a break. You want it to be short and sweet so big brother is more likely to cooperate.

    newborn-sibling-ct-heather-kelly-photography-008

    3. Praise and Reward

    Praise

    After big sister has done what you have asked, give her a lot of praise. Even if all she did was make a choice to do pictures in five minutes instead of now. You asked her to make a choice, and she did. Great job big sister! It might not seem like a big win, but it will help when you try again.

    Praise and thank big sister for every little thing she does. Kids love being praised, and to know that they are doing a good job. There is no such thing as too much praise when you are trying to get a toddler to cooperate.

    Reward

    Make a toy chest or prize bin. You can add toys that your children don’t play with anymore, or find items at the dollar store. When you first meet big sister and are becoming friends, show her what you brought. Point out a few items in your prize bin, and tell her that after she takes some pictures, she’ll get to pick out any one item to keep.

    While you are praising big sister, remind her of her reward. “You are doing such a great job with your little brother. I can’t wait to see what prize you pick out!”

    You can show the prize bin during breaks. A toddler’s attention span isn’t the greatest, so sometimes they need reminding that they’ll get a prize soon. For a real challenging toddler, you can let them pick out their prize ahead of time, and put it on a shelf or with mom and dad as a reminder.

    newborn-sibling-ct-heather-kelly-photography-009

    newborn-sibling-ct-heather-kelly-photography-010

    newborn-sibling-ct-heather-kelly-photography-011

    Do you have any other tips for working with toddlers and newborns? Let us know if you try these and how you make out. Please share your results in the comments below.

    googletag.cmd.push(function() {
    tablet_slots.push( googletag.defineSlot( “/1005424/_dPSv4_tab-all-article-bottom_(300×250)”, [300, 250], “pb-ad-78623” ).addService( googletag.pubads() ) ); } );

    googletag.cmd.push(function() {
    mobile_slots.push( googletag.defineSlot( “/1005424/_dPSv4_mob-all-article-bottom_(300×250)”, [300, 250], “pb-ad-78158” ).addService( googletag.pubads() ) ); } );

    The post 3 Secrets to Getting Amazing Toddler and Newborn Photos by Heather Symes appeared first on Digital Photography School.

    Digital Photography School

  • 10 Tips for Photographing Great Headshots

    Photographing a headshot can seem like a daunting prospect. To have one person in front of your camera, looking to you for direction and positivity, is an intense environment. People are generally very critical of themselves in photographs, and feel very nervous. However, there are some simple things that you can do to make it a lot easier for everyone.

    Headshot on Black Background 1

    Here are 10 tips to help you photograph headshots:

    1. Have a pre-session consultation

    Before your session make sure you know how the images will be used and what style they would like. This can be on the phone or face to face. Talking to them, will help them relax so much more than email. This will allow you to help them prepare for the session. Make sure they know what to expect, and are as relaxed as possible.

    Headshot on White Background 1

    Find out about what profession your subject is involved in; a corporate lawyer may well opt for a clean white background look (above), while a more relaxed style of business (yoga instructor) may prefer a more colourful, environmental image (below). Find out in the consultation what they want so you are prepared on the day.

    Indoor Headshot

    2. Help them to choose the right clothes

    Generally speaking, solid, neutral colours, work best for headshots, as you want to avoid anything that distracts away from people’s faces. If it is a formal style you are looking to achieve, make sure that everyone gets the message, and remembers to bring formal work clothes with them. Men often forget their jackets, so for a consistent look, try and have a spare one on hand, even if you need to clip it at the back. If you have time with a person, get them to bring a few items of clothing. Remind them to iron their clothes as well.

    Here are some example of good clothing choices:

    What to wear

    What to wear 2

    What to wear 3

    3. Create separation from the background

    Make sure that your subject doesn’t stand too close to the background. If you are using a studio background (or wall in an office) and you stand someone close to it, you may see shadows on the wall, which makes the images look less professional. For environmental headshots outdoors, I still recommend separation from the background. The bokeh creates a nice nondescript background, especially when shot at a wide aperture. Typically I aim for an aperture of f/4 for environmental and natural light sessions, and f/8 for studio style sessions with lights.

    4. Starting the session

    Whether you are photographing headshots for a single person, or a whole team, make sure you have a general chat with each person first, to help them relax. This can be just a 10 second, confident handshake, and a “how are you?”. People generally feel very tense about having their photograph taken, and talking about something in their comfort zone (where they live, if they have children or pets, etc) will really help them appear and be more comfortable.

    5. Silly Faces!

    A great way of helping people to relax in front of the camera, if you don’t have much time with them, is to ask them to pull a funny face for the first frame. Use this as a lighting test for a new person as well. This is great at breaking the ice, and very few refuse to do it. Once they have pulled a daft face, everything else is easy!

    Funny faces

    Headshot Photography London 0997

    6. Lighting and positioning

    For business and actors’ headshots, I tend to light quite evenly. There are a few circumstances when the images are low-key, but for the main part, they are evenly lit. A classic beauty lighting setup works well, with one light above, and a second light, or a reflector filling from below.

    I ensure the subject is turned with their body 45 degrees away from the camera, and towards the main light source (if your lighting allows for this). Their face should be straight towards the camera. You may need to guide people to look straight down the lens. It’s surprising how many people look off camera, at the flash, or somewhere random.

    Headshot setup

    Posing example

    7. Sit people down

    People may be more comfortable sitting down, and by asking them to rest their hands on the tops of their thighs, it gives them something to do with their hands. It also ensures that the subjects all know where they need to be, and they don’t move around too much.

    8. It’s all about the little adjustments

    What separates a great headshot from an average one, are generally very small changes. These little adjustments can make all the difference. The slight tilt to the head, leaning forward, a gentle but intriguing smile. Don’t be afraid to ask someone to make very specific changes to their expression and position, until you get the image you’re looking for.

    Headshot Photography London 1052

    9. Keep talking and be positive

    When you’re in the midst of taking photographs, make sure that you keep talking to your subject. Reassure them that they’re doing it right, and you’re getting great images. Even if you’re not satisfied with the images when someone turns their head in a certain direction, or how the light is falling on them, never express that to your subject. Silence will kill the atmosphere, so no matter what is happening, just keep chatting and being positive.

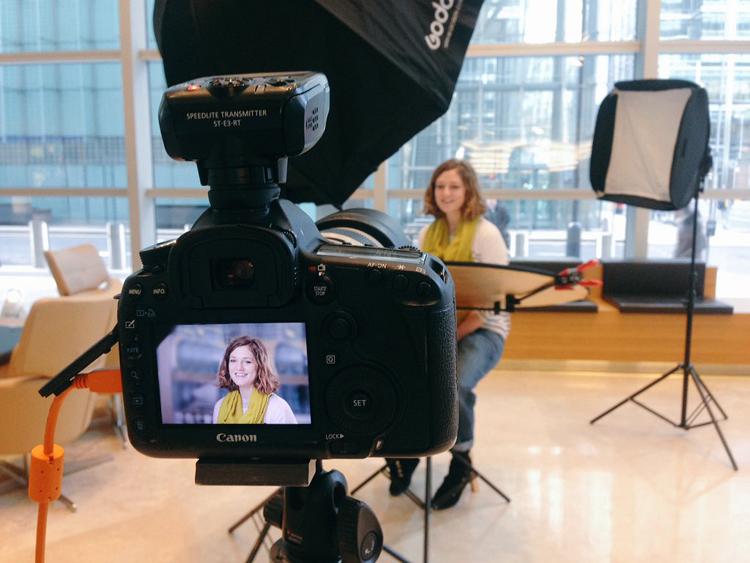
    10. Shoot tethered

    If you have all the necessary equipment, shooting tethered is a fantastic way the get great headshots. When people see a couple of shots on the screen, they can very quickly get an idea of what needs to be changed. The immediate feedback on the screen will help everyone massively.

    I hope you find these tips for better head shots helpful. Do you have any others we missed? Please share them, and your headshot photos in the comments below.

    googletag.cmd.push(function() {
    tablet_slots.push( googletag.defineSlot( “/1005424/_dPSv4_tab-all-article-bottom_(300×250)”, [300, 250], “pb-ad-78623” ).addService( googletag.pubads() ) ); } );

    googletag.cmd.push(function() {
    mobile_slots.push( googletag.defineSlot( “/1005424/_dPSv4_mob-all-article-bottom_(300×250)”, [300, 250], “pb-ad-78158” ).addService( googletag.pubads() ) ); } );

    The post 10 Tips for Photographing Great Headshots by Sean Gannon appeared first on Digital Photography School.

    Digital Photography School

  • How to Shoot a Pine Cone Time-lapse: A Mini Tutorial

    This week over at our sister site, SnapnDeals, we have a great deal running where you can get 20% off Time-Lapse Photography: A technical and practical time-lapse tutorial guidebook for all skill levels designed to get you out the door and shooting now!

    How to Shoot a Pine Cone Time-lapseIn this lighthearted mini-tutorial we’ll take an 80/20 approach to creating a simple time-lapse of a common pinecone (in this case a Black Pine).

    For a more general introduction to time-lapse photography view: Time-lapse Photography Tutorial: An Overview of Shooting, Processing and Rendering Time-lapse Movies.

    You already know that pine cones are nature’s mysterious seed pyramids, but did you know they have a gender? Yes, there are both female and male pine cones. Did you also know that pine cones are an interesting time-lapse subject? Go get a female pine cone, and give it a shot. Let this whole male/female Nature Notes youtube revelation be your last straw, or should I say pine needle that breaks your procrastination. Here was my result:

    Here’s how to make your own pine cone time-lapse:

    Step 1. Find pine cones

    Collect some good looking pine cones (preferably female: watch the Nature Notes video above). Look for good cones in fresh condition, without rot or discoloration, uniform shape, and bottoms that provide support for upright standing. I’d grab two or three for variety, and a dog chew backup. Here’s an example of an open found pine cone.

    Pinecone bts1

    Step 2. Make them close

    Pine cone motion is all about moisture, it’s a hydromorphic response. In high moisture environments pine cones close. In low moisture, over time, they open. This video showing both opened, and closed cones, with visible moisture is a perfect learning example.

    To close a cone, simply put it in a cup of water and leave it for an hour or two. That’s it.

    Step 3. Prepare for the opening shot

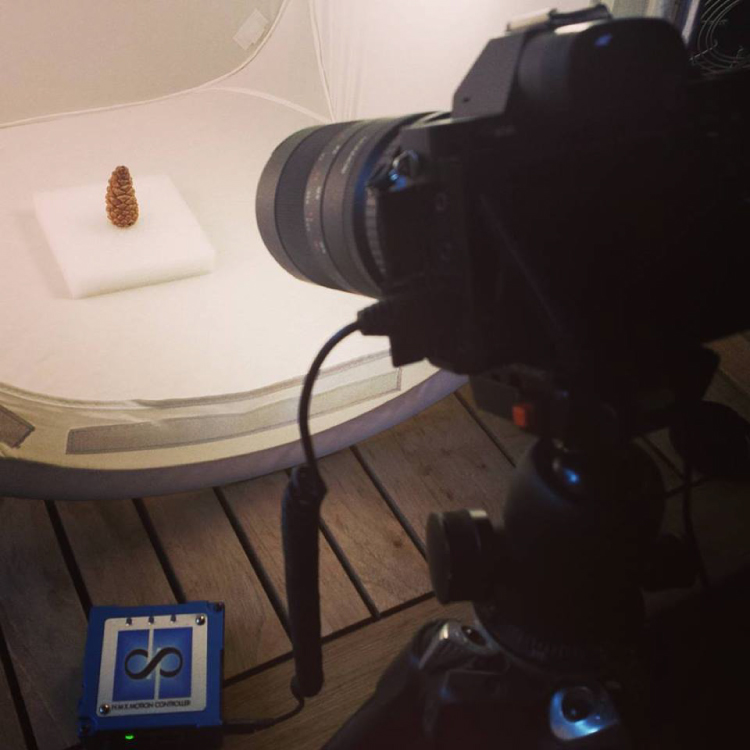
    Key thoughts: Steady (consistent) lighting, simple background, camera position, power. Let’s take these one by one.

    Steady light: Light fluctuations in a sequence of time-lapse images are bad, as they create unappealing bright and dark frames in the rendered movie, better known as time-lapse flicker (learn much more about that here). Chose a room that you can cordon off for a day or so to prevent disturbances, and block all light from any windows. Move any light sources near the photo white box, to provide a constant uniform brightness, then adjust their positions to eliminate shadows.

    Background: Completely up to you creatively. I chose a minimal white background, using a simple inexpensive white box. By slightly overexposing each shot, you can effectively eliminate almost all appearances of a background.

    Camera position: Choose one or more angles from which to shoot. I chose first, a front downward angle, and a second fully vertical angle from above.

    Power: A pine cone bloom from closed to opened may last anywhere from 8-24 hours, so you’ll need an AC adapter for your camera to make sure it keeps going.

    Step 4: Craft the time-lapse and begin

    We talked a little bit about avoiding stray light sources in the room where you are shooting, as these changes introduce time-lapse flicker into the image sequence. Having your camera in any automatic mode may also introduce flicker. To get the best possible consistent exposure over many frames, shoot in manual mode, set a manual white balance, manual ISO, and manual focus. In the example video above I used a Sony A7s and FE 90mm f/2.8-22 Macro G OSS lens.

    Pine cone bts2

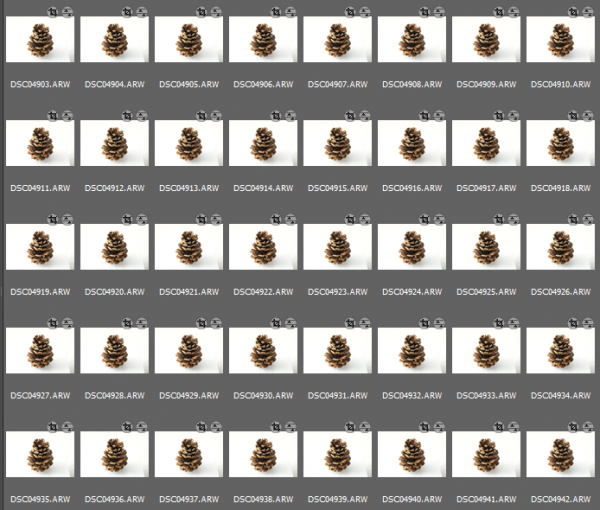
    Exposure: Six seconds at ISO 200, f/22, produced a great image, and just started to wash out the brighter white background. You can push the whites a little further in post-production, and really create a clean image background.

    Time-lapse interval: To be honest I didn’t know how long I would be shooting, or when the action would begin. Times will vary, as no two cones and no two climates, or indoor humidity levels are exactly alike. The side angle pine cone shot took from about 9:00 a.m., to 3:00 a.m. the following morning, approximately 18 hours. I chose a 30 second interval, and set the shot count to infinity, so it would continually shoot until it was manually turned off. When unsure of how quickly to shoot, or how many frames to capture, it’s always good to capture more, rather than less. You can always speed up a time-lapse with too many frames, but if you don’t get enough shots and miss important movement, you are usually stuck.

    Capture

    These 30 second exposures, over 18 hours, resulted in about 3,246 images. That’s a lot of frames. Pine cones are slow. Much slower than I anticipated, and my interval was pretty fast capturing more frames than necessary for smooth movement. For your experiment I’d recommend increasing your interval time to about 50 seconds, or one minute. Having a longer interval time will result in less photos, and with the slow moving nature of the bloom it will not result in a jumpy or less smooth cone opening video.

    Step 5: Adjust the exposures and render the time-lapse

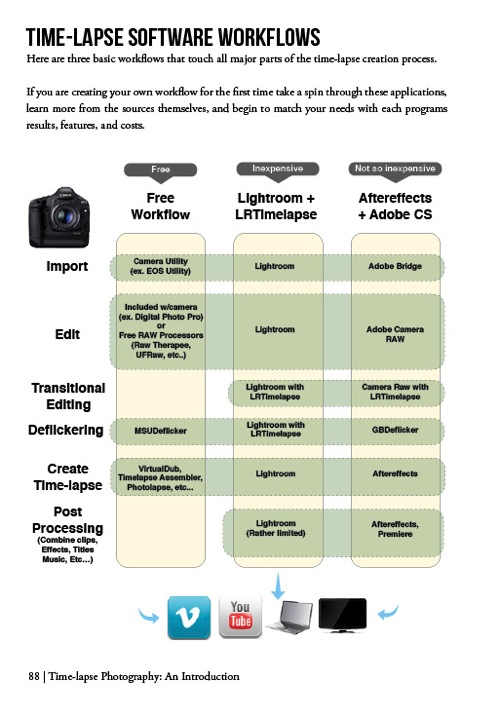
    The beauty of Lightroom, or Adobe Bridge and other applications, is that you can adjust the exposure on a single reference photo, then apply those changes across all your photos. Simple – and so is rendering the basic time-lapse. There are several different applications to choose from, to turn your collection of images into a video – varying from free and inexpensive, to not so inexpensive. Fear not, you can learn much more about time-lapse rendering in previously mentioned article, but the diagram below provides an overview of time-lapse software and applications.

    Timelapse Photography by Ryan Chylinski Book Preview6

    Patience is your most valuable commodity for this project. From pine cones to The Milky Way, I hope this mini peak into the world of creative time-lapse photography has ignited your curiosity to learn more. Time-lapse has a way of slowing the world for the photographer, while at the same time accelerating it for everyone else. I shoot time-lapse because it alters the way I think, it challenges my view of the world, and teaches me things I can bring back and share with everybody else. It’s a real honor and privilege to partner with you on this training journey. I hope is helpful and I would love to hear from you in the comments below.

    This week over at our sister site, SnapnDeals, we have a great deal running where you can get 20% off Time-Lapse Photography: A technical and practical time-lapse tutorial guidebook for all skill levels designed to get you out the door and shooting now!

    googletag.cmd.push(function() {
    tablet_slots.push( googletag.defineSlot( “/1005424/_dPSv4_tab-all-article-bottom_(300×250)”, [300, 250], “pb-ad-78623” ).addService( googletag.pubads() ) ); } );

    googletag.cmd.push(function() {
    mobile_slots.push( googletag.defineSlot( “/1005424/_dPSv4_mob-all-article-bottom_(300×250)”, [300, 250], “pb-ad-78158” ).addService( googletag.pubads() ) ); } );

    The post How to Shoot a Pine Cone Time-lapse: A Mini Tutorial by Ryan Chylinski appeared first on Digital Photography School.


    Digital Photography School

  • Getting Started with Long Exposure in Fashion Photography

    Editor’s note: Once you try to use long exposure in fashion photography, you’re likely to do it again and again. Not only can it bring outstanding results in terms of originality of your images, but it’s also a great way to add a funny bone to your portrait sessions and thus, get more natural, sincere model looks. In this post, Continue Reading

    The post Getting Started with Long Exposure in Fashion Photography appeared first on Photodoto.


    Photodoto

  • Tips for Minimizing Reflections When Photographing Through Windows

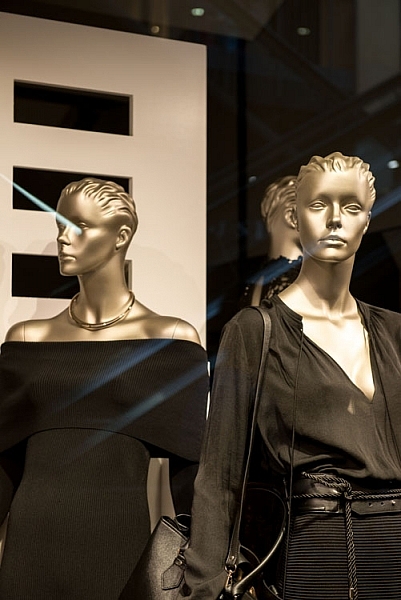
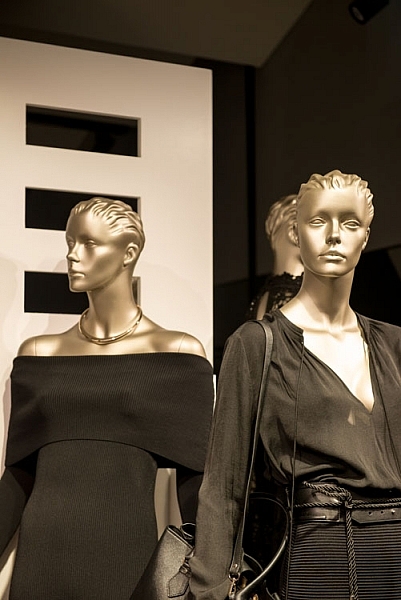
    Have you ever wanted to take a photo through a shop window, but couldn’t work out how to cut the reflections? Or been up on an observation deck, trapped behind glass that had so many stray lights shining into the glass, that you couldn’t get a good shot of what was on the other side?

    LeanneCole-photography-through-glass-1028

    It is hard to take photos through glass and not get lots of unwanted reflections.

    Glass can be one of the hardest things to take photos through. It doesn’t seem to matter where you move, you will find more reflections. Then just when you think you have the perfect shot, you put it on the computer only to find that they are still there.

    Shop Windows

    One of the most commons places to take photos, is through shop windows. But, they are often in well-lit places, and they are tough because you will be getting reflections from all directions. There are ways of minimizing the reflections, and things you can do to help prevent them.

    Polarizering Filter

    A polarizer filter will help reduce the reflections. It may not remove them all, but it will help you to eliminate many of them. Take the images below, it has all the lights on the outside of the store reflected in the glass, and with a polarizing filter.

    LeanneCole-photography-through-glass-1036

    The reflections of the lights from outside the shop can be seen on the glass.

    LeanneCole-photography-through-glass-1037

    The reflections have been removed by the help of the polarizing filter.

    A circular polarizing filter was put on the lens, and in order to remove the reflections, it was turned until they just disappeared. Take a look at the image above right, the filter has helped remove many of them.

    It doesn’t always work, but it can help reduce reflections. In some cases, you are going to find that reducing them is better than having them ruin your images.

    Using a Lens Hood

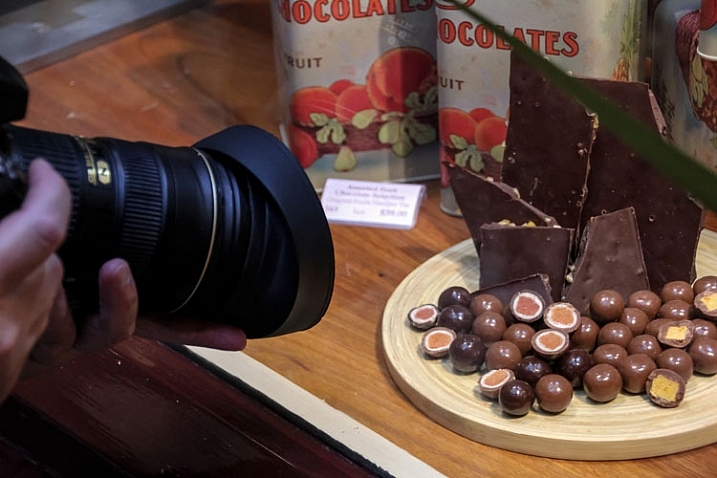
    If you can get your lens right up to the glass of the window so that it sits on it squarely, it can stop any unwanted reflections from getting in front of the lens. However, it means that you can only take photos of what is directly in front of the camera, what do you do if you want to take some at an angle? There is no doubt that once you move it on an angle you will start to see reflections.

    You want to be able to create a seal around the end of the lens, and a rubber lens hood can do that. Look at the following photo, you can see one on the lens.

    LeanneCole-photography-through-glass-1038

    The rubber lens cap is on the lens, and pushed against the window.

    The advantage is the flexibility, and how you can move it around and change the angle of your lens. The following two images show one with reflections, and one without. The latter is the one taken using the rubber lens hood.

    LeanneCole-photography-through-glass-1034

    Reflections on the glass are apparent here.

    LeanneCole-photography-through-glass-1035

    The rubber lens hood has eliminated the reflections.

    They used to be very common and a lot of people would have the rubber hoods for their lenses, but slowly the hard plastic ones have taken over. It is good to see that if you hunt around on the internet, you can still find them. The one used for this demonstration was found on Ebay.

    Trams, trains and cars

    There are numerous places you could use it, and on a recent trip to the mountains around Lake Tahoe, it would have been great in the tram up Squaw Valley. The glass in the tram had so many reflections it wasn’t worth trying to get any photos. It was the same on the tram that runs from Roosevelt Island to New York.

    Trains and other moving vehicles have the same problems with windows and reflections. The rubber lens hood would help you to get an image free of any distracting reflections. However, there is one place in Melbourne where it wouldn’t help at all.

    Eureka Skydeck

    In Melbourne there is an observation deck that is 88 floors up, Eureka Skydeck, that provides some stunning views of Melbourne. It is a great place to see the city, but a terrible place to take photos.

    There is glass all around, and it reflects everything else in it. The one place where you can go outside has mesh across it and for most cameras the holes in it are not big enough to take photos through. At night there are lights on the floor that create their own effects on the windows.

    If you go up to the glass to take photos, you will find that if you use the rubber lens hood method won’t work as there are two panes of glass. You might get rid of the reflections off the first pane, but there is not much you can do with the second.

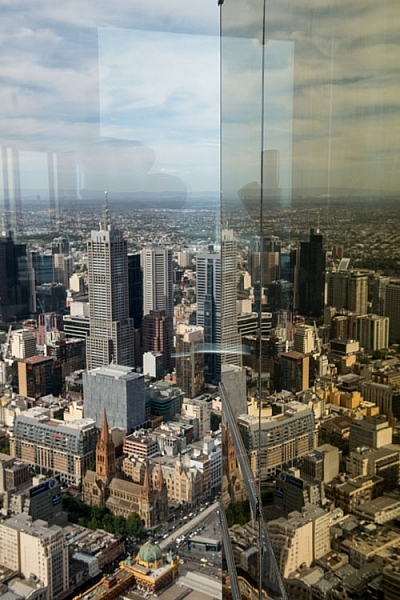
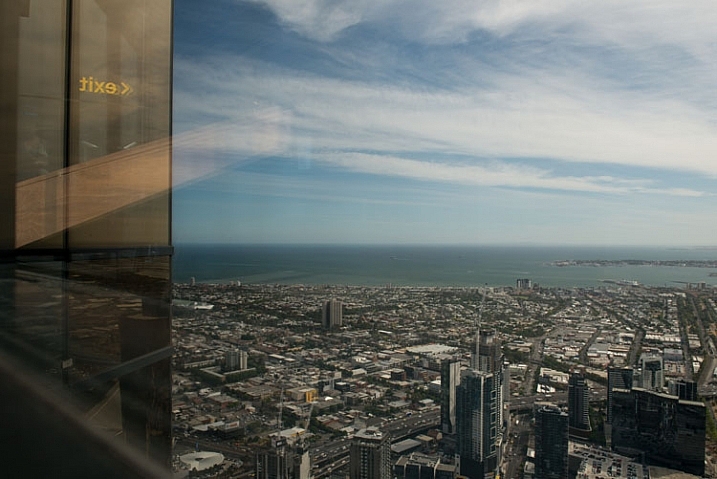
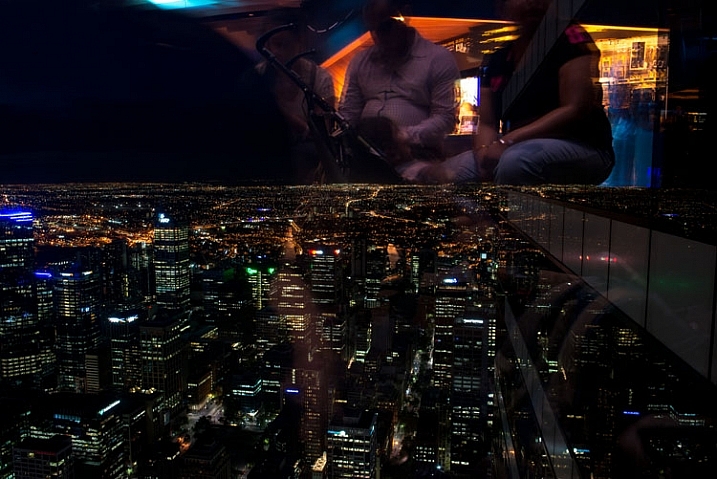
    Here are two images, the first was taken during the day and you can see the reflections. The second image was taken at night and you can see all the lights that are there reflected in the glass.

    LeanneCole-photography-through-glass-1027

    Taken during the day and you can see the reflections.

    LeanneCole-photography-through-glass-1030

    At night the lights inside reflect everywhere, and you can also get portraits shots, whether you want them or not.

    Like everything in photography, there are always ways to get around problems.

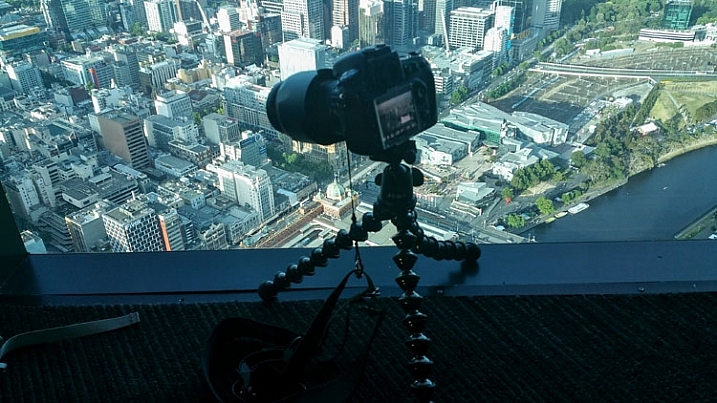
    To eliminate the reflections, you will need to put your camera on a tripod, or something similar, for the following image a GorillaPod was used. It was placed close to the ground, as you can see in the image. At the Eureka Skydeck they have lights in the floor, so you have to make sure that light isn’t coming from under the camera.

    LeanneCole-photography-through-glass-1025

    The camera on the gorillapod on the floor.

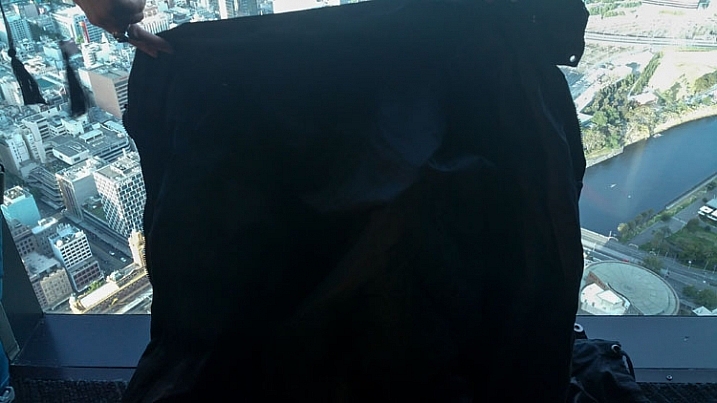
    Set up your image and create a seal around the camera with fabric, you could use a piece of black cloth. It needs to be dark as a lighter colour will reflect as well. For these images a lightweight black jacket was held up against the window, to help prevent the reflections. You want to be able use the fabric or jacket to create a closed-in area around the camera, so you don’t get unwanted views in your image. Look at the following image.

    LeanneCole-photography-through-glass-1026

    The jacket is placed around the camera to stop reflections.

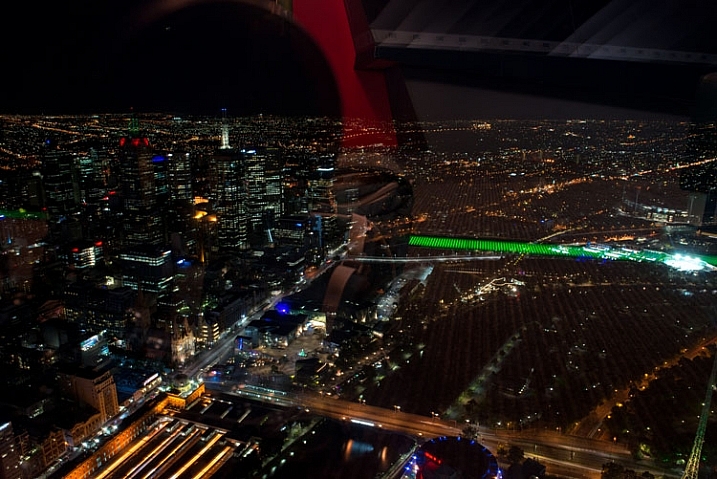
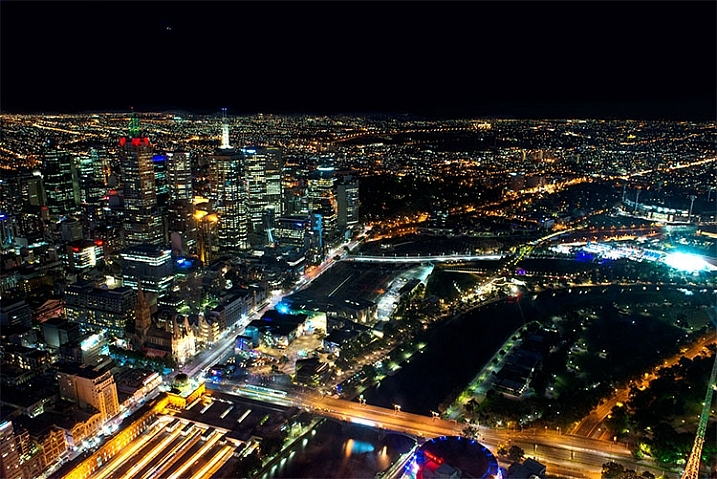
    Of course no system is going to be foolproof, but, if you compare the following two images, you can see that it does make a big difference. The first image was done without any protection, and the jacket was used for the second one.

    LeanneCole-photography-through-glass-1033

    This image has had nothing done to stop the reflections.

    LeanneCole-photography-through-glass-1032

    This was taken using the above method with a jacket to block the reflections.

    You have to judge each situation as you get to it. While one technique might work in one place, it may not work elsewhere. There is no doubt that glass and windows are one of the hardest objects to photograph through, a bit like photographing a mirror. Take care, and I hope the next time you are taking photos of a shop window, you get some great photos.

    googletag.cmd.push(function() {
    tablet_slots.push( googletag.defineSlot( “/1005424/_dPSv4_tab-all-article-bottom_(300×250)”, [300, 250], “pb-ad-78623” ).addService( googletag.pubads() ) ); } );

    googletag.cmd.push(function() {
    mobile_slots.push( googletag.defineSlot( “/1005424/_dPSv4_mob-all-article-bottom_(300×250)”, [300, 250], “pb-ad-78158” ).addService( googletag.pubads() ) ); } );

    The post Tips for Minimizing Reflections When Photographing Through Windows by Leanne Cole appeared first on Digital Photography School.


    Digital Photography School

  • Fuji X-Pro2: All Your Questions, Answered

    After years of waiting, the Fuji X-Pro2 ships on Thursday, March 3rd. I have been shooting with a pre-production unit since October, and have a pretty good feel for its strengths and weaknesses.

    Last week on Twitter I held an AMA (Ask Me Anything) about the new flagship camera. Scroll down for your questions — all of them, edited only for clarity — and my answers. If you're on the fence, hope it helps.

    Cheers,
    DHRead more »
    Strobist