Category: Photography

  • Review: Lastolite 6×4 Foot Panelite Collapsible Reflector with Translucent Diffuser

    review-lastolite-panelite-diffuser-0803

    How many times have you heard that there are certain times of day you shouldn’t photograph people? For example, at midday in harsh sunlight. The logic is pretty sound. Direct, hard light can lead to unflattering shadows and ultra high contrast, which can result in unsatisfactory portraiture. However, if you follow this advice blindly, and only wait for the golden hours each day, you’re missing out on an enormous amount of time that could be spent photographing people.

    There are several options to combat this problem, but one of the easiest and most effective, is a piece of gear called a diffusion panel.

    What is a diffusion panel?

    At its most basic, a diffusion panel is a piece of translucent material that allows harsh direct light to pass through it, so it effectively becomes a light source of its own. This softens the light and can allow you to obtain great, flattering, natural light portraits, in unfavorable conditions.
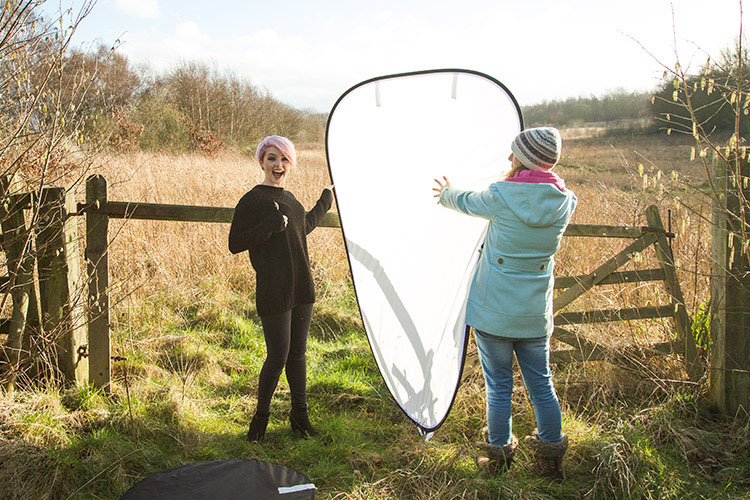
    review-lastolite-panelite-diffuser-2745

    There are many types of diffusion panels available ranging from very small, handheld ones, to giant ones that are many meters across and require dedicated stands.

    When size matters

    Small diffusion panels are useful, and if you happen to have a 5-in-1 reflector, you probably already have one. These are indispensable for still-life and tabletop work; however, in terms of portraiture, their small size often limits them to closely cropped images and headshots.

    This is where the Lastolite Panelite Reflector comes in. At 6×4 feet (1.8m x 1.2m) it’s large enough to cover enough area for full length portraits. At $ 128 retail, its price also means that it isn’t way out of reach for the serious portrait photographer.

    Putting it through its paces

    To test it out, I took the Lastolite Panelite Reflector out on location, at mid-afternoon on clear days. The sun was low at this point, but still very harsh, and the high contrast would have been difficult, if not impossible, to manage without a modifier.
    review-lastolite-panelite-diffuser-0385

    By Diffusing the sun back lighting the scene, you can even out the exposure of the highlights and shadows which is far more pleasing for portraits.
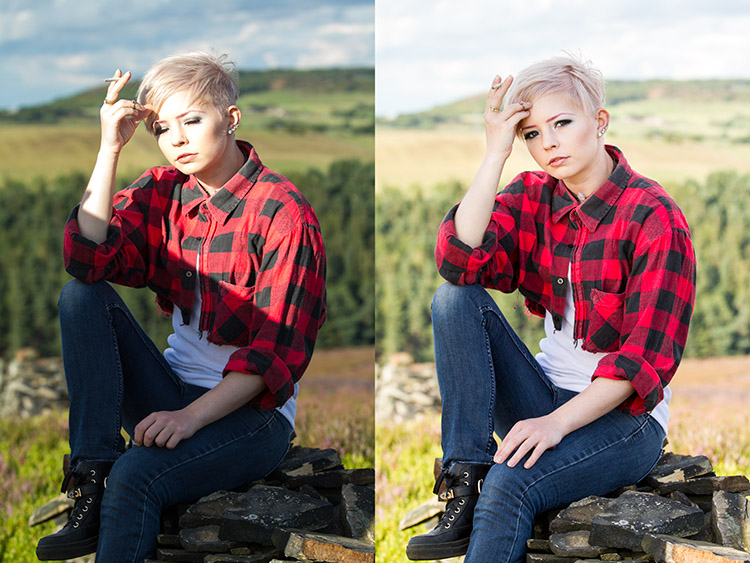
    review-lastolite-panelite-diffuser-0569

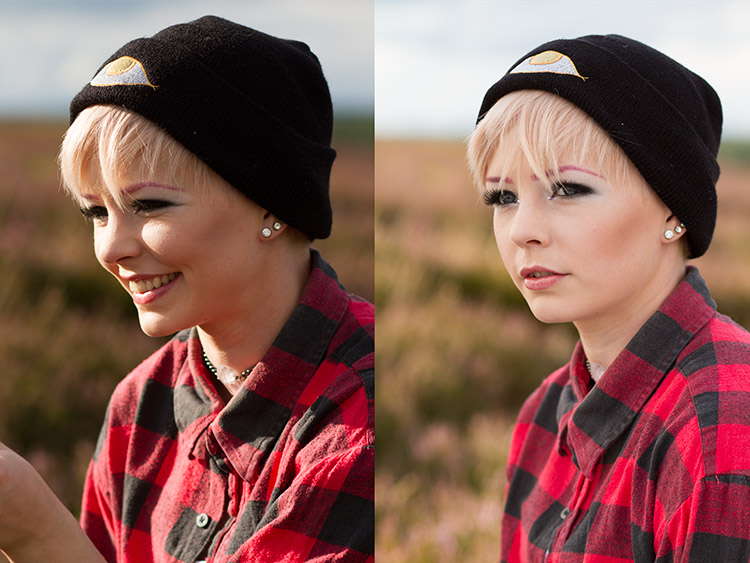
    On the left, the bottom half of the image is shaded by the diffuser. You can see the two stop difference in exposure. In the image on the right, you can see how the hard directional sunlight has been softened (note that more exposure was needed overall so the background was also brightened in the process).
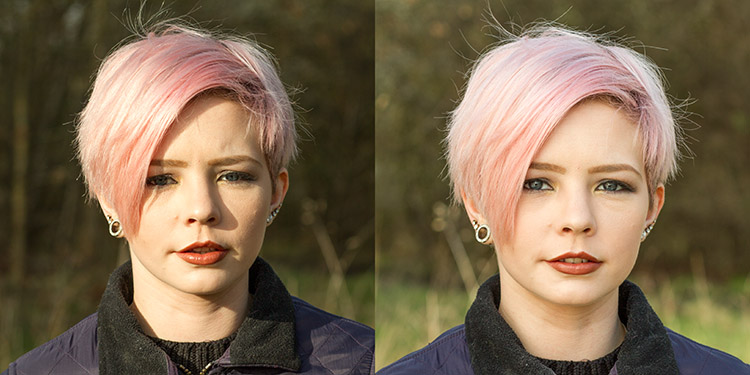
    review-lastolite-panelite-diffuser-2621

    Apart from the unflattering shadows in the left hand image, the direct sun made it painful for the model to look into the camera. With the diffusion panel (right image), her eyes were shielded from the harsh light.
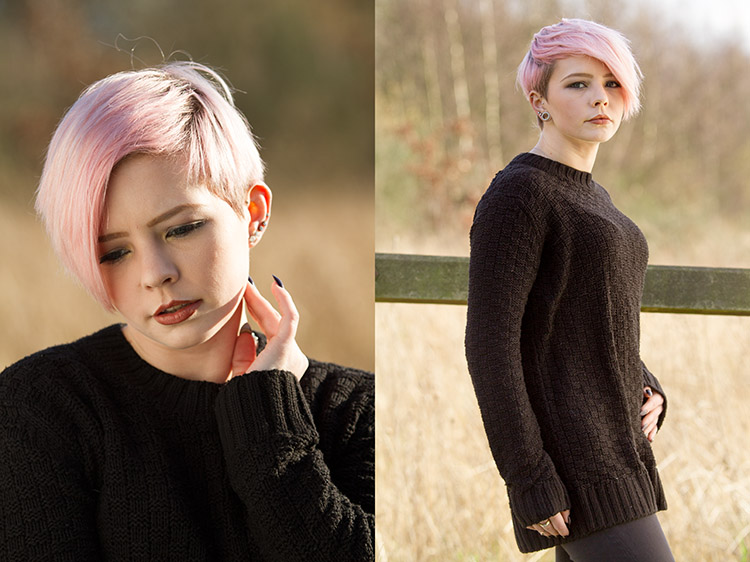
    review-lastolite-panelite-diffuser-2734

    In the left hand image, the extreme contrast from the back lighting made exposing for the rest of the image a nightmare. By diffusing the back light, the exposure was evened out, but still allowed for a pleasing rim light (image above right).

    Let’s look at some of the pros and cons of using this light panel.

    PRO: Two stop diffusion
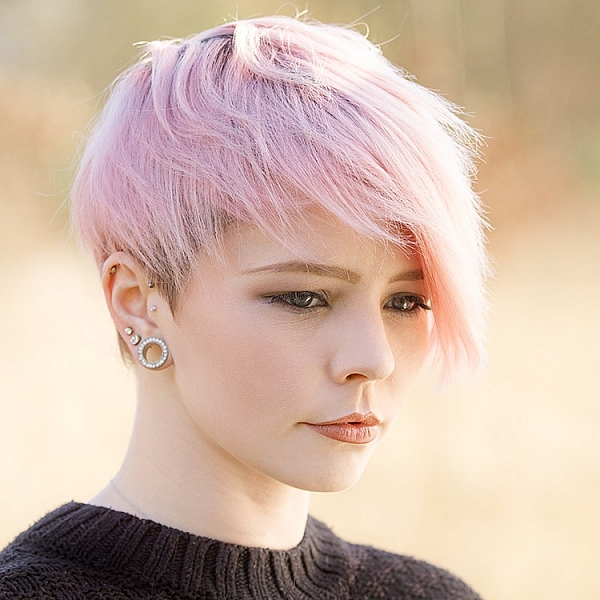
    review-lastolite-panelite-diffuser-2737

    By reducing contrast, the loss of two stops of light can be a huge help in some scenarios.

    When working with the extremes of bright sunlight, it can be difficult to get away from small apertures like f/16. This is a problem because these settings won’t allow for a shallow depth of field. By reducing the light on your subject by two stops with the diffuser, that hypothetical aperture of f/16 becomes f/8 and makes background blur much easier to control.

    PRO: Size
    review-lastolite-panelite-diffuser-2656

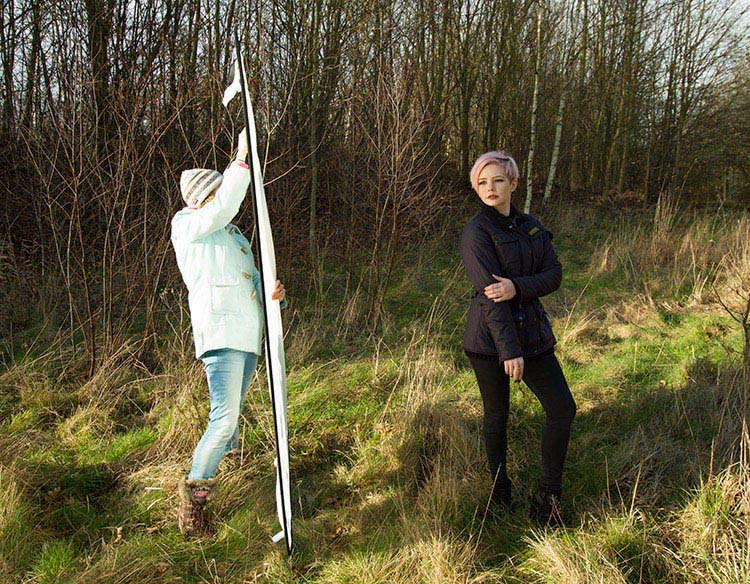
    This thing is huge. It’s not the biggest on the market, but it’s big enough for full length portraits, which is a major plus. I did not yet have the opportunity to test it on groups of people, but I believe it should work well for up to four people, with careful control.
    review-lastolite-panelite-diffuser-0734

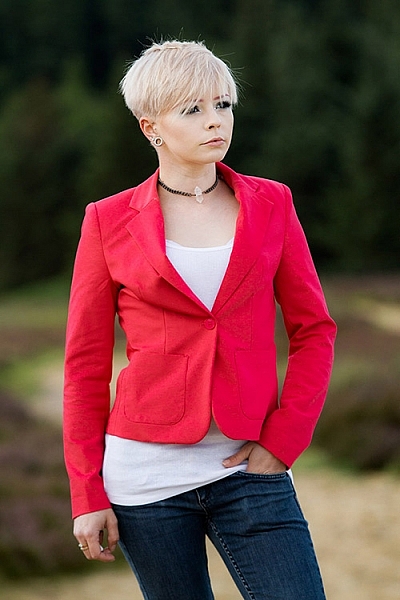
    The ability to diffuse a large enough area for 3/4 and full length portraits is a big plus.

    PRO: Portable

    Like a lot of Lastolite’s product, the diffusion panel is collapsible, and folds up to a tiny fraction of its size. Packed in its case, I would compare it to the surface of a medium sized cafe table. Combined with its light weight, it’s easy enough to throw in the back of a car, and carry along on location with you, without strain.

    PRO: Price

    At $ 128, this is not a budget tool. However, for photographers serious about location based portraiture, the Lastolite Panelite Reflector comes in cheaper than lighting modifiers of moderate quality and unlike those, this doesn’t require lights to go with it.

    CON: Extra hands

    The Lastolite Panelite Reflector is large, and you will find it very difficult to manage without an assistant to hold it for you. If it needs to be held much higher than ground level, you may well need two people. It may be possible to rig it to some stands, but this leads into the next point.

    CON: Be wary of wind
    review-lastolite-panelite-diffuser-2695

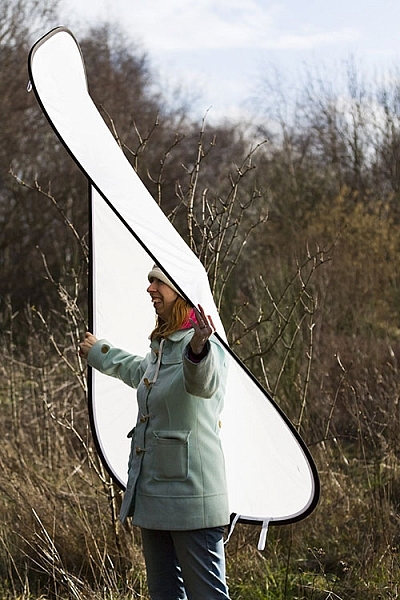
    A small gust of wind sparked a several minute struggle to regain control over the panel.

    The only real problem I came across while testing the Lastolite Panelite Reflector was that the slightest gust of wind will send it flying, and folding in on itself. Whoever is holding it for you needs to have a sure grip on it, and even then the whole process is still irksome.

    If you’re into slapstick, this can be hilarious to watch, but any time spent trying to get the diffusion panel to play along, is time not spent taking photographs.

    CON: Dirt

    Like white reflectors, softboxes and white umbrellas, the Lastolite Panelite Reflector is really, really white and will be hard to clean when it inevitably gets dirty.

    Overall thoughts
    review-lastolite-panelite-diffuser-0640

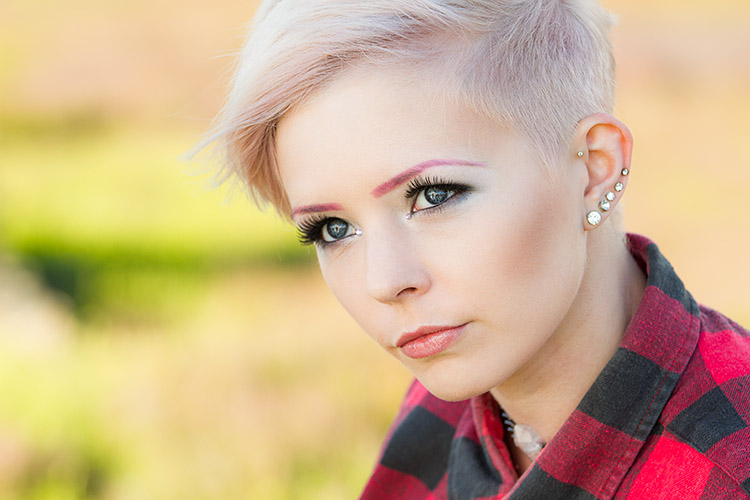
    If nothing else, when used head on, the Panelite Reflector creates some interesting catch-lights.

    To sum it up easily, the Lastolite Panelite Reflector does exactly what it says on the tin. It’s portable, creates a beautiful diffused light, and is relatively affordable. Although, it can prove tricky to handle under some conditions, I found the results to be well worth the extra logistics and effort, and I am looking forward to a long an extended relationship with it in my photographic arsenal.

    googletag.cmd.push(function() {
    tablet_slots.push( googletag.defineSlot( “/1005424/_dPSv4_tab-all-article-bottom_(300×250)”, [300, 250], “pb-ad-78623” ).addService( googletag.pubads() ) ); } );

    googletag.cmd.push(function() {
    mobile_slots.push( googletag.defineSlot( “/1005424/_dPSv4_mob-all-article-bottom_(300×250)”, [300, 250], “pb-ad-78158” ).addService( googletag.pubads() ) ); } );

    The post Review: Lastolite 6×4 Foot Panelite Collapsible Reflector with Translucent Diffuser by John McIntire appeared first on Digital Photography School.

    Digital Photography School

  • Searching for Paddling Water in Southern Colorado – Part 2

    I started my February trip to southern Colorado with visiting Paint Mine Interpretive Park at Calhan east of Colorado Springs. I spent there evening and next morning photographing fantastic clay and sandstone erosion formations. I added some pictures to my […]
    paddling with a camera

  • How to Improve Your Photos Using Micro-Composition

    One of the most fundamental elements of photography is that of composition, or how your subject, foreground, background, light, and other elements work together to produce a complete picture. While understanding how this works is fundamental to mastering the art of photography, the underlying principles behind composition go much deeper than just getting all the big things right so they look good in the frame. Masters of the medium are able to balance many different techniques of composition at the same time ,and put them together to launch their work into the upper echelon, and one rung on that ladder is a concept known as micro-composition.

    microcomposition-engagement

    This involves not just getting the big things in your picture set up and aligned properly, but making sure to capture your image in such a way that the smaller elements work together as part of the cohesive whole. It’s a technique that can be tricky to learn and take years to master, but through practice can elevate your photography to a whole new level.

    To understand how micro-composition works it’s good to start with one of best examples of this technique which can be seen in National Geographic photographer Sam Abell’s image Cowboys Branding Cattle, Montana.

    Photograph by Sam Abell, National Geographic

    At first glance it seems like an ordinary picture of some ranchers in the western United States, but the reason it looks so perfect is because everything in it is masterfully composed. All the elements come together to form a complete picture that works at the foreground, subject, and background levels. It invites the viewer to linger, not just on the calf being branded, but on the cowboys wrangling cattle behind them, and the rider on his horse in the background. Even the red bucket helps add a sense of action and mystery to the picture, but what makes this image work so well is how each of the elements is composed, not just on a macro level but on a micro level as well. The heads and shoulders of every person are above the horizon line, the horse in the background is perfectly framed between the two ranch hands, and the red bucket occupies its own space and does not overlap the man’s hat or even break through the horizon line. This was not a lucky one-in-a-million shot, but one that was carefully composed by Abell as he positioned himself in the midst of the action, kept the various elements composed in his camera’s viewfinder, and waited until just the right moment when the red bucket was just past the cowboy’s hat to take the shot. It’s the result of a master micro-composer at work.

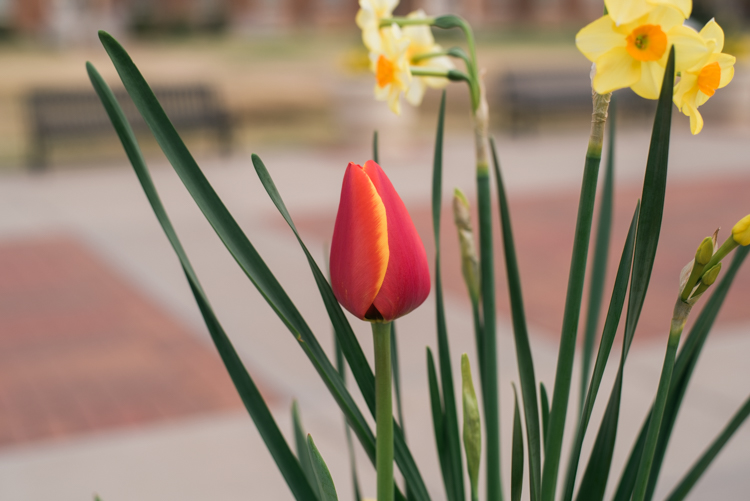
    Micro-composition is all about focusing not on just the major elements of a picture, but the minor ones as well, and putting each element in its own space, while keeping it as a clear part of the whole. While I am certainly no Sam Abell, and probably couldn’t take photos like his if I practiced for a hundred years, there are many ways the techniques of micro-composition used by him and others, can be applied to even the most mundane photos. As a bit of a case study, the following image of a tulip is not composed well on a macro- or micro-level, but it can serve as a starting point for illustrating how these concepts work together.

    microcomposition-tulip-1

    What you see here is a good start but ultimately not a very pleasing image. The red tulip is in the center of the image, when it should be off to the side, and it has a green stalk protruding vertically which creates a jarring distraction. To fix some of these issues I re-framed the tulip with a better overall macro composition and the results, while not perfect, are certainly much better (see below).

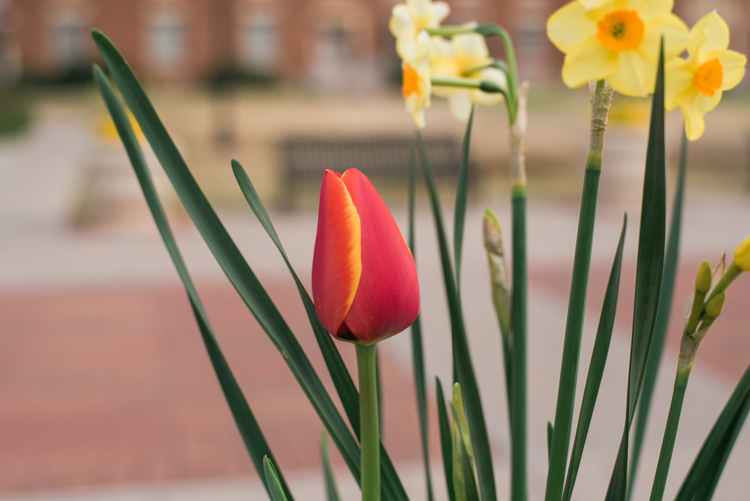
    microcomposition-tulip-2

    From a macro sense the picture has improved, but look at the small details and you will notice several things that don’t work. The tulip itself no longer has a strange green growth on top but the flower now protrudes through the horizon line and into the steel bench in the background. The stalks on the left side don’t go quite to the corner which leaves a strange empty space between them and the edge of the picture. Finally, the yellow bulb on the right side is cut off. As you can see, even though the image seems fine at first glance, looking at these micro-level compositional elements reveals a host of problems that could easily be fixed, and would result in a much better picture.

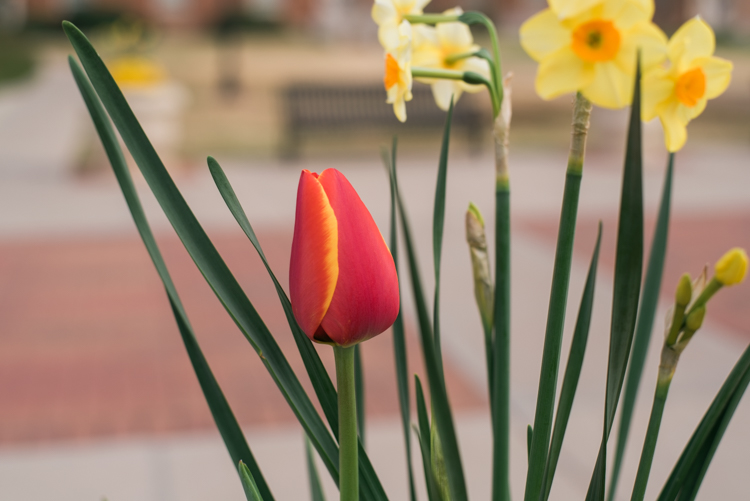
    microcomposition-tulip-3

    Finally, a photo that works! Even though it’s not perfect (as I mentioned earlier, I’m no Sam Abell) we can see how micro-composing the photo has dramatically improved it over the original. The red tulip now occupies its own space, and does not break through the horizon line into the bench. The tips of the green stalks go almost to the corner, and the bulb on the right side is fully intact without being cut off at all. All this was completely intentional, not the result of some random photographic accident. I spent several minutes poring over the composition, and looking at the scene from different angles, in order to get as many elements as possible right where they should be. The result of this extra time is a picture that is much better than just a simple snapshot.

    microcomposition-construction-site

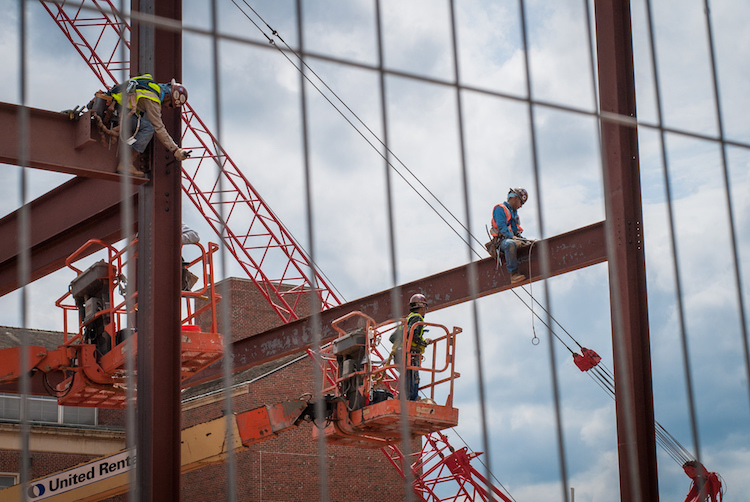
    It took a bit of work and patience to get this shot, but I wanted to make sure each worker was in his own space. The final shot is not ideal, but much better than others I took, in terms of micro-composition.

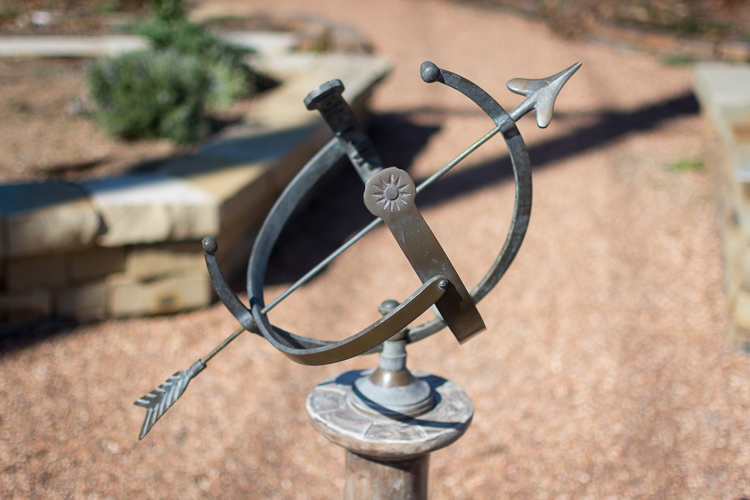
    Learning the principles behind micro-composition takes time, observation, and lots and lots of practice. It also involves quite a bit of patience, so if you are used to snapping photos with your phone, throwing on a filter and some text, and tossing them up to a few social networks, you may find the idea of micro-compositing a bit frustrating. For another example take this photo of a sundial (below) which seems okay at first glance, but when I shot it I did not want to settle for something decent. There is nothing especially wrong with the overall composition, but on a micro-level there are several elements in need of fixing.

    microcomposition-sundial-improper

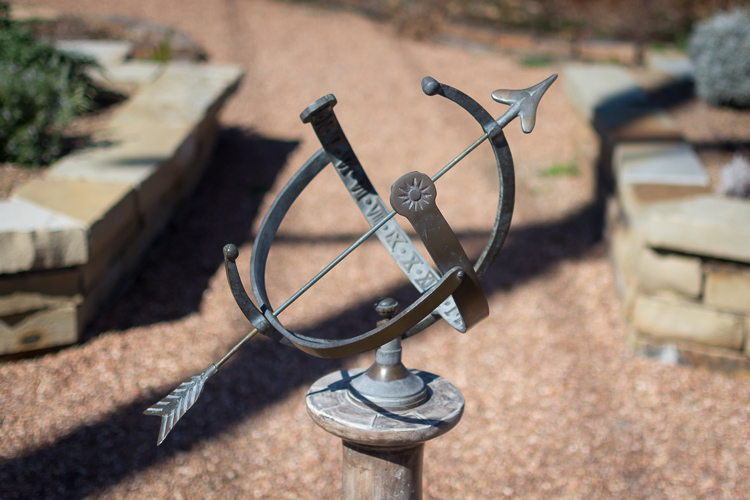
    I liked the idea of framing the sundial with a path and some greenery in the background, but studying the smaller elements and taking a new picture led to much better results. This required not only repositioning myself just a few inches over to the side, but also waiting about 15 minutes for the sun to move across the sky so I could get better shadows in the background. I could have just left this garden with the initial picture, but the next one, which is properly micro-composed, is far better.

    microcomposition-sundial-proper


    While this second image is not perfect it works far better for a few reasons:

    • The tip of the arrow stays within the path and does not intrude on other background elements like the stone borders on the side of the path.
    • The near side of the sundial arc does not overlap the far side.
    • The fletchings on the rear end of the arrow sit within the the shadow on the path, which leads to a nice sense of contrast.
    • The rear side of the sundial does not overlap the shadow of the stone ledge…except for the very tip of one arc. (Sometimes no matter how hard you try you just can’t quite get everything how you want it.)

    Masters of the art like Sam Abell will sometimes sit for hours waiting for the ideal conditions to line up, such that the resulting shot is composed beautifully from virtually all possible angles. While I have years to go before I can even hope to come close to that level, this most certainly is a technique that has helped me improve my own photography.

    microcomposition-guitar-pond-dog

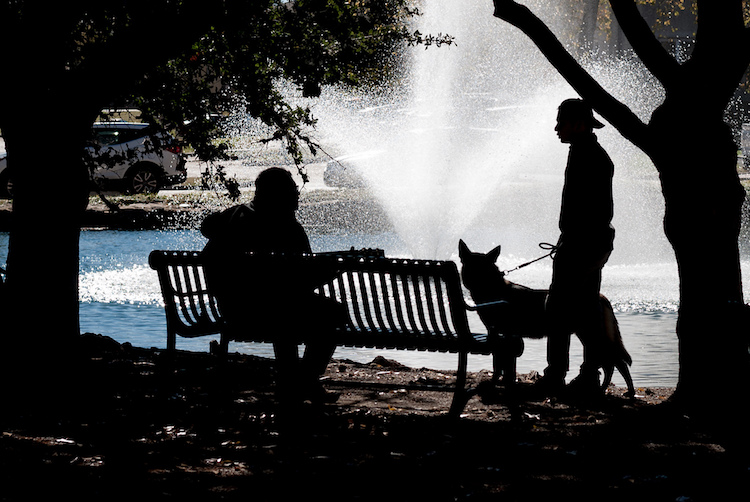
    Each element of this picture exists within its own space: the musician’s head is positioned between the branches, the bench is contained within the pond, and even the dog’s head does not overlap the bench.

    If I had to distill my advice regarding micro-composition down to just one simple phrase, I would reiterate one thing I mentioned earlier – have patience. Take your time when preparing a shot. Consider all the elements in the frame, not just your subject and the light. Ask yourself if there is another angle, another position, or even another focal length you can use to get the various elements of the photo, from the major to the minor, to all work together. You don’t need a fancy camera or expensive equipment to learn micro-composition, but once you start to get the hang of it, you will see a dramatic increase in the quality of your images.

    Have you found the concept of micro-composition to be useful in your own photography? What other tips and tricks do you have up your sleeve when it comes to composing pleasing images? Share your thoughts in the comments below, and if you have any examples that we can learn from feel free to share your photos too!

    googletag.cmd.push(function() {
    tablet_slots.push( googletag.defineSlot( “/1005424/_dPSv4_tab-all-article-bottom_(300×250)”, [300, 250], “pb-ad-78623” ).addService( googletag.pubads() ) ); } );

    googletag.cmd.push(function() {
    mobile_slots.push( googletag.defineSlot( “/1005424/_dPSv4_mob-all-article-bottom_(300×250)”, [300, 250], “pb-ad-78158” ).addService( googletag.pubads() ) ); } );

    The post How to Improve Your Photos Using Micro-Composition by Simon Ringsmuth appeared first on Digital Photography School.

    Digital Photography School

  • 10 Silly Mistakes Photographers Make

    It’s OK to make mistakes. In fact, our experience is all about making mistakes and learning certain lessons out of them. So by listing these silly mistakes most photographers have probably made at least once, we’re by no means scoffing at anyone. Our goal is to draw your attention to some issues you can easily avoid if you approach your Continue Reading

    The post 10 Silly Mistakes Photographers Make appeared first on Photodoto.


    Photodoto

  • 4 Steps for How to Make a Creative Photo Diary

    If you are a visual learner like me, seeing images and written words reinforces your memory, and enhances your learning. Concepts, ideas, and experiences associated with images, colors, and action, stay longer in our memory, help us savour the moment, and relive the events more clearly.

    Spring is in sight, the days are getting longer and lighter, let’s go out and make the most of the season and make some new memories. Here’s a fun personal photography project for you: write a creative diary in pictures!

    component-creative-photo-diary_0000

    A diary or a journal is a record of your day to day life and experiences. Entries report both mundane and unusual goings-on, your emotions, thoughts and feelings, your actions and reactions, including opinions that may even be outside your immediate experience. Diaries and journals tend to be written in a chronological sequence.

    Let’s apply this definition to a photo diary and see how well you can record a point in your life using pictures alone. The challenge is whether you can piece together a coherent and complete story, just by looking at the pictures alone.

    Here are four basic components of  a creative photo diary. When making yours, feel free to be as exhaustive as you like. In this example, I will show photos under each component and hope that you will try and piece together the entire story. That way we can gauge just how strongly and effectively the photos alone were able to recount the narrative.

    component-creative-photo-diary_0000

    #1 Set the context – lay out the plan

    Think of this like a prologue or an introduction in a book. Include photos of the locality and vary the angles; wide scenes, close ups, details, panoramas. Don’t forget to take photos of preparation, getting ready for the trip, or some action en-route to the destination.

    Set the mood. If it’s a gloomy and rainy day, take pictures of the rain or the storm clouds. If it’s a sunny day, snap photos of the sun, flare, and silhouettes included. Keep your eyes peeled and look around you. What do you see on the way to your destination? Any interesting sights? Anything out of the ordinary? Anything special or alluring? Anything new that you have never seen before? Or perhaps it has always been there but you just never bothered to look close enough until now.

    component-creative-photo-diary_0000

    component-creative-photo-diary_0000

    component-creative-photo-diary_0000

    component-creative-photo-diary_0000

    component-creative-photo-diary_0000

    #2 Have an opening chapter – a beginning

    You have reached your destination and thus the narrative begins its ascent. So far you have only given glimpses of your main character, clues to the destination, snippets to the story. Now you are ready to introduce your characters and show more of their personalities. Make them shine and take center stage.

    Vary your images by employing different angles; close up, far and wide, bird’s eye view, worm’s eye view. How about an inquisitive and questioning view? Be creative about it and think outside the box. There are many ways of presenting a person’s character like emphasizing color, favourite objects, unique accessories, action, identifying marks, etc., other than the ubiquitous frontal portrait. The obvious isn’t always the most interesting.

    component-creative-photo-diary_0000

    component-creative-photo-diary_0011

    What happened when you reached your destination? Did the plans change? Were there distractions or unforeseen events that led you to switch gears, or take a different route? Or did you head straight on to what you wanted to do? Were there any curious twists to the plan, or some surprises – nice ones or otherwise?

    component-creative-photo-diary_0000

    component-creative-photo-diary_0008

    component-creative-photo-diary_0000

    component-creative-photo-diary_0000

    #3 Inject some action or drama

    It may be that nothing happens that is spectacular or which causes emotional upheaval. That doesn’t mean you can’t create something dramatic or notable. You can focus on particular emotions, or something pretty mundane, and make a choice to celebrate life’s simple pleasures. If on the other hand there was plenty of action, choose a few main actions shots of defining moments from the day, especially those that elicited the most impressive reaction, or the quietest but most precious twinkle of an eye.

    component-creative-photo-diary_0000

    component-creative-photo-diary_0014

    component-creative-photo-diary_0014

    component-creative-photo-diary_0014

    component-creative-photo-diary_0014

    Adopt a photojournalistic stance, and record what happens without thinking too much about meaning or composition. Photograph what catches your eye, or that which you get drawn to instinctively. Trust your eyes to lead you to interesting contrasts and juxtapositions – light and shade, silence and noise, darkness and light. Aim to capture and savour every highlight. Don’t rush, but linger and indulge in the moment. The more you focus on something, no matter how small, the bigger its effects on you will be. Find an experience in the simplest of things; you are writing a story. Writers emphasize, exaggerate, infer, and aim for a climax. Don’t be afraid to do the same with your pictures. Be pro-active and creative.

    component-creative-photo-diary_0012

    component-creative-photo-diary_0000

    component-creative-photo-diary_0000

    component-creative-photo-diary_0000

    #4 Start the closing chapter

    In a book, this part is usually referred to as falling action. It comes after all the excitement and drama happen. It’s like a letting out a big sigh and things start to gather at a much slower pace. Prepare your audience for the conclusion, and end of the story. Unlike the conclusion in a book where the plot is usually unravelled, this part could plainly be writing the last paragraph to the entry of your diary for the day. It could be as simple as taking your shoes off after a long and tiring walk, drinking a well deserved cup of tea after a day full of challenges, or the sun slowly setting or the moon rising.

    Remember the purpose of a diary is to record, preferably in detail, what transpired during your day; the running of events, emotions, actions, thoughts, ideas, changes, differences, transformations. So many elements to capture in a few photos. But perhaps in and amongst all the snapshots from the day, there could be one photo that somehow encapsulates how you may be feeling at the end. Use that photo to close your diary entry, and end your story.

    component-creative-photo-diary_0000

    component-creative-photo-diary_0000

    component-creative-photo-diary_0000

    component-creative-photo-diary_0000

    Have you attempted a creative photo diary in the past? If not, I hope you try it one of these days and enjoy the experience. What do you think is the story in this example above? Please share your thoughts in the comments below.

    googletag.cmd.push(function() {
    tablet_slots.push( googletag.defineSlot( “/1005424/_dPSv4_tab-all-article-bottom_(300×250)”, [300, 250], “pb-ad-78623” ).addService( googletag.pubads() ) ); } );

    googletag.cmd.push(function() {
    mobile_slots.push( googletag.defineSlot( “/1005424/_dPSv4_mob-all-article-bottom_(300×250)”, [300, 250], “pb-ad-78158” ).addService( googletag.pubads() ) ); } );

    The post 4 Steps for How to Make a Creative Photo Diary by Lily Sawyer appeared first on Digital Photography School.

    Digital Photography School

  • How to Decide What Gear to Pack for a Wilderness Trip

    AK-ANWR-Kongakut-108094-162

    Each year, I spend many weeks guiding, and exploring, in the mountains and rivers of Alaska. The trips are a mishmash of different adventures; base-camp trips, mellow canoe trips, backpacks over rugged terrain and high peaks, or multi-day whitewater rafting trips.

    One thing that always plays a part, no matter what type of journey I’m taking, is photography. The gear however, varies. Different types of trips demand different kinds of equipment, and there are a number of things that need to be taken into consideration. For me, photo equipment decisions are a multi-step process, and there are a few things to consider. Here are three and my tips at the end for packing a kit.

    #1 – Weight Limitations

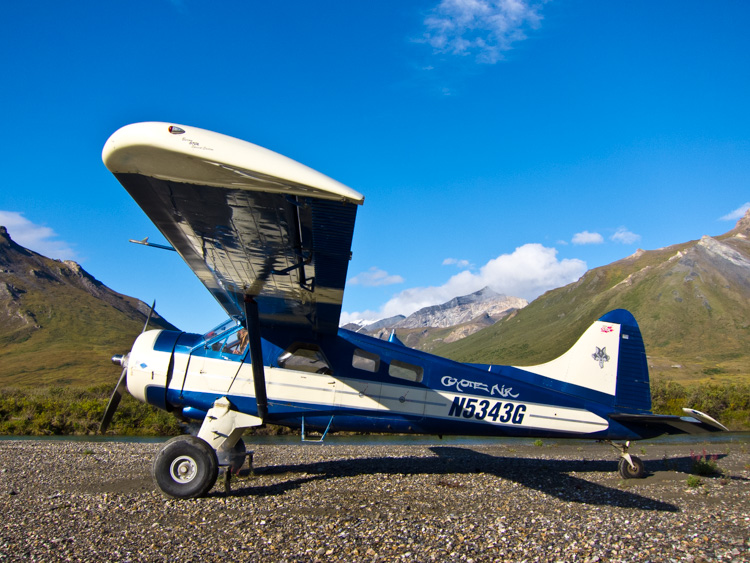
    A DeHaviland Beaver, classic Alaska bush plane on a riverside gravel bar in the Brooks Range of northern Alaska.

    A DeHaviland Beaver, the classic Alaska bush plane, on a riverside gravel bar in the Brooks Range of northern Alaska.

    This is a constant in the backcountry. Weight is always, ALWAYS an issue. On backpacking trips, every ounce of camera gear has to be added to clothing, tents, food, cookware, and safety equipment that cannot be left behind. When I’m guiding backpacking trips in Alaska’s wilderness, this can mean that on top of my usual backpacking gear, I also have an expedition first aid kit, satellite phone, ground to air radio, and more than my own share of food. My pack is heavy, long before I add camera gear. Making sure that anything extra is as light as possible, is my priority.

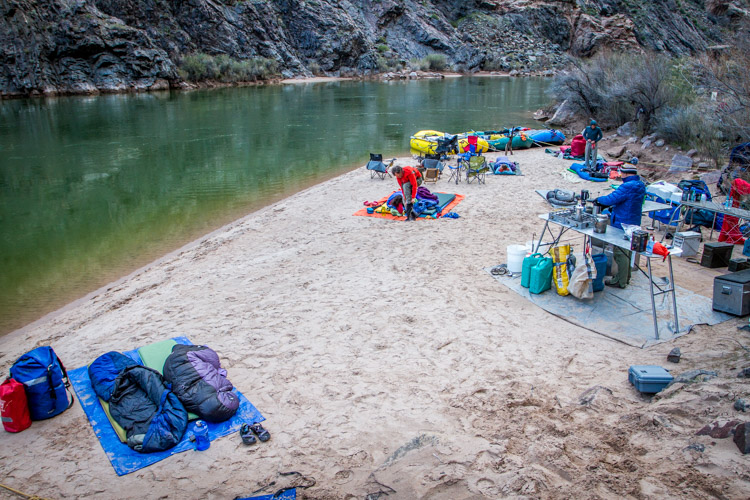
    Sometimes you can carry a lot of gear, as you can see from this camp along the Colorado River in the Grand Canyon, but even here every pound has to be loaded and unloaded daily.

    Sometimes you can carry a lot of gear, as you can see from this camp along the Colorado River in the Grand Canyon, but even here every pound has to be loaded and unloaded daily.

    Other types of trips are not as restrictive, but weight is always a concern. Most of the trips I lead involve small bush planes to get to and from our start and end points. These tiny aircraft have limits on the amount of weight that be carried. So even it’s a rafting trip where there is plenty of space in the boats, the number of pounds of excess gear is still a concern.

    Even photography-specific trips are limited. Any time you are in the backcountry, you will have to carry your gear, so it’s got to be compact and light enough that you can get it where it needs to go, quickly, and without fuss.

    I often find it helpful to run the numbers. How many pounds of total gear can I handle? For example, on backpacking trips I know that the most weight I can carry comfortably for extended periods without risking injury is around 70 lbs (31.75 kg). If non-photography gear weighs 60 (27.2 kg), then I’ve got 10 (4.5 kg) to play with (though I’m always happier with less!). For the guided trips I lead, we set a weight limit on our clients which is necessary to keep our cargo under the required limit of the small airplanes we use. Usually that number is around 50 lbs (22.7 kg) per person, less for backpacking. Start there, weigh your mandatory clothes and equipment, and then figure out what is left over for camera stuff. Safety first!

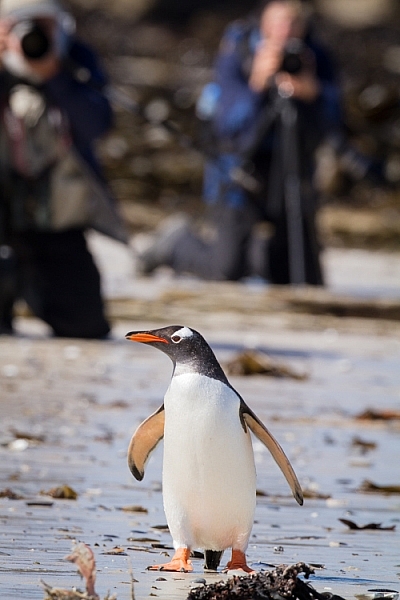
    Falklands-2Jan10-CarcassIsl-114
    #2 – Photographic Priorities

    Are you hoping to shoot primarily wildlife or landscapes? Do you plan to make formal portraits along the way? Will you need a flash or light modifiers? Ask yourself these questions, and know about the trip you are making.

    On the night before, I get together with my clients to talk about the upcoming trip. I’ve been surprised how often photographers really don’t know anything about where they are going. Since they don’t know what to expect, they are often carrying far too much gear. Do your research, find out your likely photo subjects, and make educated decisions about your equipment. If you are primarily expecting landscapes, but may have a chance at shooting wildlife, then consider a compact telephoto rather than a monster 600mm f/4. If wildlife is a major target, then by all means, take that big lens, but consider cutting out some of the smaller glass. Maybe you can get by with a single wide-angle zoom?

    #3 – Trip Types

    AZ-GCNP-FebMar12-510

    Base-camps:

    Photography trips that I lead into Alaska’s wilderness are often based out of single site. We set up a comfortable camp somewhere beautiful, where we can explore the surroundings for a few days. These kind of trips (keeping in mind airplane weight limitations), usually permit a broad array of gear, and few special precautions are needed. To haul your equipment around,  a standard camera backpack or daypack with a rain cover, is all that is needed. If the weather is really sour, we are usually drinking hot chocolate and playing cards back at camp.

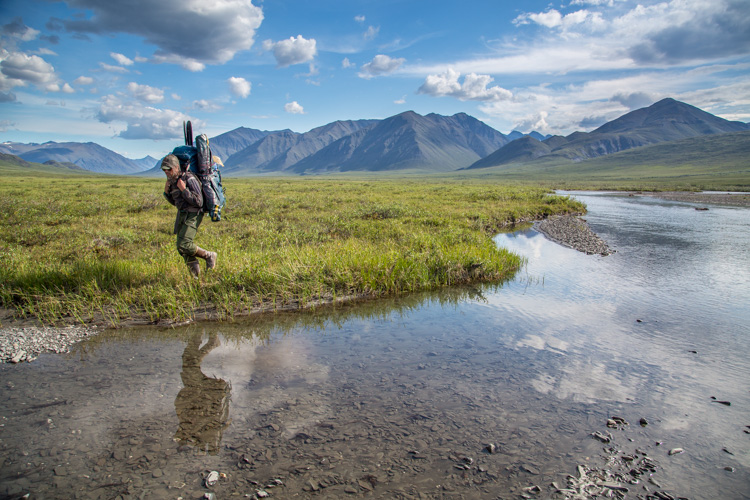
    Backpacking means every piece of gear needs to be carried, so think light.

    Backpacking means every piece of gear needs to be carried, so think light.

    Backpacking:

    On most backpacking trips, weight limitations will keep you to the bare minimum of gear. My standard kit is a lens or two, and a single body. I attach a holster style case to the chest straps of my pack with small carabiners. My camera is always there when I need it, and I don’t have to take the pack off every time I want to make a photo. Any extra gear is placed in convenient outside pockets.

    AK-Noatak-Aug-1505

    Mellow River Trips:

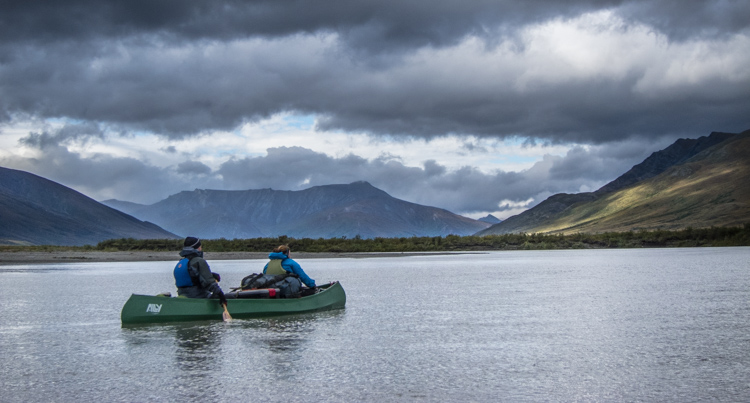
    Even on the quietest of rivers, accidents happen. A camera, left carelessly on the seat of a canoe can slip into the water with an unexpected wobble of the boat. Splashes from riffles can soak an unprotected camera. Your gear needs to be protected from these threats. On an easy river, where the risk of a flip, or rock-induced swim is small, I usually store my gear in soft-cases, placed inside a larger, roll-top dry bag. Such protection is sufficient to fend off splashes, or even short dunks, as long as the seals on the bags are closed tightly.

    AZ-GCNP-FebMar12-246

    Whitewater:

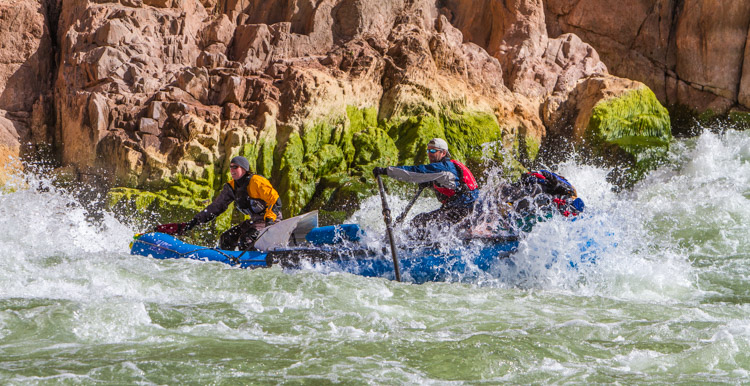
    In big rapids, bad things can happen. Boats hit rocks and canyon walls, tipping, or flipping over entirely. Big waves routinely flood boats. No matter how perfectly a rapid is navigated, you and your gear will get wet, and may be submerged. This is not the time to mess around with ziplocks and cheap dry bags. If you are headed out on a whitewater trip, invest in a hard-sided water-tight case like a Pelican. Not only will these keep your gear dry, they will also protect your delicate electronics from impacts and the inevitable jarring they will receive in rough water.

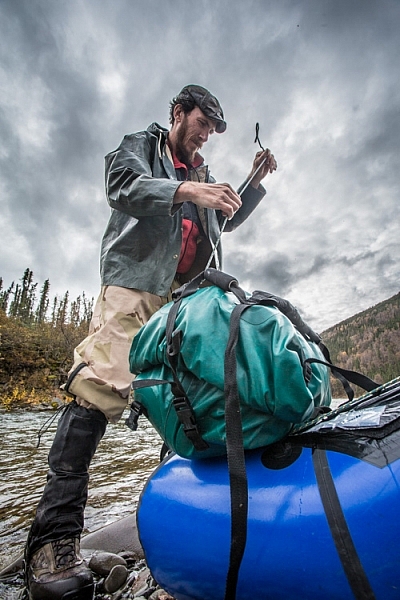
    Securing well-sealed dry bags to the front of a packraft, a daily chore on a remote river trip.

    Securing well-sealed dry bags to the front of a packraft, a daily chore on a remote river trip.

    Sample Gear Kits

    Base-camp: DSLR (or two), wide angle zoom, mid-range lens, telephoto (even a big 500mm or 600mm f/4), backpack, tripod, and accessories.

    Backpacking Heavy: DSLR, wide angle zoom, telephoto zoom like a 100-400mm, soft cases, ultralight tripod, and ultralight nylon dry bags.

    Backpacking Light: DSLR, wide-mid range zoom (24-105mm), case, and an ultralight nylon dry bag.

    Mellow River: DSLR, wide angle zoom, fixed mid-range lens (40 or 50mm), telephoto zoom (100-400mm), tripod, second body or backup camera, dry bags. (If wildlife is a top priority, I’ll replace the 100-400 with a 500mm f/4).

    Whitewater River: Same as mellow river with the addition of a suitably large pelican case.

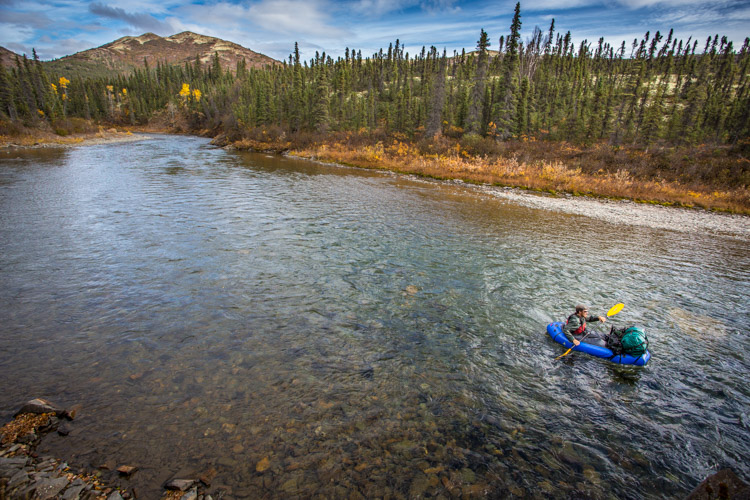
    Packrafting in western Alaska.

    Conclusion

    If you pay attention to your photography gear choices at the beginning of your trip, you are unlikely to have any troubles along the way. Think about the limitations of your journey, what it is you are planning to photograph, and how you are going to protect and transport your gear. When those decisions are made, actually selecting what to take gets easier.

    A final note of warning from someone who as been there: Please don’t overpack. It’s happened too many times to count, when have I stood around with clients at a pre-trip meeting and been forced to ask them to remove some of their precious gear due to plane, boat, or pack, weight limitations. Too much gear is just as bad, maybe worse, than too little during a wilderness trip, so pack thoughtfully.

    googletag.cmd.push(function() {
    tablet_slots.push( googletag.defineSlot( “/1005424/_dPSv4_tab-all-article-bottom_(300×250)”, [300, 250], “pb-ad-78623” ).addService( googletag.pubads() ) ); } );

    googletag.cmd.push(function() {
    mobile_slots.push( googletag.defineSlot( “/1005424/_dPSv4_mob-all-article-bottom_(300×250)”, [300, 250], “pb-ad-78158” ).addService( googletag.pubads() ) ); } );

    The post How to Decide What Gear to Pack for a Wilderness Trip by David Shaw appeared first on Digital Photography School.

    Digital Photography School

  • 5 Quick Tips for Better Blue Hour Photography

    tips for blue hour photography

    Blue hour is a special time for photographers. The sky turns a different shade of blue, it’s velvety and delicious. It’s easy to take photos during blue hour because you don’t have to worry about harsh lighting or shadows.

    In this article, you’ll learn:

    • When blue hour takes place
    • How to capture blue hour photos   
    • The best subjects to shoot for blue hour photography 

    When is blue hour?

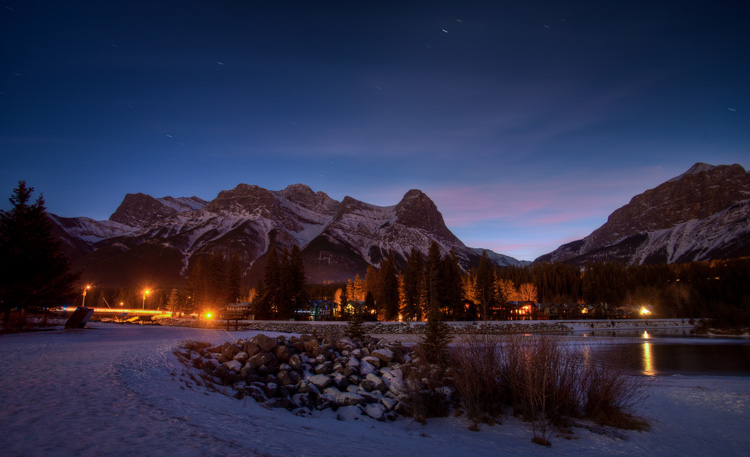
    Blue hour happens twice a day, just before sunrise and just after sunset. It lasts between 20 to 40 minutes, depending on the weather, and your geographical location. During this time, the sky can turn different shades of blue and reflect orange, yellow, purple and pink.

    blue hour photography tips 2 blue hour photography

    To catch the blue hour, look up your local sunrise/sunset times and plan on being there early. There is also a great website that tells you exactly when the blue hour is, based on the date and your location.

    5 easy tips for blue hour photography

    Blue hour photos look amazing! While they might appear complicated to create, they aren’t. Blue hour photography is easy, the hardest part might be getting there before it’s over. These tips will help beginners get started with blue hour photography.

    Howard Ignatius

    By Howard Ignatius

    1. Shoot in Shutter Priority mode

    During the blue hour, the sky will be relatively dark because the sun is below the horizon. You’ll need a long/slow shutter speed to let in enough light for properly exposed photos.

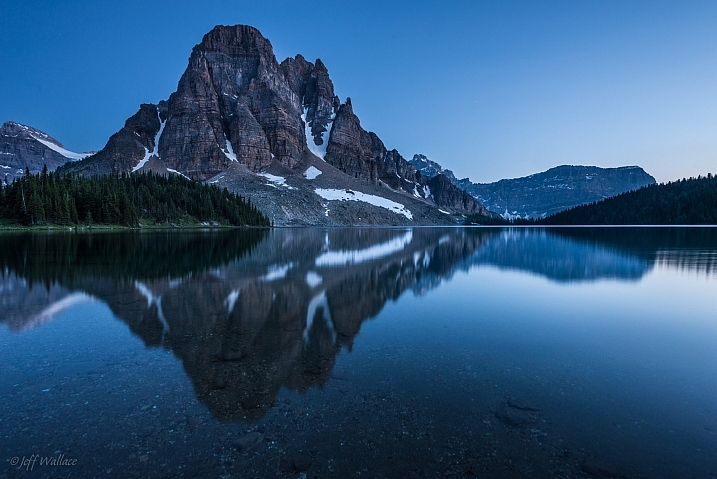
    Putting your camera in Shutter Priority mode allows you to manually choose your shutter speed. A shutter speed of one to six seconds should get good results. For the photos in this post, I used a six-second shutter speed in Shutter Priority.

    Jeff Wallace

    By Jeff Wallace

    In Shutter Priority mode, your camera will choose the aperture and ISO (if your ISO is set to auto) automatically. This makes things easier when you’re getting started with blue hour photography.

    2. Use a remote or self-timed shutter release

    Pressing the shutter release button can cause camera shake, which will create blurry photos. To avoid this, use your remote or set the camera’s self-timer to two seconds.

    3. Use a tripod

    As mentioned above, you’ll be using a slow shutter speed, so a tripod will help you capture a sharp image. If you hand hold your camera during a slow shutter speed, your photos will be blurry because of camera shake.

    Image by dPS Managing Editor – Darlene Hildebrandt

    Image by dPS Managing Editor - Darlene Hildebrandt

    Image by dPS Managing Editor – Darlene Hildebrandt

    4. Shoot in RAW

    It’s best to capture RAW files when shooting the blue hour. This will give you the highest quality capture, and the best advantages when editing. One nice advantage of shooting in RAW is that you can adjust the exposure compensation in editing. This way, if your photos came out a little too dark or light, you can adjust them up or down accordingly.

    But if you have a point and shoot that only captures JPEGs, don’t worry – you can still get great blue hour shots.

    Image by dPS Managing Editor – Darlene Hildebrandt

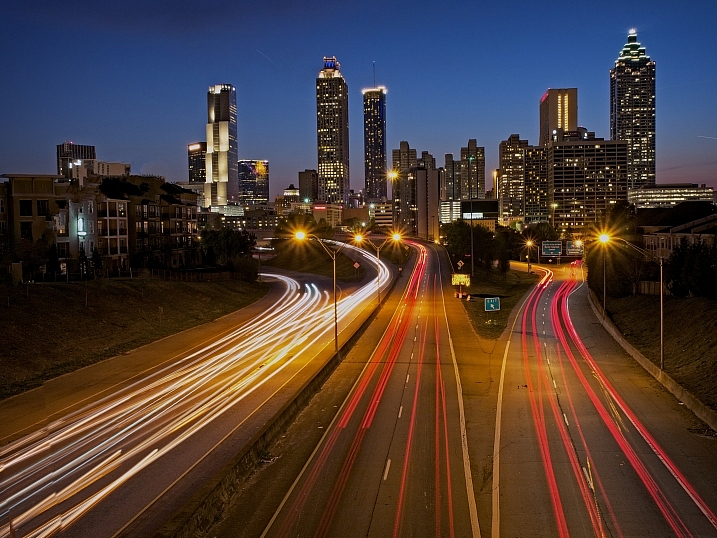
    5. Include electric lights

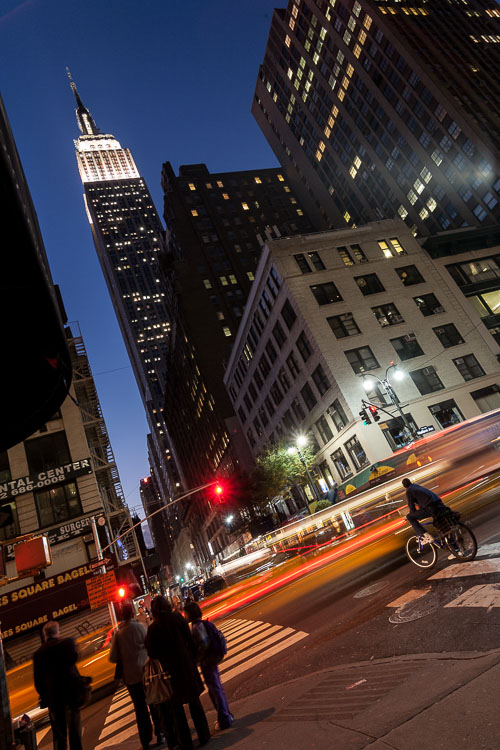
    Your blue hour photography will be easier if you choose a location near electric lights. This extra light may also add drama and interest to your photos.

    car-trails-750px-03

    Image by Darlene Hildebrandt

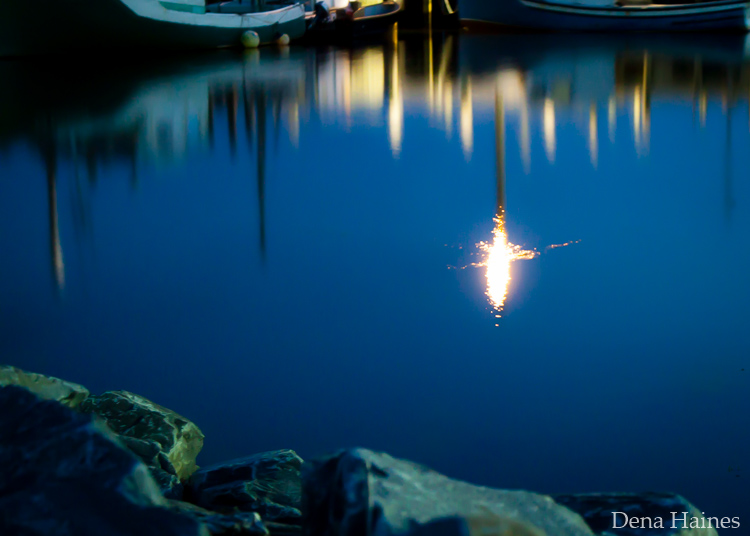
    blue hour photography tips

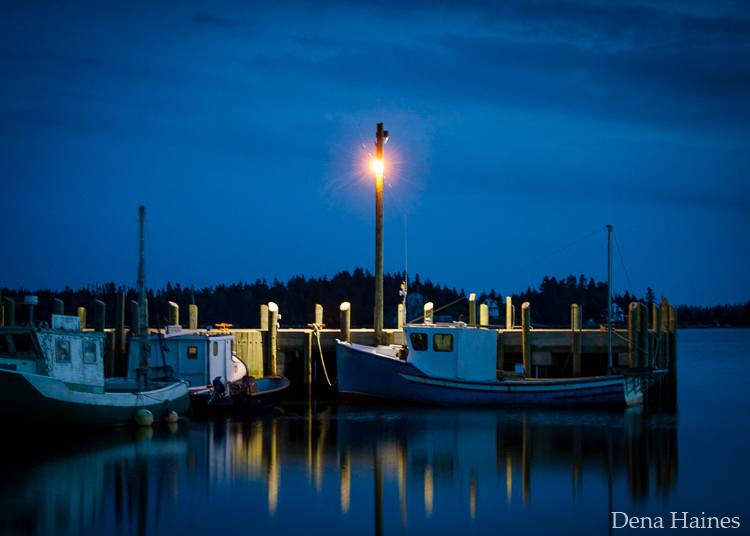
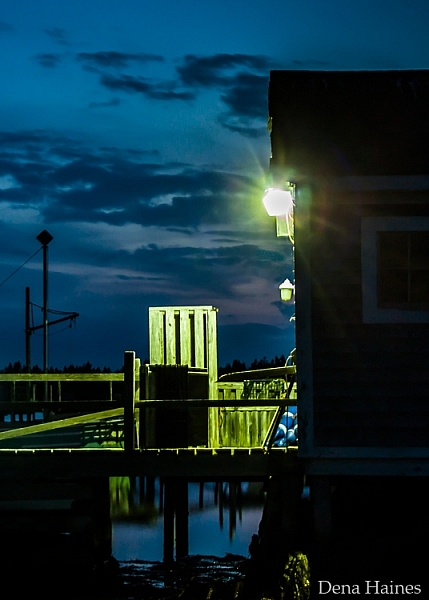
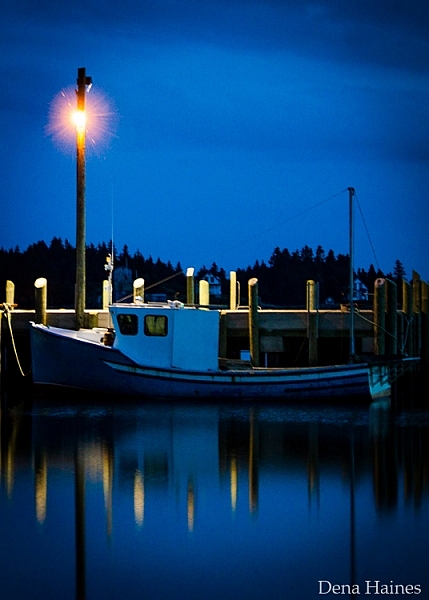
    Image by Dena Haines

    While you want electric lights in your photos, don’t shoot too close to them. If you are standing too close to the light source, lens flare could be a problem. You could get unwanted, randomly placed, light spots in your photos.

    What to photograph during the blue hour

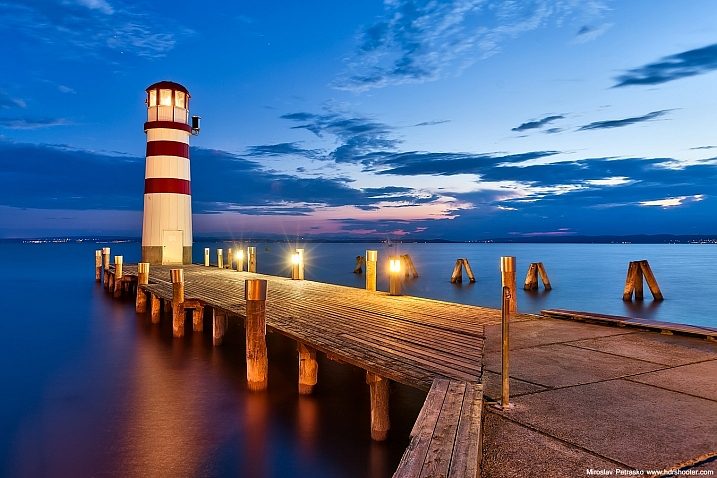
    The easiest subjects to get started with are landscapes that include electric lights.

    Mike Boening Photography

    By Mike Boening Photography

    Miroslav Petrasko

    By Miroslav Petrasko

    Some blue hour landscapes to consider include:

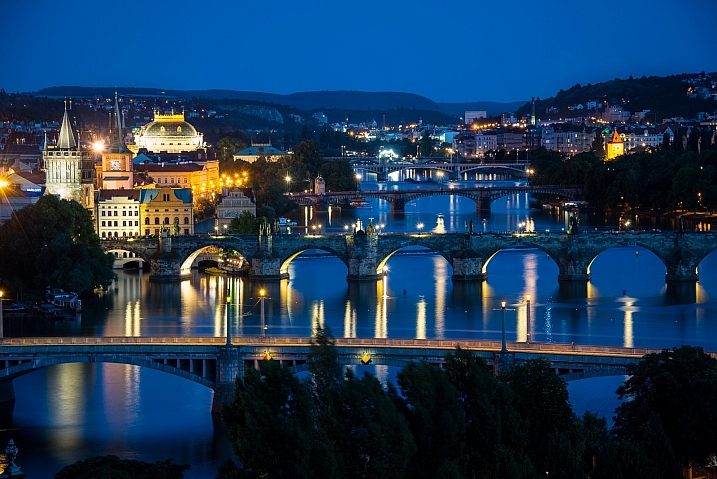
    • Cityscapes
    • Busy winding roads
    • Beaches
    • Wharfs
    • Bridges
    • A fair or circus
    • Marinas
    tips for shooting the blue hour

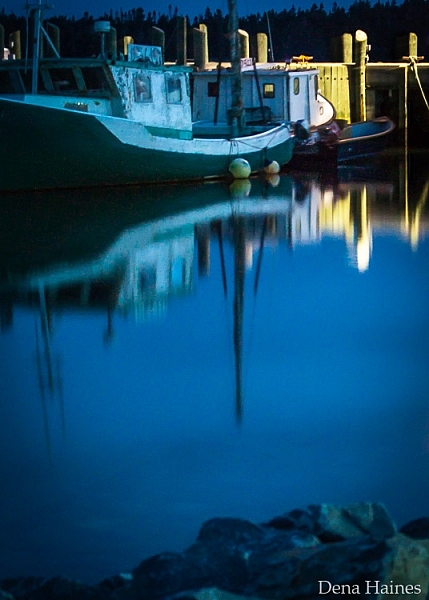
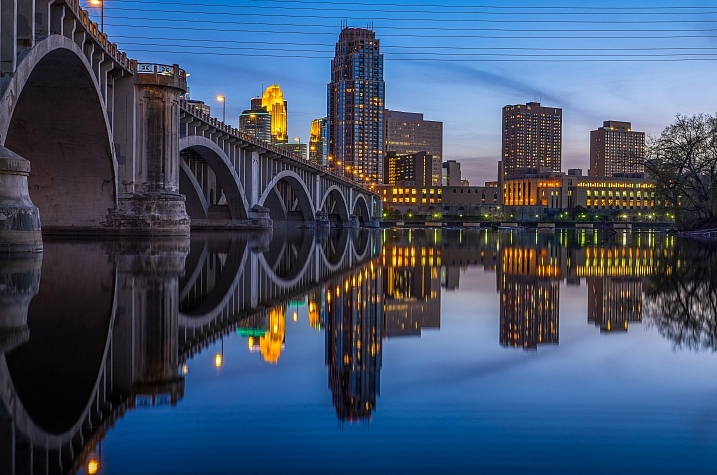
    I love blue hour photos that include water reflections.

    Mac H (media601)

    By Mac H (media601)

    What are your favorite blue hour subjects? Let me know by commenting on this post. And if you have any tips for blue hour photography, please share as well as your images.

    googletag.cmd.push(function() {
    tablet_slots.push( googletag.defineSlot( “/1005424/_dPSv4_tab-all-article-bottom_(300×250)”, [300, 250], “pb-ad-78623” ).addService( googletag.pubads() ) ); } );

    googletag.cmd.push(function() {
    mobile_slots.push( googletag.defineSlot( “/1005424/_dPSv4_mob-all-article-bottom_(300×250)”, [300, 250], “pb-ad-78158” ).addService( googletag.pubads() ) ); } );

    The post 5 Quick Tips for Better Blue Hour Photography by Dena Haines appeared first on Digital Photography School.

    Digital Photography School

  • 20 Random Thoughts on Google Photos in a Rambling Stream of Consciousness Format

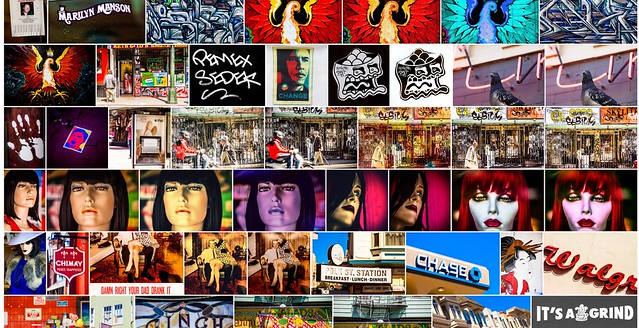
    Google Photos Mosaic

    Not exactly beat poetry, this list is a rambling mess of 20 things that I thought about today about my experience with Google Photos.

    This list is very poorly written and absolutely lacks coherence. It’s a stream of consciousness jumble of unrelated thoughts about Google Photos.

    I’ve been using (and uploading to) Google Photos non-stop since it launched. I think the service holds great promise but is also flawed in some ways at the same time.

    Disclaimer: these are my experiences. My experiences are probably different than yours. I likely have more photos on Google Photos than 99.999% of users, so things that may be broken for me may work perfectly for you.

    Album is Empty

    1. My single biggest complaint about Google Photos is how long it takes to generate shareable links to content. Being able to share a photo or album or video by creating and copying a link is a nice feature, but in my case it typically will take several minutes to several hours in order for that link to actually work. When I create a link and copy and paste it I always get: “Album is empty use the plus to add items,” when I first try to share or access that album.

    Link sharing should be instantaneous (like it is on Flickr), but even if it is not it would be better for the user to get some sort of messaging saying “your album will be ready in 27 minutes, come back later” or something like that. For the first six months or so I just thought sharing by link simply did not work, now I know it’s just a delay thing.

    2. Google face tagging is awesome! It’s wonderful to have my family and friends’ photos grouped by face and I love that I can go back and put their name on them. Unfortunately Google Photos would appear to limit you to 200 different people at which point the tagging functionality will no longer tag any new people. In my case Google Photos early on chose to facial tag a lot of musical acts that I photographed at Coachella leaving no space for other real friends that I wish were in there.

    I’m not sure why there is such a low 200 face limit or why there should be any limit at all. At a minimum, Google Photos should let me manually tag people and then run facial recognition on these people instead of the random 200 that the software has selected.

    3. I wish Google Photos had a public sharing option. Private by default is nice, but it would also be nice to be able to make some photos in the service public.

    No Keywords in Google Photos
    Your titles, descriptions and keywords do not get uploaded with Google Photos.

    4. I wish Google Photos used all of the careful keywords and metadata that I embed in my photos. One of the nice things about Flickr is that when I add descriptive keywords to my photos in Lightroom and save them to the file Flickr automatically populates the tags along with the photo’s title and description. Google Photos ignores this data. I’m not sure why Google Photos does not care about this data as I would think it would be very useful for search and also very easy to include with uploaded photos. If Google Photos can bring in the iso and shutter speed setting with my photos, why not the keywords too?

    5. Google Photos gives you a “card dismissed” message when you dismiss a card using Google Photos’ assistant. This message disappears after about 10 seconds. The problem is that if you are trying to go through a number of different Google automatic creations the page jumps as this message disappears. This makes you accidently click on the wrong place on the page all the time when trying to process more than one creation at a time. This message is not important enough to justify the instability it creates for use on the page.

    6. On March 22, Google Photos announced smarter auto albums. It’s been several weeks now and I have not had a single automatic album suggested for me yet by Google Photos assistant. It would be nice to experience what these are like.

    7. Since Google Photos launched I’ve found that it takes much longer to upload my photos to Google+, usually as long as 2 minutes or so to upload a photo. Not sure that this has anything to do with Google Photos.

    8. Google Photos seems to do a little better job uploading photos than it did in the early days. In the early days sometimes it would only upload 50 photos for me in a single day. Now it typically will upload several hundred a day, but it’s still going to be a long time before it finishes with the 489,052 remaining in the current batch — and then I will still have many more batches to upload. By contrast Amazon Photos does not resize my RAW files at all and goes about 10x as fast.

    9. Sharing very large albums with people does not work. At present Google Photos will not allow you to share over 2,000 photos at once. I spent a long time trying to figure out how to share all of the photos I’ve taken with my friend Scott Jordan with him the other day. Finally I had to give up trying and just create a new Google Account that we could both share and reupload all of the photos to that account. That was a pain and there should be a better way for people to share larger albums of photos.

    10. Auto facial recognition is good but if it can’t auto tag everyone, Google Photos should let you manually tag people. A combination of automatic AI facial recognition with manual user tagging would make more complete collection.

    11. When scrolling through your main Google Photos Library Google Photos will let you fast forward many years into the past. For example, it will start by showing me photos I took yesterday but then I can pull the slider all the way down and easily jump to say photos from 2010. When you are scrolling through photos of people Google Photos has facial tagged though they will not let you jump forward this way. If you have a lot of photos of someone getting to the year 2010 can take a very long time if you have to scroll through everything to get to that time.

    12. Sometimes thumbnail versions of photos load very slowly on Google Photos. Other times they render quickly. Not sure why the diffference at times.

    13. When I search for cats on Google Photos it brings up a lot of photos of my black labradors. If Google Photos uploaded my keywords they would probably have a better idea that it was a dog in the photo than a cat.

    14. The share photos to Facebook functionality doesn’t work for me on Google Photos. Sharing Photos to Google+ seems to work just fine though.

    15. Google Photos has only identified 143 “things in my photos.” I’ve collected over 2,000 albums on Flickr, many dedicated to specific things. My Flickr albums are much better organized than my Google Photos albums. Flickr allows me to build albums by my keywords though, Google Photos does not. After using the service as long as I have with as many photos as I have I feel like it should have identified more than 143 things.

    16. I have to launch Google Photos and the Assistant to get it to add photos from my iPhone to Google Photos on wifi. I wish as soon as my phone connected to wifi photos from my phone just automatically uploaded to Google Photos, even without having to launch Google Photos app on my phone.

    17. When you can get album sharing to work it can be a very powerful way to share photos with people. Here’s an album of all of the photos that Google Photos recognizes of my friend Robert Scoble by face. This includes both my processed and unprocessed photos so the quality is very mixed. I bet Robert hasn’t seen some of these photos.

    18. I love how much infinite scrolling Google Photos uses. Paging sucks. Flickr should take notice of how much better Google Photos does infinite scrolling.

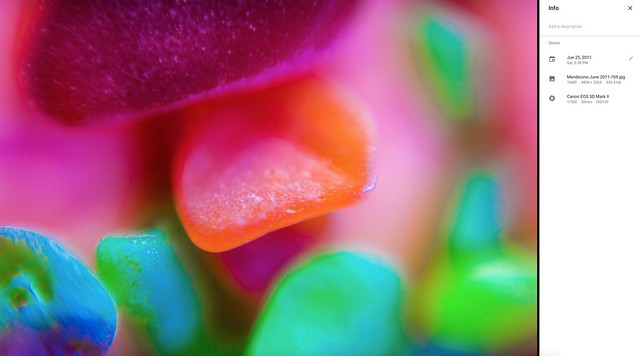
    19. I wish there was a way I could see how many photos I’ve uploaded to Google Photos. Actually there is a way. Thanks Thomas O’Brien. So far I’ve uploaded 748,892 photos to Google Photos.

    20. I wish in the share menu for Google Photos there was embed code where you could embed the photo on your blog or somewhere else on the web.


    Thomas Hawk Digital Connection

  • How to Cut Out the Subject From the Background in Photoshop

    This video by Chris from Spoon Graphics does a good job of going over many of the options available inside Photoshop for cutting things out. The most common use is to cut out the subject from the background, to place it on a different image or background – as in when making composite images.

    Watch as he goes over the options for cutting things out:

    Quick and dirty selection tools and methods:

    • Eraser tool (not the best choice, this is shown in the video)
    • The Magic Wand tool
    • Quick Selection tool

    Pro techniques tools include:

    • Manually drawing the selection
    • Lasso tool (can be frustrating and tricky to use)
    • Pen tool (also using Paths)
    • Tonal selection
    • Channels (plus Curves or Levels)
    • Color range (quick selections based on tones in an image)
    • Layer masks
    • Refine edge tool
    • Defringe to remove halos and outlines
    • Paint hair back in manually
    • Buy a Photoshop plugin like Topaz Remask

    Here’s a second video from Glyn Dewis that puts some of those techniques to use to cut out a tree from the background.

    Do you know any other methods for doing cut outs? What’s your favorite? Please share in the comments below.

    googletag.cmd.push(function() {
    tablet_slots.push( googletag.defineSlot( “/1005424/_dPSv4_tab-all-article-bottom_(300×250)”, [300, 250], “pb-ad-78623” ).addService( googletag.pubads() ) ); } );

    googletag.cmd.push(function() {
    mobile_slots.push( googletag.defineSlot( “/1005424/_dPSv4_mob-all-article-bottom_(300×250)”, [300, 250], “pb-ad-78158” ).addService( googletag.pubads() ) ); } );

    The post How to Cut Out the Subject From the Background in Photoshop by Darlene Hildebrandt appeared first on Digital Photography School.

    Digital Photography School

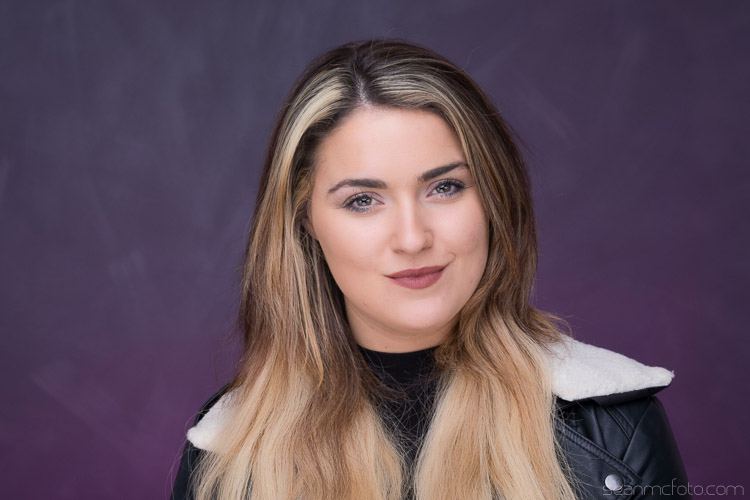
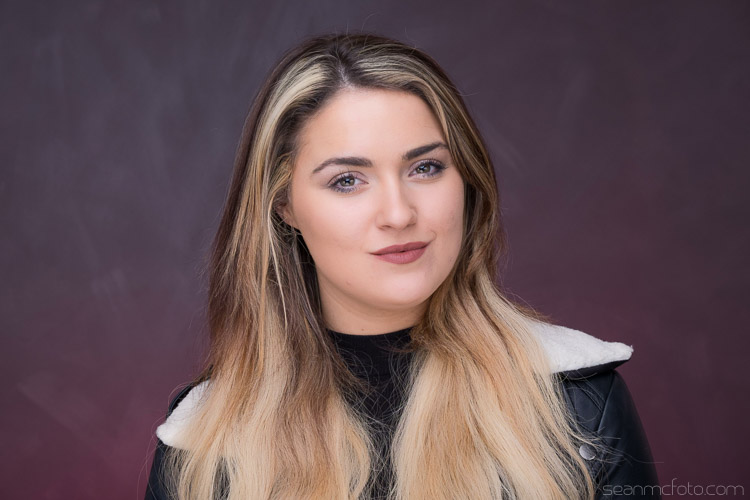
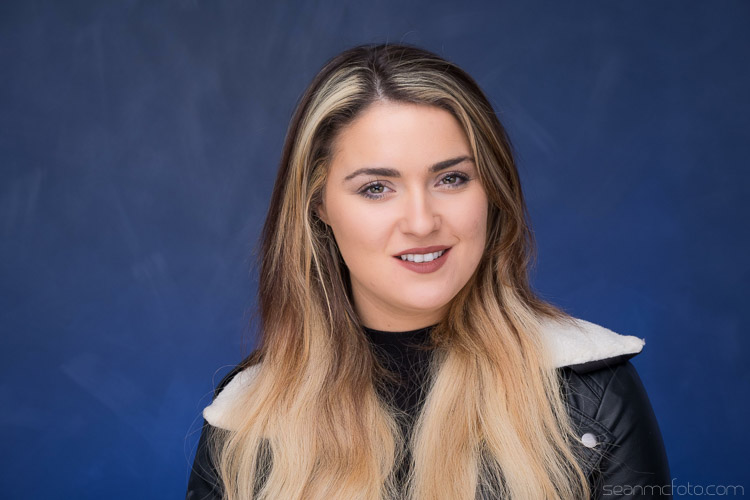
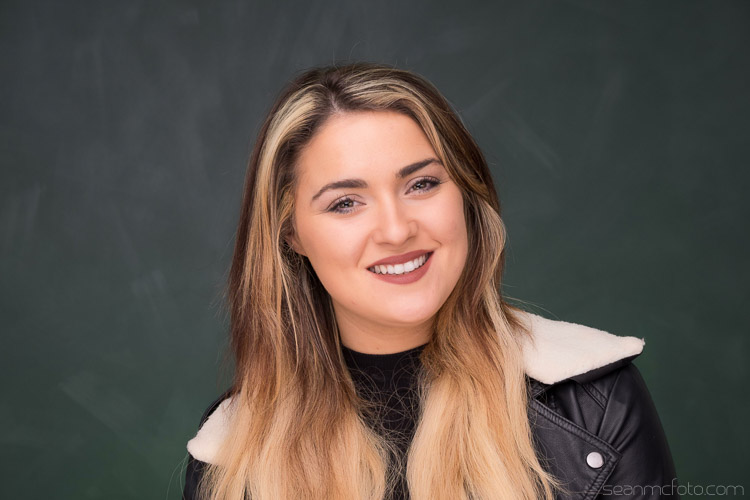
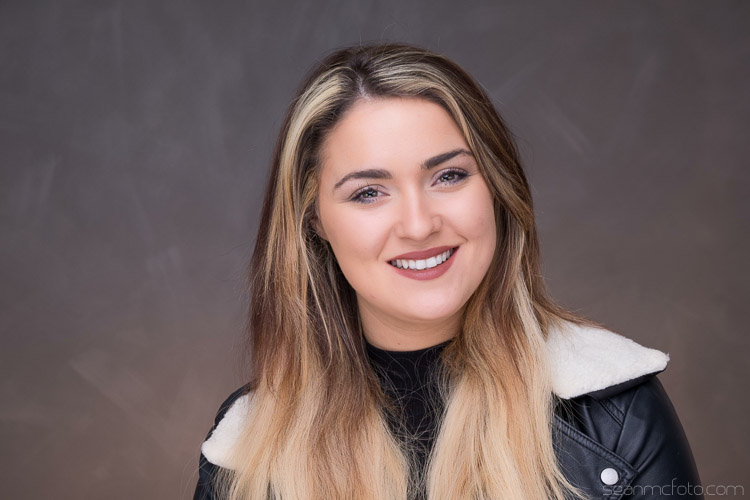
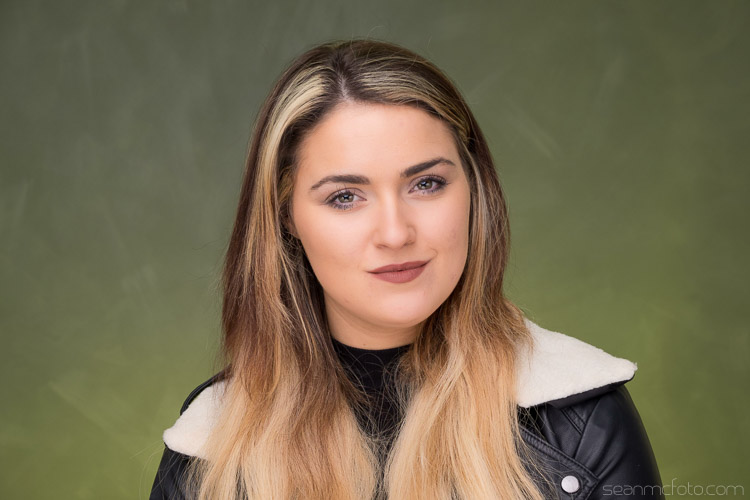
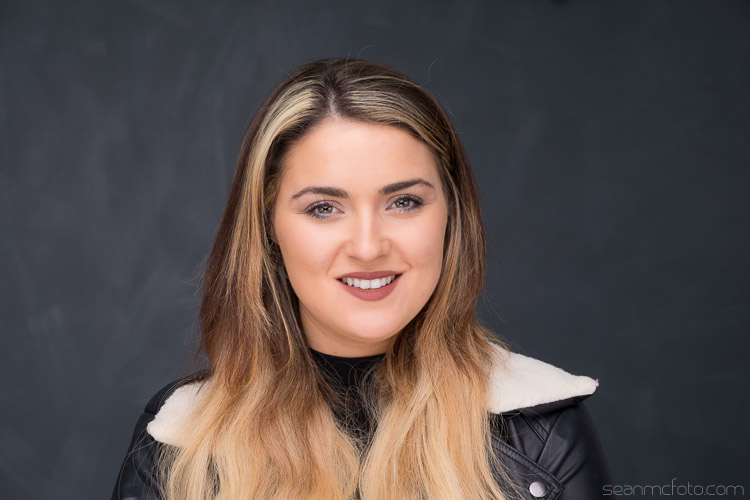
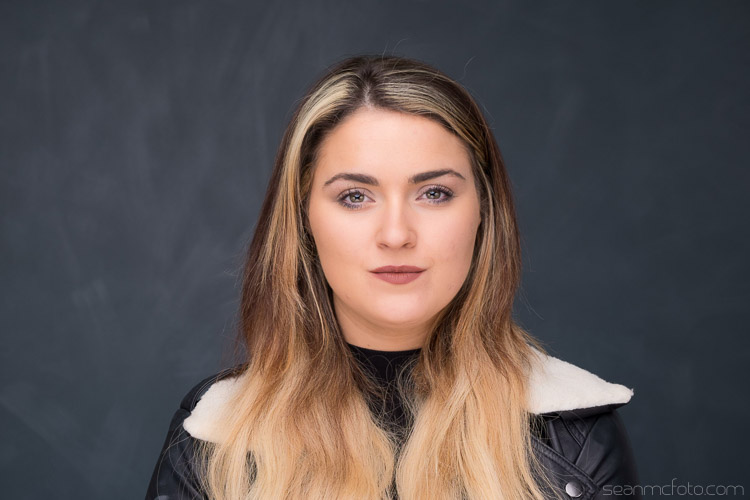
  • How to Use Lighting Gels to Change your Background Color

    If there’s one thing that bugs me about shooting in studio, more than anything, it’s that you need to have tonnes of backgrounds, taking up loads of space. I’ve even gone as far as having a painter come in and create an interesting wall for me because I get bored with what I had. I’ve got over 15 backgrounds between paper, canvas, cloth, and even some vinyl castle doors.

    Part of what I love about location work is the variety of backgrounds. Often you’re restricted to working in the the studio by the client, so that where this handy technique comes into it’s own.

    Changing-your-background-with-gels-magmod

    I’ve been using gels in studio to add color to my subjects for years. A gel is a colored, transparent, sheet of heat resistant plastic. They look akin to the colored wrappers you get on some candies. They’re generally used in theatre to create mood, or emulate natural looks like moonlight, fire, etc. Gels were a big thing in photography in the 80s, and they’re making a comeback now thanks to photographers like Jake Hicks and Glenn Norwood. This article isn’t about their techniques, but it is about something I’ve started to do because of seeing their work.

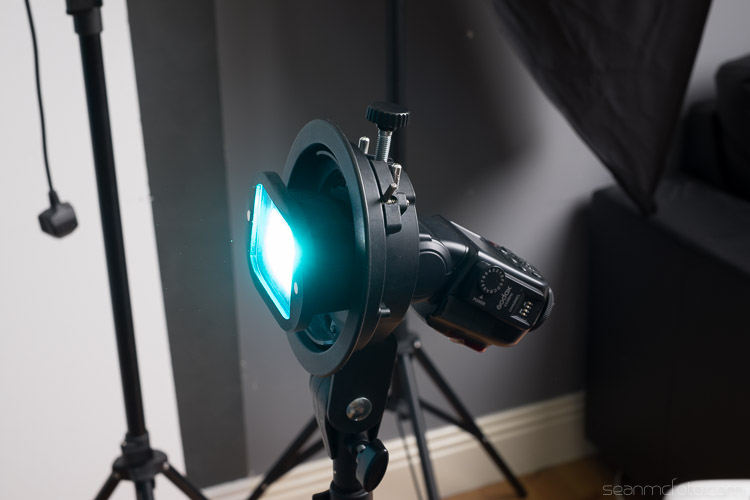
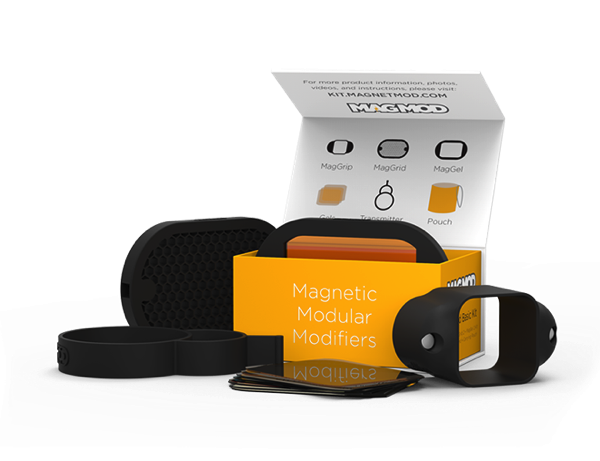
    Shooting on location with speedlights mean that I’m always on the lookout for great tools that make life easy for set up. Using gels meant that when I saw the MagMod kit, I knew I had to get a set. MagMod uses strong magnets and rubber mouldings to create a grip that stretches over your speed light. It’s much neater than rubber bands or velcro. Accessories like the MagGrid, or the MagGel holder are simply held in place with internal magnets, and are easy to swap on and off as you need.

    Basic Kit 1 1861968723

    The really great thing that applies here, is that the gels they use are rigid, not flimsy and awkward to get in and out of a holder. The basic kit ships with a MagGrip, a MagGrid and a MagGel set with color correcting gels. I also bought the Creative Gel set, and that’s what I’m using to get different background colors in my studio. They’ve also just announced the new Artist set as well.

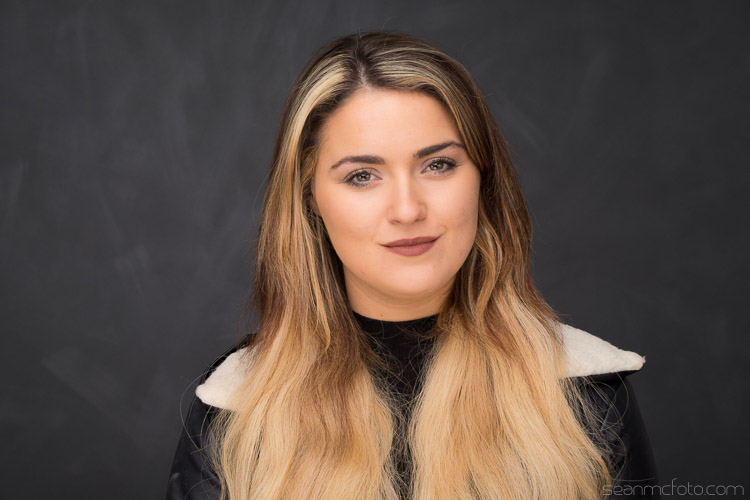
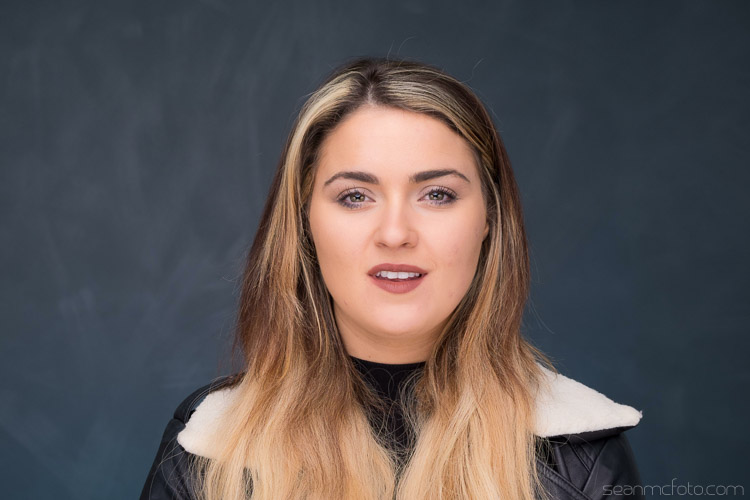
    Let’s start with the basic back wall in my studio. It’s dark grey, with a light grey mottle over it as brush strokes.

    Using Gels background 05

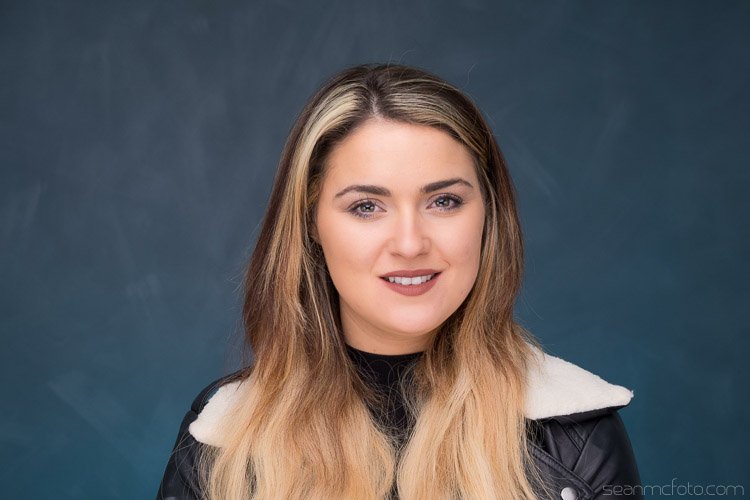
    You should set the flash to get the amount of light you want on the background. Here is mine set to 1/4 power (below).

    Using Gels background 04

    Below it is at 1/8 power, which I think is better for getting the color to work.

    Using Gels background 06

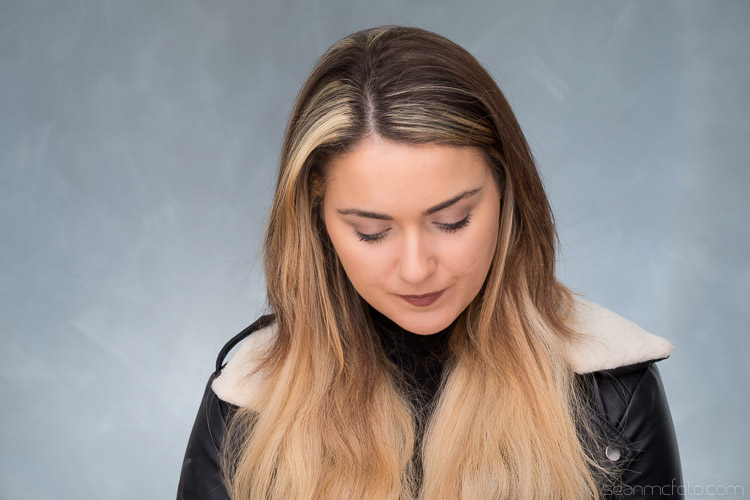
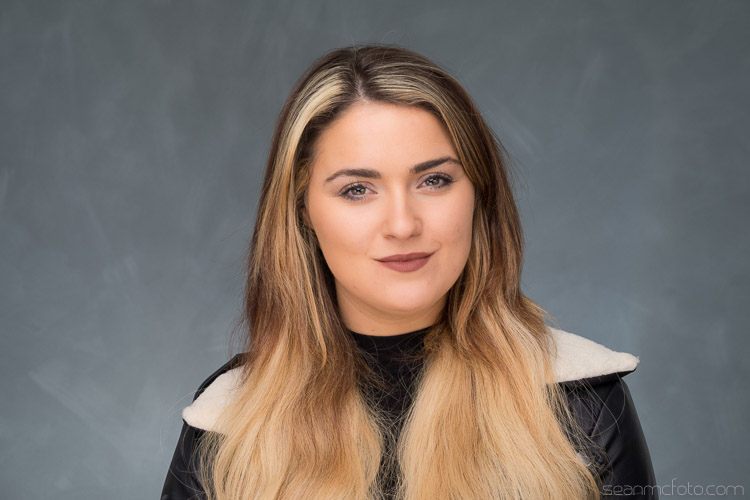
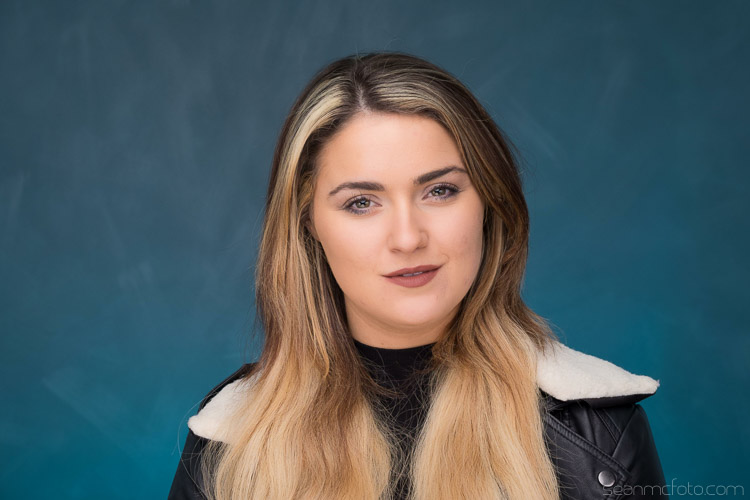
    From here you can add the gels to change the color of the background. There are plenty of options for using gels, you can even just use gaffa tape with sheet gel-or even just a rubber band. Even using the MagGel set, it’s possible for you to cut out sections from gels sheets, and then trap this cutout between the empty MagGel holder and the MagGrip.


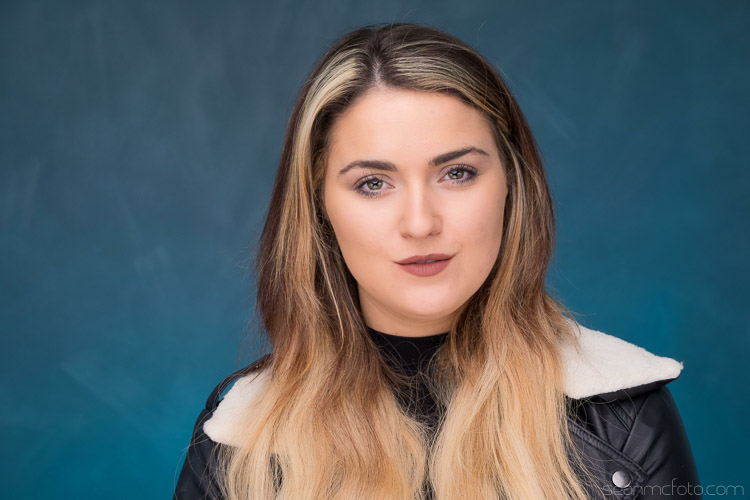
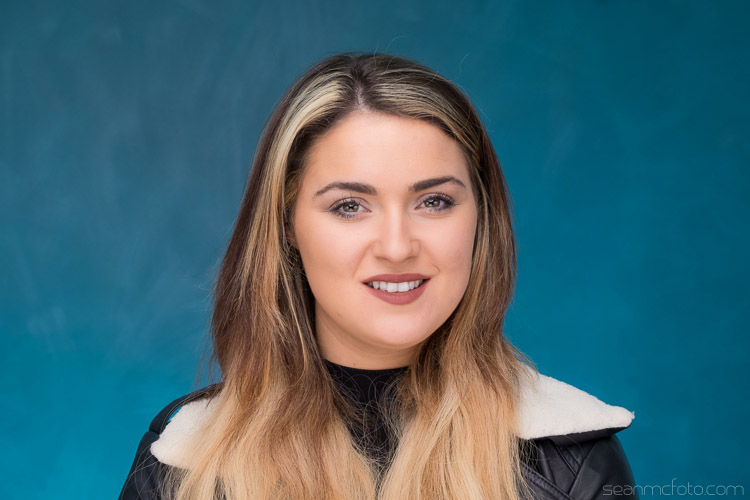
    Let’s have a look at the different gels:

    Using Gels background 07

    Cyan

    Using Gels background 08

    Purple

    Using Gels background 09

    Red

    Using Gels background 10

    Blue

    Using Gels background 12

    Green

    Using Gels background 13

    Straw

    Using Gels background 15

    Yellow

    As well as changing the color, you can also change the intensity of the light by varying your flash power.

    Here’s how the the cyan gel looks at varying power, in one stop increments starting at 1/64 power up to full power.

    Using Gels background 20

    1/64 Power

    Using Gels background 19

    1/32 Power

    Using Gels background 18

    1/16 Power

    Using Gels background 17

    1/8 Power

    Using Gels background 16

    Quarter (1/4) Power

    Using Gels background 21

    Half (1/2) Power

    Using Gels background 22

    Full Power

    As you can see, it’s possible to get a whole range of looks from just a few gels. By using the MagGrid, you can also create coloured spots of light, that fade out to the original background color. A neutral grey background is a great starting point because it takes the color well. White tends to be harder to add color to with gels (just looks washed out). You can also mix gels together to get other colors, just know that this will also absorb more light.

    If you want to get started by just using gels sheets, check out Lee Filters or Rosco on Amazon. They both have sample packs with strips that just fit over the front of most current speed lights.

    Have fun!

    googletag.cmd.push(function() {
    tablet_slots.push( googletag.defineSlot( “/1005424/_dPSv4_tab-all-article-bottom_(300×250)”, [300, 250], “pb-ad-78623” ).addService( googletag.pubads() ) ); } );

    googletag.cmd.push(function() {
    mobile_slots.push( googletag.defineSlot( “/1005424/_dPSv4_mob-all-article-bottom_(300×250)”, [300, 250], “pb-ad-78158” ).addService( googletag.pubads() ) ); } );

    The post How to Use Lighting Gels to Change your Background Color by Sean McCormack appeared first on Digital Photography School.

    Digital Photography School