Category: Photography

  • How to Create a Silky Water Effect in Post-Processing without Using Filters or a Tripod

    Affiniy-photo-mean-stack-mode

    Smooth water effect edited in Affinity Photo using the Live Stacks feature.

    Even if you don’t shoot landscape photography, photos of waterfalls with the smooth water and glassy appearance are awesome. The gist to achieving this, and I do stand corrected if I have this wrong, is as follows:

    • Slow shutter speeds – the need for a tripod
    • A remote shutter release or your camera’s timer
    • Wide angle lens and the camera settings using a small aperture of f/22, ISO 100
    • Neutral Density and/or polarizer filters, as you’ll be shooting long exposures during the day
    • Of course the scene and by all accounts patience too

    However, I personally don’t own ND or polarizer filters. These type of filters are required for long exposures during the day, so that your shutter speeds are slow enough, possibly one minute or more to get that misty look. On top of which, you have to get the exposure right, which requires a bit of math and experimentation. ND filters block out the light in terms of stops.

    So taking long exposures during the day is an involved process, especially if you want to create that smooth, silky water effect in-camera. But, is there a way to simulate this effect in Photoshop or other post-processing software? Yes there is! It does require that you take multiple shots. I’m not advocating that this technique in post editing is a replacement to going out and achieving long exposures out in the field, far from it. But, I hope this technique may serve as a stepping stone or inspiration to go out and capture silky waters, clouds etc., in-camera.

    This article will demonstrate how you can achieve a similar result by taking a bunch of photos in continuous mode without using any filters or a tripod. Although, I would recommend you use a tripod.

    First, I’ll demonstrate this effect using a manual method in Photoshop CS6 (standard version). There is an automated way to do this with the Stack Mode feature, which I believe is in Photoshop CC. If you have previous versions of Photoshop, the Stack Mode feature is only available in extended versions, not standard, unfortunately. However, Gimp has this Stack Mode feature and it’s free. Then, I will compare the manual method in Photoshop with Affinity Photo, using Live Stacks. I was really impressed with this feature.

    Photoshop manual method

    Let’s begin. On the day I took these images, I was pressed for time. So I took a series of shots in continuous mode, and handheld the camera while I focused on this part of a small river. I would recommend that you use a tripod and give yourself some time. It will be easier to align the images later.

    small-river-handheld

    I took a bunch of images in continuous mode of this small river, close-up deliberately for this article.

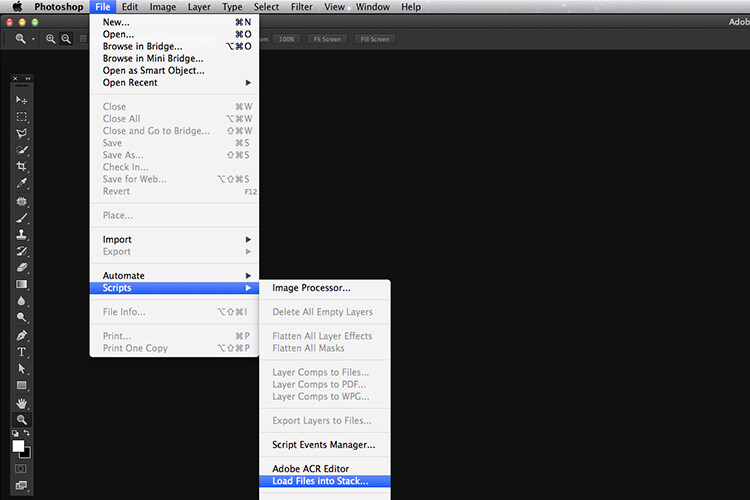
    You will need to load your images as layers into one document in Photoshop, as follows:

    file-scripts-load-files-into-stack

    Loading multiple images into one document in Photoshop. File>Scripts>Load Files into Stack

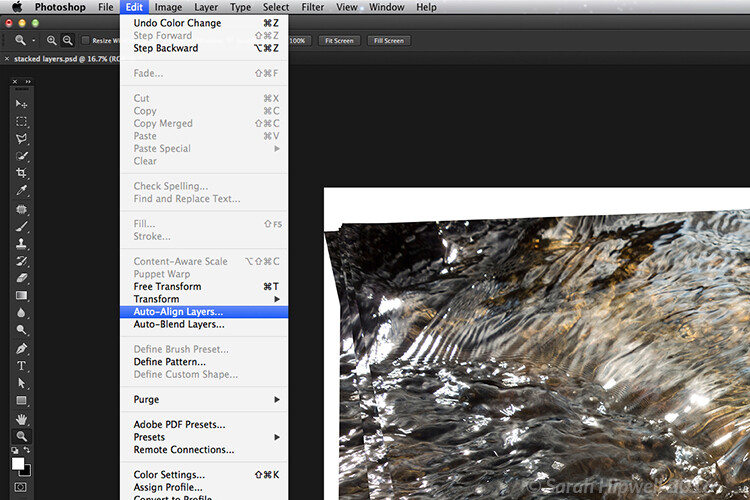
    Go up to the Menu Bar > File > Scripts > Load Files into Stack. As I didn’t use a tripod, I selected all the layers to align them. Go to Auto-Align under Edit. As you can see, Photoshop had its work cut out trying to align the images.

    images-after-auto-align-photoshop

    I handheld my camera when I took a bunch of shots in continuous mode. As you can see from this screenshot, I needed to use Auto-Align Layers in Photoshop. If you use a tripod the alignment will be much easier.

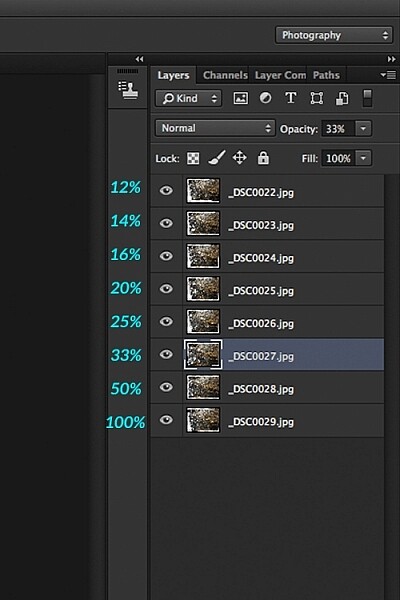
    Now that the layers are stacked on top of each other. Start at the bottom and leave this layer at 100%, go to second layer above and reduce the opacity by 50%(100÷2=50). Continue with the next layer and reduce the opacity by 33%(100÷3=33).

    percentages-opacity-reduced

    Reducing the opacity of each layer by dividing the number of the layer into 100%. The bottom layer remains at 100%. The second layer is 50% and so on.

    Therefore, depending on the amount of layers you have, and where they come in the stack, divide this number into 100. So if you had 30 images, the opacity for the top layer in the stack will be 3% (100÷30=3). Remember the bottom layer is always 1=100%. What this is doing is averaging out the layers. This may sound complicated, but in practice, it’s more straightforward. Although it is a bit more tedious than the automated way.

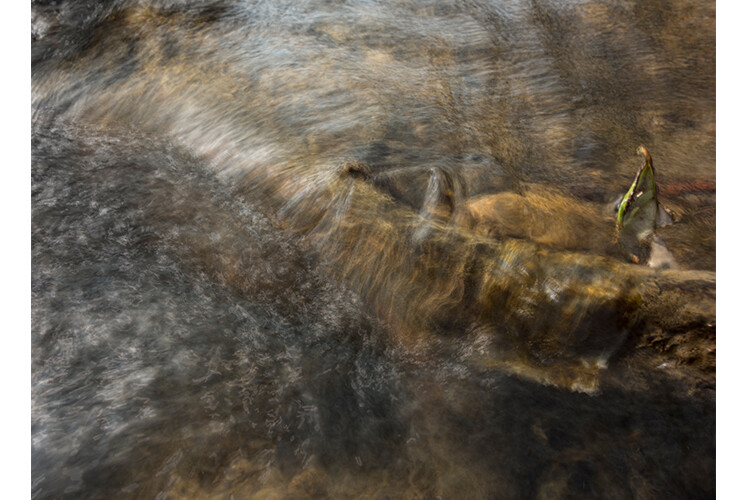
    This is the effect of averaging out the layers in Photoshop - reducing the stacked layer's opacity by X amount. I also had to crop this image, whereas the same image when edited in Affinity Photo kept more of the image. See below.

    This is the effect of averaging out the layers in Photoshop – reducing the stacked layer’s opacity by X amount. I also had to crop this image, whereas the same image when edited in Affinity Photo kept more of the image. See below.

    I have been keeping a close eye on Serif’s Affinity Photo. So I took the plunge and purchased it for (€39) $ 44 USD. That was a discounted offer. At such an affordable price, I was curious to see how this software performs and what it can do.

    In Affinity Photo, there is a Live Stacks feature which is similar to Stack Mode in Photoshop. It was easy and simple to use, and the process was fast.

    Affiniy-photo-mean-stack-mode

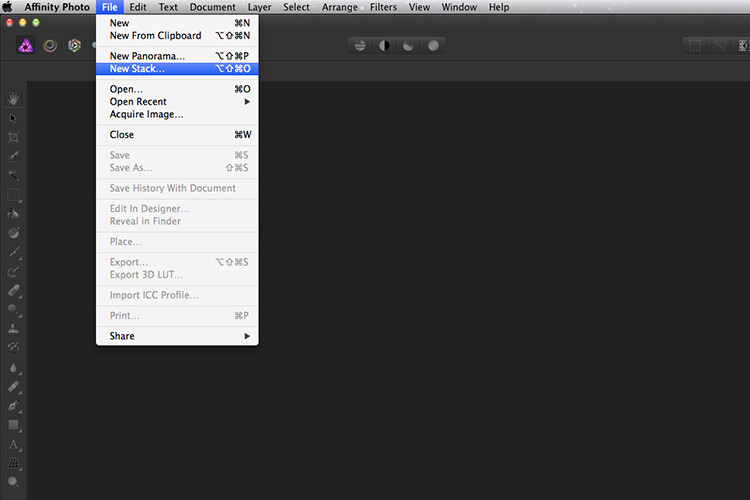
    Affinity-photo-new-stack

    The equivalent Stack Mode feature in Photoshop is called Live Stacks in Affinity Photo.

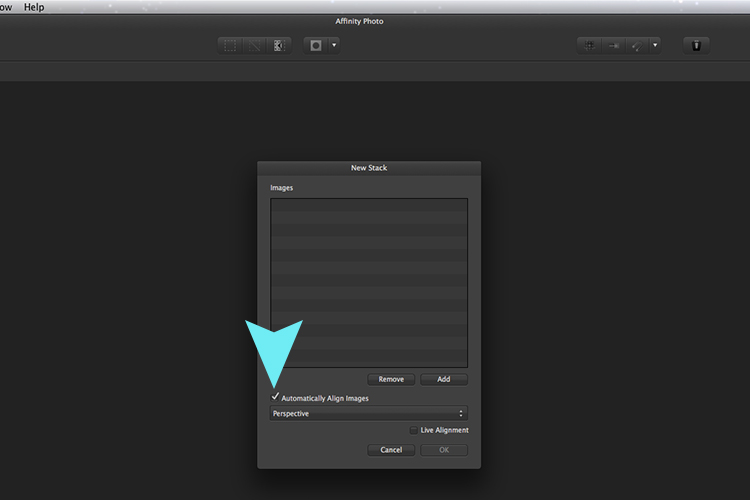
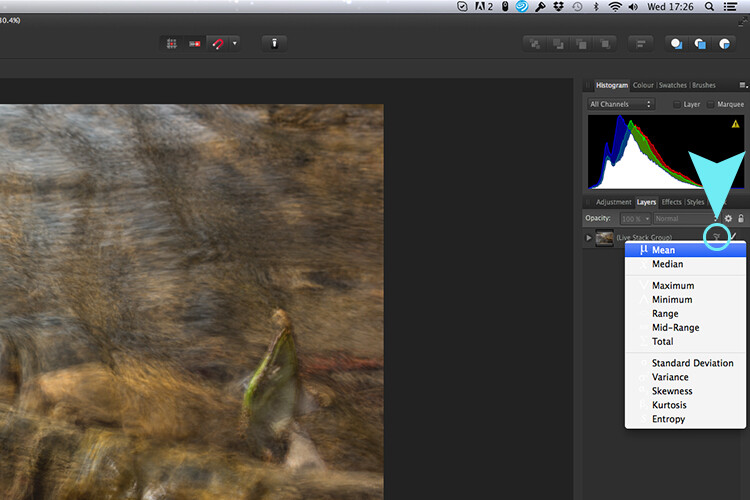
    Go to File > New Stack. The pop up dialog box appears where you select your images. Make sure Automatically Align Images box is ticked. Click Ok. This takes a couple of seconds. It defaults to Median in the Live Stack Group, but scroll up to the next one and this is Mean. That’s the one you want.

    Affinity-photo-auto-align-images

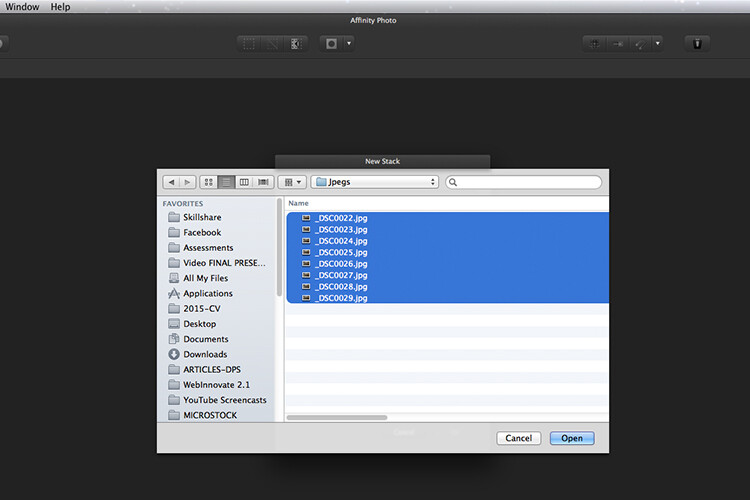
    images-selected-after-new-stack

    When you create a New Stack, the pop up dialog box appears. Select your images on your computer and click Open.

    Affinity-photo-live-stacks-mean

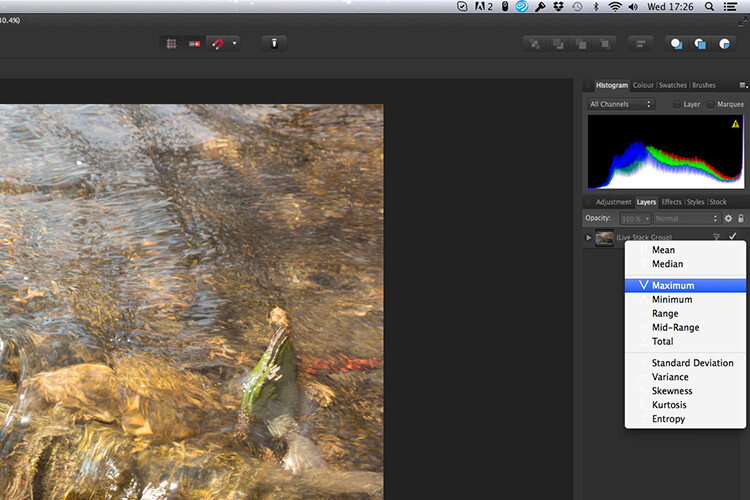
    The stacked images are grouped into a folder called Live Stack Group. The different stack options are located by clicking on the small icon, circled in blue. It defaults to Median but I changed it to Mean.

    The cool thing about this feature is when you scroll through each of the different stack modes, it shows the different results live.

    Affinity-photo-live-stacks-maximum

    Different stack options can be scrolled through one by one, and the results can be seen live, which is impressive.

    When I compared the two results from Photoshop and Affinity Photo, I could see no obvious difference, with the exception that I had to crop the image of the river more in Photoshop, whereas the auto alignment in Affinity Photo meant I didn’t lose much of the image at all.

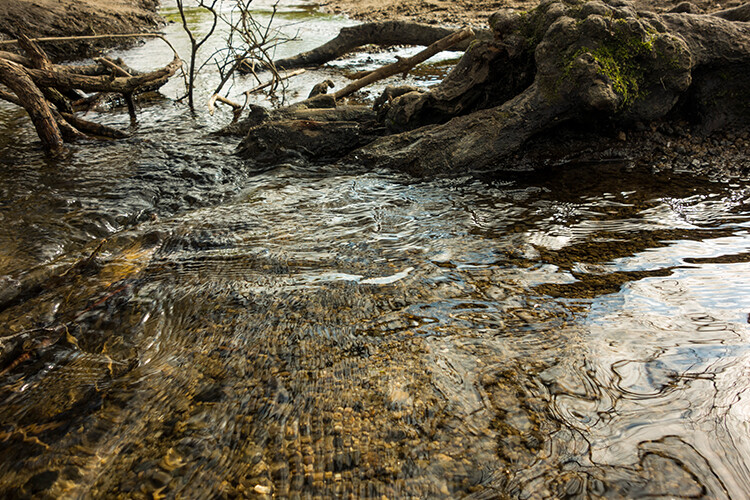
    second-river-original

    Here is another example of moving water.

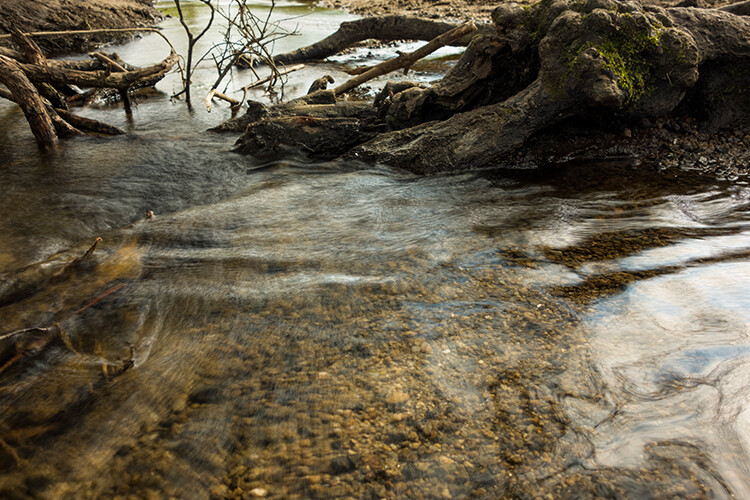
    The same image as above edited in Affinity Photo using Mean in Live Stacks. I got the same result using the manual method in Photoshop.

    The same image as above edited in Affinity Photo using Mean in Live Stacks. I got the same result using the manual method in Photoshop.

    Take away tip:

    In my examples, I didn’t use a tripod. I would recommend using one. I also took only a series of 8-10 shots. I would recommend taking at least 15 or more.

    I found this technique interesting and fun, and I am now inspired to go out and take images of waterfalls. The good thing about this technique is if you don’t have ND or polarizing filters, it doesn’t prevent you from going out and taking shots of waterfalls. Then when you get back to your computer, you can create your own silky, smooth effect.

    Let’s see some of your examples below.

    googletag.cmd.push(function() {
    tablet_slots.push( googletag.defineSlot( “/1005424/_dPSv4_tab-all-article-bottom_(300×250)”, [300, 250], “pb-ad-78623” ).addService( googletag.pubads() ) ); } );

    googletag.cmd.push(function() {
    mobile_slots.push( googletag.defineSlot( “/1005424/_dPSv4_mob-all-article-bottom_(300×250)”, [300, 250], “pb-ad-78158” ).addService( googletag.pubads() ) ); } );

    The post How to Create a Silky Water Effect in Post-Processing without Using Filters or a Tripod by Sarah Hipwell appeared first on Digital Photography School.


    Digital Photography School

  • 14 Essential Rain Photography Tips for Creating Dramatic Images

    Wherever you travel, you are always free to take that perfect shot from the best angle. Not when it’s pouring down heavily, though. Winter is not always the best climate for comfortable outdoor photography. But guess what, if you are a clever photographer, you can take even better photos in the rain than on sunny days. Cold and stormy weather Continue Reading

    The post 14 Essential Rain Photography Tips for Creating Dramatic Images appeared first on Photodoto.


    Photodoto

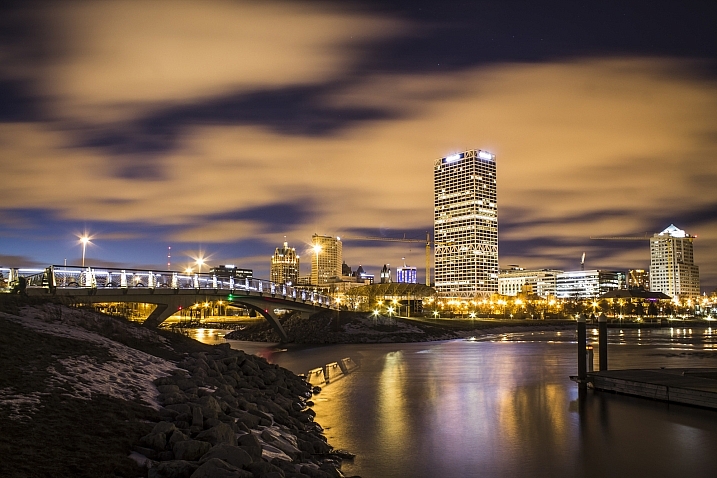
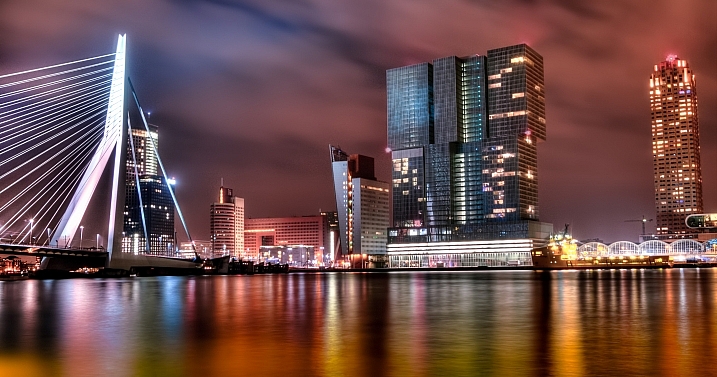
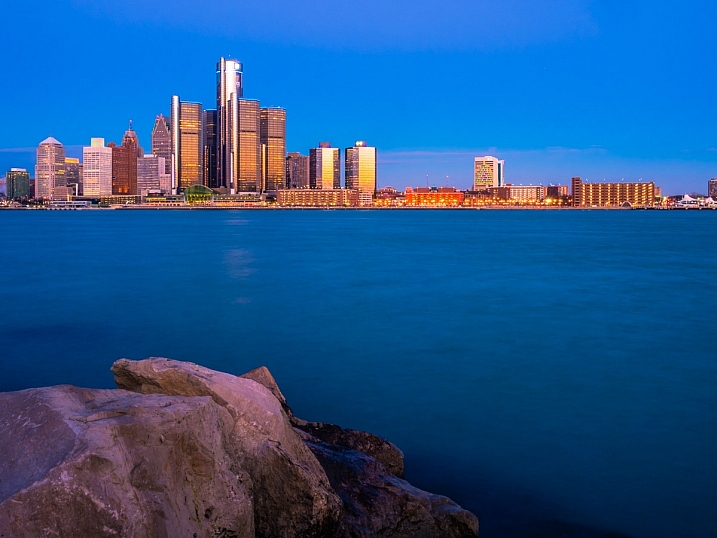
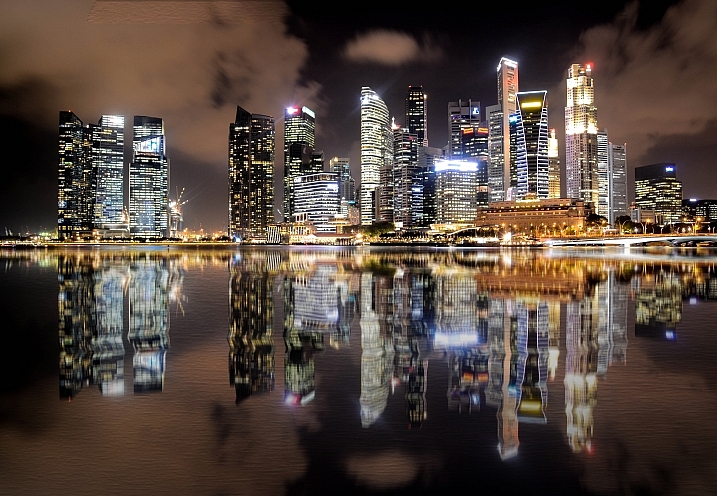
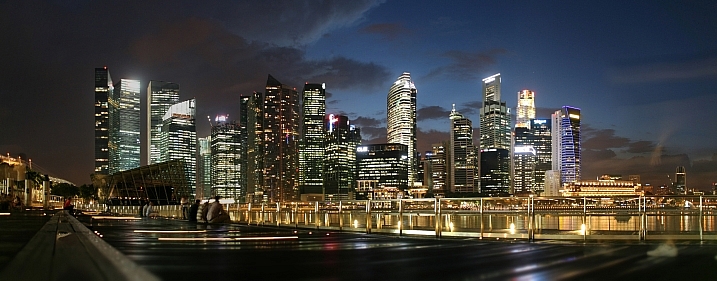
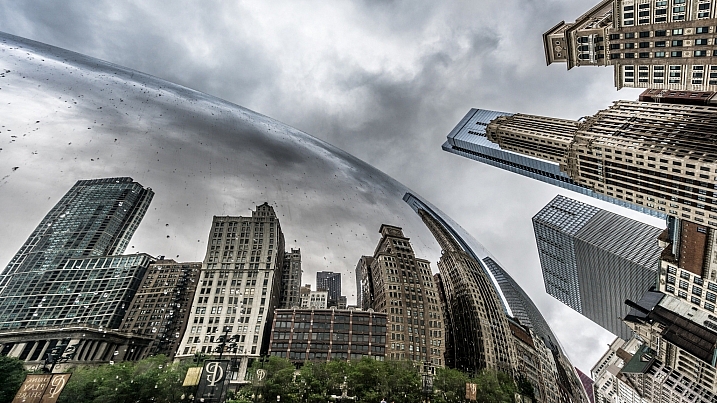
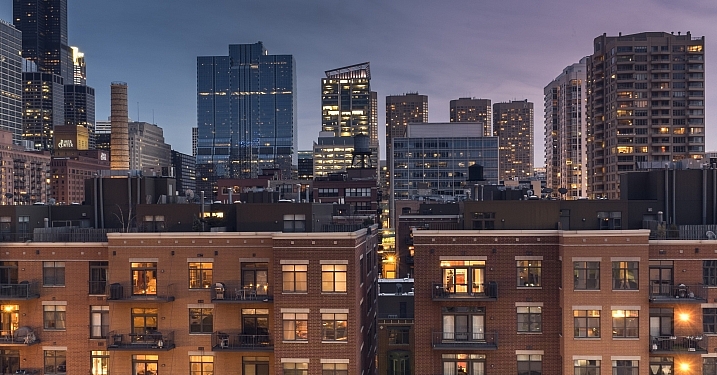
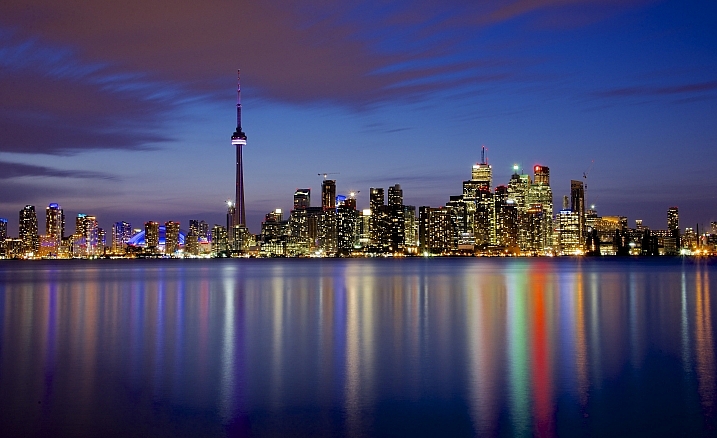
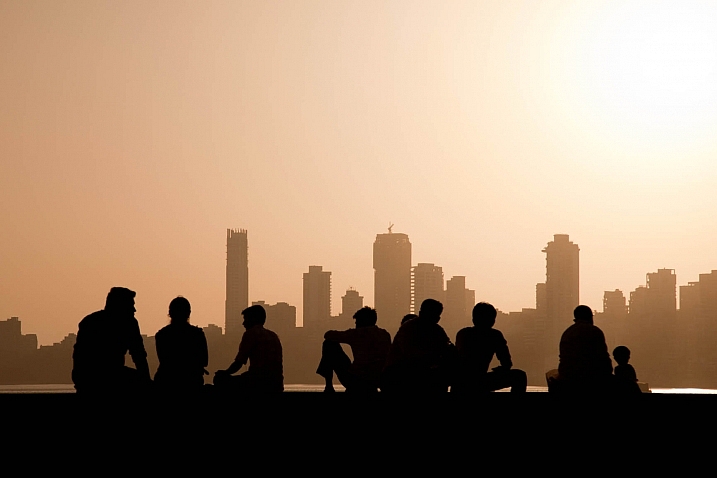
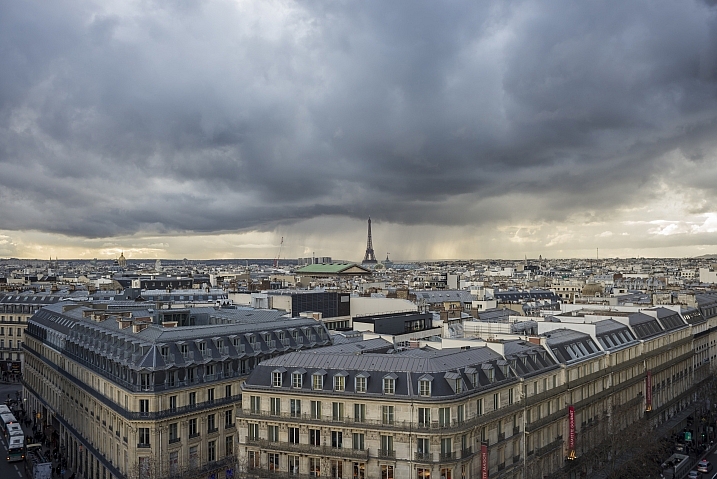
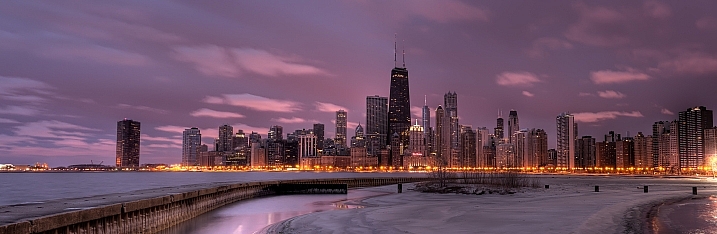
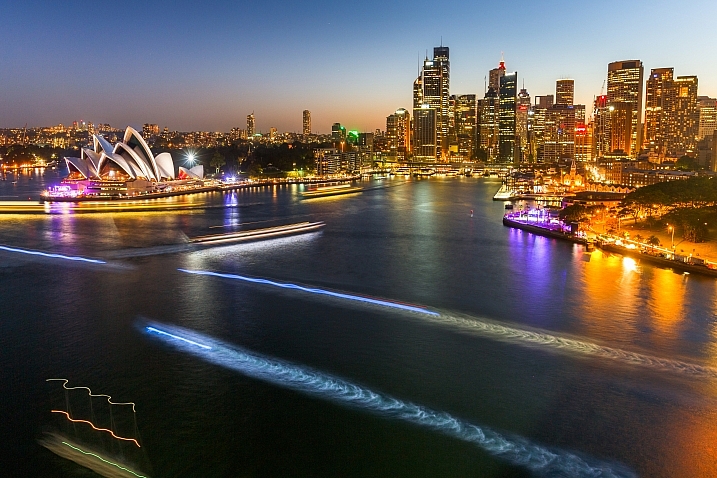
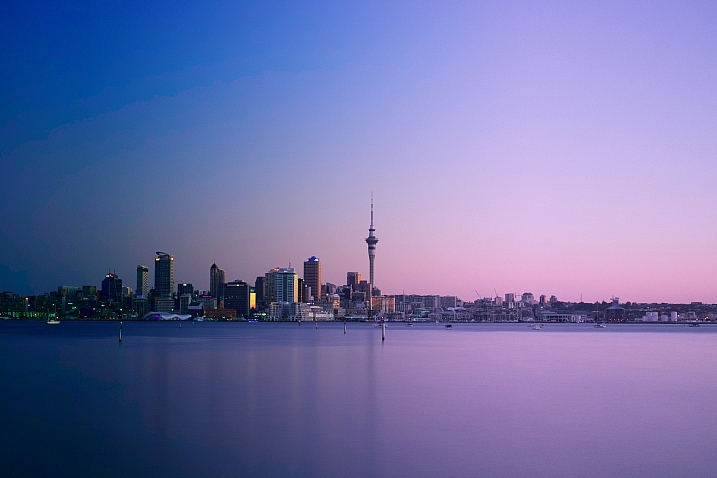
  • Weekly Photography Challenge – City Skyline

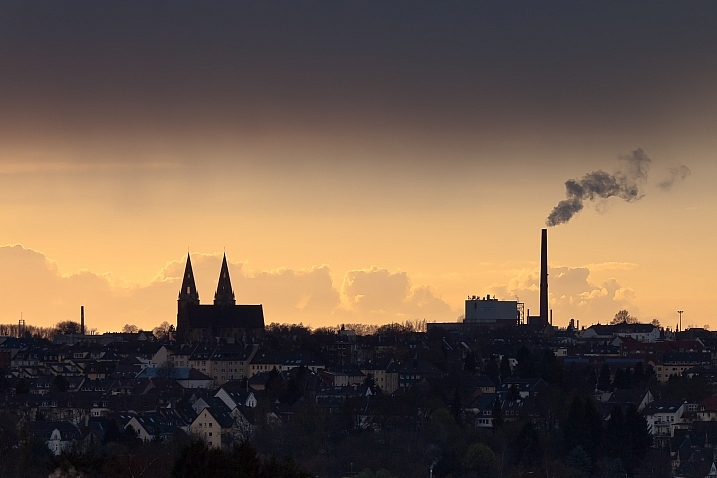
    Whether you live in a big metropolis or a small town, your urban center will have a skyline of some kind. The outline of the buildings that make up the main part of town make up the skyline.

    Barnyz

    By barnyz

    Rennett Stowe

    By Rennett Stowe

    Weekly Photography Challenge – City Skyline

    You can see 25 more example of city skyline photos here.

    If you browse online for skyline photos you may notice a common thread among the images – many of them are shot at dusk, or at night. That’s because cities look great just as daylight is fading away and the lights of the city illuminate. It’s the magic of blue hour.

    You get to decide how you want to tackle this week’s challenge and shoot your city’s skyline. Maybe go out a few different times during the day and see how the light changes.

    Trevorklatko

    By trevorklatko

    Fèlix González

    By Fèlix González

    Sdh_zh

    By sdh_zh

    If it’s a city near a body of water, try and capture a reflection of the lights at night. Or make your own reflection by finding a large rain puddle and a low camera angle.

    If you live in a city that’s been photographed a million times like NYC or San Francisco, try something different like:

    • Shoot with a fish-eye lens
    • Convert to black and white
    • Shoot straight up and get just building tops
    • Put something in front to frame the city with
    Louis Raphael

    By Louis Raphael

    David Yu

    By David Yu

    Maciek Lulko

    By Maciek Lulko

    Geoff Llerena

    By Geoff Llerena

    Rytc

    By rytc

    Ehpien

    By ehpien

    Share your images below:

    Simply upload your shot into the comment field (look for the little camera icon in the Disqus comments section) and they’ll get embedded for us all to see or if you’d prefer upload them to your favourite photo sharing site and leave the link to them. Show me your best images in this week’s challenge. Sometimes it takes a while for an image to appear so be patient and try not to post the same image twice.

    Michael Matti

    By Michael Matti

    Harshil Shah

    By Harshil Shah

    googletag.cmd.push(function() {
    tablet_slots.push( googletag.defineSlot( “/1005424/_dPSv4_tab-all-article-bottom_(300×250)”, [300, 250], “pb-ad-78623” ).addService( googletag.pubads() ) ); } );

    googletag.cmd.push(function() {
    mobile_slots.push( googletag.defineSlot( “/1005424/_dPSv4_mob-all-article-bottom_(300×250)”, [300, 250], “pb-ad-78158” ).addService( googletag.pubads() ) ); } );

    The post Weekly Photography Challenge – City Skyline by Darlene Hildebrandt appeared first on Digital Photography School.


    Digital Photography School

  • 25 Stunning Photos of City Skylines

    Urban landscape photography, pretty much involves city skyline images. Iconic shots of skylines and many cities of the world are instantly recognizable.

    See if you find these images inspiring, and if you can name the cities:

    Anh Dinh

    By Anh Dinh

    Olsonj

    By olsonj

    Viisoreanu Florin Gabriel

    By Viisoreanu Florin Gabriel

    Chris Toe Pher

    By Chris Toe Pher

    Matt Paish

    By Matt Paish

    Mike Boening Photography

    By Mike Boening Photography

    Michaela Loheit

    By Michaela Loheit

    Yooperann

    By yooperann

    Miroslav Petrasko

    By Miroslav Petrasko

    Maciek Lulko

    By Maciek Lulko

    Miroslav Petrasko

    By Miroslav Petrasko

    Whereisemil

    By whereisemil

    Herr Olsen

    By Herr Olsen

    Giuseppe Milo

    By Giuseppe Milo

    Aurimas

    By Aurimas

    Jamie McCaffrey

    By Jamie McCaffrey

    Ram Balmur

    By Ram Balmur

    RobinTphoto

    By RobinTphoto

    Peter Hubler

    By Peter Hubler

    Gordon

    By Gordon

    Dave Wilson

    By Dave Wilson

    Gord McKenna

    By Gord McKenna

    Hopeless128

    By hopeless128

    Loïc Lagarde

    By Loïc Lagarde

    Siyamalan

    By Siyamalan

    googletag.cmd.push(function() {
    tablet_slots.push( googletag.defineSlot( “/1005424/_dPSv4_tab-all-article-bottom_(300×250)”, [300, 250], “pb-ad-78623” ).addService( googletag.pubads() ) ); } );

    googletag.cmd.push(function() {
    mobile_slots.push( googletag.defineSlot( “/1005424/_dPSv4_mob-all-article-bottom_(300×250)”, [300, 250], “pb-ad-78158” ).addService( googletag.pubads() ) ); } );

    The post 25 Stunning Photos of City Skylines by Darlene Hildebrandt appeared first on Digital Photography School.


    Digital Photography School

  • 4 Things You Can Learn From Film and How to Apply Them to Your Digital Photography

    Since the introduction of digital cameras, photography is becoming more and more popular amongst everyone. This is largely due to the fact digital has dramatically reduced the cost of taking photos, as they no longer required to be developed, and the recording media (SD or CF cards) can be reused. Another fantastic advantage of digital, is the instant replay it gives you of the photo just taken, giving you the option to correct any flaws in the image. This is something that could not be done with film, and each photo taken would cost money; regardless of how great it was, or was not.

    Digital Film

    Digital technology has come so far in the last several years that it is out-performing film on almost every level; for example, camera’s can now go up to ISO 3.2 million – an ASA (film equivalent to ISO) level that was never even considered during the films days.

    But does this mean that film is useless, and has nothing to offer? Absolutely not. Regardless of whether film is making some sort of a resurgence or not, there are still many things that film can teach you about photography, that digital simply cannot. Here are some thing that shooting with film can teach you better than what digital capture can do:

    1. SELF CONFIDENCE

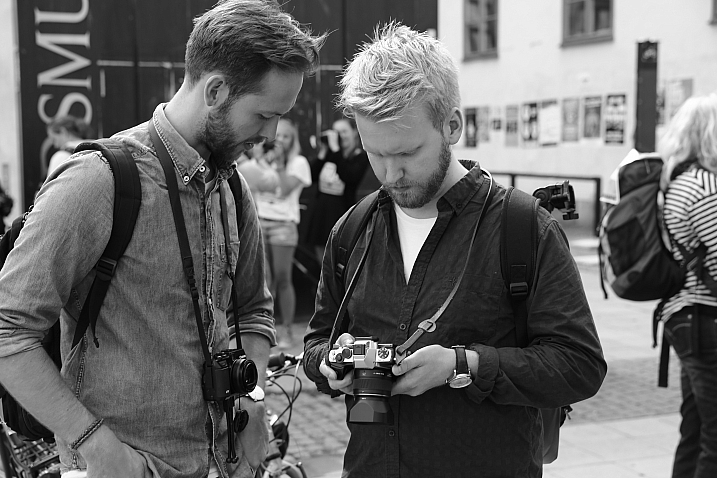
    With the immediacy of the feedback that digital cameras provide you, it is all too easy and tempting to continually check your camera’s LCD to see how your photo has turned out. This tendency to keep looking at the LCD is often referred to as chimping. You may chimp for various reasons, ranging from ensuring your photo is correctly exposed (the most common reason), in focus, or seeking self-gratification that you’ve done a good job.

    Now, imagine you were photographing with film. You would not be able to see your photos straight away; you’d have to wait a week or even two! You would not be able to see if the photo was correctly exposed, or pat yourself on the back about getting a great frame – at least not right away!

    Film taught photographers to read the light and tones within their environment, and to learn how to use their tools correctly. This built confidence within photographers to trust in their own abilities and decisions. It meant that photographers would worry less about receiving positive reassurance on the photo they’d just taken; they knew that they had exposed and focussed correctly and kept going. There was no ,”Hold on, I’ll just check to make sure your wedding dress is correctly exposed”, or “I missed that shot because I was checking my exposure.”

    Fredrik Holmberg

    By Fredrik Holmberg

    So why is chimping a bad habit? Because it says that you are not that confident in your own abilities and judgement, and you need the constant reassurance that you are doing a good job. It results in you potentially missing a great opportunity for a photograph, as your attention has now shifted from your subject to your camera. Wedding, sport, and action photographers may miss a critical moment, a defining moment, if they are always looking at their screen. If you’re looking at your screen, you’re not ready for the moment and you most certainly are not taking photos.

    For portrait photographers, taking your camera way from your eye breaks that connection between yourself and your subject. It also says that you’re more interested in the result than you are them.

    Apply this to your digital photography

    To increase your confidence in your own abilities, I challenge you to only look at your LCD once or twice the next time you’re out photographing. These times should really only be to help you achieve the exposure you wish. If the lighting conditions are consistent, there is no reason you should need to look at your LCD again.

    2. PUSH YOURSELF MORE

    All too often you may see an outstanding result on the back of your camera. You stop taking photos because you are convinced that it cannot be bettered; only to see your friend take a better image right next to you. The instant replay of your work on the back of your camera can often prevent you from pushing yourself just that little bit further, and getting that great shot. That instant replay didn’t exist on film cameras, so photographers didn’t know if they had “the shot” or not; they had to keep pushing themselves to ensure that they did get it.

    Calvinnivlac

    By calvinnivlac

    If you’re tempted to keep looking at your screen, I’d encourage you to turn preview or replay to off in your camera menu. If you are still tempted to press play and have a sneaky peek, tape a little piece of paper or card over the screen so you cannot see the image.

    Apply this to your digital photography

    Do not be tempted to keep looking at your screen, and being satisfied with what you see after the first one or two frames. Keep going. Perhaps you could try different angles, settings, lighting etc., but you should always keep pushing a little further to get a better shot. Even if it is just three or four additional frames.

    3. YOU THINK MORE

    Taking a photo with digital cameras costs nothing; just the minuscule amount of electricity the camera needs to operate and a little bit of storage. Memory cards can hold thousands of photos – far more than the 36-exposure roll of film. But that limitation of 36 exposures can teach you something that digital cannot – discipline.

    John Goode

    By John Goode

    Think about the last time you went out taking photos. How many did you come back with? I would bet that you might have hundreds of photos to go through, maybe even thousands. Now, divide that number by 36. That’s how many rolls of film you went through. When you have such a limited number of exposures until you have to change your roll (which takes a lot more time than switching memory cards, by the way), you don’t just take photos every time you see something you like. You look at the subject or scene and consider it more carefully. In doing this, you evaluate if it is indeed worth taking a photo of or not.

    Apply this to your digital photography

    Try shooting with a smaller memory card like 1gb, or even smaller if you can find some old cards. Limit yourself to 36 shots per day or per outing. Do not delete images as you go, only fill the card or your limit of shots and no more. It will help you be more intentional with your shooting. If you are always deleting images, that defeats the purpose of having a smaller card!

    4. GREATER VARIETY IN YOUR WORK

    Have you ever gone through photos that you’ve taken and realized that you took so many images of the same thing, with little or no difference between many of them? Do you find it boring going through your photos sometimes because there is such little variation in so many images? With film, each frame cost more money than digital, so photographers made each frame count.

    Phil

    By Phil

    Apply this to your digital photography

    Do you really need 10 photos of the same object, from the same angle? No, you don’t – those 10 frames are all the same, so therefore are really just one photo taken ten times. You can still have 10 photos of the same subject, but vary them; try different angles, focal length, exposures. Even try photographing it with a different lens (wide angle versus telephoto). Make each frame different to the next, and make each frame count. Not all the images will work out, but you will have much more variety in your work from the same number of subjects. It will also help you greatly in the future when deciding on what approach to take for your next subject.

    Summary

    So there you have it, some simple and practical things that shooting with film can teach you better than digital. If you have a film camera laying about collecting dust, why not pick it up, put a fresh roll of film in (extra points if you shoot on slide film) and start using it? It will be quite a strange sensation using a film camera and the the images you take may not be that fantastic to start. Should you stick with it, it will help you on your journey to improving you photography and in my experience, nothing is more satisfying that nailing a photo on film over digital.

    googletag.cmd.push(function() {
    tablet_slots.push( googletag.defineSlot( “/1005424/_dPSv4_tab-all-article-bottom_(300×250)”, [300, 250], “pb-ad-78623” ).addService( googletag.pubads() ) ); } );

    googletag.cmd.push(function() {
    mobile_slots.push( googletag.defineSlot( “/1005424/_dPSv4_mob-all-article-bottom_(300×250)”, [300, 250], “pb-ad-78158” ).addService( googletag.pubads() ) ); } );

    The post 4 Things You Can Learn From Film and How to Apply Them to Your Digital Photography by Daniel Smith appeared first on Digital Photography School.


    Digital Photography School

  • Beginner’s Guide to Buying Filters

    Use of neutral density and graduated neutral density filters

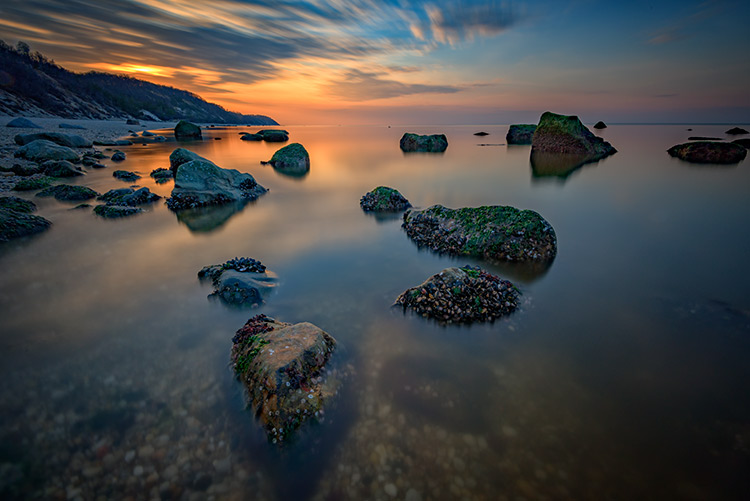
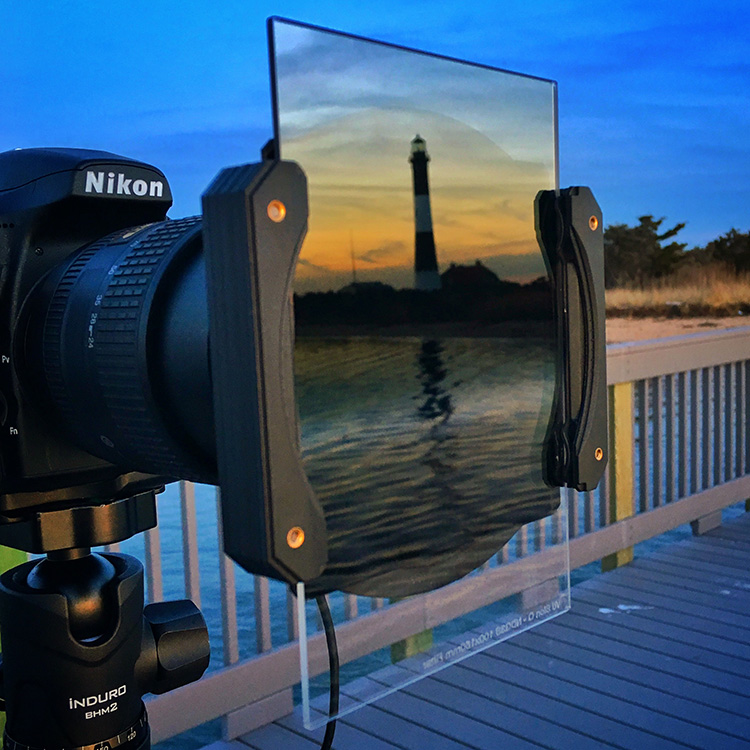
    Neutral density filters help you achieve extreme long exposures, while graduated neutral density filters help balance exposure between a bright sky and a dark foreground. Both were used in this image. The exposure time was three minutes.

    For most photographers, their first experience with a filter is when it is suggested they purchase a UV or Skylight filter to protect their lens. It’s usually much later that beginning photographers find out about the other filters available to them, and what they can be used for.

    Once you’ve decided to add a filter or filters to your camera bag, however, you’ll be faced with a myriad of choices regarding the various brands, materials, and types of filters that are available to you. Many times, the gut instinct is to purchase the cheapest filter that will do the job. The reality is, however, that there are many factors to consider when purchasing a filter, and buying the cheapest one on the rack that does what you want, it to is not usually a good idea. There is often a difference in the quality of the materials used, even when both filters appear to be made of the same things.

    In An Introduction to Filters for DSLRs, you’ll find a breakdown of the different kinds of filters, and their uses. Here, I’d like to try and demystify the differences between filters, and why similar looking filters might have drastically different price points.

    Screw-in versus drop-in filters

    Drop-in and screw-in filters

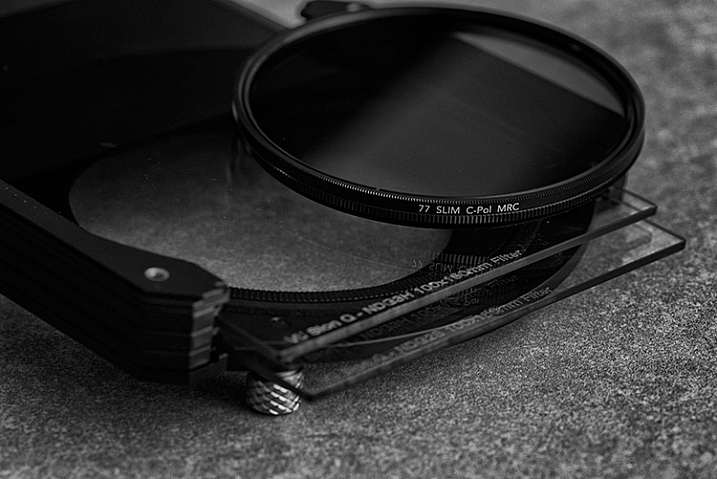
    First of all, there are two basic types of filters: screw-in and drop-in. The former mount directly onto the lens via the threads on the front, whereas the latter drop-in type are square or rectangular in shape, and require a filter holder and mounting ring that attaches to the front of the lens. Certain types of filters are available as both a screw-in and drop-in filter.

    Screw-in filters are constructed of glass with a metal ring. The quality of the glass can vary, even within the same brand, depending on whether you’re going with a high end filter or a value priced one. The metal of the ring can vary as well, as they can be made of brass or aluminum. Cheaper filters usually have an aluminum ring. It’s a soft metal that is more easily dented if dropped, or bent if put under pressure. This could cause the filter to jam when mounting it to your lens. The most popular screw-in filters tend to be polarizers, UV, and neutral density filters.

    The other type is what’s known as a drop-in filter. These are square or rectangular pieces of glass that are typically inserted in a holder that is mounted onto the lens. Often, the holder, or mounting ring, can also accommodate a screw-in polarizing filter, as well as two or three drop-in filters in front of that, allowing you to combine the effects of a polarizer, a neutral density filter, and/or a graduated neutral density filter.

    While graduated neutral density filters are available as both a screw-in or a drop-in, the drop-in style allows for more precise placement of the gradation, and thus allows for more creativity. Drop-in filters are generally part of system, or have compatibility with one. Some examples include: the Lee filter system, Vü Sion Q system, Formatt-HItech, and Cokin P and Cokin Z filter systems. You’ll want to ensure that the system you invest in has the filters you need available, and that it’s compatible with your size camera.

    Materials used

    You may notice when shopping for filters, that there is a wide range of prices, for the same types of filters. The primary difference in cost is related to the material used in the filter. Other materials used to make filters include optical resin, which is more of a plastic material, and polyester. Polyester filters are generally used for color correction or soft focus effects, while optical resin is used as a more cost effective option compared to glass, especially in the case of drop-in filters such as graduated neutral density filters.

    The more expensive filters often use a top quality glass, such German Schott Glass, which is generally color neutral and distortion free. Some filters by their nature need to be made from glass, such as polarizers. The differences in the material are related to the chemical makeup of the glass, thickness, and coatings used.  Where thickness is concerned, the thinner the filter the better, as thinner glass reduces any possible distortion.

    Use of a polarizing filters

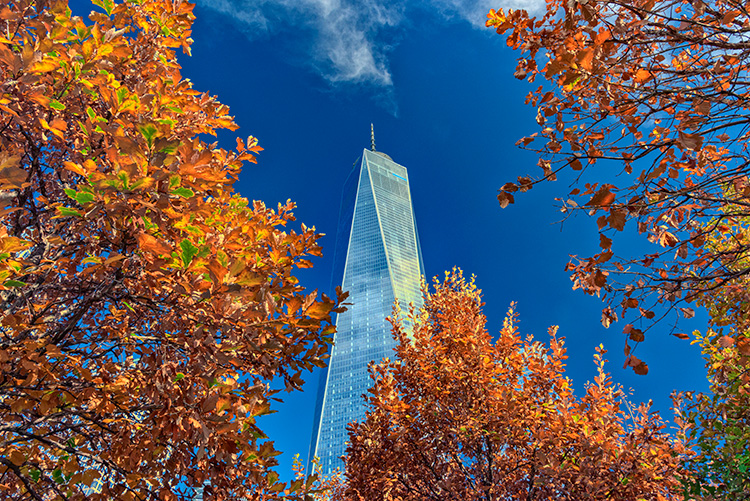
    A polarizing filter not only helps make the sky bluer, but also controls reflections on shiny surfaces, such as buildings.

    In the case of polarizers: in cheaper filters, the polarizing material is sandwiched between glass; while the polarizing material is bonded directly to the glass in more expensive ones. This reduces the chance for air pockets, and other irregularities that could affect the image quality in a negative way. Again, the quality of glass can vary widely between a budget-priced filter, and top quality one.

    I have used both high quality glass filters, and optical resin ones. While the glass is more fragile if dropped, it tends to resist scratching more effectively than resin. However, optical resin can be considerably less costly than glass, for the same type of filter. For instance, a Formatt Hitech 3-stop soft edge graduated neutral density filter lists for about $ 80, while Vü Filters 3-stop Soft Edged Graduated Neutral Density Filter,  which is made of Ultra White German Schott glass, retails for $ 224. There are different grades to optical resin filters as well. This Lee 0.9 (3-stop) Soft ND Grad Filter, made from optical resin, lists at $ 146.

    While any of these filter will provide good results, with higher end lenses, you may notice a distinct difference between a higher quality and thus higher priced filter, and one that cost less.

    Coatings

    In the days of film, filters did not need to be coated in the way they do for the digital age. Film was a more forgiving medium, which didn’t pick up flare or reflections the way a digital sensor does. For this reason, multi-coatings have become incredibly important in filter manufacturing. Higher quality filters will use these coatings to reduce flare, and increase light transmission. An uncoated filter will suffer from a loss of light. Some filters have a single coating, which is better than nonr, but not as good as a multi-coated filter. For digital if you were to take the same shot three different times, with an uncoated, a single coated, and a multi-coated filter, the difference should easily be visible in the image. In addition to minimizing flare and increasing light transmission, coatings also help maintain good contrast and color reproduction. Filter manufacturers will also use coatings that help make the filter easier to clean, and more scratch resistant.

    Many photographers will debate whether or not filters are necessary, with those who say no doing so out of fear that the filter will degrade image quality. I use filters often, especially in my landscape work. There is no true digital substitute for a polarizing filter, and neutral density and graduated neutral density filters provide for effects not easily duplicated in post-processing. The key is to ensure you are using a quality filter, that is free from color shifts and distortion, and properly coated for digital. I’m not saying you have to spend top dollar on a filter, just understand what the differences are, so you can make an educated decision.

    Drop-in filter system

    A drop-in filter system allows use of square or rectangular filters. This is advantageous when using graduated ND filters, so you can adjust the placement of the gradation.

    So do you own and use filters? What buying tips do you have for newbies? Which are your go-to and favorite filters? Please share in the comments below.

    googletag.cmd.push(function() {
    tablet_slots.push( googletag.defineSlot( “/1005424/_dPSv4_tab-all-article-bottom_(300×250)”, [300, 250], “pb-ad-78623” ).addService( googletag.pubads() ) ); } );

    googletag.cmd.push(function() {
    mobile_slots.push( googletag.defineSlot( “/1005424/_dPSv4_mob-all-article-bottom_(300×250)”, [300, 250], “pb-ad-78158” ).addService( googletag.pubads() ) ); } );

    The post Beginner’s Guide to Buying Filters by Rick Berk appeared first on Digital Photography School.


    Digital Photography School

  • 10 Ideas to Instantly Improve Your Photography Composition

    It is an illusion that photos are made with the camera; they are made with the eye, heart and head. – Henri Cartier-Bresson

    My photography training took place back in the early 90s, at an intense technical photo school in California. I love tech in all forms, and I love reading my camera manual. I love the precision and procedure of processing my own colour film, and I love learning the ever-advancing skills on photo software – I am a total tech nerd. But technical knowledge will only get you so far; it’s really the second part of the story in photography. Photography composition is the first part.
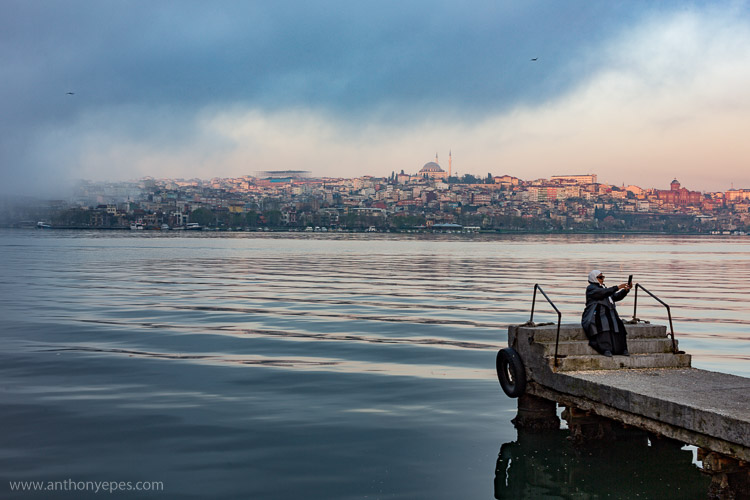
    EPESTENIDEASDPS 01

    The first part is your vision of what you want your photography to be, and learning the ability to compose compelling images. Your technical knowledge will only give you the ability to execute your vision, and make the most of the composition that you have created. It can’t replace the ability to see and to compose stunning compositions.

    So all things should flow from a good composition. And when we are learning about composition I like to keep in mind that quote that may or may not have been spoken by Picasso (it’s under dispute on the internet): “Learn the rules like a pro and break them like an artist.” Rules, guidelines, ideas about composition will give you a place to start, help develop your skills and propel you out of a rut. But they should not be followed slavishly or forever.

    Here are my ideas on what you can do to make your compositions more captivating. But, bear in mind that creating totally unique compositions comes down to creating your own style . So don’t be swayed too much by other photographers’ advice on this subject. Photography is an examination of the world through your eyes, it’s totally subjective, totally about connecting with what inspires and excites you. Just pick up ideas that make sense and motivate you.
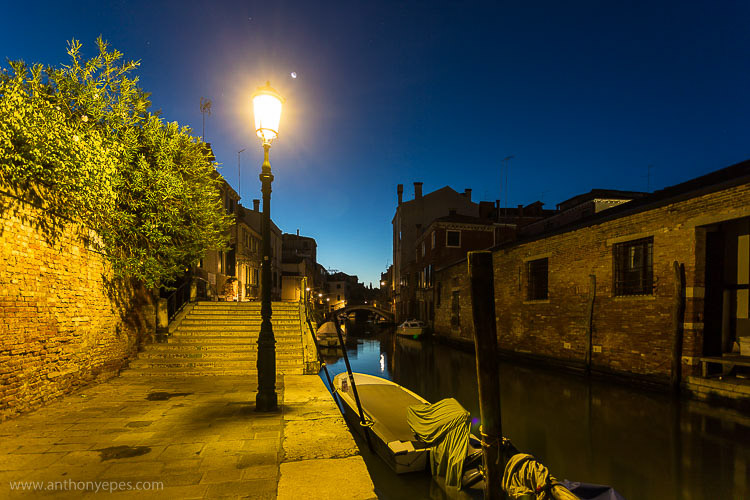
    EPESTENIDEASDPS 02

    To practice, pick one concept from below that jumps out. Don’t take all these ideas and try to incorporate them into your photography all at once. Pick one and really embrace it – then the results will come.

    So here are my 10 favourite tips on how you can instantly improve your composition.

    1. Light

    “Light makes photography. Embrace light. Admire it. Love it. But above all, know light. Know it for all you are worth, and you will know the key to photography.” George Eastman

    For me more than anything, photography is about light, and learning to identify interesting light is one of the best skills to learn. Light that is doing something interesting, or is beautiful or colourful; will take a good subject and turn it into something completely amazing.

    Light is my starting point when I am taking photos. It is the thing I consider first, and what affects me the most when deciding what to photograph. Look for light doing strange and wonderful things – creating long shadows, diffused light falling over a broken wall, reflecting, creating bursts of colour. Look for the colour of light, too: the cool blue light before dawn, the cold, almost transparent light of a winter’s afternoon, the rich orange light of near twilight – and how that affects your subject. Think always: how can I get the best out of the light that I am photographing?
    EPESTENIDEASDPS 03

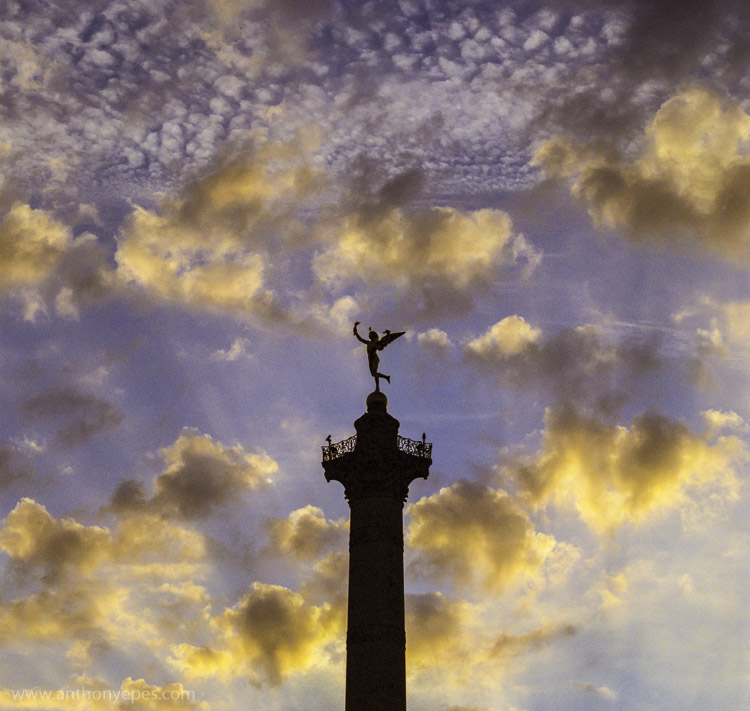
    In the photograph above, the beautiful light is obvious. I have used the silhouette of the column, to contrast the dappled light which is illuminating the clouds beautifully. This contrast makes the light look spectacular because it’s showing off its range of colours and depth against the heavy dark column.

    Learning to notice light in all its forms and colours is an excellent way to improve your compositions.

    When you see a subject you wish to photograph, look at the light around it. If it’s not interesting light – if it’s flat, boring, or draining the sense of colour – have a look at what else is happening with the weather. Maybe you can wait for clouds to pass, come back later or earlier in the day, see if you can organize the composition to incorporate light from other sources. It doesn’t have to be natural light. Artificial light, and particularly the play of natural and artificial light, can make an inspirational combination.

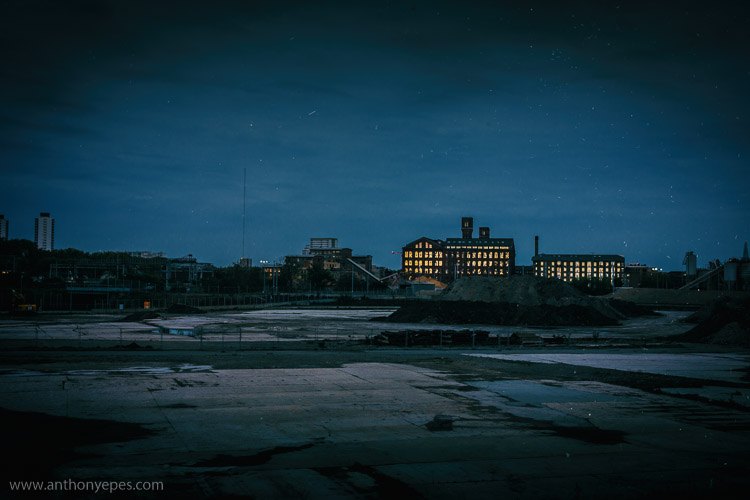
    Here’s another photo where the main subject is the light, but this one is more subtle. The absence of light is most pronounced in this shot, and then all of sudden the glow of dawn light is reflected in the windows. Again, there is a contrast of darkness against light.
    EPESTENIDEASDPS 04

    There is lots of negative space in this photo, an overload of industrial blandness, wastelands. And then these two buildings and the sudden glow of the charming light.

    2. Simplicity: think in threes

    “The ability to simplify means to eliminate the unnecessary so that the necessary may speak.” Hans Hofmann

    Simplicity is often very hard to accomplish, and can be more challenging than more complex compositions. I find there can be a misunderstanding about how to achieve simplicity in your photos. People often think it’s about taking a photo of one subject. But actually I rarely take photos which contain only one subject. Usually there has to be one subject with at least one, but usually, two supporting elements. So I like to say – think in threes.

    Humans love to think in threes – (breakfast, lunch, dinner; past, present, future; and small, medium, large). We like to find rhythms and patterns in everything.
    EPESTENIDEASDPS 05

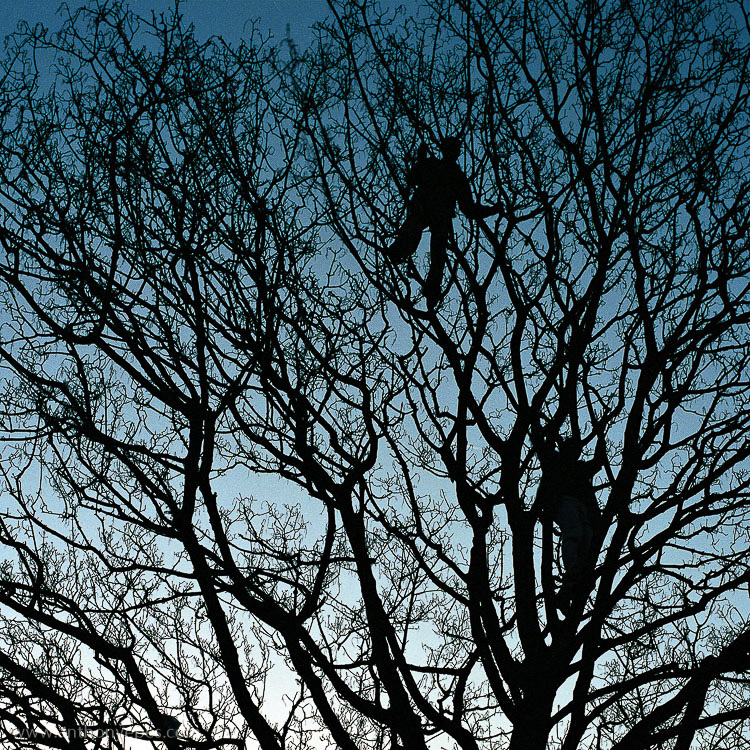
    This photo above is a very good example. How many elements make up this photo? Well, first you have the beautiful blue gradated sky, then the wild, chaotic pattern of the bare branches. That’s all very nice, but it’s the third element that is the subject, and that really makes the photo – the two men blending into the branches, while creating distinct human shapes. The photo without any one of the elements wouldn’t be as interesting.

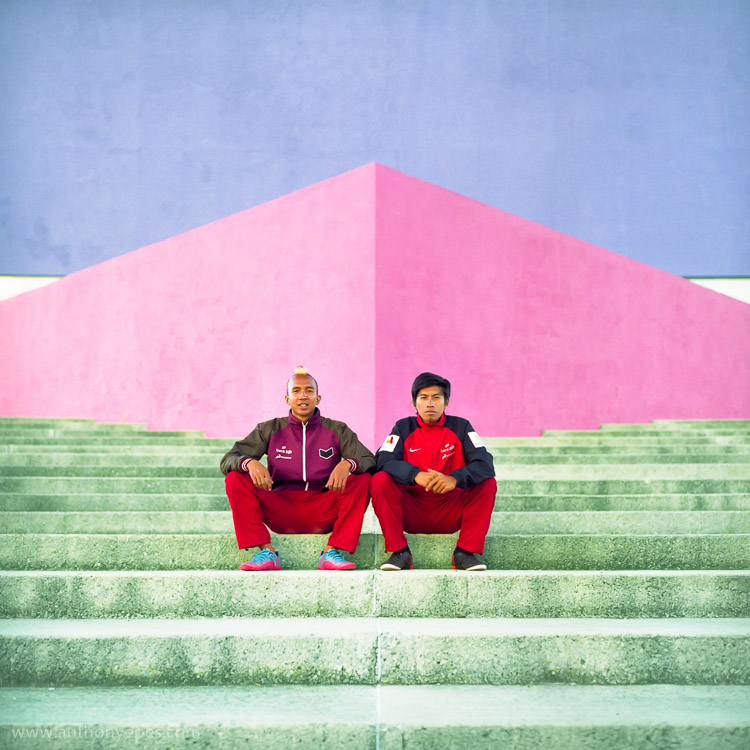
    I am a particular fan of very simple compositions when photographing people and I often use plain and colourful backgrounds. In the photo below, again there are three strong elements: bright pastel colours, the two guys and the strong lines.
    EPESTENIDEASDPS 06

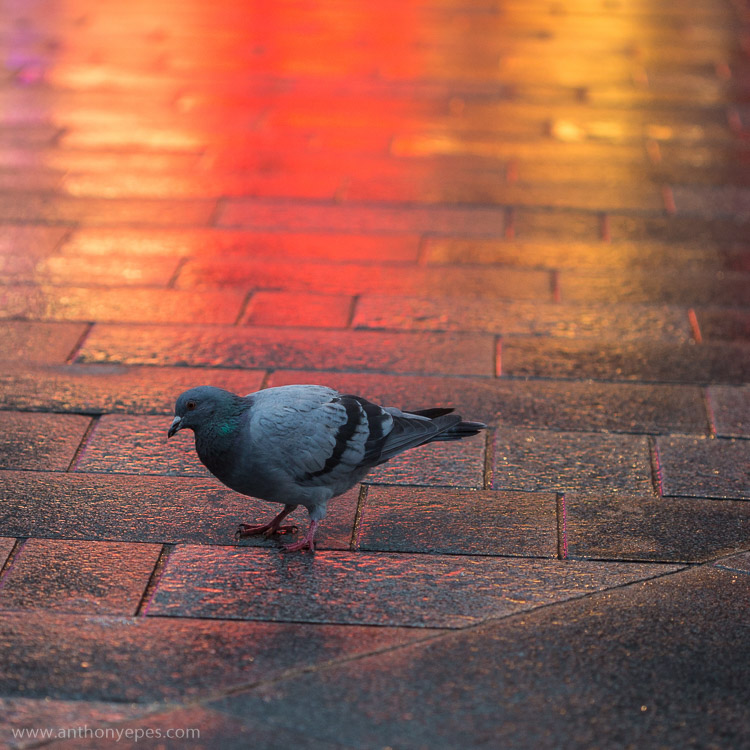
    It also works when photographing pigeons! Another photo with three elements: the grey, slightly dishevelled pigeon, the wash of colour, and the texture and lines of the wet paving stones.
    EPESTENIDEASDPS 07

    3. Move your feet

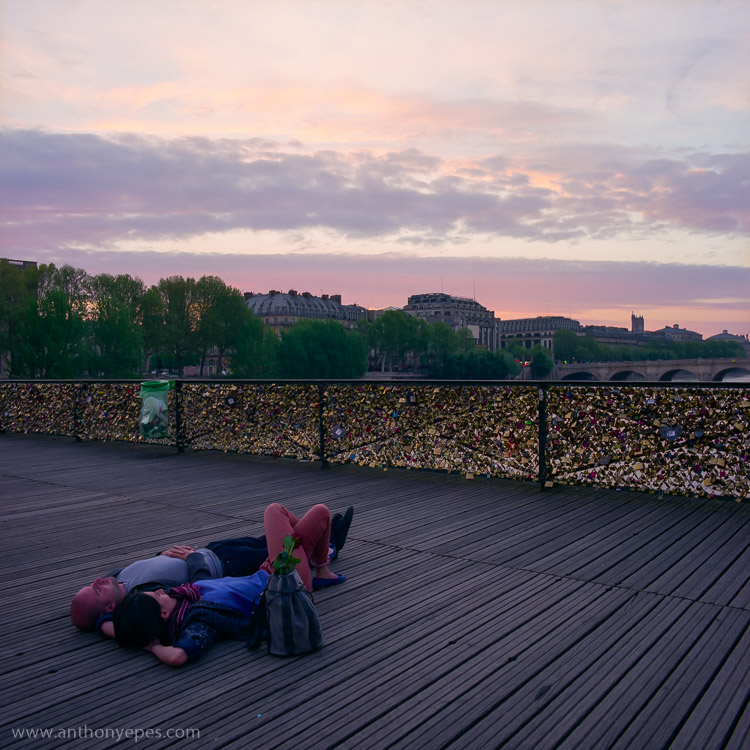
    When you are looking at a professional photographer’s work, one thing that they do more than an amateur photographer is move. You may have a killer shot laid out before you, but you still have to find the killer angle that will make the shot really special. Every shot has a perfect angle, and it’s your job to find it. If you are shooting a subject you love and then look at your images and are disappointed with what you find, I guarantee it’s because you haven’t found the perfect angle.

    Get up on that roof, lie on the floor, move your feet around until what you see in frame is the best possible angle, the best possible position you can manoeuvre yourself into. Get dirty if you have to. This requires patience (and good knees), and patience is one thing I think most amateur photographers need to develop more of.
    EPESTENIDEASDPS 08

    There is one particular culprit in our kit that discourages us to move, and makes many of us lazy – a zoom lens. This should NEVER be a replacement for moving around a scene and finding the best angle. Do not fall into the trap that just because you have the subject in frame you can just zoom in to get it. Compose your best possible shot in frame, zooming in only if it’s totally the right thing to do , and not as a default option for moving. My best advice for zooming is pick a focal length, then move your feet and find the angle you need.

    4. Get closer

    Robert Capa said – “If your pictures aren’t good enough, you are not close enough.”

    This concept reminds me of when I once read about a famous chef, who believes that the difference between home cooks and professionals is that home cooks are afraid of heat, and don’t turn their gas hobs up high enough. It’s the same with photography – obviously!

    EPESTENIDEASDPS 09

    If you feel yourself not wanting to get closer, then this is definitely an idea you should explore. You will almost be able to notice in your images that barrier of fear you set up of getting closer because there will be a distance to your subject. Push through that fear, and your images will benefit from more intimate images. The iconic travel photographer Steve McCurry always photographs subjects within a few feet of himself. For him that is the distance that feels most intimate. That is his style.

    Take a deep breathe, hold your fear in check, and just get closer. Investigate as though nothing is holding you back.

    5. Build your photo

    When I am out wandering around looking for things to shoot, I am looking for elements that I can combine. Often it starts with one thing; it could be anything – an odd looking person, a beautiful shaft of light, a piece of amazing graffiti on a pockmarked concrete wall. If one thing strikes me, I start to look around to find something else to build on that first element to make it more interesting.
    EPESTENIDEASDPS 10

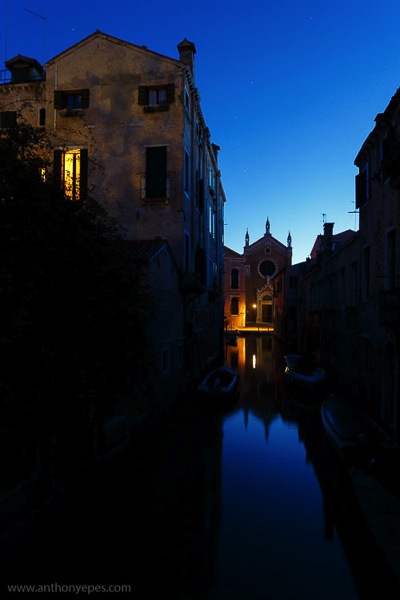
    In this photo above I think you’ll agree that if you took away the light in the window you’d have a perfectly lovely shot. But that light is what makes it work. It’s that additional element, creating another layer of depth, and providing an echo almost of the church light of the same colour. I passed this spot on many mornings and often took this particular shot, but one morning the window light was on and it changed it from a beautiful scene into a great image.

    6. Look behind you

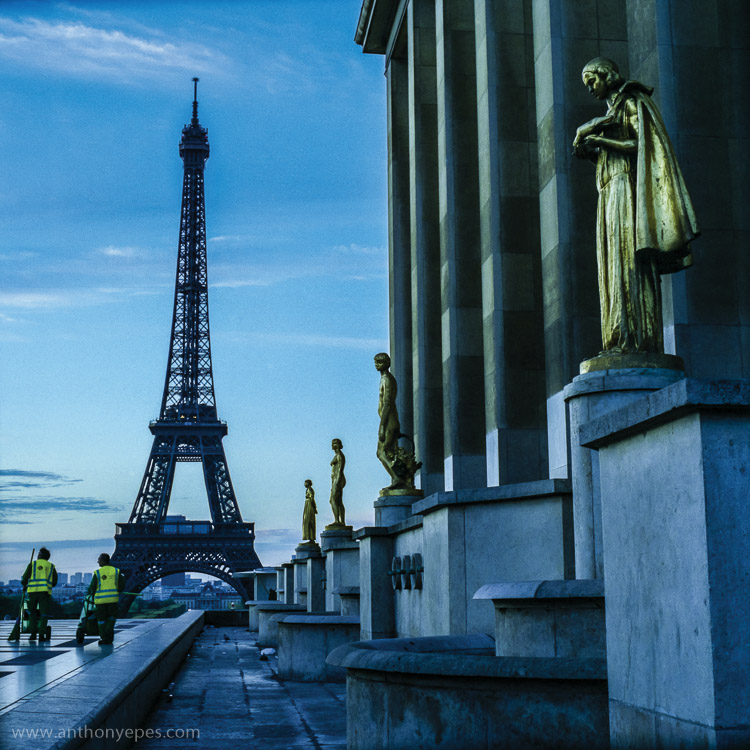
    I shoot in places where I often find myself surrounded by other photographers – the Eiffel Tower at Dawn, sunset on Westminster Bridge – and it continuously stuns me that almost every (or even every) photographer will be pointing the same way and shooting the same thing. Now of course a purple pink sunset over the Houses of Parliament is gorgeous – but that light will also be doing incredible things to everything around you. So, while everyone is going nuts at the obvious, do something different – turn around, walk down that alley way, do what everyone else is not doing.

    When I was in Paris I was intimidated about shooting the city. It’s the most visited city on earth (hence the most photographed). It is a small city and much of what’s amazing to photograph has been shot to death. I wanted to shoot the Eiffel Tower differently. Here is one shot I liked. You’ve got opulent gold, beautiful dawn sky, the iconic Eiffel Tower – all pretty so far – but then you have this injection of something that most photographers would have avoided – the cleaners.

    Have the patience to explore other angles.
    EPESTENIDEASDPS 11

    The streets cleaners are a vivid contrast against the opulent gold, and while I kept the iconic Eiffel Tower in the shot, it’s really only as a background. Paris is obsessed with tidying itself, so this is also a nice little comment on the city.

    7. Simplify your kit (and get really familiar with it)

    I think most people generally have too much kit. If you have a lot and you don’t use it daily or even weekly, you’re not going to have that intimate knowledge of how it responds to situations and subjects. Try reducing to just one lens for a while and really get to know it.

    When you have a lens that you know exactly what it will do in every situation, you’ll be able to execute even more interesting compositions, as you aren’t leaving things to chance. Chance is something that professional photographers will go out of their way to avoid.

    8. Find beauty in the mundane

    It’s easy to get a spectacular shot when you have a spectacular subject. But to make simple, boring, or mundane things look interesting – now that’s a challenge! But it’s a challenge I invite you to take up, because it’s an amazing way to train your eye to reveal the beauty of any subject.

    This for me is a good example. There are three things that are interesting in this photo (can you guess?) You have the bold colours, and then a little bit of light falling on the wall to create a contrast, and the lines. Now if light was falling on the whole wall, or if there was no light at all, the photo would be totally boring. But can you see how just three simple elements working together can make a photo?

    EPESTENIDEASDPS 12

    And as I am obsessed with colour and light, I admire this shot.

    EPESTENIDEASDPS 13

    It’s part of a longer story I am working on in Istanbul at dawn, but to me it shows that there is no subject that isn’t worthy of attention from your camera.

    9. Pre-visualize

    I love my digital camera, but I also still use film, and now that I’m mainly digital I appreciate the discipline and grounding I received from training in film. I use these skills to help me now.

    One super important skill that will really help your compositions is pre-visualizing. It’s a skill you had to have when you shot film, because otherwise you were just shooting randomly.

    Pre-visualizing is, “the ability to anticipate a finished image before making the exposure” (Ansel Adams said that, not me). What I love about this, is that it’s about creating space between seeing a shot, and taking it. It’s about being prepared, thinking through what you want to capture, looking at all of the elements of light, positioning, etc., and then picturing in your mind what the final image will look like. For example, imagine your final output was a print. Imagine the print in your hands. What would it look like? If you can see it clearly then your are pre-visualizing. If not, then keep working at it until you see the image in your head. When you have a solid picture in mind, take the shot.
    EPESTENIDEASDPS 14

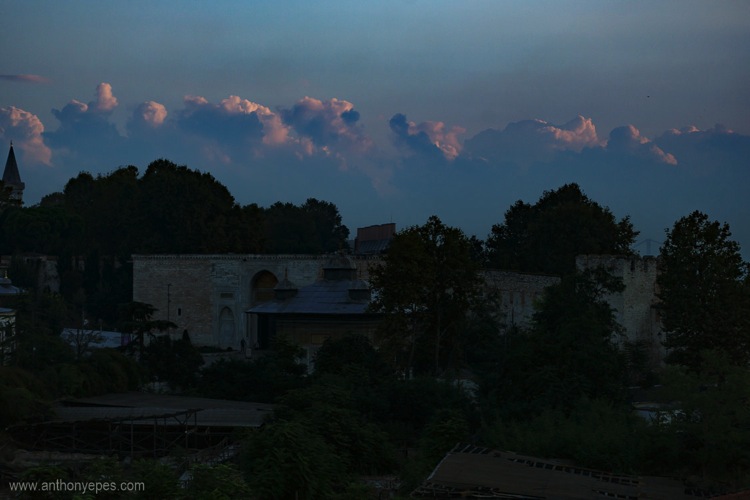
    You can also use pre-visualization when you think about timing. A lot of landscape photography is really about waiting around for the perfect moment, that great light. Here is one situation (above) where I knew the scene had potential, but was pretty flat, and if nothing else happened it wouldn’t be interesting. So, I waited for the sun to rise just that little bit more and ping, the clouds were filled with pink light giving the photo more depth.

    10. Look for patterns
    EPESTENIDEASDPS 15

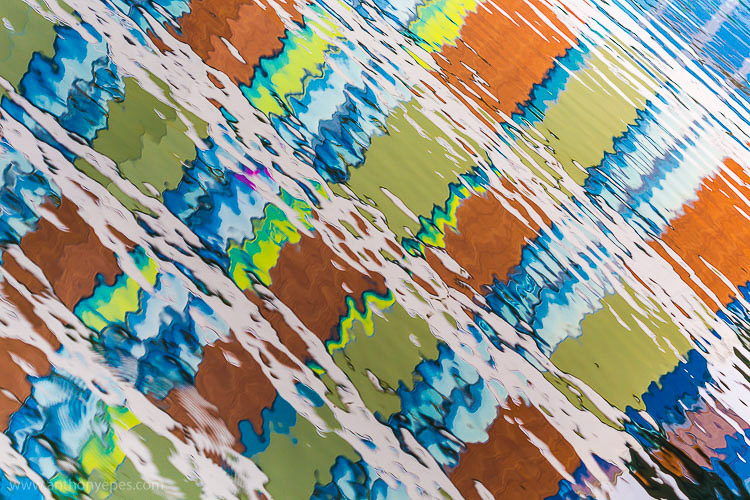
    Patterns come in many forms, and are extremely pleasing to the eye. A pattern is anything that is repetitive, that turns your subject from its innate quality, into something more abstract. So people will look and respond more to the pattern and shape that it makes, and less to the subject itself.

    “Whatever emotional response a single design element arouses is multiplied when it is repeated in a pattern.” – Bryan Peterson

    Patterns are particularly effective when you fill the frame with your subject, and totally cut off the rest of it. These are particularly interesting to look at.
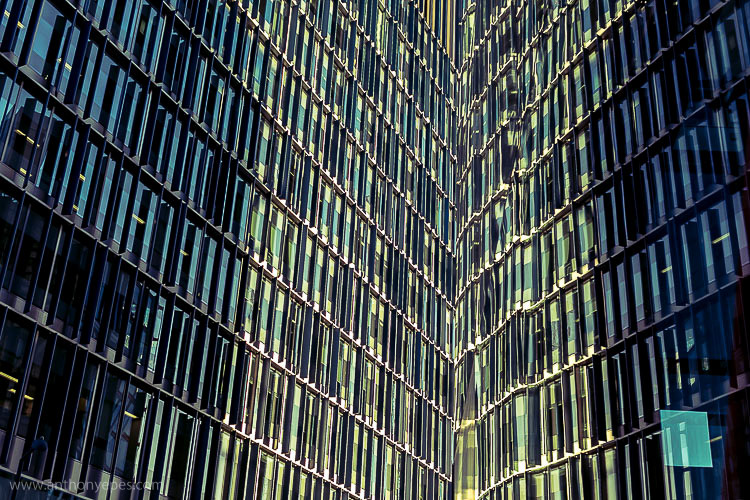
    EPESTENIDEASDPS 16

    Another way to create patterns is reflections. I love playing with reflections. Anywhere you have a bit of water, even just rain on the street, or shiny surfaces, you have the ability to play with reflections.
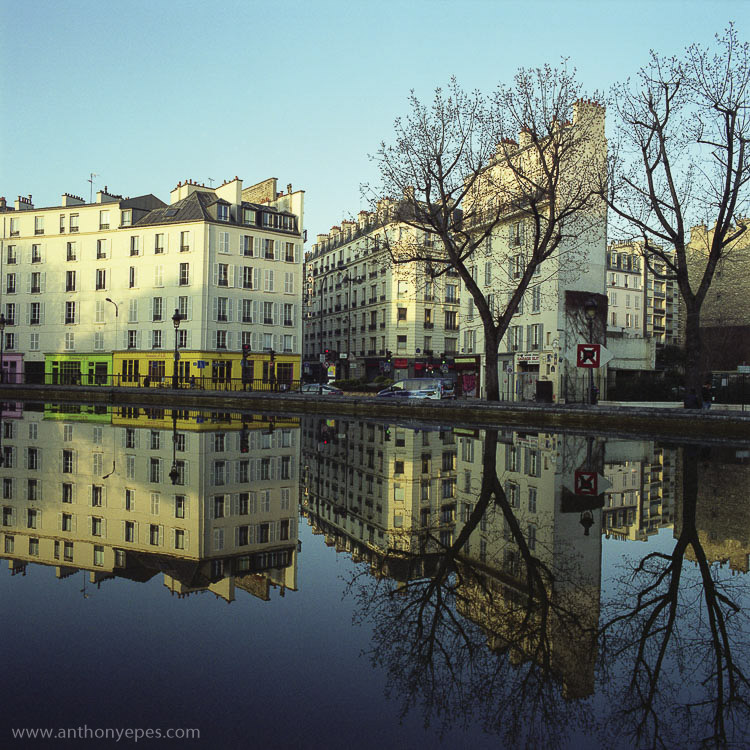
    EPESTENIDEASDPS 17

    Once you start looking out for patterns you’ll start seeing them everywhere.

    Time to practice

    I’d love to know what you think of these ideas, and if you put any into practice. Which compositional techniques do you use to enhance your photos?

    googletag.cmd.push(function() {
    tablet_slots.push( googletag.defineSlot( “/1005424/_dPSv4_tab-all-article-bottom_(300×250)”, [300, 250], “pb-ad-78623” ).addService( googletag.pubads() ) ); } );

    googletag.cmd.push(function() {
    mobile_slots.push( googletag.defineSlot( “/1005424/_dPSv4_mob-all-article-bottom_(300×250)”, [300, 250], “pb-ad-78158” ).addService( googletag.pubads() ) ); } );

    The post 10 Ideas to Instantly Improve Your Photography Composition by Anthony Epes appeared first on Digital Photography School.


    Digital Photography School
  • 6 Tips for How to be a Culturally Sensitive Travel Photographer

    There is a little wanderlust in all of us. Everyone, at some point in their lives, wants to travel the world and experience all its beauty for themselves. Travel opens the mind to many different possibilities, and makes us more tolerant and conscious as humans. What might be simple, normal, and mundane to some, might be unique, challenging and exciting to another. In the words of Gustave Flaubert, “Travel makes one modest. You see what a tiny space you occupy in the world.”

    Memorable Jaunts Ethical Travel Photography Article for Digital Photography School-5

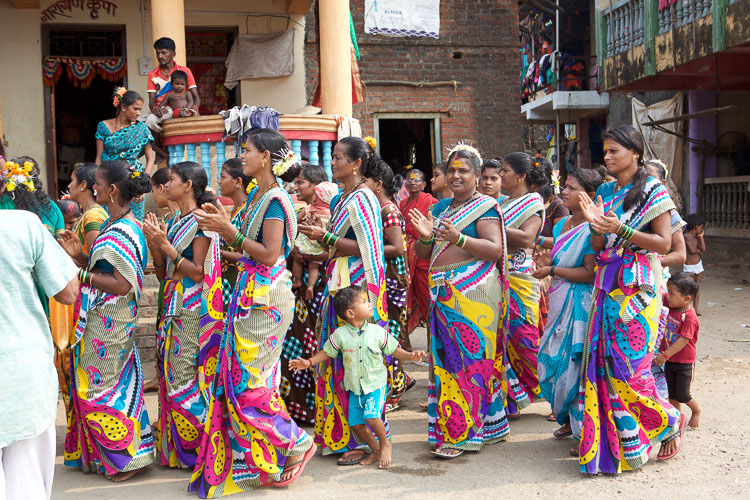
    On a particular assignment in Chennai, India last year, the whole community came out to see what I was doing and soon I found 20+ willing subjects to photograph!

    As photographers, travel and photography are very much intwined. Photography is a way to capture and communicate the sense of place and people. Our images help immortalize our experiences in travel. This is particularly important when we travel to places outside of our cultural comfort zones. Every moment and every experience is new, and the need to document and preserve them sometimes takes over simple basic common sense. I admit that there have been times when all I’ve done is experienced a place or an event through the back of my viewfinder. My camera has been strapped to my person like my life depended on it, and I have always come back feeling less than happy. The fact that I missed all the little nuances outside the line of vision of my viewfinder, weighs quite heavily on my mind.

    Even beyond the obvious need to really experience a place, is the question on when is it okay to take photos of people and places, especially when traveling to other countries? Many times there are major cultural, social and economic differences between the photographer and the subject being photographed. Perhaps the best way to answer that question is that responsible photography is very much like responsible travel. Armed with a thorough knowledge of the place, an interest in cultural enrichment, an open mind, a pleasant attitude, some common sense and a smile, photography abroad—just like travel itself—can be a very fulfilling experience.

    Here are some basic guidelines on how to be a culturally sensitive photographer when traveling

    1) Knowledge is key

    Invest time before traveling to research the customs, and photography norms of the place you will visit. Customs vary not only by country, but by region and religion as well. Understand and appreciate the diverse cultural context, and be respectful of these differences. A little research prior to your journey, goes a long way in avoiding disappointment and despair when you find out that certain photography restrictions exist in the places where you are traveling.

    Memorable Jaunts Ethical Travel Photography Article for Digital Photography School-10

    I stumbled upon a religious ceremony on a recent trip and soon found myself to be the official photographer of the ceremony – the cultural enrichment was unlike anything found in any guidebook!

    2) Be personable and communicate your needs

    Self confidence, an open attitude, and a genuine smile, are important wherever you travel. People will generally respond to you with the same attitude that you show them. Be open and honest about your need to photograph something or someone, and more often than not, people will respond positively to you. I have found that most people love to have their picture taken. If you are uncomfortable or nervous about something or someone, it’s best to just leave the camera in your bag.

    Memorable Jaunts Ethical Travel Photography Article for Digital Photography School-9

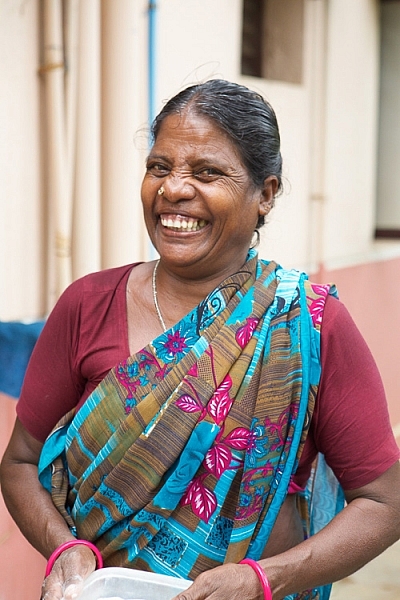
    I let my camera do the talking and was rewarded with one of the most genuine portraits I have ever taken.

    Memorable Jaunts Ethical Travel Photography Article for Digital Photography School-14

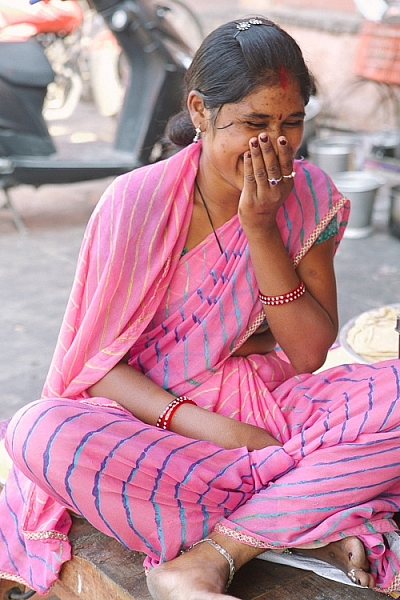
    I was grabbing a quick meal before going to the airport in Jaipur, India and this lady was very curious about me and my gear. I promised her a photograph in exchange for a smile and I absolutely adore this image!

    3) Get permission

    Almost everyone around the world knows what a camera is, and what it can do. Even if you don’t know the language, simple hand gestures and pointing to the camera, can take you far in terms of communicating what is it that you are seeking.

    Not understanding the language should never be an excuse to photograph an unwilling person. As a photographer, the responsibility of asking for permission before you click the shutter rests solely on you. If you have time, learn some simple phrases, related to photography, in the language of the country in which you are traveling. This will not only allow you to communicate more directly with your subject, explaining why you want to take a photograph, it shows your interest in learning at least some of the local language.

    Sometimes use your camera as an ice-breaker. Take a picture and show people the photos you’ve taken of them, and you will find that photography instantly becomes more fun and less intimidating. More than anything, respect the fact that “No” really does mean NO. Yes, I understand that there is another school of thought of whether asking for permission will ruin the composition of an image. And while a lot of photographers will argue one way or the other, I am of the opinion that if you are taking a picture of a person, you should make every effort to ask permission – either before or after.

    Memorable Jaunts Ethical Travel Photography Article for Digital Photography School-13

    I made the mistake of not asking this lady before photographing her and as she walked by me, she yelled at me for being rude and taking her picture – lesson learnt!

    4) Travel without taking pictures

    Take the time to really travel without obsessing over capturing every minute of every day with your camera. Spend time exploring your surroundings, and your body and mind will thank you for it. Even if you are on assignment, build in some down time to your schedule. Not only does it help you relax, but also recharges those creative juices so you are more productive when you do get back to work!

    5) Know your gear

    This one is one of the basics of photography, no matter what your genre. You should know the workings of your camera inside and out. When you are traveling and have strangers pose for you, that is not the time to start trying out different settings and fidgeting with your gear. People begin to loose patience and often get leery of you and your abilities. They are more likely to simply walk away, rather than waste their time with a stranger who does not know how to operate his/her camera.

    Memorable Jaunts Ethical Travel Photography Article for Digital Photography School-8

    These men were intently discussing the price of wholesale fruits and vegetables at the Chennai Flower market and I had exactly two seconds to take this image – this image is literally SOOC (Straight out of the camera).

    6) To pay or not to pay

    Perhaps, one of the most controversial situations while traveling abroad, is the question of giving money to people you photograph. There is always that one uneducated, desperate tourist who gives money to get what they think is an award-winning prized photograph, and soon it becomes a lucrative business in the local community. This can get quite uncomfortable and unsafe for other photographers traveling through the same places.

    I prefer engaging people openly, and sharing my story and my need for a picture. I find that in most cases people are more than happy to share their story, and to be heard. I too, walk away more culturally and emotionally enriched with the experience. However, if someone expects money for a photograph, then the decision becomes less of whether to pay and more of whether to take the photo. That is a judgement call that each of us needs to make on a case-by-case basis, while being mindful of the example we are setting for future travellers and photographers.

    Memorable Jaunts Ethical Travel Photography Article for Digital Photography School-4 Memorable Jaunts Ethical Travel Photography Article for Digital Photography School-12

    I remember one instance last year when I was traveling in India with my kids. We were visiting a temple in Southern India, and for some reason a lot of teenagers starting taking pictures of my five year old son. They would come and ask me if they could take a selfie with my son. Initially it seemed innocent enough, and my son posed with them. Soon it was getting to the point of being creepy, and I had to refuse. As a parent, I was extremely uncomfortable with having strangers take pictures of my kids. This experience taught me a very valuable lesson – value and respect people’s personal space and personal preferences.

    What are your thoughts on this topic? Do you ask for permission before taking photographs of strangers when you travel? Or do you just take the picture and move on? What other things to you take into consideration to be a culturally sensitive travel photographer?

    googletag.cmd.push(function() {
    tablet_slots.push( googletag.defineSlot( “/1005424/_dPSv4_tab-all-article-bottom_(300×250)”, [300, 250], “pb-ad-78623” ).addService( googletag.pubads() ) ); } );

    googletag.cmd.push(function() {
    mobile_slots.push( googletag.defineSlot( “/1005424/_dPSv4_mob-all-article-bottom_(300×250)”, [300, 250], “pb-ad-78158” ).addService( googletag.pubads() ) ); } );

    The post 6 Tips for How to be a Culturally Sensitive Travel Photographer by Karthika Gupta appeared first on Digital Photography School.


    Digital Photography School
  • 7 Ways Custom Photo Backdrops Can Promote Your Business

    How could you photograph a love story in Paris having less than $ 50 at your disposal? Or make local moms stand in line at your photo studio without running an expensive marketing campaign? That’s totally possible if you pay attention to one single element of your studio setup – background. Read on to find out how other photographers are successfully Continue Reading
    The post 7 Ways Custom Photo Backdrops Can Promote Your Business appeared first on Photodoto.


    Photodoto

  • Step by Step How to Use HDR Merge in Lightroom

    HDR merge in Lightroom
    There are lots of plug-ins that you can use with Lightroom to create High Dynamic Range (HDR) images. Photomatix and HDR Efex Pro are two of the best known, and MacPhun’s Aurora HDR (Mac only) is a new application that has received good reviews.

    But, if you have Lightroom 6 or CC, you can create HDR images right within Lightroom itself, without having to buy a plug-in. There are several advantages to using Lightroom for your HDR conversions:

    1. You save money. Most HDR plug-ins are not free, and are an additional cost for you.
    2. Lightroom’s HDR merge creates natural looking HDR images. Not everybody will see this as an advantage – but if you want to create garish, over-saturated images the aforementioned plug-ins will help.
    3. You don’t need a lot of bracketed images. Two seem to be enough (you can use more if you want, or if you have a really contrasty scene), one exposed at -2 stops, the other at +2 stops.
    4. The final HDR image is saved as a DNG file. Not only is this smaller than a TIFF file, but you can process it in Lightroom the same as you do with any other DNG or Raw file. The main difference is that the Exposure slider runs from -10 to + 10 stops, rather than the normal -4 to +4. There is also much more information in the file for Lightroom to work with, when you make adjustments with the Shadows and Highlights sliders (and local adjustment tools like the Graduated and Radial filters).
    5. You can take bracketed sequences hand-held, and Lightroom will align them automatically. Having said that, I’ve found the best results come from bracketed photos taken with a tripod mounted camera.
    6. There is less noise in shadow areas than you would expect from a regular, single photo.

    Lightroom HDR merge in action

    Let’s look at a couple of practical examples to see how it performs.

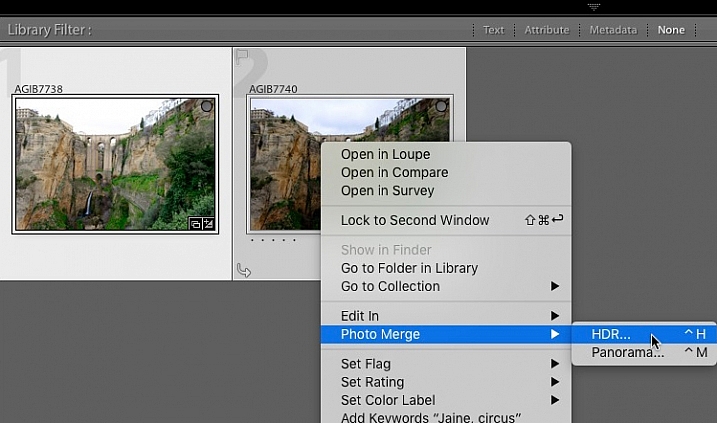
    Start in Grid View in the Library module, and select the images you want to merge. Alternatively, you can select the images in the Filmstrip in the Develop module. Then, go to Photo > Photo Merge > HDR. Or, right-click on one of the selected photos and select Photo Merge >HDR.

    HDR merge in Lightroom

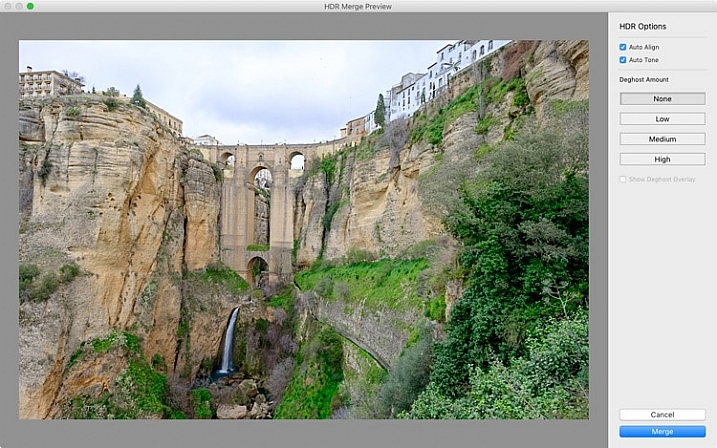
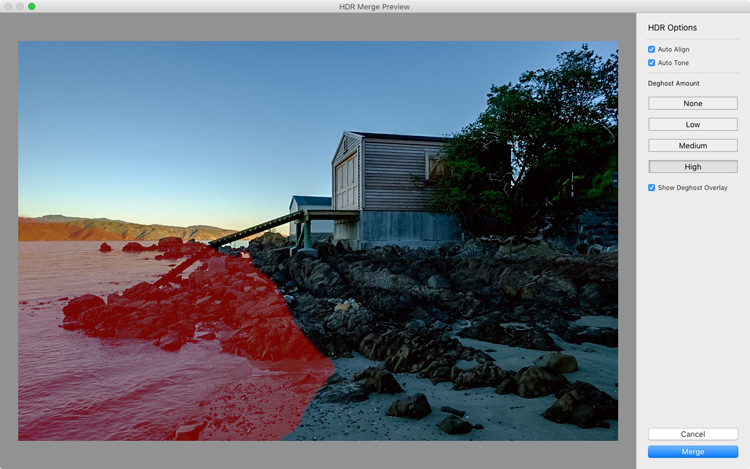
    The HDR Merge Preview window opens, and Lightroom creates a preview of the HDR image. This may take some time, especially if you have selected several images. The Auto Align and Auto Tone boxes are ticked, and the Deghost Amount is set to None, by default. Lightroom remembers the last settings used, if you have changed them.

    Auto Align is useful if the camera moved between exposures (for example if you hand-held the camera) and Auto Tone performs a similar function to the Auto Tone settings in the Basic Panel of the Develop module.

    I find HDR merge works best with the Auto Align and Auto Tone boxes ticked (see below). If there is subject movement between frames you can set Deghost Amount to Low, Medium, or High (trial and error is the only way to see what works best, and is different for each set of images).

    HDR merge in Lightroom

    You may be surprised to learn that there are not many settings to adjust. This is deliberate, as the aim is to let Lightroom produce a natural looking HDR image, which you can then process in the Develop module to achieve the desired look.

    You can set Deghost Amount to Low, Medium, or High if you see any ghosting (double images) in the image. Ghosting takes the form of lines, white patches, or other artefacts caused by subject movement taking place between frames (such as trees blowing in the wind, clouds moving across the sky, or people walking through the scene).

    You can’t zoom in to a 100% in the preview mode, so you may only become aware of ghosting once you move on to the Develop module and zoom in to 1:1 magnification. You can simply go back and reprocess the images if you notice ghosting at that stage. Tick the Show Deghost Overlay box, to reveal the areas in which Lightroom has detected and attempted to clean up ghosting (it is shown in red).

    Click the Merge button when you’re done. Lightroom saves the merged image as a 32-bit DNG file, with the suffix -HDR appended to the file name, and takes you back to the module where you started. From there you can edit the image as normal in the Develop module.

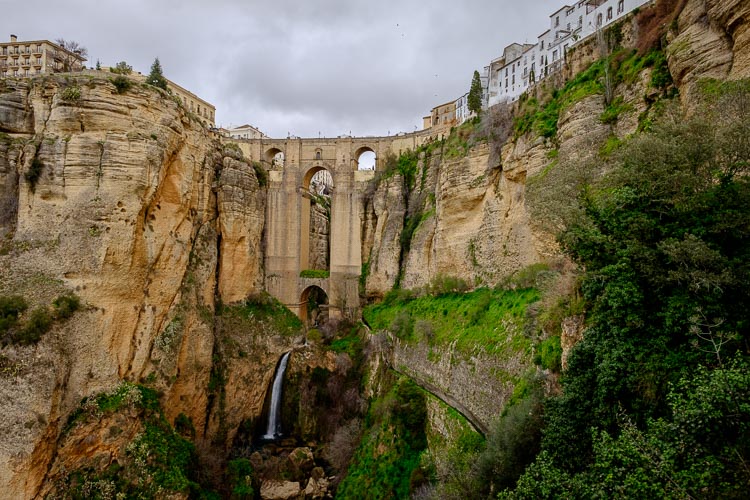
    This is the result from my HDR merge. I used two photos, bracketed one stop apart. That’s not a lot, but it was a cloudy day and what I wanted was a photo that captured detail in both the landscape and the sky. On a sunny day you would use images that were bracketed further apart.

    HDR merge in Lightroom

    The result should be treated as a starting point in your processing – a new Raw file that you can edit in the Develop module to achieve the desired effect. In this case photo was too light, so I darkened it, made some tonal adjustments, and increased clarity. This is the result.

    HDR merge in Lightroom

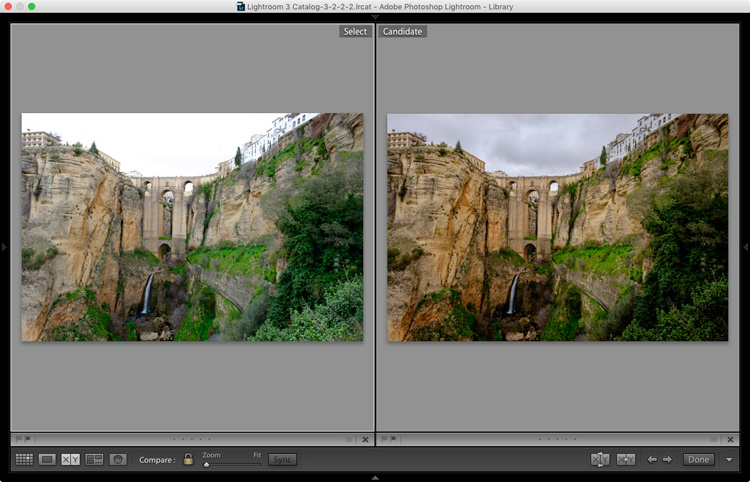
    The screenshot below shows a comparison between the HDR image (right) and the same photo taken without any exposure compensation (left). As you can see, merging two exposures has allowed me to capture the details in the grey clouds. If, at this stage, you think the image has too much of an HDR feel, you can use the Basic Panel sliders, or local adjustments, to alter the tonal values. For example, you can increase Shadows or the Blacks setting to add contrast, so you don’t have the unnatural detail in every shadow effect that typifies overdone HDR.

    HDR merge in Lightroom

    Here’s another example, this time with photos taken in the sun, and a much greater brightness range. These two photos were taken at +1 and -1 stops respectively.

    HDR merge in Lightroom

    This is the result that Lightroom gave after the HDR merge process.

    HDR merge in Lightroom

    Below is how it looks after editing in the Develop module. The differences are subtle, I just made the image a little darker, and moved the Highlights slider to zero, to bring out as much detail in the clouds as possible.

    HDR merge in Lightroom

    High contrast example

    Here’s another example, this time taken with three photos with a total of seven stops difference in exposure. You probably don’t need to make the exposure differences that drastic, but it’s always interesting to try.

    HDR merge in Lightroom

    Here’s the result.

    HDR merge in Lightroom

    The water looks different in each version of the photo so I set Deghost to High. The deghosted area (shown in red below) covers all of the water – when I compare the three original images I can see that Lightroom has used the water from the first photo in the sequence, avoiding the ghosting that would be caused by merging three photos with a different level of water in each shot.

    HDR merge in Lightroom

    Can’t find your new HDR file?

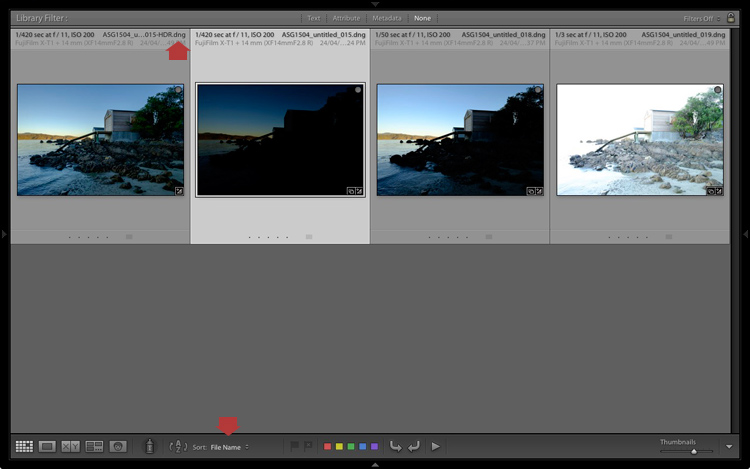
    By the way, if you’re not sure where to find the newly created HDR file, set Sort to File Name in Grid View, and it will appear next to the first image in the sequence (also make sure you are in the folder of originals, not inside a collection).

    HDR merge in Lightroom

    Here's an extreme contrast example

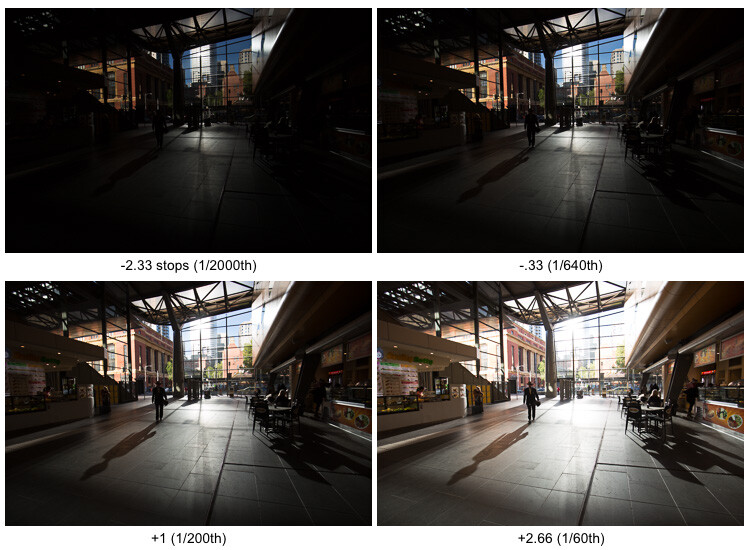
    Here’s an extreme contrast example – a tototal 5 stops bracketed to keep details in the buildings outside, and capture some inside.

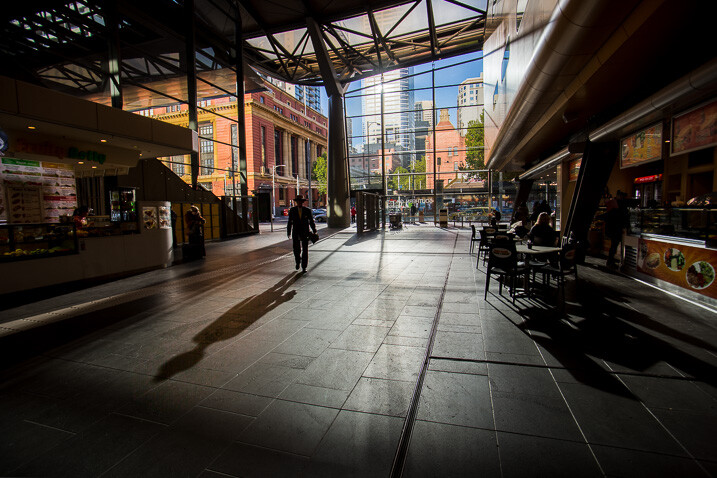
    The final HDR merged and edited version.

    The final HDR merged and edited version.

    Final notes

    You should be aware that it is best to carry out the HDR merge process with files that haven’t yet been edited in the Develop module, as Lightroom only retains some of the adjusted settings. These are taken from the most selected photo and applied to the HDR image. They are listed below (all other settings are returned to their default):

    • Presence sliders (Saturation, Vibrance and Clarity).
    • HSL / Color / B&W panel
    • Split toning panel
    • Detail panel
    • Lens Corrections (excluding Upright)

    Lightroom also requires access to the original photo files. It can’t create a HDR image from Smart Previews alone.

    Over to you

    Have you tried Lightroom’s HDR merge tool? If so, what did you think? Is it a worthwhile addition to Lightroom’s toolset or would you prefer to use a plug-in. Please let us know in the comments below.

    Mastering Lightroom

    If you’d like to learn more about Lightroom, then please check out my Mastering Lightroom series of ebooks.

    googletag.cmd.push(function() {
    tablet_slots.push( googletag.defineSlot( “/1005424/_dPSv4_tab-all-article-bottom_(300×250)”, [300, 250], “pb-ad-78623” ).addService( googletag.pubads() ) ); } );

    googletag.cmd.push(function() {
    mobile_slots.push( googletag.defineSlot( “/1005424/_dPSv4_mob-all-article-bottom_(300×250)”, [300, 250], “pb-ad-78158” ).addService( googletag.pubads() ) ); } );

    The post Step by Step How to Use HDR Merge in Lightroom by Andrew S. Gibson appeared first on Digital Photography School.


    Digital Photography School