Category: Photography

  • 10 Bitchin’ Accounts to Check Out on Ello

    Without a doubt Ello is one of my most favorite places to hang out on the interwebs these days. No site looks better for photos and in addition to a well designed web experience they also have a first rate iPhone app as well. Structured as a public benefit corporation, Ello has no advertising and they don’t target you and track your usage to sell your activity to advertisers. I hardly ever use Facebook or Instagram anymore because because the advertising just seems so overwhelming to me. I also find that I feel much more positive after spending time on Ello instead of Facebook and Instagram.

    In addition to such a clean, ad-free experience, Ello has some of the most creative photographers, curators and artists posting anywhere on the web today. It’s always such a delight to find new and interesting people to hang out with there.

    Below are 10 Bitchin’ Accounts to Check Out on Ello. If you’re not on the site yet, these might be 10 good accounts to start with. If you already are there you may already follow most of these accounts. This post could have easily been titled 100 Bitchin’ Accounts to Check Out on Ello or even 1,000 Bitchin’ Accounts to Check Out on Ello. In that sense, this list is almost a bit random, and just represents 10 accounts that came to top of mind that you might want to check out as is by no means meant to be exhaustive.

    Pro Tip: when on a page on Ello use the = key to toggle between large photos and thumbnails for any user.
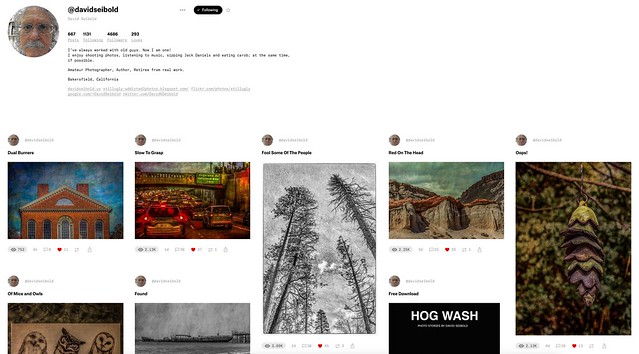
    David Seibold
    1. David Seibold. I’ve known David for a few years now. He hails from Bakersfield and is very active using various social media channels. One thing I like about David is that he interacts with others so well and really engages on the sites that he uses.
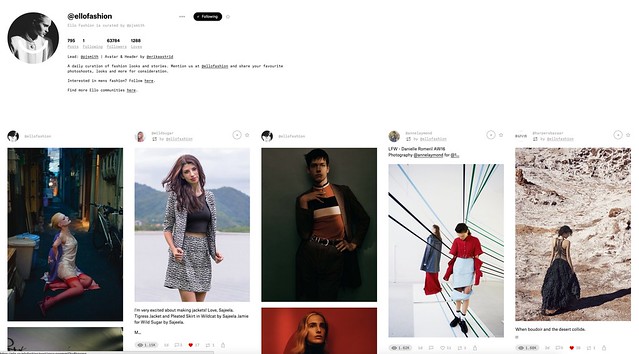

    Ello Fashion
    2. Ello Fashion. Ello Fashion is a curated page by Pj Smith. If you are interested in cutting edge new fashion beautifully photographed it’s a great page with new content daily.
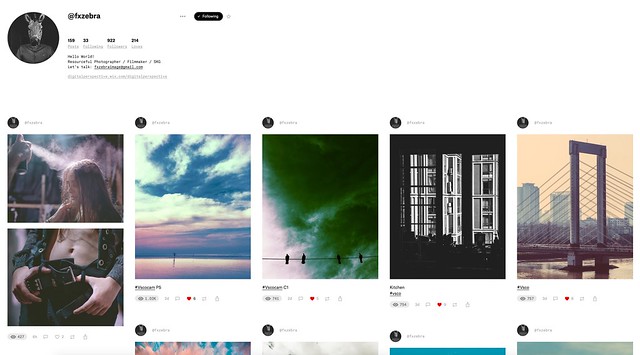

    fxzebra
    3. fxzebra. Karen Gkiounasian is a photographer and filmmaker behind the faxzebra Ello account and posts wonderfully creative works in a style of his own.
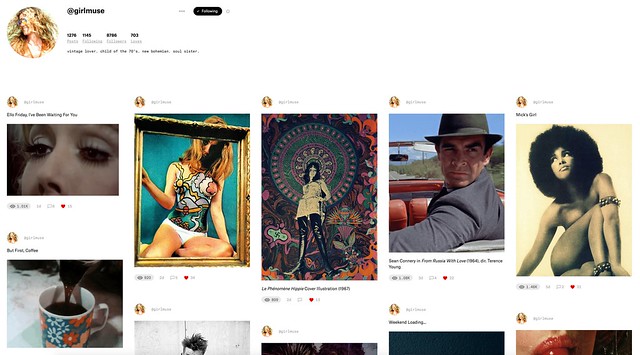

    girlmuse
    4. girlmuse. A self described vintage lover, child of the 70s, new bohemian and soul sister, girlmuse and I both grew up in the 1970s which is probably why I enjoy the nostalgia on Ello page as much as I do. A wonderful showcase of the best of vintage culture.
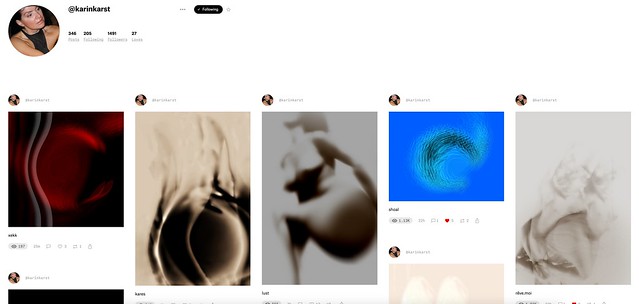

    karinkarst
    5. karinkarst. karinkarst’s account is full of wonderful digital abstraction. Combining photography with abstract processing there is a lot to love here.
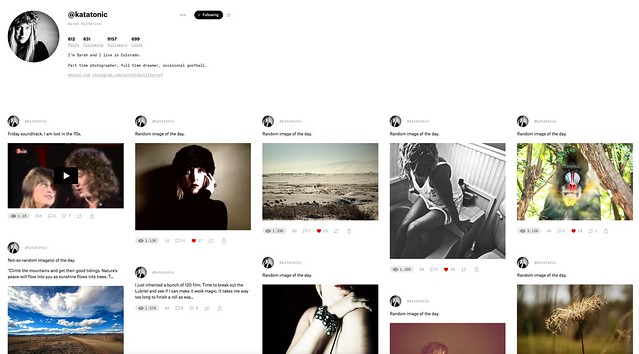

    Katatonic
    6. katatonic. katatonic is Sarah Katherine from Colorado who always seems to come up with the best random images of the day.
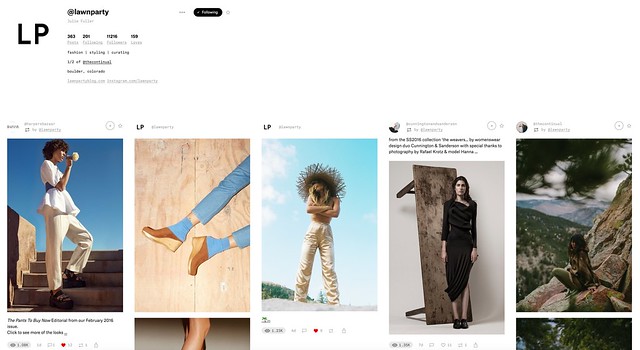

    Lawn Party
    7. lawnparty. Julie Fuller runs the LP account which focuses on fashion, styling and curating. Julie is also 1/2 of thecontinual account on Ello. It seems like so many of the great Ello accounts hail from Colorado. ?


    Matt Harvey
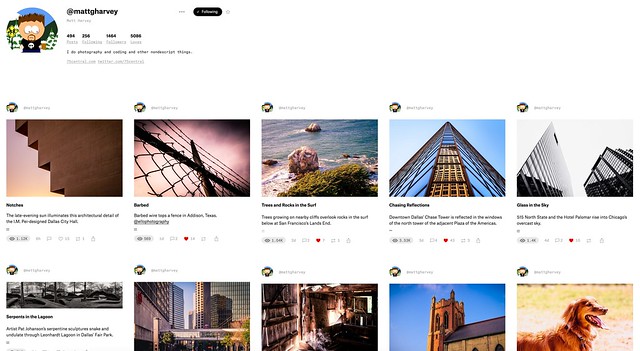
    8. Matt Harvey. I’ve enjoyed Matt’s terrific photography on Flickr where he posts as 75Central for many years now. Full sized photos on Ello though look even better than Flickr and so it’s always nice to see his work on Ello as well.
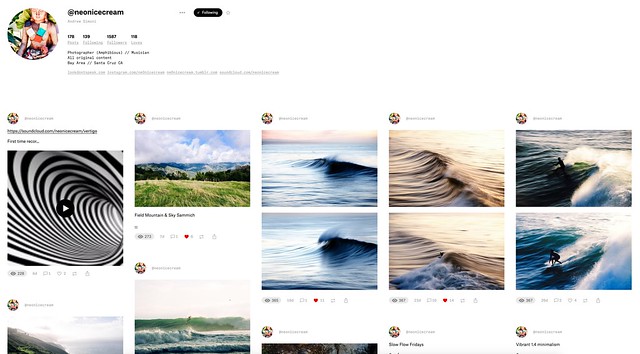

    Neon Ice Cream
    9. neonicecream. Andrew Simoni is a Santa Cruz based photographer and musician. He does wonderful work with water and wave among many, many other things.
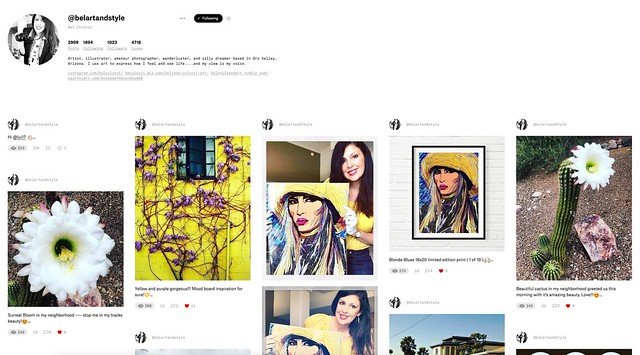

    Bel Colozzi
    10. belartandstyle. Each day I look forward to what Saatchi artist Bel Colozzi is going to come up with next. In addition to her own paintings and prints that she showcases, she does it with style and flair mixing in her photographs from her Arizona desert along with what seems like an endless need for coffee.


    As mentioned before, these 10 accounts are but a tiny sample of the amazing talent you will find on Ello. If you want to see more beautiful work by the thousands of artists posting there daily, I’d encourage you to check out my loves page on Ello where you can find so many more interesting people worth following.

    Are you on Ello yet? If not, what are you waiting for?

    I post daily on Ello myself and you can check out my work on here.

    Thomas Hawk Digital Connection

  • 30 Action Packed Panning Images

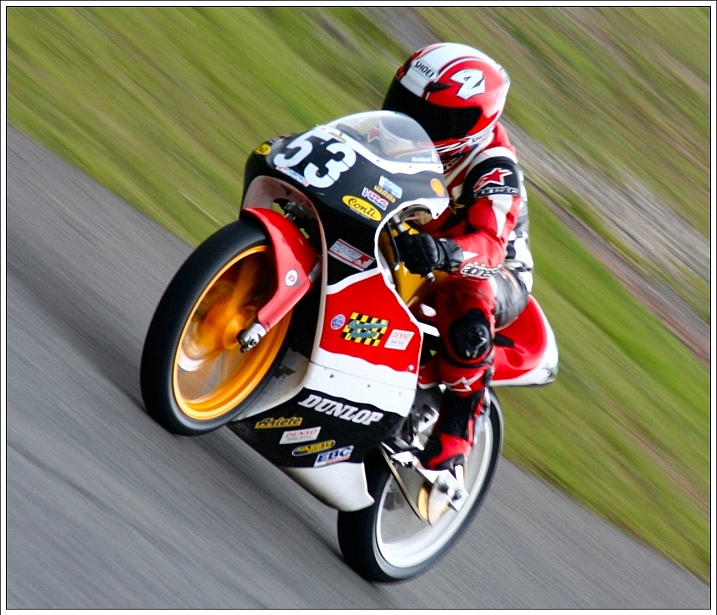
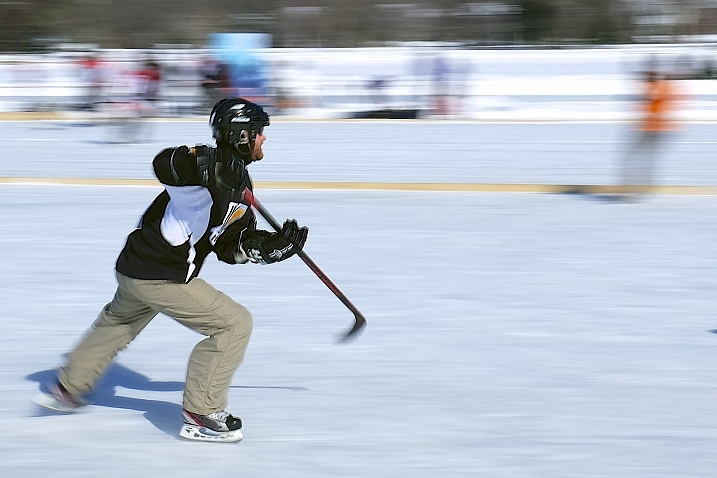
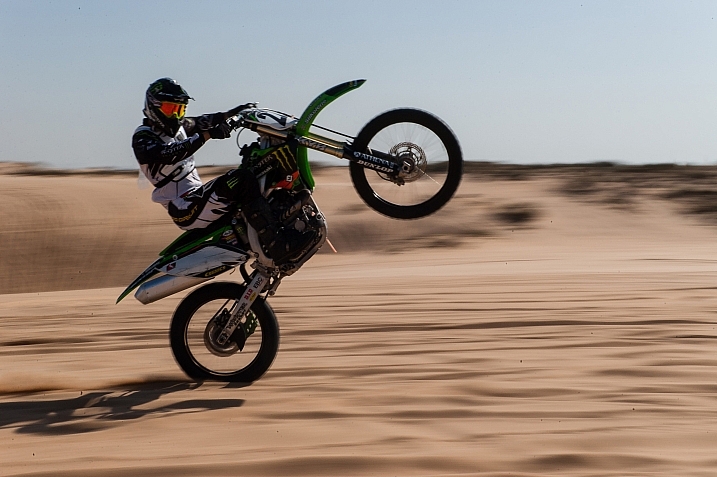
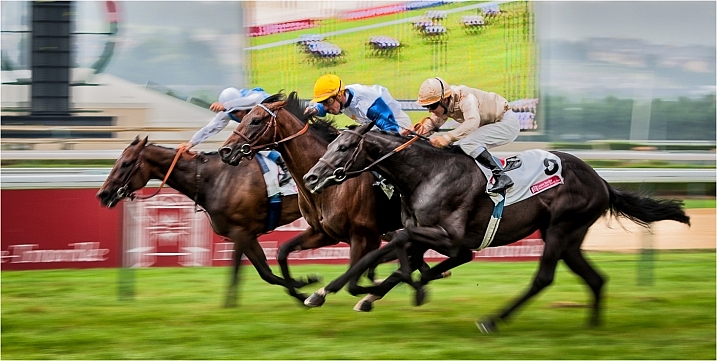
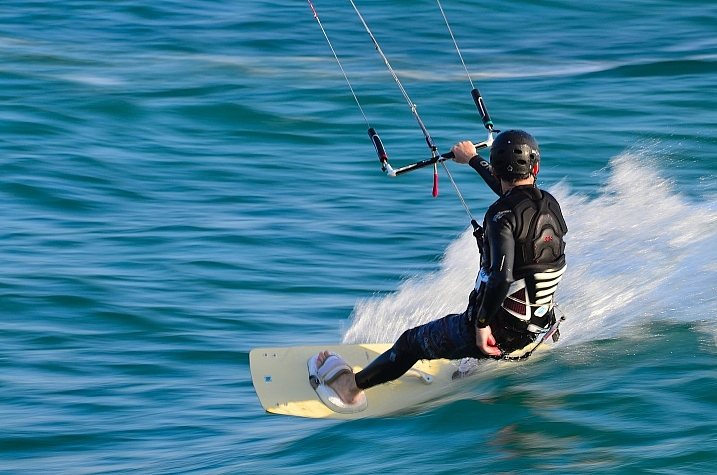
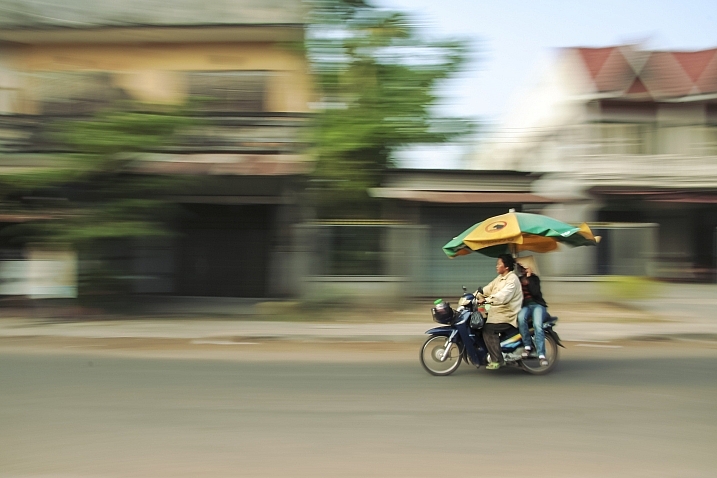
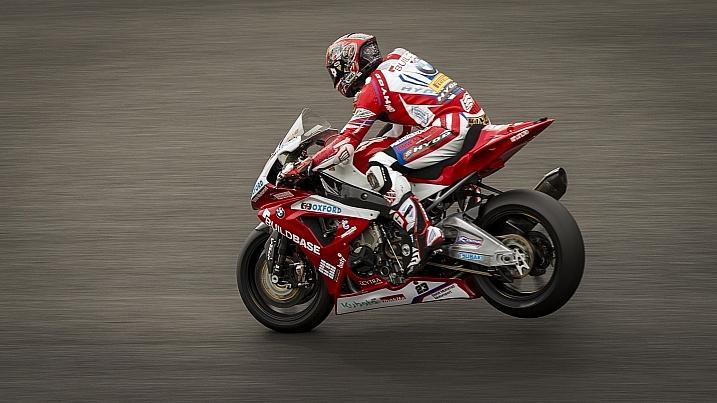
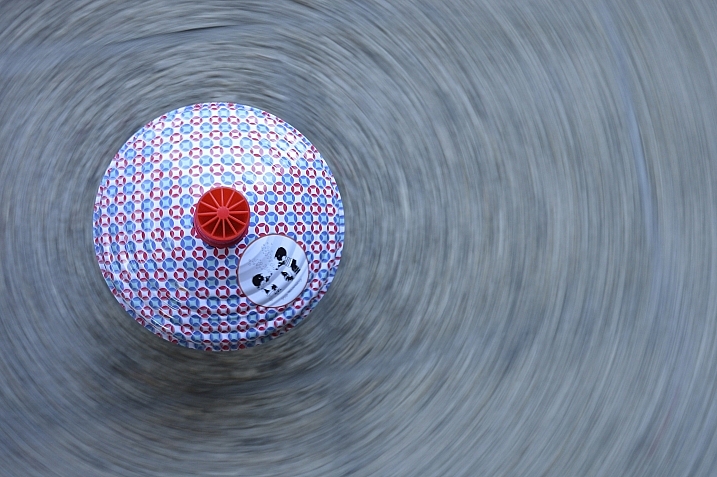
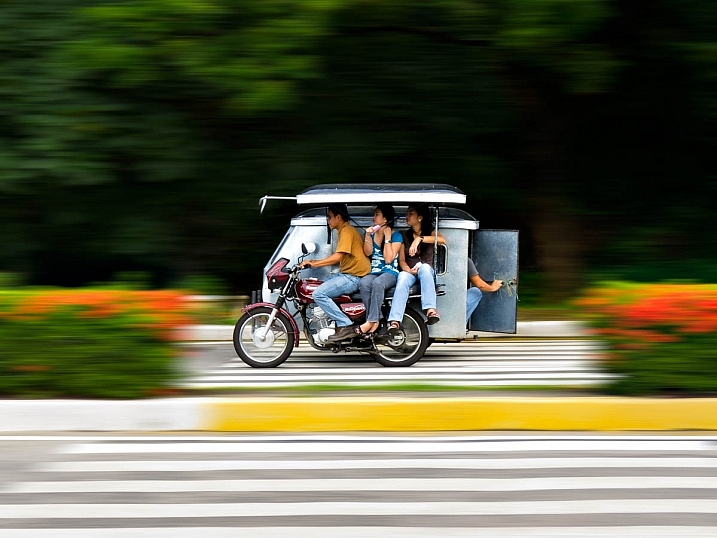
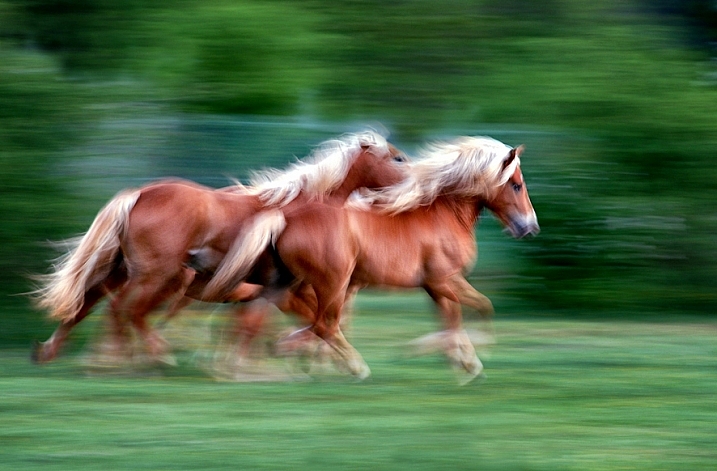
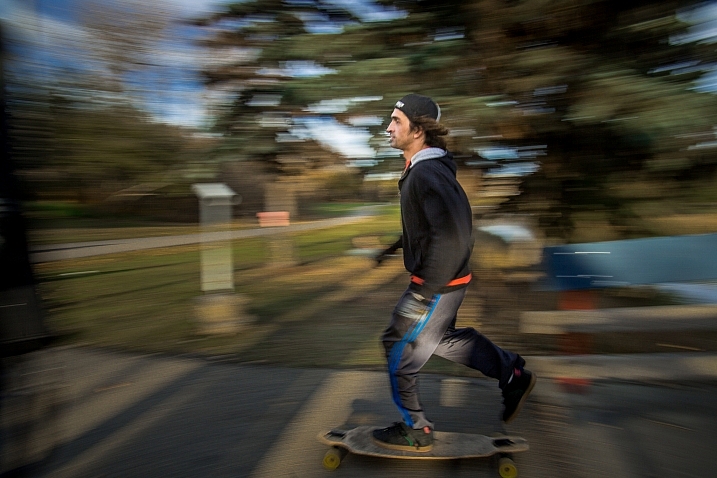
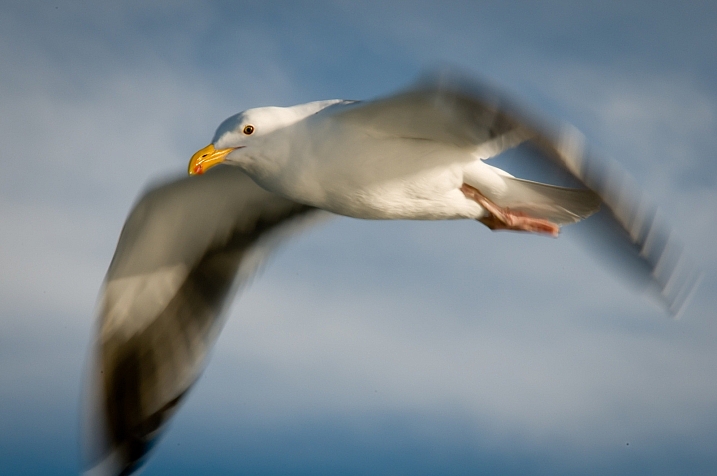
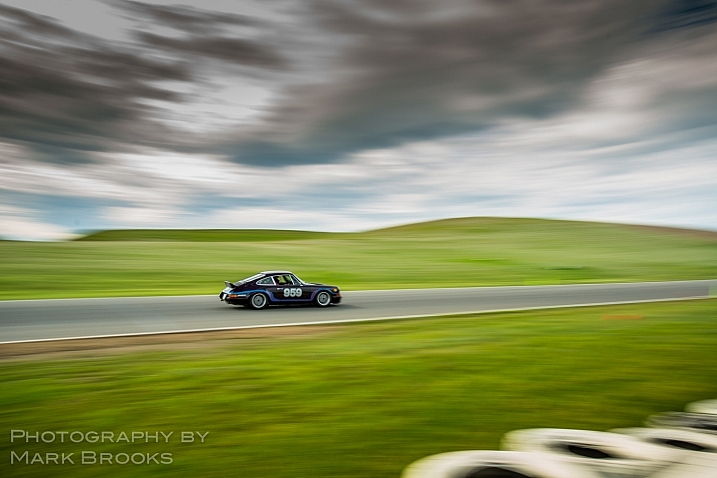
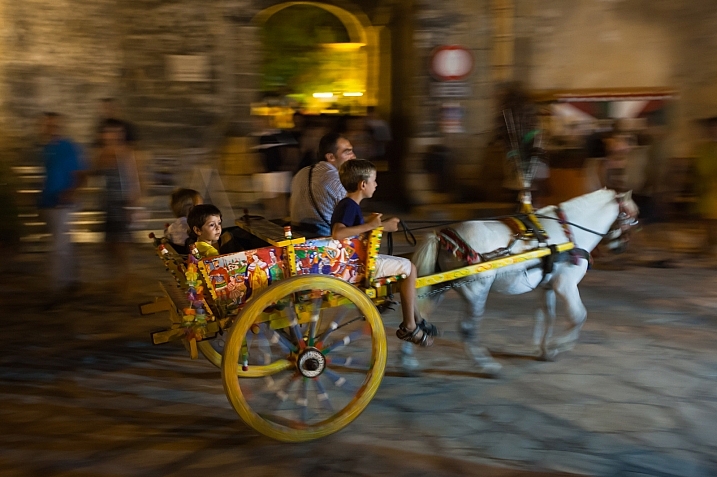
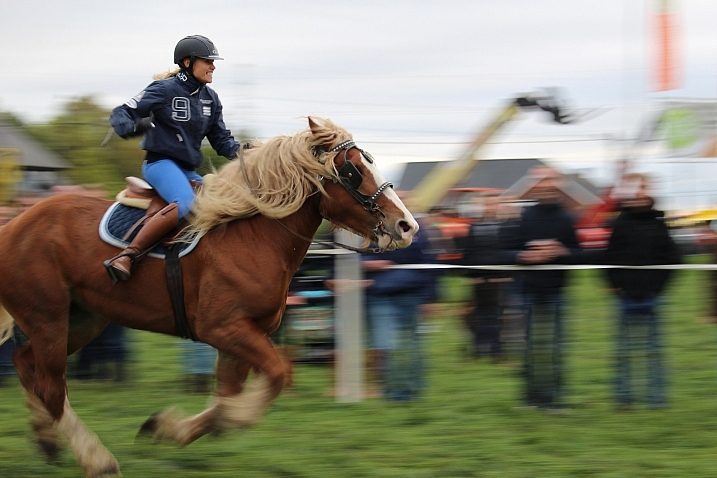
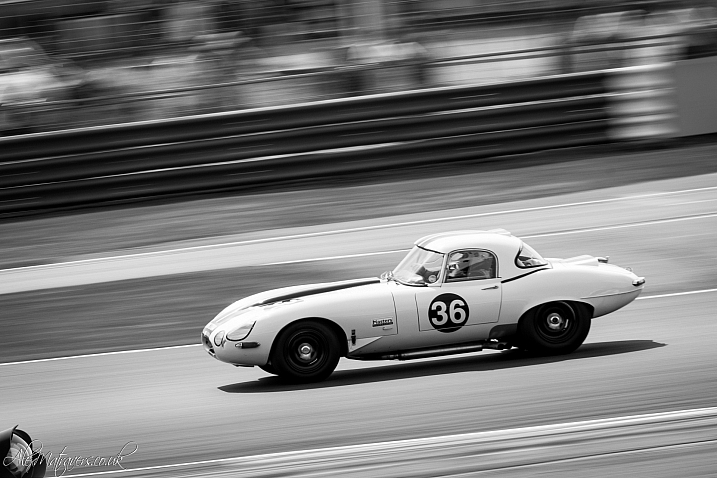
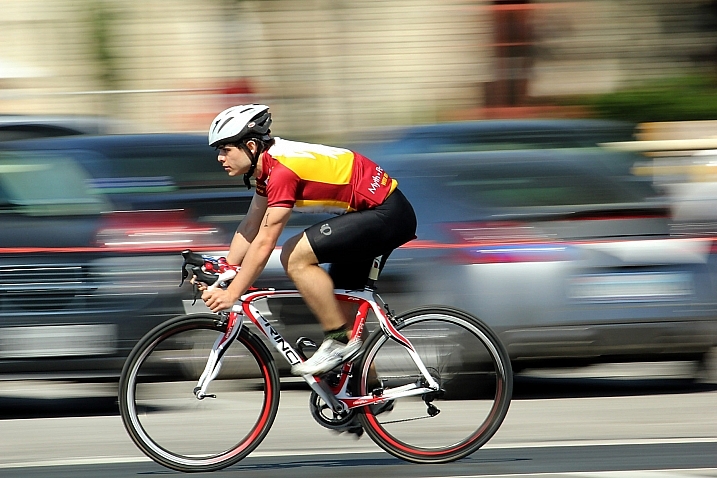
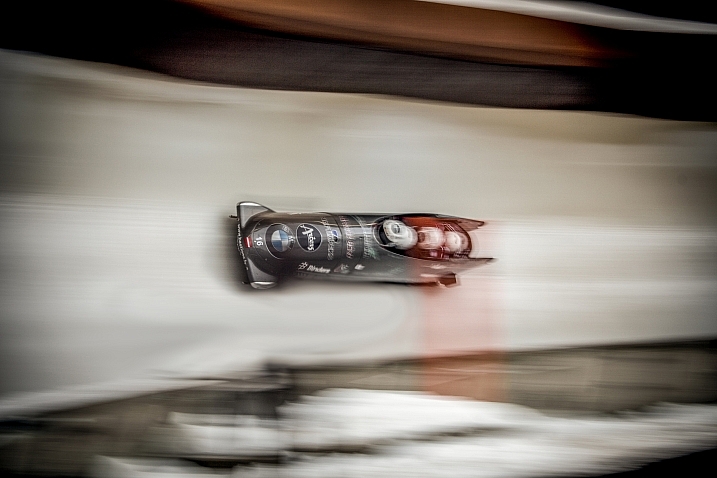
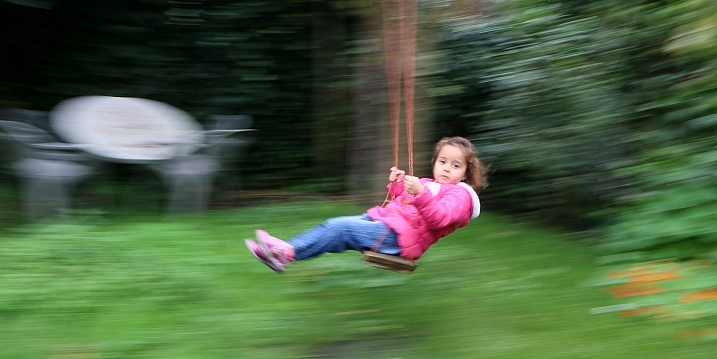
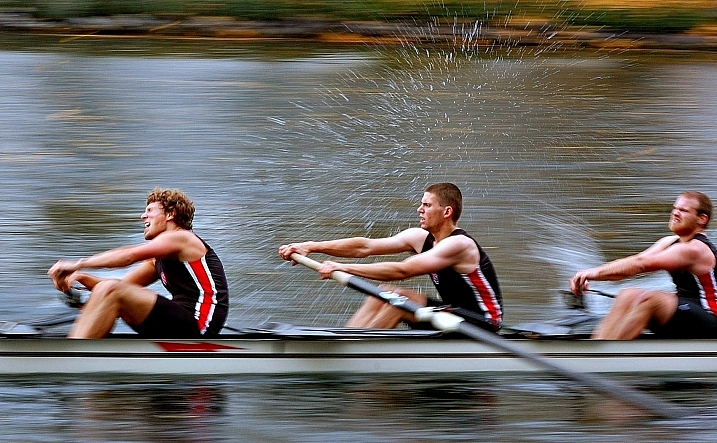
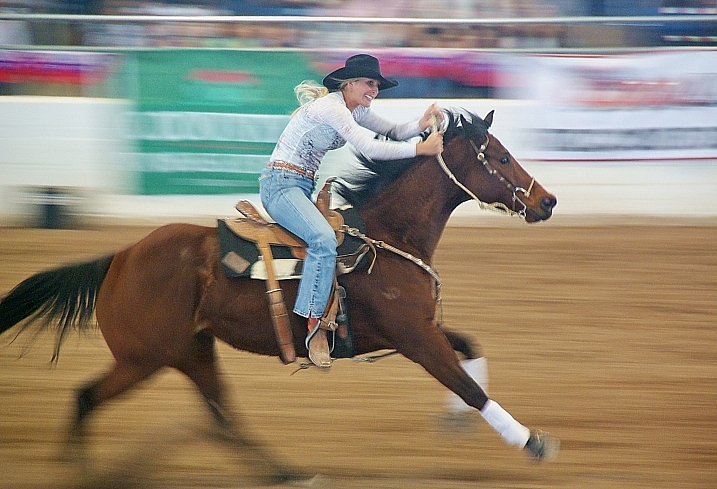
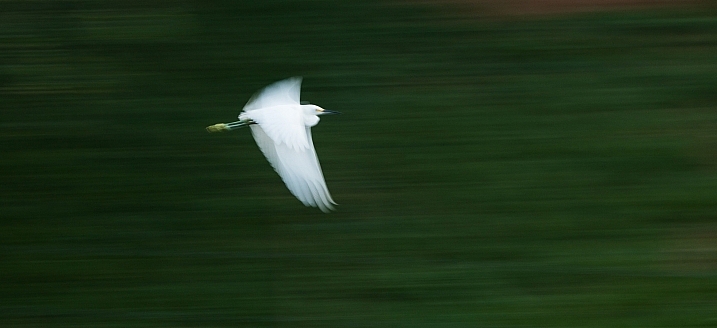
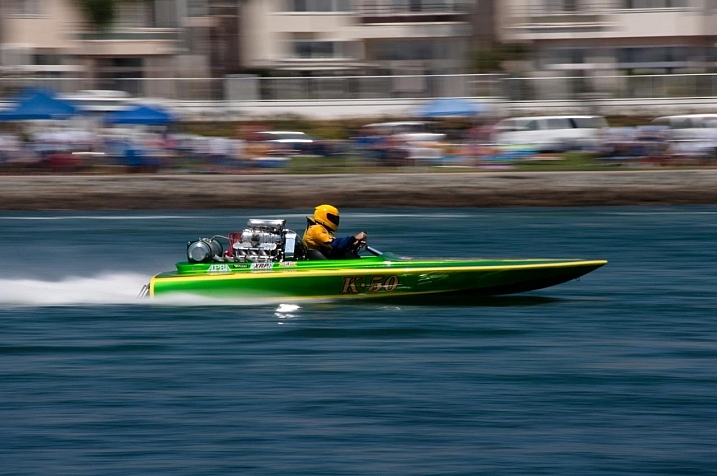
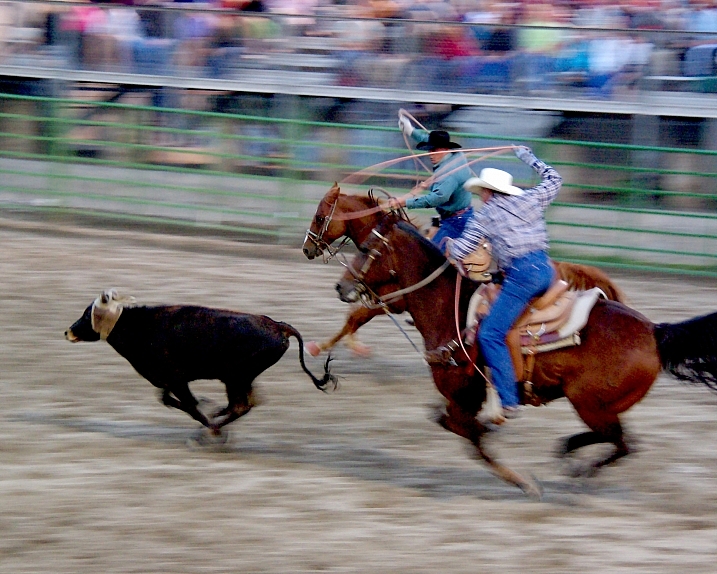
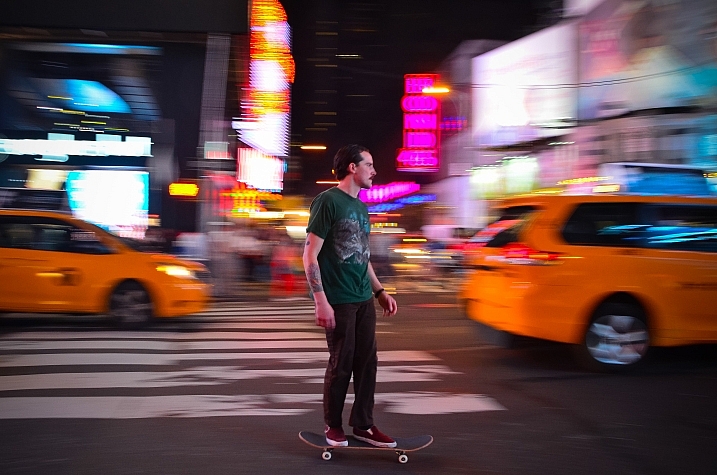
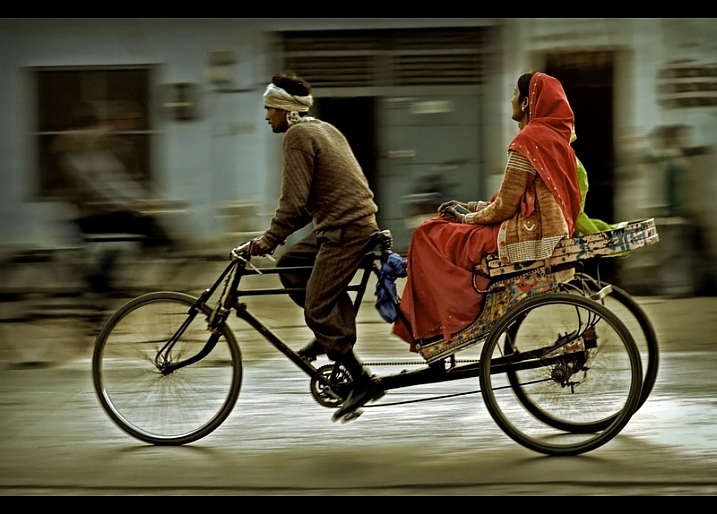
    Adding a feeling of motion to your images by using a slow shutter speed can be very effective. One technique to do that is panning, where you move the camera to match the subject and it blurs the background and keeps the subject relatively sharp.

    You can pan just about anything that’s moving. Let’s see what these photographers found that they could pan:

    Ram Reddy

    By ram reddy

    VR46

    By VR46

    Jamie McCaffrey

    By Jamie McCaffrey

    Flavio~

    By Flavio~

    Angus

    By Angus

    Amira_a

    By amira_a

    Lain

    By Lain

    Jamie Manktelow

    By Jamie Manktelow

    Silke Remmery

    By Silke Remmery

    Spreketek

    By spreketek

    Carlo Scherer

    By Carlo Scherer

    Darlene Hildebrandt

    By Darlene Hildebrandt

    Howard Ignatius

    By Howard Ignatius

    Msomm

    By msomm

    Mark Brooks

    By Mark Brooks

    Angelo Domini

    By Angelo Domini

    Melissa Himpe

    By Melissa Himpe

    Alex Matravers

    By Alex Matravers

    Jan Buchholtz

    By jan buchholtz

    DFSB DE

    By DFSB DE

    Groman123

    By Groman123

    Damianos  Chronakis

    By Damianos Chronakis

    AmaruDaiKyoko

    By AmaruDaiKyoko

    David Atkinson

    By David Atkinson

    Cocoa Dream

    By Cocoa Dream

    Al_HikesAZ

    By Al_HikesAZ

    Moisés  Silva Lima

    By Moisés Silva Lima

    Mbtrama

    By mbtrama

    Al_HikesAZ

    By Al_HikesAZ

    Angela N.

    By angela n.

    googletag.cmd.push(function() {
    tablet_slots.push( googletag.defineSlot( “/1005424/_dPSv4_tab-all-article-bottom_(300×250)”, [300, 250], “pb-ad-78623” ).addService( googletag.pubads() ) ); } );

    googletag.cmd.push(function() {
    mobile_slots.push( googletag.defineSlot( “/1005424/_dPSv4_mob-all-article-bottom_(300×250)”, [300, 250], “pb-ad-78158” ).addService( googletag.pubads() ) ); } );

    The post 30 Action Packed Panning Images by Darlene Hildebrandt appeared first on Digital Photography School.


    Digital Photography School

  • Weekly Photography Challenge – Panning

    If you want to see action and motion, check out these 30 moving panning images.

    Panning is the technique of moving your camera to match the direction and speed of an object that is moving in front of you, while shooting at a slow shutter speed. The result will blur the background, and make the subject relatively sharp. The trick is to get your speed and timing just right – it takes a bit of practice so now is a good time to do just that!

    Andreas Nilsen

    By Andreas Nilsen

    Weekly Photography Challenge – panning

    If you need some help perfecting your technique check out these dPS articles:

    • Showing Speed: Using Panning When Shooting Action
    • Mastering Panning – Photographing Moving Subjects
    • The Art Of Panning
    • Intentional Blur- How to Create it and Why it’s Awesome
    • How to Create Better Photos by Adding a Sense of Motion
    • Using Slower Shutter Speeds to Show Motion in Your Images
    Chaval Brasil

    By Chaval Brasil

    Eric Heupel

    By Eric Heupel

    Alcidesota@yahoo.com-OFF-For Several Months

    By alcidesota@yahoo.com-OFF-For Several Months

    Shinichi Higashi

    By Shinichi Higashi

    Brian

    By brian

    Share your images below:

    Simply upload your shot into the comment field (look for the little camera icon in the Disqus comments section) and they’ll get embedded for us all to see or if you’d prefer upload them to your favourite photo sharing site and leave the link to them. Show me your best images in this week’s challenge. Sometimes it takes a while for an image to appear so be patient and try not to post the same image twice.

    googletag.cmd.push(function() {
    tablet_slots.push( googletag.defineSlot( “/1005424/_dPSv4_tab-all-article-bottom_(300×250)”, [300, 250], “pb-ad-78623” ).addService( googletag.pubads() ) ); } );

    googletag.cmd.push(function() {
    mobile_slots.push( googletag.defineSlot( “/1005424/_dPSv4_mob-all-article-bottom_(300×250)”, [300, 250], “pb-ad-78158” ).addService( googletag.pubads() ) ); } );

    The post Weekly Photography Challenge – Panning by Darlene Hildebrandt appeared first on Digital Photography School.


    Digital Photography School

  • How to Critique Your Images Objectively: Ask for Other Points of View

    What happens when you ask 150 people to look at the same photos and pick their favourites? The answer is simple: a pattern emerges. But which pattern emerges can be very surprising, as I found out recently.

    Last year I decided to self-publish a photo book on Spain. I’d been wanting to do it for years. When the crowd-funding website Kickstarter announced it was opening up shop in Spain, where I live, I took it as a sign and made sure my project was uploaded the day they opened.

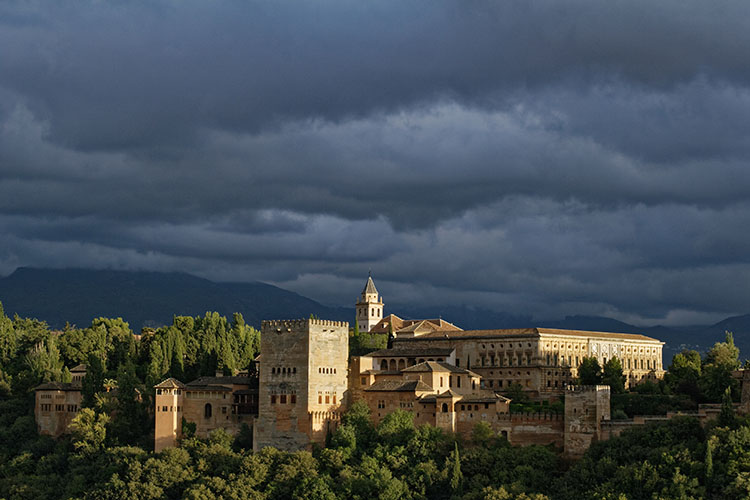
    Alhambra palace ranked number 1

    #1 ranked image by my crowd-fund book supporters.

    But I wanted to do something different with the book. Then it hit me – I could get supporters to be a part of the process by choosing which photos would go in the book. I thought of it as crowd-funding meets crowdsourcing. I wanted everyone to play a role in my book. So I uploaded 240 images onto a private webpage, and gave everybody a password and a mission; chose your favourite 80 images. After the voting period was over, I tallied up the results and the top 80 images went into the book.

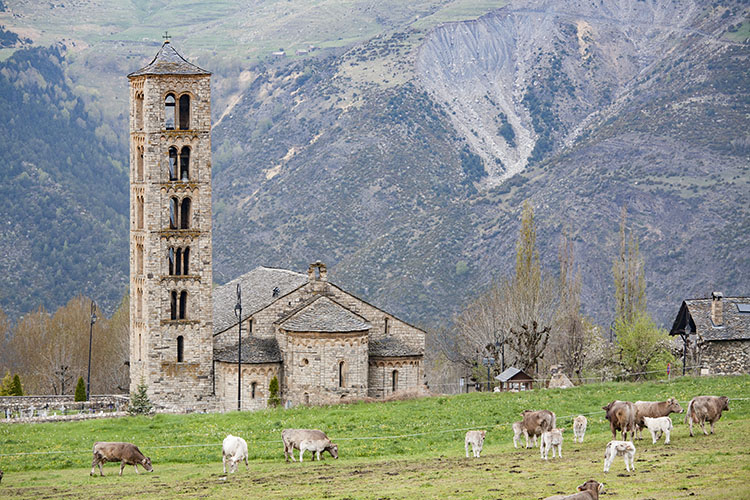
    I was blown away by the results. Some of my personal favourites didn’t even make it in, and some other images that I didn’t think were particularly strong, ended up being extremely popular. It was very instructive. The one that stands out for me is of cows in a field beside a church in the mountains of northern Spain. I almost didn’t even include it in the original batch of 240 images. But not only did it make it into the top 80, it was the 6th most popular image!

    Cows ranked 6

    On the other hand, here’s a shot of a beach in the south of Spain that I quite like. But it didn’t make the cut – not even close. It ranked a mere 223rd. Fascinating!

    Beach ranked 223

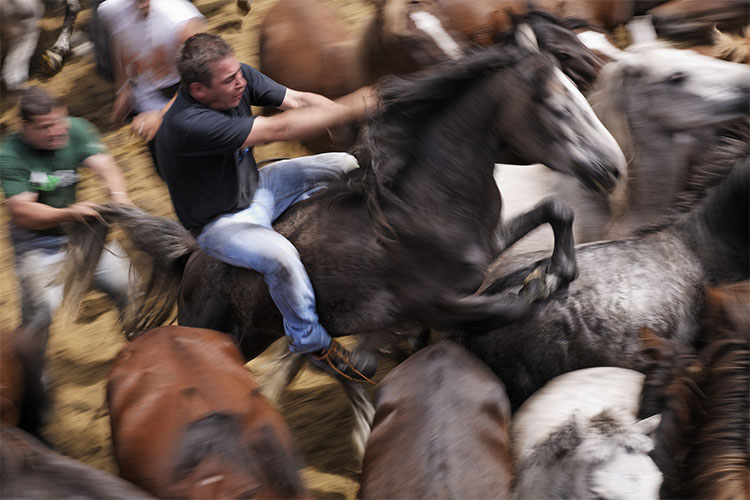
    I think there are a number of things at play here. For one, the photographer often attaches a value to a photograph that the viewer doesn’t. If an image took repeated attempts to achieve, or was somehow difficult to get in another way — perhaps finding the right angle took hours, or maybe there was some fantastic luck involved that would be impossible for the viewer to appreciate — then it’s natural for the photographer to place a greater value on it. But the final image is what counts, and should be judged on its merits alone, which is sometimes hard for the photographer to do without bias.

    Wild horse roundup ranked 133

    Ranked #133

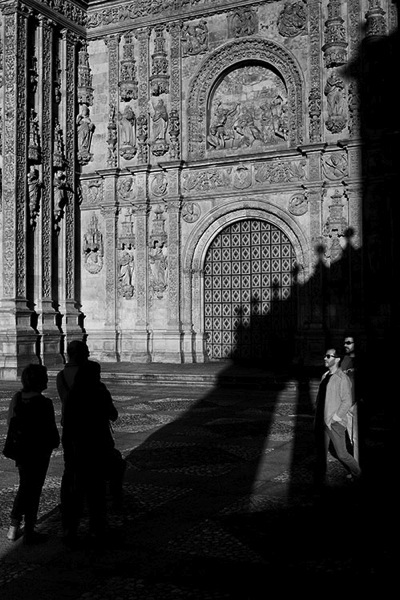
    For instance, I particularly like this image of a church in the city of Salamanca. The strong graphic lines of the church’s shadow on itself, was not only dynamic because of its oblique orientation, but also offered a second yin-yang with the tourists, some in shade against the sunlight, the others in sunlight against the shade. But, it ranked only #208, again, not even close. But I find the fact it was not very popular more interesting, than disappointing. It wasn’t an obvious image to take, I had to see the opportunity first, then carefully compose, and wait for people to enter the light (and shade) at just the right time. I got it after almost an hour of waiting. Is that part of the reason I like it so much? I find that an interesting question.

    Church shadows ranked 208

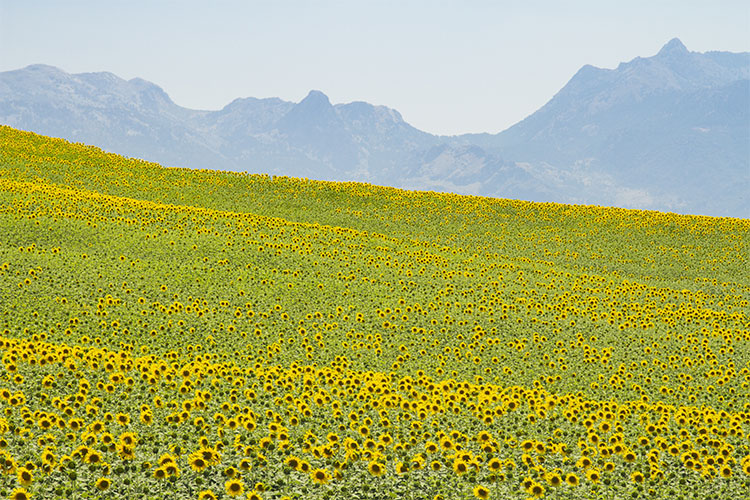
    Of course the reverse also happens. The following image of the field of sunflowers was an easy photo to take, and much easier to spot as a photo-op, versus the church in Salamanca. Speaking as a photographer, I don’t think it’s one of my best images technically or creatively, but that doesn’t change the fact it’s a beautiful landscape. The people who look at your photos don’t (and shouldn’t) care about how hard or easy an image was to take. They either like it or they don’t. In this case, the field of sunflowers was very popular, ranking 4th overall.

    Sunflowers ranked 4

    Now, this doesn’t mean that you should only take photos that you think will be popular. But if you want to please a crowd with a slideshow, or a book, paying attention to what people like will make it more successful. It doesn’t matter how lucky you got, or how hard you worked to get a photo. The important thing is to try to look at it through other people’s eyes. If you enjoy sharing your images, it’s crucial to remove your own bias, and in the end it will make you a better photographer.

    Editor’s note: How you can go about using this new knowledge without making a book? You can try posting a set of images as a collection on Facebook and ask people to rank their favorites. Or post a color and black and white of the same image and ask people which they prefer. Why not go ahead and try it here – post some photos in the comments below and rank each others images. How else can you look at your image objectively? 

    googletag.cmd.push(function() {
    tablet_slots.push( googletag.defineSlot( “/1005424/_dPSv4_tab-all-article-bottom_(300×250)”, [300, 250], “pb-ad-78623” ).addService( googletag.pubads() ) ); } );

    googletag.cmd.push(function() {
    mobile_slots.push( googletag.defineSlot( “/1005424/_dPSv4_mob-all-article-bottom_(300×250)”, [300, 250], “pb-ad-78158” ).addService( googletag.pubads() ) ); } );

    The post How to Critique Your Images Objectively: Ask for Other Points of View by Mike Randolph appeared first on Digital Photography School.


    Digital Photography School

  • 8 Tips for Food Photography Newbies

    Making food look appetizing, is not quite as simple as photographing your plate. There are a number of tricks that you can use to really enhance the subject. By using your camera creatively, you can capture the scrumptious side of food. Whether it’s your favorite dessert, or a full meal, these tips will help take your food photography to the next level.

    8 Tips for Food Photography Newbies

    1) Use a very shallow depth of field

    When you’re about to take a photo, the first technical question you want to ask is, “What kind of background would be best?” With food photography, you typically only want a sliver of the subject sharp, and the rest of the plate to be a soft blur. To do this, choose the widest aperture your lens allows. At f/2.8 the opening in your lens is physically wide open, creating what’s known as shallow depth of field. If you’re using a kit lens, the effect will be enhanced if you use your lens at a longer focal length, and get closer to the food.

    2) Less is more

    N I C O L A

    By N i c o l a

    Irudayam?

    By Irudayam?

    While looking at the scene through your camera, ask yourself, “What’s really the subject here?” This simple question will help to shape your composition. While this may seem rudimentary at first, the impact is undeniable once applied. For a helpful reminder, consider taping a small note to the inside of your lens cap. Check all four corners of the frame carefully. Anything that does not work towards emphasizing the chosen subject should be eliminated. The goal is to create a clean frame as opposed to visual clutter.

    3) Design your composition

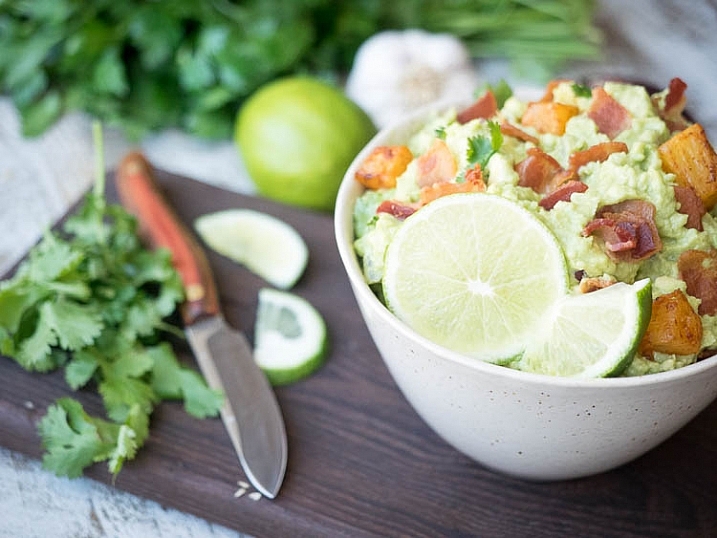
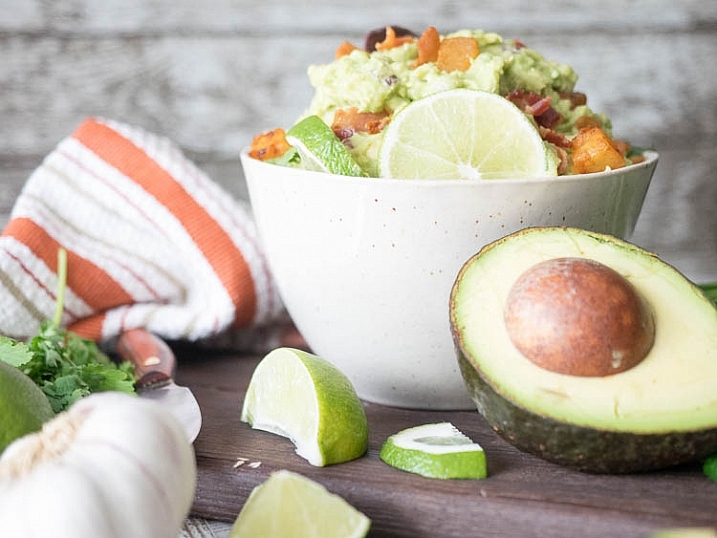
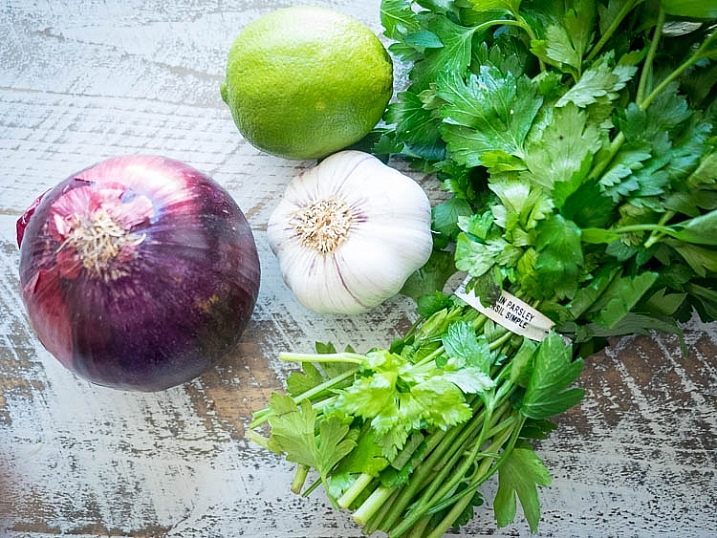
    Think beyond the obvious subject, and consider shape and form when crafting your composition. Adding a knife for instance, can balance a composition if placed in the rule of thirds. By shooting from directly overhead you create an elegant frame. In the image above, the towel in the left hand corner adds a pop of color, while the parsley, lime and avocado all add various shades of green. To add more shine to your silverware or reflective objects, in this case the knife, use a reflector board to bounce in extra light.

    4) Get messy

    Tracy Benjamin

    By tracy benjamin

    Stefano

    By Stefano

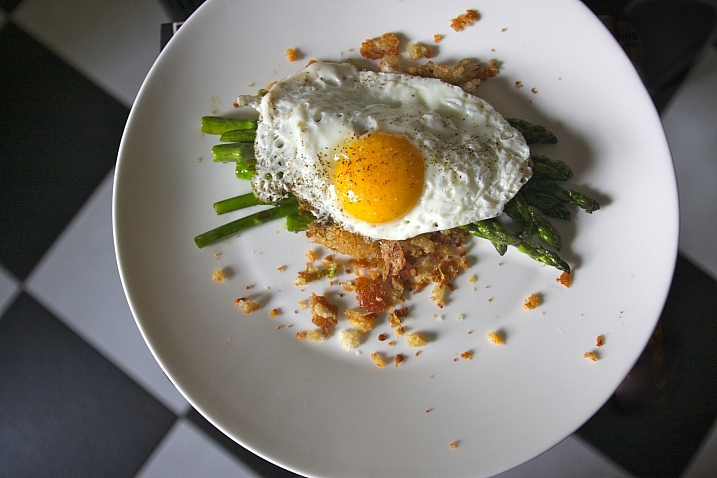
    To make your food photography look real and not staged, try adding crumbs to the set. This imperfection may seem odd at first, but it adds visual appeal. A bit of cheese sprinkled over the plate is an easy way to accomplish this. A little bit goes a long way here, so be subtle with your approach.

    5) Use a high ISO

    Simply put, the higher the ISO number is, the faster light can get into the camera. At ISO 800 you will get light into the camera faster than you would at ISO 100 or 200. When shooting food indoors you will often need to be at 1600 or even 3200. I generally do not recommend using ISO 6400 or higher as they will show an increased amount of digital noise, also known as grain. If noise is an issue for your camera, try using Lightroom’s noise reduction tool.

    Editor’s note: as this article is aimed at newbies the author assumes you’ll be shooting handheld. If, however, you will be shooting with a tripod, it is recommended to use the lowest ISO possible to keep noise to a minimum and get the sharpest, crispest images possible.

    6) Use natural light to your advantage

    Felipe Neves

    By Felipe Neves

    Terence Lim

    By Terence Lim

    Rather than adding flash, or working with harsh artificial light, take advantage of the beautiful natural light available. This can give a food picture a feeling of bright airiness. Look for spaces where sunlight streams through a window to set up your shot. The morning is typically the best time of day for this, as the light is softer, with less contrast. You can keep shooting in the afternoon but you’ll want to move the food into an area with even light, to avoid harsh shadows.

    7) Try black and white

    David Pacey

    By david pacey

    Jazz Guy

    By Jazz Guy

    Perhaps the most famous food photo of all time is Edward Weston’s “Pepper No. 30”. It was captured in black and white, and shows the shape and form of the subject beautifully. In your food photography, try shooting in monochrome from time to time. Not only does the lack of color simplify the shot, but it also works well to reveal contrast, highlight, and shadow. If shooting in RAW, convert the shot to black and white in post-production. One of my favorite tools to do this is Exposure X by Alien Skin, as they have a large array of creative options.

    8) Take a bite

    DLG Images

    By DLG Images

    Xsomnis

    By xsomnis

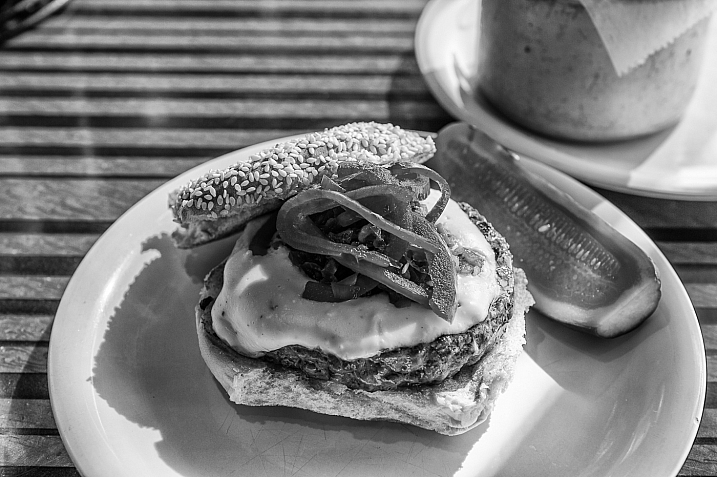
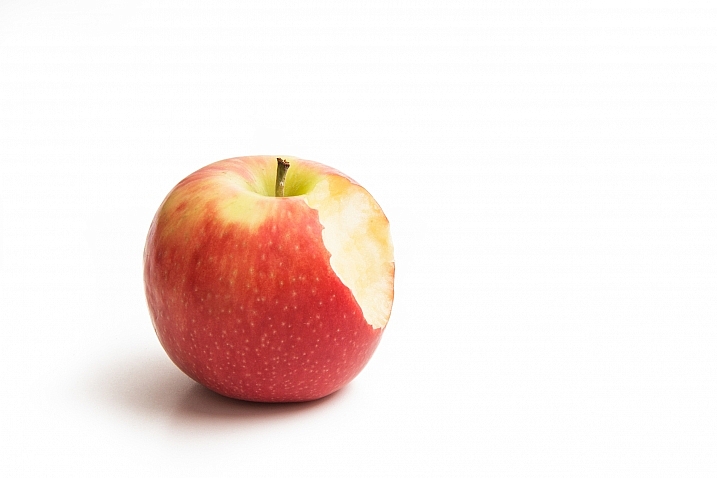
    Great food photography doesn’t need to be staged. Once you are done with your shoot, go ahead and take a bite. This photo adds a sense of authenticity to your shoot. If you’ve made the viewer want to take their own bite, you’ve succeeded in your goal of creating scrumptious food photographs.

    googletag.cmd.push(function() {
    tablet_slots.push( googletag.defineSlot( “/1005424/_dPSv4_tab-all-article-bottom_(300×250)”, [300, 250], “pb-ad-78623” ).addService( googletag.pubads() ) ); } );

    googletag.cmd.push(function() {
    mobile_slots.push( googletag.defineSlot( “/1005424/_dPSv4_mob-all-article-bottom_(300×250)”, [300, 250], “pb-ad-78158” ).addService( googletag.pubads() ) ); } );

    The post 8 Tips for Food Photography Newbies by Chris Corradino appeared first on Digital Photography School.


    Digital Photography School

  • How to Critique Your Images Objectively: Ask for Other Points of View

    What happens when you ask 150 people to look at the same photos and pick their favourites? The answer is simple: a pattern emerges. But which pattern emerges can be very surprising, as I found out recently.

    Last year I decided to self-publish a photo book on Spain. I’d been wanting to do it for years. When the crowd-funding website Kickstarter announced it was opening up shop in Spain, where I live, I took it as a sign and made sure my project was uploaded the day they opened.

    Alhambra palace ranked number 1

    #1 ranked image by my crowd-fund book supporters.

    But I wanted to do something different with the book. Then it hit me – I could get supporters to be a part of the process by choosing which photos would go in the book. I thought of it as crowd-funding meets crowdsourcing. I wanted everyone to play a role in my book. So I uploaded 240 images onto a private webpage, and gave everybody a password and a mission; chose your favourite 80 images. After the voting period was over, I tallied up the results and the top 80 images went into the book.

    I was blown away by the results. Some of my personal favourites didn’t even make it in, and some other images that I didn’t think were particularly strong, ended up being extremely popular. It was very instructive. The one that stands out for me is of cows in a field beside a church in the mountains of northern Spain. I almost didn’t even include it in the original batch of 240 images. But not only did it make it into the top 80, it was the 6th most popular image!

    Cows ranked 6

    On the other hand, here’s a shot of a beach in the south of Spain that I quite like. But it didn’t make the cut – not even close. It ranked a mere 223rd. Fascinating!

    Beach ranked 223

    I think there are a number of things at play here. For one, the photographer often attaches a value to a photograph that the viewer doesn’t. If an image took repeated attempts to achieve, or was somehow difficult to get in another way — perhaps finding the right angle took hours, or maybe there was some fantastic luck involved that would be impossible for the viewer to appreciate — then it’s natural for the photographer to place a greater value on it. But the final image is what counts, and should be judged on its merits alone, which is sometimes hard for the photographer to do without bias.

    Wild horse roundup ranked 133

    Ranked #133

    For instance, I particularly like this image of a church in the city of Salamanca. The strong graphic lines of the church’s shadow on itself, was not only dynamic because of its oblique orientation, but also offered a second yin-yang with the tourists, some in shade against the sunlight, the others in sunlight against the shade. But, it ranked only #208, again, not even close. But I find the fact it was not very popular more interesting, than disappointing. It wasn’t an obvious image to take, I had to see the opportunity first, then carefully compose, and wait for people to enter the light (and shade) at just the right time. I got it after almost an hour of waiting. Is that part of the reason I like it so much? I find that an interesting question.

    Church shadows ranked 208

    Of course the reverse also happens. The following image of the field of sunflowers was an easy photo to take, and much easier to spot as a photo-op, versus the church in Salamanca. Speaking as a photographer, I don’t think it’s one of my best images technically or creatively, but that doesn’t change the fact it’s a beautiful landscape. The people who look at your photos don’t (and shouldn’t) care about how hard or easy an image was to take. They either like it or they don’t. In this case, the field of sunflowers was very popular, ranking 4th overall.

    Sunflowers ranked 4

    Now, this doesn’t mean that you should only take photos that you think will be popular. But if you want to please a crowd with a slideshow, or a book, paying attention to what people like will make it more successful. It doesn’t matter how lucky you got, or how hard you worked to get a photo. The important thing is to try to look at it through other people’s eyes. If you enjoy sharing your images, it’s crucial to remove your own bias, and in the end it will make you a better photographer.

    Editor’s note: How you can go about using this new knowledge without making a book? You can try posting a set of images as a collection on Facebook and ask people to rank their favorites. Or post a color and black and white of the same image and ask people which they prefer. Why not go ahead and try it here – post some photos in the comments below and rank each others images. How else can you look at your image objectively? 

    googletag.cmd.push(function() {
    tablet_slots.push( googletag.defineSlot( “/1005424/_dPSv4_tab-all-article-bottom_(300×250)”, [300, 250], “pb-ad-78623” ).addService( googletag.pubads() ) ); } );

    googletag.cmd.push(function() {
    mobile_slots.push( googletag.defineSlot( “/1005424/_dPSv4_mob-all-article-bottom_(300×250)”, [300, 250], “pb-ad-78158” ).addService( googletag.pubads() ) ); } );

    The post How to Critique Your Images Objectively: Ask for Other Points of View by Mike Randolph appeared first on Digital Photography School.


    Digital Photography School

  • How to Use Clouds to Enhance and Improve Your Images

    Siberian Husky, 7 months old, male, white, lying on a hill with dramatic sky

    Many photographers enjoy taking pictures of clouds, and it’s easy to see why. From the vivid patterns and brilliant sunset formations, to the storm clouds and unusual styles, there’s almost always something interesting happening in the sky. While there’s no doubt that clouds can make great subjects in their own right, I feel that they are most useful, photographically speaking when they’re used as backgrounds for other subjects. The proper use of clouds in an image can add texture, dimension, and drama to many photos, while enhancing or serving as an additional storytelling feature for your main subject.

    Making clouds work for you in this way usually requires a little bit of planning, some location scouting (always fun!), the right subject, and, course, keeping a sharp eye on the sky for weather that will produce great clouds. Let’s get started!

    Clouds = texture

    First let’s examine how clouds can turn boring into brilliant. This image below of a Whippet was taken on a hill, on a clear day without any clouds at all. The plain blue background is striking, but the solid color perhaps lacks interest:

    Whippet, portrait on hill

    Now consider this shot, taken of the same dog back in the same location, but on a day with large summer clouds. The difference is immediately obvious – the clouds add some much-needed texture and drama, elevating this image above the plain blue version (and earned it a spot in an upcoming Whippet calendar).

    Whippet, portrait on hill

    A good landscape photo can also often benefit from some cloudy texture:

    Farm fencing, fields, clouds

    Reach for the sky

    Finding a way to include clouds behind the subject is one of those photographic puzzles that we have to solve from time to time. Often, the key is to figure out how to raise the subject, or lower yourself. A great way to do this is to utilize a hill. Generally, the bigger the hill, the better, but even tiny knolls and rises can work.

    Here’s a shot taken on a large hill, where I was able to get much lower than the horses.

    Herd of horses grazing on hill, clouds

    The hill blocks out anything distracting, and gives the photo a clean horizon line. But again, if this was just a blank, blue sky, the photo wouldn’t be as interesting, and wouldn’t pack as much of a punch. The clouds provide added texture, and help balance out the top of the photo.

    Now here’s a photo where the subject was on just a tiny rise.

    DJ-SM-20-159

    Getting this shot required a little extra work on my part, as I had to get myself and my camera down close to ground and look up, but it worked. What you can’t see is that there were actually a lot of distracting elements all around the scene, that I was able to remove just by getting down low. A big part of photography is understanding what not to include in the viewfinder.

    You can also take advantage of subjects that are already higher than you are.
    Person pitching loose hay on haywagon with tractor, clouds in sky

    Person pitching loose hay on wagon with tractor, clouds in sky.

    Silhouettes optional

    Remember, not all subjects against a sky have to be black silhouettes. Because the horses and clouds are being lit with the same light, from the same direction, detail and color remain consistent for both. In the case of the Whippet image, I used a large reflector board to illuminate her body, until her brightness matched the sky and clouds, preventing the Whippet from becoming underexposed.

    Storytelling

    It’s great to be able to use clouds as a storytelling device. Let’s look at a few examples of this:
    Windmill on farm with clouds

    I thought the big weathervane was an interesting subject, but the terrific approaching storm clouds were what really made me look twice. The weathervane says “weather,” but the subject combined with some actual weather maybe suggests the question, “What’s going to happen when the storm comes?”
    How about this one?

    Two cowgirls on hill with dramatic clouds and fencing

    Again, even though the clouds aren’t the star, they’re still pulling their weight composition-wise, and add a lot of drama and balance to this shot. The cowgirls and their fence may be the main subject, but the clouds are adding some storytelling, too. It looks like rain, is that good? Do the cowgirls want rain, or not? It’s all up to the viewer to decide.

    Girl on farm hill with clouds and stormy skies

    Increase depth of field

    If you’re using a telephoto lens, or if you’re close to your subject, you may want to stop your lens down a bit to increase your depth of field and keep your cloudy background looking distinct. If you would normally shoot a portrait at f/4 or f/5.6 for instance, try using f/11 or f/16 to help retain cloud detail.

    Colorful clouds

    One last takeaway, remember that clouds aren’t always white and grey. As with all types of outdoor photography, the golden hours can be your friend. In the case of clouds, a great sunrise or sunset can make the clouds turn red, pink, and orange. Don’t necessarily shoot towards the sun either, look on the opposite side of the sky to find more subtle, but still beautiful, colors.

    Moon and clouds

    Got a favorite image with a cloudy background?

    googletag.cmd.push(function() {
    tablet_slots.push( googletag.defineSlot( “/1005424/_dPSv4_tab-all-article-bottom_(300×250)”, [300, 250], “pb-ad-78623” ).addService( googletag.pubads() ) ); } );

    googletag.cmd.push(function() {
    mobile_slots.push( googletag.defineSlot( “/1005424/_dPSv4_mob-all-article-bottom_(300×250)”, [300, 250], “pb-ad-78158” ).addService( googletag.pubads() ) ); } );

    The post How to Use Clouds to Enhance and Improve Your Images by Daniel Johnson appeared first on Digital Photography School.


    Digital Photography School

  • How to Use the Clone Stamp Tool in Photoshop to Make Clear Skin

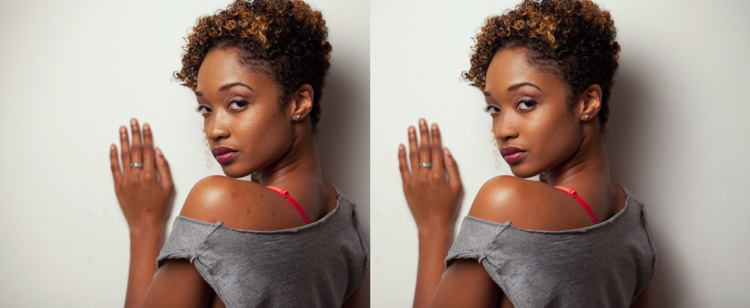
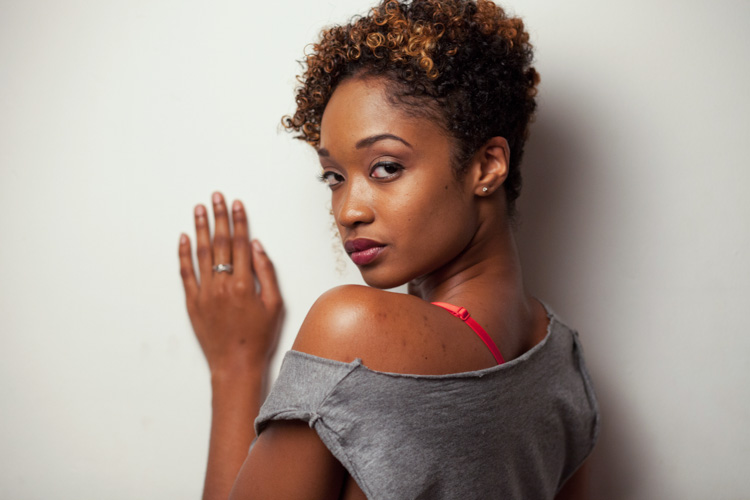
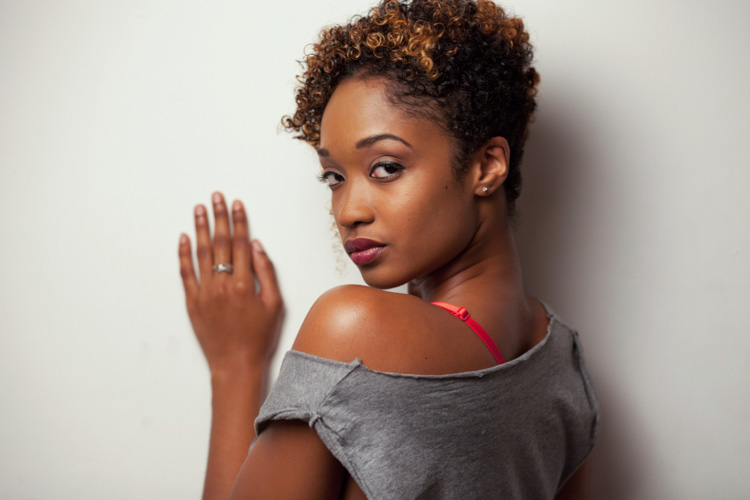
    We’re all beautiful. Sometimes however, we have imperfections that can be a distraction (most often they are magnified in our minds and really not as bad as we think). In this tutorial, I am going to show you how you can use a basic Photoshop tool, the Clone Stamp, to create clear, natural looking skin in your photos.

    Image 1

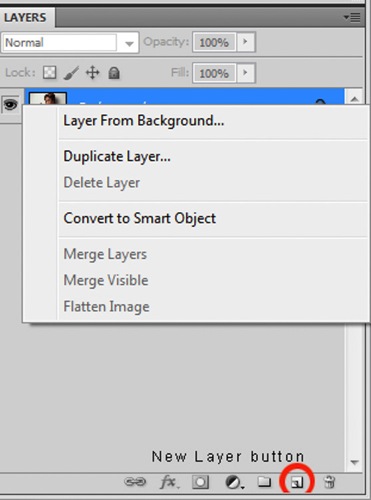
    It’s always a good idea to work on a separate layer when editing or retouching images in Photoshop. Once you have your image open, you should create either a new layer or a duplicate layer which you will edit on. You can create a new layer by clicking the new layer button in your Layers Panel, or by selecting Shift+Ctrl+N on a PC (or Shift+Command+N on a Mac). If you prefer to create a copy layer like I have, you can right click on the image in the Layers Panel and select the Duplicate Layer option provided. If you prefer to use keyboard shortcuts, you can simply press Ctrl+J if you’re using a Windows PC, or Command+J if you’re using a Mac.

    Image 2

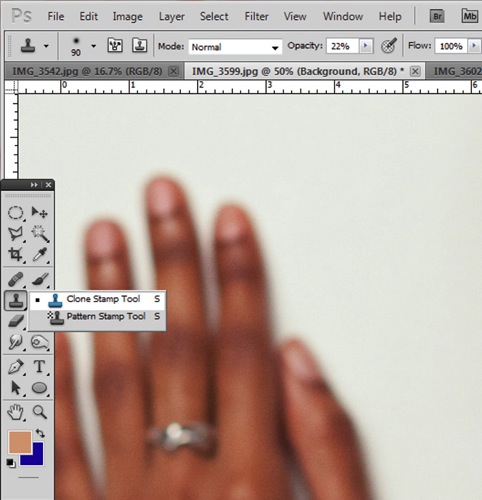
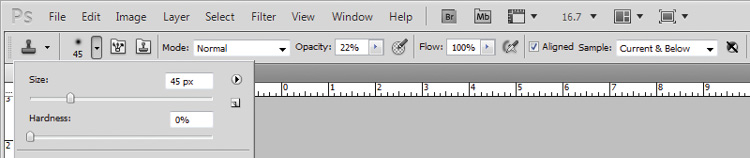
    Select the Clone Stamp tool from the tools panel, it conveniently looks like a miniature office stamp. In the options bar at the top of your screen, ensure that your brush softness is set to zero, the mode is normal, and it is set to sample Current & Below. You can keep your opacity anywhere between 10 and 30% depending on the subject. To get a natural looking result, it’s best to gradually work your way up to the final complexion or shade you are trying to attain.

    Image 3

    Image 4

    Zoom in on the area you would like to retouch by pressing Ctrl (or Command) and the plus (+) symbol on your keyboard. In this image, I’m going to focus on the shoulders mainly. You don’t need to zoom all the way in to the area, but ensure that it’s zoomed enough for you to clearly see the area you are trying to adjust.

    Image 5

    The Clone Stamp tool works by allowing you to duplicate a selected area, over to another section of your image. It’s really great for removing unwanted elements from your photos. Hold down the Alt key on your keyboard and click on an area of skin close to the spot you are trying to remove. If your spot is lighter than the overall skin tone, select an area that is darker than the spot; if the spot is darker than the surrounding skin, you will make your selection from an area that is slightly lighter than it.

    Play around with your Clone Stamp brush size and the opacity, until you find a combination that gives your best results. You will more than likely end up using a variety of brush sizes and opacities for the image (change the sample area frequently as well so you don’t get a repetition of patterns). The clone stamp method is very effective at clearing skin but requires patience on your part. A few other minor adjustments resulted in the final image below.

    Image 6

    With practice and patience you can clone your way to clear skin with the Clone Stamp tool. Have fun!

    Please share any questions and comments you have about using the Clone Stamp tool to make clear skin.

    googletag.cmd.push(function() {
    tablet_slots.push( googletag.defineSlot( “/1005424/_dPSv4_tab-all-article-bottom_(300×250)”, [300, 250], “pb-ad-78623” ).addService( googletag.pubads() ) ); } );

    googletag.cmd.push(function() {
    mobile_slots.push( googletag.defineSlot( “/1005424/_dPSv4_mob-all-article-bottom_(300×250)”, [300, 250], “pb-ad-78158” ).addService( googletag.pubads() ) ); } );

    The post How to Use the Clone Stamp Tool in Photoshop to Make Clear Skin by Tricia Bent appeared first on Digital Photography School.


    Digital Photography School

  • 5 Important Focal Lengths to Know and the Benefits of Each

    5 Focal Lengths and Why You Should Use Them 1

    Please note: all focal lengths mentioned in this article are in reference to 35mm full frame sensors.

    There are photographers that favor the convenience and flexibility of zoom lenses, and those that favor their sharper, lighter and cheaper counterpart, the prime lens. Note: some modern zooms do have prime-like optics. Often, it’s your line of work that will make that decision for you. Whichever variant you favor, you owe it to yourself to experiment with different focal lengths to learn where they each excel, and which ones mesh best with your style. You can achieve this with primes, or zooms if you can commit yourself to not touching that handy zoom barrel. Among the many options, five focal lengths you want to use are the: 24mm, 35mm, 50mm, 85mm, and 135mm.

    Let’s look at each one at a time.

    #1 – 24mm wide angle

    Areas it excels in: landscapes, astrophotography, group portraits, and event photography.

    This one is easy to experiment with because not only are there many affordable prime options available, but you’ll find this focal length at the wide end of many full frame zoom lenses. The 24mm prime lens is sufficiently wide and remarkably sharp, making it an ideal candidate for landscape photography. Zooms are wonderful for landscape photography too, but the locked-in field of view (or a prime lens) will force you to think carefully about your compositions.

    5 Focal Lengths and Why You Should Use Them 2

    The 24mm focal length also excels in situations that don’t offer a lot of light. That includes astrophotography, where 24mm lenses with wide apertures (f/.8 or wider) will facilitate shots of the milky way, and in event photography, where you’ll have an ample field-of-view to shoot indoors and add context to your photographs. Additionally, the 24mm focal length is sufficiently wide to capture group portraits with minimal perspective distortion. Just don’t get too close, and watch the edges of your frame.

    5 Focal Lengths and Why You Should Use Them 3

    #3 – 35mm focal length

    Areas it excels in: street photography, events, environmental portraits, and shooting-across-the-dinner-table photography.

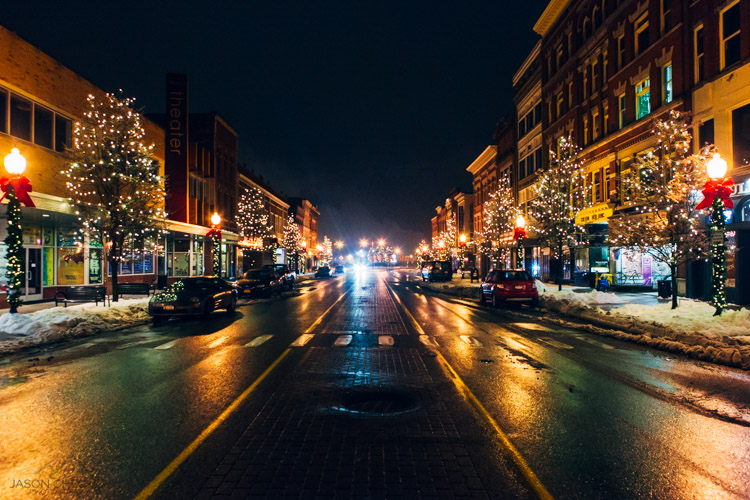
    35mm is a classic focal length for many photojournalists. Part of that reason is that the field-of-view requires you to be close to the action, but still maintains enough of the environment surrounding your subject to give an image context. This same philosophy applies well to wedding or event photography, and makes the 35mm focal length a great fit.

    5 Focal Lengths and Why You Should Use Them 4

    Another great thing about the 35mm prime lens is that it just so happens to be the perfect focal length for shooting a portrait from across the dinner table. Any wider and your subjects face will suffer from perspective distortion (exaggerating their facial features) and any narrower and you’d have to get out of your seat for the shot.

    5 Focal Lengths and Why You Should Use Them 5

    #3 – 50mm (normal) lens

    Areas it excels in: street photography, full-body portraits, walk-around shooting.

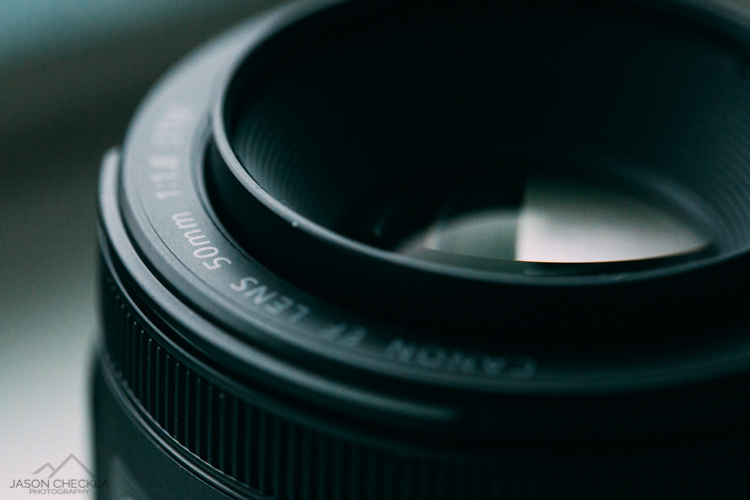
    There are so many reasons to try shooting with a 50mm prime lens. Perhaps the best one is that they’re cheap. You can purchase a brand new 50mm lens for most DSLR systems for a little over $ 100. Also, they produce an image that is normal, or most-like the image that we see with our own eyes. There is a common misconception about this concept. The normal perspective that a 50mm lens offers refers to the perspective distortion (or lack thereof), not the field-of-view. For this reason, the 50mm lens is great for full-body portraits and walk-around or street photography.

    5 Focal Lengths and Why You Should Use Them 6

    5 Focal Lengths and Why You Should Use Them 7

    The 50mm lens is another classic, and a large part of that reason is that often, the area in frame is just right. It’s narrow enough to create balanced compositions with ease, but still wide enough to create interest beyond your subject. That is why you will find a 50mm lens in the bags of most street photographers.

    #4 – 85mm slight telephoto lens

    Areas it excels in: portrait, events, and sports photography.

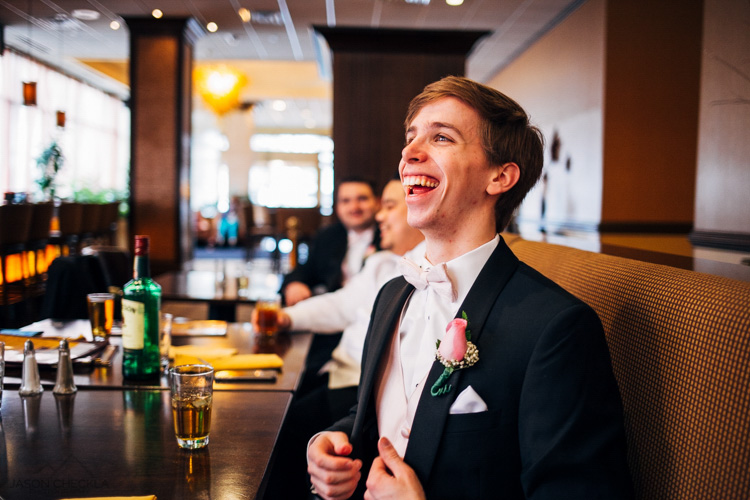
    The 85mm focal length is one that you will find in the bag of many wedding and portrait photographers. It creates beautiful portraits with the ability to flatten one’s features, which is generally flattering, and brilliant background separation. The field of view is not so tight that you’ll feel like you need to be outdoors to use one, but it gives you a nice working distance that allows this focal length to sneakily capture candids at a wedding or family gathering.

    5 Focal Lengths and Why You Should Use Them 8

    That working distance is great for full body shots when you’re on the sidelines of a sporting event, too. The 85mm prime is also a great working distance for photographing your kids or pets.

    5 Focal Lengths and Why You Should Use Them 9

    #5 – 135mm telephoto

    Areas it excels in: head-shots, portraits, and wedding photography.

    When you need to get in close, or if you just love bokeh, the 135mm lens is a great pick. For details and head-shots that bring your subject to life, grab this focal length. The background separation is fantastic, due to the increased compression of the image. The flattering flattening effect (say that five times) from the compression, makes this lens great for shoulder shots, senior portraits, candids, and more. You’ll have fun shooting wide open to create magical separation between your subject(s) and their surroundings.

    5 Focal Lengths and Why You Should Use Them 10

    5 Focal Lengths and Why You Should Use Them 11

    The drawback to this focal length is that you do need a lot of working room, and a lot of light. Remember the 1/focal length rule for shutter speed? In other words, you wouldn’t want to shoot a 135mm lens any slower than 1/135th of a second, without a very steady hand or a tripod. When light or space become a problem, it’s nice to have an 85mm lens to fall back on.

    5 Focal Lengths and Why You Should Use Them 12

    Chances are you will love some of these focal lengths and dislike others, but you’ll never know until you give them all a shot. Modern zoom lenses are remarkable in their optical-quality, but you do lose the connection you feel when you are truly in sync with your focal length. The more you shoot with a 50mm lens, the more you will start to see with a 50mm perspective. Good luck and happy shooting!

    googletag.cmd.push(function() {
    tablet_slots.push( googletag.defineSlot( “/1005424/_dPSv4_tab-all-article-bottom_(300×250)”, [300, 250], “pb-ad-78623” ).addService( googletag.pubads() ) ); } );

    googletag.cmd.push(function() {
    mobile_slots.push( googletag.defineSlot( “/1005424/_dPSv4_mob-all-article-bottom_(300×250)”, [300, 250], “pb-ad-78158” ).addService( googletag.pubads() ) ); } );

    The post 5 Important Focal Lengths to Know and the Benefits of Each by Jason Checkla appeared first on Digital Photography School.


    Digital Photography School

  • Priime Styles for Mac

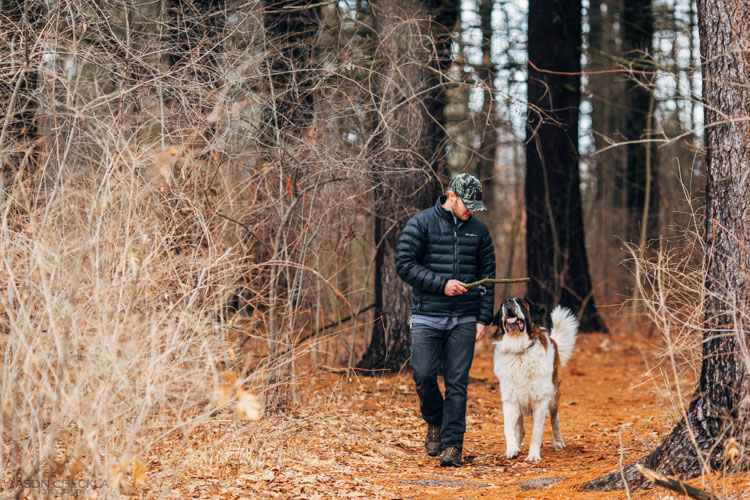
    Priime Styles for Mac Batch Editing

    Disclosure: I am a style author and advisor for Priime.

    One of my favorite ways to edit photos on my iPhone the past year has been with the Priime app for iOS. In addition to being one of the style creators for Priime, I’ve enjoyed utilizing the custom styles created by so many other talented photographers for my mobile photography. I don’t always have as much time to work with an image when I’m editing it on mobile and it’s nice to have some super easy styles that I can easily apply to my photos and quickly publish on the go.

    As great an app as Priime for iOS is, 98% of my photos that I work with are still processed the old fashioned way, using Adobe Lightroom and Photoshop on my iMac. One of the things that I love about using Lightroom in my workflow is that more and more you are finding quality external editors that can be used as part of your editing process. Recently Google made headlines when they decided to give away their Nik software (which I have also used for several years now and love). So I was really pleased to hear that in addition to the iOS app, Priime was also releasing an external editor for Lightroom.

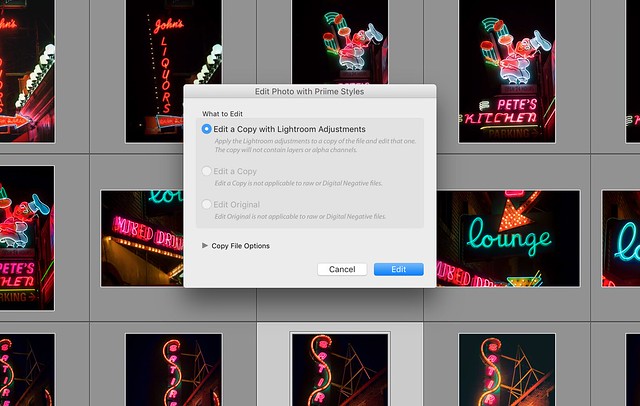
    The way that I use Priime Styles for Mac is as part of my normal Lightroom editing process. Here I can easily take a special photo (or batch of photos) and quickly move them into the Priime editor to make changes and then have copies saved back to the Lightroom catalog I’m working in. I don’t process every photo with Priime, but if I find one that is special I will often import it in there and work with it.

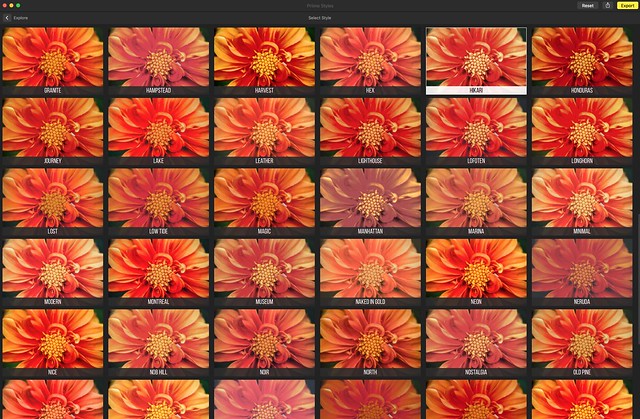
    Sometimes you want just one final version of a photo, but oftentimes I find myself making multiple versions of a photo. While some photos look great in color or black and white. Some photos look great in color AND black and white. I like creating different versions of photographs and then later deciding which I like better or maybe even publishing a few different versions. Priime allows me to try different things with a photo that I may not have thought about creating organically myself in Lightroom. With over 100 different editing styles from some of the top photographers out there today, there are a lot of new things to explore.

    Priime Styles for Mac Lightroom External Editor

    The nice thing about editing something in Priime with Lightroom is that I can still iterate on that version even after I bring it back into Lightroom, adding additional edits or touches to the photo, customizing it more as my own even as I borrow edits from others.

    I think Priime Styles for Mac will be an excellent Lightroom add on tool that serious and professional photographers can have at their disposal to make their photos look as good as possible.

    In addition to more serious and professional photographers using Priime Styles for Mac as a Lightroom plug in, I think it also is a great first step for the new or emerging photographer. Some people are not quite ready yet to pay $ 10/month to Adobe every month to use Lightroom. They just want something that can quickly make their photos look better that’s a bit more affordable.

    Even if you are not a Lightroom user, in fact especially if you are not a Lightroom user, Priime may be something for you. In addition to the Lightroom plug in, Priime can also be used as a standalone editor as well. You simply launch the app and then drag and drop the photos that you want to work with. For a lot of people $ 24.99 (on sale for launch) as a one time cost is a better value proposition than paying $ 9.99 a month ongoing for Lightroom.

    PExploring Styles with Priime Styles for Mac

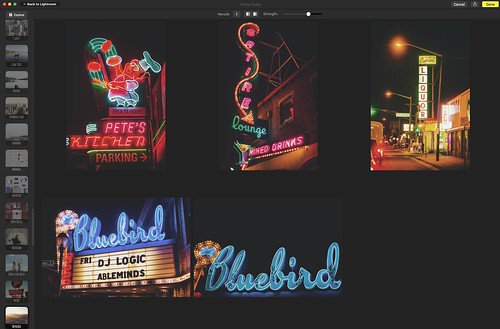
    Priime Styles for Mac has a great Explore function as well. This allows you to look at all of the styles as they’d be applied to a photo at once, which makes it easier to narrow down what might look best.

    Another way I think Priime can be helpful is for the less serious photographer/blogger who just wants a consistent look for a batch of photos. A lot of bloggers I know are not exactly photographers but need to include images with their posts. Priime Styles for Mac allows bloggers an easy go to solution where very quickly they can edit a batch of photos and have a consistency to their photos that makes them work much better together as part of a total post.

    Anyways, check it out.

    Priime Styles for Mac supports JPG, RAW and TIFF files.


    Thomas Hawk Digital Connection