Category: Photography

  • Pros and Cons of Photographing Dogs with a Prime Lens

    DPS article 6

    Dogs, by their very nature, are excitable creatures. Of course, they like nothing more than being outside and running around, chasing sticks, balls, and other dogs. All this can’t be conducive to prime lens photography, right? You want a good zoom lens for a job like this, surely? Well, not me. I love shooting my pet portrait sessions with my trusty Canon f/1.4 50mm prime, and I’m going to go through what I consider to be the advantages of doing so, and how best to overcome the disadvantages.

    Pros – or advantages

    Prime lenses are as quick as the dogs they’re snapping!

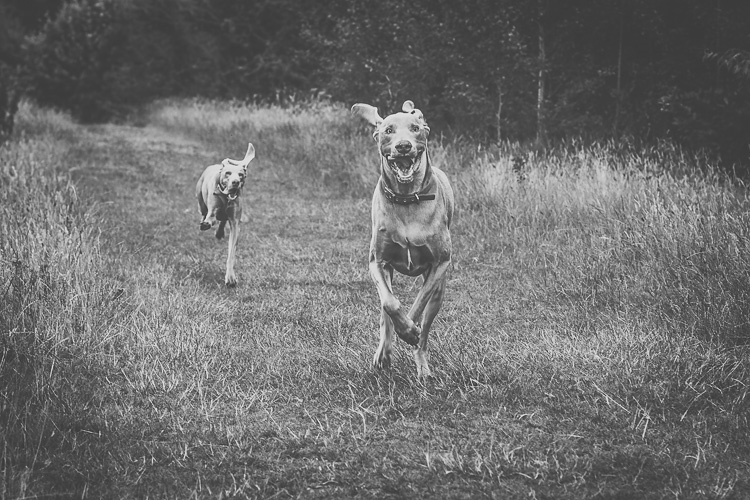
    We’ll start with the obvious benefit of shooting with a prime lens – speed. The wider maximum aperture allows for faster shutter speeds, which means that you can freeze your sprinting pooch in action and get pin sharp images as they run (below).
    DPS article 9
    These two Weimaraners were sprinting full pace towards me. Fortunately my shutter speed was fast enough to freeze their movements in full flight.

    Let’s not forget that the light conditions aren’t always going to be favourable. On dull, overcast, days you’ll be thankful for that extra couple of stops, rather than having to boost the ISO and bring noise into the equation.

    Bearing this in mind, it’s also important to remember that as you’re widening your aperture to improve your shutter speed, you’re also narrowing your depth of field, so it’s about striking the right balance for the situation.

    Image quality and sharpness

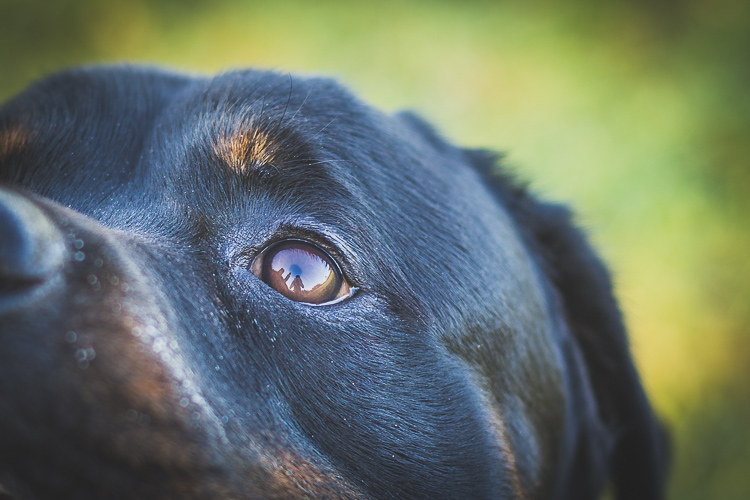
    Another well-known advantage of shooting with a prime lens is the image quality. Prime lenses are much more simple than zoom lenses in terms of the components that make them, and the mechanisms that operate them. All in all, it’s widely acknowledged that prime lenses consistently offer an extremely high level of image quality.
    DPS article 1

    Sharper images are going to be a positive thing in any situation, but when you’re editing your images and you can zoom in to see all the details in the fur of your subject, and the glint in their eye, then you will really appreciate that image reliability.

    You’re forced to focus on composition

    This is an interesting one, and certainly an argument that crops up time and time again when talking about the benefits of prime lenses. If you only use zoom lenses, there can often be a level of complacency that sets in, especially if you’re relatively new to photography.
    DPS article 4
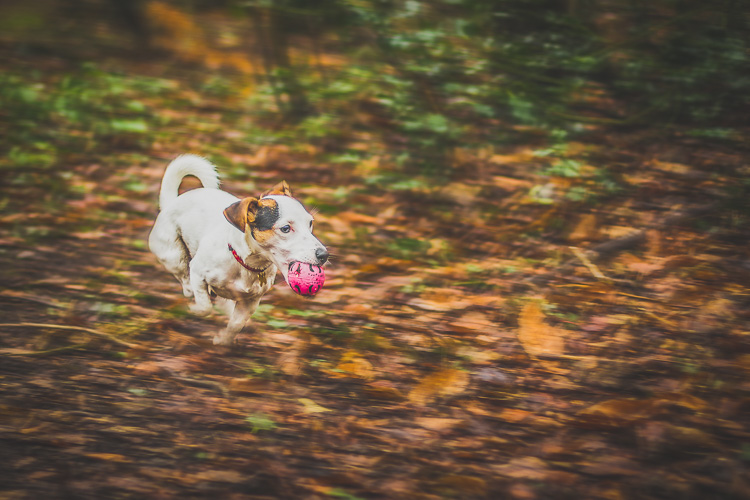
    caption: If I’d been using a zoom lens on this shoot there’s a good chance I would have zoomed in for a tighter composition, with the subject in the middle of the shot. With that option unavailable to me I was able to think about it, and ended up giving the subject plenty of room on the right to run into, improving the overall composition of this image.

    When you’re using a lens with a fixed focal length, you have no choice other than to move around with your subject. You’ll be constantly looking for different angles and opportunities, and eventually you will find yourself in the perfect position, one that you may never have found yourself in, if you weren’t using a prime lens.

    Narrow depth of field

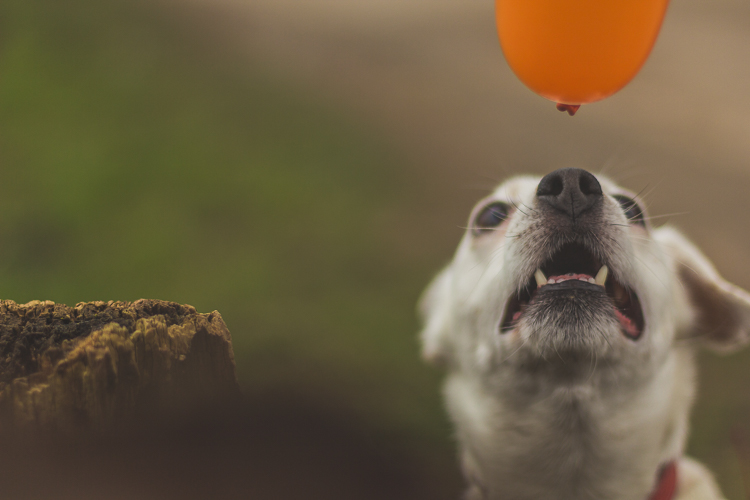
    If you want to make the pictures of your dogs stand out, then a really tight depth of field is a great way to go about it. A prime lens will allow you to open your aperture to f/1.4 or wider, and really blur out that background, making your subjects pop.

    The real benefit of this when you’re taking pictures of dogs is that, unlike human subjects, most of the time you’re not going to get the opportunity to place your dog in position with the ideal background. When you’re photographing dogs, more often than not you’re going to have to work with what you’ve got, and having the ability to blur out background distractions is a huge advantage.
    DPS article 3

    caption: I was at f/1.4 here, which allowed me to focus on the subjects mouth and nose, while completely throwing everything is the background out of focus.

    Cons – or disadvantages

    Having subjects that can move faster than you

    So you’re out with your dog, and he’s running around at full pace for the best part of an hour. Trying to photograph a subject that is constantly moving around can be very tiring, and when you’re looking at your images and seeing a large percentage that will be unusable, it can be a little discouraging.

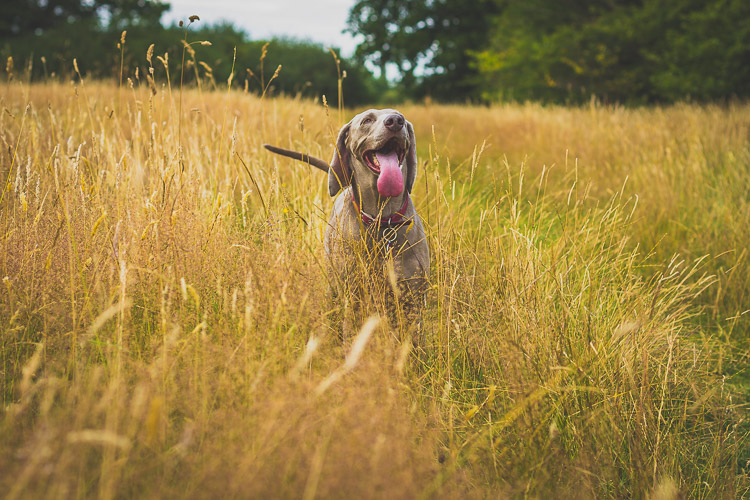
    Something you need to be prepared for when taking pictures of dogs, is that you’re going to have a higher amount of rejects than usual. Unfortunately, this is the nature of pet photography. However, if you learn to embrace this, then you can get some really rewarding shots. Make sure you set your camera to high speed continuous burst mode, set your focus point over the necessary area on your subject, and fire away. Yes, you’re probably going to throw away 75-80% of them, but the ones you keep are going to be well worth it.
    DPS article 8

    Difficulty positioning yourself

    You may find that one of the most daunting aspects of dog photography is knowing where to position yourself. You don’t have the option to zoom in, so where you are physically positioned is vital to getting the shot.

    In order to limit the amount of opportunities you miss, you need to think a couple of steps ahead at all times. Where are your subjects likely to run next? If they’re going to head over there, then where will you need to be to get the best shot? Should you try to get higher than your subject, or should you prepare to get low in order to get down to their level? These are all questions that you should always ask yourself.
    DPS article 7

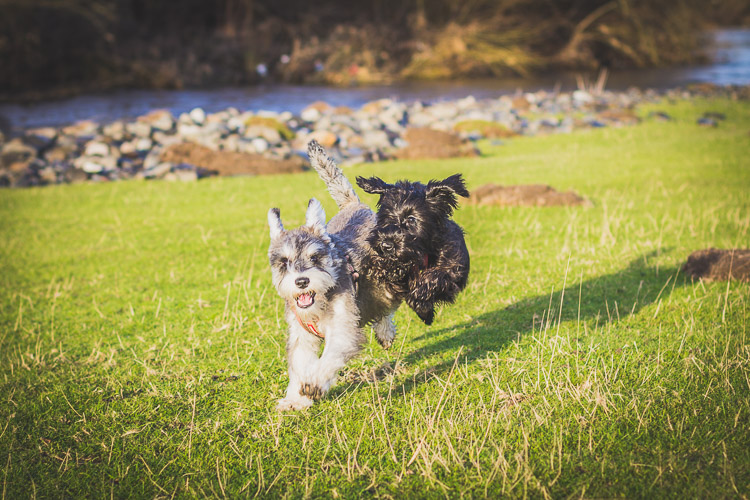
    caption: These two Schnauzers were bundles of fun, but they never stopped moving. I constantly had to guess where they would be next. Often you’ll get it wrong, but sometimes you’ll get it right and nail the shot.

    If you’re doing a pet portrait session then you could stand relatively close to the owner, ask them to throw a stick or ball (or pretend to). While the dogs are running away, get into position, and be ready for when they inevitably run back towards you.

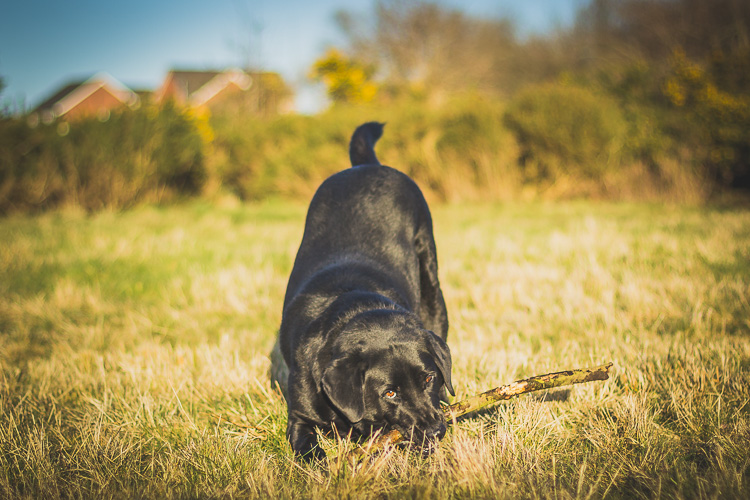
    Remember, your subject is likely to always be moving, so set your focus mode to AI Servo for Canon cameras, or AF-C for Nikon. These focussing modes are designed to continuously adjust focus on moving subjects to ensure that you have the best chance of nailing each shot.
    DPS article 5

    You end up too far away and have to crop heavily in post-processing

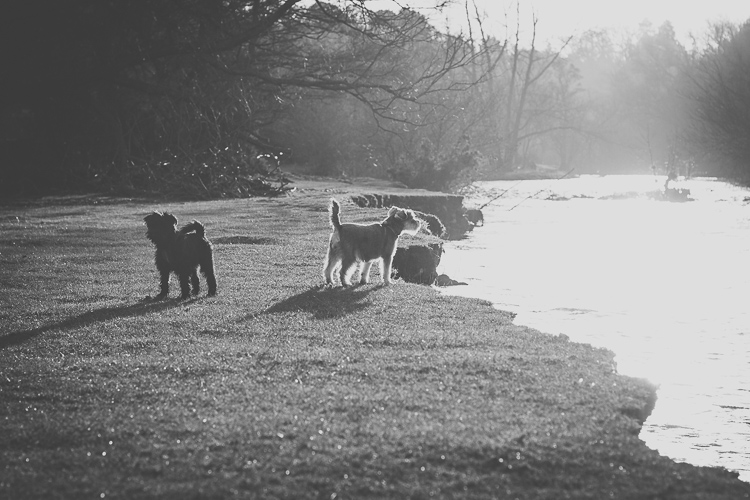
    You don’t always need to get a close crop of your subject to end up with a great image. It’s fantastic when you can see their expressions close-up, or the actions of their body and legs as they run, but sometimes a picture of the dog playing in the distance, with a picturesque backdrop of an open field or wooded area, may be the perfect way to portray the scene.
    DPS article 10

    caption: Not zooming in on this shot allowed me to capture a greater sense of the atmosphere in this winters morning portrait session.

    In summary

    Hopefully this is enough to persuade anyone with an interest in pet photography to give prime lenses a try. You can pick up a nifty fifty prime for the fraction of the price of a decent zoom lens, and you’ll have real fun getting the most out of it. At the very least, you’re guaranteed an excellent workout!
    DPS article 2

    Do you photograph dogs or pets? Have you ever tried using a prime lens? Please share your results, thoughts and comments below.

    googletag.cmd.push(function() {
    tablet_slots.push( googletag.defineSlot( “/1005424/_dPSv4_tab-all-article-bottom_(300×250)”, [300, 250], “pb-ad-78623” ).addService( googletag.pubads() ) ); } );

    googletag.cmd.push(function() {
    mobile_slots.push( googletag.defineSlot( “/1005424/_dPSv4_mob-all-article-bottom_(300×250)”, [300, 250], “pb-ad-78158” ).addService( googletag.pubads() ) ); } );

    The post Pros and Cons of Photographing Dogs with a Prime Lens by Ben Hughes appeared first on Digital Photography School.
    Digital Photography School

  • 12 Tips For Indoor Natural Light Photography

    Feeling frustrated with indoor photography?

    Harsh shadows and weird skin tones are common problems. In this article, you’ll learn how to improve your indoor photography.

    natural light photography indoors

    8 tips for indoor natural light photography

    Working with natural light indoors can be a little tricky. These beginner tips will help you create beautiful photos using natural light.

    1. It’s all about the windows and doors

    You’ll want to get to know the light that comes through them. Sometimes it floods the room softly. Other times it beams in, bouncing off the walls and floor.

    Soft light will add a soft glow, and harsh light will give a dramatic or moody look.

    indoor natural light photography tips 2

    Take note of what kind of light enters each room throughout the day.

    The color of light also changes during the day. It has a warmer look at sunrise and sunset. During midday, it has a cooler or neutral color. Use this to add different effects to your photos.

    2. Turn off the lights

    Natural light doesn’t like competition. Electric lights can affect your white balance. This is because the color of light varies with the source. Skin tones can look odd when artificial light mixes with natural light. The easiest way to fix this problem is by turning off all electric lights.

    3. Shoot in Aperture Priority mode

    In Aperture Priority mode, you choose the aperture. With indoor natural light photography, you need to let in as much light as possible. To do that, you’ll want a wide open aperture. The lower your aperture number (f-stop), the wider your aperture is open.

    When you use a wide aperture, your depth of field will be shallow. So your subject will be in focus, while your background is left soft and blurry. This adds a beautiful effect to portraits and product shots.

    indoor natural light photography

    For portraits, an aperture of around f/5 or f/6 will keep the entire face in focus. Focus on the eyes for best results.

    Note: Also shooting in RAW is better than JPEG for indoor natural light. RAW files give you a lot more to work with when editing.

    aperture priority for indoor natural light photos

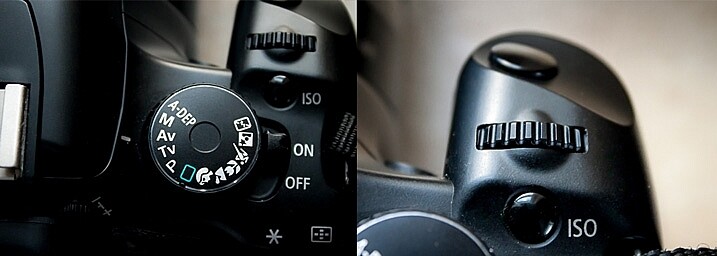
    Aperture Priority is marked with either an AV (Canon cameras, pictured above) or an A (Nikon cameras). To adjust the setting, you’ll turn the small dial (pictured on the right).

    4. Choose your White Balance

    To get good white balance take your camera out of Auto White Balance (AWB). The button for changing white balance is usually marked with a WB somewhere on the back of the camera (or use your Canon Quick menu if you shoot that brand).

    For proper skin tones choose Daylight (the one with the picture of the little sun). This will give good results, not too blue and not too yellow. If you want to warm things up a little, choose Cloudy. This will add more yellow. Try a shot with Daylight, then one with Cloudy, and see which looks right or which you prefer.

    You can adjust your White Balance while editing (if you shoot in RAW) but getting it right while shooting makes editing easier.

    5. Use a light catching backdrop

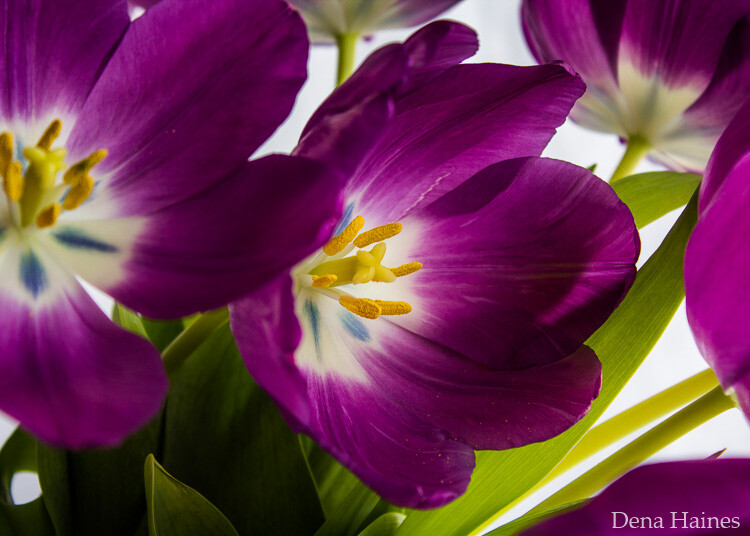
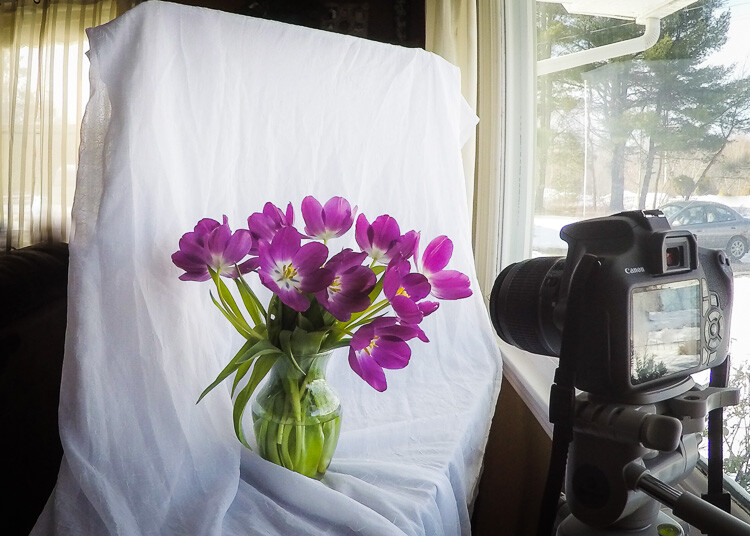
    A backdrop will help catch the light and bounce it back on your subject.

    light catching backdrop for natural light photography

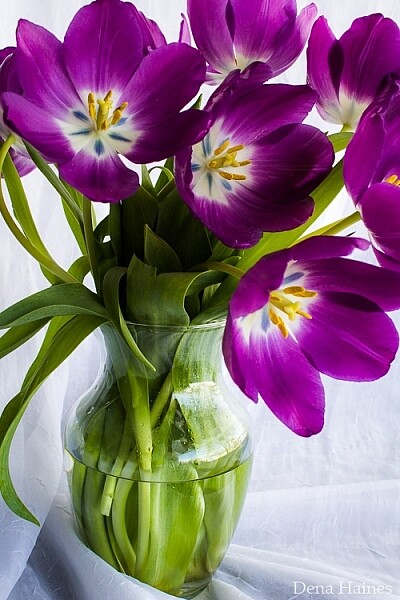
    In the above image, the white material helps to cradle the light around the flowers.

    catch natural light with a backdrop

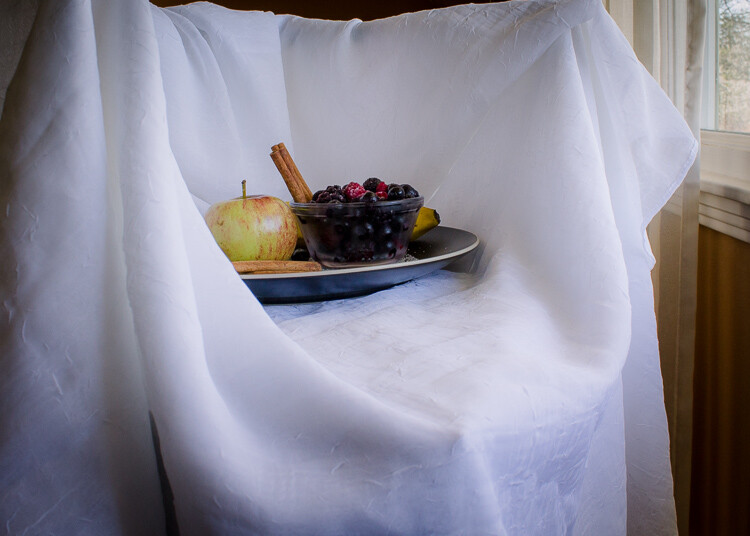
    This backdrop is made with a freestanding collapsible clothes rack and a long piece of white material. I love how easy it is to set up and move around.

    6. Use a light box

    A light box will create a similar effect as the backdrop, but it will help control the light even more.

    use a natural light light box for indoor photos

    I made this light box out of Lego and used the same piece of white material pictured in tip #5.

    tips for natural light photos

     7. Use a reflector

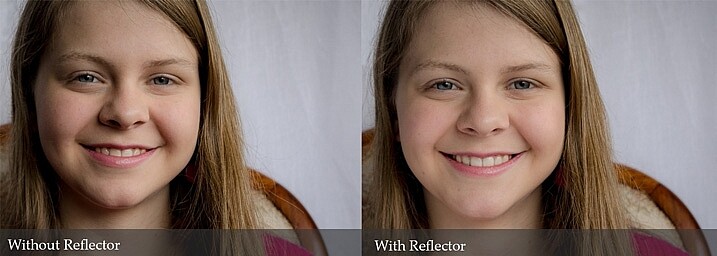
    A reflector is used to bounce natural light back on your subject.

    use a reflector for natural light photography

    tips for indoor natural light photography

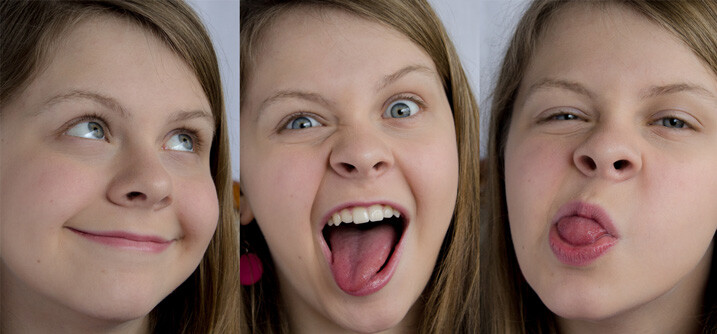
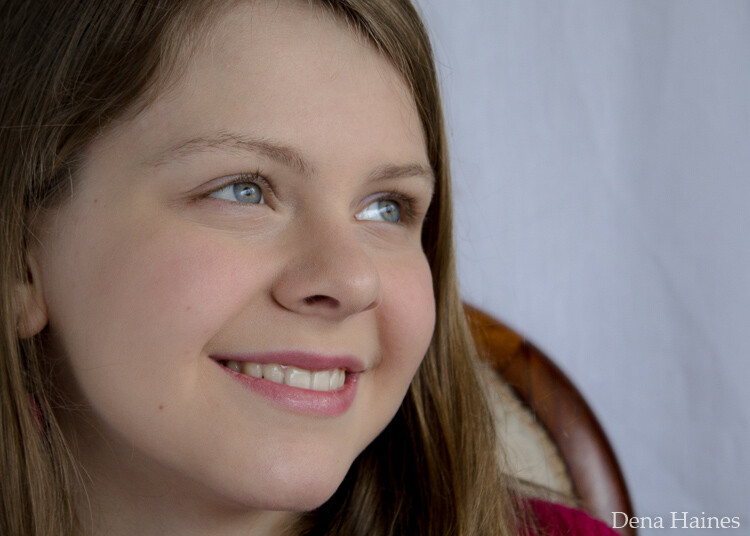
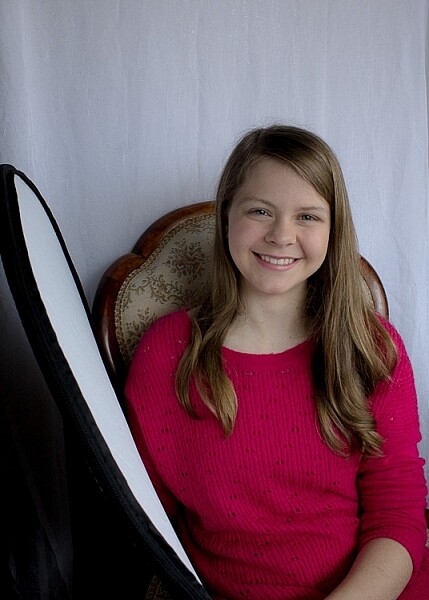
    For these shots, I used a reflector and the backdrop. My daughter was sitting with her left side facing the window. She was holding the reflector in her right hand, which helped lighten the shadows.

    8. Use a mirror

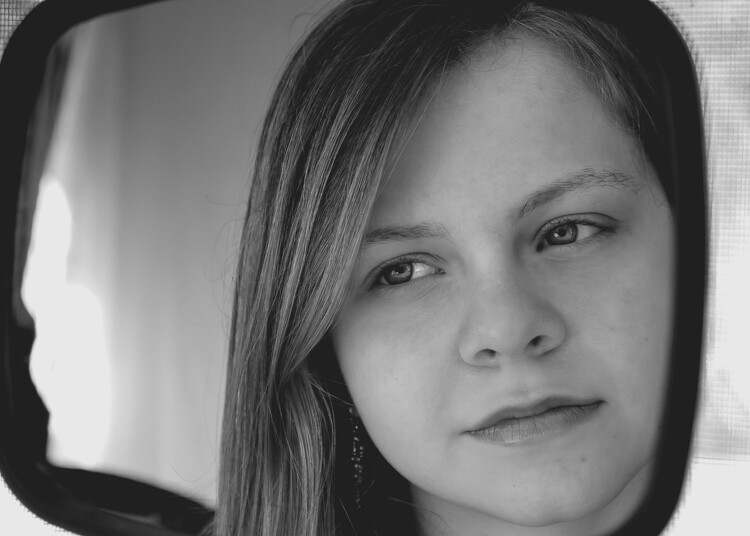
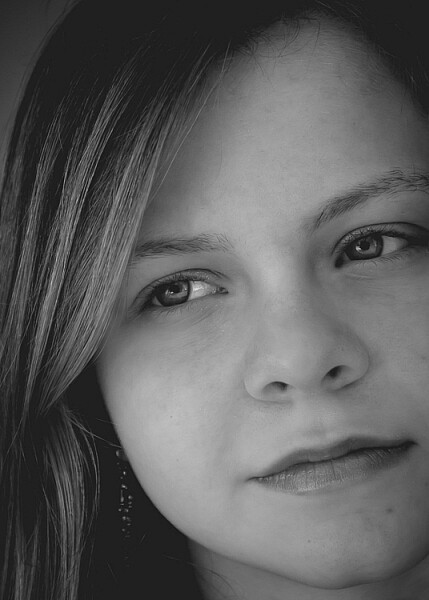
    A mirror is another great way to control natural light. Hang a mirror in the window. I used a large suction cup with a hook to hang the mirror.

    indoor natural light photography tips

    Have your model look in the mirror. As you take your shot make sure your reflection is not in the mirror. It can take some patience to get the angles and reflections under control, but it’s worth it.

    I used a small handheld mirror for this shot. A larger mirror would require less cropping.

    tips for indoor natural light photos

    9. Tidy up

    There are often things lying around the house, especially if you have kids. This clutter can be distracting in a photograph. It’s worth taking a couple minutes to tidy up before you start shooting.

    In a small space, a backdrop can serve a double purpose. It will control light and create a blind to background clutter. It can help make a small space more workable. For most of the photos in this article, I pushed our sofa and table into the middle of our living room, so I could set up in front of our largest window. Without the backdrop, this location wouldn’t work.

    natural light photography indoors 2

    10. Place your subject close to the window

    Place your subject a foot or two away from the light source. This way you’ll make the best use of the natural light, and avoid the harsh contracts that can be created by being too close to the window/door. Try backlit, side lit, and full light by having your model face different angles to the window. 

    11. Use the curtains

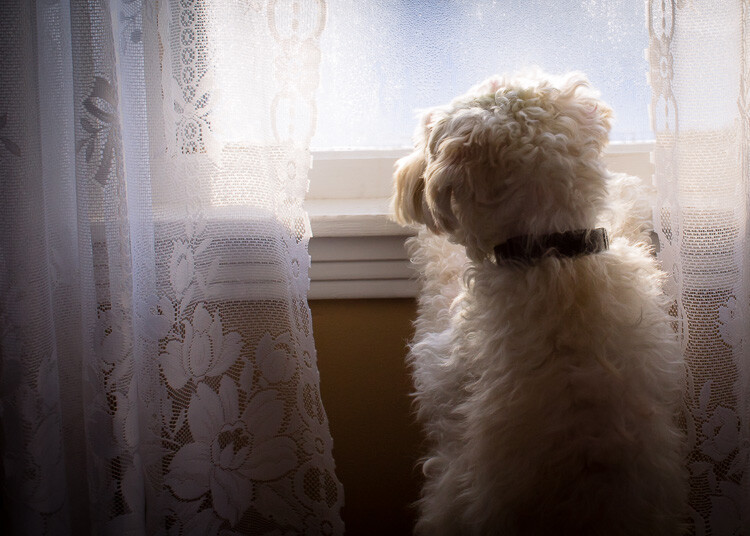
    Use curtains or blinds to help diffuse harsh light. When the sun is beaming into the room, the light can blow out your photos. Pulling the curtains can soften the light and help with proper exposure. If the curtains are not suitable, you could use a sheer piece of material to hang over existing curtain rods.

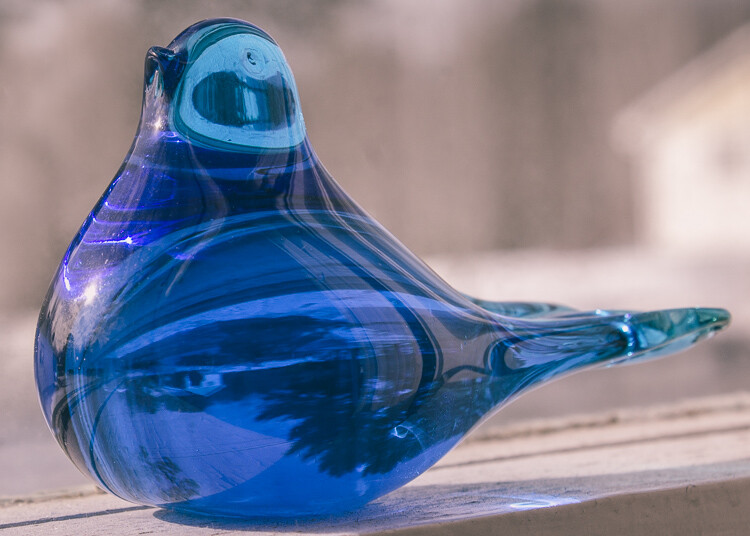
    12. Shoot reflective objects

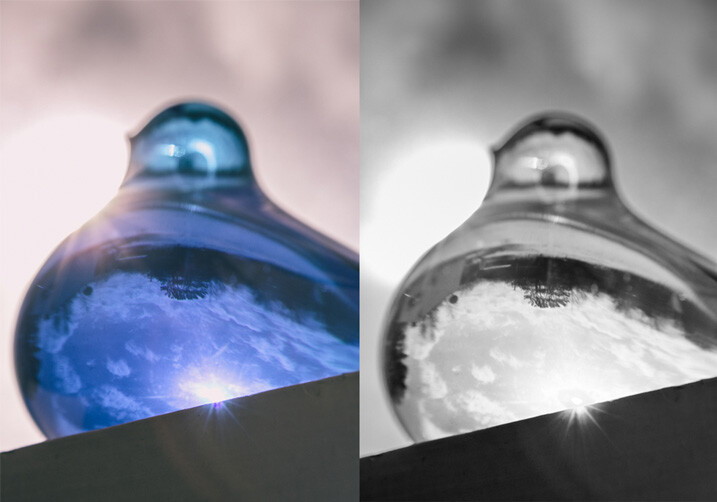
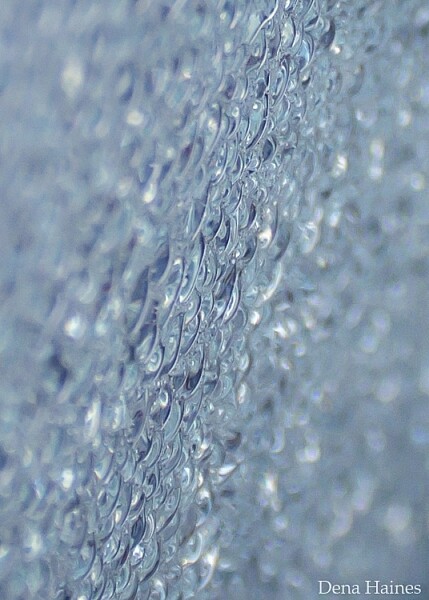
    Natural light can turn the most common thing (like the moisture on the window pictured below) into something beautiful.

    natural light on glass objects

    natural light on reflective objects

    natural light through water on the window

    Have fun playing around with reflective objects and natural light. I love the way light creates reflections and glistens on shiny/iridescent objects.

    You’ve got to love it

    It’s easy to love indoor natural light photography.

    The setup is inexpensive, portable, and easy; and you can create beautiful photos no matter the weather or time of day. Don’t forget to have fun, and let that inner beauty shine through.

    have fun with natural light

    Your turn

    Let me know how your experimenting goes by commenting below. I can’t wait to see what you create. Please share your photos as well.

    googletag.cmd.push(function() {
    tablet_slots.push( googletag.defineSlot( “/1005424/_dPSv4_tab-all-article-bottom_(300×250)”, [300, 250], “pb-ad-78623” ).addService( googletag.pubads() ) ); } );

    googletag.cmd.push(function() {
    mobile_slots.push( googletag.defineSlot( “/1005424/_dPSv4_mob-all-article-bottom_(300×250)”, [300, 250], “pb-ad-78158” ).addService( googletag.pubads() ) ); } );

    The post 12 Tips For Indoor Natural Light Photography by Dena Haines appeared first on Digital Photography School.

    Digital Photography School

  • Fuji Crystal Archive Deep Matte Paper is Freaking Amazing

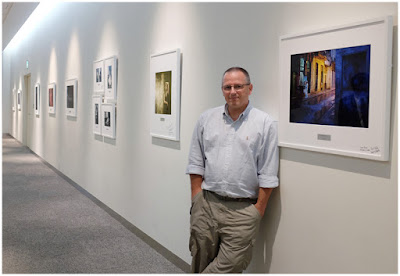
    That’s me, above, in 2013. I made a trip to Japan for some meetings with Fuji. It was me, three other photogs and a room of Fuji engineers for two solid days of “How can we make our cameras better?” discussions. Because that’s how they do.

    One of the highlights of the trip was seeing my work displayed at Corporate HQ at Fujifilm Square in Tokyo. (Pic, above, by Zack Arias.) One of the lowlights was realizing how much better these prints were than anything I could get done in the US.

    Sigh.

    I just assumed it was some sort of Fuji in-house magic file tweaking or something. Or more likely, Fuji’s continuous custody of the whole vertical process, right back to the film SIM.

    Then it happened again in the 5th Anniversary event in Tokyo earlier this year: Gorgeous print, followed by the instant pang of sadness that I cannot get it done to this quality in the US.

    An Import You’ll Wanna Drive

    Well, it turns out that you can. I found it while auditioning several labs for printing of an image of mine that is to be sold be sold at a local gallery. Short version: I have found the paper I am gonna marry, and it is Fujicolor Crystal Archive Deep Matte.

    The prints are hard to describe. They are beautiful and painterly; somehow muted and saturated at the same time. If you want a mental picture, it feels like a Gregory Crewdson image. As for the paper itself, the substrate is quite substantial and the surface is beautifully non-reflective.

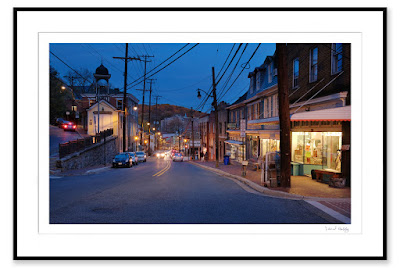
    Here’s the file/framed mock-up. The thing is, the print looks significantly better than the file. And I can’t remember ever thinking that before — other than those two times in Japan.

    I have not tried it with anything subtle yet as far as the files go. But on my color-drenched citiscapes, it looks phenomenal. So much so that I am getting several of my existing prints reprinted on this paper.

    They tell me at the lab that it is great for B&W, too. You’d better believe I am gonna be trying that.

    The paper is silver halide based, and designed for large format and Frontier laser printers, according to Fuji’s poop sheet.

    It uses CP-RA (or RA-4) process, and is said to be archivally stable for 100 years on display, 200 in storage. (Okay, I’ll be dead by then. But this print will still be beautiful.)

    Do yourself a favor and try this stuff. You just need two things: A really competent lab, and Fuji Deep Matte paper. I’m using AdoramaPix and letting them drive on the color correction. (New paper, new printer, what do I know, right?) And I was super happy with the result.

    Pick your favorite file and go big, as in 16×20 or larger. Because the beauty of this paper is that it somehow seems to both accentuate detail and mask noise. I don’t know how it does that. But holy crap.

    $ 5 to Try It

    And here’s something cool: if you want to try it as a one-off, AdoramaPix has a refer-a-friend special that’ll get you $ 5 off on $ 15 or more if you are a new member. And since a 16×20 print there is $ 16.99, it qualifies and drops this little experiment to $ 11.99. Not bad.

    If you give it a try at this link, the referral code should auto-populate. And a quick heads-up, some folks are saying they can’t find the “deep matte” option. Here’s how to do it:

    Sign up using the code. Go to ->Photo Prints, ->Upload Photos Now (upload your image) ->#3 Paper Finish and ->”Deep Matte Finish”.

    It’s only available for 16×20 and up. And these guys being a pro lab, I suggest you let them color correct for you. (If you want to marry them later, you can easily download their ICC profiles and drive the car yourself then.)

    So that’s my Epiphany of The Day, if you will. Suffice to say I am done auditioning prints.

    Try it and let me know what you think.

    Strobist

  • 5 Secrets for Finding Great Indoor Portrait Locations

    156

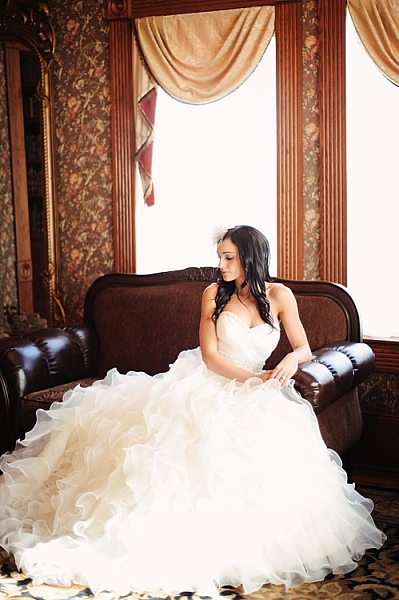
    Not all photographers choose to have a dedicated indoor studio, but sometimes you need to shoot a session indoors. Maybe it’s freezing outside, and you don’t want to be out in that weather. Maybe you have a bride who wants bridals, but is worried about her dress getting dirty. Maybe you just want something fresh and a little quirky. Maybe the building has special meaning to you or the person you are photographing.

    Whatever your reasons, in this article you are going to learn all my secrets to finding indoor locations, and getting permission to use them. Hopefully they’ll help you find the perfect spot for your next session!

    174

    Secret #1: Always be on the lookout

    Wherever you go, keep your photographer eyes open. You may be surprised at how many places transform into a great location once you really start looking. Some unique and exciting photography locations could be: family photos in the library, model portfolio shots in the city building, engagement session in the laundromat, dance group session in a hotel lobby, mom and toddler portraits in a grocery store, bridal session in a grand old house, a museum, a quaint bed and breakfast, a roller-skating rink, a university building, a furniture store, a toy store, or candy store – the list is endless.

    Look for great lighting, open spaces, interesting backgrounds, and fun things to interact with. Notice if there are lots of people that you might be disturbing, or if it’s a relatively calm place that you could photograph in peace. Use your imagination and creativity to turn the ordinary into something extraordinary.

    192

    Secret #2: Always ask permission

    Once you’ve found a place you’d like to try, make sure you ask permission before you bring a client there. I find, if possible, that asking in person is usually the best, because they can see who they are talking to, and are often less resistant if they can see your smiling friendly face. If you need to call, be professional and friendly on the phone, so they feel comfortable letting you come with your camera.

    If you aren’t sure who owns the building, check with city or county records, or ask a neighboring building or house if they know who owns it. Do the legwork to find out who owns the property before you barge in uninvited. It gives all photographers a bad name if you trespass. I’ve had many times where I call to ask permission, and the owner thanks me profusely for asking permission. They express their frustration that other photographers just start shooting without asking. They allowed me to photograph on their property, so obviously they don’t mind people being there, but they always appreciate being asked first.

    Some locations, like museums, or theme parks, are fine with you taking photographs inside, but you have to pay the entrance fee.

    148

    Some places charge a fee for photography, and some don’t allow photographers at all. If you whip your camera out in either of those types of places without asking permission first, you could be fined huge amounts. It’s not worth it. If you ask permission and get a no, just move on and find another place. However, it never hurts to ask. Most of the time you get a yes, and often they are pleased that you think their building is worthy of being a photography location.

    112

    Secret #3: Find an owner who will also benefit

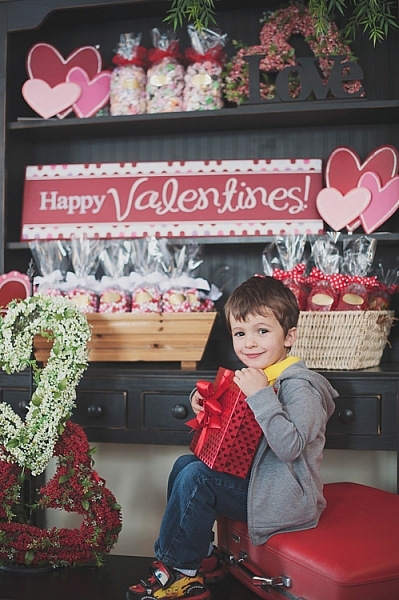
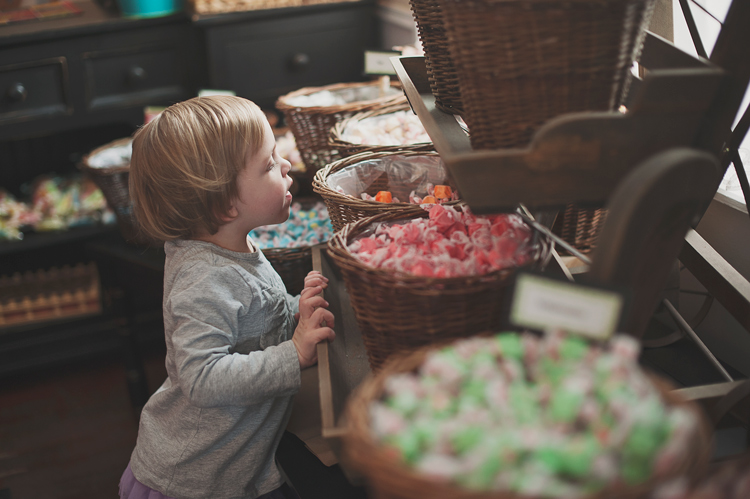
    I needed a place to have adorable kids come for Valentine’s Day photos, but I didn’t know who would want multiple kids and families traipsing in and out of their establishment. Then I came across an adorable little candy shoppe that was decorated perfectly, and full of delicious sweets and treats. My photography clients came in and out all day for their sessions, and ended up buying lots of candy in the process. Many who came had never noticed the little hometown shop, with homemade caramel apples and every kind of candy you can think of, and they were happy to have discovered it. I ended up having a great place for my Valentine’s Day photos, and the owner got a lot of new business.

    177

    Look for places that might have a similar situation, and chances are the owner will be more than happy to let you use their location, free of charge. Many small locally owned places need a couple of photos of their establishment for websites and advertising purposes, or maybe even a quick headshot, and would be thrilled to let you photograph there in exchange for a photo or two.

    146

    Secret #4: Explore any connections

    Sometimes a friend may own a quaint little bed and breakfast, or maybe she works at a museum. If you are photographing that friend, that may be an especially smooth way to get your foot in the door. If things go really well, they may be okay with you bringing other people to their property again. Even if they aren’t the one that you are photographing, you could ask what they think about letting you use the property that they have a connection to.

    Be careful not to ask for too much, and be careful not to put anyone in an uncomfortable position. If you sense that they are hesitant about having a camera there, don’t push it. A little respect goes a long way, and you don’t want to be the photographer that people avoid at all costs. Relationships are more important than having a cool place to photograph, so be extra sensitive when using this secret.

    171

    Secret #5: Be the best guest

    When you’ve gotten permission to use a place, never, never, never ever let anything get destroyed, damaged, or left in any way other than how you found it. If you need to move something out of the way, ask if it’s okay first, and then put it back where you found it. Be mindful of what is going on around you, especially if you are photographing kids. You are responsible for what happens with your session, and you never want to pay a big repair bill, or lose a friendship because you were careless.

    You are not only representing yourself, but all photographers everywhere, when you use a public or private property for photographs. If you make it a horrible experience for the owners, you have more than likely ruined it for future sessions for yourself, and for all other photographers who might think to ask permission. Please don’t be that careless photographer who ruins it for everyone. Instead, leave such a great impression that all photographers will be welcomed with open arms into almost every establishment, to create beautiful and unique photographs.

    111

    Do you have any other tips for finding great indoor portrait locations? Have you found any gems? Please share your comments and images of your favorite spots below.

    googletag.cmd.push(function() {
    tablet_slots.push( googletag.defineSlot( “/1005424/_dPSv4_tab-all-article-bottom_(300×250)”, [300, 250], “pb-ad-78623” ).addService( googletag.pubads() ) ); } );

    googletag.cmd.push(function() {
    mobile_slots.push( googletag.defineSlot( “/1005424/_dPSv4_mob-all-article-bottom_(300×250)”, [300, 250], “pb-ad-78158” ).addService( googletag.pubads() ) ); } );

    The post 5 Secrets for Finding Great Indoor Portrait Locations by Melinda Smith appeared first on Digital Photography School.

    Digital Photography School

  • 5 Troubleshooting Steps for When Your Nikon’s Autofocus Stops Working

    You’re in the middle of a photoshoot and suddenly you notice nothing in your viewfinder is in focus. Your shutter and AF-ON buttons (if using back-button focusing) do not seem to work. All eyes are on you, and the pressure is on to quickly fix the problem. Where do you start? Or perhaps you have just changed lenses and suddenly nothing works. Where might you have gone wrong?

    This has happened to me one too many times, so I have now come up with a system of troubleshooting in the quickest time possible on the spot. It goes without saying, of course, that your camera needs to be switched to ON and the lens cap needs to be off.

    nikon-autofocus-troubleshooting-photo-tips

    #1 Autofocus not Manual

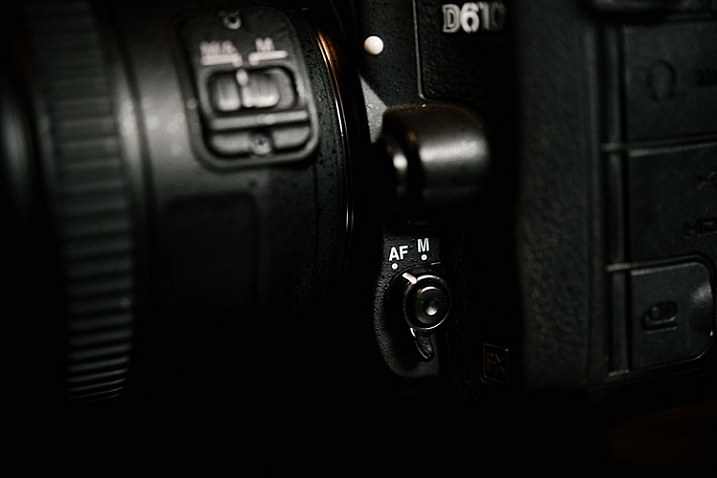
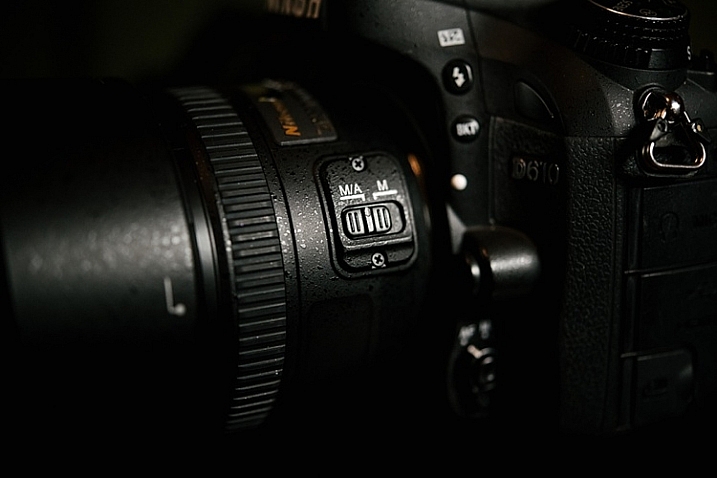
    Check that both the lens and the camera switches are both pointing towards Autofocus. On the camera it must be set on AF, not M, and on the lens put it to M/A (A stands for Autofocus and M for Manual, M/A allows you to use both). Flicking the lens switch to Manual can be done unwittingly and fairly easily, especially if you are in a rush to change lenses.

    nikon-autofocus-troubleshooting-photo-tips

    nikon-autofocus-troubleshooting-photo-tips

    #2 Back dial is not Locked

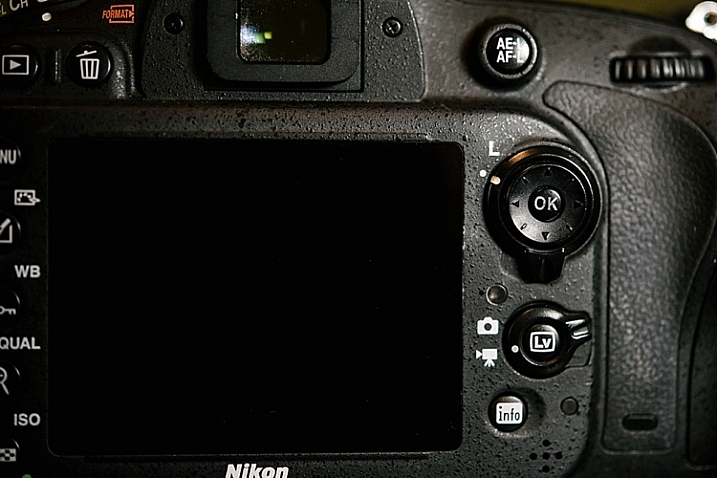
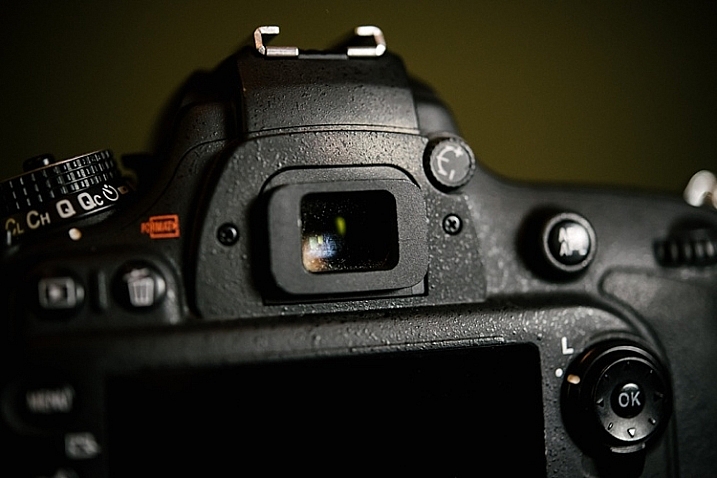
    Check that the dial is pointed towards the camera icon and not the L, which stands for lock.  You can easily flick this dial, especially if you are back-button focusing and your dial sees so much action.

    nikon-autofocus-troubleshooting-photo-tips

    #3 AEL / AFL

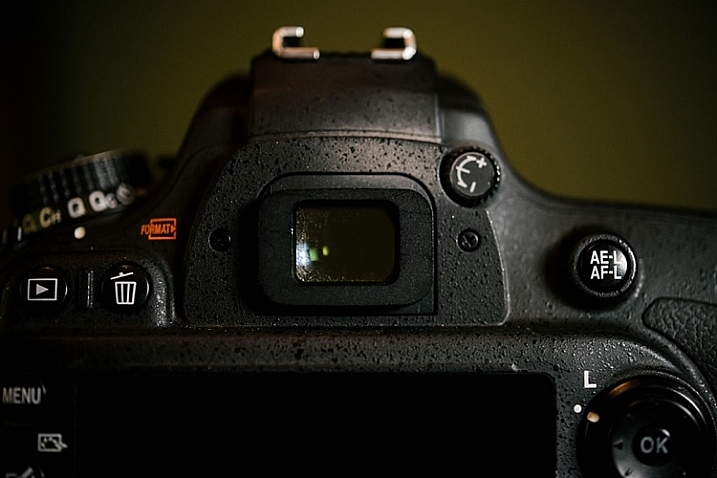
    Check your AEL/AFL button that you haven’t locked focus. Clicking it once locks focus so click it another time to unlock focus.

    nikon-autofocus-troubleshooting-photo-tips

    #4 Check the lens

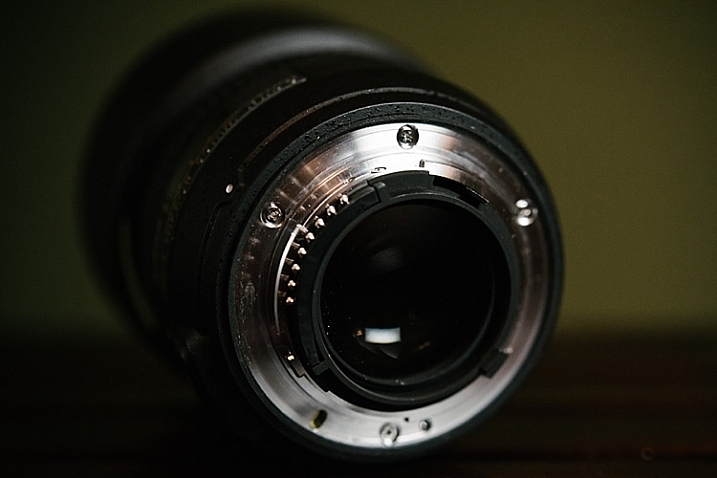
    Remove the lens. Inspect the front and rear lens aspects for smudges or dirt. Check also that no part of the lens is broken. If you have filters on your lens, check that they are clear and there are no cracks. When you re-attach the lens, make sure you hear a click once the lens is twisted in place.  If there are any smudges on the lens, make sure you clean it with a lens cloth, and do not blow on the lens.

    Lens cloths are usually lint-free pieces of material, and should be used with a lens cleaning solution, rather than anything with solvents. Blowing on the lens can contribute to lens damage since a person’s breath can contain harmful acids. If you feel you have to blow, use a lens bulb blower and a brush.

    nikon-autofocus-troubleshooting-photo-tips

    #5 Viewfinder

    Finally, check your viewfinder and make sure there are no oils, smudges or dirt covering your sight. You can clean the viewfinder the same way you clean your lens.

    nikon-autofocus-troubleshooting-photo-tips

    #6 Bonus

    This applies to any camera, not just Nikons. If something is going on with your camera that is odd – turn it off for a few seconds, then turn it back on. It’s like a reboot for your camera, just like you do with your computer. If that doesn’t work you can also try removing the battery for a minute or more (remember to turn the camera off before removing the battery). As a last ditch effort you could try resetting all functions and settings on the camera to factory default. If it still isn’t working test the camera with another lens, if that one works you may need to take your lens in to get serviced. If the

    I hope this little troubleshooting guide helps when you get stuck with focusing problems. Do you have any other quick focus troubleshooting tips to share?

    googletag.cmd.push(function() {
    tablet_slots.push( googletag.defineSlot( “/1005424/_dPSv4_tab-all-article-bottom_(300×250)”, [300, 250], “pb-ad-78623” ).addService( googletag.pubads() ) ); } );

    googletag.cmd.push(function() {
    mobile_slots.push( googletag.defineSlot( “/1005424/_dPSv4_mob-all-article-bottom_(300×250)”, [300, 250], “pb-ad-78158” ).addService( googletag.pubads() ) ); } );

    The post 5 Troubleshooting Steps for When Your Nikon’s Autofocus Stops Working by Lily Sawyer appeared first on Digital Photography School.

    Digital Photography School

  • 5 Tips for Using Risk Taking as a Tool for Better Photography

    With the rising tide of enthusiast photographers and the ubiquitous camera phone, there is more competition for eyeballs than ever before in the photo industry. How can you ever stand out from the crowd to be noticed? The trick is both deceptively simple and incredibly complicated: take more risks. Great photographers rarely play it safe, but before you head into the world with reckless abandon, let’s dive into what kinds of risk taking is productive.

    1 – Your camera is a tool, not a pet

    You’ve received your very first, very shiny, very expensive DSLR kit. Your instincts are to cradle and protect the expensive piece of equipment. Don’t. While you shouldn’t fully submerge your camera, or throw it off the balcony and expect good results, coddling it like your newborn child won’t do you any good either. It’s a tool and is meant to be used out in the world. It should get a few scratches in the paint and some wear and tear on the grip. Take a look at the following images and ask yourself where the camera is.

    CmscottiRisk01

    CmscottiRisk02

    CmscottiRisk03

    For the first two, the camera is sitting on the bow of a kayak roughly four inches above the water. For the third image, the camera is a half inch off the muddy ground. Water is often a camera’s worst enemy, but without the risk of the camera getting wet, these images would not be possible. Water is not your camera’s only enemy though. Dings and scrapes, dust, and even wild animals pose a threat.

    That said, there are ways to be smart about risk taking and mitigating potential problems. For example, when kayaking you could store the equipment in a dry bag, so it is only exposed when you stop to take a photograph. You could have a friend kayak with you and help stabilize your kayak, or warn you when a large wave is coming. (It is recommended to do outdoor activities with a buddy anyway for general safety). You can use various coverings, coatings, and cases as well to protect your gear.

    CmscottiRisk04

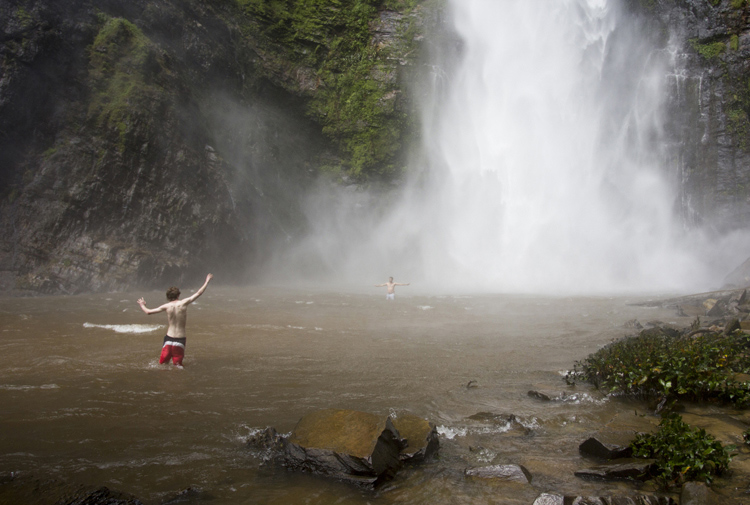
    You don’t even have to be in the water to expose your camera to harsh elements. The spray from Wli falls in Ghana was strong enough to reach me 300 meters away. I kept a light jacket in front of my camera until the right moment.

    2 – Know your tools

    In order to take risks in a smart fashion, it helps to know the limitations of your tools. Does your camera have dust or weather sealing? Does the lens? Did you remember to put a clear (UV) filter on the front of the lens to protect against the basic threats? Is the body primarily plastic? Does it have a metal frame? A quick visit to the manufacturer’s website or a websearch for your equipment’s user manuals should get you the information you need.

    There are many more things to consider, but the point is to learn as much as possible about your kit. Your DSLR and lens may be weather sealed and can handle light rain but the audio recorder may not be and may wind up being the weak link.

    It’s wise to know how to use your camera well. Often in risky situations you will want to expose your equipment to that risk for the least amount of time possible. The better you know your camera, the less time you’ll spend fiddling with settings. Be sure to practice using your equipment in a low-stress environment, before exposing yourself to a risky situation. Digital Photography School is a great resource for articles on the nitty-gritty workings of your camera, so you don’t have to travel far to get started mastering your gear.

    3 – Do your homework on your subjects too

    CmscottiRisk05

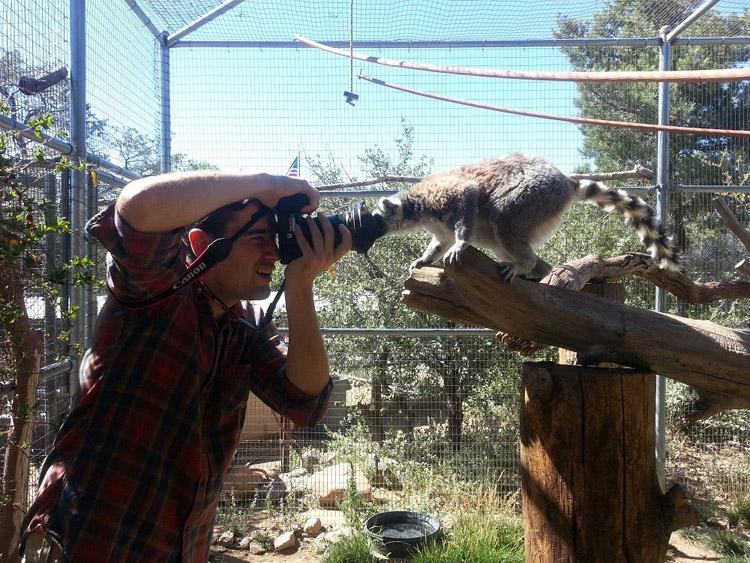
    Let’s say you have been given an assignment that involves getting into an occupied cage at the zoo. How do you prepare? It isn’t enough in this situation to know your gear alone. You need to learn about the animals you are interacting with, some basics on their behavioural cues, and what potential stressors may be present. Luckily in this situation you are likely to get help from the zoo’s staff; in fact, they are required to enter the enclosure with you. But be sure to meet with them prior, and take some time online or in a library to supplement your knowledge. Be sure to ask questions specific to your situation as well.

    CmscottiRisk06

    Photo courtesy of Clare Hancock.

    In this case, what do you do if an animal approaches you and grabs, bites, or otherwise latches onto the camera? It turns out in the case of lemurs, just hold still and they’ll lose interest pretty quickly. The point is don’t panic and don’t be afraid to ask questions, even if they sound far-fetched.

    CmscottiRisk07

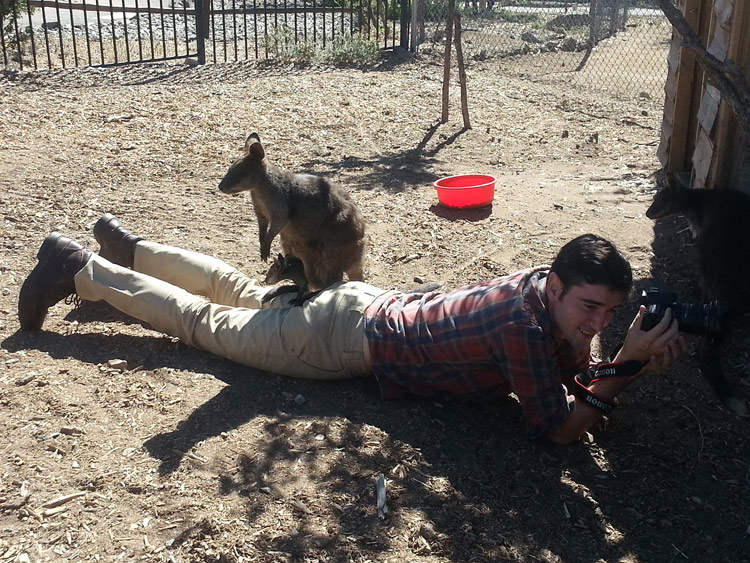
    What would you do in this situation? Photo courtesy of Clare Hancock.

    In the same vein as asking questions to be prepared, don’t be afraid to ask questions during a shoot either. You are only expected to be an expert photographer. In this particular example, the zoo staff are there to help everything go smoothly. Don’t let pride prevent you from tapping into their expertise. Consider the photo above, I had no idea what to do when a wallaby and her baby decided I made a comfy resting place. I checked with the keepers to make sure there wasn’t any risk to myself or the wallabies. There wasn’t, so I continued to shoot from that position until she eventually hopped away.

    Being informed is the best way to enter a potentially risky situation. The zoo session may seem specific, but consider what would go into photographing a tall ship setting sail, or snowboarders screaming down slopes, or even your own dog in your backyard. Snapping good images often involves getting in close, or shooting from a unique angle that could involve having a camera accidentally knocked out of your hands on a crowded ship deck, having snow sprayed onto your camera, or even having an excited dog slobber all over your equipment or tackle you. Do some homework, be aware of your surroundings, ask questions and you will have mitigated most of the riskiness.

    4 – Taking risks in your career

    Using risk as a tool in your career is not specific to photography, but it is especially important in this field. If you always use the same tried and true portrait poses, and standard three point lighting that you learned in your high school photo course, you are likely going to be stuck at a studio in the mall holding a stuffed giraffe in one hand and a remote trigger in the other, praying that baby Jesse stops crying. (If you work at one of these and enjoy your job, that is awesome and you are honestly a much more patient person than I). Most photographers I know have bigger dreams than this, whether it is running their own mall studio or becoming a successful commercial photographer. Unless you run into some magnificent stroke of luck and were born with real talent, this is going to a lot of time, more effort, and a few risks.

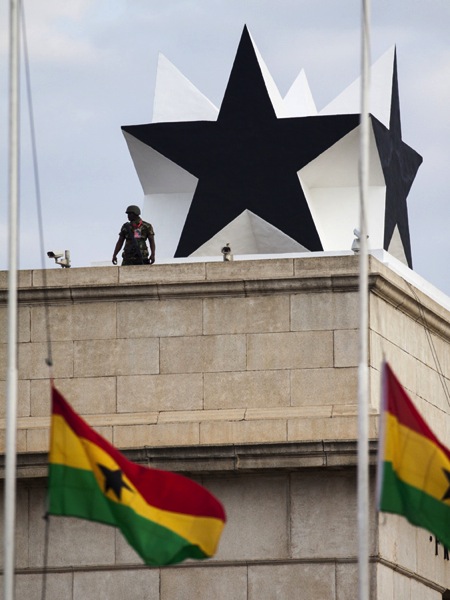
    I am no Warren Buffett when it comes to business sense, but I can say the biggest jumps in my own career came from taking big risks. When former Ghanaian President John Atta Mills passed away in July of 2012, I was just coming out of graduate school and interning at the Daily Guide newspaper in Accra. President Mills was the first Ghanaian president to die in office and his state funeral was considered one of the most important stories in the region. I had just arrived in country, knew only what I had read about the culture and only had two weeks to convince my new, sceptical editor to let me be a part of the team covering the story. I worked very hard with my new coworkers, contributing to as many stories as possible, and hanging out with the reporters to learn about Ghanaian politics, history and culture.

    CmscottiRisk08

    Two days before the funeral, I convinced my editor to let me go on the assignment. Going in I was scared. I felt like I could never be prepared enough, and doubted every decision I made during the assignment. Regardless, I took the risk of screwing up an important assignment, and managed to rise to a challenge. The images ran front page and an entire centrefold was dedicated to my images of the event. Moments like these demand taking risks. If you have ambitions beyond photography as a hobby, you will need to get used to going in over your head. Risk will always force you to be a better photographer.

    CmscottiRisk09

    However, the risks you can take regarding your career can be mitigated to some extent as well. The key, as you already know, is being prepared. This is a much more abstract process compared to mitigating risks related to camera equipment. While some things are the same, – knowing your tools and subjects well enough to work efficiently – others go a little beyond the act of photography itself. They involve politics in your particular branch of the profession, and knowing just how far you can push yourself.

    CmscottiRisk10

    As I eluded to earlier, I am not the kind of guy you will see doing family portraits or weddings. I am horrible at convincing the average person to smile or look natural. I simply am no good at those kind of portraits. That said, after I won my first photo award I ran out and bought a Vivitar flash, cloth backdrop and three hot lamps. I was convinced I was going to quit my job waiting tables and pay for my impending college career with my photographic talent. I was wrong… very wrong. I managed to perform poorly on three portrait sessions before realizing that my foray may have been a mistake, and I was out a few hundred dollars in studio gear.

    I knew nothing about the family portraiture business. I didn’t do any research aside from reading a couple of gear reviews and really burned myself in the process. Worst of all I didn’t know my equipment very well. I had a total of one lesson in studio lighting under my belt at the time and may have purchased a book, that to this day, I have read a total of three pages of. I took a dumb risk and hurt my confidence and disappointed people in the process.

    CmscottiRisk11

    Crappy portrait of Markus Sales

    5 – When things go wrong

    There is one catch to risk taking. What if it doesn’t pan out. You may end up with broken equipment, angry customers, or bodily injury. What now?

    Broken equipment is relatively easy to deal with: mourn the loss of your trusted tool, then buy a new one. If you are worried about not being able to afford replacing equipment, talk to your insurance company about whether your homeowners or renters insurance will cover your gear outside your home. Specific camera (and commercial) insurance policies are available as well. Be sure to find out what is covered and how they handle claims.

    Smoothing customer relations or repairing a career are tougher issues. Patience and good customer service skills will go a long way, but every case has to be approached individually. Giving a discount for a mediocre portrait shoot might work in one case, but blowing an expensive commercial shoot is going to take a whole different approach. I have been lucky enough that I haven’t had to do this in my own career, but I encourage joining professional associations and talking to other professional photographers to learn what consequences there might be, and how to recover from them.

    Bodily injury is the worst on this list. If you are risking your life or serious injury for a photograph, STOP! No photograph is worth getting hurt or dying for. There has been a recent rash of people dying while taking selfies or trying to capture memories from crazy angles over the edge of a skyscraper. It doesn’t matter if it could be the best photo ever taken, this kind of risk is never worth taking in the first place. Broken cameras can be replaced, careers rebuilt, and customer relations smoothed over, but the best photo of your career is worthless if you die or are maimed in the process. Just don’t do it.

    One final disclaimer

    The nature of risk taking is that the result could be game changing good, or painfully bad. You can fail and fail hard. The advice given here is simply what I have learned over the course of my own career, and it may not apply to you at all. There is no guarantee that taking any kind of risk will result in a positive outcome. Ultimately, you must decide if the risks you take – if any – are worth taking. The outcomes of taking those risks will be entirely yours, so use your best judgment. If you do decide to take a risk, be smart about it and do everything in your power to lessen that risk. Best of luck out there.

    googletag.cmd.push(function() {
    tablet_slots.push( googletag.defineSlot( “/1005424/_dPSv4_tab-all-article-bottom_(300×250)”, [300, 250], “pb-ad-78623” ).addService( googletag.pubads() ) ); } );

    googletag.cmd.push(function() {
    mobile_slots.push( googletag.defineSlot( “/1005424/_dPSv4_mob-all-article-bottom_(300×250)”, [300, 250], “pb-ad-78158” ).addService( googletag.pubads() ) ); } );

    The post 5 Tips for Using Risk Taking as a Tool for Better Photography by Christopher Scotti appeared first on Digital Photography School.

    Digital Photography School

  • 5 Tips for Using the Lightroom Adjustment Brush Tool

    One of Lightroom’s most useful tools is tucked away at the top of the Develop panel, under a rather strange-looking icon that looks like a magic wand from Harry Potter. Clicking this Adjustment Brush icon, gives you access to many of the macro-scale alterations and edits available on some of the other Develop panels, but lets you control them on a micro level. It’s a fantastic tool for editing specific portions of an image, as opposed to the whole picture, but figuring out how to use it can be a bit overwhelming.

    Here are my five favorite tips and tricks for using the Lightroom Adjustment Brush tool, and hopefully some of these will be useful to you as you explore how to use it for your own editing.

    five-tips-brush-tool-woman-portrait

    1. Use the A/B brush options to alternate between different types of brushes

    My wife and I have done a great deal of painting in our house over the years. From hallways, to walkways, to bedrooms, we have spent more time and money on painting than I ever thought possible before we became homeowners. One of the most valuable lessons we have learned is that different types of painting jobs require different brushes. Sometimes you need a large roller, other times you need a small one. Sometimes you need a two-inch angled brush, and other times you need a small foam one. Each brush has its own purpose, and all are required to properly complete a painting task.

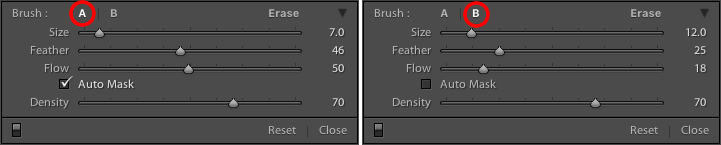
    The same principle holds true in Lightroom, and you often need more than one brush to make the adjustments necessary on a given image. This problem is easily remedied by switching between the A and B brushes near the bottom of the Adjustment Brush panel.

    five-tips-brush-tool-a-b-brushes

    Brush A is highlighted by default when you click on the Adjustment Brush panel, which means that any size, feather, flow, mask, and density settings you use will be automatically applied to that brush. When you click on Brush B you can use an entirely different set of options, then cycle between the two brushes just by clicking A and B. In the example above, Brush A is small with a medium feather and flow rate. Brush B is larger with a much lower flow rate and no Auto Mask, which makes it better suited for large-scale edits, whereas Brush A would be better suited for fine-tuning specific parts of an image. Setting up two different brushes is a great way to speed up your editing workflow, since you won’t need to continually change the parameters of a single brush, and you can instantly switch between the brushes by pressing the forward slash (/) key.

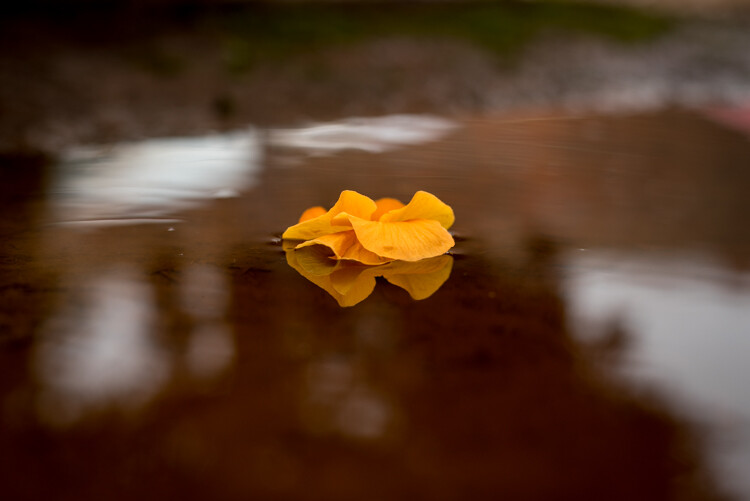
    I used a large brush on the background and a smaller brush on the flower petals, and was able to switch between the two easily to get the edits I needed quickly.

    I used a large brush on the background and a smaller brush on the flower petals, and was able to switch between the two easily to get the edits I needed quickly.

    2. Create custom brush effect presets

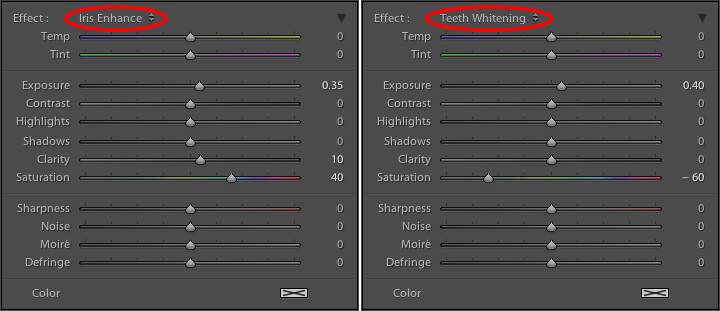
    If the A/B brushes are similar to choosing different physical brushes at a hardware store, then the brush effect presets are like picking out different types of paint. Lightroom has several different presets that are available as default options, and they have names like “Highlights,” “Temp,” and “Teeth Whitening.” These presets are just default values that Lightroom thinks would work well to accomplish specific tasks like: adjusting exposure, adding contrast, or reducing noise. You can see how they work just by looking at the sliders, as you change from one preset to another.

    These presets don't inherently do anything special, they just adjust various sliders in different ways.

    These presets don’t inherently do anything special, they just adjust various sliders in different ways. You can create your own presets to do unique tasks as well.

    The beauty of these presets is you are free to add new ones that suit your own workflow. You would never select from only a dozen colors when choosing how to paint a room in your house, and neither should you be forced to stay within the confines of the existing presets in Lightroom. To add your own presets, adjust the sliders how you want, click the name of the existing preset to pull down the list, and choose “Save Current Settings as New Preset.” Give your new collection of slider settings a name, and you can now select it whenever you want, right alongside the rest of the presets.

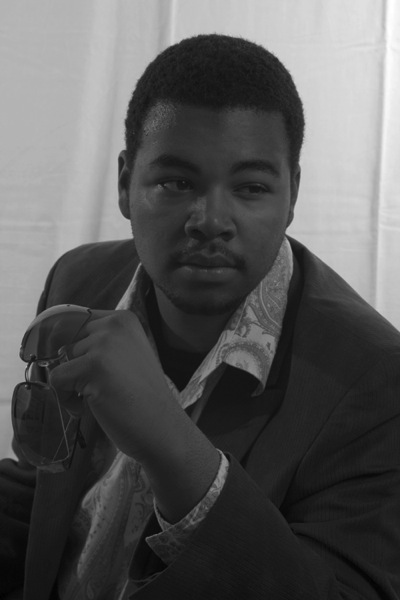
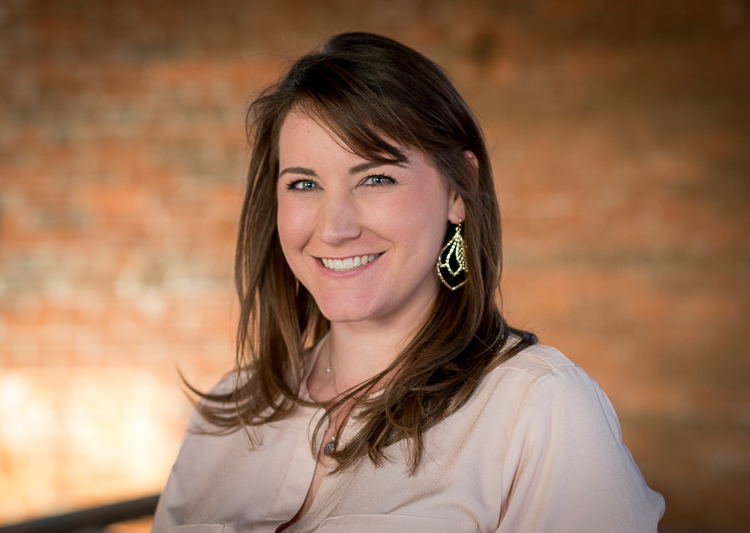
    For example, I have found that on many of my portraits I need to brush in some sharpness while reducing the noise so I created a preset to do exactly that. I also have custom skin smoothing and teeth whitening presets that are a bit different from the default set Lightroom uses, and it’s very handy to switch over to these brushes whenever I need to, instead of configuring the sliders from scratch every single time.

    3. Adding color to a brush

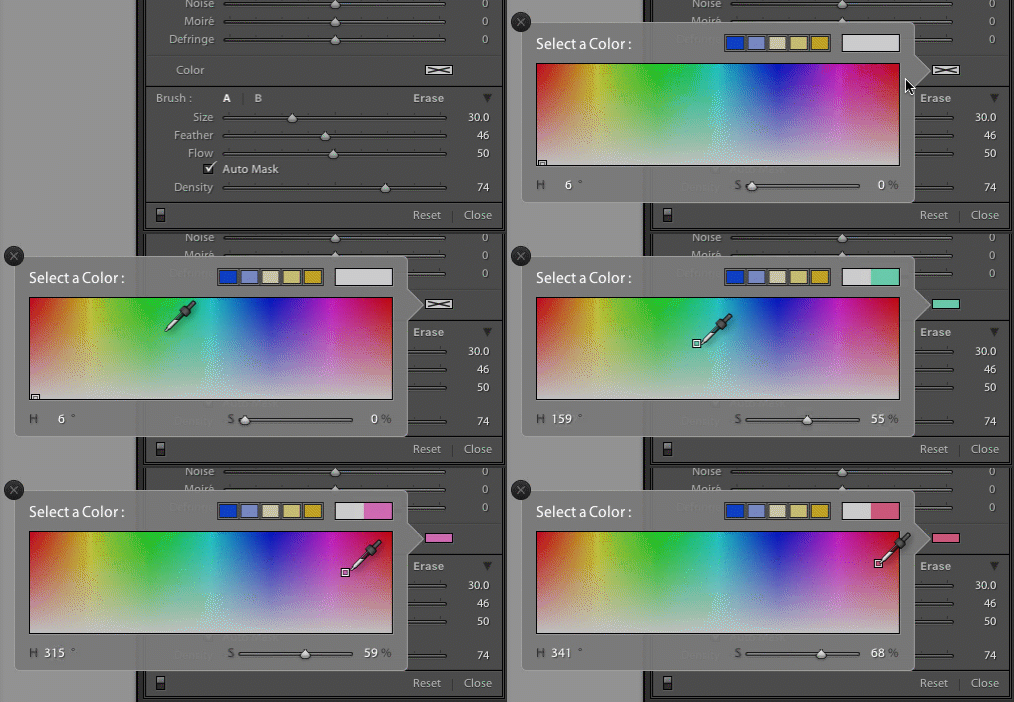
    I started this article with an analogy comparing the Adjustment Brush tool in Lightroom to a literal paint brush, but what some people don’t realize is you actually can use the tool exactly like a paint brush to add color to your images. Near the bottom of the color panel is a rectangular box with a large X through it, and if you click on that you will see a color picker with an eyedropper tool that you can use to give your brush strokes a bit of color.

    five-tips-brush-tool-color-selection-animated

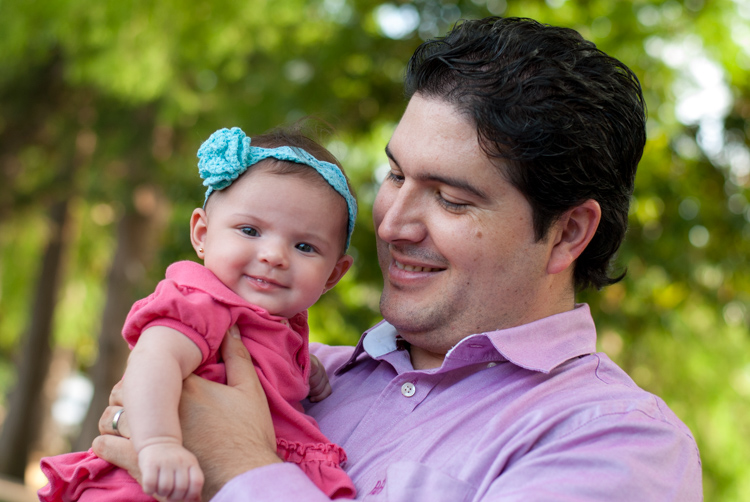
    Once you apply a color, the Lightroom Adjustment Brush tool now functions just like the paintbrush in any standard painting application on your computer. It applies any effects you are already using such as exposure, clarity, or saturation while also painting in the color you specified. In the following picture I used this technique to add a subtle splash of color to the baby’s face, but you can also use it on much larger edits like changing the color of flowers or altering the eyes on a portrait.

    five-tips-brush-tool-man-baby

    4. Use Auto Mask to contain the brush to specific areas

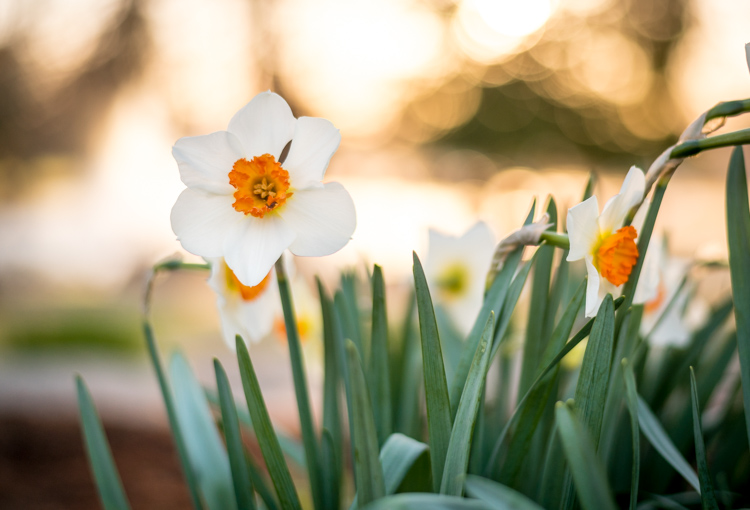
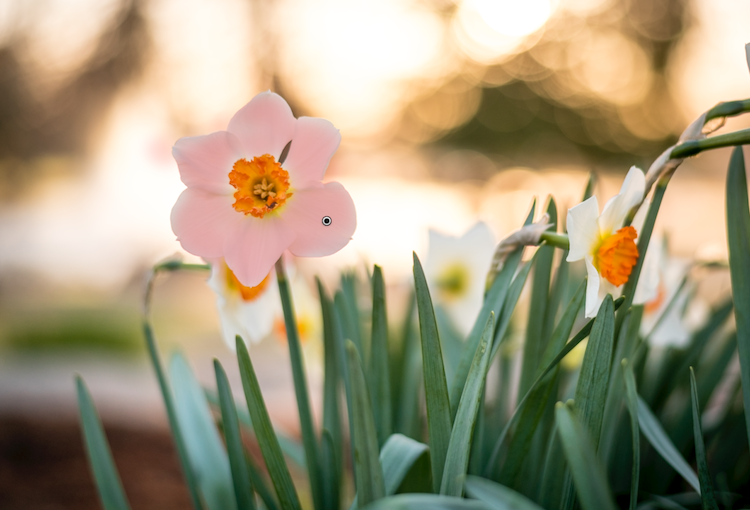
    One of the most frustrating parts about the Adjustment Brush tool is that, unlike regular paintbrushes, it only comes in one shape: a circle, which can present a bit of a problem when editing photos with hard lines and angles. How do you confine your brush edits to just a specific area? The key to this lies in the Auto Mask feature which, when checked, tries to keep all the brush edits to places on the image that are similar to where you started painting. In the following picture I used some custom brush settings involving highlights and clarity and then clicked the Auto Mask function to keep these edits within the petals only, and not the surrounding areas.

    five-tips-brush-tool-white-yellow-flower

    An easy way to make sure the Auto Mask is doing what you want is to hover your mouse over the black dot that appears where you started brushing in your edits (hit the H key if you do not see it). You will then see a red overlay that shows precisely where your edits for that particular brush have been applied, and as you can see below they were confined to the precise area that I wanted, the flower petals. This type of precision is very difficult without the Auto Mask option, but with the click of a button Lightroom makes it very easy for you to do as your kindergarten teacher likely admonished years ago, color inside the lines.

    five-tips-brush-tool-white-yellow-flower-edits

    5. Changing brush size, resetting settings, and fixing mistakes

    There are so many useful elements to the brush tool that it’s kind of difficult to distill everything down to five points. As such, here are a few more tips and tricks that I have found quite handy and you might too.

    • Use the scroll wheel on your mouse to quickly change the size of your brush. For fine-grain adjustments you can click the numbers in the brush parameters that indicate Size, Feather, Flow, and Density and increase or decrease them with the arrow keys on your keyboard. To go up and down in units of ten, hold the [shift] key while pressing arrow-up or arrow-down.
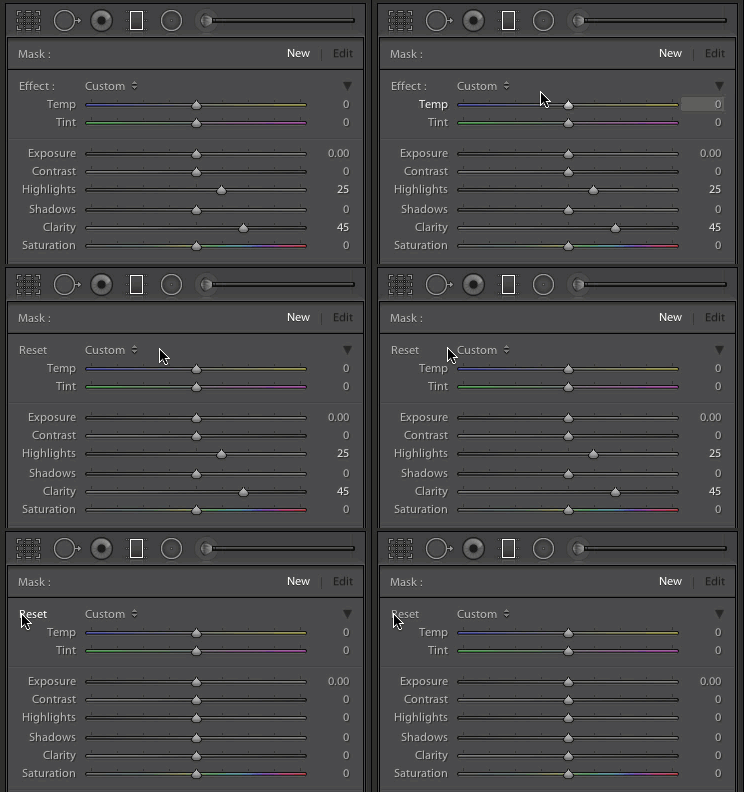
    • five-tips-brush-tool-resetAfter you have brushed in a particular set of edits, click “New” on the top-right of the Brush panel to create a new brush, but notice that all your sliders and adjustments remain unchanged. To reset all your parameters to their default values, hold down the alt key (option on a Mac) and you will see the Effect label at the top change to Reset. Click on that and everything will be set back to zero for you to start creating a fresh set of edits.
    • Pencils have erasers, but fixing errors when painting with brushes and pigment is not so easy. Fortunately the Brush tool in Lightroom has a feature that makes it much more like its wood-and-graphite counterpart in the real world, and makes fixing mistakes as simple as pressing a button. No, I’m not talking about Edit > Undo. If you’re brushing away with some edits and realized that you made a mistake or two, press and hold the Alt key (option on a Mac) and your brush will instantly switch over to eraser mode. Now, just like using the rubber end of a pencil, clicking and brushing will remove any edits you have made to the photo with the current brush. If you have used several different brush edits within one photo, your edits will mercifully be confined to the whatever brush is currently selected, and you can also adjust parameters of the eraser like size, feather, and so on.

    five-tips-brush-tool-white-flower
    As I mentioned earlier there are enough tricks with the Adjustment Brush tool to fill several articles, but I’m going to stop here and instead ask you for your favorite tips and hidden features. Leave your thoughts in the comments section below and I’m sure I will learn a thing or two from your experiences as well!

    googletag.cmd.push(function() {
    tablet_slots.push( googletag.defineSlot( “/1005424/_dPSv4_tab-all-article-bottom_(300×250)”, [300, 250], “pb-ad-78623” ).addService( googletag.pubads() ) ); } );

    googletag.cmd.push(function() {
    mobile_slots.push( googletag.defineSlot( “/1005424/_dPSv4_mob-all-article-bottom_(300×250)”, [300, 250], “pb-ad-78158” ).addService( googletag.pubads() ) ); } );

    The post 5 Tips for Using the Lightroom Adjustment Brush Tool by Simon Ringsmuth appeared first on Digital Photography School.


    Digital Photography School

  • Weekly Photography Challenge – The Light of Dawn

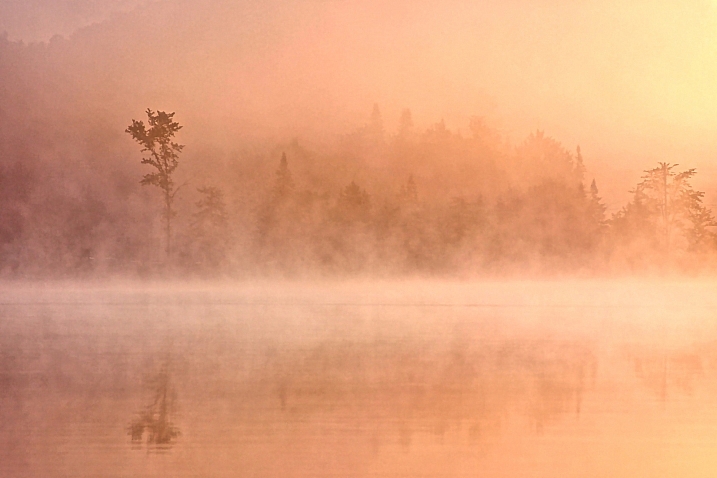
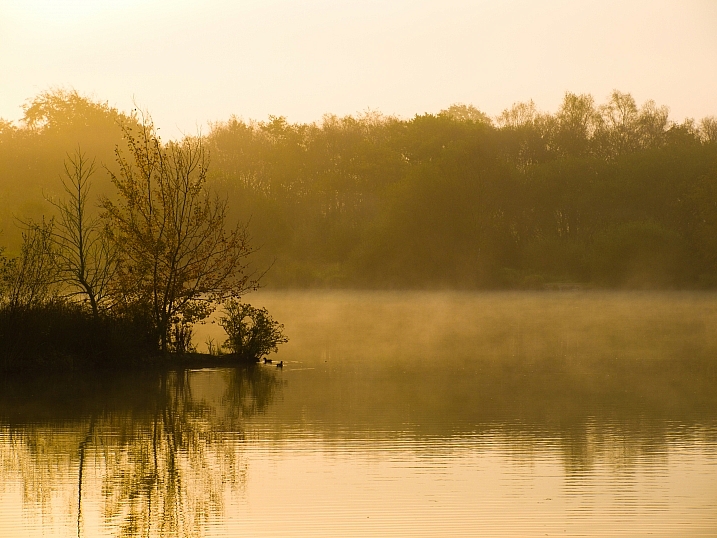
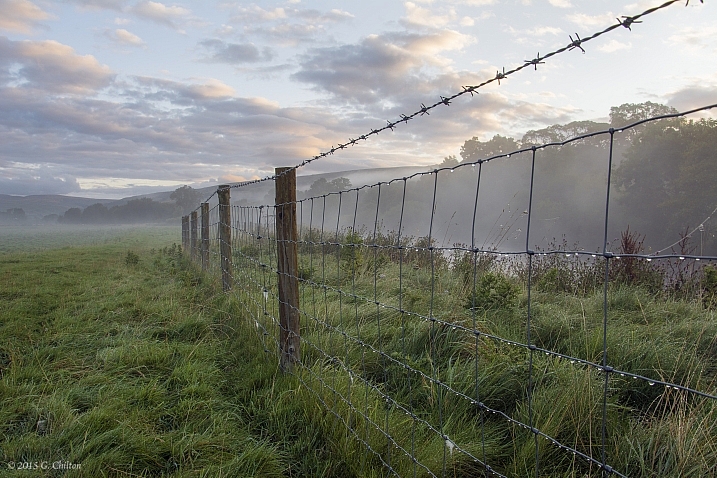
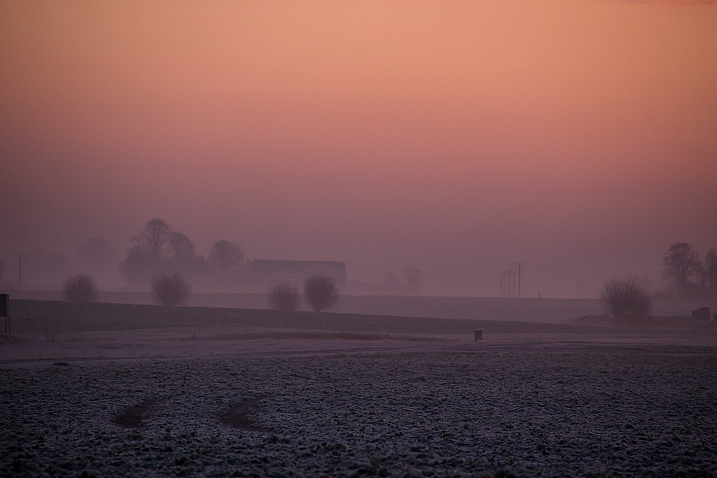
    This set of images of dawn shared earlier are great examples of using the magic light of dawn to take stunning images.

    Susanne Nilsson

    By Susanne Nilsson

    Weekly Photography Challenge – the light of dawn

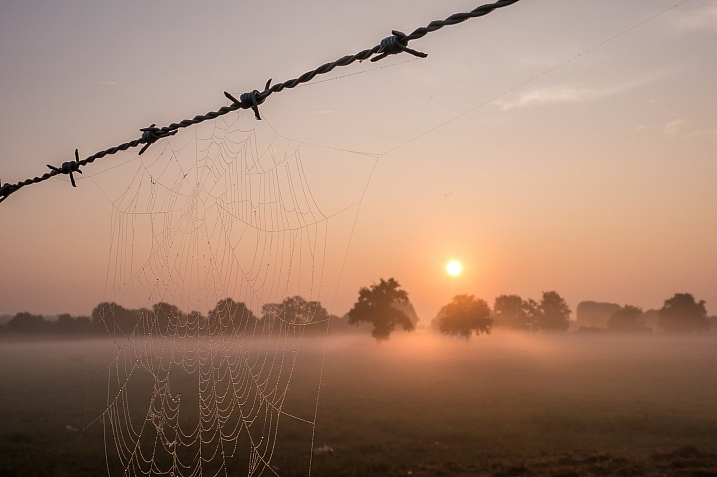
    Your challenge this week is to get up early , get out of your comfy bed, and photograph with the first light of the day, dawn. Sunrise photography can be tricky as you’re usually heading out in the dark. So you may need to plan ahead and scout some locations and shots the night or day before.

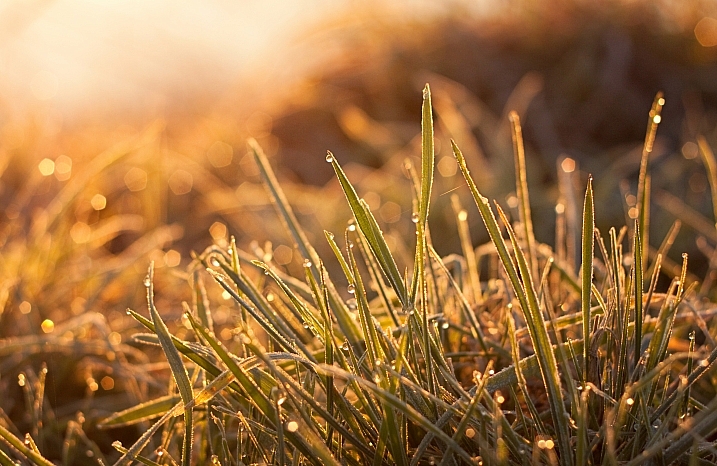
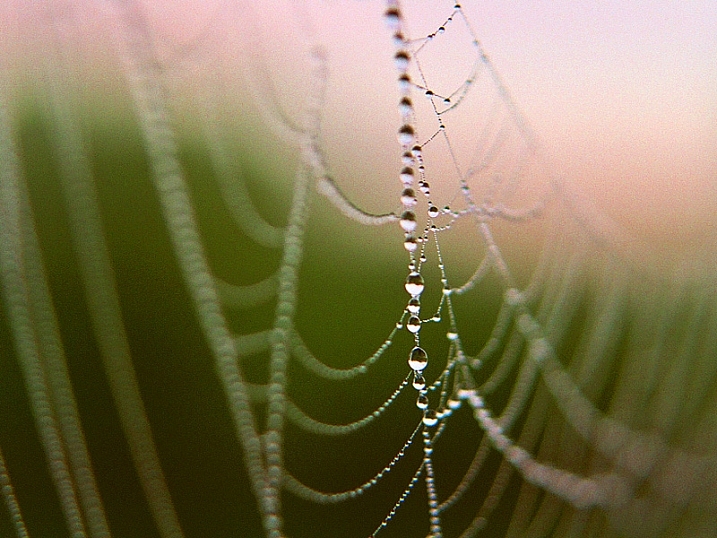
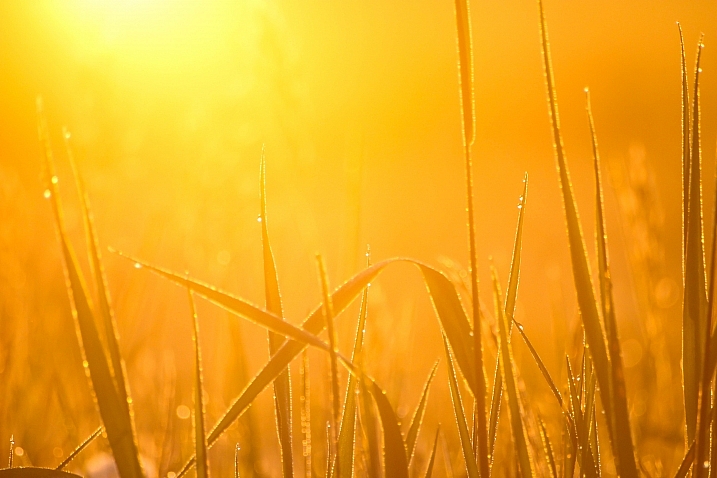
    Get there early so you can capture the first light – it’s magical. Landscapes are the obvious choice for this challenge, but there are so many other subjects you can work with – so think outside the box a little. What about some macro photography? A blade of grass with morning dew, for example. Go urban and hit the city streets to see how the light plays off the buildings and early risers heading to work. There are a ton of possibilities.

    Pierre Metivier

    By Pierre Metivier

    Andreas

    By Andreas

    Joe

    By Joe

    Share your images below:

    Simply upload your shot into the comment field (look for the little camera icon in the Disqus comments section) and they’ll get embedded for us all to see or if you’d prefer upload them to your favourite photo sharing site and leave the link to them. Show me your best images in this week’s challenge. Sometimes it takes a while for an image to appear so be patient and try not to post the same image twice.

    Jeff Wallace

    By Jeff Wallace

    57Andrew

    By 57Andrew

    googletag.cmd.push(function() {
    tablet_slots.push( googletag.defineSlot( “/1005424/_dPSv4_tab-all-article-bottom_(300×250)”, [300, 250], “pb-ad-78623” ).addService( googletag.pubads() ) ); } );

    googletag.cmd.push(function() {
    mobile_slots.push( googletag.defineSlot( “/1005424/_dPSv4_mob-all-article-bottom_(300×250)”, [300, 250], “pb-ad-78158” ).addService( googletag.pubads() ) ); } );

    The post Weekly Photography Challenge – The Light of Dawn by Darlene Hildebrandt appeared first on Digital Photography School.

    Digital Photography School

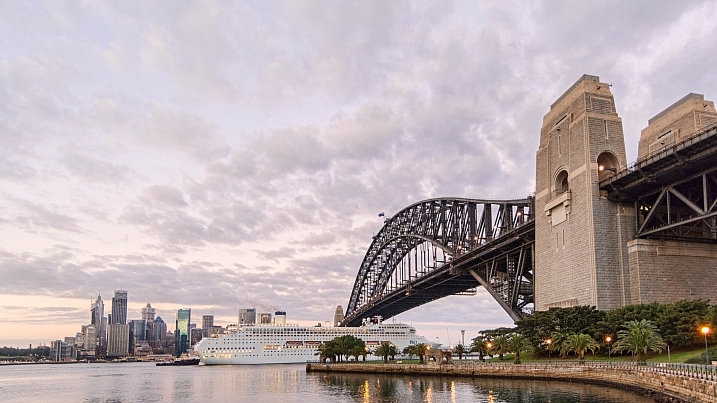
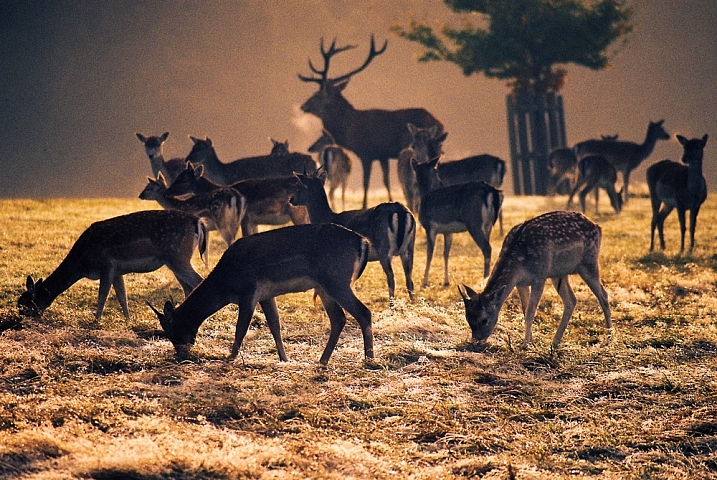
  • 23 Dazzling Dawn Images with Magic Light

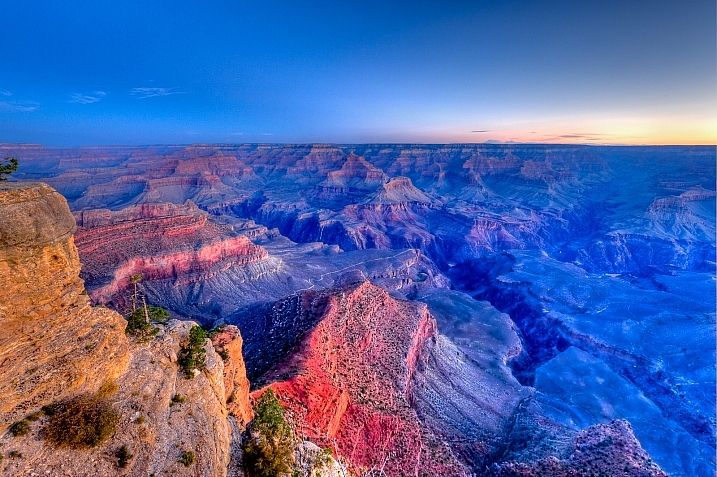
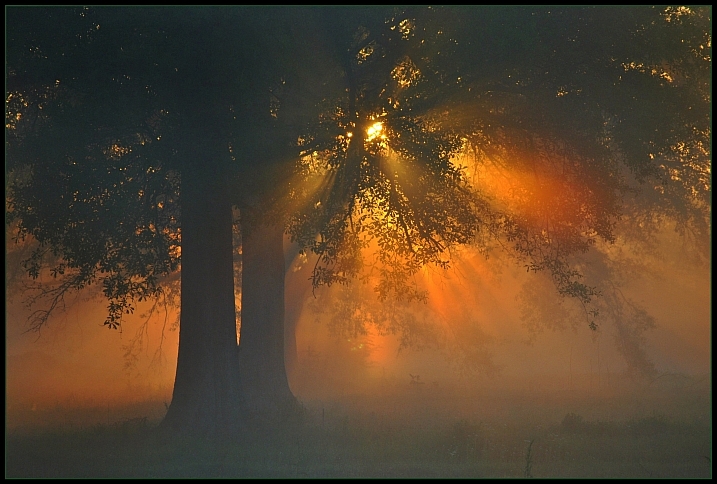
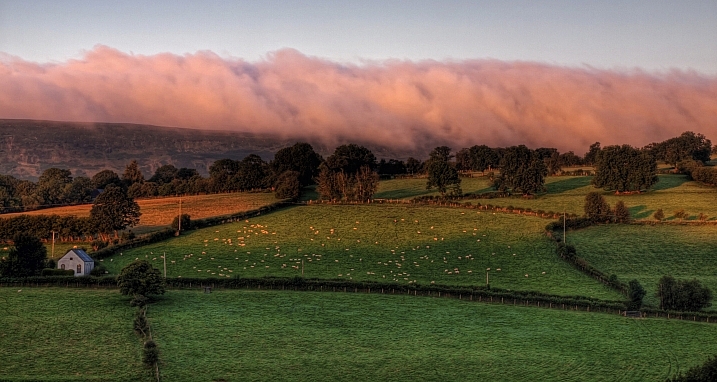
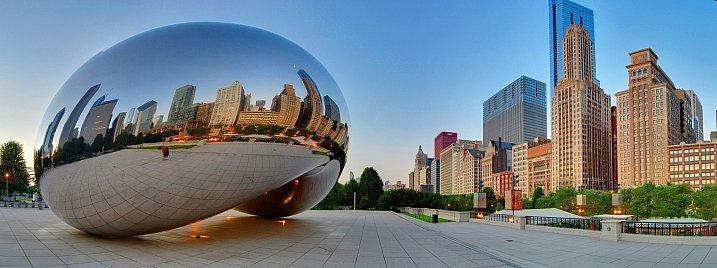
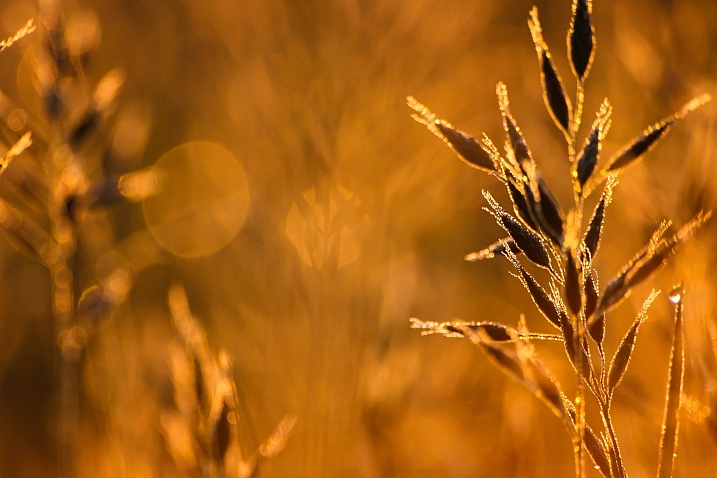
    The time of day you shoot at can make a huge difference to the images you capture. Often photographers are shooting at the coveted golden hour – early morning or late evening – when the sun is low and the light is special.

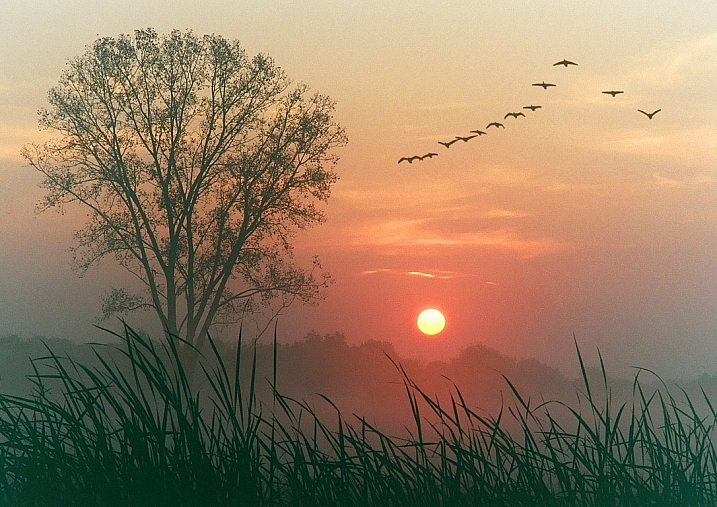
    Here is a set of dazzling dawn images that use this magic golden hour light.

    Timothy Neesam

    By Timothy Neesam

    James Jordan

    By James Jordan

    Guy Mayer

    By Guy Mayer

    William Warby

    By William Warby

    Gideon Chilton

    By Gideon Chilton

    Susanne Nilsson

    By Susanne Nilsson

    Howard Ignatius

    By Howard Ignatius

    Kylie_Jaxxon

    By Kylie_Jaxxon

    Loco Steve

    By Loco Steve

    Neil Howard

    By Neil Howard

    Thomas Hawk

    By Thomas Hawk

    Enric Martinez

    By Enric Martinez

    Nicolas Raymond

    By Nicolas Raymond

    Chuddlesworth

    By chuddlesworth

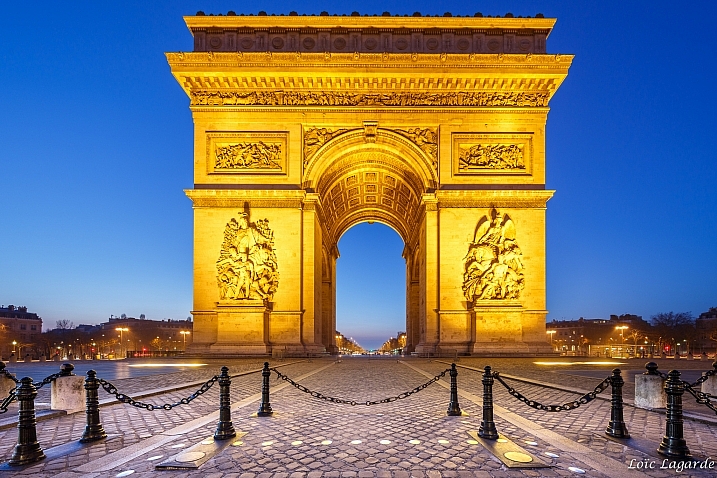
    Loïc Lagarde

    By Loïc Lagarde

    Nicki Mannix

    By Nicki Mannix

    Bobby Giggz

    By Bobby Giggz

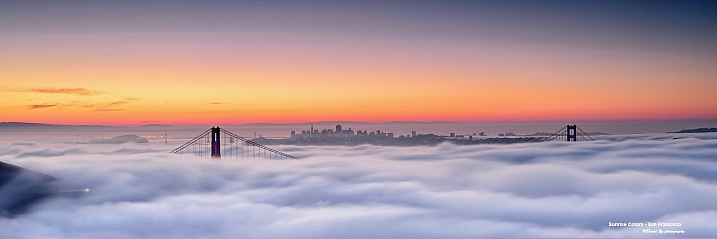
    David Yu

    By David Yu

    Sarah Horrigan

    By Sarah Horrigan

    Mike Warot

    By Mike Warot

    Susanne Nilsson

    By Susanne Nilsson

    James Jordan

    By James Jordan

    Susanne Nilsson

    By Susanne Nilsson

    RobinTphoto

    By RobinTphoto

    googletag.cmd.push(function() {
    tablet_slots.push( googletag.defineSlot( “/1005424/_dPSv4_tab-all-article-bottom_(300×250)”, [300, 250], “pb-ad-78623” ).addService( googletag.pubads() ) ); } );

    googletag.cmd.push(function() {
    mobile_slots.push( googletag.defineSlot( “/1005424/_dPSv4_mob-all-article-bottom_(300×250)”, [300, 250], “pb-ad-78158” ).addService( googletag.pubads() ) ); } );

    The post 23 Dazzling Dawn Images with Magic Light by Darlene Hildebrandt appeared first on Digital Photography School.

    Digital Photography School

  • 45 Random Thoughts on Flickr in a Rambling Stream of Consciousness Format

    Not exactly beat poetry, this list is a rambling mess of 45 things that I thought about tonight about my favorite photo sharing site Flickr. This list is very poorly written and absolutely lacks coherence. It’s a stream of consciousness jumble of unrelated thoughts about Flickr.

    There is no order or rhyme or reason behind any of these thoughts. These are just my thoughts as a heavy user who uses the site every day.

    1. Flickr could be the most successful stock photography site in the world. They could be bigger than Getty Images and could become the leader of a multi billion dollar industry.

    2. On the Flickr mobile app, comments specifically take too long to load.

    3. Yahoo requiring phone numbers to create accounts (and by extension Flickr) greatly reduces the amount of harassment and trolling that takes place on Flickr. This is a positive thing.

    4. On the Flickr mobile app you eventually run out of your contacts’ photos. There should be no reason to run out. When people run out and it defaults to a repetitive staple of Flickr promoted photos this encourages the user to close the app and go to another social network. Flickr should strive to keep users in their app for as long as possible.

    5. While the “connect” splash page in the mobile app encouraging users to try to hook up their Facebook and Twitter friends in Flickr is likely a good thing, after you have seen this splash screen 500 times it’s just wasting real estate. Flickr should limit the number of times it shows this screen to users or allow users to dismiss it after say 60, 70, 300 times it’s shown and no action is taken.

    If you actually click on the “Facebook” button on the connect screen and follow it through, it is the most convoluted mess I’ve ever seen in a mobile app and asks for Facebook verifications, SMS, and all kinds of other things that no user would actually go through.

    6. On the Flickr mobile app you can double tap to favorite a photo. Frequently I will accidentally tap the photo once and an unwanted larger version of the photo appears. Instagram does not have this problem. Might there be another gesture to open larger photos or an option for advanced users to disable one click photo opening?

    7. Groups were where the magic happened in the early days of Flickr and the conversations that took place in the discussion forums were powerful social lubricant. By diminishing the discussion functionality of Groups, Flickr hurt social on Flickr. Groups can and should be rebuilt and represent Flickr’s greatest possible potential in social. The rebuild should focus on social and conversations over pool photos.
    8. Flickr allows you to view your contacts’ photos by contacts and friends and family. More customization here would be helpful. Google+ failed but their idea for circles was interesting. Allowing advanced users the ability to create more than two buckets would be a wonderful power user feature.

    9. Sometimes users will change the “date uploaded” on their photos to make their photos appear more often in their followers photos from contacts page. This can be annoying as a consumer of photography, but I get it, they want more views on their photos.

    10. Flickr still needs strong block functionality. Facebook has done a much better job here and should be studied. If I block someone or someone blocks me Flickr should do everything in it’s power to make sure that we are entirely invisible to each other. This should include making comments invisible from someone you are blocking in all areas of the site, including the help forum and groups especially. When you block someone their photos should not appear in your search results on Flickr.

    11. When you block someone their existing comments will be removed from your photos. This should happen faster than it happens at present.

    12. My single personal biggest complaint with Flickr today has to do with the photos from my contacts page. As the page adds photo it jumps around. Very often exactly as I’m going to favorite a photo the entire page will jump and I will accidentally open a photo that I did not mean to open. This page should remain static and in place as new photos are loaded.

    13. Collections and Profiles should both be included under the “You” menu at the top of the Flickr page.

    14. Explore is interesting but it would be more interesting if there were two versions. One for general Flickr and one specifically for the people that you are following.

    15. Flickr needs a better way for Flckrmail to work on mobile.

    16. The non-app mobile site for flickr m.flickr.com is very slow. Chrome users frequently have to use “request desktop site” to use the web version of Flickr on mobile.

    17. Publicly designating Flickr “Pro” accounts as well as prominently showing the date someone joined the site are very helpful tools. It allows users a good way to gauge authenticity of accounts.

    18. I never use any of the camera or editing functionality of the flickr mobile app.

    19. Flickr is currently the best site on the internet for photo sharing for more serious photographers.

    20. On the Flickr photo page there is a “date taken” field. This field should link to the archive view of that date for the photographer in question.

    21. I love using SuprSetr for managing my albums on Flickr. I don’t know why when using SuprSetr Flickr’s API limits me to 4,500 photos in an album.

    22. Personal interestingness scores seem to have deteriorated over time on Flickr. There especially seems to be given preference for more recent photos, but overall it feels like it’s heavily discounting the value of favorites, comments and other social data. The result is that when using the Flickr API to sort a SuprSetr album by interestingness, it is not really in the best order.

    23. Similarly with search on Flickr when you search and rank by interestingness. A photo with 1 favorite should not appear ahead of a photo with 100 favorites.

    24. The “albums” page for Flickr users should not have any paging at all, it should infinite scroll forever.

    25. Recent Activity is the most important page on Flickr. It is so well done and the ability to filter it by different types of activity is very powerful.

    26. I wish Flickr had so much more infinite scroll than it does. While iterating on designs over the past few years there was a point when it had more than it has today. If I had it my way I’d never have to page on Flickr for anything ever.

    27. Stats are awesome and worth the price of Pro alone.

    28. When looking at your Flickr contacts’ photos if your mouse is over a photo and you press the F key on the keyboard it should favorite that photo.

    29. I miss notes in Flickr.

    30. In most areas of Flickr they use an empty star for an unfavorited photo and a full white star for a favorited photo — except on the photos from your contacts page where a full white star means the photos is unfavorites and a pink star means the photos if favorited. Flickr should be more consistent. On the photos from your contacts’ page it should be changed to match the format with the rest of the site.

    31. When you hover over a tag on Flickr it should tell you who added that tag. Flickr used to do this.

    32. Flickr should show more than 6 albums on the main photo page without a user having to click on “show more albums.”

    33. I love the fact that flickr uses AI to auto tag my photos with tags that I forgot.

    34. Sometimes I feel like I’m interacting with photos from people on Flickr that are just autoposts from their instagram accounts and that these people do not really interact on Flickr. Instagram auto posts to flickr diminish the authenticity of the flickr experience and are much less valuable than organic posts to flickr.

    35. Interestingly enough my own personal Instagram to Flickr functionality has been completely broken for about a year. Probably Instagram’s fault though.

    36. Sometimes if I put 16 photos in the uploader form to upload some of the photos immediately generate a thumbnail while others might take several minutes to generate a thumbnail. I’m not sure why this is and feel like all photos should generate a thumbnail immediately.

    37. It is a very cool thing that Flickr has figured out a way for both regular content and adult oriented content to exist on the same site.

    38. I wish there were a way for flickr to identify photos that have signatures, watermarks or borders and then give me an option to eliminate those photos from my search results.

    39. Flickr is an amazing tool to find things to photograph if you are going to be visiting some place new. It’s my number one “go to” place for researching things to photograph ahead of any trip that I embark on.

    40. I’d love to see “suggested” facial tags for my flickr photo stream that would go into a holding bin for my approval and private photo facial recognition along the lines of what Google Photos offers today, grouping people into private albums.

    41. Yahoo Image search should rely much more heavily on Flickr than it does. Flickr has the largest, high quality, highly organized collection of images on the internet today. Yahoo image search should strive to send traffic to Flickr photos over other photos on the web and should weight Flickr images and Flickr tagged images (and especially highly rated interestingness images) very high in their image and web search results.

    42. It’s harder for me to blog flickr images on my blog than it used to be. The html doesn’t render right. Having the old code was cleaner.

    43. I should be able to have an easy option to exclude certain flickr users from my search results when searching for images on Flickr. This is different than a block, I should just be able to easily exclude a list of users from my search results.

    44. With regards to search results there are two different thumbnail views I can select. I wish I had a third that was just a bit bigger and more consistent with the size of photos on the “photos from my contacts’” page.

    45. I always visit the Flickr page of anyone who adds me as a contact on Flickr. If I like what I see I add them back. If their photos have signatures, watermarks, or are largely commercial related images I never add them back.


    Thomas Hawk Digital Connection