Category: Photography

  • 6 Must-Have People Shots to Capture When Photographing Corporate Events

    Corporate events may not be every photographer’s dream, but they can certainly be interesting and maybe even fun depending on the assignment. As a freelance event photographer, about half of my shoots are corporate events, and they are among my favorite things to shoot. There’s always lots to learn from the speakers at these events, and they tend to be relatively easy gigs to shoot if you use a pre-planned shot list and know what to look for. This article details the six key people shots that you absolutely must focus on when photographing corporate events.

    #1: Posed shots of VIPs

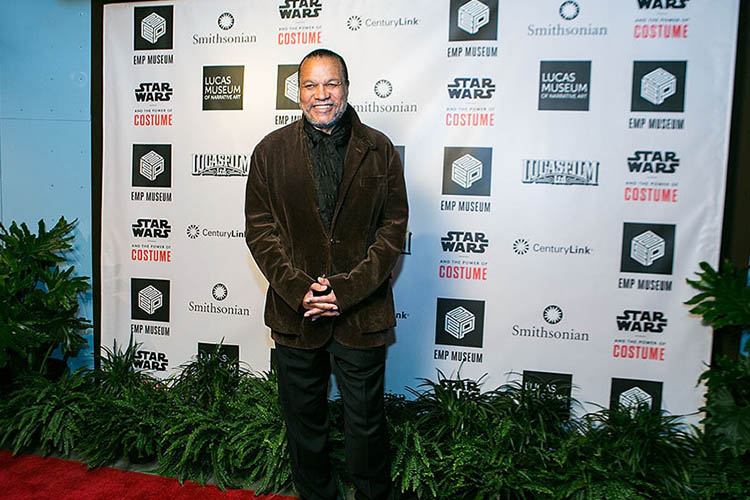
    Every corporate event will have its own form of VIPs, and your client will definitely want lots of images of them. Larger events will typically have recognizable local or national celebrities as their designated VIPs, while smaller events may have harder to recognize internal executives as their VIPs. Either way, it’s important to check with your client ahead of time to get a list of their VIPs in attendance, and ideally someone on-site who will help you identify them. Always make sure you understand the perimeters of photographing these VIPs as some, particularly celebrities, can be image-conscious. Whenever possible try to get posed shots of these VIPs with signage in the background that shows proof that they were present at your particular event.
    Seattle Corporate Event Photographer

    Actor Billy Dee Williams posing at a step-and-repeat.

    #2: Posed and action shots of keynote speakers

    Corporate events typically include keynote speakers who may or may not be the VIPs described above. Before you start shooting, grab ahold of the event program, and find out who are the keynote speakers. Work with your client to arrange posed shots of the keynote speakers both alone and posed with VIPs. Also, don’t forget to get plenty of shots of the keynote speaker, from a variety of angles, giving his or her speech.

    Sattle Corporate Event Photographer

    Actor and activist George Takei giving a keynote address.

    #3: Candid shots of VIPs and Keynote speakers

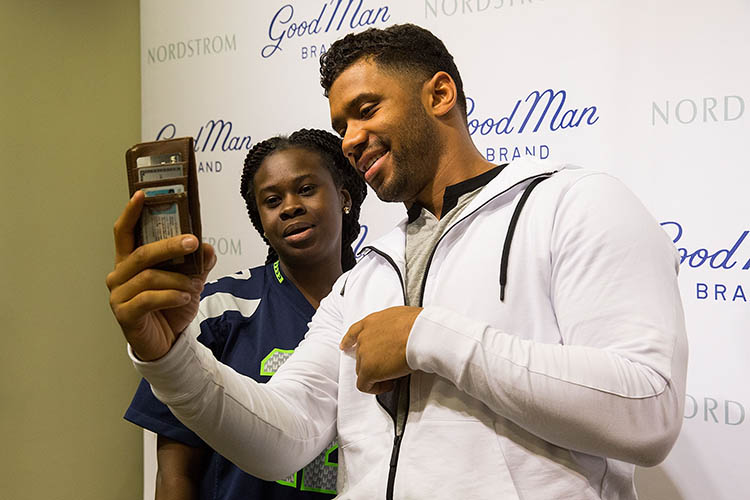
    In addition to getting posed shots of VIPs and keynote speakers, it’s also important to get candid shots of them interacting with each other, or event attendees. Depending on the nature of the event, these opportunities could include book signings, meet and greets in the green room, or an organized step-and-repeat photo booth. These days, many candid shots of VIPs will include selfies with guests, which can be a challenge to capture, so be prepared for that!
    Seattle Corporate Event Photographer

    Seattle Seahawks quarterback Russell Wilson posing for a selfie with a fan.

    #4: Posed shots of attendees

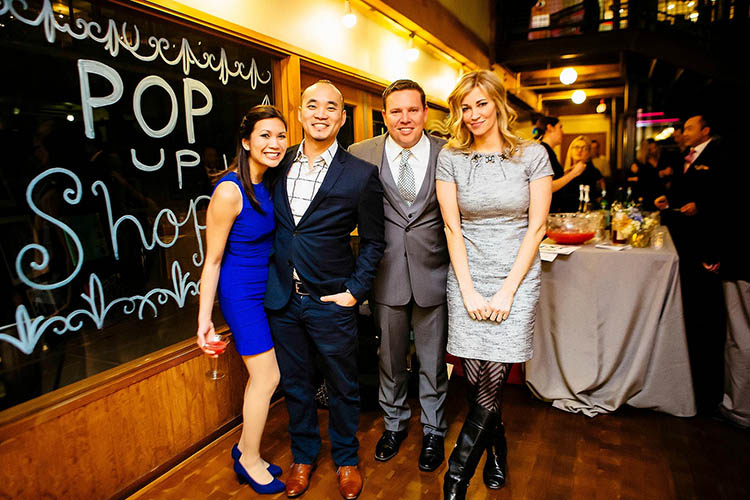
    Depending on the type of event you’re photographing, most attendees will be looking their absolute best and will want photos of themselves. Always be on the lookout for well-dressed and energetic event attendees, and don’t hesitate to approach them to ask for a posed photo. Along these lines, it’s also not unusual to have at least one event attendee who doesn’t want to be photographed. Sometimes, you’ll be made aware of this by your client, and other times the attendee will explicitly tell you themselves. Either way, respect the wishes of the attendees, and definitely do not photograph someone who doesn’t provide consent.
    Seattle Corporate Event Photographer

    Corporate event party attendees.

    #5: Candid shots of attendees interacting

    Most corporate events are held for two main reasons: to give keynote speakers chances to educate and address an audience, and to allow for networking among attendees. Always be on the lookout for attendees chatting or interacting with each other, and get their reactions while they are listening to keynote speakers. Ideally, make sure these shots incorporate some form of your client’s branding materials, such as a brochure or sign, to give the photos context.

    #6: Full room shots

    A final type of corporate event photo that almost every client will request are shots that show off how many attendees were present at an event. This can be tricky depending on the type of venue you are photographing at, and whether or not the event is actually well-attended. Addressing these two challenges can usually be solved in one of two ways:

    a) Get a bird’s eye view

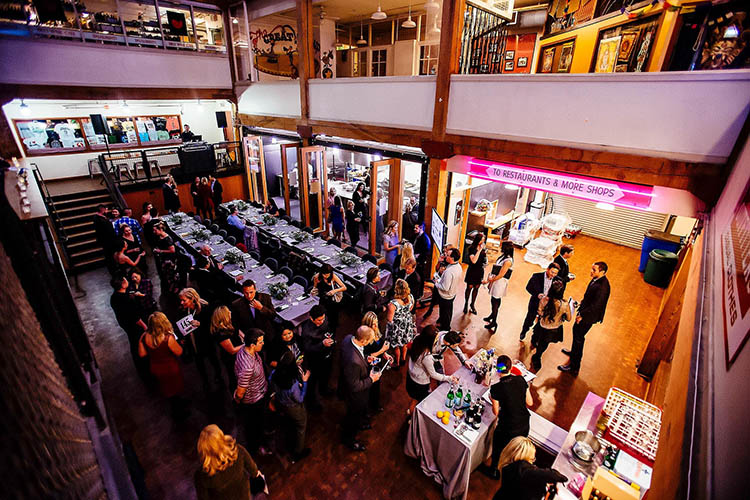
    Try to get access to a ladder, stool, balcony, or some vantage point within the venue that will let you shoot from overhead and capture wide-angle shots showing a full room. If the room isn’t really that full, try to find angles or special crops that still hint at a room being moderately full. Your client will appreciate the extra effort.
    Seattle Corporate Event Photographer

    Shooting from up high to show a different vantage point.

    b) Get up close and personal

    Whenever possible, I always ask my client to make sure that the first several rows of seats or tables at an event are packed with as many people as possible. This way, I can always make an event feel well-attended, even when it’s not. The approach in this case is to avoid wide-angle shots and shoot as close to the stage or from wherever the keynote address is being made, including as many rows or tables of people as possible.
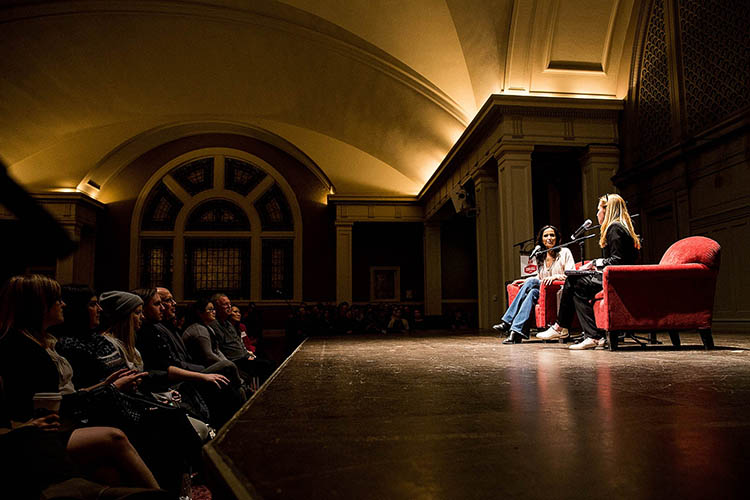
    Seattle Corporate Event Photographe

    This was actually a well-attended event, but an example of how to shoot up close with attendees in the frame.

    In Conclusion

    These are just several types of photos to always capture when photographing a corporate event. Above all, it’s important to understand why clients hire corporate event photographers in the first place. Typically, the reasons involve showing visual documentation of special people who were at the event, the fact that the event was well-attended, and the fact that event attendees were engaged and enjoyed themselves. Always keep these overall goals in mind when photographing an event and be sure to snap photos that help you and your client meet these overall objectives.

    People photography week

    This week on dPS we’re featuring articles all about different kinds of people photography including portrait, event and travel photography. See all the previous ones below, and watch for more people photography articles over the next few days.

    • How to Take Low Key Head-shots
    • How to Do a One Light Portrait Setup and Use it as Your Back-up Plan
    • Travel People Photography – Tips and Pitfalls
    • 8 Tips for Photographing Men
    • 24 Diverse Images That Showcase People Photography
    • Weekly Photography Challenge – People Photography
    • Tips for Getting Yourself to Relax as a Photographer and Have More Successful Portrait Sessions
    • 5 Good Reasons to Add People into Your Landscape Photography

    googletag.cmd.push(function() {
    tablet_slots.push( googletag.defineSlot( “/1005424/_dPSv4_tab-all-article-bottom_(300×250)”, [300, 250], “pb-ad-78623” ).addService( googletag.pubads() ) ); } );

    googletag.cmd.push(function() {
    mobile_slots.push( googletag.defineSlot( “/1005424/_dPSv4_mob-all-article-bottom_(300×250)”, [300, 250], “pb-ad-78158” ).addService( googletag.pubads() ) ); } );

    The post 6 Must-Have People Shots to Capture When Photographing Corporate Events by Suzi Pratt appeared first on Digital Photography School.
    Digital Photography School

  • Create a Photography Business Marketing Plan in 3 Days (+ Save $30 Instantly)

    Starting a photography business these days is quite a challenge. It takes courage. You need to push yourself constantly to go out of your comfort zone and learn a whole pack of new things. While there are no shortcuts to success, there are accelerated ways. Read on to learn about one of them and build a photography business marketing plan Continue Reading

    The post Create a Photography Business Marketing Plan in 3 Days (+ Save $ 30 Instantly) appeared first on Photodoto.


    Photodoto

  • 5 Good Reasons to Add People into Your Landscape Photography

    Are you looking for a way to spice up your landscape photography? Many times when we think of making great landscapes image,s we try not to include people. Sometimes we even wait for long periods of time for other sightseers (or other photographers) to exit our view. There are many times this is the best technique for shooting a landscape photo, but adding the human element to a scene can be just the extra touch needed to create a great image. Let’s take a look at 5 reasons to add people to your landscape images.

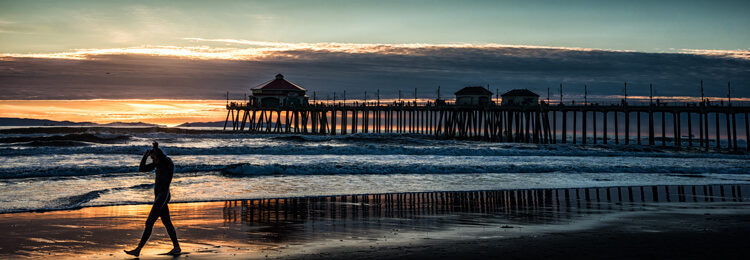
    Sometimes breaking the rules can work. Here the man walking out of the image seems to work with the image of the end of the day on the beach.

    This surfer is done for the day. Normally it is preferable that a person faces into the photo, but exceptions may work too.

    #1 Tell a Story

    Adding a person to your landscape can help your image tell a story. People, or even a single individual, may add mystery and adventure to your landscape, causing your viewers to wonder who, what, and why about the person in your image. When your viewers ask these questions, their eyes will stay engaged with your image, adding entertainment value to the photo. An image of a person standing in front of a grand mountain range may cause the viewer to wonder what that individual is doing there. If the person has a backpack and a walking stick, the viewer may imagine a hike in the mountains is about to commence. Or maybe the person in your shot is carrying a rifle and wearing camouflage, leading the viewer to imagine a hunter heading into the woods in search of adventure. A person can be the subject of the image or interact with the landscape of the image; but either way, if the person fits into the image’s story, your landscape will draw the viewer in and the photo will tell a successful tale.

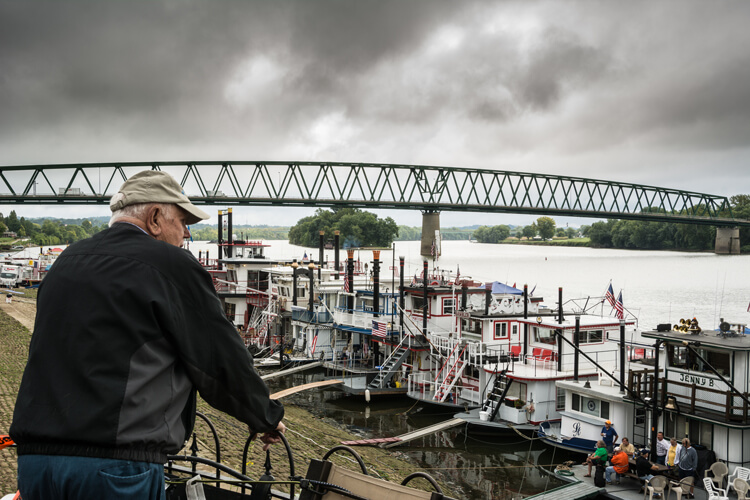
    This image seems to tell the story of a man thinking about the yester-years working on a river boat.

    This image tells the story of a man thinking about his former career working on a river boat.

    #2 Composition

    Placing a person or persons in an image in negative space can add balance to your landscape. A person in the foreground, or mid-way into your scene, will help create a sense of depth in the image. When you have the opportunity to position the person, take care to place them in the image in a way that draws the viewer into the image. Place your subject off to the side, preferably on a rule of thirds point, with them facing into the open space. It is almost never a good idea to have a person looking or facing out of your image, as this will cause a viewer’s eye to leave the image rather than explore the image fully. Nevertheless, with every rule of composition there are exceptions that will work. Knowing the rules of composition, when to use them, and when to break them, will help you when adding a person to your image.

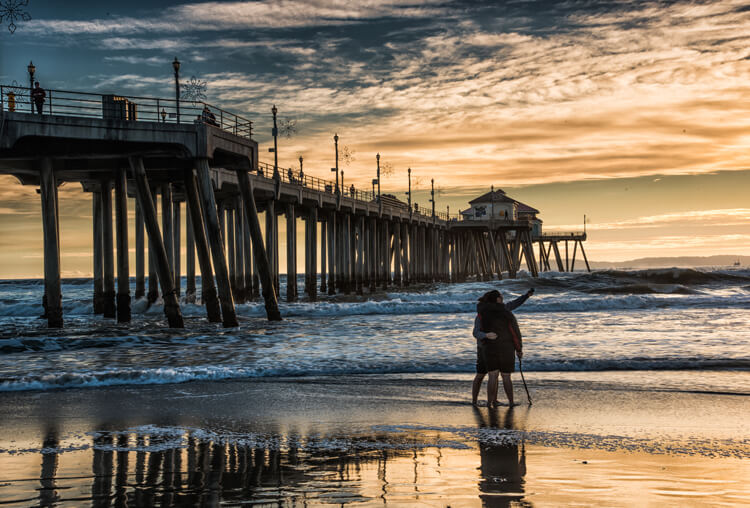
    The couple taking a selfie is placed in a rule of thirds position and fills a negative space on the beach.

    This couple taking a selfie is placed in a rule of thirds position, and fills a negative space on the beach.

    #3 Scale of Size

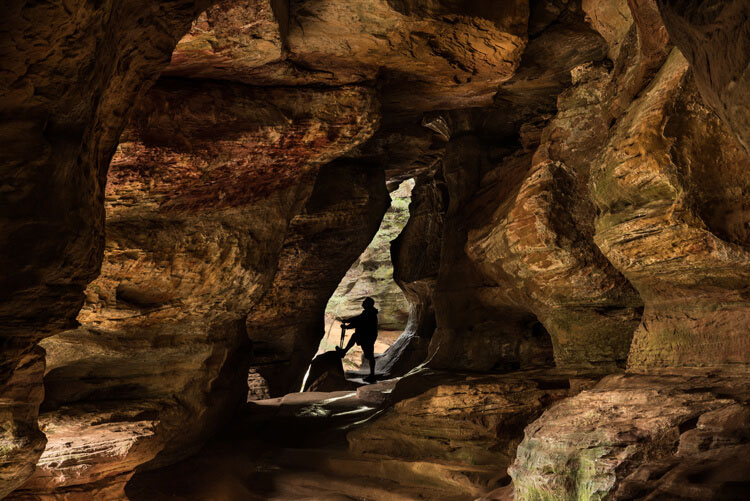
    Adding a human to an image is a great way to reveal the size and scale of objects in your image. Without the person in many images, objects like trees and rocks may lack a scene of scale. The addition of a person immediately gives your viewer a point of reference and scale to the landscape.

    In this image of Rock House in Hocking Hills State Park in Logan Ohio adding the Silhouetted figure at the end of the cave adds a sense of scale and also adds a focal point to the image.

    Adding the silhouetted figure at the end of the cave gives a sense of scale and also adds a focal point to the image.

    #4 Drama and Excitement

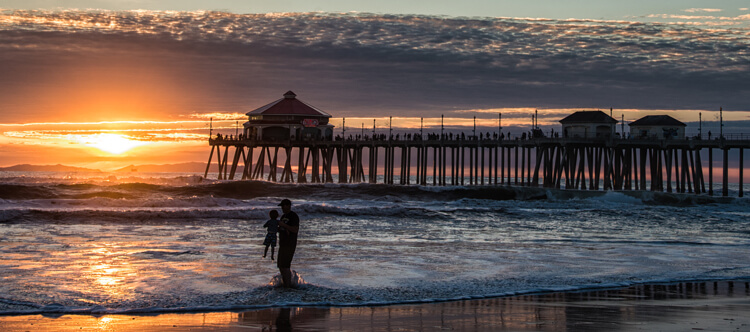
    Silhouetting someone against a sunset or other backlit view, is a perfect example of how a person can help create a more dramatic image. Even the simplest of landscapes can become more interesting and exciting by adding people within the image. Photographing a couple holding hands as they interact with the landscape can add the drama of romance to your image.

    This image tells a story of a Father and son playing in the surf at sunset. The sillouhetted figures add drama to an image that could just be another sunset at the beach.

    A silhouetted father and son playing in the surf at sunset add drama to an image that would otherwise be just another sunset along the shore.

    #5 Focal Point

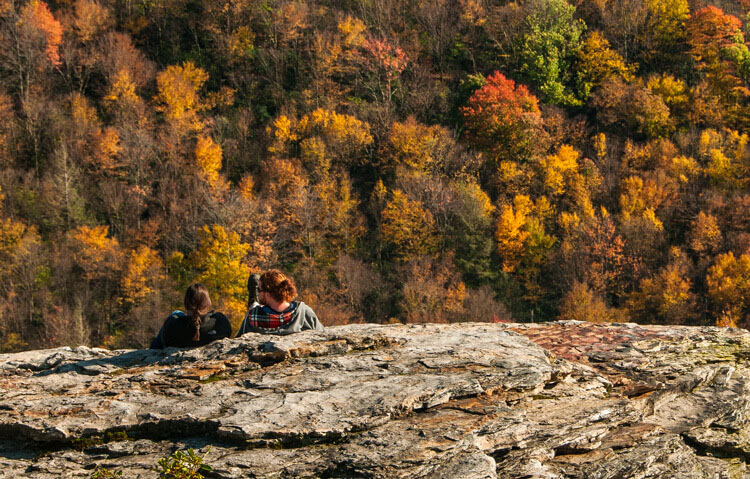
    A successful photo needs a focal point that gives the viewer’s eye a place to land to hold their attention, and adding people can achieve that. It is important to add a point of interest that will change a boring landscape into a striking one. Most landscapes have natural features or buildings as a point of focus, but adding a person can sometimes make for a much more interesting image. As mentioned earlier, at times you may have negative space in the foreground of your landscape, and by adding a person into your scene that negative space is filled, and your image will benefit from the balance. As a focal point, the person in your image can be the subject of the scene, or a complement to your landscape.

    A couple sitting on a rock enjoying the Autumn view adds a romantic drama to the fall colors of the West Virginia Mountains

    This couple sitting on a rock enjoying the fall color,s placed on the rule of thirds, creates romantic drama.

    Tip: When adding a person or persons to your landscape, try to keep their face (s) obscure. This will allow the viewer to imagine themselves as the participant in the image.

    Conclusion

    Many times adding a person to your landscape image can be as serendipitous as people just wandering into your viewfinder, especially if you are visiting a park or popular scenic area. But if you are out alone in an interesting area, use yourself as the person in the scene. Place your camera on a tripod, set the timer, then add yourself into the image. Next time you are engaged in a landscape photo shoot, look for opportunities to add one or more persons to one of your images, and see if you like the results. You may be surprised at the difference you see.

    Many landscape locations are powerful enough to stand on their own, but if your image needs a little spice, try adding a human. What other kinds of landscape scenarios do you think could benefit from adding a person to create a more interesting image? Leave your ideas in the comments below.

    People photography week

    This week on dPS we’re featuring articles all about different kinds of people photography including portrait, event and travel photography. See all the previous ones below, and watch for more people photography articles over the next few days.

    • How to Take Low Key Head-shots
    • How to Do a One Light Portrait Setup and Use it as Your Back-up Plan
    • Travel People Photography – Tips and Pitfalls
    • 8 Tips for Photographing Men
    • 24 Diverse Images That Showcase People Photography
    • Weekly Photography Challenge – People Photography
    • Tips for Getting Yourself to Relax as a Photographer and Have More Successful Portrait Sessions

    googletag.cmd.push(function() {
    tablet_slots.push( googletag.defineSlot( “/1005424/_dPSv4_tab-all-article-bottom_(300×250)”, [300, 250], “pb-ad-78623” ).addService( googletag.pubads() ) ); } );

    googletag.cmd.push(function() {
    mobile_slots.push( googletag.defineSlot( “/1005424/_dPSv4_mob-all-article-bottom_(300×250)”, [300, 250], “pb-ad-78158” ).addService( googletag.pubads() ) ); } );

    The post 5 Good Reasons to Add People into Your Landscape Photography by Bruce Wunderlich appeared first on Digital Photography School.

    Digital Photography School

  • Quick Intro to the New Sony Cyber-Shot RX10 Mark III

    At the end of March (2016) Sony released the new version of their Cyber-shot RX10 Mark III. The main difference between it and its predecessor, the Mark II, is the lens, which is a lot longer. Let’s take a quick look at its main features:

    • 24-600mm f/2.4-4 zoom lens with 3 control rings for focus, zoom and aperture
    • 4K video quality
    • Fast autofocus
    • Magnesium alloy body

    This video from B&H photo will show you what the new camera looks like, check it out.

    This video by Chakru shows some of the key features and specs:

    If you are a travel photographer and want to go light, this might be a good option for you. Or maybe even as a a backup camera to a heavy pro SLR. Perhaps an upgrade from a point and shoot camera is in order, give it a go and see if this is the right one for you.

    googletag.cmd.push(function() {
    tablet_slots.push( googletag.defineSlot( “/1005424/_dPSv4_tab-all-article-bottom_(300×250)”, [300, 250], “pb-ad-78623” ).addService( googletag.pubads() ) ); } );

    googletag.cmd.push(function() {
    mobile_slots.push( googletag.defineSlot( “/1005424/_dPSv4_mob-all-article-bottom_(300×250)”, [300, 250], “pb-ad-78158” ).addService( googletag.pubads() ) ); } );

    The post Quick Intro to the New Sony Cyber-Shot RX10 Mark III by Darlene Hildebrandt appeared first on Digital Photography School.

    Digital Photography School

  • Tips for Getting Yourself to Relax as a Photographer and Have More Successful Portrait Sessions

    When I first got started in photography I thought I had things all figured out regarding cameras, lenses, exposure, and even some post-processing. However, the first time I greeted a client on location for an actual photo shoot, I realized just how clueless and ill-prepared I really was, and found myself nervous to the point of almost being nonfunctional. I was so uptight and anxious about the whole photo session, that I’m still not sure how I managed to get any good pictures, but thankfully things have gotten much better in the subsequent years.

    Even though I have greatly expanded my knowledge and experience, I still get a little nervous when meeting with clients. I have found several tips that work well to calm the butterflies in my stomach and help make for much more enjoyable and productive portrait sessions, both for me and my clients. I’m going to share them with you.

    relaxing-for-portrait-session-couple-farm

    Even after doing this type of work for years, I can still get nervous going into a photo session.

    The Three Phases of Portrait Anxiety

    While this triad of temporal distinctions is entirely nonscientific in nature, I have found that my stress and anxiety regarding a given portrait session generally can be divided into three discrete phases:

    • Phase 1 – The days or weeks leading up to a photo session. This lasts the longest, but thankfully doesn’t require impromptu decisions and instead gives you time to be thoughtful, analytical, and reflective. The downside is it lasts the longest! This unfortunately means you have way too much time to over-think and over-analyze everything.
    • Phase 2 – The short time before you start the session. This is usually five or ten minutes, interacting with the client at the session but before you start taking pictures. This period is brief but critical, as it can set the tone for the entire photo session and if you’re not properly relaxed things can go downhill quickly.
    • Phase 3 – The photo photo session itself, which usually lasts about an hour, unless you are doing a wedding or other type of protracted engagement. Things can get very tricky here, but if you have taken the time to properly relax during Phases 1 and 2 you will probably find Phase 3 to be smooth sailing.

    Here are my tips for helping yourself relax, take things easy, and get mentally prepared for the photo session. While not all of these may apply to you, I do hope they are general enough to be useful to you in similar situations.

    relaxing-for-portrait-session-child-looking-up

    If you aren’t relaxed the kids won’t chill out either, and neither will their parents.

    Phase 1: Preparing for the Session

    Adele, one of the most popular singers in the world, recently told Rolling Stone that she gets stage fright. “I’m scared of audiences,” she said. “I don’t like touring. I have anxiety attacks a lot.” As a photographer this gives me some degree of comfort knowing that my nervousness leading up to a photo session is not all that different than world-famous singers and actor,s who perform in front of thousands of people every day. Even though I have done many portrait sessions, I still get nervous beforehand, but have found a few tips and tricks to help calm myself down and relax in order to clear my head and do the best job I can.

    Talk to someone supportive

    Whether it’s a friend, a coworker, a family member, or even a former client, spending time talking about the upcoming session is one of the best ways to clear my head and get some reassurance. For me it’s my wife, who is a solid rock and a constant reminder that I can do the job. She and I discuss my goals for the session, look at examples from other photographers, and talk about what has worked and not worked in past sessions. These conversations always help me calm down, while also giving me a big boost of confidence that goes a long way towards a successful photo session.

    relaxing-for-portrait-session-baby-sister

    In the days leading up to this session, my wife and I spent a long time discussing the shoot and planning things out. This did wonders to calm my nerves and helped me do a better job at the session.

    Look at your own successful images

    Look at your own past images as a reminder that you are fully capable of doing the job. Sometimes in the days leading up to a photo session I start to wonder if I really have what it takes to get the shots I want, but looking through my own portfolio always offers enough reassurance to bring me out of that funk and back to reality. Yes, each session has its own unique challenges, but reminding myself of what I have done before, is a great way to relax and prepare for what is about to come.

    Have a plan

    Have a plan for the session and make a list of poses and shots you want to get. It can be a mental list, but a physical list will help you be sure to get everything you want, and will allow your clients see that you are prepared if you cross items off it during the shoot. One of the last things you want is to get back to your computer and realize you forgot to get a shot of grandma holding her new grandbaby, the happy couple underneath their special tree, or little Timmy in his special new cowboy boots that his mother emailed you about the day before. Making a list will help you avoid this scenario while also helping you to de-stress before the session.

    relaxing-for-portrait-session-couple-downtown

    This couple sent me a few ideas for different shots, and since the location was 60 miles away I used Google Maps Street View to investigate things beforehand.

    Scout the location ahead of time

    Visit the location to make sure you know what it’s like, and how you can use it to frame your shots. Ideally this would be at the same time of day as your photo session, so you can make sure you know what the lighting will look like on the day of the shoot. This will help you see all sorts of things you might miss if you just show up the day of the session, and it will make you look like a confident professional as you direct your clients.

    Know your gear

    Know your gear inside and out. It sounds silly but you don’t want to freeze up in the middle of a session because you can’t find the menu that lets you change white balance, or you forgot which dial changes the shutter speed. If you find that you need a quick refresher re-read the manual, watch online tutorials, or just spend 15 minutes poring through the menus and buttons. When it comes time to do the photo session, you can rest assured that these planning efforts will have been put to good use.

    You don't want to scramble trying to locate menu options and camera buttons. Make sure you know your gear beforehand so you can focus on your clients when you're on the job.

    You don’t want to scramble trying to locate menu options and camera buttons. Make sure you know your gear beforehand, so you can focus on your clients when you’re on the job.

    Practice with test subjects

    If you’re going to do a newborn session, practice with stuffed animals. If you’re on location, get a friend or family member to go out with you a week beforehand and do some test shots, so there are as few surprises as possible when you go out there with the client.

    Make a gear packing list

    Make a list of all the gear you need and check it off one-by-one as you pack up for the session. You don’t want to get to the location and realize you forgot something at home, or left a battery on the charger. I once did an outdoor shoot and realized all too late that I forgot my lens hoods, and almost immediately started hyperventilating into my camera bag when the clients asked for some shots with the sun behind them, just out of the frame. Things ended up working out, but a simple list would have prevented a great deal of stress during the shoot.

    Phase 2: On your mark, get set…

    relaxing-for-portrait-session-couple-barn

    Chatting with this couple as I set up my gear helped put everyone at ease, including myself.

    One of the weirdest parts about a portrait session can be the few minutes when you are visiting with the client before you start actually taking pictures. What do you do? What do you talk about? How do you strike a balance between friendly and professional? It’s enough to send even the most seasoned photographer’s blood pressure to the top of the charts, and messing up this brief pre-session period can send the rest of the gig into a tail spin.

    In my experience one of the best ways to help you and the client relax is to go on the offence instead of playing defence. Don’t stand around waiting for people to talk to you, as they are probably feeling just as awkward, and are likely waiting for you, the person in charge, to take the lead. Even if smalltalk is not your forté, you need to be willing to strike up a conversation and have a few things ready to talk about as you are getting set up. In a nutshell, make this time all about the client, and helping them feel comfortable.

    As you are getting ready to start taking pictures talk to your clients about their life outside of the photo session, and find out what hobbies they have, what they like doing in their spare time, or even what they are doing over the coming weekend. Ask questions to show you are interested, and use this time to also run some ideas past the client in terms of what you will be doing. This helps build a sense of rapport and respect, and can go a long way towards putting everyone at ease. Your clients might be just as nervous as you, but getting the chance to get to know each other will help put everyone at ease and also help them feel comfortable if you have lots of lighting, lenses, or other gear. If there are kids involved, bring some toys or snacks (nothing crumbly as it will get on their clothes) to win them over. At my most recent family session I gave the two-year-old a fake toy camera and asked if he could help me get some photos. This not only won him over but his parents too, and a week later, before they had even seen their photos, they were telling some friends about how much they enjoyed the picture session.

    relaxing-for-portrait-session-family

    A few minutes chatting sports with the grandparents and playing with the kids went a long way towards a more successful photo session.

    Phase 3: Here we go!

    Even though you have done everything in your power to chill out, relax, and put your mind at ease leading up to the photo session, things can still be a little nerve-wracking as you go about the process of actually taking pictures. At any moment there are a thousand decisions to be made, and trying to balance everything can be enough to make your palms sweat. My favorite trick for relaxing during a photo session is to simply make things fun. Don’t bark out orders, but instead have your clients do silly things like make faces or try just-for-fun poses. This will help you loosen up, and also give you a chance to build on the rapport you have already established at the beginning. Clients can tell if their photographer is wound up tight and needs to chill out, and if you make things more fun and lighthearted as opposed to all business, you will find yourself loosening up, relaxing, and getting much better results.

    These are just a few of my favorite tips and tricks to help me calm my nerves before and during a photo session, but what about you? How do you approach your portrait sessions and what do you do to help yourself relax? Share your thoughts in the comments section below!

    People photography week

    This week on dPS we’re featuring articles all about different kinds of people photography including portrait, event and travel photography. See all the previous ones below, and watch for more people photography articles over the next few days.

    • How to Take Low Key Head-shots
    • How to Do a One Light Portrait Setup and Use it as Your Back-up Plan
    • Travel People Photography – Tips and Pitfalls
    • 8 Tips for Photographing Men
    • 24 Diverse Images That Showcase People Photography
    • Weekly Photography Challenge – People Photography

    googletag.cmd.push(function() {
    tablet_slots.push( googletag.defineSlot( “/1005424/_dPSv4_tab-all-article-bottom_(300×250)”, [300, 250], “pb-ad-78623” ).addService( googletag.pubads() ) ); } );

    googletag.cmd.push(function() {
    mobile_slots.push( googletag.defineSlot( “/1005424/_dPSv4_mob-all-article-bottom_(300×250)”, [300, 250], “pb-ad-78158” ).addService( googletag.pubads() ) ); } );

    The post Tips for Getting Yourself to Relax as a Photographer and Have More Successful Portrait Sessions by Simon Ringsmuth appeared first on Digital Photography School.

    Digital Photography School

  • How to Use the Patch Tool in Photoshop

    There are tools in Photoshop that I use more than others, and some not at all. The Patch tool is one of my favourites. It is so easy to use and with each version of Photoshop, it has gotten even better.

    title-Patch-tool-in-Photoshop

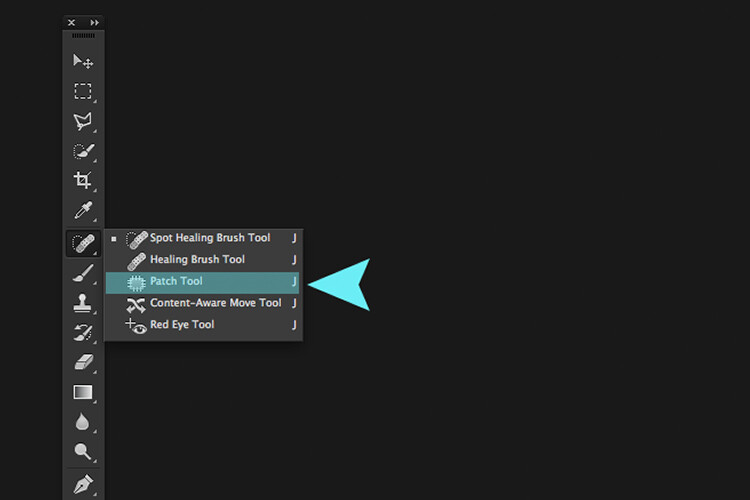
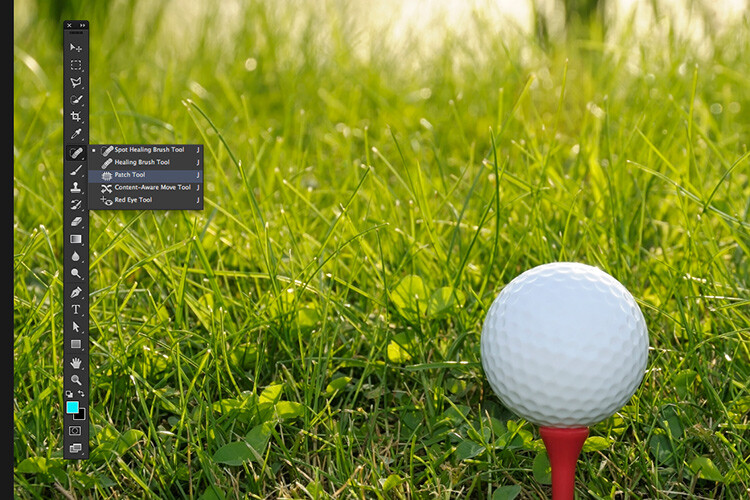
    The Patch Tool is located under the fly out menu of the Spot Healing Brush.

    What exactly is the Patch Tool for?

    The Patch Tool is part of the healing brush set of tools. These are the go-to tools for retouching and repairing your images. The Patch Tool is primarily used to repair larger areas of an image, or get rid of any distractions or blemishes.

    The patch tool was introduced into Photoshop at the same time as the Healing Brush. It is similar to the Healing Brush Tool, in that it matches the texture, lighting and shading of the sampled pixels to the source area. But, the Patch Tool uses selection-defined areas instead of a brush.

    Prior to Photoshop CS6, you could not work on a separate empty layer when using the Patch Tool, unlike the Spot and Healing Brushes. This meant that you had to duplicate the layer that you were working on. However, in Photoshop CS6, Content-Aware was introduced to the Patch Tool. So you can now work on an image using an empty layer. This has made it quite powerful indeed.

    What makes the Patch tool unique is that each time you use, it will give a slightly different result even on the same selection. It is great for retouching larger areas of your image, very fast and quite seamlessly. Or if you are in Destination Mode, this can also duplicate, or clone an object. Although, I rarely use it for that, it’s still an option. I will illustrate this further on in the article. There is also an option to use a pattern or Transparent, neither of which I’ve had a use for yet to date.

    What does the Patch Tool look like?

    The Patch Tool can be found hidden behind the Healing Brush tool in the Tools panel.

    patch tool highlighted in tools panel in photoshop

    By clicking on the Spot Healing brush in the tools panel. A fly out menu appears, the Patch tool is the third one down.

    How does the Patch Tool work?

    1. Select the Patch tool and draw an area around your selection. It works in a similar way to the Lasso selection.
    2. Move the cursor over the selected area and drag it to the left, right, or in any direction.
    3. Choose whether you choose Source or Destination mode in the Options Bar. You will see a preview of the image as you drag it.
    4. When you release the mouse or stylus, Photoshop does the magic of blending the pixels from the source or the destination area, to merge the pixels with the original selection seamlessly. Deselect by hitting Cmd+D on a Mac. Ctrl+D on a PC.
    original image before using the patch tool

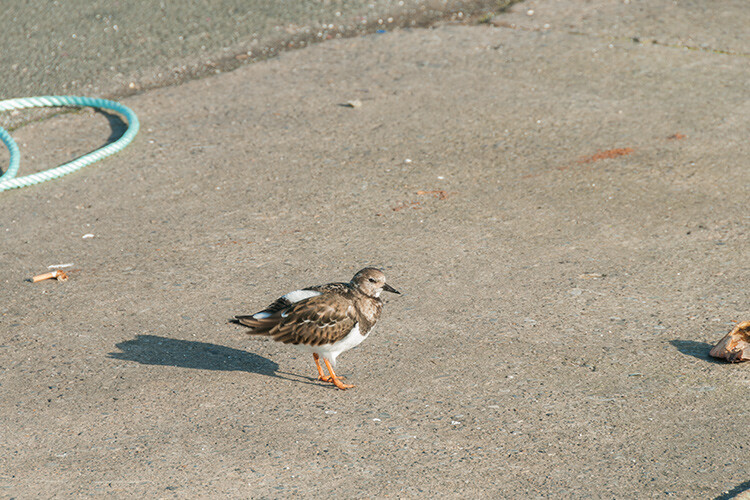
    Image showing definite areas that needs to be removed.

    simple-distractions-removed-patch-tool-normal-mode

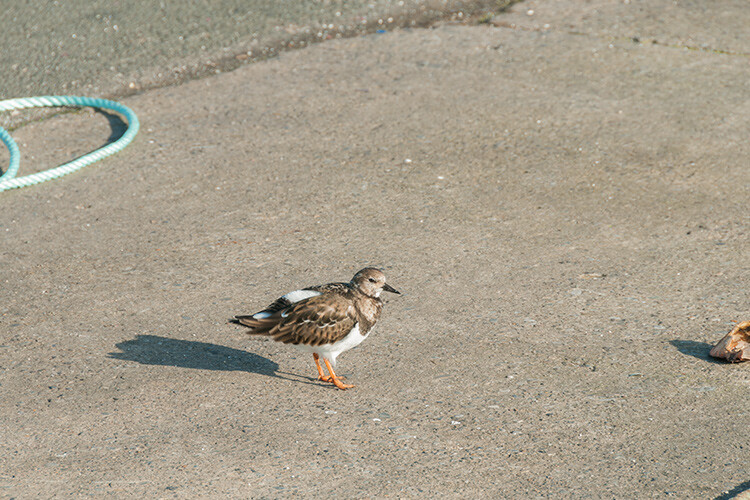
    The Patch Tool in normal mode removed some unwanted things (cigarette butts) in this image very easily and quickly.

    It’s that easy, but you probably won’t get a 100% accurate result every time. You may have to make a few attempts. Just make sure you are working on a duplicate background layer, or using a separate empty layer – not your original background layer.

    Tip: You don’t have to use the Patch tool to define a selection. You can use any selection tool and then select the Patch tool.

    Before I show you how to use the Patch Tool with Content-Aware, I want to demonstrate how the it can be used to clone an isolated area of your image.

    Duplication

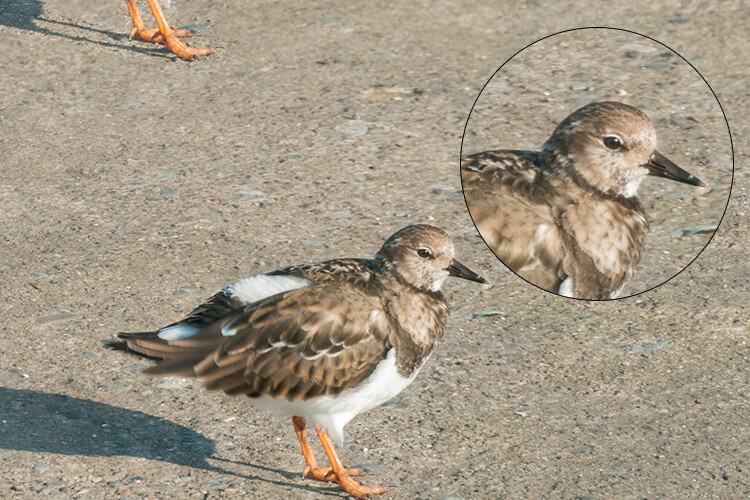
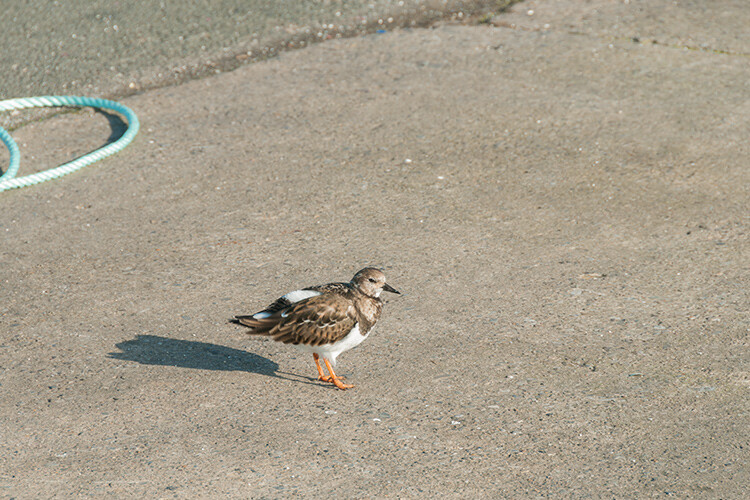
    In the following example, I want to duplicate the bird and add another one. Similar to the steps above:

    • Make a selection around the bird.
    • Choose Destination in the Options Bar.
    • With the Patch tool selected, position the cursor over the selection and move it into place.
    • It doesn’t do a bad job, however, if you look closely the surrounding pixels of the selection haven’t blended in so well.
    patch-tool-options-bar

    Click on the Destination radio button to duplicate or clone a specific area.

    Bird3-duplicated

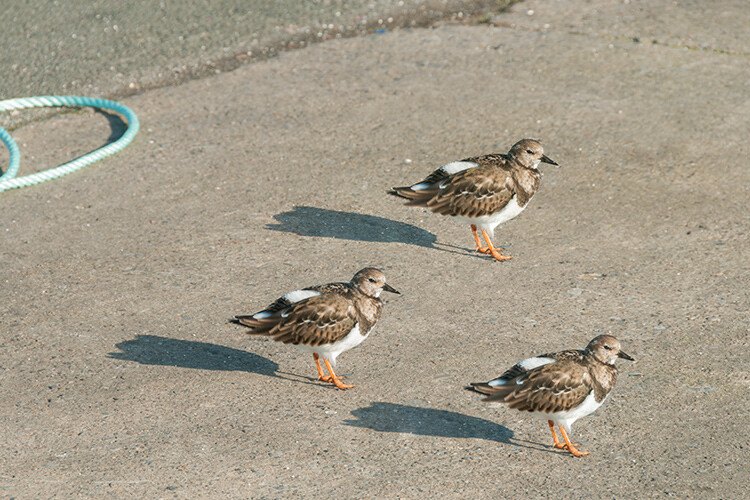
    Using the Patch tool to clone or duplicate an area of an image in Destination Mode. However, the results can produce a noticeably pixelated edge.

    Here’s an alternative method in getting a better result. Once you have made the selection for duplicating an area.

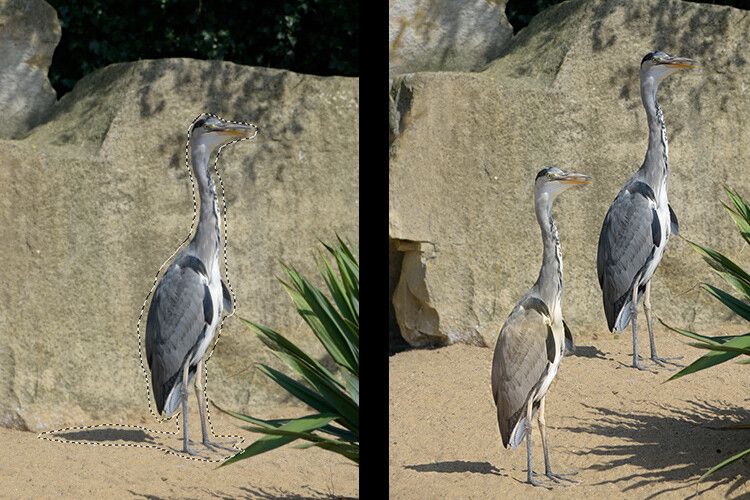
    Press Cmd+Alt+T on a Mac (Ctrl+Alt+T on a PC). This brings up the free Transform tool. Now move the selection to a new area on the image. Click on the tick box to commit, or press Enter. The selection is still active as the marching ants are visible around it. With the Patch tool selected, move the cursor over the selection, hold down the mouse or stylus and move the selection slightly and then release. You will notice the surrounding pixels are blended better.

    Bird2-duplicated-free-transform

    There is a definite improvement using the free transform tool, then holding down the mouse or stylus and moving the selection slightly at the same time just before releasing it.

    bird-duplicatedx3-after

    And voila, three birds!

    Another example of using the free transform tool along with the Patch tool set to Destination Mode.

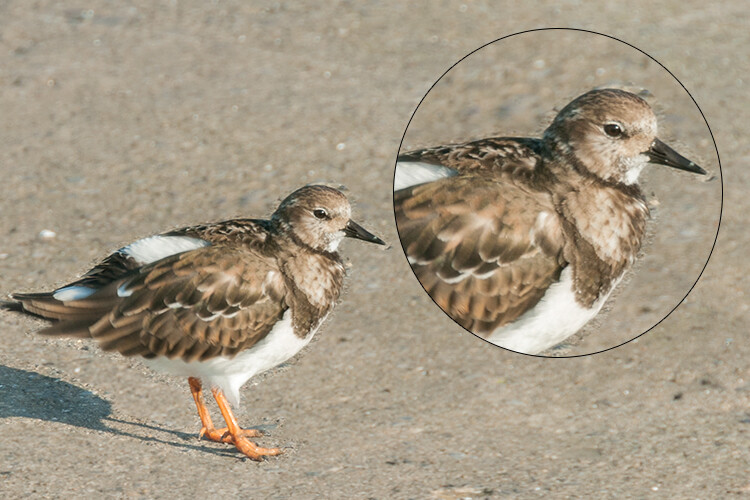
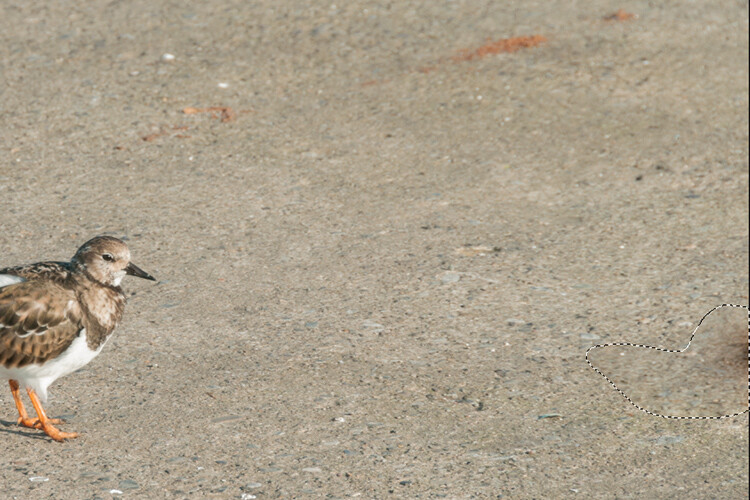
    I like to use the Patch Tool in both the normal mode and content-aware. In normal mode the Patch Tool does a great job for general clean up. However, where there are areas close to the edge of the image, the Patch tool struggles to blend or repair the selection. This is where the Patch tool in Content-Aware mode really shines.

    When an area has a sharp contrast, or is up against the edge of a photo, the Patch Tool in normal mode is less effective than using the Patch with Content-Aware. (notice the selection on the right here)

    In this image. I removed the unwanted areas using a combination of the Patch Tool in normal mode and Content-Aware.

    Content-Aware Mode

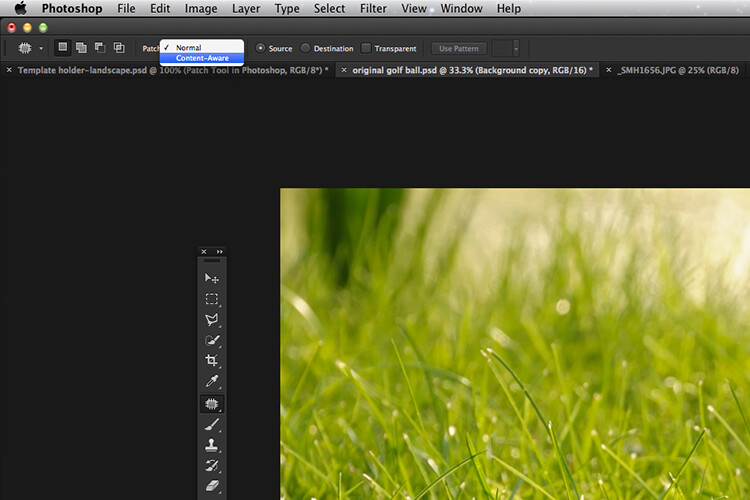
    In order to use the Patch Tool in this mode, go up to the Options Bar and change it from Normal to Content-Aware. If you want to work using an empty layer above the image, make sure Sample All layers is checked. As well, in the Options Bar, you will also see Adaption.

    switching-patch-tool-content-aware

    Switching the Patch Tool in the Options Bar from Normal to Content-Aware.

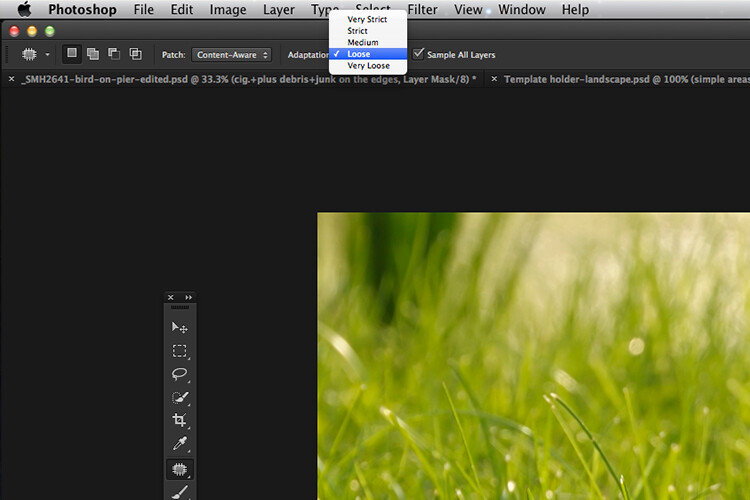
    By clicking on this, a drop down menu appears with five options. Your choices range from Very Strict to Very Loose, depending on how much blending is required. You will need to experiment to see which one looks best. Before you deselect, press Cmd+H to hide the marching ants and toggle between each option to see which one you prefer.

    Patch-tool-content-aware-5-options

    The five options for the Adaptation setting of the Patch Tool in Content-Aware.

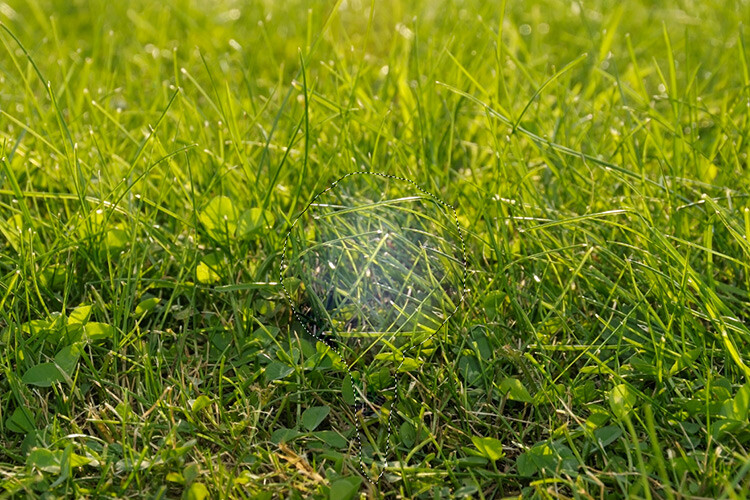
    You can see quite clearly the differences between the two modes in the images below.

    The Patch Tool in Normal Mode is trying to remove the golf ball on the tee from the image.

    The Patch tool in Content-Aware has successfully removed the golf ball and tee from the image.

    I hope you found this article useful. Do you use the Patch Tool in Photoshop? Please let me know in the comments below.

    googletag.cmd.push(function() {
    tablet_slots.push( googletag.defineSlot( “/1005424/_dPSv4_tab-all-article-bottom_(300×250)”, [300, 250], “pb-ad-78623” ).addService( googletag.pubads() ) ); } );

    googletag.cmd.push(function() {
    mobile_slots.push( googletag.defineSlot( “/1005424/_dPSv4_mob-all-article-bottom_(300×250)”, [300, 250], “pb-ad-78158” ).addService( googletag.pubads() ) ); } );

    The post How to Use the Patch Tool in Photoshop by Sarah Hipwell appeared first on Digital Photography School.


    Digital Photography School

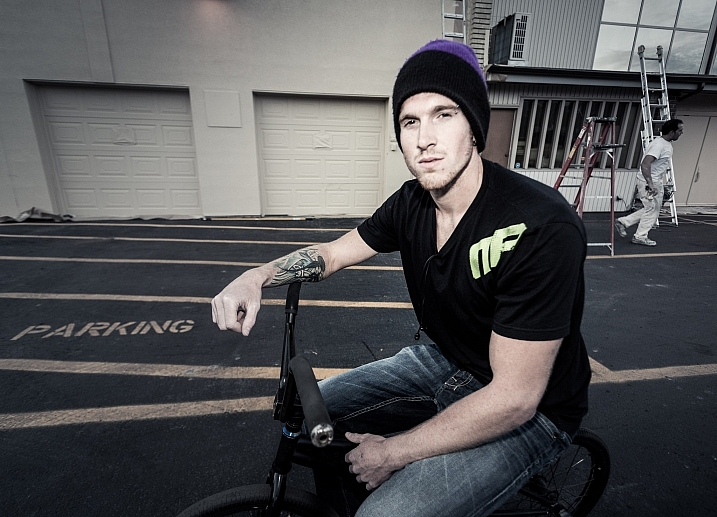
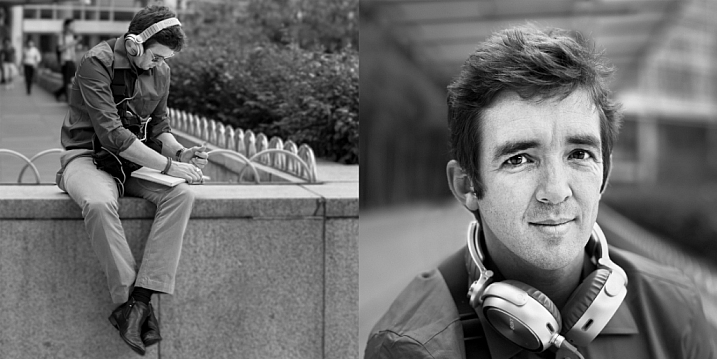
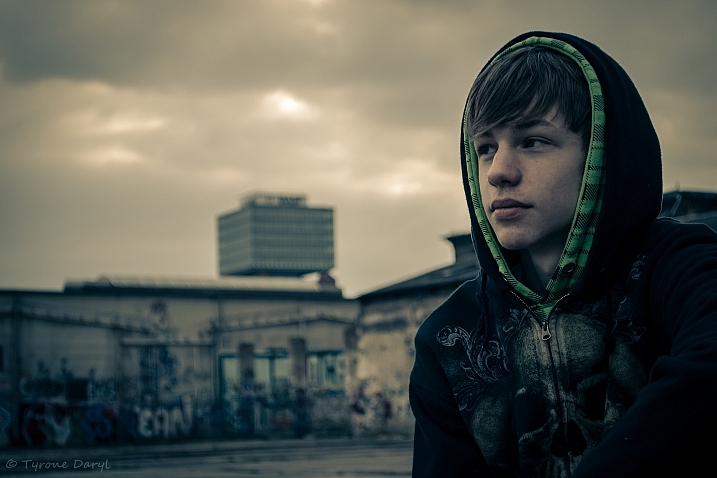
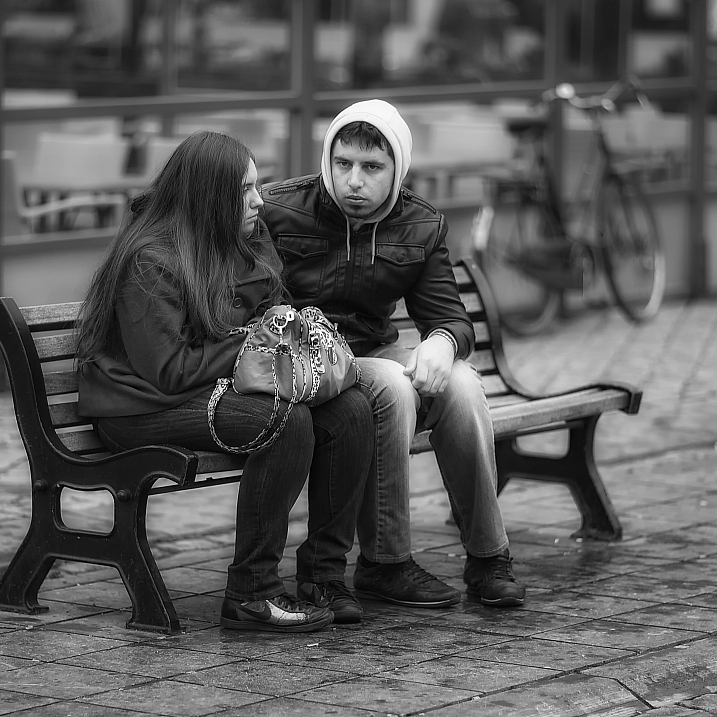
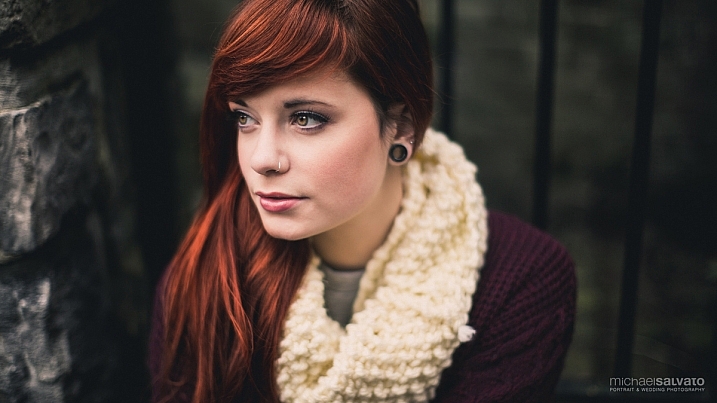
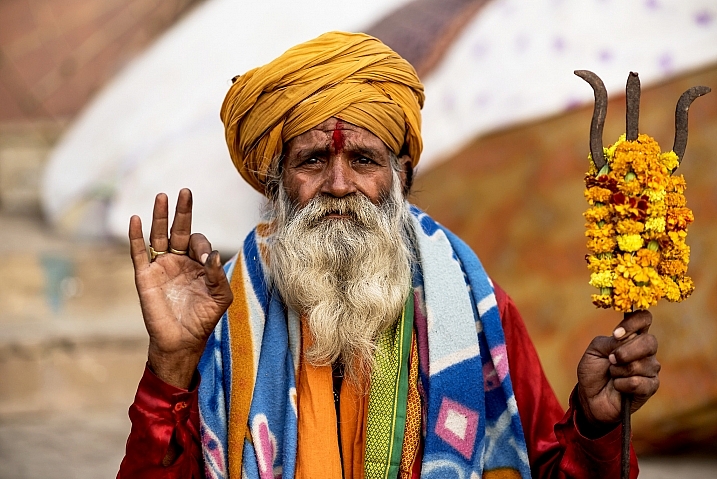
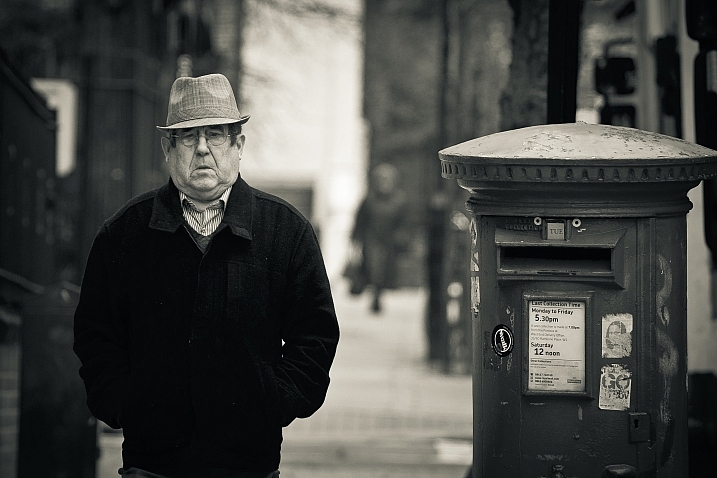
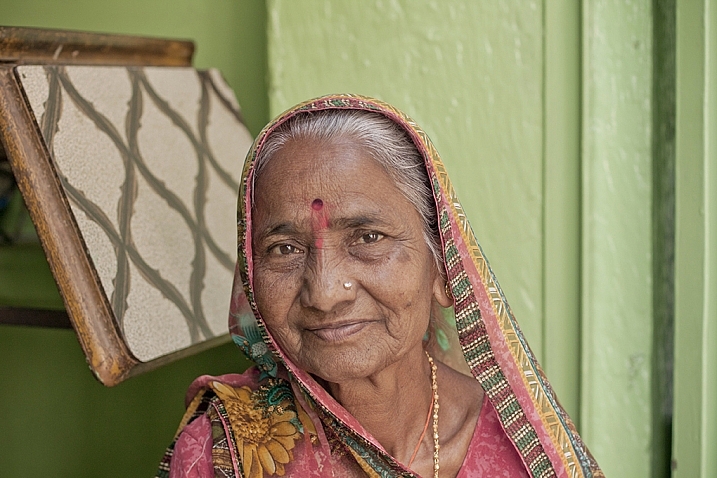
  • 28 Diverse Images That Showcase People Photography

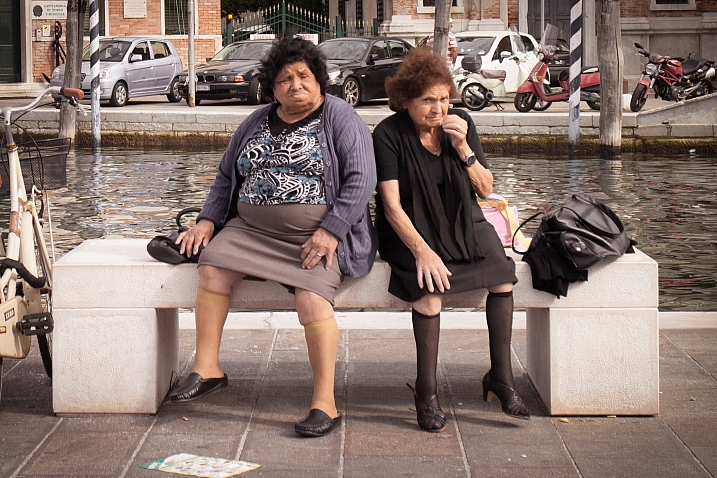
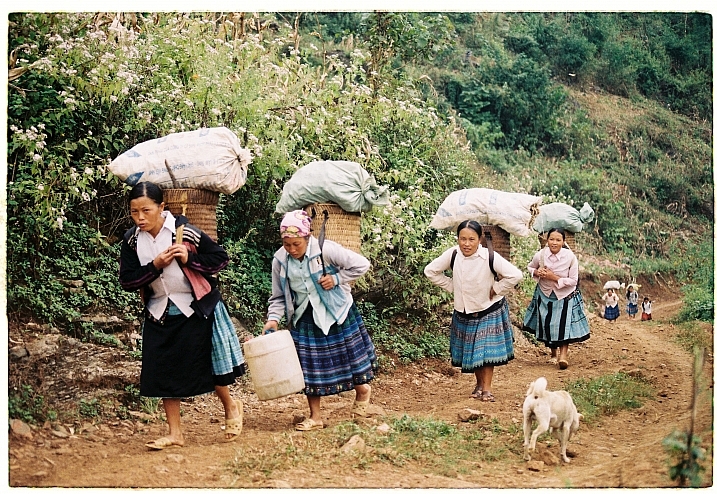
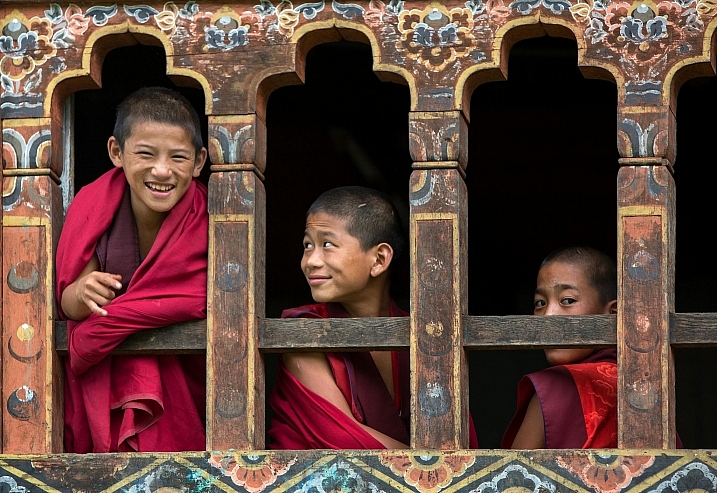
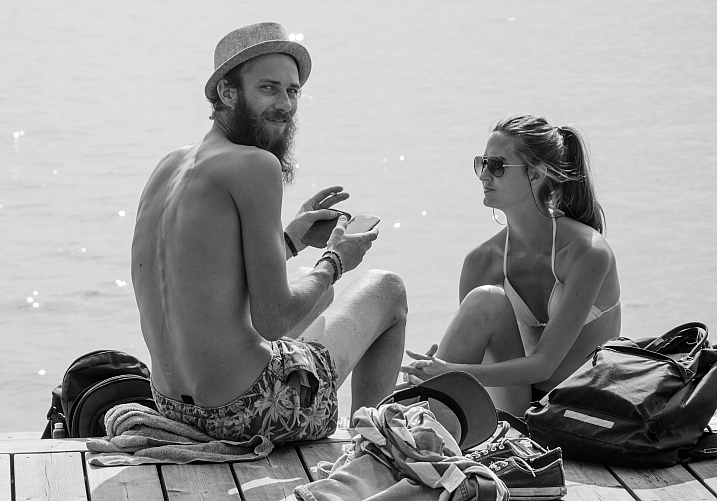
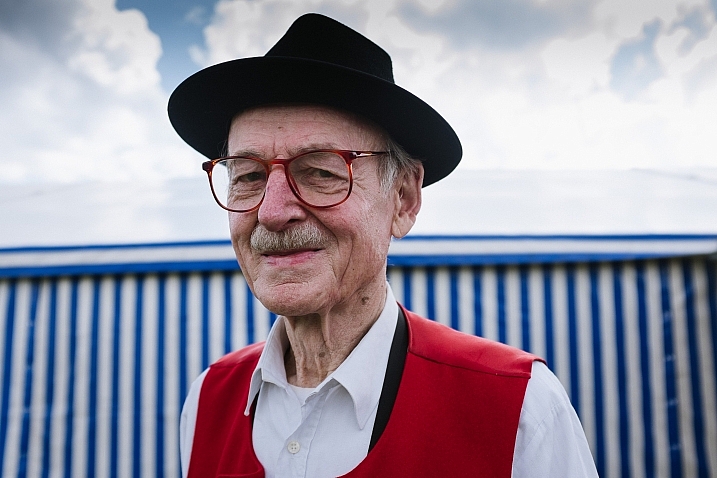
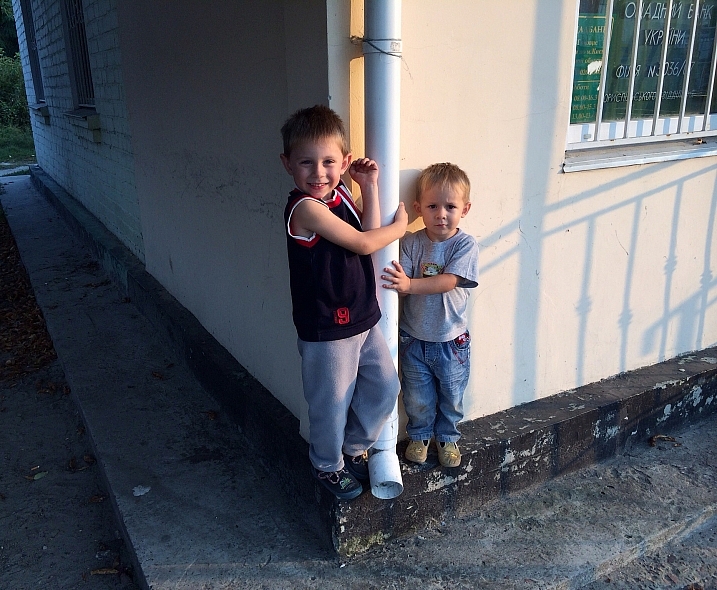
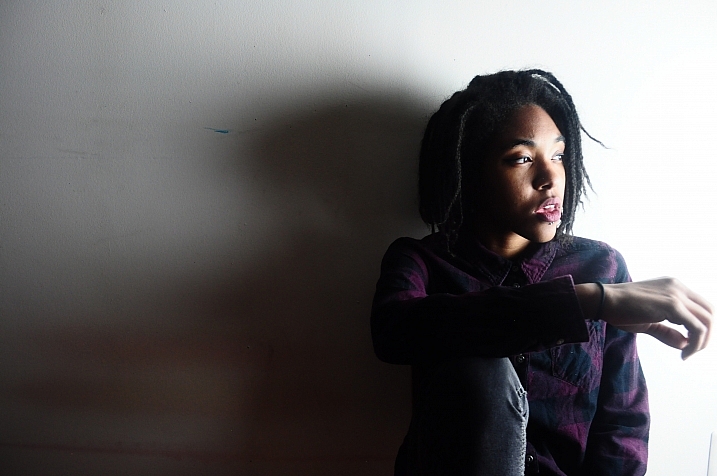
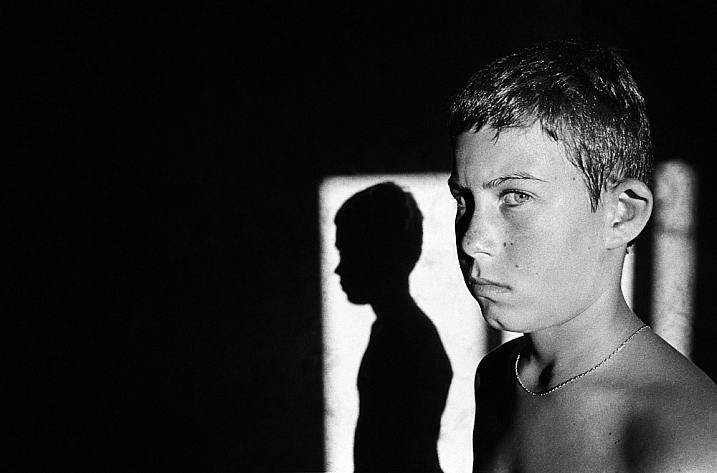
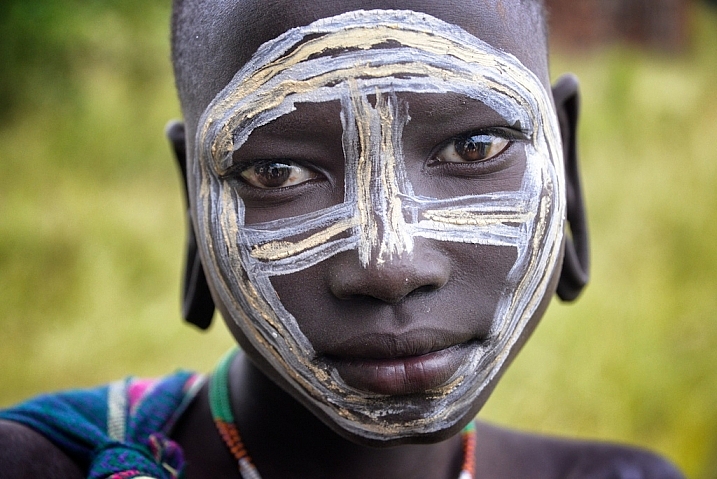
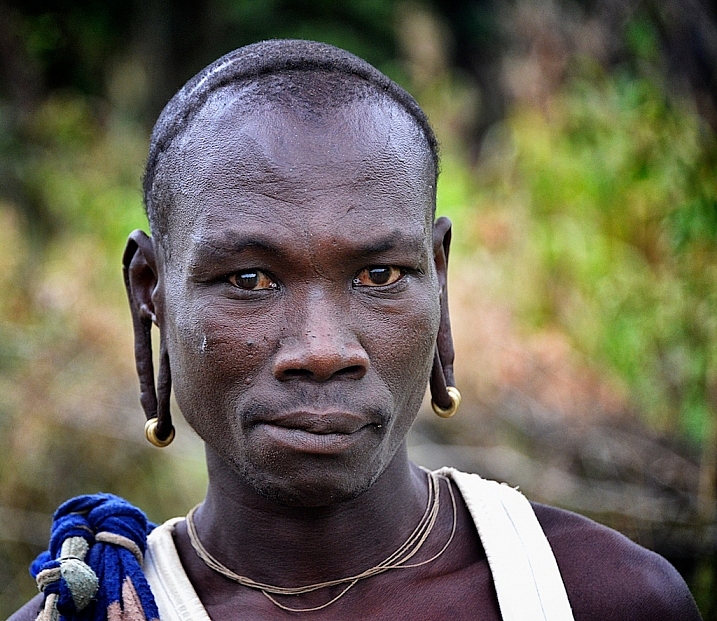
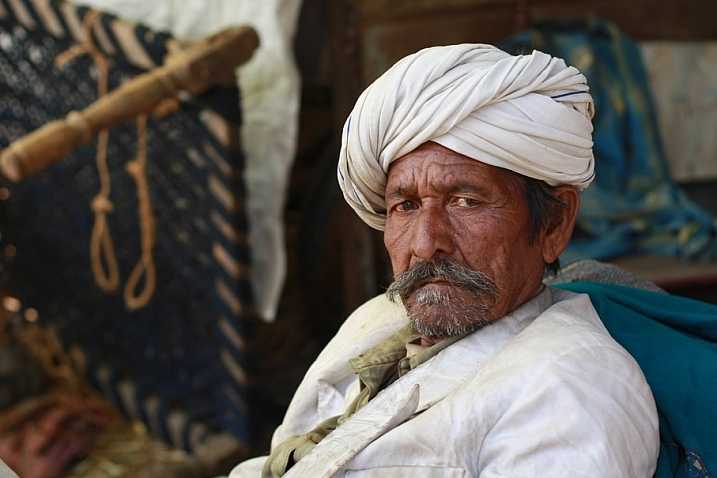
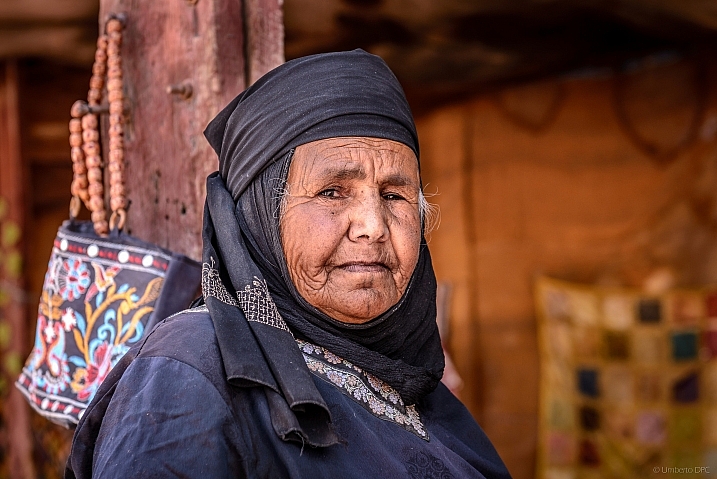
    People have a diverse range of emotions, styles, and looks and capturing that with a camera is the photographer’s job. From posed studio portraits, to street photography or candid shots, getting the character and essence of a person in an image is the goal. Let’s see how these photographers did with people photography:

    United Nations Photo

    By United Nations Photo

    Darlene Hildebrandt

    By Darlene Hildebrandt

    Jim O'Connell

    By Jim O’Connell

    Darlene Hildebrandt

    By Darlene Hildebrandt

    Shahab

    By Shahab

    Tyrone Daryl

    By Tyrone Daryl

    Fouquier ?

    By Fouquier ?

    Sebastian Rieger

    By Sebastian Rieger

    Khánh Hmoong

    By Khánh Hmoong

    Christopher Michel

    By Christopher Michel

    Astrid Westvang

    By astrid westvang

    David Stanley

    By David Stanley

    Eric Montfort

    By Eric Montfort

    Chryssa Kotsanidou

    By Chryssa Kotsanidou

    T W I N K A

    By T W I N K A

    Enki22

    By enki22

    Tilman Haerdle

    By Tilman Haerdle

    Elena Penkova

    By Elena Penkova

    Monique Prater

    By Monique Prater

    Ivan Constantin

    By Ivan Constantin

    Michael Salvato

    By Michael Salvato

    Kannan Muthuraman

    By Kannan Muthuraman

    Hernán Piñera

    By Hernán Piñera

    Meena Kadri

    By Meena Kadri

    Rod Waddington

    By Rod Waddington

    Rod Waddington

    By Rod Waddington

    Meena Kadri

    By Meena Kadri

    Umberto De Peppo Cocco

    By Umberto De Peppo Cocco

    People photography week

    This week on dPS we’re featuring articles all about different kinds of people photography including portrait, event and travel photography. See all the previous ones below, and watch for more people photography articles over the next few days.

    • How to Take Low Key Head-shots
    • How to Do a One Light Portrait Setup and Use it as Your Back-up Plan
    • Travel People Photography – Tips and Pitfalls
    • 8 Tips for Photographing Men

    googletag.cmd.push(function() {
    tablet_slots.push( googletag.defineSlot( “/1005424/_dPSv4_tab-all-article-bottom_(300×250)”, [300, 250], “pb-ad-78623” ).addService( googletag.pubads() ) ); } );

    googletag.cmd.push(function() {
    mobile_slots.push( googletag.defineSlot( “/1005424/_dPSv4_mob-all-article-bottom_(300×250)”, [300, 250], “pb-ad-78158” ).addService( googletag.pubads() ) ); } );

    The post 28 Diverse Images That Showcase People Photography by Darlene Hildebrandt appeared first on Digital Photography School.


    Digital Photography School

  • Weekly Photography Challenge – People Photography

    In my career as a photographer I’ve covered many genres from studio product photography, editorial, industrial, food photography, weddings, portraits, fine art, and travel – but through all of that, I’m primarily a people photographer. I like to photograph people.

    Darlene Hildebrandt

    Shoe repair man in Nicaragua – By Darlene Hildebrandt

    Darlene Hildebrandt

    Model at sunset – By Darlene Hildebrandt

    Darlene Hildebrandt

    Cuban beauties – By Darlene Hildebrandt

    Whether it’s in a studio environment doing a posed portrait, a candid doing street photography, a shop owner or vendor in a foreign country – people are always interesting and challenging to photograph.

    Weekly Photography Challenge – People

    We’ve got lots of articles to help you as you go about photographing people this week in fact it’s our feature topic right now. You can see all the ones we’ve done so far this week below, and watch for more people photography articles over the next few days:

    • How to Take Low Key Head-shots
    • How to Do a One Light Portrait Setup and Use it as Your Back-up Plan
    • Travel People Photography – Tips and Pitfalls
    • 8 Tips for Photographing Men
    • 24 Diverse Images That Showcase People Photography
    Darlene Hildebrandt

    Nicaraguan school kids – By Darlene Hildebrandt

    Darlene Hildebrandt

    Wedding fun – By Darlene Hildebrandt

    Darlene Hildebrandt

    Cuban dancers – By Darlene Hildebrandt

    You can also check out our ebooks on people and portrait photography:

    • Fast Flash for Portrait Perfection
    • Portraits: Lighting the Shot
    • Portraits: Making the Shot
    • Portraits: Striking the Pose
    • Kids Photography

    So if you are not inclined to photograph people and this challenges makes you a bit nervous – maybe now is the time to get out of your comfort zone and just do it. I promise they won’t bite!

    Share your images below:

    Simply upload your shot into the comment field (look for the little camera icon in the Disqus comments section) and they’ll get embedded for us all to see or if you’d prefer upload them to your favourite photo sharing site and leave the link to them. Show me your best images in this week’s challenge. Sometimes it takes a while for an image to appear so be patient and try not to post the same image twice.

    You can see some of mine here on this page – now it’s your turn to share, and show me your people photos.

    dramatic-images-using-shadows-750px-01

    dramatic-images-using-shadows-750px-15

    After lit using a combination of flash and natural light at 1/30th of a second.

    dramatic-images-using-shadows-750px-36

    googletag.cmd.push(function() {
    tablet_slots.push( googletag.defineSlot( “/1005424/_dPSv4_tab-all-article-bottom_(300×250)”, [300, 250], “pb-ad-78623” ).addService( googletag.pubads() ) ); } );

    googletag.cmd.push(function() {
    mobile_slots.push( googletag.defineSlot( “/1005424/_dPSv4_mob-all-article-bottom_(300×250)”, [300, 250], “pb-ad-78158” ).addService( googletag.pubads() ) ); } );

    The post Weekly Photography Challenge – People Photography by Darlene Hildebrandt appeared first on Digital Photography School.


    Digital Photography School

  • 8 Tips for Photographing Men

    When I put my hand up to write an article about photographing men, it didn’t occur to me (until I sat down in front of a blank screen) just how big a topic it actually is. While much could be written about photographing men, from lighting ratios to posing, post-processing and more, there seems to be a drastic imbalance in the amount of material devoted solely to photographing men, as compared to women.

    A guide to how lighting ratios can differ for men, women and children are covered in the article Lighting Ratios to Make or Break your Portrait, and  Tips for Posing Men offers suggestions, along with Posing Guide: 21 Sample Poses to get you Started with Photographing Men.

    Image showing tips for photographing men

    When it comes to context, men are photographed within the genres of photojournalism, fashion, sports, travel, wedding and family photography, and corporate portraiture to name a few. My primary genre is family photography, and I also shoot corporate portraits. There is a growing demand for more relaxed professional portraits for clients to use on their LinkedIn profiles, professional Facebook pages – even online dating sites. Clients want a portrait that flatters, showcases their personality or perhaps the type of work they do, without looking too corporate. For the purpose of this article, I’ll be talking about photographing men mostly within these two contexts.

    Tip #1: Include him in the consultation process

    This tips sits at number one with good reason. One of the most common complaints I hear in portrait photographers’ forums is that of the reluctant father/husband – the guy who turns up to the family portrait session, looking like it’s the last place on earth he wants to be. His crankiness is infectious, and makes your job of capturing all those joyful family connections close to impossible.

    I confess, it was one of my bugbears also until I realized how often I’d been leaving male partners out of the consultation process altogether. In every grumpy dad case I encountered, I had mistakenly assumed that the women I spoke to during consultation would communicate everything to their partners, and in turn, share with me any concerns their partners had.

    Following a major light-bulb moment, I started to include men in the process, and it made a world of difference. Turns out, they just want to be heard. The more you engage with a man before the shoot, the more comfortable he will be when you are wielding a camera, and the better the photos you will get. This applies whether you’re photographing a paying client, the guy next door, or your brother.

    Ask him if he has any features he’s sensitive about. A prominent nose, a double chin, acne scarring and a bit of a tummy are common sensitivities. Allow him to express his insecurities without feeling silly, and reassure him that you can work around these with posing, camera angles, lighting, and post-processing.

    Ask him what kind of clothes he feels good in, and make sure he understands how these may work for or against him in photographs. Tread gently; if it’s a family session, there’s a good chance his partner is already on his case.

    Image showing tips for photographing men

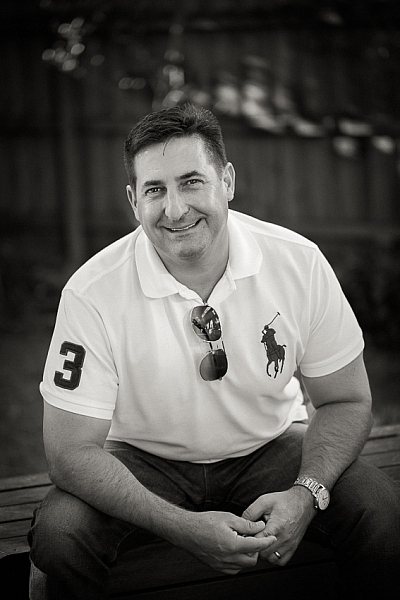
    If he has made the effort to look good, do him justice in the photographs by paying attention to detail.

    If he makes the effort to dress well for your photo shoot, as most men will, show him the same respect by paying attention to detail in the editing process. Zoom in close and check for stray hairs the razor may have missed, a loose thread, or a smudge left by a child’s fingers.

    Tip #2: Find purpose and meaning

    Following on from tip#1, find out why he wants these photos taken. If it is an individual portrait, what is he using it for? If it’s for professional use, what kind of work does he do? What kind of look does he want? If he is a passionate kite-surfing instructor, he may not appreciate your moody black and whites – he is more likely to want something full of colour and action. However, a budding author may love them.

    If it’s a family shoot, ask questions about his family. It sounds like a no-brainer, but you’d be surprised how often this important step is missed. What does the family like to do together? What is special about his partner? What does he love most about his child or grandchild? Dig deep, and listen to his answers. You’ll be surprised at what he reveals.

    The photo below of my dad with my eldest daughter is one of my personal favourites. He told me he loves the fact that, even though she is a teenager, she still takes his hand or his arm, when they go for walks together through the forest near his home. I love how the arch of the trees frames them. To me, it suggests they are walking towards the future together.

    Image showing tips for photographing men

    Photograph the connections that are meaningful.

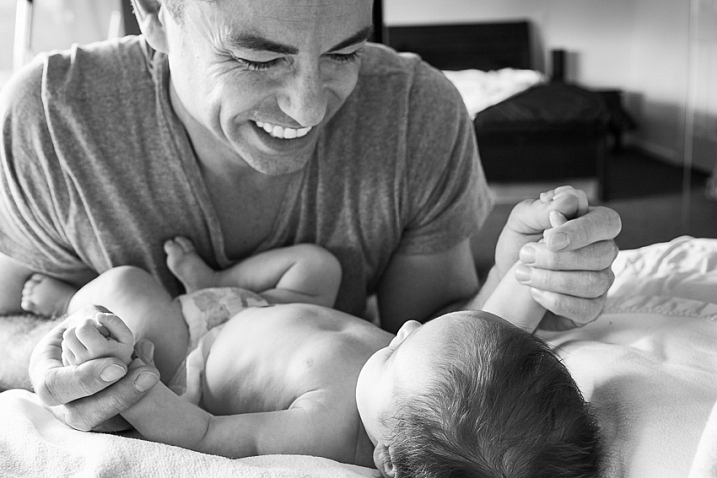
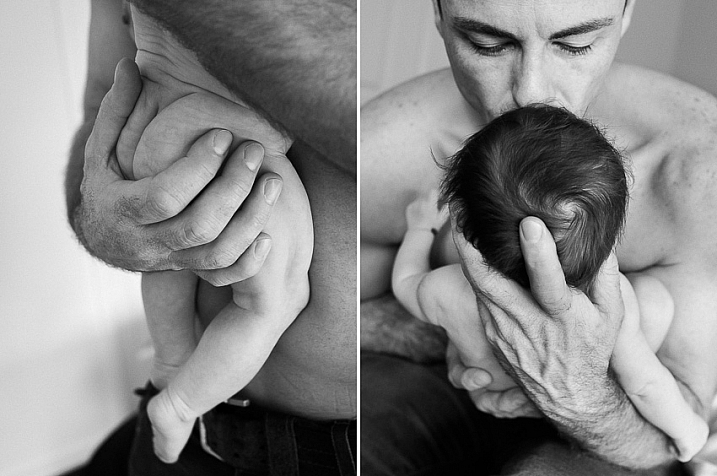
    The man in the photos below told me how he marvels at the smallness of his new daughter’s hands and feet. Like many young dads, he is at a very busy stage in his professional life, securing a future for his family. Often his baby is asleep by the time he gets home at night, and so he cherishes the quiet moments they get to spend together.

    Image showing tips for photographing men

    Image showing tips for photographing men

    Busy dads cherish those quiet moments with their little ones.

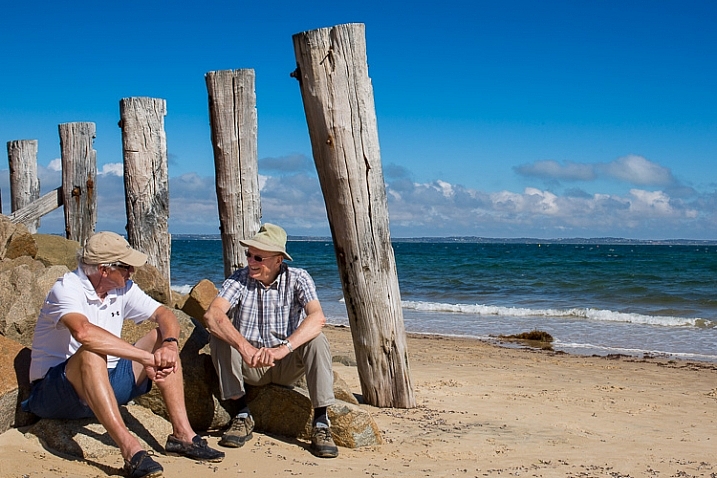
    The photo below is of two male cousins. They played together as children, but have lived on separate continents since their families emigrated from their native country when they were young. Remarkable to me was how similar their gestures and body language were, despite having lived apart for most of their lives, and I wanted to capture that in a photograph. The ocean is symbolic in this photo, as it usually separates them. At this moment, they were both on the same side of it.

    image showing tips for photographing men

    I wanted to capture the similarity between these two cousins who have lived on separate continents most of their lives. The ocean is meaningful in this context: usually it separates them but, at the moment when this photo was taken, they were both on the same side of it.

    Tip #3: Give him something to lean against or sit on

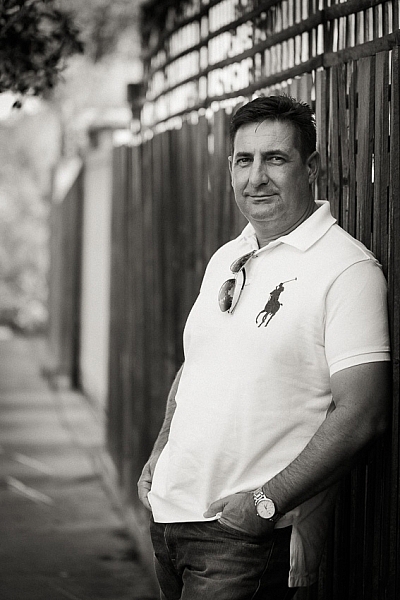
    Regardless of how much prepping you’ve done, many people are profoundly uncomfortable in front of a camera, especially at the start of a shoot. If your subject feels awkward standing in front of the camera, ask him to lean against a vertical surface such as a wall, fence, lamppost, or car. It will help him feel anchored, and will allow him to angle his body without looking unnatural. If he is seated, you’ll be ready for the next tip.

    Image showing tips for photographing men

    Find a vertical surface for him to lean against.

    Tip #4: Minimize a double chin, prominent nose, or heavy jowls

    One way to minimize a double chin is to shoot from above eye level, with your subject leaning slightly forward. If he is seated, ask him to rest his forearms on his thighs, and angle his knees 45° away from you.

    You can also use lighting to your advantage. Strong, directional light can visually slim a face, or a torso.

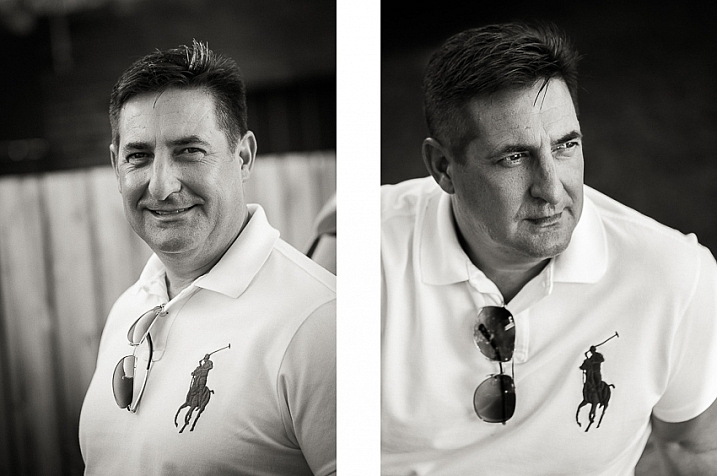
    The photo below left was shot from below eye level (the subject was taller than me and was standing) and with light falling on both sides of his face. The photo on the right is more flattering. The subject is seated, leaning forward and angled away from the camera. Strong light reflected off a wall in the late afternoon casts his neck and left hand side of his face into shadow.

    Image showing tips for photographing men

    The use of shadow and angle in the photo on the right create a more flattering portrait.

    Tip #5: If it bends, bend it

    Bent arms and legs make your subject appear more natural and relaxed, and have the added advantage of making the body more compact for the sake of composition.

    Tip #6: give him something to do with his hands

    “What should I do with my hands?” is a question I am often asked during a session. People become suddenly self-conscious about their hands when they are facing a camera, and arms hanging straight down at the sides look awkward.

    If he is standing, ask him to put one or both hands in his pocket(s), or loop his thumb over a belt. If he is sitting, he can interlink his fingers or clasp his hands together. In the case of a family photo, have him hold a baby, or a child’s hand.

    Image showing tips for photographing men

    Give him something to do with his hands.

    Tip #7: Detail and contrast

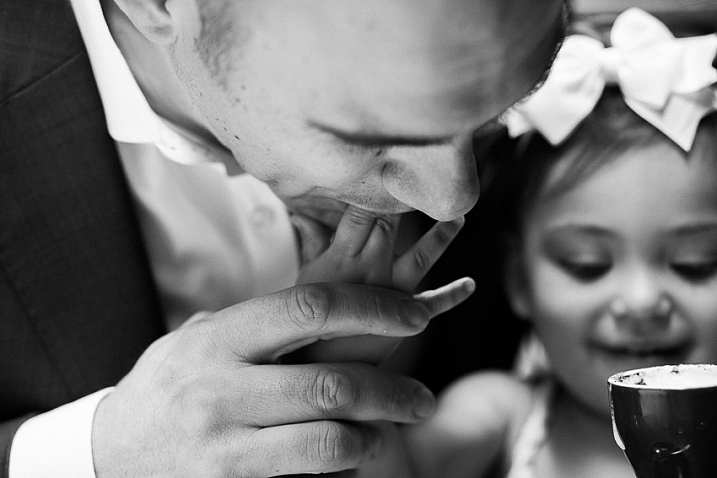
    Details such as eyes, lips, and hands help tell a story, and depict the connections between people. Of all these details, hands are my favourite. Hands are a powerful expression of emotional connection and tenderness. Because of their size, men’s hands are visually striking to photograph in contrast to women’s and children’s hands.

    The portrait below shows a tender and playful moment between father and daughter. His hand is large and strong next to hers, and she smiles as he kisses milk froth from her fingertips.

    Image showing tips for photographing men

    A father playfully kisses milk froth from his daughter’s fingertips.

    In the photos below of a man with his baby daughter, the size and strength of his hands contrast against the baby’s soft skin and her tiny body. They show how small and vulnerable she is, and depict tenderness and trust.

    Image showing tips for photographing men

    The size of the man’s hands contrast against the baby, depicting protectiveness and care.

    Tip #8: Post-processing

    Let’s face it, digital cameras can be brutal. They capture in minute detail all those little imperfections the naked eye doesn’t see, and hold it in a static image for the eye to gaze over.

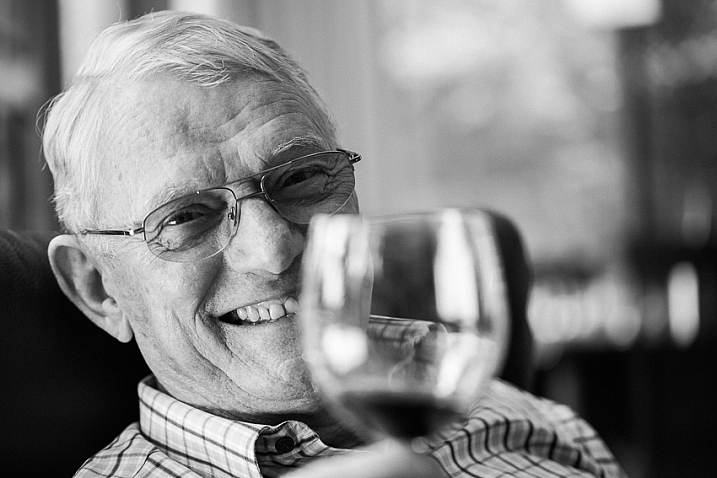
    In some styles of portraiture, this is desirable. Elderly men with craggy faces are popular subjects for travel photographers and photojournalists. However, wrinkles and blemishes are not something you want to draw attention to in family photos or professional head shots, so be kind!

    Men will give you clues during the consultation and the shoot. If he cracks jokes such as, “Can you Photoshop me to make me look 10 years younger?” or, “Can you make me look like George Clooney?”, he’s probably only half-kidding. Just because he’s a man doesn’t mean he’s okay with the zit that reared its head yesterday morning, or the hair poking out of his nostril that he missed with the trimmers.

    When it comes to editing, much will depend on your personal style. While I’m not a fan of heavily edited portraits, I’ll still follow my basic Lightroom workflow as explained in my article 11 Steps for Basic Portrait Editing in Lightroom. With men, I use the brush tool sparingly to soften skin. The effect should be subtle, and his skin should never appear softer than a woman’s or child’s in the same photo.

    When it comes to blemishes, my rule-of-thumb is to remove any blemish that is temporary. Pimples, scratches, stray hairs – if it’s going to be gone from his face in a fortnight (two weeks for you non-Aussies), I’ll remove it from his face in the post-processing stage. I wouldn’t remove a mole or birth mark unless the client specifically asked me to do so.

    image showing tips for photographing men

    In this casual portrait of my father, I have removed some temporary blemishes, but the portrait retains its authenticity.

    Over to you!

    This article has only scratched the surface of what is a very broad subject. Tell us about your experiences photographing men. What are some of your triumphs or frustrations, your favourite tips and techniques?

    People photography week

    This week on dPS we’re featuring articles all about different kinds of people photography including portrait, event and travel photography. See all the previous ones below, and watch for more people photography articles over the next few days.

    • How to Take Low Key Head-shots
    • How to Do a One Light Portrait Setup and Use it as Your Back-up Plan
    • Travel People Photography – Tips and Pitfalls

    googletag.cmd.push(function() {
    tablet_slots.push( googletag.defineSlot( “/1005424/_dPSv4_tab-all-article-bottom_(300×250)”, [300, 250], “pb-ad-78623” ).addService( googletag.pubads() ) ); } );

    googletag.cmd.push(function() {
    mobile_slots.push( googletag.defineSlot( “/1005424/_dPSv4_mob-all-article-bottom_(300×250)”, [300, 250], “pb-ad-78158” ).addService( googletag.pubads() ) ); } );

    The post 8 Tips for Photographing Men by Karen Quist appeared first on Digital Photography School.


    Digital Photography School

  • Travel People Photography – Tips and Pitfalls

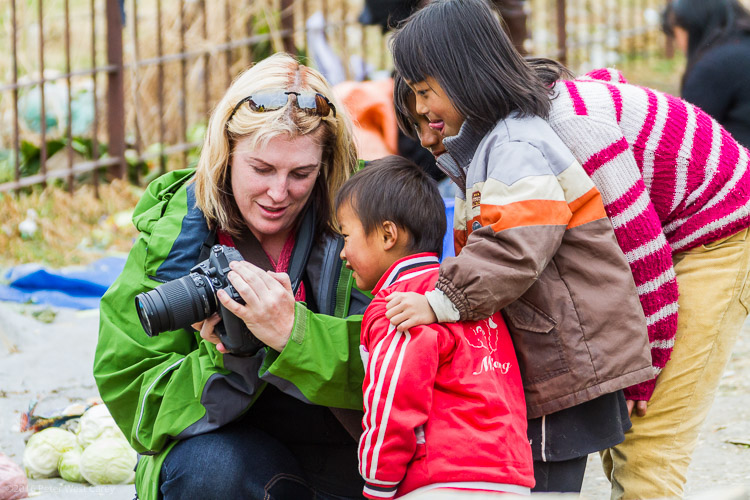
    “Oh the people you will meet!” goes one of Dr. Seuss’ famous lines, speaking to a particular joy of travel. We don’t just travel to see new places, we travel to experience new cultures full of new people – and as photographers, we’re intrigued to take their photo.

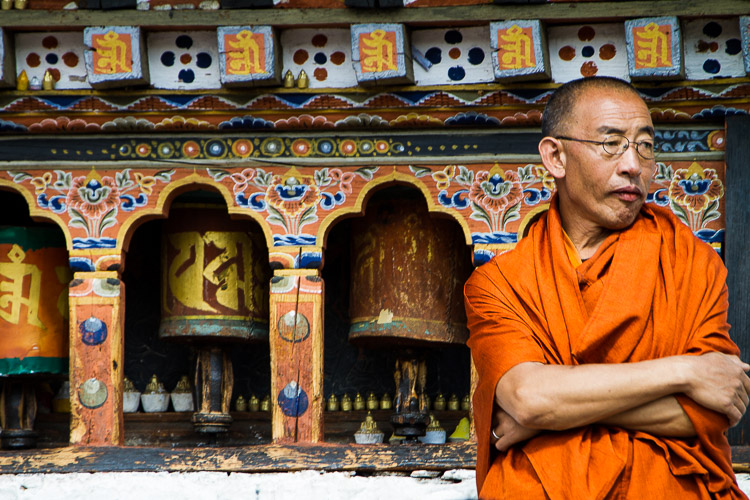
    Monk, Paro, Bhutan

    Yet it’s not as easy as taking photos of foreign mountains or cityscapes. because, gasp!, those people are full of life and feelings and opinions. They might be speaking a language we don’t understand. We are left wondering what they are thinking as we start to bring our camera up to our eye.

    I’ve been photographing for 26 years, and traveling regularly for the last eight. I don’t know it all, but I have learned, through trial and error and research, what helps and what hinders travel portrait photography.

    The Tips

    Watch the light

    Photography is about light. You’ve likely heard it a hundred times before. Sometimes we forget that when out of our comfort zone, but it’s important to remember that great photos need great subjects, and great use of light.

    PWC-Nepal100509-093652-4565-b

    Before raising your camera, know your light. Know what light will be available, and how best to use it. This article: Understanding Natural Light Part 3: Direction of Light – has a wealth of knowledge to get you thinking about the natural light at your location. Of course, you can use a flash as well, but most of us rely on natural light for our travel portraits.

    Connect

    Hot Button Topic: To connect before or after you take a photo? This decades-old discussion will not be settled here, but I will give my opinion as fuel to the fire.

    I believe in give and take. If I’m always taking photos when I travel, I feel more the part of an interloper than a welcome guest. There are irresistible times when someone is doing something soooooo perfect, we have to have a photo, we think. Introducing ourselves will ruin the moment and break the magic we are witnessing.

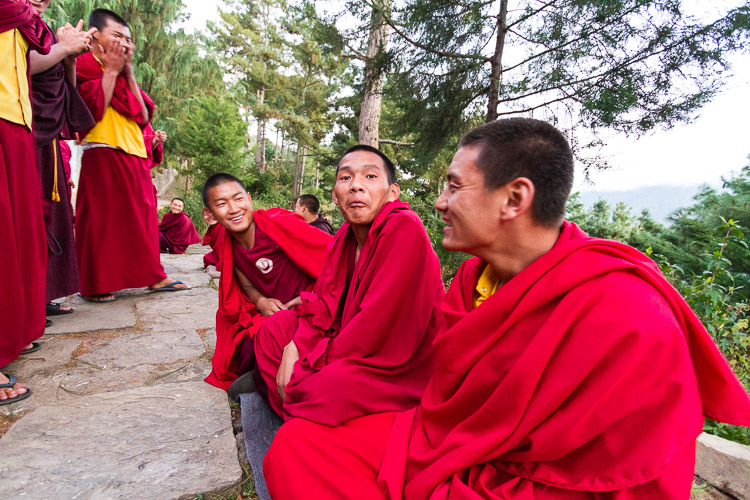
    Monk Debates, Jakar, Bhutan

    My advice is to take those photos, but give something back. Approach your subject after the fact and introduce yourself. Smile, make eye contact, promote goodwill, and be nice.

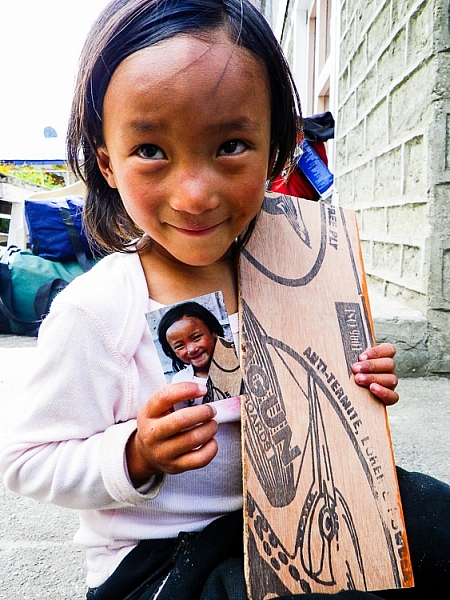
    If they are a vendor, buy something they are selling, or at least take a look. Canon, Sony and others now have portable printers you can bring with you, and what better way for give and take than to hand over a printed copy of the portrait you now treasure. It’s more work than just taking photos and continuing on your way, but it is also more rewarding.

    PWC-Nepal2011-1001-0530

    Get their feedback

    Building on the point above, show your subject their portrait. It’s part of giving back. Get their feedback on how they think they look.

    You might hear good things or bad, because everyone tends to be their own worst critic. Ask their friends as well, if they are around, to know if you have captured an accurate representation of your new friend.

    PWC-Bhutan2013-0317-4766

    They may have an idealized portrait they want you to take. What’s the harm in taking the photo they would like and the one you like? The more interaction, the better the portrait.

    To smile or not to smile

    This argument goes both ways. Some photographers want all smiles, especially if they believe there are in a happy place. Others abhor a grin. What a different story Steve McCurry’s Afghan Girl photo would tell if he was playing the ham and got her to smile!

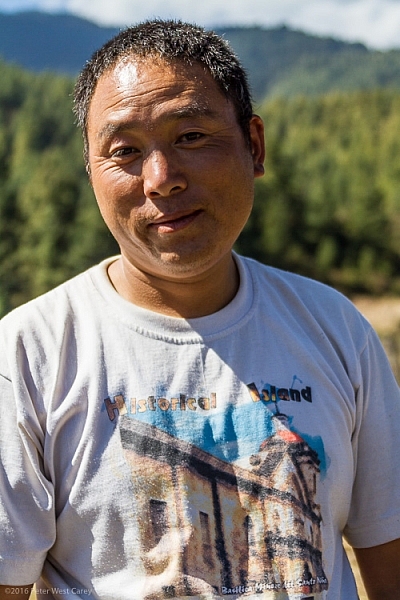
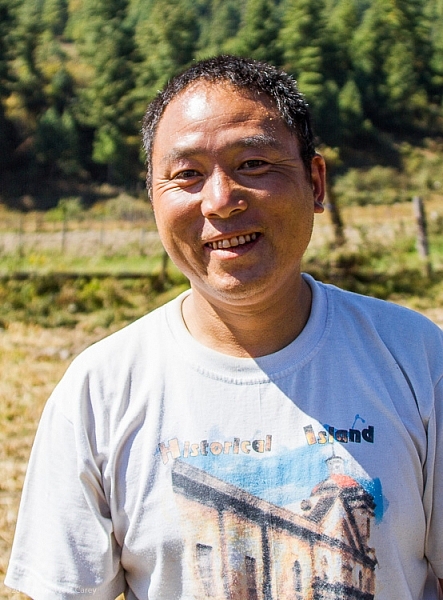
    As artists, we always instill our own bias into our art, that is okay. Sometimes your subject will also instill their bias. For instance, in Bhutan I encountered mostly stern faces when I took portraits, even if the subjects were lively, happy and smiling while I talked to them for a few minutes beforehand. I didn’t feel the stoic portraits the subjects wanted to portray accurately, reflected the warmth I felt while walking the countryside. So, what to do?

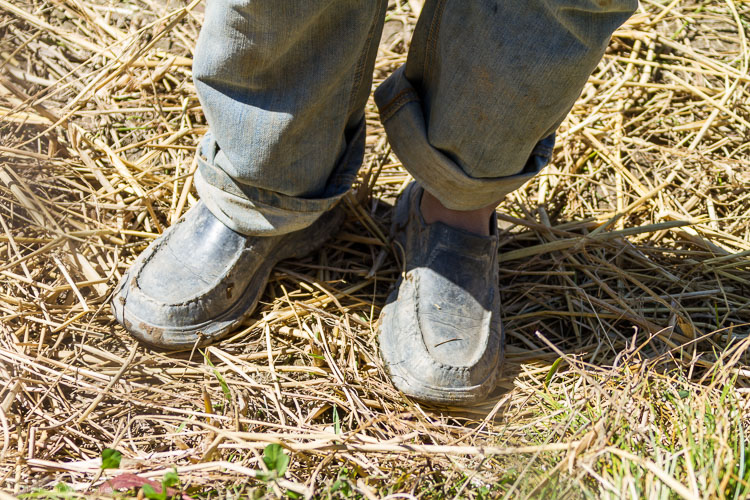
    I developed a technique on that trip of taking pictures of people’s shoes. This served two purposes; I got images that tell their own story (footwear can tell you a lot about the wearer) and, in that moment when the subject was wondering why the heck is this guy taking pictures of my shoes, they let their guard down and returned to the smile I had encountered until the portrait was taken.

    PWC-Bhutan2011-1024-9664

    Before shoe photo

    PWC-Bhutan2011-1024-9666

    PWC-Bhutan2011-1024-9667

    After shoe photo

    My suggestion is to get to know your subject before taking their portrait. Then find a way to help that personality shine in their portrait.

    Let them do their thing

    To tell a better story of an individual is to put them in their environment. It helps travel portraits if there is context of the individual, in relation to the space around them.

    Interact with your subject, take their posed portrait to your liking, then let them return to what they were doing. This is probably what drew you to them in the first place. Sit, observe, and be patient with your next photos.

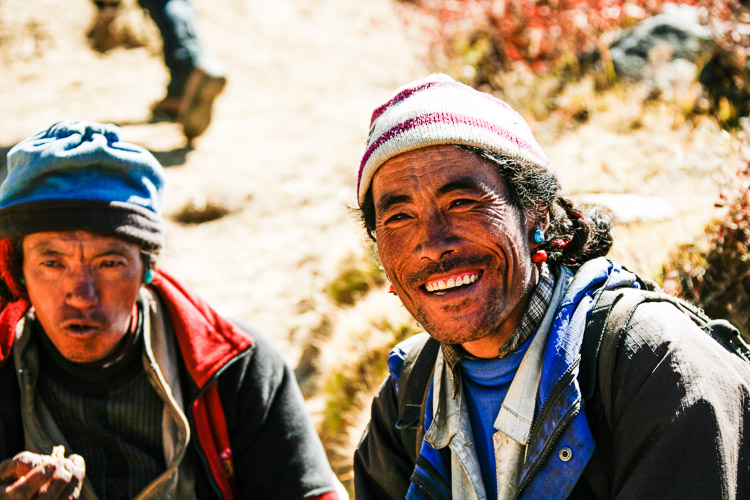
    Tibetan Shepherds

    They might not be classic portraits, subject’s eyes on the lens. To tell the story of the individual in the digital age is to have the ability to show more than one side, more than one image of your subject. You’re not a National Geographic photographer who will only get one image of the person in the magazine. You’re someone with a Facebook or other online account, and you can share both the portrait and the person in their element.

    The Pitfalls

    The Death Stare

    You can probably feel the chill down your spine right now when I mention the Death Stare. Every street photographer has felt it at one point, and most every travel photographer as well.

    PWC-Nepal2008-1010-3229

    The Death Stare comes when someone sees your camera pointed their way, and fully disapproves of being the object of your desire. It’s important to realize the Death Stare is usually not so much about you, it’s about the situation, and empathy goes a long way to avoiding it. So does the tip above about connecting.

    Recovery from the Death Stare can be hard. It chips at your confidence while you are in a foreign environment, already feeling out of place. Now you are unwelcome?

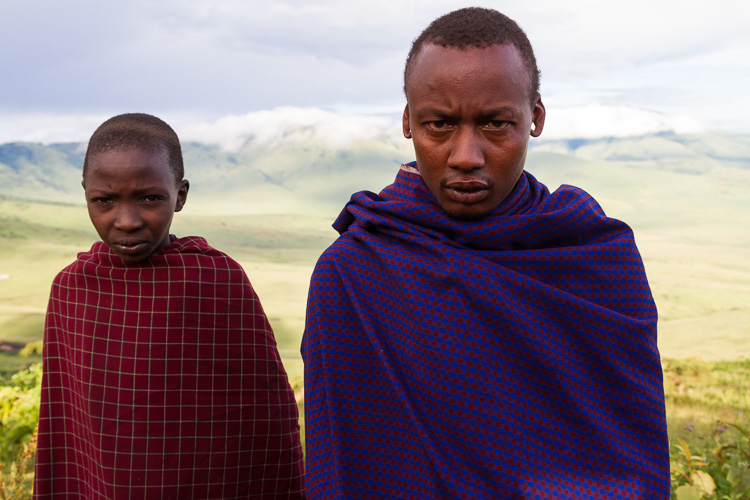
    Maasi On The Rim

    When I receive the Death Stare, I take a few mental steps backward, and put my camera away for just a bit – maybe 10 minutes, maybe an hour. I spend that time soaking in my surroundings and trying to connect with locals instead of capturing them.

    Super posers

    Kids are famous posers, but the disease travels across every age range. Some societies are more prone than others to super posing. By super posing I mean the tendency to totally ham it up for the camera. We all like to put on our best face, but the super poser makes almost a 180 degree change from what you first saw in them and wanted to photograph.

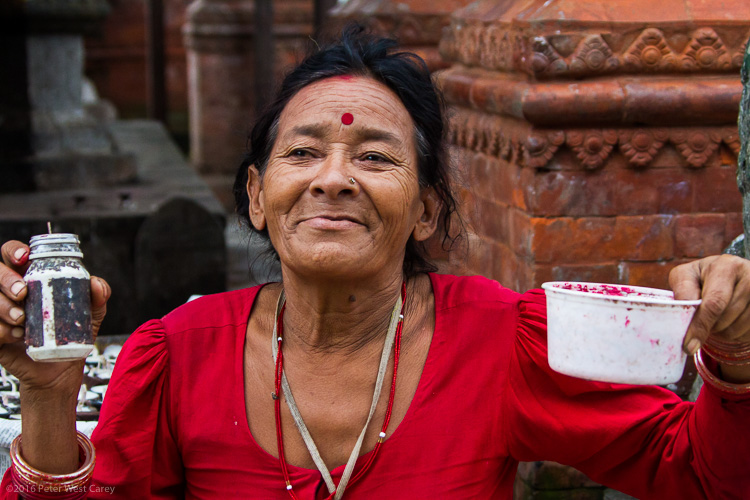
    Pay Me For Paint, Kathmandu, Nepal

    I have watched enough parents try to get their kids to, “smile normally, please?” and spend tens of minutes in frustration at their children being children. My suggestion with travel photos is to not fight the super poser. Accept that the moment you saw in them has passed, and move on.

    Only telephoto

    Afraid of the Death Stare, or an imaginary worse reaction, the telephoto-only portrait becomes the easy out. If I can shoot from 100 feet away, in obscurity, why get closer?

    Because your images will lack intimacy, that’s why. I’m not saying don’t shoot with a telephoto from a distance – but don’t only shoot from a distance. If I peruse your gallery of images from Egypt and only see telephoto attempts at portraits, I’m going to feel as distant as you physically were from your subject.

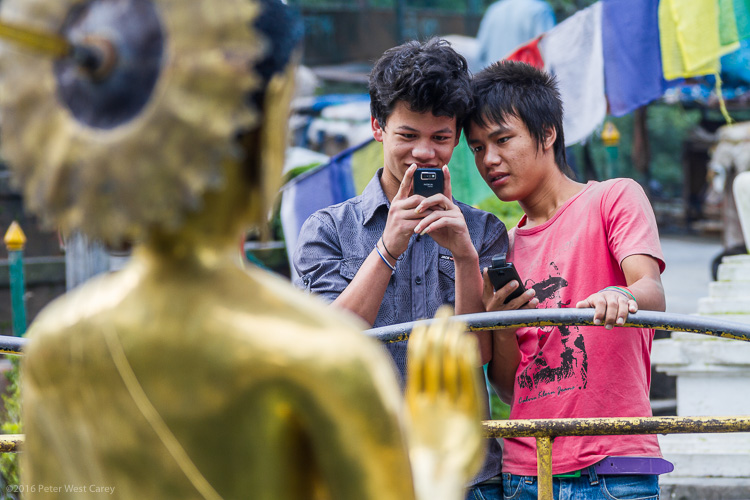
    Boys photographing statue of buddha - Nepal

    In my mind, connecting with strangers and only obtaining a few mostly-posed portraits is better than 100 shots from across the street. To me it says, “I traveled to this land, but didn’t really get into it.”

    “Please don’t use that”

    Following the advice above, you show some shots to your subject. They reply, “Oh, please don’t use any of those. I look horrible!” Now what?

    If there is a chance, reshoot the images. If you must move on with your travels, I suggest you take the high road and respect the individual’s wishes. You may think they look perfect. Yet being respectful is more important than impressing your Facebook friends or Instagram followers.

    This makes my original advice a bit of a double edged sword. Maybe you shouldn’t show them if there is a chance they will say no? The problem is face recognition software is getting more and more powerful, and Facebook’s (and other companies’) database is getting larger and more accurate. I live of the virtue it is better karma to error on the side of not potentially ticking people off.

    Use of the photos after the fact

    Ghombu

    This brings up a good point about use. What are you going to do with those images?

    Again, street photographers know this argument well. “You can’t take my photo!” they have had shouted at them if they have been in the game long enough. While this may be true in certain countries or situations, in most public spaces, especially in the US, you are free to photograph individuals.

    What you do with the images after is the key point. Your own personal, artistic use is okay – included in a gallery on Facebook or a post on Twitter, a slideshow presentation at the local social club, or a gallery showing. Commercial use, where a model release is needed (think: ad campaigns, brochures, catalogs, stock), is not. Editorial use in a magazine or newspaper generally is okay.

    DPS has some excellent resources, including our article Model Releases: What You Need To Know (with samples).
    Conclusion

    PWC-Tanzania100321-105740-2967

    PWC-Nepal2011-0929-8494

    Travel portrait photography can be a tricky world to navigate. You’re out of your comfort zone, you may not speak the language or know the customs, but you want to bring home photos of not just the pretty sites, but the interesting people, too.

    Be kind. Treat people as people, not objects. Share your images and take time to connect.

    Speaking of sharing, what other advice would you give those wishing to bring back travel portraits?

    People photography week

    This week on dPS we’re featuring articles all about different kinds of people photography including portrait, event and travel photography. See all the previous ones below, and watch for more people photography articles over the next few days.

    • How to Take Low Key Head-shots
    • How to Do a One Light Portrait Setup and Use it as Your Back-up Plan

    googletag.cmd.push(function() {
    tablet_slots.push( googletag.defineSlot( “/1005424/_dPSv4_tab-all-article-bottom_(300×250)”, [300, 250], “pb-ad-78623” ).addService( googletag.pubads() ) ); } );

    googletag.cmd.push(function() {
    mobile_slots.push( googletag.defineSlot( “/1005424/_dPSv4_mob-all-article-bottom_(300×250)”, [300, 250], “pb-ad-78158” ).addService( googletag.pubads() ) ); } );

    The post Travel People Photography – Tips and Pitfalls by Peter West Carey appeared first on Digital Photography School.


    Digital Photography School