Category: Photography

  • Software Review: Macphun Creative Kit 2016

    Image edited in Macphun Intensify CK

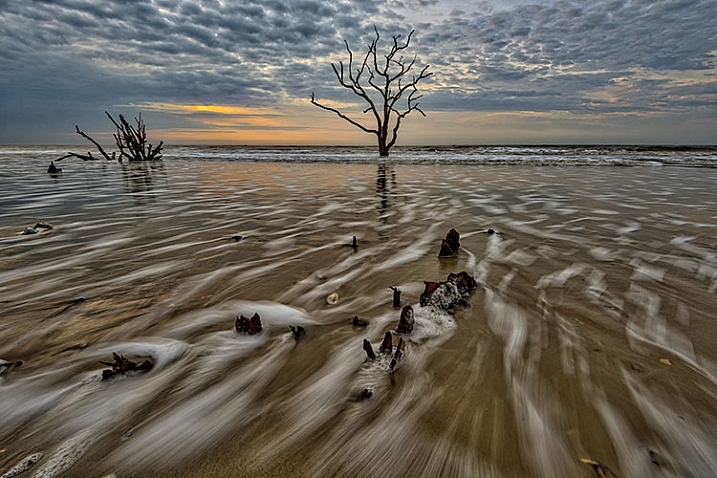
    Boneyard Beach, Botany Bay Plantation, South Carolina. Edited in Macphun Intensify Creative Kit.

    My philosophy on photography has always been that photography starts with the push of the shutter button, but it does not end there. Back when film was king, I spend a lot of time in the darkroom, learning and mastering darkroom techniques, and printing my work. With the advent of the digital age, those processes moved to the digital darkroom. Always one for working smarter, not harder, I have often employed plugins with Photoshop to make the work of editing my images a bit easier. I’m a big fan of plugin suites that offer a soup to nuts solution for editing images, so when Macphun released its Creative Kit 2016, I was excited to give it a try.

    Note: all Macphun products are made for Mac only.

    Macphun’s Creative Kit 2016 includes six plugins for Photoshop or Lightroom. This is a comprehensive collection that can handle all aspects of image editing, from color and contrast adjustments, to black and white conversion, to removing unwanted elements, sharpening, and noise reduction. The six modules are Intensify, Tonality, Snapheal, FX Photo Studio, Focus, and Noiseless. I’ll explain each one individually to give you an idea of the capabilities of each. Macphun Creative Kit, as the name implies, is only for Mac users, and is currently on sale at Macphun for $ 129 (USD)

    Intensify CK
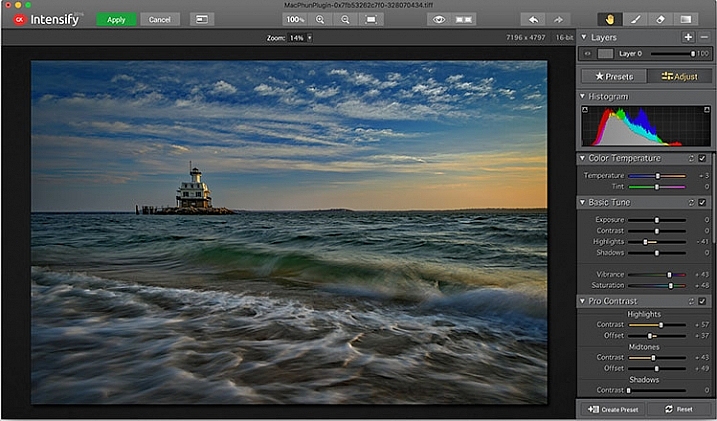
    Macphun Intensify CK application window

    The Macphun Intensify CK application window.

    Macphun Intensify is a plugin in the same vein as Topaz Adjust. You can adjust everything from color temperature and saturation, to contrast, structure, and details.  When you open Intensify, your image will be in the center of the screen with a tool bar on the right, which can alternate between presets and manual adjustments.

    The list of presets is broken down into groups: Architecture, Black & White, Creative, Detail Enhancement, Image Tune, Landscape, and Soft. Within each group is a list of presets that pertain to the subject of the main group. For instance, within Landscape is Aerial Photo Enhance -2, Gloomy Day, Natural Enhance, Structured Scape, and Warm Day. When you select a preset, an amount slider appears underneath so you can adjust the amount applied to the image. You also have the option of manually adjusting all the sliders to tweak the preset to to your tastes.
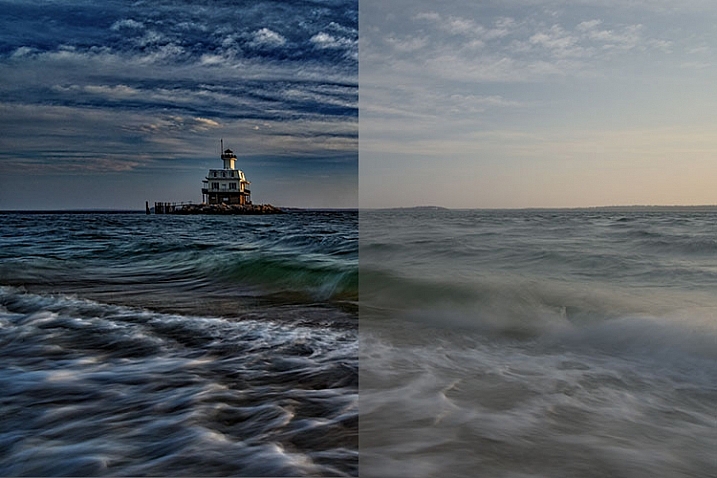
    Macphun Intensify CK Comparison Image

    Comparison of an image edited in MacPhun Intensify, before (right) and after (left).

    While I found many of the presets to be a bit heavy handed, manual adjustments are easy to make, and gave me a much more satisfying result than simply clicking a preset. For a more in-depth look at Intensify, read MacPhun Intensify Pro Software Review. While Macphun Intensify CK is a newer version, the controls and presets are largely the same and Andrew Gibson does an excellent job of breaking them down.
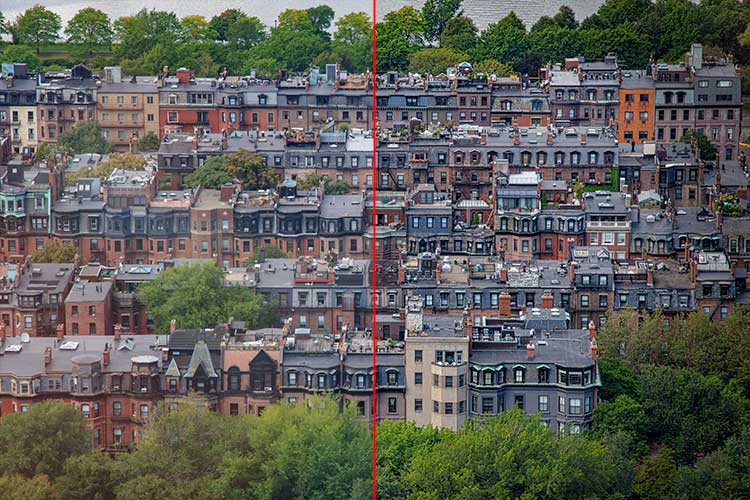
    Intensify-Architecture

    Before (left) and after (right) Intensify CK

    Snapheal CK
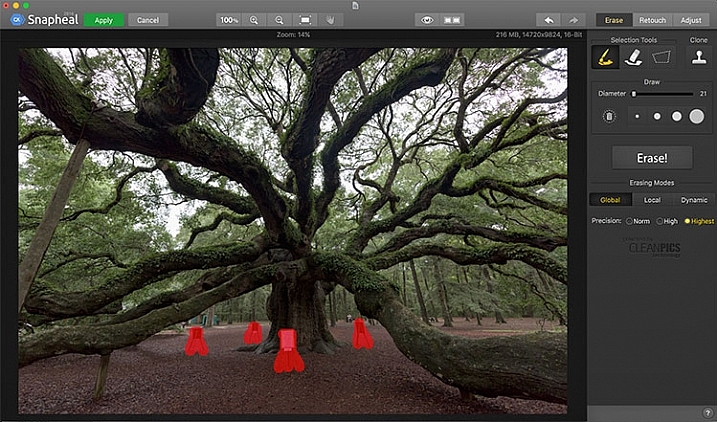
    Macphun Snapheal CK application window

    The Macphun Snapheal CK application window.

    Snapheal CK may very well be the crown jewel of this collection. Think of the healing brush or clone stamp on steroids, and that’s what Snapheal CK is like. Snapheal CK is an amazingly simple way to remove unwanted objects from a scene. When you open Snapheal CK, You’ll notice a tool panel on the right, and a menu bar across the top. You’ll see zoom and move tools, an eyeball icon, which shows the object you’ve removed, a comparison button, arrows to step forward or backward, and finally – Erase, Retouch, or Adjust, which are the different modes you can work in. The selection tools at the top are a paintbrush, an eraser, and a marquee selection. There is also a cloning stamp tool.

    Once you have your image in Snapheal CK, if you select Erase mode, you can either use the paint brush or the marquee tool to select the object you want removed from the scene. A red mask will appear over the object you’ve selected. The size of the paintbrush can be adjusted using the slider, or the bracket keys on the keyboard. If you paint in an area you don’t want removed, simply select the eraser tool and erase the painted area.
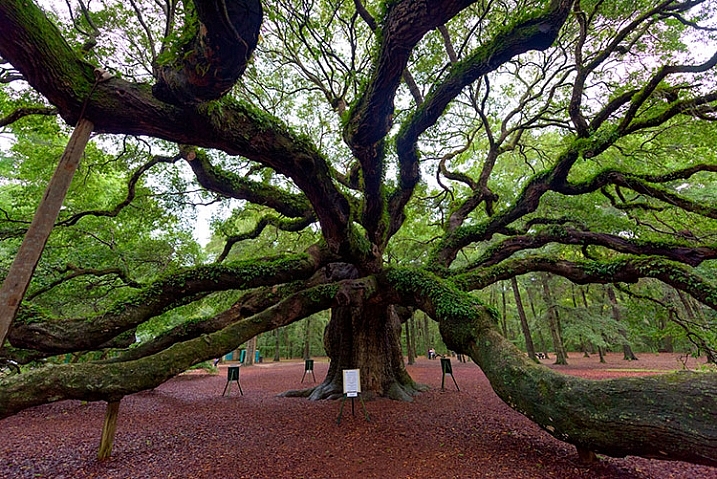
    Image before Macphun Snapheal CK.

    An image before using Macphun Snapheal CK. The signs in the scene were not allowed to be moved, so I was resigned to having to clone them out.

    Underneath the selection tools, you’ll find the options for each tool, such as brush size, polygonal or free marquee, and for the clone stamp, diameter, softness, and opacity. Beneath the options, is a very large button clearly marked as Erase! Under the erase button are three erasing modes: Global, Local, and Dynamic, as well as three Precision options: Norm, High, Highest.

    Once you’ve made your selection, you simply press the Erase button and Snapheal CK goes to work. While you wait, the status bar displays a variety of interesting facts to keep you entertained. It does take a few minutes to do its thing, even on my 2015 Macbook Pro with 16GB of RAM. After the process has finished, if the result is not to your tastes, try changing the erasing mode to one of the other modes. Each one behaves a bit differently and will produce a different result. The same goes for the Precision setting.
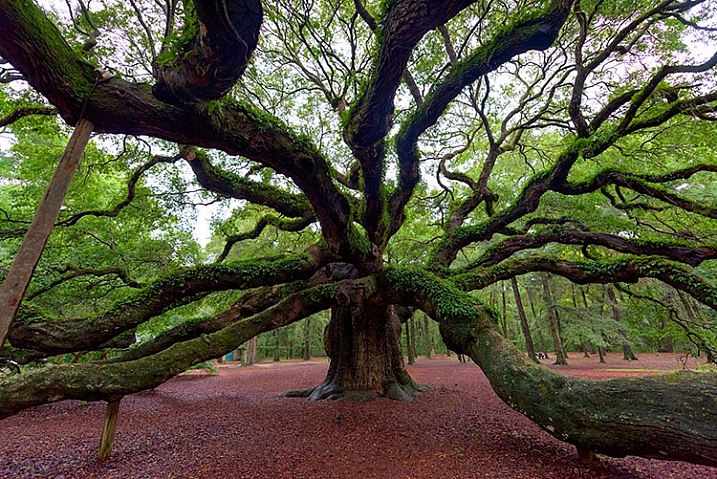
    After Macphun Snapheal CK

    The same image after being edited in Macphun Snapheal CK. The signs and other unwanted objects have been removed.

    Retouch mode works similar to erase mode, but instead of erasing, it allows you to adjust the selected area for color, contrast, and more. Adjust mode is similar but instead of working on a selected area, it makes global adjustments to the entire image.

    Even without the Retouch and Adjust modes, the object removal mode of Snapheal CK makes it worth the price of admission in my book, saving me time every time I need to clone or remove an object from an image for whatever reason.

    Note: if you are a Lightroom user and want a more powerful cloning and healing tool without having to purchase Photoshop, this may be a good option for you to look at.

    Tonality CK
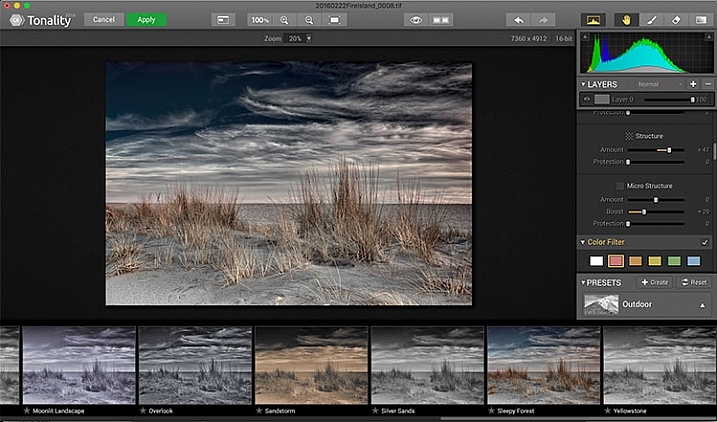
    Macphun Tonality

    The Macphun Tonality CK application window.

    Macphun bills Tonality CK as, “The world’s most advanced black & white photo editor.”  With hundreds of presets available to you, as well as the ability to work in layers and adjust virtually everything about the image, there’s a lot of truth in that statement.

    As you open Tonality CK, you will be presented with your image in the main window, a menu bar across the top, tool palette on the right hand side, and preset preview bar across the bottom.  The palette on the right hand side features all of the settings, including; layers, a histogram preview, adjustment sliders for color temperature, tone, clarity and structure, color filter, tone curve, split toning, glow, lens blur, texture overlay, vignette, grain, photo frames, and layer properties. There are a lot of variables to adjust to get exactly the look you want. Beneath these adjustments is a drop-down menu to select various presets, from groups including Basic, Architecture, Portrait, Dramatic, Outdoor, Street, Vintage, Film Emulation, Toning, HDR, a Favorites group, and a group for user defined presets.
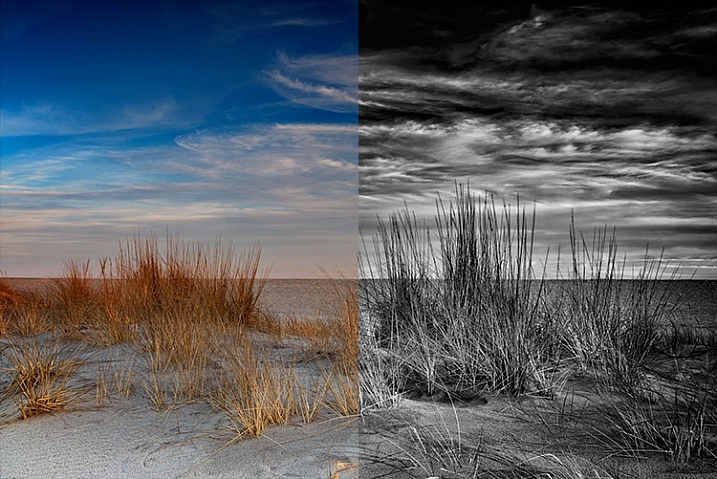
    Macphun Tonality CK Comparison

    Before (left) and after Macphun Tonality CK (right)

    With the use of layers and individual adjustments, there are literally endless combinations and looks that can be creative with Tonality CK. I really like the amount of freedom I have in the editing images, and the ability to create layers with different effects, and mask them off if desired, takes that freedom to a whole new level. For a more in depth review of Tonality, Product Review: Macphun Tonality Black and White Photo Editor goes in depth. As with Intensify CK, Tonality CK is an update to the version reviewed, but both are similar enough that I found the review helpful when I first began using Tonality CK.
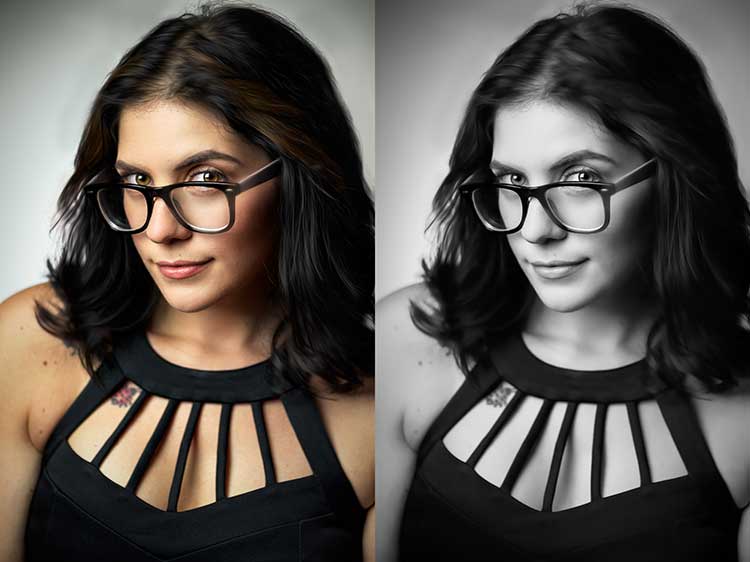
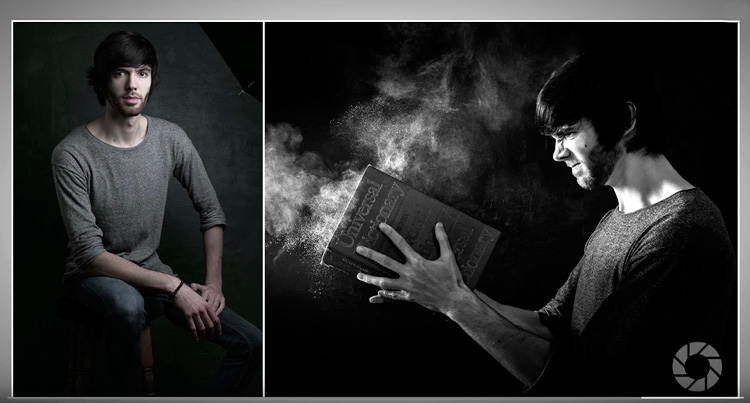
    Tonality CK applied on a portrait

    Tonality CK applied on a portrait

    Focus CK
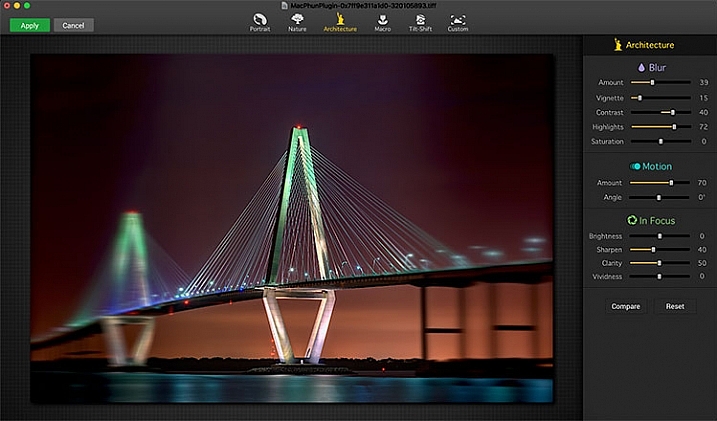
    Macphun Focus CK application window

    Macphun Focus CK application window.

    Macphun Focus CK is a plugin that allows you to create lens focus effects easily and quickly. The interface when the plugin is opened is a minimalistic one, with only six presets across the top of the screen, and your image in the main window underneath. The presets are as follows: Portrait, Nature, Architecture, Macro, Tilt-Shift, and Custom. Truth be told, Nature, Architecture and Tilt-Shift are all similar, in that the blur is similar to that created when using a tilt-shift lens. There are subtle differences in each preset, with the most notable being the angle of the blur. This is user-adjustable, however, as are several settings sliders, which are adjusted slightly differently according to the preset selected. The same can be said for the Portrait and Macro settings, except instead of a parallel blur field, they create a circular blur field.

    When you select a preset, a series of sliders appear on the right side of the screen, in three groups. The first group is Blur. This set of sliders, as you may have deduced, adjusts the image in the blurred area. The settings include amount of blur, vignette, contrast, highlights, and saturation.  The next group of sliders is Motion, which allows you to add motion to the blur, rather than simply a normal blur. Here you can adjust the amount and the angle of the motion. The final group of sliders is for the In Focus area of the image, and allows you to adjust the brightness, sharpness, clarity, and vividness of this area of the image.  Beneath these sliders are a Compare button, to allow you see before and after the blur is applied, and a Reset button, to allow you to start over if you don’t like what you’ve done.
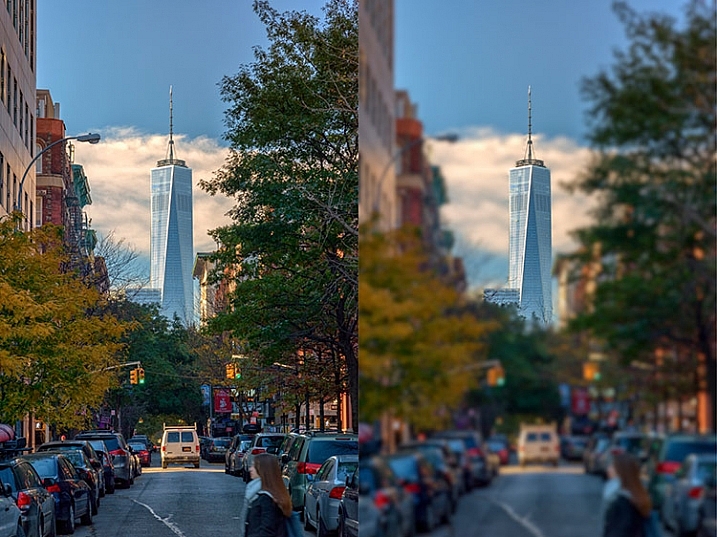
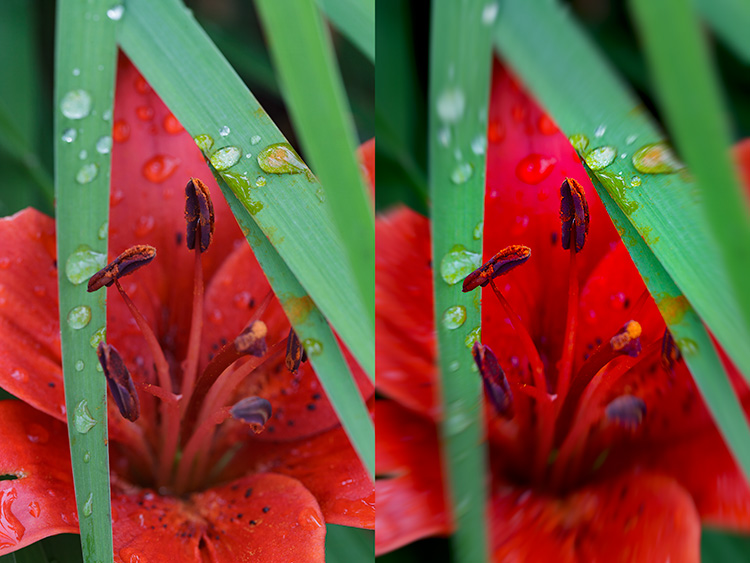
    Before and after comparison of Macphun Focus CK

    Before (right) and after (left) Macphun Focus CK.

    The most fun part of Focus CK is the Custom setting. The custom setting allows you to mask off the areas of the image you wish to remain sharp, using the paint brush. As you paint, you’ll see the effect on the image. There is an eraser tool if you paint in an area you’d like to remain blurred. This custom setting allows you to really create different looks within your image. Have two objects at different depths, and want them both sharp and everything else blurry? No problem. Simply mask each object and adjust the blur of the out of focus areas to taste.

    The biggest drawbacks in Focus CK is in this custom mode. There is no ability to zoom in on the area you are masking to do fine detail work, and the brush will not go smaller than 20 pixels, making it very difficult to mask off fine detail, such as the antenna on the building in the example above. If those two deficiencies could be rectified, I could see using Focus CK much more in my personal work.
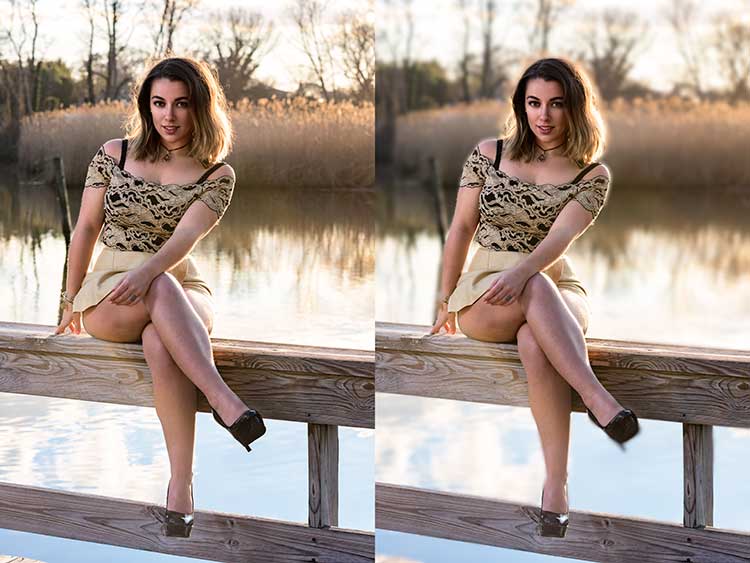
    Focus-CK-Portraiture

    Focus CK applied to a portrait

    Focus-CK-Macro

    Focus CK applied to a macro image

    Noiseless CK

    Noiseless CK is Macphun’s entry into the digital noise removal arena. Like the other plugins in the Macphun Creative Kit, the interface features a large window for your image, a button bar across the top, and a palette of sliders on the right, that allows you to adjust a wide array of settings and customize the noise reduction to your preference.
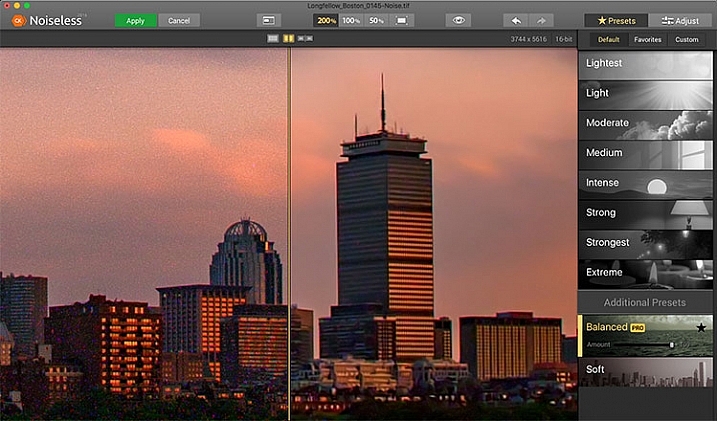
    Macphun Noiseless CK application Window

    Macphun Noiseless CK application window.

    To test out Noiseless CK, I dug out an image I created several years ago that has the worst noise I’ve ever had in an image. It was a four minute exposure, and I had neglected to turn on long exposure noise reduction. I found Noiseless CK was able to subdue the noise pretty easily.

    Noiseless is simple to use. Open your image in Photoshop or Lightroom and start the Noiseless Plugin. On this image, I started at the Lightest preset, just to see how that would do with the noise, knowing that most likely it wouldn’t come close to reducing it enough for my taste, due to the heavy noise within the image. As I worked my way down the list of presets, I found that once I hit the Strong preset, it really reduced detail in the image, which I wanted to try and avoid. In addition to the presets ranging from Lightest to Extreme, there are also two additional presets, called Balanced and Soft. The Balanced setting seemed to work the best on this image. There is also an Amount slider to adjust the application of noise reduction using that setting.  From there, I could also select the Adjust tab, and individually adjust the settings individually to get a look I was happy with. If I wanted to save those settings, I can create a custom preset of my own for future use.
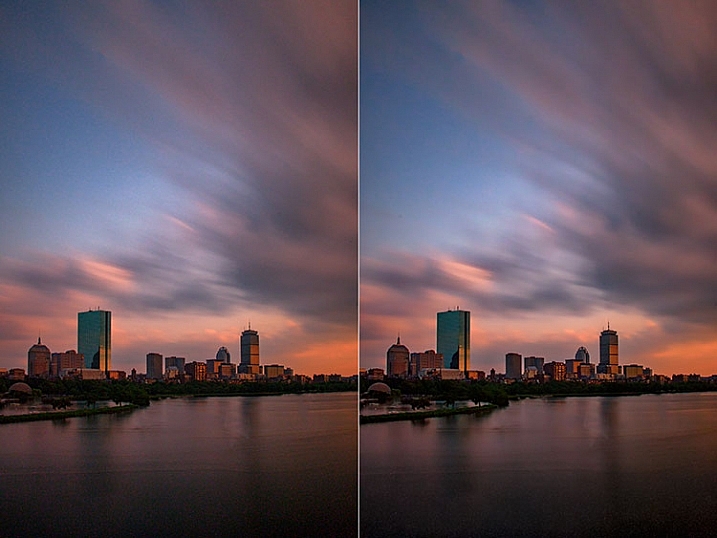
    Before and after editing in Macphun Noiseless CK

    Before (right) and after (left) comparison of an image edited in Macphun Noiseless CK.

    I found that using some of the presets resulted in a greater loss of detail than I was happy with, but once I went into the Adjust tab and started using the sliders, I was able to get some detail back, and get a look I was happy with. As I said, this was an extreme image I was using to test, and I have to say Noiseless CK did a great job with it. The ability to adjust the noise reduction using both the amount slider and individual settings sliders, gives me the confidence that Noiseless CK can handle almost anything I need it to.

    FX Photo Studio CK
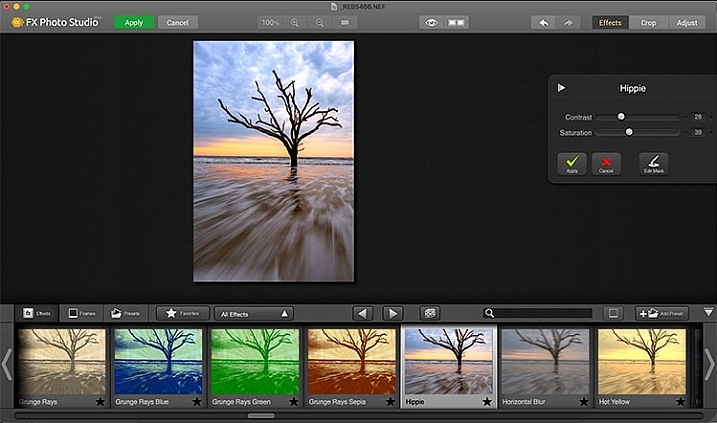
    Macphun FX Photo Studio CK

    Macphun FX Photo Studio CK application window

    FX Photo Studio Ck is a special effects generator and photo editor that, at first glance, looks relatively simple and easy, but doesn’t offer many options. However, if you dig a little deeper, you’ll see there is more than meets the eye here. It offers over 200 different effects and frames, as well as the ability to create your own.

    When you first open an image in FX Photo Studio CK, you’ll see your image in the main window, and underneath is a preview bar of presets. You will also notice the menu bar above, and on the right end of that, a mode selector, allowing you to select from Effects, Crop, and Adjust. The presets for Effects include Effects, Frames, and Presets, with Presets in this case meaning user-defined presets. The Effects tab also features a drop down menu with 20 groups of effects. These include Art, Black & White, Blur, Color Fantasy, Color Lenses, Color Strokes, Color Temperature, Cross Processed, Distortion, Glow, Groovy Lo-Fi, Grunge, Hollywood FX, Hue, Photo Styles, SFX, Sketch, Symmetry, Vignettes, and Vintage. When you select the Frames tab, you’ll be presented with a preview of frames below, and a drop-down menu to select different groups of frames appears, allowing you to select between Art, Classic, Grunge & Analog, and Photo Borders.
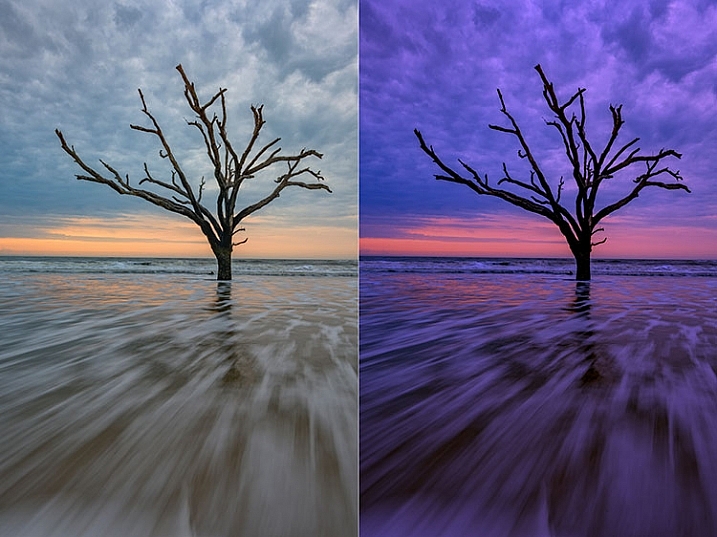
    Before and after comparison of Macphun FX Photo Studio CK

    An image before editing in Macphun FX Photo Studio CK on the right, and after, on the left.

    To be honest, most of the effects and frames do not appeal to me. But there is more to FX Photo Studio CK than just presets and frames. At the right of your image are adjustments for the various effects. These adjustments will vary depending on the effect chosen, and is usually a minimal control of one or two sliders to adjust the effect. You can combine effects, by selecting one, applying it, and then selecting another one to apply to that. FX Photo Studio CK lacks the layer capabilities of Tonality, which would really make it easier to combine multiple effects and adjust how they are applied together. As it stands now, you must commit to one effect before adding another. One great feature of FX Photo Studio CK is the ability to edit the mask on the image, so you can apply the effect only to areas of the image you want, and hide the effect in other areas.
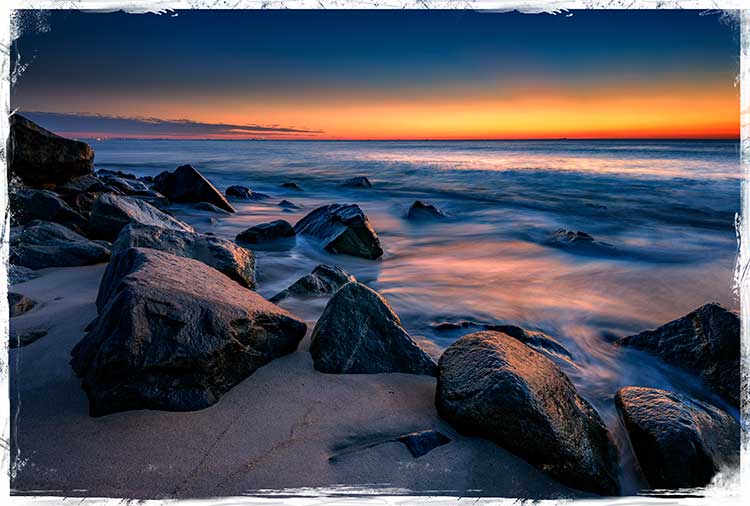
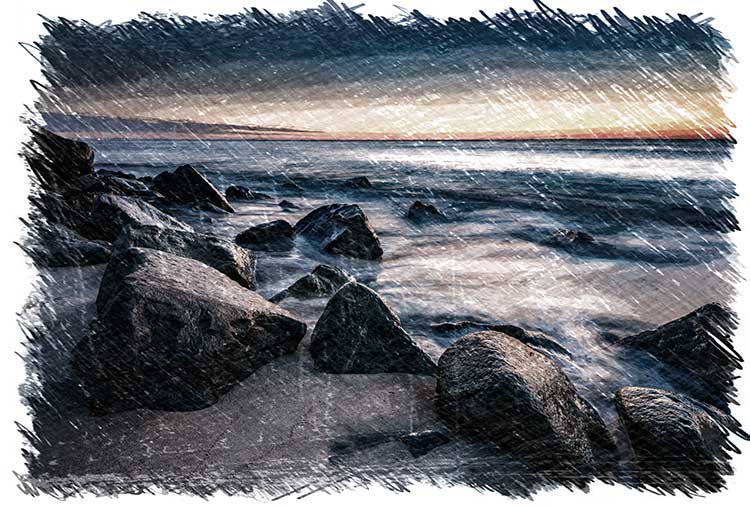
    FXPhotoStudio-Frame-Grunge

    FXPhottoStudio-Color-Charcoal-Sketch

    FXPhotoStudio-Groovy-Lo-Fi-Napa

    If you wish to make further adjustments, you can select the Adjust tab, which opens a palette of sliders including Temperature, Saturation, Hue, Exposure, Brightness, Contrast, Shadows, Highlights, Sharpen, Red, Green, and Blue. There are fewer controls available than in Intensify CK, so I’m not sure I see the usefulness of FX Photo Studio CK for in-depth editing, but for someone looking to quickly add an effect or frame to their image, FX Photo Studio CK may be just what they need.
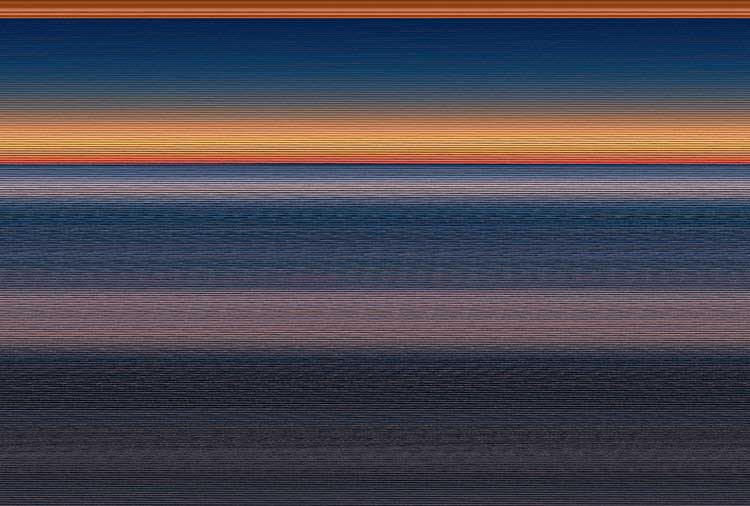
    Error using frames

    Error using frames

    Note: I could not get FX Photo Studio to give me a clean image. Every frame I tried, every file I tried, gave me the same result when I tried to use the Art Frames and Classic Frames. I was able to use a Grunge Frame, and have shown examples above. Not sure if this is a greater bug with MacPhun’s software or a problem with my system specifically.

    Conclusion

    The Macphun Creative Kit is a full-featured, well thought out, suite of image editing tools that would be welcome in any photographer’s tool kit. While I would prefer more control in certain areas of the suite, Macphun has continued to develop the software for the past several years, and I have no doubt they will continue to make improvements as they move forward.

    Overall rating: 3.5 out of 5. I really liked MacPhun Creative Kit and think it has a lot to offer, but I ran into a bug with the FX Photo Studio when trying to add a frame to an image, and I think Focus CK needs a zoom feature and a finer brush to allow for more precise masking. Fix the bug with the frames and add the zoom and finer brushes to Focus CK and I’d give another star.

    googletag.cmd.push(function() {
    tablet_slots.push( googletag.defineSlot( “/1005424/_dPSv4_tab-all-article-bottom_(300×250)”, [300, 250], “pb-ad-78623” ).addService( googletag.pubads() ) ); } );

    googletag.cmd.push(function() {
    mobile_slots.push( googletag.defineSlot( “/1005424/_dPSv4_mob-all-article-bottom_(300×250)”, [300, 250], “pb-ad-78158” ).addService( googletag.pubads() ) ); } );

    The post Software Review: Macphun Creative Kit 2016 by Rick Berk appeared first on Digital Photography School.
    Digital Photography School

  • 5 Advantages of Using a Fully Manual Lens

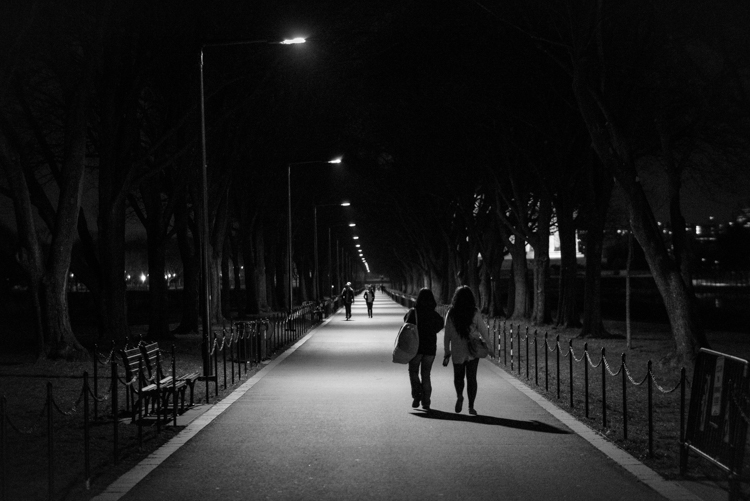
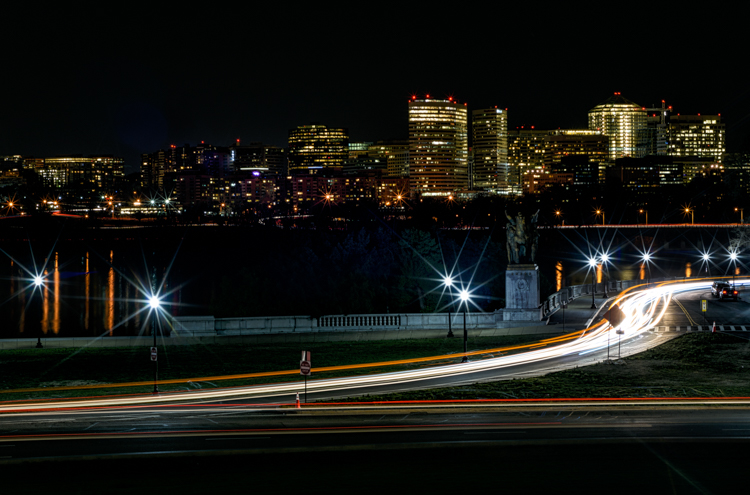
    A Stroll in the Night DPS

    Shooting with a manual lens centers your attention on the precise image you want to produce. Once you get the hang of shooting manual (here are two prior dPS tutorials: Tips for Using Legacy Lenses and Shooting in Full Manual and Why Every Photographer Should Use a Manual Focus Lens), you learn how to produce some pretty cool images that are easier to manage, than if you leave autofocus on, and that can make for some fun photography.

    With all of the computing that’s in a modern autofocus lens, the camera and the lens often take the photo for you. Further, autofocus and shake reduction can actually work against your art. If you shoot frequently on autofocus, then you know the camera can easily focus on the wrong subject. This is particularly true in situations where the light varies greatly.

    Potomac at Night DPS

    Even when you turn off autofocus and go manual, the modern computer-driven lens can be cumbersome. It’s like turning off an automatic mode in a car and using paddles to shift gears. The experience is just not the same, things don’t work right. You want to step on the clutch, and shift through gears, feeling the engine with your right hand as you accelerate.

    That’s how I feel about shooting manual. Your eye and hand drive the photo, rather the camera telling you how to drive.

    Here are some of the cooler shots I’ve taken while photographing with manual lenses. They are listed from easiest to hardest. I hope you’ll enjoy some of these, too .

    1) Nature shots that feature lots of bokeh

    Purple Blossoms DPS

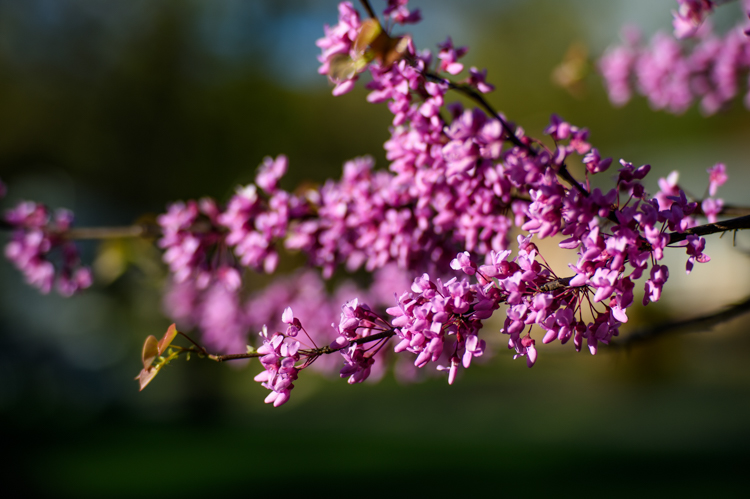
    It’s spring and that means the world is filled with lots of colorful flowers, and blossoms to admire. Who doesn’t love photographing these beautiful subjects?

    Because I live in a populous city, I shoot flowers with a wide-open aperture to create maximum bokeh. It allows me to blur many unwelcome background objects like cars, bikes, telephone polls, people, and even some buildings.

    Manual is ideal for this kind of shot, as it is simplistic. I focus as closely as the lens permits, and set the aperture as wide as possible. I calibrate shutter speed to accommodate light and shadow differentials. The rest is easy as could be. I move myself and the camera to a position that frames the relatively still flower (wind not included) and capture the frame. The above crabtree blossoms shot is a classic example of this technique.

    2) Spot focus street shots

    Don t Fall Down DPS

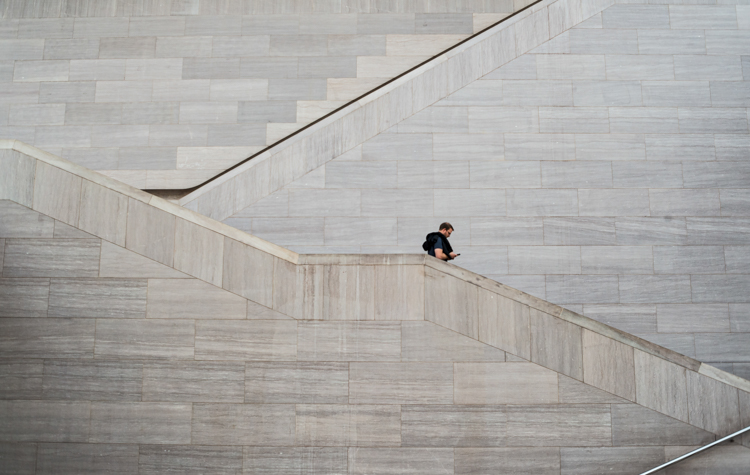
    Street photographers like to capture candid moments of human nature. Capturing cool street shots is hard. Personally, when I do shoot street photography, I tend to find a setting that I like, frame the shot, set my camera, then wait for the right person to come along. So perhaps I cheat a bit if you are a pure zen street photographer.

    However, to get that shot, I love manual focus. I can set the focus based on the distance between the camera, and where I anticipate the subject will be. Autofocus often latches on to an object, and frankly sometimes the object is a little off from the spot I want to shoot. So I prefer to use manual focus, on the spot where I anticipate the subject will be.

    This shot taken at the National Gallery of Art took about 10 minutes. I focused on the middle stair well and waited for the right person to come through. Unfortunately for me, a bus load of secondary school kids were there at first, but once they cleared out, things happened quickly.

    3) Bright night shots

    Ferris Wheel DPS

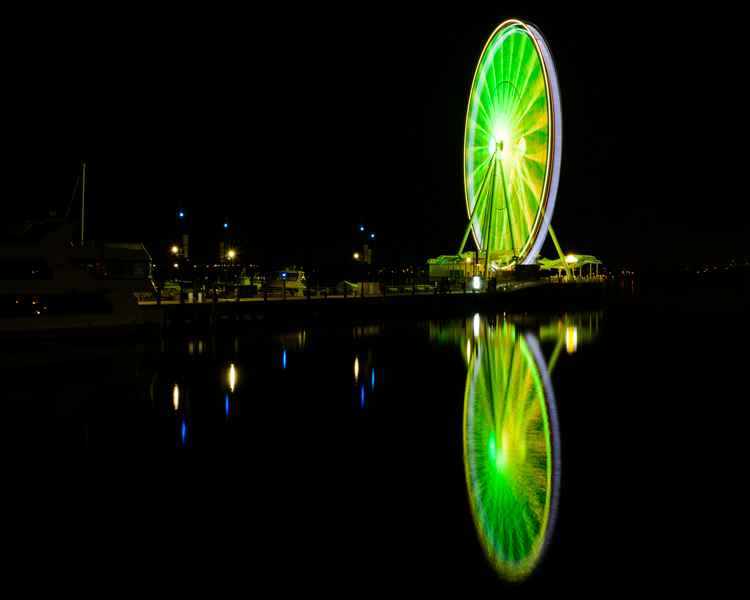
    Some objects are brighter at night than others. The moon is a great example. So are ferris wheels, because they shed an enormous amount of light, often rendering all other light sources as dull or non-existent.

    For some reason, in darker situations like this, the light meter in my Nikon D810 and the autofocus on some of my lenses, don’t synch well. At times autofocus doesn’t catch the subject at all, or worse, it focuses on the wrong object, like a street light in the background. So I almost always calibrate both focus and aperture manually, to get the sharpness and light just right.

    Back to the ferris wheel in the image above. The image was shot with a Figmentum 35mm lens. Focus was easy, as the distance from the subject let me simply set the lens on infinity. But, the aperture required some manipulation, as I started off too bright, and had to close the aperture slightly. I actually shot this at ISO 100for 30 seconds at f5.6, which turned the water reflection into a crazy bokeh as it came closer to me.

    4) Panning

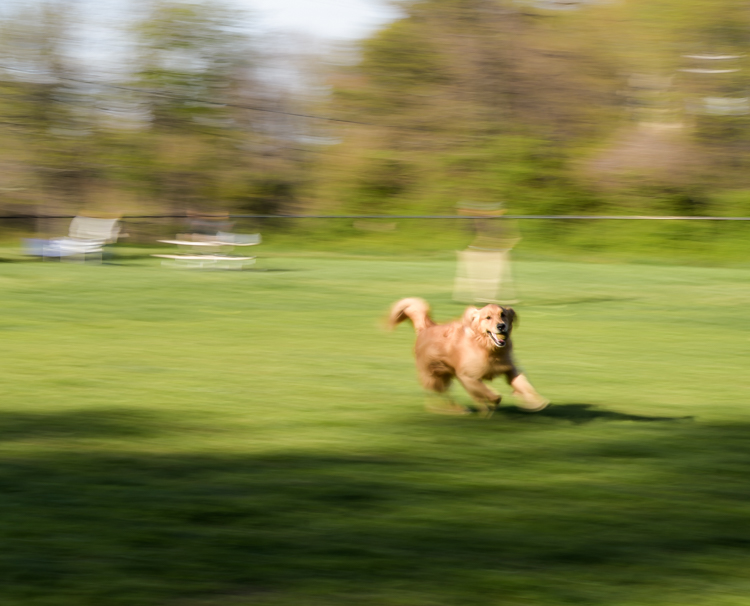
    Good Catch Panning DPS

    Panning is one of the most difficult forms of photography, literally catching an object in motion, at a slower shutter speed. This creates fantastic blur behind the subject, while at the same time keeps the object in focus.

    You pretty much need to shoot manual to pan well. Sure, you can lock in your moving target with autofocus and then pan, but really there’s so much that most cameras get wrong with autofocus. When I pan, I like to spot focus with manual. I understand where my subject will be from a distance perspective. I focus, then keep my hands on the focus dial to sharpen as necessary.

    In the case of this photo with my dog, I shot it with an 85mm lens, so I set the focus on infinity and planted myself in the middle of a dog park. This fine pup was playing catch with her Dad and was quite happy about it. I caught this shot on her sixth catch.

    5) Shutter drag

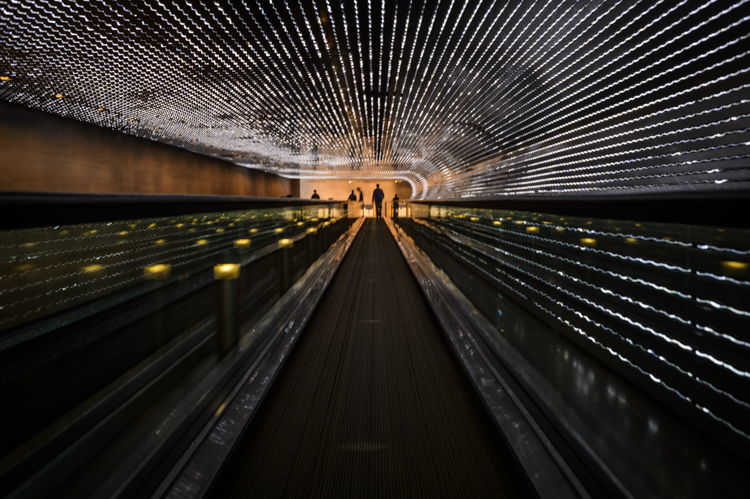
    Shutter Drag DPS

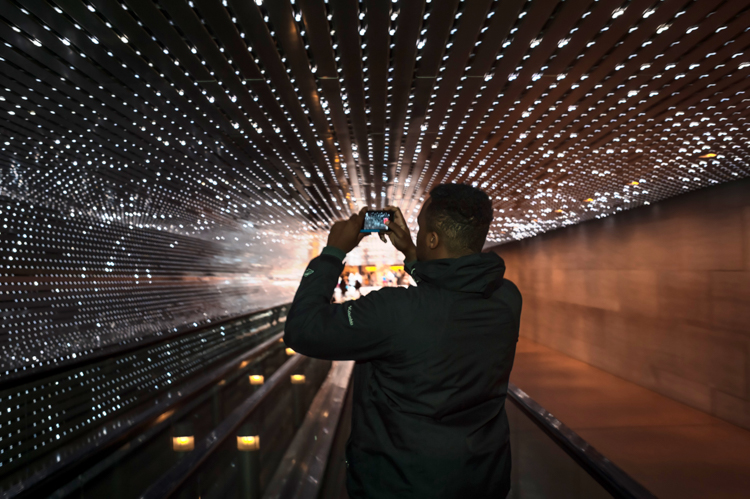
    Instagram Rock Star DPS

    If you think manual panning produces some cool shots, try dragging the shutter. This is for low light situations where you basically have the same technique as panning, but now use a flash to freeze your subject in motion.

    Generally speaking if you are in a low light situation, autofocus may be suspect anyway. That’s why I prefer shooting manually. I’ll confess. If there is an autofocus lens on my body, then I’ll use it to get the camera focused on or close to the subject, then go manual to finish the job.

    This shot was also taken at the National Gallery of Art, and features the LED light tunnel between the East and West wings. If you are on Flickr or 500 Pixels, you see a great photo of this every week or two. I decided to play double jeopardy with this shot and rode the conveyer belt while I shot the pic, so not only were the lights and the subject moving, but I was also moving at the same speed as the belt. The exposure was 1/4 of a second, with on-camera flash.

    What are your favorite manual shots?

    googletag.cmd.push(function() {
    tablet_slots.push( googletag.defineSlot( “/1005424/_dPSv4_tab-all-article-bottom_(300×250)”, [300, 250], “pb-ad-78623” ).addService( googletag.pubads() ) ); } );

    googletag.cmd.push(function() {
    mobile_slots.push( googletag.defineSlot( “/1005424/_dPSv4_mob-all-article-bottom_(300×250)”, [300, 250], “pb-ad-78158” ).addService( googletag.pubads() ) ); } );

    The post 5 Advantages of Using a Fully Manual Lens by Geoff Livingston appeared first on Digital Photography School.

    Digital Photography School

  • Improve Your Middle of the Day Photos By Doing Black and White

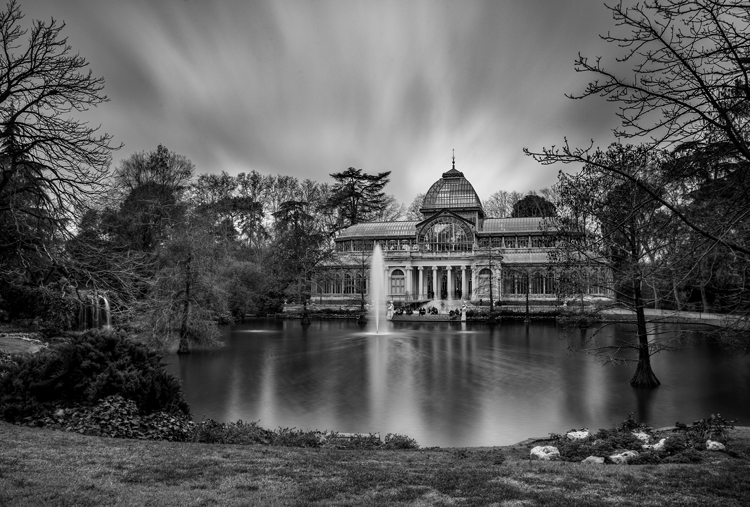
    Crystal-Palace

    Sometimes beginning photographers ask me to look at their photos and tell them how they can make the photos better. Nearly every time this happens I end up saying the same thing, “You need to stop taking your pictures in the middle of the day.”

    I have previously written about how and why photos taken at dawn and dusk are vastly superior to those taken at midday, so I won’t do so again here. I have also talked about a few things you can do to mitigate the damage of the midday sun. But that’s all you are doing – mitigating the problem – not solving it.

    At the same time, I understand that you cannot always photograph at dusk or dawn. Family and work commitments limit us all. We cannot always get up so early or stay out so late.  Some places aren’t even open or accessible at dawn. Is there anything else that can be done if you have to shoot in the middle of the day?

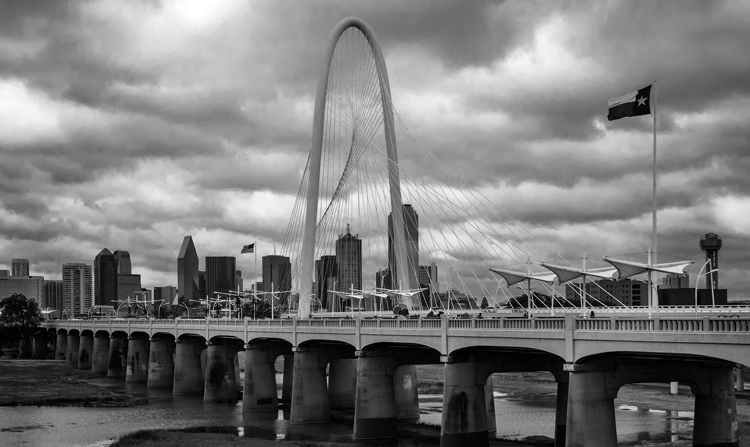
    There is one way that you can still take great photos in the middle of the day. That way is to convert them to black and white. Black and white photos frequently work much better than color photos in this regard.

    Dallas-1

    Look to the old masters

    If you don’t believe me, just to check out the work of photography masters. I initially noticed this when looking at the work of Ansel Adams, who many – myself included – consider the greatest photographer ever. A large number of his photos are obviously taken at midday. For example, check out Monolith, the Face of Half Dome (1927). Yosemite Winter Valley (1940), Canyon de Chelly National Monument (1942), Mount Williamson (1944). and Half Moon and Clouds (1968).

    All of these photos were obviously taken at midday. You can tell by the bright light and shadows. But they are all still great pictures. In fact, some of them are among his best. Why is that?

    Reason #1: High contrast works well in black and white

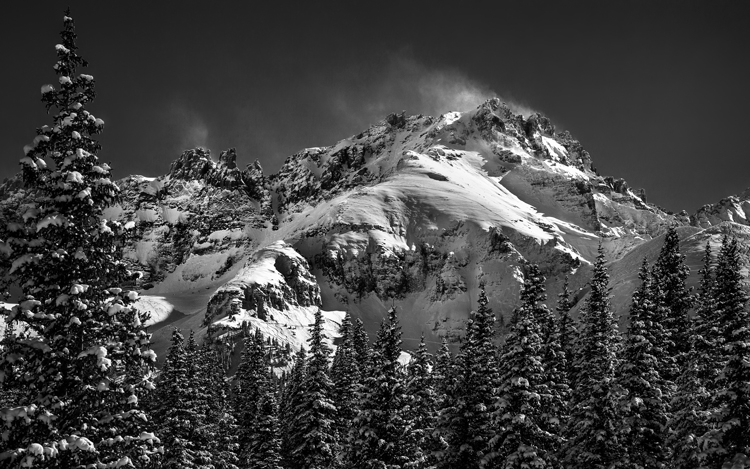
    Why does the same picture taken at midday look horrible in color, but pretty good as a black and white? One reason is that black and white pictures handle high contrast really well. That is not to say their dynamic range is any different, but that these pictures look great when there is high contrast within them. In fact, black and white pictures crave high contrast. Color pictures, on the other hand, don’t always do well with stark contrasts. Therefore photographing at midday – with all of its bright areas and dark shadows creating high contrast – can look really nice as a black and white photo.

    Mountain-1

    Reason #2: Pushing the processing

    The other reason why black and white photos taken at midday can still look great, is that they seem to handle processing better than color photos. In other words, you can push the processing further with a black and white photo and get away with it. This was true in the darkroom, and it is also true today with digital tools.

    Why is that? I think it is because black and white photos are already unnatural; obviously, the world is not black and white. When you look at a black and white photo, your mind knows that it is not an accurate representation of reality. If the processing is pushed a little further, your mind accepts it more readily.

    That is not to say that you cannot over do processing in black and white, you can. But it does offer you a little more flexibility.

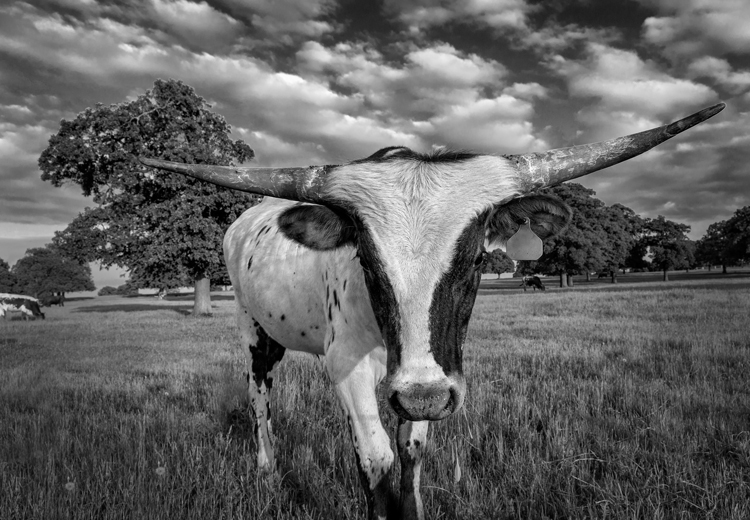
    Longhorn

    A reason for HDR?

    Perhaps, for this reason, this is one area where HDR can still be a really useful technique. There is much discussion these days about HDR being dead. To be sure, almost no one in photography likes the HDR look (oddly, 100% of non-photographers do like that look). In addition, there are a lot of great tools these days for dealing with dynamic range problems without resorting to HDR. Nevertheless, black and white photos are one area where HDR is still very useful. Since there is no color, part of the surreal nature of HDR is avoided. In addition, the same phenomena mentioned above about being able to push the processing further in black and white is at work.

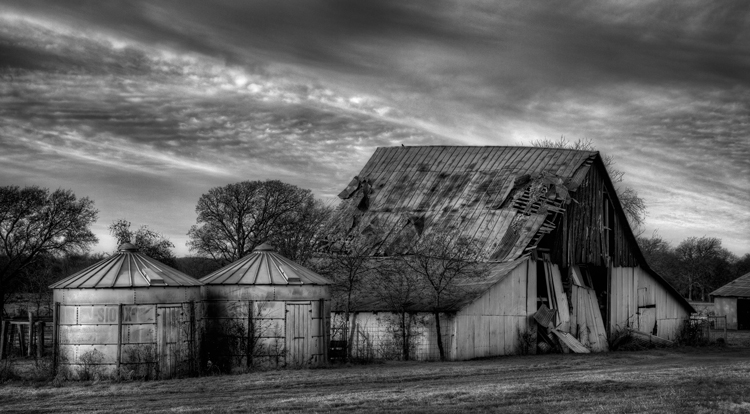
    Barn-2

    Break out the Neutral Density filter

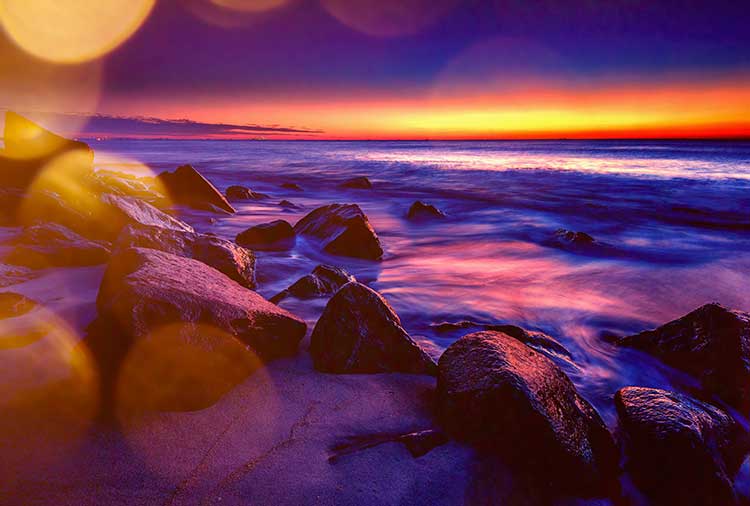
    Another way to improve your black-and-white photos taken at midday is to break out your 10-stop neutral density filter. If there are clouds in the picture, it will give them a sense of movement. If there is water in the picture, it will smooth it out. You can see and example of this in the top picture in this article, which has both clouds and water. Of course, this works for color pictures as well, but it seems to work particularly well with black and white images.

    Conclusion

    I still maintain that the number one thing you can do to improve your photographs is to start shooting at dawn or dusk. It costs nothing, and you don’t even have to increase your skills to make vast improvements. You just have to get up earlier, or stay out a little later. But for those occasions when that is just not possible, try converting some of your photos to black and white. The high contrast might look good on your photo. In any case, you’ll be able to push the processing a little further. It might prove an easy way to make your photos better.

    Please share your black and white midday photos in the comment below.

    googletag.cmd.push(function() {
    tablet_slots.push( googletag.defineSlot( “/1005424/_dPSv4_tab-all-article-bottom_(300×250)”, [300, 250], “pb-ad-78623” ).addService( googletag.pubads() ) ); } );

    googletag.cmd.push(function() {
    mobile_slots.push( googletag.defineSlot( “/1005424/_dPSv4_mob-all-article-bottom_(300×250)”, [300, 250], “pb-ad-78158” ).addService( googletag.pubads() ) ); } );

    The post Improve Your Middle of the Day Photos By Doing Black and White by Jim Hamel appeared first on Digital Photography School.

    Digital Photography School

  • Two Photographers Go Head to Head in the Small Studio Challenge

    I found these videos on the Adorama TV channel and thought this is a great idea to learn how photographers work.

    Wallace vs Hoey : Small Studio Challenge

    In these two videos Mark Wallace and Gavin Hoey go head to head in a small studio challenge to see what they can do with the same gear, in the same small space, with the same model – in 20 minutes or less. Let’s see what they each come up with.

    Mark goes first:

    Then it’s Gavin’s turn:

    Which final image do you prefer? What did you learn by watching how they each approach the subject and make decisions? What would you have done?

    small-studio-shootout

    googletag.cmd.push(function() {
    tablet_slots.push( googletag.defineSlot( “/1005424/_dPSv4_tab-all-article-bottom_(300×250)”, [300, 250], “pb-ad-78623” ).addService( googletag.pubads() ) ); } );

    googletag.cmd.push(function() {
    mobile_slots.push( googletag.defineSlot( “/1005424/_dPSv4_mob-all-article-bottom_(300×250)”, [300, 250], “pb-ad-78158” ).addService( googletag.pubads() ) ); } );

    The post Two Photographers Go Head to Head in the Small Studio Challenge by Darlene Hildebrandt appeared first on Digital Photography School.

    Digital Photography School

  • The 6 Most Important Things You Need to Know about Lightroom’s Develop Module

    Lightroom is powerful, but it’s also complex and has a steep learning curve. If you feel overwhelmed by all the options, there’s great value in taking a simple approach and learning to use the tools that are most useful first. Leave the more advanced features until you have more experience.

    With that in mind, I’ve put together this list of the six most important things you need to know about Lightroom’s Develop module. Learn these and you will be well on the way to Lightroom mastery.

    1. Backup your catalog regularly

    This is the most crucial thing to set up, as everything you do to your photos in the Develop module (not to mention metadata changes like Collections, flags and keywords) is stored in the catalog. It would be a disaster to lose your catalog (and consequently all your hard work) to hard drive failure, so you need to make sure that Lightroom is backing it up regularly to an external hard drive.

    To do so, go to:

    • For Windows users: Edit > Catalog Settings > Back up catalog
    • For Mac users: Lightroom > Catalog Settings > Back up catalog

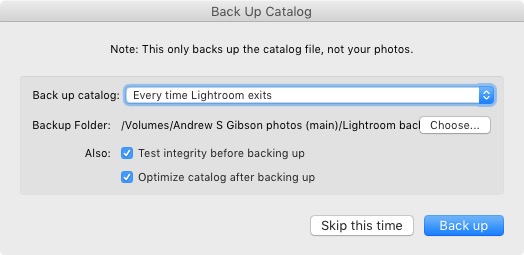
    I have mine set to: Every time Lightroom exits – some photographers find that Once a week, when exiting Lightroom is enough.

    When you exit Lightroom, a dialog window appears that shows you where Lightroom is going to save the backup Catalog. Click Choose to change the location if you need to. Note: this is the only time you can select the destination where the backup will be saved.

    Make sure the Test integrity before backing up and Optimize catalog after backing up boxes are both ticked. This slows down the back up process, but it’s worth it because it helps ensure that your catalog remains free from corruption, and is optimized for speed.

    Lightroom Develop module

    Please note: The Catalog doesn’t contain any of your photos. Backing up your Catalog doesn’t back up your photos, only the information that Lightroom contains about them. Photo backups need to be managed separately.

    2. Profile is the most important setting in the Develop module

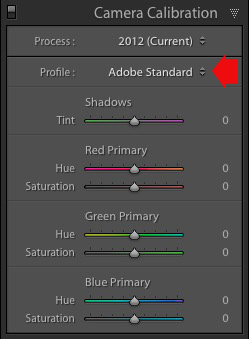
    The Profile menu is tucked away in the Camera Calibration panel, at the bottom of the right-hand panels in the Develop module. The default profile setting is Adobe Standard (circled below). This profile was created specifically for your camera by Adobe. Pick that one for accurate colors.

    You will also find the color profile settings specific to your camera (Landscape, Portrait, and so on). You can pick one of these if you prefer the look to Adobe Standard.

    Lightroom Develop module

    The profile affects both color and contrast, so from a practical point of view it’s important to select the right one, before you start adjusting contrast and white balance in the Basic panel. Get the profile right, and it makes all subsequent processing steps much easier. Get it wrong, and it makes them more difficult.

    For example, if you apply a profile intended for landscape photos to a portrait, then you could end up with over-saturated colors and unnatural skin tones. Then you might try and fix that by playing with the Basic panel sliders or other color controls. This approach rarely works, it’s far better to select the most appropriate profile from the start.

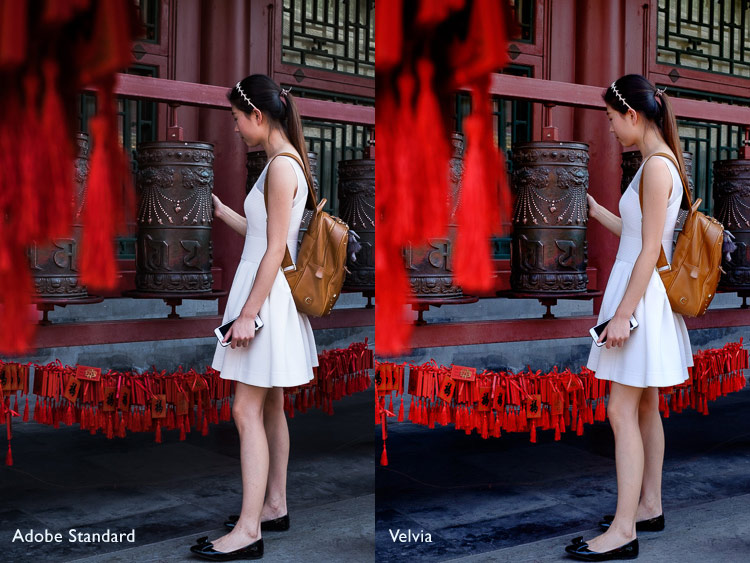
    These two photos show the difference between the Adobe Standard and Velvia profiles on a Fujifilm X-T1 camera. The Velvia profile saturates colors, the Adobe Standard profile looks more natural.

    Lightroom Develop module

    3. Use Lens Corrections to correct distortion and eliminate chromatic aberrations

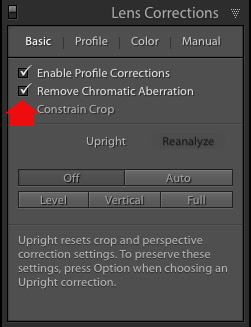
    No lens is perfect, and most have at least a little distortion and chromatic aberration. One of the benefits of digital photography is that you can eliminate these in the processing stage, so they are not the problem they once were. Go to the Basic tab in the Lens Correction panel, select Enable Profile Corrections and Remove Chromatic Aberration in order to do so.

    Lightroom Develop module

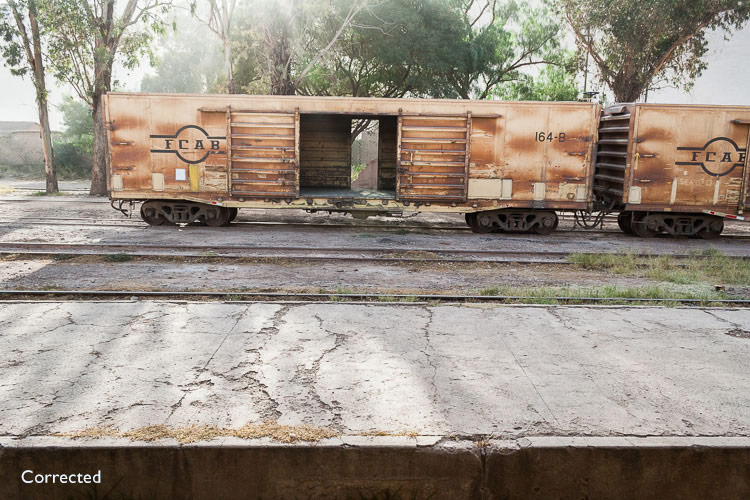
    This comparison shows the result on a photo taken with a zoom lens producing barrel distortion.

    Lightroom Develop module

    Lightroom Develop module

    4. You can carry out 80% of your processing in the Basic panel

    Once you have selected a Profile, and applied Lens Corrections, you can go to the Basic panel to start making any adjustments required to the photo’s brightness, contrast, and color.

    The sliders in the Basic panel are extremely powerful. Take the time to get to know what each one does, and how the settings affect your images. Once you get the hang of these sliders it’s quite possible that you can do all of your global adjustments (those that affect the entire image) here, and not have to touch the Tone Curve or HSL / Color / B&W panels at all.

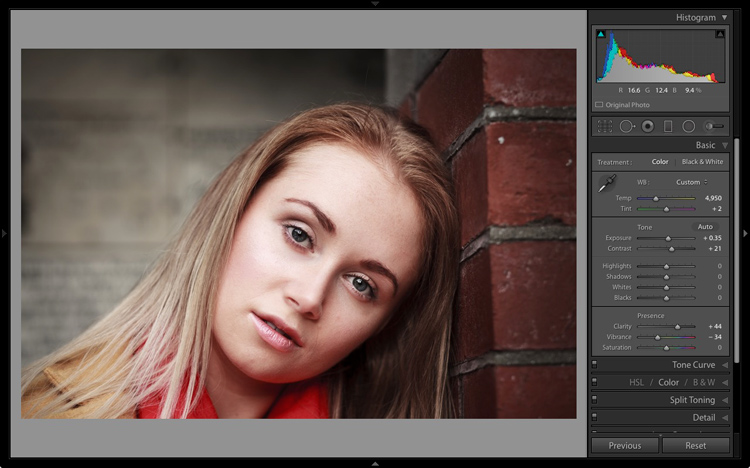
    This photo is a good example. Virtually all the processing was done in the Basic panel, made possible by selecting the most appropriate profile first. The only additional thing I did was add a vignette using the Effects panel.

    Lightroom Develop module

    My article Steps for Getting Started in the Lightroom Develop Module goes into this in more detail.

    5. Learn to use local adjustments wisely

    It wasn’t so long ago that many professional photographers would send their negatives to master printers who used dodging, burning, and other fancy darkroom techniques, to create a far better print than the photographer ever could. These local adjustments – those applied to only part of the image, rather than all of it – are often vital for bringing the best out of your Raw files in Lightroom.

    Lightroom has three tools for making local adjustments – the Adjustment Brush, Radial Filter and Graduated Filter. They allow you to selectively adjust brightness, contrast, and other tone and color settings. Each tool has its own idiosyncrasies, so take the time to get to know each one in turn.

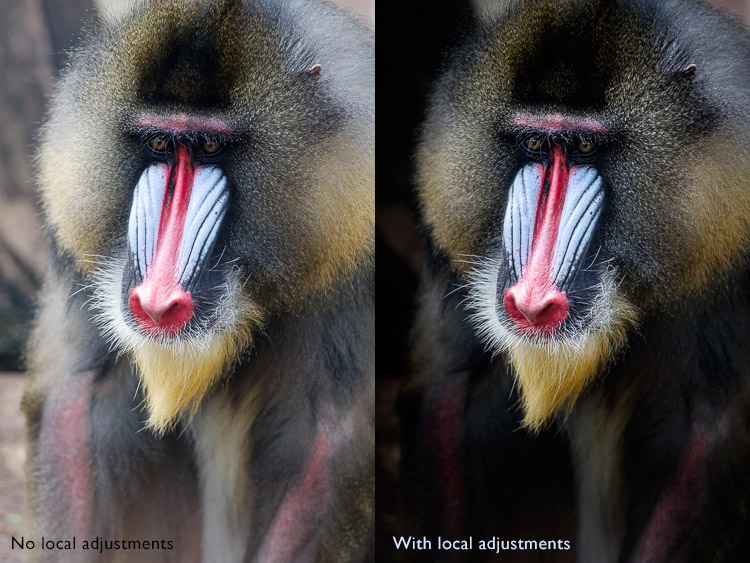
    This example shows the difference that local adjustments make. I used a combination of all three of Lightroom’s tools to turn the image on the left, into the one on the right.

    Lightroom Develop module

    6. Don’t overlook the Clarity slider

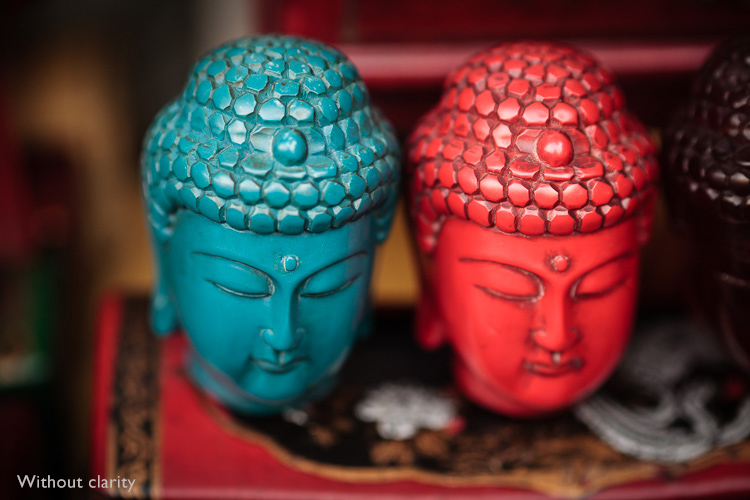
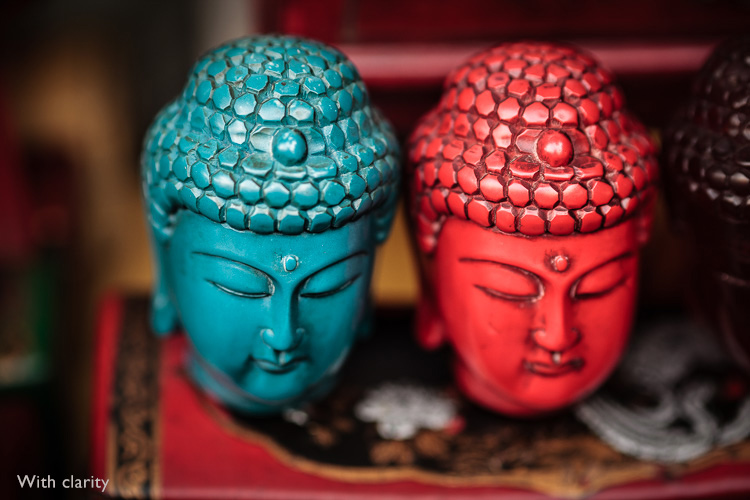
    The Clarity slider is extremely useful as both a local, and global adjustment. It’s primary use is to enhance texture, and it does so by increasing edge contrast (the spots where dark and light areas meet). You do have to be careful not to overuse it, but judicious applications of texture enhancement can help bring the best out of any photo. Clarity is also an ideal tool for enhancing black and white images, which often rely on texture to add impact.

    The following photos show the effect of adding Clarity. I used the Radial filter to apply Clarity to the Buddha heads to bring out the texture.

    Lightroom Develop module

    Lightroom Develop module

    These six items are not a comprehensive list of what you can do in Lightroom’s Develop module, but they will certainly get you started, and simplify the process of learning to use it.

    What do you think are the most important tools to master in the Develop module? Do you agree with my selection? Please let me know in the comments below. And if you want to learn more about Lightroom then please check out my Mastering Lightroom ebooks.

    googletag.cmd.push(function() {
    tablet_slots.push( googletag.defineSlot( “/1005424/_dPSv4_tab-all-article-bottom_(300×250)”, [300, 250], “pb-ad-78623” ).addService( googletag.pubads() ) ); } );

    googletag.cmd.push(function() {
    mobile_slots.push( googletag.defineSlot( “/1005424/_dPSv4_mob-all-article-bottom_(300×250)”, [300, 250], “pb-ad-78158” ).addService( googletag.pubads() ) ); } );

    The post The 6 Most Important Things You Need to Know about Lightroom’s Develop Module by Andrew S. Gibson appeared first on Digital Photography School.

    Digital Photography School

  • Long Exposure Fire Photography – 5 Tips for Beginners

    tips for long exposure fire photography

    ISO 100, f/10, shutter speed 5.0 seconds

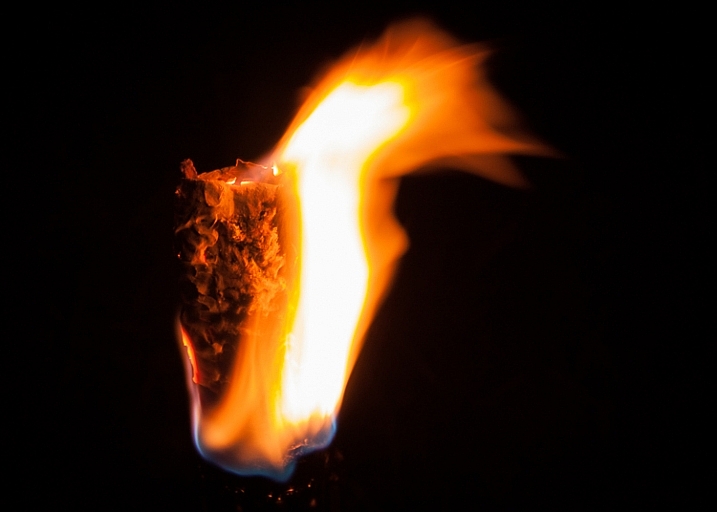
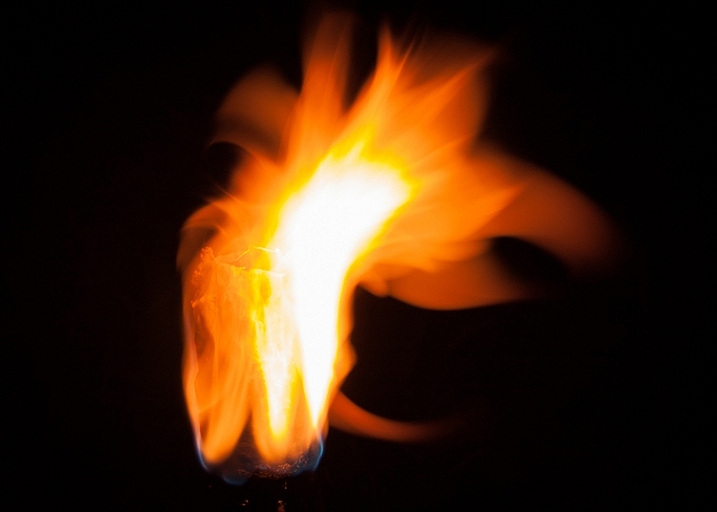
    A long exposure photo can make flames look soft and feathery, capture spark trails, and be used to create a romantic or cozy mood. The tips in this article will help you get started with long exposure fire photography.

    Long exposure fire photography: 5 tips for beginners

    Remember to be careful as you practice your fire photography. Fire can be dangerous, and it’s easy to be careless when we’re thinking more about our photography than the fire. Maintaining a safe distance is important for you and your gear.

    1. Use a slow shutter speed

    To take a long exposure photo, the shutter in your camera needs to be open long enough to blur motion and light. Here are a couple of ways to ensure that the shutter stays open:

    • Shutter Priority: you choose the shutter speed
    • Aperture Priority: the camera chooses the shutter speed

    Shutter Priority

    Put your camera in Shutter Priority mode, choose your desired shutter speed, and let the camera do the rest.

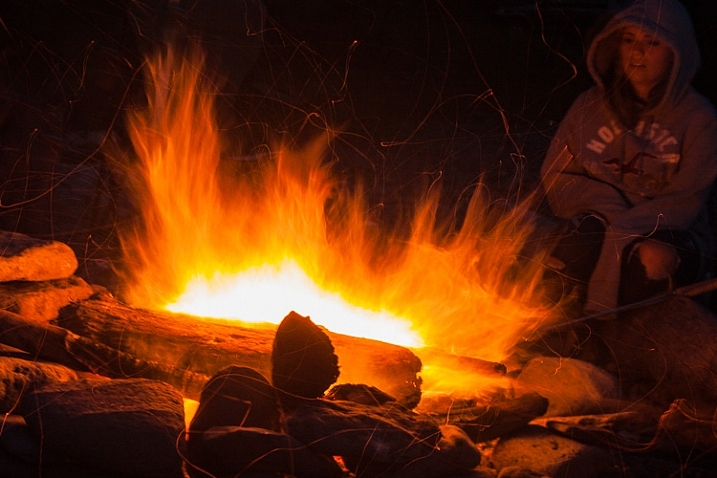
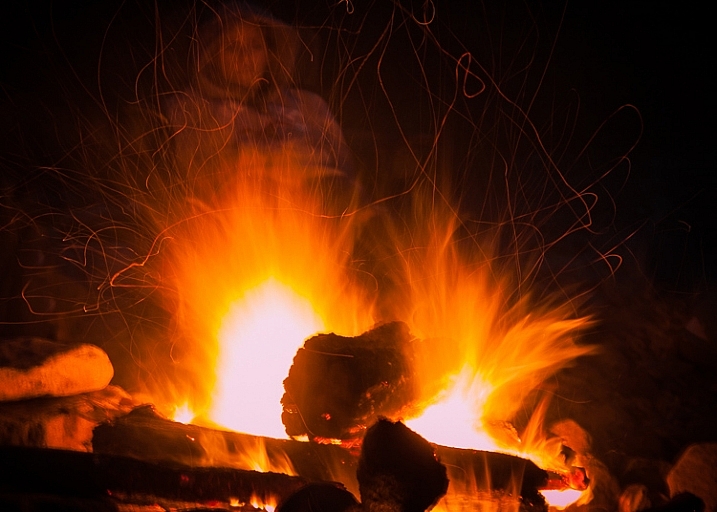
    This will force your camera to let in light for the amount of time you’ve chosen. This means your camera will be choosing your ISO (if it’s set to auto) and your aperture. This will give you varied results depending on how much light is available. Using Shutter Priority in this way can be fun. When you choose a shutter speed of five or six seconds, you can capture interesting flame shapes, and lots of spark trails. The bonfire and torch photos in this article were captured in Shutter Priority mode.

    long exposure fire photo

    ISO 100, f/11, shutter speed 6.0 seconds

    Aperture Priority

    You could also put your camera in Aperture Priority, choose a mid-range aperture (f/8 – f/11,) set a low ISO (100 – 200,) and let your camera choose the shutter speed. If you’re shooting at night (when it’s really dark) and the fire is your light source, your camera will choose a slow shutter speed. This should give you a photo with large depth of field, relatively free of grain (noise).

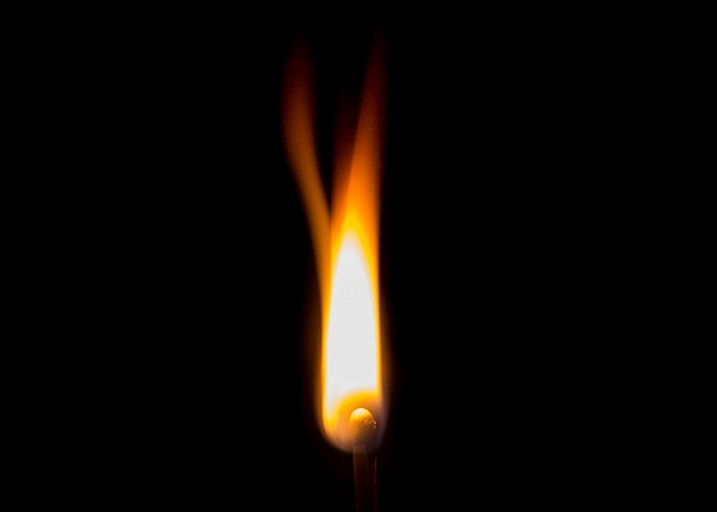
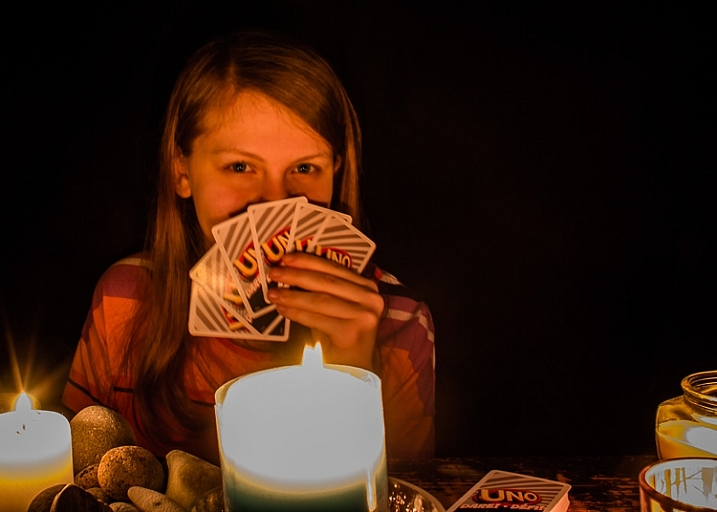
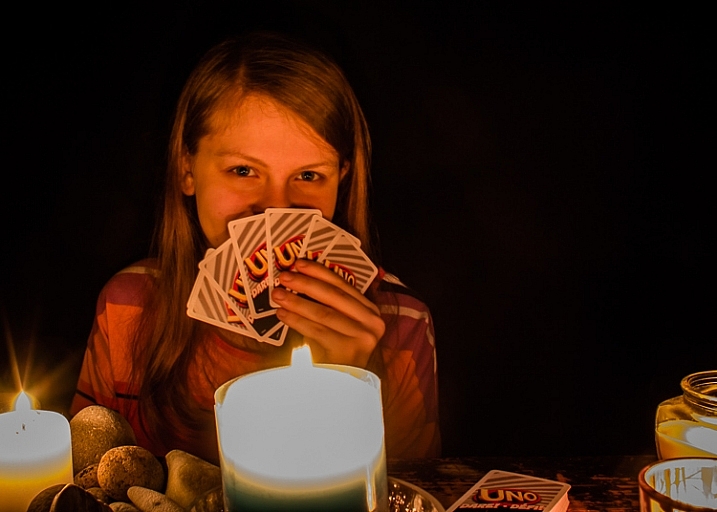
    If this causes your shutter to be open for longer than you want, increase the ISO. This will start adding noise, which can be reduced during editing. The card game and match photos in this article were shot using Aperture Priority.

    long exposure flame photo

    ISO 100, f/11, shutter speed one second

    Those are a couple of suggestions to get you started. Long exposure fire photography is all about playing around and having fun. Try lots of different apertures and shutter speeds. If you’re like me, you’ll get excited as you review each shot, and see the interesting shapes you’ve captured.

    2. Set your camera on a tripod

    When using a long exposure, you’ll want to reduce camera shake which results in blurry photos. Camera shake occurs when the camera moves while the shutter is open. Slow shutter speeds (of more than one second) make it impossible to hand-hold your camera, and still get sharp images. Using a tripod will keep your camera steady.

    3. Use a remote shutter release or set the self-timer

    Your remote (or the camera’s self-timed shutter release) can also help you cut down on camera shake. When you press the shutter release manually the camera moves a little, this could cause blur in your photo. But when you use a remote shutter release (or set your camera’s self-timer) you don’t have to worry about that. This may seem like a small thing, but it can make a big difference to your image sharpness.

    long exposure fire spark trails

    Spark trails. ISO 320, f/6.3, shutter speed 6.0 seconds

    When capturing match flames the remote works best. It’s super frustrating trying to capture that flame burst while waiting for the camera’s self-timer.

    4. Choose your subject

    Do you want your main focus to be the fire itself? Or are you trying to capture more of the mood created by the fire? While capturing the mood, it can be tricky to focus on people. It’s not easy to sit still during a long exposure and any movement will create blur in your photo.

    The following photos were shot in Aperture Priority mode, with an aperture of f/8. For the first photo, I set the ISO at 100, and my camera chose a shutter speed of 5 seconds. That was too long for my daughter to stay still, so the photo is blurry.

    long exposure fire photography tips 3

    ISO 200, f/8, shutter speed 5.0 seconds (blurry)

    For the second photo, I set the ISO to 400 which cut the shutter speed in half = 2.5 seconds. That was a little easier for her, and the photo is clearer.

    long exposure fire photography tips 2

    ISO 400, f/8, shutter speed 2.5 seconds

    5. Switch to manual focus

    Sometimes auto focus doesn’t work well in the dark.

    Here’s how to focus on something other than the fire: Shine your flashlight on the subject, and press the shutter release button halfway. When autofocus locks on, turn off the light and switch to manual focus. Without moving or adjusting anything on the camera, take your shot. Your camera will maintain the same focus point – as long as nothing is adjusted.

    Note: you could also try back button focus.

    Where will you practice?

    Do you enjoy a cozy fire at your campsite, or having bonfires at the beach? Do you like candlelit dinners? Or what about backyard marshmallow roasts? All of these would be great places to practice long exposure fire photography.

    long exposure bonfire

    ISO 160, f/5.6, shutter speed 6.0 seconds

    Experimenting with long exposures around a campfire can be a little addictive. I’ll bet the more you practice, the more fun you’ll have.

    Don’t forget your flashlight! You’ll need it to see your camera controls, for help with focusing, and to get safely back to your car.

    long exposure fire photography tips

    ISO 100, f/16, shutter speed 5.0 seconds

    Please share your tips and photos by commenting on this article.

    googletag.cmd.push(function() {
    tablet_slots.push( googletag.defineSlot( “/1005424/_dPSv4_tab-all-article-bottom_(300×250)”, [300, 250], “pb-ad-78623” ).addService( googletag.pubads() ) ); } );

    googletag.cmd.push(function() {
    mobile_slots.push( googletag.defineSlot( “/1005424/_dPSv4_mob-all-article-bottom_(300×250)”, [300, 250], “pb-ad-78158” ).addService( googletag.pubads() ) ); } );

    The post Long Exposure Fire Photography – 5 Tips for Beginners by Dena Haines appeared first on Digital Photography School.

    Digital Photography School

  • Weekly Photography Challenge – Spiral Staircases

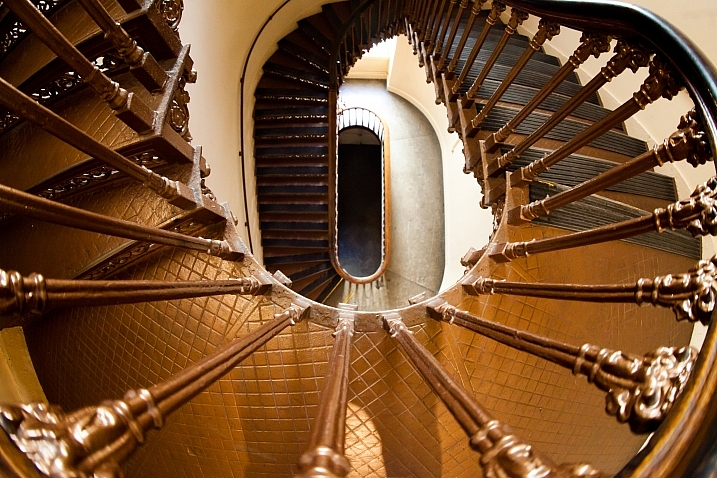
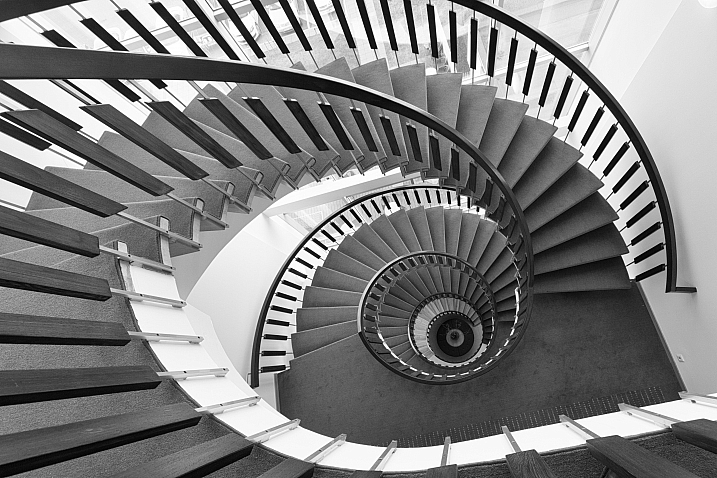
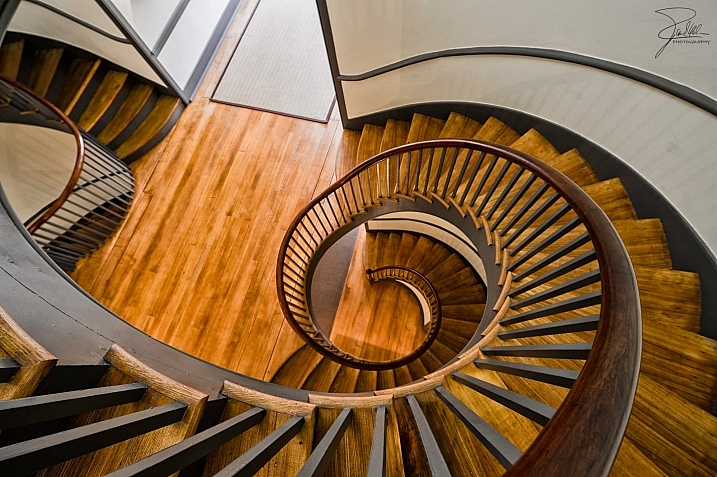
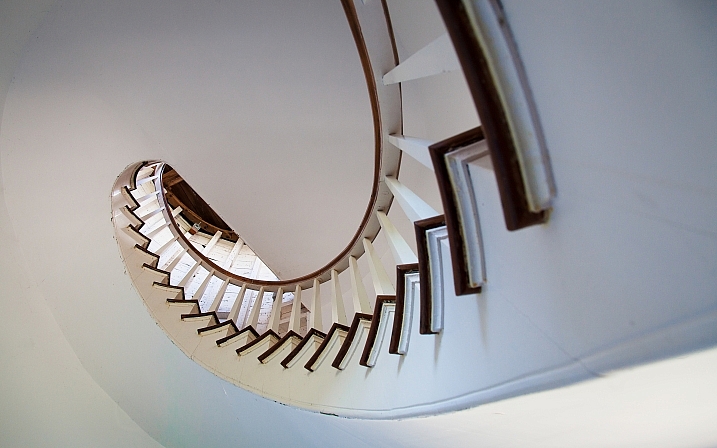
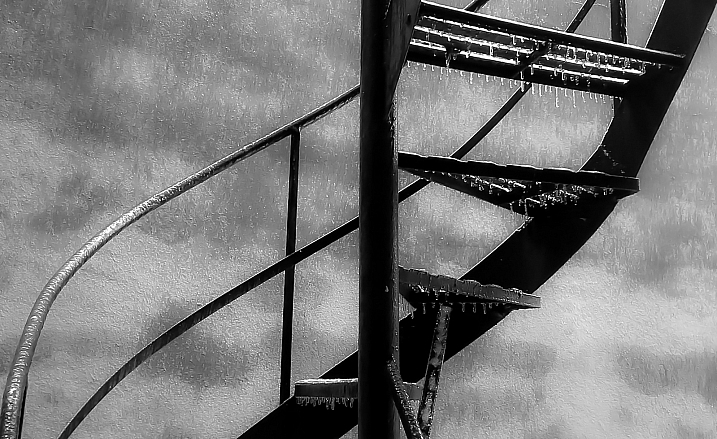
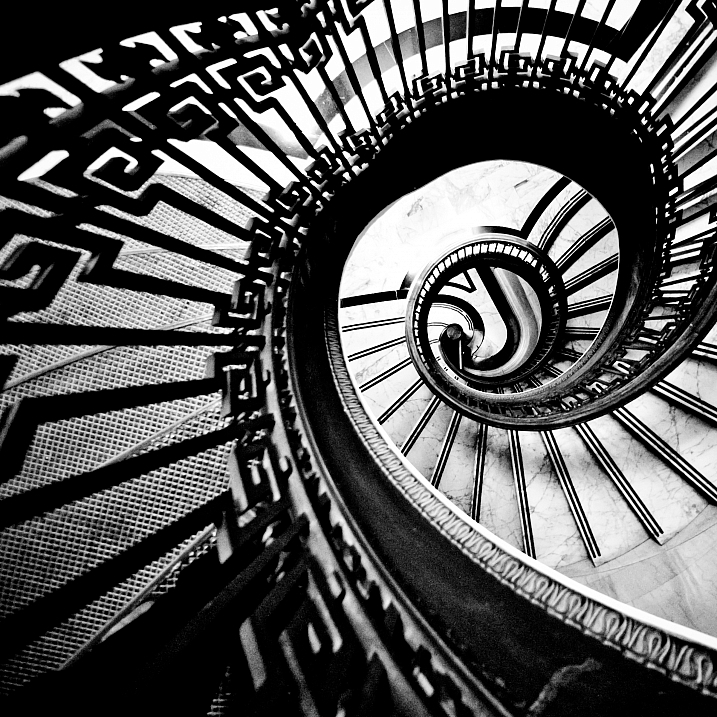
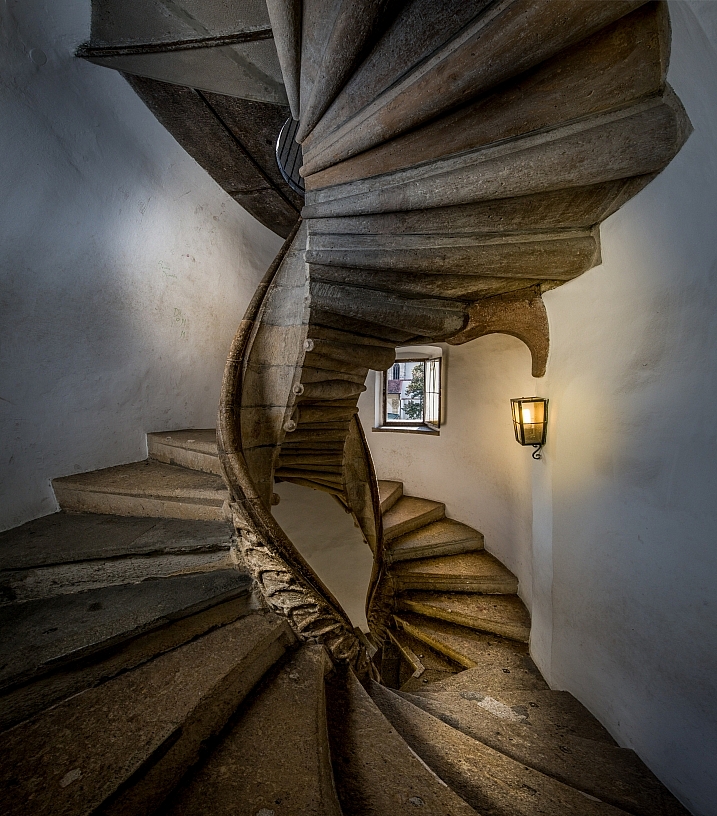
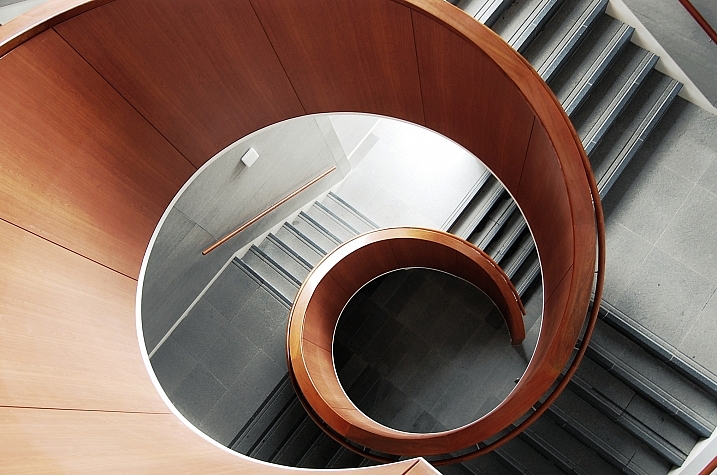
    Fibonacci sequence, the golden mean, the golden ratio – a series of numbers recognized and named after an Italian mathematician. If you look around it’s everywhere, in nature and man-made things.

    Mark Strozier

    By Mark Strozier

    Roger Jones

    By Roger Jones

    In this week’s challenge we’re going to concentrate on the latter, specifically spiral staircases.

    Weekly Photography Challenge – Spiral Staircases

    As you go about your daily life be on the lookout for spiral staircases. Got an appointment – take the stairs instead of the elevator and see what you can find. Look in historic buildings, museums, churches, on fire escapes, industrial buildings, and architecturally interesting structures.

    Cleber Mori

    By Cleber Mori

    Mack444

    By Mack444

    Cornelli2010

    By Cornelli2010

    Read: Divine Composition With Fibonacci’s Ratio (The Rule of Thirds on Steroids)

    Share your images below:

    Simply upload your shot into the comment field (look for the little camera icon in the Disqus comments section) and they’ll get embedded for us all to see or if you’d prefer upload them to your favourite photo sharing site and leave the link to them. Show me your best images in this week’s challenge. Sometimes it takes a while for an image to appear so be patient and try not to post the same image twice.

    Vincent Ferron

    By Vincent Ferron

    Sean_hickin

    By sean_hickin

    If you can’t find one – build your own!

    Katie Walker

    By Katie Walker

    googletag.cmd.push(function() {
    tablet_slots.push( googletag.defineSlot( “/1005424/_dPSv4_tab-all-article-bottom_(300×250)”, [300, 250], “pb-ad-78623” ).addService( googletag.pubads() ) ); } );

    googletag.cmd.push(function() {
    mobile_slots.push( googletag.defineSlot( “/1005424/_dPSv4_mob-all-article-bottom_(300×250)”, [300, 250], “pb-ad-78158” ).addService( googletag.pubads() ) ); } );

    The post Weekly Photography Challenge – Spiral Staircases by Darlene Hildebrandt appeared first on Digital Photography School.

    Digital Photography School

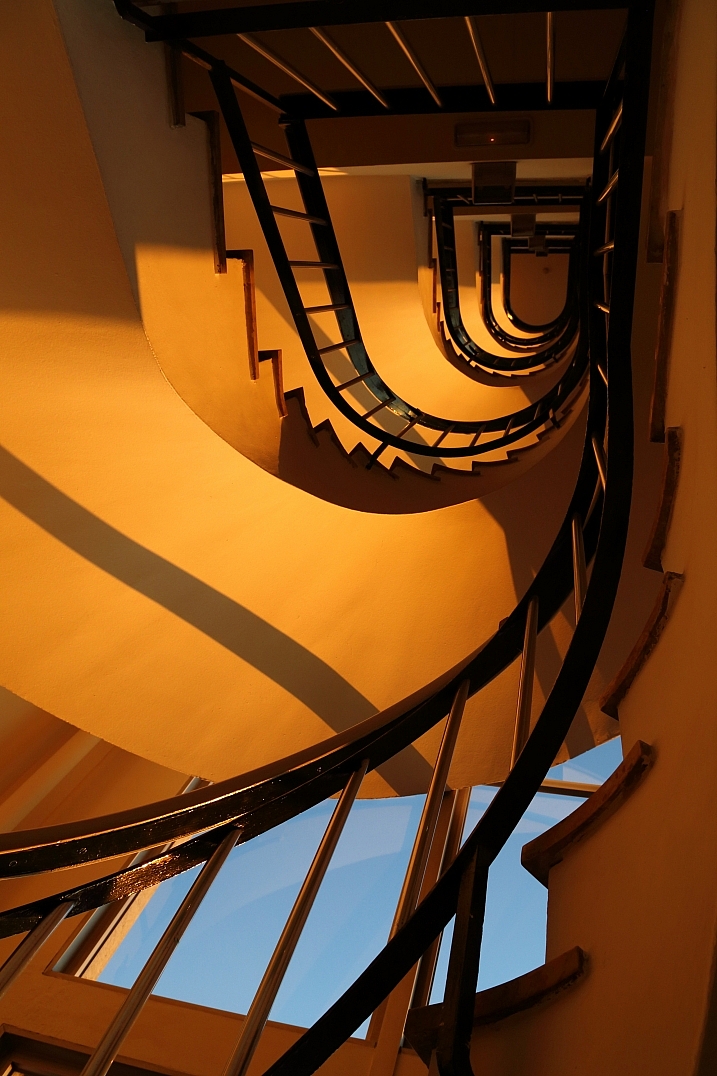
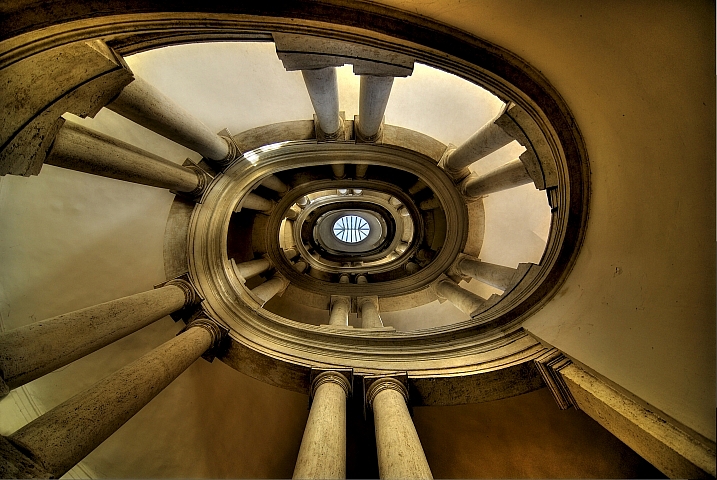
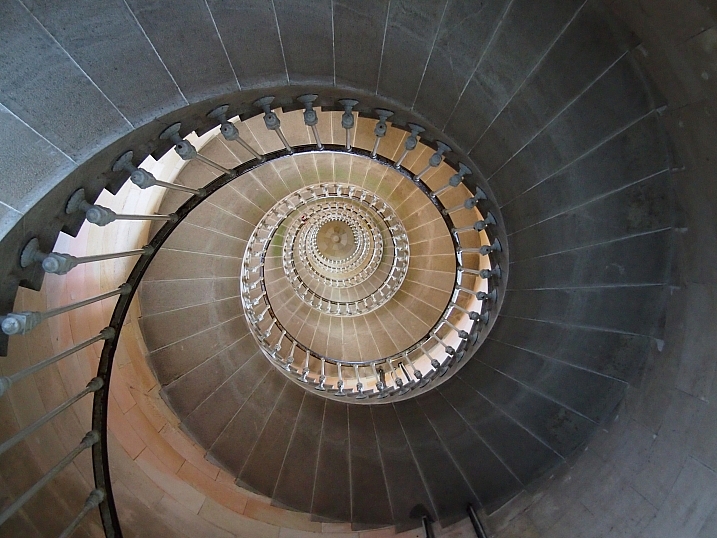
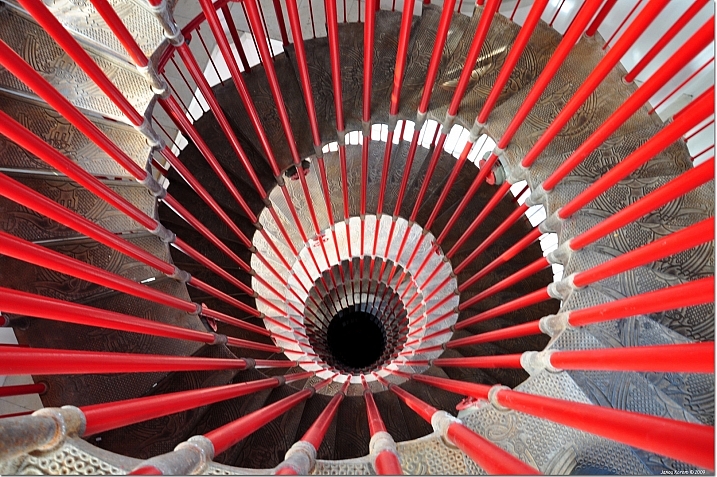
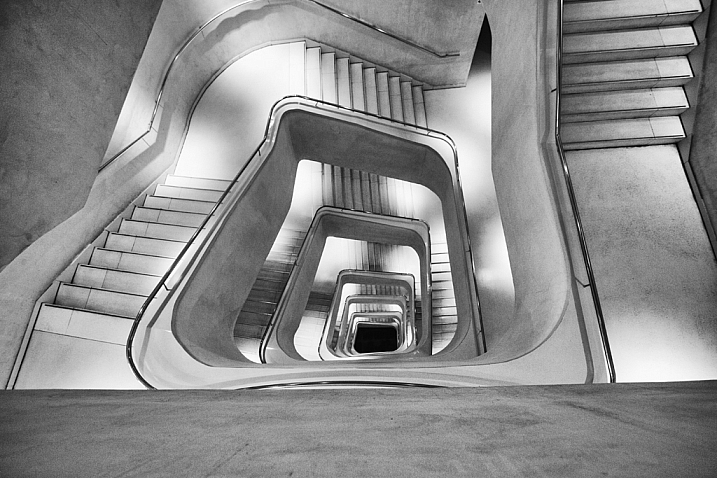
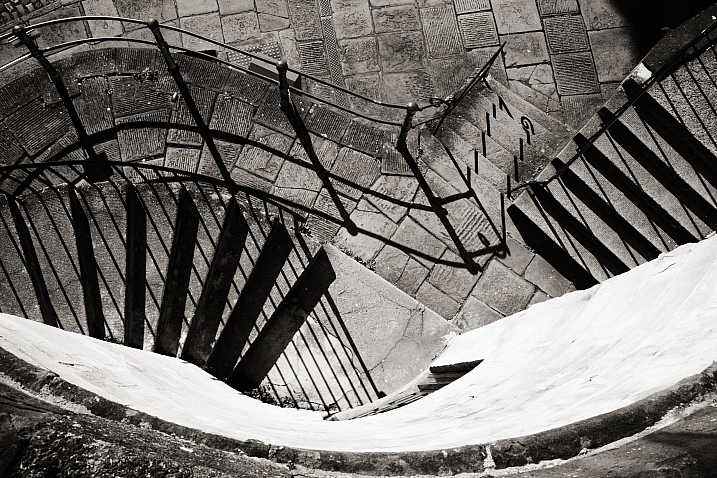
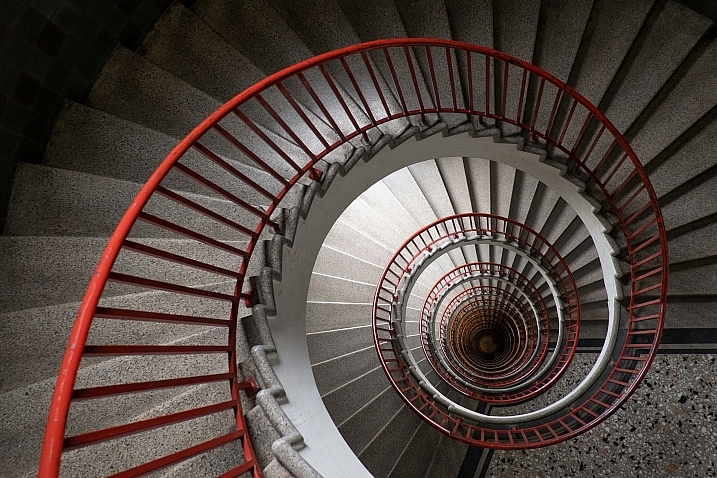
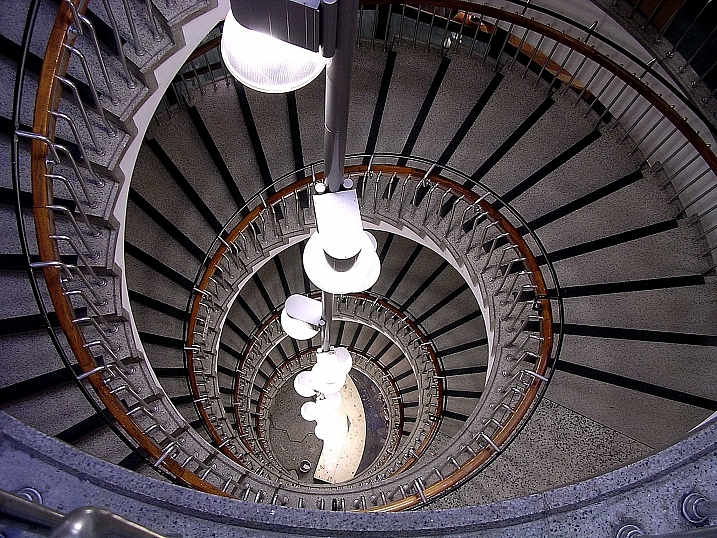
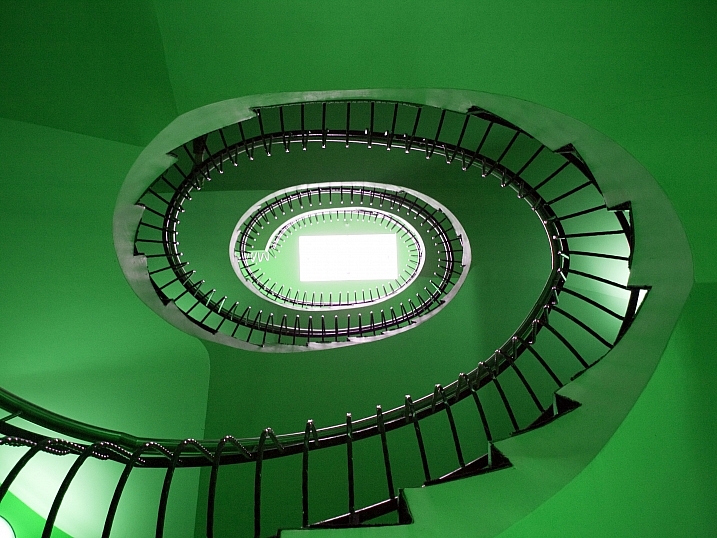
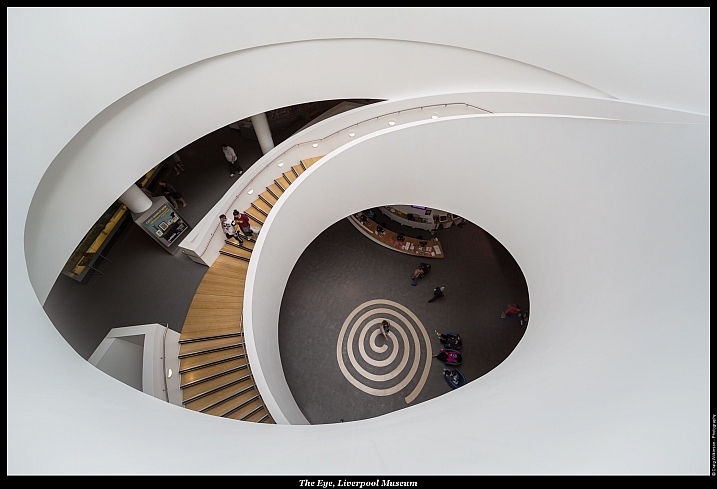
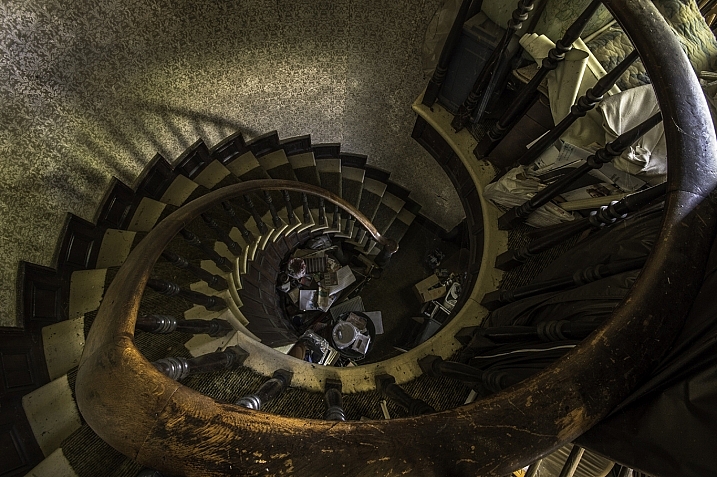
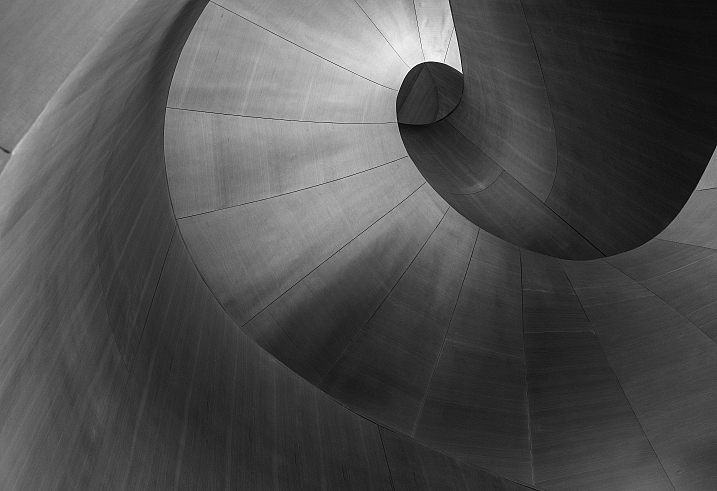
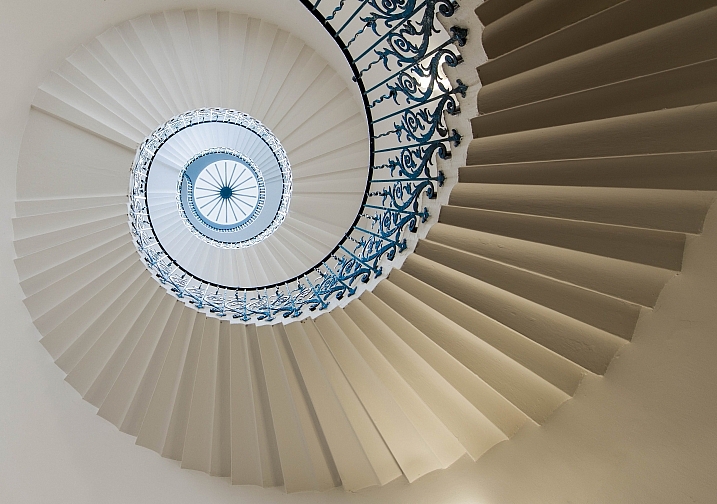
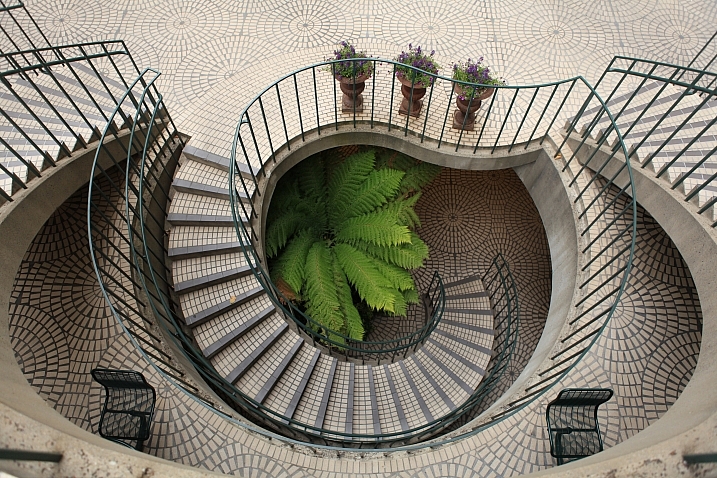
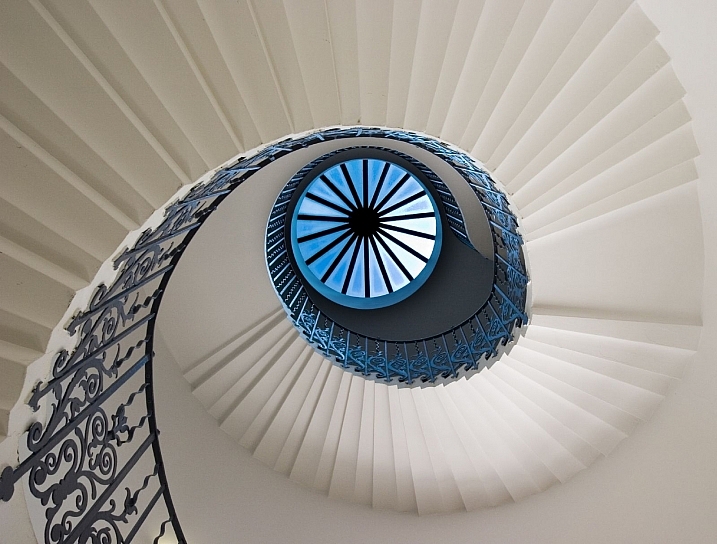
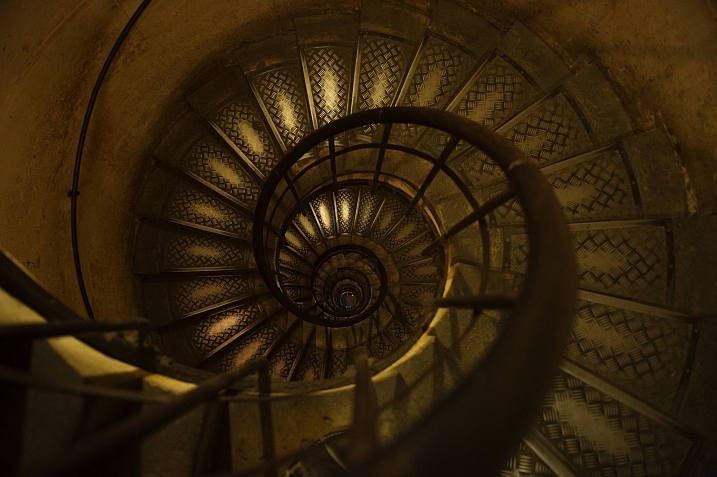
  • 32 Dizzying Images of Spiral Staircases

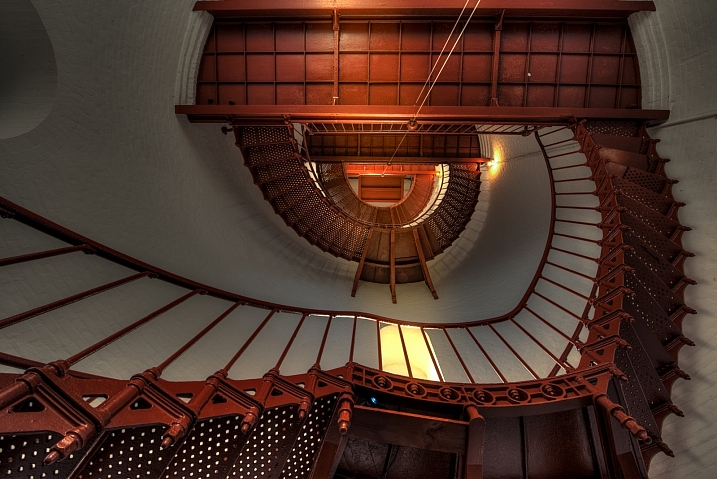
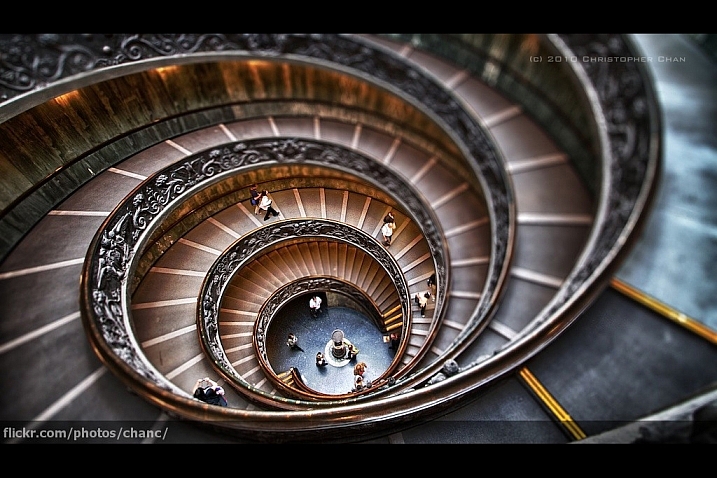
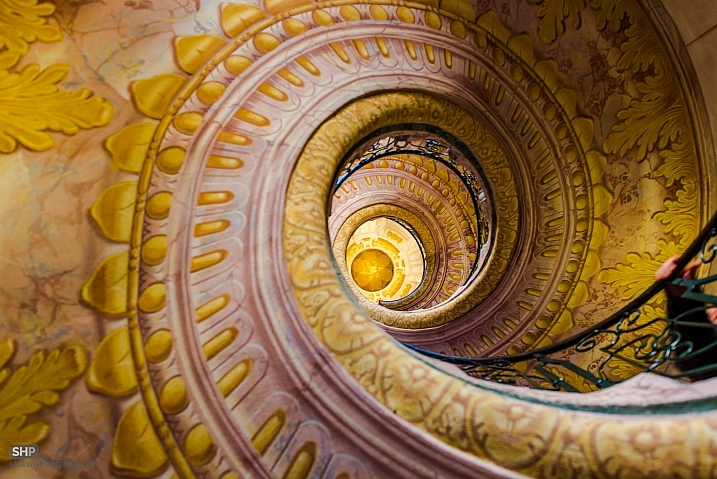
    Composition is an important part of photography. You may have heard of the Rule of Thirds, or even the Fibonacci sequence (aka the golden mean). It is something that appears in nature often (think spiral sea shells) and which man imitates almost instinctively.

    Check out some of these images of grand spiral staircases and see if you can’t see similarities. The symmetry, and unique properties, the math!

    Howard Ignatius

    By Howard Ignatius

    Christopher Chan

    By Christopher Chan

    Shawn Harquail

    By Shawn Harquail

    Don McCullough

    By Don McCullough

    Riccardo Cuppini

    By Riccardo Cuppini

    Capture99

    By Capture99

    János Korom Dr.

    By János Korom Dr.

    Thomas Hawk

    By Thomas Hawk

    Jeremy Brooks

    By Jeremy Brooks

    Roger Jones

    By Roger Jones

    Frank Kehren

    By Frank Kehren

    Robin Jaffray

    By Robin Jaffray

    Artur Salisz

    By Artur Salisz

    Simon Holliday

    By Simon Holliday

    Gert Swillens

    By Gert Swillens

    VanessaC (EY)

    By VanessaC (EY)

    ReflectedSerendipity

    By ReflectedSerendipity

    Craig Wilkinson

    By Craig Wilkinson

    Freaktography

    By Freaktography

    Timothy Neesam

    By Timothy Neesam

    Garen M.

    By Garen M.

    Scott Schiller

    By Scott Schiller

    Jeff Oliver

    By Jeff Oliver

    Dustin Gaffke

    By Dustin Gaffke

    Gabriel Caparó

    By Gabriel Caparó

    Thomas Hawk

    By Thomas Hawk

    Bernd Thaller

    By Bernd Thaller

    Lhongchou's Photography

    By lhongchou’s photography

    Jeremy Brooks

    By Jeremy Brooks

    Kosala Bandara

    By Kosala Bandara

    Pim Stouten

    By Pim Stouten

    Thomas Hawk

    By Thomas Hawk

    googletag.cmd.push(function() {
    tablet_slots.push( googletag.defineSlot( “/1005424/_dPSv4_tab-all-article-bottom_(300×250)”, [300, 250], “pb-ad-78623” ).addService( googletag.pubads() ) ); } );

    googletag.cmd.push(function() {
    mobile_slots.push( googletag.defineSlot( “/1005424/_dPSv4_mob-all-article-bottom_(300×250)”, [300, 250], “pb-ad-78158” ).addService( googletag.pubads() ) ); } );

    The post 32 Dizzying Images of Spiral Staircases by Darlene Hildebrandt appeared first on Digital Photography School.

    Digital Photography School

  • Aide de Camp Camera Bag Review: Where Function Meets Style

    If you’re a woman in the photography business, you’ve probably heard of Aide de Camp by now. Yeah, it’s the company that has literally took camera bag out of the box (the clumsy black box), and proved that practical can be stylish. In this post I’m sharing my hands-on review of Aide de Camp’s new offering, the elegant Nadine Camera Continue Reading

    The post Aide de Camp Camera Bag Review: Where Function Meets Style appeared first on Photodoto.


    Photodoto

  • 5 Steps to Increase the Sharpness of Your Photographs

    Image001

    Here are five steps you can take which help to increase the sharpness of your photographs:

    1) Keep your lenses, filters, and camera sensor clean

    Somewhat of an obvious point, but a very important one nonetheless. If your lenses and/or filters have dust or debris on them, however small and unnoticeable to the naked eye, it can create ugly soft spots on your photograph. There have been countless times I was in such a hurry to go shoot, I didn’t check the glass to see if it needed a good cleaning. This especially holds true if the lens I am using has been sitting on my shelf for a while, collecting dust. Even if the lens has been wrapped up in a pouch with a cap on top, it can still accumulate dust on the outer element.

    Quick side issue: This is why it’s a good idea to keep a protective filter over your lenses when they are resting on a shelf, or when you are traveling. Along with the front lens cap, a protective filter helps to keep dust off the lens glass. If you get scuff marks or dirt on a cheap protective filter, who cares? But if you scuff up the outer element on the lens, it’s costly to fix.

    Back on point: It can be very frustrating to think you’ve got yourself a good shot, only to upload the images to your computer and see ugly spots scattered all over the image. You can use the Dust and Scratches Filter in Photoshop, use the healing brush, and/or clone away only so much before the smudges become a real time-consuming burden.

    This is easily avoidable if you make it a routine to clean your glass before heading out to shoot.

    Image002

    2) Shoot at the lowest possible ISO

    The higher the ISO, the more noise you introduce into the image.

    Sometimes you absolutely have no choice but to shoot at a higher ISO. For example, if you are in a poorly lit gym shooting your kid’s basketball game, you are going to need a relatively high ISO to freeze the action, even with a fast lens. Newer cameras mitigate this issue somewhat, because they are able shoot at higher ISOs without a significant amount of noise.

    Additionally, if you are only going to be displaying low resolution photographs on Facebook or elsewhere on the internet, or printing small 5X7 pictures, you can get away with some noise in the photo. But, if you are going to be creating larger prints, or will be showcasing the images on the internet at a high resolution, you want your images tack-sharp, and lower ISOs undoubtedly help. There are all kinds of software programs which can help reduce noise in a photograph, but the more noise you are correcting, the softer the image will become.

    This segues nicely into the next step because, if you lower ISO, your shutter speed will slow down (assuming aperture is constant). One way to shoot tack-sharp photographs at slow shutter speeds is to use a sturdy tripod.

    Image003

    3) Use a sturdy, well-grounded tripod

    On a tripod, you can shoot at any shutter speed and the camera and lens will (ideally) stay motionless. This assumes your camera is firmly fastened to the tripod head, and the tripod’s foundation is well anchored and balanced on the ground. Don’t take that for granted – just because you’re on a tripod doesn’t mean everything will stay locked in place. Make sure your tripod feet are solidly on the ground before setting up the camera (I usually press down relatively hard on the tripod to make sure the ground won’t give way…this is especially important on loose ground like mud, wet rocks, or sand).

    Then, once your composition is set, make sure your tripod head is locked in position. Additionally, If your tripod has a hook beneath the centre column, hang something with a little bit of weight on it to further lock down the tripod (I usually hang my backpack on the center hook). Even a gentle gust of wind, or the vibration from a nearby car passing by, can introduce minor camera movement into a tripod setup, so you want that setup locked down as tightly as possible.

    Image004

    4) Mind your shutter speed

    If you are going to hand-hold the camera, it is customary to choose a shutter speed that is at least as fast as the reciprocal of the focal length you are using. For example, if you are shooting with a 50mm lens, then you will want your shutter speed to be at least 1/50th, or faster, to get acceptable sharpness. Any slower and you risk motion blur. If you are shooting with a 500mm telephoto, then you want at least 1/500th or faster, and so on. The one caveat to this formula is if your camera or lens has some sort of additional stabilization, like Nikon’s Vibration Reduction (VR – called Image Stabilization or IS on other cameras). This will allow you to shoot at slower shutter speeds, usually by several stops, without introducing significant motion blur.

    Image005

    5) Lock-up the mirror before firing away

    When you are looking through the viewfinder in a DSLR, what you see is the light which passes through the lens, but you don’t actually see it until it bounces off a couple of mirrors. The light of the scene enters through the lens, bounces off of a mirror that sits at an angle directly in front of the shutter/sensor, then it travels through a pentaprism or penta-mirror, before it finally reaches the viewfinder.

    So, in order for the exposure to be taken, the mirror in front of the sensor has to flip up, then the shutter opens to allow light to hit the sensor. If the mirror flips up at the same time the shutter opens, there is the potential for very slight movement of the camera due to vibrations caused by the mirror flipping up.

    Most modern DSLRs give you the option of locking the mirror up well before the exposure is taken. The Nikon D810, for example, gives you the option of locking up the mirror anywhere between one and three seconds before the shutter opens (Nikon calls it Exposure Delay Mode). I always choose three seconds, unless there’s a need to shoot quicker. That makes sure the camera is nice and still before the shutter opens and the exposure is taken.

    Note: if you’re using a mirrorless camera you don’t have to worry about this step!

    This is also helpful if you forgot to bring along a remote shutter. Pressing the camera’s shutter release almost always causes slight movement in the camera. But, if the camera waits a couple of seconds after the mirror flips up, it gives the setup time to become completely still again.

    Image006

    Do you have any additional tips or tricks to increase sharpnes in your images? Please share in the comments below.

    googletag.cmd.push(function() {
    tablet_slots.push( googletag.defineSlot( “/1005424/_dPSv4_tab-all-article-bottom_(300×250)”, [300, 250], “pb-ad-78623” ).addService( googletag.pubads() ) ); } );

    googletag.cmd.push(function() {
    mobile_slots.push( googletag.defineSlot( “/1005424/_dPSv4_mob-all-article-bottom_(300×250)”, [300, 250], “pb-ad-78158” ).addService( googletag.pubads() ) ); } );

    The post 5 Steps to Increase the Sharpness of Your Photographs by Jeb Buchman appeared first on Digital Photography School.

    Digital Photography School