Category: Photography

  • Sigma 30mm f/1.4 DC HSM Art Lens Review

    The world of camera lenses can be separated into two main groups: zooms and primes. Prime lenses are those which have a fixed focal length, meaning that they don’t zoom in and out. Once upon a time there were only primes. With the advent of zoom lenses photographers no longer had to rely on just their feet in order to get achieve the desired composition. This versatility brought with it a trade-off. Zoom lenses have more moving parts and components, which adds weight and reduces the speed of the lens, along with sharpness. Optically, primes are generally much faster and sharper than zoom lenses but limit the shooter to only one focal length, which can be off-putting to some.

    But times change. Today we see a new generation of photographers realizing the merits of shooting with prime lenses. This paradigm shift is reflected by lens manufacturers who are beginning to produce more prime lenses for a hungry new market.
    Sigma 2

    The 30mm f/1.4 DC HSM Art lens from Sigma is among one of these that is meant be an all-purpose fast prime, for those needing a lens with excellent sharpness and great low light capabilities. I put the Sigma 30mm f/1.4 through its paces and have a feeling you will be well pleased.

    Build Quality
    Sigma 4

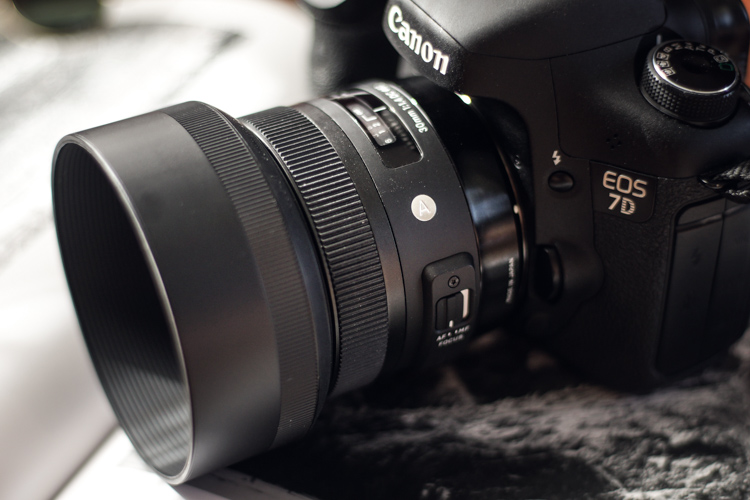
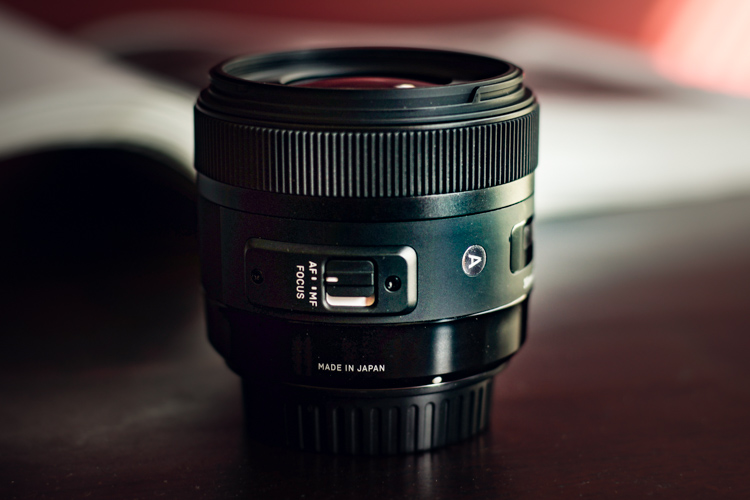
    Being part of Sigma’s well regarded Art line of lenses, I expected the 30mm to be highly refined and well-built; it did not disappoint in this area. It’s manufactured from the same thermally stable composite (TSC) which is incredibly metallic in its heft and appearance. The entire lens looks very smooth and professional, with all markings and indicators being commendably well executed. The focusing ring has that perfect feel of silk when it’s turned. It moves very smoothly, being neither overly tight, nor too loose. The travel from minimum focus distance to infinity is just right, and it still leaves a lot of cushion for focusing accurately when in manual mode. The AF/Manual switch is ideally placed for no-look operation, and is very crisp when it is clicked from one to the other.
    Sigma 5

    Sigma 3

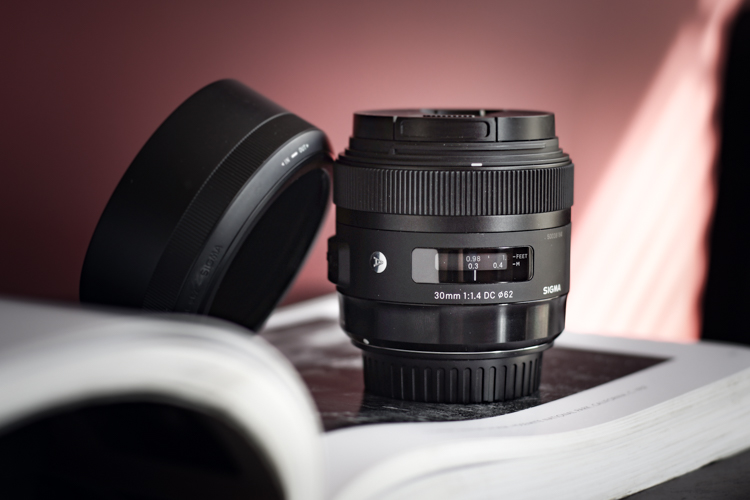
    Included in the package is also a great looking lens hood which causes a bit of deception when attached because it makes the lens appear markedly larger than it actually is in reality. But it does a superb job of reducing the amount of contrast-robbing peripheral light from making its way to the lens’s front element. Overall, the quality of workmanship displayed in the 30mm is outstanding. It feels very well balanced when mounted to the camera (Canon 7D).
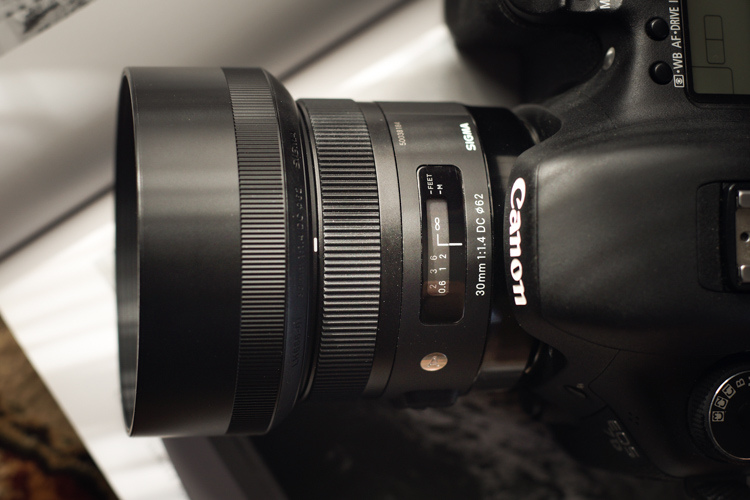
    Sigma 1

    It leans towards the robust side in terms of weight for a normal (close to the naked eye’s field of view) prime lens at 15.3 ounces (434g), but it is by no means clunky or difficult to shoulder for long periods. Here we see the Sigma 30mm f/1.4 compared to another prime work horse, the Canon 50mm f/1.4.
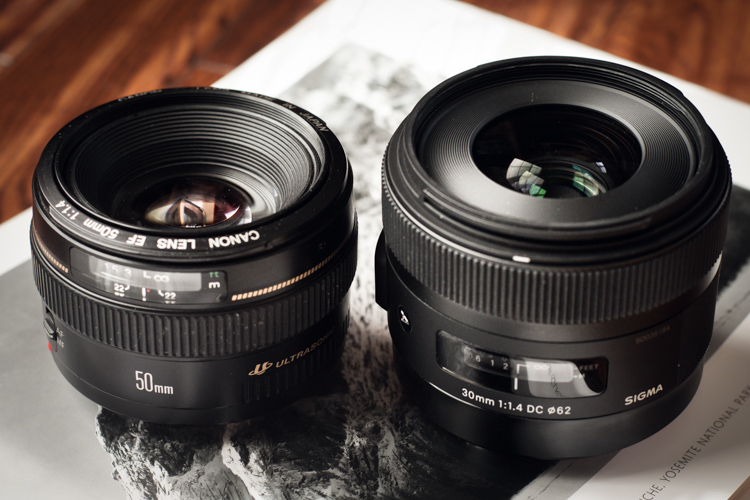
    Canon Sigma

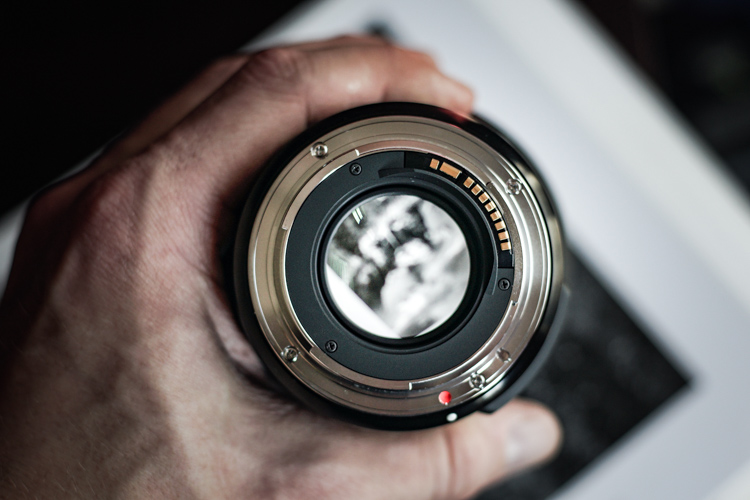
    With the lens hood reversed for storage, it’s easy to see just how compact this lens really is in the hand.
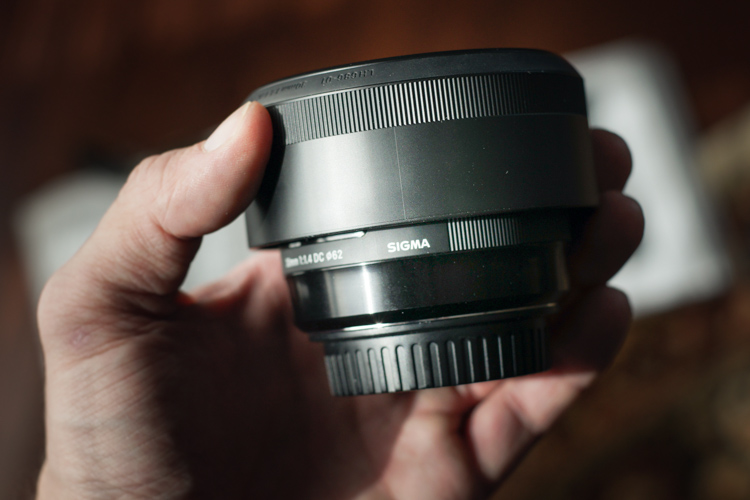
    Sigma in hand

    Here are the official lens specifications and element array provided via Sigma USA.
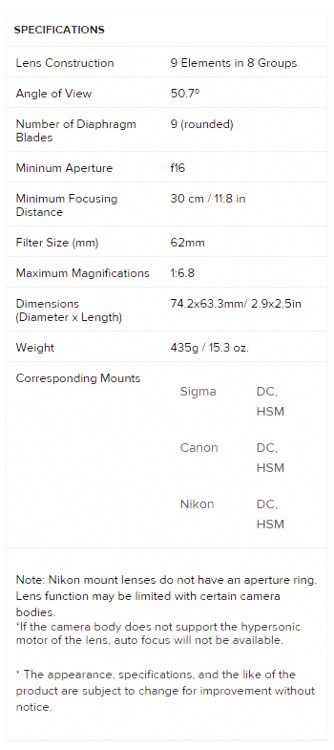
    Sigma 30 Specs


    Image Quality

    The Sigma 30mm f/1.4 is quite the beast, photographically speaking. The 30mm focal range is very close to what could be considered wide angle, yet it shows no perceivable distortions at the corners. The bokeh is absolutely beautiful; the nine curved aperture blades produce an incredibly smooth, nearly dream-like, background blur when shooting at wide apertures. Some portraits today are being shot with alarmingly short focal lengths with very positive results. This lens would serve that purpose well, and offers richly vibrant colors across the entire aperture range. This great color rendition will make for a love at first sight situation with landscape photographers also. If you shoot a lot of nightscapes this lens will appeal to you as well. Of course the f/1.4 aperture capability makes for great low light work, but the coma was found to be very low likewise. This means all your great shots of the night sky will be produced clearly, with little distortion of those small points of starlight.

    The autofocusing of the Sigma 30mm f/1.4 is also a point of praise. Focusing was very fast and accurate, and very quiet. It’s great to see a prime lens with AF that is on par with its other features. While manual focusing is always a good idea, the benefit of a high-performing autofocusing mechanism can’t be understated when shooting at the wide open apertures which this lens is capable of achieving.

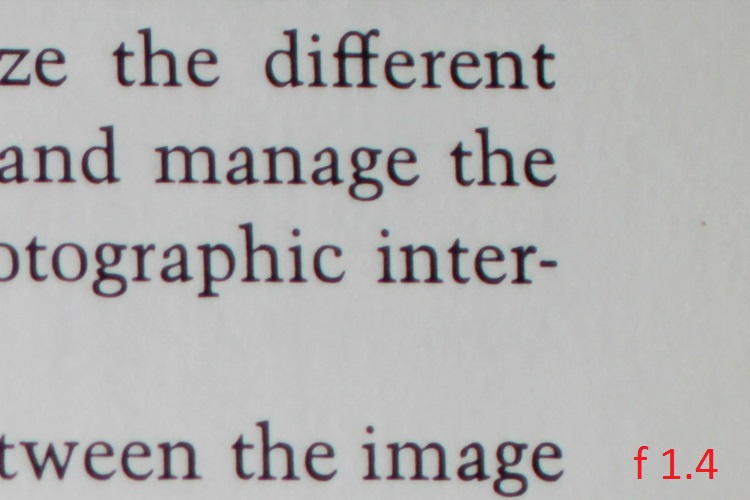
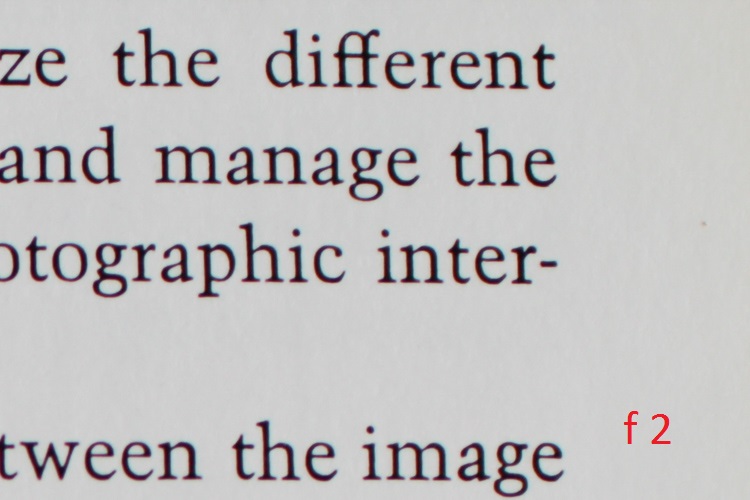
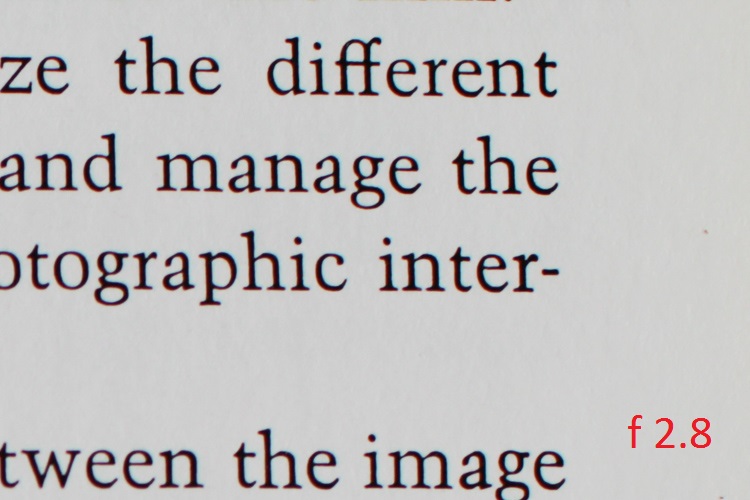
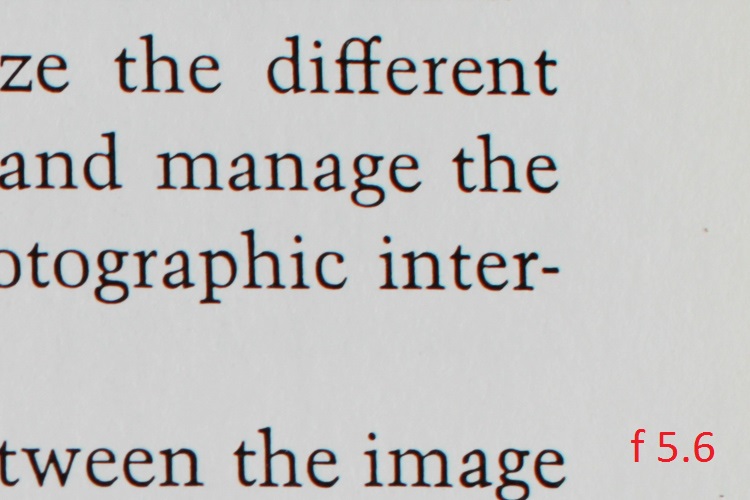
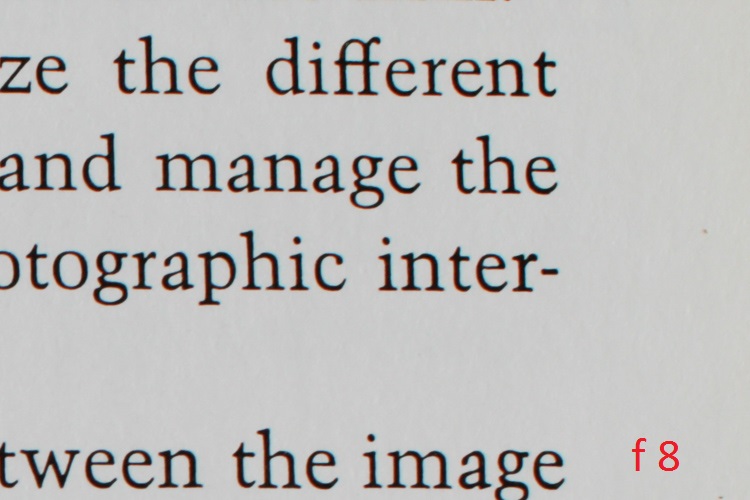
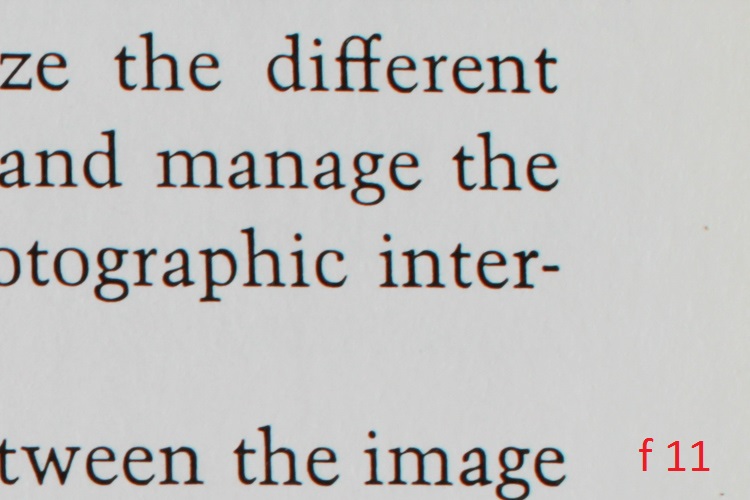
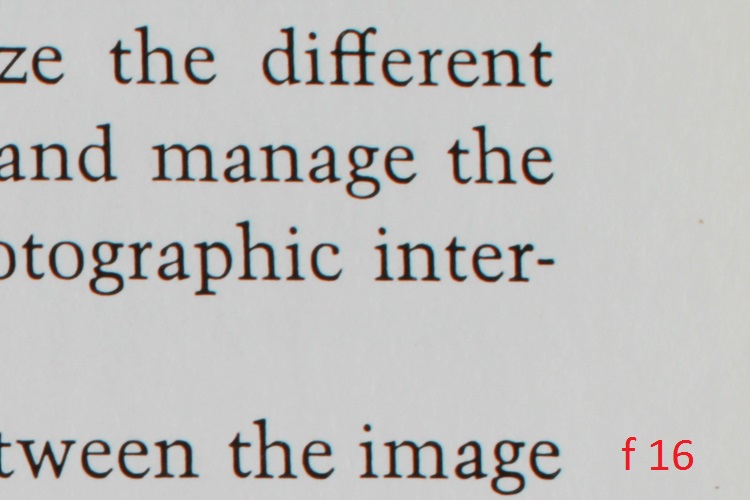
    This brings us to one of the only two downsides thus far found in the 30mm; its sharpness at small and large apertures. It is certainly not uncommon to see a marginal reduction in sharpness when approaching minimum and maximum apertures, from even the most highly prized lenses. From f/2.2 through to f/11, the sharpness of this lens is wonderful. Anything smaller than f/11 or wider than f/2.2 however, saw a significant drop in overall sharpness in my tests. Happily though, that leaves an enormous range of possibilities for optimal image sharpness, and in my opinion, should not diminish the respect this lens deserves.

    Here are some sample images to demonstrate the corner sharpness over a range of apertures from f/1.4 through to f/16. The first picture is for reference to the 1:1 magnification applied to the samples.
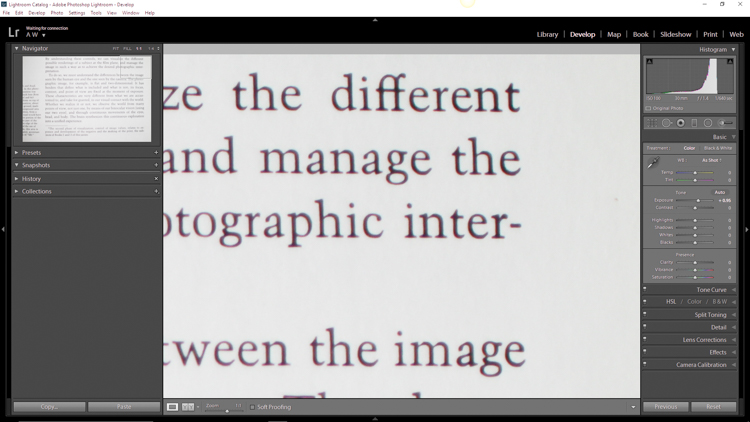
    Corner 1 to 1

    And now for the samples:

    F 1 4

    F 2

    F 2 8


    F 5 6

    F 8

    F 11

    F 16

    The other downside is relatively noticeable chromatic aberrations at wide apertures. Of course this is to be expected, but it bears mentioning nonetheless. For a lens of this quality the chromatic aberration is a little more than expected when the lens is wide open at f/1.4. These aberrations drop extremely quickly past f/1.8 and diminish completely around f/2.2.

    Even at their most noticeable, Lightroom handled the fringing easily in post-processing. Much like the sharpness issue, for most shooters, the chromatic aberrations shouldn’t be a concern, or at the very least should be manageable.

    The 30mm F1.4 DC HSM | Art is a terrific lens, despite any marginal concerns with sharpness and aberrations. It performs quite well across a wide range of situations, and will be a great addition to those looking for a low light prime lens with low distortion. Astro photographers will love it for its low coma and sweeping perspective, and landscapers will be drawn to its wonderful color rendition. Even street photographers would be elated to have this lens in their bag due to its incredible bokeh.

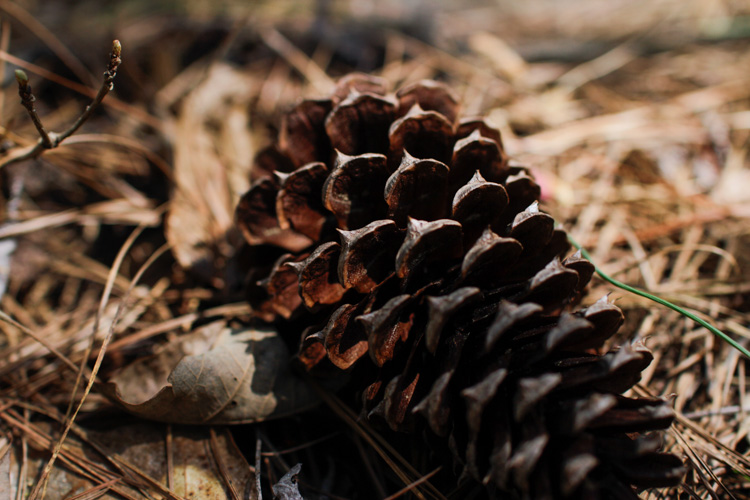
    Here are a few real world sample images which were shot with the Sigma 30mm F1.4 DC HSM | Art lens, mounted to a Canon 7D, processed in Adobe Lightroom CC.

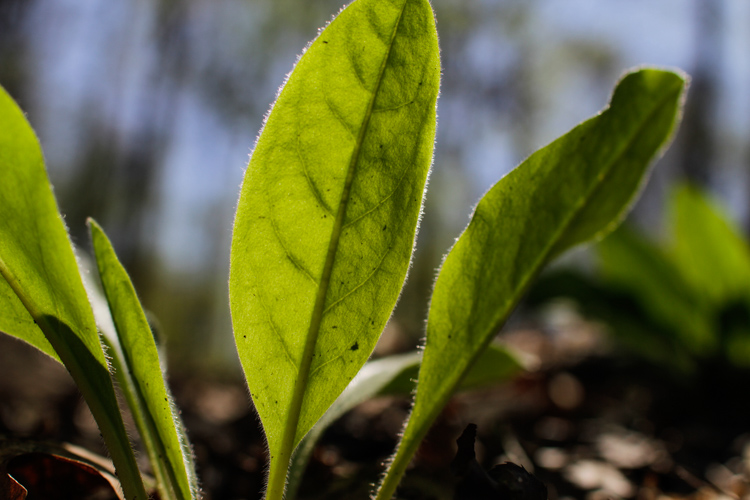
    Sigma 30 Sample 1

    Sigma 30 Sample 2

    Sigma 30 Sample 3

    Sigma 30 Sample 4

    Sigma 30 Sample 5

    Sigma 30 Sample 6

    I would recommend this lens to virtually anyone who needs a sturdy low light prime lens. It fits a myriad of circumstances when high grade professional quality photographs are needed. When shooting at common apertures it is an incredible value for a prime lens at this price point.

    googletag.cmd.push(function() {
    tablet_slots.push( googletag.defineSlot( “/1005424/_dPSv4_tab-all-article-bottom_(300×250)”, [300, 250], “pb-ad-78623” ).addService( googletag.pubads() ) ); } );

    googletag.cmd.push(function() {
    mobile_slots.push( googletag.defineSlot( “/1005424/_dPSv4_mob-all-article-bottom_(300×250)”, [300, 250], “pb-ad-78158” ).addService( googletag.pubads() ) ); } );

    The post Sigma 30mm f/1.4 DC HSM Art Lens Review by Adam Welch appeared first on Digital Photography School.
    Digital Photography School

  • 5 Tips for Doing Photography from a Hot Air Balloon or Biplane

    Do you do most of your shooting with your feet firmly planted on the ground? Camera shake is a basic concept that directs you to take a strong stance, brace your elbows, and keep that camera as still as possible. But what if you are not on the ground? What if you are up in the air? For myself, I would say that 95% of my photography happens on land, and while I get to do some underwater scuba photography sometimes, and that shooting from the sky is something I have only done a couple of times. But I hope that the lessons I have learned will help you, when and if you have that rare opportunity to get up off the ground and photograph the world from new heights.

    001 Title

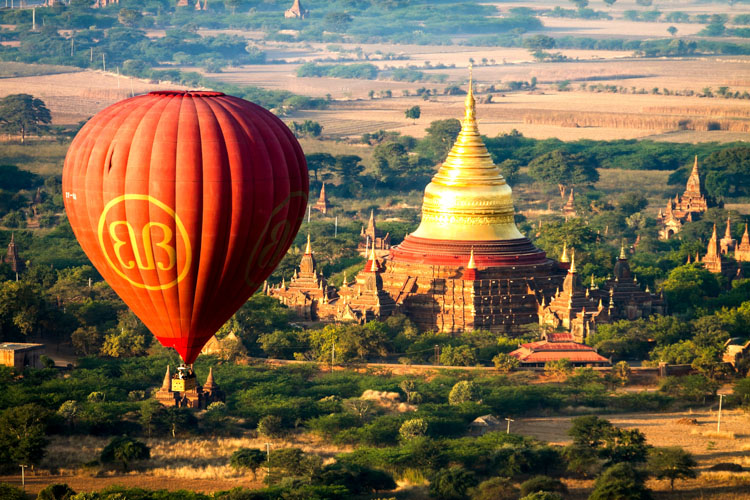
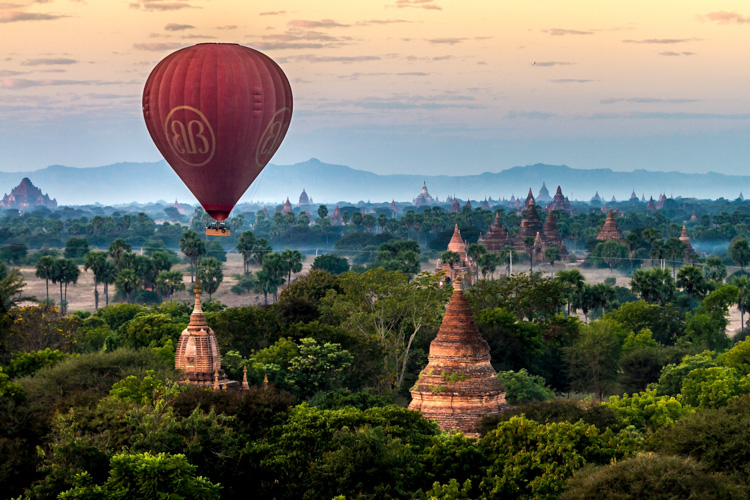
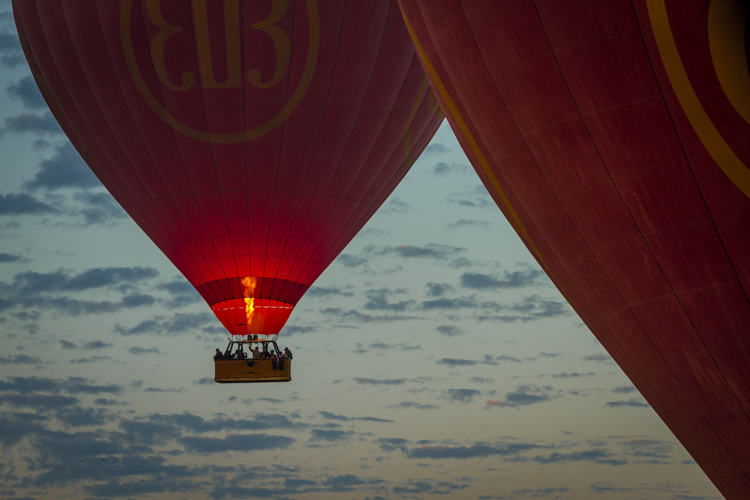
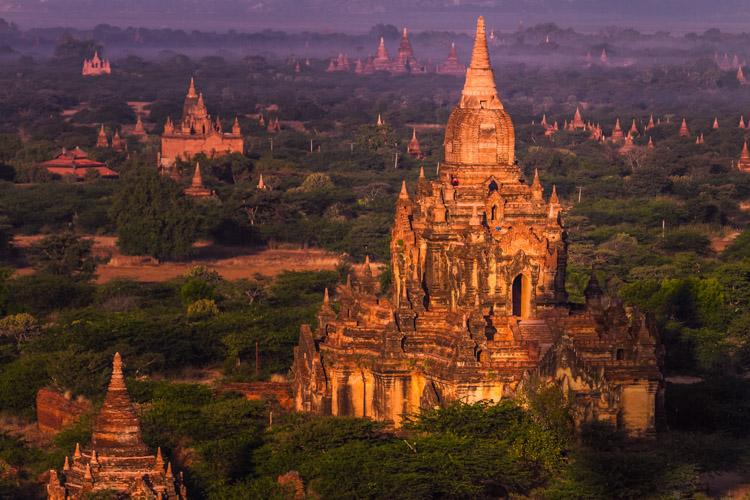
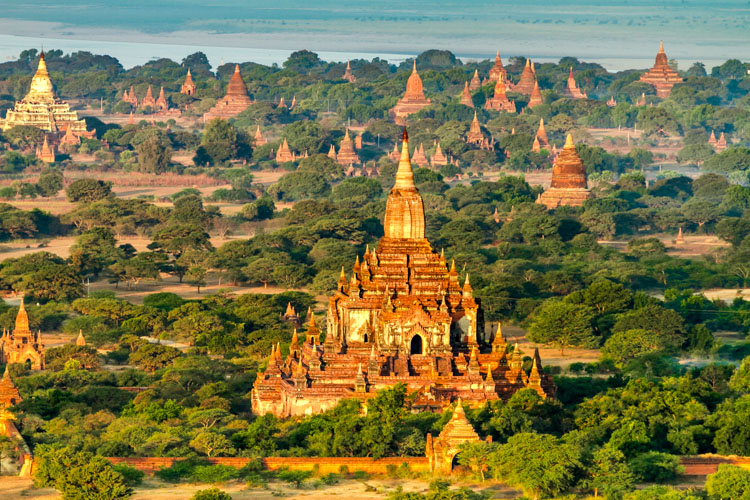
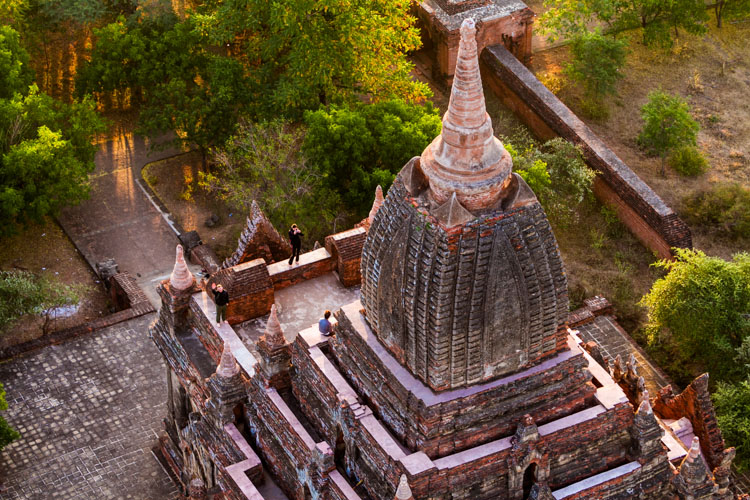
    These tips are inspired by a balloon flight that I had in Bagan, Myanmar. Despite growing up with one of the world’s largest balloon festivals in my backyard (Albuquerque, New Mexico), I had never been in one. I have helped many land, but never been up in a balloon. So in Bagan, when an opportunity presented itself, I couldn’t think of a better way of seeing the over 2,000 temples of the area from the air. Also, I will show some photography examples from a single engine prop plane flight over the Bay Area, California.

    So here are my five tips for doing photography from midair:

    1. There’s limited space – so chose wisely

    In anything defying gravity, whether it be a balloon or a plane, space is always limited. Before going up, there should be a safety briefing, and the pilot has the final say. So talk to the pilot and see if you can get a spot on the corner, or if he knows the best place from which to get a photos. It may not even be where you expect.

    002 Limited space

    2. The changing light conditions – be prepared

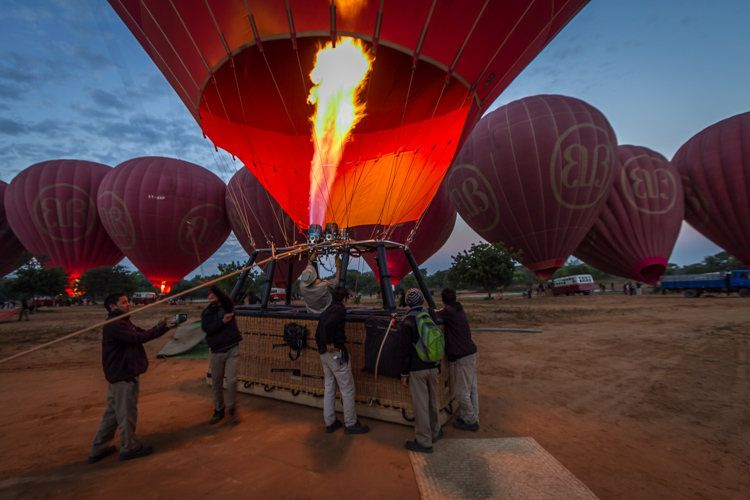
    Most balloon flights start before sunrise, for both romantic notions, along with better flying conditions. But for a photographer that makes our job all the more difficult to capture the early morning darkness, turning into blue, then golden hour, and finally full daylight. So we have four different lighting conditions that need to be captured. If you bring a tripod leave it on the ground. It may be good for a sunrise picture, but getting the balloons or airplanes ready requires work. So there are lots of moving parts, and when you are in the air, you will definitely not need it.

    The tip is really that there are many variables regarding light conditions.  I know it is a little obvious, but in a balloon (or airplane) you are not in a stable environment.  You will be dealing with multiple light conditions in a limited time and it is not so easy to just wake up the next day and fly again, so you need to be prepared for anything.

    Bring a flash for fill. Use a gel on your flash to balance the blue or orange natural light. The fill flash is for the people in the balloon. During flight the balloon rotates, thus there are many times when the sun is at your back, being able to fill the shadows with some light is beneficial.

    003 Changing light 2

    003 Changing light

    3. Camera – bring a second one along if possible

    While I am not a gear junky, this is one place where it is nice to have another camera on hand. The confining space and the dynamic conditions (take off, spinning, turning, landing, etc., along with the changing light) make an extra camera really handy to have to be able get a range of shots in a limited space, in a limited amount of time. There are really not many options for doing that without having multiple cameras.

    4. Lenses – take a long one

    So what lenses to put on your cameras, is the next logical question. My first tip with lenses would be to bring a long telephoto. I have seen too many people with a 16-35mm lens try get the whole landscape, but when you are up high, you can get everything in frame with a longer lens. At 16mm the features of the landscape become minuscule from the air. It may seem strange to you to use a longer focal length lens for landscapes, but they are your good friend when floating or flying.

    004 Lens 150mm

    150mm lens

    5. Don’t forget to just enjoy the trip

    Balloons are to airplanes, as sailboats are to motorboats – they are quiet and hover calmly. It’s a bit surreal that it’s just a pocket of air that so delicately hoists you off the ground and drifts with the wind. It’s so smooth, so enjoy it!

    Let me give you a breakdown of what I found worked for me, and if you have your own ideas please share them in the comments below.

    004 Lens 200mm

    My two cameras where a Canon 7D and a G-12. I brought two lenses with me, an equivalent 16-35mm lens, which stayed in my bag once we loaded up, and a 70-200mm. I brought a Canon 430ex II flash that was mounted on the hot shoe of my Canon G-12 (no need for it to be on the 70-200 when you are floating way up in the air). The flash was used primarily as fill light when the balloon would spin into the sunset with the sun behind. Thus, the basket, pilot and other passengers wouldn’t be black silhouettes or the background being totally blown out. I used a ¼ CTO gel to balance the orange morning sun.

    Using my 70-200mm lens I was able to compress the background while still encompassing the landscape. In this case using a higher f-stop could help for clarity of both foreground and background. However, depending on when you actually get up in the air, you might want some more speed while keeping your ISO down. You also need to remember that you are moving. On the other hand, while directly over a subject a little less depth of field can be used, so a larger aperture. Takeoff and landing would be the best times to get some nice landscapes, but inside the balloon safety is first, and we were instructed to have our cameras secured. Thus, after takeoff get ready to start shooting before you are just way too high.

    005 Zoom in

    While having coffee and getting instructions from our pilot I asked a question, made a joke (that was not about safety), and hinted at a corner spot. The pilot, in my case, goes up every day during the winter months, and was no fool when it came to understanding my intention. So what do you know, he assigned me first, right in the corner. Whether he did it for a tip or for photography sake, I have no idea, but it worked in my favor. Instead of only a 180 degree view, I saw more like 270 degrees and that was 25% more options. I took it.

    So go out there and get up in the air, land safely, and see the world from a new perspective. After all, photography is about perspectives and new horizons. Change your perspective of the world down here.

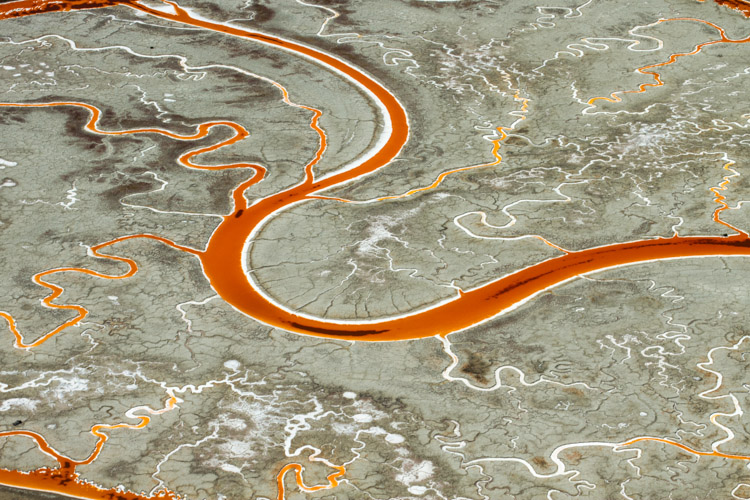
    006 Salt Ponds of San Fransisco Bay Areal Photo from Single Engine Prop Plane

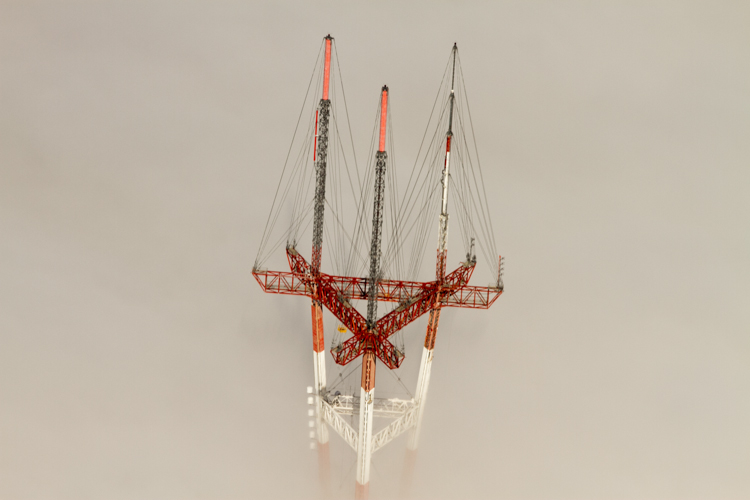
    007 Sutro Tower San Fransisco 170mm from Single Engine Prop Plane

    Seeing things in a new way can only make you understand your time on the ground that much better. As photographers a common goal we all share are the amazing visuals that we capture and create. So create from above, and share your thoughts in the comment section below.

    googletag.cmd.push(function() {
    tablet_slots.push( googletag.defineSlot( “/1005424/_dPSv4_tab-all-article-bottom_(300×250)”, [300, 250], “pb-ad-78623” ).addService( googletag.pubads() ) ); } );

    googletag.cmd.push(function() {
    mobile_slots.push( googletag.defineSlot( “/1005424/_dPSv4_mob-all-article-bottom_(300×250)”, [300, 250], “pb-ad-78158” ).addService( googletag.pubads() ) ); } );

    The post 5 Tips for Doing Photography from a Hot Air Balloon or Biplane by Branson Quenzer appeared first on Digital Photography School.

    Digital Photography School

  • Creating a Lens Flare Effect and Dust Particles in Photoshop

    This article isn’t about how to magically transform your images using Photoshop. The real magic of Photoshop is trying to convince the viewer that no effects were added at all, and that the image was captured in camera. Photoshop can add that little extra to your imagery. Conversely, it can also ruin an image if it’s overdone.

    I shoot to capture the best possible image as I can get at the time, but more often than not, time is not on my side. If I am shooting for a client, time is money. Deadlines and strict schedules are uppermost when dealing with a client. When shooting outdoors, I am dealing with natural light which is constantly changing and weather conditions, which may force me to shoot faster or abandon the shoot completely.

    So, when I get to look at my image(s) on the computer, I take the time to critically review them. As I shoot RAW, I need to apply basic post-processing to all my images. In some cases, I may need to add an extra enhancement, but that will depend on the image and what I need it to say.

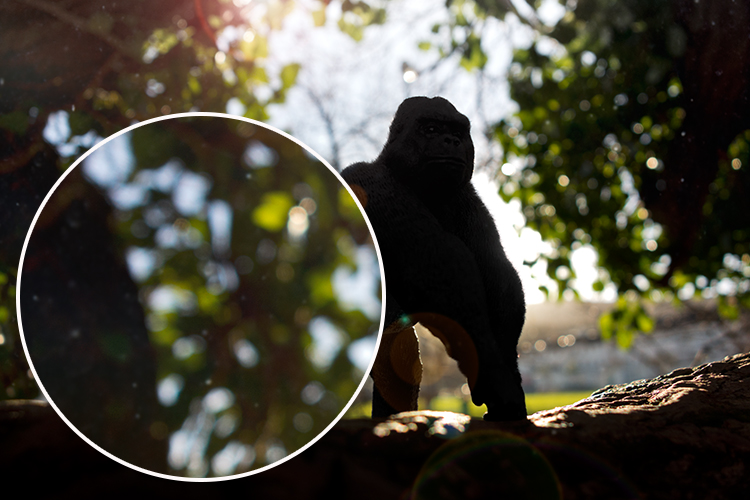
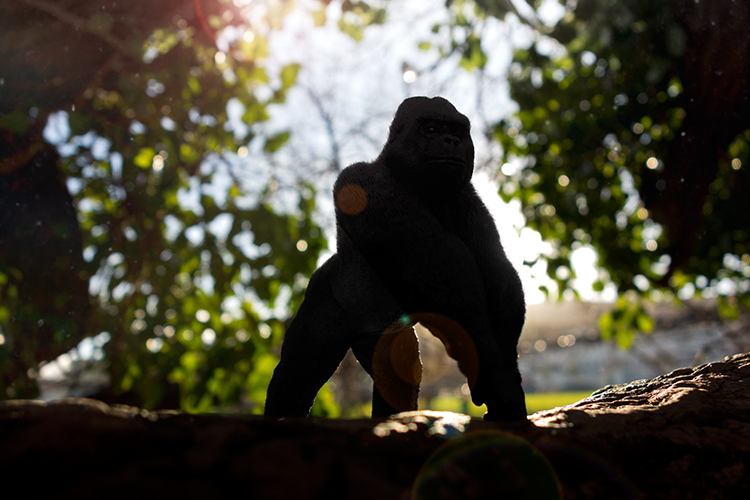
    Gorilla-with-lens-flare-and-dust-particles

    Lens Flare and dust particles added using Photoshop

    This is the power of post editing. To be able to add an enhancement to the image, to give it that extra drama or a desired effect that you wanted to convey in your image in the first place. It can be as subtle as adding dust particles, or a bit more dramatic such as a lens flare effect. Both of these effects, whether you use one or both together, can add that little bit of oomph!

    When applying any Photoshop effects, It’s not just about technique, although the know-how is important, but it is the application which is key:

    • How to execute the technique – different methods to achieve the same end result
    • When to use it – some images suit this technique over others
    • By how much?
    Before

    Before

    After

    After

    The above may sound quite obvious and fundamental, but I can’t stress it enough, especially if you are new to creating effects in Photoshop.

    • HOW = the technique. I will demonstrate how to create a lens flare effect non-destructively in Photoshop using the Lens Flare filter. I will also describe how to create your own simple custom dust particle brush. Plus, I’ll show you my own unique in-camera method to capture dust particles.
    • WHEN = you deciding if this technique will work on the particular image in question. Just because you know how to use a technique doesn’t mean you have to apply it to every image. Yes, by all means practice on your images until you have refined the process.
    • HOW MUCH = knowing how little of the technique to apply – less is more. Don’t be afraid to reduce the opacity on the layer that you have applied the technique on.

    This is where beginners can get carried away when learning post-processing techniques in Photoshop, for the first time. As tempting as it is, you want to show off your new skill and see the effect on your image in a dramatic way, try and keep it subtle.

    What is Lens Flare?

    Flare is particularly caused by a very bright light sources either in the image – which produces visible artifacts – or shining into the lens but not in the image – which produces a haze. Most commonly, this occurs when shooting into the sun (when the sun is in frame or the lens is pointed in the direction of the sun), and is reduced by using a lens hood or other shade. – as seen in Wikipedia

    If applied well, the lens flare effect really does convey that good-feeling summer shot.

    The Lens Flare Filter in Photoshop

    Filter-render-lens-flare

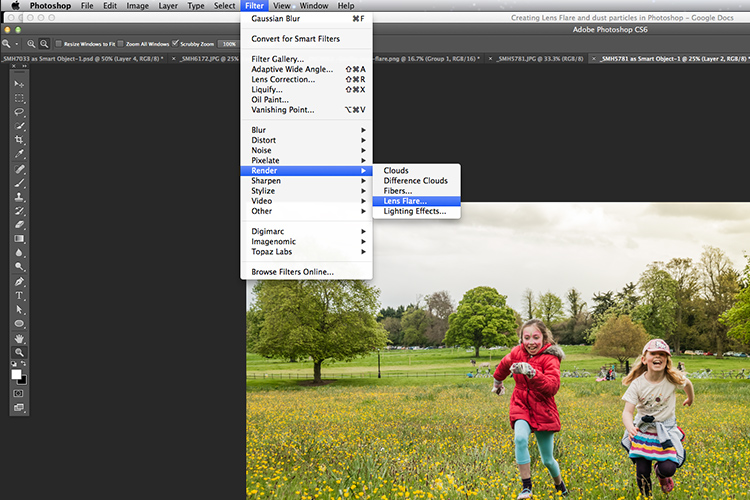
    The Lens Flare filter is found under Filter > Render > Lens Flare.

    The Lens Flare is found under Filter>Render>Lens Flare. However, this doesn’t work in the same way as an Adjustment Layer, as in non-destructively. The effect works directly on the image itself. It also won’t work on an empty layer. So, create a new layer above the image and fill it with black. Change the blend mode to Screen. Go up to the Menu Bar and go to Filter > Render > Lens Flare.

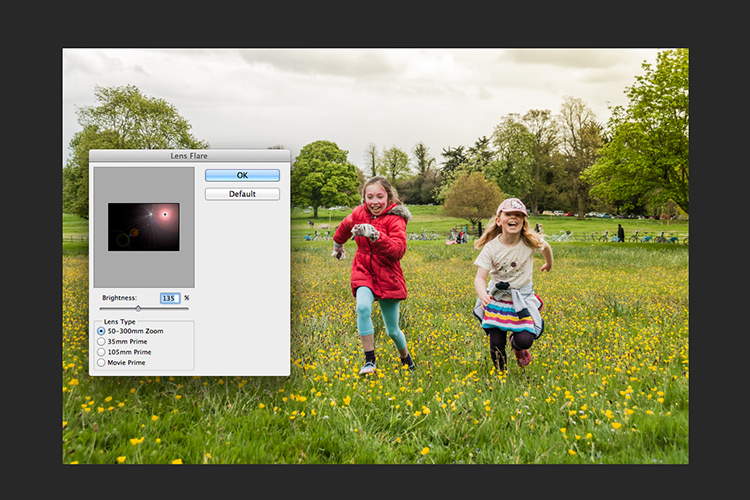
    As you can see in the image below, a small pop up dialog box appears with a preview window, and shows the four different types of lens flare available. Click inside the preview window to move the Lens Flare to whatever position you want.

    Filter-render-lens-flare

    The Lens Flare dialog box.

    50-300mm-zoom-lens-flare

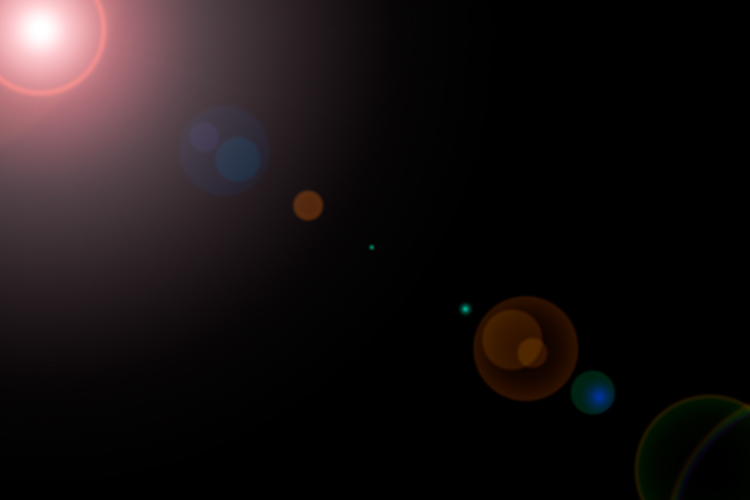
    This is the 50-300mm zoom Lens Flare effect on a layer filled with Black.

    105m-prime-lens-flare

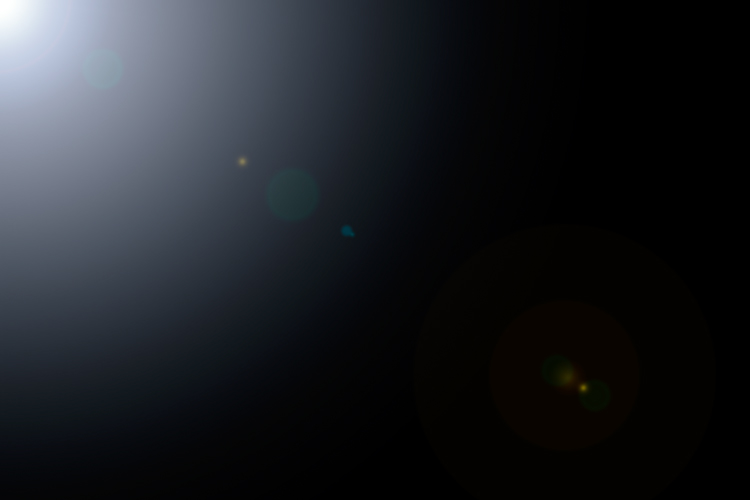
    This is the 105mm Lens Flare effect on a layer filled with Black.

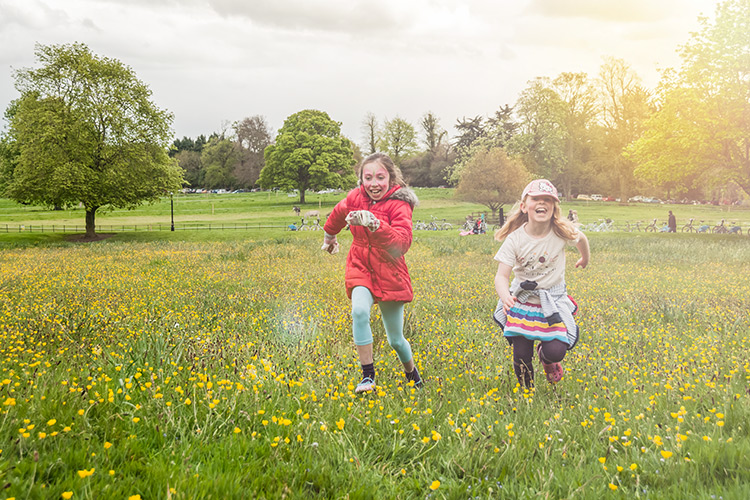
    Becky-and-Amy-with-lens-flare-applied

    Lens flare applied

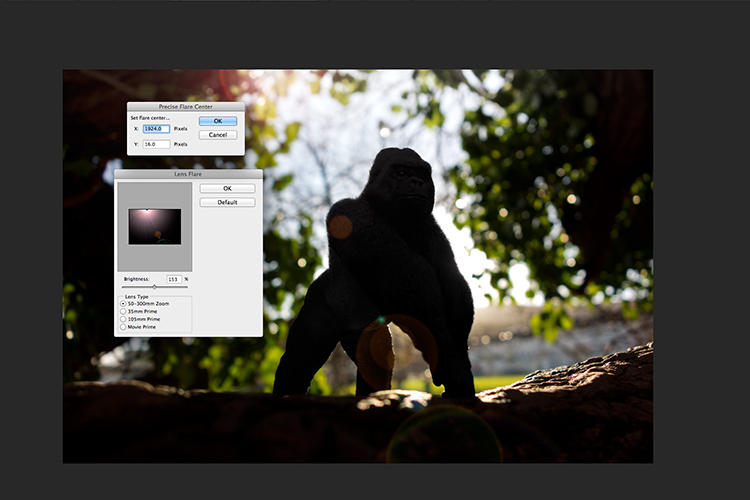
    Tip: To get a more precise position for the lens flare, bring up the Info Panel, and move your cursor over the spot on your image where you want the flare to be positioned. The x and y coordinates tell you the exact position in pixels. When you have the Lens Flare dialog box open, click on the preview window while holding down the Alt/Option button, and the precise Flare Center dialog box appears. Type in the x and y coordinates and click OK.

    Gorilla-precise-flare-center

    The precise Flare Center dialog box appears when you click on the preview window of the Lens Flare while holding down the Alt key on a Mac (Option on PC).

    How to create your own custom dust particle brush in Photoshop

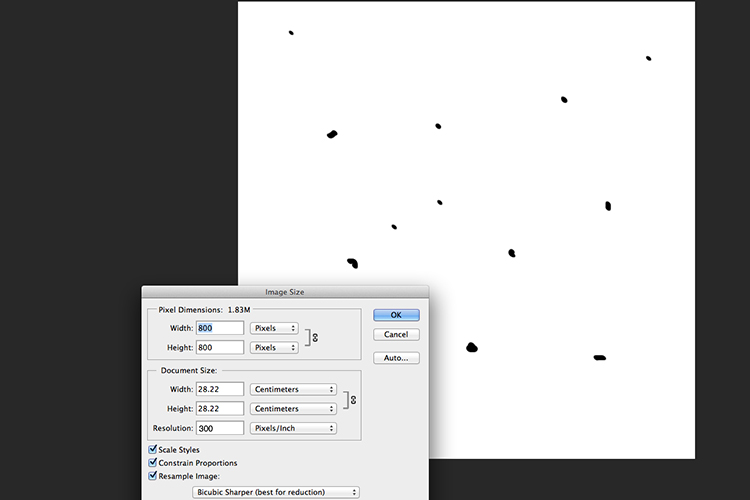
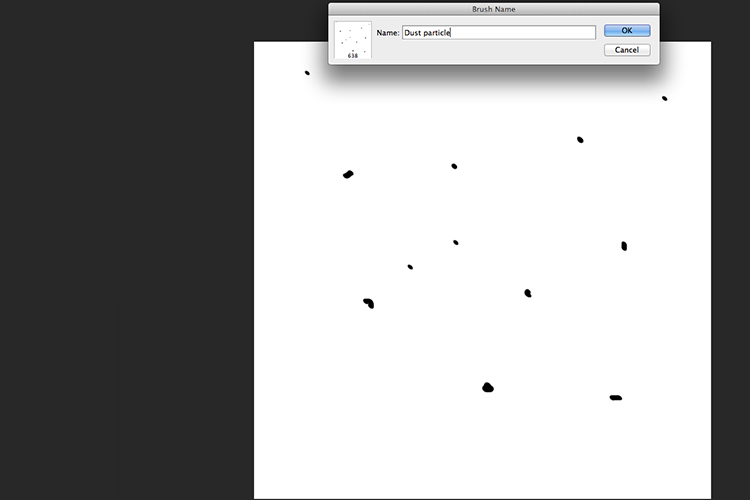
    To create your own custom dust particle brush in Photoshop is relatively simple. Open a new document in Photoshop, I made mine 800×800 pixels on a white background, set the dpi to 240 or 300. Use a small brush, hardness set to 25%, and use the color black. Create random small dots on the canvas. Not too many. Go up to the Menu Bar > Edit > Define Brush Preset. Type the name of your new brush and click OK.

    creating-new-document-custom-dust-particle-brush

    Create a new document with a white background 800px x 800px.

    naming-dust-particle-custom-brush

    Go to Edit > Define Brush Preset and name your new custom brush.

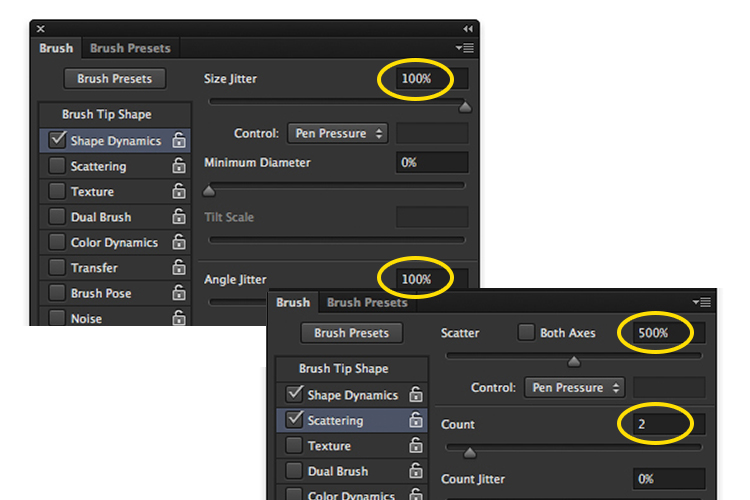
    Before you start using your brush, you need to change a few properties of the brush so that it behaves like dust particles. Go up to Window > Brush. This brings up the brush dialog box. Use the following brush settings (see below screenshots also) Change the spacing to 100%, click on the Shape Dynamics box and move the Size Jitter and the Angle Jitter sliders to 100%. Next click on the Scattering tick box. I moved the Scatter slider over to 500%. Tick on Both Axes. Keep the Count Jitter at 2.

    custom-brush-settings

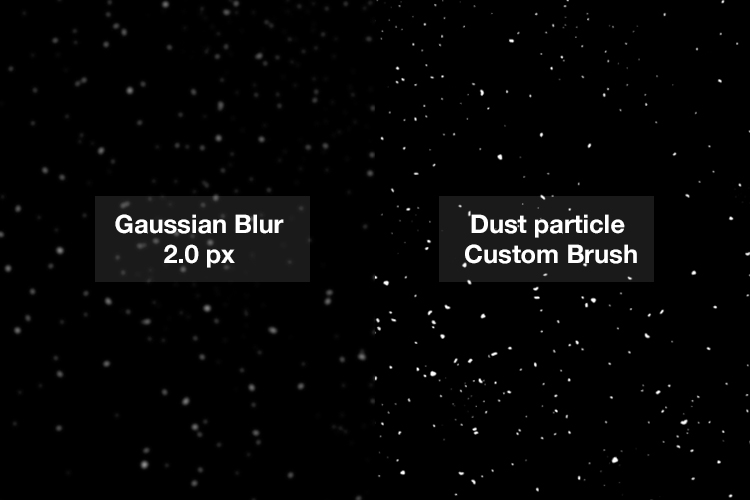
    Create a new blank layer over your image and fill it with black. Using the custom brush, set to white, start creating dust particles across the canvas. Change the blend mode to Screen and now you can see the dust particles as white specks. Add some Gaussian Blur and reduce the opacity down to around 75%. You can always add a new layer to build up the effect too.

    Dust-particles-with-custom-brush

    How to create dust particles in-camera

    I have to admit, this technique made me smile. I had been wracking my brains for a while for a possible solution to capture dust in-camera. The other morning, I got up early, as usual, to get my girls off to school. I looked out the kitchen window, the skyline was a lovely orange from the sun.

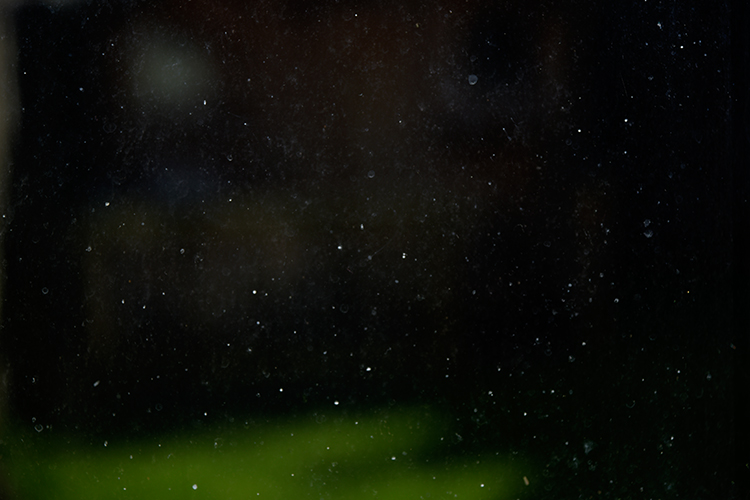
    I then noticed all the specks (dirt) on the window and I had an eureka moment, I grabbed my camera and I focused on the specks using an aperture f/4. I also underexposed it by two stops. I wanted the specks to show through a dark background. I brought this image into Photoshop and applied a Levels Curve Adjustment to darken the image even more. I placed this image on the photo of the Gorilla. I then changed the blend mode to screen. I added some Gaussian Blur and reduced the opacity. Not bad for what is essentially dirt on a window.

    Dust-particles-on-a-window

    Dust and dirt particles on a window.

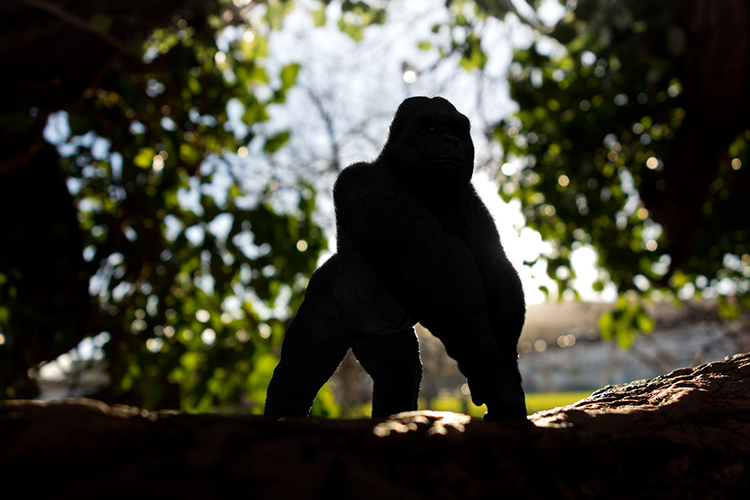
    small-toy-plastic-gorilla

    The image of the Gorilla without the Lens Flare effect and dust particles.

    zoomed-in-dust-particles

    Zoomed in area to show the dust particles I took of my own window!

    Disclaimer: I had to persist with dirty windows for weeks in the name of photography. That’s my story and I am sticking with it!

    Have you got a technique for creating your own flare or dust particles in Photoshop? If so, please share in the comments below.

    googletag.cmd.push(function() {
    tablet_slots.push( googletag.defineSlot( “/1005424/_dPSv4_tab-all-article-bottom_(300×250)”, [300, 250], “pb-ad-78623” ).addService( googletag.pubads() ) ); } );

    googletag.cmd.push(function() {
    mobile_slots.push( googletag.defineSlot( “/1005424/_dPSv4_mob-all-article-bottom_(300×250)”, [300, 250], “pb-ad-78158” ).addService( googletag.pubads() ) ); } );

    The post Creating a Lens Flare Effect and Dust Particles in Photoshop by Sarah Hipwell appeared first on Digital Photography School.

    Digital Photography School

  • How to Take Low Key Lighting Portraits

    Low key lighting when taking portraits is an effective technique that can leave you with some beautiful images.

    Low key lighting portrait

    In this video Gavin Hoey explains how to set up a low key lighting portrait in a small home or portable studio. It really is achievable with a relatively simple setup.

    If you give some low key lighting portraits a go we’d LOVE to see your results in comments below.

    Further Low Key Lighting Portrait Reading

    Interested in learning more? Here’s some tutorials in our archives on low key lighting.

    • How to Create Dark Moody Low-Key Portraits with Minimal Gear
    • Get an Invisible Black Background to Your Portraits – Shooting Anywhere
    • Setting The Mood With Low Key Lighting
    • Low-Key Lighting for Dramatic Portraits
    • Low Key Lighting Portrait Example

    googletag.cmd.push(function() {
    tablet_slots.push( googletag.defineSlot( “/1005424/_dPSv4_tab-all-article-bottom_(300×250)”, [300, 250], “pb-ad-78623” ).addService( googletag.pubads() ) ); } );

    googletag.cmd.push(function() {
    mobile_slots.push( googletag.defineSlot( “/1005424/_dPSv4_mob-all-article-bottom_(300×250)”, [300, 250], “pb-ad-78158” ).addService( googletag.pubads() ) ); } );

    The post How to Take Low Key Lighting Portraits by Darren Rowse appeared first on Digital Photography School.

    Digital Photography School

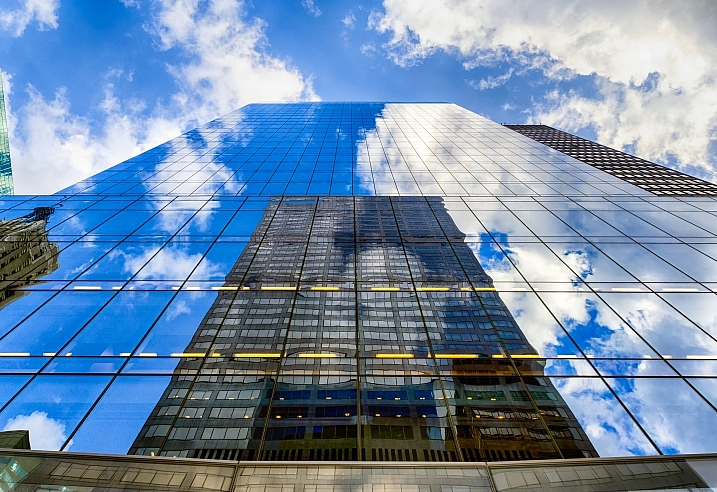
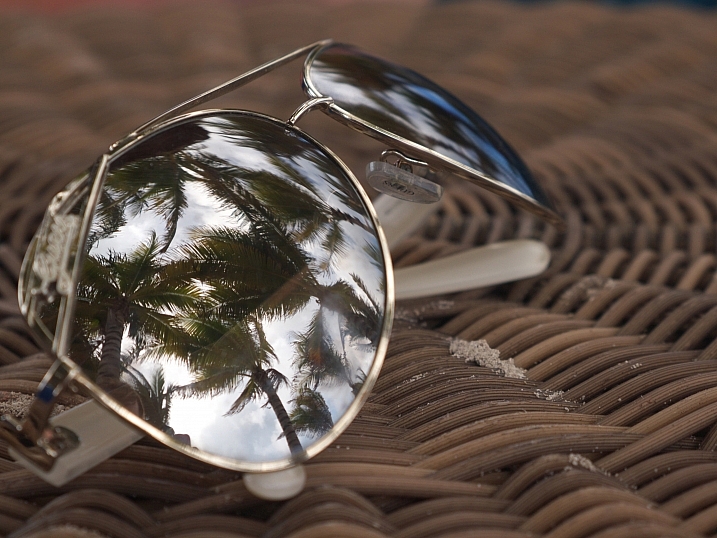
  • Weekly Photography Challenge – Reflections

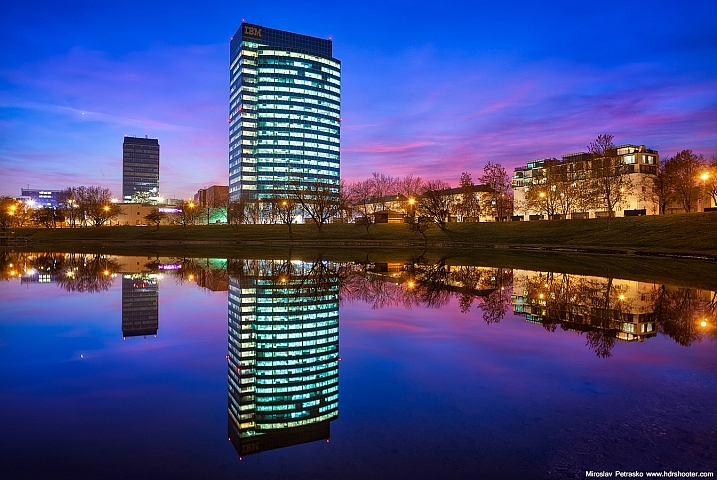
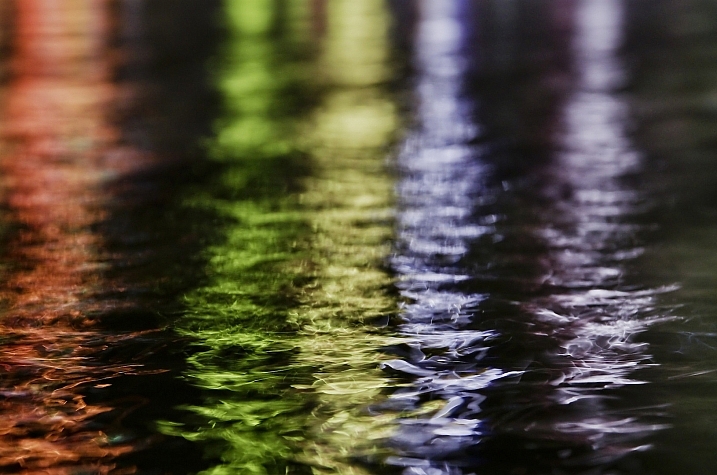
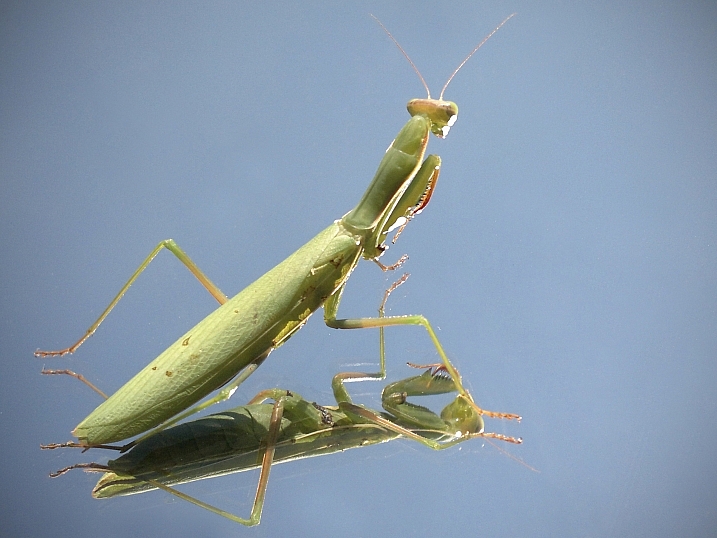
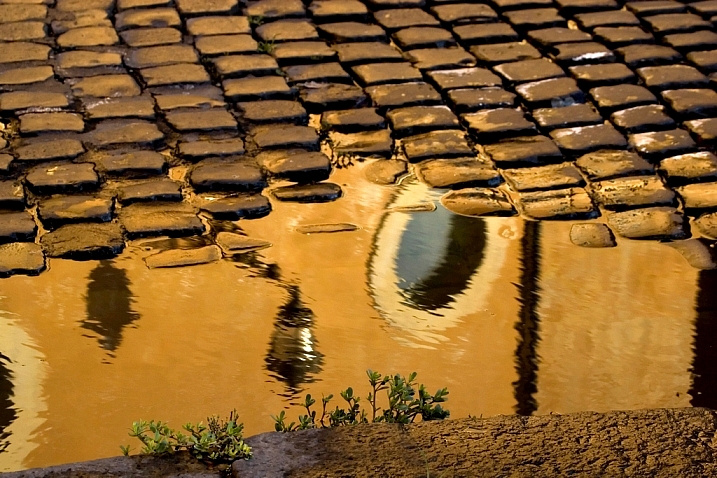
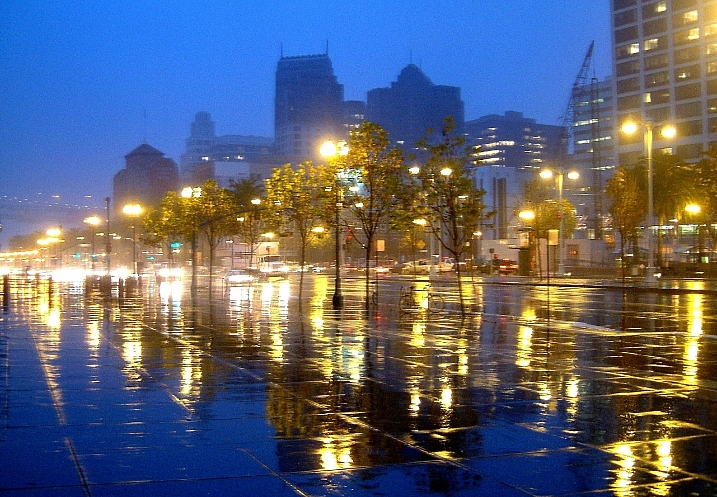
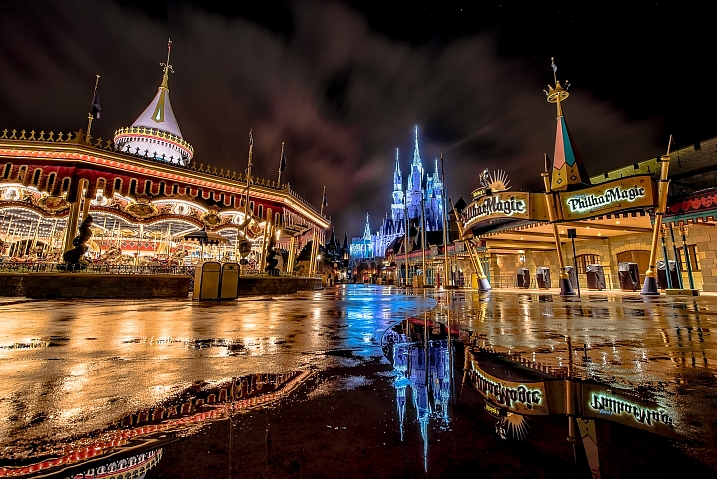
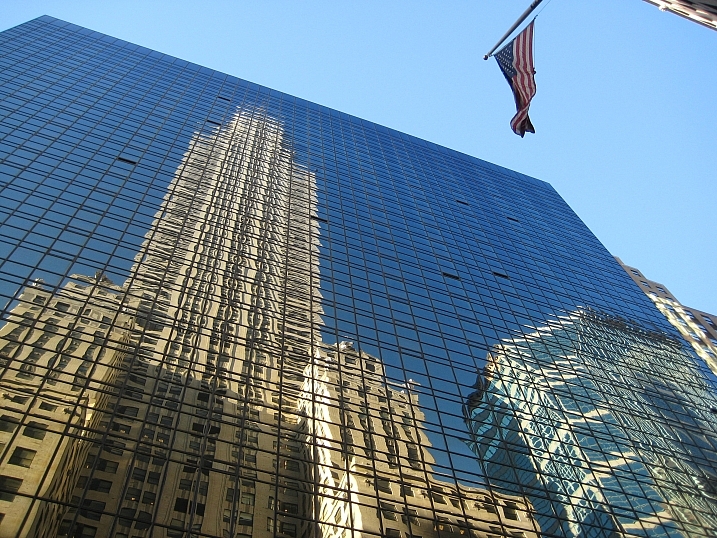
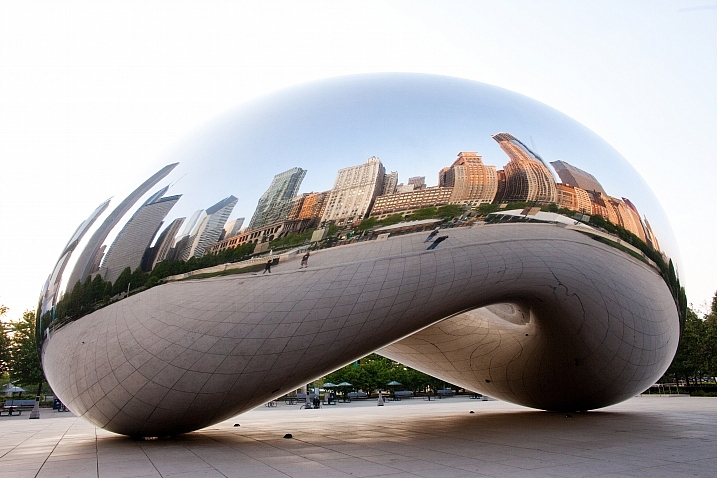
    First have a look at these: 24 Reflective Mirror Images to Make You Look Twice, then think about how you’re going to tackle this week’s challenge:

    Javier Díaz Barrera

    By Javier Díaz Barrera

    Weekly Photography Challenge – Reflections

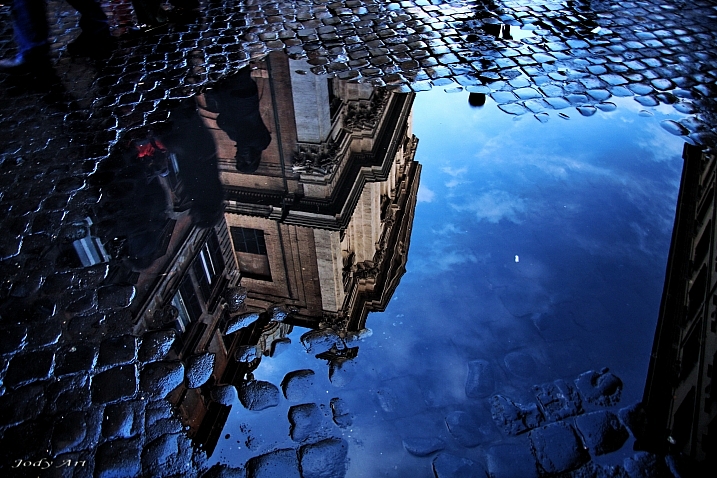
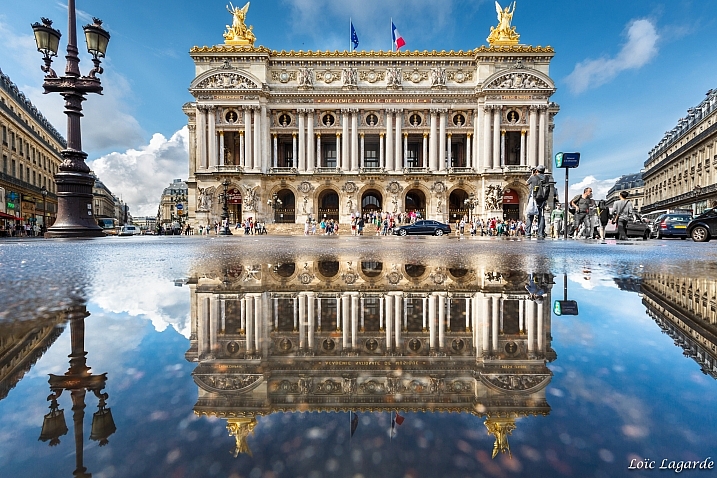
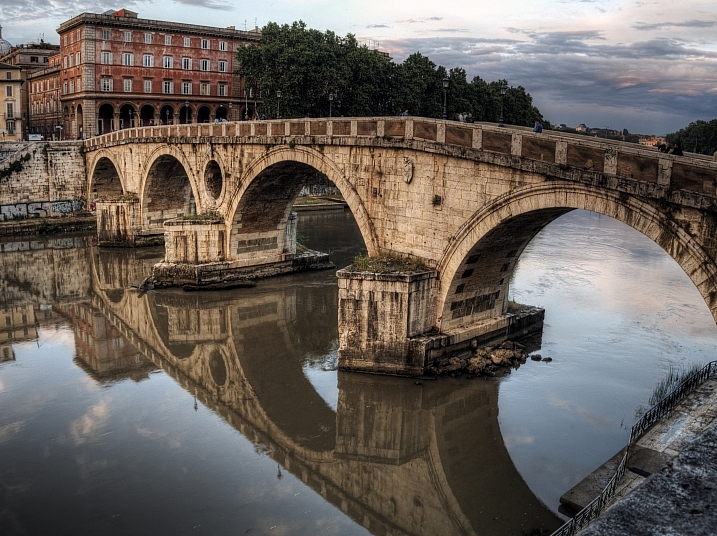
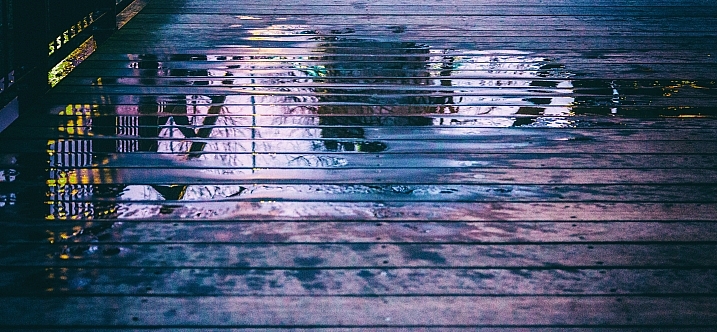
    Reflections can be made by anything that is smooth and glasslike: water, glass, windows, a puddle, plastic, etc. Look for unlikely sources and different camera angles, make your own puddles – get creative. Wander around your area and look for things that reflect.

    But – remember to still keep in mind all the things that make a good photo:

    • Good composition
    • Good light
    • A clear subject
    Gary Ullah

    By Gary Ullah

    Eduard Díaz I Puig

    By Eduard Díaz i Puig

    Tanyanat Pichitwong

    By Tanyanat Pichitwong

    Roman Boed

    By Roman Boed

    Share your images below:

    Simply upload your shot into the comment field (look for the little camera icon in the Disqus comments section) and they’ll get embedded for us all to see or if you’d prefer upload them to your favourite photo sharing site and leave the link to them. Show me your best images in this week’s challenge. Sometimes it takes a while for an image to appear so be patient and try not to post the same image twice.

    Wolfgang Staudt

    By Wolfgang Staudt

    Danna § Curious Tangles

    By danna § curious tangles

    googletag.cmd.push(function() {
    tablet_slots.push( googletag.defineSlot( “/1005424/_dPSv4_tab-all-article-bottom_(300×250)”, [300, 250], “pb-ad-78623” ).addService( googletag.pubads() ) ); } );

    googletag.cmd.push(function() {
    mobile_slots.push( googletag.defineSlot( “/1005424/_dPSv4_mob-all-article-bottom_(300×250)”, [300, 250], “pb-ad-78158” ).addService( googletag.pubads() ) ); } );

    The post Weekly Photography Challenge – Reflections by Darlene Hildebrandt appeared first on Digital Photography School.

    Digital Photography School

  • 24 Reflective Mirror Images to Make You Look Twice

    Kids love a good puddle to splash in – photographers love them for a different reason – reflections.

    In this collection of images have a look at how these photographers captured reflective surfaces in creative ways:

    Darlene Hildebrandt

    By Darlene Hildebrandt

    Nick Kenrick

    By Nick Kenrick

    Theophilos Papadopoulos

    By Theophilos Papadopoulos

    Karol Franks

    By Karol Franks

    Jos Van Wunnik

    By Jos van Wunnik

    Highlights6

    By highlights6

    ANDY ARCIGA ( Www.arcigaandy.com )

    By ANDY ARCIGA ( www.arcigaandy.com )

    Jon Wallach

    By Jon Wallach

    Miroslav Petrasko

    By Miroslav Petrasko

    ?Jin Mikami?

    By ?Jin Mikami?

    Mario

    By Mario

    Darlene Hildebrandt

    By Darlene Hildebrandt

    Stefano Corso

    By Stefano Corso

    Jody Sticca

    By Jody Sticca

    Loïc Lagarde

    By Loïc Lagarde

    Neil Howard

    By Neil Howard

    Davide D'Amico

    By Davide D’Amico

    Thomas Hawk

    By Thomas Hawk

    ?ethan

    By ?ethan

    Brett Kiger

    By Brett Kiger

    Phil Whitehouse

    By Phil Whitehouse

    Thomas Hawk

    By Thomas Hawk

    Roman Kruglov

    By Roman Kruglov

    Moniek Van Rijbroek

    By Moniek van Rijbroek

    googletag.cmd.push(function() {
    tablet_slots.push( googletag.defineSlot( “/1005424/_dPSv4_tab-all-article-bottom_(300×250)”, [300, 250], “pb-ad-78623” ).addService( googletag.pubads() ) ); } );

    googletag.cmd.push(function() {
    mobile_slots.push( googletag.defineSlot( “/1005424/_dPSv4_mob-all-article-bottom_(300×250)”, [300, 250], “pb-ad-78158” ).addService( googletag.pubads() ) ); } );

    The post 24 Reflective Mirror Images to Make You Look Twice by Darlene Hildebrandt appeared first on Digital Photography School.

    Digital Photography School

  • 8 Reasons to Love Long Exposure Photography

    Long exposure photography is not a new type of photography, but it is one that is gaining in popularity. Many photographers are buying Neutral Density filters (ND Filters – more on them below) to capture their own long exposures. It is quite an addictive form of photography. Over the last couple of years I have added many different ND filters to my kit. I use Formatt Hitech filters, though there are other brands that have them as well. Here are some reasons why I love this type of photography.

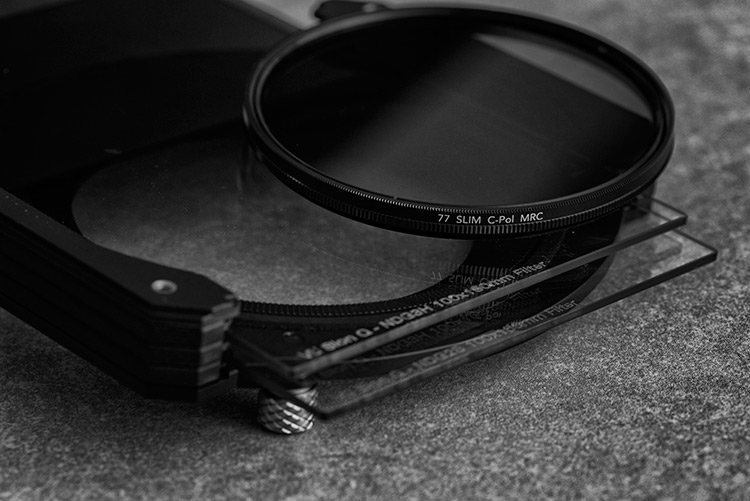
    Drop-in and screw-in filters

    Note: Neutral Density filters or ND Filters are designed to restrict the amount of light that enters the lens and camera. They can either screw onto the end of the lens or you can buy brackets that will fit square ones. They came in different densities, and how dark they are is referred to by how many stops of light they block. The most common ND filter is the 10 stop which many brands make. The neutral refers to them having no colour, supposedly. They are meant to have no colour and cause no colour cast in your images, though the more stops the filter has, often the more likely you are to get some colour cast. Cheap ND filters always have a colour cast, usually magenta. If you want to get serious about doing long exposure photography, then purchasing good quality filters from the start is something you will never regret.

    1 – Get a smooth look to water, or show how the water moves

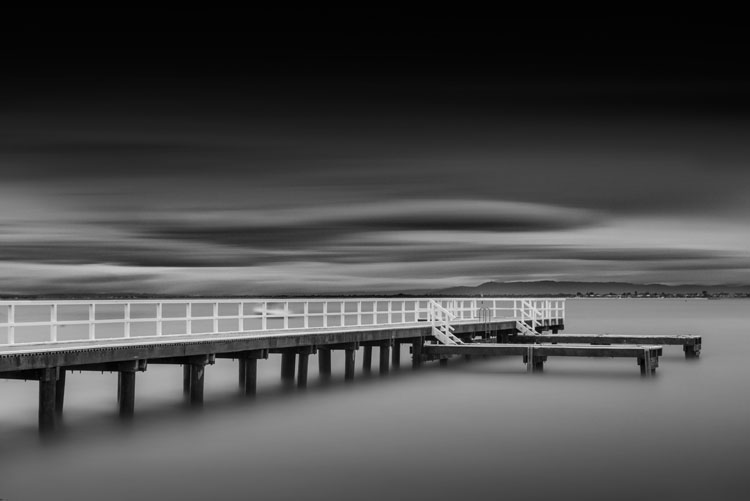
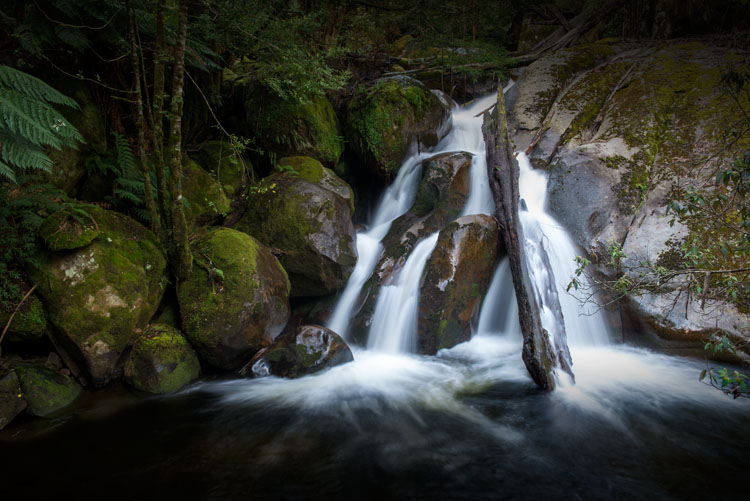
    One of the more popular ways of using long exposures is to smooth out water to make it look still or frozen. This can be done with the ocean, rivers, and lakes. It can make the water in a scene less distracting because the water doesn’t have any movement in it. The image is then more about the sky, the rocks or whatever else is there.

    LeanneCole-7reasons2lovelongexposures-daveysbag

    A pier at Davey’s Bay, the long exposure has blurred the clouds and smoothed the water – 5 minute exposure.

    Another alternative is to do long exposures of around a second, so you can see the movement of the water. As the tides come in and out on the beach, you can see where it has been, it almost looks like a slow motion capture. It’s a wonderful effect and we are seeing it a lot more. Though water moving on the beach isn’t the only way to use it, water falling over rocks can be just as engaging.

    Waterfalls are another type of long exposure that people love. Though many waterfalls are down in canyons, you still need a ND filter to get that smooth marshmallow effect with the water as it flows down. Though, you don’t often need a multi-stop one like you would for the previous water examples.

    LeanneCole-7reasons2lovelongexposures-taggertycascades

    Adding a few seconds (1.33 seconds) to an image of a waterfall gives it a lovely marshmallow effect. You can also see the movement of the water.

    2 – Get blurred clouds

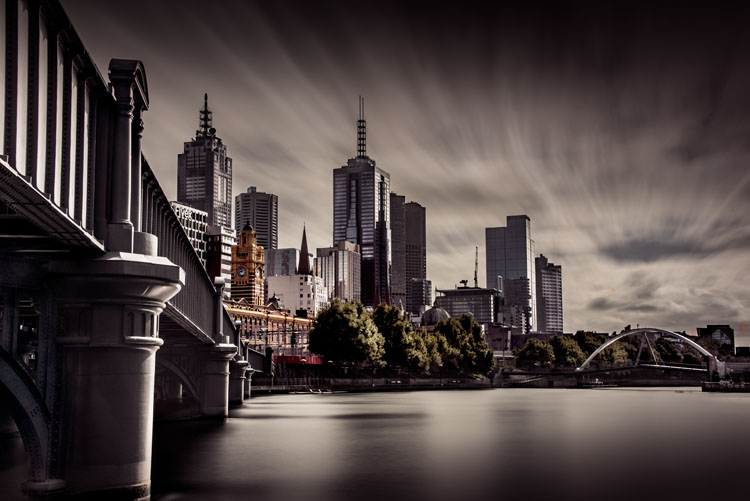
    Architecture is a very popular subject for long exposures because you can blur the clouds. It gives the image a different look, and it almost seems like your subject is lost in time. With blurring the clouds, it also makes the building(s) you are photographing your main focus point, and gets rid of any distractions.

    LeanneCole-7reasons2lovelongexposures-melbourne

    Melbourne from across the river. The long exposure (4 minutes for this shot) gives the view a different feel to what we normally get.

    3 – You can clear spaces of people and traffic

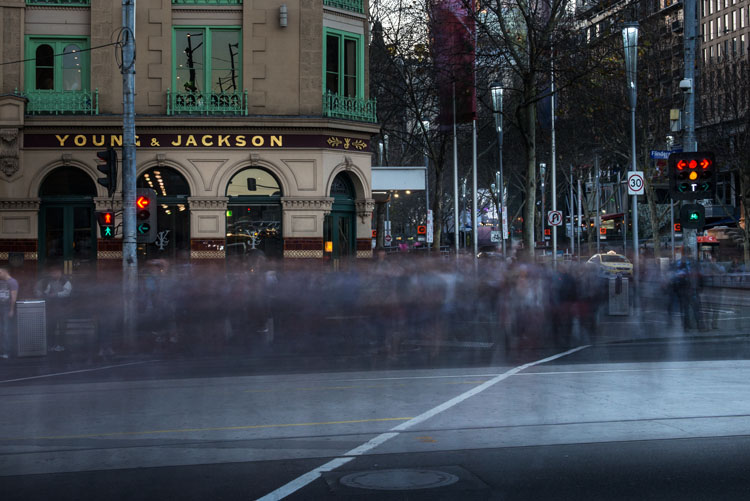
    If you love photographing areas in towns and cities, but one of the challenges of that type of photography is that people are always around, long exposures using filters will help you clear those distractions. Exposures of several minutes can almost clear a scene of people, though it depends on the density of them. A scene where there are only a few people walking around can come out with the appearance of being empty with a long exposure. However, where there are many people you will find that they just blur, though this can be a great effect as well.

    LeanneCole-7reasons2lovelongexposures-youngandjacksonscorner

    Photographing a busy intersection with a ND filter makes people look like ghosts – 30 second exposure.

    4 – There is a quietness about the work

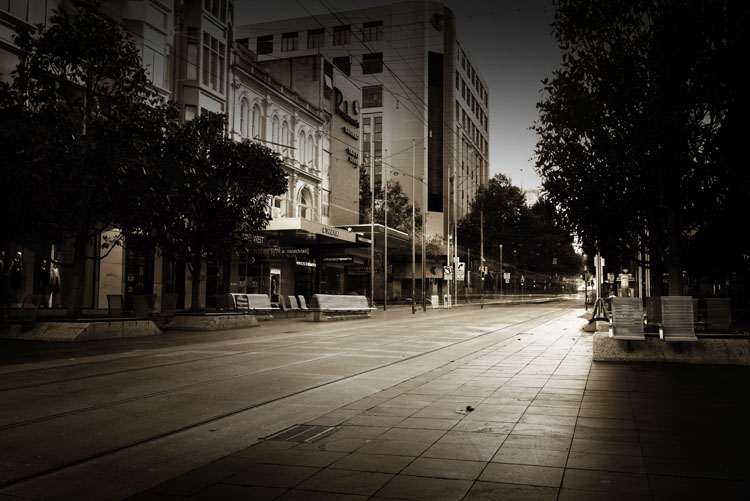
    Once people are introduced into a scene that you are photographing, it brings with it noise, as in how people see the images. They can be noisy, and whether people looking at the images realize it or not, they hear what they would hear if they were actually there. Vehicles can have a similar effect.

    LeanneCole-7reasons2lovelongexposures-bourkestmall

    Bourke Street Mall at peak hour, a 10 minute exposure has removed the people and given it an empty feeling.

    If you do a long exposure of the same thing, that noise is gone. Often when you see a long exposure image it has a quietness to it. Fill a room with images done this way and put people in it, they will feel as though they have to be quiet.

    5 – Take photos of a common subject and give it a completely different feel

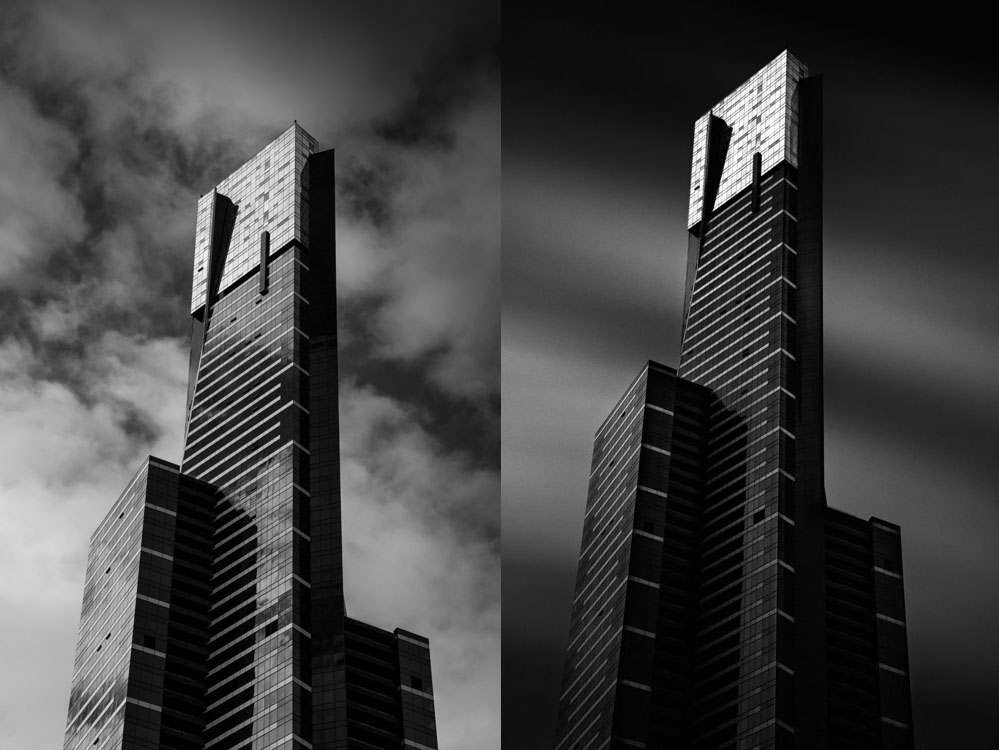
    In every city around the world there are iconic places and scenes that everyone is trying to photograph differently than others. If you have some ND filters and your tripod, you can create an image that not many others get. Especially when travelling, not many people have filters with them. You would have an opportunity to get something quite different to the thousands of other photos that are taken in those places. Of course it is a given that they are places where you can set up a tripod.

    LeanneCole-7reasons2lovelongexposures-eurekatower

    Eureka Tower is a very photographed building in Melbourne, the image on the right is similar to what most people get, but by adding a ND filter you give a well photographed building a different look. Left image: 1/200th – Right image: 6 minutes.

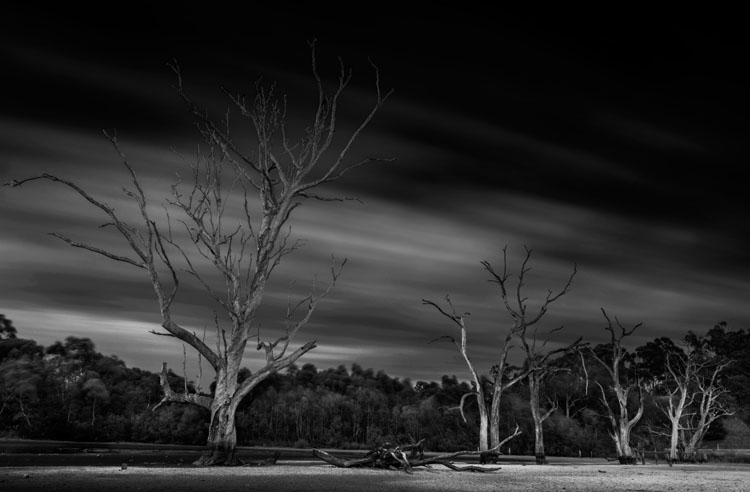
    6 – Give a landscape a sense of time, or time passing

    When you have images of clouds being blurred as they go over the top of a building or a landscape, it seems like you have captured time. Many people feel like they are looking at time passing. The long exposure is taken over a period of time, so it makes sense that you would get that feeling when you look at those images.

    LeanneCole-7reasons2lovelongexposures-banyuleflats

    Dead trees in a dried out swamp, and the moving clouds give the impression they have been there for an eternity – 3 minute exposure.

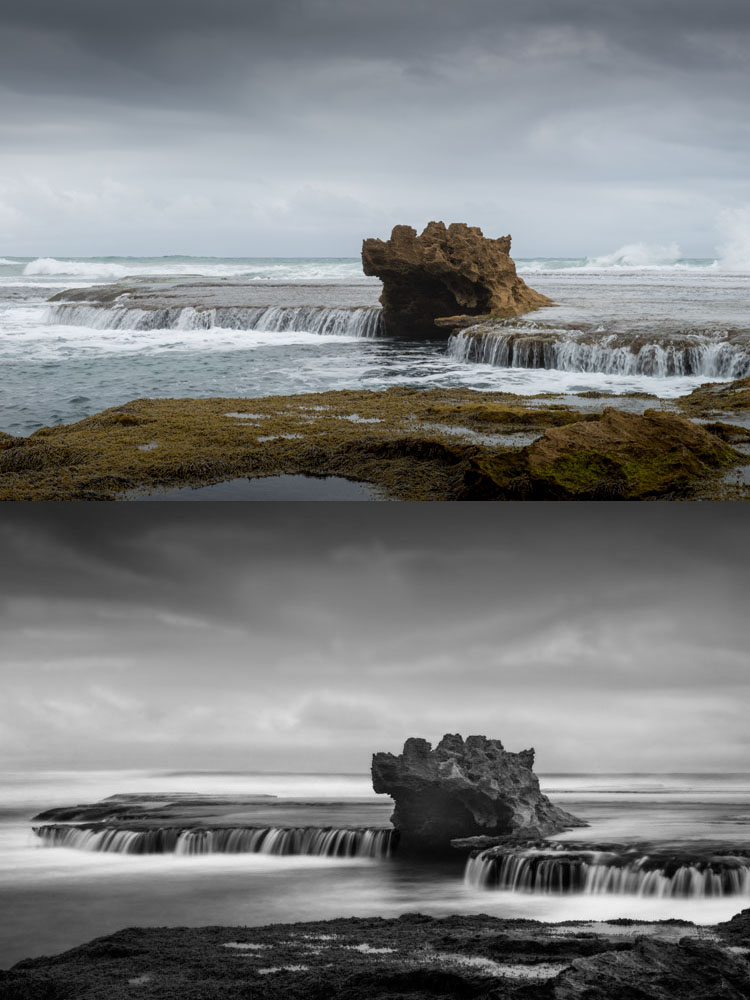
    7 – Images have a surreal look and give you a different perspective

    One of the great aspects of long exposure photography is that you can set up your camera, your tripod, and slot in your neutral density filter, but you won’t know what you will get until the image is taken. It will give you an image that is nothing like what you can see with your eyes. When you get the images onto your computer it is always a surprise to see exactly what you have captured.

    LeanneCole-7reasons2lovelongexposures-dragonshead

    The same image, one take without the ND Filter and the second one with it. It gives the scene a completely different feel. Top image: 1/50th – Bottom image: 13 seconds.

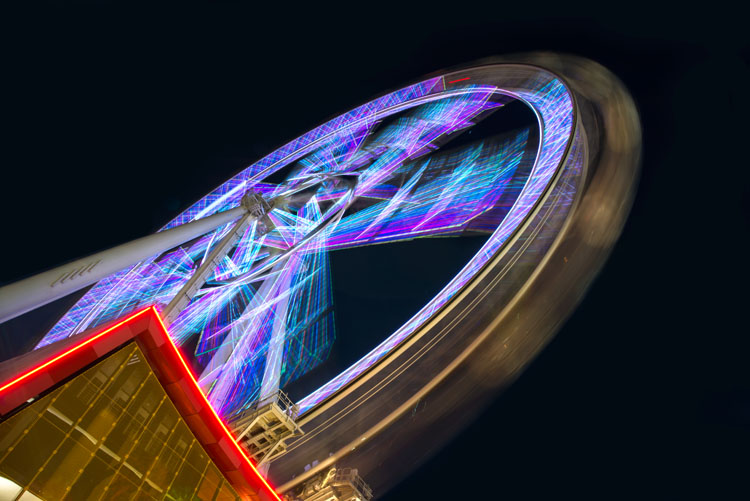
    8 – Night Photography is great for the same reasons

    Night photography gives you an opportunity to take photos and not have to worry about filters. You can expose for however long you need. If it;s a windy evening and there are clouds in the sky, you will get movement in your images. If you are taking photos across a water way, then the water will be smooth, and you will get reflections of the lights if there are some on the other side. For all the reasons stated for long exposures, night photos have the same effect.

    LeanneCole-7reasons2lovelongexposures-melbournestar

    A night long exposure makes the Melbourne Star blurred and you can see how it moves – 2 minute exposure.

    These are the reasons why I think long exposure photography is wonderful. If you are curious and want to try doing these then I am sure you will become addicted like many others. If you already do them, you might have your own reasons and perhaps you would like to share with us what they are in the comments below as well as your long exposure images.

    googletag.cmd.push(function() {
    tablet_slots.push( googletag.defineSlot( “/1005424/_dPSv4_tab-all-article-bottom_(300×250)”, [300, 250], “pb-ad-78623” ).addService( googletag.pubads() ) ); } );

    googletag.cmd.push(function() {
    mobile_slots.push( googletag.defineSlot( “/1005424/_dPSv4_mob-all-article-bottom_(300×250)”, [300, 250], “pb-ad-78158” ).addService( googletag.pubads() ) ); } );

    The post 8 Reasons to Love Long Exposure Photography by Leanne Cole appeared first on Digital Photography School.

    Digital Photography School

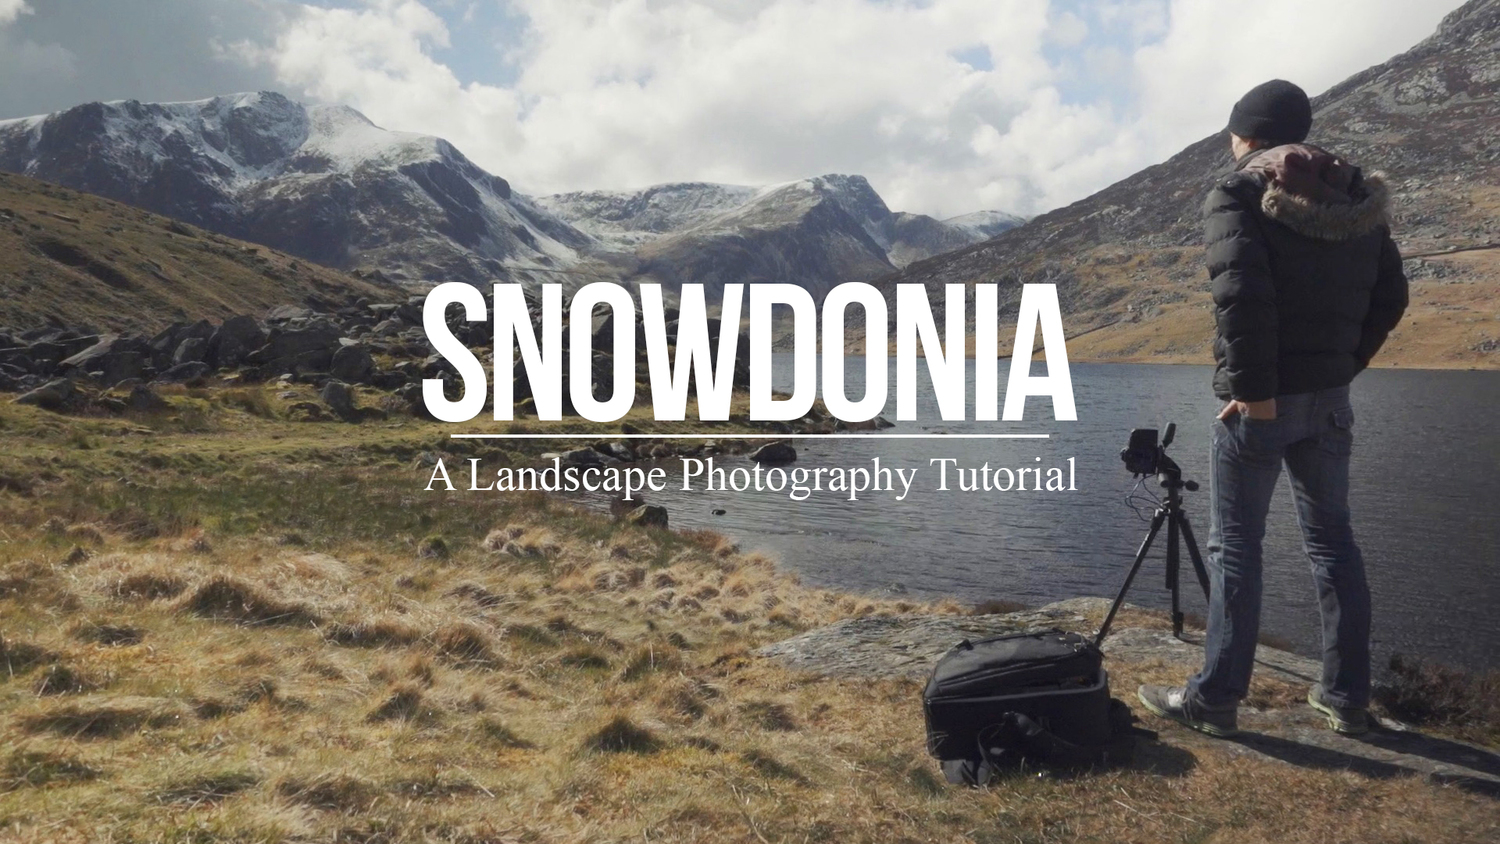
  • A Landscape Photography Tutorial (from a Portrait Photographer Trying Something New)

    landscape-photography-tutorial

    Sometimes when you’re in a rut the best way to get out of it is to do something completely out of the box and try something new – something a little risky.

    Portrait photographer Sean Tucker changed things up recently but setting out on a landscape photography road trip.

    He videos the experience and I think the result is fascinating – both to see how he approached his landscape photography but also to hear his insights on stepping outside his comfort zone to approach a new type of photography for him.

    I like what he wrote in his blog about the experiment:

    “There was no guarantee the trip wouldn’t be a waste as I’m not a professional landscape photographer by any means, but I think the best creativity will always come out when you are taking risks.”

    Grab a cup of your favourite beverage and settle down to journey with Sean. The end results are at the end of the video.

    Have you ever stepped out of your normal type of photography to try something new like Sean did?

    Further Reading for helping you to break out of a photography rut:

    • 10 Tips to Motivate You out of a Photography Rut
    • 5 Ways To Break Out of a Creative Photography Rut
    • Are You in a Photography Rut? 11 Tips to Get Out of It!

    googletag.cmd.push(function() {
    tablet_slots.push( googletag.defineSlot( “/1005424/_dPSv4_tab-all-article-bottom_(300×250)”, [300, 250], “pb-ad-78623” ).addService( googletag.pubads() ) ); } );

    googletag.cmd.push(function() {
    mobile_slots.push( googletag.defineSlot( “/1005424/_dPSv4_mob-all-article-bottom_(300×250)”, [300, 250], “pb-ad-78158” ).addService( googletag.pubads() ) ); } );

    The post A Landscape Photography Tutorial (from a Portrait Photographer Trying Something New) by Darren Rowse appeared first on Digital Photography School.

    Digital Photography School

  • 20 Awesome Mother’s Day Gifts for Photographers

    If you’re like me, you love Mother’s Day, don’t you? We love it not only for a chance to greet our dearest women (or accept greetings if you’re a Mom), but merely for a reminder of what really matters in life. Every Mother’s Day is another chance for us to see that life is not about the number of figures Continue Reading

    The post 20 Awesome Mother’s Day Gifts for Photographers appeared first on Photodoto.


    Photodoto

  • Six Essential Steps to Taking Great Photographs

    Whether you have been creating photographs for years, or only for few weeks, your goals and dreams are to create great photographs that everyone will admire. You may notice this is not an easy task, and I’m sure that most of the time you experience more disappointments than successes. But don’t worry, I have for you six essential steps that will help you speed up the process, and give you confidence on your journey to these elusive great photographs.

    Step 5 - Organise by eva polak

    Step 1 – See

    Seldom does a photograph succeed because of unusual technique or exotic equipment. Most of the time it succeeds for one simple reason – the photograph was well seen. So, to create great photographs we just need to learn to see better.

    Unfortunately this isn’t as easy as it sounds. There’s more to seeing than just looking. It requires time and patience. Begin by concentrating on the objects before you; see how light strikes those objects; see colour, see quality and direction of light, see contrast, see texture, lines,forms and shapes, see details.

    The strength of a photograph is directly related to how well, and how carefully you see things around you.

    Step 1 - See by eva polak 2 Step 1 - See by eva polak

    Step 2 – Feel

    Feeling has to do with the emotions generated by a place or subject. Sometimes you need to just sit and absorb your surroundings. Listen to the wind and the birds. Smell the flowers. Feel the rough texture of the trunk you sit on. If you are photographing an animal, watch its movement and behaviour. If you are photographing people, listen to their words, and try to understand their feelings expressed by body language. You can’t photograph the smell of flowers, the sound of birds, or the feelings of a person, but the emotions generated by them can guide you in finding the essence of the scene or subject.

    Step 2 - Feel by eva polak 2 Step 2 - Feel by eva polak

    Step 3 – Think

    This is the most important step in the process. Strong images begin in the mind, not in the camera. Before you begin photographing ask yourself, “Why am I about to take this photo?”

    Think about how you will use that sensual input and combine it with your camera, the lighting, and the mood. Is the lighting the best? Would soft, overcast light work better? What about angle of view? High angle? Low angle? Which lens will give the effect you are after? What about shutter speed and aperture?

    Answering all these questions is very easy when you have a clear idea of why you want to take an image. Your choices will be completely different when you want to just record your holiday, as opposed to capturing the warm glow cast over the scene by the evening light.

    Step 3 - Think by eva polak 2 Step 3 - Think by eva polak

    Step 4 – Isolate

    Many good shots have been spoiled through poor composition. We tend to concentrate our attention on the subject of a photo, remaining oblivious to what is going on beyond. Make a habit of spending just a second or two before pressing the shutter, checking the viewfinder for any unwanted elements. Get rid of those chaotic objects in the picture. Simplify. Isolate only those elements that convey the message you are trying to express. Emphasize the strong lines, shapes, patterns, textures or colours – but not all of them at once. Be bold and decisive. Ask yourself why. What does it contribute to the overall image? Can you make it stronger by isolating even more? Would you hang that picture on your wall? If not, why not?

    Step 4 - Isolate by eva polak Step 4 - Isolate by eva polak_2

    Step 5 – Organize

    Having isolated carefully, you now need to organize or arrange the elements in the strongest possible way. Where should you place the subject in the frame? In the centre? If so, why? The arrangement may be too boring or static, or on the other hand, it may convey a sense of peacefulness. Or should you put the subject near the edge of the frame? What about the picture orientation itself? You have a choice of creating a vertical or a horizontal image. Which is best for the subject? Vertical orientation tends to emphasize vertical lines or the height of things. Horizontal orientation can give emphasis to sweeping panoramas or the movement of subjects. When you make these choices, always by guided by the message that you are trying to express.

    Step 6 - Experiment by eva polak Step 6 - Experiment by eva polak_2

    Step 6 – Experiment

    Digital photography makes it easy to experiment because you have instant feedback on the LCD screen. Look for new ways to portray familiar subjects. Don’t always photograph the same kinds of scenes in the same ways. Be creative, try different lenses or compositions or angles of view. Play with light. Investigate, explore, observe, evaluate. Don’t be afraid to make mistakes, and above all, have fun!

    googletag.cmd.push(function() {
    tablet_slots.push( googletag.defineSlot( “/1005424/_dPSv4_tab-all-article-bottom_(300×250)”, [300, 250], “pb-ad-78623” ).addService( googletag.pubads() ) ); } );

    googletag.cmd.push(function() {
    mobile_slots.push( googletag.defineSlot( “/1005424/_dPSv4_mob-all-article-bottom_(300×250)”, [300, 250], “pb-ad-78158” ).addService( googletag.pubads() ) ); } );

    The post Six Essential Steps to Taking Great Photographs by Eva Polak appeared first on Digital Photography School.

    Digital Photography School