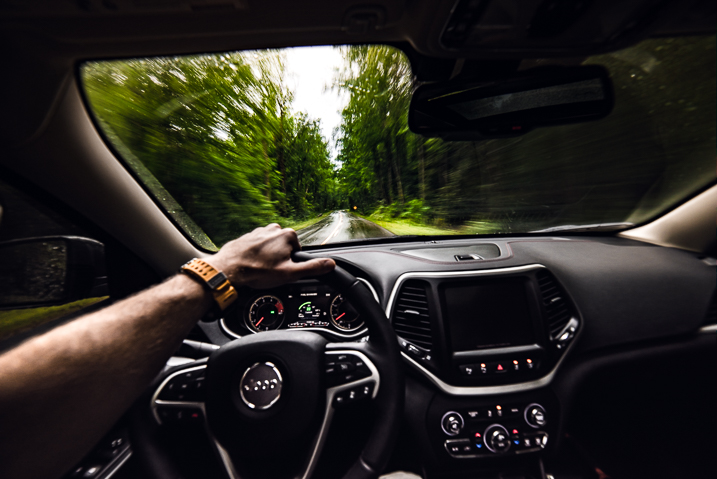
Category: Photography

  • Photographer’s Dress Code – What to Wear to a Photo Shoot

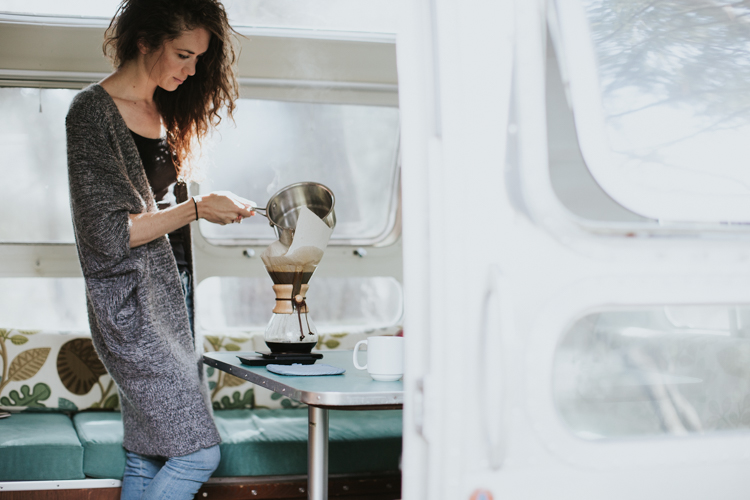
    As a budding photographer, one of the biggest questions that will eventually come to mind is, “What should I wear to a photo shoot? Is there a photographer’s dress code?” The answer varies widely depending on the type of photo shoot you’re conducting, the specific client you’re working with, your overall style and brand as a photographer, and the culture of the region where you’re shooting.

    A portrait photographer, for example, may have more flexibility in how he or she dresses compared to a corporate event photographer. Similarly, a photographer shooting in the West Coast of America will likely be able to dress more casually than an East Coast photographer. All variations aside, here are some general photographer dress code guidelines to start off with.
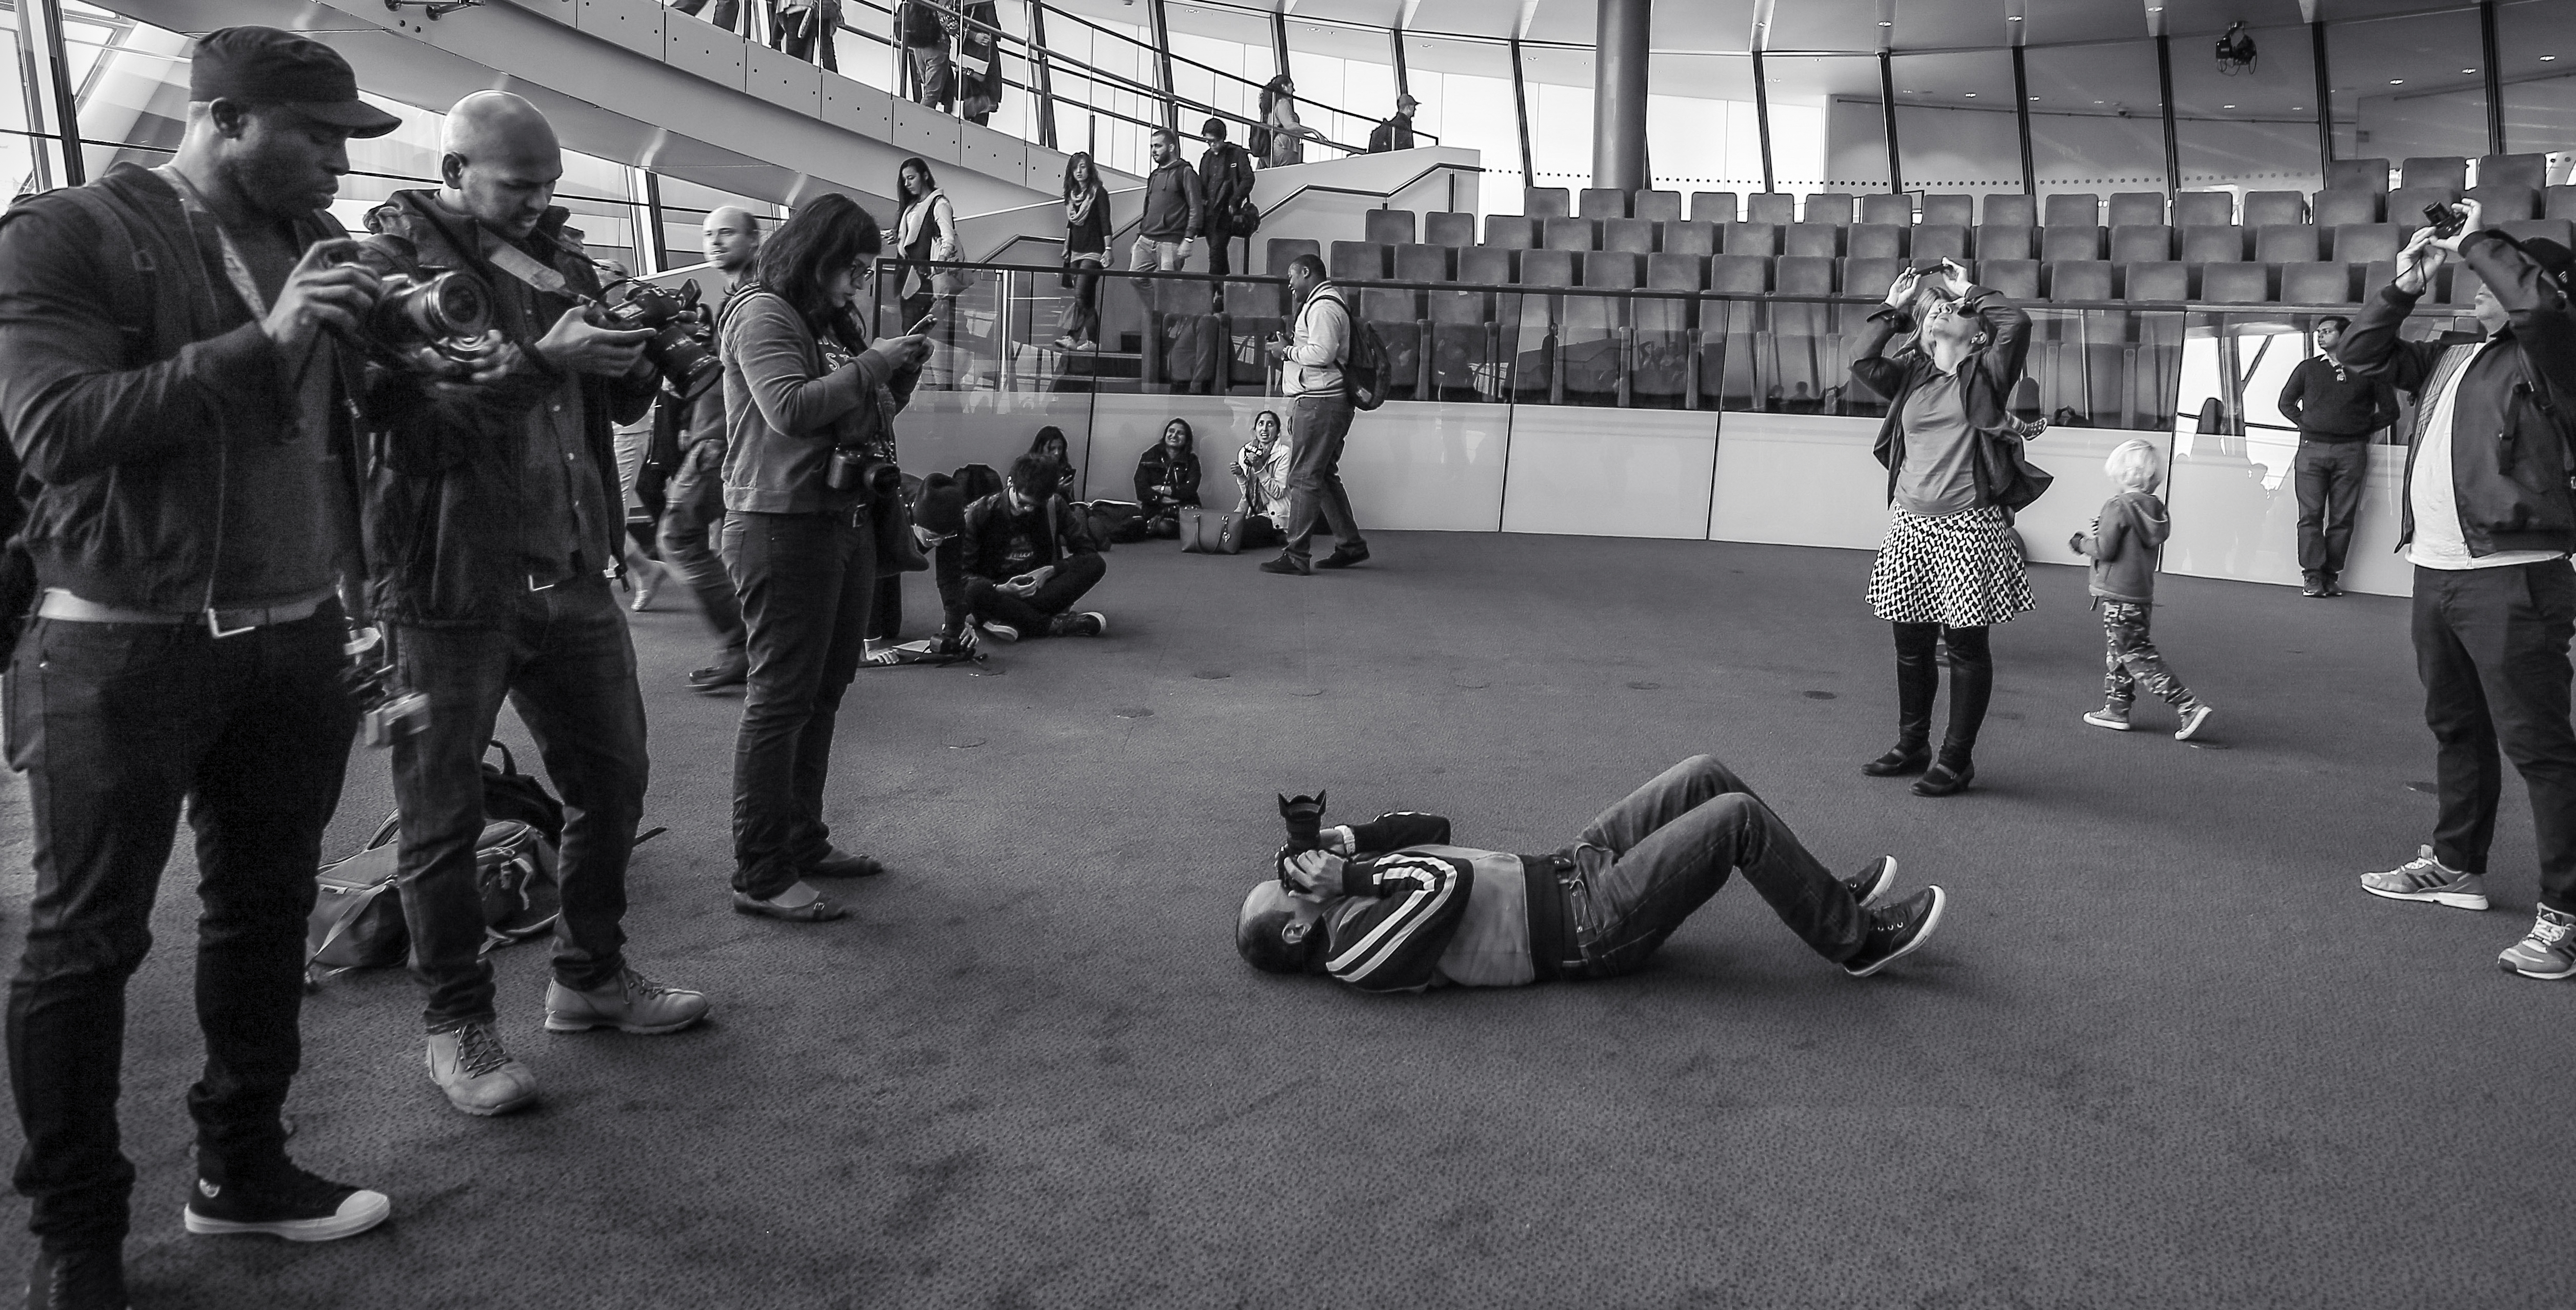
    Michael Broad

    By Michael Broad

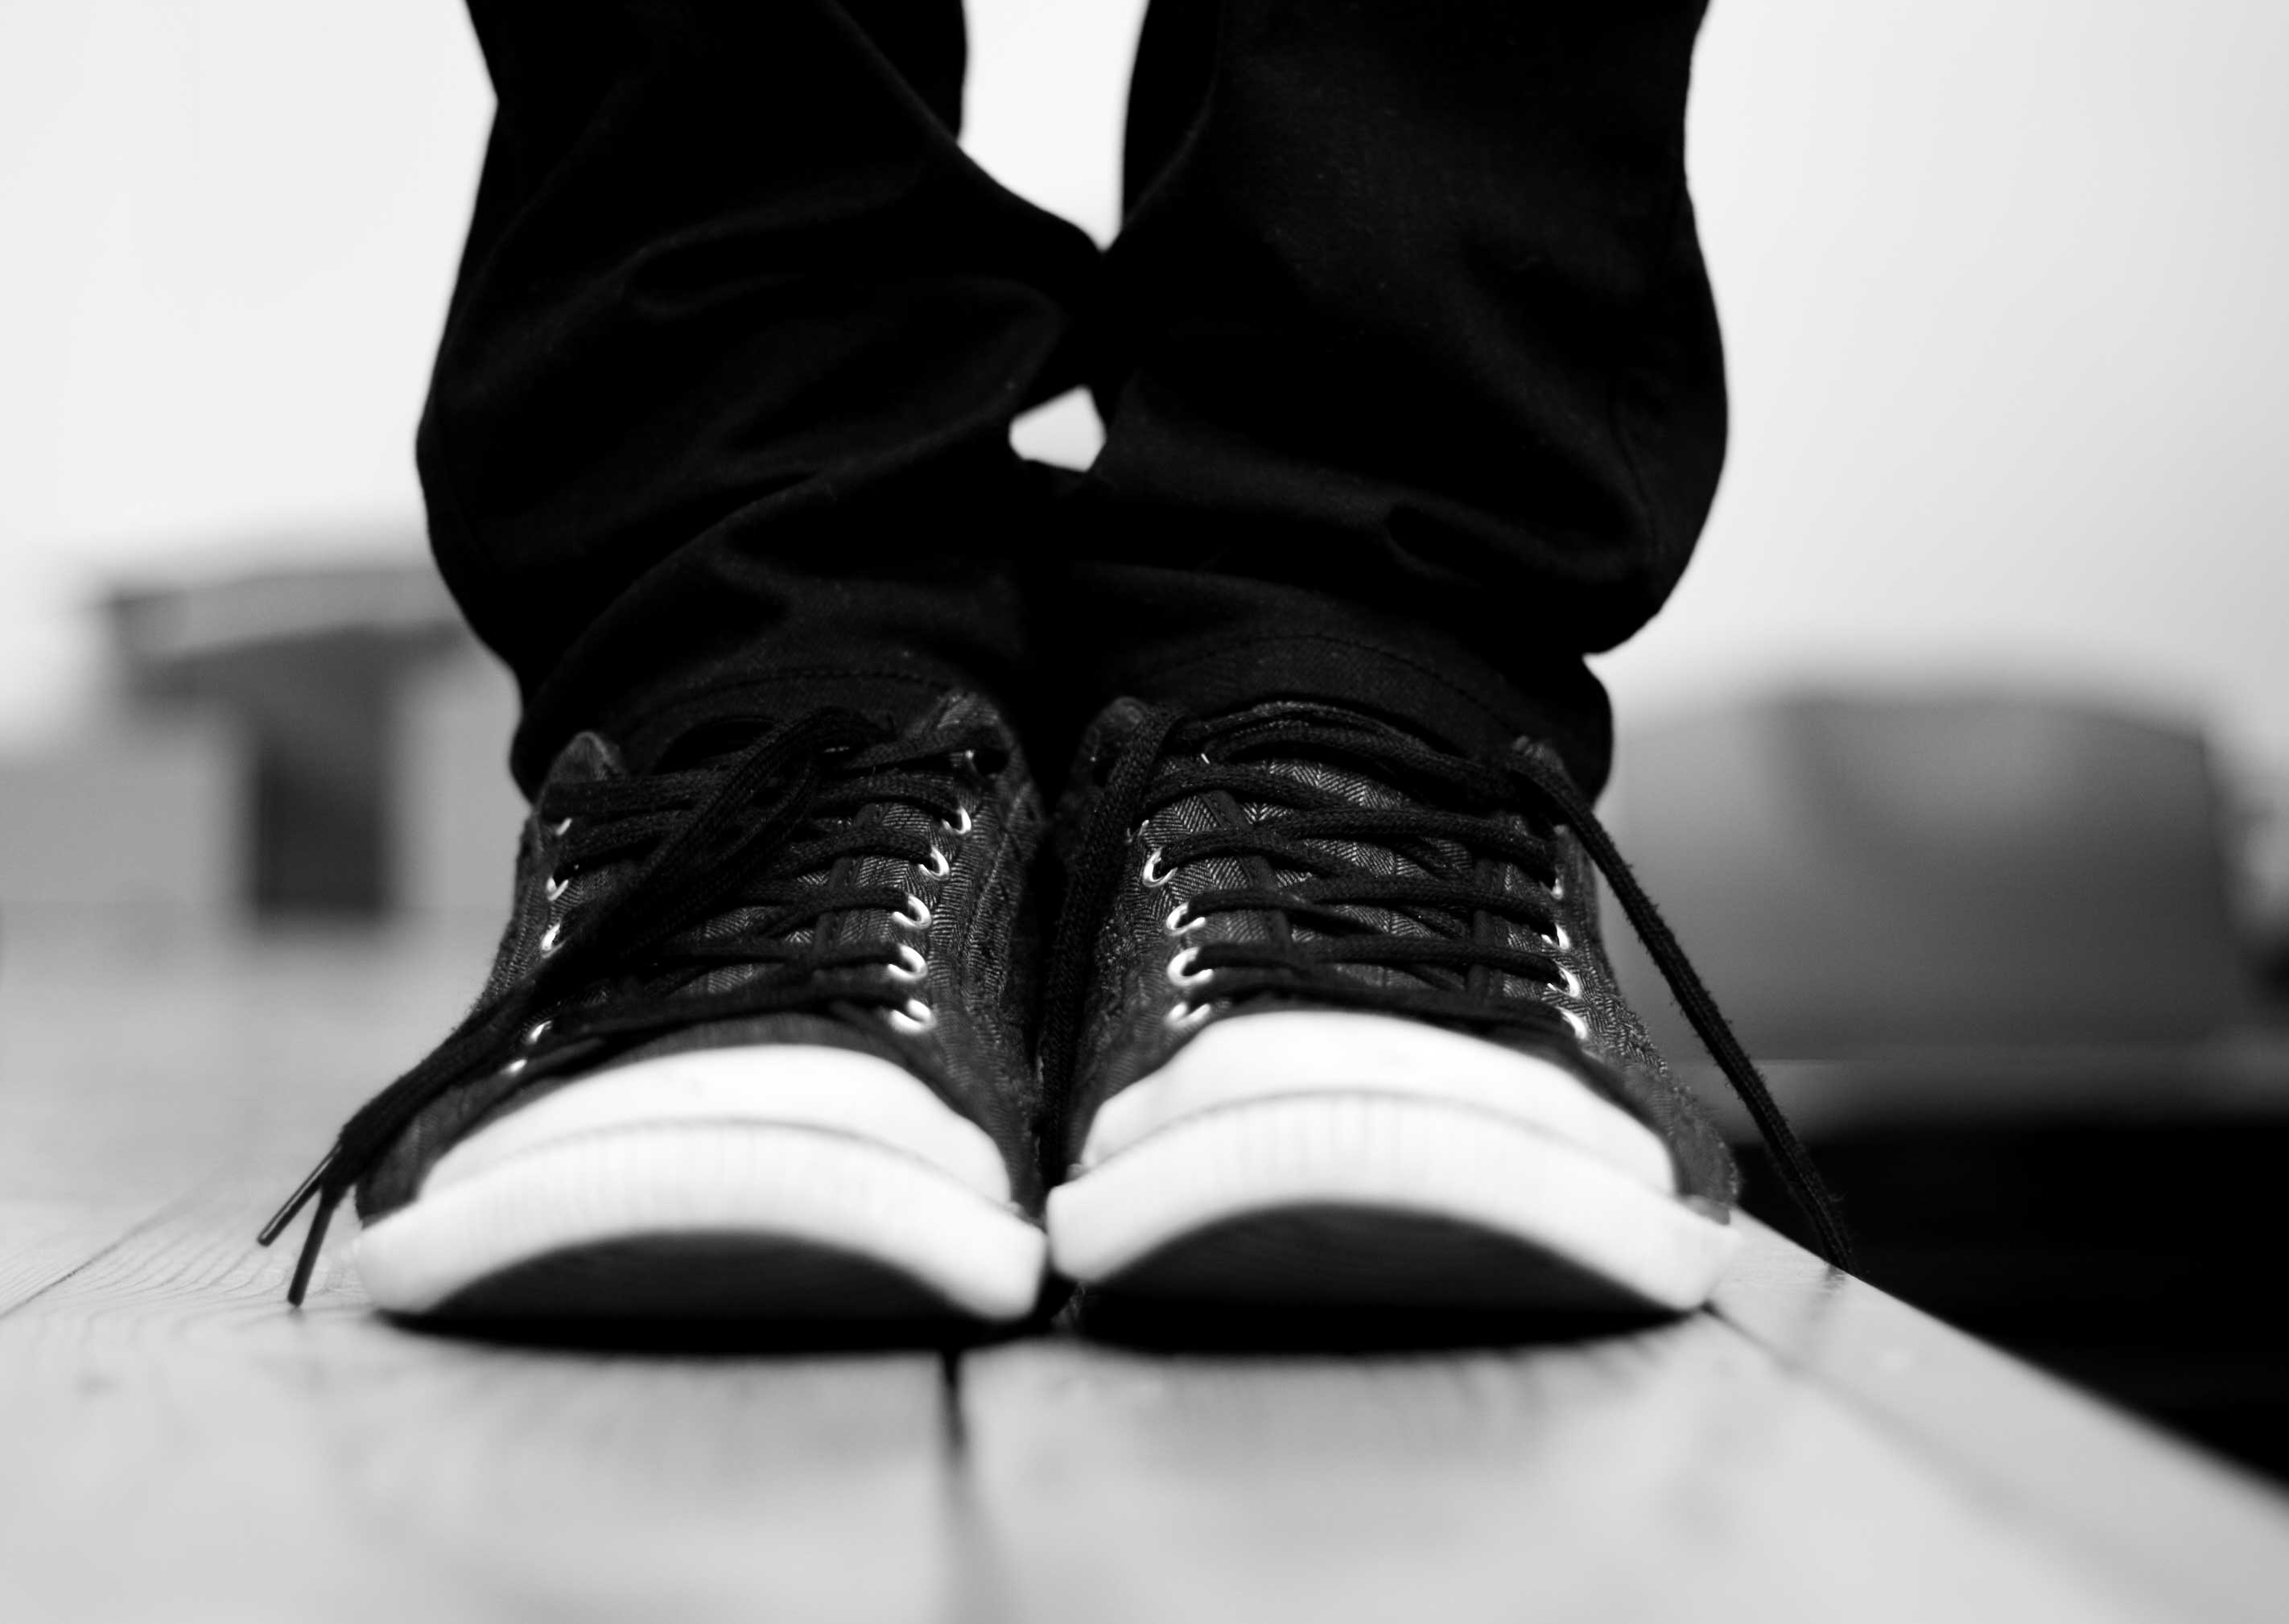
    1. Invest in a solid, comfortable pair of shoes

    Regardless of what kind of photo shoot you’ll be conducting, start with shoes. Consider that you’ll likely be standing for hours on end, so comfort and ergonomics are key. Also, think about the terrain you might encounter during your shoot, and the seasonal weather. Will there be grassy fields, sandy shores, or other outdoor elements you might be venturing into to get unique angles? If so, shoes that can take a light beating and still look good will be of utmost importance.

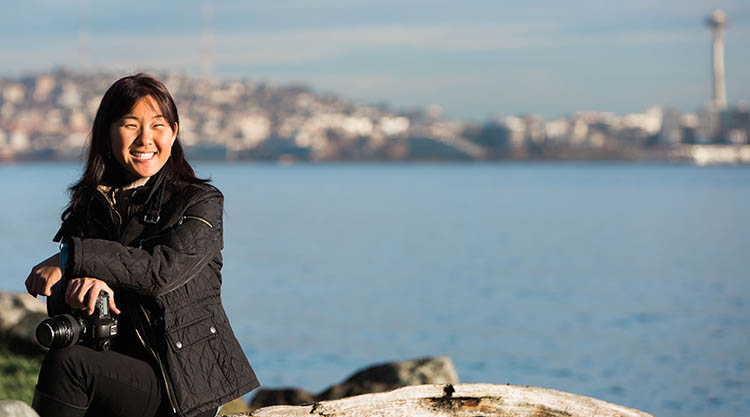
    As a female photographer who shoots mainly for corporate clients, I generally opt for black leather flats during the warm season, black leather boots for colder weather, or dressy black leather sneakers for extra long shoots with outdoor elements. In any case, it’s generally a good idea to stay away from sandals, high heels, and flip flops.
    Laura Thorne

    By Laura Thorne

    2. Cover up

    As a creative photographer in constant search of creative angles, consider the possible physical maneuvers such as bending, stooping, and squatting that you might be pulling off during a shoot. Dress accordingly, making sure to wear an outfit that will allow you to be physically flexible without giving your clients an eyeful, or worse yet, causing a wardrobe malfunction. Ladies, this means avoiding low-cut tops, ultra short skirts and dresses, and skimpy outfits. At the very least, bring a blazer or sweater to cover up. Gentlemen, don’t forget a belt and a longer shirt that can be tucked in.

    3. Dress in all black

    This is a contestable point, as it can also be argued that dressing according to your brand is a better strategy. However, it’s a general rule of thumb that wearing all black is best for being as invisible as possible at a photo shoot. That way you won’t stand out and take attention away from the main photo subject. Not to mention, dressing in all black makes you look more official, like a staff member which can potentially be helpful in navigating around a venue.

    Personally, I opt for the all-black rule for all of my photo shoots, simply because it’s one less thing to worry about when I have a pre-assembled uniform to fall back on. For me, this uniform consists of mixing and matching from the following selection; one pair of black skinny jeans, one pair of black slacks, a black leather belt, several button-down black blouses, several black polo shirts, and a black blazer. Whenever possible, I also try to buy my black clothing in lightweight, moisture resistant fabrics rather than cotton, to avoid sweat absorption.
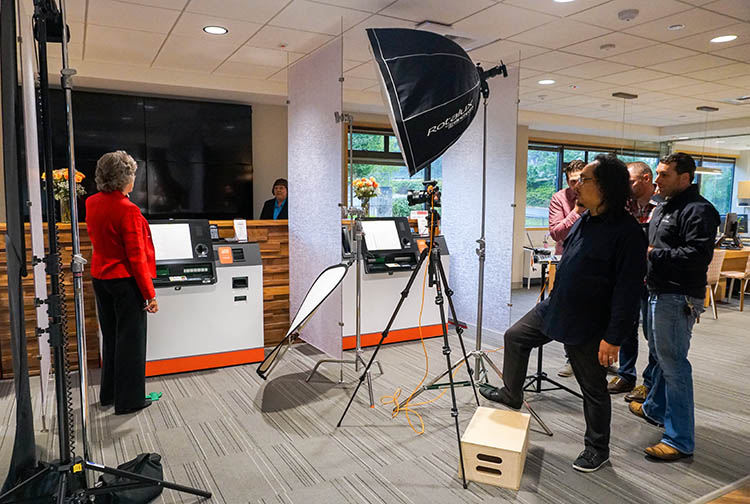
    what-to-wear-as-a-photographer-01

    4. Add a personal touch

    Some photographers might contest the above point of dressing in all black with the argument that it’s important to dress according to your brand. This is something I definitely believe in as well, but having brand elements infused in your style of dress can also be done while still wearing all black. As an example, I always make sure to wear a few pieces of statement jewelry to accent my outfit and also serve as a conversation starter. I have a couple pairs of unique earrings, necklaces, and watches that almost always attract comments or questions, but they are also subtle in size so they don’t stand out too much.

    Another idea is to custom order black clothing that has your logo on it, such as a polo shirt with a subtle branding element. A photography colleague of mine has done this with huge success as it further reinforces his brand, while also making him look and appear more official at photo shoots.
    what-to-wear-as-a-photographer-01

    5. When in doubt, ask

    If you’re truly stumped on what to wear to a photo shoot, ask your client if they have any preferences. This is likely less important if you’re doing an intimate portrait session, but for event photographers, in particular, it never hurts to ask the client. I once had a corporate photography client who forgot to send over their two-page document detailing their dress code for photographers, which I would never have received had I not asked. At the very least, it’s important to find out if the dress code for your shoot is formal, semi-formal, or casual, and what exactly those terms mean to the client.
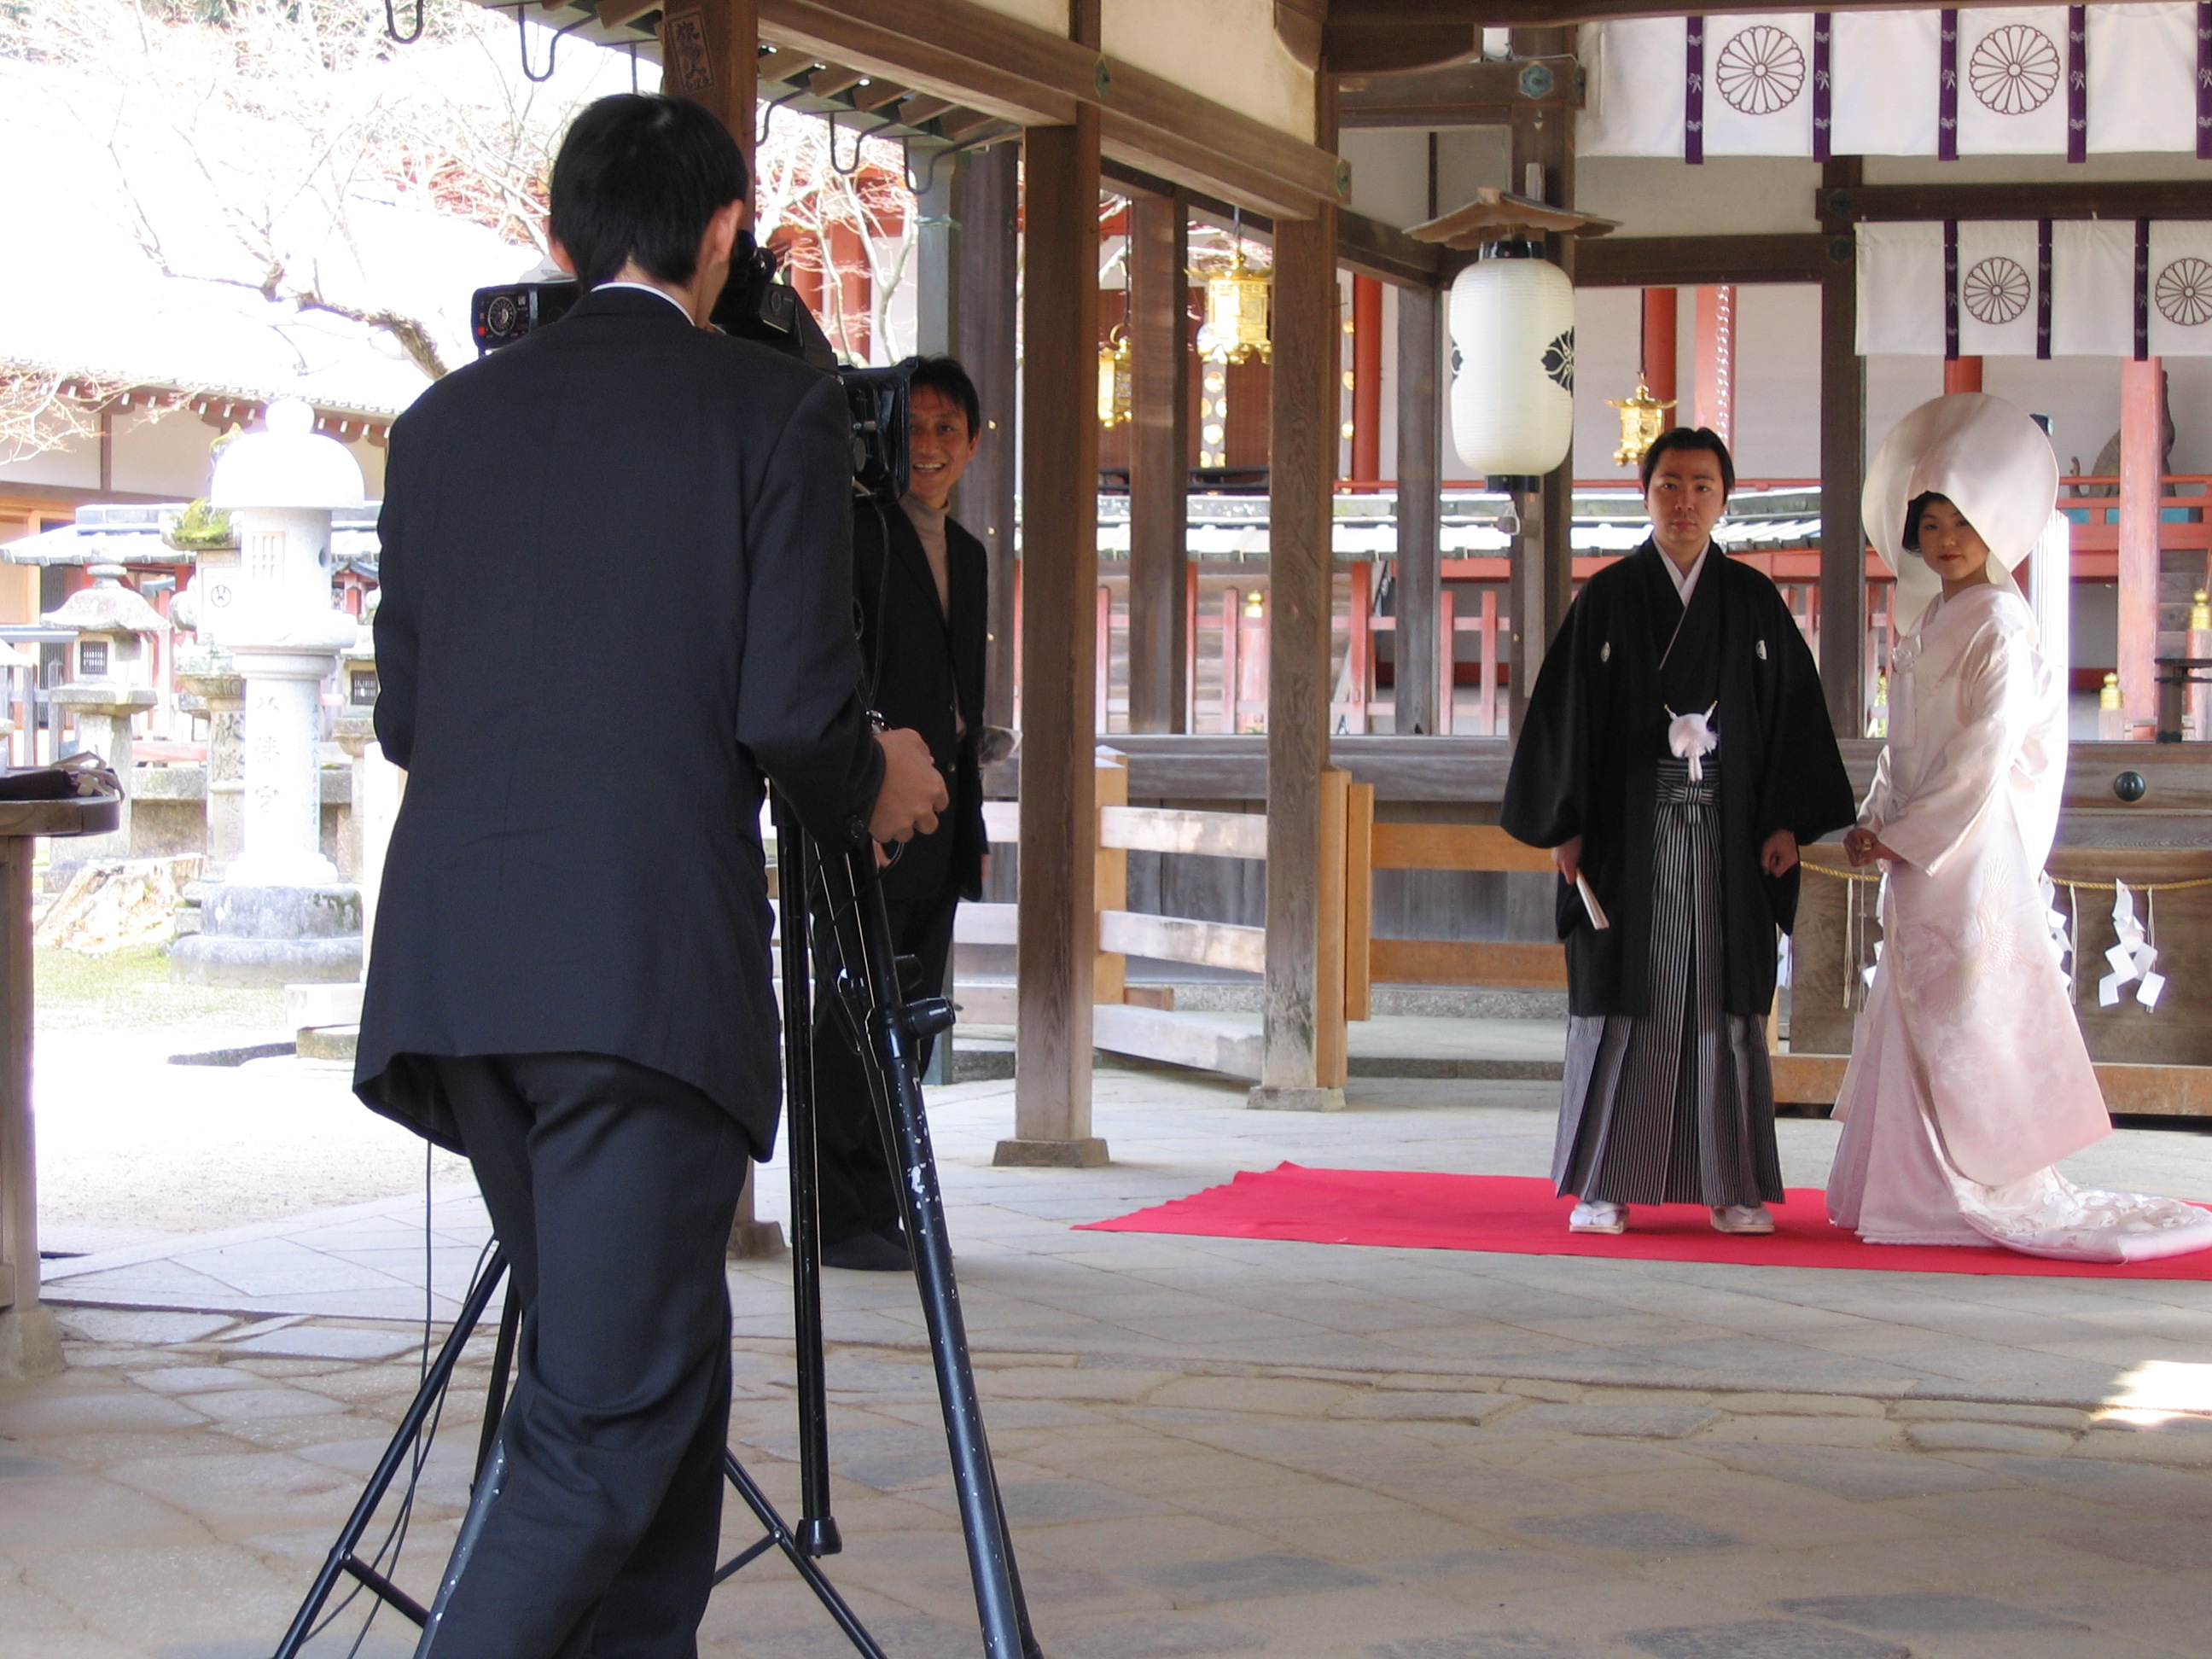
    Jpellgen

    By jpellgen

    Over to you

    To some photographers, what you wear to a photo shoot may not seem like a big deal. But I firmly believe how you dress is a reflection of your brand, so considering every element of your outfit is crucial.

    What do you wear when you’re conducting photo shoots? Let me know in the comments below!

    googletag.cmd.push(function() {
    tablet_slots.push( googletag.defineSlot( “/1005424/_dPSv4_tab-all-article-bottom_(300×250)”, [300, 250], “pb-ad-78623” ).addService( googletag.pubads() ) ); } );

    googletag.cmd.push(function() {
    mobile_slots.push( googletag.defineSlot( “/1005424/_dPSv4_mob-all-article-bottom_(300×250)”, [300, 250], “pb-ad-78158” ).addService( googletag.pubads() ) ); } );

    The post Photographer’s Dress Code – What to Wear to a Photo Shoot by Suzi Pratt appeared first on Digital Photography School.

    Digital Photography School

  • How to Give Your Landscape Photos Extra Punch in One Easy Step

    Have you ever felt that your landscape photography is missing a little punch? You look at other photographers’ images and their colours have a very appealing amount of contrast. But no matter how much you play around with HSL (Hue, Saturation, Luminance), Contrast, Vibrance or Saturation, your colours just don’t get the same depth and contrast and end up looking fake and oversaturated.

    The quality of the lens being used affects color greatly (more expensive lenses generally give a much better colour contrast than entry-level lenses). But there is a step that you can do when post-processing your recent landscape photos to give the colours an extra little bit of punch and contrast and more importantly, keep them from looking overcooked.

    before-after

    Color space

    You may be aware of a term Colour space which essentially determines how devices represent colour. The two most common colour spaces are Adobe RGB and sRGB. Adobe sRGB is used on the web and for many smart devices. Adobe RGB is a little bigger than sRGB and can show more colors. However, these are not the only colour spaces around. Lightroom, for example, uses one of the largest (able to produce a larger amount of colours) called ProPhoto RGB.

    But enough about colour spaces! I can already see your eyes glazing over, mine are already as I type this. But knowing that there are different colour spaces can be helpful. Knowing exactly how they work isn’t necessarily all that important.

    Convert to Lab Color

    The colour space that you’ll want to recognize is LAB Color. How does it work? Doesn’t really matter. But how can you use it give your images that extra punch? In this article, I’ll explain how a very simple step (and I mean simple!) that will help give your images that extra punch using the LAB colour space in Photoshop.

    Okay, so first up you’re going to want to bring your image into Photoshop. Before you do this, you may need to develop the image a little in Adobe Camera Raw or Lightroom. Fix up any exposure issues, correct the white balance, etc.

    This is the image that I’ll use as an example.

    before

    This image has had very little done to it prior to Photoshop. A simple crop, general contrast and exposure correction were all that was applied.

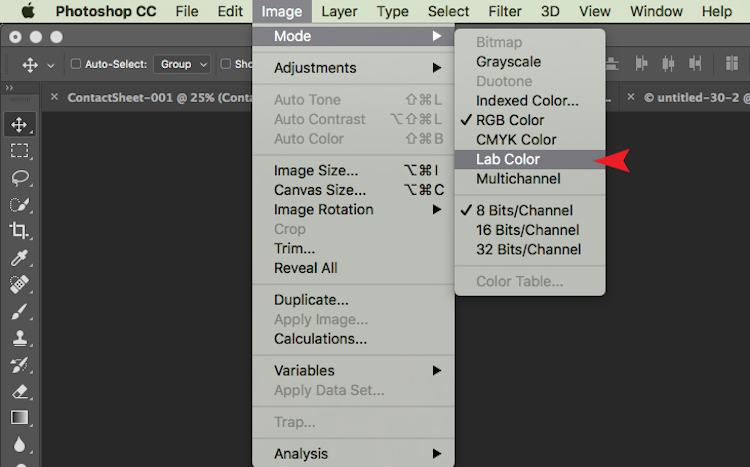
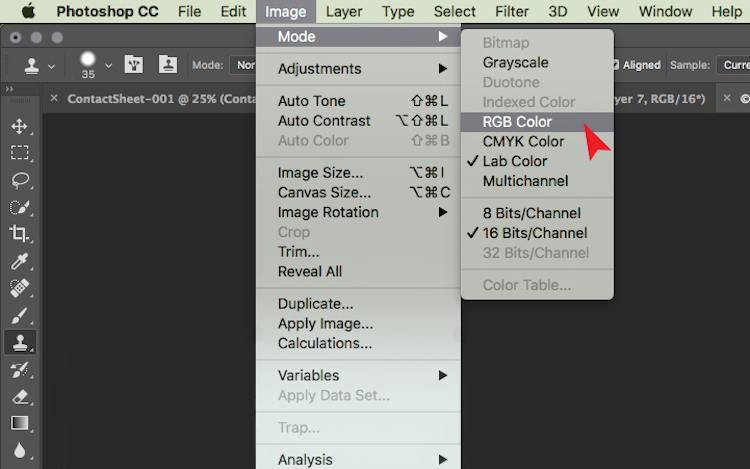
    Now that your images is open in Photoshop, the very first thing you need to do is convert it from Adobe RGB or sRGB (depending on what you have set as the working colour space in Photoshop) to LAB Color.

    To do this, go to: Image > Mode > Lab Color.

    The tick next to RGB Color means that Adobe RGB is currently being used.

    The tick next to RGB Color means that Adobe RGB is currently being used.

    Now Photoshop is using LAB instead. You won’t notice a change at all at this step because nothing has changed on your end. All you have simply done is tell Photoshop which method to use to display colours.

    Add a Curves Adjustment Layer

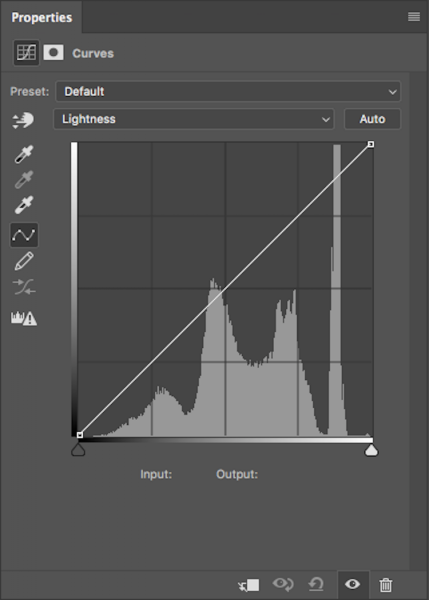
    With your image in LAB Color, the next step is to create a Curves Adjustment Layer. Once this layer has been created, you should see something like this:

    lab-curves1

    Generally, this doesn’t look any different to any other Curves Adjustment Layer except for one thing. Instead of having RGB in the drop down menu, you will see Lightness.

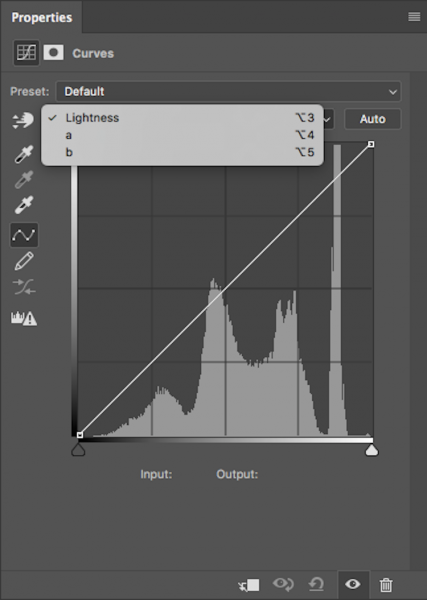
    With this adjustment layer created, the next step is to click on the Lightness drop down menu. This brings up Lightness, A, B; which is what LAB is short for!

    lab-curves

    Adjust Channel A

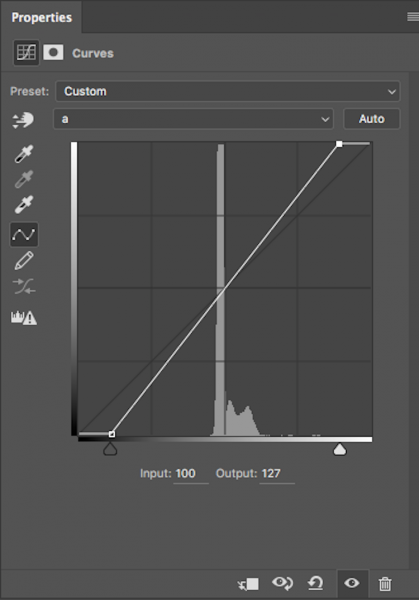
    Now, you need to select the A-channel. With the A-channel selected, bring in the shadows anchor point at the bottom-left corner toward the bottom-centre. You will notice the Input numbers increasing from -128. As a starting point, I like to bring this value to -100. Now, find the highlight anchor point (top-right) and bring that toward the top-centre by the same value; for -100 set it to 100.

    Notice the anchor points have moved toward the centre equally?

    Notice the anchor points have moved toward the centre equally?

    You’ll notice strange things happening to your colours as you slide the anchor points along. Don’t panic – this is supposed to happen.

    Adjust Channel B

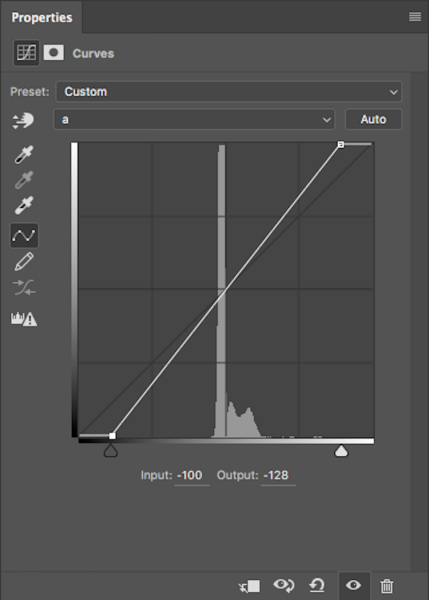
    Now do the same steps by the same values for both shadows and highlights for the B-channel.

    Same steps have been done for Channel B

    Same steps have been done for Channel B

    NOTE: make sure your Output value remains at -128 for the shadows and 127 for the highlights. If these numbers are altered it means that the anchor point is being lifted from the bottom for shadows and dropped from the top for highlights. You just want to drag the sliders along horizontally (not move them up or down).

    With both A and B channels having been done now, the colour and colour contrast of your image should look different from the original. This is how my original image looks after these steps.

    This is after setting A/B shadows to -100 and highlights to 100.

    This is after setting A/B shadows to -100 and highlights to 100.

    Fine tuning

    For me, that is looking a little overdone. But no problem! To change this, all you have to do is reduce the amount you moved the anchor points in both A and B channels. I generally find going by increments of 10 is most helpful.
    If you feel your image needs more punch, then you will want to bring the anchor points closer to the centre. Just remember to keep each value across the shadow/highlight, A/B channels the same.

    After increasing the numbers in my images, I felt that -110/110 in A/B worked the best (see below).

    after-110

    Convert back to RBG

    Once you are happy with how your image looks, it’s time to change it back to RGB. To change your image from LAB to RGB, go to: Image > Mode > RGB color.

    change-to-rgb

    You’ll be alerted that changing modes will discard adjustment layers, but that is fine. Select OK and you’ll be brought back into RGB. You’ll notice that the Curves Adjustment layer is now gone and that your image is now the background layer. However, the effect on the colours should remain. Now you’re free to go about editing the photo as much as you like.

    So that’s a very simple technique to add more colour punch in your images. Just remember these two points:

    • This is something that you should do at the beginning of editing your image in Photoshop and not the end as you will lose all your adjustment layers when changing modes.
    • Remember to alter the anchors points from A/B b by the same value to eliminate strange things happening to your colours.

    googletag.cmd.push(function() {
    tablet_slots.push( googletag.defineSlot( “/1005424/_dPSv4_tab-all-article-bottom_(300×250)”, [300, 250], “pb-ad-78623” ).addService( googletag.pubads() ) ); } );

    googletag.cmd.push(function() {
    mobile_slots.push( googletag.defineSlot( “/1005424/_dPSv4_mob-all-article-bottom_(300×250)”, [300, 250], “pb-ad-78158” ).addService( googletag.pubads() ) ); } );

    The post How to Give Your Landscape Photos Extra Punch in One Easy Step by Daniel Smith appeared first on Digital Photography School.

    Digital Photography School

  • Overview of the Samyang 12mm F2.8 ED AS NCS Fisheye Lens

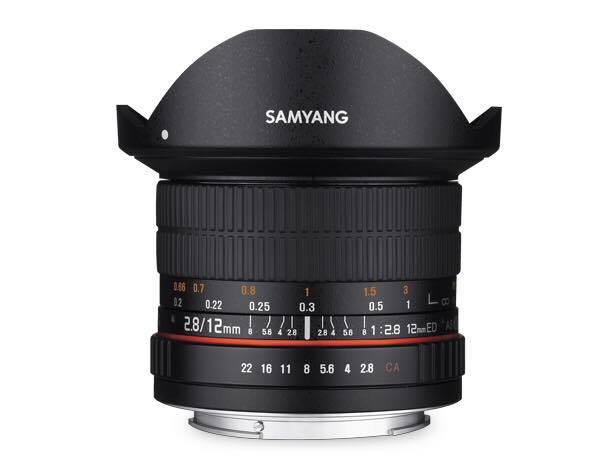
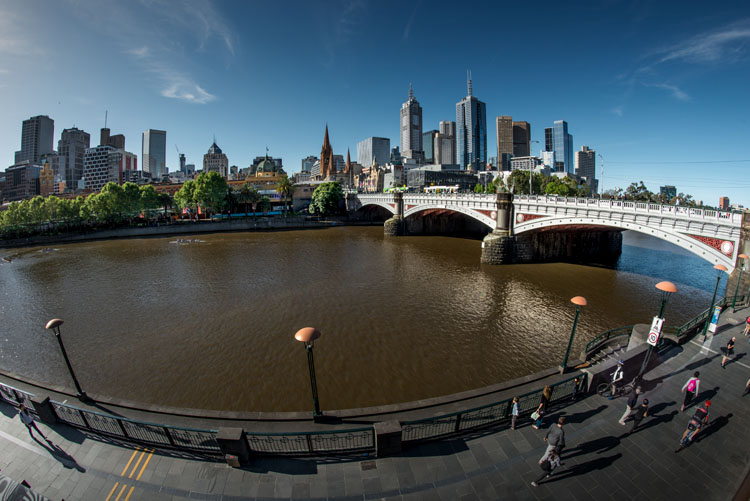
    There is nothing quite like seeing the world through a fisheye lens. The way it bends straight lines and creates curves where there were none. You get to see more of the world through it than you can with your own eyes, well that is unless you turn your head. Recently I was loaned the Samyang 12mm F2.8 ED AS NCS Fisheye lens to play with and I have been having a lot of fun seeing what it can do.

    leannecole-samyang-12mm-fisheye-30

    Samyang 12mm F2.8 ED AS NCS Fisheye lens

    Price out this lens on Amazon and B&H Photo.

    Fisheye lenses have been around for a long time. But for most of us, they have not been something that we thought would be worth spending all that money on. However, the 12mm fisheye from Samyang is affordable and can give your photography a new look.

    How wide is it?

    There is nothing like using a wide angle for the first time and having objects fit into your frame like never before. This lens is very much like that. The first reaction most people have when they look through the viewfinder for the first time is “wow”. It is incredible what you can fit into it.

    You get an 180-degree view with it. It really does fill the frame with all that you can see, including your periphery vision. While this is a good thing, there is also a downside. You can end up with unwanted distractions in the image. If you point the lens down too far you may end up with your feet in the image. Or if your camera bag on the ground is not behind you, it too will be included. Going out with friends to take photos means constantly asking them to step back behind you. If they are good friends, they won’t mind.

    leannecole-samyang-12mm-fisheye-38

    Melbourne from across the river.

    This lens won’t break the bank

    When you consider how much other lenses with an f/2.8 aperture cost, you would think this one would also be very expensive, a thousand bucks or so. But it retails for around USD$ 500 (less if you have a mirrorless system) so it makes it a lot more affordable than the top brand fisheye lenses. It is a good quality lens and is a great alternative for those that can’t afford the pricier top brand ones.

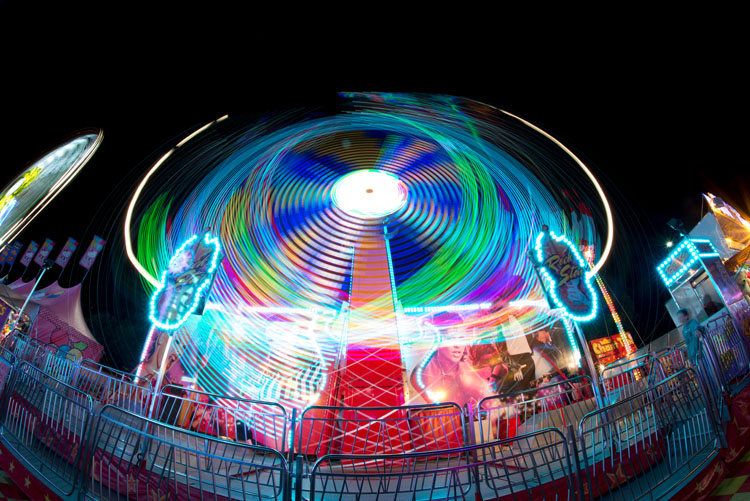
    leannecole-samyang-12mm-fisheye-33

    One of the rides at the Royal Melbourne Show

    This lens is fun!

    Without a doubt, this is a fun lens. It can have real uses, but in the end, I dare anyone to put the lens on their camera and not have a great time seeing what they can get with it. It is amazing to watch how the world is transformed through it.

    I was first loaned the lens one day while in the city and I wouldn’t take it off my camera. I really enjoyed seeing what it could do and how much I could see with it. It was a challenge to see how I can make the world make sense with it. In the end you have to let that go and just take photos.

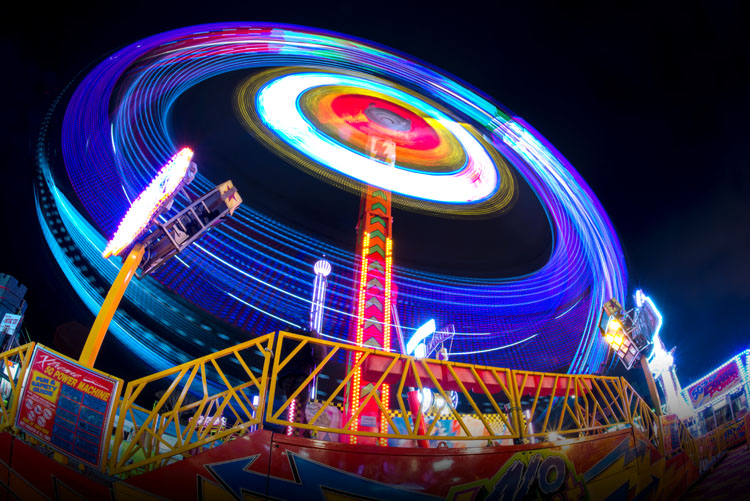
    leannecole-samyang-12mm-fisheye-32

    One of the rides at the Royal Melbourne Show.

    It is small

    For a fisheye, it is very small which is great because it means it’s easy to carry around with you. You would expect a fisheye to be a large bulky lens with big bulbous glass on the front. The Samyang fisheye is a lot smaller and not much bigger than a normal 50mm lens. Don’t let the size fool you, as it still takes a great image.

    Full frame lens

    Surprisingly for the cost, it is a lens for a full frame camera. It seems that many lenses for these are usually a lot more expensive. You are going to get much wider images with the full frame, and if you put the lens on a cropped sensor that aspect will suffer and you won’t get as wide an angle (about like an 18mm), though you should still get the fisheye effect.

    First time mounting the lens

    When you first put the lens on your camera you can get some strange numbers coming up on your camera display. If that happens you need to change the aperture ring on the lens. Turn it all the way around until you can see the aperture on your camera.

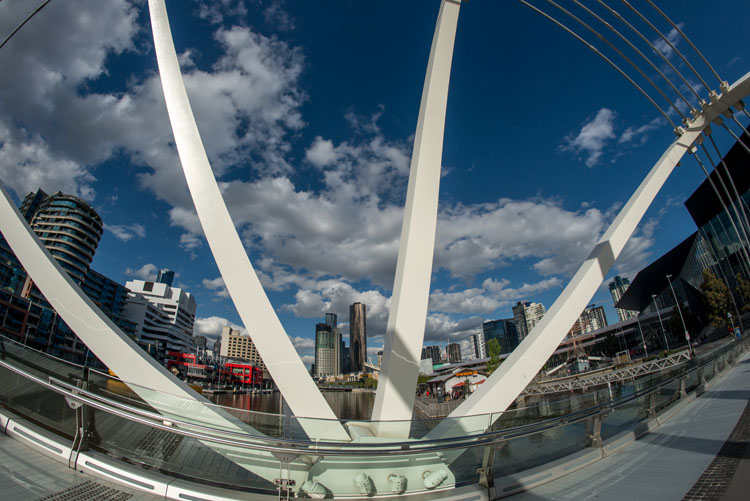
    leannecole-samyang-12mm-fisheye-35

    Looking at the city through the Seafarers Bridge.

    It distorts the world around

    For many the distortions may be too much and maybe the lens won’t be for them. The first time I posted a few photos I took with it, some people pointed out that I could get rid of the weird curves. My first thought was why would I, isn’t that the reason for using a fisheye in the first place?

    It is a manual focus lens

    For many people, the manual focusing for the lens is a negative. We have gotten used to autofocus, and having to go back to do it manually again can seem too hard. However, it is amazing how quickly you can adapt to it. The more you do it the easier it really does get. I seem to be using a lot of lenses lately that are manual focus and I don’t have an issue with it now.

    One of the benefits with the Samyang fisheye is that for most subjects they are going to be several feet or meters from you so you can put the focus ring on infinity and just click away. It is rare than anything you shoot will be too close for that. Obviously if something is close you will need to focus the lens, but for the most part you can put it on infinity and just go for it. Just remember that it is on that setting and don’t forget to keep checking that the image is focused (zoom in on the image playback).

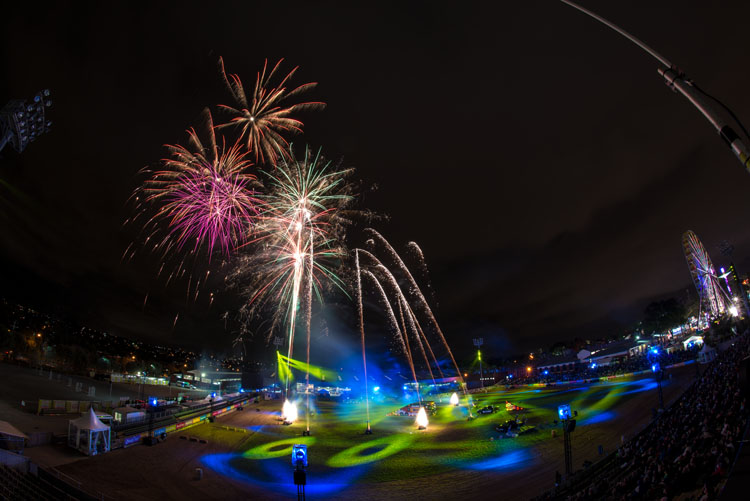
    leannecole-samyang-12mm-fisheye-31

    Fireworks at the Royal Melbourne Show.

    Conclusions

    Working with the lens

    If you have purchased the fisheye then it would seem you are looking for more than just a wide angle lens. The lens is known for its distortions, so work with that. Find subjects that will be enhanced due to the curve of the lens. If you are somewhere like in a city, try different compositions to see which will work the best.

    If you want something to appear straight, like the bridge, if you put that more in the centre of the image the distortion is far less. The same is true for the horizon. If you put the horizon line in the center of the frame then it will stay straight, but if you move it up or down it will get a curve to it. That can be really effective as well.

    leannecole-samyang-12mm-fisheye-34

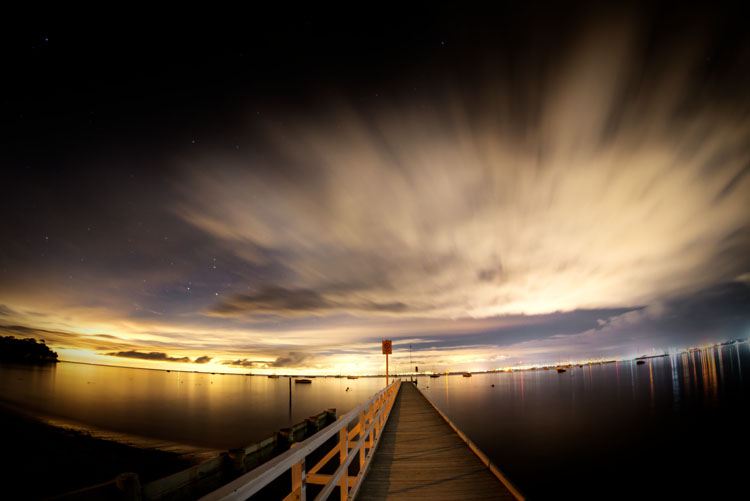
    Looking down a pier into the night sky at Sorrento. See the horizon is almost straight as it is closer to the middle of the image.

    Applications

    The lens is perfect for astrophotography and that is mainly where it is used. You can get a lot of sky into a fisheye image and the distortions wouldn’t matter so much. You can get brilliant shots of the Milky Way, or great star trails. Samyang Australia tends to market it to aurora hunters too, but it has other uses as well.

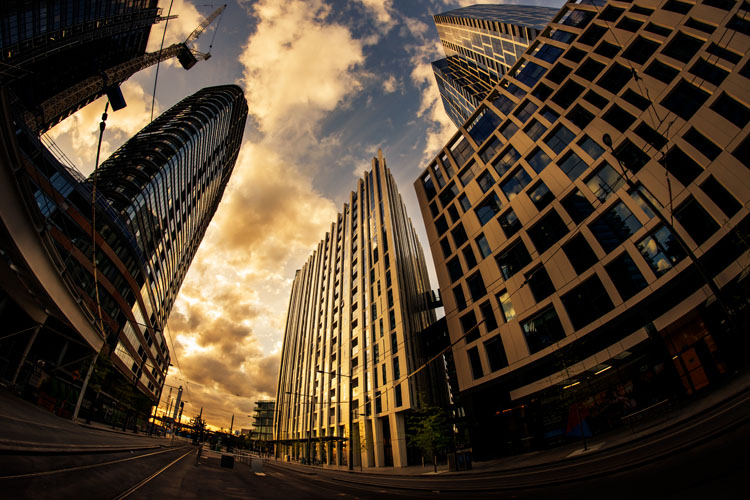
    Architecture is a great subject for this lens. It does give many of the lines a curved shape, and in people’s minds they know they are meant to be straight. But you can use those distortions to create unique images.

    leannecole-samyang-12mm-fisheye-36

    Some of the new architecture down at Docklands.

    Many sports photographers could also find it useful. Not for everything, but for some special images. Cycling photographer Graham Watson often uses a fisheye for unique views of races like the Tour de France. With cycling ,you can get very close to the cyclists. So the fisheye would be perfect for some races, especially for a criterium when they are going around corners.

    As the lens is so wide, there are many types of photography that it is not well suited for. Landscapes could work, but you need to have something in the foreground, otherwise everything would be too far away. The use of leading lines is important for that type of photography.

    leannecole-samyang-12mm-fisheye-37

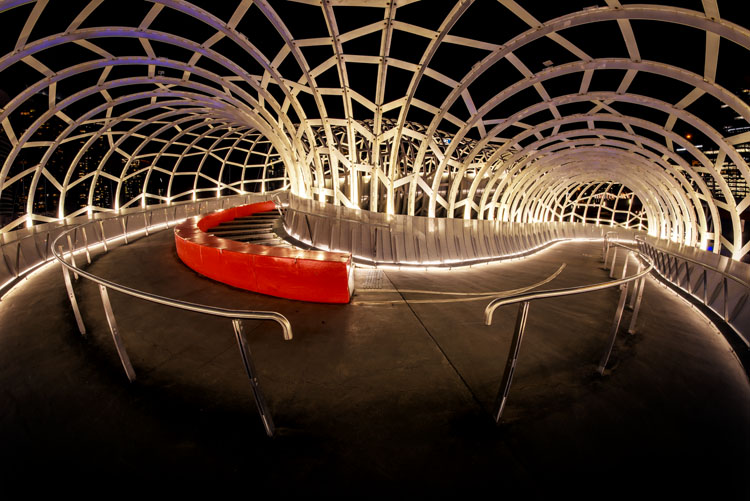
    The full curve of the Webb Bridge in the Docklands.

    Who is this lens for?

    The most obvious answer to this would be astrophotographers and aurora hunters, but there are others who would also benefit from it as well, like sports and architectural photographers. Perhaps others who want to add something unique or different to their images. For the price and size, it could be a great addition to any photographer’s kit.

    If you are looking for a challenge in your photography, or perhaps you want to start looking at the world in a different way, I would highly recommend the Samyang 12mm F2.8 ED AS NCS Fisheye lens. It’s a fun and not too expensive piece of kit. While you may not use it a lot, you will get it out and take photos with it from time to time. We all have lenses that we don’t use a lot, but enjoy using them when we do.

    Price out this lens on Amazon and B&H Photo.

    googletag.cmd.push(function() {
    tablet_slots.push( googletag.defineSlot( “/1005424/_dPSv4_tab-all-article-bottom_(300×250)”, [300, 250], “pb-ad-78623” ).addService( googletag.pubads() ) ); } );

    googletag.cmd.push(function() {
    mobile_slots.push( googletag.defineSlot( “/1005424/_dPSv4_mob-all-article-bottom_(300×250)”, [300, 250], “pb-ad-78158” ).addService( googletag.pubads() ) ); } );

    The post Overview of the Samyang 12mm F2.8 ED AS NCS Fisheye Lens by Leanne Cole appeared first on Digital Photography School.

    Digital Photography School

  • 5 Non-HDR Things You Can Do With MacPhun’s Aurora HDR 2017

    Yes Aurora HDR was developed for creating HDR photographs. But did you ever think of using it for non-HDR tasks?

    You’re in luck because in the next few minutes I’m going to open your eyes to some new ideas. Specifically ideas for using Aurora HDR in your photography workflow without using the term HDR.

    What is Aurora HDR?

    If you haven’t heard of Aurora HDR, it’s MacPhun’s answer to all the other HDR software out there. Developed in partnership with Trey Ratcliff, Aurora HDR has unique tools which rival even non-HDR software. I look at it as a mix between Photoshop and MacPhun’s Intensify.

    But this isn’t about HDR. It’s about anything other than HDR. Before we dig in, know that the software can open a single image just like any other app or plugin. Let’s take a look inside:

    scott-wyden-kivowitz_dps_1

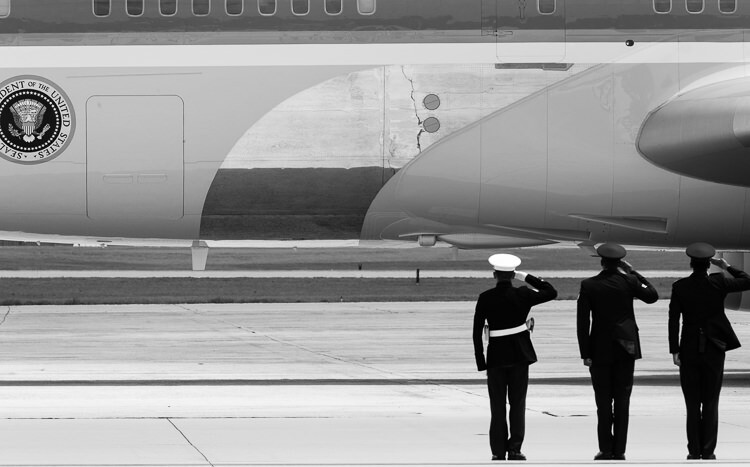
    Air Force Airmen saluting Air Force One as it takes off.

    1. Local Adjustments

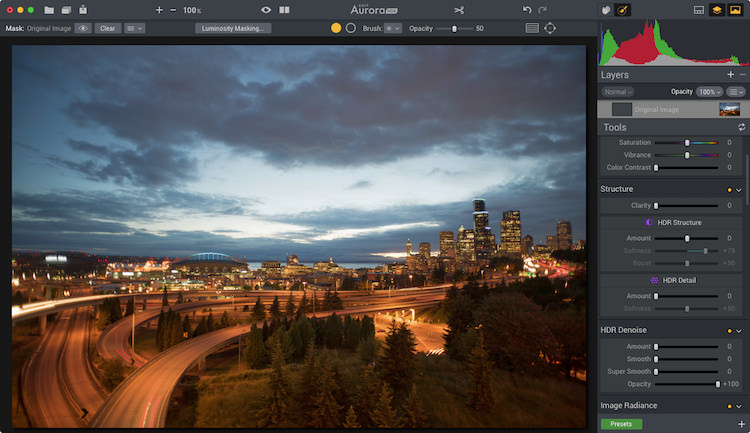
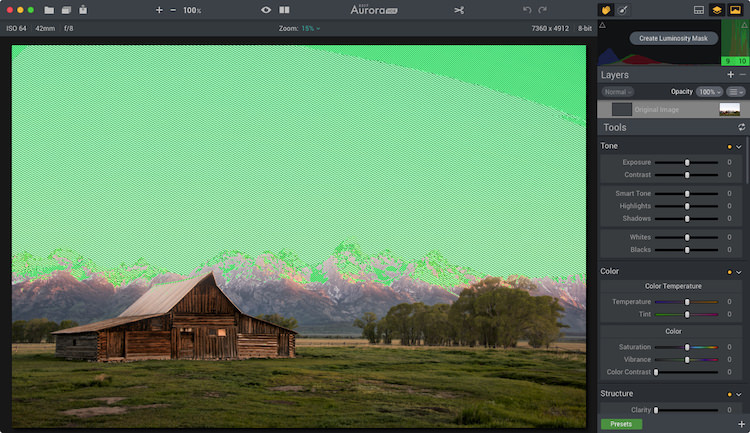
    Aurora HDR 2017 includes some local adjustment features which you are used to seeing in non-HDR software, like Lightroom or ON1. It includes things like gradient filters, radial filters, and the new Zone System Luminosity Masking. These are all powerful tools to make unique changes to specific areas of a photograph. The beauty is that any edits made to those local areas do not impact any other region of the image.

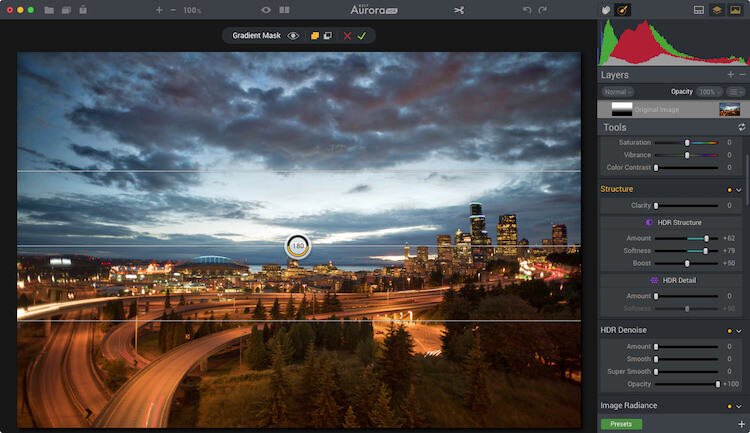
    One local adjustment feature often overlooked is the Top & Bottom Adjustment module. It’s like the gradient tool but has a few sliders specific to this module. It includes things like exposure, warmth, vibrancy, and contrast. Each of which appears twice; once for the top of the frame and once for the bottom of the frame.

    Before

    Before

    After the Top and Bottom Adjustment.

    After the Top and Bottom Adjustment.

    What makes this even cooler is the quick slider method of changing the gradient smoothing (blend), X or Y axis location of the tool (shift), and the rotation which makes it vertical or horizontal.

    Because the standard gradient tool in Aurora HDR 2017 requires you to make adjustments to the mask, having this module makes quick adjustments to a larger local area really quick.

    Local adjustments in Aurora HDR 2017

    Local adjustments in Aurora HDR 2017

    2. Luminosity Masking

    Aurora HDR Pro (pre-2017 version) had Luminosity Masking, but it has been improved in the new version.

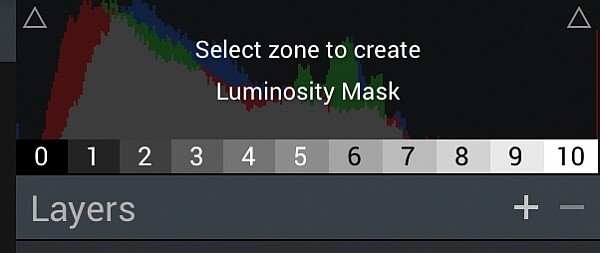
    Luminosity Masking is popular in portrait processing, but it’s also useful for other kinds of photography. What MacPhun did in the new version is to take a page out of Ansel Adam‘s book, by adding the Zone System into the Luminosity masking tool. Now you can create a mask based on specific zones of light. And they made it so simple.

    Aurora HDR 2017's Zone System Luminosity Masking.

    Aurora HDR 2017’s Zone System Luminosity Masking.

    luminosity-masking-before

    With the Luminosity Mask applied.

    With the Luminosity Mask applied (masking the sky).

    3. Advanced Masking

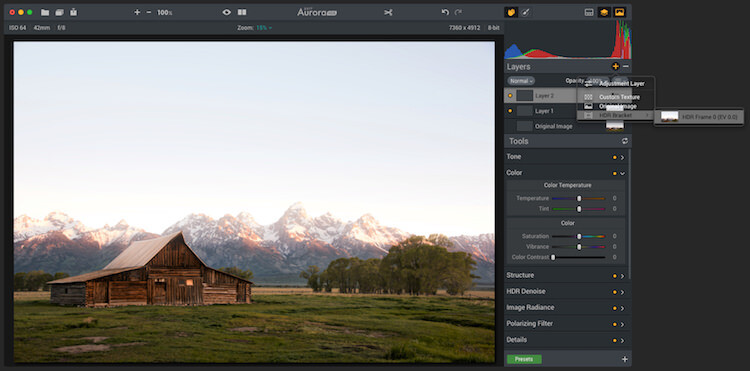
    The layers and masking tools in the software are advanced. When you add a layer, you can do it from a single bracket, a blank slate, and other choices. The options enable you to load any amount many brackets you want, and not process them as HDR, but instead do regular masking and editing.

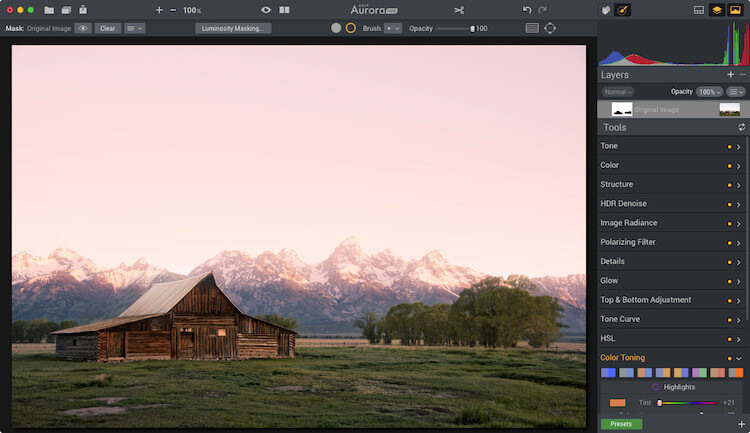
    Masking can be implemented using a Wacom Tablet and as a radial or gradient brush, or using the new zone system tool.

    adv-masking

    This shows both color toning being combined with a brush mask.

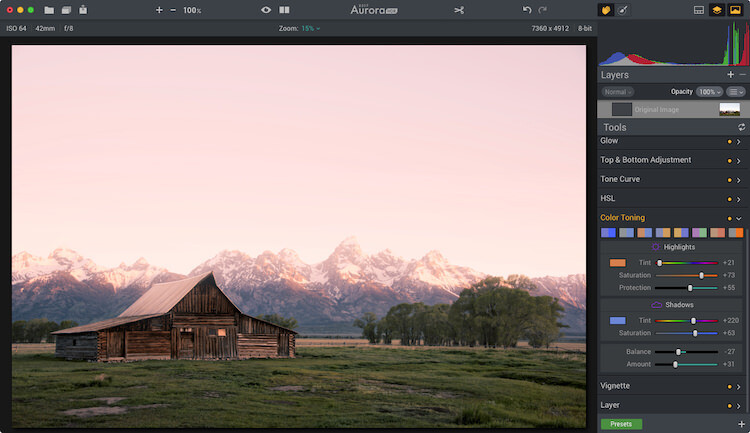
    4. Color Toning

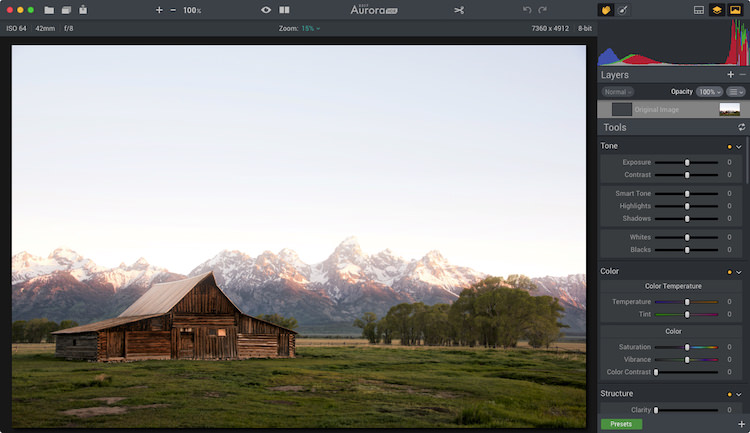
    Aurora has heavy duty color toning (split toning) features built into the software. Like Lightroom, users can choose a color to tone the highlights and shadows individually. But Aurora goes beyond that by adding highlight protection of the color. That way you can be more strategic on how much of the highlights are affected by the toning. You also have saturation control of the color for both highlights and shadows.

    Like Lightroom, Aurora provides the ability to adjust the balance of the color tone. To add more or less color in either the highlights or shadows. Of course, there is also an amount slider which enables you to reduce the impact of the color on the complete photo.

    Color toning applied.

    Color toning applied.

    Mask applied to keep the color toning off the roof of the barn and other areas.

    Mask applied to keep the color toning off the roof of the barn and other areas.

    There are also a variety of preset color toning swatches included, or you can make your own by making an Aurora HDR 2017 preset. When combining color toning with the masking tools you have some incredible color options.

    5. Batch Processing

    Batch Processing might sound silly to some but think about it for a moment. Imagine you like one of the editing tools in the software, like the color grading tool, and you want to add that to a large volume of photos. With the batch processing tool, you can do that. You would launch the Batch Processor and then choose the preset and settings you want to be used. So if you want color grading, make a preset with it. Simple!

    The way MacPhun does it is you can drop a folder of images and pick what preset you want to use on the photos. It will then run through it quickly without you having to do anything.

    So Much More

    Aurora HDR 2017 is made for HDR photography. I think that’s obvious by its name. But I think it’s important for photographers to understand when a tool can be beneficial, even when it is least expected.

    This software has made its way into my regular rotation of post-processing tools. The reason is that when using a tool with a different user experience and features my creativity expands. Doors are opened which were once closed, and I walk away with fun edits of photographs I once didn’t know if I would touch.

    scott-wyden-kivowitz_dps_3

    Not the end!

    If you have made it to the end and wanted one more takeaway, here goes.

    My last piece of advice for you is this – go for it and try something new. Even if it’s not this software or the next. If you don’t try, you won’t learn and grow. But really, as a wise green man once said, “Do or do not, there is no try.”

    googletag.cmd.push(function() {
    tablet_slots.push( googletag.defineSlot( “/1005424/_dPSv4_tab-all-article-bottom_(300×250)”, [300, 250], “pb-ad-78623” ).addService( googletag.pubads() ) ); } );

    googletag.cmd.push(function() {
    mobile_slots.push( googletag.defineSlot( “/1005424/_dPSv4_mob-all-article-bottom_(300×250)”, [300, 250], “pb-ad-78158” ).addService( googletag.pubads() ) ); } );

    The post 5 Non-HDR Things You Can Do With MacPhun’s Aurora HDR 2017 by Scott Wyden Kivowitz appeared first on Digital Photography School.

    Digital Photography School

  • How to Travel Safely with Your Camera Gear

    One of our favorite things about becoming photographers is the way the entire world seemed to open up once we picked up a camera. We currently live wherever we’re shooting. Over the past year, we’ve visited 10 countries on three continents, and countless cities in between. While we love the freedom of travel, our biggest concern is always how to travel safely with our gear. Whether you’re hopping on flights every other week or want to keep your camera with you to document your kiddos around town, there are some simple hacks to keep your gear in good shape and out of thieving hands.

    travel-safely-with-gear-10

    Make a list and check it twice

    Before you leave the house, make a detailed list of every piece of equipment you’re taking with you, along with all the serial numbers. It’s helpful to be able to tally the list up whenever you’re in transit. There isn’t a worse feeling than hopping on a train and realizing you thought your 50mm lens was in your backpack when it is actually waiting for you on the kitchen table. Make a list, run through it, and save yourself the effort of keeping every piece of gear in your own head. Having the serial numbers recorded will help you report and track them should they ever go missing.

    travel-safely-with-gear-1

    Our travel gear checklist changes depending on how long and far we’re traveling. When we took a six-month honeymoon in Asia last autumn, our list looked very different from when we fly to say, New York to shoot a wedding. Our two checklists look something like this:

    Personal Travel Checklist

    • 2 Canon Mark IIIs – one for each of us, though sometimes we get crazy and only bring one body.
    • 50mm f/1.2 lens – ALWAYS. We never leave home without this lens as it affords us the greatest flexibility to shoot any scene.
    • 45mm f/2.8 tilt-shift lens – When we travel through cities, having a tilt-shift is ideal for us, and since we also love shooting portraits with it, it somehow became one of our most versatile lenses.

    Professional Travel Checklist

    • 2 Canon Mark IIIs
    • 50mm f/1.2 – If pressed, we could probably shoot an entire wedding with it!
    • 45mm f/2.8 tilt-shift – Again, awesome for setting scenes and for individual portraits.
    • 35mm f/1.4 – Shooting couple’s portraits with this one sets a slightly more interesting scene than the 50mm and allows you to get better environmental details. It’s also our go-to for dance floor shots.
    • 85mm f/1.2 – Though we wish this one had a faster focus, it is just nuts how gorgeous this lens is. It takes portraits to an entirely new level. But it also weighs roughly one million pounds, so we use it less often than we’d like because it’s just too heavy for casual personal travel.

    travel-safely-with-gear-4

    Depending on the size and scope of the project, we may also bring:

    • 70-200mm f/2.8 – This is a battle because we definitely prefer to not carry it. But it’s a great catch-all lens for shooting from the very back of large ceremonies or capturing wedding guests from a distance and staying out of a scene.
    • 17-40mm f/4 (we use this wide-angle lens less and less, but occasionally it provides a good way to grab an entire wedding ceremony or a building from closer up. We’re increasingly turning to our 35mm for the work we used to put on the wide angle.)

    Our lighting setups are the most difficult part of travel, and inevitably earn us a long date with security. If we’re bringing our bare minimum, it includes the following:

    • Canon Speedlite 600EX-RTs – We have two matching Speedlites and the ST-E3-RT Transmitter. These serve us well for most weddings, but if we have to bring something a little heftier, we’ll also add . . .
    • Profoto B1 setup – This light is amazing. But it adds one more whole bag to carry on with us and we try to leave it for home studio work as much as possible to reduce our carry-ons. with the Profoto 36″ RFI Octa Softbox. The B1 also requires a . . .
    • C-stand –These are heavy as heck and a huge hassle to fly with, so we normally end up leaving it at home and just renting it wherever we land. For some equipment that is just too bulky, heavy, or awkward, consider the relative costs and benefits of renting it at your shoot location. For us, the $ 20 or so to rent a C-stand far outweighs the hassle of traveling with it.

    travel-safely-with-gear-9

    Before you leave for any trip, whether personal or professional, it’s imperative to know your ideal outcome for photos. We don’t bring a zoom lens or flashes on personal trips because we don’t shoot wildlife or anything that would require long lenses. We use only ambient light whenever possible and prefer our night photography to only incorporate the light that already sets the scene.

    Even for professional projects, we pack very carefully and keep our projects in mind as we put our gear together. Some large weddings or events might require a wide angle lens or a longer zoom, but if we can avoid bringing a lens we will. This requires more work on the planning end, working closely with our clients, and knowing our equipment really well. But it’s worth it when we can pack all of our gear into a little bag and be very confident that we can produce great work with it!

    Downsize

    On that note, pre-travel is a great time to downsize your gear. Take only what is most important to you, and consider the images you’ll be aiming for while you travel. We never leave home without our 50mm f/1.2, but depending on the kind of trip we may also bring along our tilt-shift lens or our 1950s Yashica film camera as well. You want to have options, but bringing along your entire catalog of gear without a specific plan for it will only add stress to your life. Keep it light, and use what you’ve got.

    travel-safely-2

    We got this case used for $ 20 at a camera shop and it has the best repackable/removeable foam pads in it.

    travel-safely-1


    If you’re flying, this is especially true. Keep your gear minimal enough to fit in your carry-on luggage. We would rather crawl to a destination than check a bag containing our most precious gear and let it out of our sight. Yes, it’s a super hassle to run your gear through security (they always seem to be blown away by light sets, old film cameras, and unusual lenses), but it also leads to some good conversations, and the extra time is worth the peace of mind.

    Going through customs

    A thought on customs forms: If you enter a country that may have an iffy relationship with journalists, lay low and don’t mark “photographer” or “journalist” on their customs forms. Drawing attention to your camera gear and your ability to use it will often create more hassle at the airport when you land. While we don’t encourage anyone to lie on their entry forms, the more you can stay under the radar the better.

    travel-safely-with-gear-11

    Protect your data

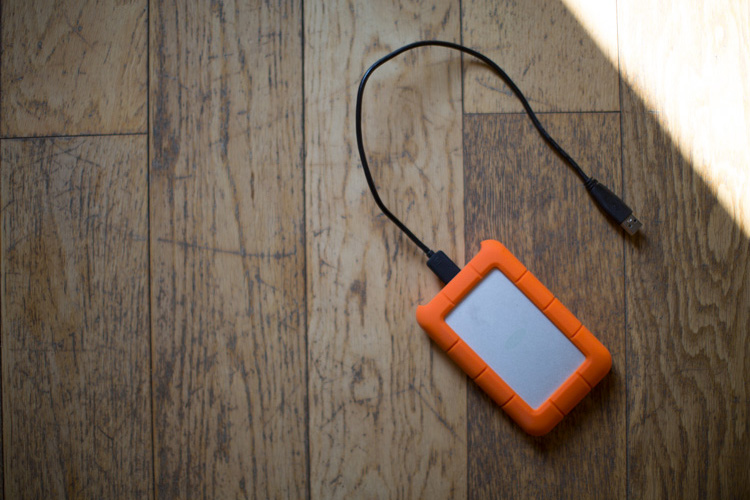
    We carry LaCie Rugged hard drives with us everywhere and back up whenever we can. We use online storage when we can find fast internet, but good luck finding wifi strong enough to upload a thousand raw files when you’re high up in the Burmese mountains. I keep track of this thing just as closely as I keep track of my passport. Why LaCie Rugged? The last thing we need is a hard drive failing because the dirt road was too bumpy when it was sitting in the back of some mud covered jeep.

    Note: Price LaCie Rugged drives on Amazon.com and B&H Photo’s websites. 

    lacie-drive-travel-photography

    We also use large memory cards that we back up every night. We always have a backup card in our briefcase, but as long as our cameras are with us, the memory card is as well. 

    Make your gear look cheap

    Avoid fancy, overdone camera cases and accessories. Anything with brand logos or obviously expensive features will draw attention to you. While you move your gear into your new low-key camera bag (there are lots of solid options out there that look like a regular bag, or you can buy protective inserts to slip into the old backpack that’s already sitting in the back of your closet), make a couple of tweaks to your gear that will instantly make it look less conspicuous:

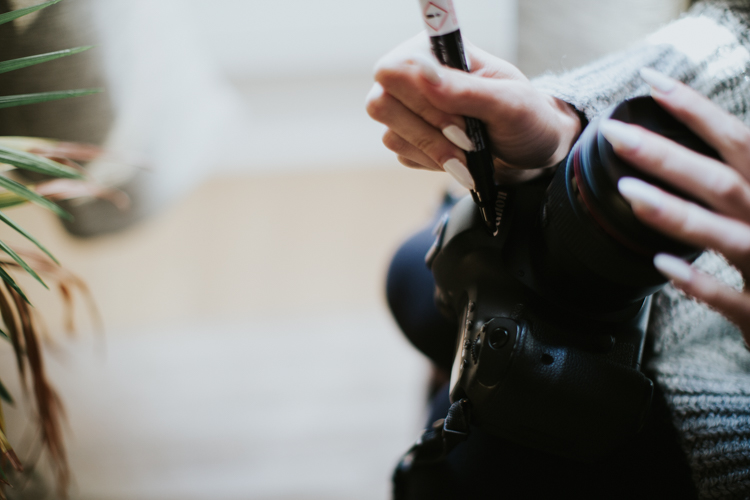
    • Remove your logo-covered camera strap (I mean, unless Canon is paying you to advertise for them, you don’t need their logo on your strap) and replace it with something more personal.Cover up your camera brand on the body with black gaffer’s tape (or even duck tape if you’re super committed). Not having that white print will make your camera look more average and take the attention away from how much you might have paid for it.

    travel-safely-with-gear-14

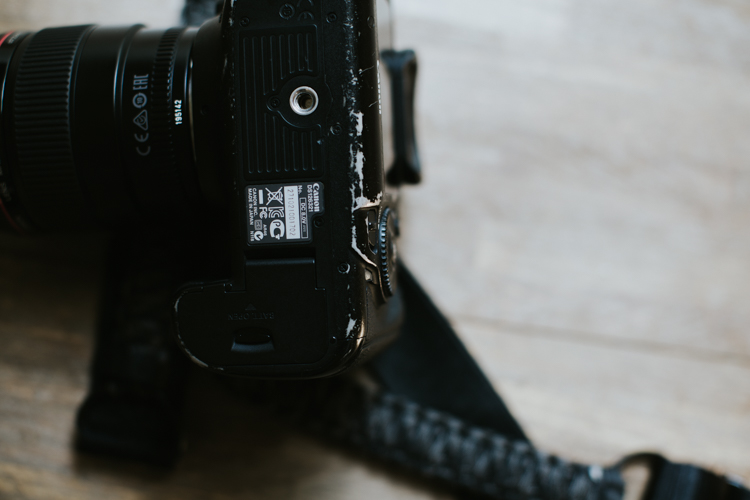
    • Scuff it up, baby! We’ve been shooting on our Canon 5D Mark IIIs for over three years now, and they are certainly showing the wear and tear of being dragged all over the world—and I love it! It’s like that well-worn sweater that everyone else thinks is a bit too beat-up, but you love it more every time you wear it. Those scuffs and marks mean you’re using your gear and that it’s serving you. Don’t rush to polish it up or replace it when it looks old. That charm is hard-earned and will cause anybody eyeing your gear to think it’s worth less than it probably is. Double win.

    travel-safely-with-gear-12

    Safety at your location

    Of course, getting to a place in one piece is only half the battle. Once you’ve landed, you have to keep your wits about you and work wisely. A few brief thoughts on shooting safely once you arrive:

    • Just like at home, don’t display your camera gear in a way that invites attention. Keep it close to your body, on a strap, or zipped into a bag that’s close to you. It’s amazing to me how many people will wander around with their cameras on full display, which doesn’t just make you look like a tourist, it’s inviting thieves to follow you.
    • Don’t talk to strangers about your stuff! We sat next to some drunk and friendly travelers in a bar once who wanted to show us their big zoom lenses they just bought. They made fun of our tiny 50mm, but we couldn’t help but feel like we’d get the last laugh as our camera setup was (though more expensive than theirs) tiny, inconspicuous, and less appealing to thieves who don’t know the difference.travel-safely-with-gear-8
    • A thought on tripods: we never, ever travel with them. They are awkward to set up in public areas, invite unwanted attention, and in 99% of cases aren’t actually necessary. We use makeshift tripods – things like banisters, tables, rocks, bar tops, etc., to get a steady shot when needed. We too often see other photographers making a big deal out of setting up a tripod Hi, thieves! We’re over here!) when they could have gotten just as excellent a shot with a slightly faster shutter speed. Strongly consider whether or not you need a tripod and make the best decision for yourself, and if you do bring one, keep your camera strap around your neck while you shoot
    • While you should always be careful in unsafe neighborhoods, we also recommend that you do not limit yourself to only visiting “safe” areas while you travel. Not only can theft happen anywhere, but you’ll miss some of the best parts of travel if you restrict yourself too much. When shooting in neighborhoods with a higher likelihood of crime, be alert. Walk confidently with your head up and avoid hunching around your gear as if you have something to hide. Keep your bags zipped and always be aware of pick-pockets, no matter where you are. Shoot confidently without inviting too much attention to yourself. 

    Conclusion

    travel-safely-with-gear-7

    Capturing all the beauty and hidden corners of this world is one of the most satisfying things about becoming more proficient with our gear. Though there are risks anytime you leave the house with pricey items strapped to your shoulder, this gear is made to be used, to show some wear and tear, and not to be thought of as so precious that it’s left at home.

    How do you protect your gear when you travel? Please share your comments and tips below.

    googletag.cmd.push(function() {
    tablet_slots.push( googletag.defineSlot( “/1005424/_dPSv4_tab-all-article-bottom_(300×250)”, [300, 250], “pb-ad-78623” ).addService( googletag.pubads() ) ); } );

    googletag.cmd.push(function() {
    mobile_slots.push( googletag.defineSlot( “/1005424/_dPSv4_mob-all-article-bottom_(300×250)”, [300, 250], “pb-ad-78158” ).addService( googletag.pubads() ) ); } );

    The post How to Travel Safely with Your Camera Gear by Tim Sullivan appeared first on Digital Photography School.

    Digital Photography School

  • 19 Delicious Bokeh-licious Images

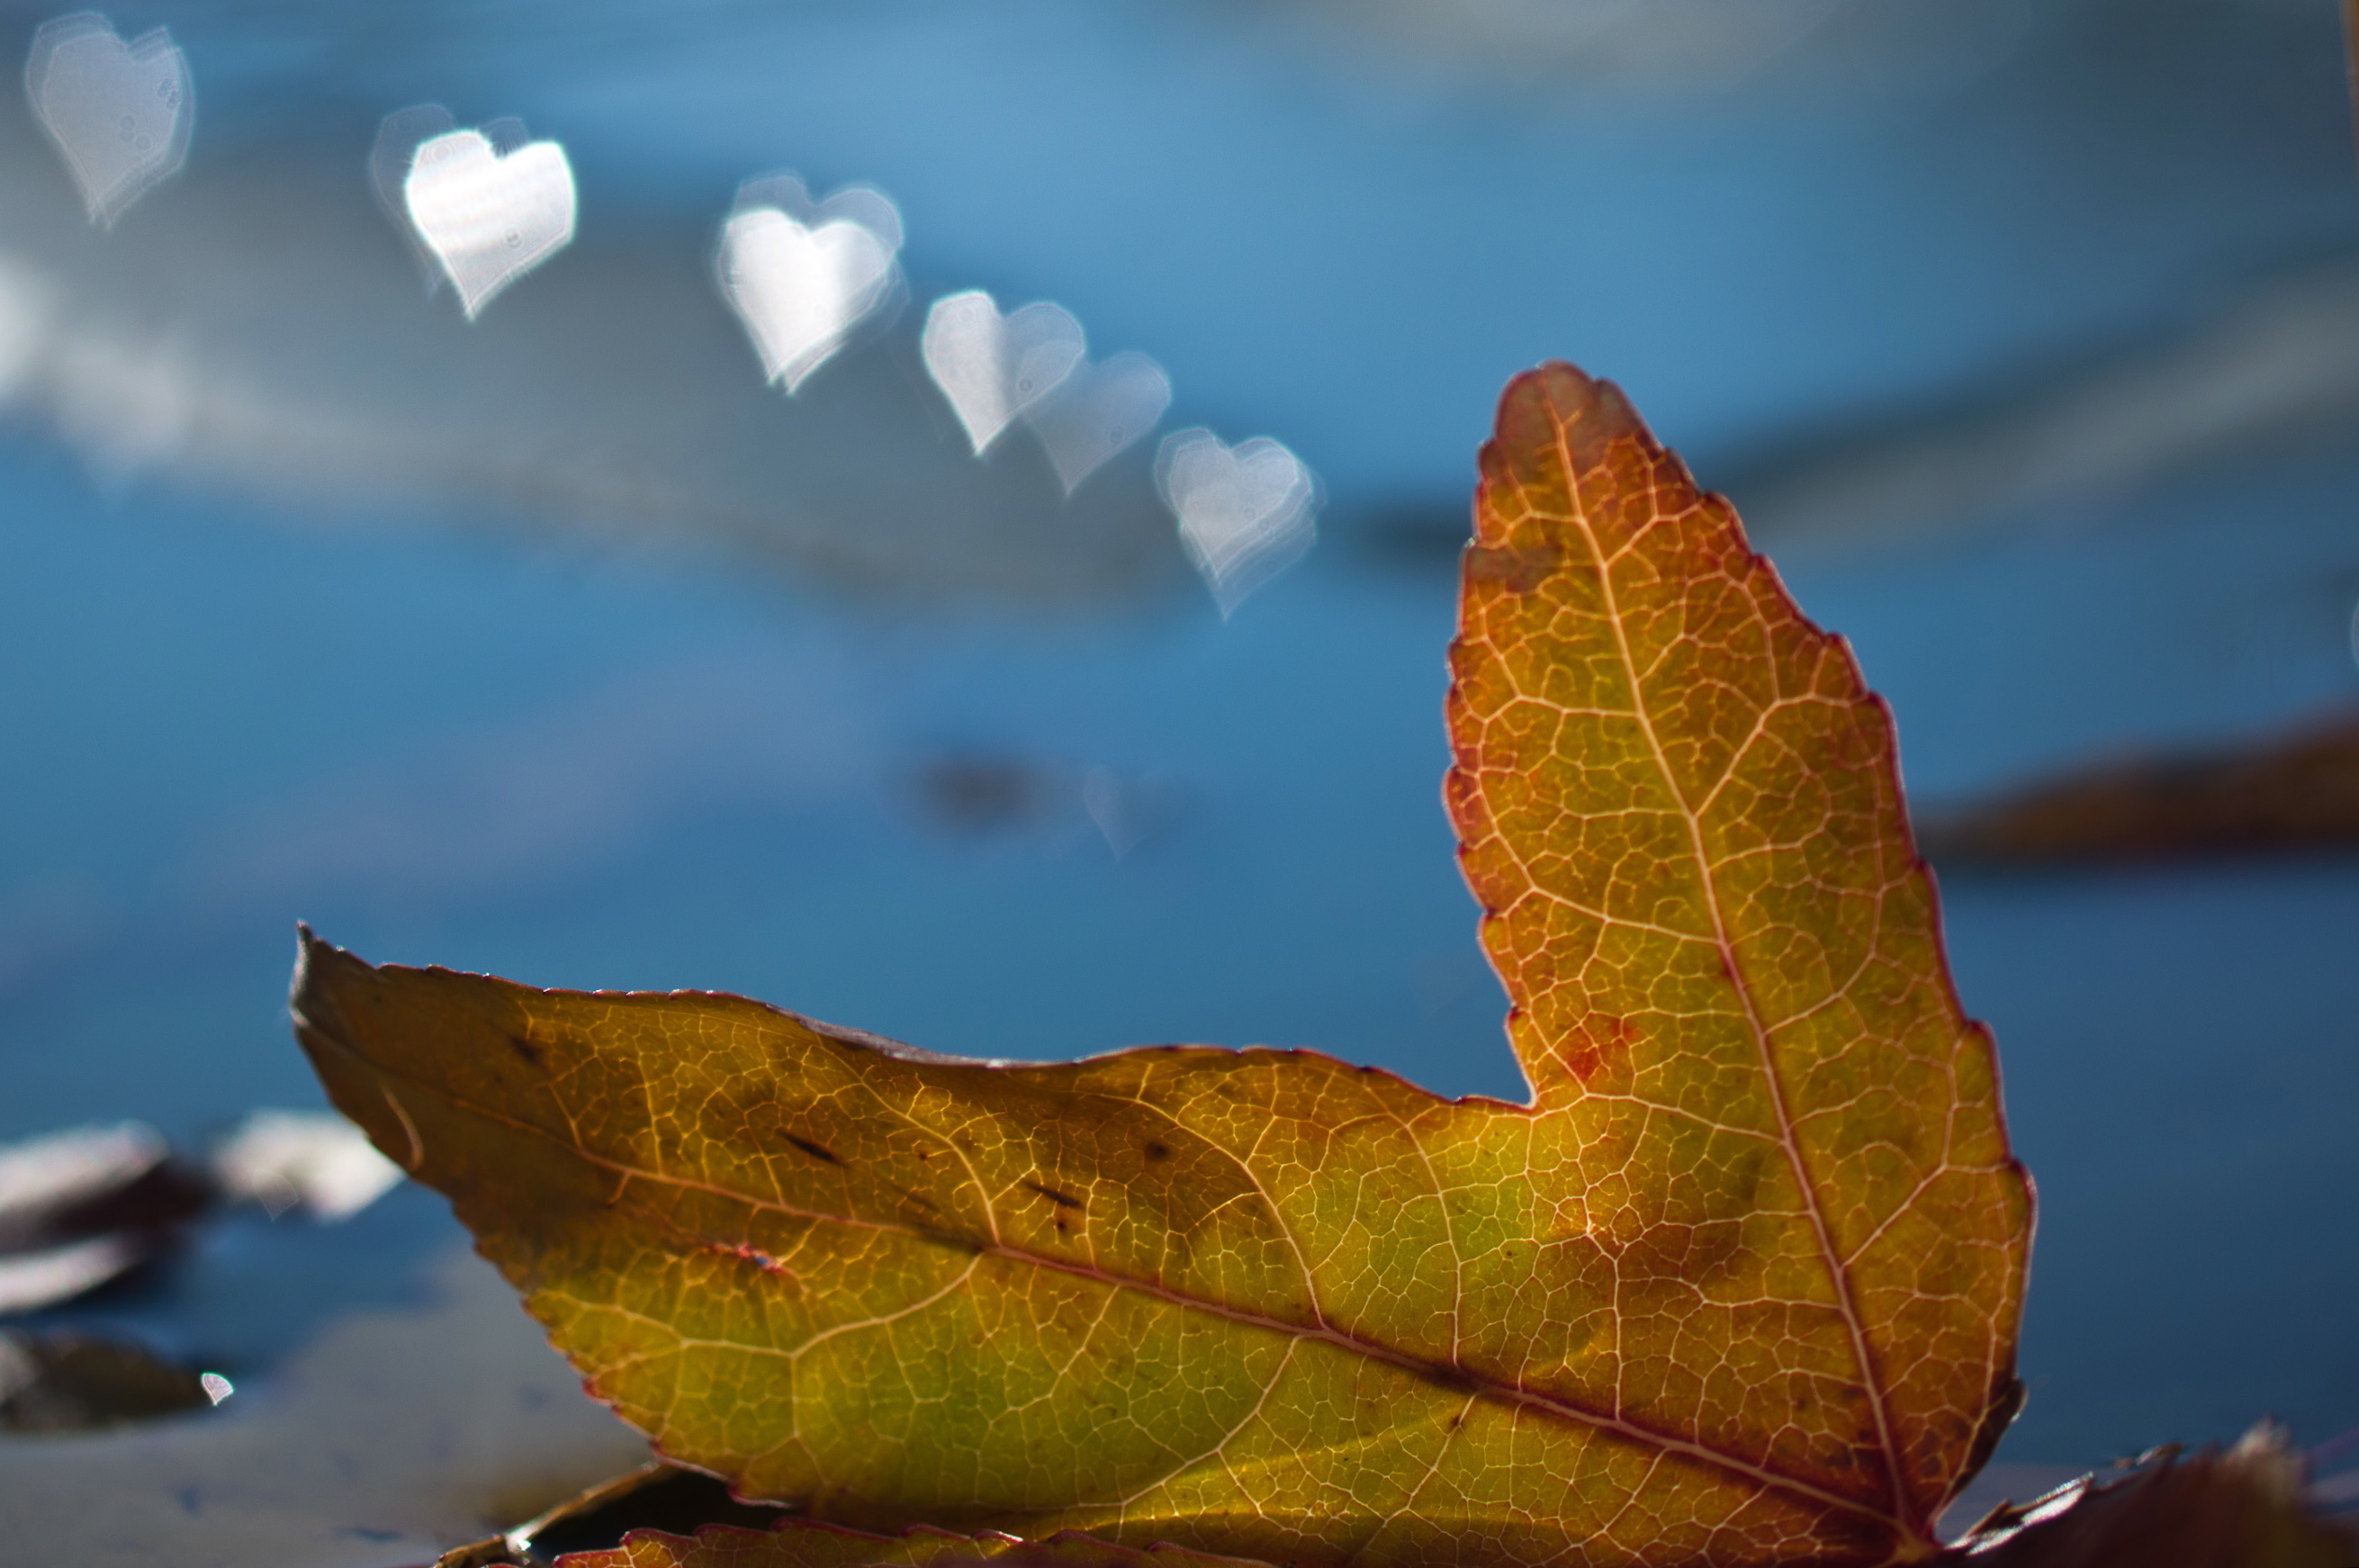
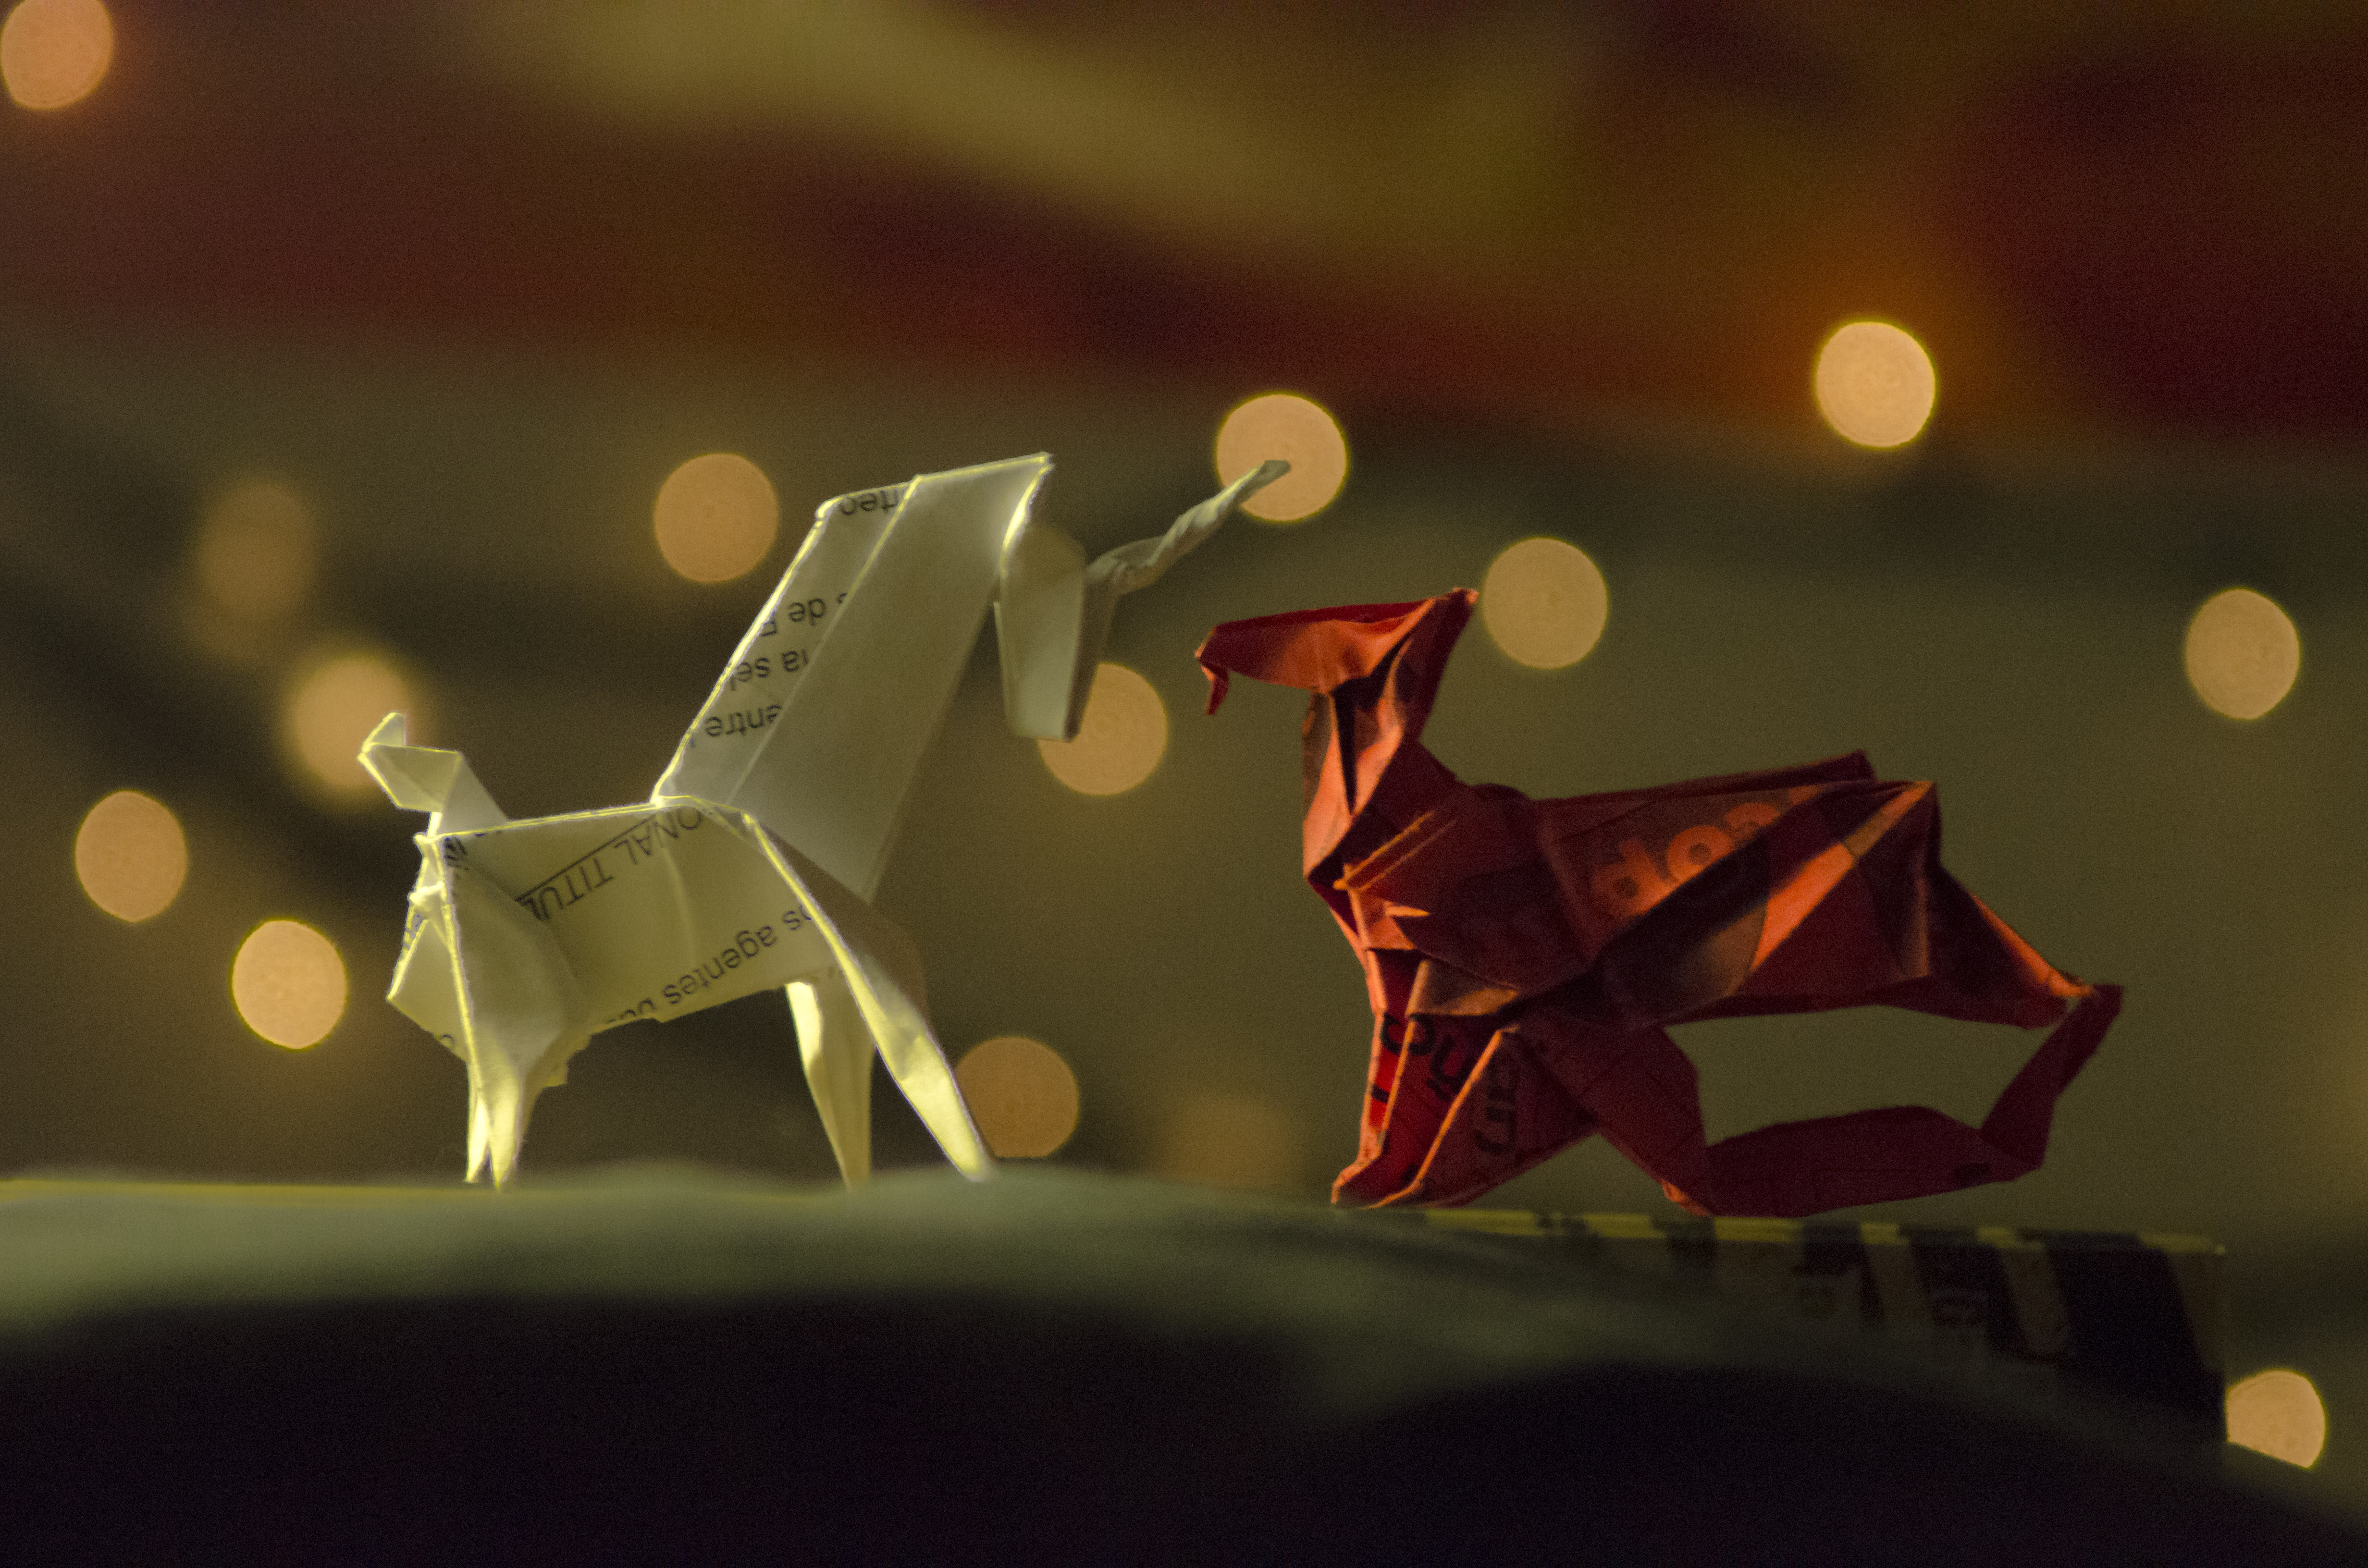
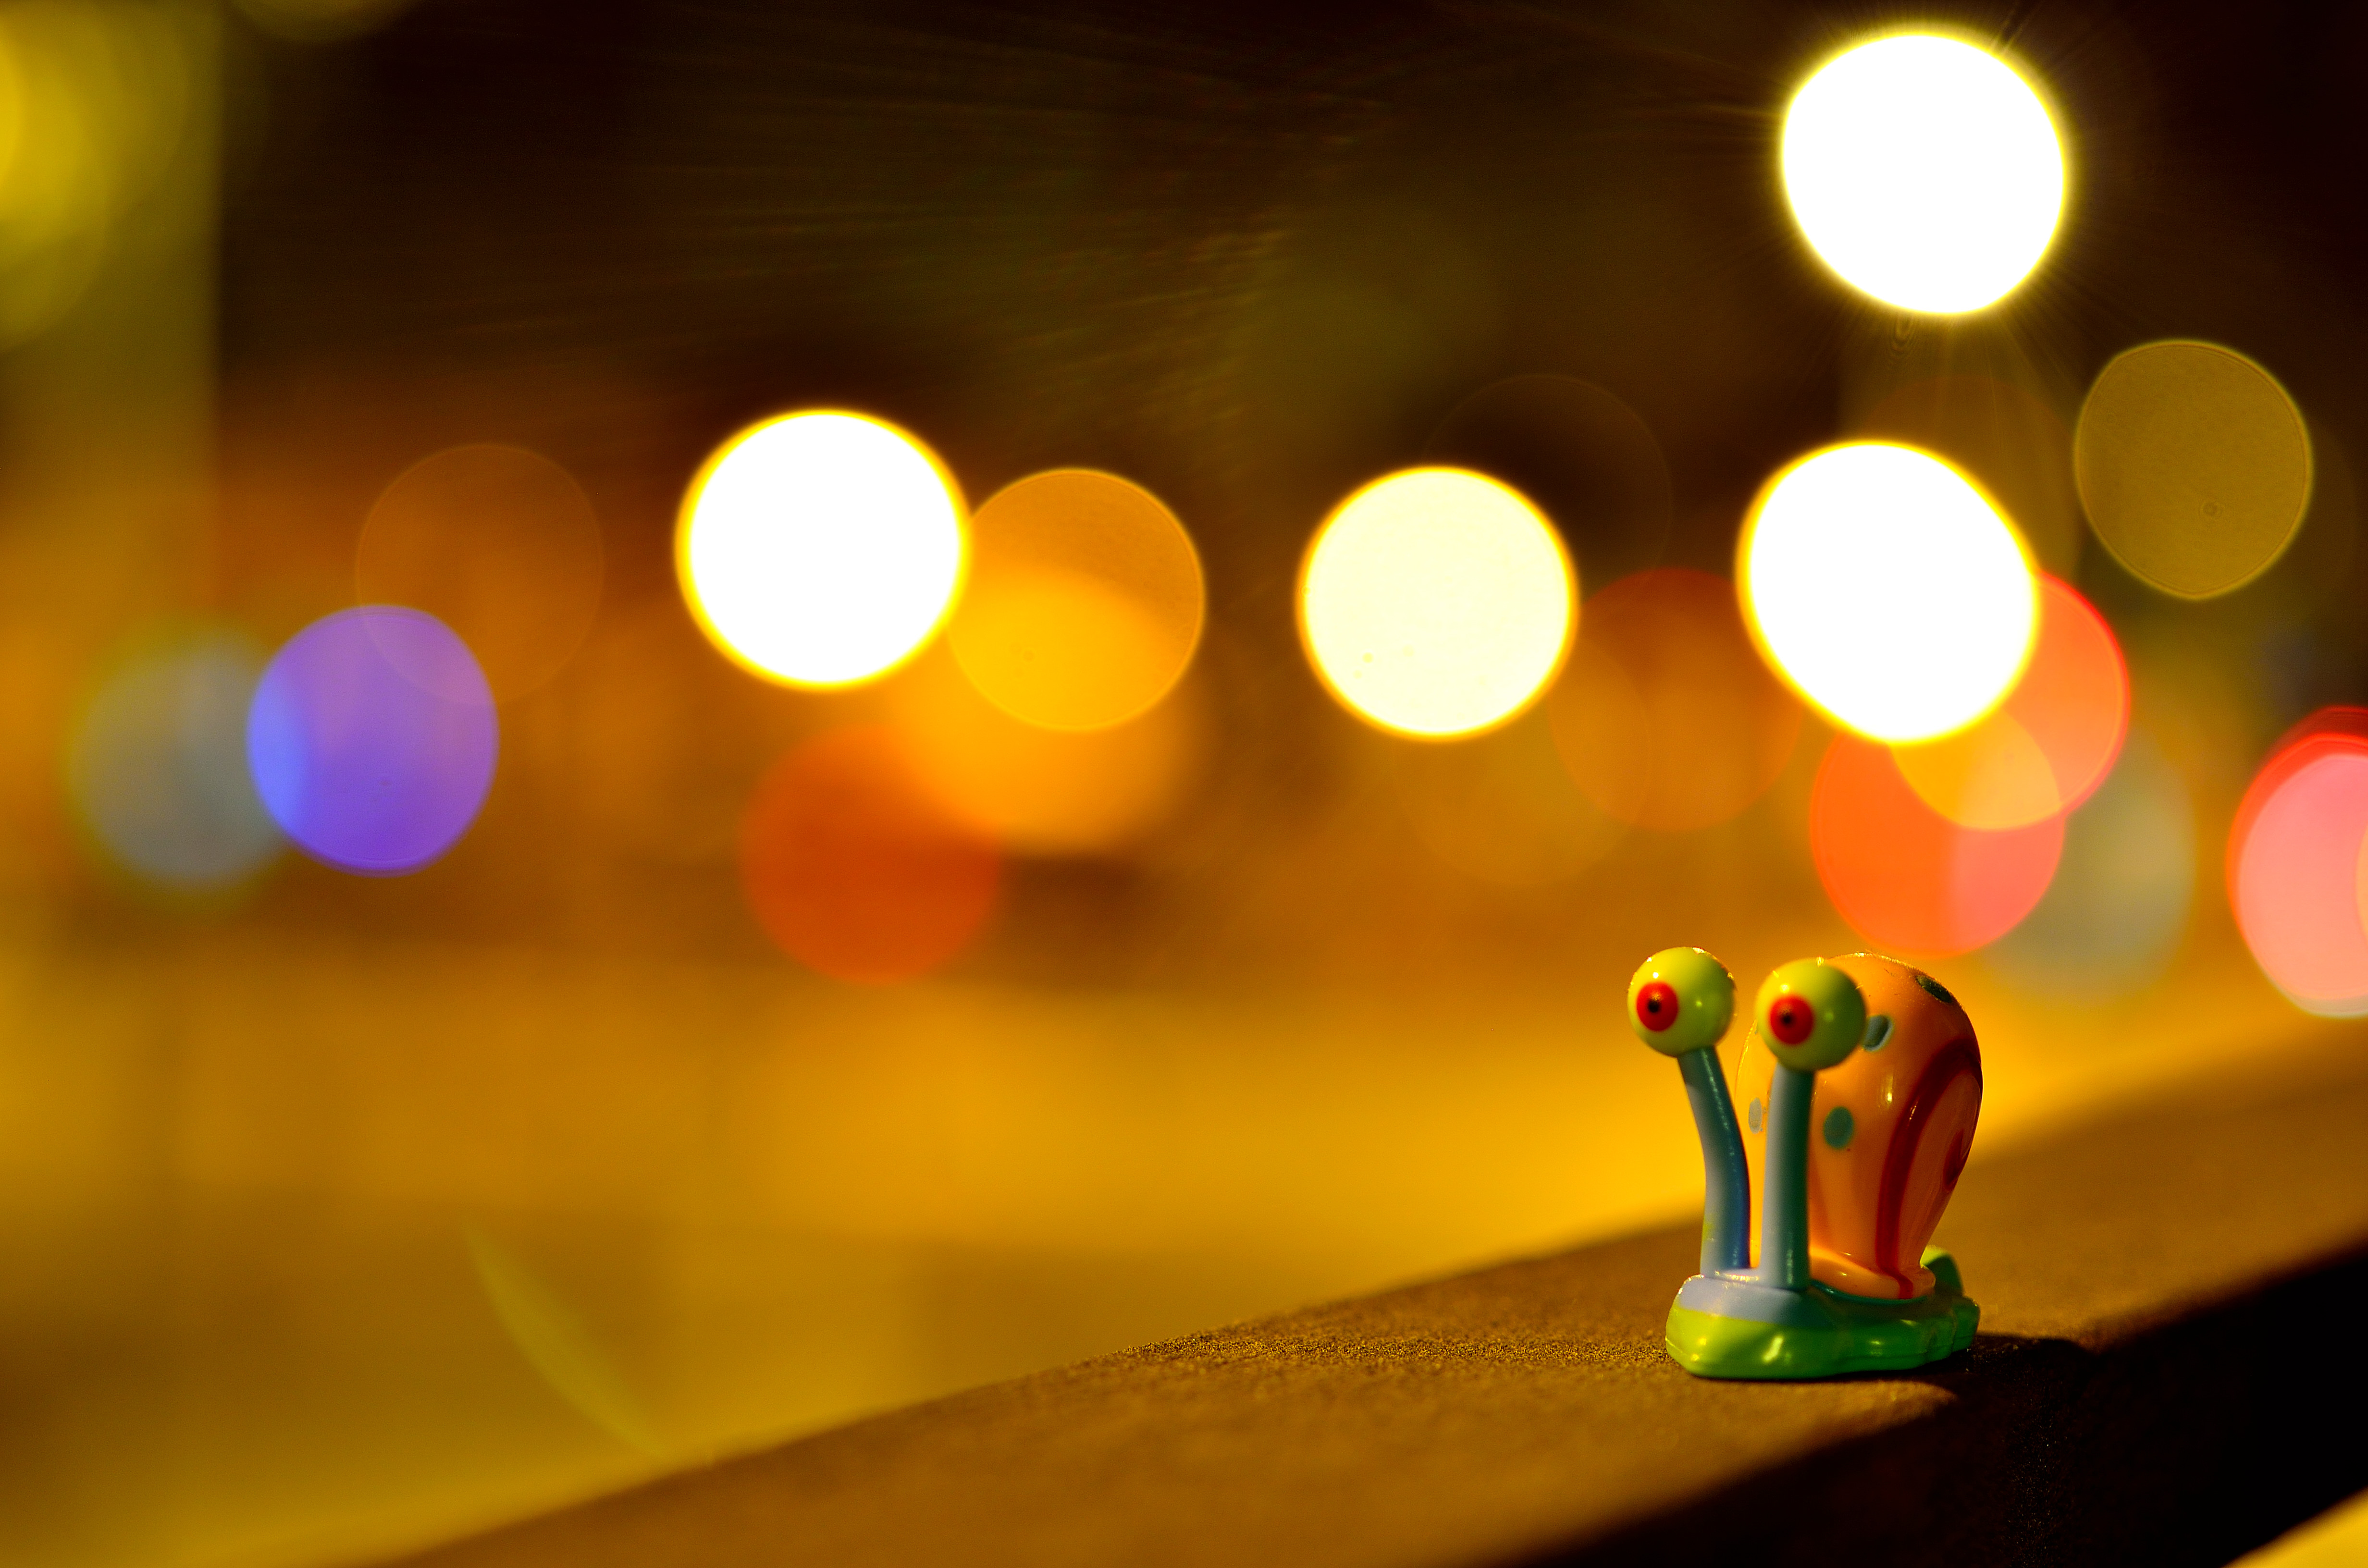
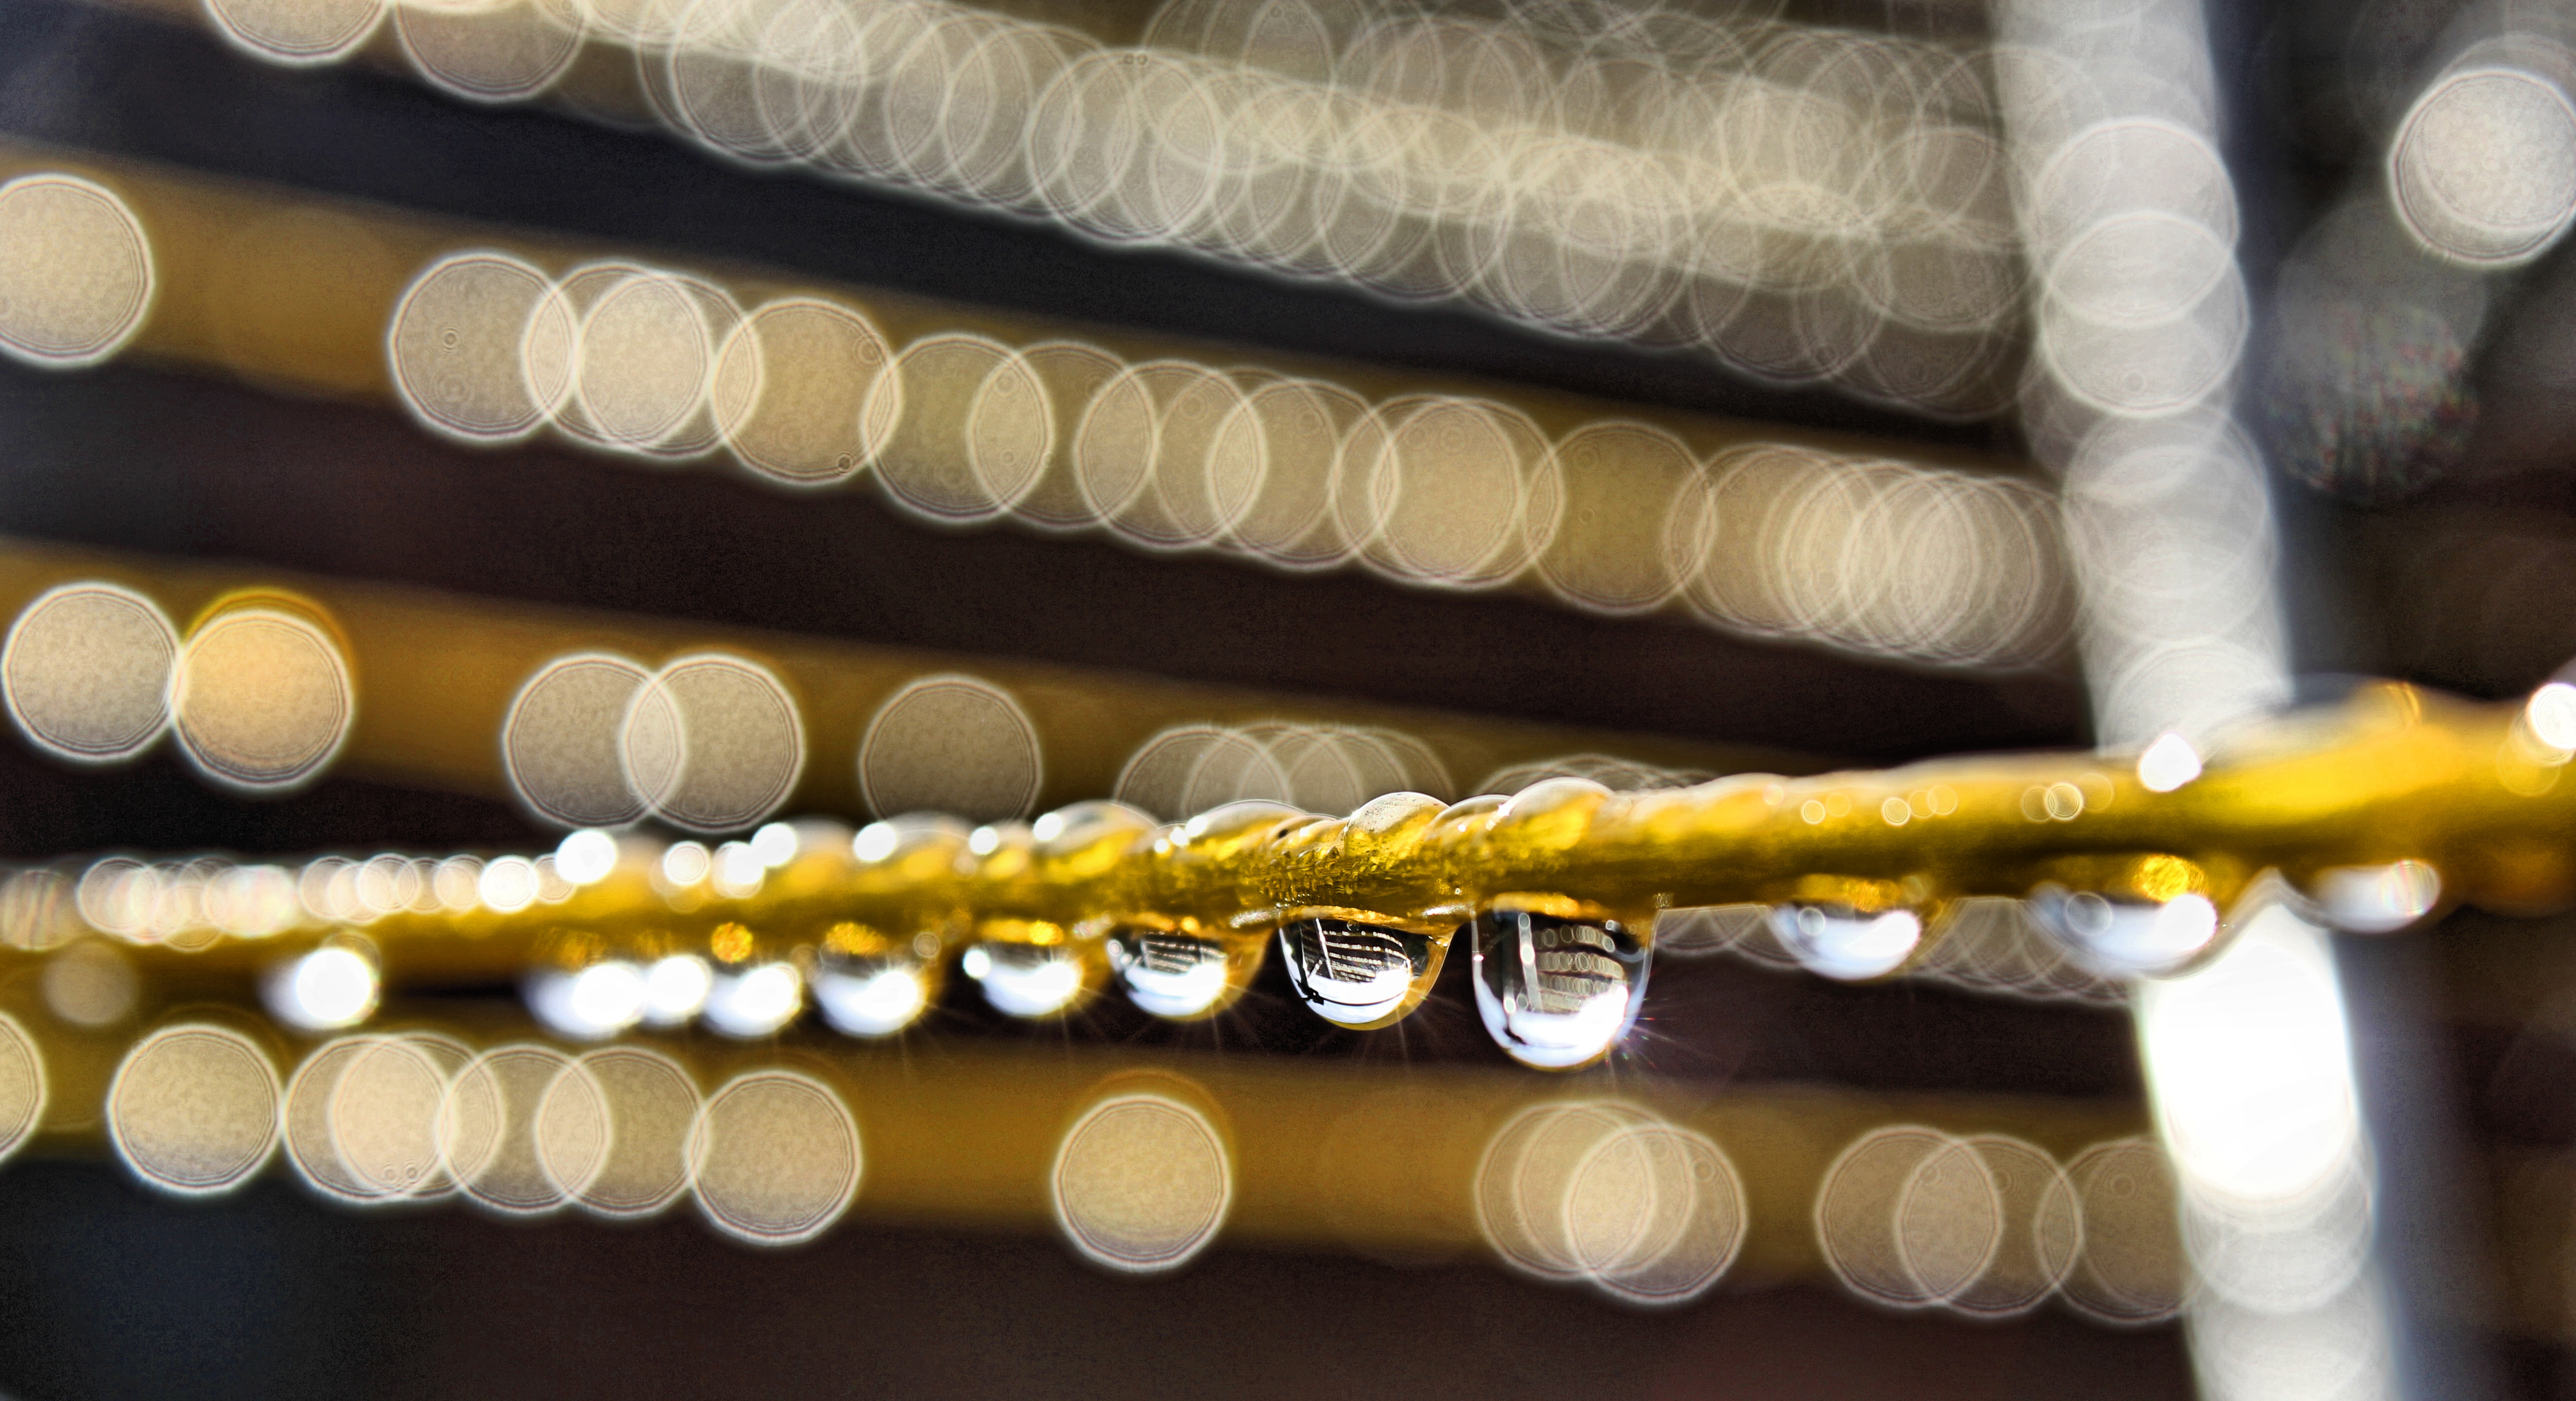
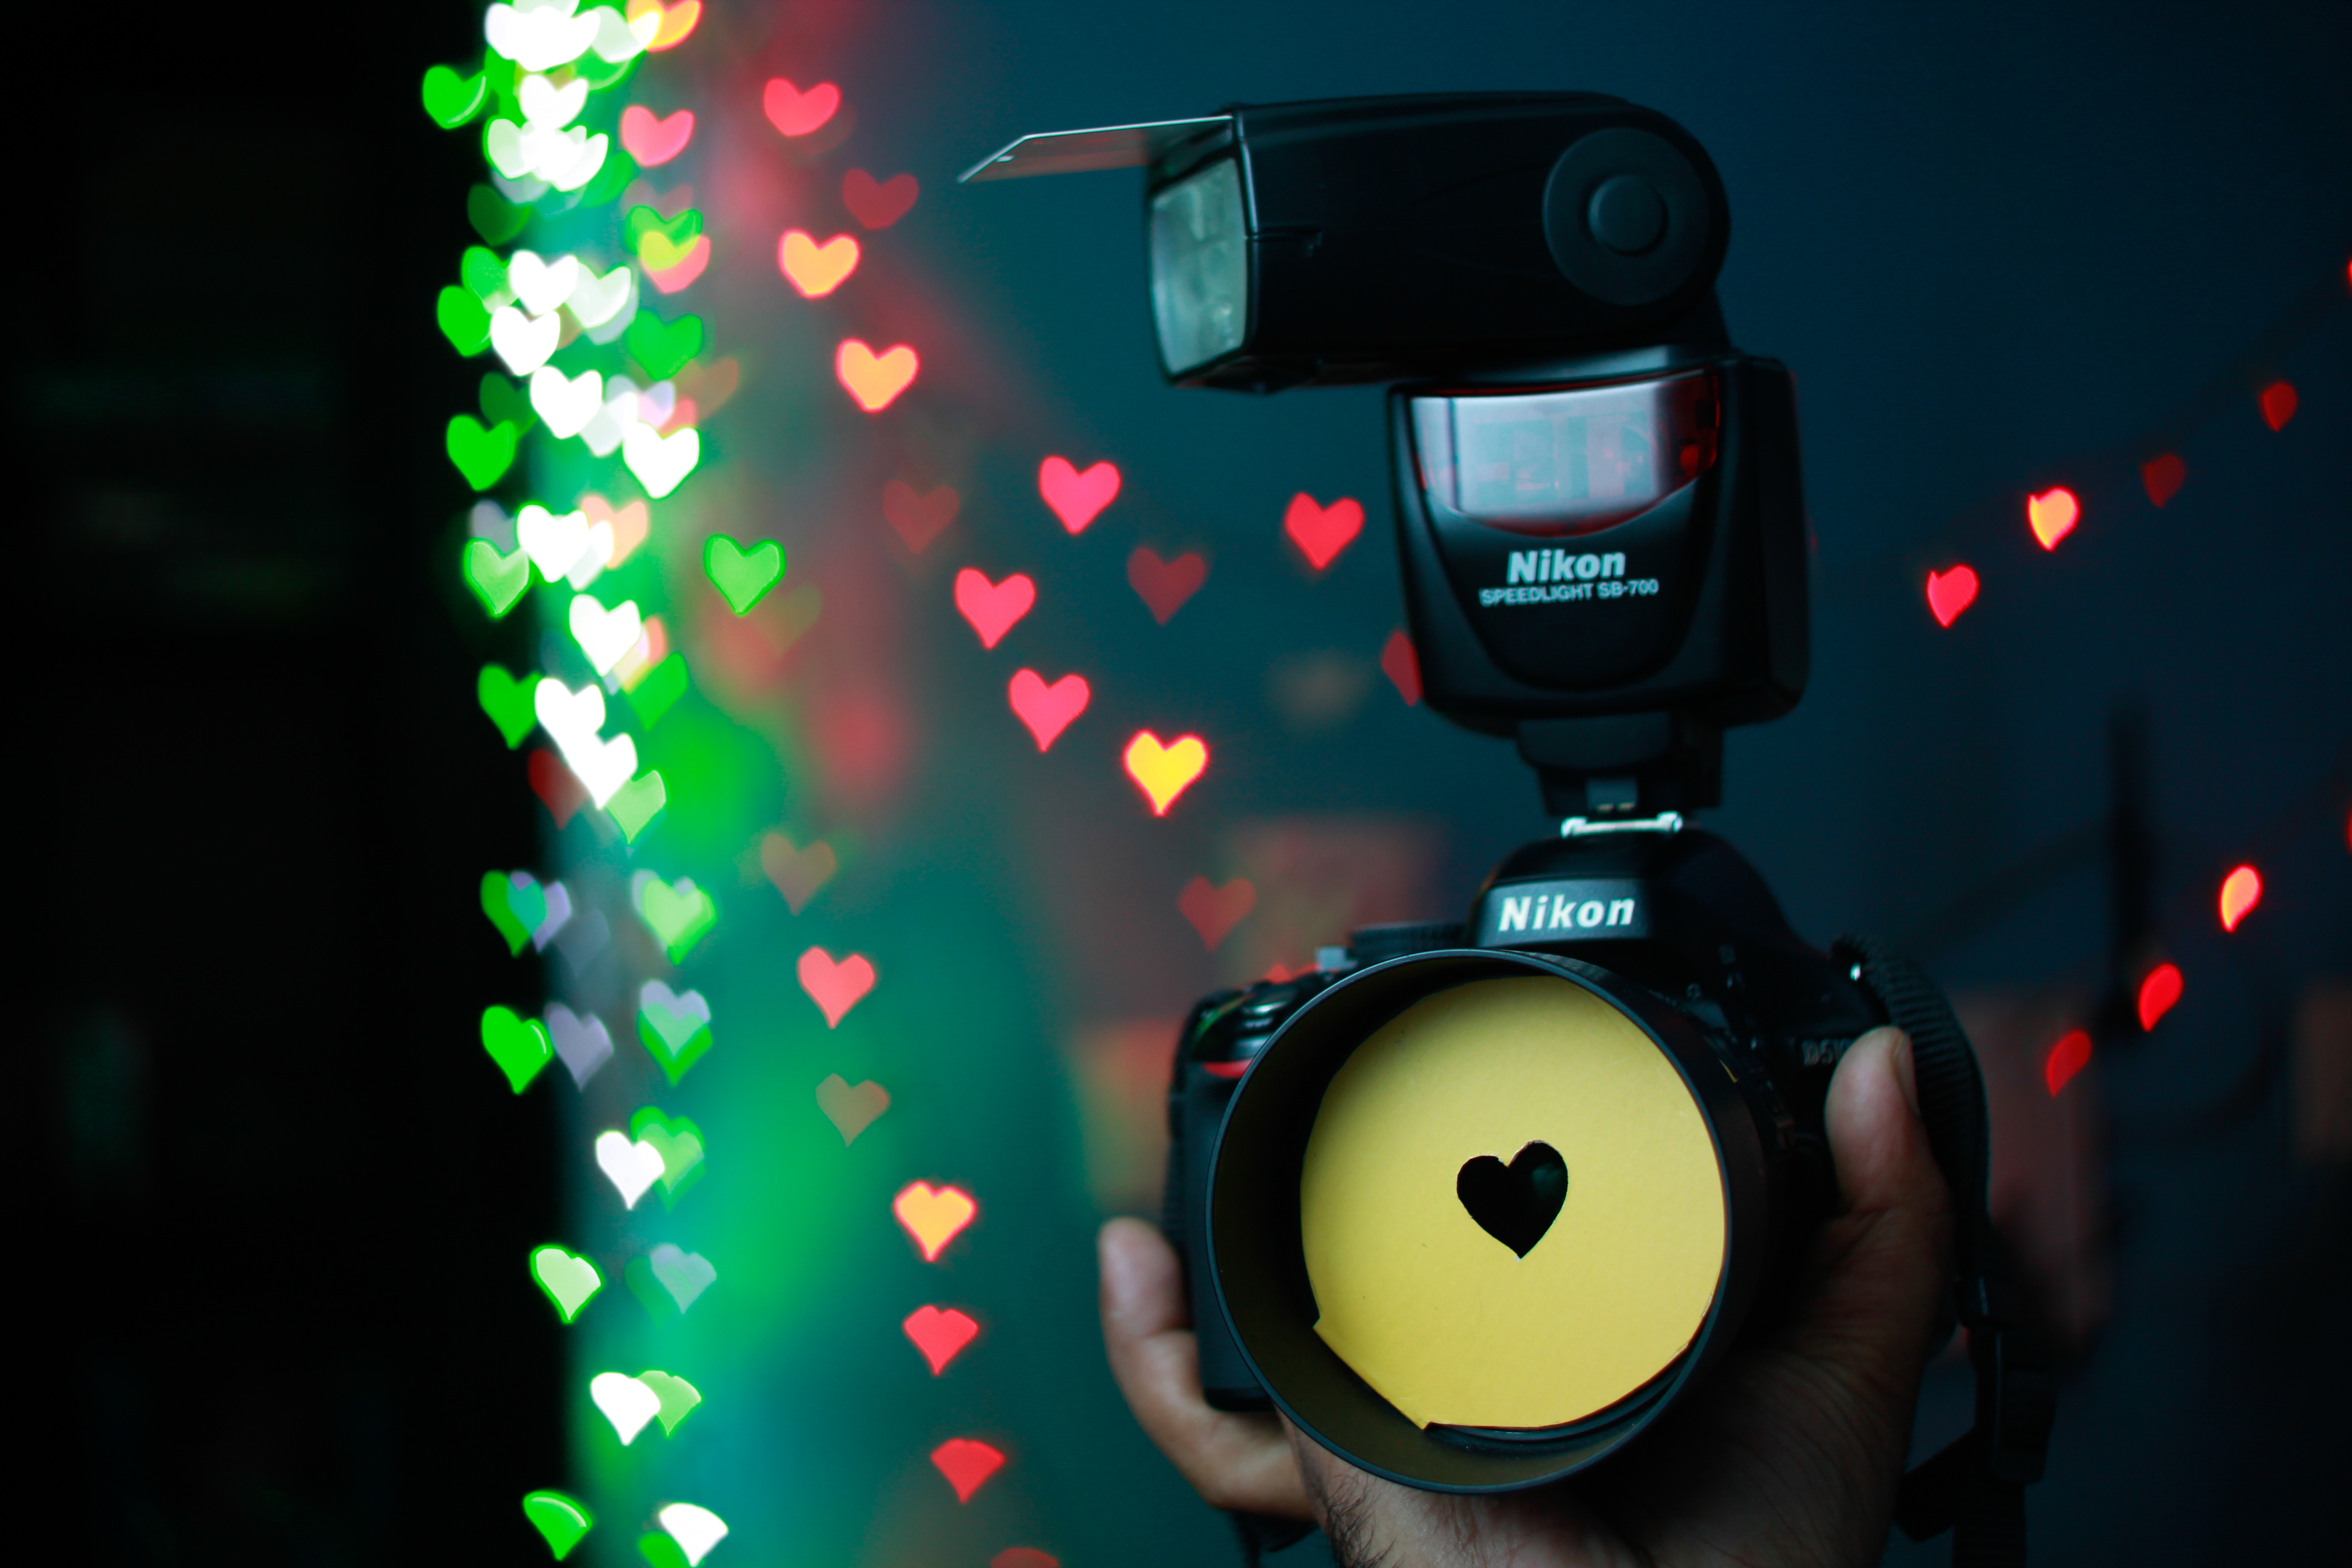
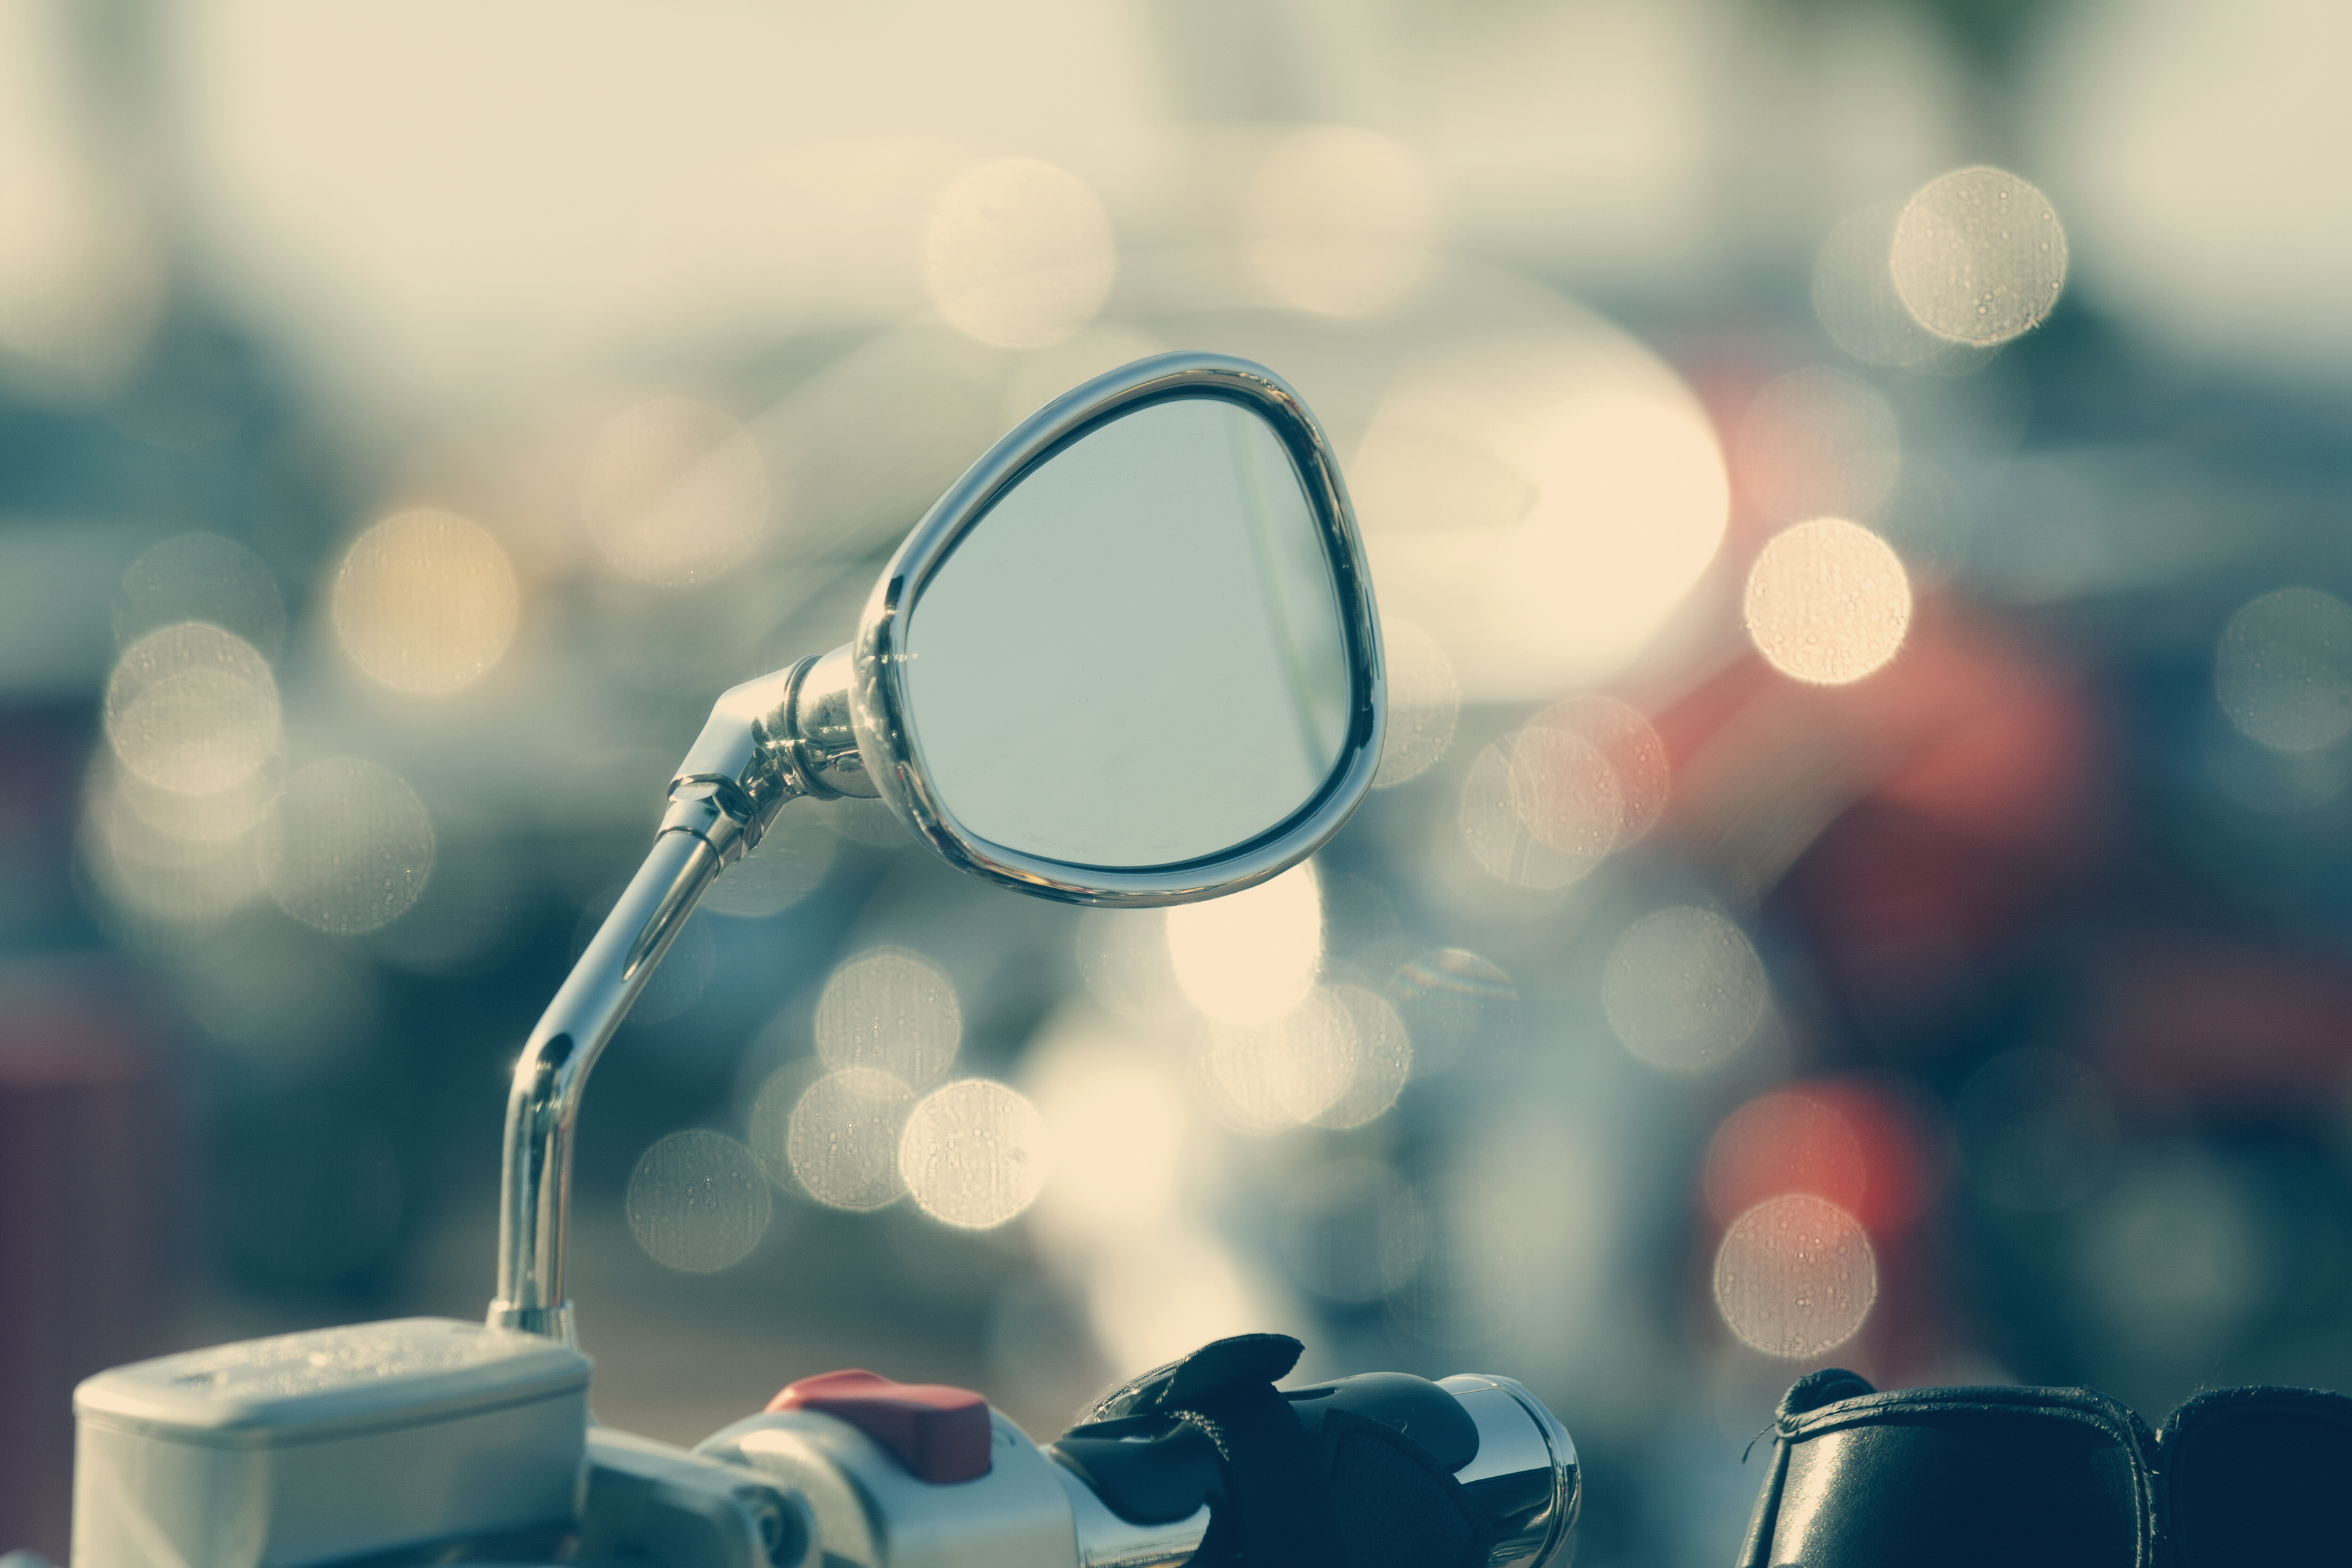
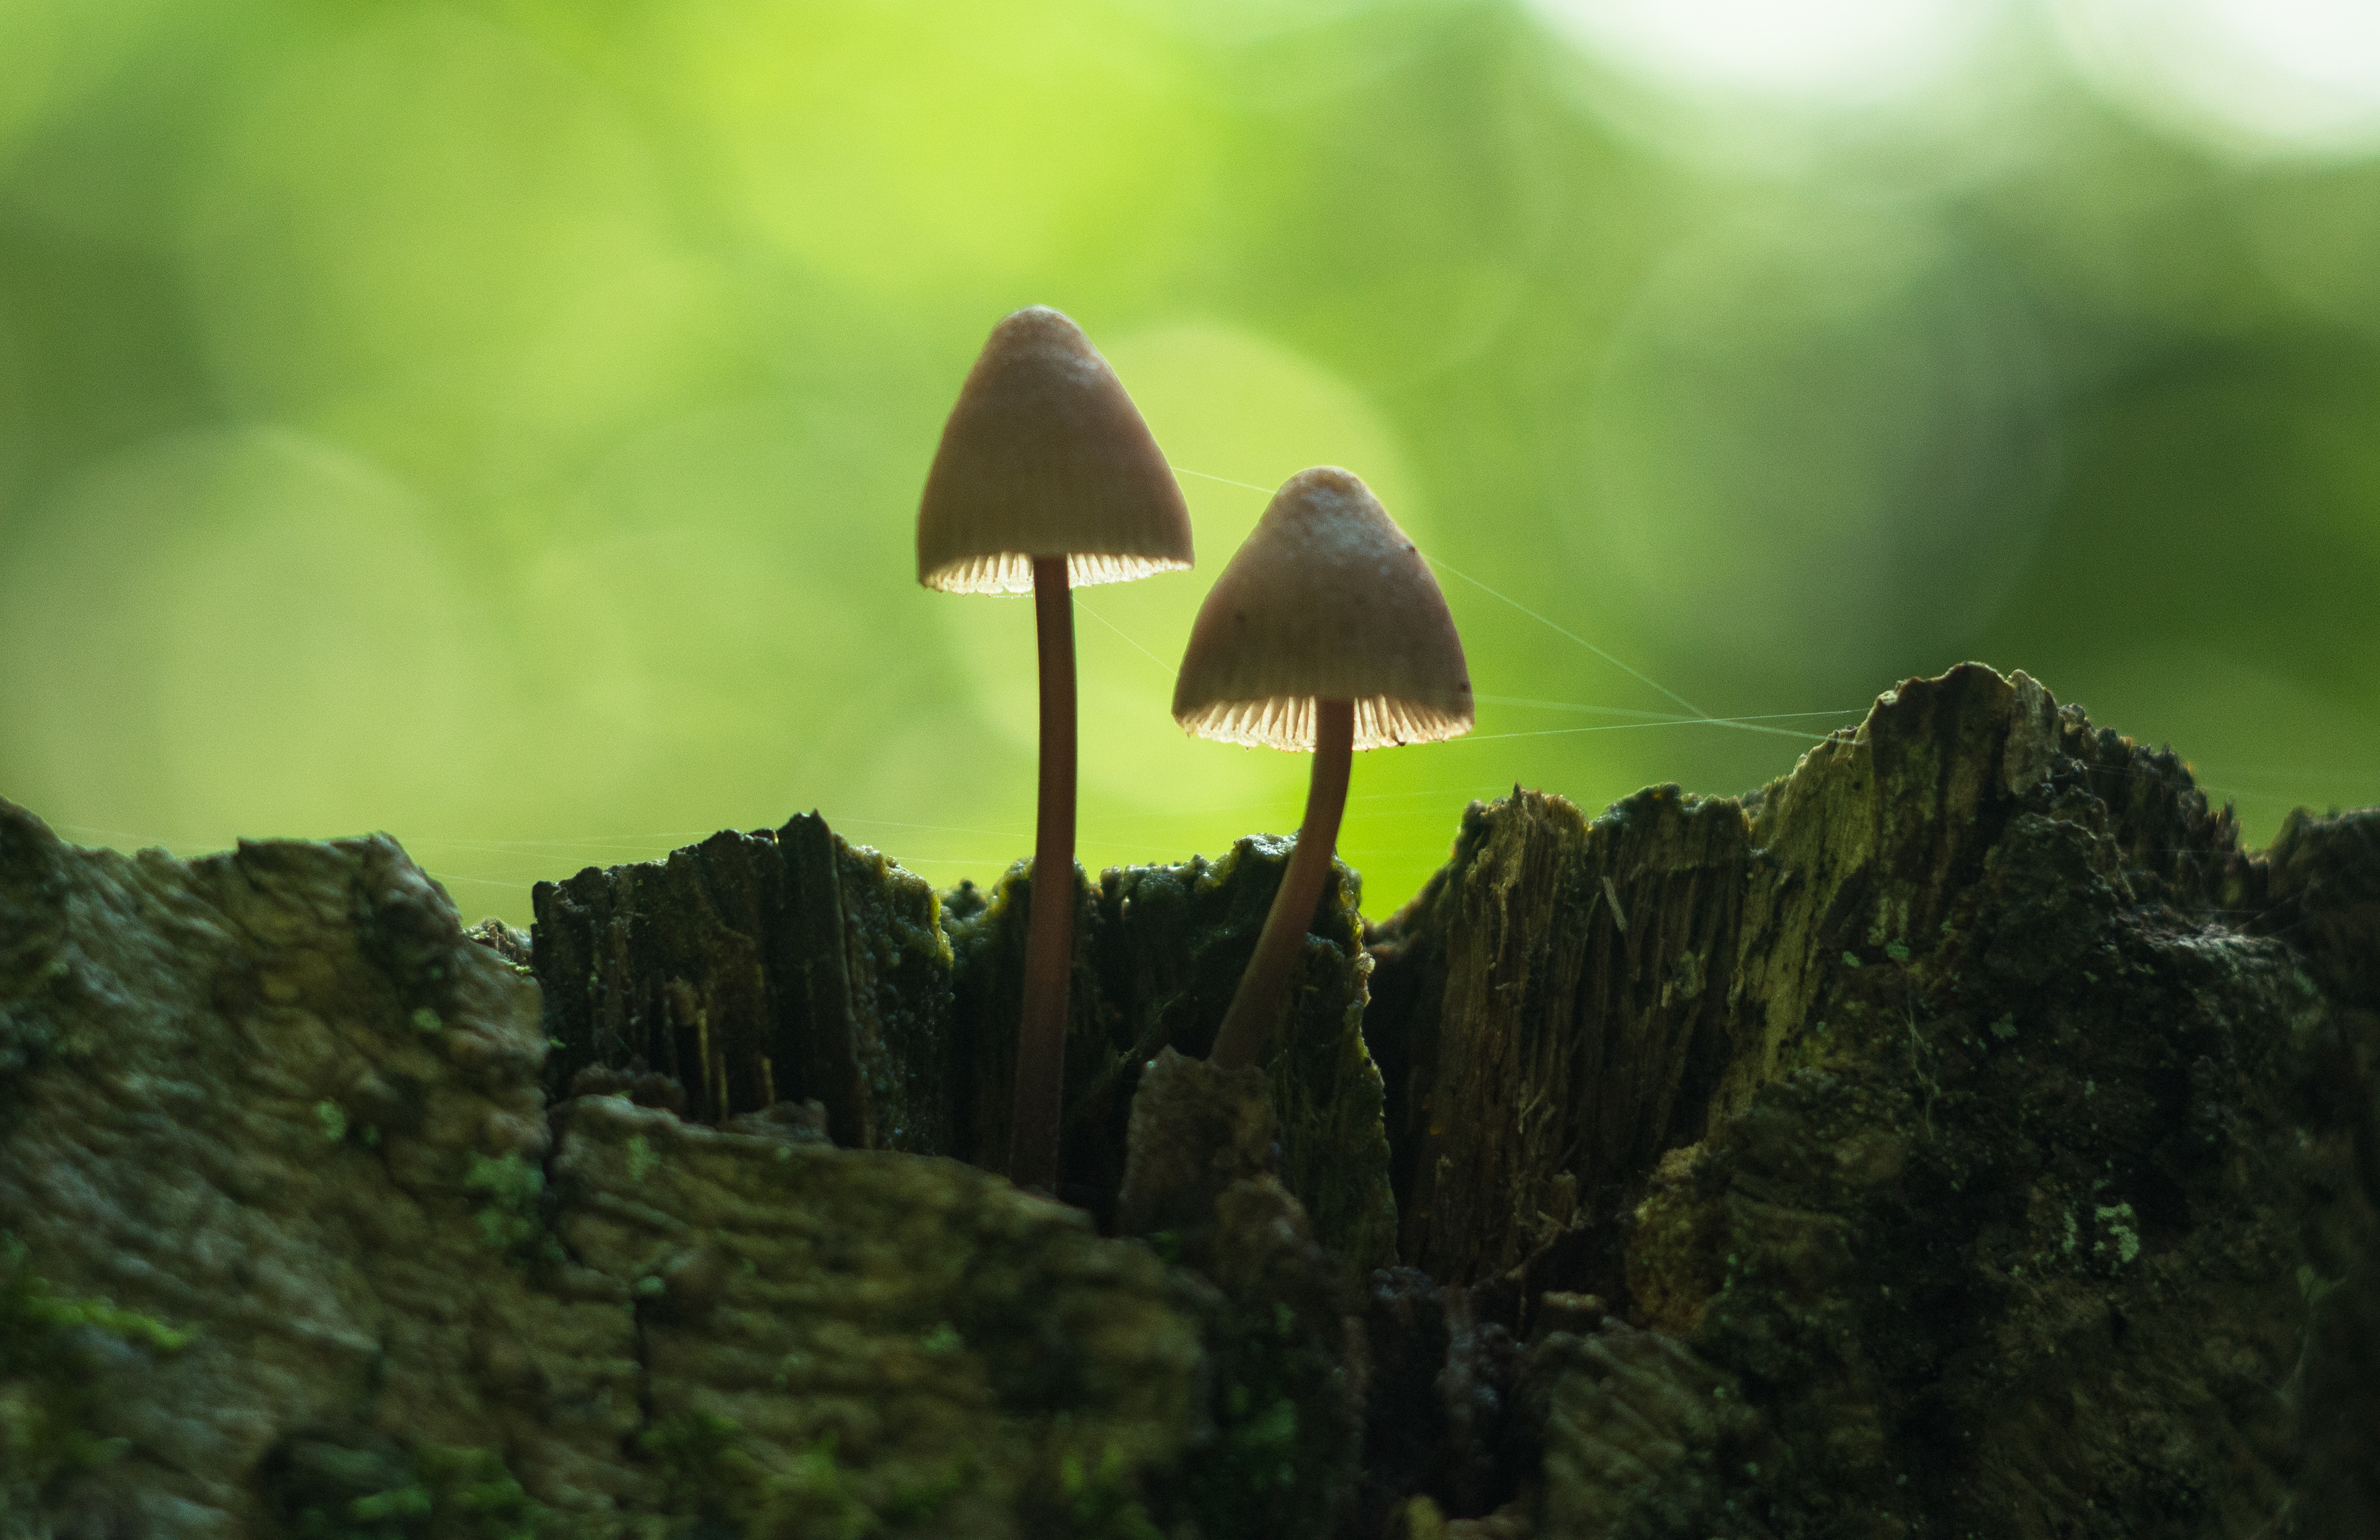
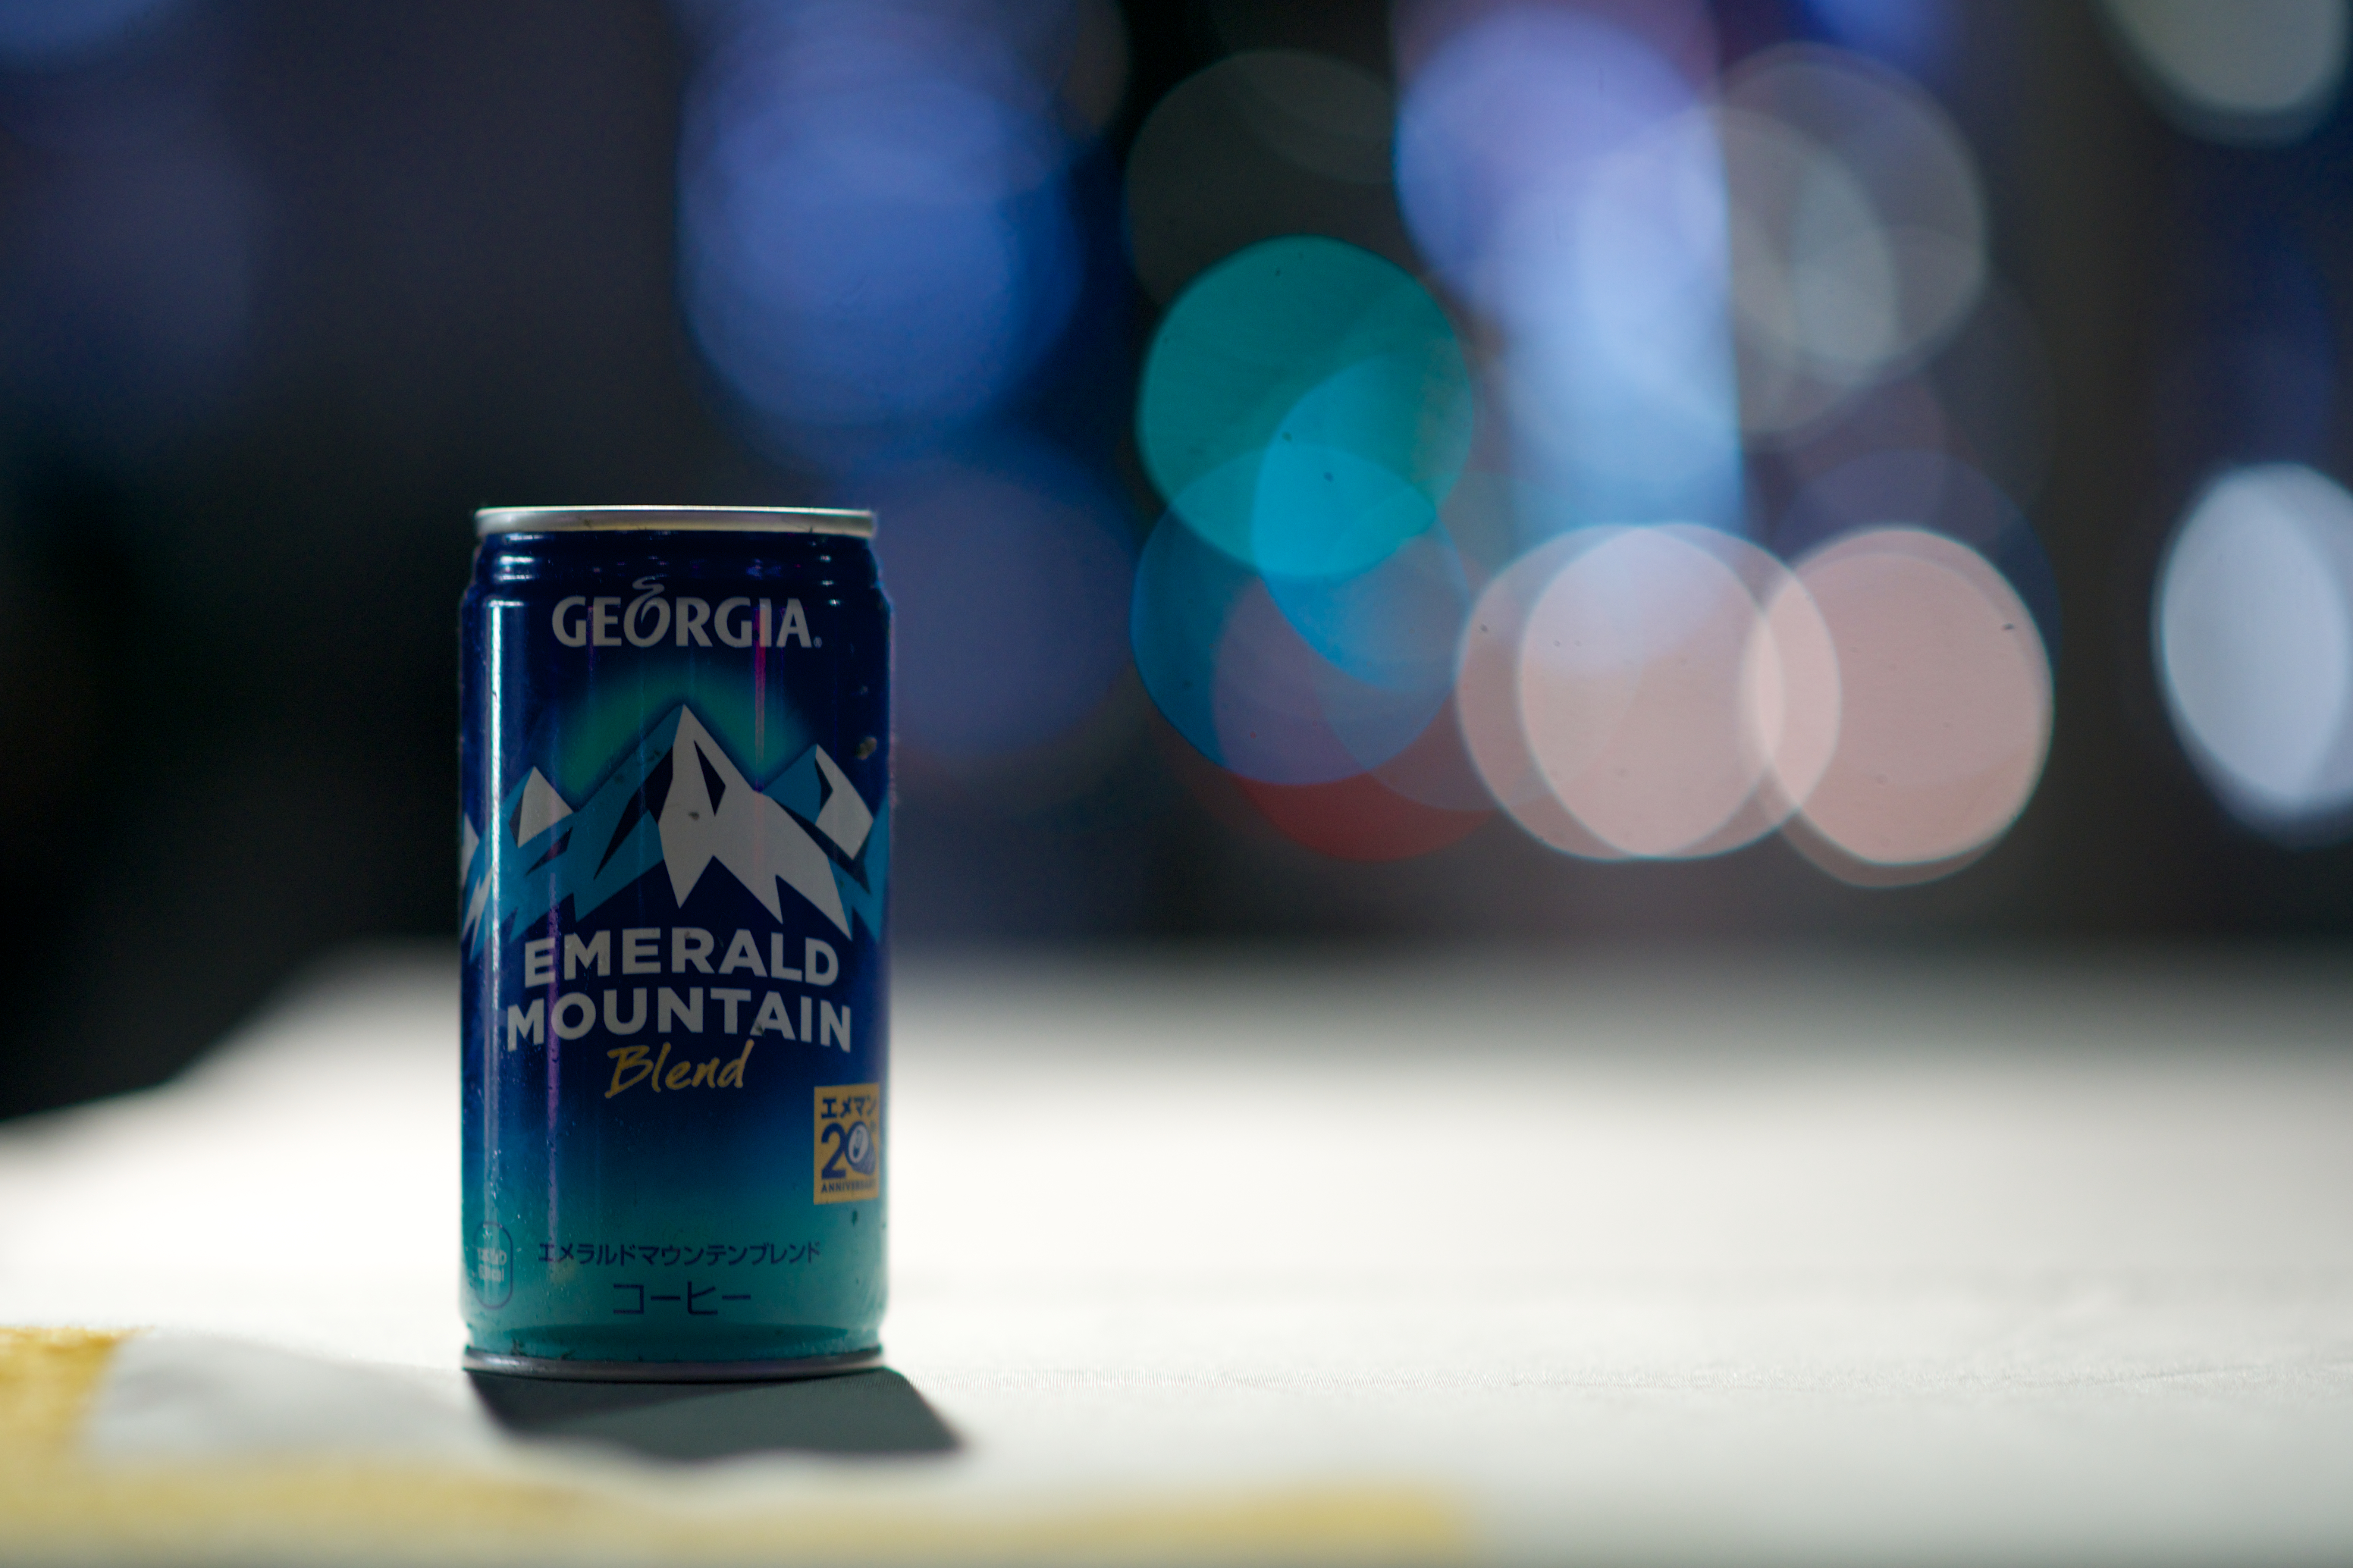
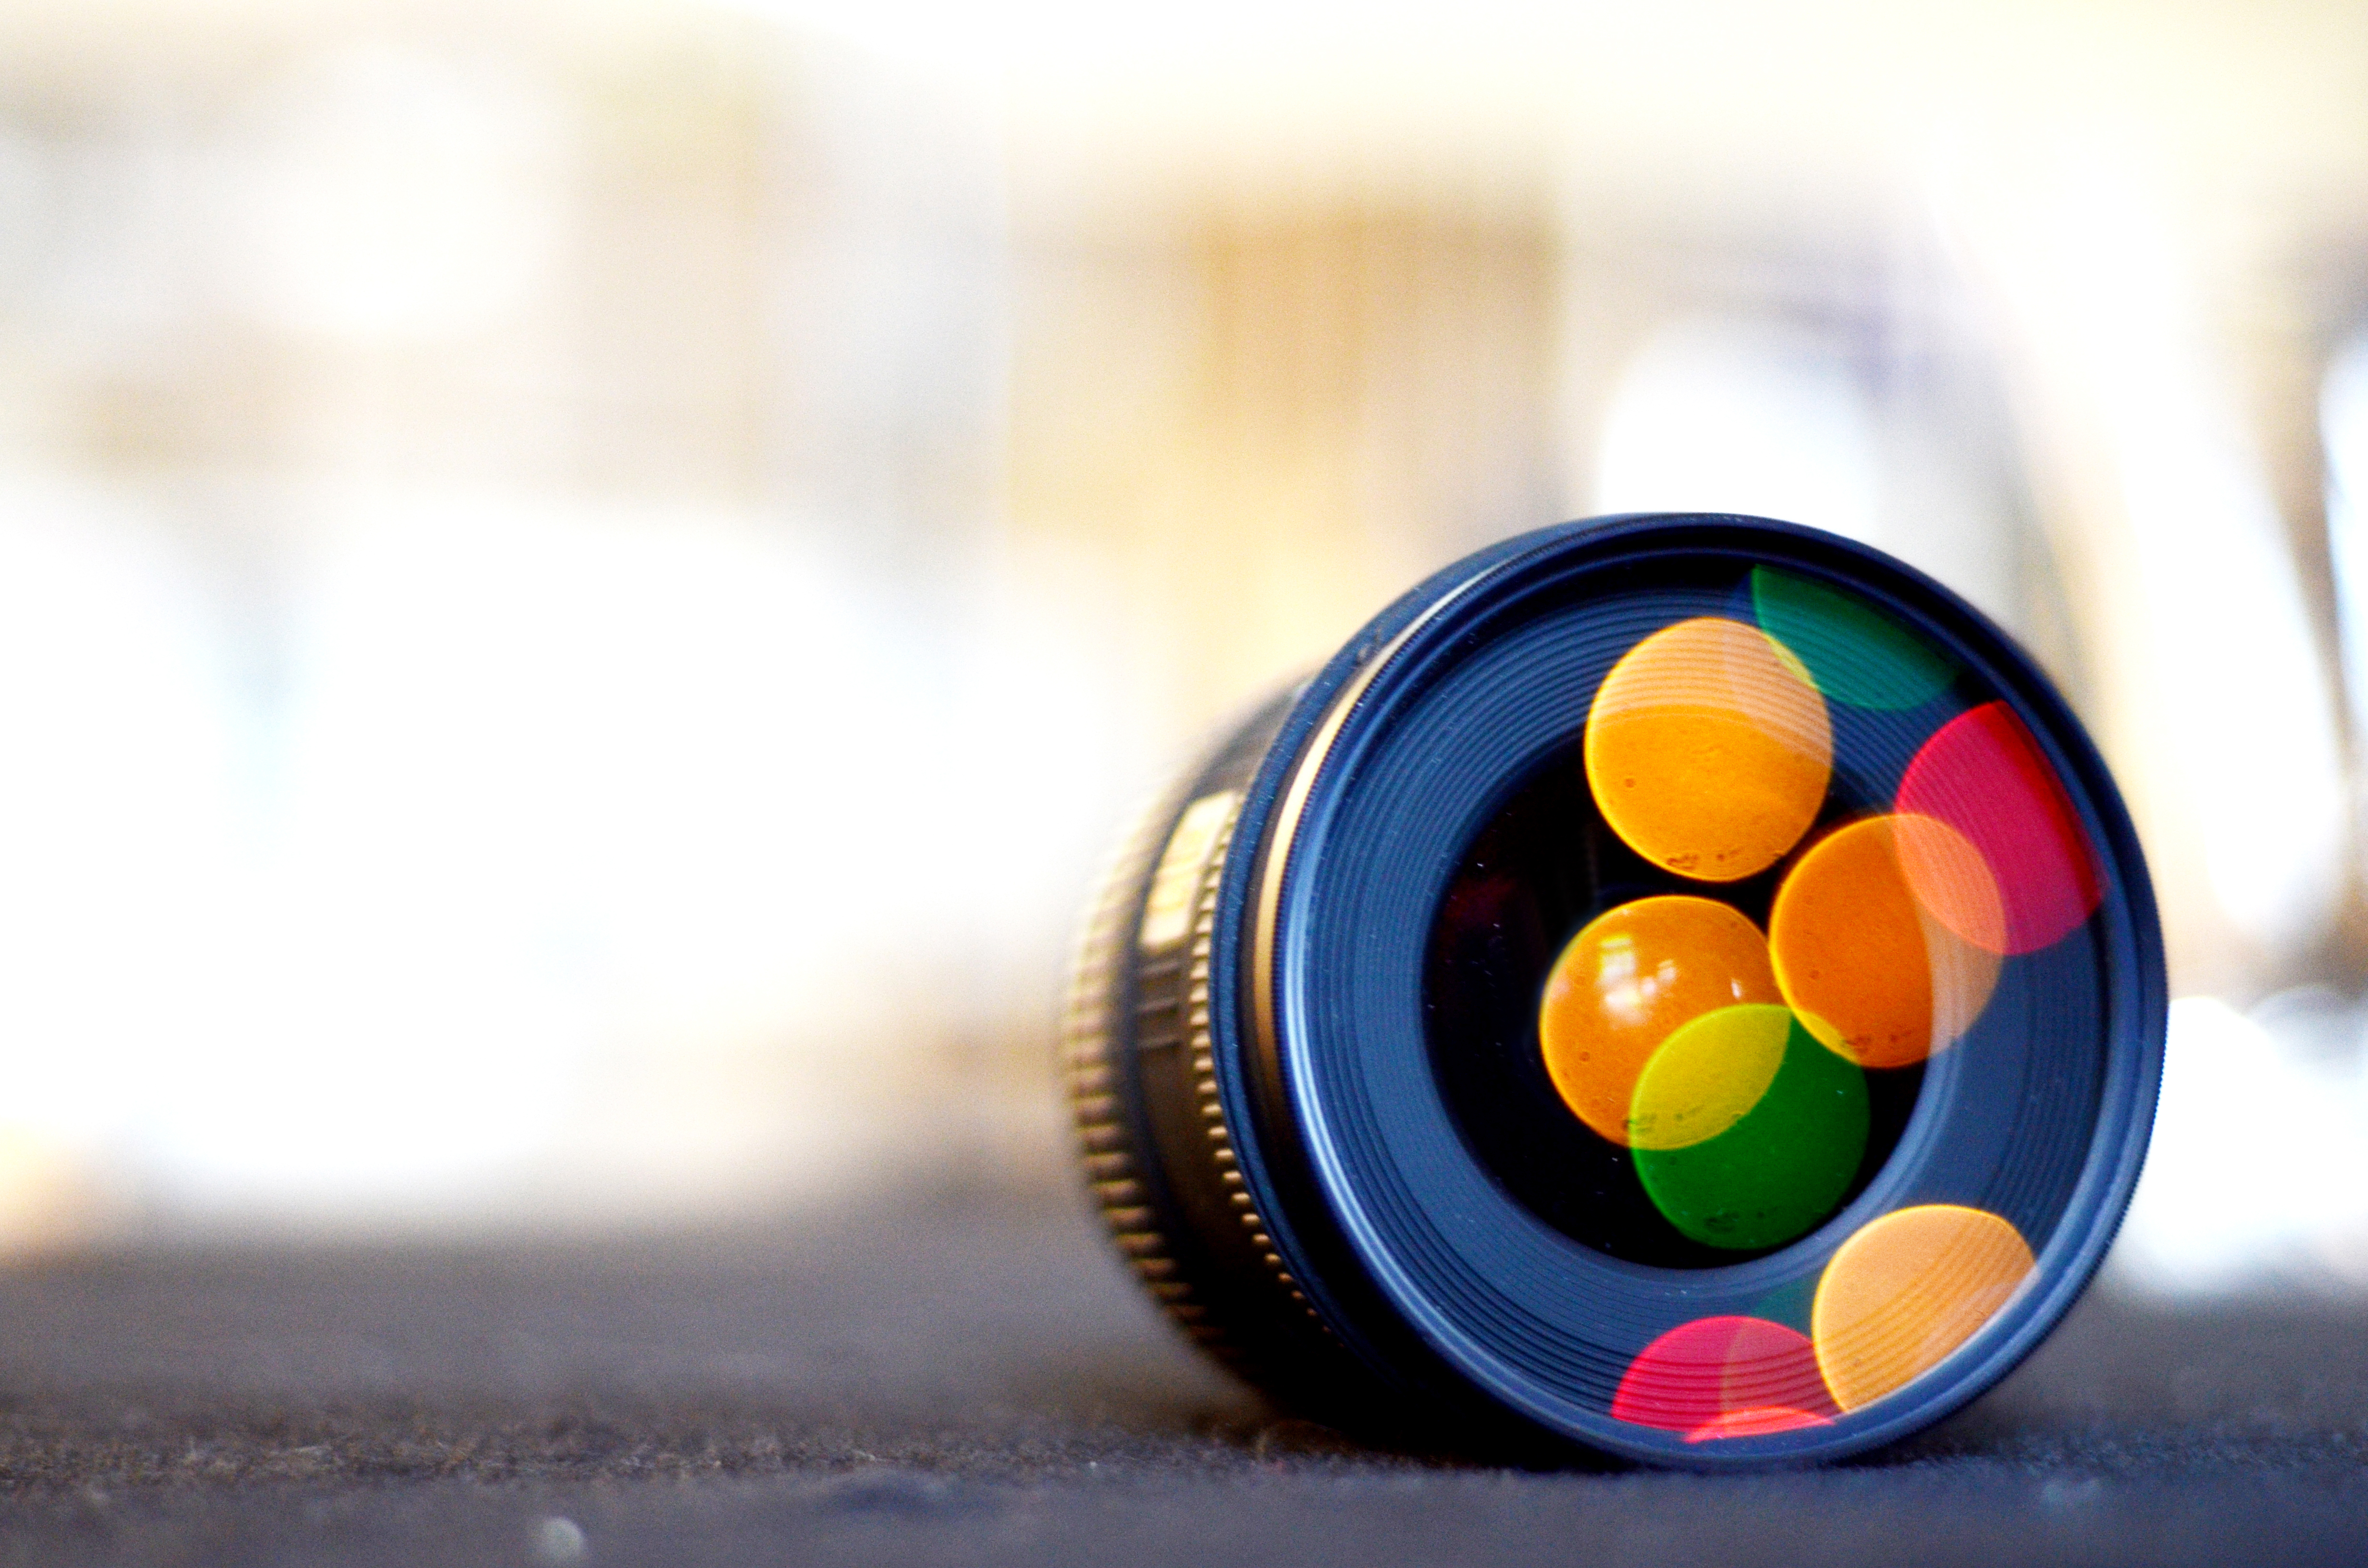
    Bokeh – it’s that word nobody really seems to know how to pronounce, and the thing all photographers love. Those dreamy out of focus blobs that occur when you have shallow depth of field.

    Here’s what several photographers did with their bokeh:

    Maritè Toledo

    By Maritè Toledo

    Alejandro Malonda

    By Alejandro Malonda

    Santiago Muñoz Pérez

    By Santiago Muñoz Pérez

    Kate Russell

    By Kate Russell

    Damien Thorne

    By Damien Thorne

    Katie Wheeler

    By katie wheeler

    Saleh ???? Alnemari - ??????

    By Saleh ???? Alnemari – ??????

    Martin Dvoracek

    By Martin Dvoracek

    Kitty Mao

    By Kitty Mao

    Susanne Nilsson

    By Susanne Nilsson

    Vida Dimovska

    By Vida Dimovska

    Patrick Manac'h

    By Patrick Manac’h

    Raul Lieberwirth

    By Raul Lieberwirth

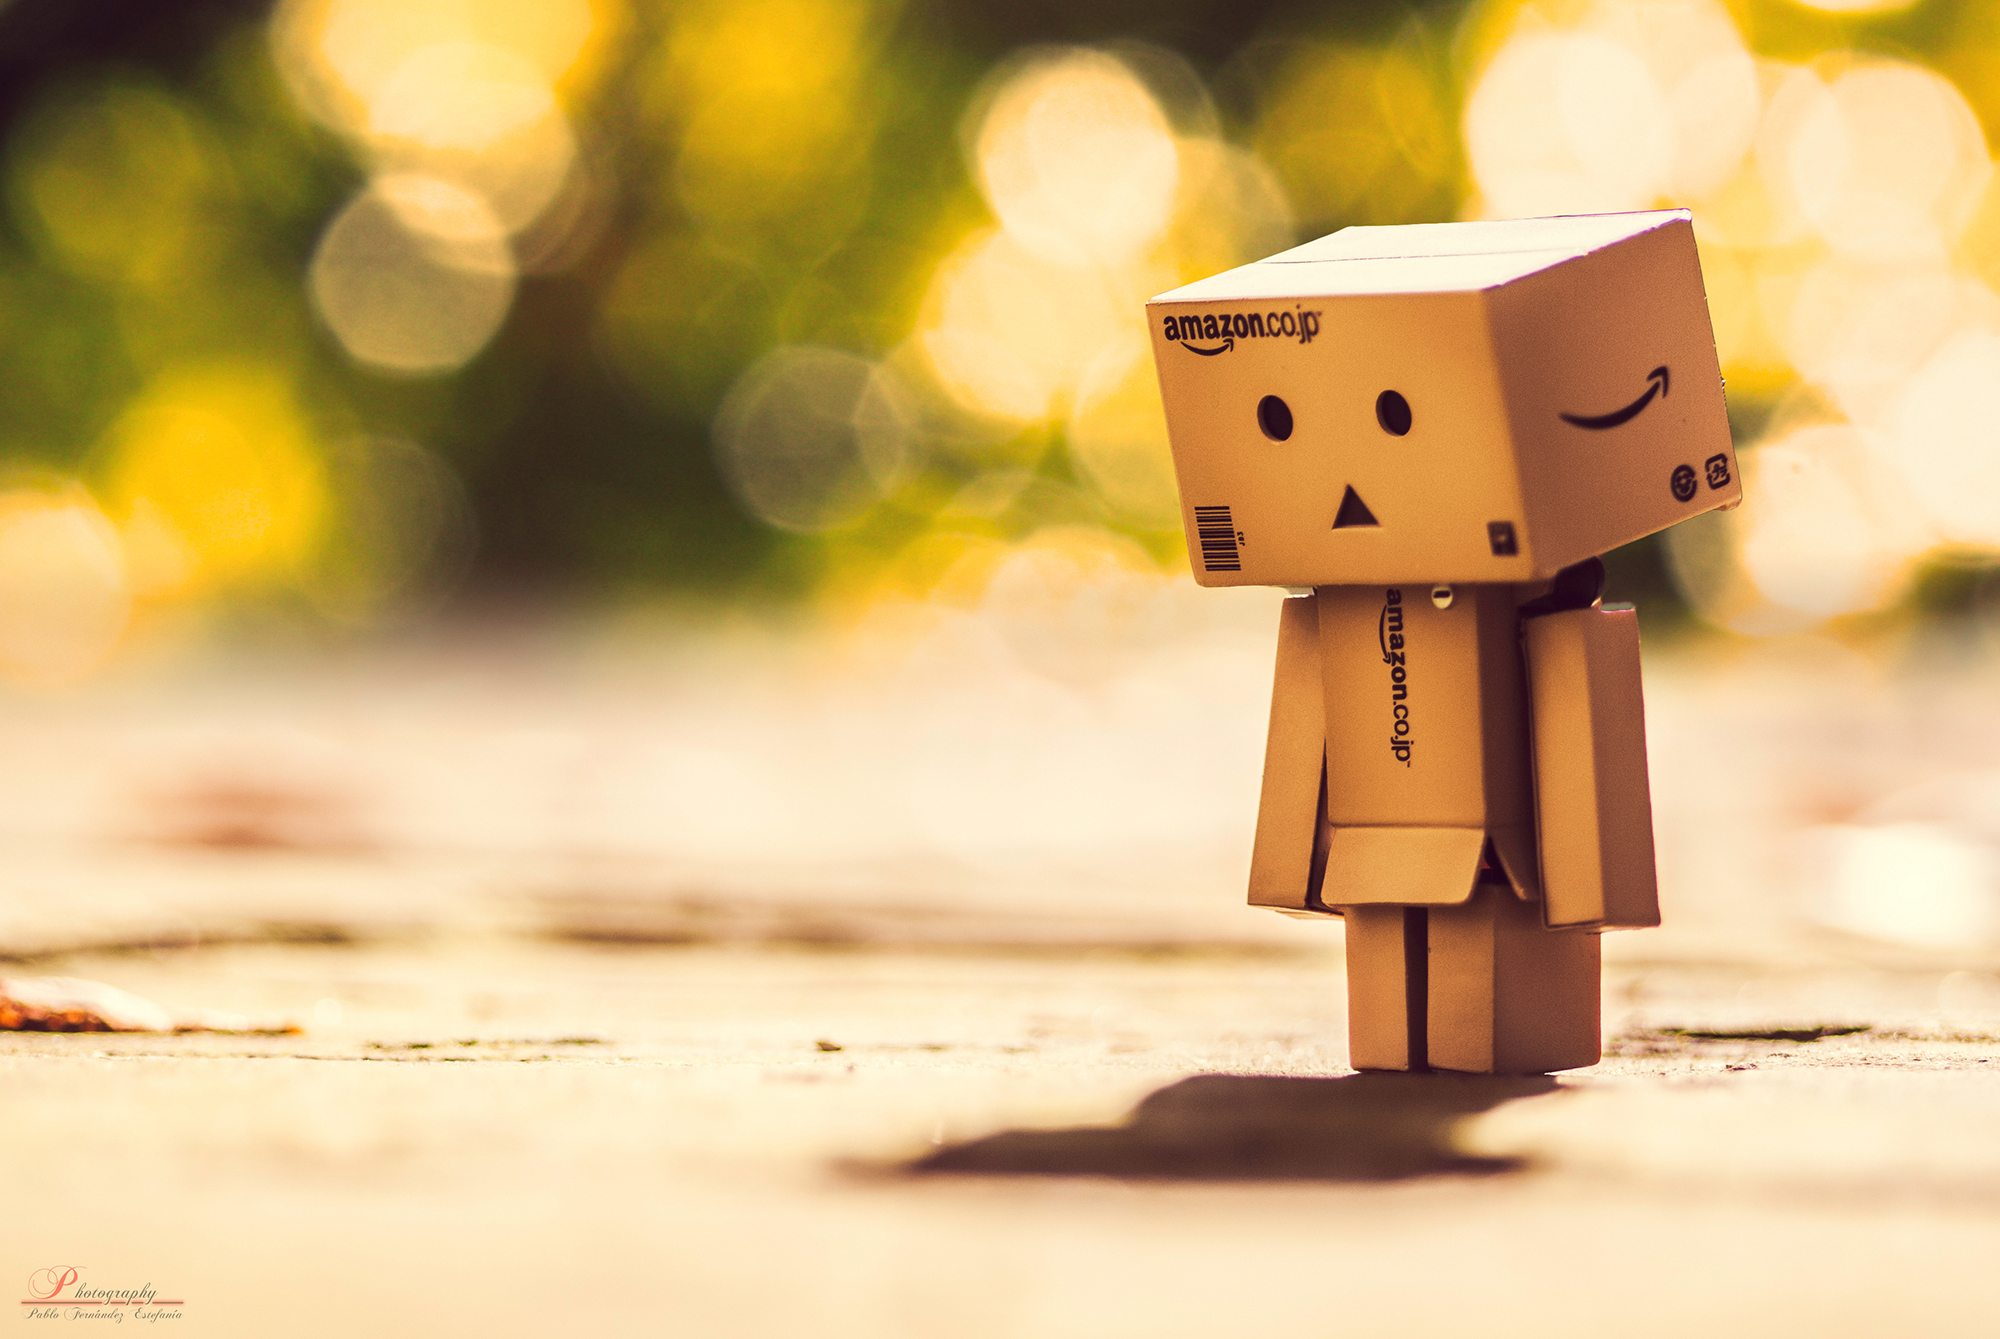
    Pablo Fernández

    By Pablo Fernández

    Paris

    By Paris

    Jovan J

    By Jovan J

    Chris Zerbes

    By Chris Zerbes

    Sinkdd

    By sinkdd

    Sam Wolff

    By Sam Wolff

    googletag.cmd.push(function() {
    tablet_slots.push( googletag.defineSlot( “/1005424/_dPSv4_tab-all-article-bottom_(300×250)”, [300, 250], “pb-ad-78623” ).addService( googletag.pubads() ) ); } );

    googletag.cmd.push(function() {
    mobile_slots.push( googletag.defineSlot( “/1005424/_dPSv4_mob-all-article-bottom_(300×250)”, [300, 250], “pb-ad-78158” ).addService( googletag.pubads() ) ); } );

    The post 19 Delicious Bokeh-licious Images by Darlene Hildebrandt appeared first on Digital Photography School.

    Digital Photography School

  • Weekly Photography Challenge – Bokeh

    Have a look at these images of bokeh to get some ideas.

    bo·keh /b??k?/noun
    PHOTOGRAPHY
    noun: bokeh
    1. the visual quality of the out-of-focus areas of a photographic image, especially as rendered by a particular lens.
    Web4camguy

    By web4camguy

    Weekly Photography Challenge – Bokeh

    This week your challenge is to create and shoot some bokeh. If you need some help check out these articles:

    • How to Achieve Background Blur or Bokeh
    • How to Create a Delicious Blurry Bokeh Background in 4 Easy Steps
    • How to Create Bokeh In-camera and Using Photoshop
    • How to Create a Spectacular Background Using an El Bokeh Wall
    • How to Create a Unique Bokeh Portrait for Under $ 10

    JD Hancock

    Abdul "B.as.it" IM

    By Abdul “B.as.it” IM

    Chris Jones

    By Chris Jones

    Share your images below:

    Simply upload your shot into the comment field (look for the little camera icon in the Disqus comments section) and they’ll get embedded for us all to see or if you’d prefer, upload them to your favorite photo-sharing site and leave the link to them. Show me your best images in this week’s challenge. Sometimes it takes a while for an image to appear so be patient and try not to post the same image twice.

    Share in the dPS Facebook Group

    You can also share your images on the dPS Facebook group as the challenge is posted there each week as well.

    googletag.cmd.push(function() {
    tablet_slots.push( googletag.defineSlot( “/1005424/_dPSv4_tab-all-article-bottom_(300×250)”, [300, 250], “pb-ad-78623” ).addService( googletag.pubads() ) ); } );

    googletag.cmd.push(function() {
    mobile_slots.push( googletag.defineSlot( “/1005424/_dPSv4_mob-all-article-bottom_(300×250)”, [300, 250], “pb-ad-78158” ).addService( googletag.pubads() ) ); } );

    The post Weekly Photography Challenge – Bokeh by Darlene Hildebrandt appeared first on Digital Photography School.

    Digital Photography School

  • Review: Neat Image 8 Noise Reduction Software

    In the early days of digital cameras, noise was a much bigger problem than it is these days. DSLRs routinely top out at high ISO ratings that film shooters and early DSLR users could only dream of. In those early days (the early 2000s), when ISO 800 was typically the upper usable limit of high ISO, noise reduction software became a must-have for those of us who were post-processing our files and wanted them to look less like sandpaper and more like something we’d be willing to display. Neat Image was one of the first noise reduction applications I used at that time.

    Neat Image 8 Review

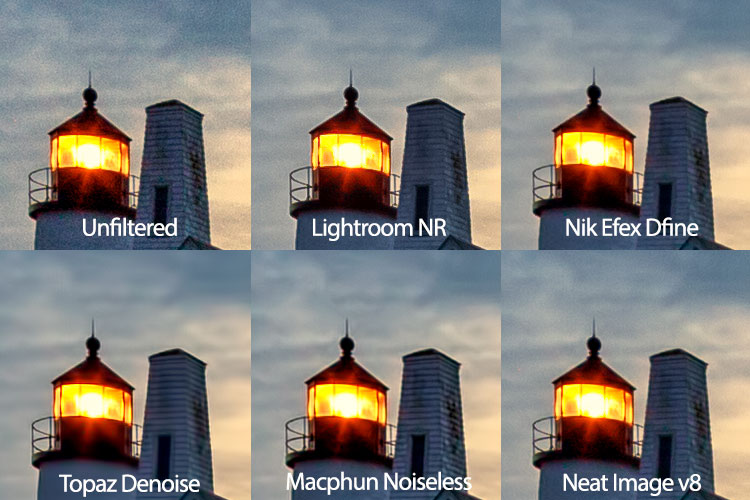
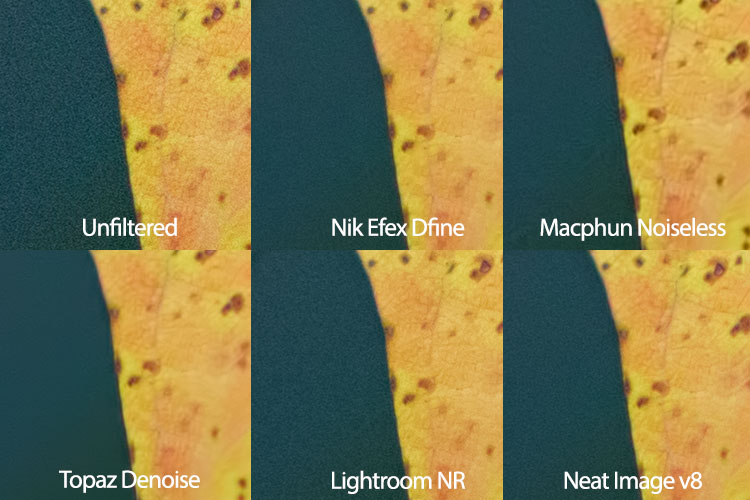
    While it did a nice job, at that time, all noise reduction software was problematic in that it tended to give images an overly smooth, almost plastic or painted look that did a lot of damage in the fine details of an image. Neat Image was no exception in this regard, so I used it sparingly. Over the years, I found myself gravitating to other noise reduction plugins and applications, such as Nik DFine, Topaz DeNoise, and more recently, Macphun’s Noiseless. When I saw that Neat Image had recently been updated to version 8, I was excited to give it a try and see how it stacked up against the others. While Neat Image 8 is available as a standalone app or a Photoshop and Lightroom plugin, I will be focusing on the plugin version, as that suits my workflow better.

    Overview of Neat Image 8

    Neat Image Profile Screen

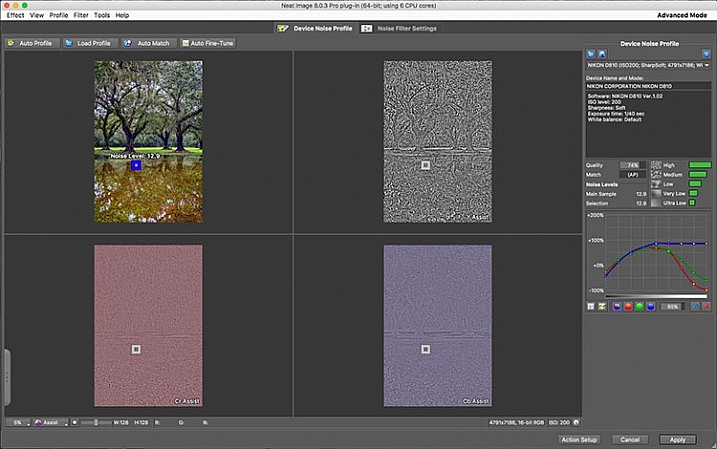
    Upon opening Neat Image 8, the Device Noise Profile screen is the first thing you see.

    Neat Image 8 is a fairly simple software to use, although upon first opening the plugin it can appear a bit confusing. You will be presented with multiple views of the image you are working on; a full-color preview, and the R, G, and B components of the image. There are four buttons at the top left of the screen; Auto Profile, Load Profile, Auto Match, and Auto Fine Tune. In the center are two tabs, Device Noise Profile, which is the tab the plugin starts in, and Noise Filter Settings.

    Analyze image

    Once the plugin is open, you’ll see the four different versions of your image. The easiest way to get started is to simply click “Auto Profile” and let Neat Image analyze the image. Once complete, a box will highlight the area that Neat Image has selected to use for noise analysis. Neat Image looks for an area with minimal detail for best results. If you select your own area to analyze, make sure it’s an area that contains minimal detail.

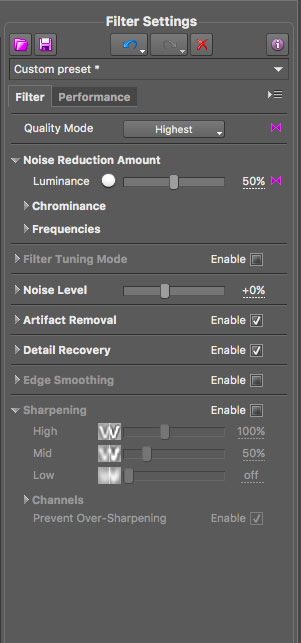
    Neat Image 8 Adjustment Sliders

    These sliders allow you to tweak the noise reduction to your liking after Neat Image has applied the noise profile to the image.

    Filter settings in Neat Image

    Now that you’ve analyzed the noise levels in the image, you’ll want to click on the Noise Filter Settings Tab. The preview will switch to the full-color image in the center and the R, G, and B channels will disappear. At the bottom left is a zoom toggle to zoom in or out of the image as desired. You’ll also have the ability to change the preview to various other options, including the RGB preview, a Luminance and Chrominance preview, as well as individual channels. Neat Image will then apply the noise filter settings based on the analysis as done above.

    You can tweak the settings using the sliders at the right side of the app window. You’ll have the ability to adjust quality, the noise reduction amount, recover detail, smooth edges, sharpen, and fine tune the filter itself. In addition to the sliders, Neat Image comes with some presets, such as Recover Fine Details, Apply Less Noise Reduction, Apply More Noise Reduction, Reduce Noise and Sharpen, and more. You can also create your own presets for future use. These settings put Neat Image among the most customizable noise reduction applications I’ve used.

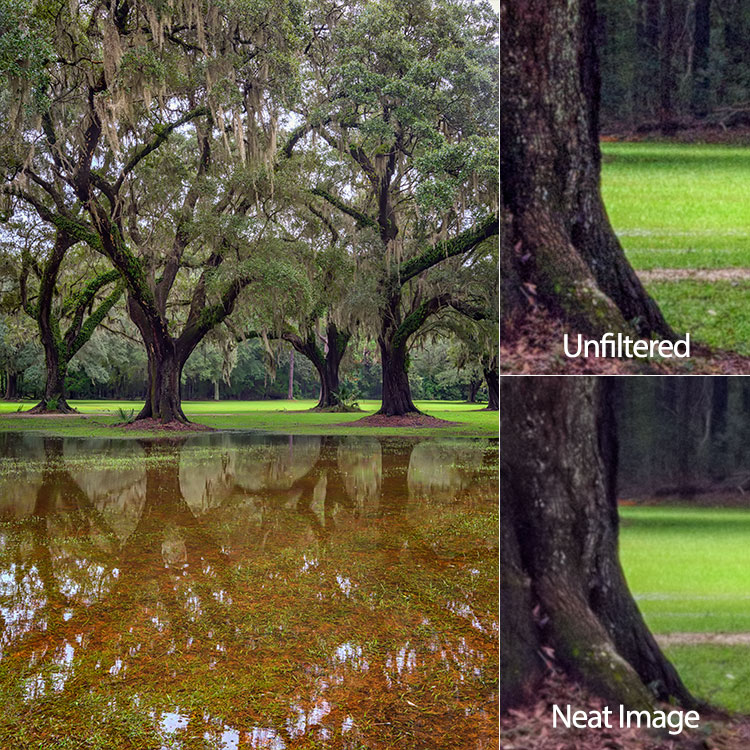
    oaks-neat-image

    Pros

    For me, noise reduction has always been a love-hate relationship, always battling with a balance between preserving detail and reducing unsightly noise. One of my favorite things about Neat Image is the software’s auto profiling ability, customizing the noise reduction to each image as needed. While Nik Collection’s Dfine 2 also does its own image analysis, it doesn’t offer the customizability that Neat Image does. And Neither Topaz’s Denoise 5, nor Macphun’s Noiseless offer any kind of image profiling, with both requiring you to simply select a preset on your own and go from there.

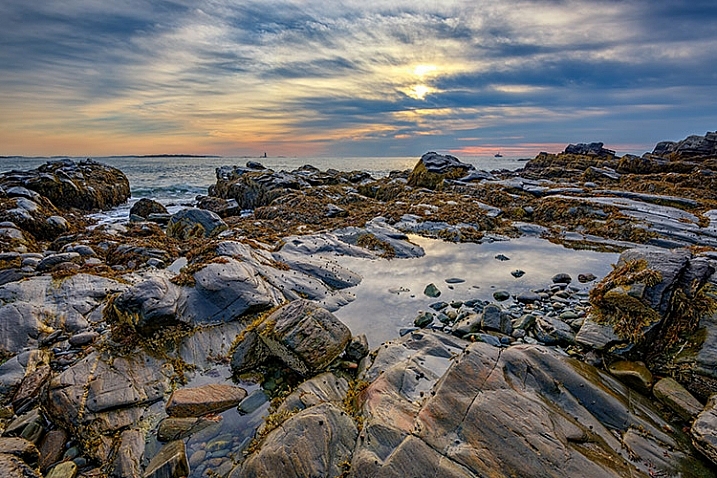
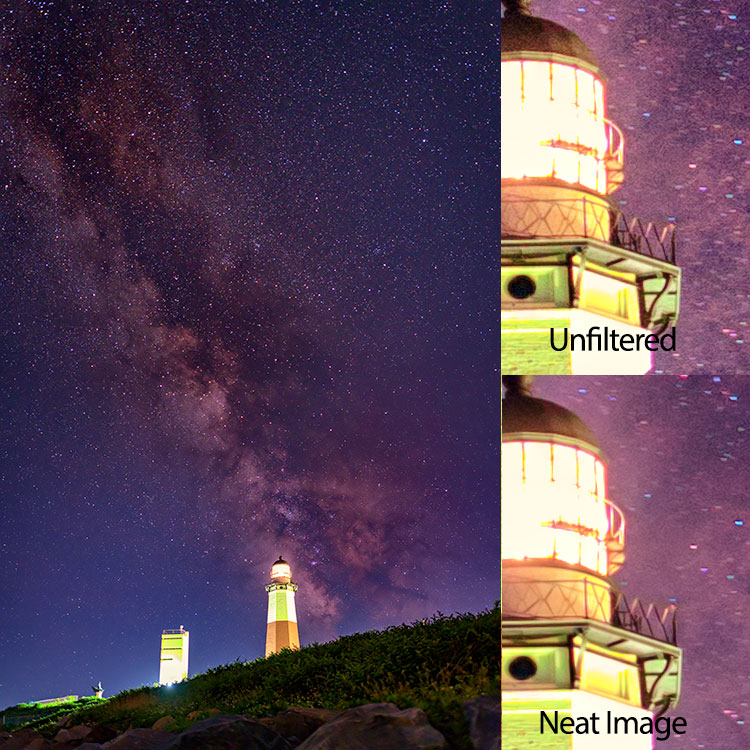
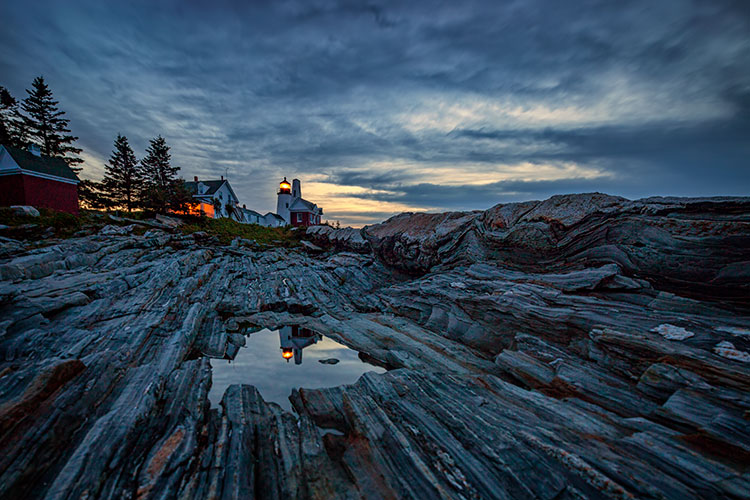
    Neat Image 8 does an excellent job of maintaining detail while reducing noise in an area with little or no fine detail, such as skies.

    night-sky-neat-image

    Cons

    With all the customizability, of course, comes a bit of a learning curve in terms of use. Neat Image does offer tutorial videos on their website to help get you started, but for those of us who are less patient and just want to dive in, it can be frustrating. I had one or two false starts when I first downloaded Neat Image 8, before finally going to their video tutorial to give me a jumpstart.

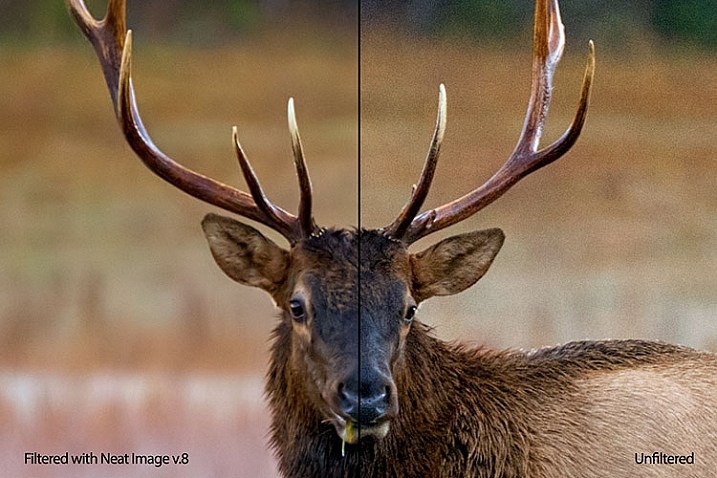
    Neat Image 8 side-by-side comparison.

    Side by side comparison of an image shot at ISO 2500, before and after Neat Image 8.

    Conclusion

    Ultimately, the ability to auto profile an image, adjust settings to personal taste, and use presets for repeatability of noise reduction, makes Neat Image an excellent choice for photographers who battle noisy images for any reason, including shooting long exposures, low light photography, or high iso photography such as indoor sports, events, or weddings. Neat Image is available starting at $ 39.90 per license.

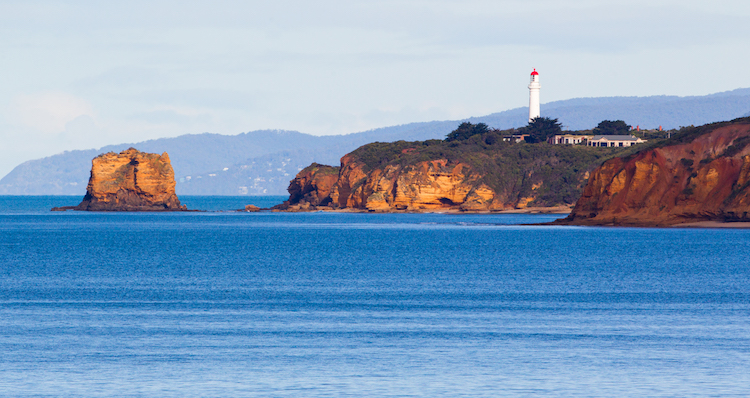
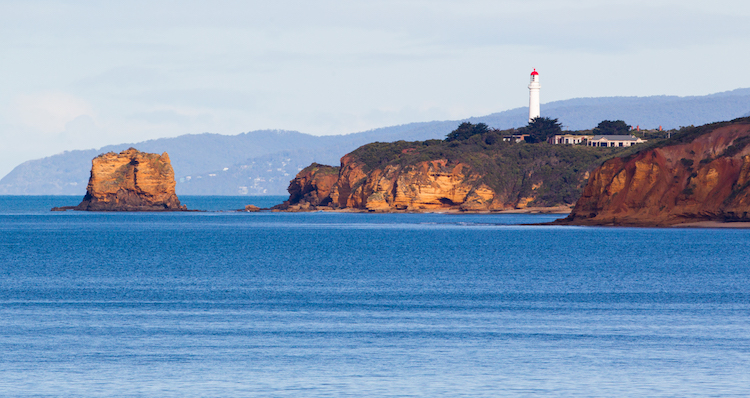
    lighthouse-neat-image-v8

    neat-image-comparison

    leaf-neat-image

    leaf-neat-image-comparison

    googletag.cmd.push(function() {
    tablet_slots.push( googletag.defineSlot( “/1005424/_dPSv4_tab-all-article-bottom_(300×250)”, [300, 250], “pb-ad-78623” ).addService( googletag.pubads() ) ); } );

    googletag.cmd.push(function() {
    mobile_slots.push( googletag.defineSlot( “/1005424/_dPSv4_mob-all-article-bottom_(300×250)”, [300, 250], “pb-ad-78158” ).addService( googletag.pubads() ) ); } );

    The post Review: Neat Image 8 Noise Reduction Software by Rick Berk appeared first on Digital Photography School.

    Digital Photography School

  • Top 6 Considerations to Help You Decide on Color or Black and White for Your Image

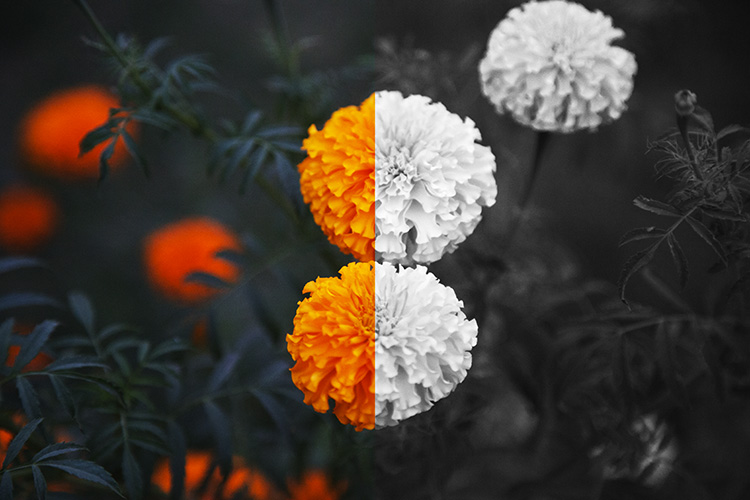
    As soon as humans discovered that it was possible to capture black and white tones in a photographic image, a practical means of color photography was sought by those who dreamed of harnessing the full spectrum of visible light. Some of the very first photographic color experiments began in the mid-19th century with scientists trying to discover a material that could capture the color properties of the light that fell upon it.

    In 1886, physicist and inventor Gabriel Lippmann created what was to be the first color photograph without the aid of any pigments or dyes. By 1906, Lippmann exhibited his process along with color images of a parrot, a bowl of oranges, a group of flags, and a stained glass window. His discovery earned him the Nobel Prize in Physics.

    blackworcolor03

    But Lippmann was onto something else in his experiments. Selecting subjects for his photographs that are not only inherently colorful but are also strongly associated with color within the human brain. Perhaps without realizing it, Lippmann was one of the first photographers to draw a line between color and black and white photography. Deliberately selecting subject matter that was exemplified by radiant colors to reproduce in a color medium.

    Nowadays, digital photography grants photographers with both the blessing and the burden of being able to choose between color or black and white in post-production. It can often be a painstaking process deciding between the two. Although making a deliberate decision between a color or a black and white image is a skill that requires practice and trial-and-error, ultimately the choice is down to you, the individual.

    blackworcolor07

    However, there are a few points to consider if you find yourself stuck between the two. Here are the top six tips for deciding whether to go with color or black and white.

    #1 Color Relationships

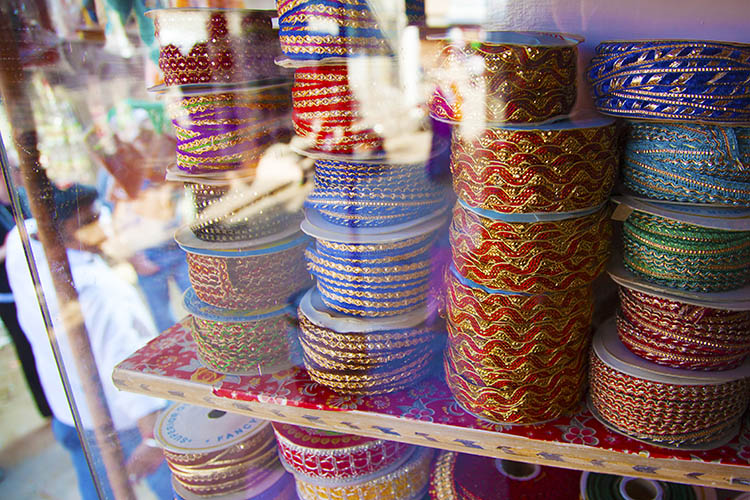
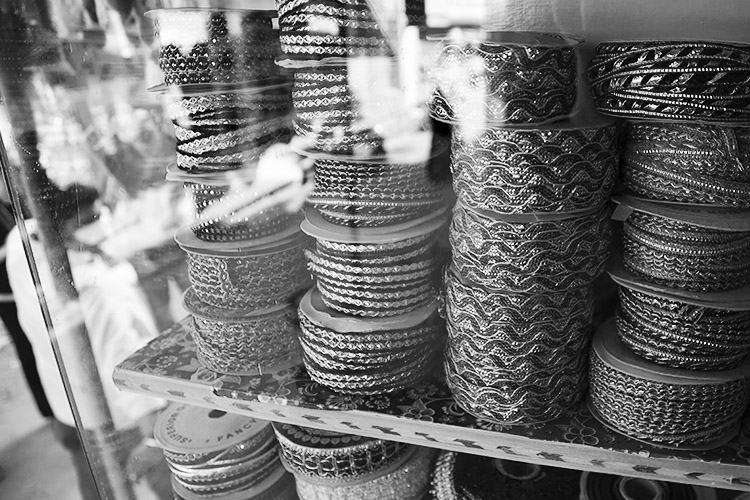
    The first thing to consider when choosing between color or black and white is in fact, color itself! Ask yourself; what is it that draws you to the image? If you find that the relationship between distinct hues in your image are important, color is your best bet. Color doesn’t always translate to a black and white image successfully. An image with contrasting hues such as red and green often appears similar in tone in a black and white conversion, making for a less striking or muddy image.

    blackworcolor04

    black-white-or-color-considerations-04b

    #2 Mood

    Just as artists have used color in paintings to denote mood for centuries, the colors in a photograph can also create the emotional atmosphere of an image. Color is a powerful messenger. It can impact a viewer’s emotions, draw associations between ideas, and guide the eye around an image.

    While black and white images generally evoke a sense of sensuality or seriousness due to its association with documentary photography, color can emphasize a feeling of joy or sadness depending on the color scheme. Just as we associate warm colors like red and orange with comfort and warmth, so do we relate to the colors in a photograph, giving the viewer clues about the image and creating a more immersive experience.

    The tone or color balance of a photograph can point to a time of day or season which conveys a particular emotion or experience within the image. Black and white photographs appear to be more timeless than color images because they are free from color schemes associated with particular types of film, processes, or trends in digital processing. Black and white photojournalism is often hard to date with a cursory glance, so the subject matter remains relevant to the present day.

    blackworcolor05

    black-white-or-color-considerations-05b

    See how the color version has a completely different mood?

    #3 Attention

    We see it all around us in marketing, architecture, and print. Color is used to grab a viewer’s eye and draw them in. But it is a fine balance and can often become complicated or convoluted if too much is happening with the picture. Look for a dominant color or color combination in your work. The most visual impact is often created by either isolating a particular color or having two colors from

    The most visual impact is often created by either isolating a particular color or having two colors from well-separated areas of the color spectrum included in the one image. Colors such as red and green, or orange and purple (complementary colors) play off each other when they reach the human eye and create a sense of movement and action.

    If your image has these combinations it might be better to stay with color and spend time emphasizing the colorful components of the image rather than converting it to black and white. A lack of color accentuates the light and shadows rather than eye-catching color combinations. Emphasis on particular colors can also be useful in forming a cohesive body of work, using color to contrast different imagery in a series, or uniting each piece with harmonious trends in color schemes.

    Black&WorColor01

    #4 Viewing time

    Many photographers prefer black and white images for their tendency to distance the subject matter from reality. In documentary photography, the reverse is also true as humans see the world in color, and a rendition of the world in monochrome gives us pause to investigate. In both cases, removing color from a picture helps the viewer to focus on what is happening in an image. Due to the lack of cues that we naturally look for in color imagery, the viewer tends to look at a photograph more closely to ‘read’ what is happening in the image. A slower viewing time means that there is more time for the image to communicate with the viewer, impart emotion to a greater extent and perhaps stay with the viewer even after they have stopped looking at the work physically.

    Due to the lack of cues that we naturally look for in color imagery, the viewer tends to look at a photograph more closely to read what is happening in the image. A slower viewing means that there is more time for the image to communicate with the viewer, impart emotion to a greater extent, and perhaps stay with the viewer even after they have stopped looking at the work physically.

    blackworcolor09

    #5 Content

    To put it simply, black and white images create an emphasis on light, form, or texture. If the content of the photograph is more important than the color of the subject, or you feel that the color in a photo serves only as a distraction from the message you want the image to convey – then black and white is probably a good choice.

    The focus shifts from colors to tones in black and white. So subjects like smoke, shadows, subtle changes in light and dust become more obvious in a black and white image. Because of our associations with these subjects and their otherworldly appearance, a sense of drama can become more apparent in a black and white image than that of a color image.

    blackworcolor06

    #6 Simplicity

    Often a color photograph looks too busy or convoluted if it has too many colors going on at once. Sometimes converting the image to black and white is a way of separating those tones out into an image that is easier on the eye. Images with a wide range of tonal values tend to work well for black and white imagery. As well, most black and white images work best when there is a definite range from the blackest black through to the whitest white, with varying gray tones in between.

    A few words of advice…

    Beware the quick fix! Inexperienced photographers can sometimes fall into the trap of converting a sub-par image to black and white in order to quote, “save it”. Photographs that are out of focus, blurry, or poorly exposed may or may not be saved with a black and white conversion. But they do look suspiciously obvious when they are presented within a series of images that is mainly in color.

    The problem with relying on black and white as a crutch is that you aren’t investigating what you did wrong in the first place. While a black and white conversion may or may not save a photograph, relying on converting images will not help you develop your own technical practice.

    blackworcolor02

    Digital photography is amazing, in that we have the option of shooting in color and switching to black and white in post-production. With film, this was at least a pain in the neck and at most, impossible. If you are unsure about an image, play around with it in Photoshop! Tools in Photoshop like the premade settings for black and white conversion are designed to give you a good set of variations to experiment with. If an image looks busy and over saturated, but you don’t want a full black and white conversion, try desaturating the image with the Vibrance adjustment layer or the Curves tool which are located in the Adjustment Layers panel.

    Conclusion

    Experimenting with color and black and white is fun, but no matter what option you do go with, be certain that you know why you chose that particular color scheme and make sure it adds to the sum of the image rather than detracting from it!

    googletag.cmd.push(function() {
    tablet_slots.push( googletag.defineSlot( “/1005424/_dPSv4_tab-all-article-bottom_(300×250)”, [300, 250], “pb-ad-78623” ).addService( googletag.pubads() ) ); } );

    googletag.cmd.push(function() {
    mobile_slots.push( googletag.defineSlot( “/1005424/_dPSv4_mob-all-article-bottom_(300×250)”, [300, 250], “pb-ad-78158” ).addService( googletag.pubads() ) ); } );

    The post Top 6 Considerations to Help You Decide on Color or Black and White for Your Image by Megan Kennedy appeared first on Digital Photography School.

    Digital Photography School

  • Some Tips to Help You Figure Which Camera is Best for You

    As far as absolute requirements go, there aren’t many which are needed in order to make a photograph. There is, however, one certain necessity that cannot be dispensed with if you set yourself onto the maddening path of a photographer. You need a camera. Now, it doesn’t really matter which camera you have. A camera is after all just a box with an opening that allows light to pass onto some kind of receptor.

    This simplistic technology is the facilitator of every photograph that has ever been made. A camera is indeed just a tool. That being said, there are virtually limitless cameras to choose from in this world. If there’s one question I receive more than any other it is this . . .

    Which camera should I buy?

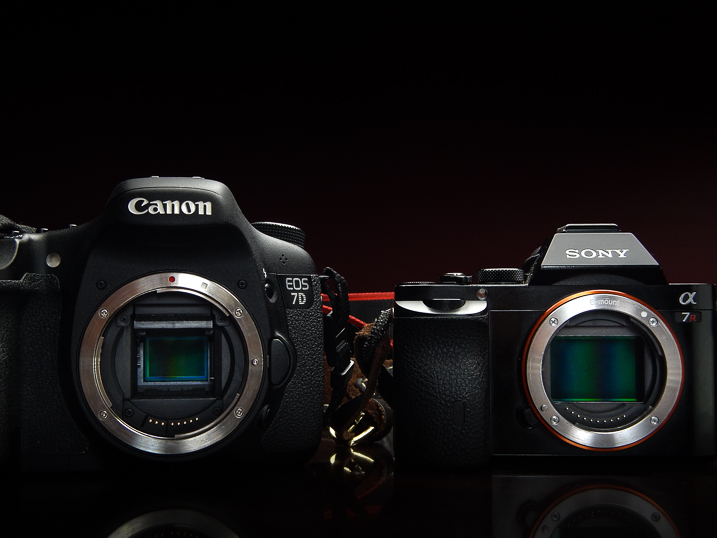
    Cameras sony canon which camera is best for you

    On its own that is an unanswerable question. You see, as it relates to cameras and photography, the camera you use is utterly dependent on you. This is not a guide for how to choose the right camera from a technical standpoint, nor is it a commentary on what gear is better than any other. This is an article to help you to understand yourself and to that end, the type of camera that will allow you to fulfill whatever needs you have right now, and maybe even beyond.

    which camera is best for you - destination journey

    There are so many cameras to choose from (remember we’ve said this) that it can quite literally become overwhelming to make a choice. There are point and shoot cameras, cropped sensor digital SLRs, mirrorless cameras, full-frame mirrorless, and so on.

    Of those cameras, there are also countless models and variations which muddy the waters even more. Each one essentially performs the same function, which is to make a photograph. Still, each type of camera offers many variables that work for a wide variety of different situations and for different people. But you have to decide which camera fits YOU best.

    The biggest hurdle to conquer when choosing a camera is to understand exactly what you want and need. That is not always as easy as it sounds. However, here are some tips to assist in making your decision.

    Where do you shoot?

    The location where you will be doing most of your shooting takes up a big chunk of the pie when it comes to deciding on a camera.

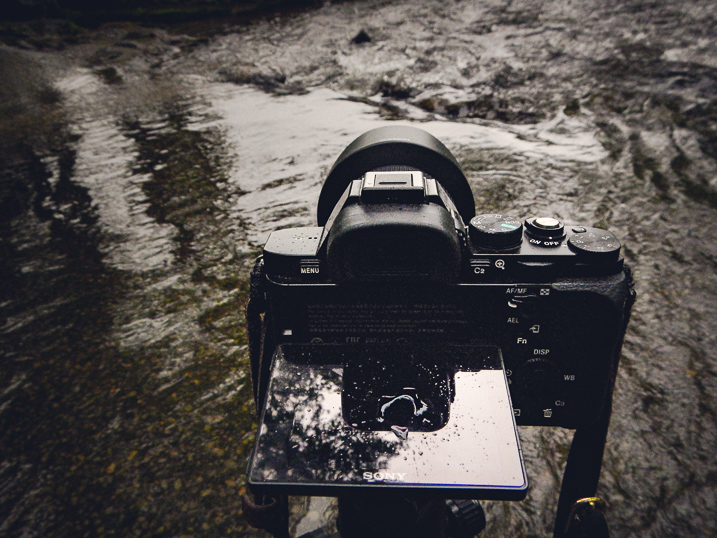
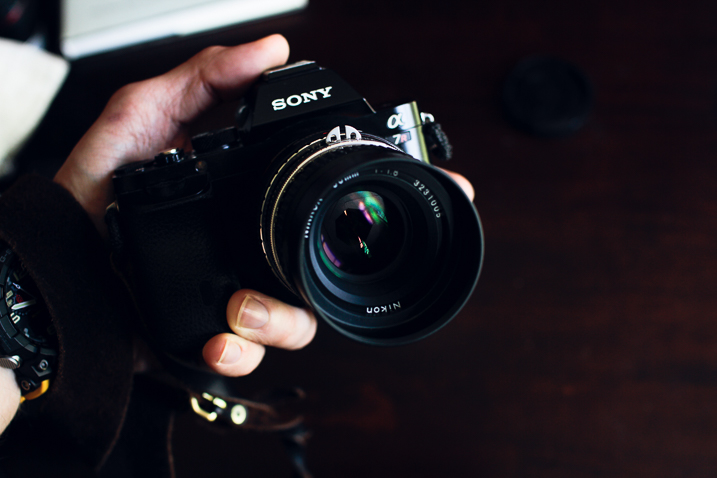
    which camera is best for you - Sony a7r camera

    Will you be outdoors most of the time or will you be inside in more of a studio-type setting? Do you need weather sealing? How about wireless flash capability? Having an idea of the environment in which you will most often find yourself will help you to better understand the features you may or may not need in a camera.

    What will you shoot?

    The “what” you will be shooting goes hand-in-hand with the “where.” While it’s not possible to completely predict every subject you will ever photograph it’s still very possible to know what kind of photography you enjoy.

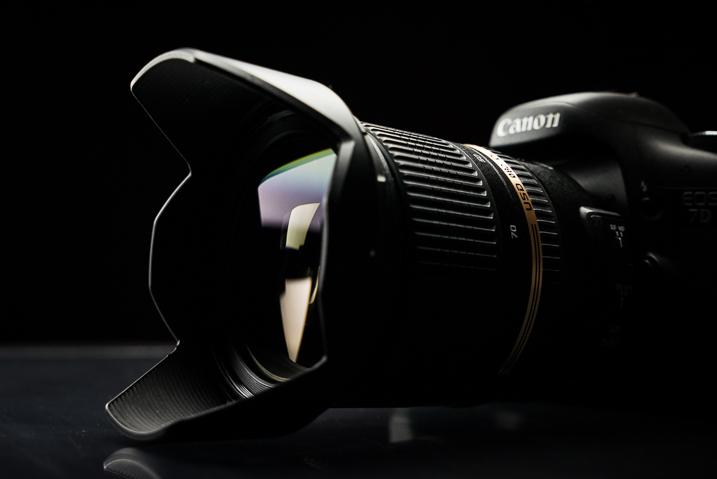
    which camera is best for you - Canon 7d camera

    If you understand what you like to shoot, then you can move forward in a more educated and deliberate fashion when deciding what camera to buy. If you love street photography then a smaller, more compact system, may be better to carry around for hours on end. Need a lot of resolution for landscapes? Ask yourself what you will use the camera for the most and the choice will become much clearer.

    Where are you now in your photographic journey?

    It’s a good idea to be constantly self-aware of where you stand in your journey as a photographer. The benefits of constant self-evaluation helps you to grow your skills and refine your craft. It also allows you to know when and if you have surpassed the capabilities of your equipment and need to upgrade. When it comes to finding a camera that fits your current position within the photography world, you must look at the realities of your situation and proceed accordingly.

    which camera is best for you

    Are you just starting out and need a learning tool? Are you a hobbyist who only shoots occasionally, or have you pushed yourself everyday and now feel like you need a more advanced camera body to facilitate your growing ability? Take stock of yourself and be honest (even brutally) so that you can find the best camera to fit your needs.

    Where do you want to take your photography?

    Perhaps even more important than learning where you stand in terms of your photography is knowing where you want to take your work. It goes without saying but I’ll say it anyway, that your camera is the link between you and whatever vision you want to express with your images.

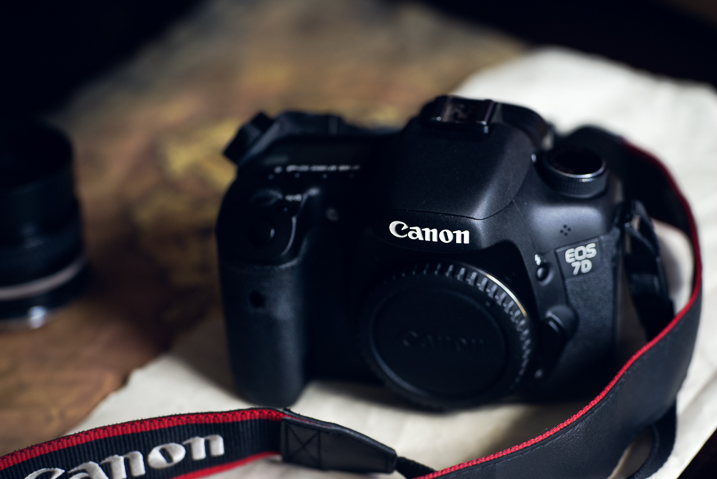
    which camera is best for you Canon 7d camera

    This expression can be personal, commercial, or something in between. Realizing where you want to go and setting goals is paramount in your development as a photographer. Naturally, your choice of camera should reflect this.

    I remember when I was starting out on my own journey making photos. I realized that this was something I wanted to pursue seriously. So I invested in a camera that not only fit my needs at the time, but would also grow with me as I moved towards making photography a career. I still have that camera (Canon 7D Mk1) and it still sees a fair amount of use today. It was quite an investment for a lowly college student at the time but it has paid for itself time and time again, not just from a monetary standpoint.

    Conclusion

    which camera is best for you - Journey photography

    The internet is chock full of more reviews and tech write-ups than I can count. So I hope you didn’t come here looking for advice on the latest and greatest advancements in the camera industry. Instead, hopefully you got something much more meaningful from this article; the understanding of how important it is to truly know yourself and what you intend to do with your photography.

    Are you a beginner? Are you a hobbyist set on taking your passion to the next level? Or are you still trying to decide if that shiny new dSLR is worth the money just to take pictures of your pet?

    Whatever your current situation may be, before you buy a camera be sure you know why, how, and to what end you intend to use it. Take it from me, you can save yourself a lot of regret by simply understanding your own intentions on the front end before making the jump.

    googletag.cmd.push(function() {
    tablet_slots.push( googletag.defineSlot( “/1005424/_dPSv4_tab-all-article-bottom_(300×250)”, [300, 250], “pb-ad-78623” ).addService( googletag.pubads() ) ); } );

    googletag.cmd.push(function() {
    mobile_slots.push( googletag.defineSlot( “/1005424/_dPSv4_mob-all-article-bottom_(300×250)”, [300, 250], “pb-ad-78158” ).addService( googletag.pubads() ) ); } );

    The post Some Tips to Help You Figure Which Camera is Best for You by Adam Welch appeared first on Digital Photography School.

    Digital Photography School