Category: Photography

  • How to Make Abstract Glitch Art Photographs

    Have you ever watched a television system receiving a corrupted signal – misplaced squares, static, jagged frames, freezing, misplaced or inverted colors – and thought “hey, that actually looks pretty neat?” Being eager to get your favorite show going again, the answer might well be no. Yet, these corruptions or glitches can be exploited to add a unique dimension to your photography.

    What is glitch art?

    Glitch art is a fairly recent phenomenon that has developed from the fast-paced evolution of digital technology. Technically, a glitch is the temporary and slight malfunctioning of a system. Due to the limitations of current technology, time, funding, and human error, glitches run the whole gamut of the digital landscape and can be difficult to pinpoint due to their transient nature. From software and games to sound files, automated systems and phones, there is an endless number of glitches that we encounter, often unknowingly, during day to day life.

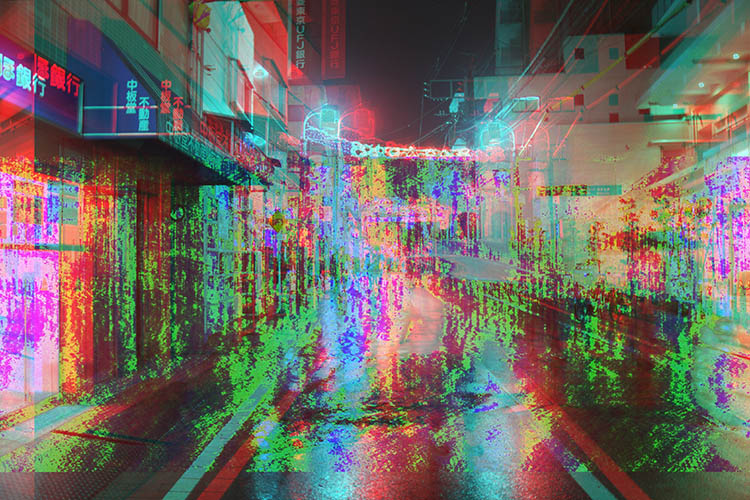
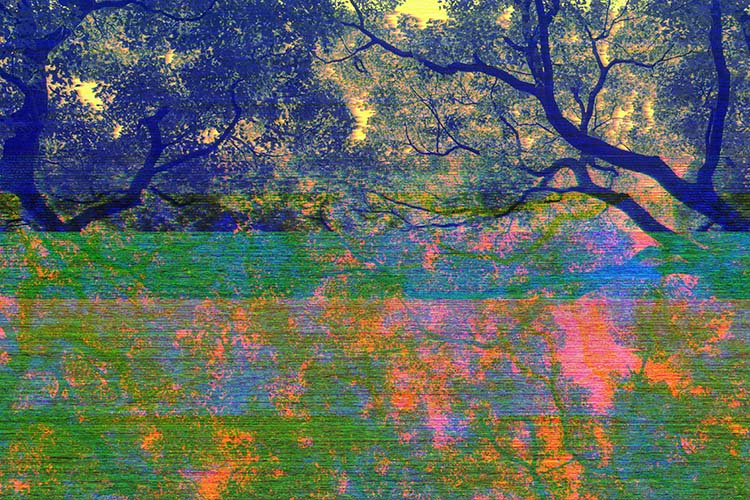
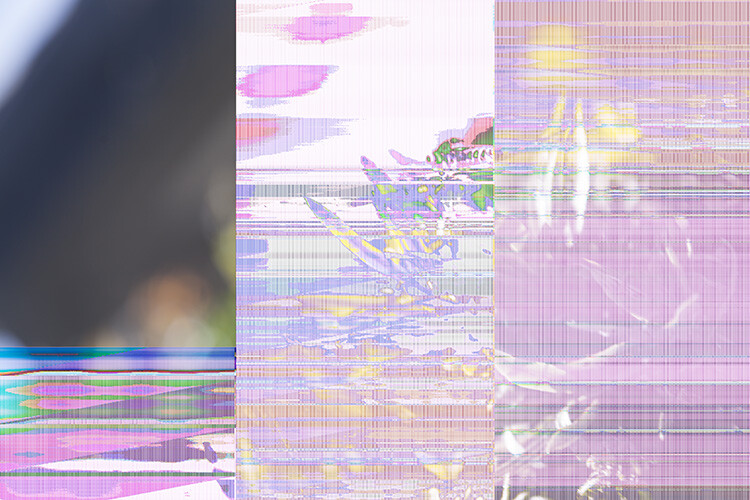
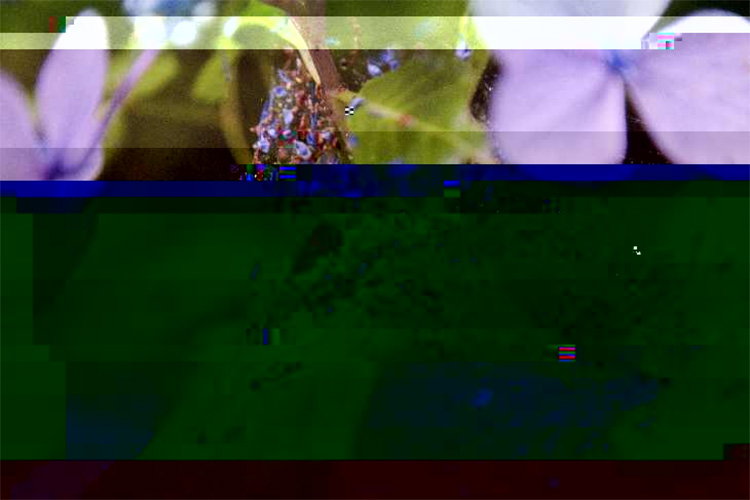
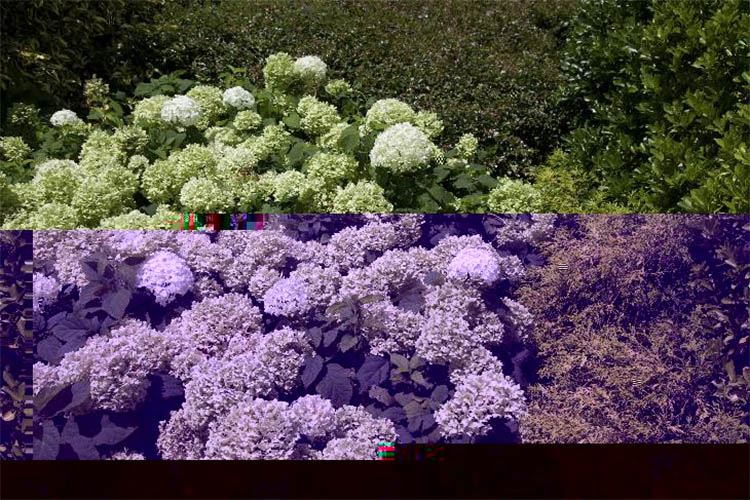
    Glitch art is an art form that harnesses the visual effects of data corruption. By applying certain encoding or actions to an image, a photograph can become visually corrupted while retaining a usable file. Glitch art is generally an experimental process, with glitch artists walking the fine line between a usable file and a completely broken one.
    glitch-art-photography-01

    Even the dreaded CF card malfunction can produce intriguing results

    Controlled glitching

    In analogue photography, glitches came in the form of negative scratches, light leaks, dust, finger prints, and chemical residue. Some problems were solved with a trip back to the enlarger or a re-inspection of chemicals. Other incidences, like exposed negatives and light leaks could be an unmitigated disaster. Nowadays, it’s the defective memory card that could spell certain doom – so the very notion of intentionally breaking an image may well send chills up a photographer’s spine. This is where glitch art comes in, to explore the flaws of our temperamental digital landscape, under controlled circumstances with carefully backed up files.

    Glitching with the internet

    There are many complex methods of glitching photography, including short-circuiting cameras, applying code, and creating automated programs. Fortunately, there are some less complicated methods too. If you google “glitch art maker” you will see numerous hits for various automated glitching programs. These programs allow you to upload an image and the program will apply a glitch art effect to the file in real time.

    Some programs are more in-depth than others, allowing you to adjust the parameters of the effect or emulate several glitch aesthetics at once. Programs that can apply glitch effects to photographs are also available as apps for smartphones, making for easy uploading to social media sites. While quick and easy, the downside of using an online program is that it can produce some generic or bland results, but they are great for an initial induction into the world of glitch art.
    glitch-art-photography-17

    glitch-art-photography-21

    Image file vs text editor

    One of the methods of glitching digital image files is called databending. This involves manipulating an image file by opening it in a program designed for another purpose. Be sure to make duplicates of the images you decide to use, as you will not be able to undo the databend later.

    For Windows users

    If you use Windows – select a BMP, TIF, or RAW image file. Open the image using WordPad (which comes with almost all versions of Microsoft Windows from Windows 95 onward). After loading, you will be met with a wall of seemingly random text. Click File > Save and then close WordPad. Open the saved file in Paint or Photo Viewer to see the result. You can also experiment with entering text from the middle of the document, but doing so can increase the likelihood of an unreadable file.

    For Mac users

    If you use Mac, select any image. Mac users can use any file type. Open the image in Text Edit (a default program with Mac operating systems). After loading, a document with a wealth of text will appear. The first few lines of text are important and contain information that tells the image how to open. Scroll down to about midway through the text file and select and copy a few lines of text. Paste the copied text into other areas around the middle of the file. Click File > Save and open the glitched image in Preview to view the result.


    glitch-art-photography-02

    glitch-art-photography-03

    This is the result of a .bmp file having been opened in WordPad and saved.
    glitch-art-photography-04

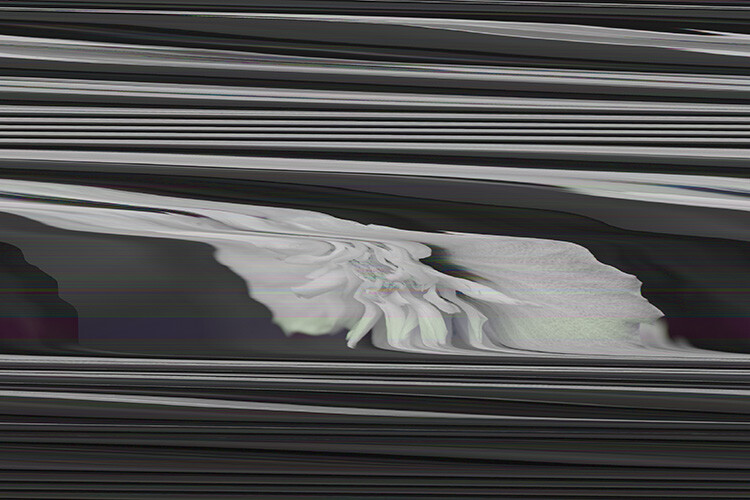
    This glitched flower image was saved as a .tif file is slightly different in appearance

    If the image you’ve saved won’t open, the glitch may have rendered the file unusable. Persevere with a new image or a different file type and make conservative interventions while you get used to the process.

    Databending with an audio editor

    Audacity is a free audio editing software available for both PC and Mac platforms. Databending with Audacity is a technical process, with a high degree of trial and error involved. As with any databend, files can become corrupt, so make numerous copies of any image you choose to databend. I’m using a PC for this tutorial, but the process is similar on a Mac.

    Prepare your file

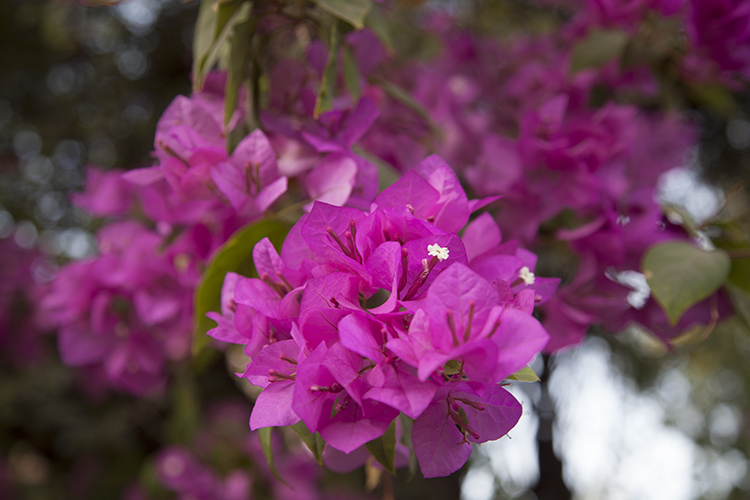
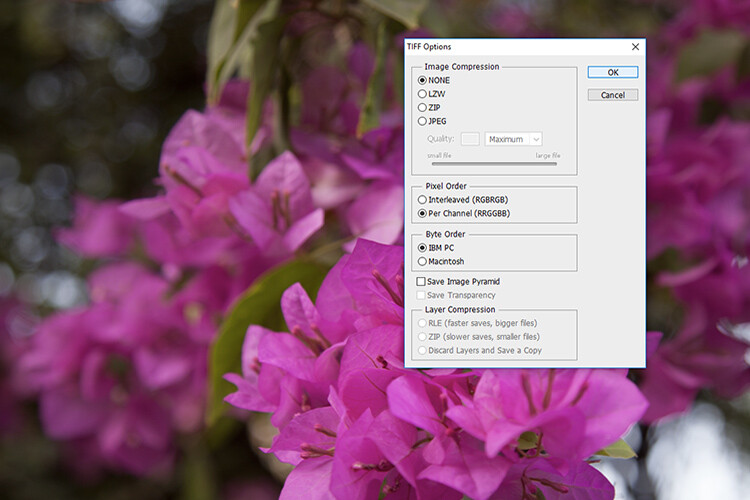
    First, you will need to prepare a file for databending. Open an image in Photoshop and save it as a TIF. Select “per channel” as the pixel order in the TIFF Options prompt. Be sure that “none” is selected for image compression.
    glitch-art-photo-08

    glitch-art-photo-07

    TIF saving settings

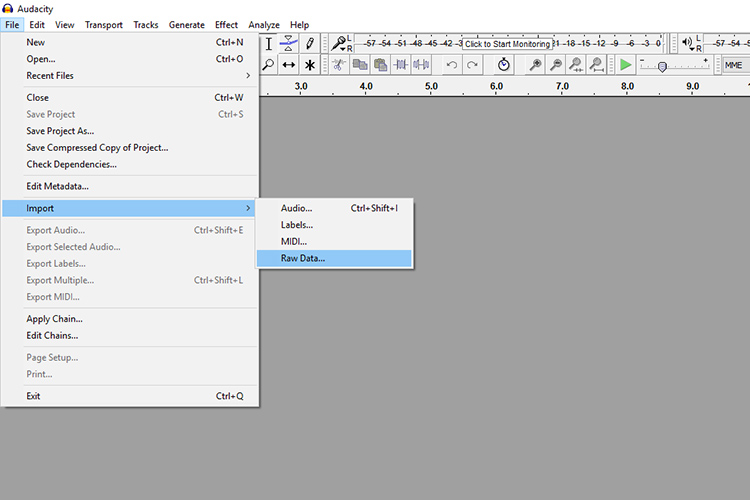
    Open Audacity and select File > Import > Raw Data and select your file.
    glitch-art-photo-09

    You will need to input some parameters so that Audacity reads the image as a sound file. Copy the settings in the image below.
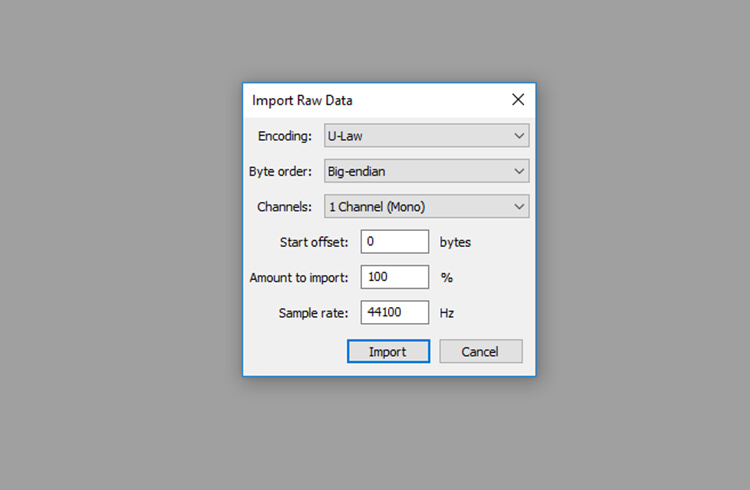
    glitch-art-photography-10

    Drag your mouse over the middle portion of the timeline. Leave the first 5 seconds un-selected as it contains important file data.
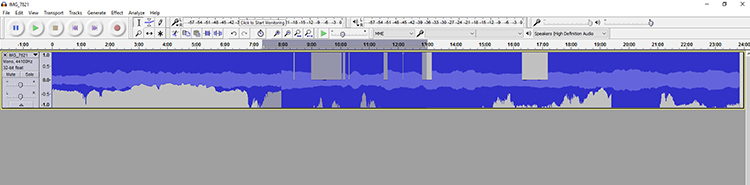
    glitch-art-photography-11

    With the middle portion of the timeline selected, click Effect and choose an effect. Reverb is a good starting point.
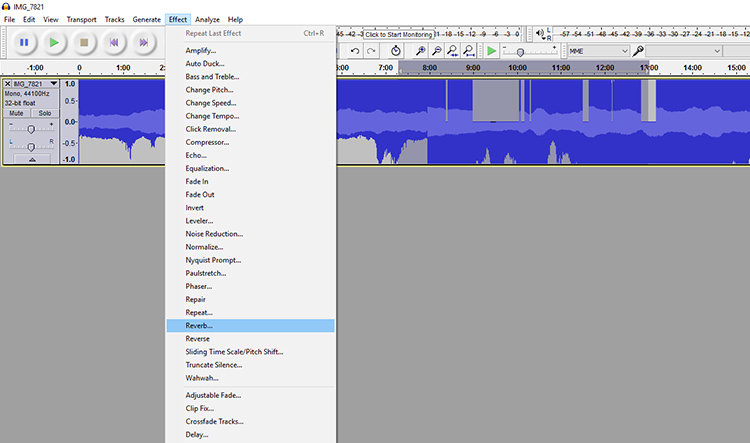
    glitch-art-photography-12

    A window with options to fine-tune the effect will appear, click ok. Once you have applied the effect, click on File > Export Audio.
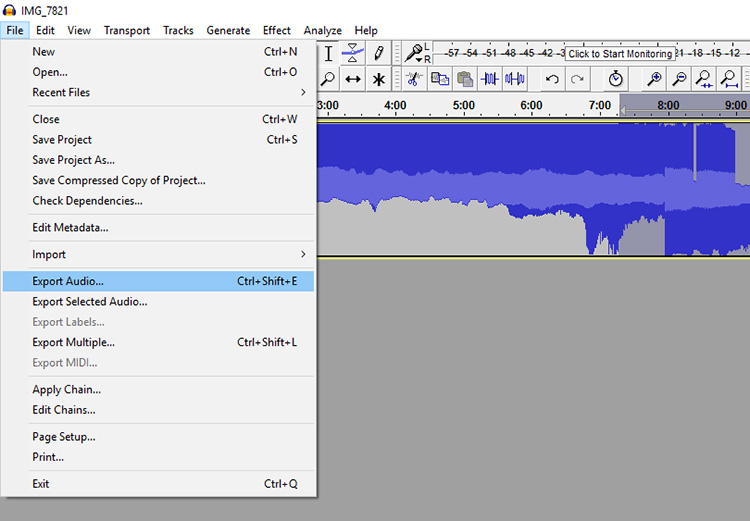
    glitch-art-photography-19

    Name the image and enter a .jpg extension at the end. In the “Save as type” menu, select “Other uncompressed files”. Select “Options…”  and copy the specifications in the image below. Click Save. Select OK for the various prompts.
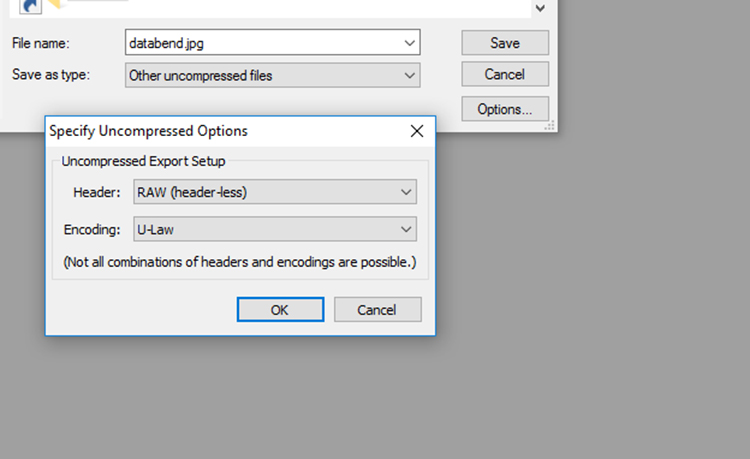
    glitch-art-photography-13

    Open the file in Paint, Preview, or Camera Raw to view the results of the databend. Save the file as a JPG under a new name if you want to open the file in Photoshop. If you discover that the file has been rendered completely unreadable, try a different image or file formats.
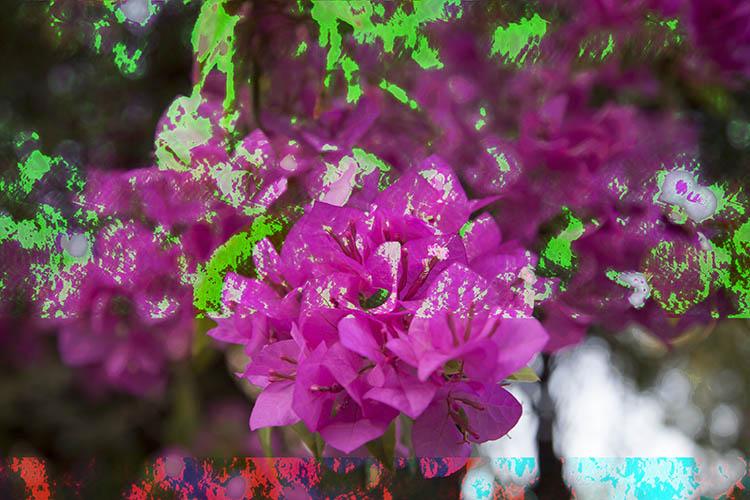
    glitch-art-photography-14

    Conclusion

    The experimental nature of glitch art makes it an intriguing undertaking. As photographers, glitch art allows us the freedom to create visually engaging imagery by deferring to the idiosyncrasies of technology. Databending explores themes of creativity and destruction, control, and unpredictability by exploiting the digital systems with which we surround ourselves.

    Visually, glitch art creates unusual, surrealistic, and even abstract imagery via a set of interventions that may likely never be repeated again. Whether you experiment with an automated program or try your hand at data bending – when you leave your images to the whims of digital devices, the results will always surprise you.
    glitch-art-photography-16

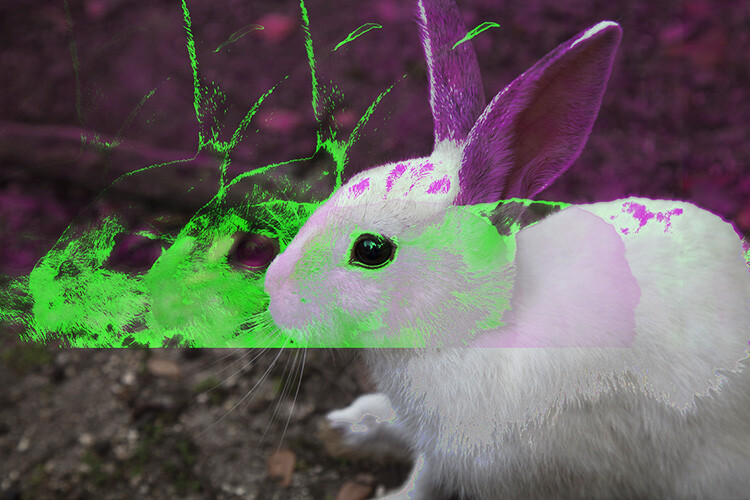
    The repeated effect of the rabbit’s face was achieved with the “Echo” effect
    glitch-art-photography-20

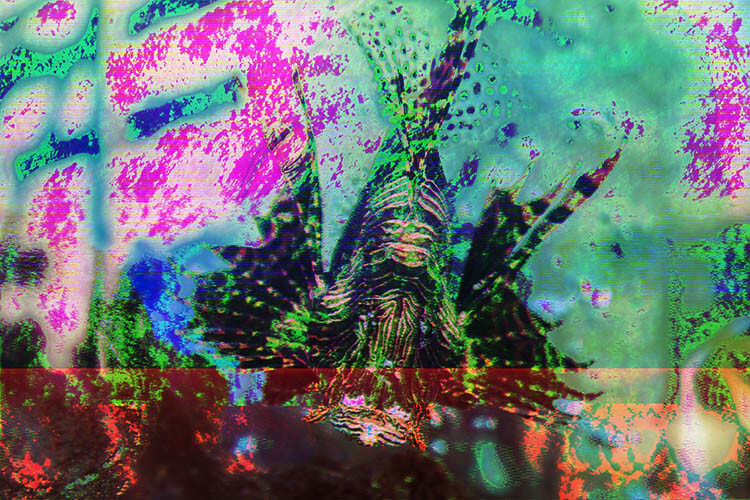
    I used the “Fade in” and the “reverb” effect for this photograph of a Lion Fish.
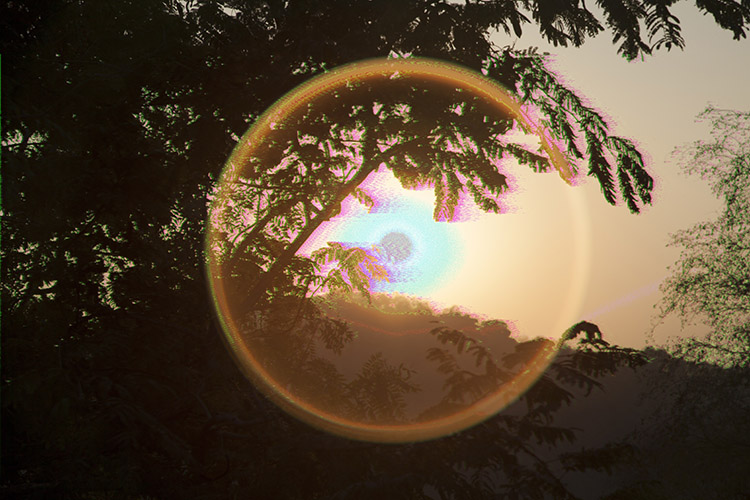
    glitch-art-photography-23

    glitch-art-photography-15

    glitch-art-photography-24

    googletag.cmd.push(function() {
    tablet_slots.push( googletag.defineSlot( “/1005424/_dPSv4_tab-all-article-bottom_(300×250)”, [300, 250], “pb-ad-78623” ).addService( googletag.pubads() ) ); } );

    googletag.cmd.push(function() {
    mobile_slots.push( googletag.defineSlot( “/1005424/_dPSv4_mob-all-article-bottom_(300×250)”, [300, 250], “pb-ad-78158” ).addService( googletag.pubads() ) ); } );

    The post How to Make Abstract Glitch Art Photographs by Megan Kennedy appeared first on Digital Photography School.

    Digital Photography School

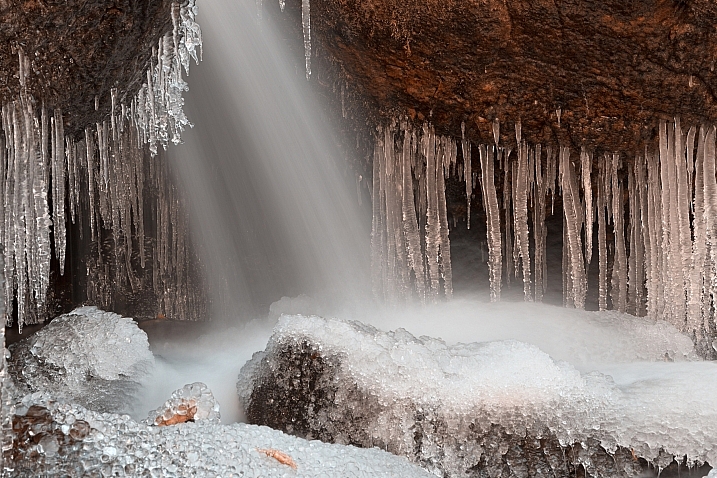
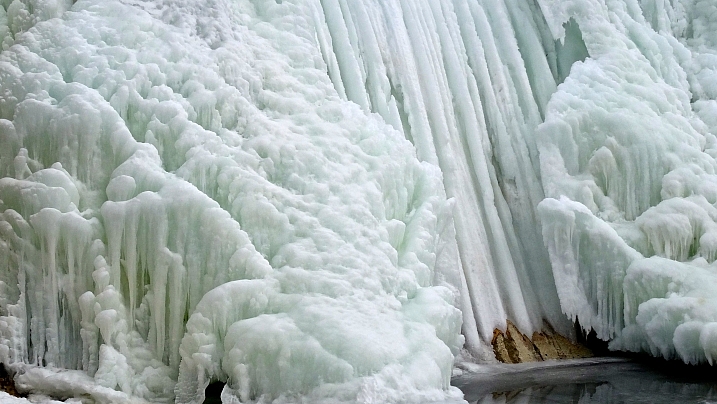
  • 24 Frozen Images of Some Cold Winter Weather

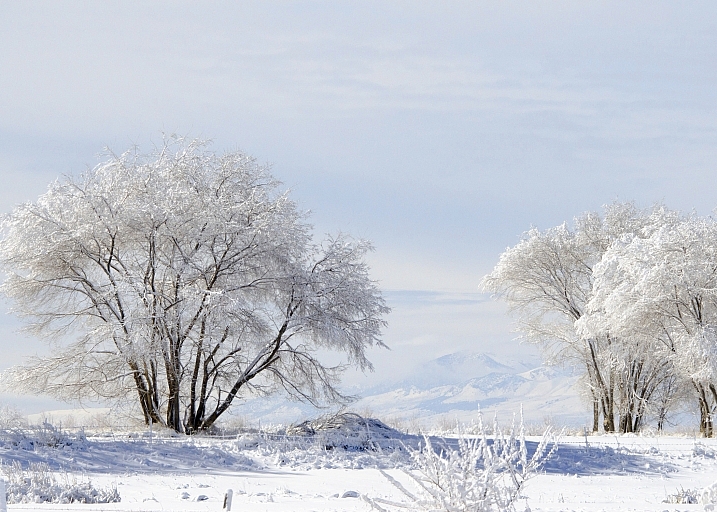
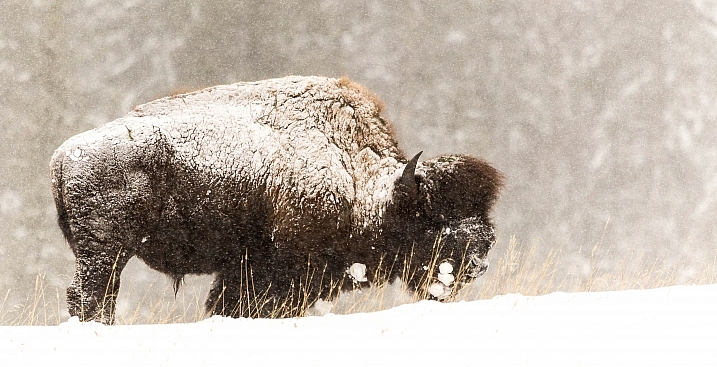
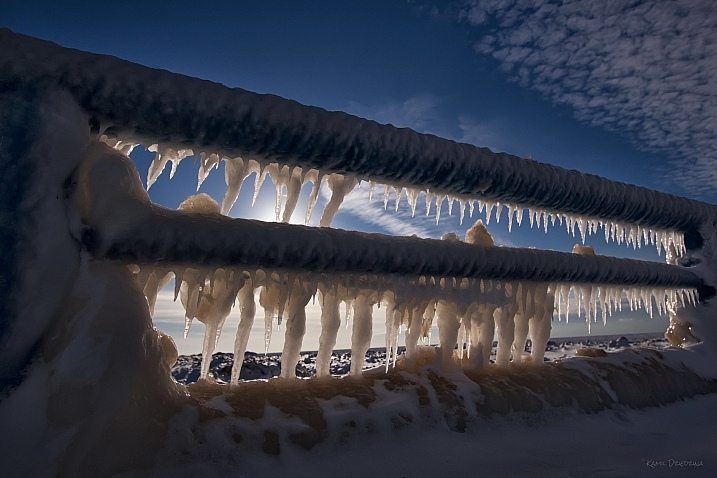
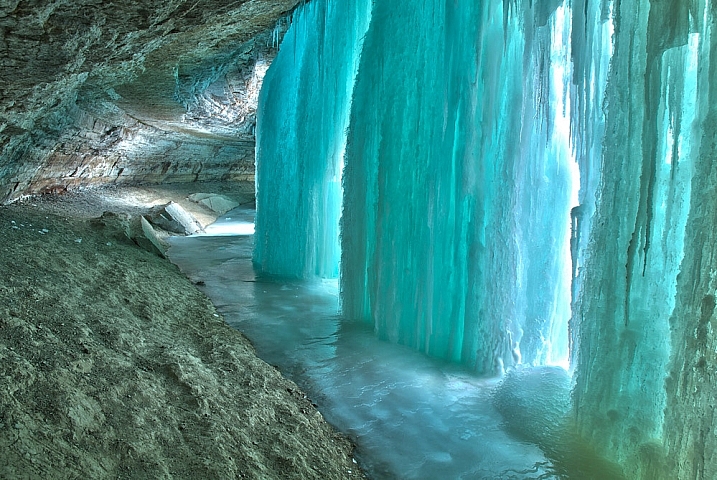
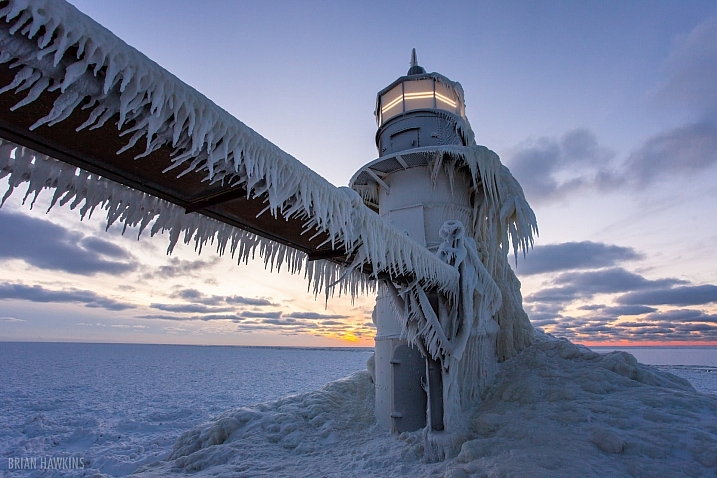
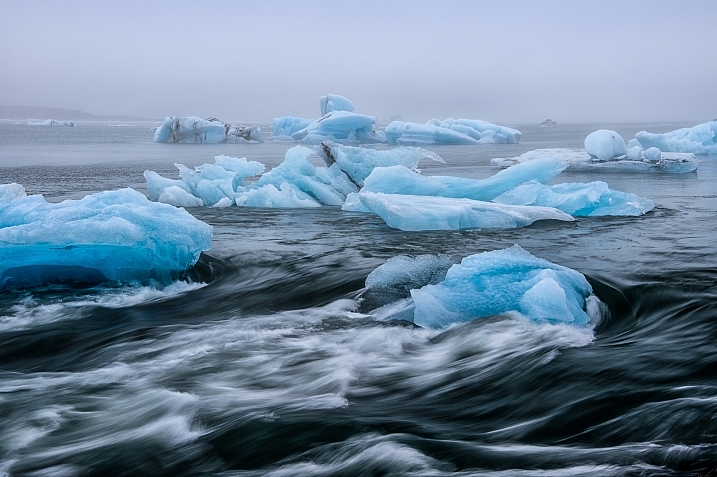
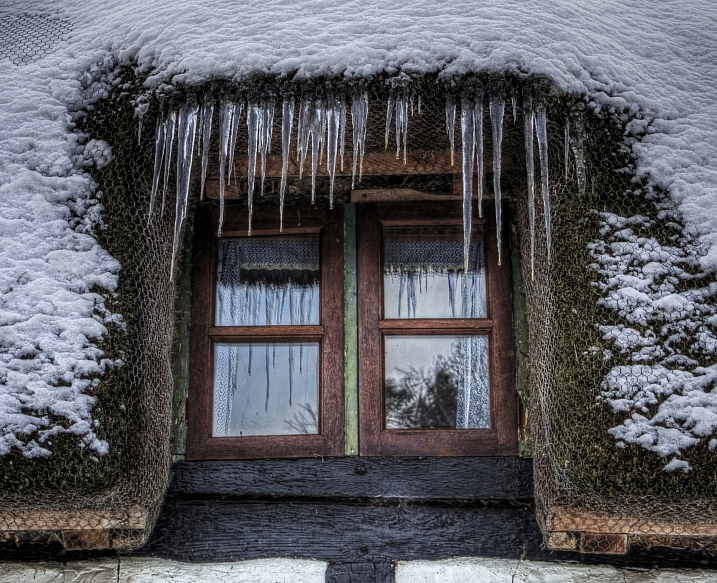
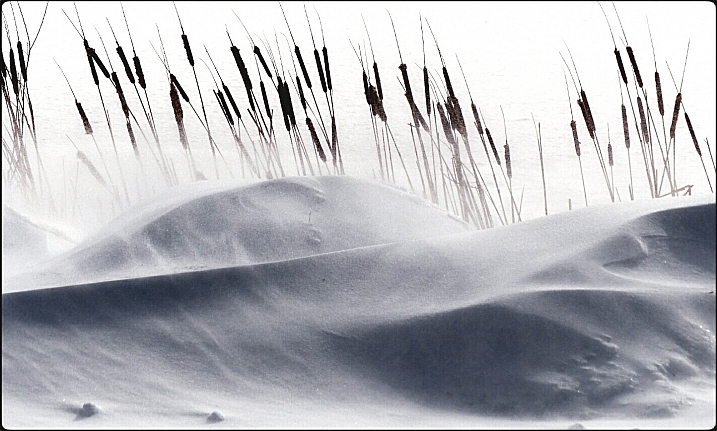
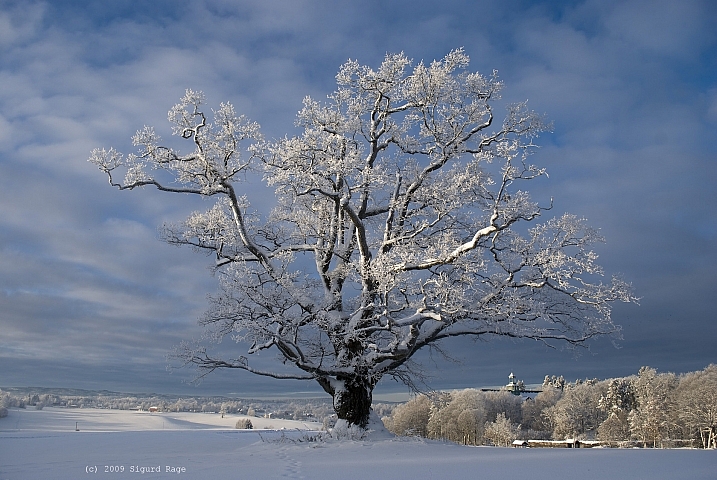
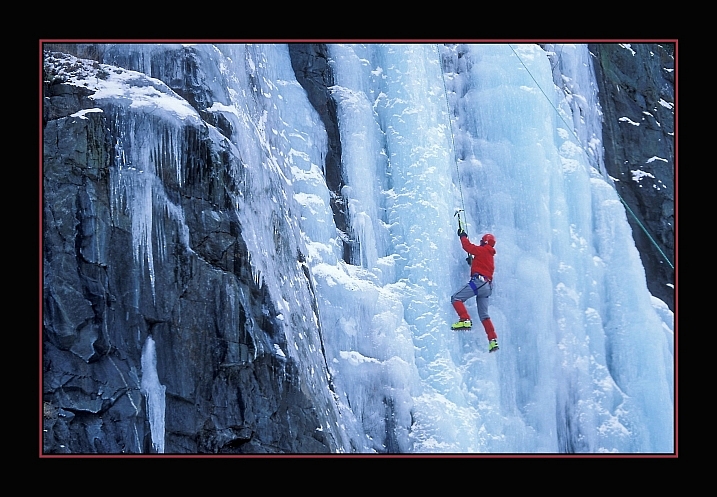
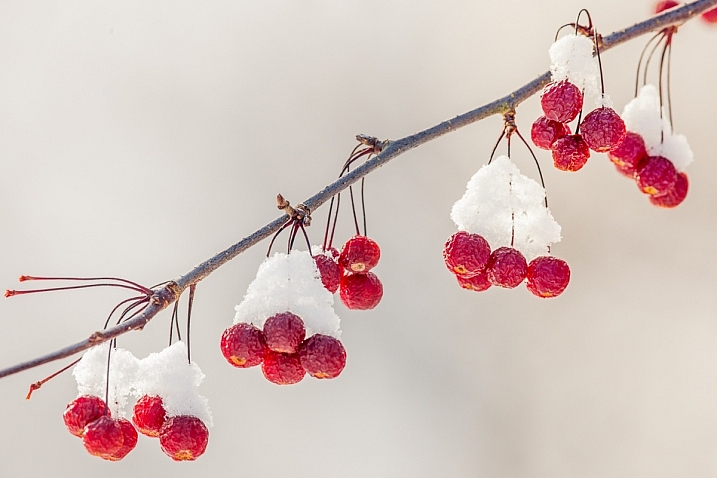
    Here in the northern hemisphere part of the world, it is winter. That means two things – cold and snow. But that doesn’t stop some people (nor should it stop you) from doing photography.

    Let’s have a look at some frozen images of some cold winter scenes.

    By Howard Ignatius

    By Neil Howard

    By Dan (catching up)

    By smilla4

    By Ken Mattison

    By Sigurd Rage

    By Roger S. Hart

    By Barbara Friedman

    By Julie Falk

    By chuddlesworth

    By USFWS Mountain-Prairie

    By Jack Skipworth

    By ShinyPhotoScotland

    By B Gilmour.

    By Tupulak

    By Kamil Dziedzina

    By MJI Photos (Mary J. I.)

    By Brian Hawkins

    By Melinda Shelton

    By Simon Doggett

    By Nicolas Raymond

    By ellenm1

    By Gonzalo Baeza

    By ravas51

    googletag.cmd.push(function() {
    tablet_slots.push( googletag.defineSlot( “/1005424/_dPSv4_tab-all-article-bottom_(300×250)”, [300, 250], “pb-ad-78623” ).addService( googletag.pubads() ) ); } );

    googletag.cmd.push(function() {
    mobile_slots.push( googletag.defineSlot( “/1005424/_dPSv4_mob-all-article-bottom_(300×250)”, [300, 250], “pb-ad-78158” ).addService( googletag.pubads() ) ); } );

    The post 24 Frozen Images of Some Cold Winter Weather by Darlene Hildebrandt appeared first on Digital Photography School.

    Digital Photography School

  • Weekly Photography Challenge – Frozen

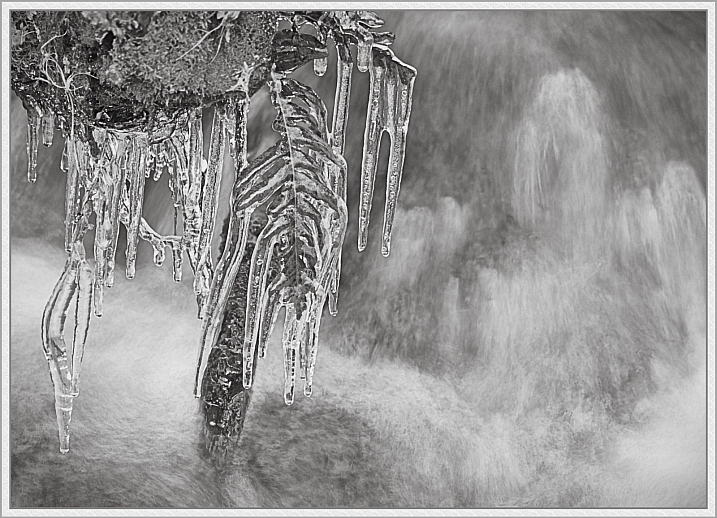
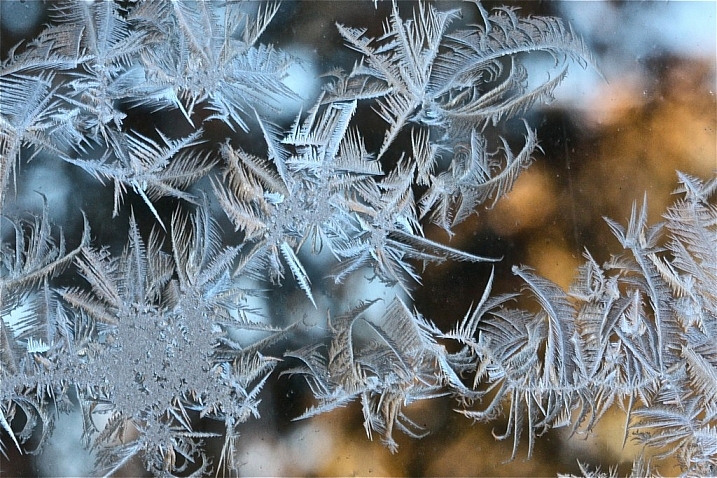
    The first thing I want you to do to get ready this week is to have a look at these 24 Frozen Images to get you ready for a spine-chilling challenge!

    Weekly Photography Challenge – Frozen

    If you live in a northern part of the globe this should be easy for you. Find something frozen, just look around for:

    • Icicles
    • Snow
    • Frost
    • Snowflakes if you want to go ultra macro!

    By wiredforlego

    By LASZLO ILYES

    By Susanne Nilsson

    Even if you do not live in the northern parts of the world you can participate in this challenge. Think outside the box what else is frozen? How about:

    • Ice cubes
    • Popsicles
    • Ice skating rink
    • Ice cream!

    You could even freeze something inside an ice cube and photograph that! How about a flower or slice of cucumber? Get inventive.

    By Barta IV

    By Derek Key

    By m01229

    Share your images below:

    Simply upload your shot into the comment field (look for the little camera icon in the Disqus comments section) and they’ll get embedded for us all to see or if you’d prefer, upload them to your favorite photo-sharing site and leave the link to them. Show me your best images in this week’s challenge. Sometimes it takes a while for an image to appear so be patient and try not to post the same image twice.

    Share in the dPS Facebook Group

    You can also share your images on the dPS Facebook group as the challenge is posted there each week as well.

    googletag.cmd.push(function() {
    tablet_slots.push( googletag.defineSlot( “/1005424/_dPSv4_tab-all-article-bottom_(300×250)”, [300, 250], “pb-ad-78623” ).addService( googletag.pubads() ) ); } );

    googletag.cmd.push(function() {
    mobile_slots.push( googletag.defineSlot( “/1005424/_dPSv4_mob-all-article-bottom_(300×250)”, [300, 250], “pb-ad-78158” ).addService( googletag.pubads() ) ); } );

    The post Weekly Photography Challenge – Frozen by Darlene Hildebrandt appeared first on Digital Photography School.

    Digital Photography School

  • How to Photograph Close-Up Details of Newborns and Infants

    Newborn portraits warm hearts and bring tons of joy to those who view them, especially if they are the new parents or extended family of the newborn. Often, we focus on capturing the new baby among their surroundings with various props and scenes setup. One area we might overlook in our quest to photograph their fresh new life is the tiniest of parts in comparison to the larger world around them. Parents love these special details of newborns just as much, and you’ll enjoy taking them, too.

    newborns

    The Gear

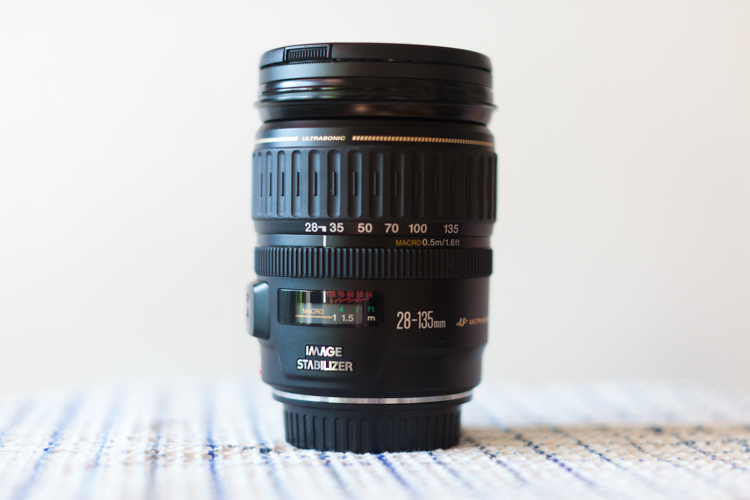
    Using a macro lens or a close-up filter will help you get in tight without the need for cropping in post-processing which may degrade the image quality later. Ideally, you want to use a macro lens as they stay sharp while allowing you to get in closer than ever before.

    Close-up details of newborns macro lens

    If you don’t have a macro lens or close-up filter in your lineup, a zoom lens works well, too. You can be a short distance away and still get close-up without needing to crop. Post-processing may help with sharpness if you’re using a zoom lens.

    Non-macro fixed lenses may be a little more challenging to use for getting close up, depending on their minimum focusing distance (how close you can be to the subject while still keeping it in focus). Investing in a fixed macro lens or close-up filters would be more suitable for this application.

    The Hands

    Everyone remarks on the small hands of a baby and how soft they are when they’re holding them. There are two ways to photograph close-up details of newborn hands to make an impact.

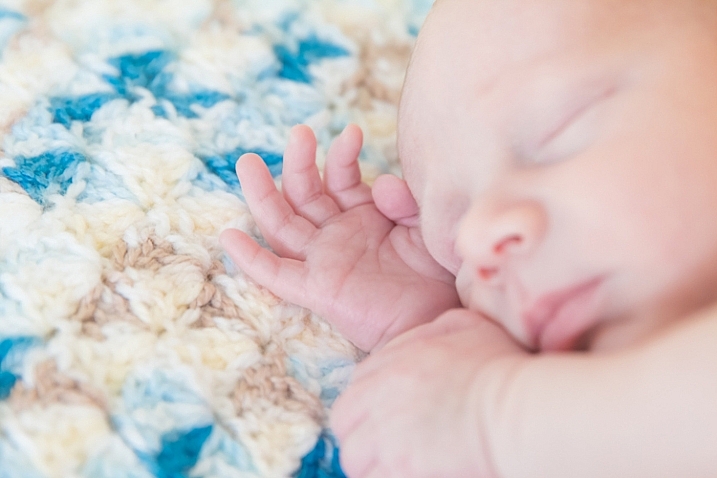
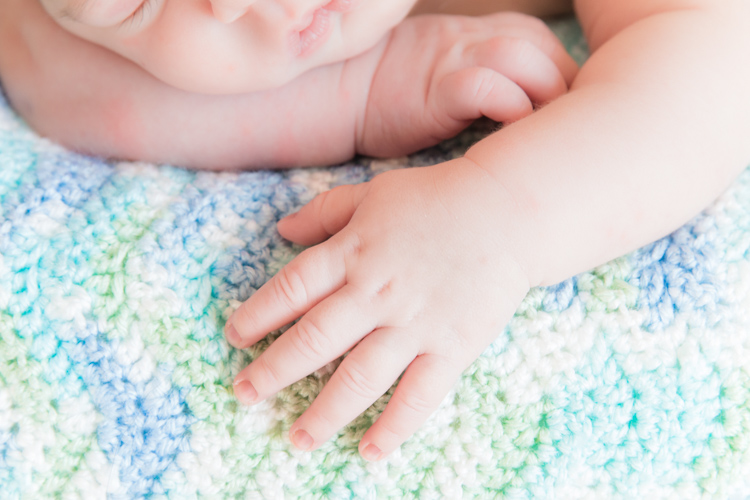
    The first way to photograph new hands is up close. Hands resting near their body or close to their face shows the small details on their hands and provides a glimpse into how soft they are.

    Close-up details of newborns hands

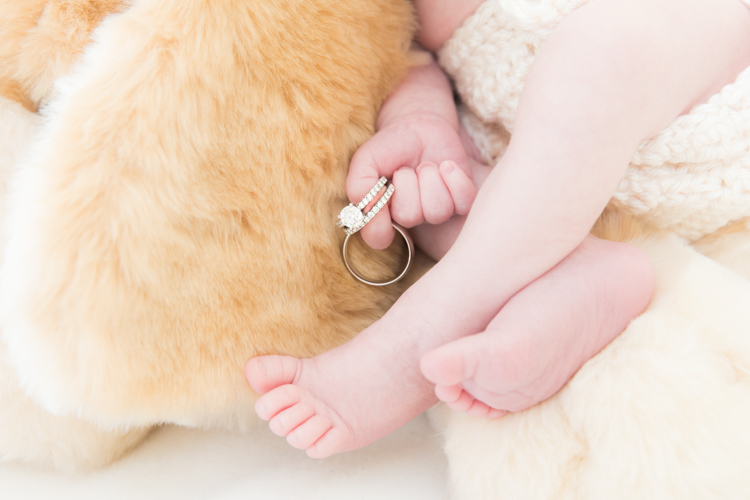
    The second way to photograph their hands is against another person’s hand, finger, or an object that shows the actual size of their hand. By capturing hands near or holding an object, the viewer easily can gauge how small the baby’s hands are in comparison to the world around them.

    Place their hand around a parent’s finger, or a special family heirloom like wedding rings to show their true size.

    Close-up details of newborns hands

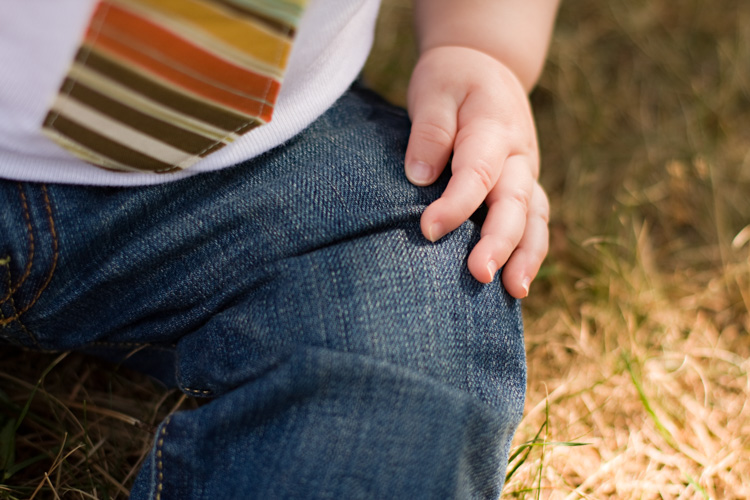
    As the newborn grows, hands become an integral part to how they begin to use their body or hold themselves steady. Make sure to give some focus to their hands in the coming months as they grow and start to grasp objects, use them for balance, or while they are relaxing in a seated position.

    Close-up details of newborns hands

    The Face

    A newborn’s face is priceless to their parents. Photographing details of their face at various angles will give you more than just a straight-on standard image. Their tiny nostrils or eyelashes can have a tremendous impact on the viewer. Ears, lips, and hair are just as valuable to capture in an image when focusing close-up and on details.

    Close-up details of newborns face

    As the child grows, his or her face will change tremendously from those first few weeks. Photographing their face over the course of infancy will be a proud addition to their baby album as they morph features from one parent to another over a short time.

    Close-up details of newborns face

    The Feet

    The feet are extra soft and cuddly, minus the wrinkles of age or use. They might be pricked and prodded before they get home, but photographing them alone is worth the additional editing time it may take to remove small pricks from hospital needles. Getting in close to shoot details of newborn feet makes the viewer almost want to touch them and feel how smooth and gentle they are.

    Close-up details of newborns feet

    Try capturing their feet while they are lying on their back and while also snuggled up on their stomach. Both angles will give you options to again add-in family heirlooms in addition to showing just how tiny they are in comparison to their parents’ fingers. Parents love these types of images that embody the love they have for their new addition.

    Close-up details of newborns feet

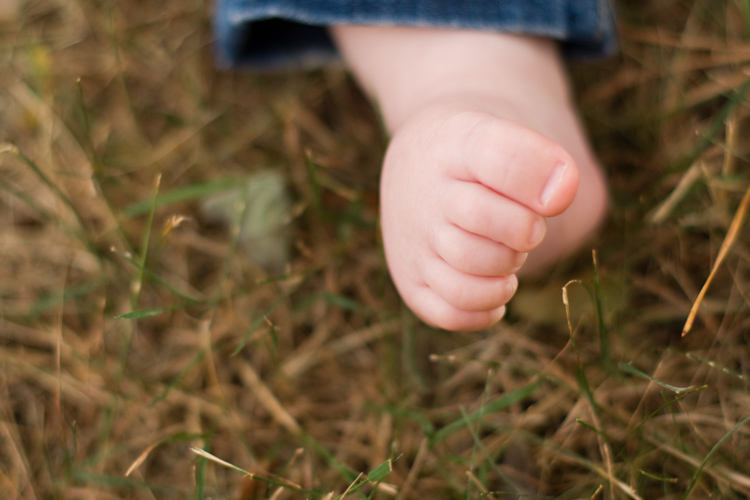
    Also, as growing infants become more aware of their feet, you’ll be able to capture them against a backdrop of their face while sucking on their toes, or pulling back from touching the green grass outdoors for the first time.

    Close-up details of newborns feet

    Wrap-up

    Getting close-up with newborns is essential to telling the entire story of their fresh new life.

    Photographing these little parts makes for beautiful wall decor, while also capturing the same features one might ordinarily try to get set in ink for their baby book. To cherish their growth over time, getting in close with macro or zoom lenses offers the best option when focusing on these tiniest of parts and parents will absolutely love these details shots.

    Please share your newborn details photos in the comment below, or post any questions you have.

    googletag.cmd.push(function() {
    tablet_slots.push( googletag.defineSlot( “/1005424/_dPSv4_tab-all-article-bottom_(300×250)”, [300, 250], “pb-ad-78623” ).addService( googletag.pubads() ) ); } );

    googletag.cmd.push(function() {
    mobile_slots.push( googletag.defineSlot( “/1005424/_dPSv4_mob-all-article-bottom_(300×250)”, [300, 250], “pb-ad-78158” ).addService( googletag.pubads() ) ); } );

    The post How to Photograph Close-Up Details of Newborns and Infants by Kate Nesi appeared first on Digital Photography School.

    Digital Photography School

  • Lighting 103: How to Safely Gel a Speedlight

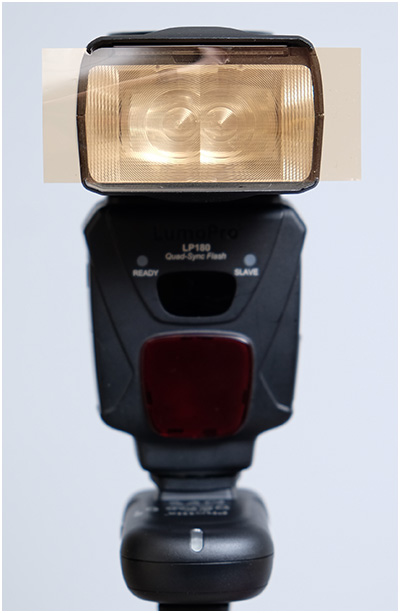
    Do you work mostly with speedlights? If so, congratulations. Gelling your lights is going to be quick, easy and cheap. The fresnel lens on your speedlight (where the light comes out) is only about 3-4 square inches. And that is all you are ever going to need to gel on a speedlight.

    As far as how to attach the gel, you have several choices and all are simple. But there are also a few things to watch out for, unless you want your gel to be permanently heat-welded to your flash. Read more »
    Strobist

  • 3 Handy Lightroom Features I Discovered by Accident

    When I first started to dabble in photography, I knew very little about post-processing. I used Picasa to edit my photos. It’s free and easy to use. I experimented with the different settings and created some pretty interesting images (they weren’t very good). Needless to say, I had no idea what I was doing.

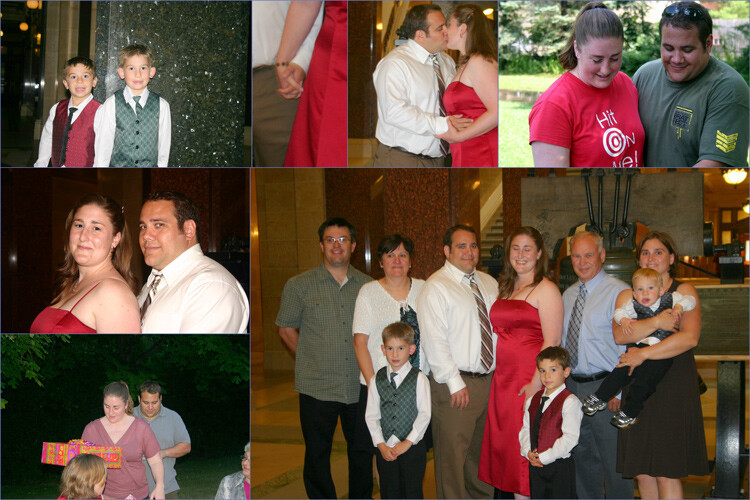
    This was the extent of my early post-processing attempts. I created collages in Picasa.

    This was the extent of my early post-processing attempts. I created collages in Picasa.

    Self-learning methods and benefits

    Like many of you, I am a self-taught photographer. My degree is in English Literature, and photography was something I dabbled in as a hobby. I learned photography by reading books, participating in online forums and through trial and error. It’s been a long hard road but it’s been well worthwhile.

    I learned most of my post-processing by watching YouTube videos. It has become one of my favorite ways to learn. There’s some inspirational stuff available that you can use to teach yourself all kinds of different skills. It’s a lot of fun, and the benefit of learning in this way is that you can go at your pace.

    This type of learning is perfect for my lifestyle, and I’m sure for many of you the same factors apply. It always amazes me what we can teach ourselves when we put our minds to it. Check out this video. Sean Tucker experiments with landscape photography and discusses how important it is to continue to learn and push ourselves.

    Three Lightroom Features Discovered by Accident

    Now that we are on the path to self-directed learning I would like to share with you three Lightroom shortcuts, hacks, tricks, or whatever you want to call them, that I learned completely by accident. I just pushed buttons to see what would happen. By just experimenting, the results paid off. I learned some very efficient ways to manage my post-processing workflow, and I want to share them with you.

    Accidental Discovery #1 – the Alt key

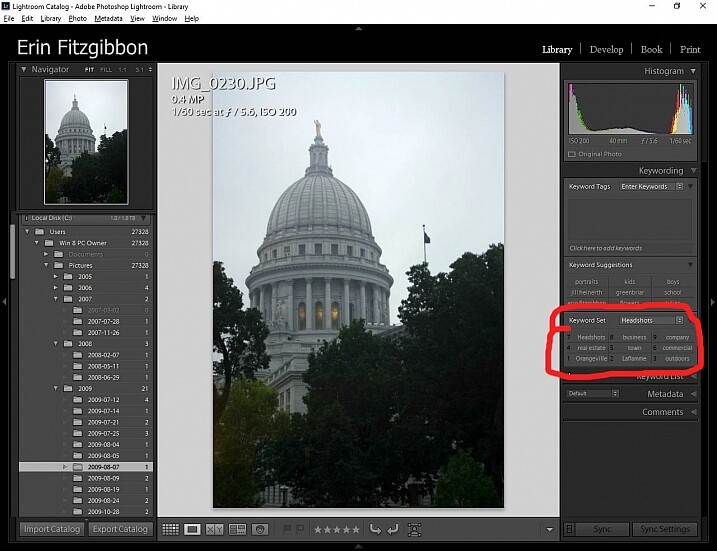
    By simply pushing buttons I discovered some pretty cool functions. If you hold down the Alt key while in the Library module, little numbers appear by each keyword. You can then simply hit the number, and the module will tag your images with that keyword. Brilliant!!!

    If you create a set keywords, this little trick becomes even more useful. The keyword set is then added to your images by simply typing in the correct number.

    Alt key Lightroom Library module

    This little discovery saves me loads of time.

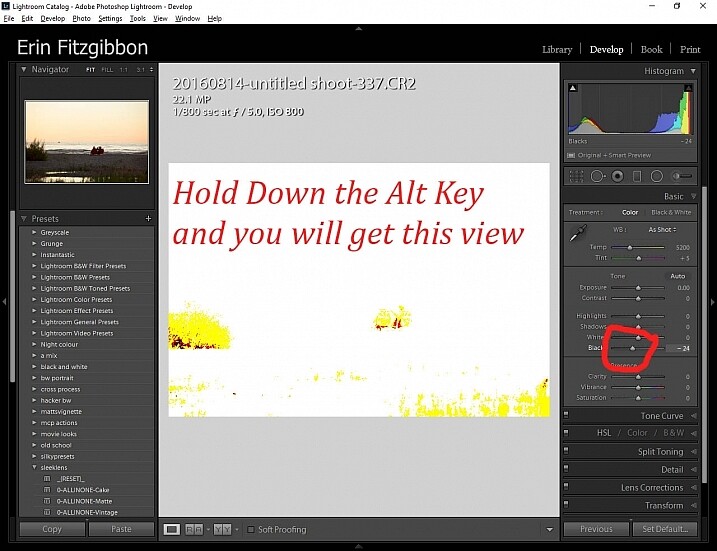
    In the Develop module, the Alt key is very useful when setting black and white points in your images. Hold down the Alt key while hovering your cursor over the Blacks slider. The image will go completely white and as you move the slider from side to side (move it left to darken or add black) you will be able to see when the blacks begin to clip in your image.

    This is a great way to adjust your image and super easy to see (and adjust) how much contrast range it will have. You can use the same principle to adjust the white points in your image. Give it a try. It’s one of the first steps I take when editing my work.

    Note: It’s okay and even desired to have some blacks clipping in your image, but ideally you want to keep any whites from doing so. Clipping means areas with no detail in that tonal range.

    Alt key Lightroom Develop module black point slider.

    Here’s a screen shot of the black point slider.

    Accidental Discovery #2 – Navigator Window

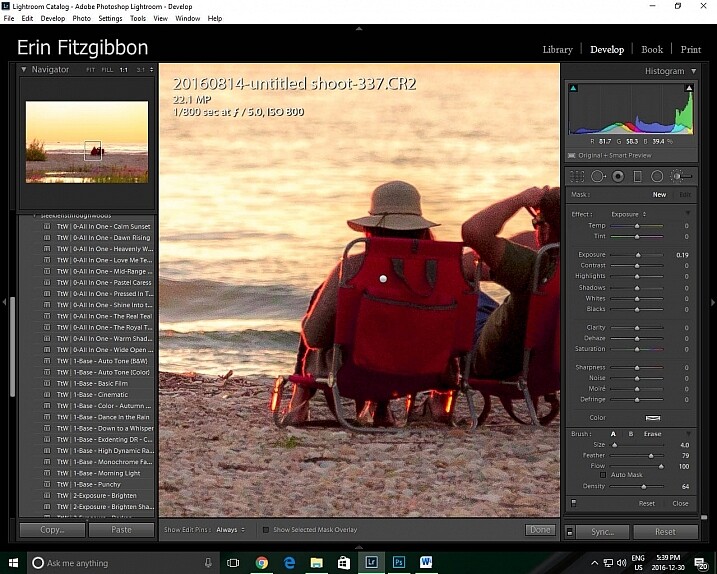
    The Navigator window is very useful when you need to zoom in. This is probably really obvious and silly to those who have formal Lightroom training. Before discovering this little trick, I would zoom in and out applying the adjustment brush to small sections of the image. It was very tedious.

    Then one day I discovered that if I click the 1:1 button on the Navigator (preview) window and then slide the square around on the screen, I could apply the adjustment brush without the tedium of closing the adjustment brush and moving out to the full-screen view.

    Lightroom features 1:1 preview window

    When I need to apply the same brush to several different areas of an image I click on the 1:1 feature and slide around the image making adjustments.

    Accidental Discovery #3 – Lights Out in the Library

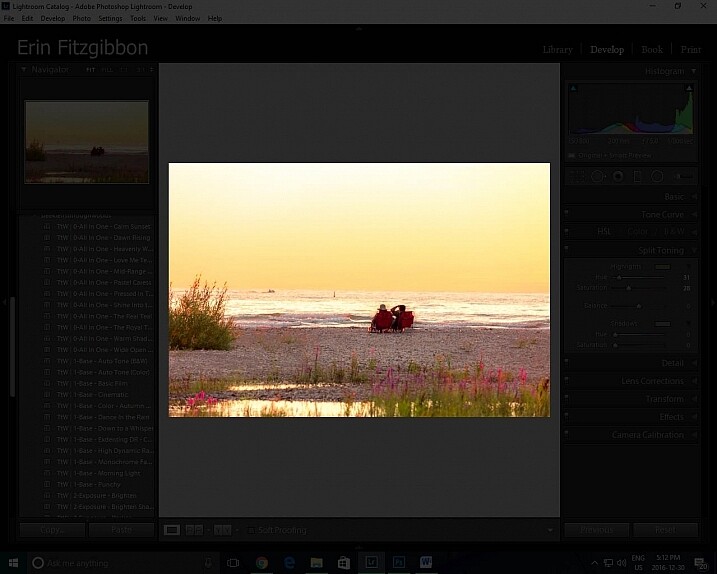
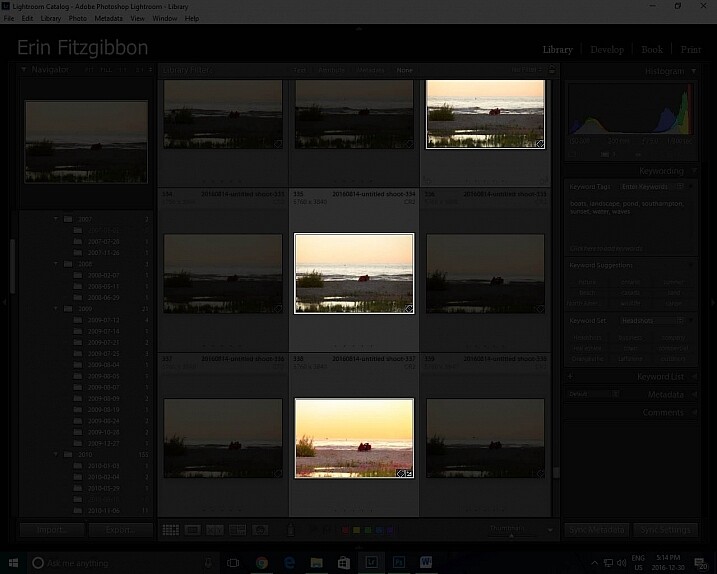
    It took me a little while to figure out this trick. Again, I was just experimenting and pushing buttons. I had learned to use the Lights Out feature in the develop module.  When you press the letter L on your keyboard, it dims the surrounding panels so that you can focus more on the image at hand (press L again for total black around your image, and once more to return to normal). This same tool works well in the library module. I now use the “Lights Out” feature to isolate specific images. Simply select the images you wish highlight then hit the “L” button. It’s a neat little trick.

    This same tool works well in the library module. I now use the Lights Out feature to isolate specific images. Simply select the images you wish highlight then hit the “L” button. It’s a neat little trick.

    Lightroom features Lights Out in Library module

    I use this feature to help me analyze an image before I decide it’s finished.

    Lightroom features Lights Out in Library module

    Look how easy it is to isolate specific images in the library module.

    Conclusion

    Experimentation is never a bad thing. We live in an age when we are lucky to have so many resources available to us. The internet is a true cornucopia of opportunity. Don’t be afraid to try different things. You really can’t break the program.

    Sure there have been times when I have had to call Adobe and ask for assistance because I’ve pushed some button and haven’t been able to reset the program, but those times have been very few and far between.

    Let me know about some of the tricks you use when post-processing. I’m sure there’s so much out there I still need to learn and I’m hoping you can add to my list of discoveries. What have you taught yourself about post-processing or using Lightroom in general? Please share in the comments below.

    googletag.cmd.push(function() {
    tablet_slots.push( googletag.defineSlot( “/1005424/_dPSv4_tab-all-article-bottom_(300×250)”, [300, 250], “pb-ad-78623” ).addService( googletag.pubads() ) ); } );

    googletag.cmd.push(function() {
    mobile_slots.push( googletag.defineSlot( “/1005424/_dPSv4_mob-all-article-bottom_(300×250)”, [300, 250], “pb-ad-78158” ).addService( googletag.pubads() ) ); } );

    The post 3 Handy Lightroom Features I Discovered by Accident by Erin Fitzgibbon appeared first on Digital Photography School.

    Digital Photography School

  • Some Options for Backing Up Your Photos Online

    Backing up your data is an essential part of your photography workflow. While many photographers still advocate for using physical external hard drives, there are also many online services where you can store your images. In this article, I will go over the pros and cons of several popular sites to backup your photos online. Please note that these photo solutions are constantly changing their features, so always check with them directly to verify any details.

    Photo backups versus photo sharing sites

    Some Options for Backing Up Your Photos Online

    It’s important to note the differences between a designated photo backup services and photo sharing websites. Traditional photo backup services such as Backblaze and CrashPlan focus purely on backing up data and can be set to backup an entire computer or hard drive. This is good in the sense that you can have everything you’ve ever created on your computer saved to the cloud. However, these backups end up being extremely large files and they take extra time to retrieve. So if you need to constantly and quickly access your backed up photo data, it may not be wise to rely solely on these types of providers.

    Photo sharing sites, on the other hand, are not meant to be comprehensive backups of your entire computer. Many of these sites impose limits on the types and sizes of files that can be uploaded. Thus, photo sharing websites are best used to upload, store, and share edited photos.

    How I backup my photos

    My advice is to have a backup for your backup. As a professional photographer who shoots primarily in RAW, I have terabytes of data to store, but I don’t generally need frequent access to those original files. I opt for CrashPlan to do automatic backups of my RAW images, in addition to storing them on external hard drives.

    Charles Wiriawan

    Image By Charles Wiriawan – external hard drive method of backing up.

    My photography business is such that I constantly need to dig up old high-resolution photos to present to clients, and CrashPlan doesn’t give me easy, immediate access to those files. So I save edited, high-resolution copies of every photo I take and upload them to SmugMug. This way, I have quick access to the photos and can easily prepare an online gallery to share and sell images to clients. I also have Google Photos set to do automatic online photo backups anytime I save a new JPG image to my computer. In the end, I have four ways of backing up my photos.

    Backup Services

    These are comprehensive backup and cloud storage solutions meant to hold large amounts of data. Set them to automatically backup your entire computer or hard drive, and practically any file type or size will be accommodated. On the plus side, these backup solutions are pretty affordable for what they offer. However, it can take a long time to backup huge files, and file restoration can also take a bit of time.

    Backblaze

    One of the most popular backup solutions, Backblaze can automatically backup an unlimited amount of data from a single computer (note; it will connect and backup external drives as well). There’s no restriction on file type or size, and there’s only one pricing plan. It costs $ 5.00 per month or $ 50 USD per year for a Backblaze account. You can even pre-pay $ 95 for a 2-year plan. It’s an affordable and reliable solution for making sure everything on your computer is backed up.

    Some Options for Backing Up Your Photos Online backblaze

    CrashPlan

    Virtually the same as Backblaze, CrashPlan also offers automatic computer backups. The main difference is that CrashPlan offers several different subscription plans. Included in the free plan is an automatic backup to a local hard drive or another computer. If you want to backup your data to CrashPlan’s cloud, the cost is $ 5 per month to backup one device for unlimited cloud storage and mobile file access. To add an extra device (as many as 10), the Family Plan is available for $ 12.95 per month.

    crashplan Some Options for Backing Up Your Photos Online

    Amazon Cloud Drive

    At $ 11.99 a year for unlimited photo storage (or free for Amazon Prime members), Amazon offers competitive cloud storage solutions, but at some expenses. The main downside to Amazon Cloud at the moment is its lack of features when compared to other more established solutions. For example, a desktop client must be used to upload files larger than 2GB, there are no automatic backup features, and stored files are not automatically updated. Given these underdeveloped features, Amazon Cloud Drive at this moment seems more like an off-site hard drive rather than a true backup solution.

    amazon-online-photo-backup

    Microsoft OneDrive

    Formerly known as SkyDrive, OneDrive is Microsoft’s cloud storage solution that works with Windows, Mac, iOS, and Android devices (but still no Linux). Base plans include a generous 15GB of free storage. Paid plans start at $ 1.99 a month for an extra 100 GB, or $ 6.99 for 1TB of space. The main downsides are a slow upload and download speed, a 10GB size limit per file, and the need to have a Microsoft, Outlook, or Xbox Live account in order to access OneDrive. This may be a hurdle for those who don’t use any Microsoft or Windows products.

    onedrive-online-photo-backup

    Google Photos

    The photo storage solution offered by Google takes a slightly different approach than that of Dropbox or Flickr. Google Photos offers unlimited backup of a wide variety of file formats (including RAW images). You can also set automatic backups to occur whenever a new photo is taken on your mobile device or saved to your computer. However, all photos and videos must be under 16 megapixels or 1080p HD video.

    If you upload larger files under the unlimited plan, your files will be compressed to fit these maximum size requirements. The only way to upload original, full resolution images is to opt for a plan with limited storage. In a way, this makes sense. You pay for more storage space if you need it.

    google-photos-online-photo-backup

    Photo Sharing and Image Hosting Websites

    These websites were not originally meant to be comprehensive backup solutions. However, many photographers have begun using them as such. Most of these websites have limitations when it comes to data storage or file types that you can upload. Thus, they may not be the best all-around backup solution for your photos, depending on your needs.

    Dropbox

    One of the most popular tools to backup photos online is Dropbox. It exists in the form of a mobile app, website, and desktop app and allows you to store all types of media including photos, documents, videos, and other files. Anything you add to Dropbox can be immediately accessed anywhere when you log in via the corresponding website or app.

    Using the free version gives you 2MB of storage space, but you can purchase additional space. Dropbox made an attempt at pushing an automatic photo backup feature in the form of Dropbox Carousel. However, this app along with Dropbox’s email app Mailbox shut down in early 2016. Thus, it’s questionable if they will make future investments into further feature development.

    dropbox-online-photo-backup

    Flickr

    Yahoo’s venerable photo solution, Flickr, has withstood the test of time and continues to be popular among amateur and professional photographers. Even with a free account, you get 1TB of photo storage space. However, you cannot get more than 1TB of space, even with a paid Flickr Pro account. Instead, the paid account just removes ads and gives you access to your account stats. While Flickr isn’t the best for sharing photos with clients, it does give you the option to license and sell your photos.

    The main downside to Flickr has to do with file size limits. Uploaded photos cannot be more than 200MB and videos must be 1GB or less in size. Additionally, RAW images cannot be uploaded.

    flickr-online-photo-backup

    SmugMug, Zenfolio, and Photo Shelter

    These three paid photo-sharing websites are popular for presenting and selling photos to clients:

    1. SmugMug
    2. Zenfolio
    3. PhotoShelter

    However, the push for offering unlimited photo storage has elevated these sites into becoming viable ways for photographers to backup images. All three sites also offer components that help you build your photography website. SmugMug and Zenfolio are among the most affordable, while PhotoShelter is more expensive.

    In Conclusion

    So which photo backup solution is best for you? It truly depends on what media you are looking to backup, how often you will access it, and your budget. Whichever solution you choose, remember to always have a backup for your backup. Also, please remember that these services are constantly offering new promotions and features. The information in this article may change, so always check directly with the provider to verify details.

    How do you backup your photos? Let us know in the comments below.

    googletag.cmd.push(function() {
    tablet_slots.push( googletag.defineSlot( “/1005424/_dPSv4_tab-all-article-bottom_(300×250)”, [300, 250], “pb-ad-78623” ).addService( googletag.pubads() ) ); } );

    googletag.cmd.push(function() {
    mobile_slots.push( googletag.defineSlot( “/1005424/_dPSv4_mob-all-article-bottom_(300×250)”, [300, 250], “pb-ad-78158” ).addService( googletag.pubads() ) ); } );

    The post Some Options for Backing Up Your Photos Online by Suzi Pratt appeared first on Digital Photography School.

    Digital Photography School

  • A Couple of Overviews of the New Nikon D3400

    Last fall an update to the D3300 was released, the new Nikon D3400. I looked around and was able to find a couple of videos that go over the features and how it compares to the D3300, and also to the relatively new Canon T6.

    The Nikon D3400 Review by Chris Winter

    In this video photographer, Chris Winter goes over the features in the Nikon D3400 as compared to upgrades from the D3300, and some pros and cons. He mentions the new Nikon app Snapbridge as one of them, which allows you to receive photos to your smartphone directly from the camera without wifi.

    Nikon D3400 versus the Canon T6

    This next video compares the Nikon D3400 and the Canon T6 in several areas. See which one Chris rates on top:

    • Size and weight
    • LCD screens
    • Menus
    • Wireless integration
    • Video
    • Battery life
    • Burst mode
    • Autofocus

    Field test of the Nikon D3400

    In this last video you can see the D3400 in use in the field in more practical situations, and how it performs.

    Which camera is for you?

    So if you are looking for an entry-level DSLR the Canon T6 or the Nikon D3400 might be for you. Have you given them a look? Which fits your needs and why? Tell us your thoughts in the comments below.

    • Shop for the Nikon D3400 on Amazon.com or on B&H Photo
    • Shop for the Canon T6 on Amazon.com or on B&H Photo

    Note: The D3400 also made this list: The 19 Most Popular DSLRs Among our Readers

    googletag.cmd.push(function() {
    tablet_slots.push( googletag.defineSlot( “/1005424/_dPSv4_tab-all-article-bottom_(300×250)”, [300, 250], “pb-ad-78623” ).addService( googletag.pubads() ) ); } );

    googletag.cmd.push(function() {
    mobile_slots.push( googletag.defineSlot( “/1005424/_dPSv4_mob-all-article-bottom_(300×250)”, [300, 250], “pb-ad-78158” ).addService( googletag.pubads() ) ); } );

    The post A Couple of Overviews of the New Nikon D3400 by Darlene Hildebrandt appeared first on Digital Photography School.

    Digital Photography School

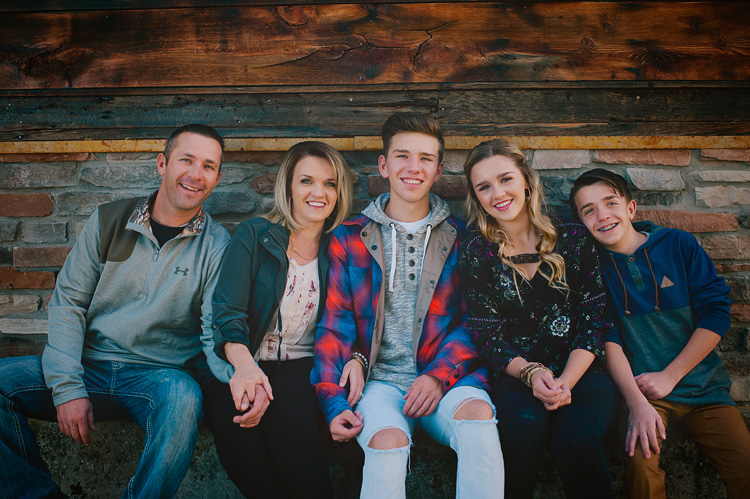
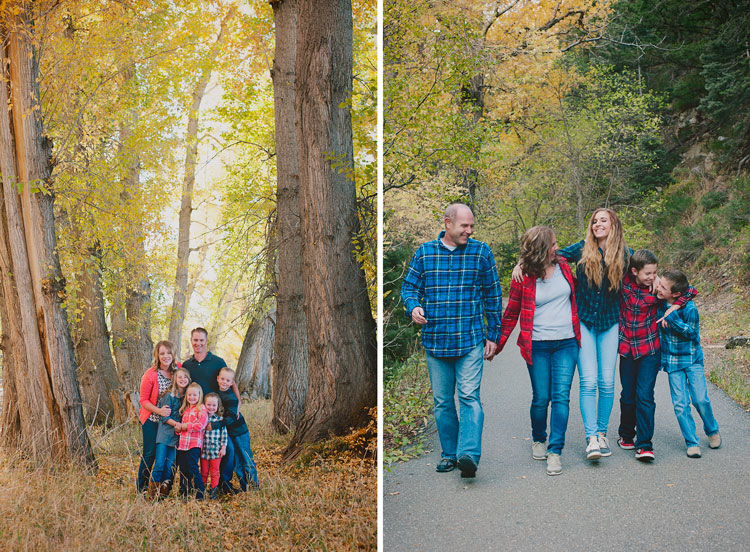
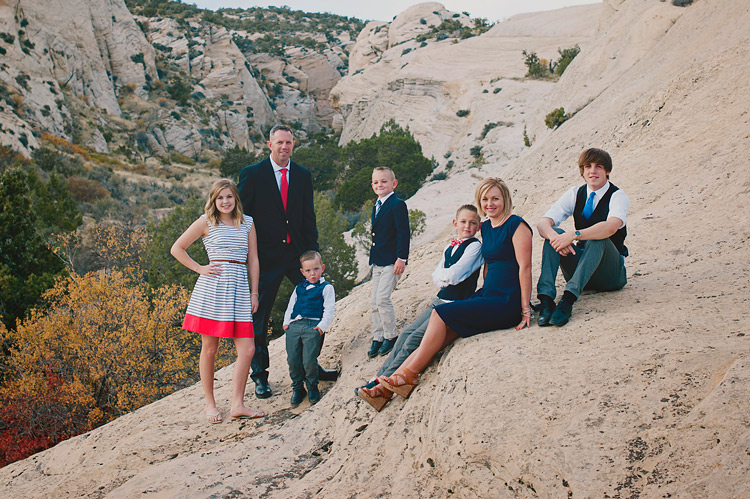
  • 8 Tips for Getting Great Expressions in Family Portraits

    8 Tips for Getting Great Expressions in Family Portraits

    Sometimes as a photographer, you are lucky enough to get a family session full of models with perfect natural smiles in every photo. It doesn’t take much to get a photo that is ready to hang on the wall. However, most of the time with family portraits it isn’t that easy.

    Maybe you’ve got somebody who doesn’t want to be there or little kids that have no idea what you’re trying to get them to do. And maybe, just maybe, you’d like to have some photos that show some extra personality. Everyone looking at the camera and smiling is nice, but I always love the ones that show a little more of who the family really is. I’ve got a few tricks up my sleeve to help you through the more difficult sessions, and to help you get some fun full-of-personality shots and great expressions with any family.

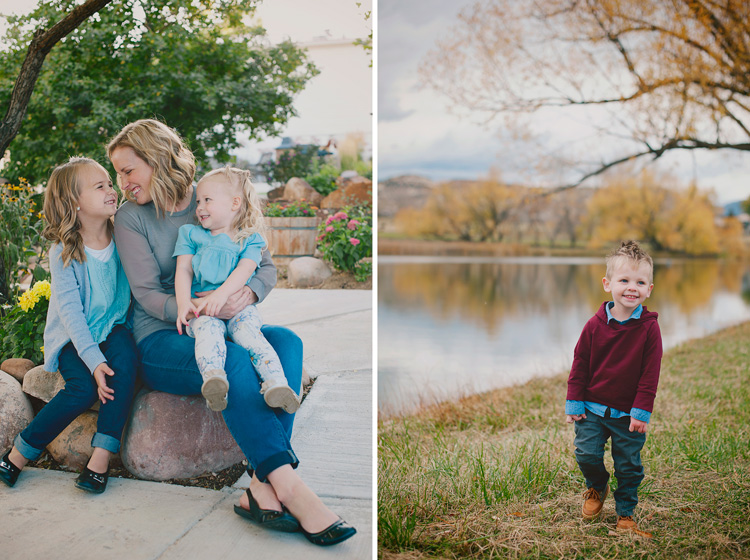
    1. You’re in charge of the kids

    8 Tips for Getting Great Expressions in Family Portraits kids

    Many times during a family session, you’ll have parents that are really concerned about whether or not their kids are looking and smiling at the camera. They don’t realize that the moment their little one looks and smiles, their faces aren’t photo-ready because they’re spending all their time wondering what their kid is doing.

    Remind the parents to keep their faces ready for photos at all times, and you, as the photographer, will take care of getting their kids to look and smile. If they are talking to their child, it will be hard for their child to look at you, because he’ll think he needs to be looking at mom or dad. Whether you want the parents looking at the camera or not for a particular photo, remind them to do their part for the photo and leave the rest to you.

    2. Let the parents help sometimes

    parents - 8 Tips for Getting Great Expressions in Family Portraits

    This might seem to contradict point #1 above, but there are times when getting those genuine smiles from the kiddos requires a little bit of help from the parents. If you have a reluctant smiler and you want to get a good individual photo of the child smiling, ask the parent to make a funny face, or do something silly off-camera. If you want the subject looking at the camera, ask the parent to get right behind you. Parents often know one silly word that will get their child giggling, or the child might just need the comfort of seeing a parent smiling at them to know that it’s all okay.

    You can also have photos with the parents interacting with their children in the frame. These often end up being some of my favorites. I love capturing the genuine interactions, and those expressions that the parent sees every day. Put the parent and child together, and simply ask them to smile at each other. Often this initially awkward directive gets them really giggling together, and you’ve got the perfect expressions.

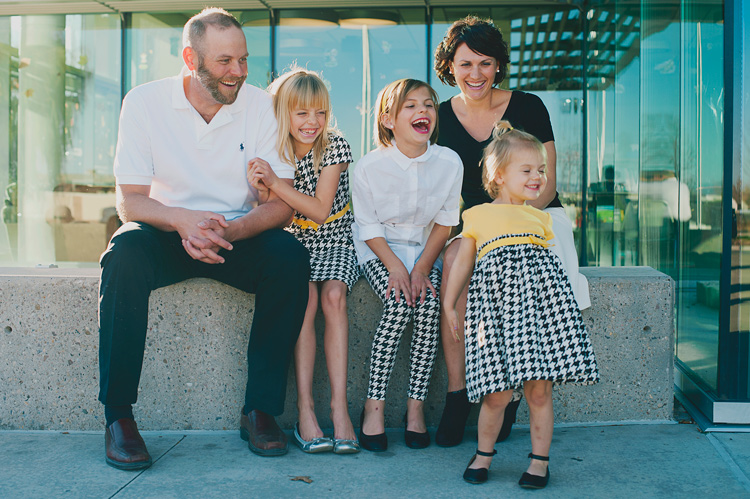
    3. Laugh at the silly one

    laugh silly - 8 Tips for Getting Great Expressions in Family Portraits

    One of my most effective prompts for natural looking family interaction and genuine expressions is to ask them to laugh at the silly one. Sometimes they all look to the same person right away, and everyone will start truly laughing. Sometimes they all look at someone different, and after a second of bewilderment, they all start laughing.

    This one can backfire, though, and needs to be used with caution. Some kids automatically think that laughing means to be over the top silly, and they over-exaggerate a huge laugh that doesn’t look natural at all. Some kids think that laughing also must be accompanied by pointing, and that never looks great in a photo either. In these cases, I tell them to giggle quietly and to keep their hands down. Usually, that solves the problem. If it doesn’t, I just move on to something else and let the moment go.

    4. Simply hug

    hug - 8 Tips for Getting Great Expressions in Family Portraits

    Oftentimes in sessions, I position everyone into a nice arrangement, take a photo of them all smiling and looking, and then I just say, “Now, everyone hug each other.” or “Put your arm around the person next to you.” When I look at the photos side by side later, I’m always amazed at how much more natural the smiles are in the hugging photos.

    I think that when photos feel really formal, it’s hard to relax, and people end up with stiff smiles. When they feel comfortable, the true smiles come out. There’s just something about being surrounded and hugged by those you love that makes you feel safe. Sometimes you need to prompt them to hug each other but make sure they’re still looking at you. Occasionally you get the real huggers that will turn right around and give their mom a bear hug. Although that looks cute in real life, it doesn’t work as well for a photo.

    5. Let the personalities shine

    personality - 8 Tips for Getting Great Expressions in Family Portraits

    Sometimes you might have a perfect photo in mind, but you just have some little guys that have big personalities. You could spend the whole session trying to get them to be somebody they’re not, or you can just go with it and laugh about it.

    Let’s be honest, sometimes those expressions that just scream personality make the best photos. Families will treasure those photos and laugh about them throughout their whole lives. You can try to get that perfect family photo for mom, but don’t make everyone miserable by insisting on squelching unique poses and expressions every time they pop up. That said, I don’t encourage them in their silliness because sometimes that can make them go a bit out of control. Just simply take the photo, and don’t make a big deal out of it.

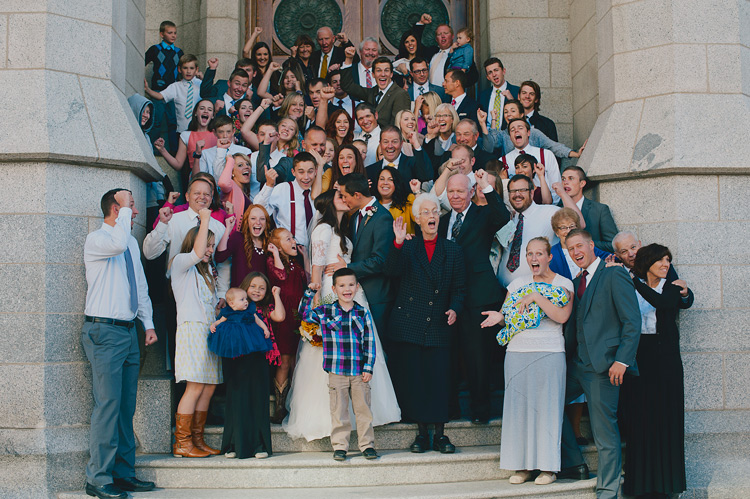
    6. Big groups are fun too

    big groups - 8 Tips for Getting Great Expressions in Family Portraits

    Giant group photos can look very dull at times. When you have tons of people in one photo, it can be a task just to get them all arranged, and then after all that work the photo just looks like a bunch of little boring faces.

    Try getting a few photos that are just for fun. Ask the entire group to hug or kiss their neighbor. (Give them the option. Nobody likes to be told they must kiss the person next to them.) If you have a bride and groom, you can have the bride and groom kiss, and ask everyone else to cheer or to react however they’d like.

    When you have a big group of people with funny happy faces, it makes a photo that you want to look at for awhile, and you can’t help but smile. These photos are never perfect, but they’re fun, and end up being the photos the families really love.

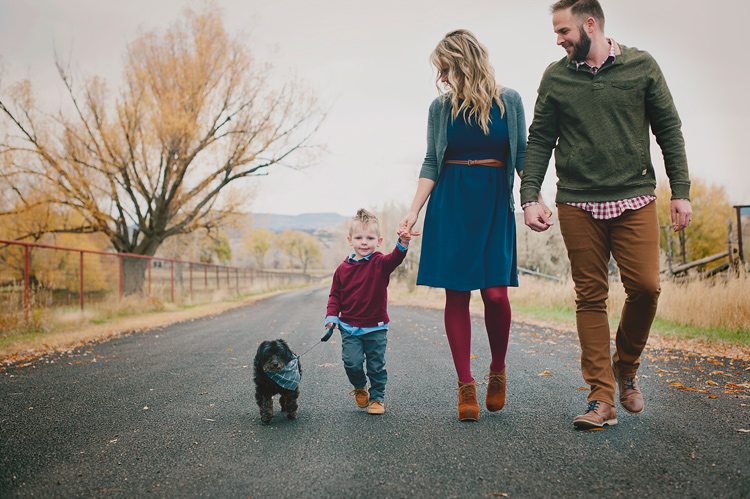
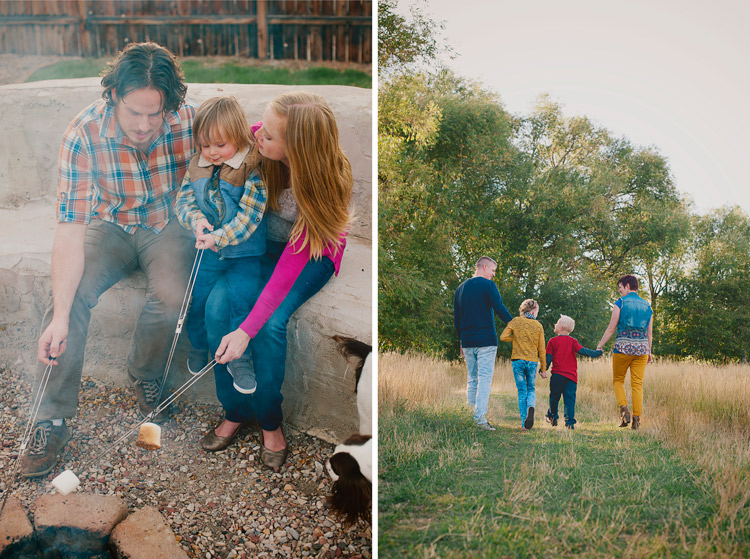
    7. Capture life

    life - 8 Tips for Getting Great Expressions in Family Portraits

    You don’t always need smiles, nor do you need all the eyes showing. Capture the family participating in an activity together, and just let their expressions happen naturally. These lifestyle photos will capture the family as they are, right now. They will be the photos that really bring back memories for your families when they come across them later. You don’t have to set up anything elaborate. It can be as involved as a picnic together with the blanket and basket and everything, or as simple as holding hands and walking together. If you do have them walking away from you, ask the family to look at each other as they walk, so you get some profile expressions, and interaction with each other.

    You don’t have to set up anything elaborate. It can be as involved as a picnic together with the blanket and basket and everything, or as simple as holding hands and walking together. If you do have them walking away from you, ask the family to look at each other as they walk, so you get some profile expressions, and interaction with each other.

    8. Take a lot of photos in a row

    8 Tips for Getting Great Expressions in Family Portraits

    When you’ve got a lot of people to capture at once, the chances of getting all of them with a great expression at the same time is slim to none. I snap a lot of photos in a row of one pose because the chances of catching smiles and open eyes for each person go up greatly when you have a lot to choose from. If all else fails, you have a lot in nearly the same position, so you can swap eyes, faces, or heads if needed.

    It can be so frustrating when you have a family photo that is nearly perfect, but one family member is blinking. Trust me, even three in a row may sometimes not be enough to get every expression that you need. I don’t head swap often because I usually have one in the series that captures everything as I want, but it’s nice to have the option of swapping something if needed.

    I’d love to see your family portraits in the comments! What tricks have you found to capture great expressions in your family sessions?

    googletag.cmd.push(function() {
    tablet_slots.push( googletag.defineSlot( “/1005424/_dPSv4_tab-all-article-bottom_(300×250)”, [300, 250], “pb-ad-78623” ).addService( googletag.pubads() ) ); } );

    googletag.cmd.push(function() {
    mobile_slots.push( googletag.defineSlot( “/1005424/_dPSv4_mob-all-article-bottom_(300×250)”, [300, 250], “pb-ad-78158” ).addService( googletag.pubads() ) ); } );

    The post 8 Tips for Getting Great Expressions in Family Portraits by Melinda Smith appeared first on Digital Photography School.

    Digital Photography School